

Gregory
-
Posts
2,735 -
Joined
-
Last visited
Content Type
Profiles
Forums
Gallery
Events
Posts posted by Gregory
-
-
A lot of images going into my " How I want things to look " collection...
- FrankWouts, glbarlow, Dave_E and 2 others
-
 5
5
-
Are the bulkheads on the MS kit bass or plywood?
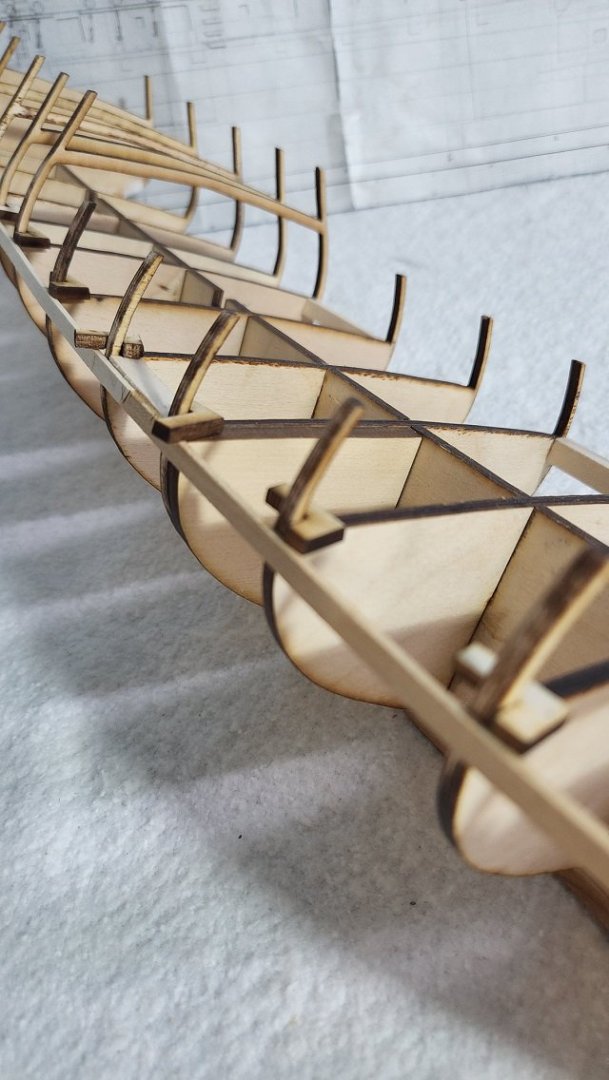
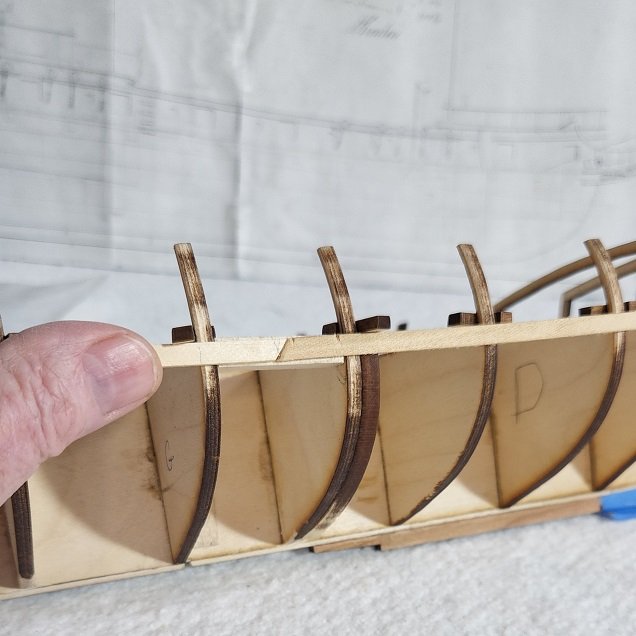
I have found my 5/32 plywood to be pretty robust, and those cross pieces seem strong to me..

I broke this one with a little thumb pressure while sanding.
- Edwardkenway, yvesvidal, bruce d and 4 others
-
7
-
Have been working on the skeleton and some mini projects, including the anchors and the cannon, that I will be documenting soon.
Other things to look forward to are the capstan, binnacle and long boat.
Here is the rough bow filler.
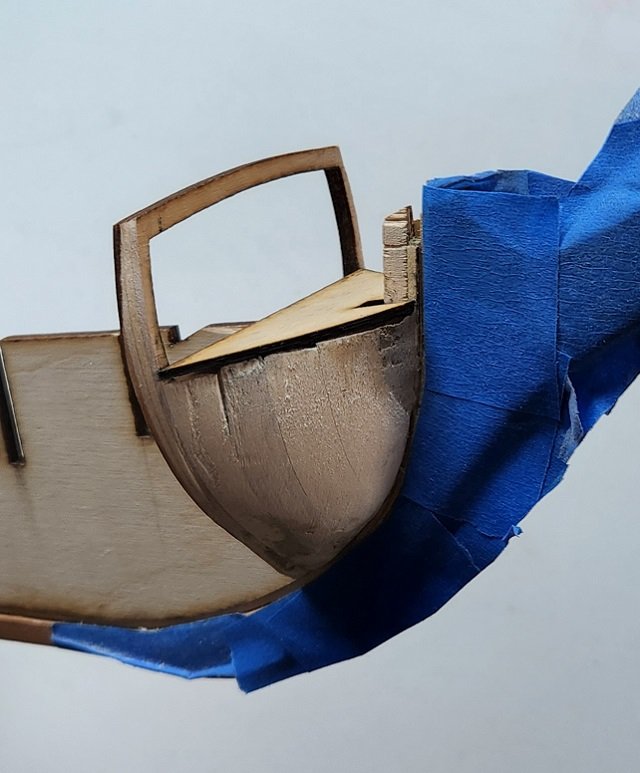
Smoothed out.
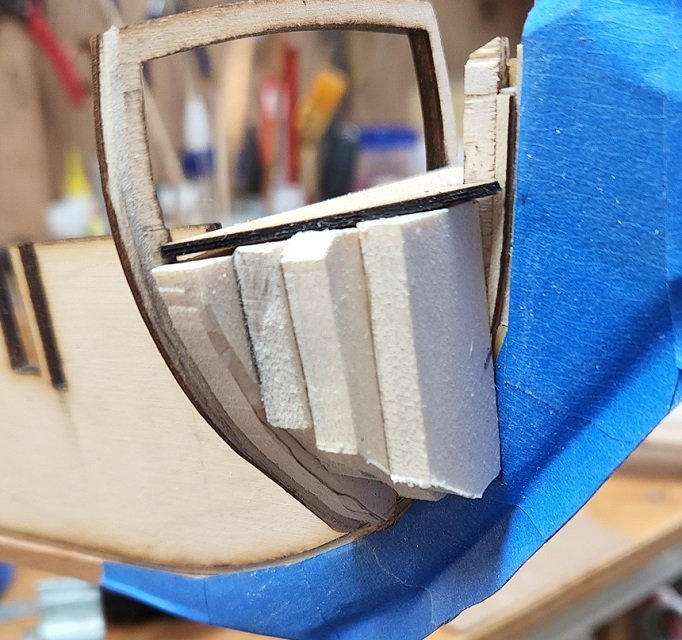
Counter and stern filler. I find it easier to work with layers rather than one big piece.
Getting close to a final shape. Starting to anticipate the run of the planking. The MS plans have some very detailed planking info, which I find very helpful , but I am calculating my plank dimensions based on the larger scale and what I feel looks good based on some other models.
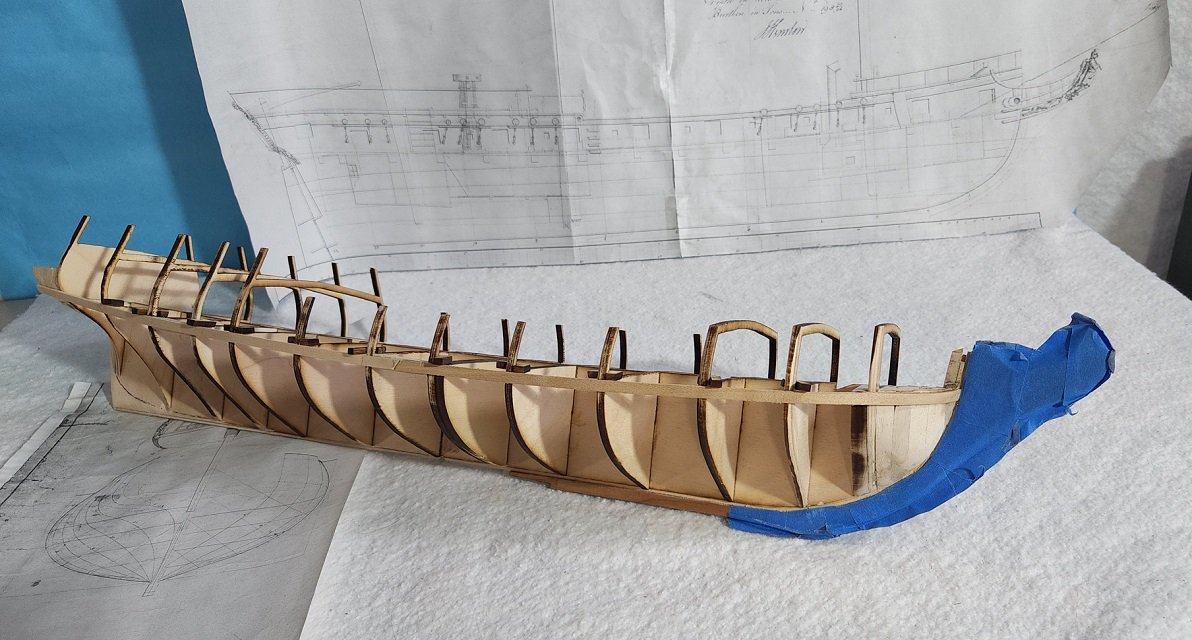
I will be double planking because I want to finish with some cherry veneer I have. I'm laying this first plank even with the gun deck so I can get a foundation for setting up the gun ports.
I need to get something going with the bulwarks to make it harder to break off those bulkhead extensions. I have only broke one so far, but I see it happening again.
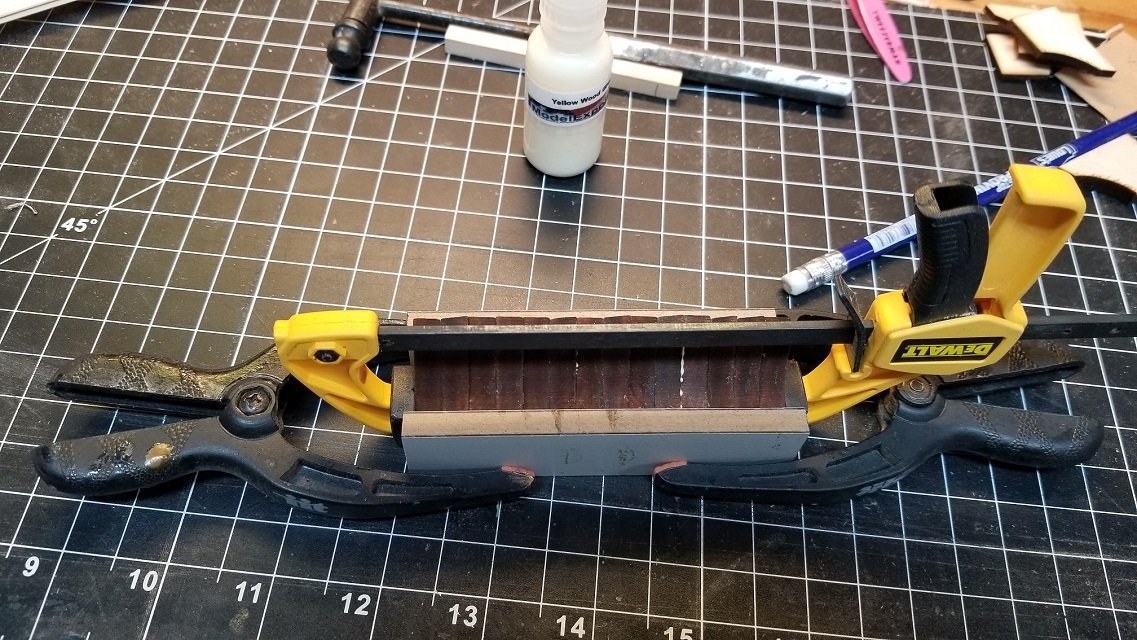
Something that made laying that first plank a little easier for me was to use these little pieces to butt up against while the glue set.
I also split the plank up into two pieces instead of using the the typical full length plank, which I have done before, following most kit instructions.
I find the long planks unwieldy, particularly on a longer model like this. I may use more than two pieces at times as the first layer continues.
- bruce d, mtaylor, Edwardkenway and 10 others
-
13
-
I apologize if I came across as being critical.. You have a great build going that I am following.
I was just offering an observation.
- Keith Black and AJohnson
-
2
-
-
John McKay's AOTS shows 12.
Goodwin also shows 12 on Blandford.
-
-
-
If you want to build it, I think $75 would be a fair offer. You might mention the the wood is probably dry and brittle and may need to be replaced to be able to build the kit.
- Oldsalt1950, Dave_E, mtaylor and 1 other
-
4
-
-
Hey Dave, at the risk of raining on your parade:
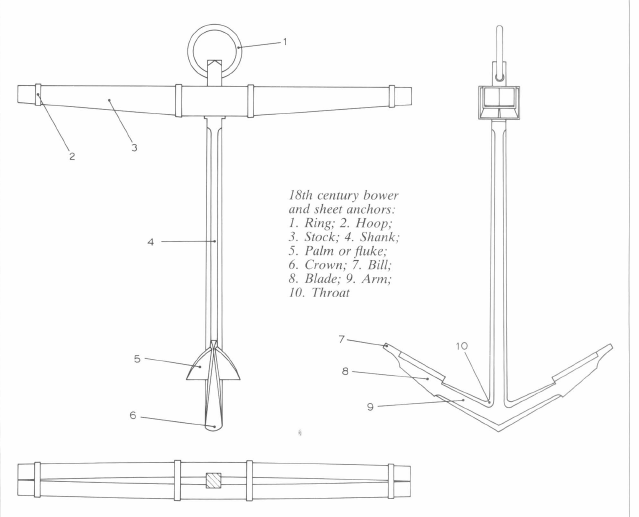
This simplified drawing from Mondfeld shows a basic anchor design for the 18th-19th century.
Note the two halves of the stock have a gap when viewed from above. This design seems to be prevalent
in multiple sources that I have.
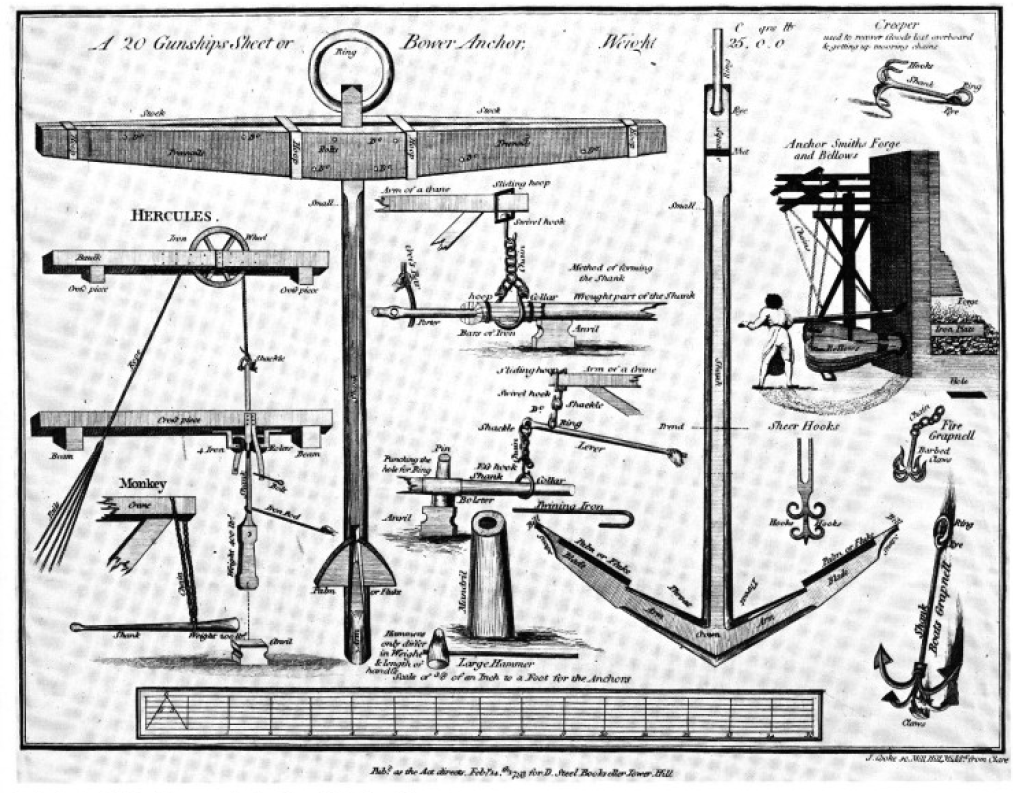
Here is a drawing from 1797 found in Lavery's Arming and Fitting of English Ships of War
- etubino, flutlo6180, CDW and 6 others
-
9
-
15 minutes ago, Dave_E said:
If I were to “bash” the anchors, what’s the recommendation for wood?
The basswood that comes in the kit should work.. There should be a little extra square stock. or use scrap sheet stock from the laser sheets.
You might experiment with some dye or stain to get it looking the way you want.
- Dave_E, Edwardkenway, Mr Whippy and 2 others
-
5
-
Final version of the stem I plan to go with.
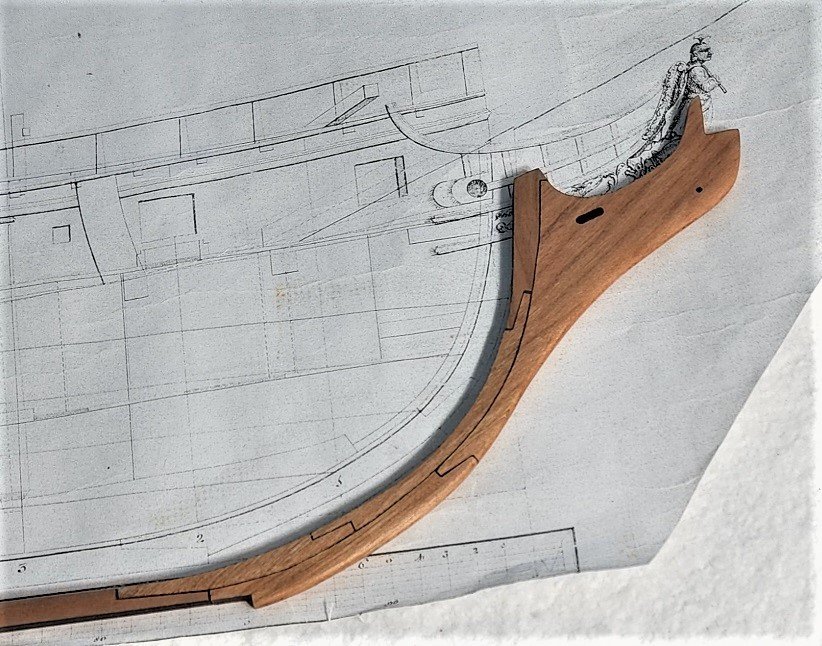
I changed the scarf pattern a little compared to the earlier work I posted. The upper stem was probably constructed of more pieces, but I decided to not
go to any additional work that would be obscured by the cheeks and other head work
I added a seat for the figurehead.
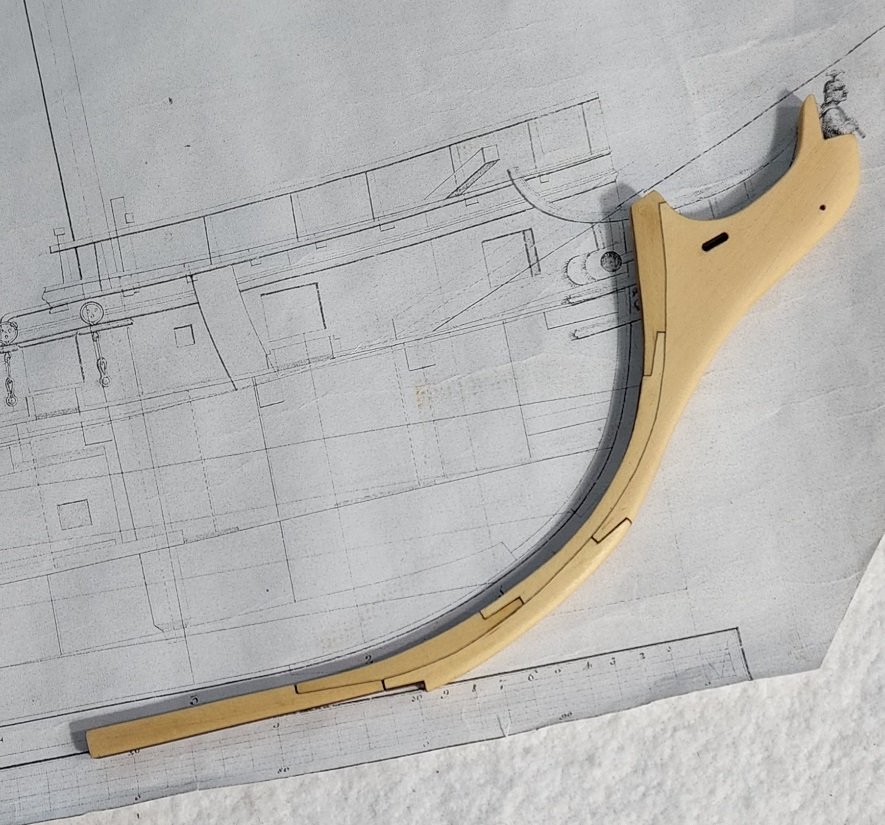
Just for fun and practice, here is an AYC stem I made. I'm going to have to base a project on that stuff some day.
- mtaylor, CiscoH, GrandpaPhil and 8 others
-
11
-
Those are some generic balusters found in a lot of kits. How do the dimensions match up with the 'scaled' drawings on the plans?
You could use some square stock to make something like Ian's pic, without a lot of trouble. I think the Mamoli parts are a fair compromise.
Making every detail look like the real thing sort of negates the purpose of building a kit. It's not a realistic goal.
If you run short of those balusters, I'm sure I have a few of those in my stash I would be happy to share..
-
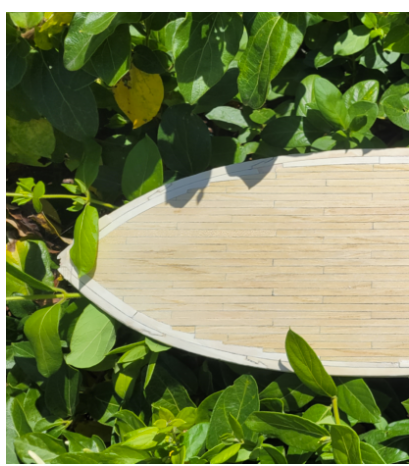
I love the color of your AYC, prticularly in the 2nd shot.. I have saved that one and it is my standard now.. If my work doesn't look close to that-tear it off and start over..😁
I hope the lighting doesn't change it much.. Of course it may darken some with age, but you are achieving an exceptional finish.
Have I misread somewhere that you are using boxwood, and not AYC?
- glbarlow, FrankWouts and chris watton
-
3
-
Something that makes you go " Oh wow " when you are copying the plans and building your own.

A little redesign after running into issues with the backbone ver1.0. I will be updating my log soon. The scrap pile is growing
- javajohn, Dave_E and Oldsalt1950
-
3
-
Here is a chart that will print out to scale.
https://syrenshipmodelcompany.com/resources/Suren Ultra Scale Rope Size chart.pdf
- Ryland Craze and Rustyj
-
2
-
P.S
In the future, you might consider not following through with a butt joint when it involves a very short piece of blank.
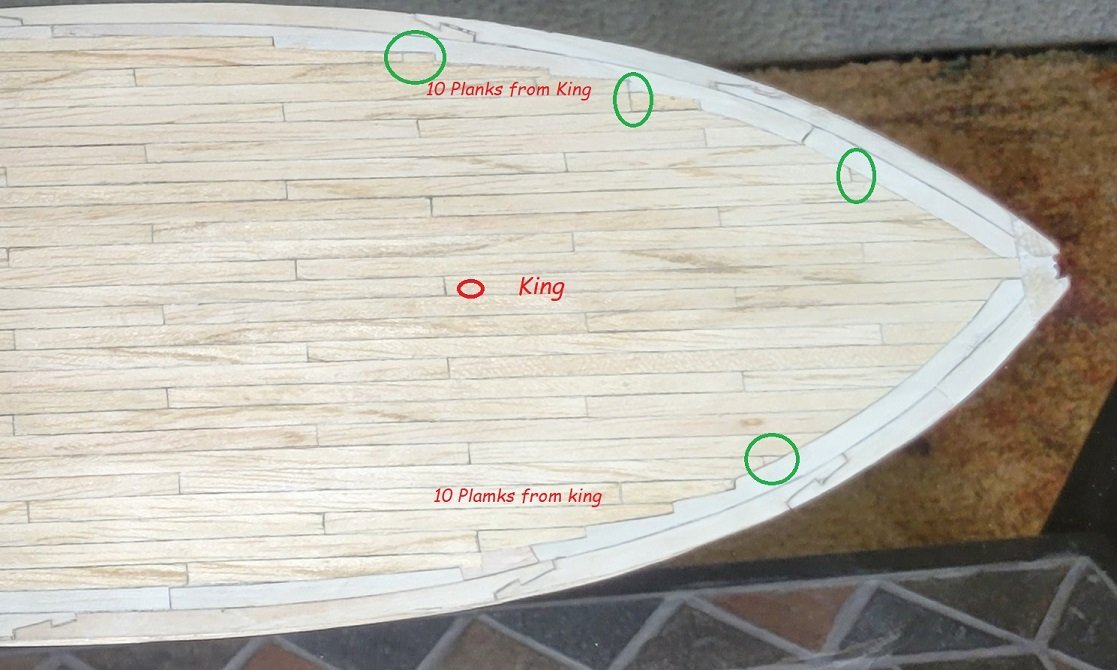
-
Without anything else to go on, you lost your symmetry somewhere..
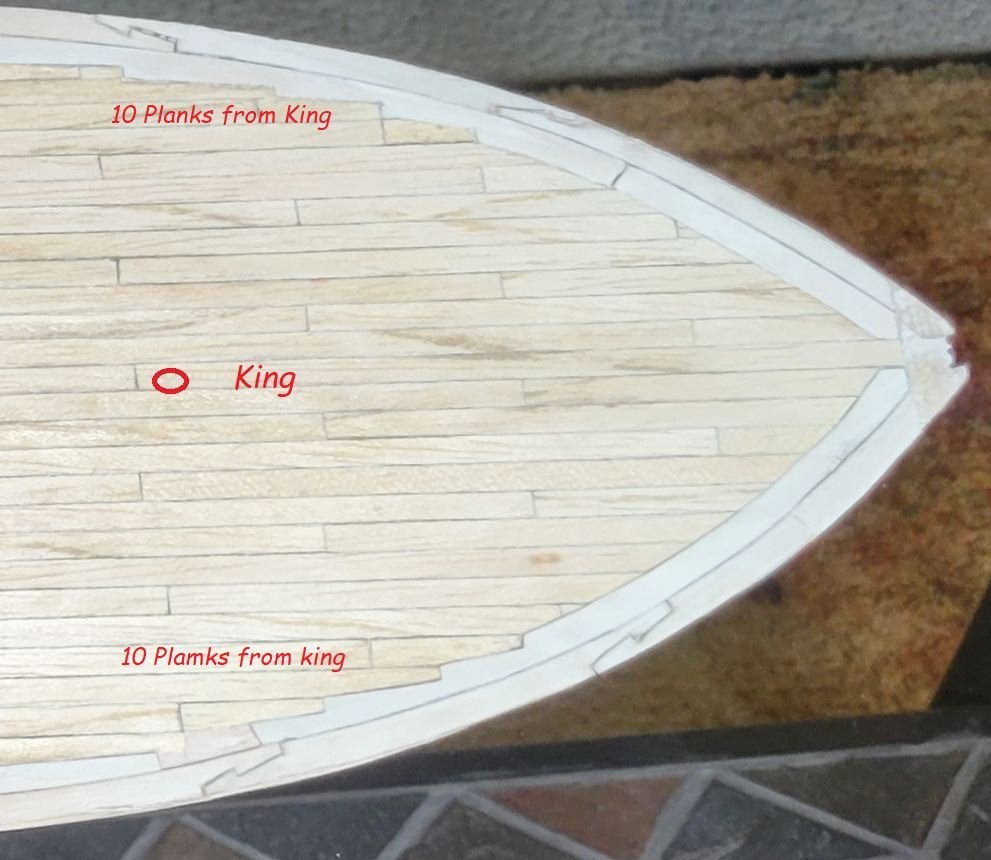
So, you lost your mirror image..
This has happened to me before.
Could be a flaw in the kit design..
Something to keep in mind next build.. I don't think it is a big detractor in an otherwise good build so far..
-
-
Do you have a close-up of this area. I would like to see if I can sort out your mirroring problem..
-
I have three different Dremel tools.
This one is easy to hold and has very low torque.. It usually stops before doing damage..
Dremel 2050
With all Dremel's I would recommend the three jawed chuck..
Keyless Chuck
-
Doing a lot of prepping & planning in the background, wondering how helpful or informative it might be to include it in the log.
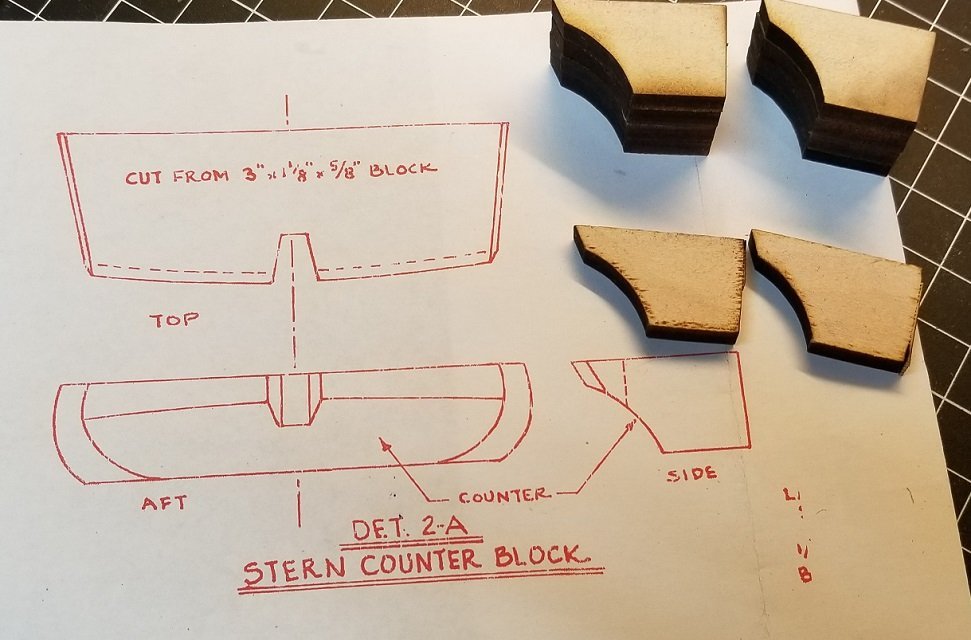
Does the MS kit provide any pre-shaped fillers?
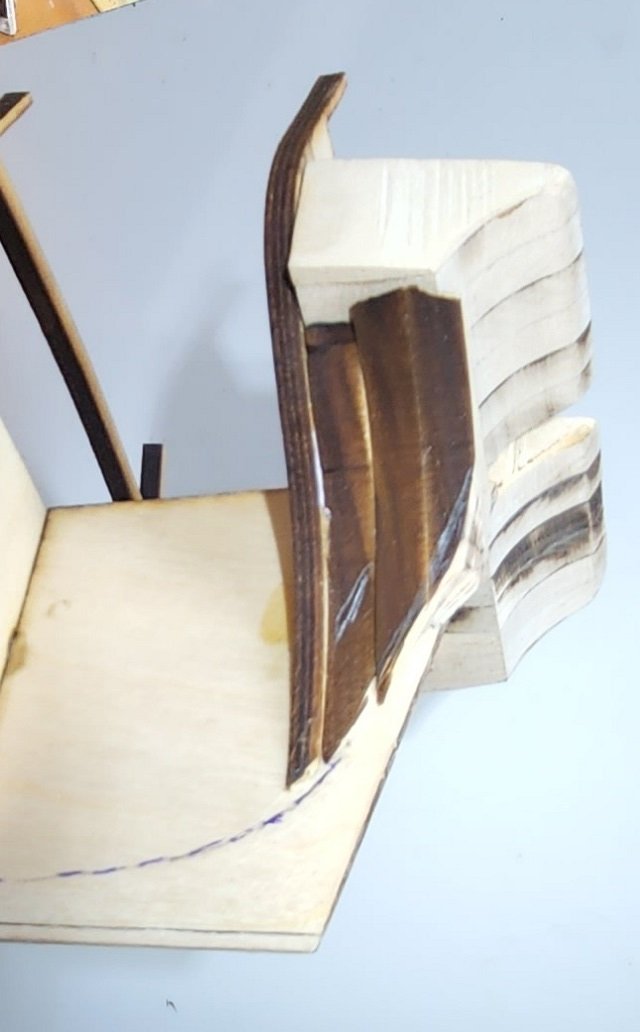
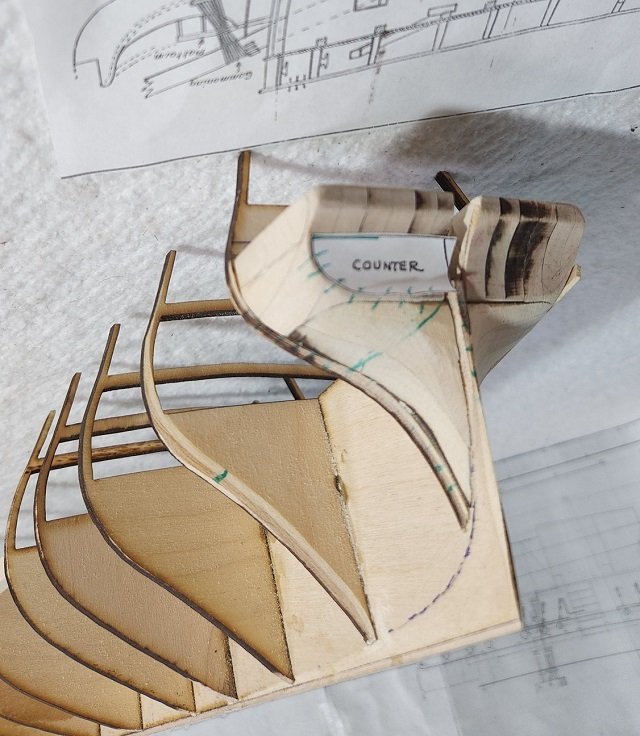
I took the plans and made several 1/4" pieces to build up the counter filler.
Glued them up..
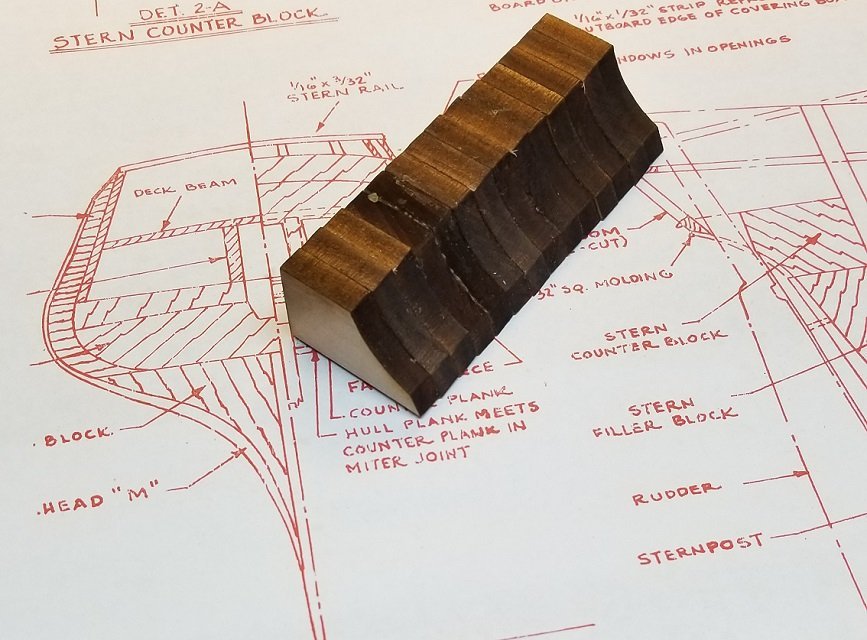
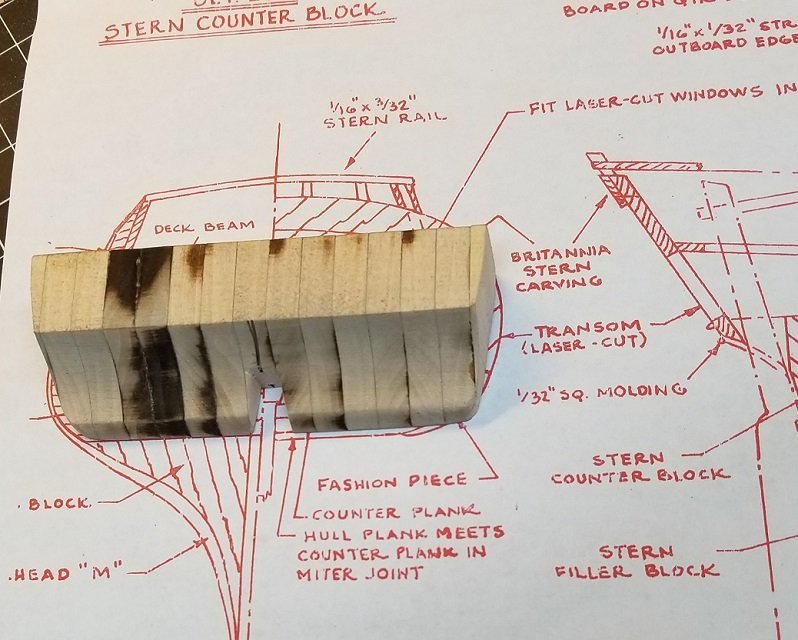
Did some early finishing off the frame. Have a pretty good match to the plans so far. Will see how things fair up as the build progresses.
- bruce d, Edwardkenway, GrandpaPhil and 7 others
-
10
-
It looks like a beveling tool rather than tapering, and would work with very small bites.
I see the angle of the blade ( flat ) as a design shortcoming.
- thibaultron, mtaylor and Canute
-
3


HMS Winchelsea 1764 by glbarlow - 1:48
in Member Build logs for the HMS Winchelsea
Posted
Is there another way?