

Gregory
-
Posts
3,168 -
Joined
-
Last visited
Content Type
Profiles
Forums
Gallery
Events
Everything posted by Gregory
-

Planking Question
Gregory replied to Malazan's topic in Building, Framing, Planking and plating a ships hull and deck
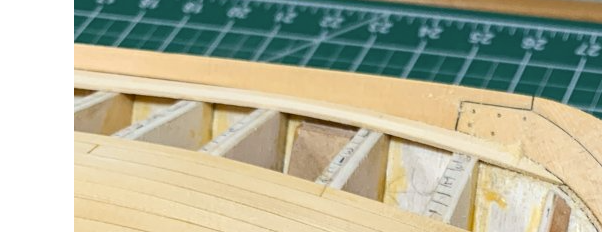
The Rabbet ( rebate ) is a groove that the planks fit into at the Stem and along the keel. Here is Glbarlow's Cheerful.. The ends of the planks butt into the rabbet at the stem. The garboard plank sits in the rabbet along the keel. In modeling it can be simulated in a couple of different ways .. It isn't always necessary to cut it.. In this topic, I showed an example of how a thin strip down the center of the keel and stem simulates the rabbet when separate keel and stem pieces are added to the backbone in a plank-on-bulkhead model.. There are probably hundreds if not thousands of examples in the build logs.. Just search for " rabbet " ..
-
Here is a sample of the Ships In Scale index. There is also a powerful search tool that will search through all the issues to find what you are looking for..

-
PS Here is some nice work by Moreplovac on his Brigantine Phoenix at 1:72 .. You can skim through the log for more detail..
-
They ( both magazines ) show up on ebay for $3 or more plus shipping.. Not to mention it would be a challenge to put together a complete collection. That makes the CD collections a real bargain..
-
Have you seen these: https://thenrgstore.org/collections/ships-in-scale
-
Something we bring up from time to time; ask yourself are you making a model of a ship, or a miniature ship? With the rigging, if you are modeling, you want to use whatever methods let you give the appearance of full size rigging. As scale goes down, details are lost, and trying to follow full size practice for making knots and such, results in over sized details. I don't know if this is a good example to illustrate what I'm saying, because the builder is pretty much following full size practice, but it shows what can be accomplished, and is something to strive for. La Créole 1827 by archjofo - Scale 1/48 - French corvette I find small amounts of CA are useful in rigging, to hold something in place, when it will be hidden under a lashing or seizing..
-
Test fit on the boat.. My rope is more of a hemp color as seen in the pictures previously.. Phone camera wants to make it lighter.. I will be blackening the bolts on the tackle fittings..
-
"Royal Navy Warship" discovered near Riga in Latvia
Gregory replied to Beef Wellington's topic in Nautical/Naval History
The headline is misleading in that the text of the story says a 39 foot "section" was uncovered, leaving the possibility that the full extent of the wreck could be much longer. -
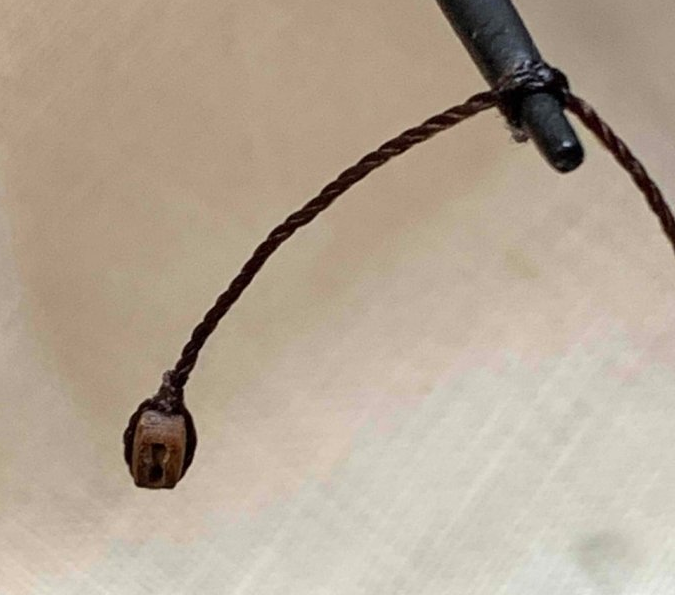
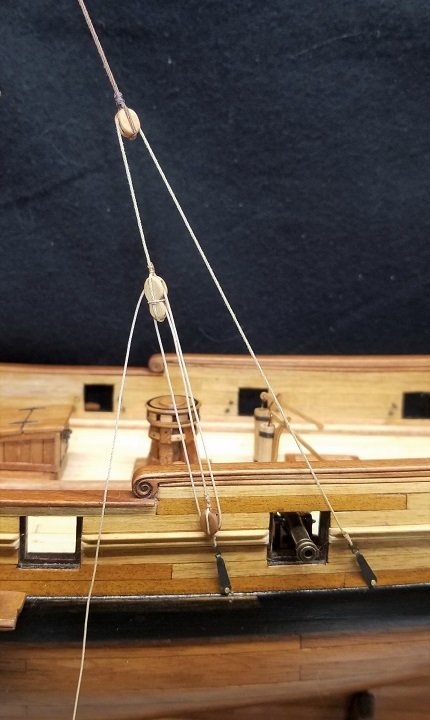
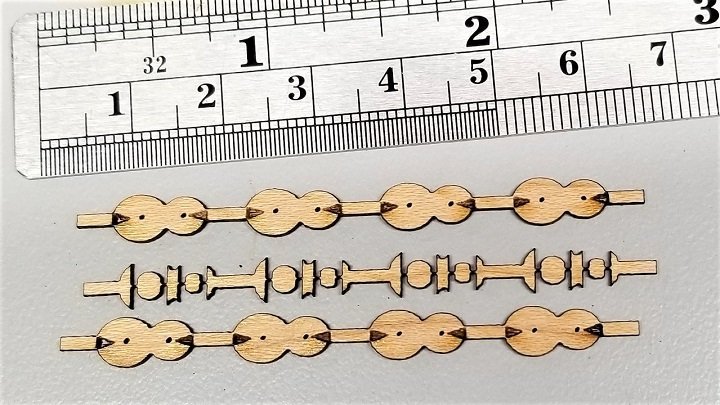
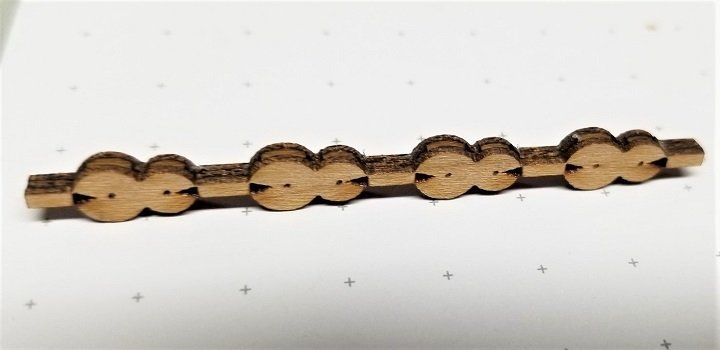
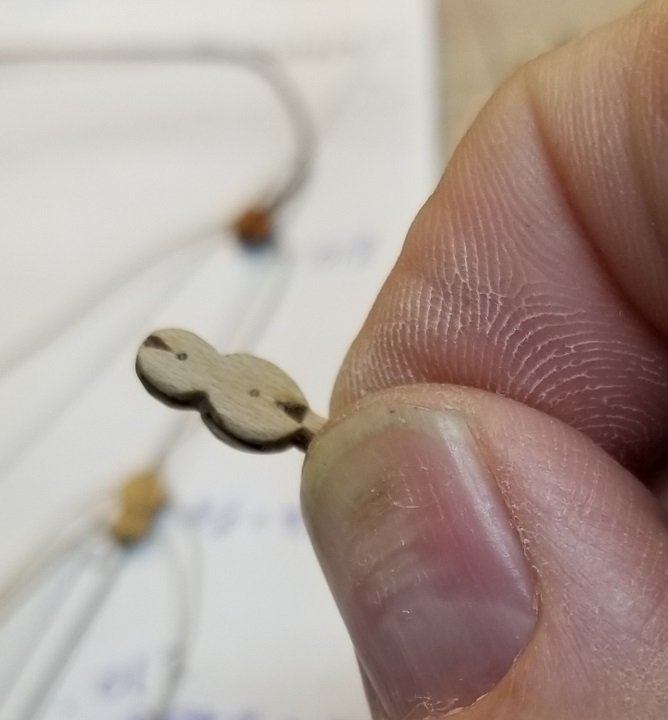
Some progress on the rigging. In this session I'm making some fiddle blocks. Here are the parts made with the laser from 1/32 cherry. I borrowed the build method from Chuck.. I really like the blocks Chuck makes, but if I can make them myself, I can save a little expense, particularly when I mess up one or more trying to finish them. Here are the pieces glued up. The little tab is handy for holding it while finishing it up.. The cherry doesn't finish as fine as boxwood, but I like the color of the cherry and it's really my go-to wood for this project. Here is one of the backstays with the fiddle tackle. Cheerful builders will find this familiar looking. Close up of one of the fiddles.. Thanks for looking in..
.jpg.4d81fb3aa0dffe8f5e3133403d839b18.jpg)
.jpg.8c3f92c888947d6e5457a990ca3fa942.jpg)
-
Planking Question
Gregory replied to Malazan's topic in Building, Framing, Planking and plating a ships hull and deck
Nice pun! The word " rabbet " is probably not found in any European ship kit plans or instructions... I don't know if Vanguard is an exception to that. Thousands of those models have been built without the builder ever knowing what a rabbet is. It is most useful on single planked models, but even then , it is possible to plank without it, but very hard to get a clean look where the planking meets the keel and stem.. -
It is a business that I think many of our members have dealt with in the past with favorable results. However, the owner is closely involved ( owner/admin) of another modeling forum that has no problem with and even endorses IP theft and Chinese ship model kits that are clearly rip-offs of legitimately produced kits. Have you seen the MSW Stance on Piracy in the hobby ?
-
Just discovered the sail making tutorial.. That should be pinned in the NRG Articles and How-To's.. It will be useful for any sail making project.. I'm also paying more attention to your Medway longboat kit. I think I need a new project to relieve the doldrums.
- 421 replies
-
- 4
-

-
- medway longboat
- Syren Ship Model Company
- (and 1 more)
-
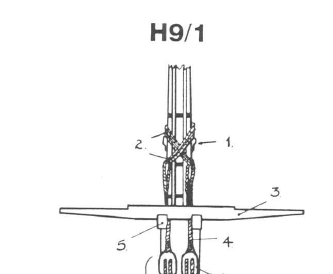
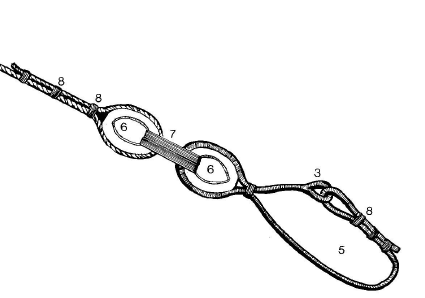
In my mind, lashing usually refers to attaching something to something, whereas a seizing involves binding up a rope or line to itself. Someone else would have to clarify what lashings might show up on a mainstay.. Goodwin doesn't appear to identify anything in the Alert book as a 'lashing'.. In this drawing from Blandford, Goodwin identifies No. 2 as the lashing for the jeer strop - 4... Just found this in Lavery's Bellona book He identifies 7 as a lashing between the hearts on the mainstay. So, this might be what steel is referring to. The Alert doesn't have this arrangement.
-
I would 2nd this without recommending the book at all. This log by Glenn Barlow is an excellent source. There are several other logs . The Lauck Street products do not have much of a following here at MSW..
-
I agree with GrandpaPhil. The other kits on your list leave a lot to be desired for a first wood ship kit.. They would tend to be more discouraging than helpful in getting started in this hobby.
-
Hopefully they will respond, but Foxy hasn't visited here since Sept 2018..
-
I was saying the paint made the planks disappear, and looked as smooth as plastic or fiberglass. It was supposed to be a compliment regarding the quality of the paint job.. I apologize if it sounded otherwise..
-
Amazing how you have taken what is already a fine kit to the next level..
- 345 replies
-
- 2
-
-
- Duchess Of Kingston
- Vanguard Models
- (and 1 more)
-
Which CNC Machine to get?
Gregory replied to KrisWood's topic in Modeling tools and Workshop Equipment
It appears to be a subscription type plan.. I really couldn't justify that unless I were doing CNC as a business.. Have you tried Meshcam ? It is a little pricey up front, but looks pretty robust, and worth it in the long haul. I'm looking to move into CNC from my lasering, but haven't pulled the trigger yet, and have been exploring what's out there from a hobbyist's perspective. -
Amazing how the planking lines disappeared, at least in your photos.. If I didn't know better I would think it was fiberglass or plastic.. ( Please forgive the use of the P word.. )
-
Glad to see you back at work.. That Deck looks great.. Basswood can be surprising if worked correctly.. Also, I have seen a great deal in variance in the quality of basswood I have seen over the years. In my experience it doesn't stain well, but can look really good when varnished.. Your deck is testament to that.
-
Which CNC Machine to get?
Gregory replied to KrisWood's topic in Modeling tools and Workshop Equipment
Are you referring to their " Easel " software or something else? -
Thanks, but: 😁
-
I just can't wrap my head around the idea of bolt ropes without sails. It's like wearing a belt with no pants..


