Gregory
-
Posts
3,168 -
Joined
-
Last visited
Content Type
Profiles
Forums
Gallery
Events
Everything posted by Gregory
-
This is what PRS asked, and it looks like a couple of owners have responded with relevant information.. I can only echo what tkay11 says. The tilting blade and micro adjustable fence are great to have without having to assemble or disassemble anything. Of course, the heart of a good saw is the blade, and I don't care for the options offered by Proxxon. I have been using blades from Malco Saw. I'm sure there are superior machines but I have no reason to purchase one if the FET is doing what I need to do.. If you have any specific questions Pail, I will try to answer based on my experience.
-
Do you feel it is all you need without any of the add on's?
-
 The oil looks very nice and you might apply more coats as time goes on.. To protect it as you go forward, you will see a lot of builds where the stem and keel are covered with painters tape until the major hull finishing is done.
 -
@PRS This 1/2" arbor adapter from Micromark works on the FET and will increase your blade options..
-
If someone doesn't beat me to it. I will offer a suggestion soon. Your build looks great so far..
-
Something else about those cast transoms.. They are often a lot thicker than they need to be. You may be able to sand them down from the back and make them easier to bend..
-
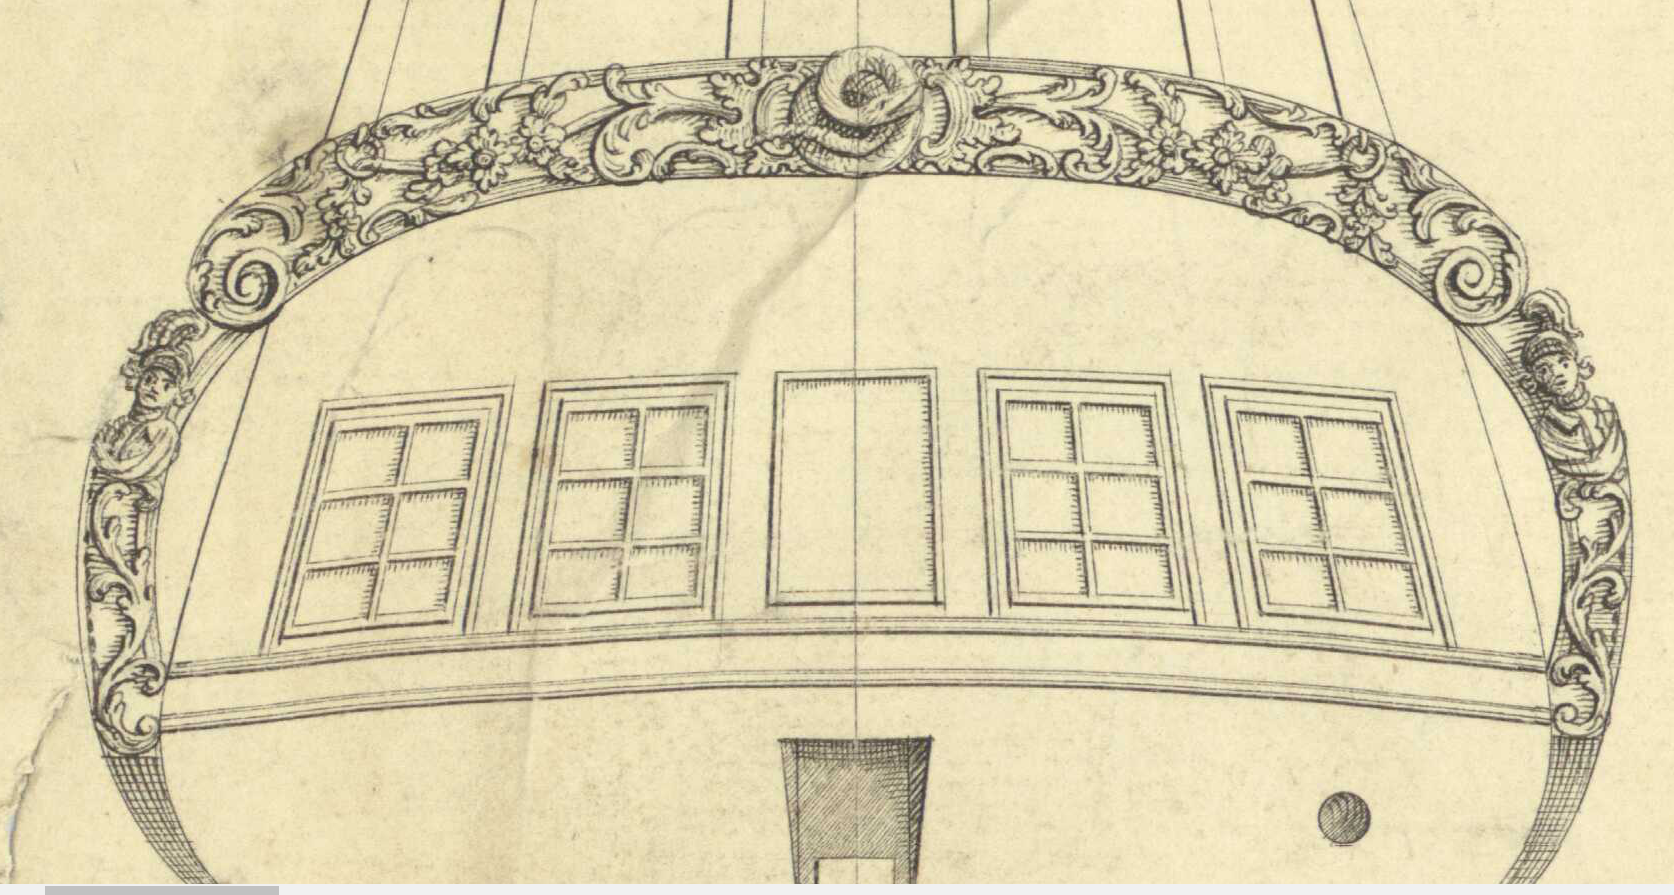
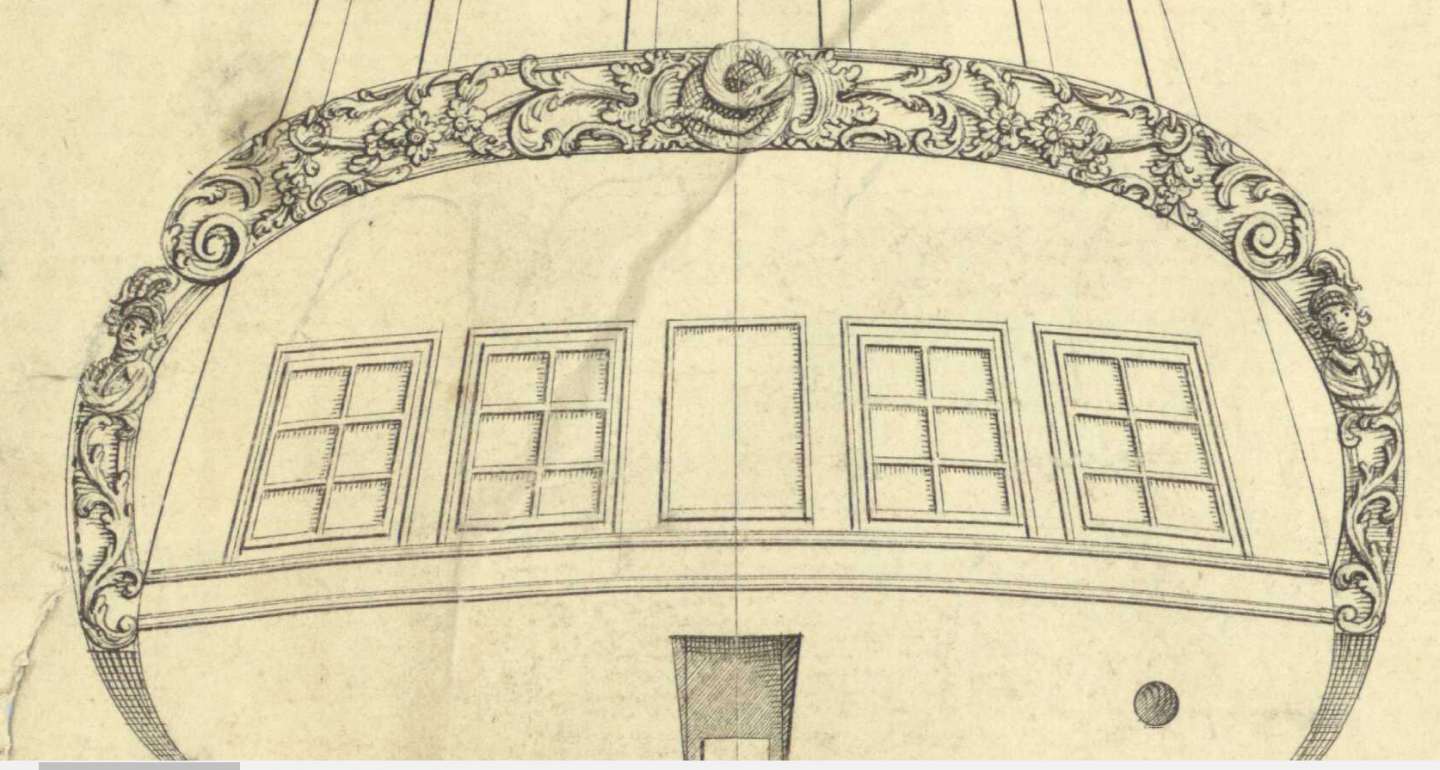
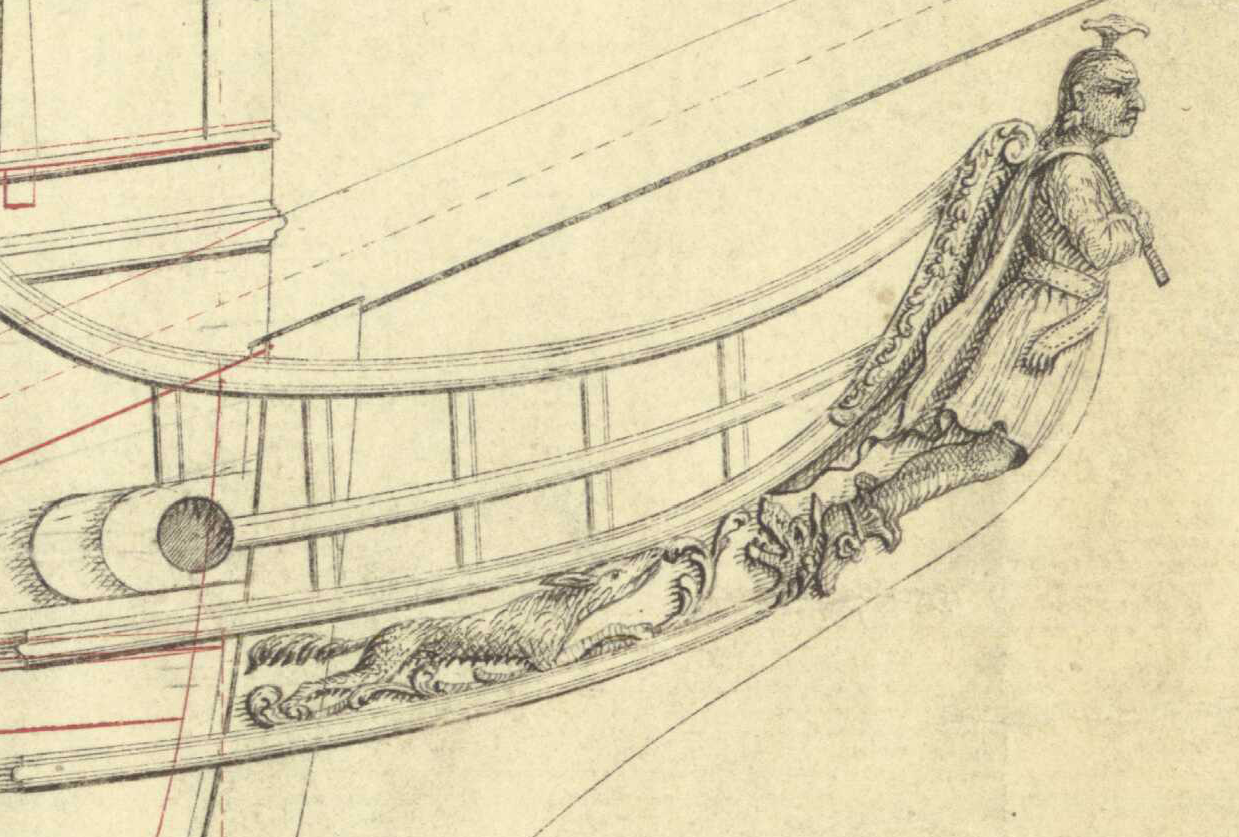
You might find the high resolution plans of Cormorant at Wikimedia commons helpful.. There are several different sheets.. You can click through them at the link provided. All Rattlesnake kits are based on these plans. The plans do not show any quarter badges, but they make a nice extra touch.. The carving detail and figurehead are very interesting..
-
I've seen some pretty decent mahogany veneer.. Not cheap but not crazy either.. I like veneer for 2nd planking on double planked kits.. You can do some spilling and really fine tune your plank widths.. At Rockler for instance..
-
Le Coureur by PC52 - Mamoli - 1:54
Gregory replied to PC52's topic in - Kit build logs for subjects built from 1751 - 1800
I think you should go with what works and looks good to you. Is there some room to add a cleat to the bulwark?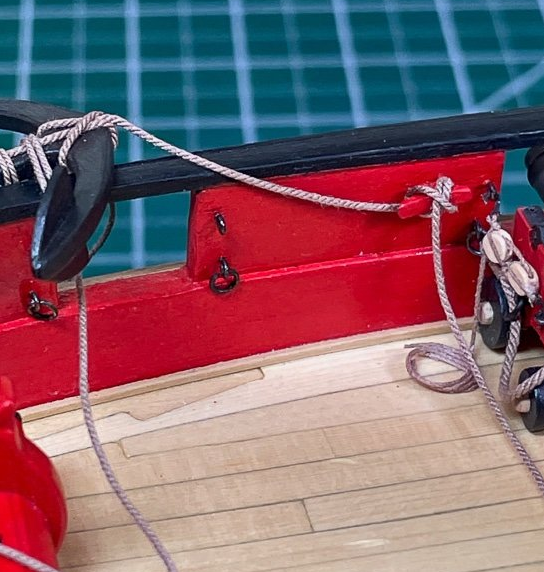
-
I respect your decision to paint, but that wood looks fantastic..
-
This is good to know...
-
Le Coureur by PC52 - Mamoli - 1:54
Gregory replied to PC52's topic in - Kit build logs for subjects built from 1751 - 1800
Look through this anchor rigging on GBarlow's Cheerful.. I don't think you can go wrong by using this information. ( follow the arrow at the top right of the post quote.. ) -
Martindale 4" Saw Blades
Gregory replied to HReardon's topic in Modeling tools and Workshop Equipment
Mark, ' Martindale ' would not search at either of those sites.. -
Martindale 4" Saw Blades
Gregory replied to HReardon's topic in Modeling tools and Workshop Equipment
If Googling doesn't turn up a retailer, I would be surprised if anyone here knows of a source.. For years, the go-to blades here were Thurston, then when they went out of business, Malco is the preferred source. Why the Martindale blades? -
Really it didn't.. I sensed the spirit of your comment.. Actually, I do hate the idea that I missed out on some essentially free stuff, that is hard to get today at any price.. It's like the thought of all the comic books and baseball/football cards I had as a kid in the 50's...
-
Martindale 4" Saw Blades
Gregory replied to HReardon's topic in Modeling tools and Workshop Equipment
https://martindaleco.com/store/product-category/circular-saws-cutting-tools/solid-carbide/ -
I seem to remember a long discussion where there was speculation that the recoil forces would not contribute that much to gun movement. But I might be remembering incorrectly. I'll have to see if I can find the topic..
-
I thought I had seen it called the " in-haul " tackle, and used to pull the gun inboard, and also restrain the gun from rolling when hauled in.. A true train tackle would be attached to either side of a carronade on a swivel mount. The only way to train a carriage mounted gun would be to pull the rear sideways across the deck, not from a tackle to the rear of the gun.
-
You have to add the paper.. I don't know if they have this in the UK, but it is my go to sanding for all uses.. Dura Gold Adhesive backing that is really good, but not too hard to remove.. Many different grits The sanders themselves are not real soft. They are a firm foam, but not spongy..
-
No reason to hate.. Times have changed. I bought this on a whim just to check the quality, knowing I could return it if I had a problem.. Getting a decent board, or combination of similar pieces from Gilmer would probably put me at least $30 before shipping costs.. Our sponsor Modelers Sawmill has some nice sheets for what seems a reasonable price..
-
Another easy place to find them without having to pay shipping, are places like Walmart, Michaels and Hobby Lobby. Look in the jewelry crafting department. It is easy to resize them if you need to..

-
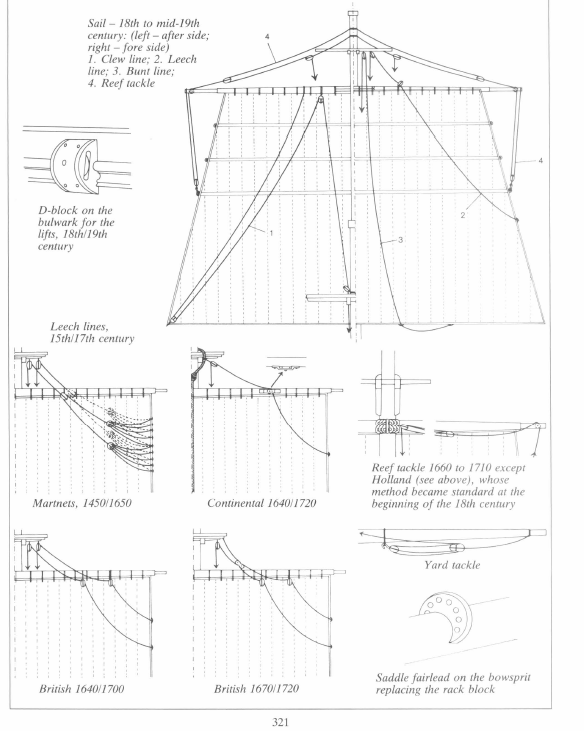
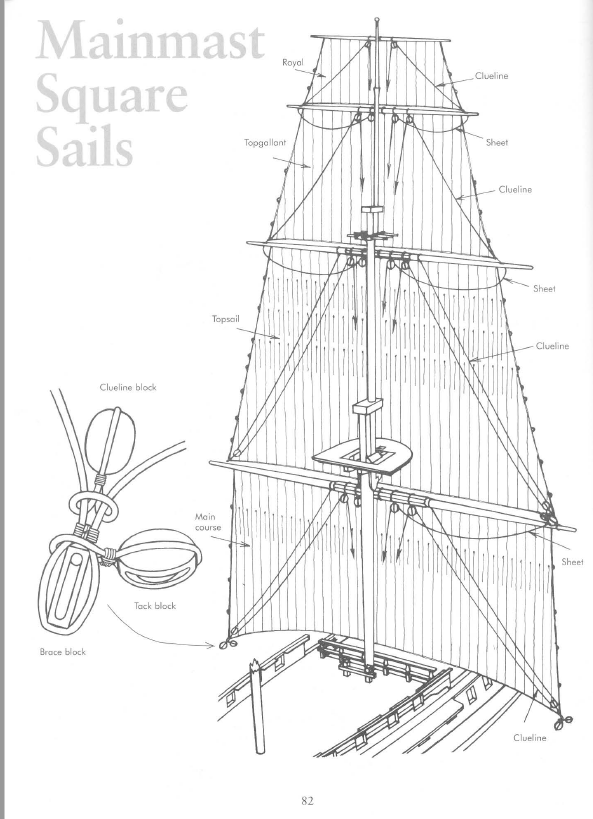
Your question would take a lot of answering that would probably lead to many more questions, and I'm sure you will get some help.. For something so essential to model ship building you need a good reference like Historic Ship Models where you will find drawings like: Or Rigging Period Ship Models.. where you will find a diagram for every line on the ship..
-
Knowing you were in the doldrums for a while, I'm looking forward to seeing your progress on this kit.. I know you will do it justice..
- 505 replies
-
- 4
-

-
- vanguard models
- Sphinx
- (and 1 more)
-
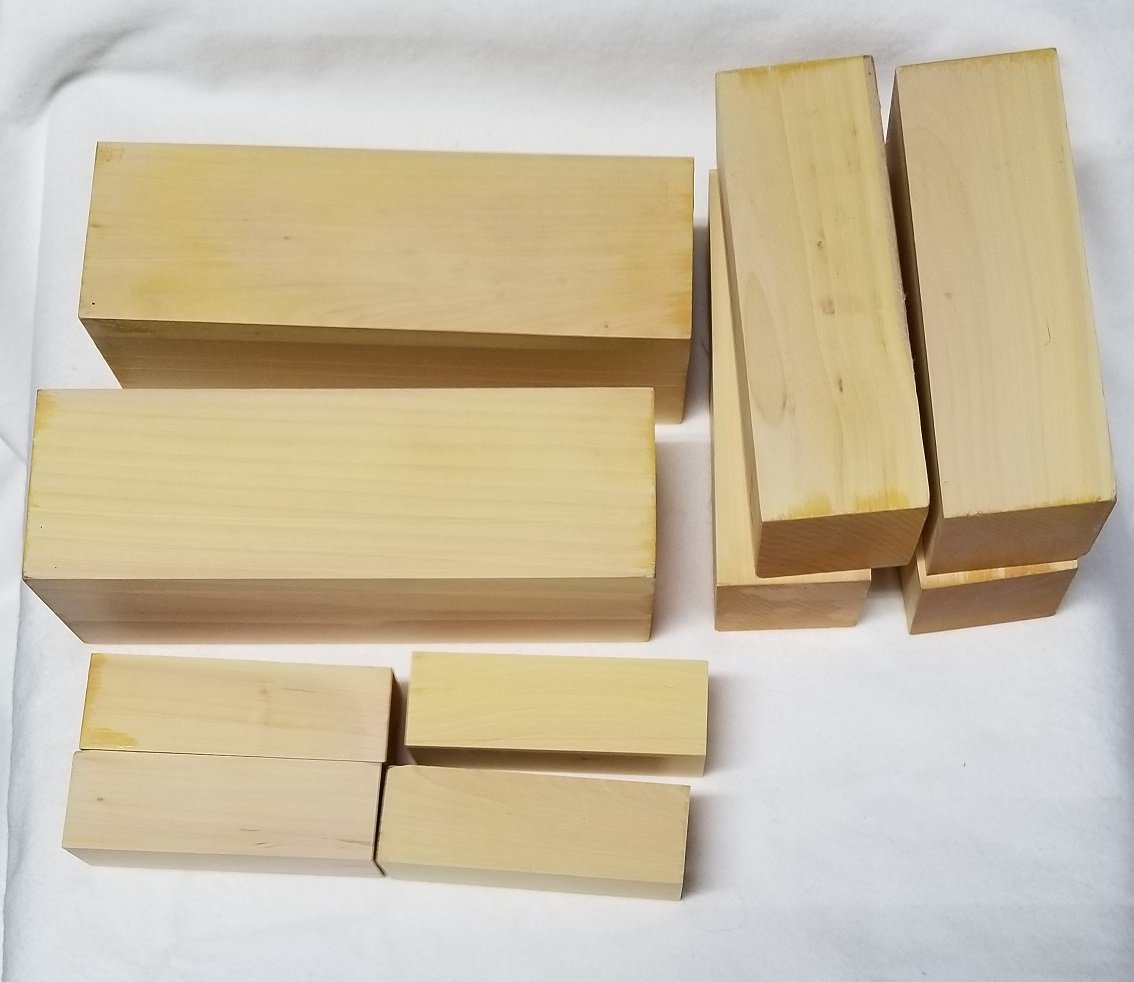
Do you have Amazon Prime? I can return this within 30 days, no questions asked, even if I use some of it.. I would not buy wood from eBay.. Too much hassle if not satisfied..
-
Here is what I received.. It looks like other castelo I have, and have seen in the past. It is very dense and fine grained. The finish is marble smooth. May be a while before I see how it saws and carves.. The big pieces are 15cm long and 5cm square. I have yet to see anything compared to this price in this type of size.. Here are a couple of eBays: South American Castelo Boxwood turning blank 1-7/16" x 1-7/16 x 6 $13.25 shipped. Boxwood Logs for Knife Handle Scales Blanks Wood carving, 15cm Length, 1 piece $37 shipped Those prices seem pretty outrageous, but I guess someone is buying it..