Gregory
-
Posts
3,168 -
Joined
-
Last visited
Content Type
Profiles
Forums
Gallery
Events
Everything posted by Gregory
-
 I'm confident your paint work will not detract form the quality of your ship.. Besides, unless you were going to avoid paint altogether, leaving the hull unpainted while using paint for other major aspects of the model, such as the counter and bulwarks, the unpainted hull would look a bit incongruous IMO..
 -
Are you checking your personal messages?
-
Which CNC Machine to get?
Gregory replied to KrisWood's topic in Modeling tools and Workshop Equipment
I don't think you are going to get close to a 24" table in that price range.. -
Yep.. Had double stuck in my mind..
-
I'm no expert, and didn't give it much thought until Allan brought it up.. Lavery talked about how heavy the guns were and why the tackle was necessary.. 32 Seems like an arbitrary cut-off point. On another hand, I don't see ship fitters using a double when a single would get the job done..
-
@ Thukydides In another post Allan said: Lavery in Arming and Fitting of English Ships of War, 1600-1815 says: " A gun tackle consisted of a rope fixed to a single block, passed through a double block, and through the double block again. He also says " In 1716 tackles were of 2 1/2in rope for guns of 24lb or more and 2in for smaller guns. The blocks were 8 or 6 1/2 in." Lavery is usually considered reliable, but he may have failed to elaborate..
-
I had the same problem. Maybe with practice it would work better. I don't think waxing would help, or look good. The thing about the video, you don't know how many times the person in the video didn't get it right..
-
I hope Unegawahya is Ok.. They haven't visited here since January..
-
Nice jig and coils.
-
48pdr cannon
Gregory replied to Thanasis's topic in Discussion for a Ship's Deck Furniture, Guns, boats and other Fittings
Project " Wind of Luck " appears to be associated with a gaming site about Pirates and such.. -
48pdr cannon
Gregory replied to Thanasis's topic in Discussion for a Ship's Deck Furniture, Guns, boats and other Fittings
Not much help towards your question but just an observation.. This looks like a modern addition, and not part of the original document.. I could be wrong.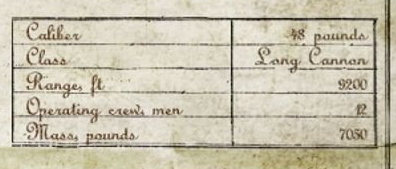
-
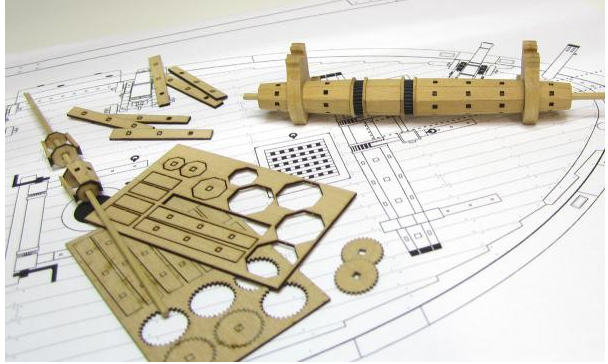
If it was me, I would make the end pieces separate, and add the ratchet piece in the middle.. You might also try the building style that Chuck made with his little windless kit, although the shape is somewhat different..
- 17 replies
-
- 2
-

-
- windlass
- Dutch model
- (and 2 more)
-
Where to buy blocks, hearts, line etc...
Gregory replied to bobc622's topic in Masting, rigging and sails
It would usually be the longest outside dimension .. Chuck could tell you for sure.. -
Where to buy blocks, hearts, line etc...
Gregory replied to bobc622's topic in Masting, rigging and sails
Chuck has some decent hearts also.. Scroll down to see options.. Laser Cut Ship Model Parts and Fittings -
Will this char be visible on the completed model? Otherwise, I have heard that brushing off the loose char is sufficient to get a good gluing surface. This has been my experience with wood, but have haven't worked with any lasered MDF at this point..
- 857 replies
-
- 2
-
-
- Sphinx
- Vanguard Models
- (and 1 more)
-
You might consider finishing it and keeping it as a memorial for Sam.. My condolences for your loss..
- 89 replies
-
- 1
-

-
- Enterprise
- first build
- (and 2 more)
-
You might find this discussion interesting. Typically, no double blocks on cannon smaller than 32's..
- 89 replies
-
- 1
-
-
- Enterprise
- first build
- (and 2 more)
-
Here is a discussion between FrankWouts and Chuck about the curve of the transom.. It might be of some help..
-
I'm pretty sure Chuck has mentioned the slight arch when commenting on other builds. You might pop him a message.. He is usually quick to respond. The arch might be achieved by fairing rather than the placement of the posts.. I'll look at some other logs and see if I can be of further help..
-
Which kit? It might be an opportunity to add detail to the inside to sharpen your building skills...
-
I think you could soften it up a bit by sanding. It shouldn't detract that much from an otherwise great model. If you Can't live with it, you'll have to do it over. For your stern frames.. Take a good look at Chuck's prototype build in the early stages..
-
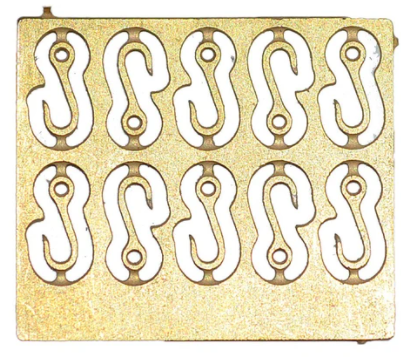
The hook in my picture is made from scratch with wire. It was made by member Chuck in his Cheerful log.. These hooks from Crafty Sailor are pretty good and come in several sizes. Falkonet Hooks (20pcs)
-
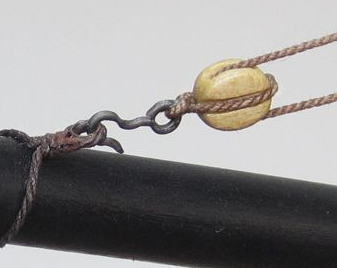
An eye or a hook? Here is a block stropped with rope and a hook added. If you also meant an eye bolt, just picture the above arrangement with the hook missing and the shaft of the eyebolt being a bit longer..
-
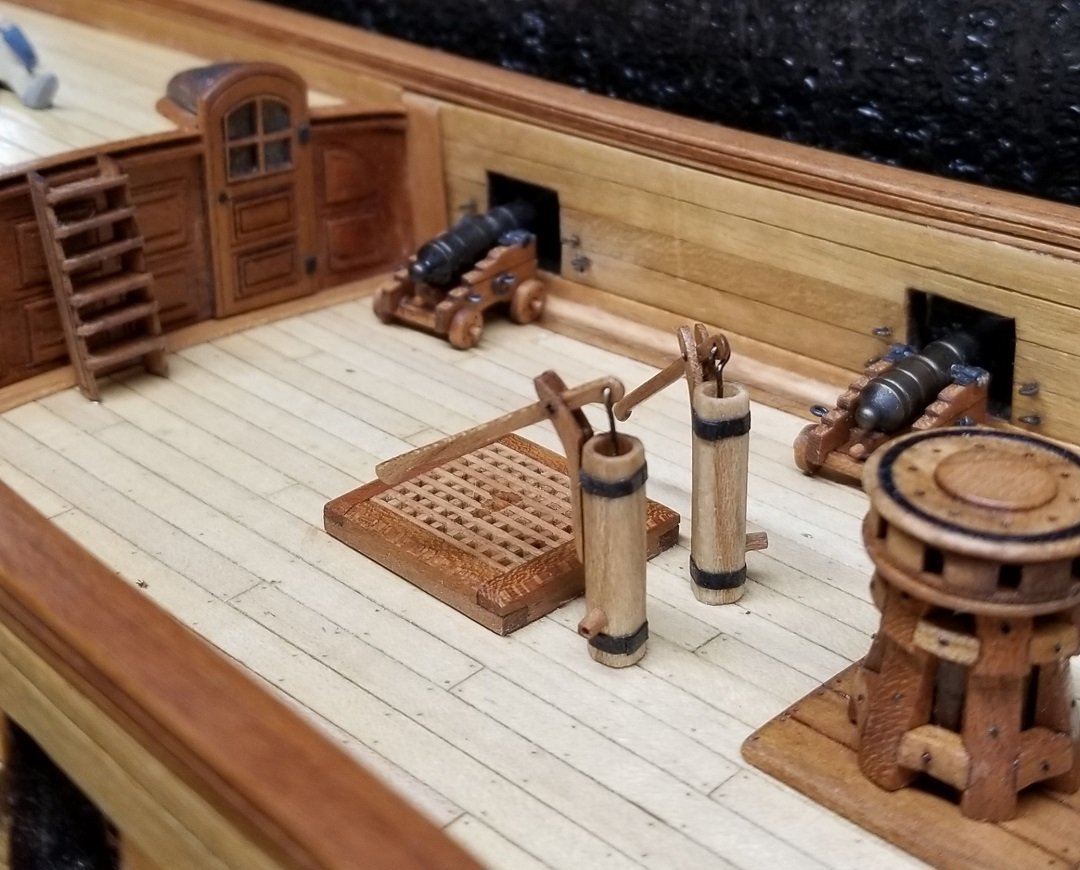
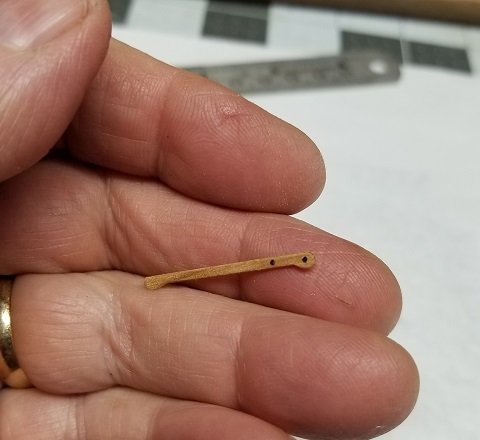
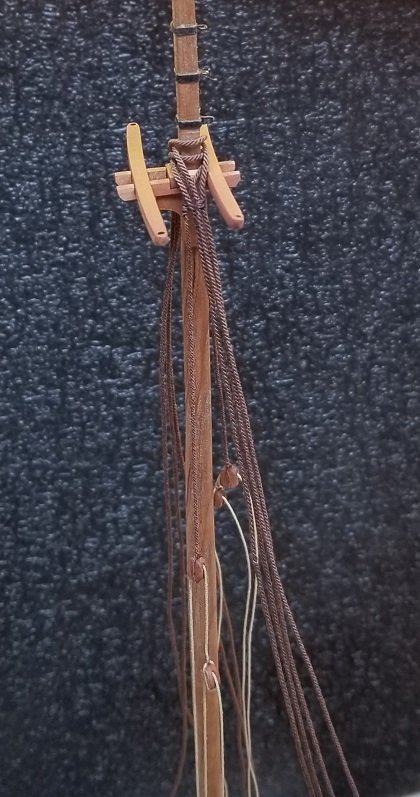
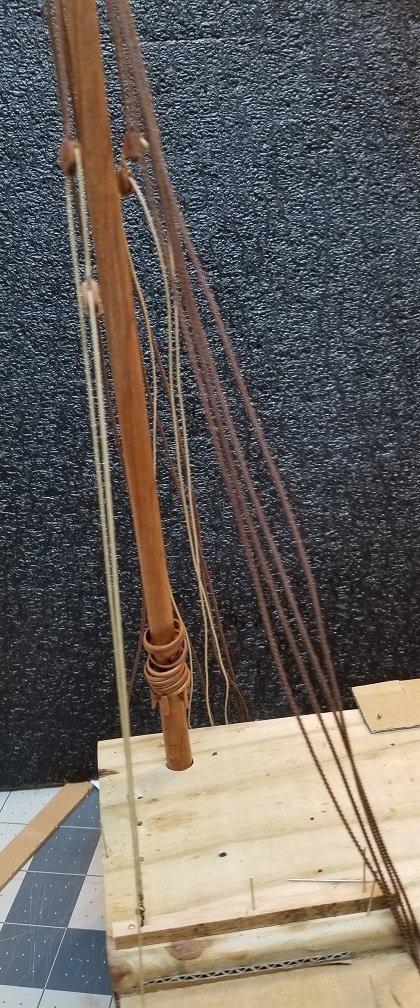
Small update.. Fiddly stuff.. Some pumps I can live with.. Pretty simple.. Basic design from the Cheerful plans. Broke a few of these before I got two I could use.. Ladder going up to the quarterdeck. Plan on a few more details there, like a railing of some sort.. Working on some rigging off the ship.. Shrouds and Burton pendants with tackle.. Another view of my little off-the-ship rigging jig.

-
Dave, if you hover over the users icon, you have the option to send a message..