Gregory
-
Posts
3,175 -
Joined
-
Last visited
Content Type
Profiles
Forums
Gallery
Events
Everything posted by Gregory
-
 This will be great practice for your Sphinx..
 -
The rigging is exceptional, along with the rest of the build..
- 263 replies
-
- 1
-

-
- Medway Longboat
- Syren Ship Model Company
- (and 1 more)
-
Oops.. My bad.. I have the plans, but haven't built.. They call for 5 carronades per side ... You would have to ask Chuck why not 6.. I'm sure he was following some reference he has.. (I see chuck has spoken while i was composing )
-
Check the plans! They call for two long guns in the forward ports, but there is some debate about this.. I'll get you the discussion from the prototype build.. Discussion starts here:
-
How to seize a block to an iron band
Gregory replied to Laggard's topic in Masting, rigging and sails
Many of us started with plastic but became infatuated with wood model ships.. Enjoy the ride and learn as you go.. Don't get bogged down by the rivet counters.. I'm reminded of the cliché about asking someone for the time, and getting a lecture about how to make a watch.. -
How to seize a block to an iron band
Gregory replied to Laggard's topic in Masting, rigging and sails
The point is, don't scare off an aspiring modeler with minutia.. -
How to seize a block to an iron band
Gregory replied to Laggard's topic in Masting, rigging and sails
Laggard was looking for information to attach blocks to a mast in a model kit. I think we provided some good information. Pointing out that something is historically inaccurate without offering a good alternative doesn't really help the aspiring modeler very much, and may very well discourage them because they are intimidated by " not getting it right " according to the experts.. -
How to seize a block to an iron band
Gregory replied to Laggard's topic in Masting, rigging and sails
Are there any reliable references for longboat rigging in 1742? -
How to seize a block to an iron band
Gregory replied to Laggard's topic in Masting, rigging and sails
The builder of this contemporary 1742 model didn't get the memo..😁 -
How to seize a block to an iron band
Gregory replied to Laggard's topic in Masting, rigging and sails
Here is another nice image from the log of BobF You will be hard pressed to find any kit with detailed instructions for stropping blocks. If you search forum topics for the word " stropping " or " strop " you will find a lot of different approaches, that you will have to sort out for yourself, and find a method that suits you. Here is another example: Here are some of GlBarlow's simulated iron bands ( made with tape ) Here is some of his stropping work with hooks.. -
How to seize a block to an iron band
Gregory replied to Laggard's topic in Masting, rigging and sails
I provided this information in the post above. I also imagine you didn't look at the information I provided about the Medway long boat, as it has very detailed photos of blocks stropped with hooks. -
How to seize a block to an iron band
Gregory replied to Laggard's topic in Masting, rigging and sails
You didn't see any help in my post above? -
How to seize a block to an iron band
Gregory replied to Laggard's topic in Masting, rigging and sails
The rigging on that boat will be a lot like the Medway Longboat. In the post above Chuck explains making the bands from tape instead of metal. I make similar bands from black cardstock. If you go further in that log, you will see the blocks are stropped and hooks added. The rigging on the longboat would have been easy to break down, and the blocks would not have been permanently attached to the mast. Follow that log and you can't go wrong. If you are not comfortable making the hooks, I have found these to be pretty good, after being blackened.. Crafty Sailor Hooks Note: They come in several sizes. -
The AOTS for Bellona said she shipped out with 48 tons of coal, wood and candles.. Perhaps the Winchelsea would have had half that.. I don't think the candles would have been a big part of that..
- 1,784 replies
-
- 2
-

-
- winchelsea
- Syren Ship Model Company
- (and 1 more)
-
Without actual section stations other than the one provided. your only option would be to invent them yourself. Some of your top drawings appear to be missing also.
-
How to seize a block to an iron band
Gregory replied to Laggard's topic in Masting, rigging and sails
Just to make sure you are getting good info, it would help to have more information about the model and the purpose of the block. If the plans do not show how to set up the block, there may be other missing or incorrect information. -
Very nice work so far.. FA Is one of my favorite kits, and on my to-do list.. I'm a big fan of un-painted wood, so I look forward to seeing how much bare wood you end up with.
-
Apparently this is one of those modeling conventions that has a life of it's own.. To me, it's one of those things that detracts from an otherwise nice model.. It looks like someone started a basket and didn't finish it.
-
With apple wood, you have to work with an orchard to get prunings or a culled tree.. still may not be a practical option for you..
-
If you Google the title, you can get it for at least half that.. Here is one at Abe Books for $95 shipped.. If you don't have to hold a book in your hand, here is a free E-book .. The Elements and Practice of Rigging And Seamanship, It is apparently in the public domain. There is also a free "Steels Art of Rigging" in the NRG resources..
- 857 replies
-
- 3
-
-
- Sphinx
- Vanguard Models
- (and 1 more)
-
I know how I will be making most of my lashings from now on.. How I used to make them is embarrassing..
-
One more thought.. I thought I read somewhere that NZ has lots of apples.. If you can get your hands on some good apple wood, it is excellent for modeling. Of course, it would also depend on your milling capabilities.
-
Probably no more than the average storm drain around the world..😁
-
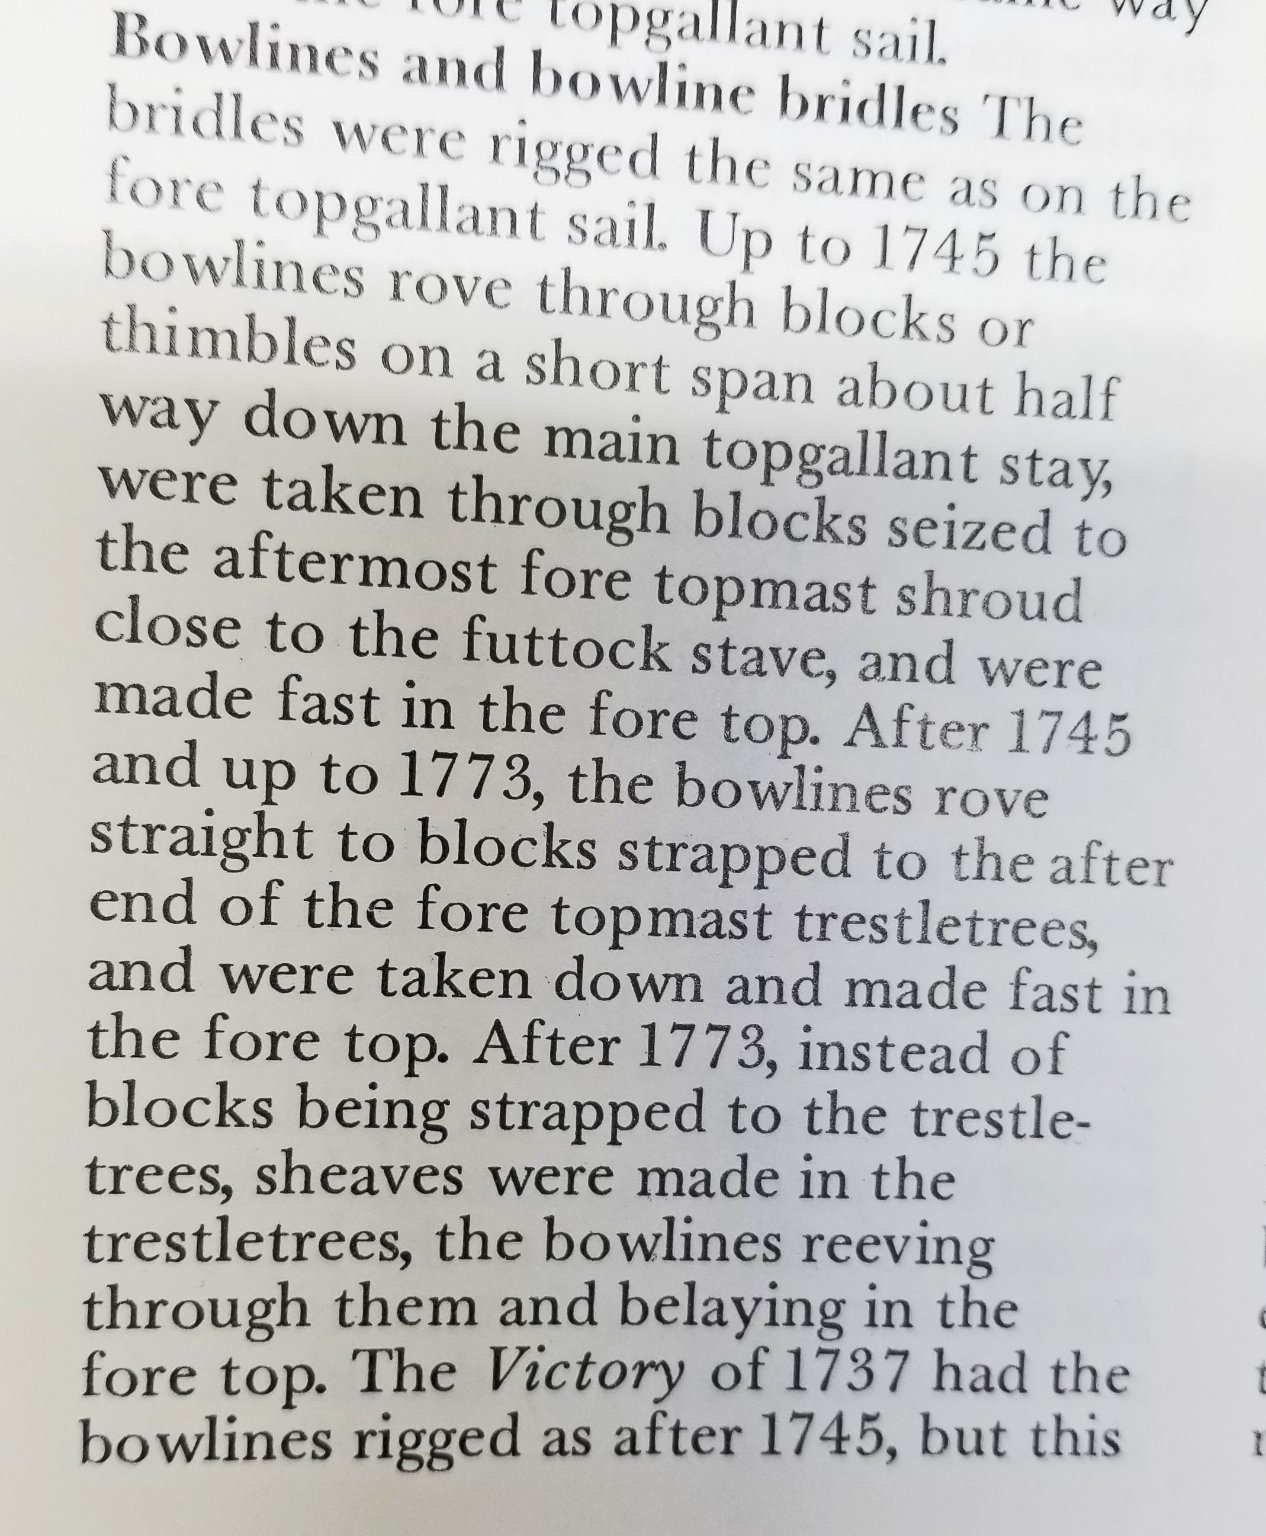
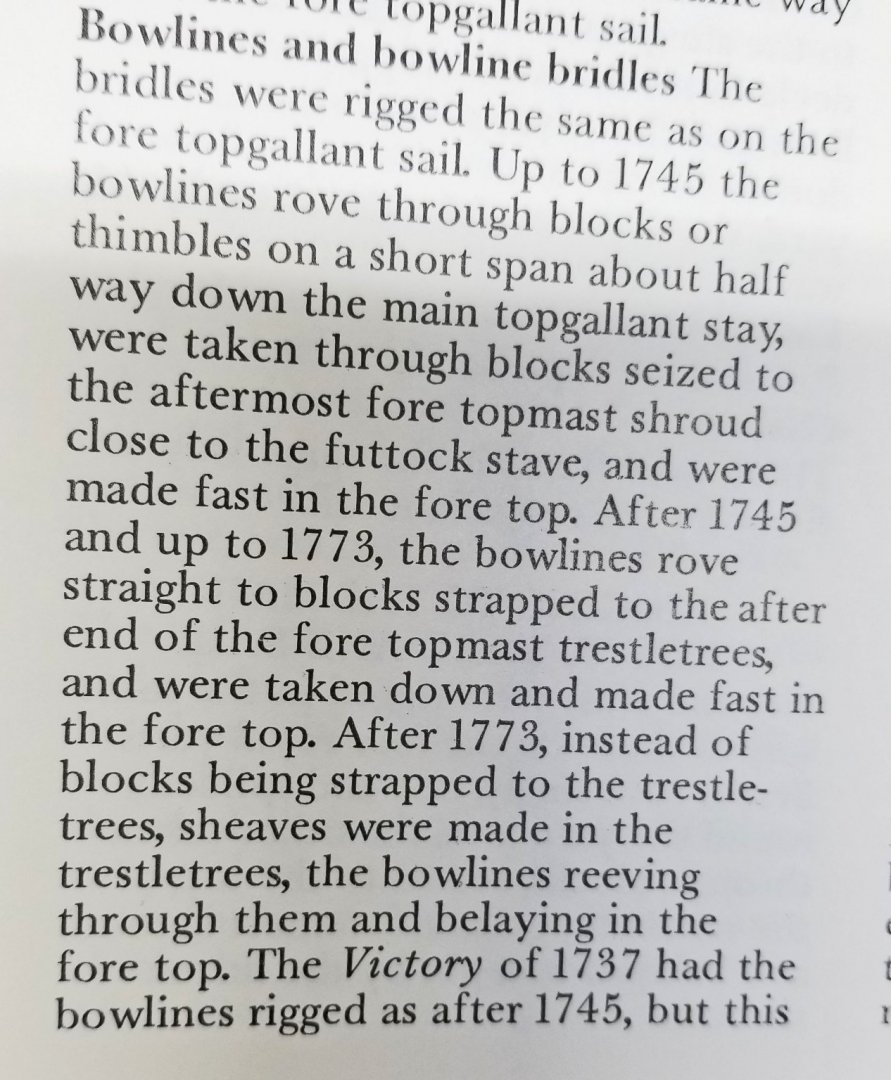
( Alan, just saw your comments. Thanks for the additional input. ) Here is a quick quote from Lees regarding some of the belaying points in question.. Page 97 of my copy regarding topgallant bowlines and bowline bridals. After 1773 ( Melumpus ) they were still belayed to the fore top, but blocks that were used previously are omitted. So that is the change/improvement that would have been made since 1750 ( Royal Caroline ). As to the question of whether lines were belayed at the tops, this reference says they were, and there was no change in that regard between 1750 and 1785.
-
The information I provided from Petersson was an effort to answer a question. There was no claim of reliability, just a possibility. However, a reply from Delf appears to add some credibility to the information. Which I have added to my fount of knowledge.. I will look forward to your input when you return from holiday and can check your references...