


chris watton
-
Posts
2,272 -
Joined
-
Last visited
Content Type
Profiles
Forums
Gallery
Events
Posts posted by chris watton
-
-
19 minutes ago, BobG said:
Nice work on the fairing, Glenn.
Fairing is one task that I'm never 100% confident about doing. I never seem to know exactly if I'm taking off too much or too little even when checking with a batten. For example, I did it as carefully as I knew how on my Medway Longboat and still ended up with a slight bulge and dip near the port bow once I started planking. Getting both sides faired exactly symmetrical is not easy for me either. I was able to sand it out but it made the planking pretty thin at that point. That's just me though, I'm sure more experienced modelers do just fine.
My preferred method is to use a 6 or 7" length of 1.5-2" 0.8mm ply with the abrasive paper wrapped around it, and then, in very technical terms, sand the crap out of the hull until the edges are no longer black. Works every time for me!
-
Nice work, Glenn!
Do not worry too much about the pear quarterdeck beam pattern, it is inset slightly, so that char showing is fine.
And again, do not worry about breaking a few of the upper tabs, this is almost inevitable - as long as you still have couple left by the time you add the outer skins, that is fine. Even if all of them broken off, you probably still would be fine..
-
Glad you like the coaster!
I only do these if I have enough time and after everything else is cut. Each sheet does 24 coasters, and is four and a half hours engraving/cutting time per 600x400mm sheet, as the etched hull drawing has a lot of lines and curves.
If I get time, I shall do some in the clear acetate.
- DelF, BobG, Old Collingwood and 5 others
-
 8
8
-
1 hour ago, AlanDavison said:
Wonderfull build, wonderful kit. All we need now are some flags. Any possibilities, Chris, James?
It is something I shall look at in the future, I need to find someone that can print in good definition and appropriate materials, yet be cheap enough not to add too much to overall kit cost.
Regarding the stand (two in each of my kits), if I put in enough options to please everyone, there wouldn't be enough room in that cavernous box for the actual kit - and then there would be a few who would still not be happy!
-
Don't worry about the figurehead, we shall send you a new one with your blocks
")
ETA - I will NEVER offer any of my kits without a printed manual - except for my Japanese distributors, who translate my files and print their own.
- mtaylor, Canute and GrandpaPhil
-
3
-
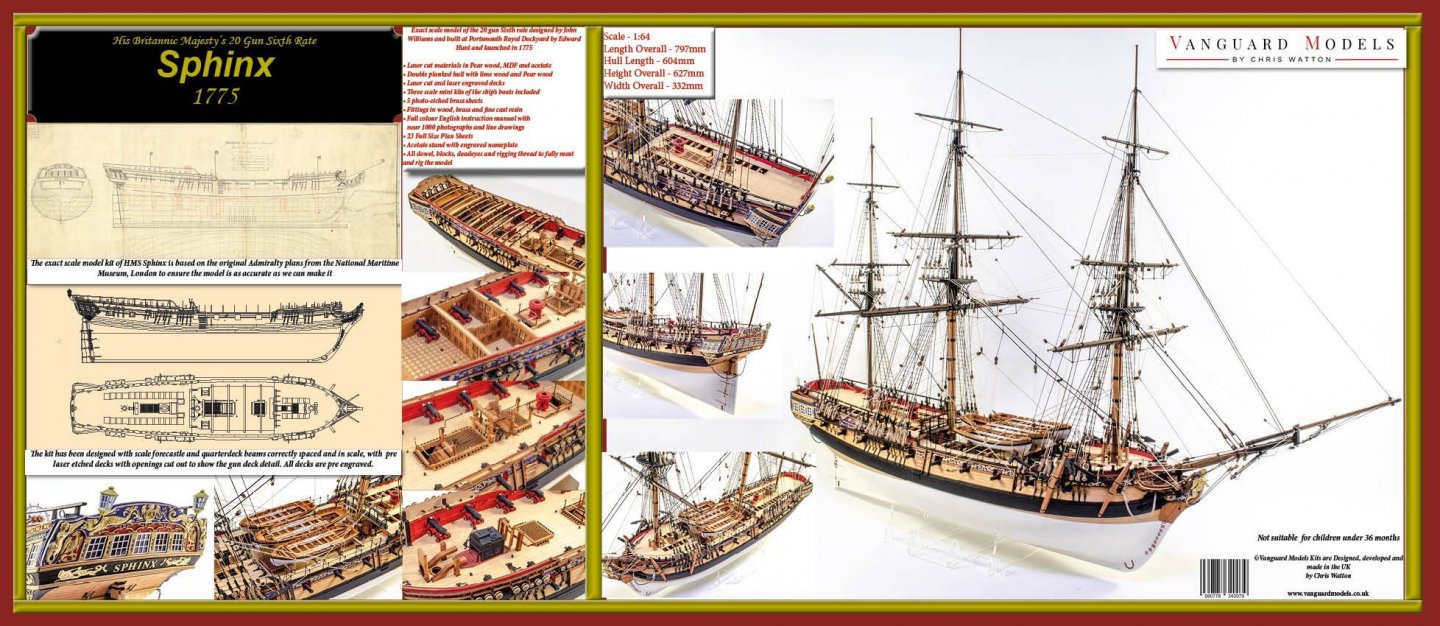
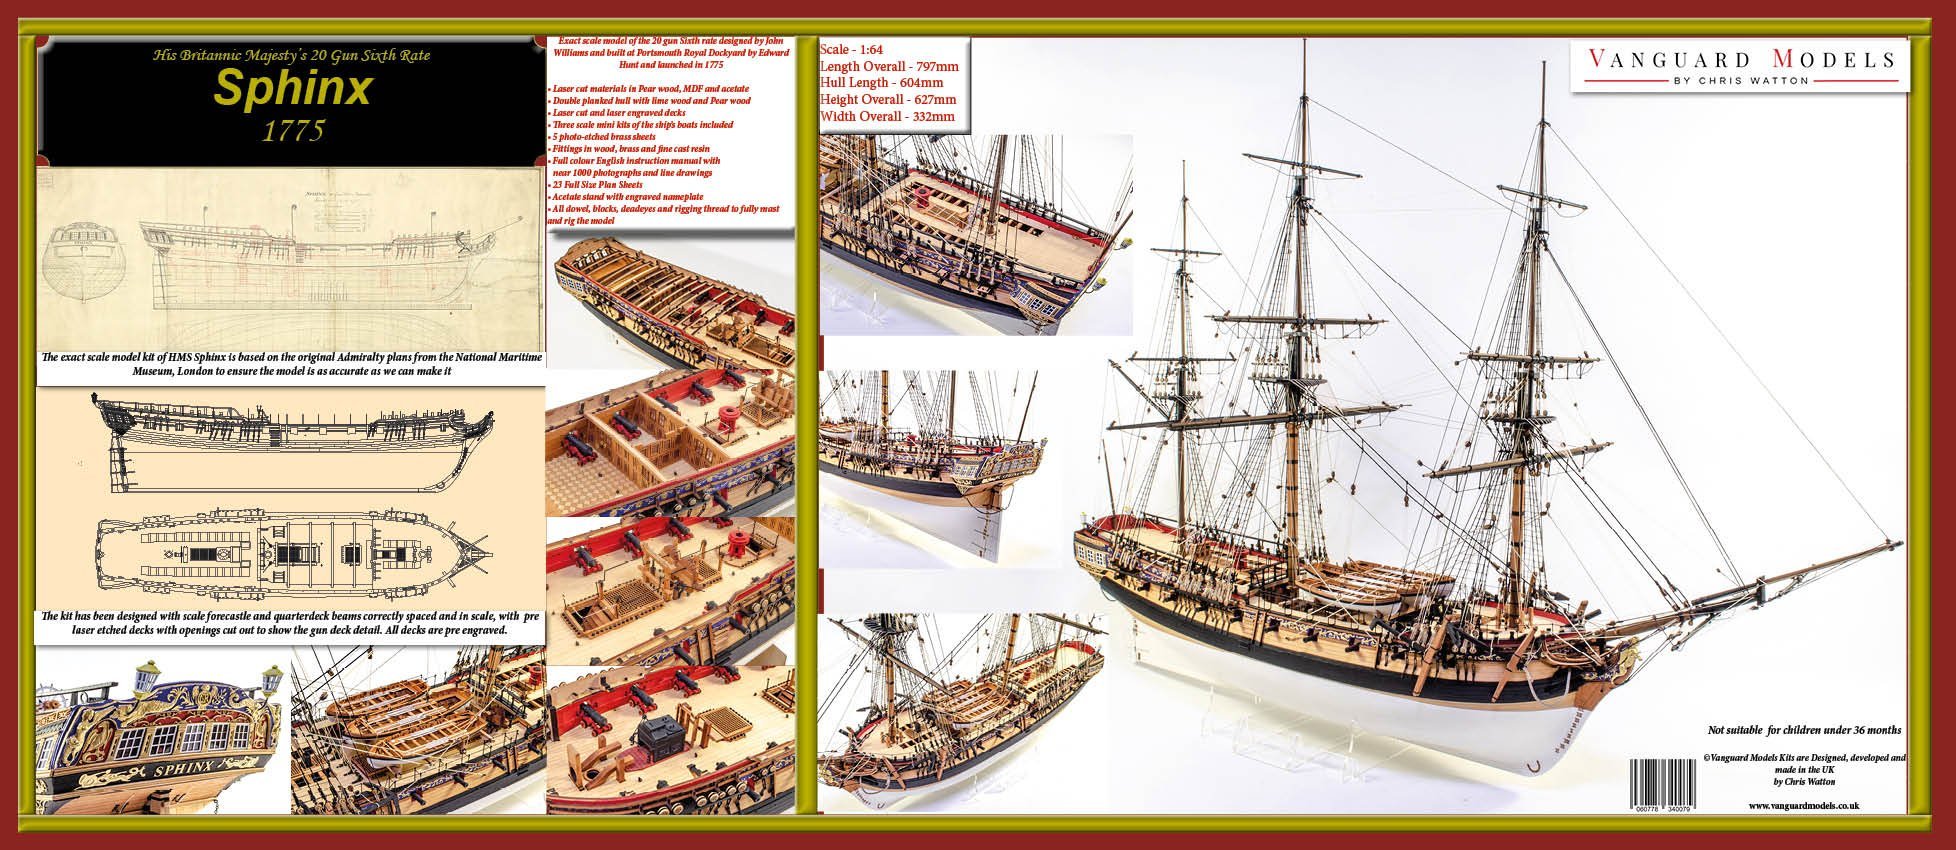
OK, Sphinx Revision 2 manual all done, and will be sent off to printers, along with new box label.
The revised manual can be found using the download link at the bottom of the page here:
HMS Sphinx – 1775 – VANGUARD MODELS
Have attached the new box label, perhaps I will now stop getting enquiries asking if the kit has masts and rig.
-
Strange how customers in the US have very differing times for the parcel to reach them. Some in a couple of days, some in a couple of weeks, and one, in California was fun. I had an email from customs asking me to fill in a 'TSCA Form', in which I had to write down the species and genus of each wood type before they released it to the customer! Didn't realise I needed a doctorate in botany to produce and sell these kits!
-
4 minutes ago, maaaslo said:
wouldn't it be easier to relabel the bags?
All the kits I had have already gone. The second batch is being done now. I will have the manuals in for reprint next week. All I had to do was to change the part numbers in the text relating the the first and second planking in the manual, just two minor changes. It really was no big deal, coupled with the fact that you only have two types of planking in the kit, the lime first planking and the pear second planking. It isn't like there's a myriad of different size planks.
-
4 minutes ago, myxyzptlyk2003 said:
Chris
I'll be installing the first planking on the Sphinx this weekend. The instructions say the planking is labeled F36. But the kit has them in a bag labeled F43. Same thing for the 2nd planking. Instructions say bag F37 but really in bag F44
You are right!
Just changed the instructions to reflect this, so the reprint will have the correct numbers.
Cheers!
- Canute, Ryland Craze, mtaylor and 2 others
-
5
-
-
During wartime, even well before the French Revolutionary Wars, captains ordered their crew to build up the bulwarks. It seems the Admiralty knew about this, but turned a blind eye. But it does seem that when carronades were introduced and were found to be very effective close range weapons, bulwarks were built up to perhaps help counter the recoil effect of the carronades.
In peacetime, ships were ordered to have their bulwarks open (don't know why, perhaps for aesthetic reasons), but in wartime, they were closed. It isn't until the very tail end of the 18th Century do we see Admiralty plans showing built up bulwarks, first just aft, and then forward.
- thibaultron, BobG, Canute and 2 others
-
5
-
-
6 minutes ago, Jasseji said:
I do believe the HMS Camilla was mentioned to be re-coppered at some point (hence she would have been coppered initially), also those ships starting 1794 were fitted with 12-24pdr Carronades (4 or 6 of them: 0 or 2 on fcsle and 4 on the quarterdeck) so that might be 2 "Upgrades" worth considering over the kit
Yep - Also, if people want to model the vessel as she appeared later in her operational career, the quarterdeck bulwarks would be solid, not open. This applies to the forecastle too, if carronades were to be positioned there.
- BobG, thibaultron and Canute
-
3
-
19 minutes ago, Vane said:
Regarding Sphinx, would it be completely wrong to do built it with copperplates?
Not at all. I would think that the Sphinx Class were copper bottomed for most of their operational career.
- hollowneck, mtaylor, Vane and 2 others
-
5
-
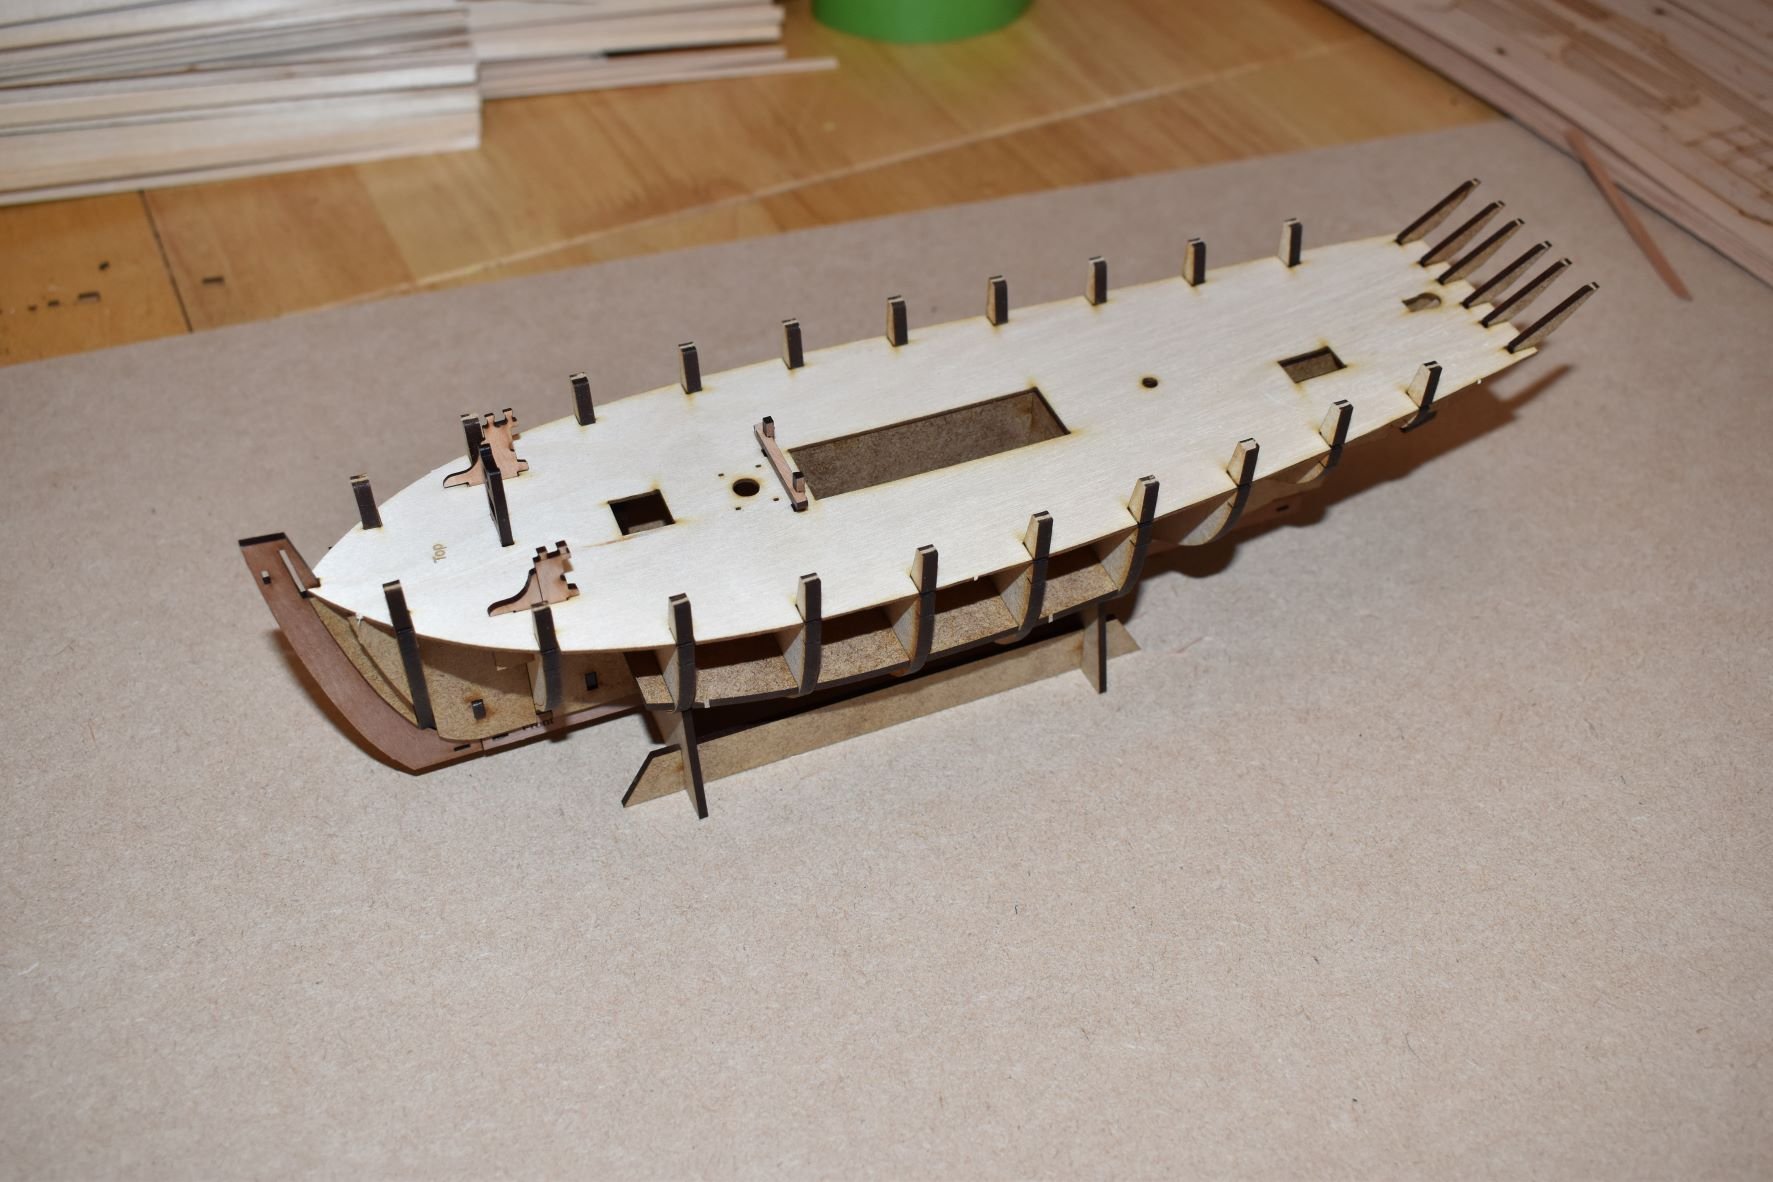
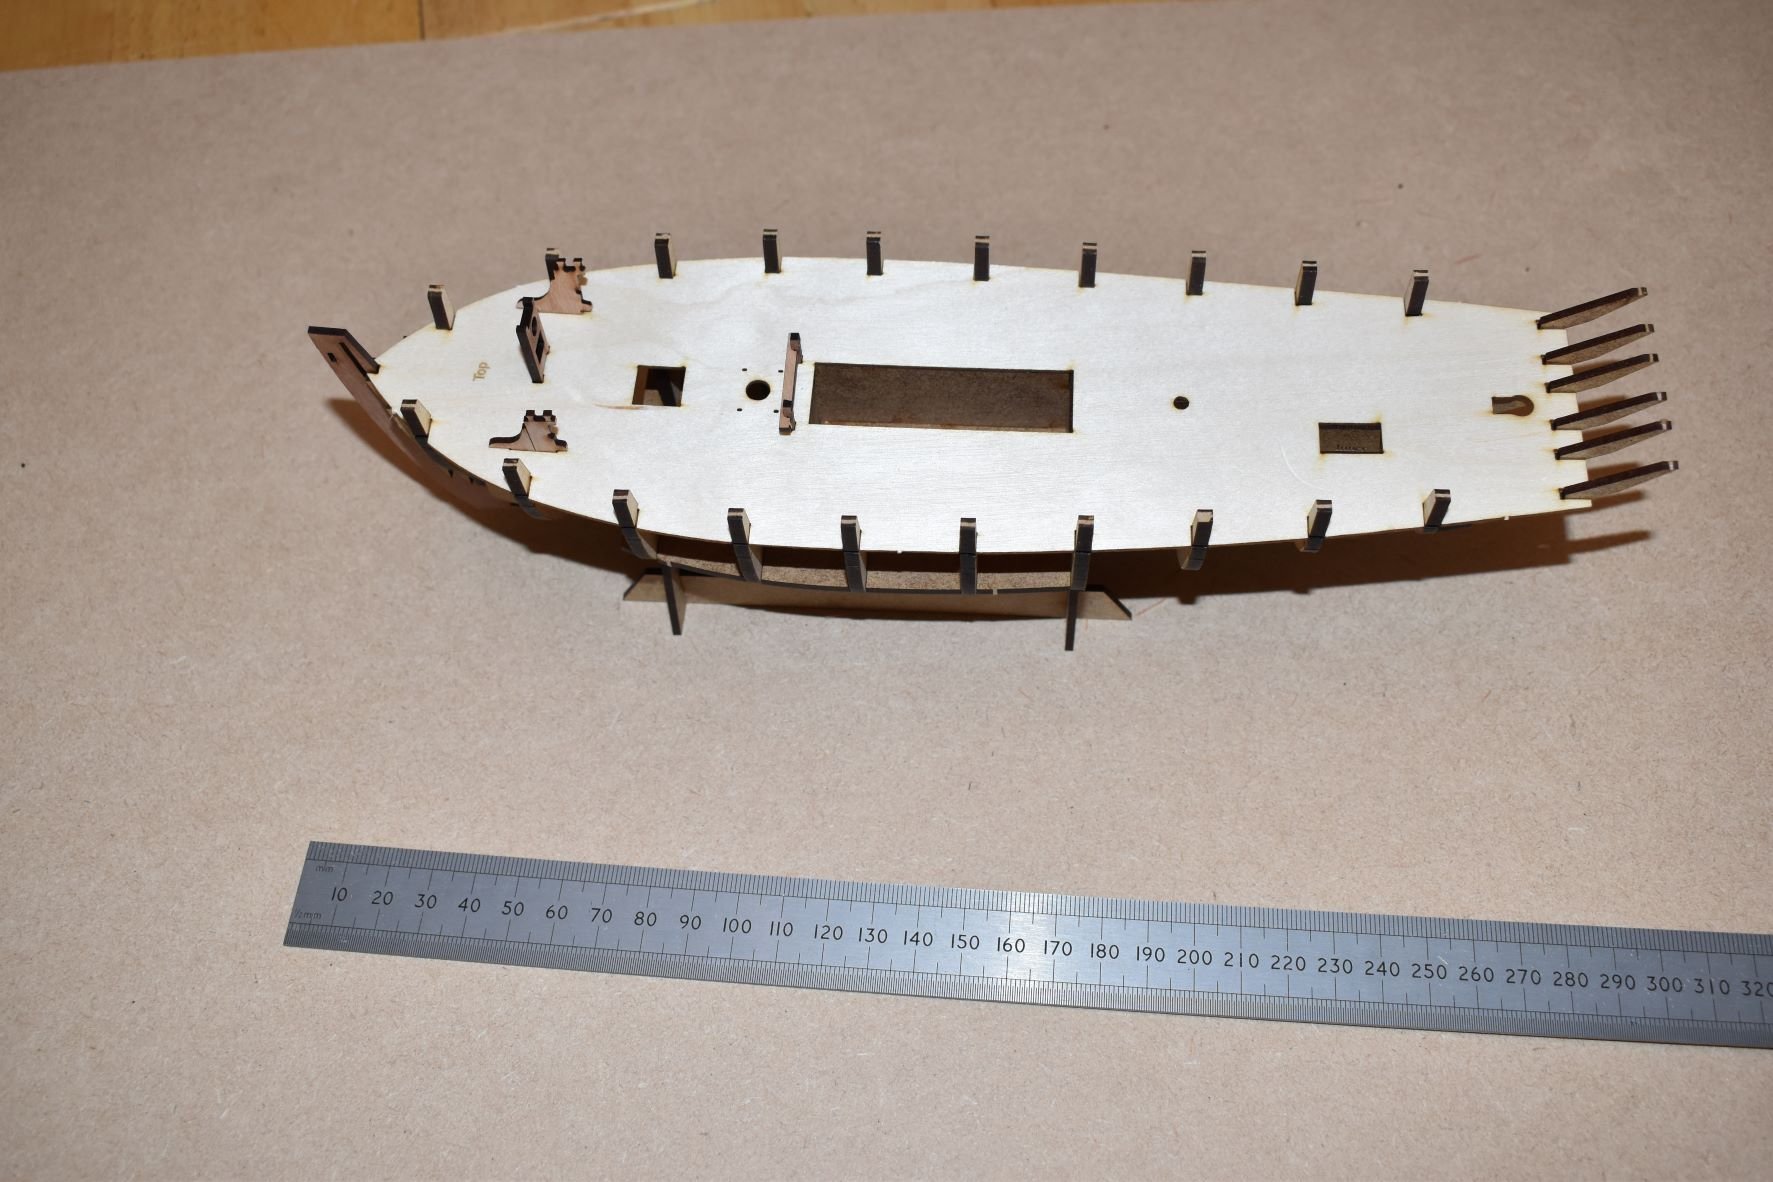
Very nice progress, Glenn!
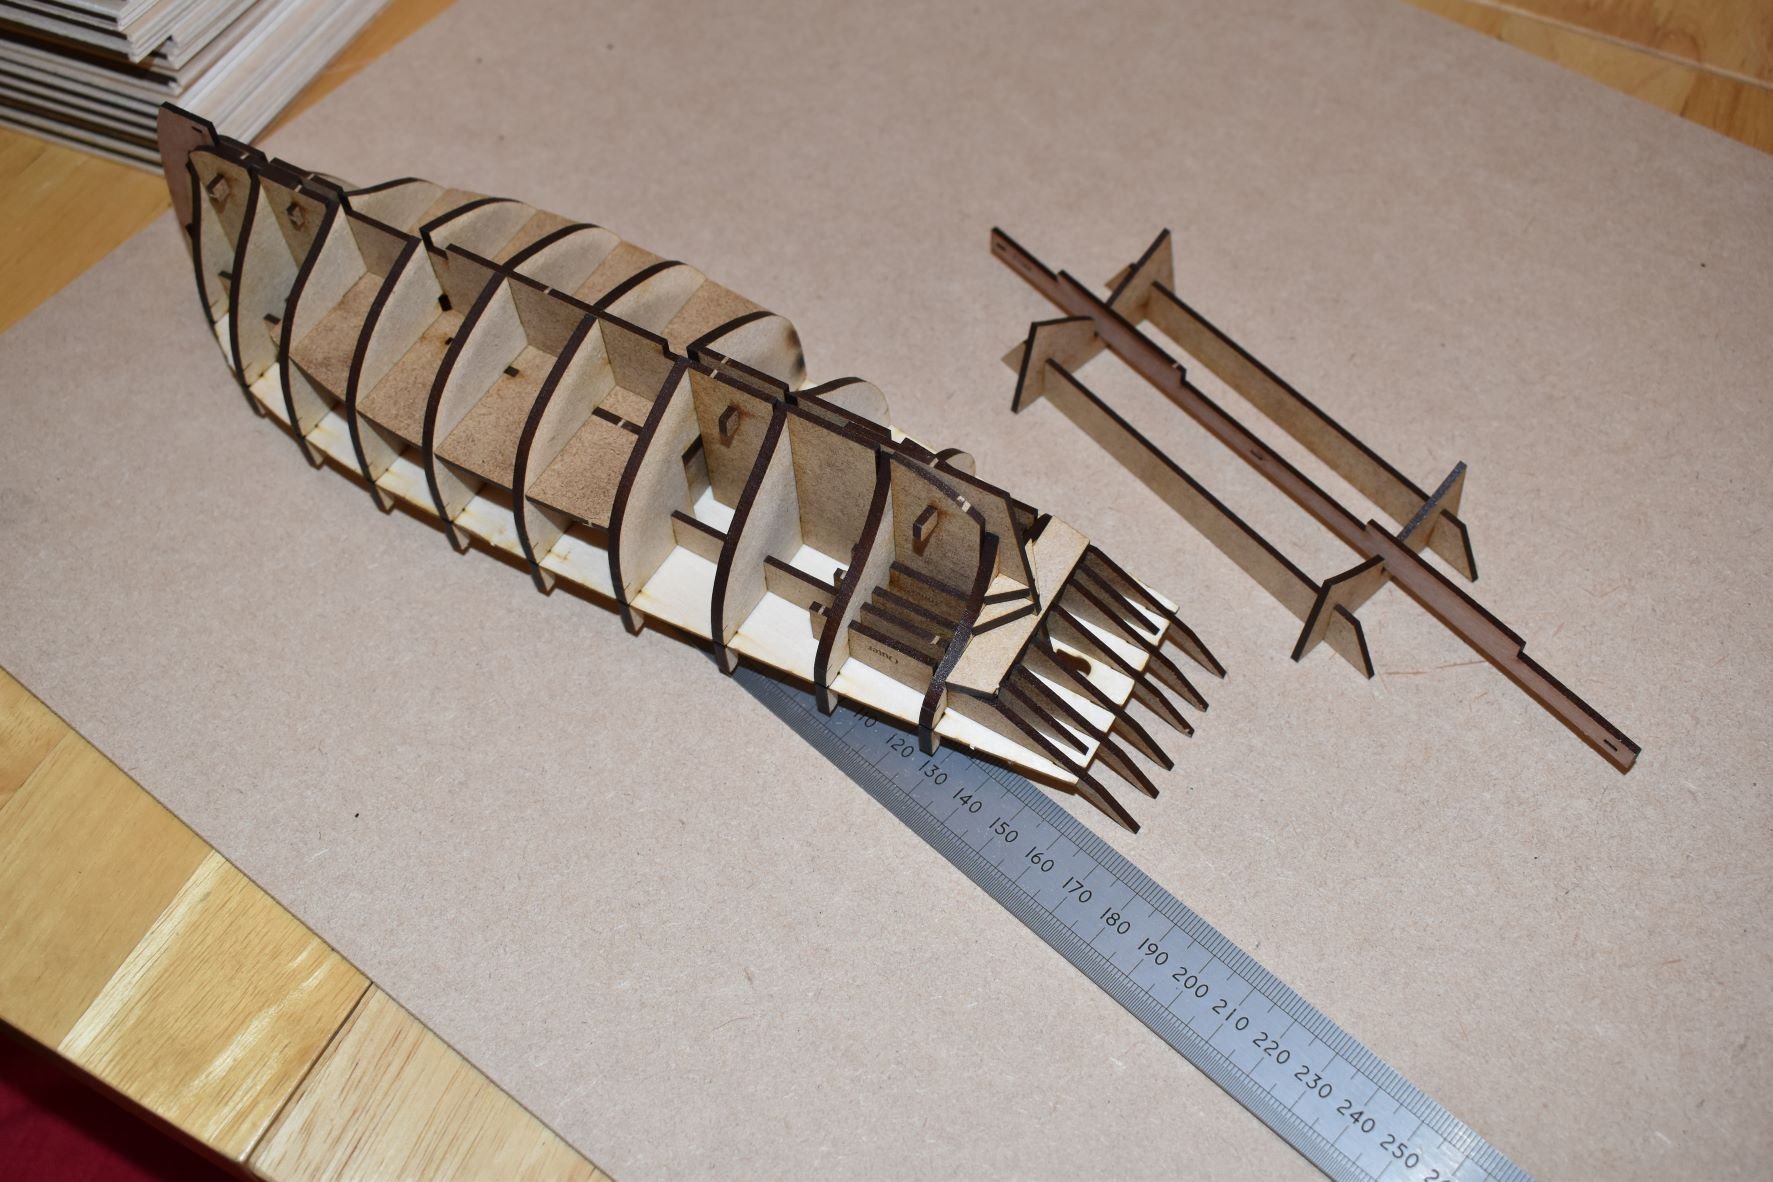
Regarding the vertical gun port frames, it doesn't matter so much if the tops are fragile, or if they break off even. The only thing that matters is that they create the inner surfaces of the gun port frames, the rest is more or less superfluous, so don't worry about the areas above and below the longitudinal patterns.
-
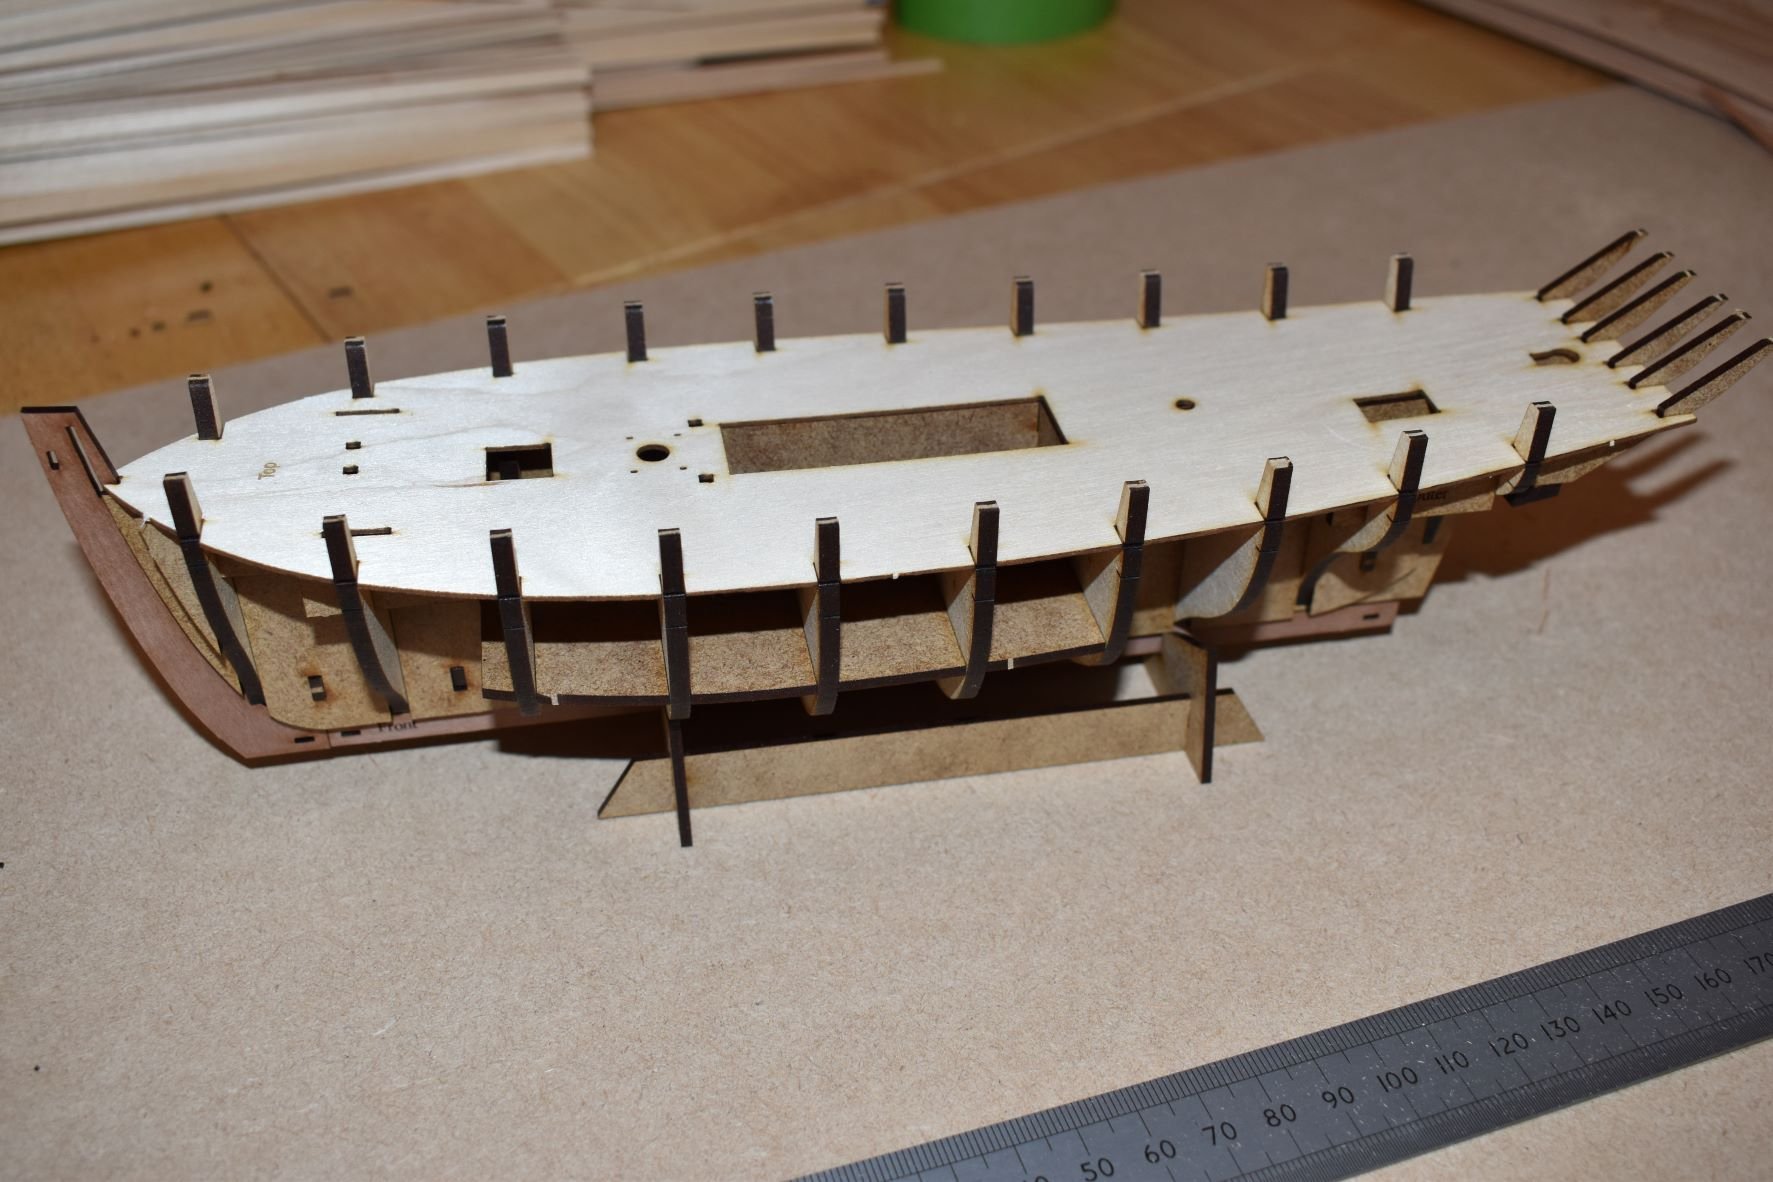
14 hours ago, myxyzptlyk2003 said:
Sorry. Not on my build. Both halves when placed tightly up against the bulkheads overlapped by about 2mm. Basically, I don't think this is a very big thing. In all the kits I've built most have needed this kind of adjustment. And while I certainly can screw up things, in this case, I don't see how that would be possible as the open width between the bulkhead ears is established in the kit cutting and I made no adjustments
In the near future I can take a close up picture showing the adjustments. You will see that the bulkhead slots are tight up against the bulkheads and the centerline of the two pieces meet perfectly after removing that bit from the slots
OK, I have spent 45 minutes checking my cut files to make sure, the master files that are used to actually laser cut the production parts. I checked the distances from the slots in the gun deck and each bulkhead from 2-13.
For example, on bulkhead 13, the distance between the tabs is 93.78mm, and the distance between the ply deck slots is 92mm, giving a whopping 1.78mm leeway. This is the same story for all slots I checked, some have a little less tolerance, but always more slack than what is required. There's even plenty of slack in the slot widths, being 4.25mm wide for slots for 4mm thick bulkheads 2-9 and 4.3mm wide for slots for bulkheads 10-13.
As these are the exact drawings in the files that I use to cut all kits, there is no way they would cut any different from one to the other.
What I suspect has happened is that the deck has not been fitted fully home in the slots in some areas. I know this can happen, as I did this during one of my prototype builds, but noticed just in time.
-
13 minutes ago, myxyzptlyk2003 said:
Just glued the gun deck on. I had to deepen the outboard bulkhead slots about 1-2 mm on each side. I used the center line of the model to determine how much to deepen each slot. Averages about 1.5mm each side.
That is very odd, I add more than enough tolerances on slots so they should all fit perfectly, you should not have deepen them by so much! Stuff like this is nailed very early in the designs.
-
12 minutes ago, Nirvana said:
Chris, you are your own factory new designs and models one after another. Very nice!😀
Cheers!
I wasn't going to start this one yet, but I had the lines scanned into my PC, and couldn't help myself. I just like to nail the hull designs, as that is well over half the battle for commercial kits, even more so for commercial kits with absolute beginners in mind.
Love the name of this one, 'Saucy Jack'! Because it's a much earlier vessel compared to the other fishing boats, the hull shape is more like earlier small craft, almost like a cutter with no guns.
For larger kits, don't worry, I certainly haven't forgotten those..
- Nirvana, ccoyle, thibaultron and 13 others
-
16
-
-
-
-
Do not believe or take to heart any mindless negative comments. The work you are doing on this fantastic subject is simply superb.
- mtaylor, bruce d, SighingDutchman and 5 others
-
8
-
-


HMS Sphinx 1775 by James H - FINISHED - Vanguard Models - 1:64
in - Kit build logs for subjects built from 1751 - 1800
Posted
I think what I shall do is continue doing what I do. I know I will never please everyone (and the loudest critics are usually the ones who would never buy your product anyway), but I like to think I know enough as to what most would like to see in a kit, I just think of what I would like to see in a kit that I paid my own hard earned on.
I will source flags at some point, but right now, I want to concentrate on new kits, this is where my investment money is going.