


chris watton
-
Posts
2,314 -
Joined
-
Last visited
Content Type
Profiles
Forums
Gallery
Events
Posts posted by chris watton
-
-
Thank you for all the good wishes, very much appreciated! It is nice knowing that there are no more restrictions to expand.
This is where we shall be based:
https://maps.app.goo.gl/BAjBq12Xsvdvwee88

- hollowneck, Paul White, cotrecerf and 16 others
-
 19
19
-
2 hours ago, scrubbyj427 said:
Nice!!
you can probably acquire another laser now.
This is the issue I have now - I already have the other laser machine (100w), the problem is that I have no room to run both at the same time, due to not being able to fit in another extractor, which is required to run when the machine is working. Now, I will be able to buy another and finally run both in concert.
-
Well, today, we made a huge step (for us) forward.
We have been so busy, and right now, I can only run one laser machine at a time, as we have no space for another extractor, which we need to run both simultaneously - so have been drowning under work load, and running out of space for the business. We have totally outgrown the repurposed garage for the workshop.
With that in mind, we went to look at some proper business units, and I have just put a deposit down for a nice little unit, over 4 times the space I currently have, which we move into in January. I will be able to run both lasers at full pelt, and have much more space to put stuff!
I have added some pics of our modest little new unit – we have an option of having something larger as we grow more.
Realistically, we had little choice, as with Surprise imminent, that’s 18 kits we need to find space for, and a 3-bed house and converted garage can no longer cut it….


-
-
A very neat job you have done there!
- Nightdive, AJohnson and Ryland Craze
-
3
-
2 hours ago, Ronald-V said:
To be honest...it's the first time I hear the term "Restoration period". Was your Revenge 1577 design from Amati also from this period? Or was this to early?
That was a hundred years' earlier, Elizabethan Period.
")
(The Restoration period in England began in 1660, which marked the return of Charles II to the throne)
-
Even before deciding on the name for the model kit range in 2019, Royal George was the first on my list of subjects for the 'Flagship Model'. That huge double equestrian figurehead will look magnificent on the head of the ship.
If I am to spend another two plus years on one large development, I will make damned sure it is released once complete - although I suspect it won't be cheap, but what the hell, I spoke to the owner, and he said he doesn't care about the cost, but seeing a completed model of this is more than and know we can give those an opportunity build such a kit is worth the time alone!
Not for another couple of years or so, though, as I have Aggy next (not a quick and easy development also) , followed by the Restoration warship...
-
I do have a Resoration warship subject in my development folder.
- STK, BlackDog, thibaultron and 4 others
-
7
-
4 minutes ago, DARIVS ARCHITECTVS said:
Imagine what Chris could do with HMS Sovereign of the Seas...
Well, for one thing, it wouldn't have a square tuck.....:)
-
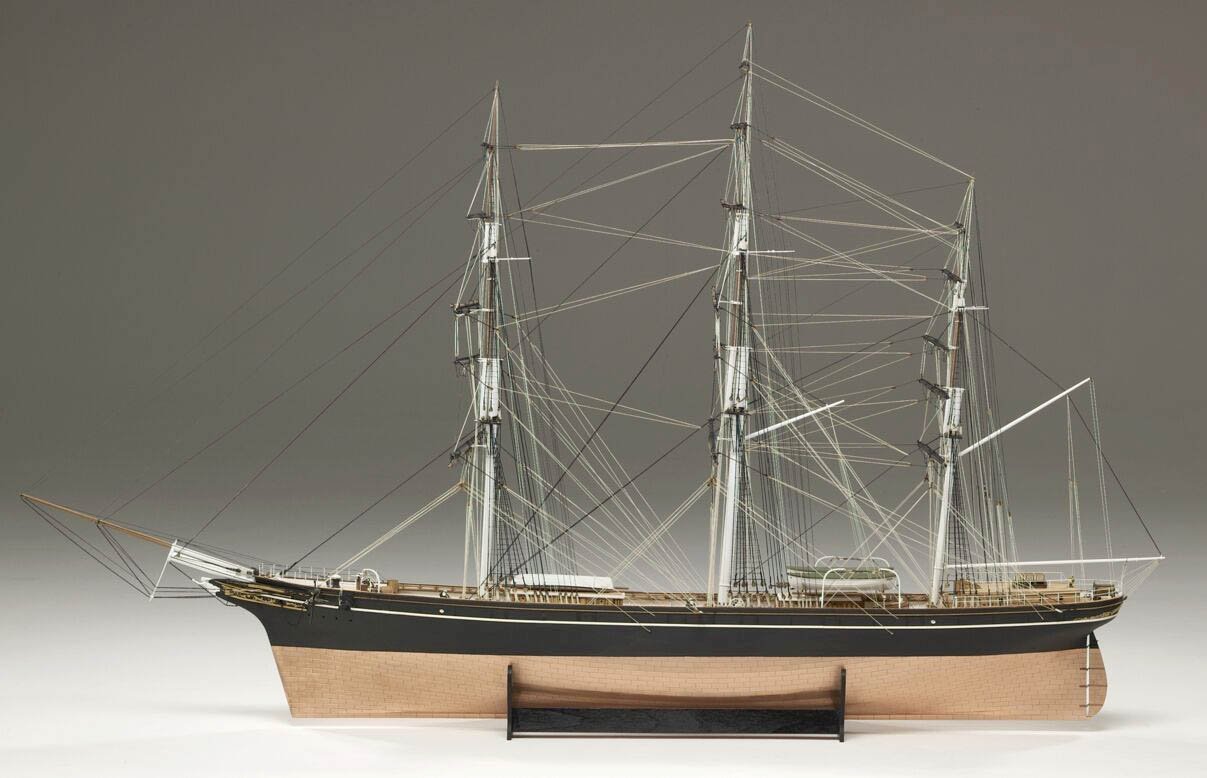
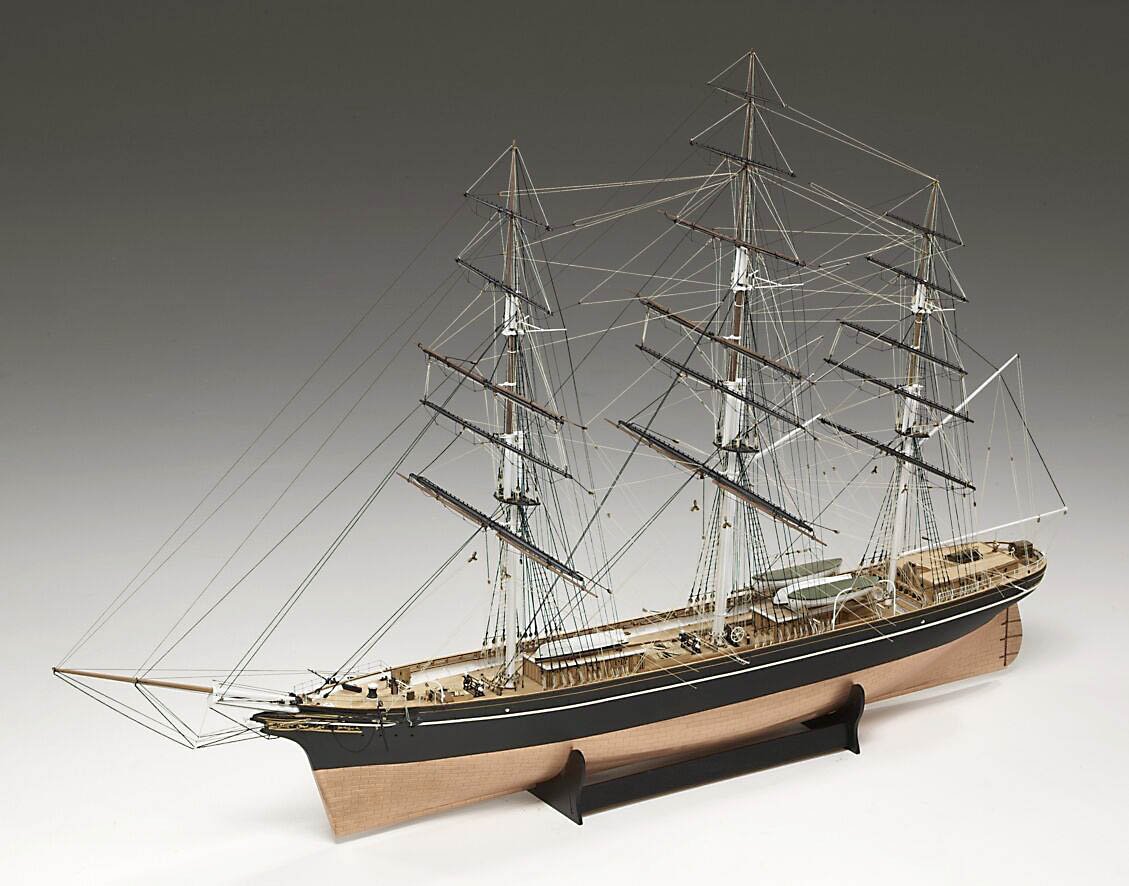
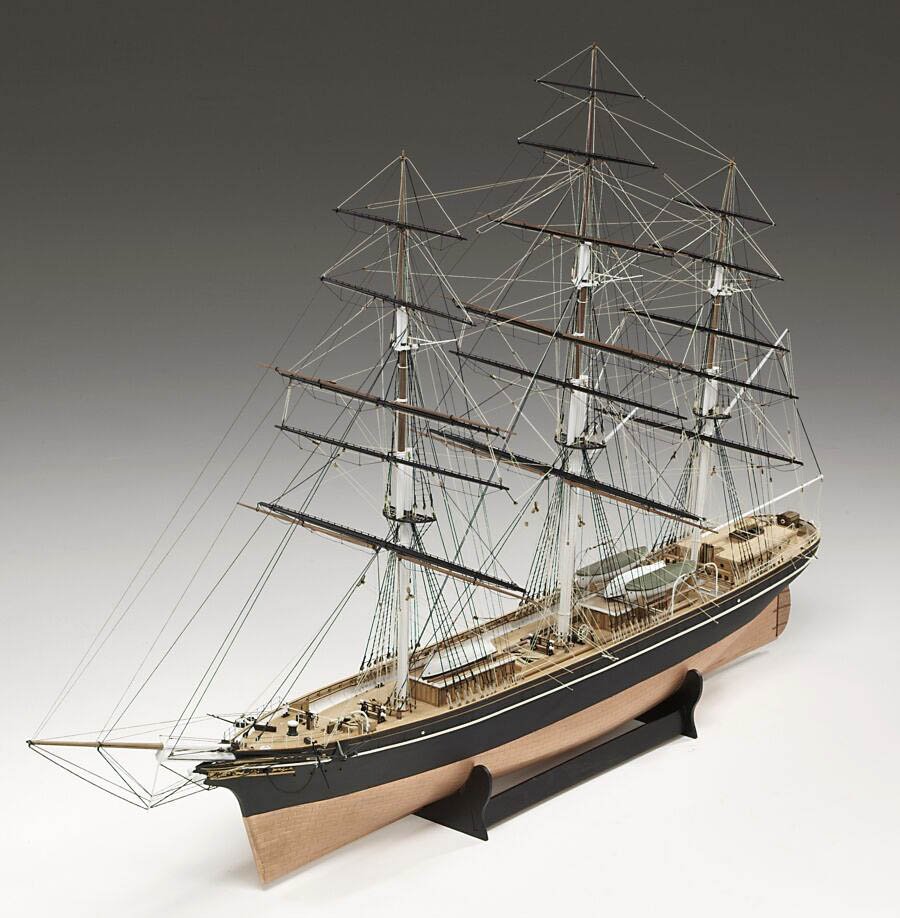
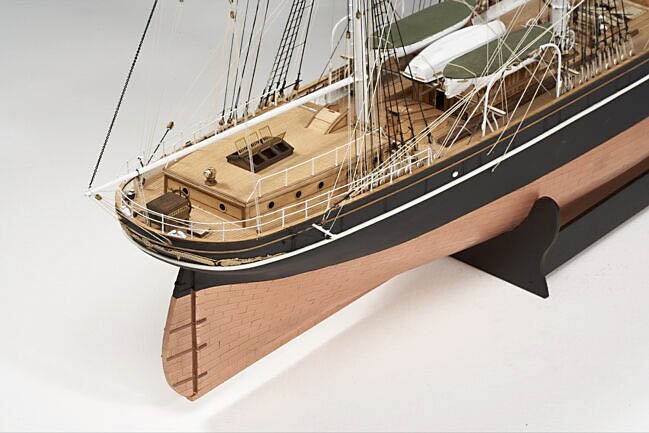
But I have designed a Cutty Sark, a rather large one, too, in 64th. This was back in 2008 (damn, almost 2 decades ago now) - but it was for a part work for Hachette. They did test publications, to see how popular something is, and if they do well, then they follow it through. Cutty Sark clearly didn't sell too well, as nothing become of this design, being in limbo ever since. Shame, as I had all the deck cabin detail in there...
Because I had to design these very quickly, and then build the prototype very quickly (always to silly deadlines), no real plans or construction pics were ever done (just speed built as quickly as possible) - these were always done later, if they had the go ahead. Another reason I really hated doing these part works, such a massive waste of time (for my part, at least)
- GrandpaPhil, mgatrost, hollowneck and 15 others
-
15
-
 3
3
-
28 minutes ago, Ronald-V said:
Good interview! Nice to hear some insights and you did well Chris👍. Also fun to hear that you picked Sphinx as your favorite design 😀
I think I chose Sphinx because that was the kit that forced me to make a leap of faith and quit my day job to concentrate fully on Vanguard Models.
- John Murray, Oboship, mgatrost and 9 others
-
12
-
Jason Port was brilliant, put me at ease (somewhat), as I have never done anything like that before - I stressed and worried for weeks about doing this.
The show was good, but for me personally, looking at all the stuff there, it was like going back in time 26 years (over a quarter of a Century)!, the last time I went there with Jotika. Nothing seemed to have changed, same models and kits, with the only difference being some parts being 3-d printed instead of resin cast. My wife said that we didn't really belong there, as no one was displaying/selling our type of kit. I had to remind her that, other than jotika, we are the only company in the UK that actually develops these kinds of kits, so us being the only ones there selling these is quite natural. I did enjoy it, though, met quite a few people and orders have been coming in a lot more since the show. So, all in all, I think it went well. We shall be doing Telford next year.
Regarding US subjects, I do have Grecian. I have thought about a 64th Constitution, but the more I think about it, the more of a minefield I think that would be - what period would I show her, and what if I get one detail wrong that wasn't specific to that period etc. You would metaphorically hang me!
Anyway, for now, I have years of work for developments I want to do before I expire – am hoping another 20 years if I am very lucky…
-
I can't watch....
- AJohnson, bruce d, hollowneck and 3 others
-
 6
6
-
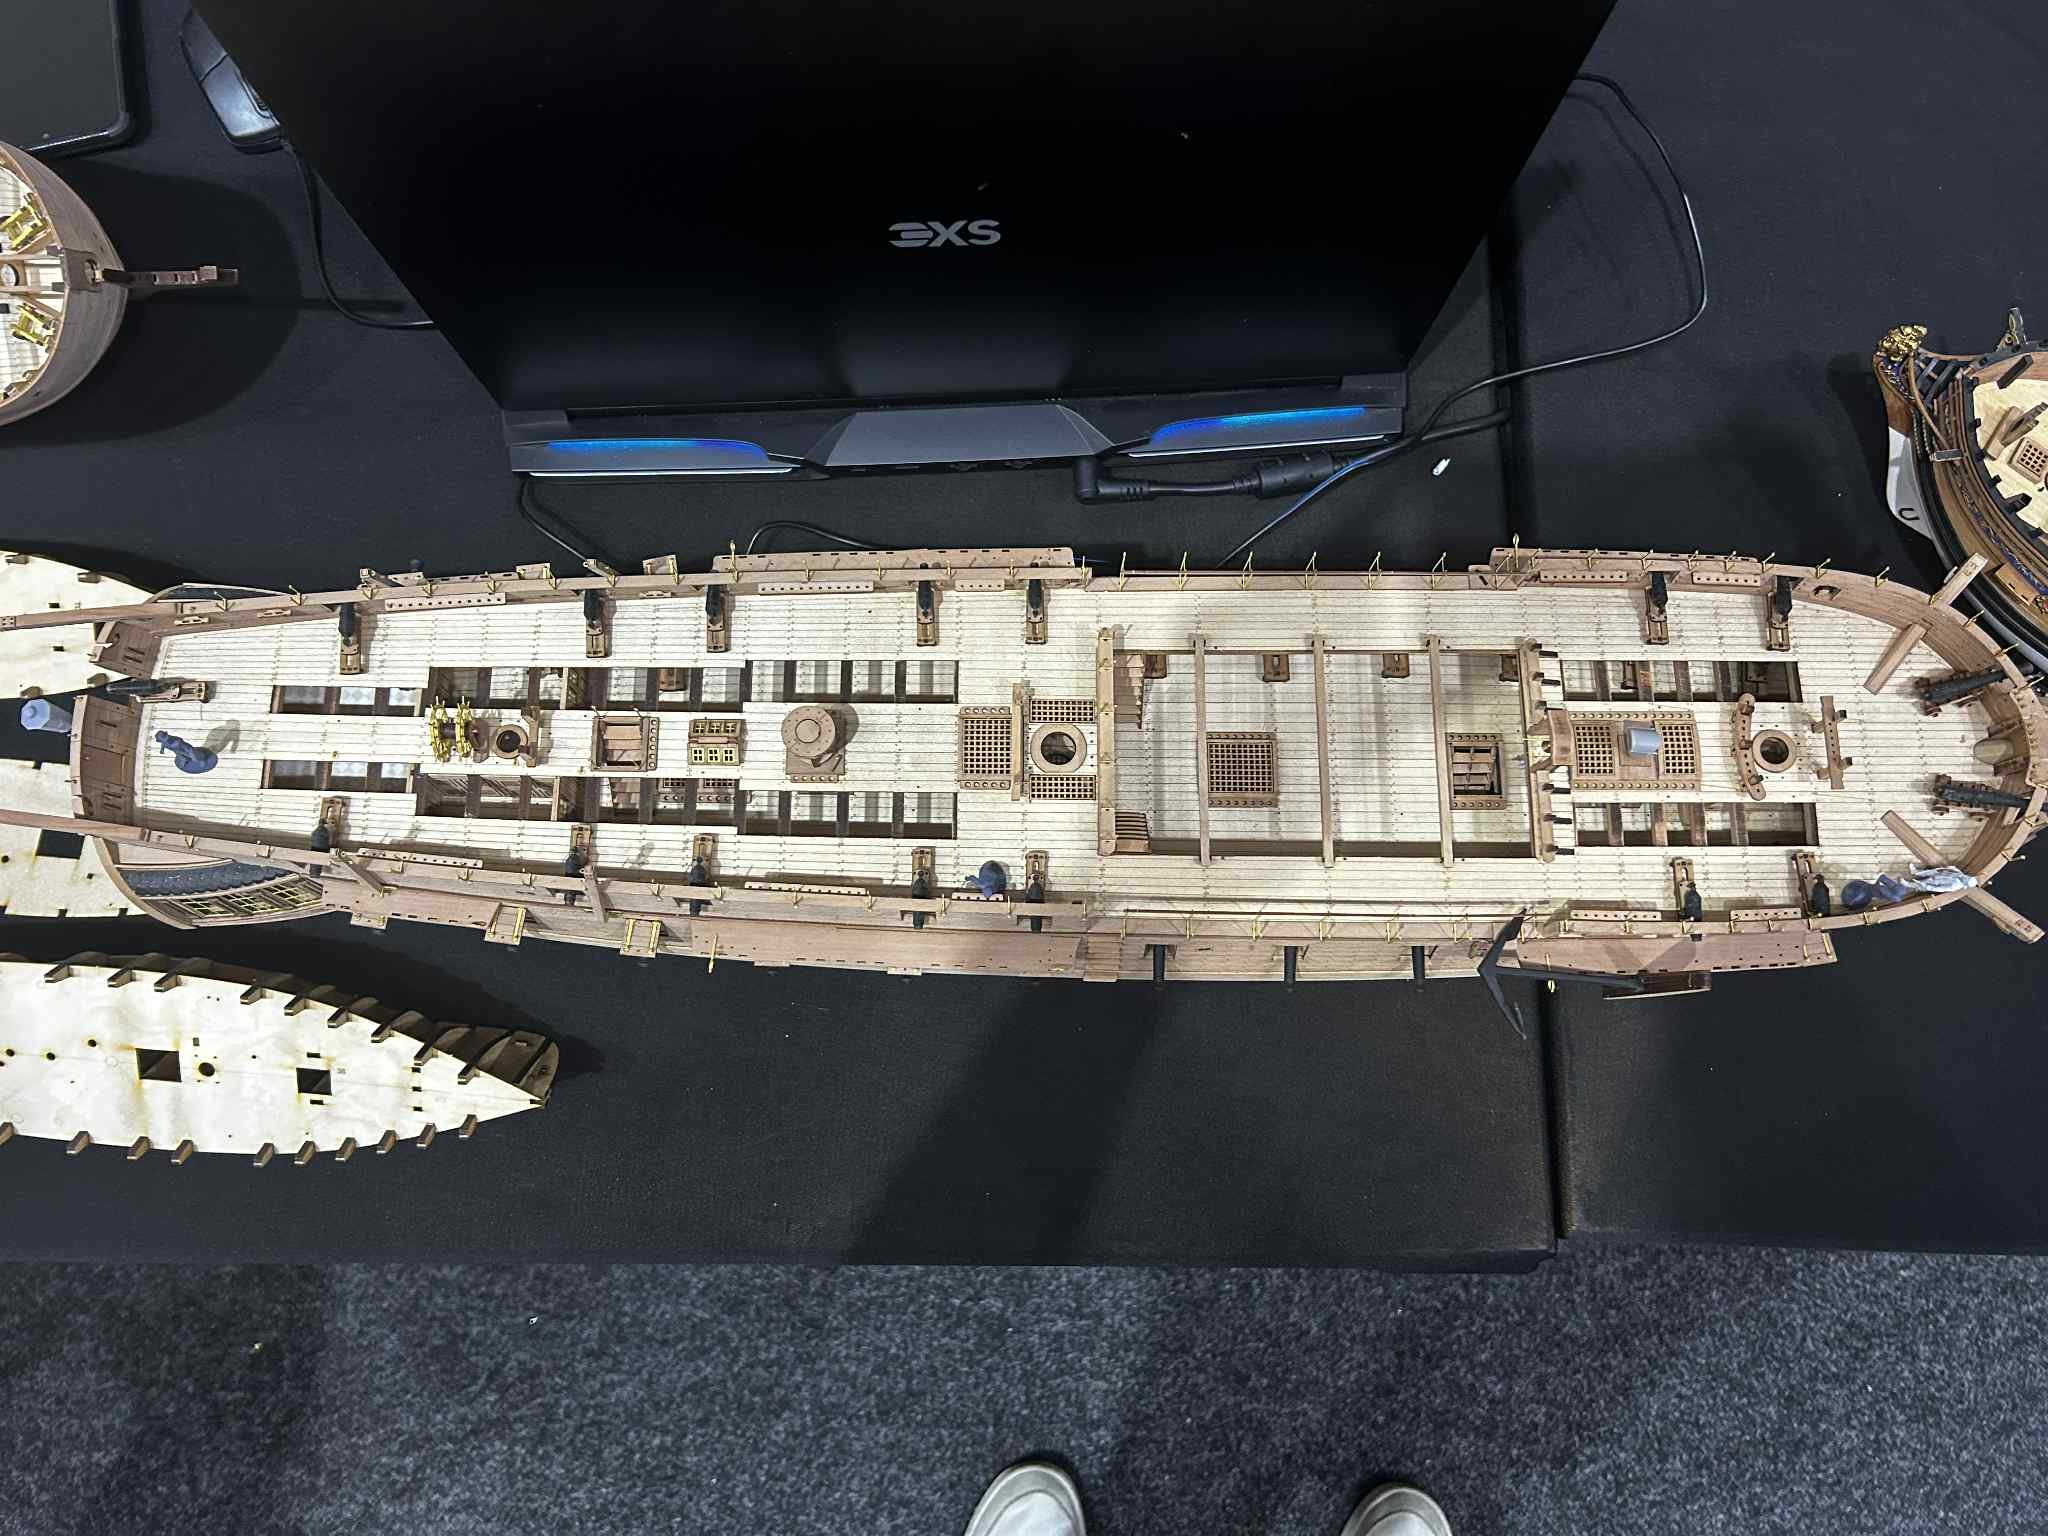
When I started Surprise, I had a choice to develop her as she was for her very short real career, or more like as per the novels. I decided that the majority, I suspect well over 90% of builders, would like to depict her as per the novels, so this is what I focused on for the main kit. There will be an optional armament for the 32-Pounder carronades and the different figurehead, so there is a choice.
I shall reiterate, Surprise is developed with the fictional version well and truly in mind, and most, if not all of that action was post 1801 - this is why, when I was asked by the supplier of the flags, which period would I like to go for, I told them the later version. As these sets are quite expensive, being of very nice quality, I thought it best to go with the version that I strongly suspect most modellers will build her as. I could not get either/or, as the costs are too prohibitive to have one set gathering dust on the shelves for years to come.
The only area that I have left alone is the main mast, there will be no 36 gun frigate main mast in the kit. I think this is fine, as that mast wasn't stepped upon Aubrey's command, but later.
As for what I am doing now, I am trying hard to complete the plan sets. I suspect now that I will have them done in the next 4 weeks, or just before Christmas. This has taken much longer than I anticipated due to having to stop frequently and focus my attention on production for orders. I have yet to start production for Surprise, but this is normal. I usually start when I am 100% sure the parts I gave Jim are all fine. If I started before this, and Jim came accross a problem, it would be a disaster, as all of that expensive pear wood sheet would have to be scrapped and re done - so production of laser cut parts is usually the final job for me once I am 100% sure all parts fit as intended.
We are now actively looking for a unit to rent, as we have well and truly outgrown the space we have here, so hopefully we can find somewhere where we can expand a lot more.
Finally, I am looking into purchasing better 3-d printers, (commercial grade rather than consumer grade) and have been looking at FormLabs products. I think these would be better suited for my needs going forward, as the print tolorances are much tighter, although quite a large investment (FormLabs 4L package is quite an investment, plus the resin required).
- scrubbyj427, Aa-schipper, woodartist and 36 others
-
35
-
 2
2
-
2
-
11 minutes ago, glbarlow said:
I’m glad of the flag set too and have been a customer of Vanguard since its first model. Chris works so hard to get things right and to communicate so effectively on this forum I just tire a bit when someone nitpicks at his choices. I did learn a new word though, had no idea their was one for the study of flags.
I learned that word from The Big Bang Theory!
-
To be clear, my version of Surprise is depicted post 1801, as per the novels. The quarter davits would not be shown if it were much earlier.
This does not stop anyone from changing the model to 1796 spec if they so wished - buy another flag set (or leave them off) and leave off the slightly later innovations like the davits.
I did think adding a quality flag set for the first time ever as standard for my kits would be a nice little addition - should have known it would cause a ruckus! 😅
-
1 minute ago, AlanDavison said:
I note that the union flag includes the cross of St. Patrick which was added to the flag in 1801. Is this appropriate for Surprise which I believe was sold out of service in 1802?
I knew I would get this question.
Yes, for me, the flag from 1801 is appropriate. This is because I figured the vast majority of builders will want to depict the model as per the novels, the overwhelming majority being post 1801.
If I asked for the pre 1801 flag, I am sure I would also get comments about that. On balance, I thought the post 1801 would suit the majority.
- DonSangria, Rustyj, PaddyO and 17 others
-
20
-
Just heard that my Surprise flag sets and optional machined blocks are arriving tomorrow!
The flag set will be included as standard in the first and perhaps second batch of Surprise kits. In fact, the only optional extra will be the machined blocks, and that's only because I know some will want to just build the hull and leave off the masts and rig. The quality is very high for these flags, printed on a very fine material, Jim has my first samples..

-
23 minutes ago, AJohnson said:
You are spoiling us Chris, most (if not all other manufacturers) would say "like it or lump it!"

If the customer is happy, then I am happy! Doing alternatives like this is possible because I produce all my own stuff, rather than sub contracting to some Chinese company. So if I feel I have the time and it can be done, I shall endeavour to do it - like personalised nameplates for pre orders on some past kits.
-
12 hours ago, DB789 said:
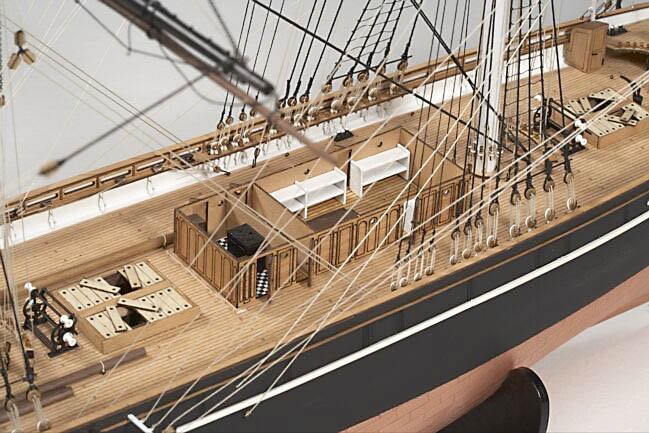
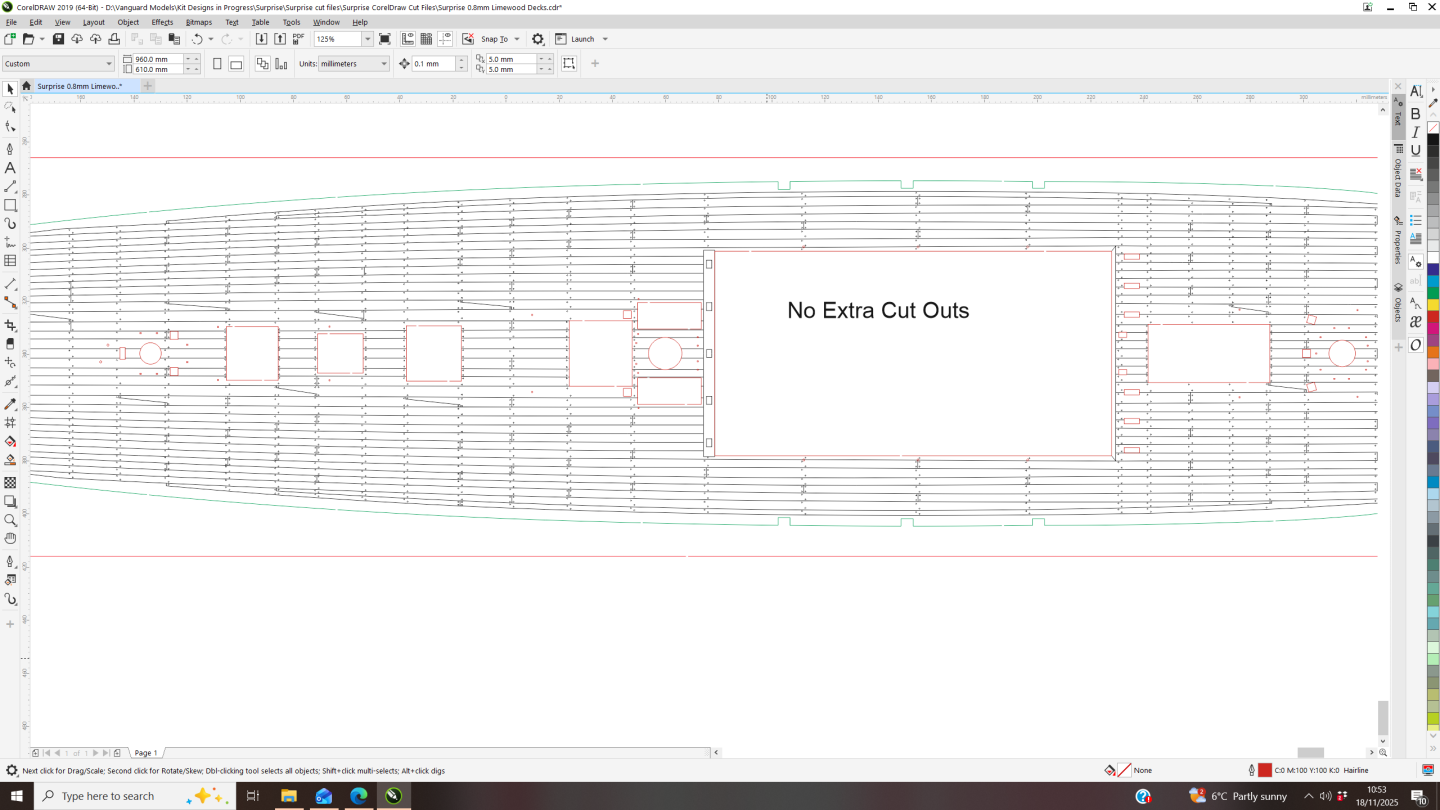
I really like the Vanguard engraved decks. I’m less keen when they’re cut away to show the interior as they are on Sphinx and Surprise. The cutaway deck works really well on Harpy as it makes the model much more interesting, but in my opinion detracts from the small frigates. It’s entirely a personal preference but I’d prefer they weren’t cut away as standard. I’d like to have had the option to fully deck Surprise myself so I can choose whether to have the cutaway engraved deck or not. I may have another go with deck planking on my next build (Speedy).
This is always the issue, I cannot please 100% of the people 100% of the time.
However, after reading this, I have done a modified Surprise upper deck with NO cut outs (apart from the required ones for hatches). So if anyone orders a Surprise, let me know if they want a deck with no extra cutouts to show the beams. So for my next kit, at least, the option is there - you will just need to ask.
-
-
36 minutes ago, myxyzptlyk2003 said:
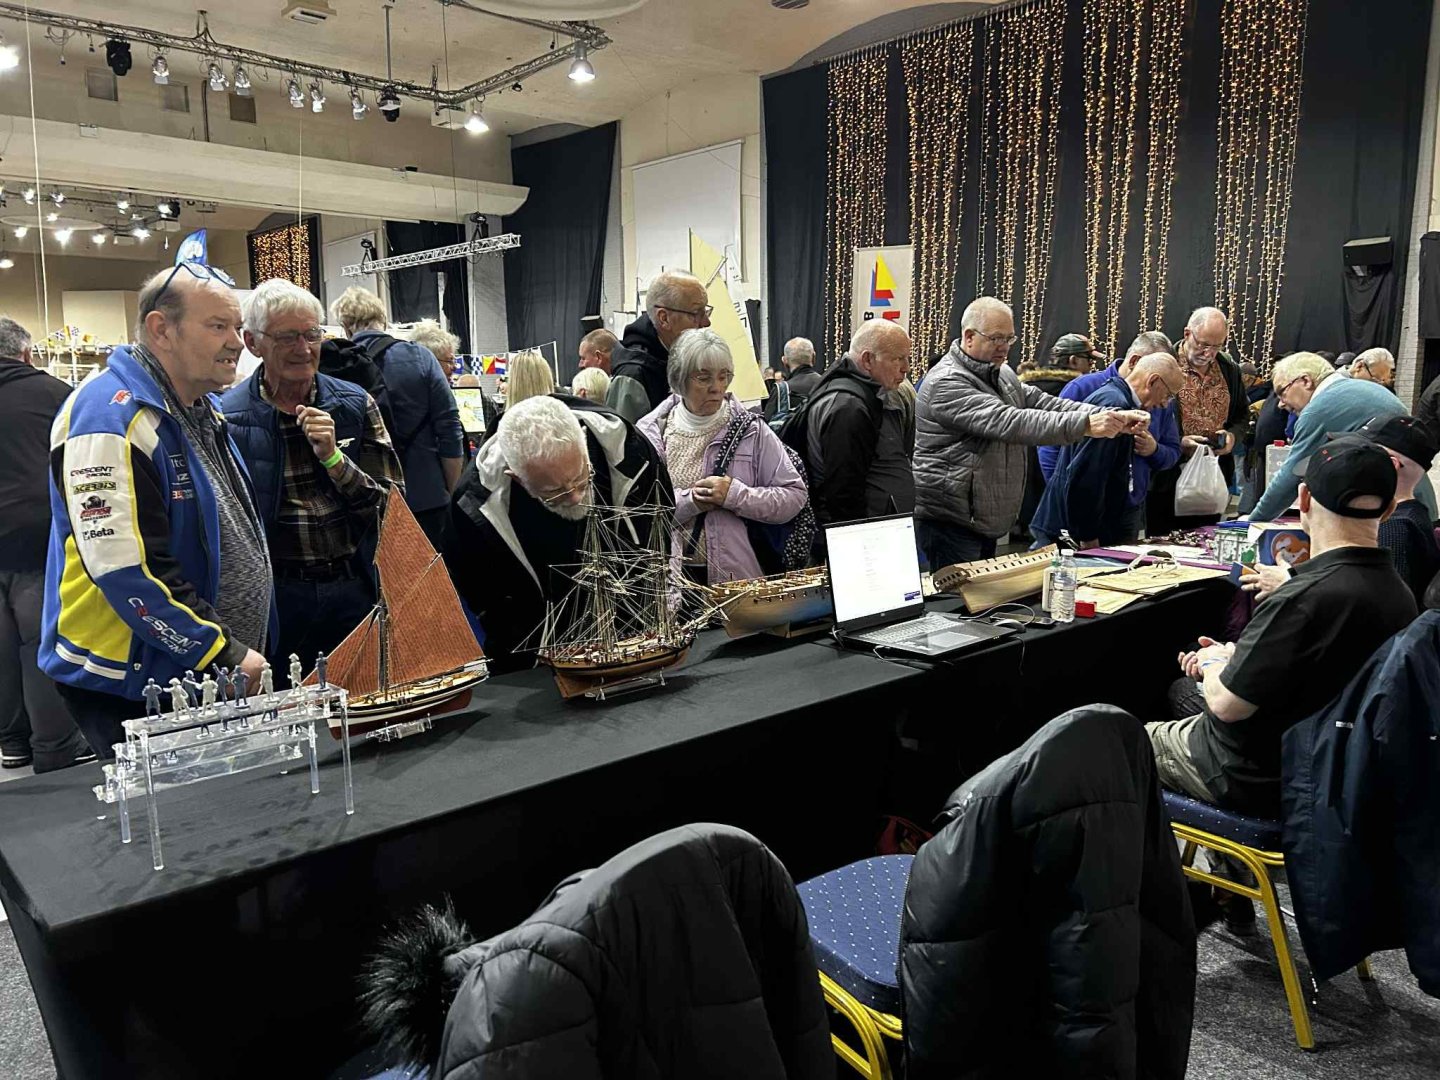
Did anyone note that the picture of the crowd was pretty much all silver haired, older people? If that is the case, were there any younger people in attendance? If that is the major demographic for this activity then I fear for the future. While I love participating in the hobby, I am also of that age group and don't have all that many years left.
Funny that you mention that, people have been saying this exact thing for as long as I can remember, well over a 30 year period. I remember feeling the odd one out when I was younger, entering scale model competitions when still in my 20's. I used to think the same and worry, everyone is so much older. Yet, three decades later, same story and people are still out there. Am sure the same will be said another 30 years from now..
The Blackpool show was mainly old tugs, steam vessels and warships, which is no surprise as there were only UK based traders there. (It was great to see and chat with Ron Dean again), I even saw a model of the very first model kit I was involved with, the steam drifter Peggy, which I did way back in 1994 - forgot just how big those hulls are...
And with my 60th coming up next year, I too have become one of those old silver haired (well, perhaps a couple of hairs) folk!
- AJohnson, hollowneck, Ryland Craze and 21 others
-
23
-
1
-
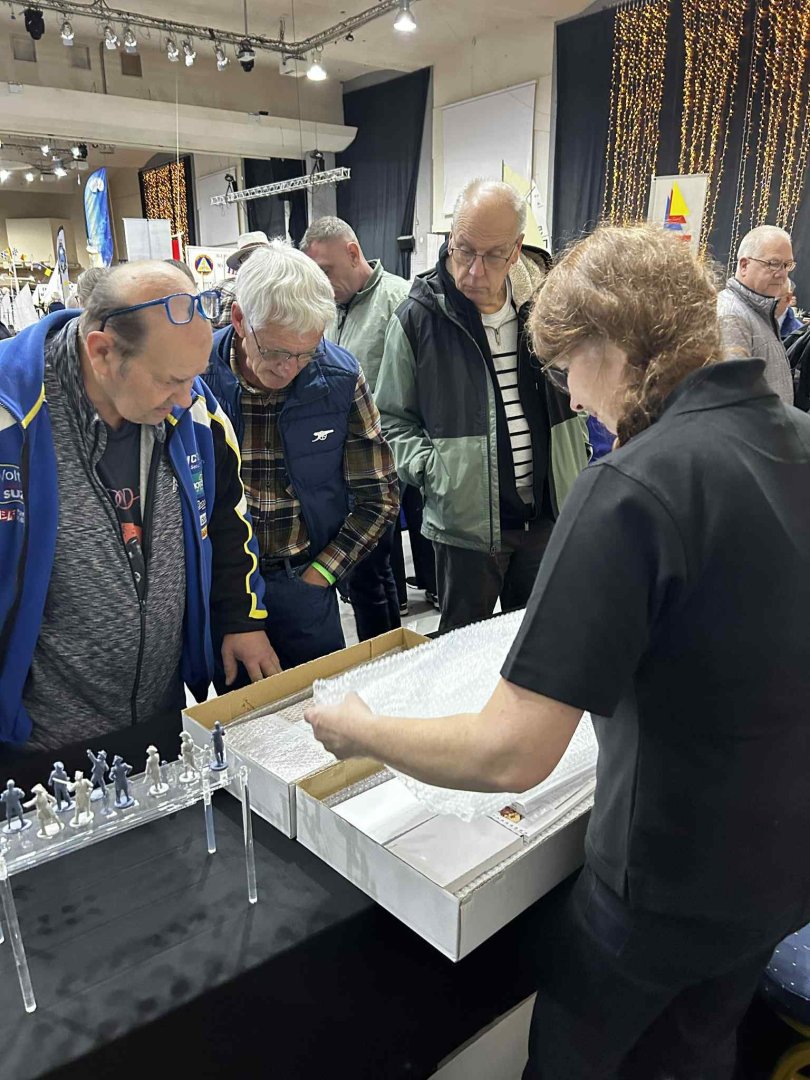
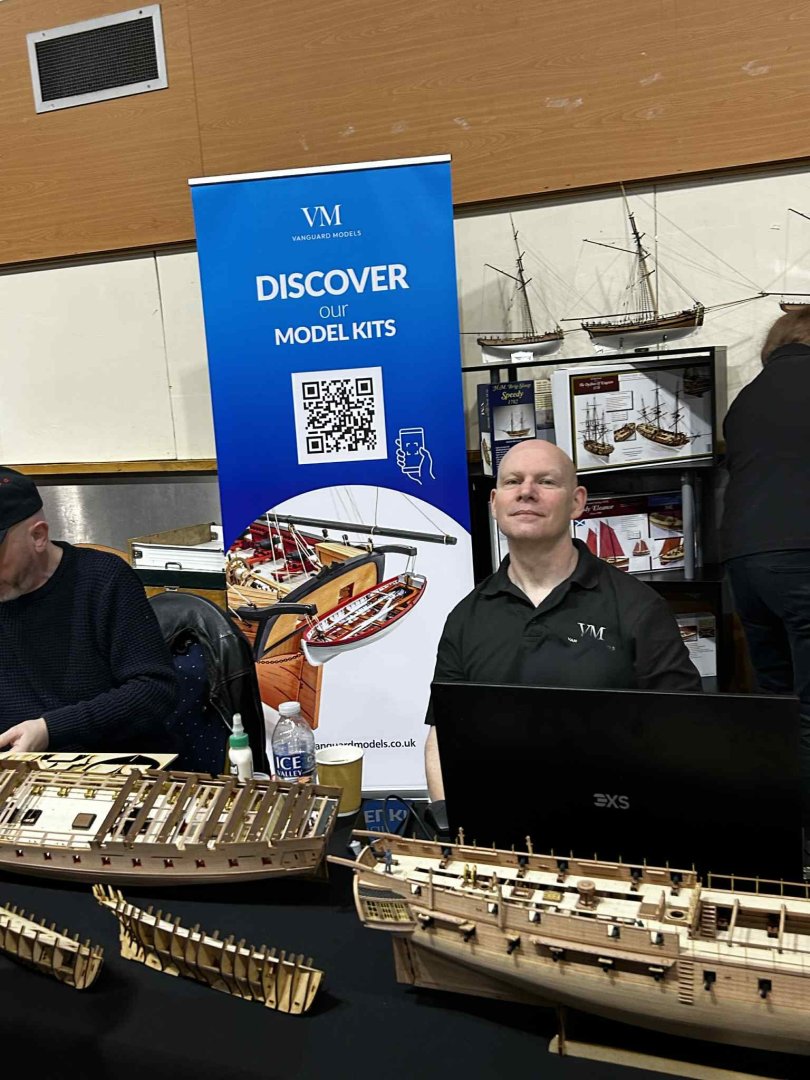
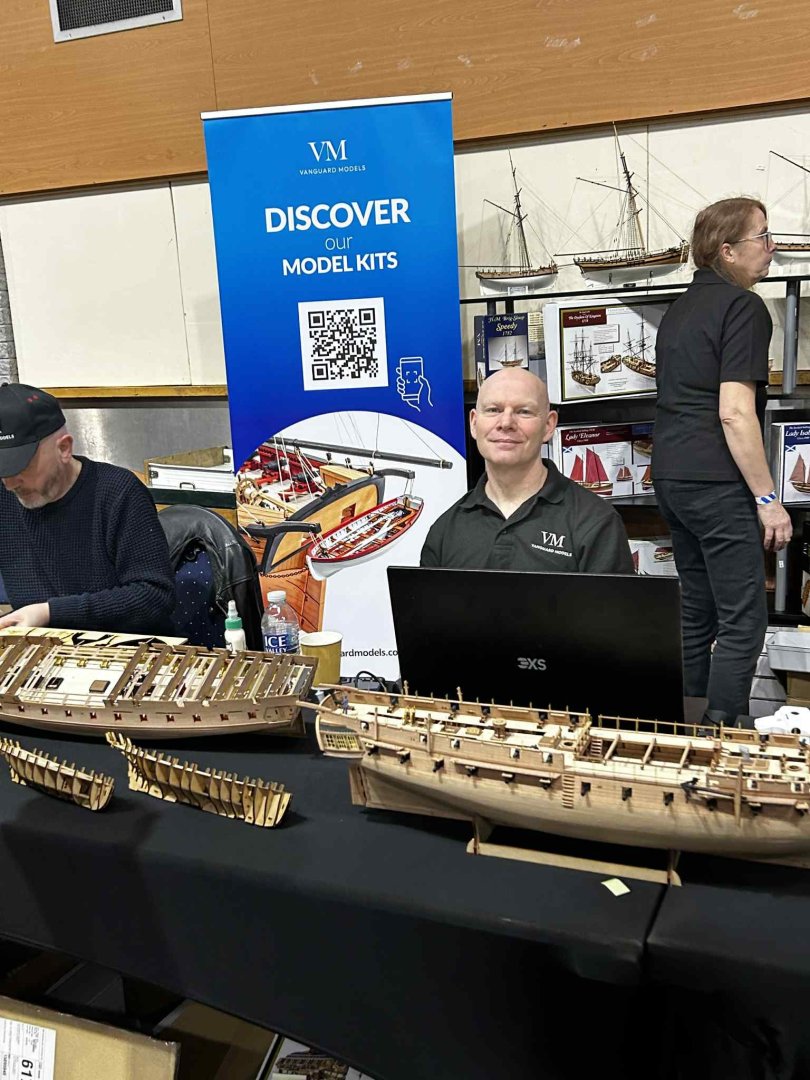
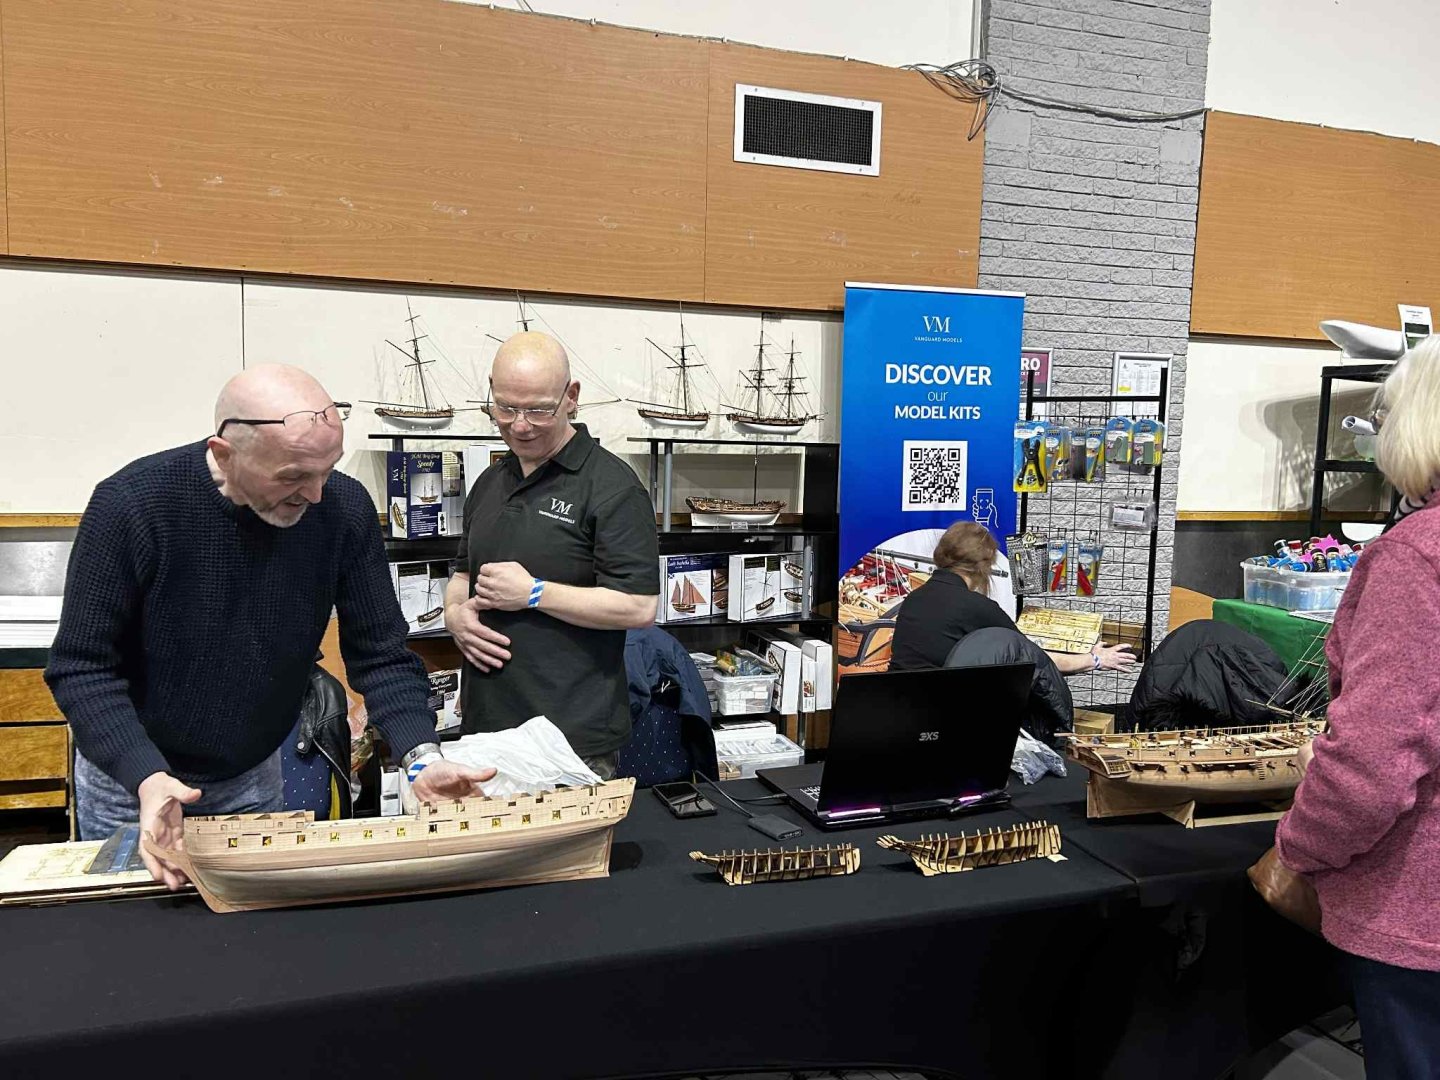
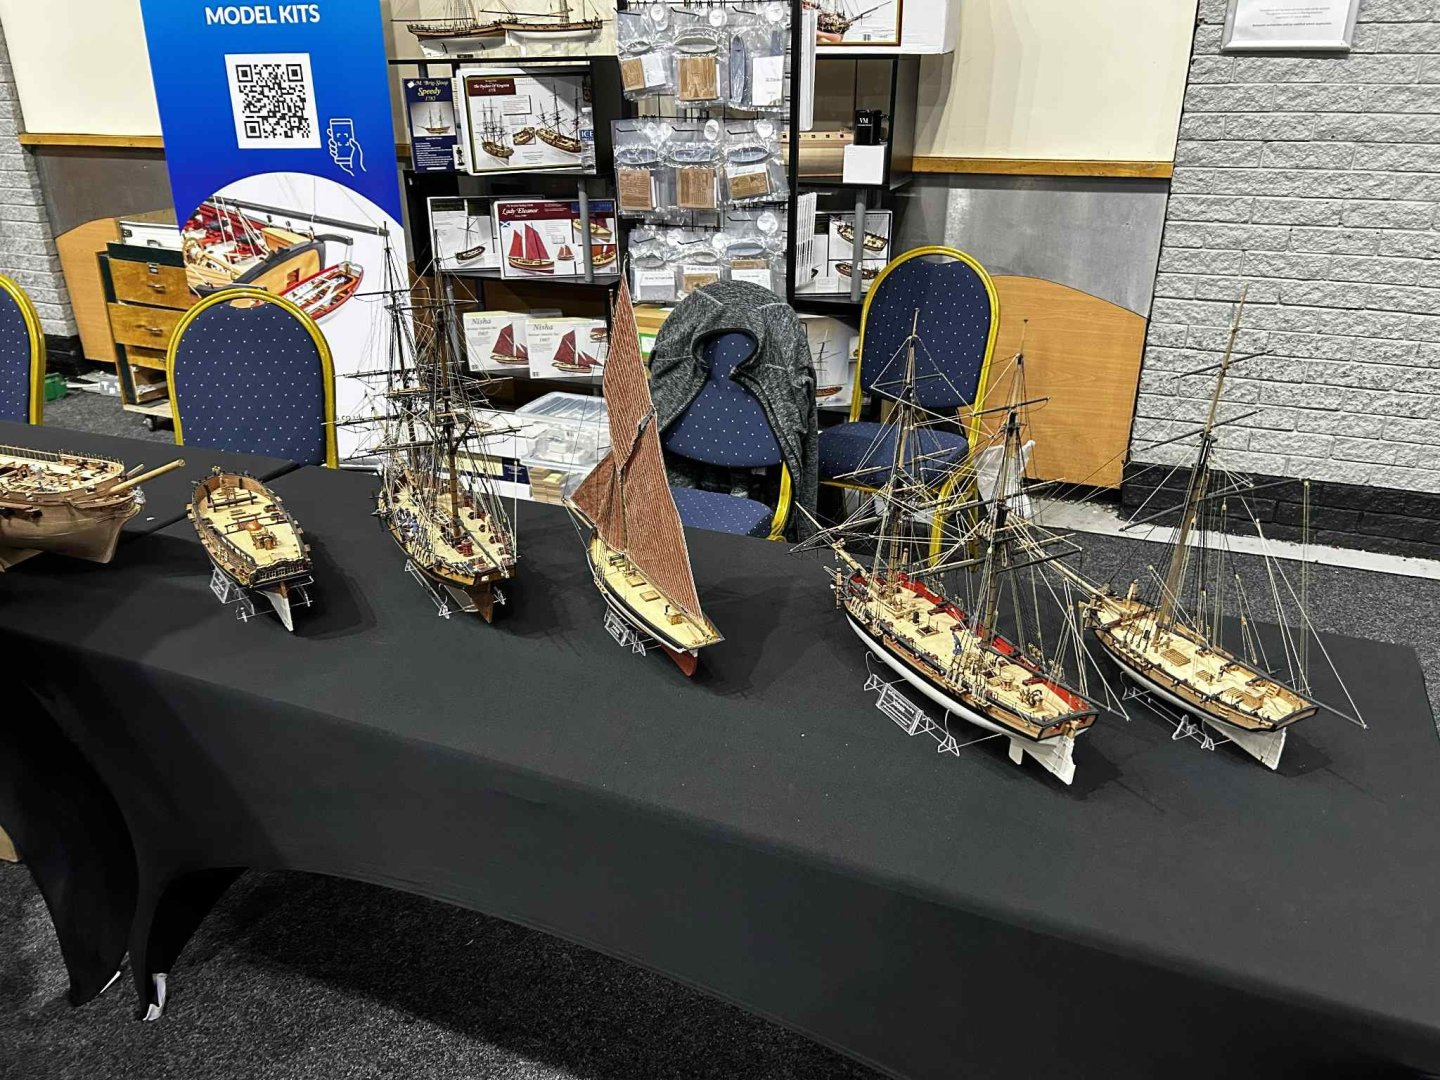
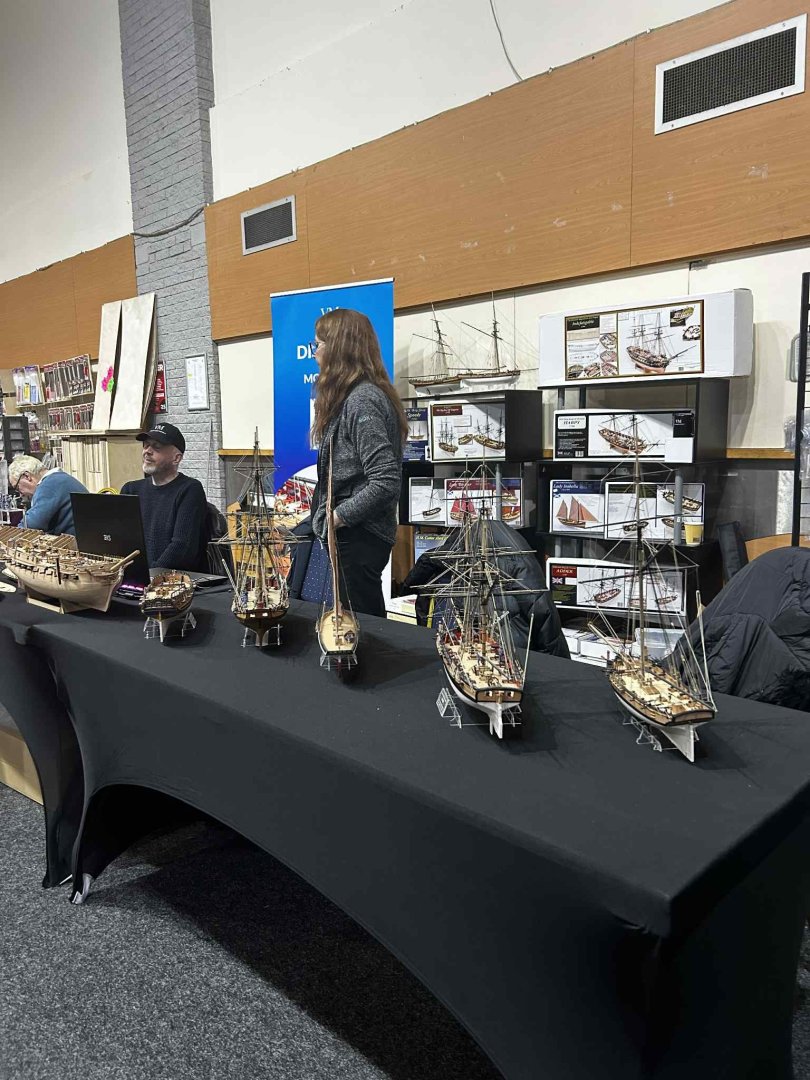
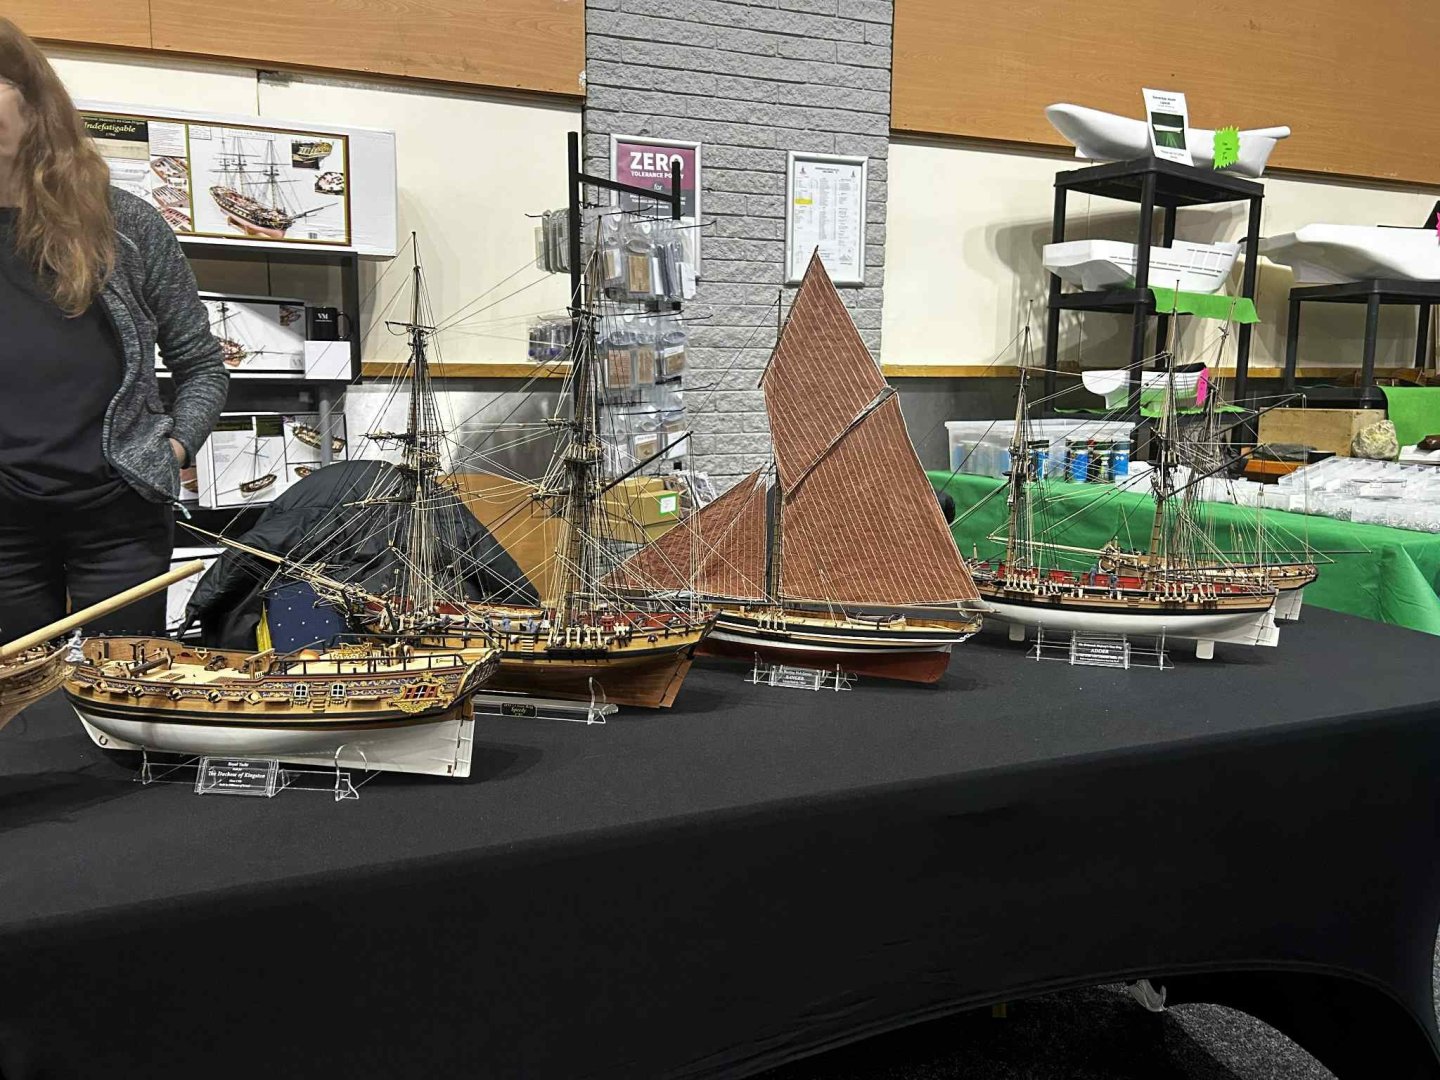
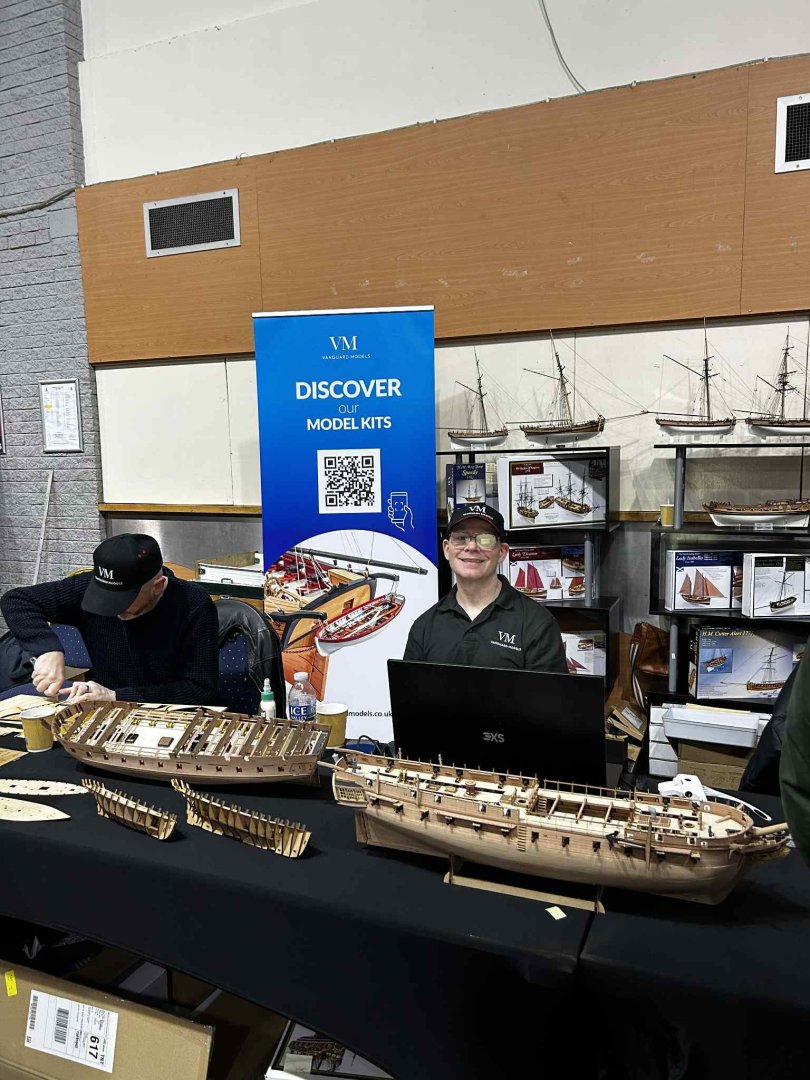
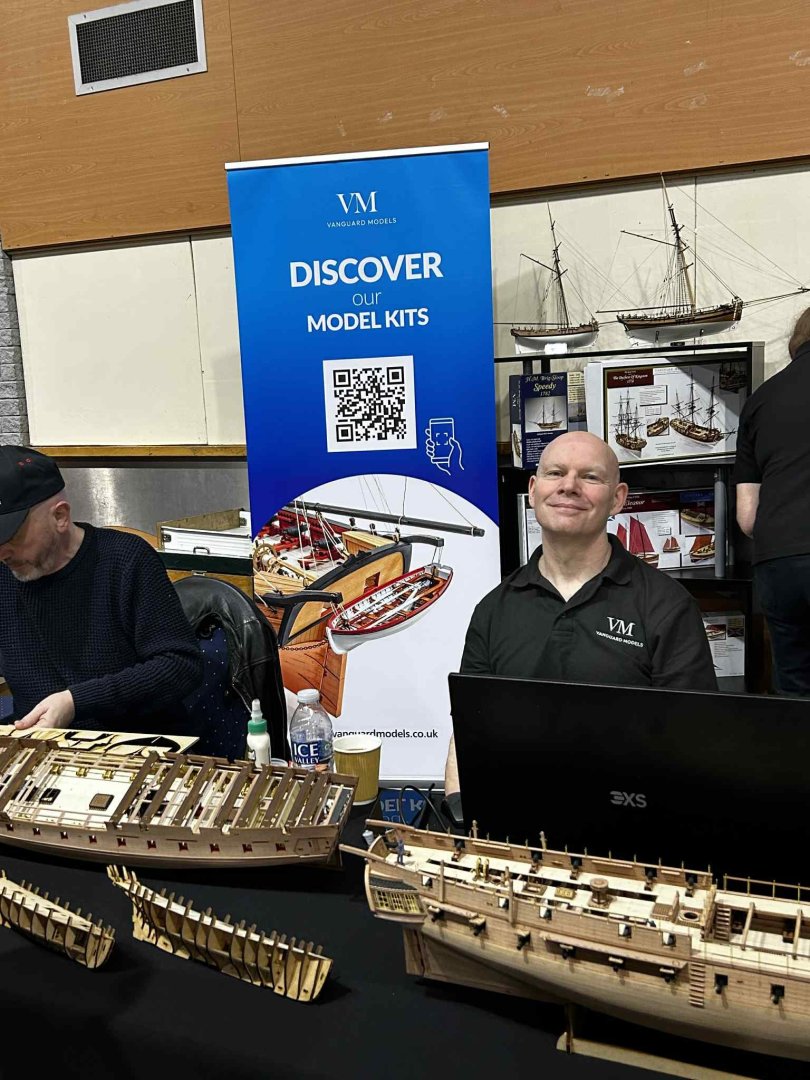
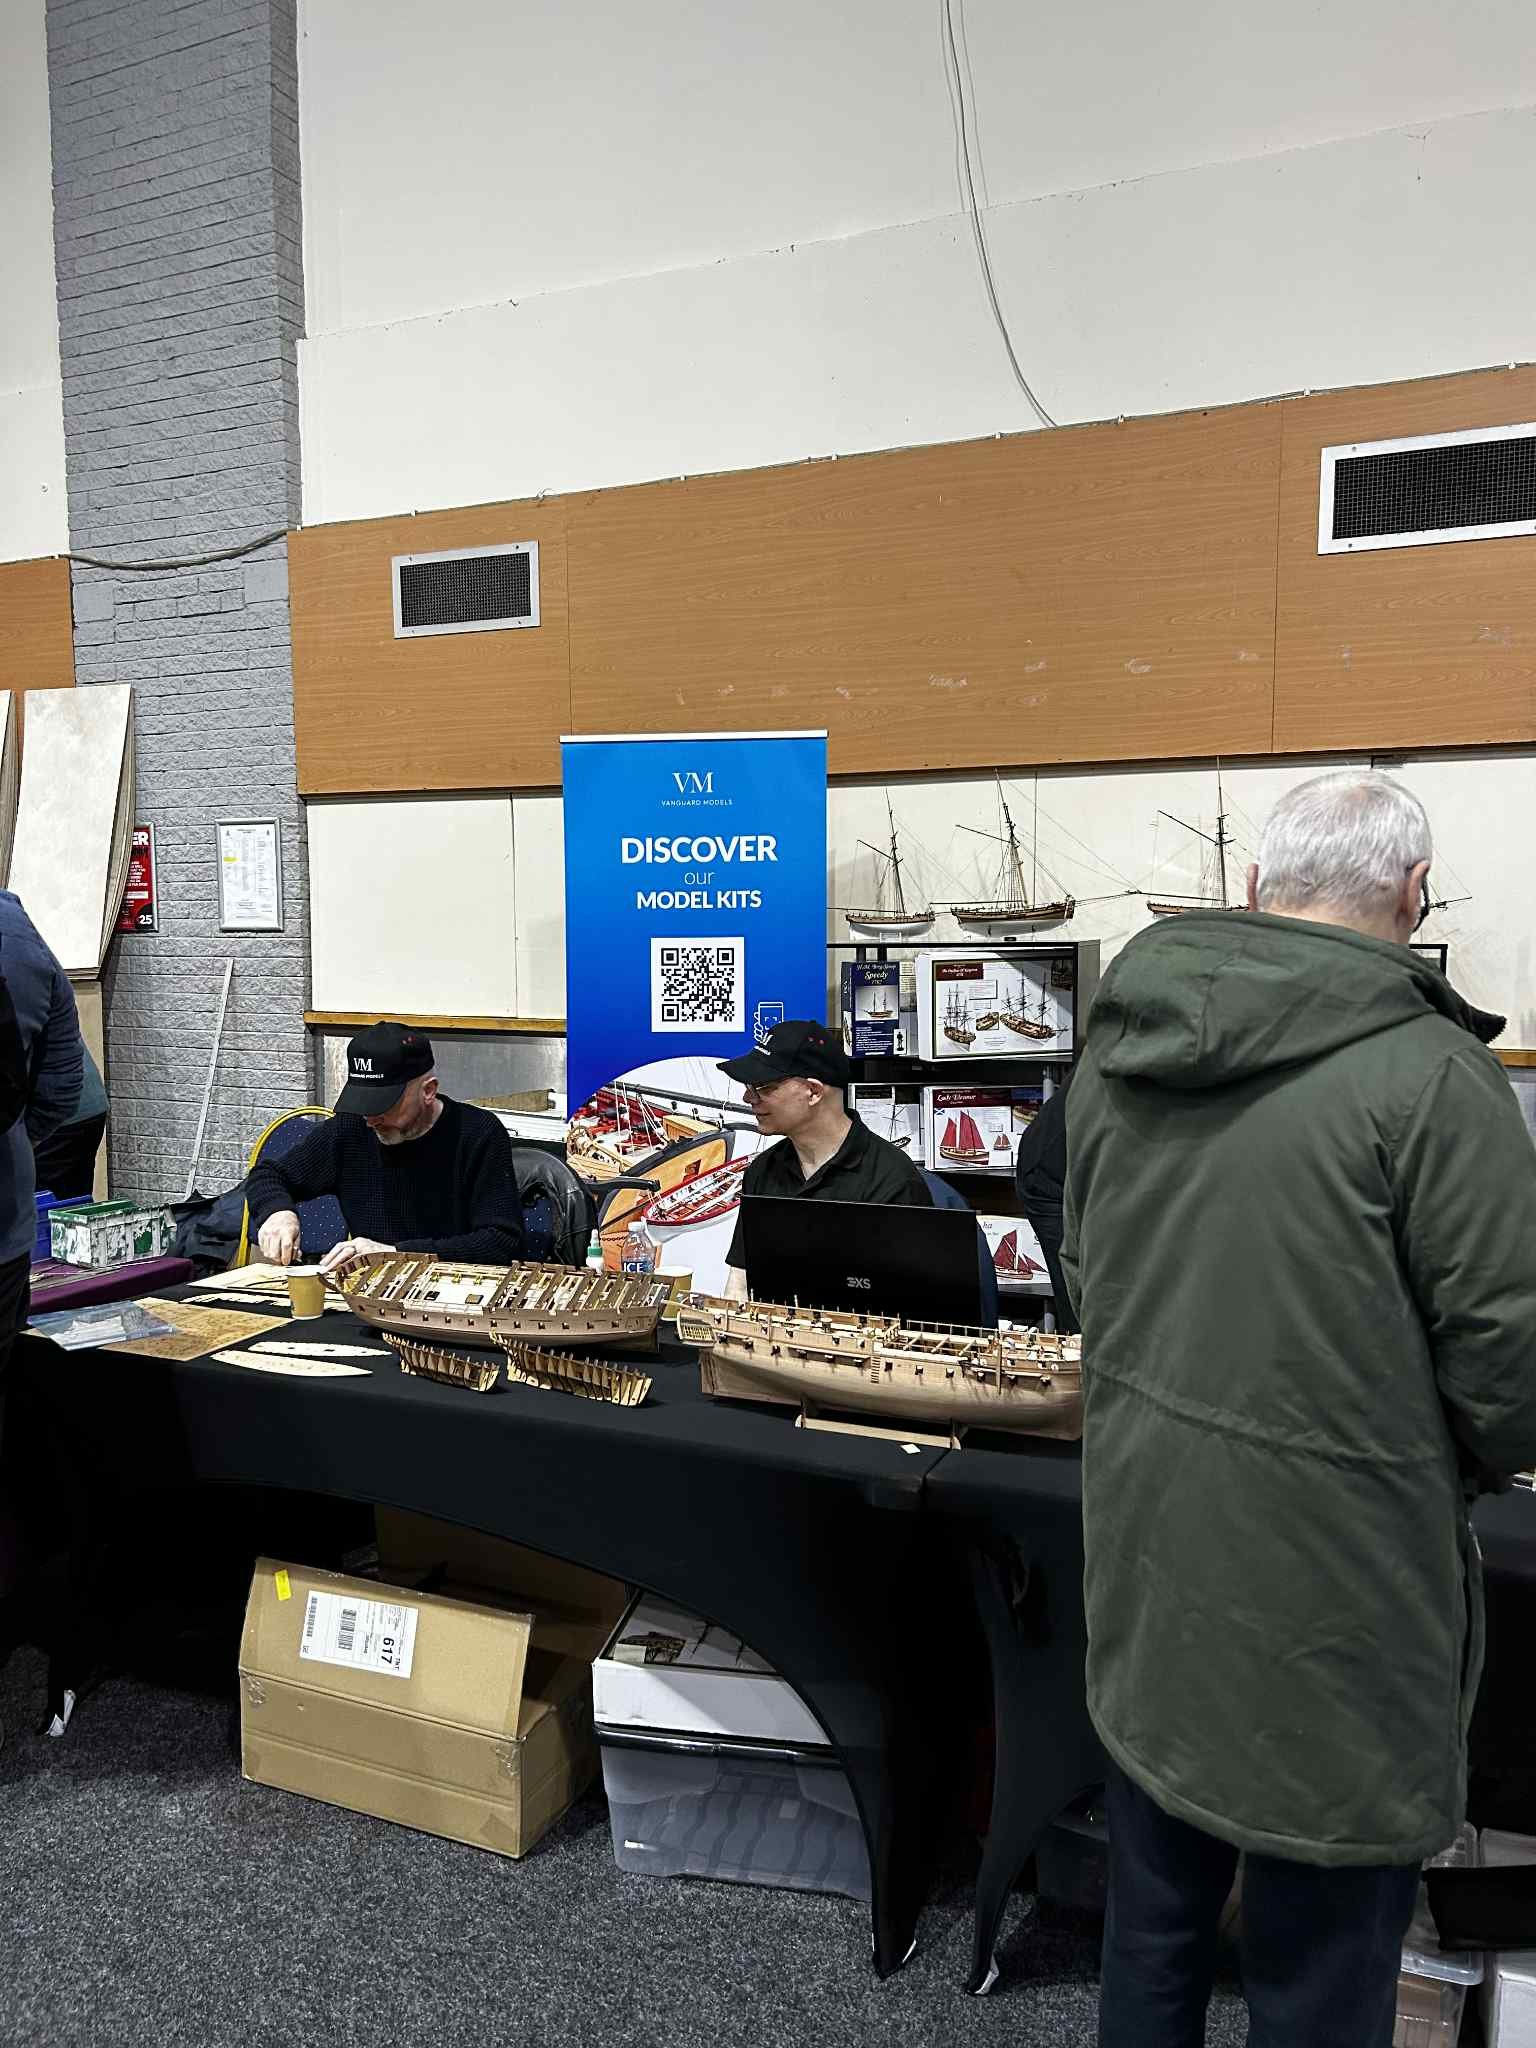
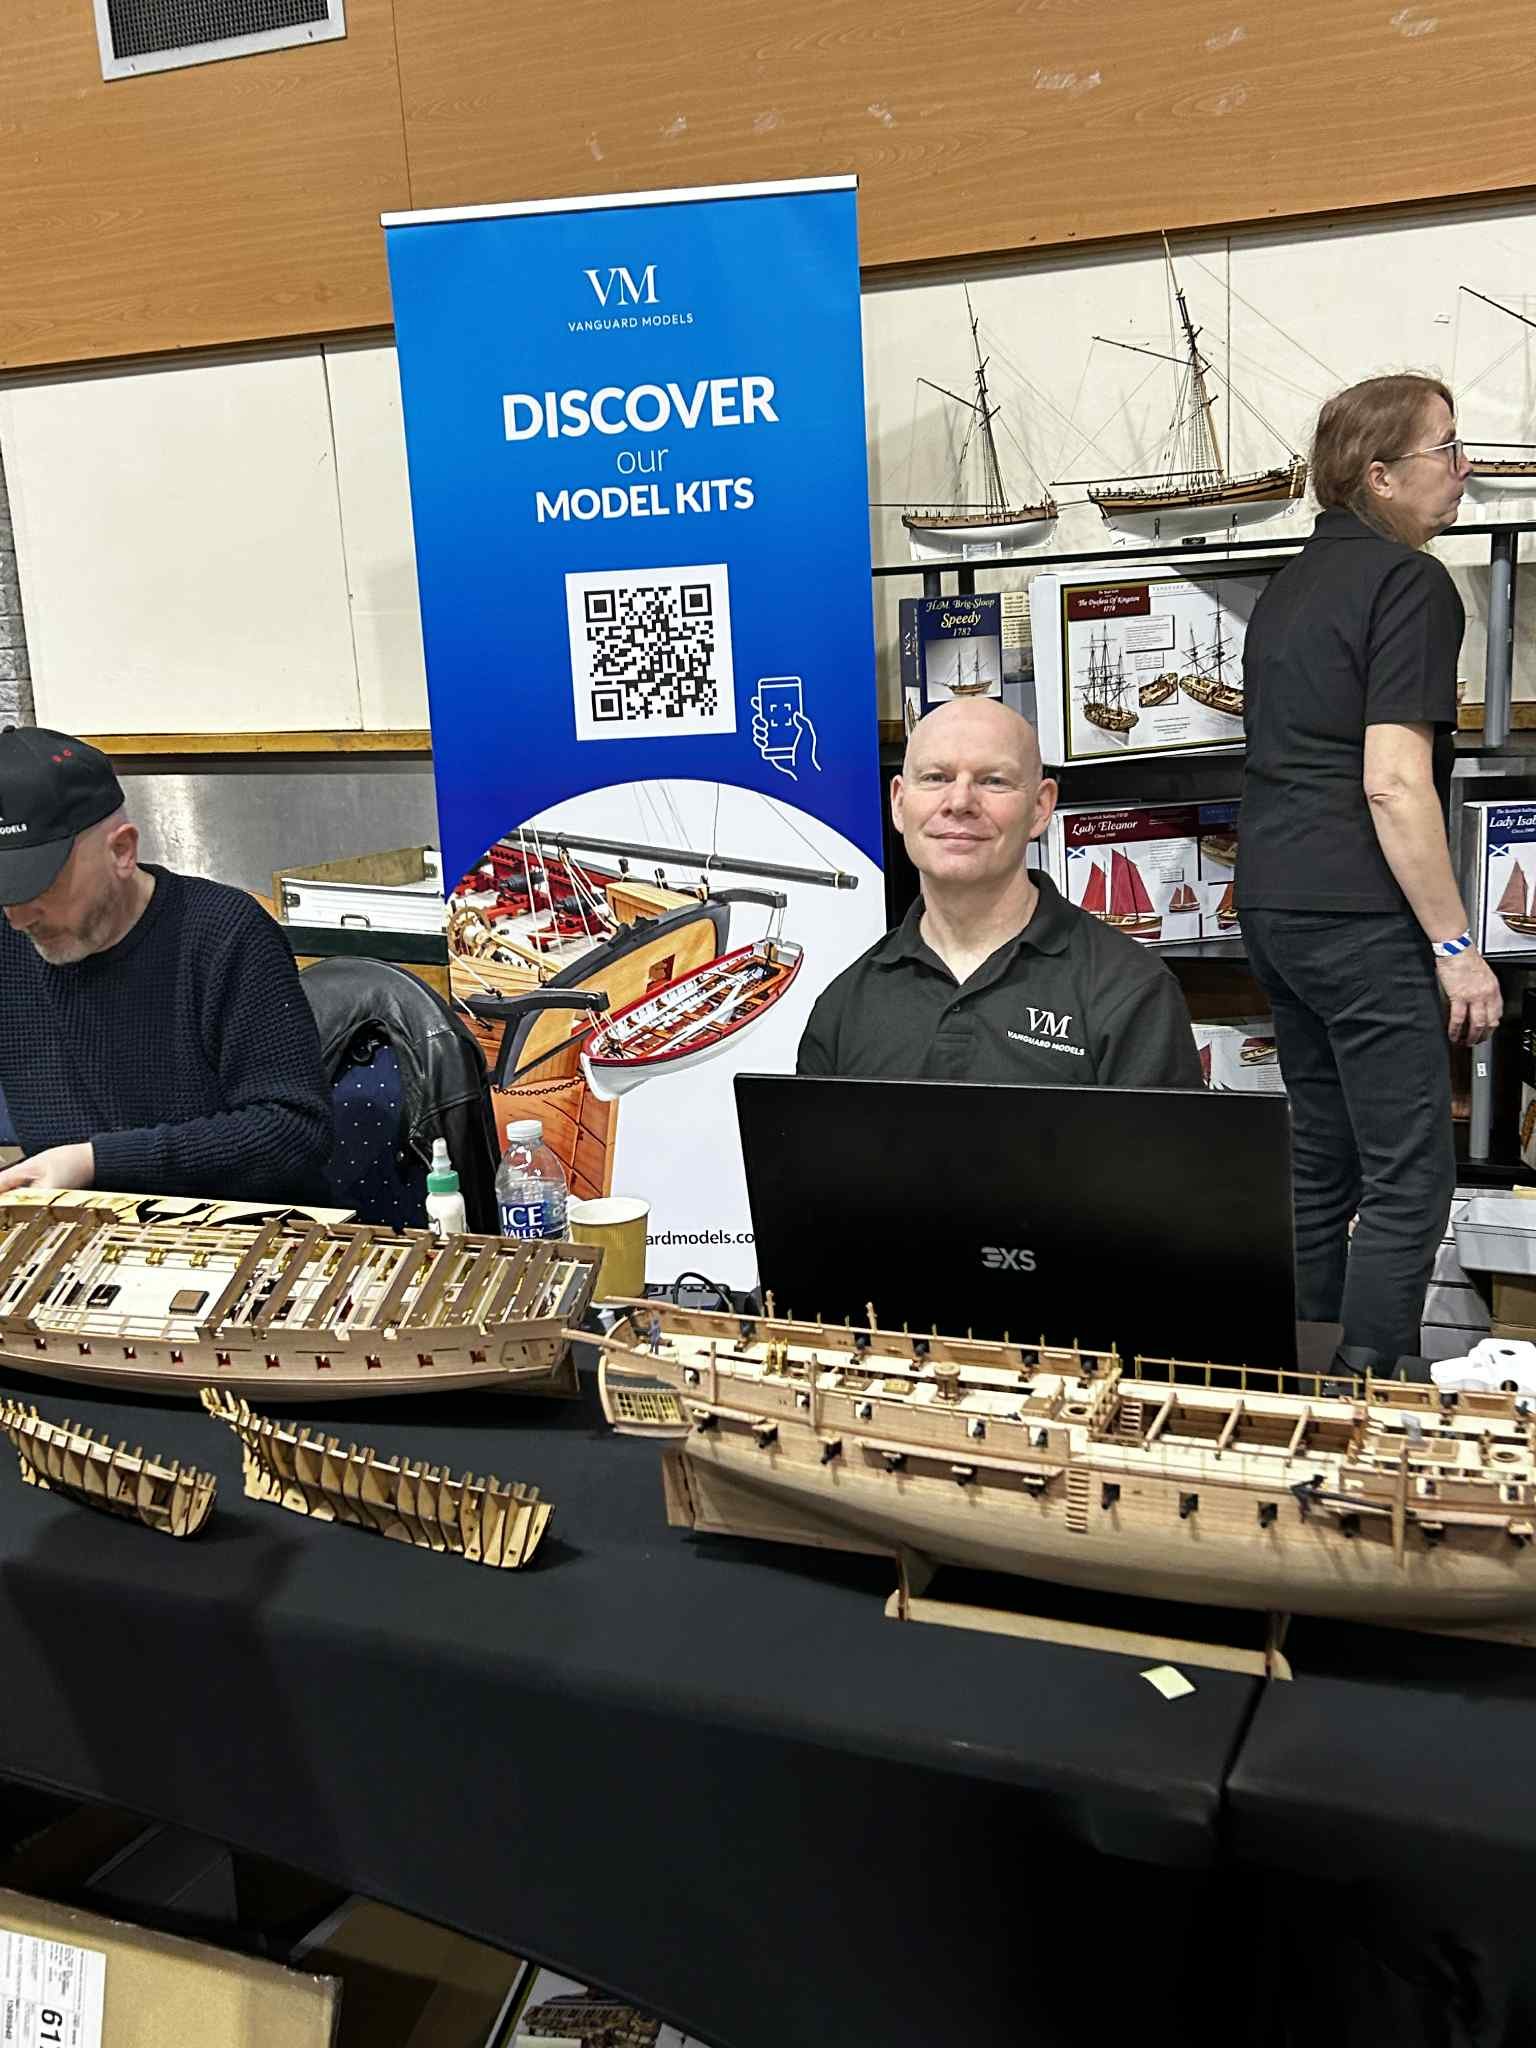
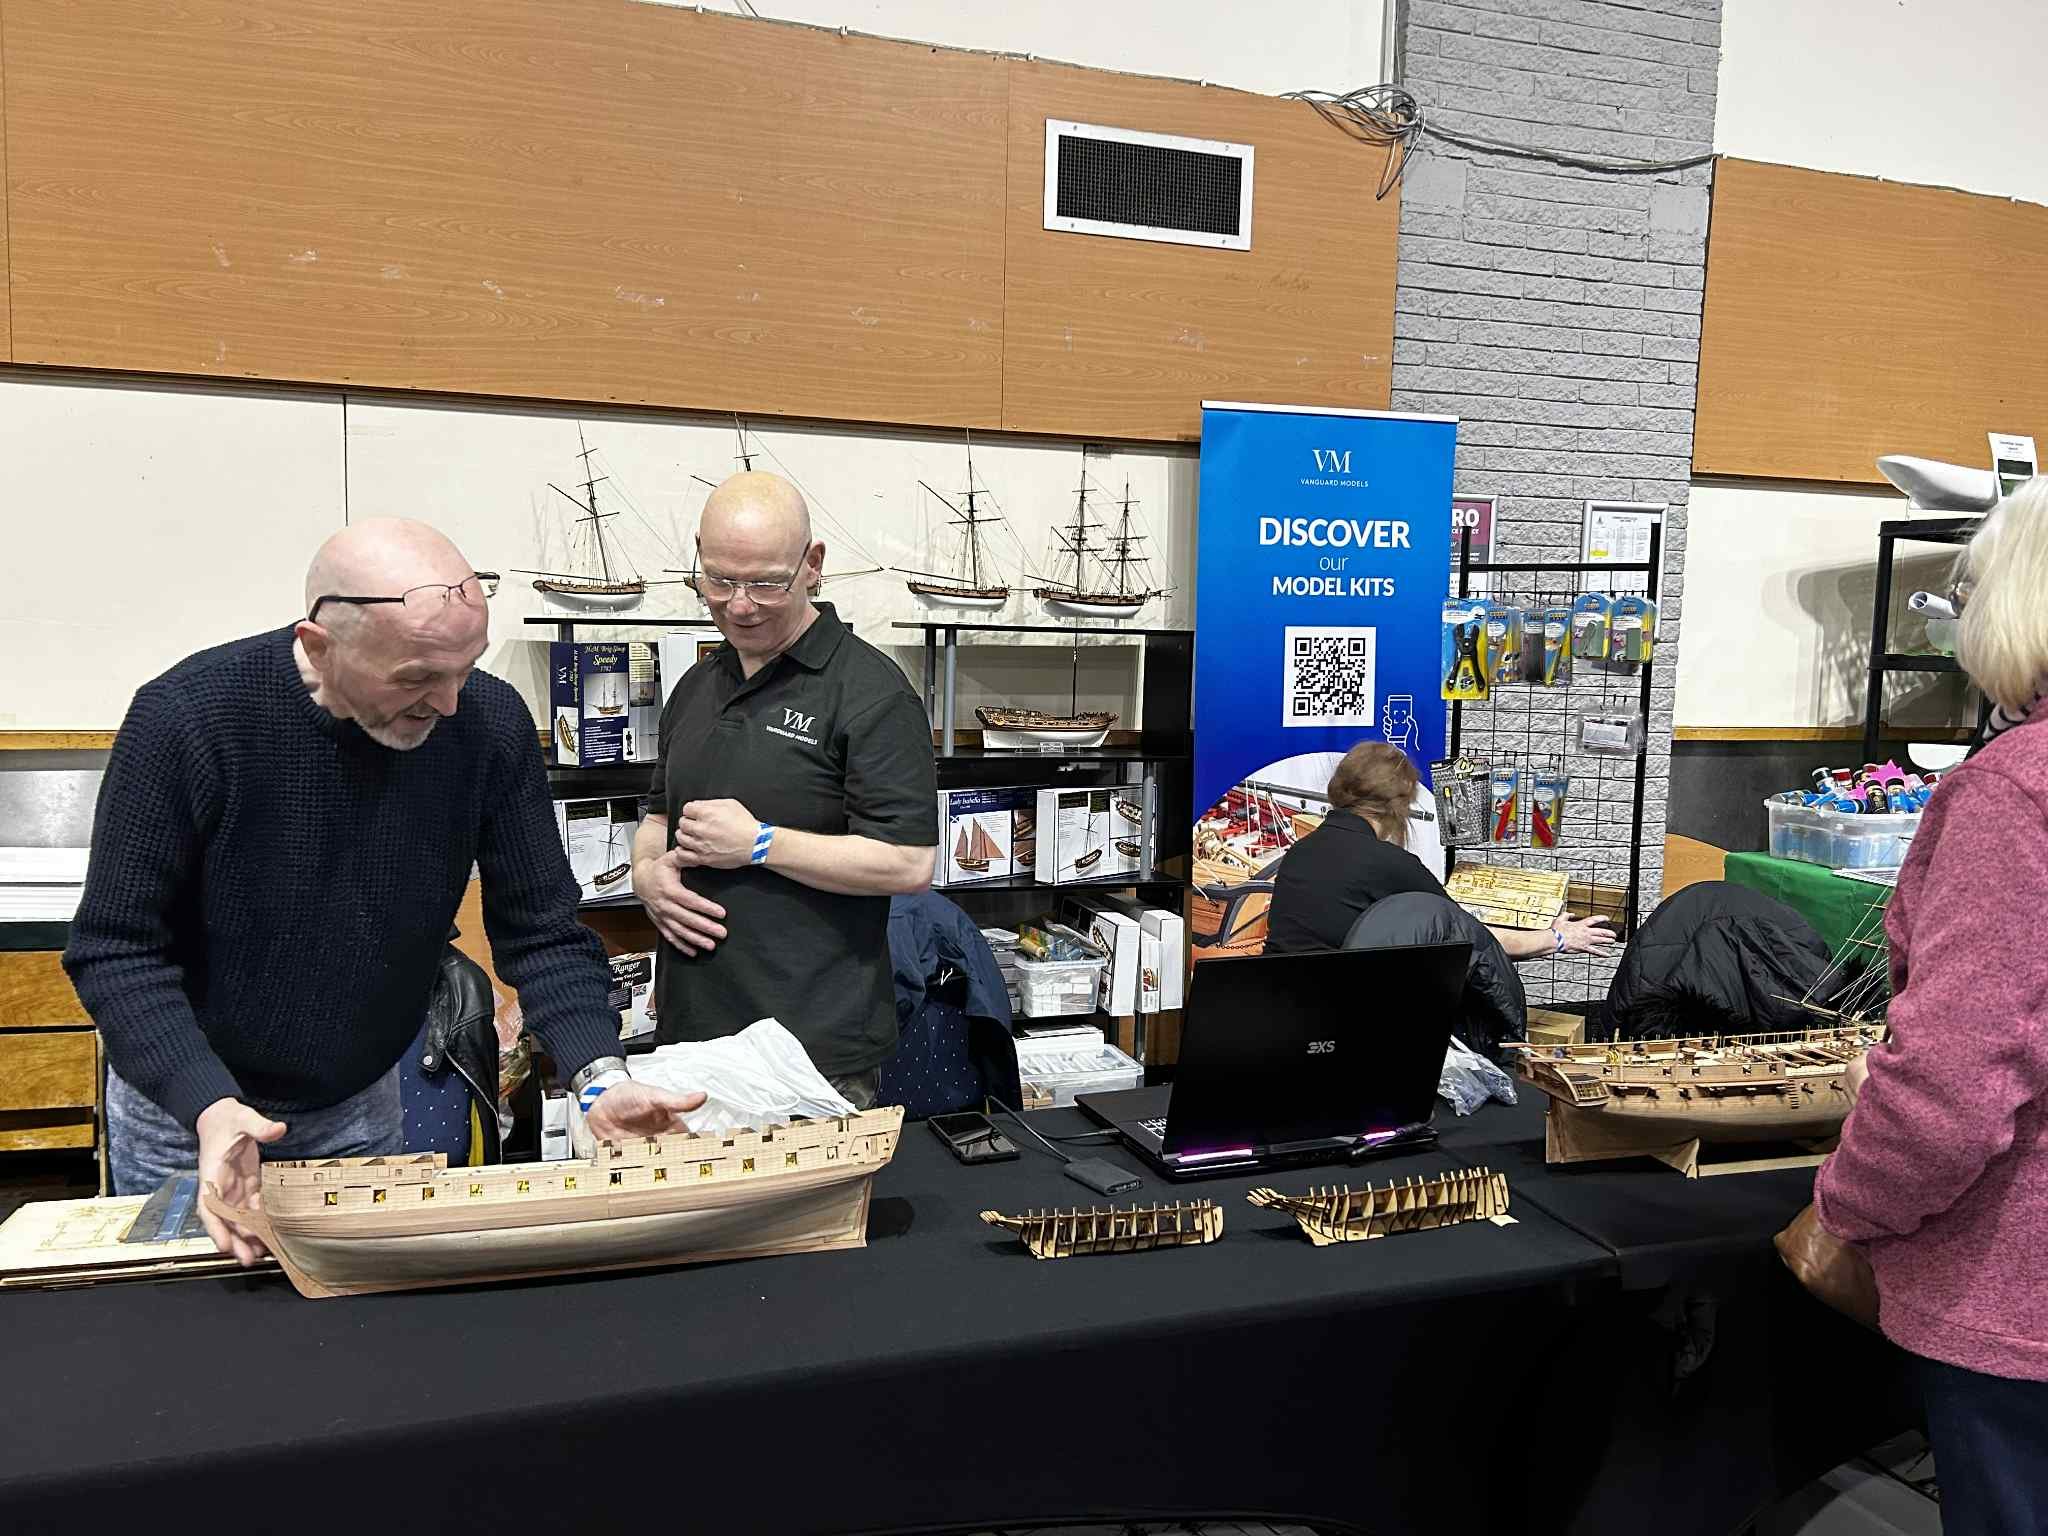
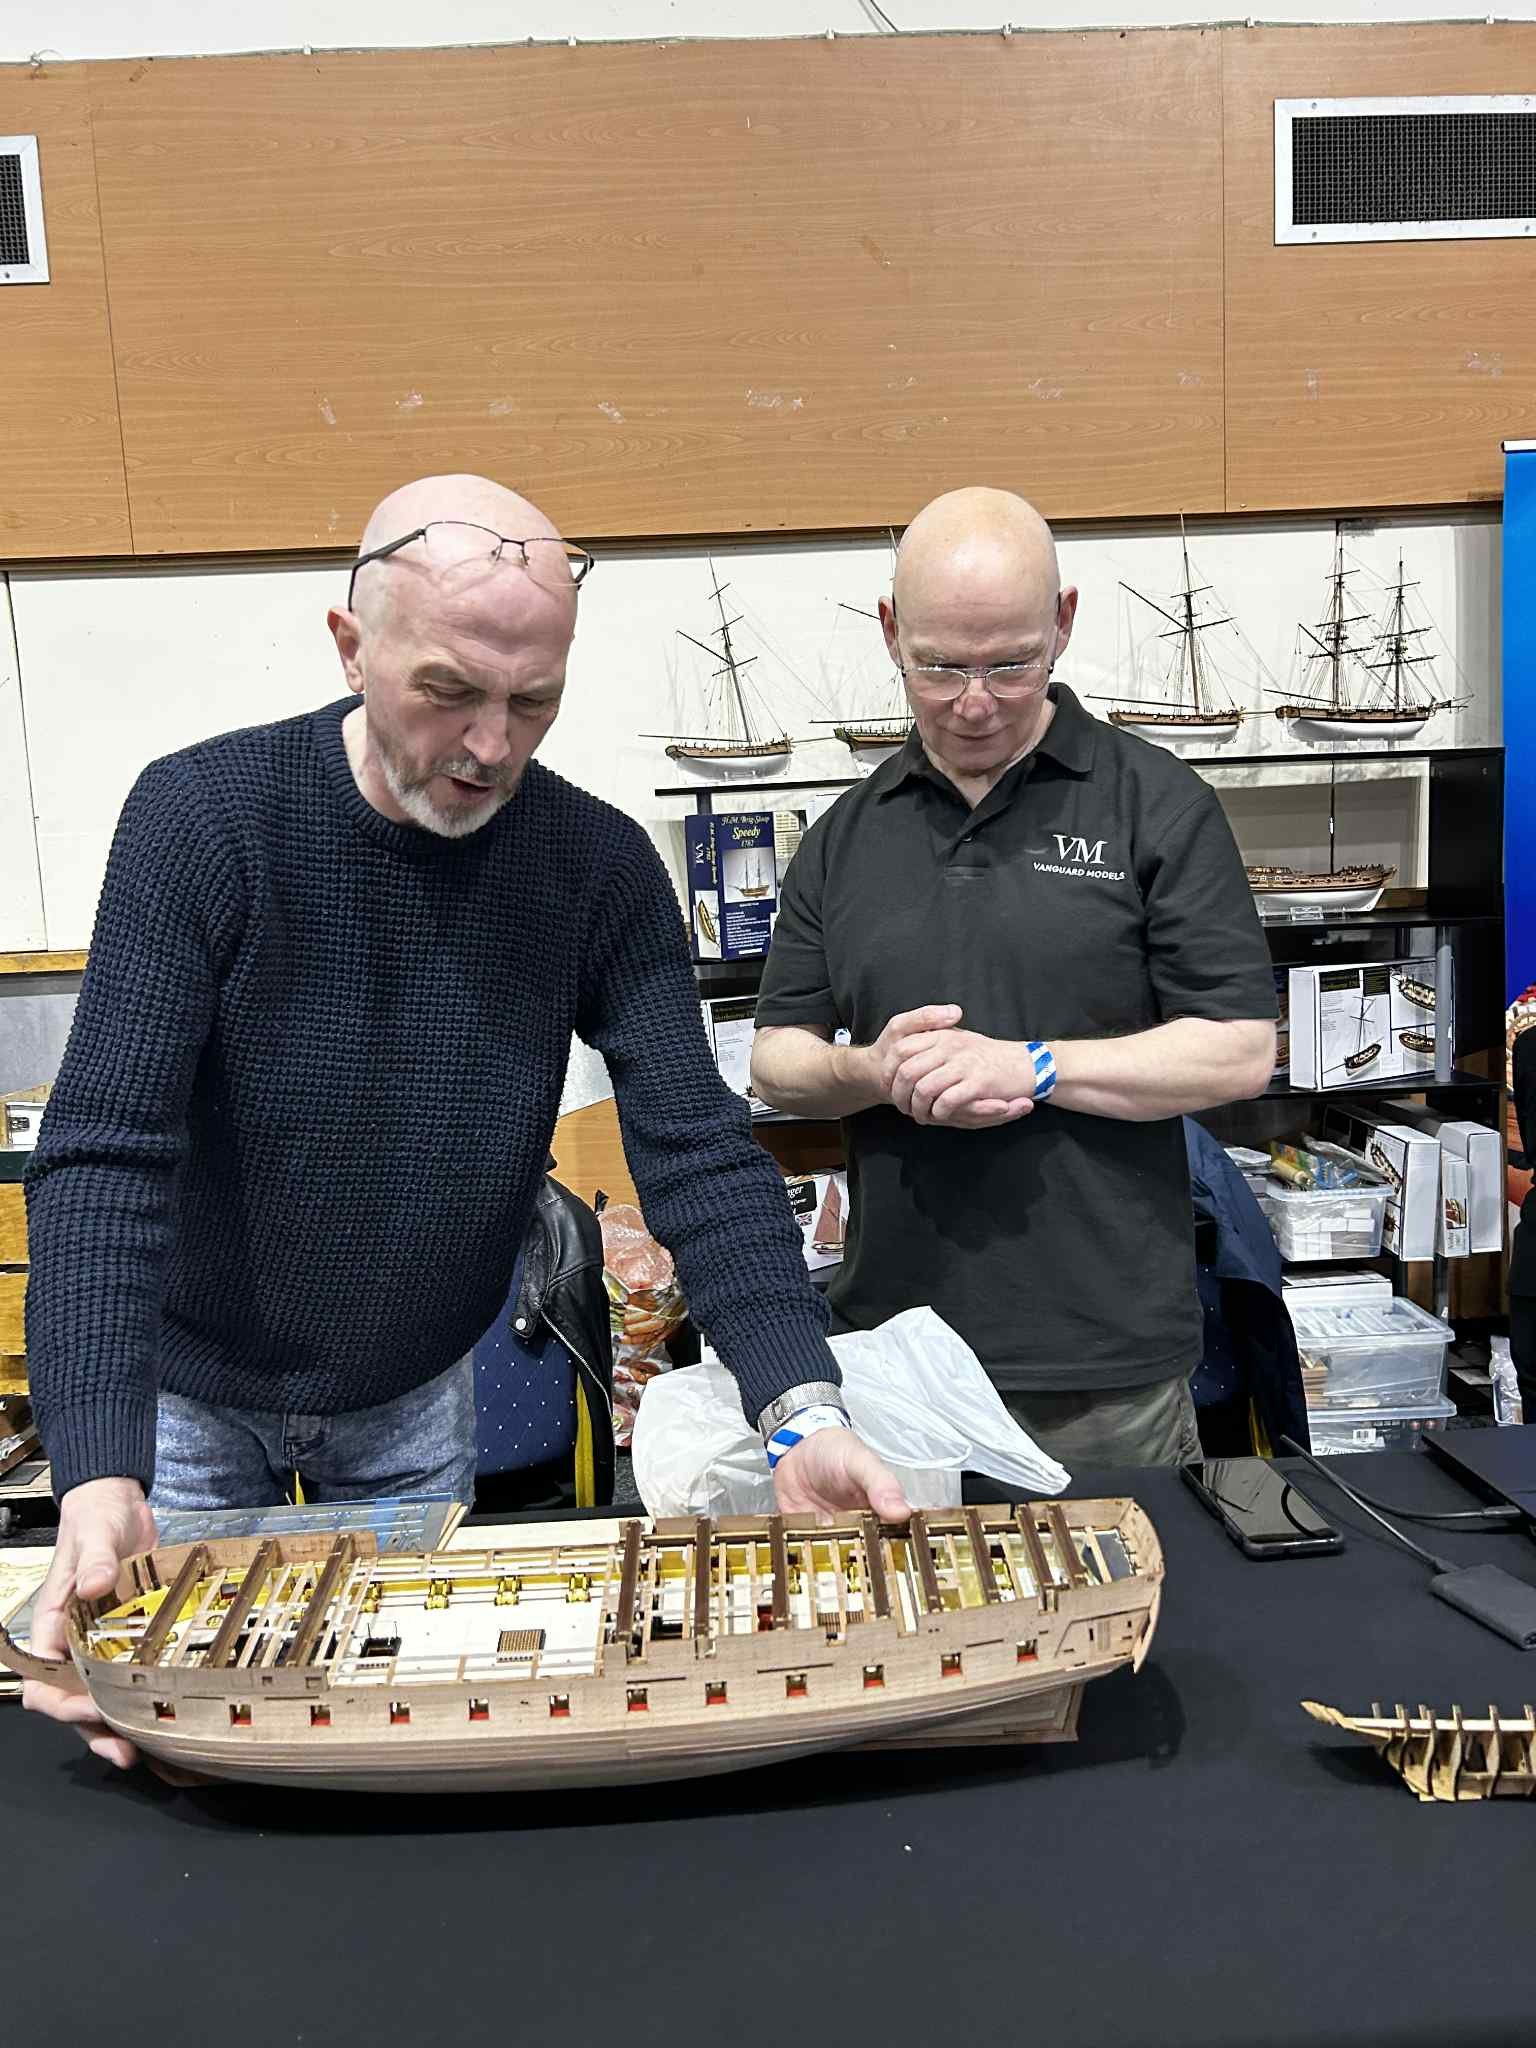
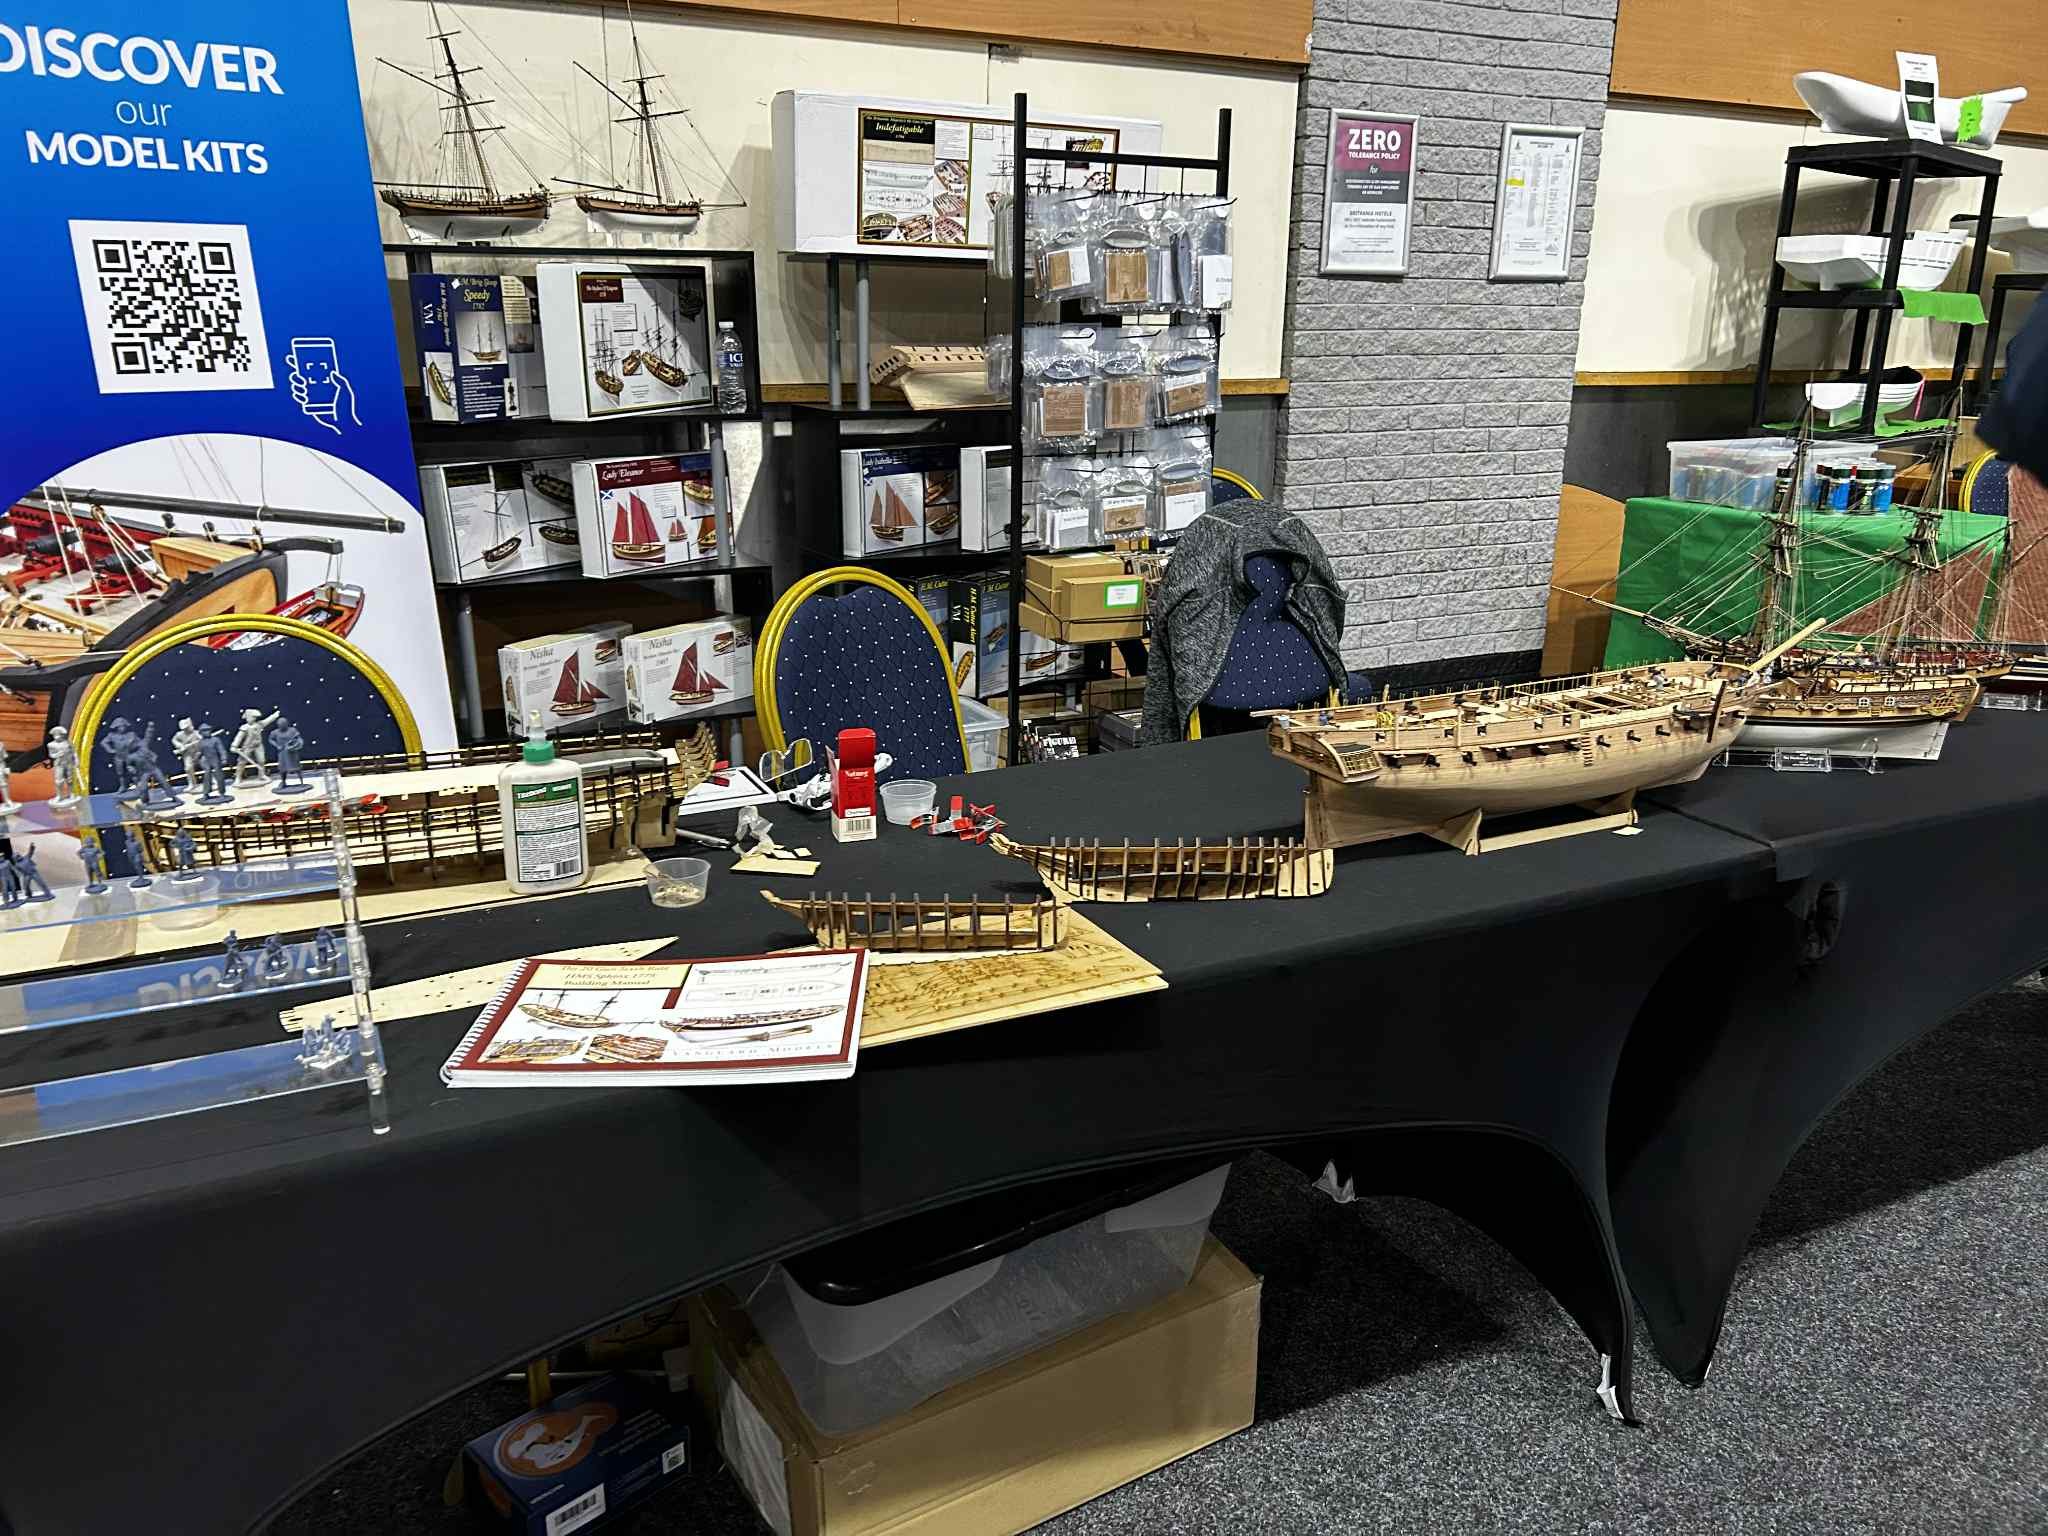
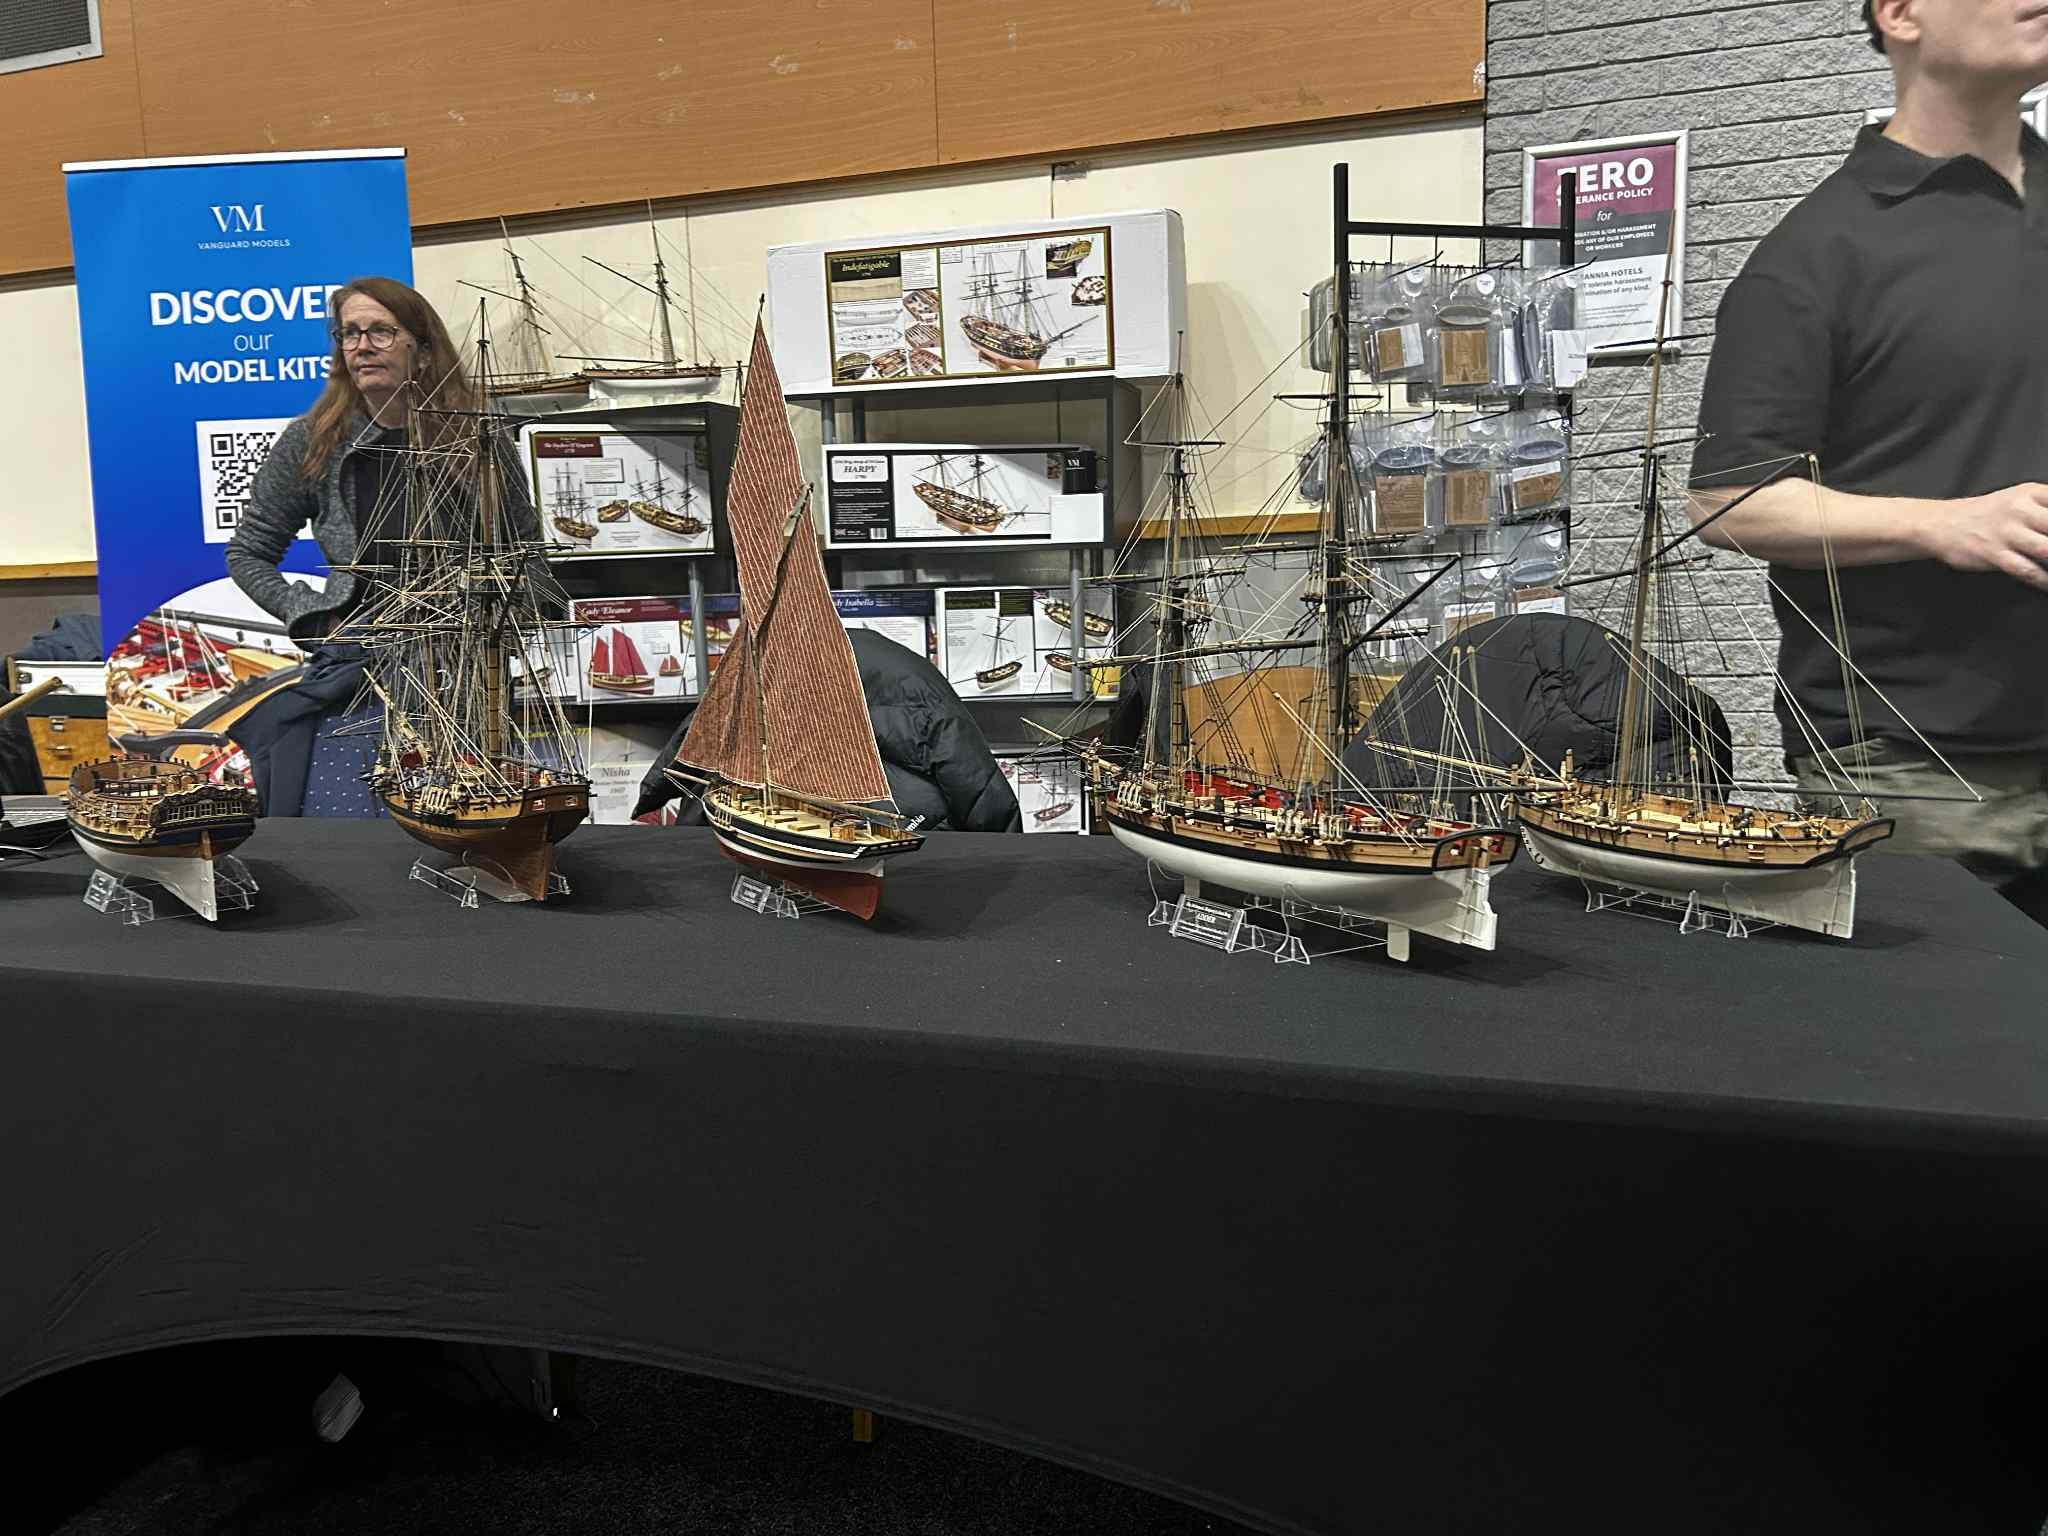
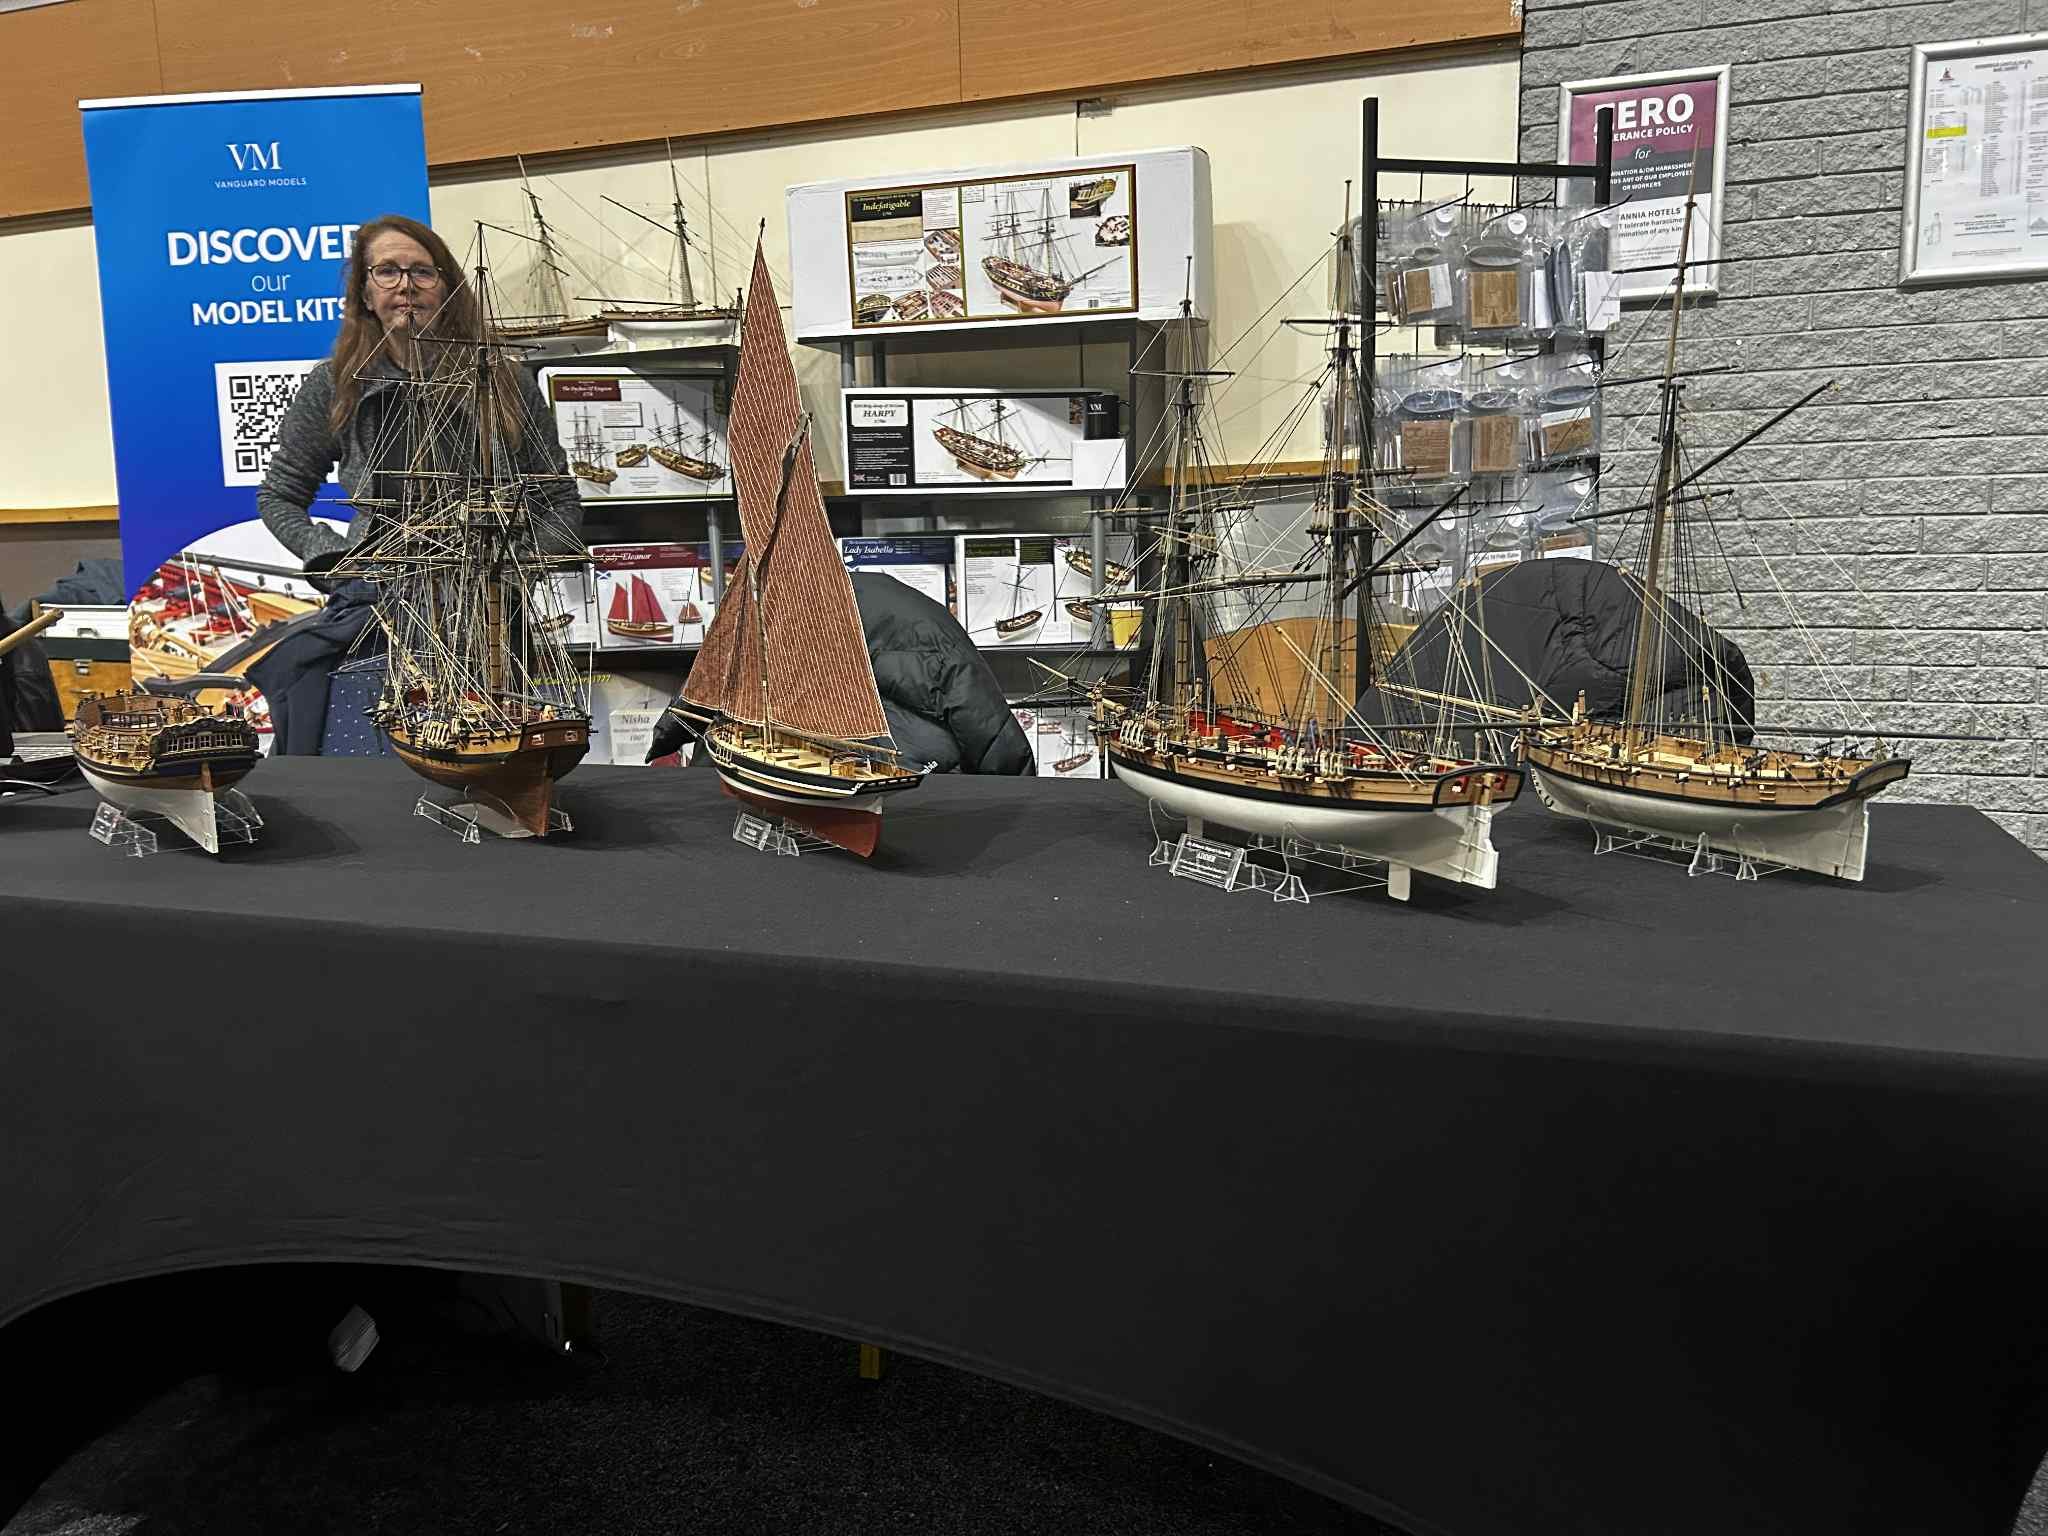
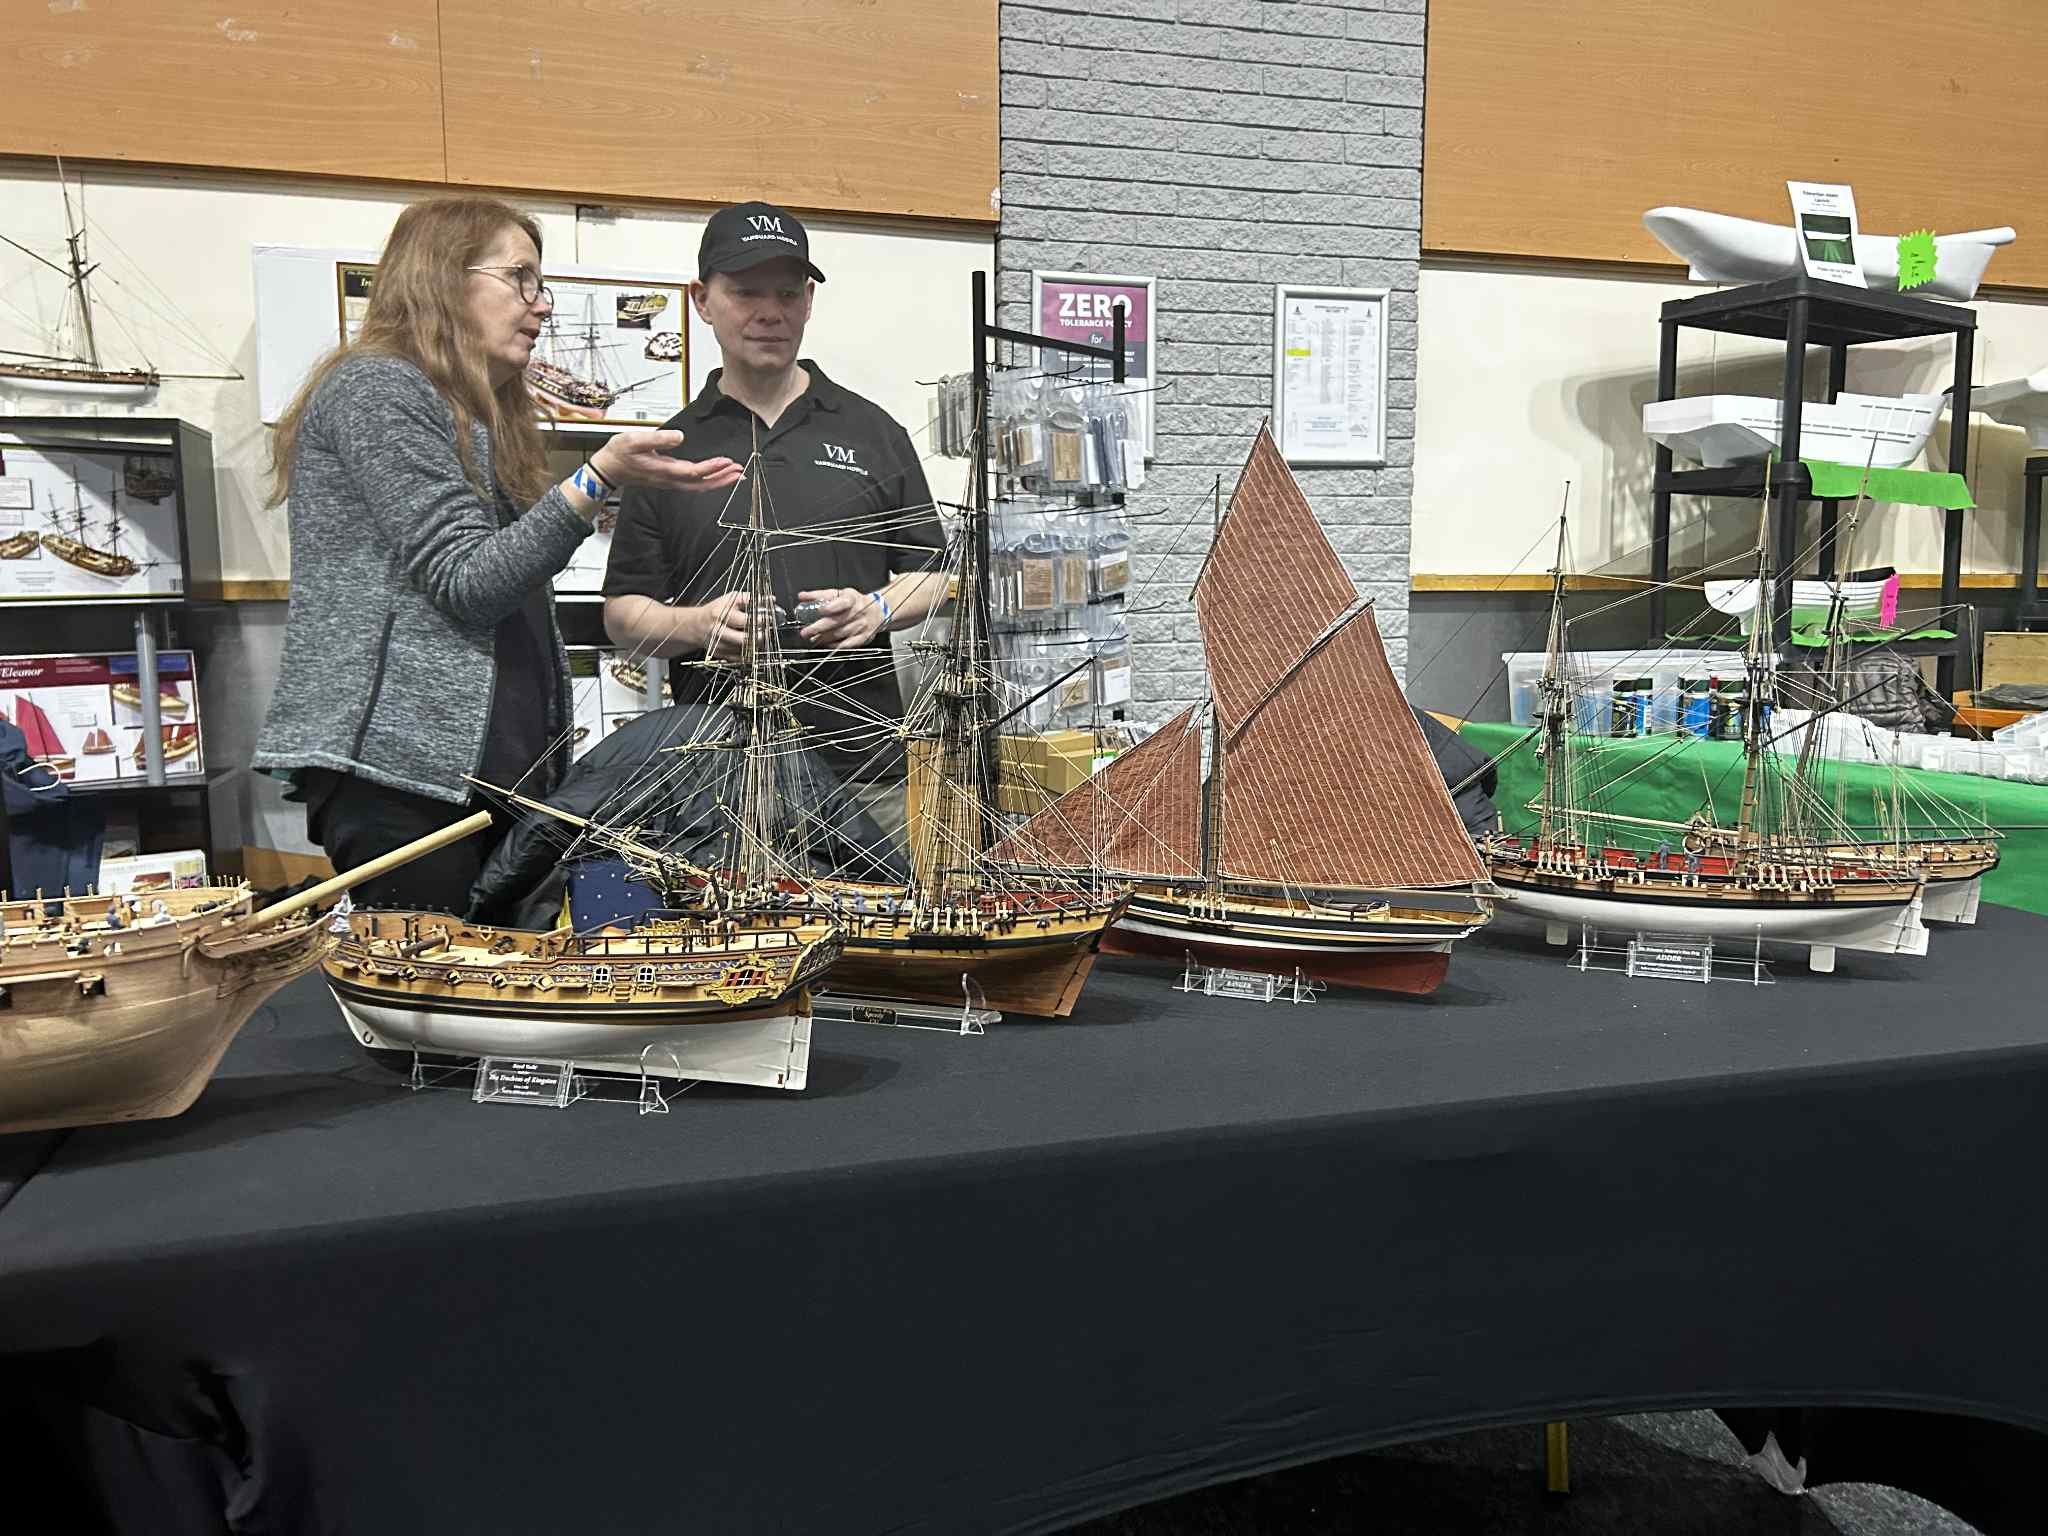
OK, we're back from Blackpool, our first real show, and we have learnt a lot! Here are some pics.
Jim was brilliant, building up a Sphinx hull whilst there, which created much interest. We were the only exhibitors with period ship kits, the rest were mainly tug boats, fishing vessels, lifeboats and warships - but I guess we are only one of two companies in the UK that produce this type of model, so not too surprising.
We plan to do Telford next year.


-
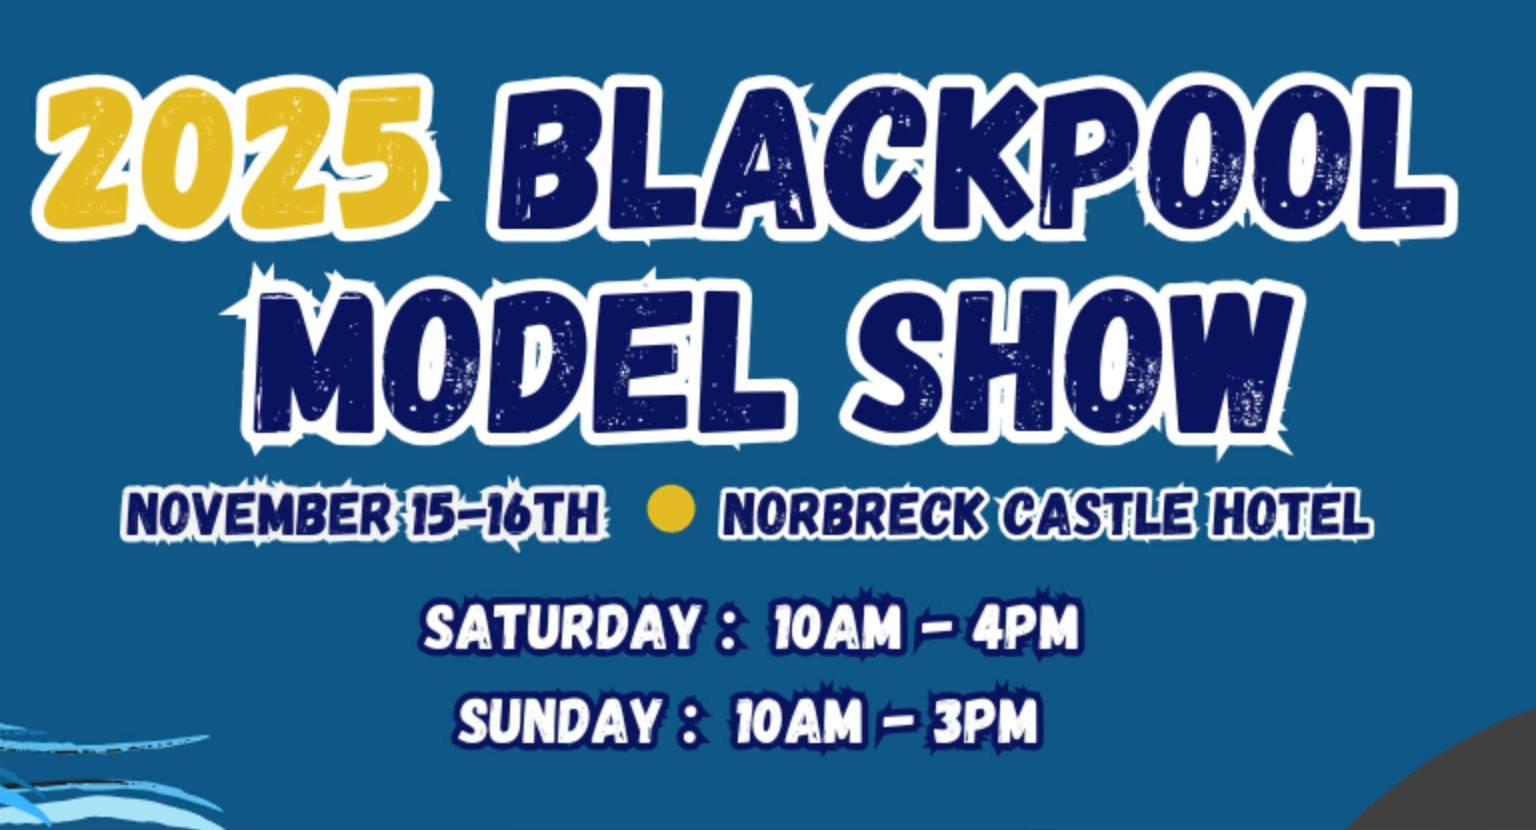
We will be at the Blackpool Model Show this weekend (Saturday and Sunday), so anyone near in the UK, we shall be there!
ETA - Jim (Hatch) will be there, too!


- jpalmer1970, BenD, Canute and 20 others
-
23


Chris Watton and Vanguard Models news and updates Volume 2
in Traders, Dealers, Buying or Selling anything? - Discuss New Products and Ship Model Goodies here as well!!
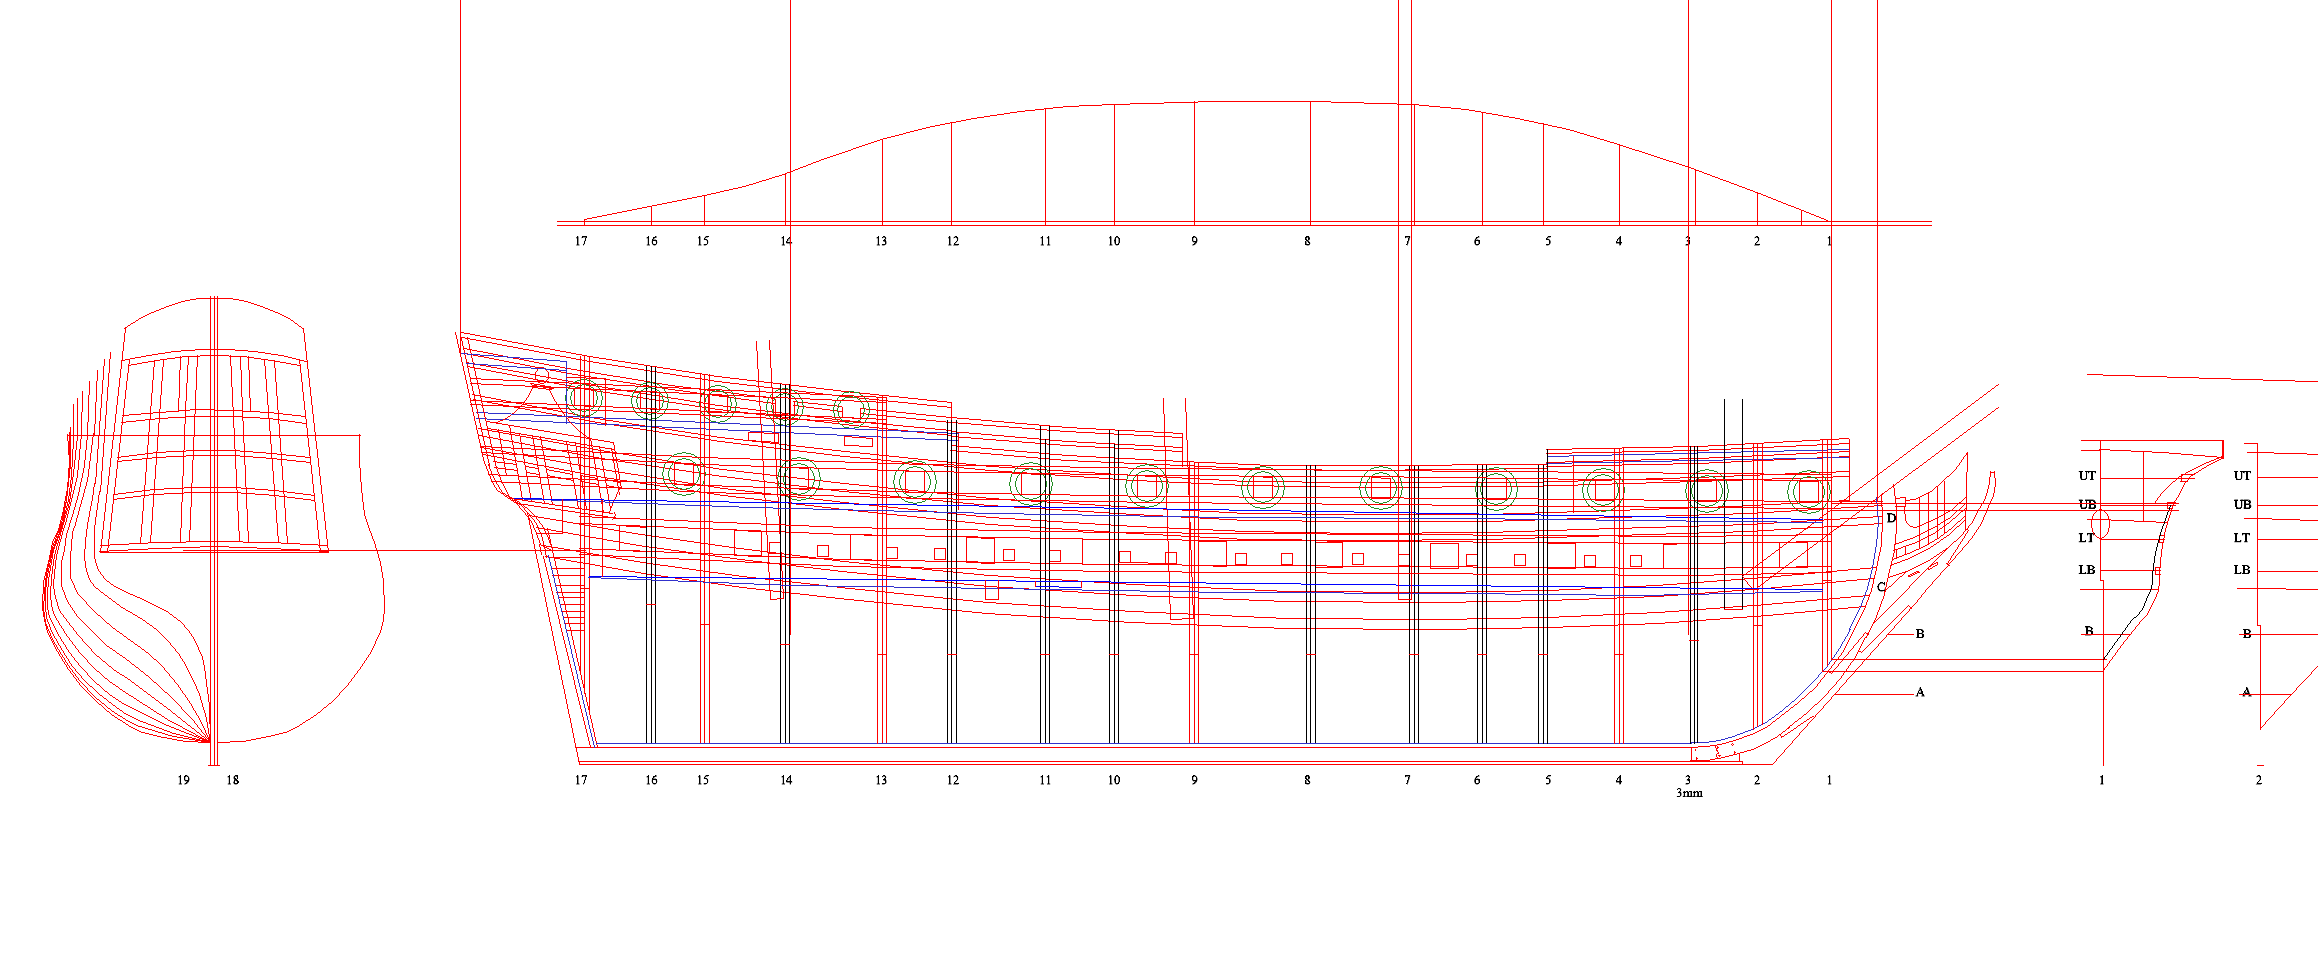
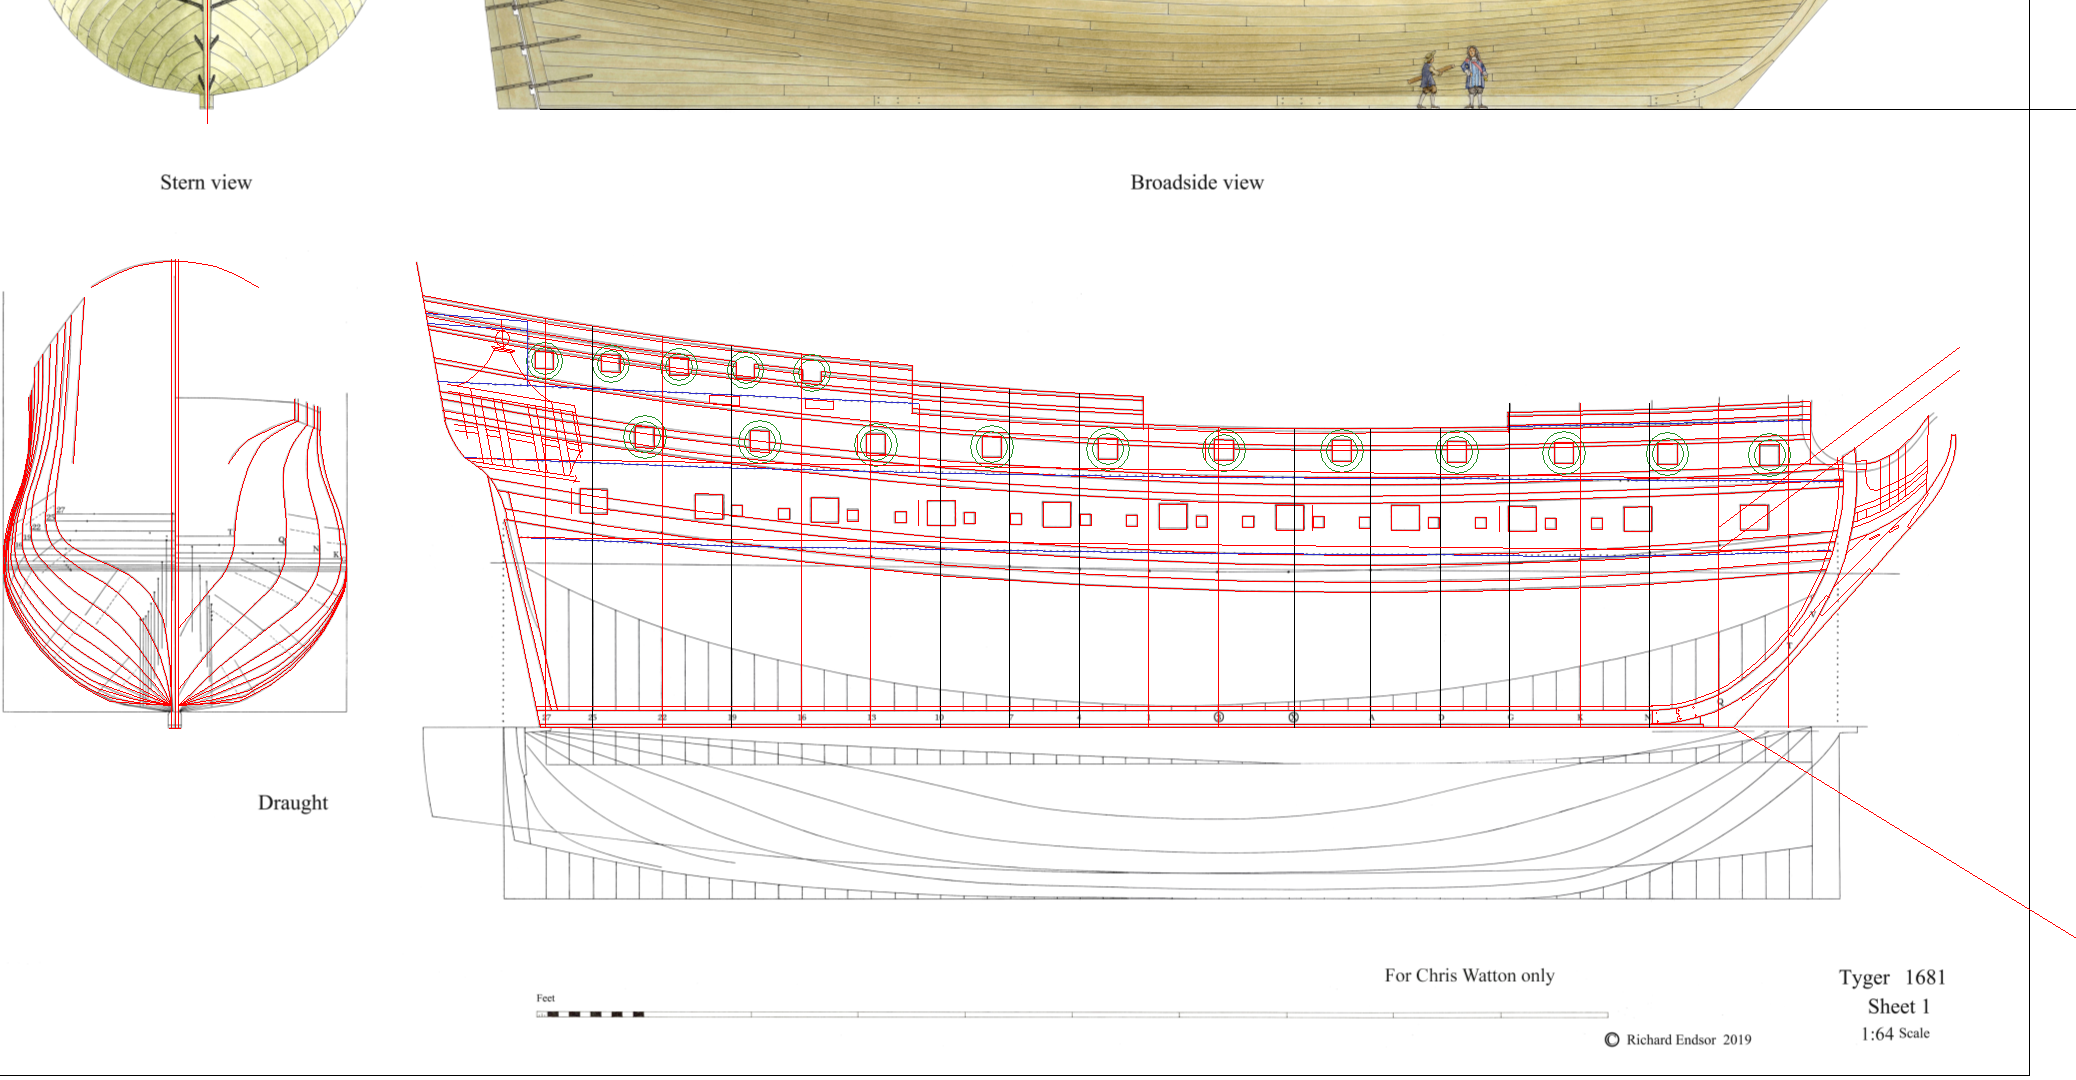
Posted
Speedwell will not change at all from Chuck's designs, I will literally be producing what Chuck designed, with only slots changed to take into account the metric rather than imperial sizes - and materials that I use like pear.