yvesvidal
-
Posts
3,624 -
Joined
-
Last visited
Content Type
Profiles
Forums
Gallery
Events
Everything posted by yvesvidal
-
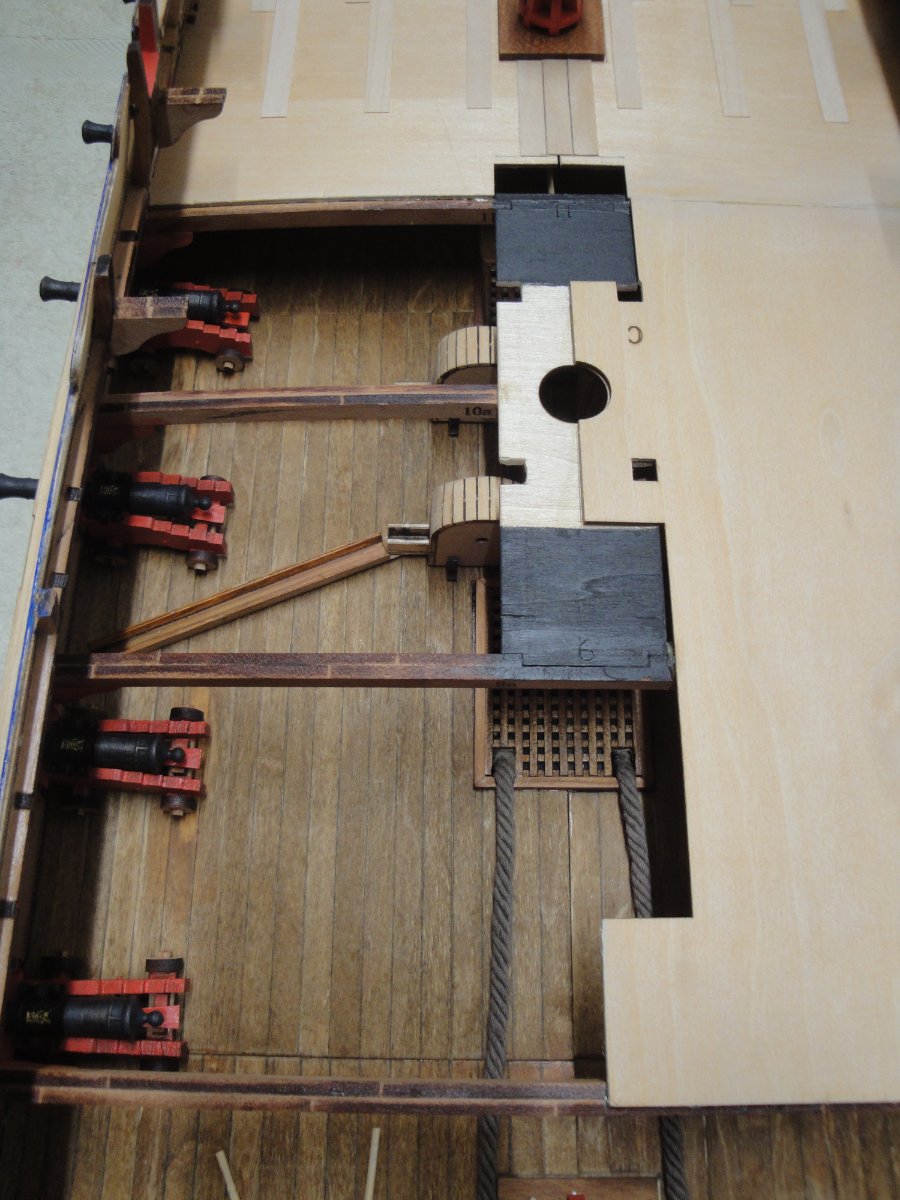
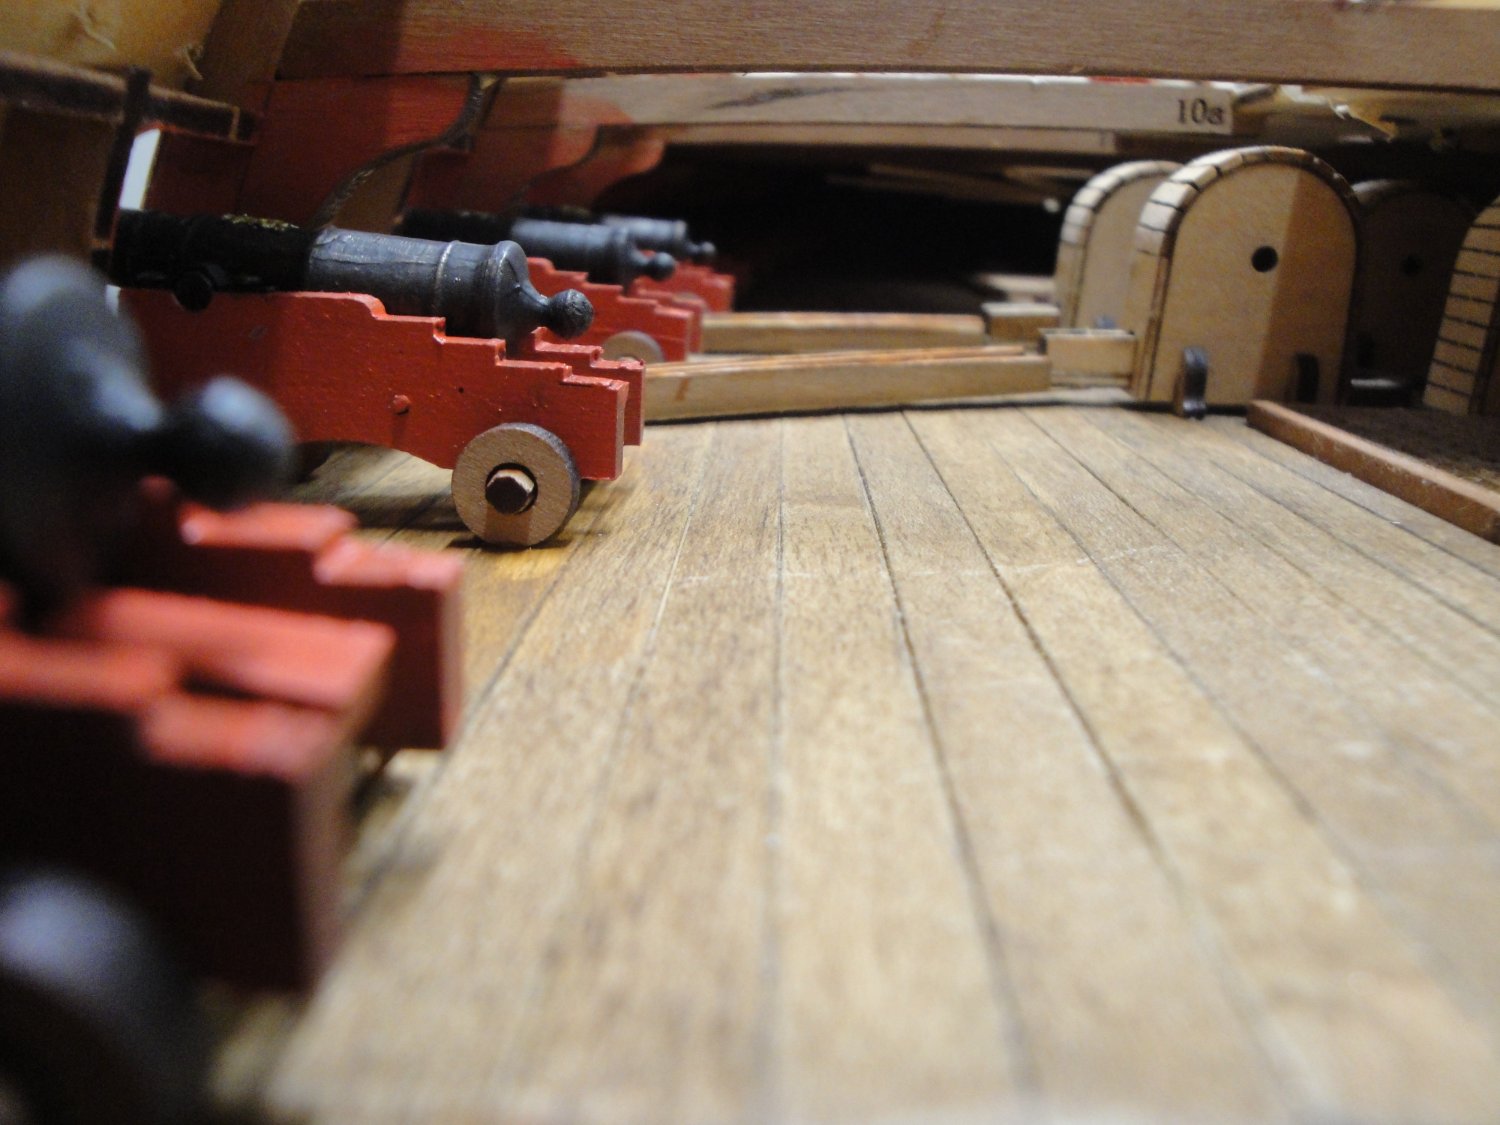
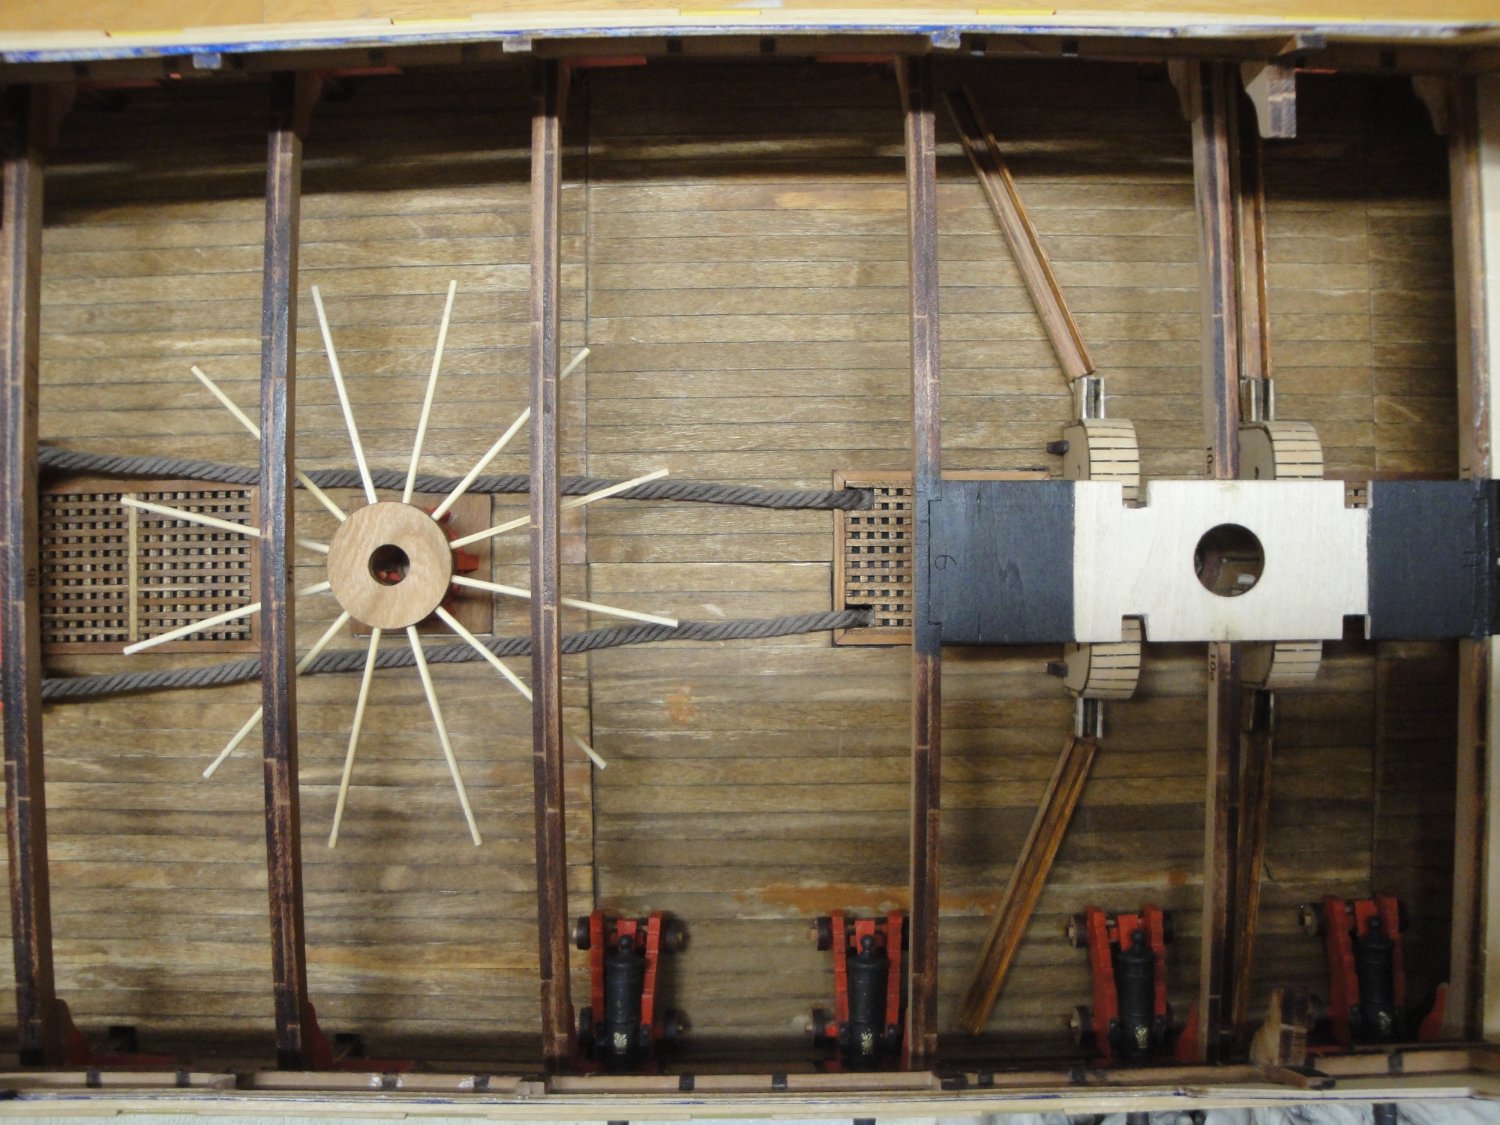
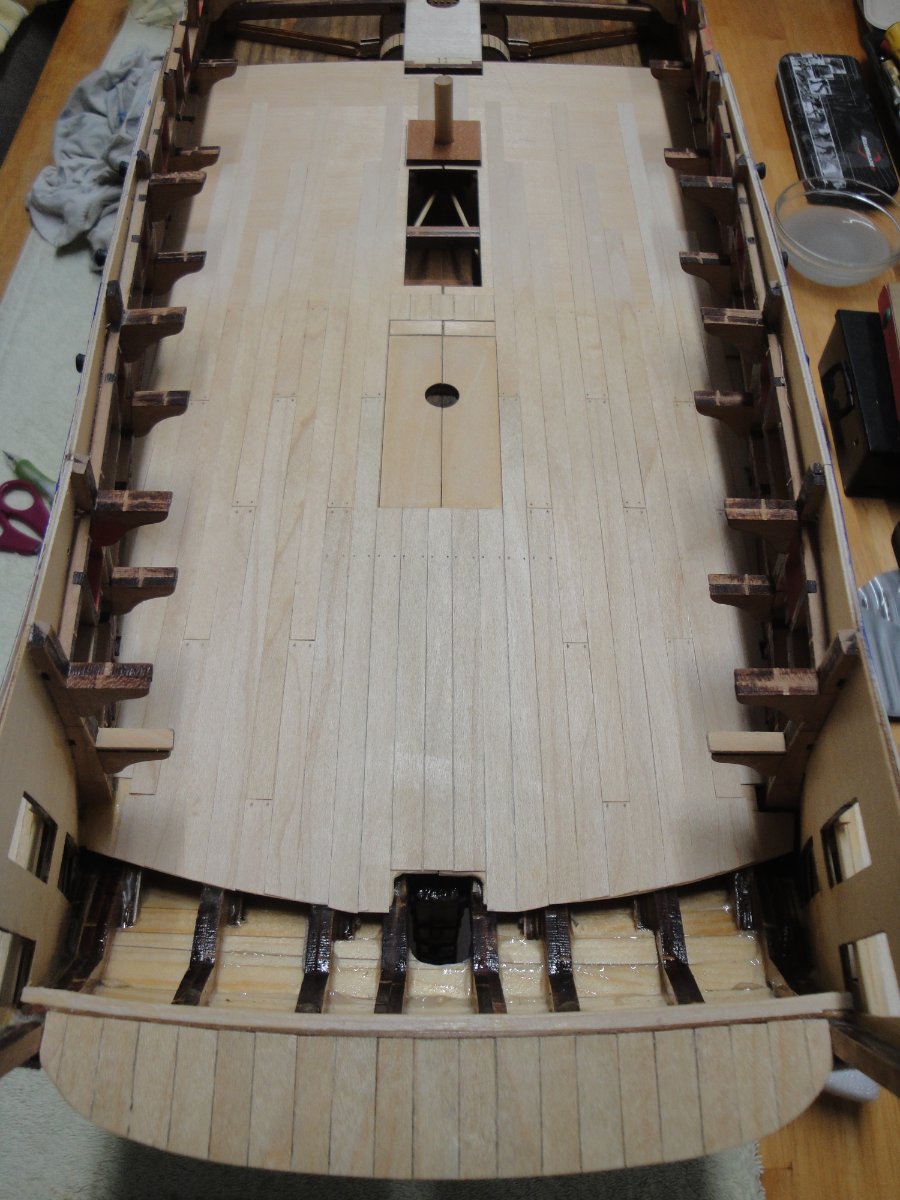
 Still taking a (well deserved...) break from the galleries, I am now moving to the partial completion of Session #3. This is basically, the building, planking of the main deck with some parts added here and there. After installing the four guns underneath, the lid is placed permanently. The two anchor ropes are installed and wrapped around the bitts: At this point, the other four guns are glued and the other side of the deck can be installed: Of course, the preliminary work of adjusting all the deck parts, pays big at this stage. All parts are dovetailing perfectly. The planking can now be started. Most planks are 20 cm long and staggered by 5 cm. Two coats of Wipe on Poly have been spread and I will most likely use a third coat, before adding anything to the deck. You can clearly see the demarcation of the Wipe-On-Poly, below. I like that grayish and still warmish hue that it gives to the wood, and the protection it brings to that fragile wood. On the picture, the WOP has just been spread, causing that wet look on the maple wood. Overall view: Yves


- 507 replies
-
- 19
-

-

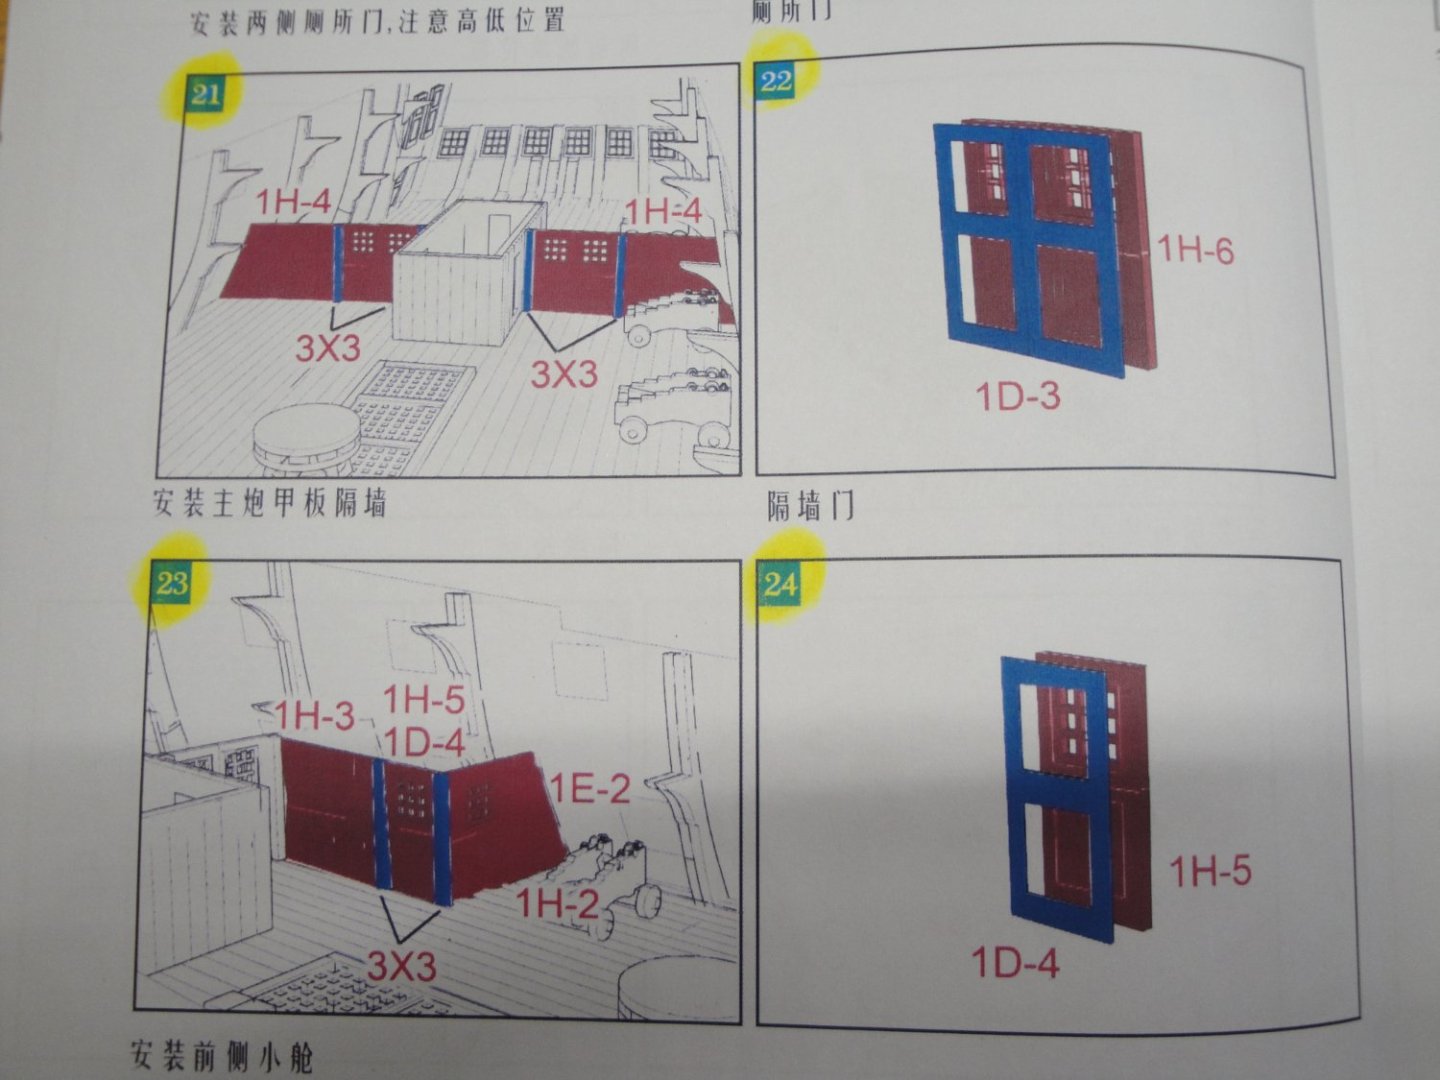
-
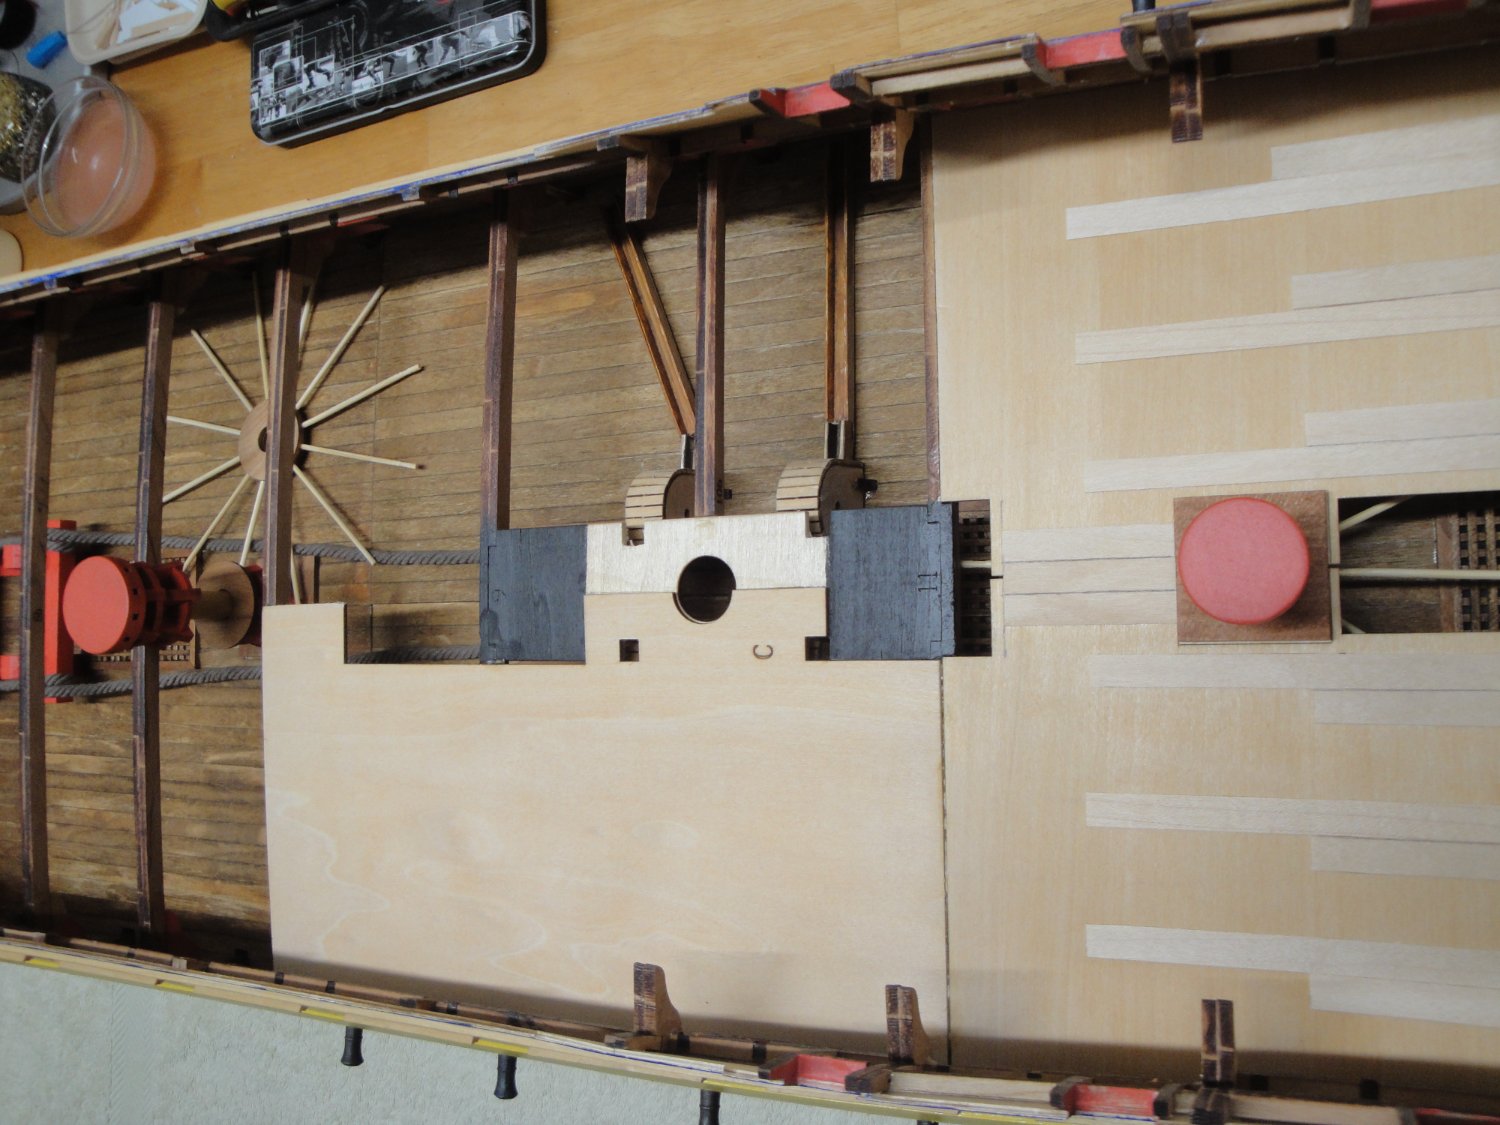
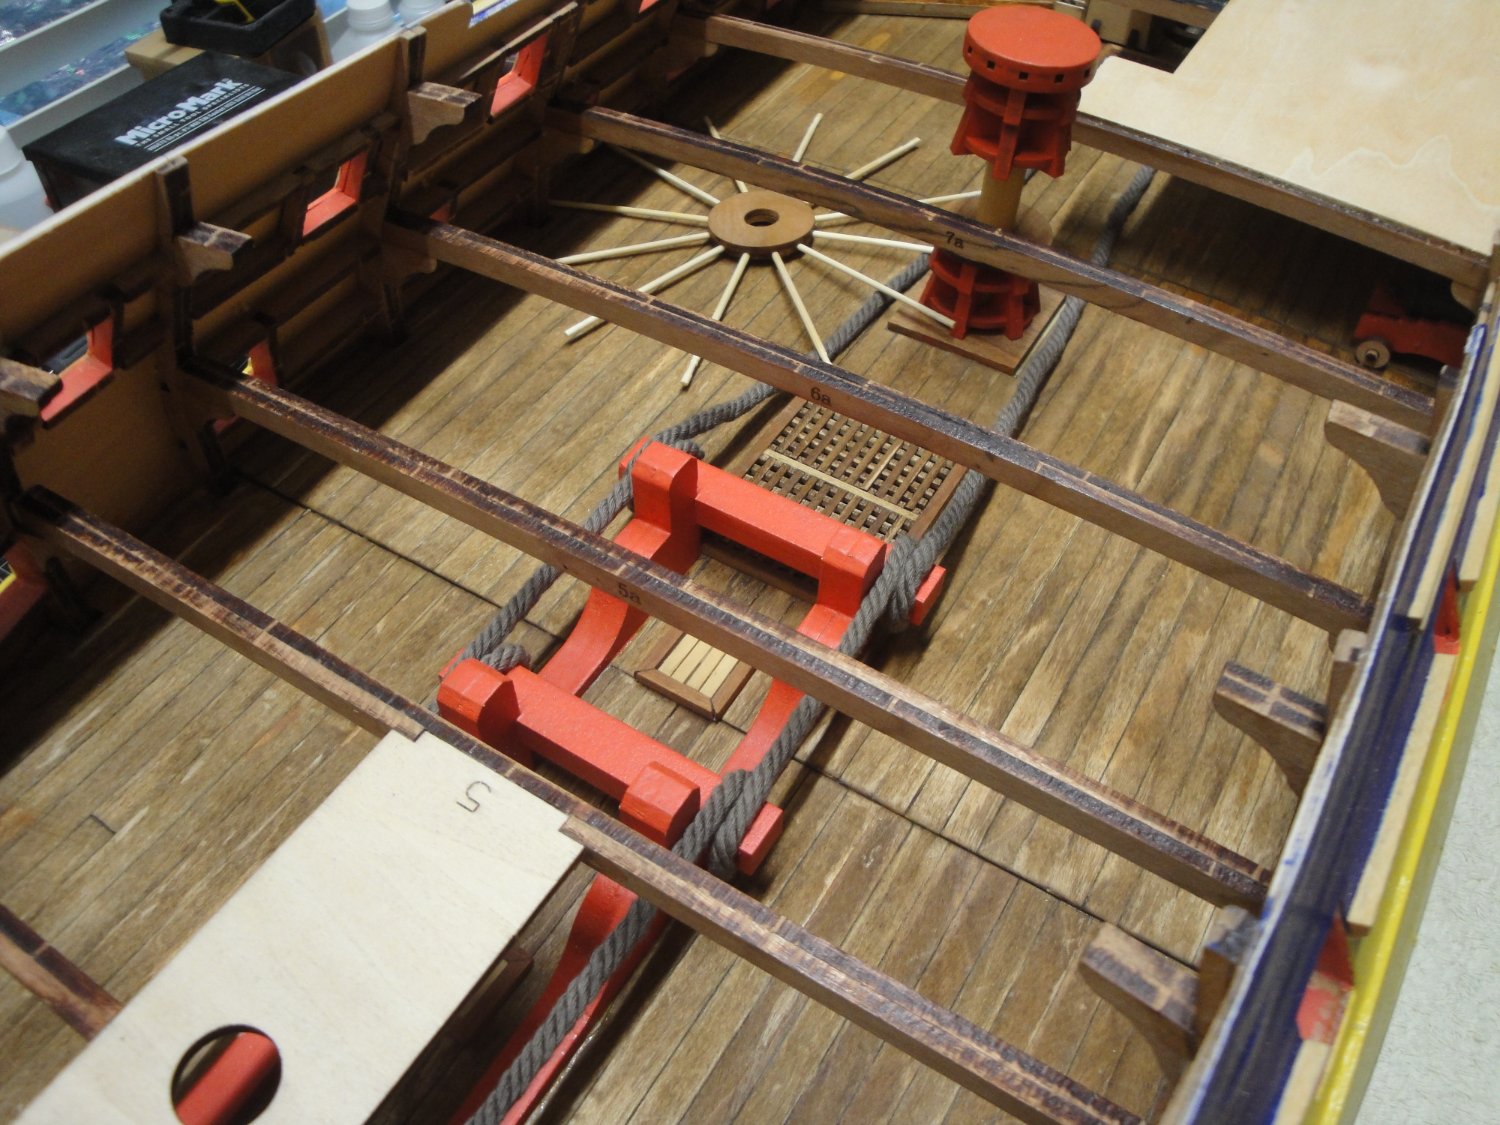
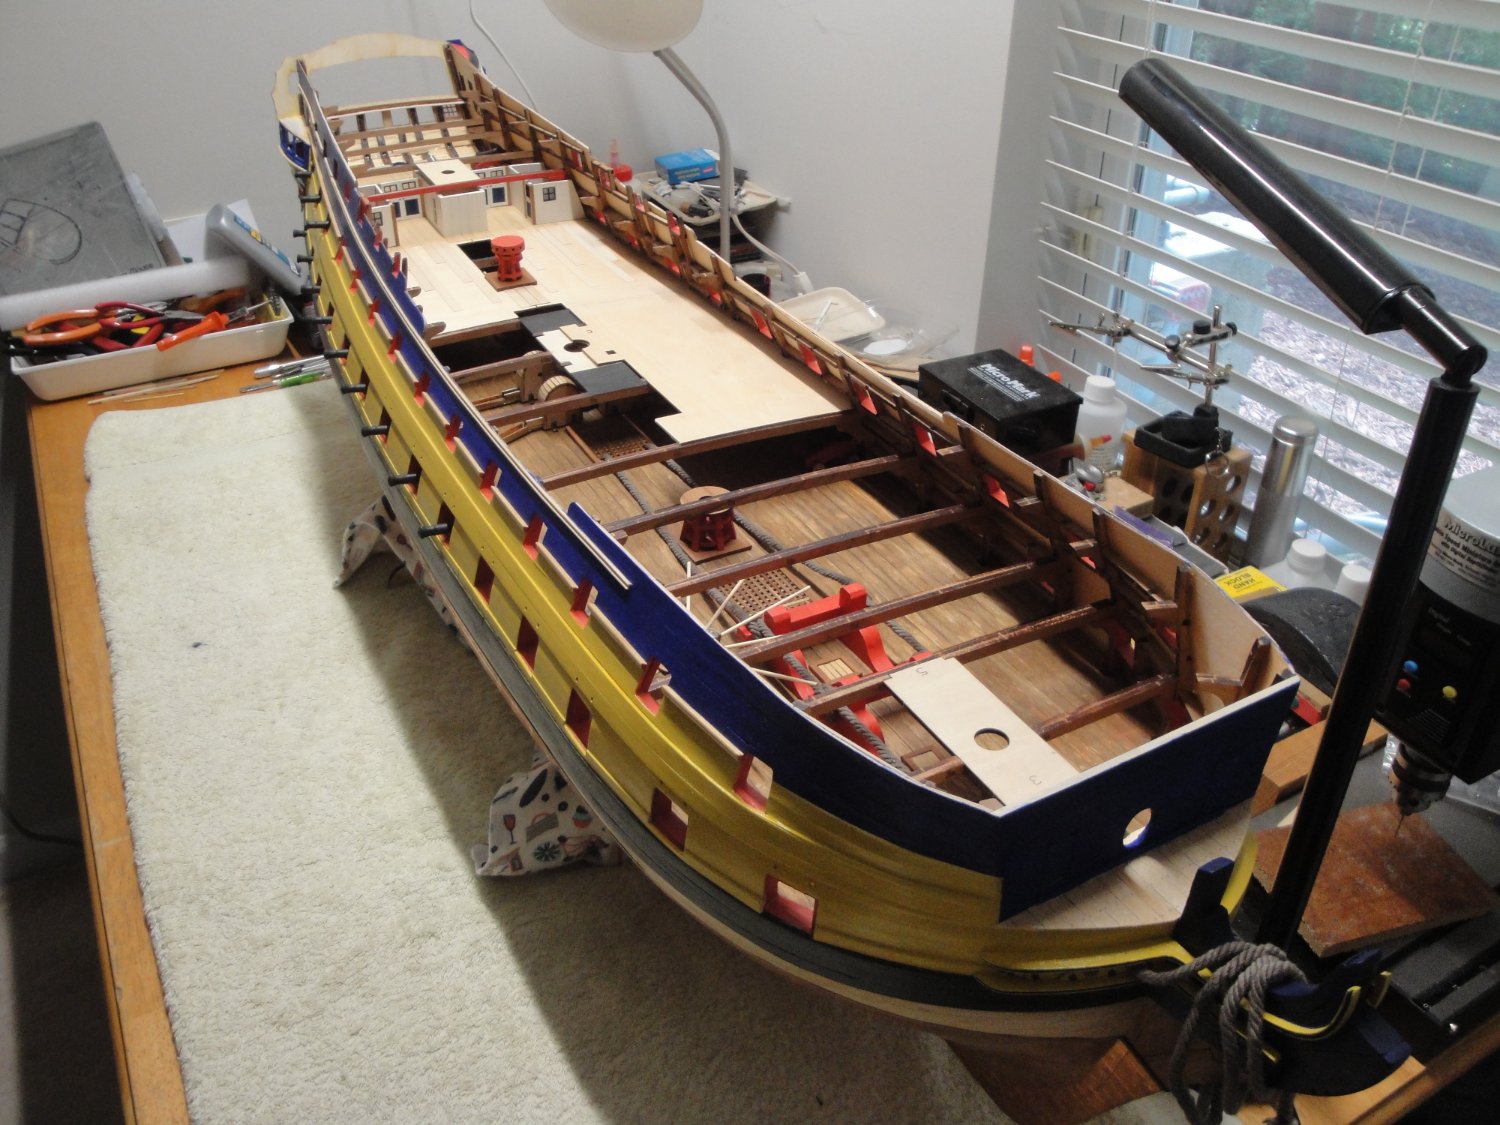
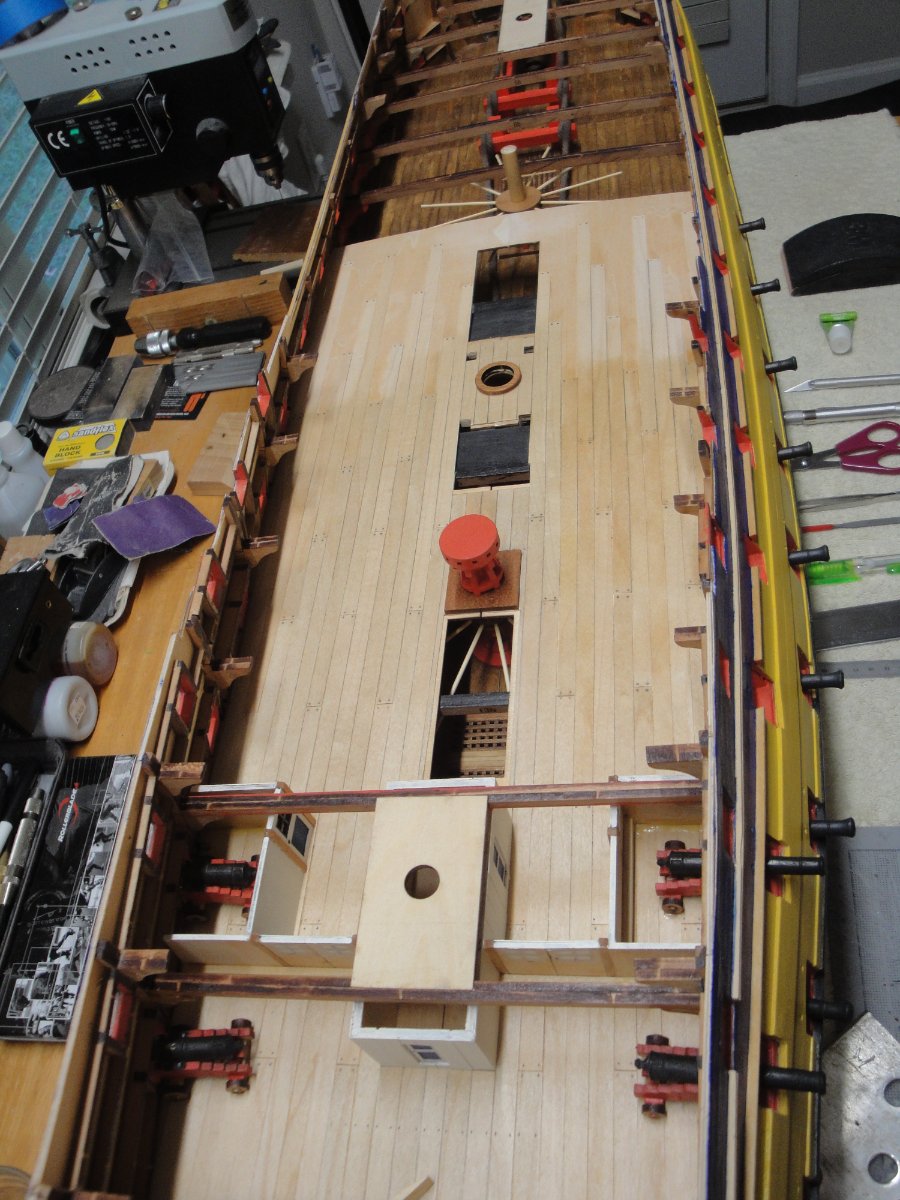
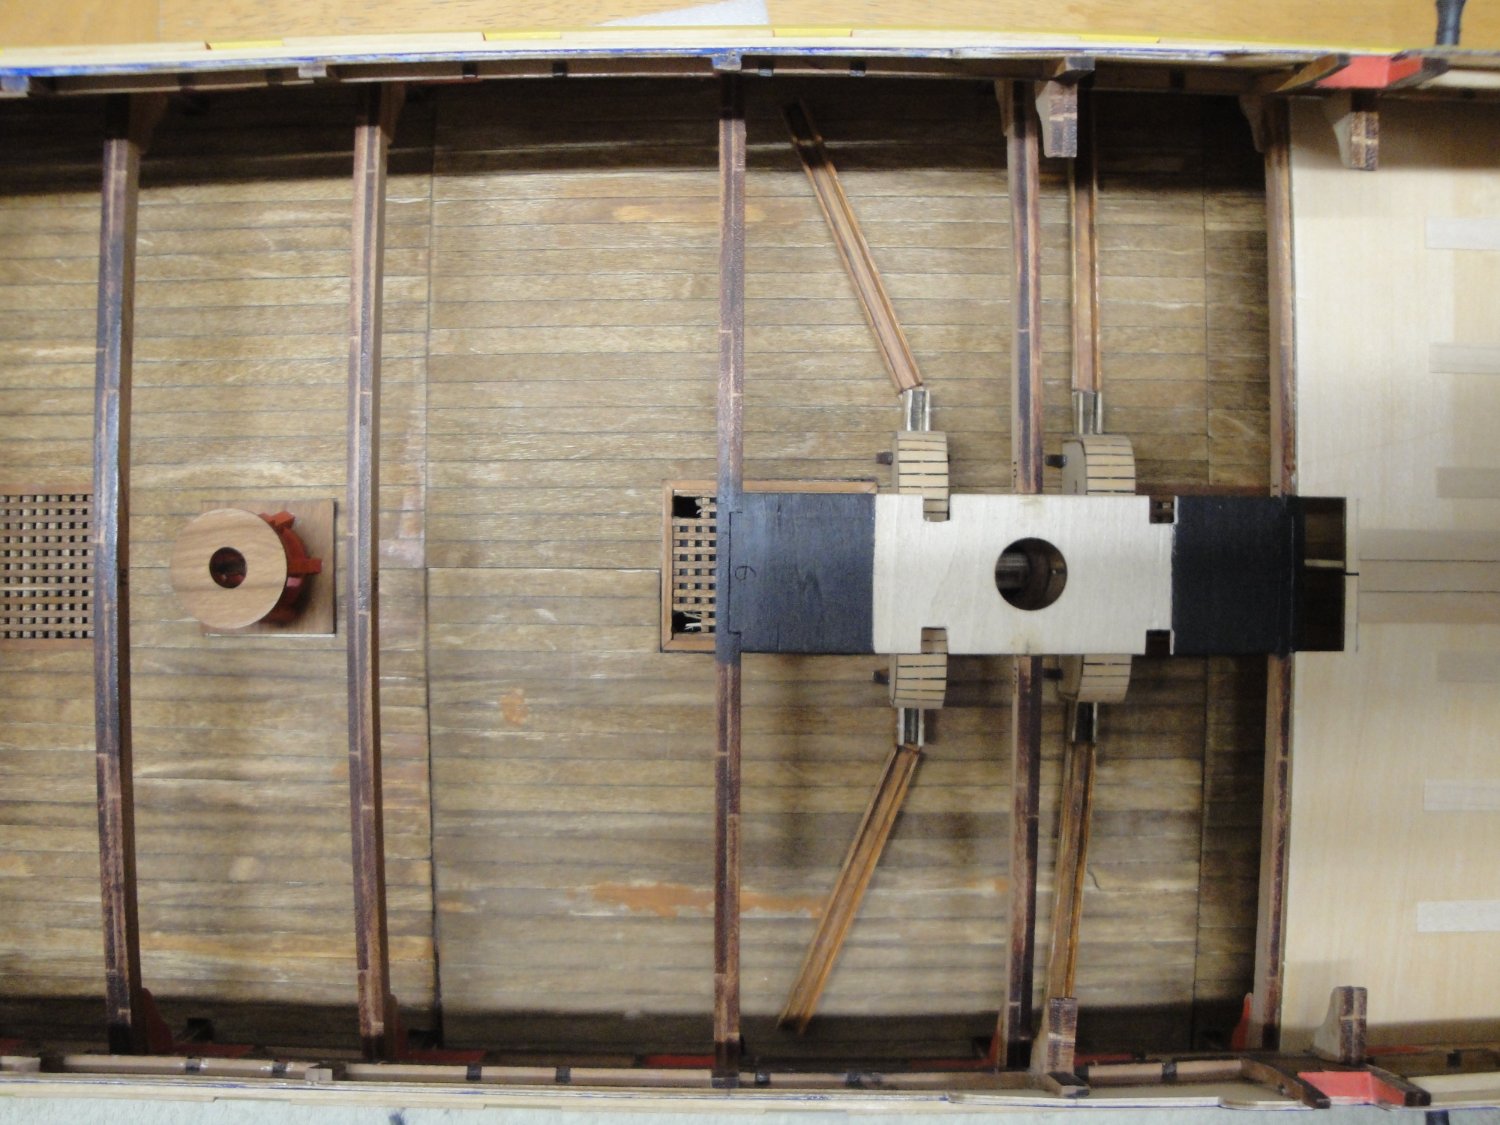
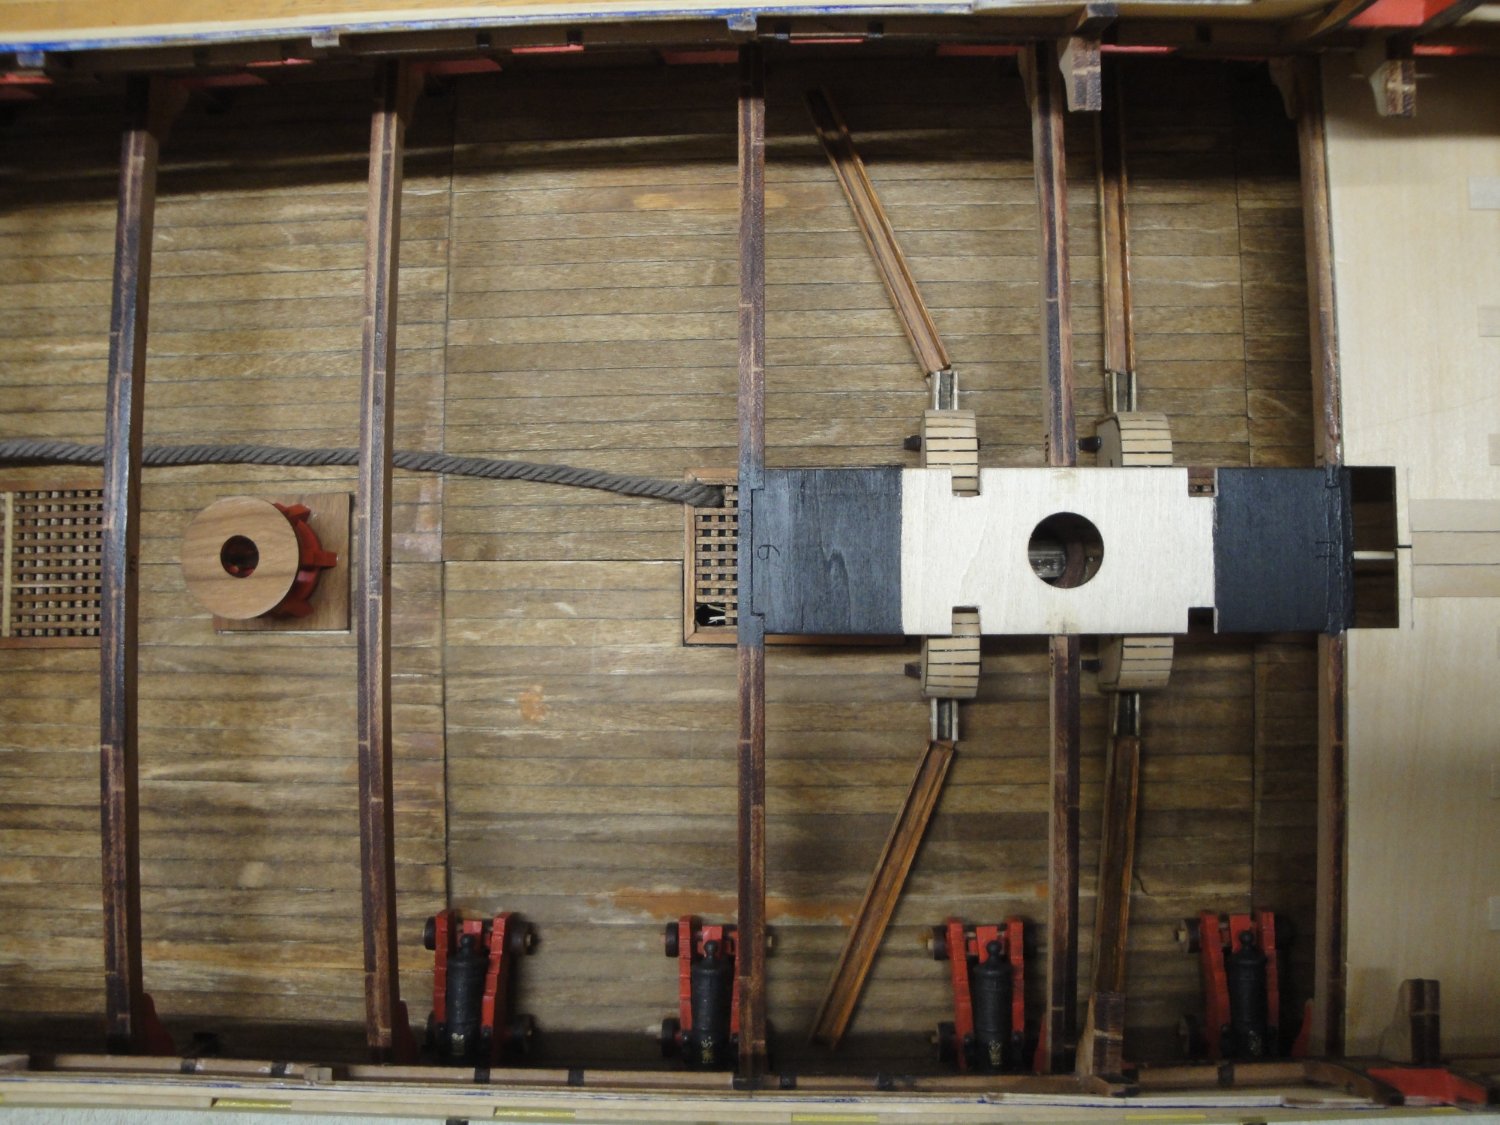
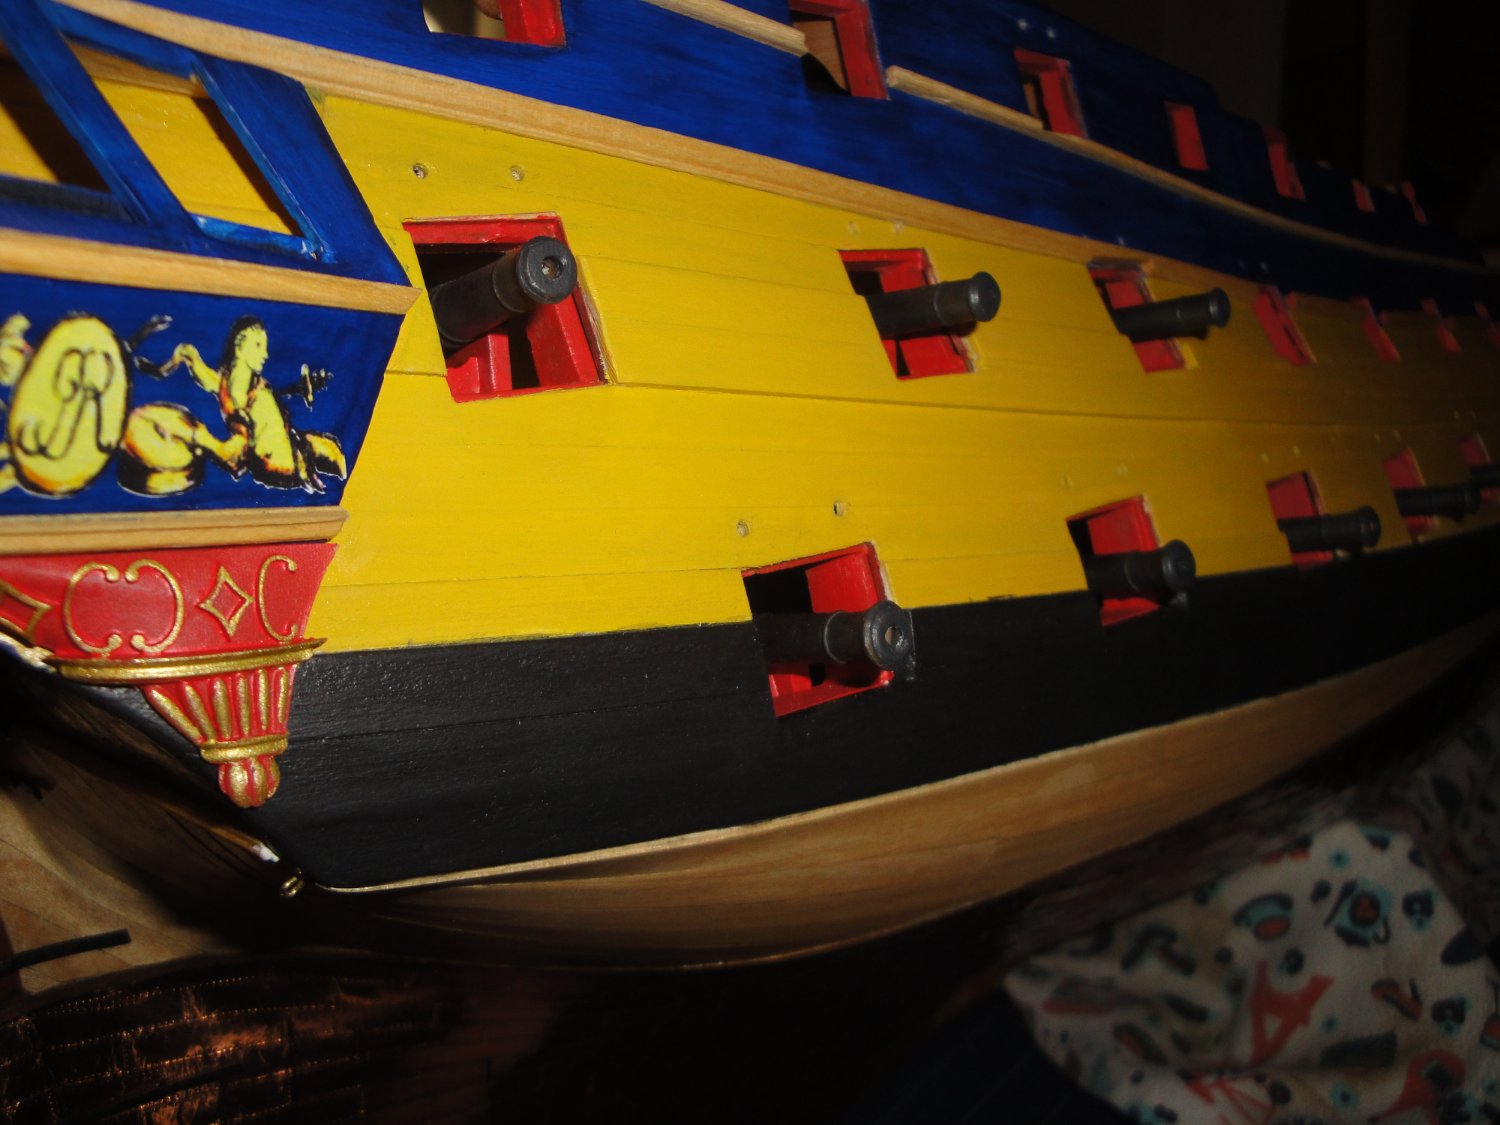
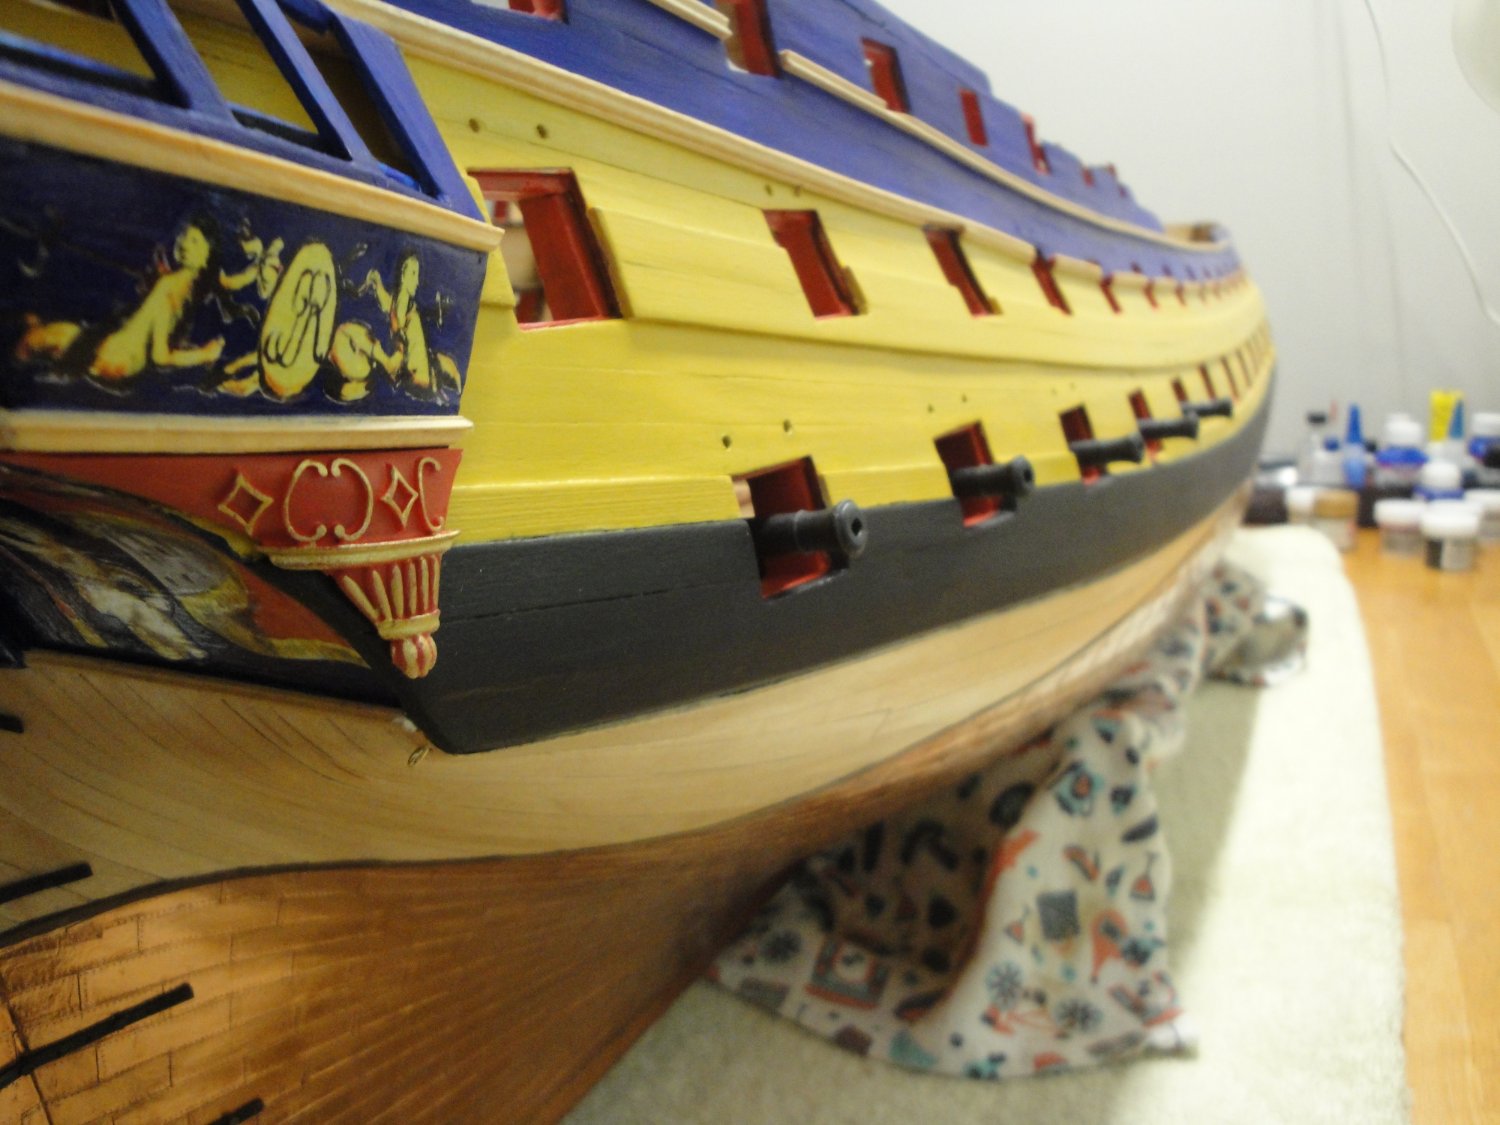
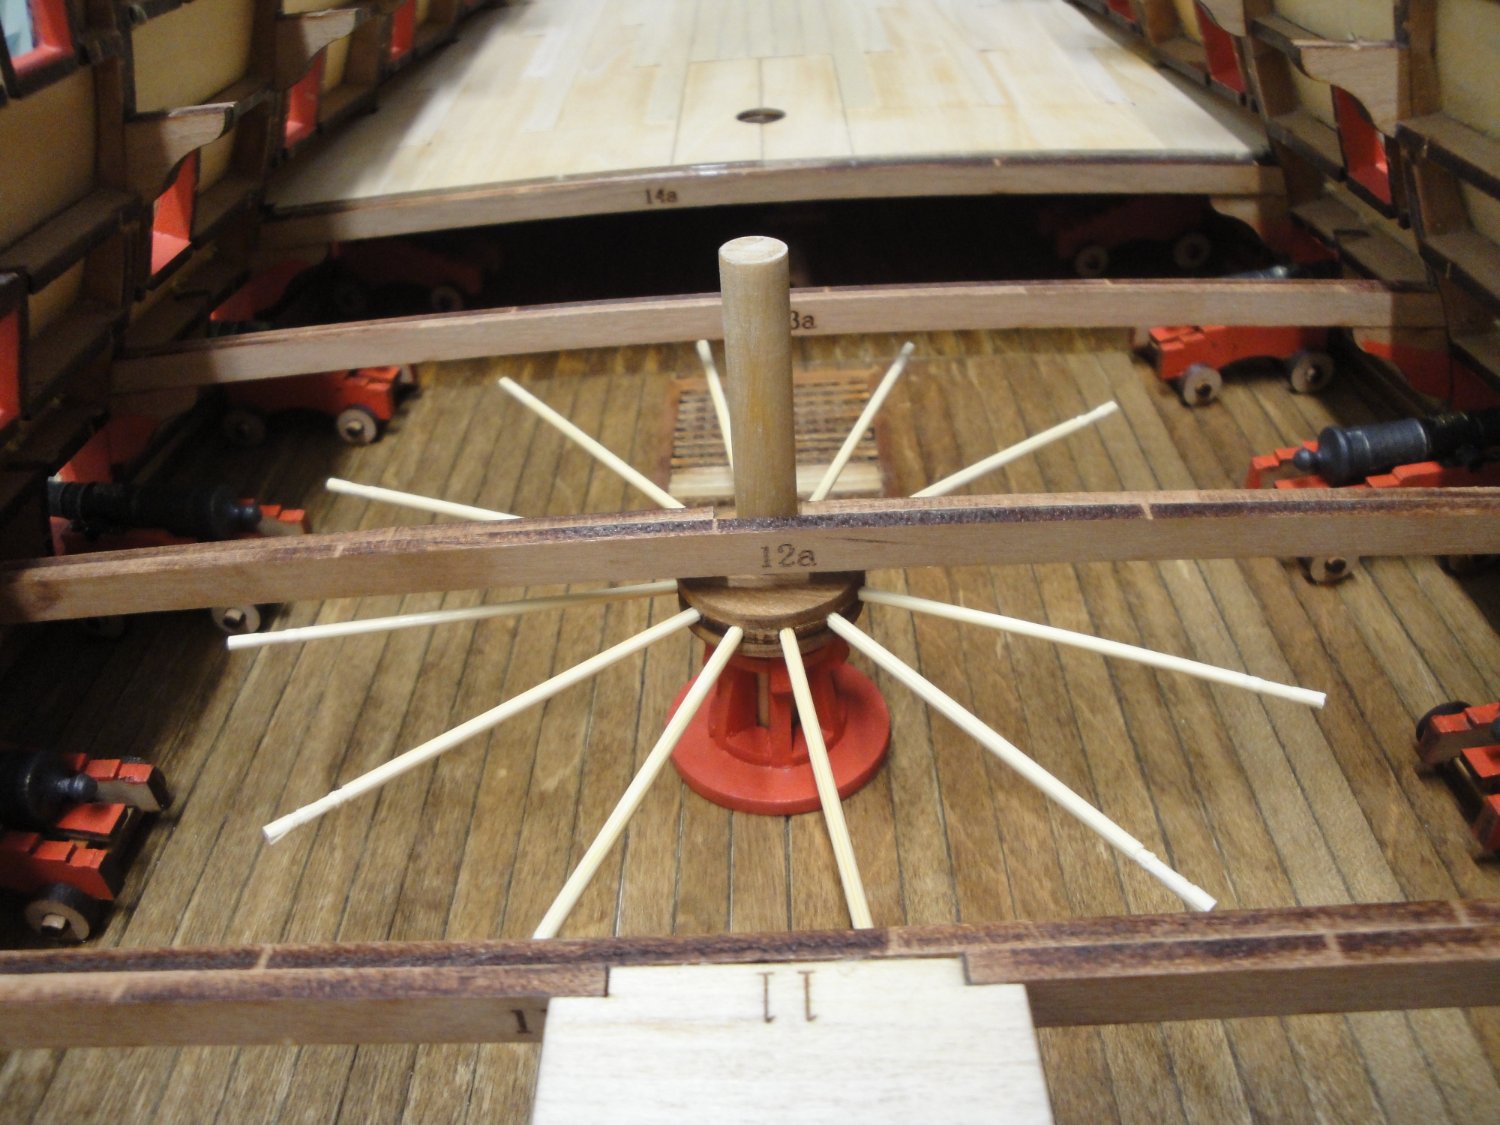
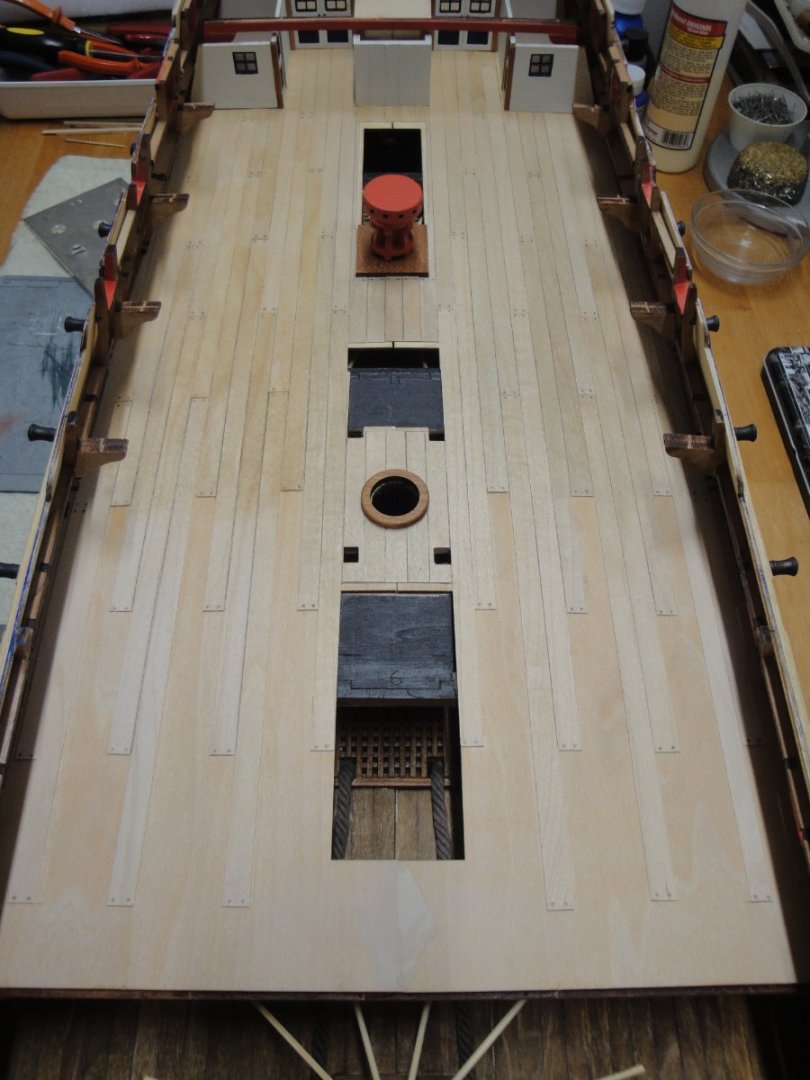
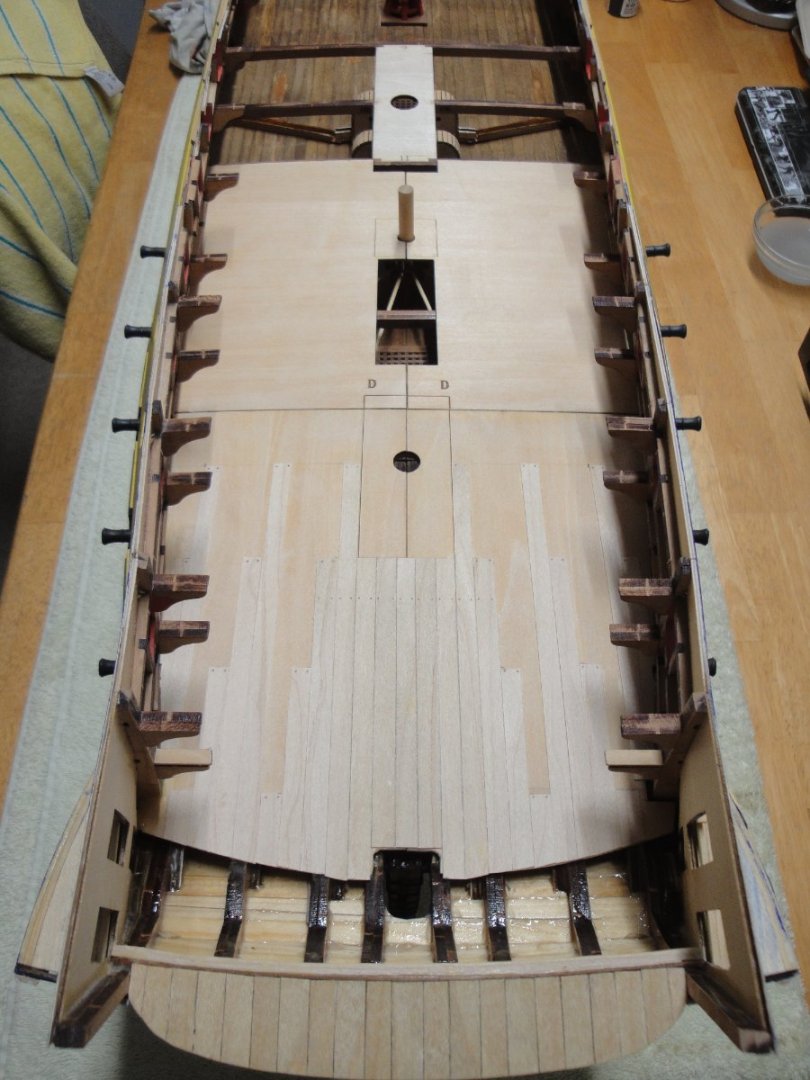
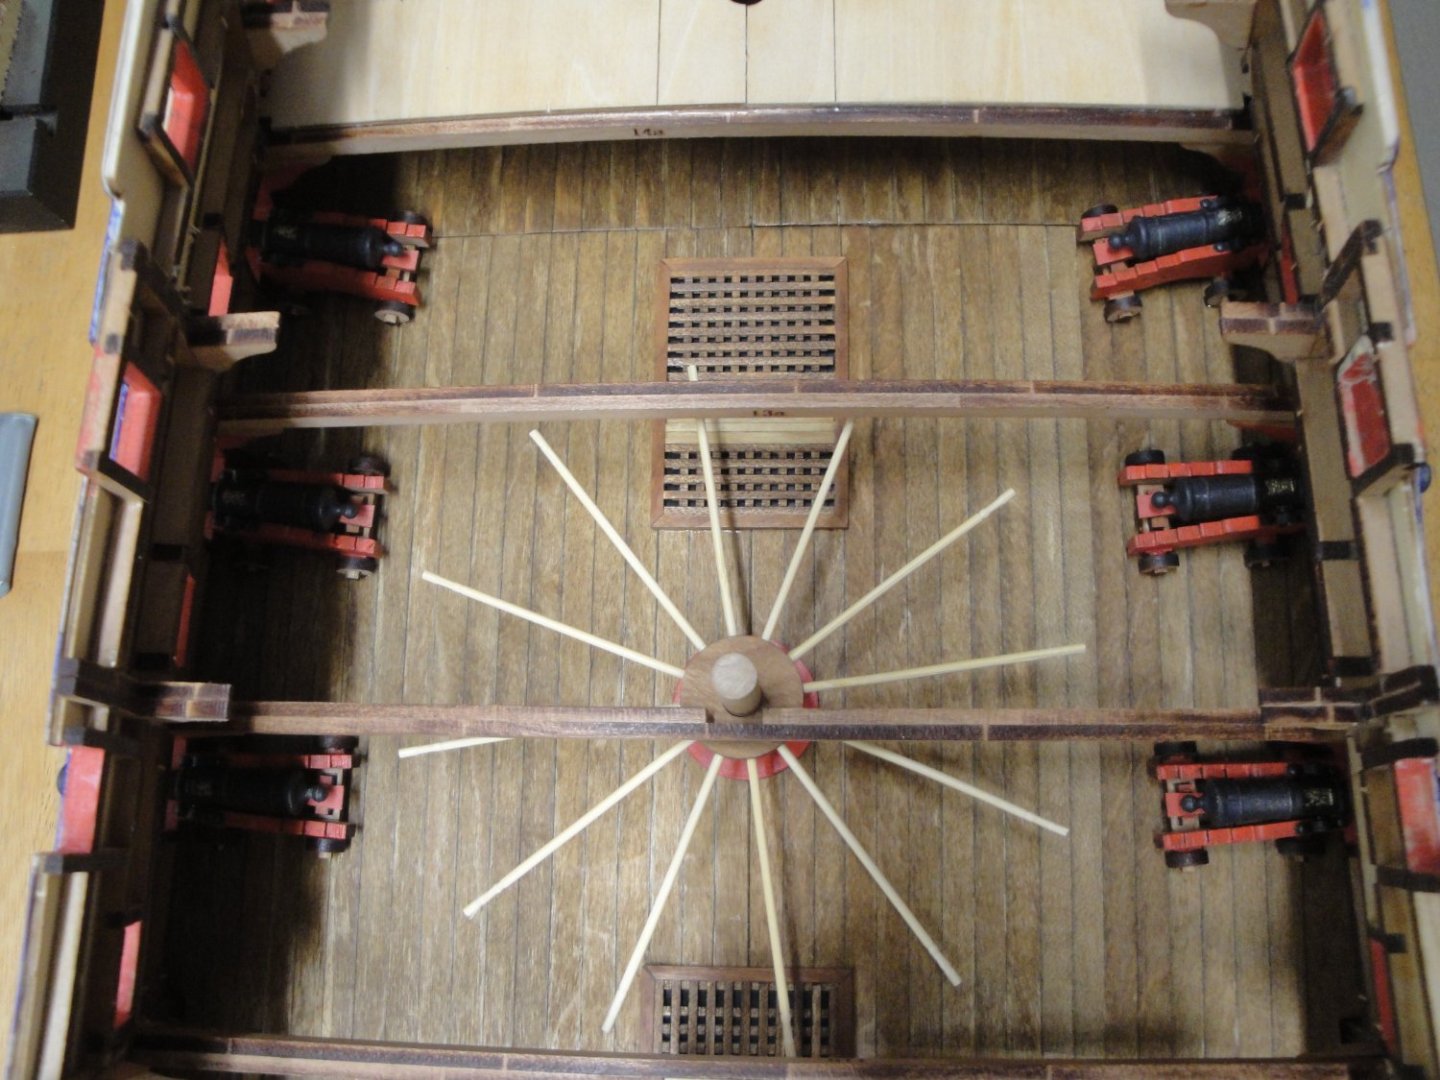
Now, is the time to prepare all the details of the gun deck, before closing the lid on it: I have precut the square holes that will be used for the bitts. I also painted black the wood surfaces that will sit below the grates. The guns are then placed, on one side only....for the time being. It is starting to look very menacing (above). I am then installing the large ropes used for the anchors. At this point, I can start covering the port side of the central section. The main capstan has been inserted in place, since it will be very difficult to position it when the central main deck section is glued. Yves


- 507 replies
-
- 17
-
-
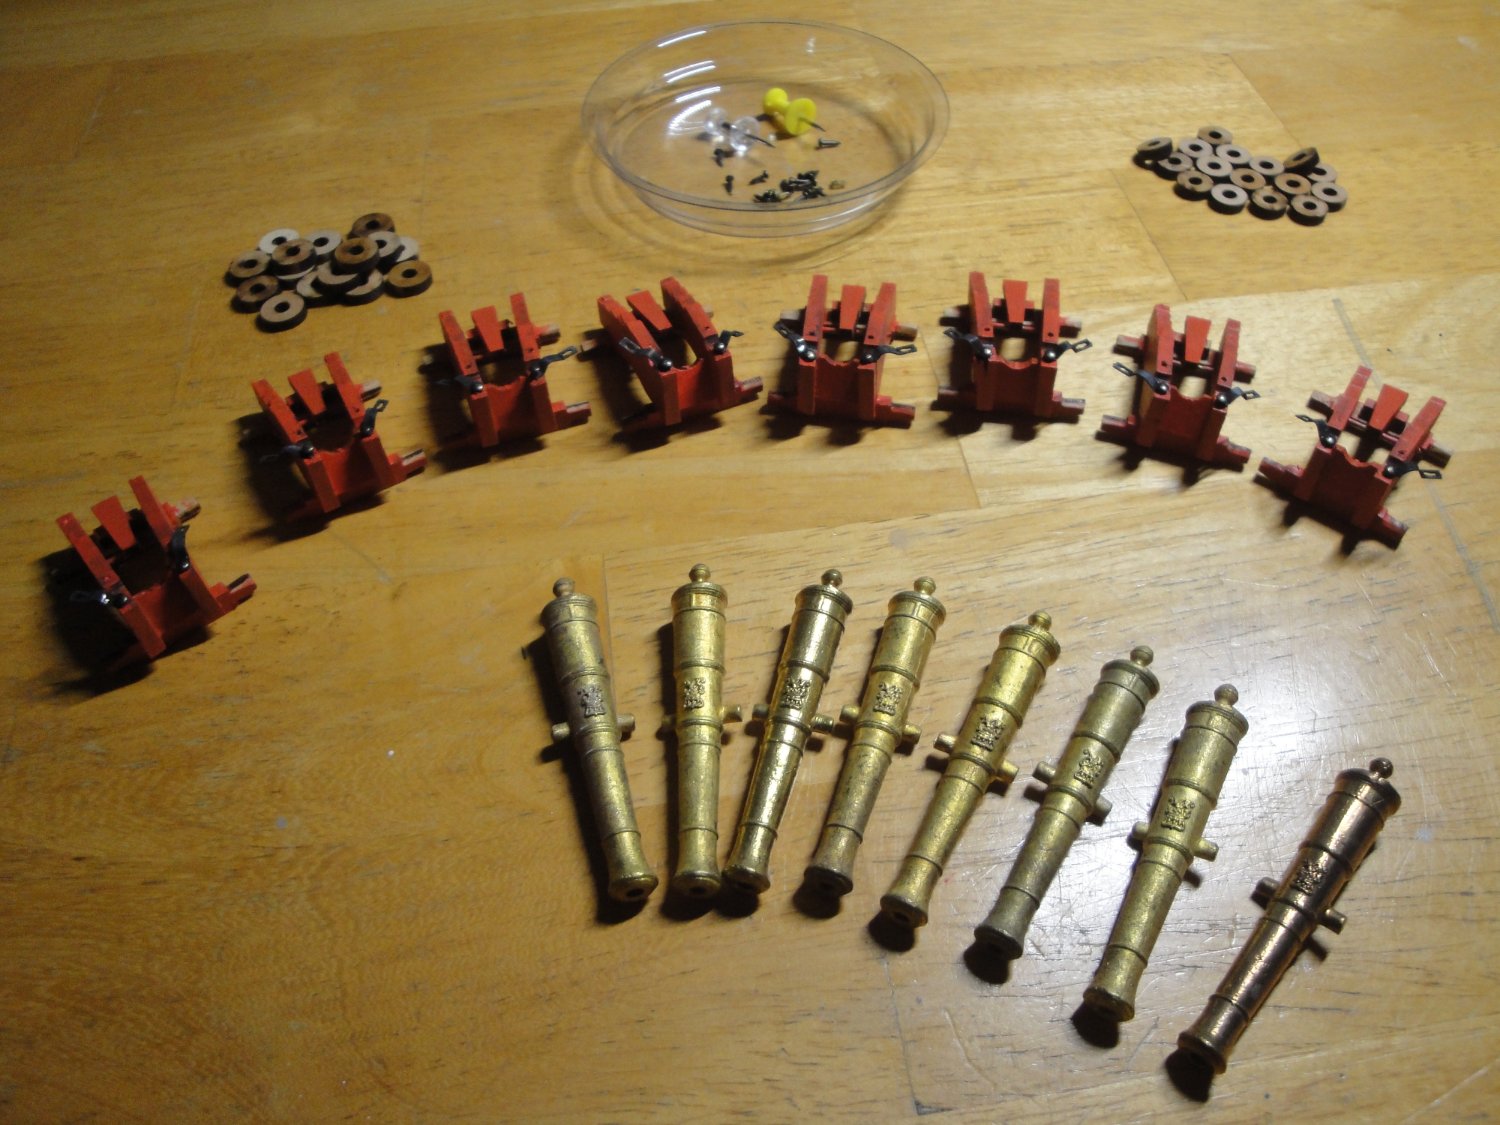
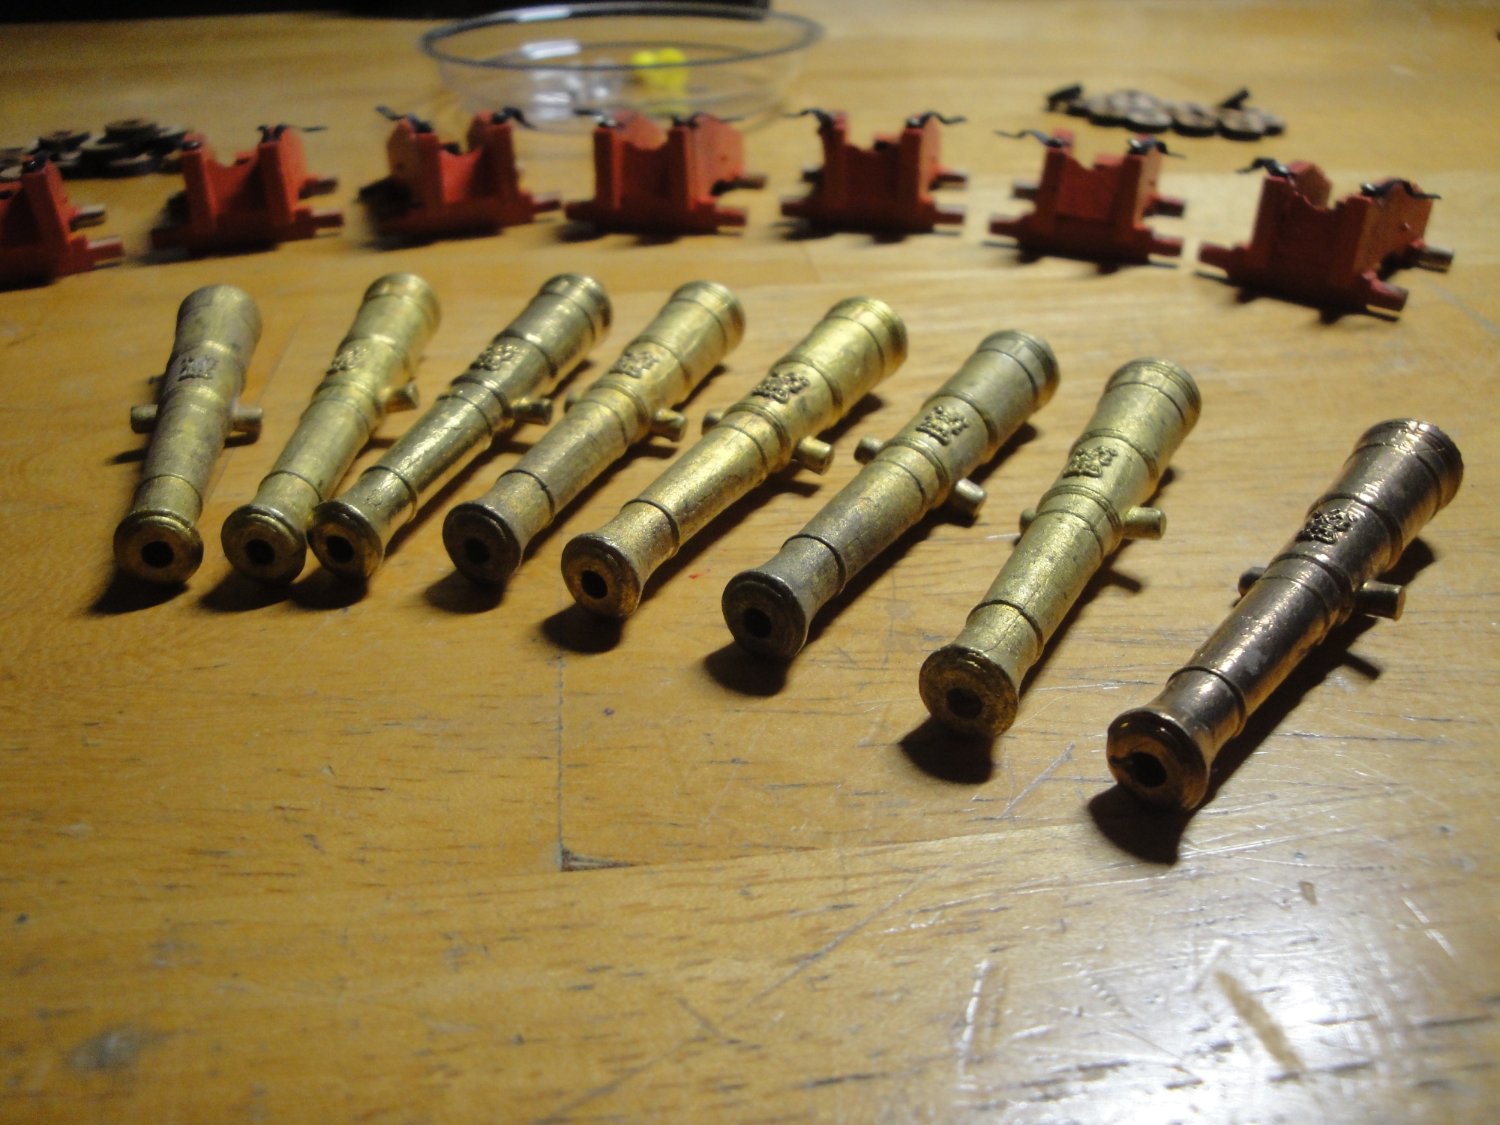
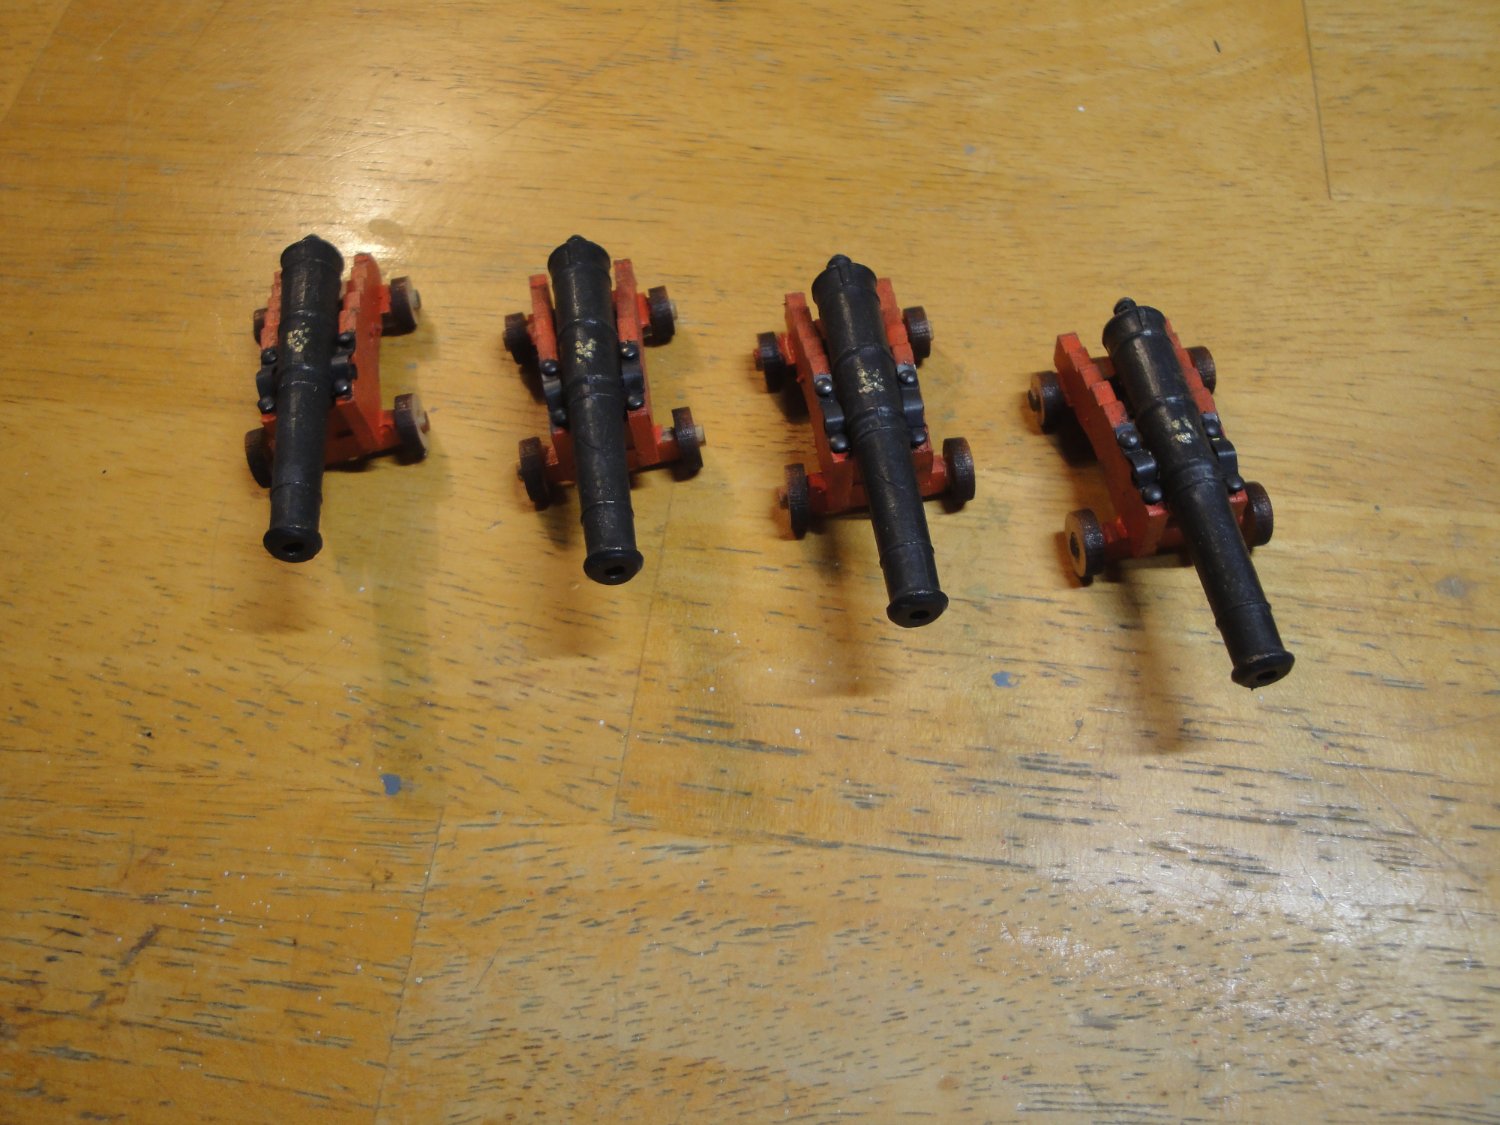
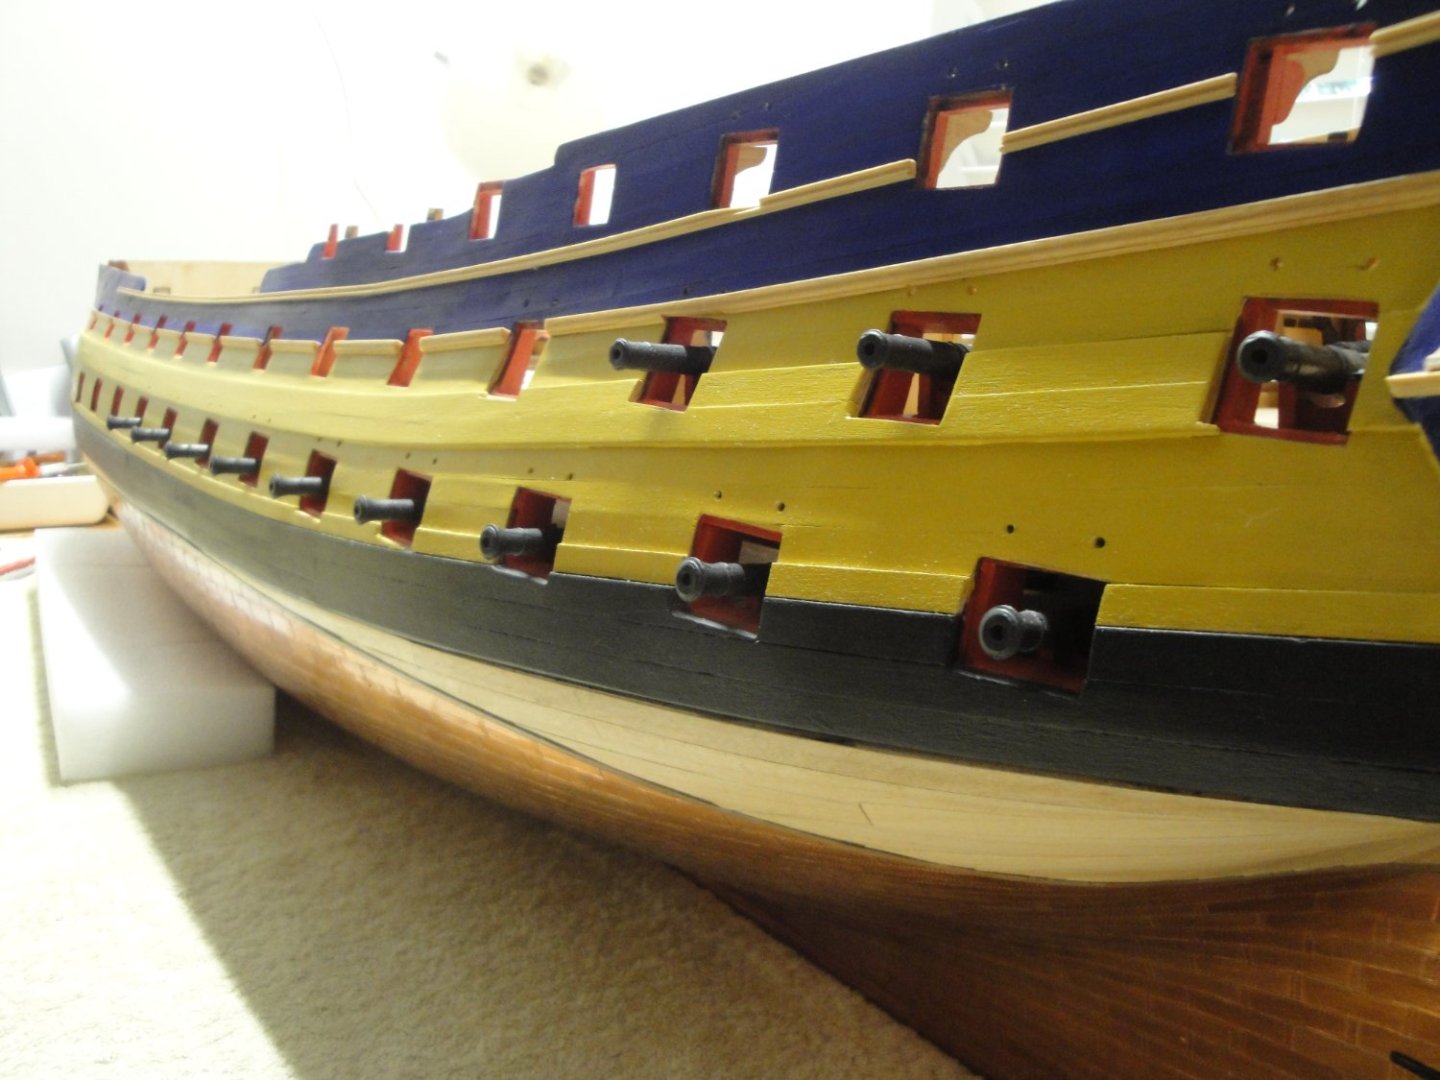
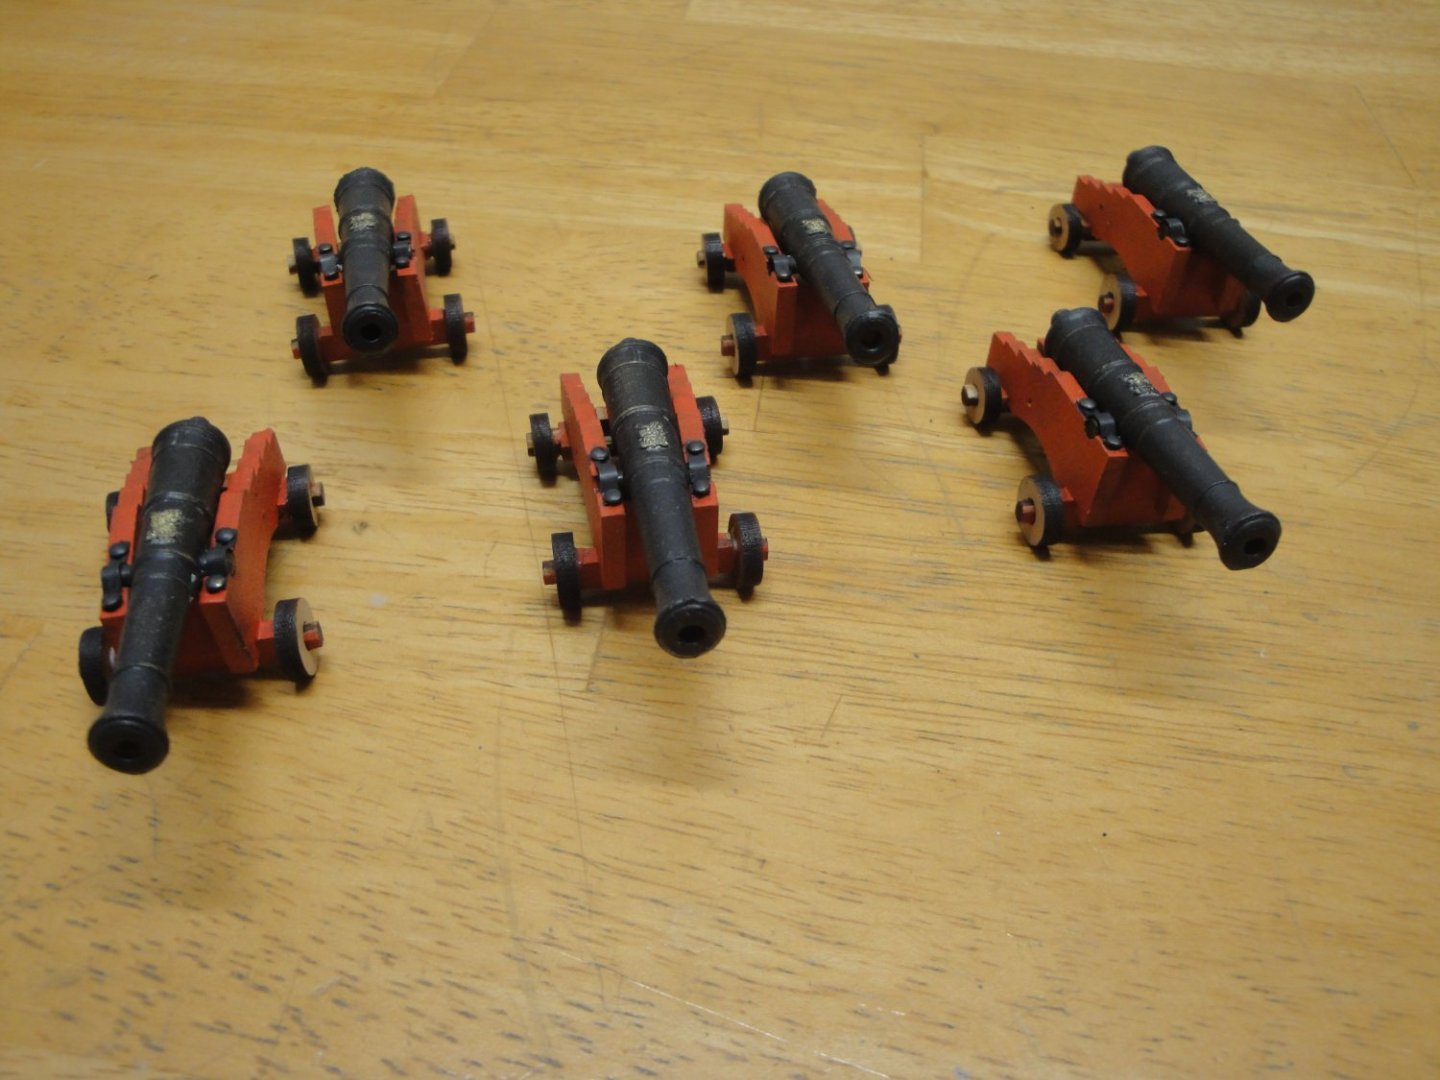
It is time to build a few more cannons, that will sit under the main deck. This task, as many of you know so well, is tedious and repetitive. That is why I do it in small quantities at a time (almost homeopathic doses). The brass parts are immersed in a mixture of vinegar (apple cider) and baking soda. The parts are then carefully cleaned in lukewarm water and then dipped into the black solution. Again, rinsing, drying and waxing are performed on each barrel. Touch-ups, when necessary are made with the Model Shipways cannon black acrylic color, that matches so well the chemical blackening. Yves


- 507 replies
-
- 12
-
-
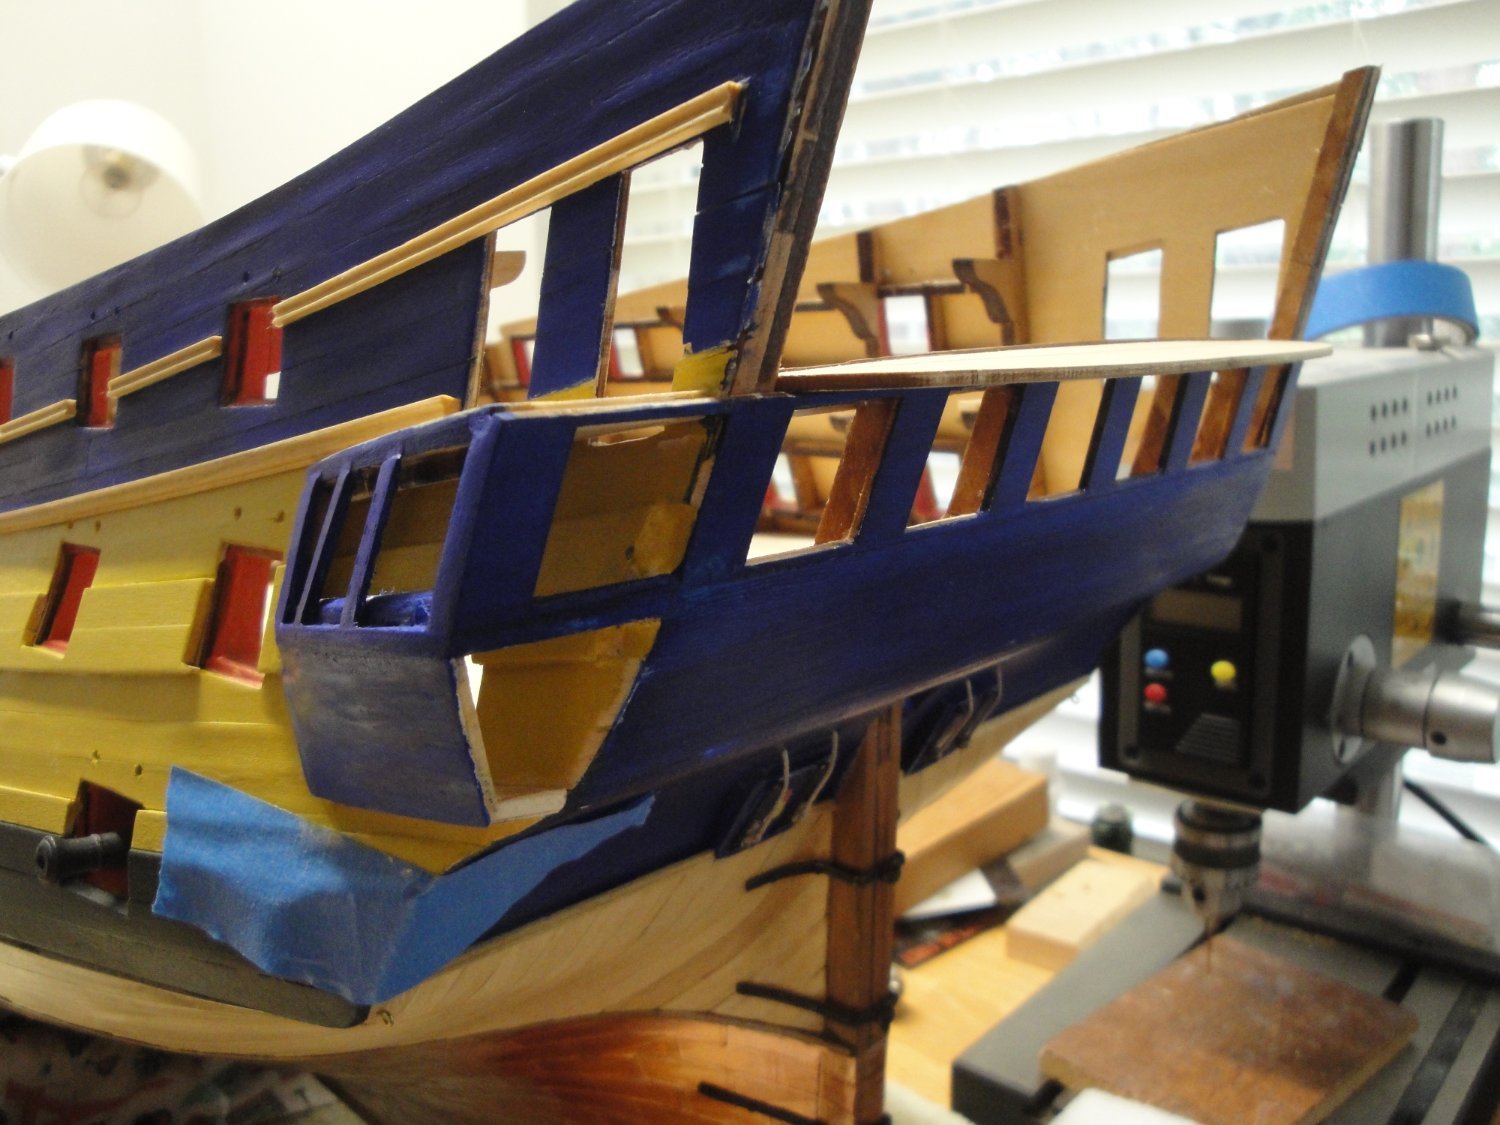
Yes, the Quarter Galleries are a royal pain in the **** to put together. However, they also contribute so much to the beauty and splendor of the ship, that all these efforts are worth it. When you look at the entire model, these small deficiencies vanish as there are so many details to grab the attention of the enthusiasts. Thank you all, for your encouragements and words of support and wisdom. I will try to do better on the starboard gallery. In the meantime, I am building a few more big pounders for the gun deck, so that I can make some more progress on the main deck. A slight change of pace, so to speak.... Yves
-
Thank you Blue Ensign, coming from you that is very encouraging and supporting. I use your Build Log as a reference for a lot of details on my model. Yves
-
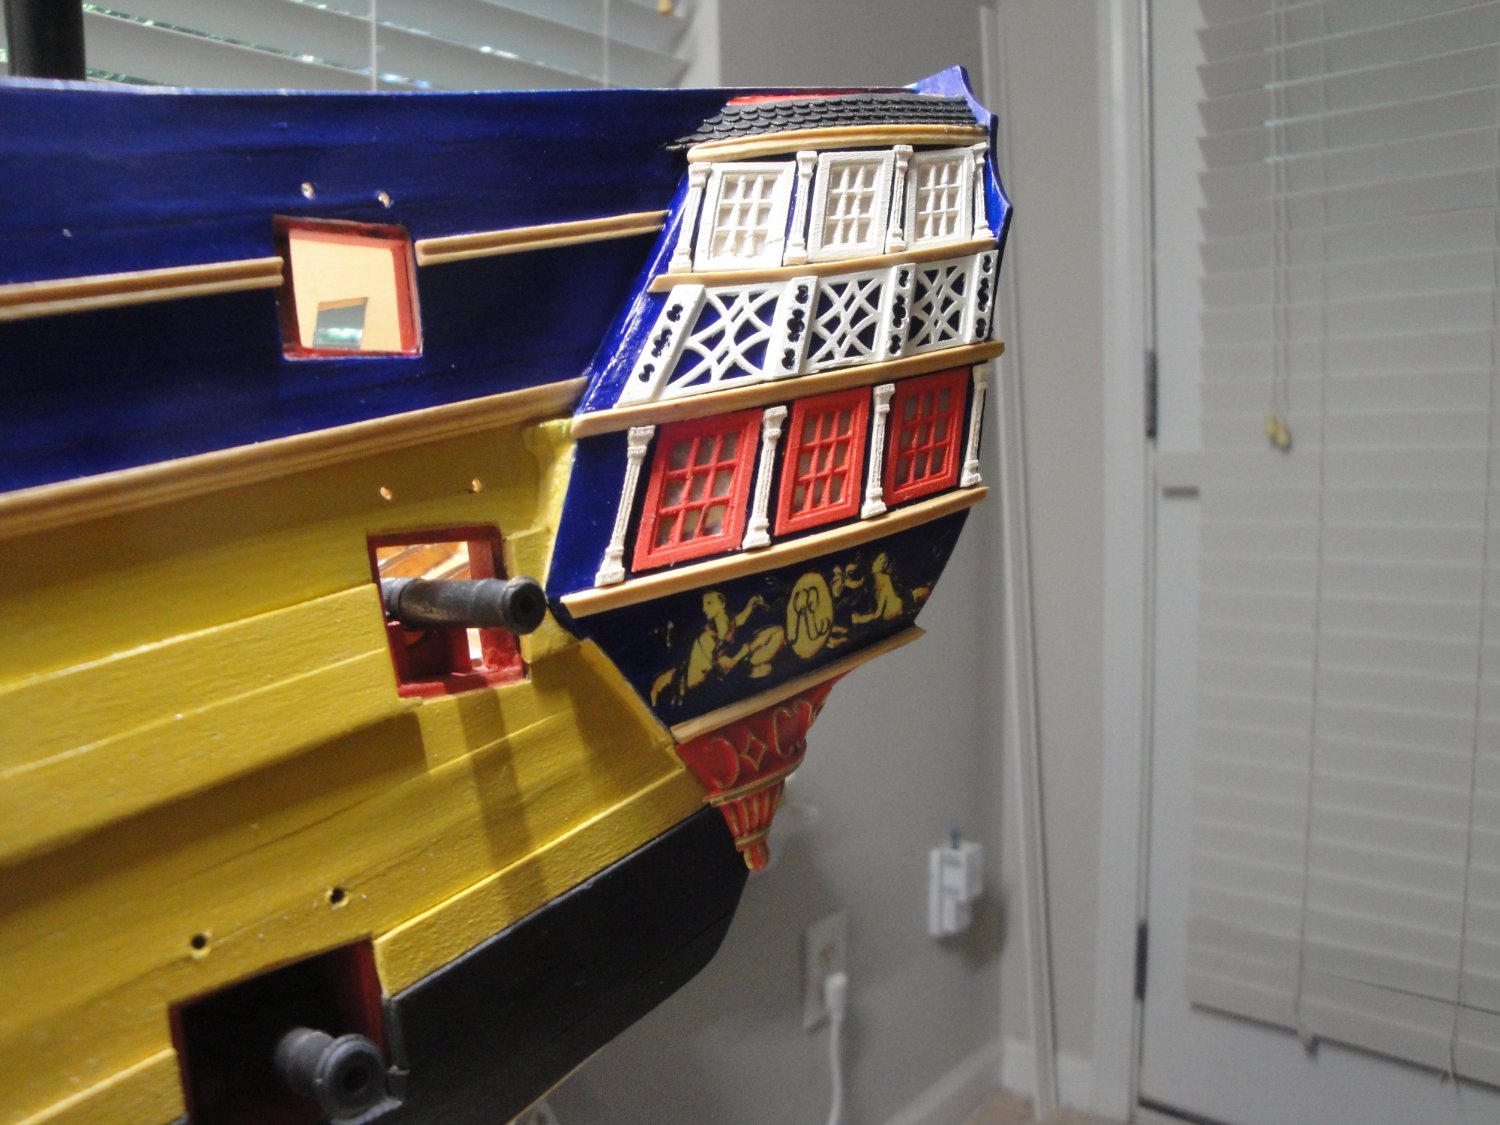
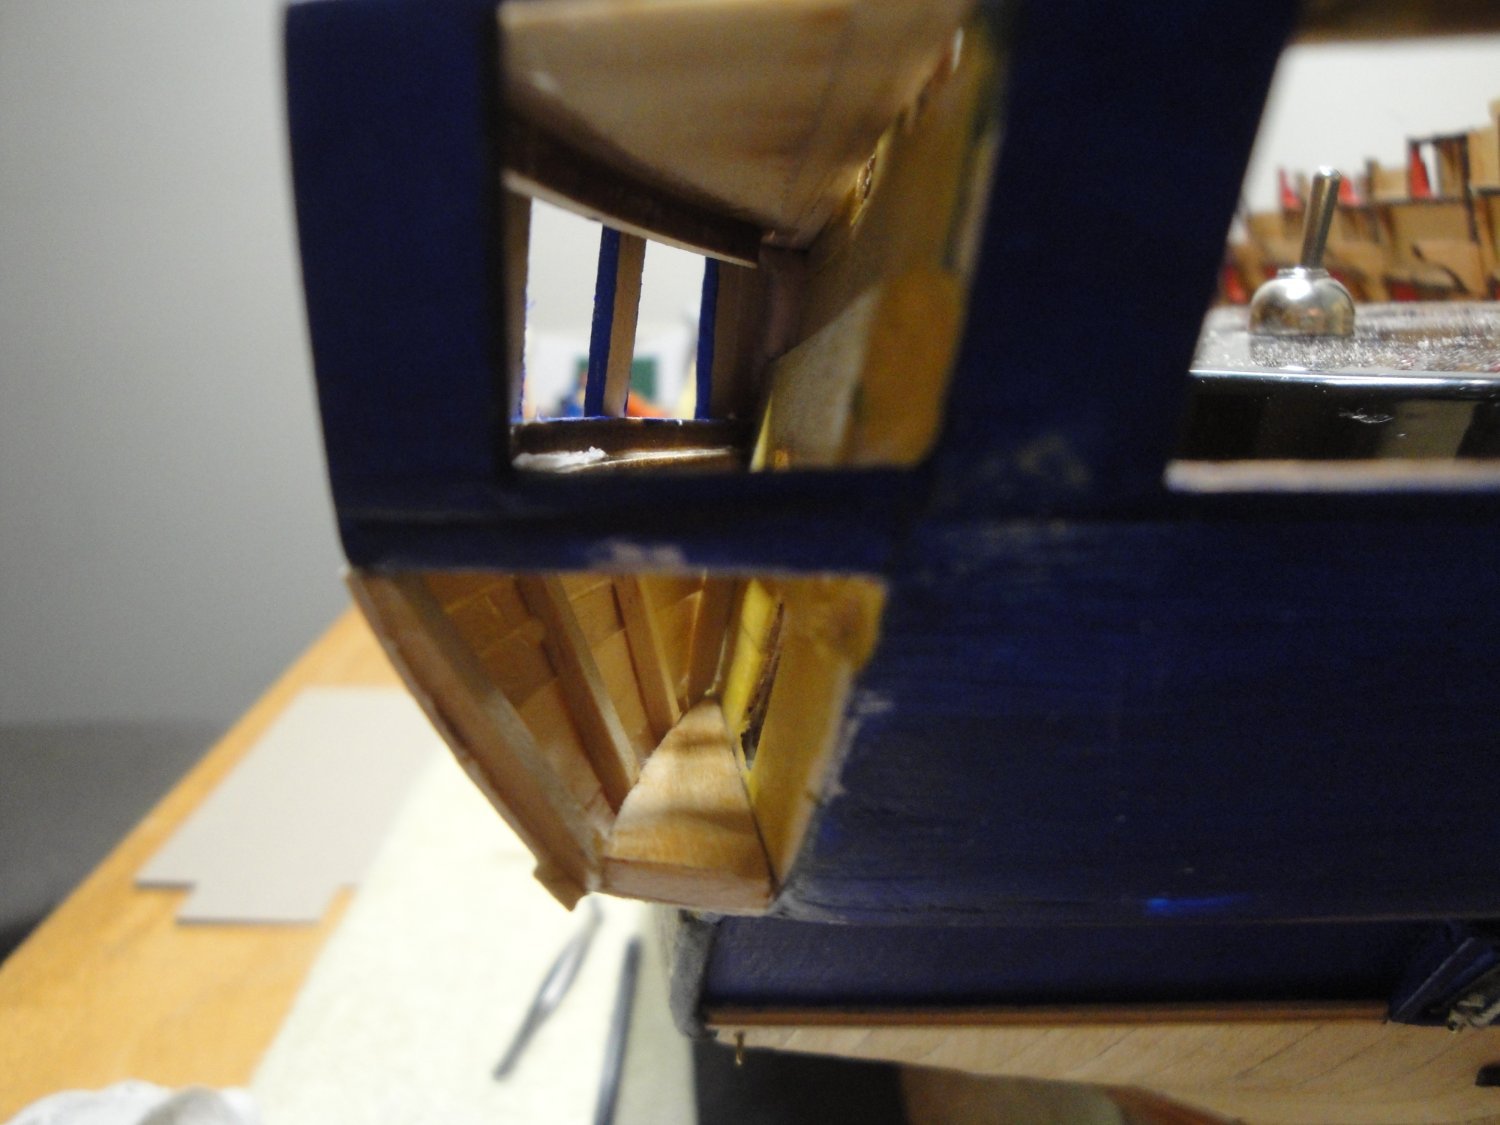
Again, a quick update after almost two weeks of working on one of the Galleries. What a royal pain overall..... The first thing was to position and glue (after bending in a jig for a couple of days) the rear stern wall: The construction of the galleries can then be started. Again, the parts provided by CAF are not matching exactly and need to be modified. It is extremely tedious, requires a lot of trials, sanding and CA glue is your best friend in this kind of endeavor. The most horrible parts are the slanted window frames: they are poorly machined and require each glass pane to be individually cut, with the most care. The wood is very brittle and the rungs are only asking to break in the process. It is so unfortunate that CAF did not print these frames in resin. They are printing so many other parts and these would look so much better in resin. Anyway, cutting nine glass panes on each window, gluing rungs and microscopic pieces of wood is not exactly fun and I will take a break before assembling the second gallery. Same goes with the pilasters: They should have 3D printed them instead of using that carved/machined wood which does not look very realistic at that scale. For someone with 3D design skills, it would be worth re-designing these parts and getting the window frames correctly aligned and matching the openings. Yves


- 507 replies
-
- 13
-
-
-

-
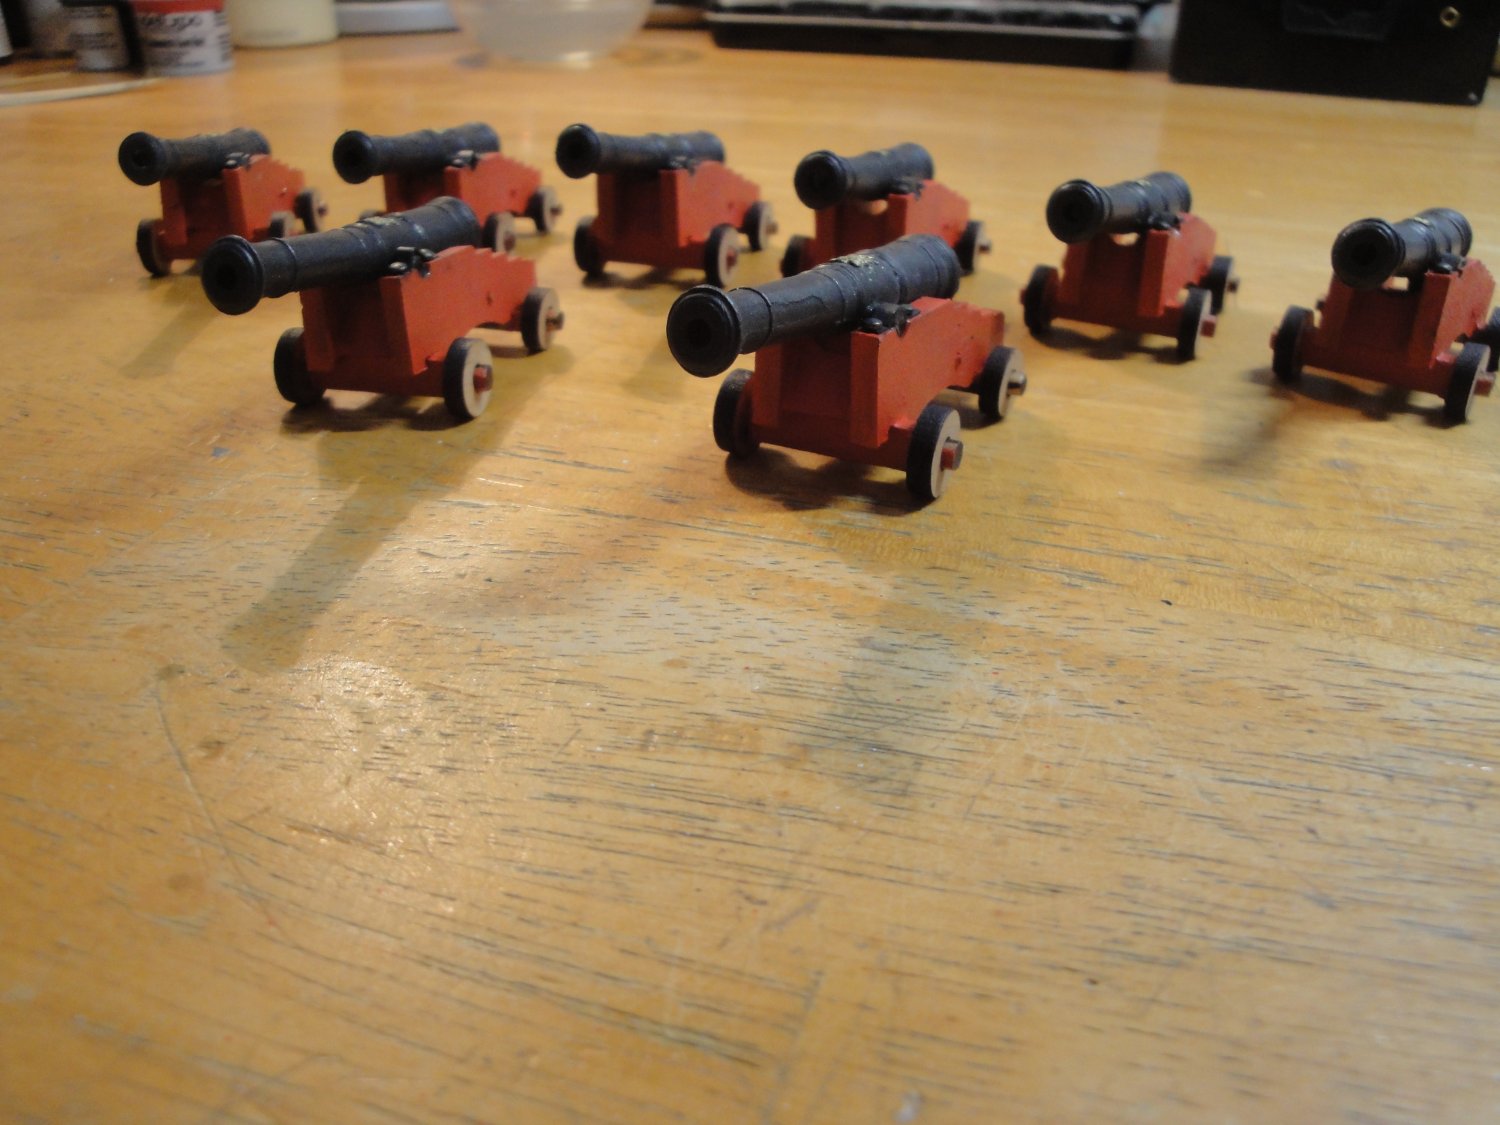
A very short update. Still on the stern section, preparing for the quarterdeck: I put together six smaller guns (two have already been installed): Next, I will be installing the long beams that will be used to hold the rear quarterdeck. Yves


- 507 replies
-
- 14
-
-
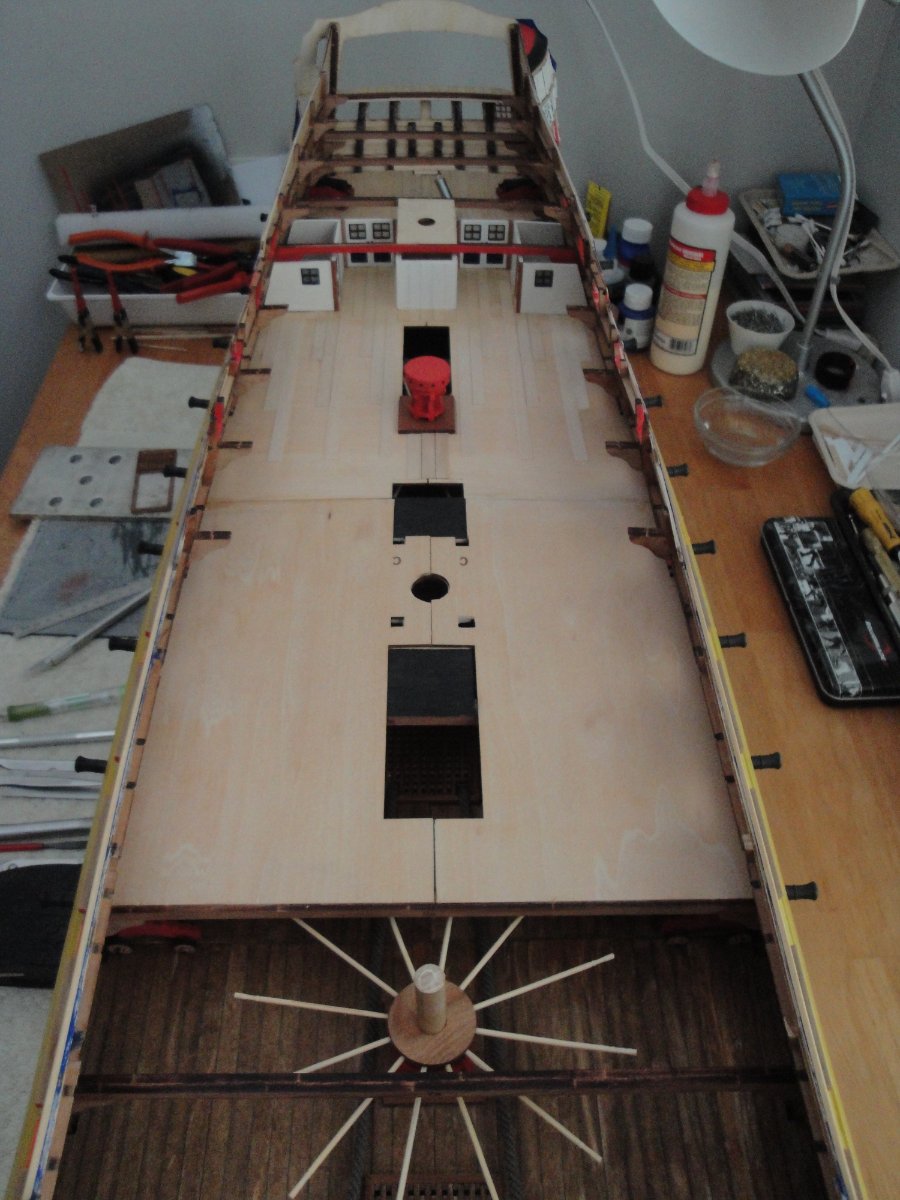
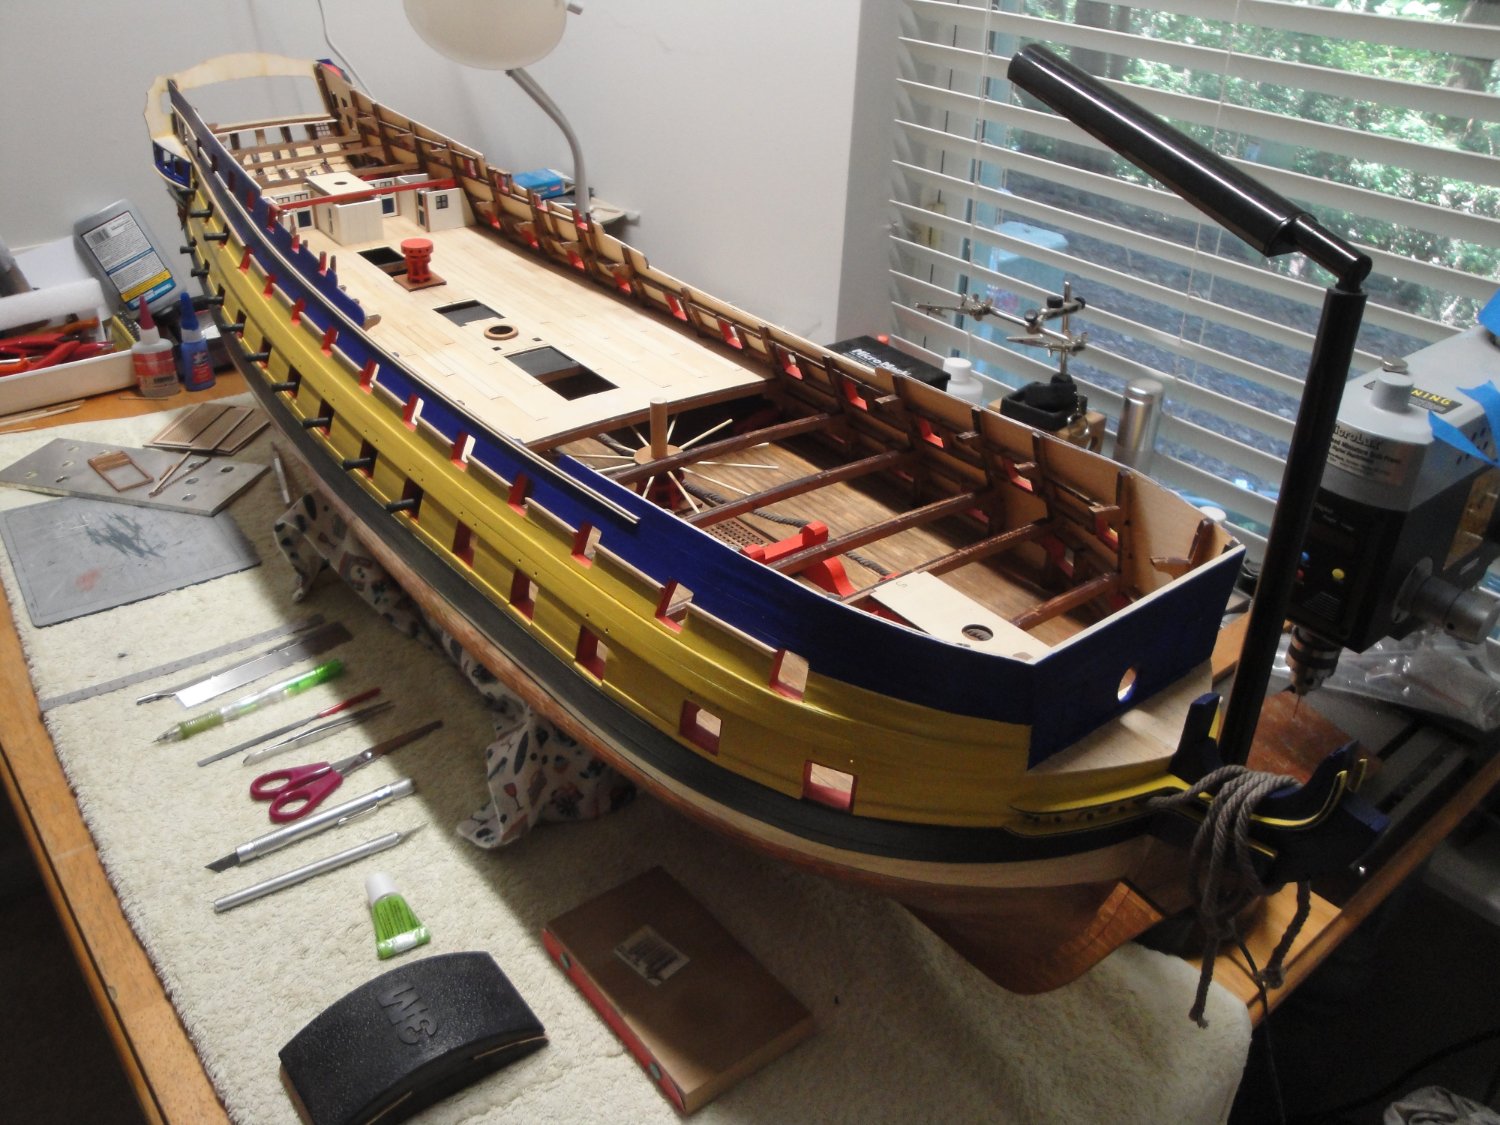
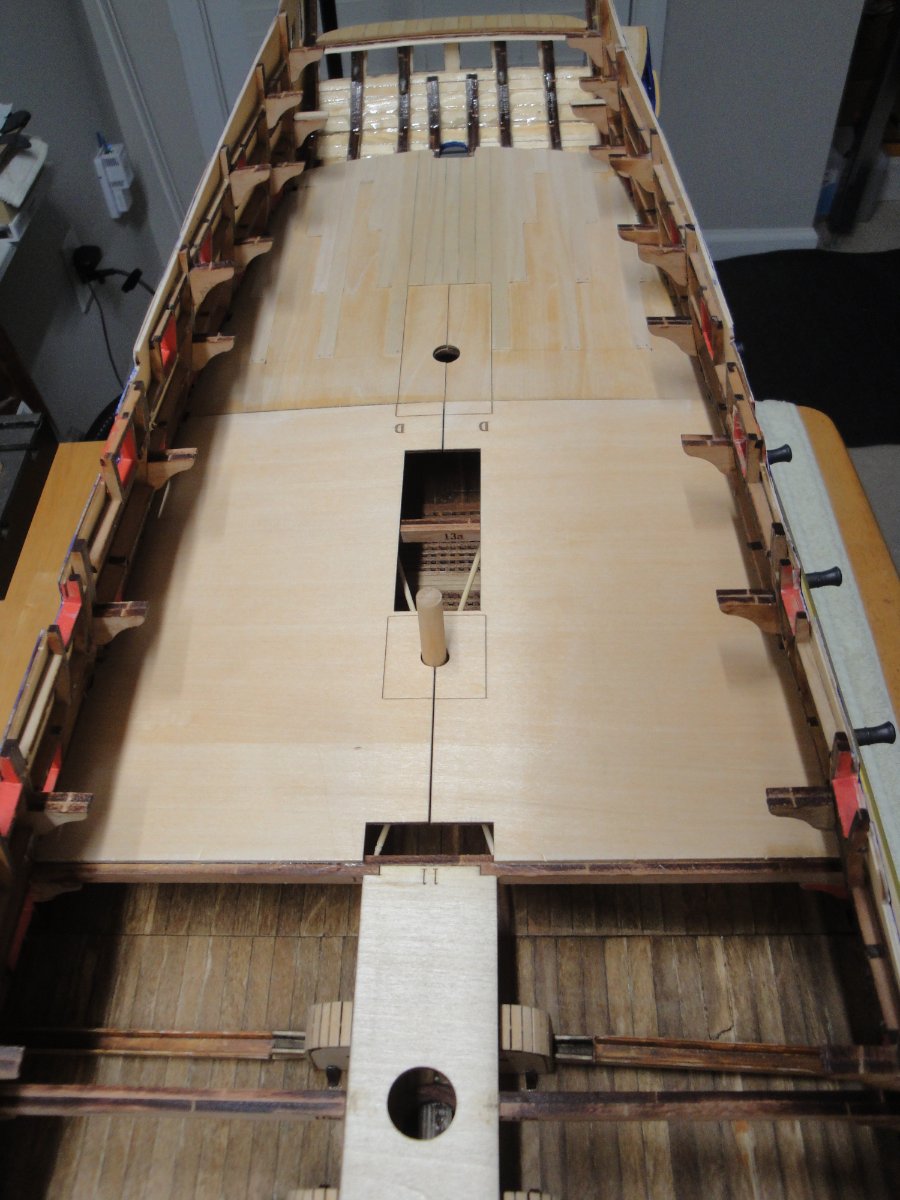
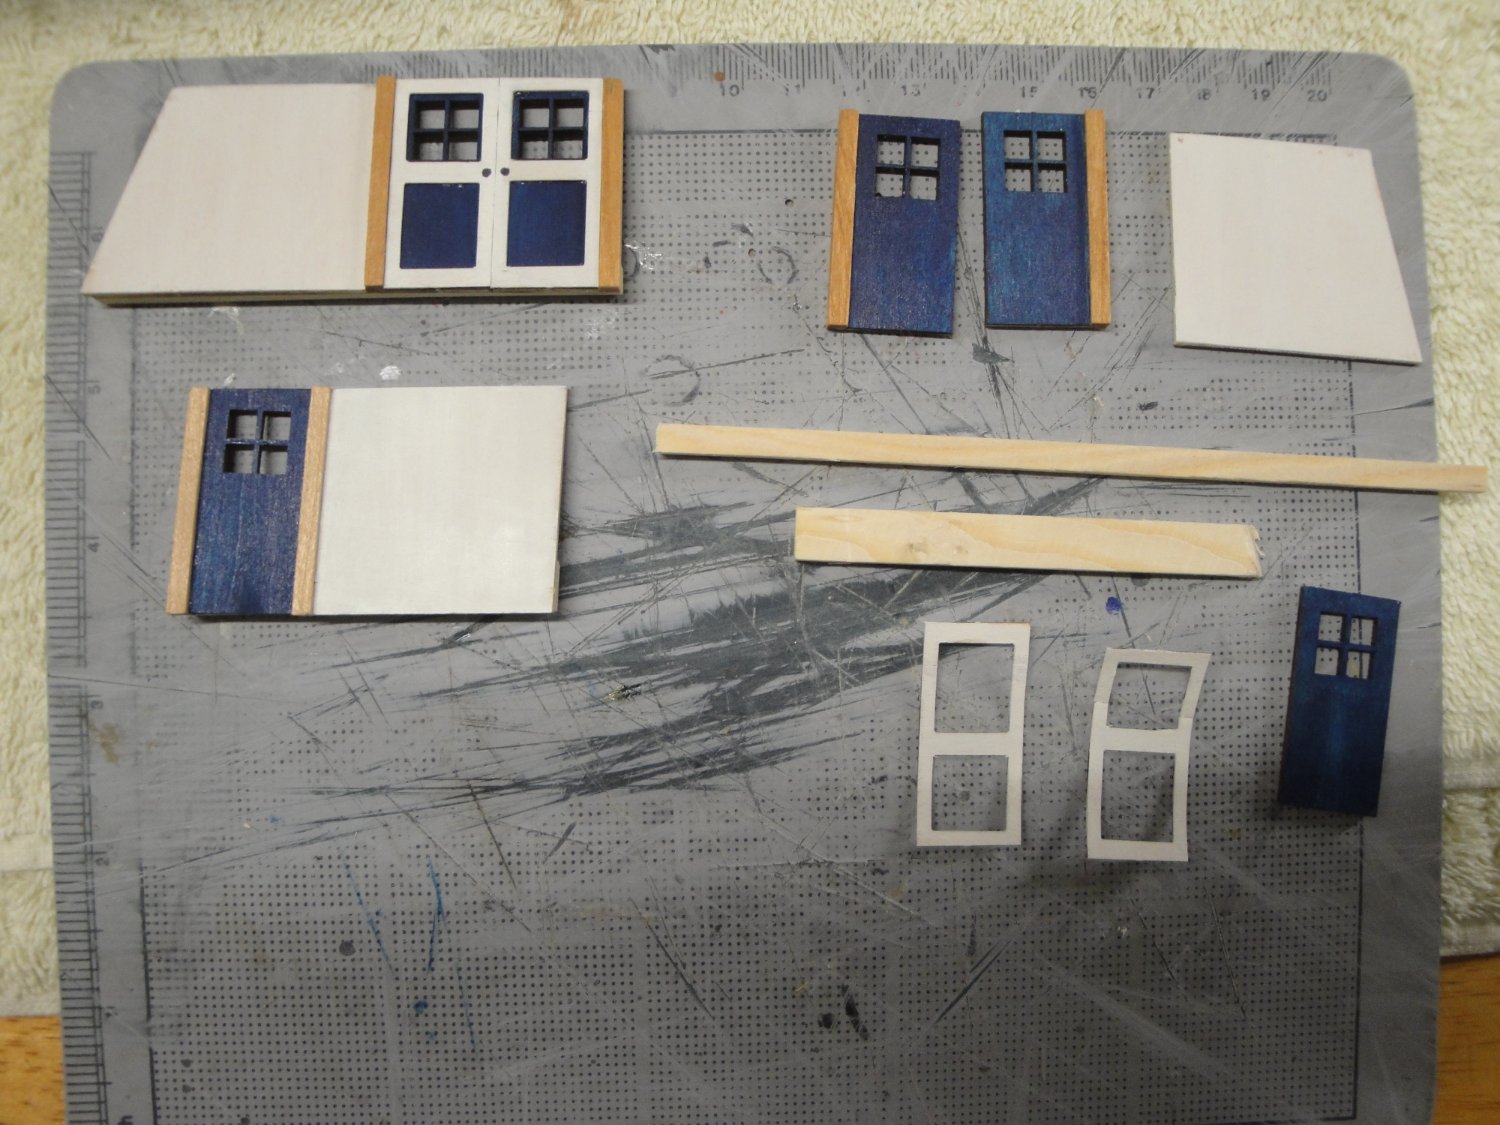
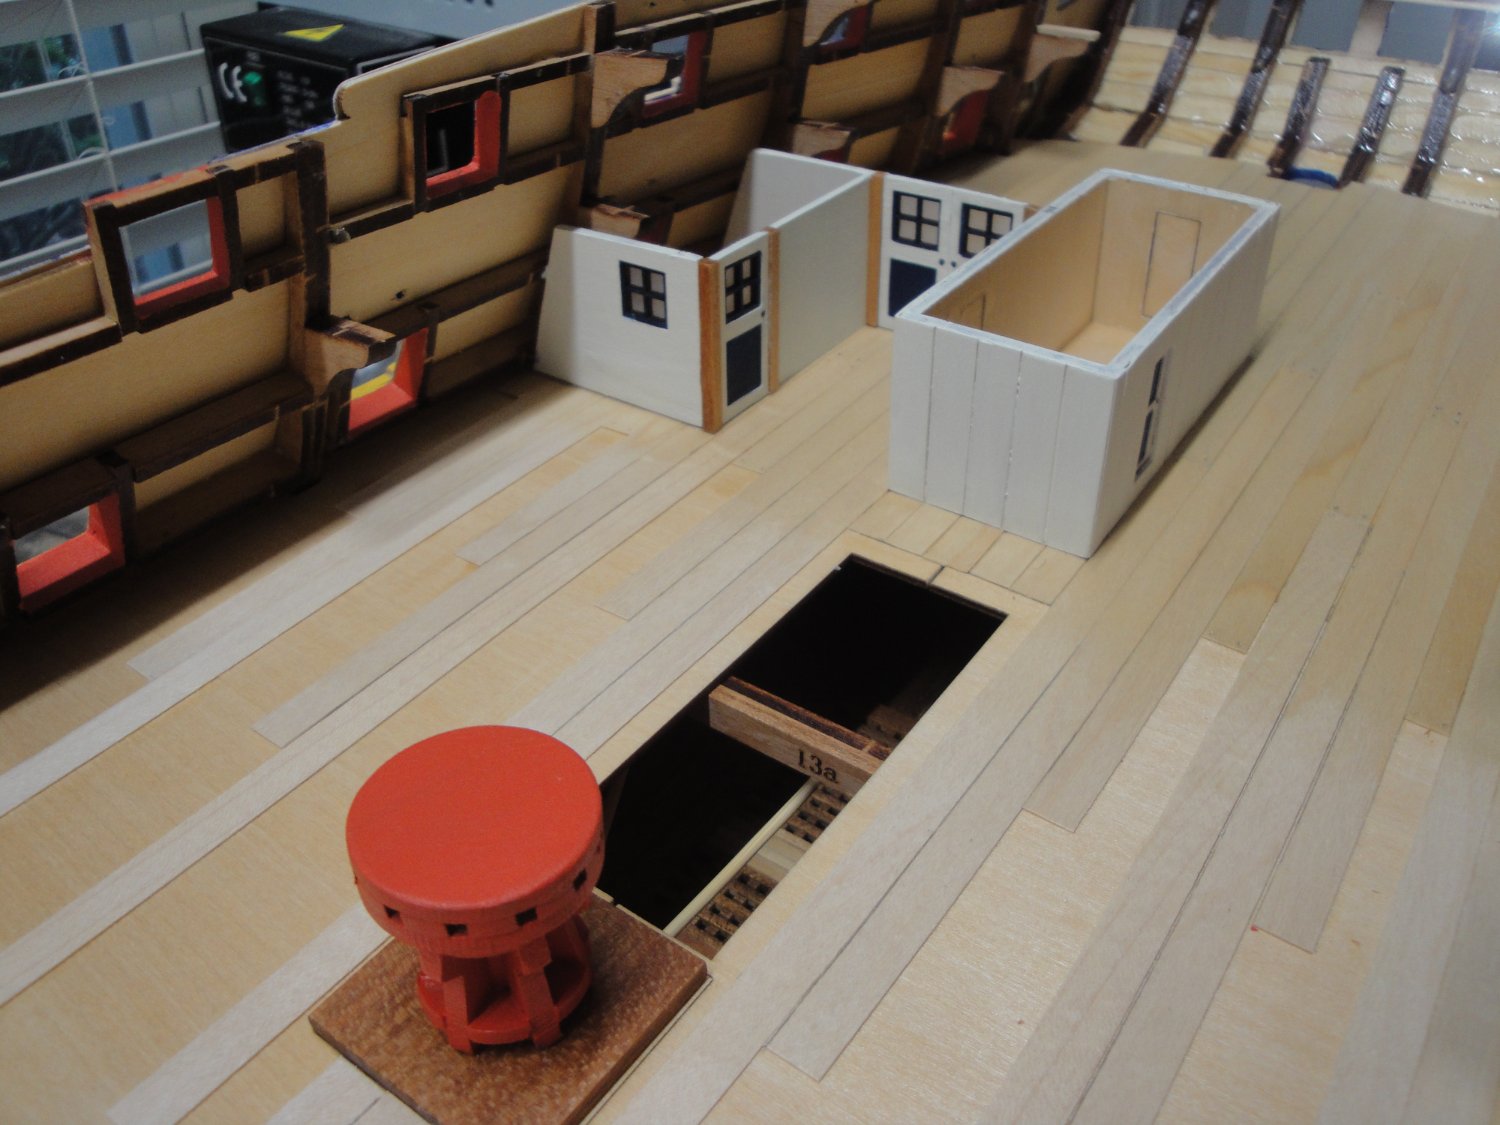
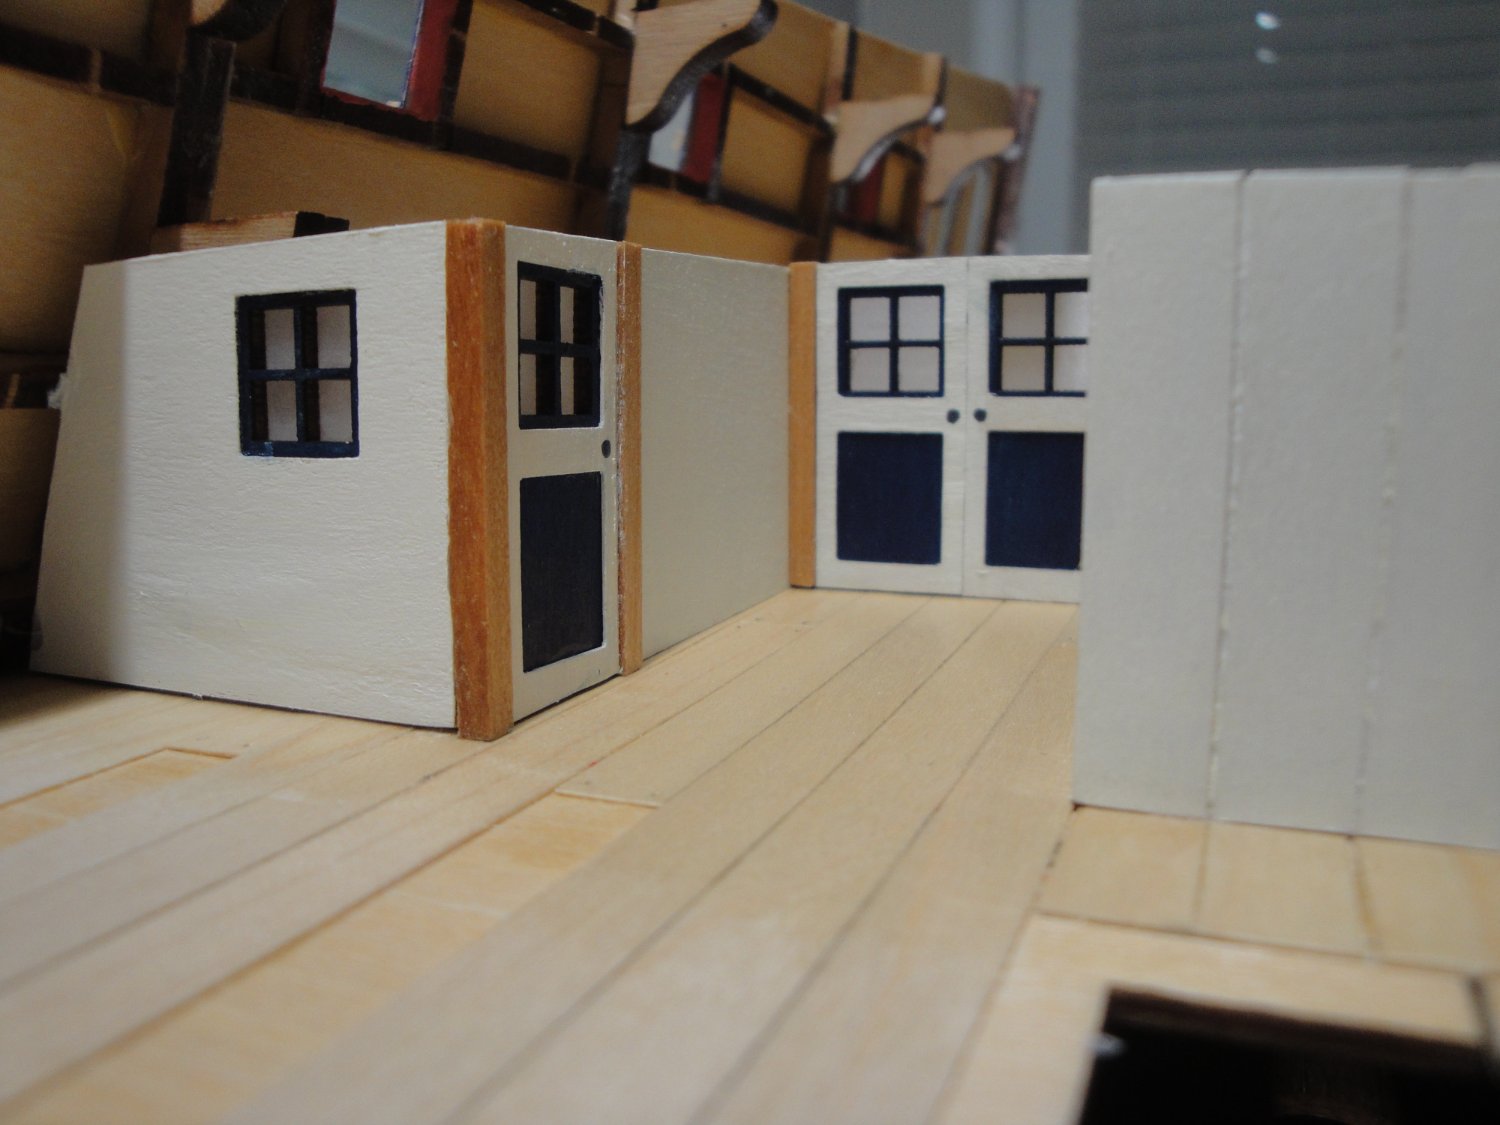
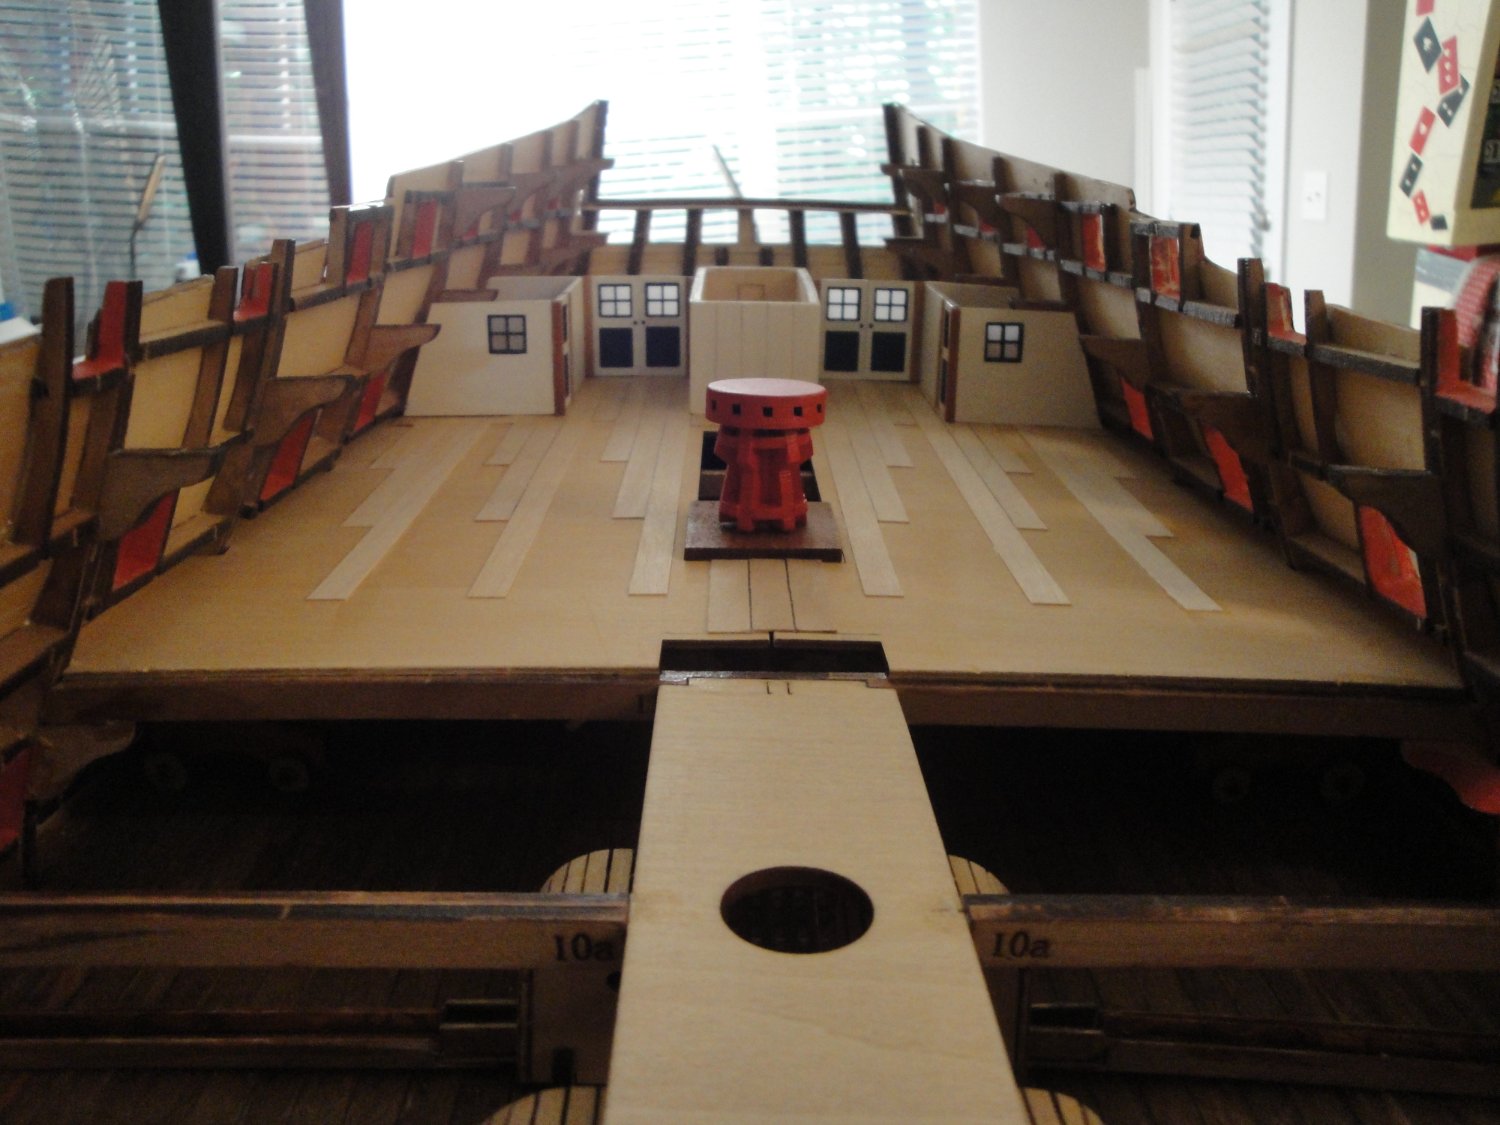
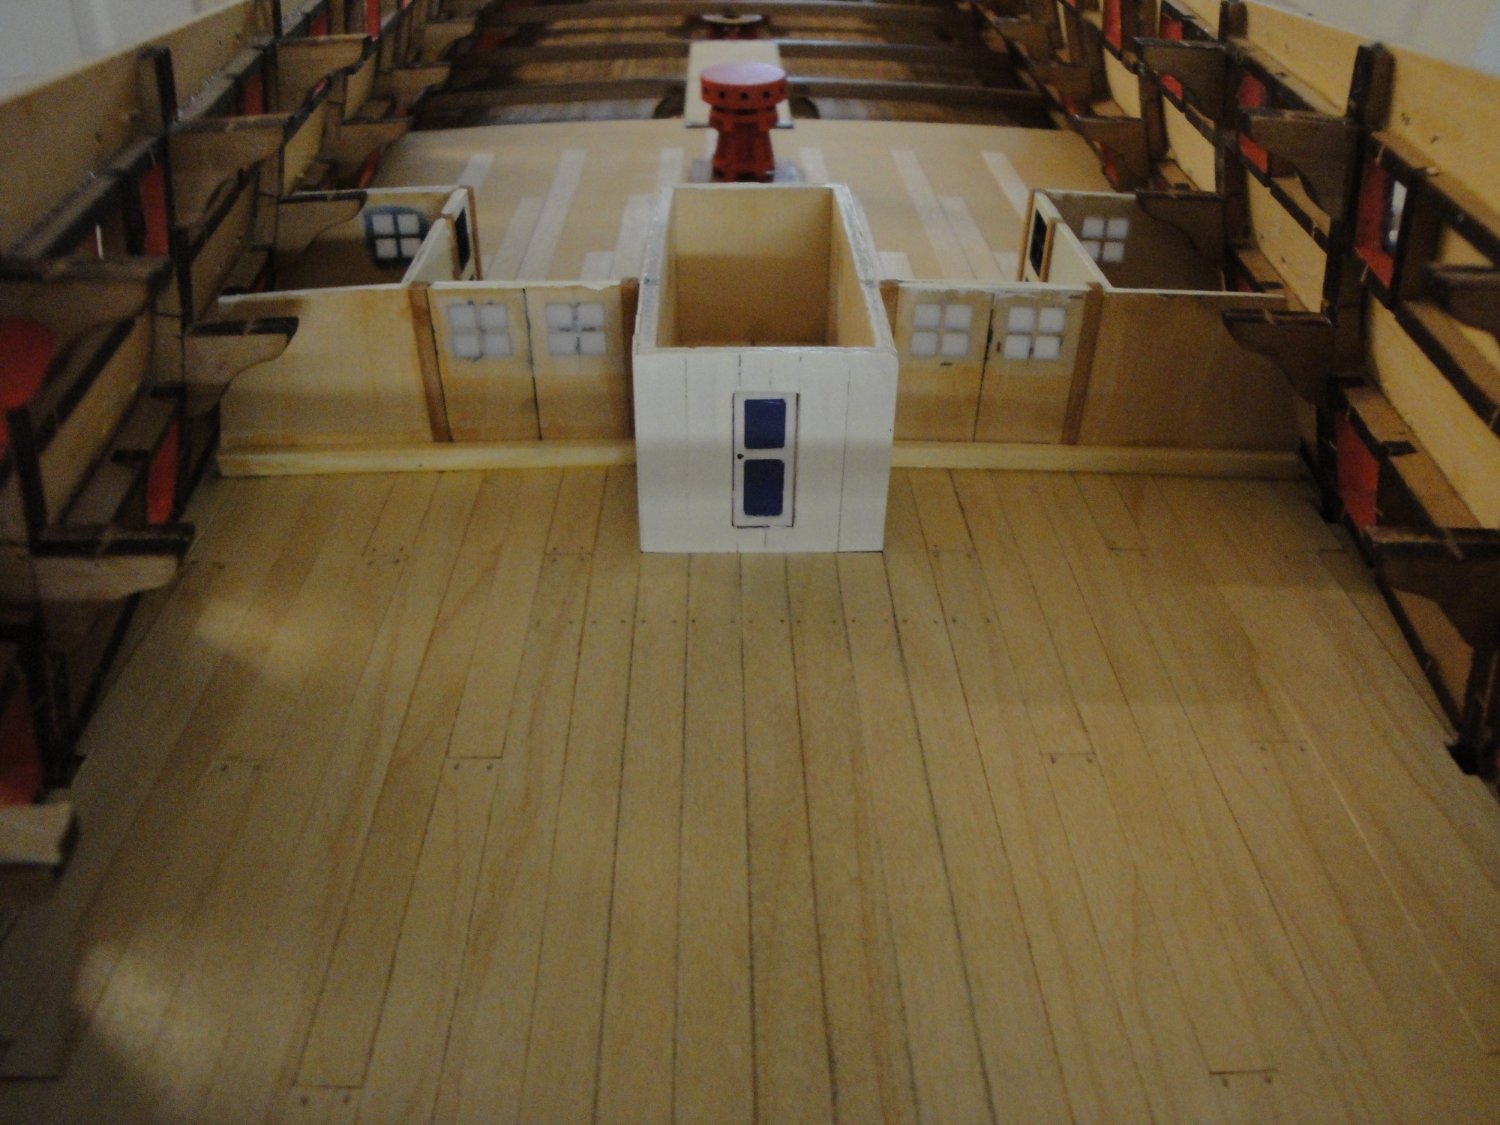
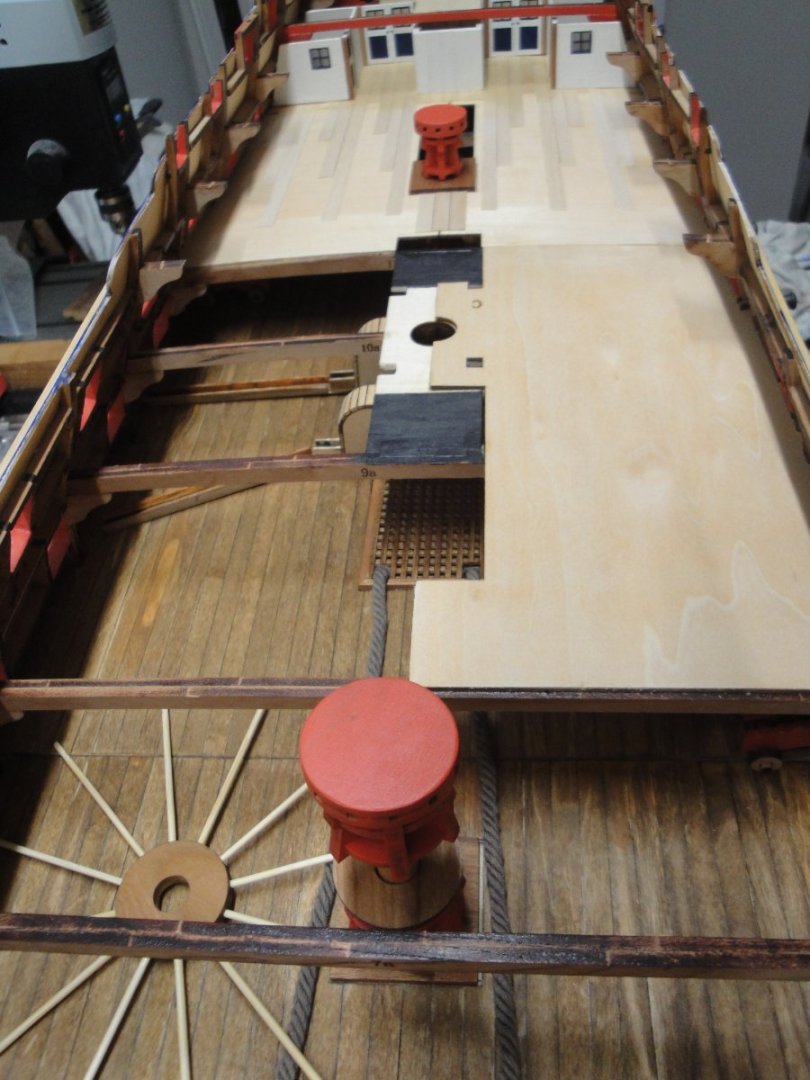
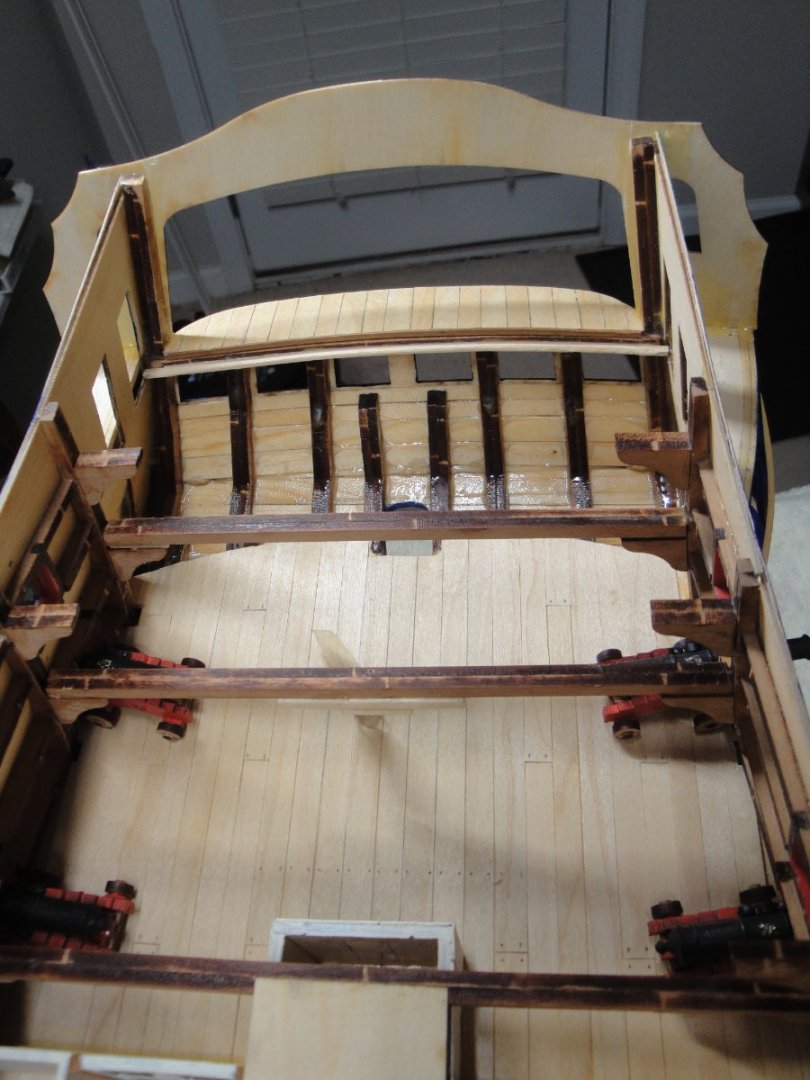
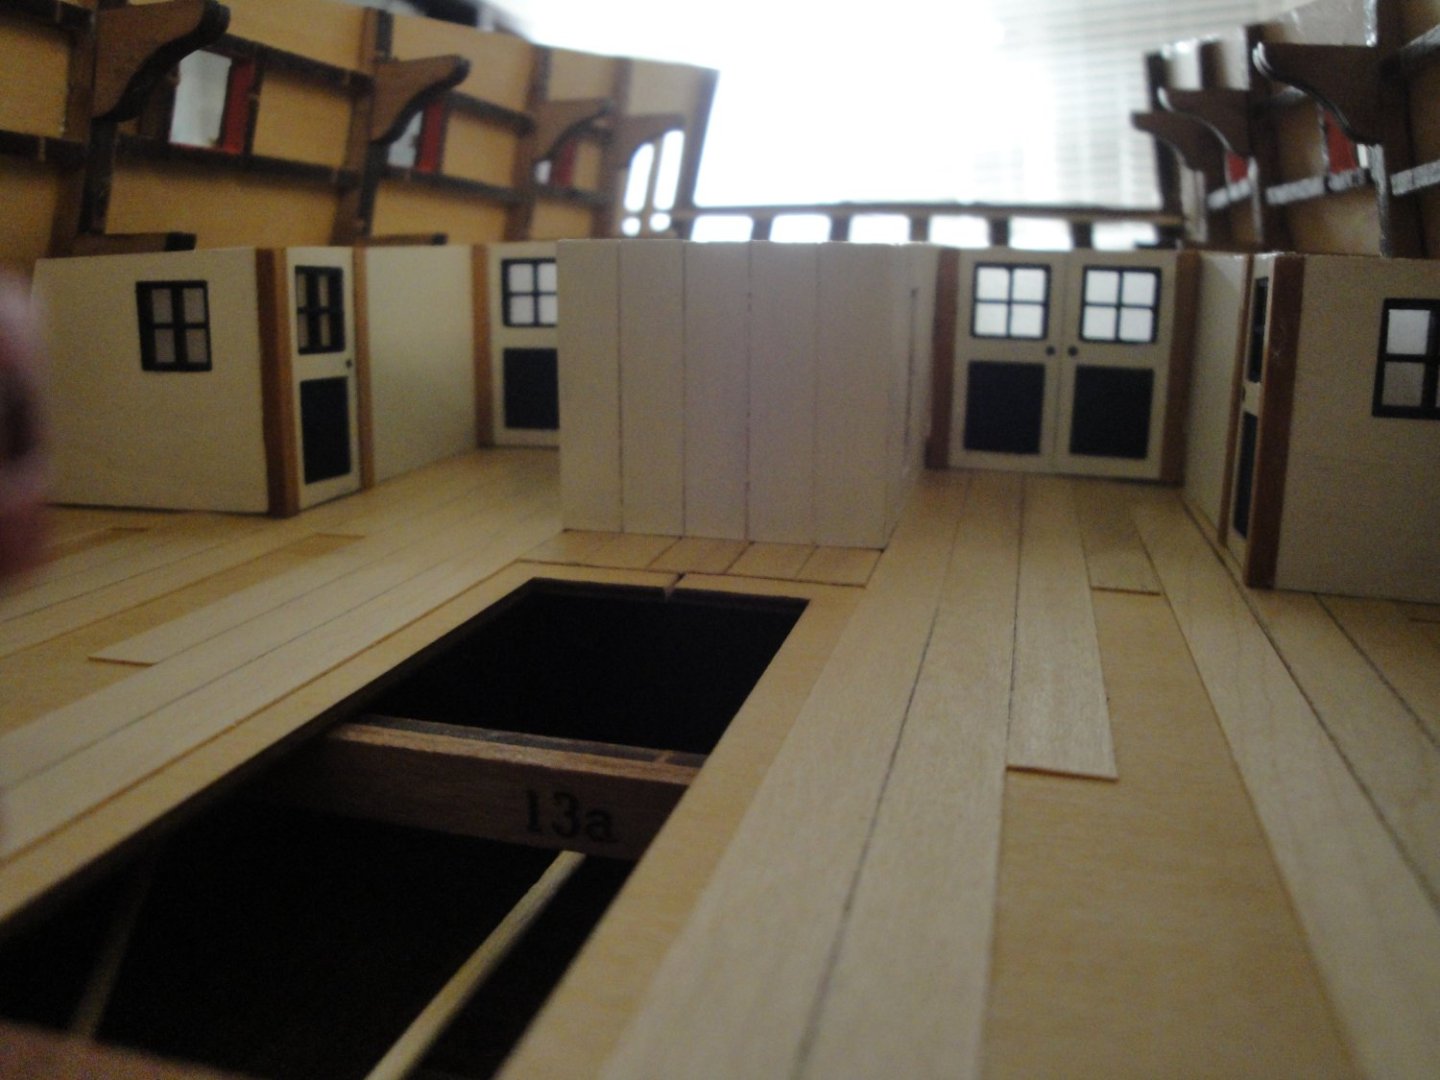
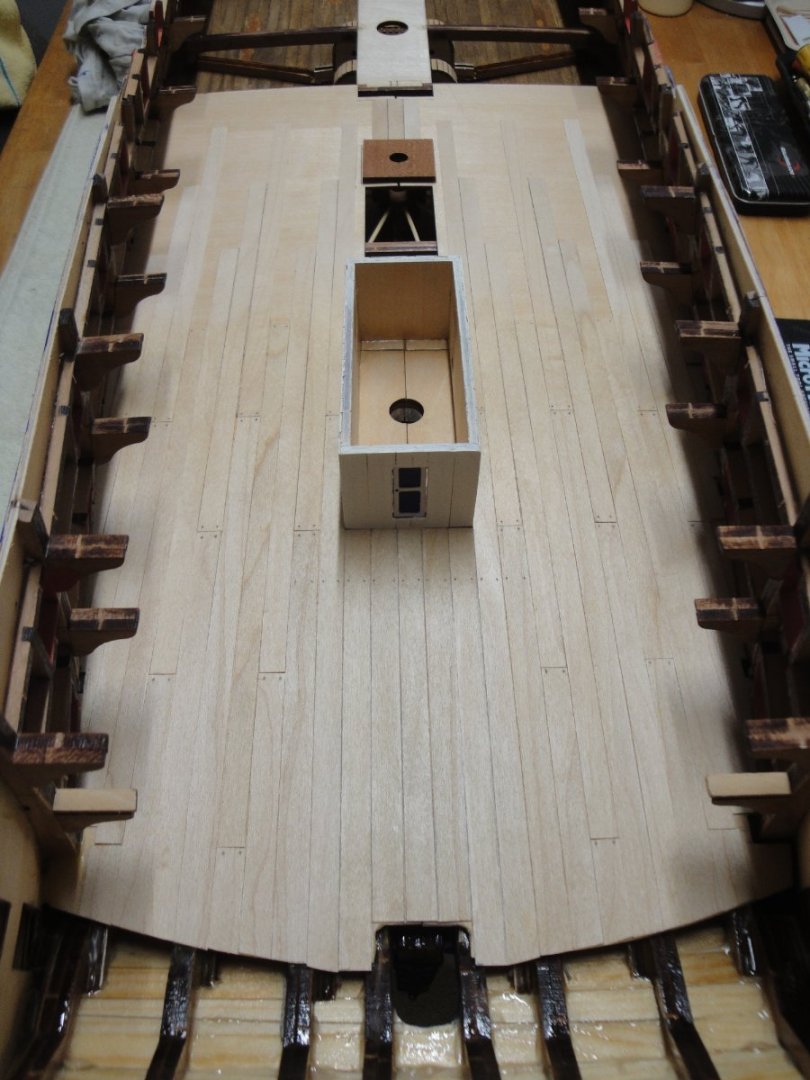
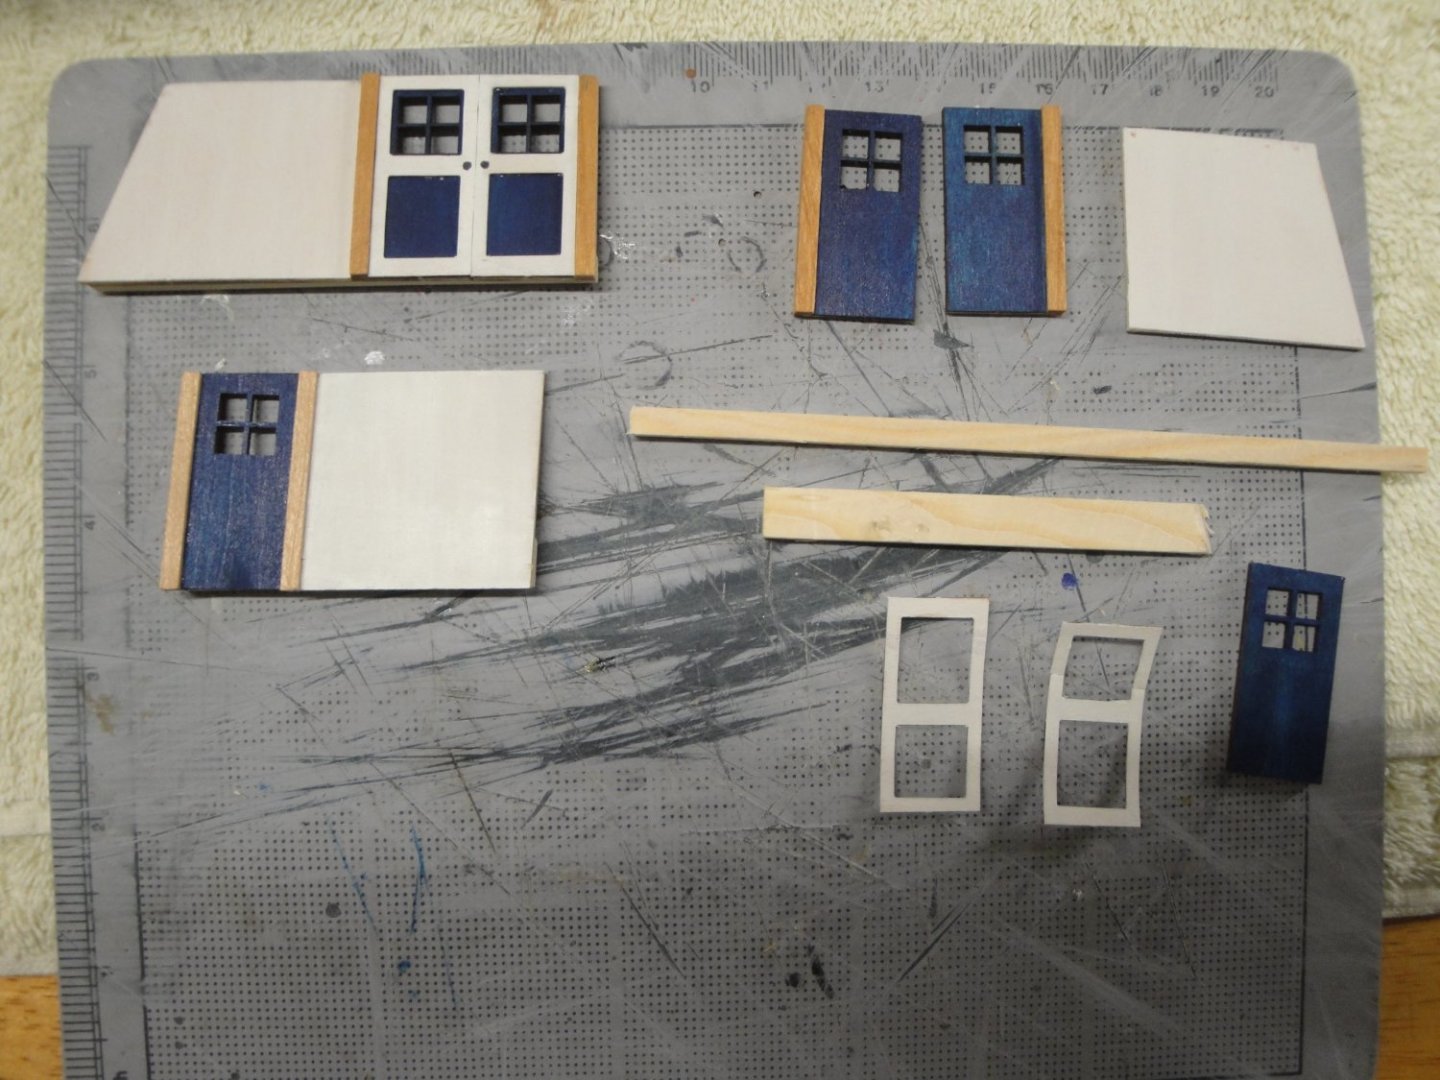
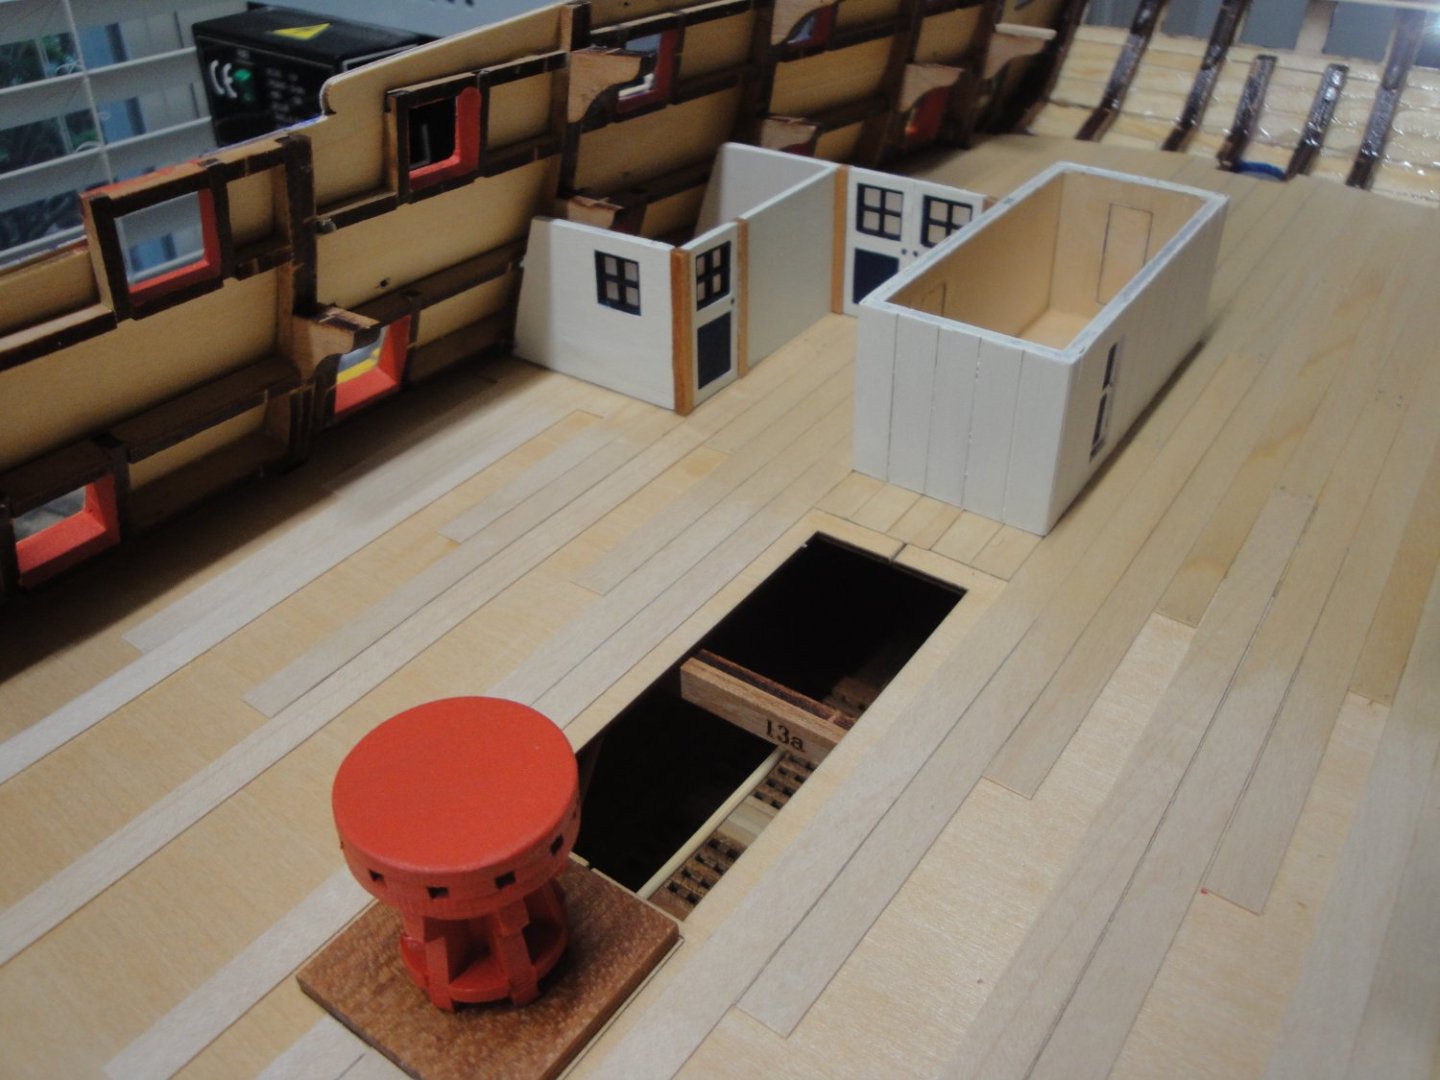
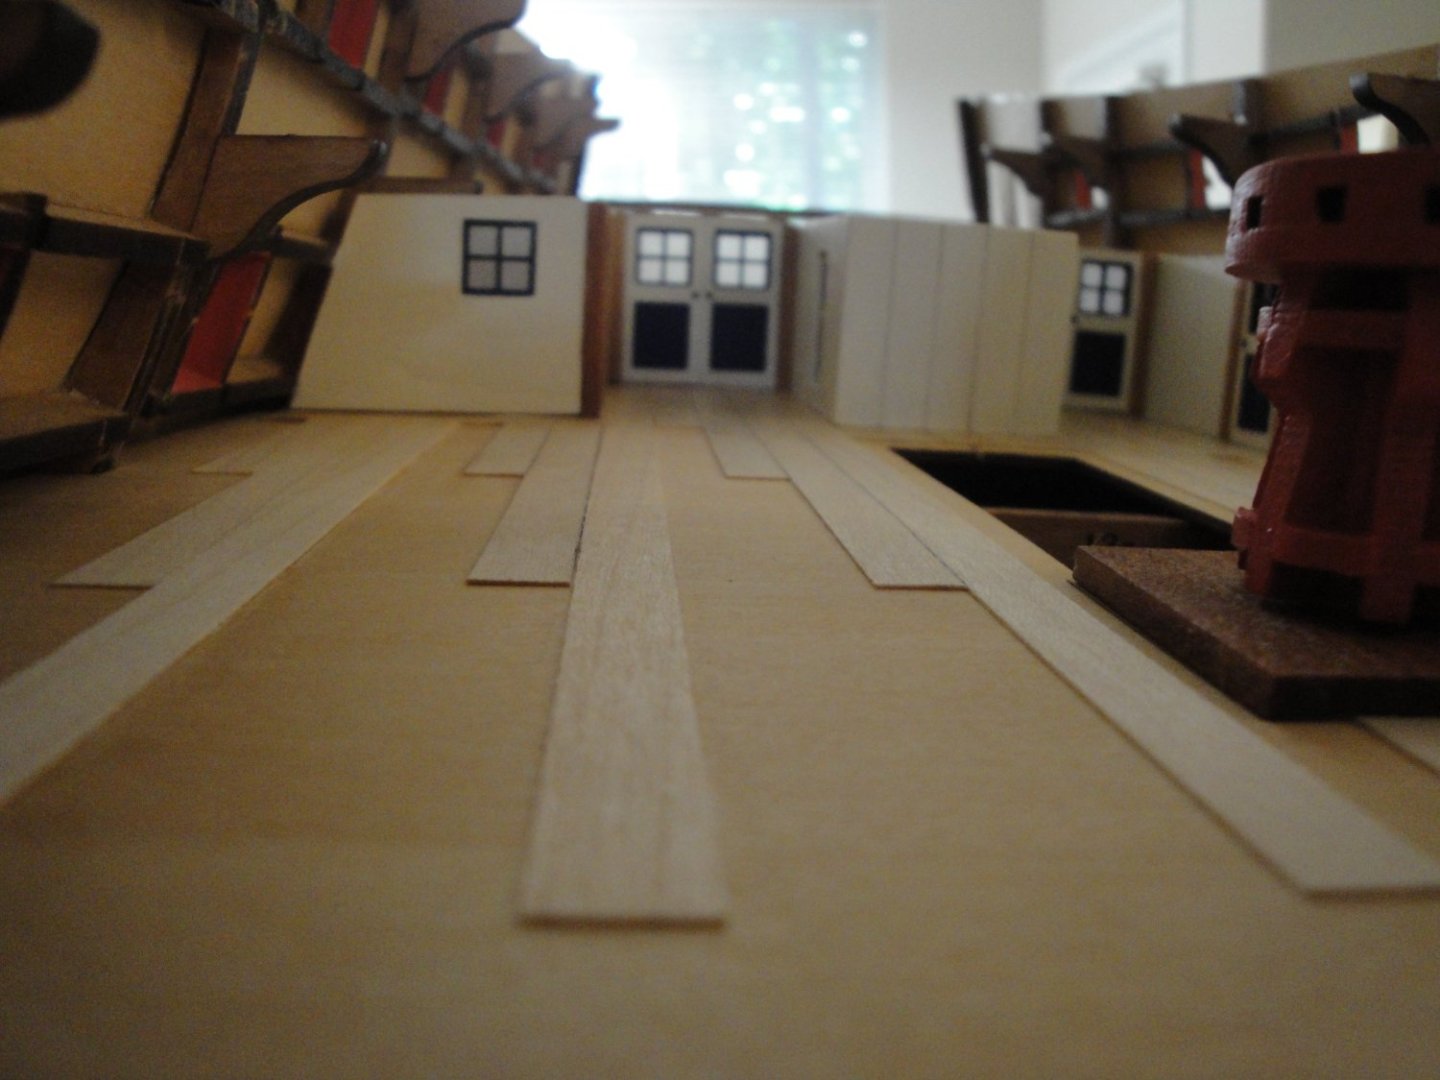
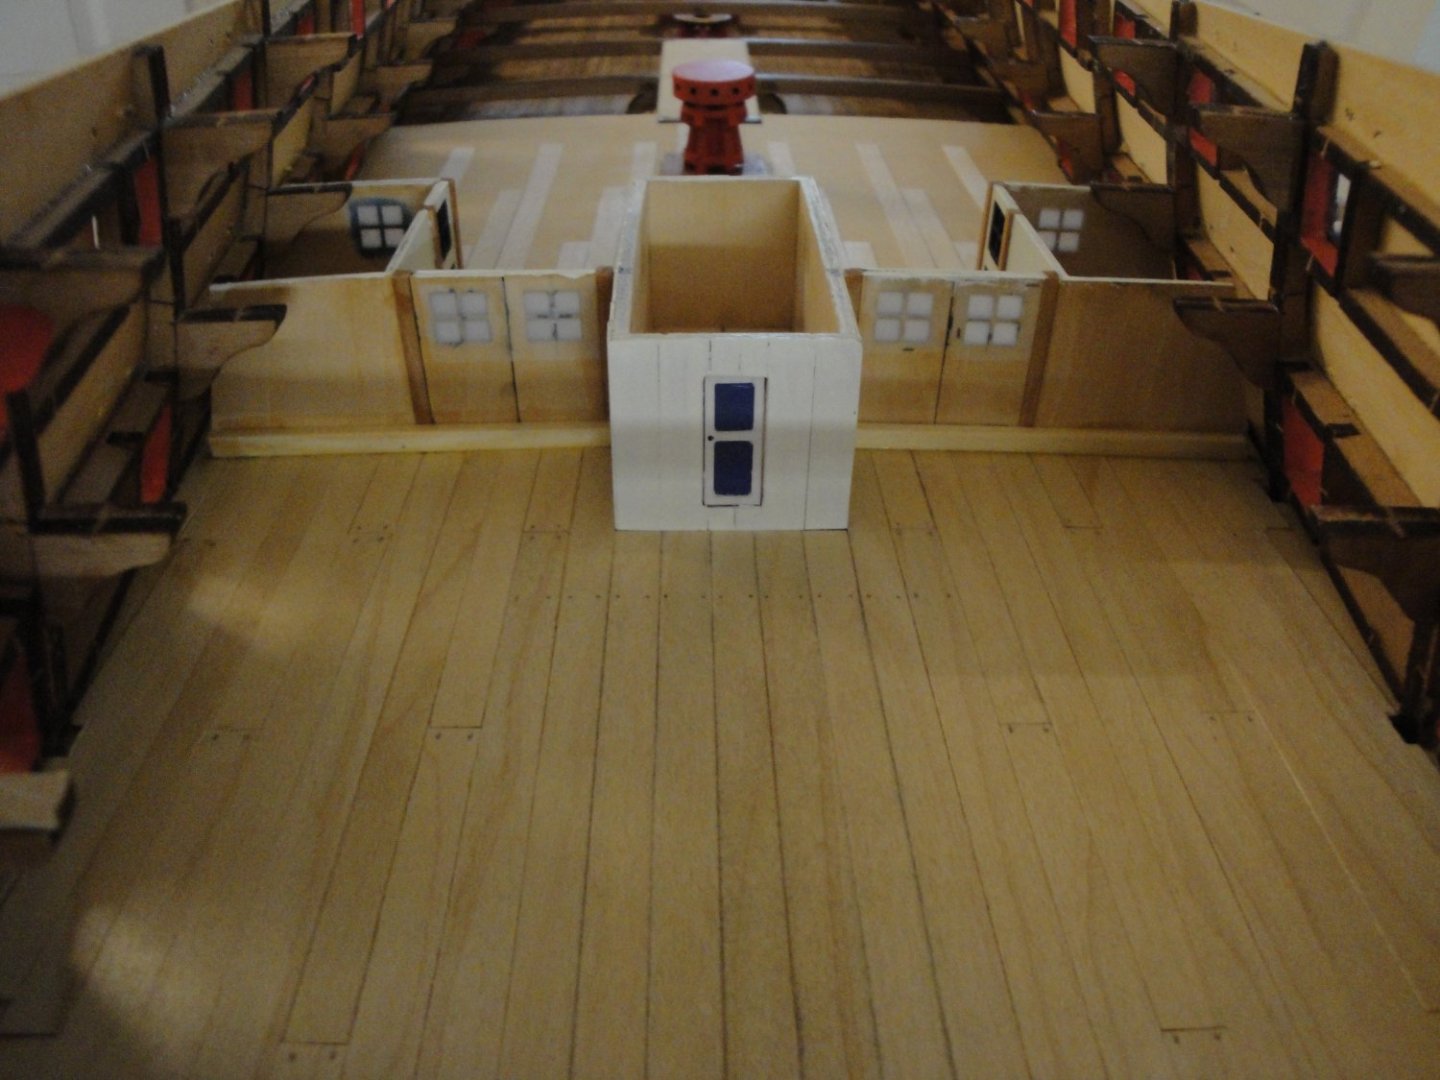
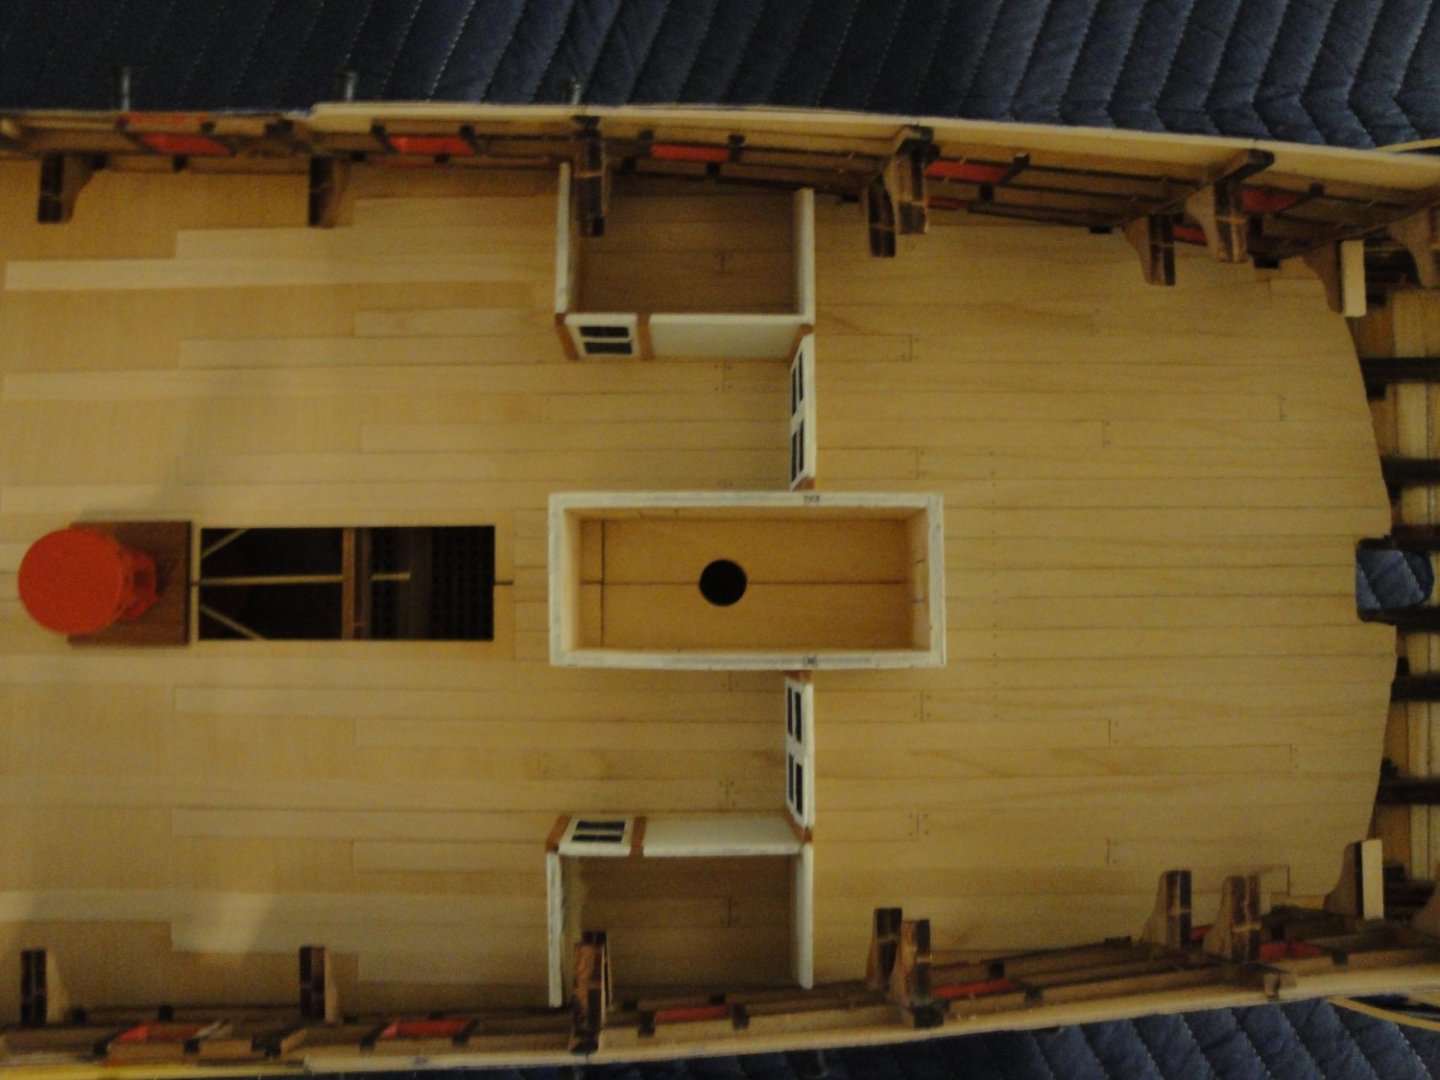
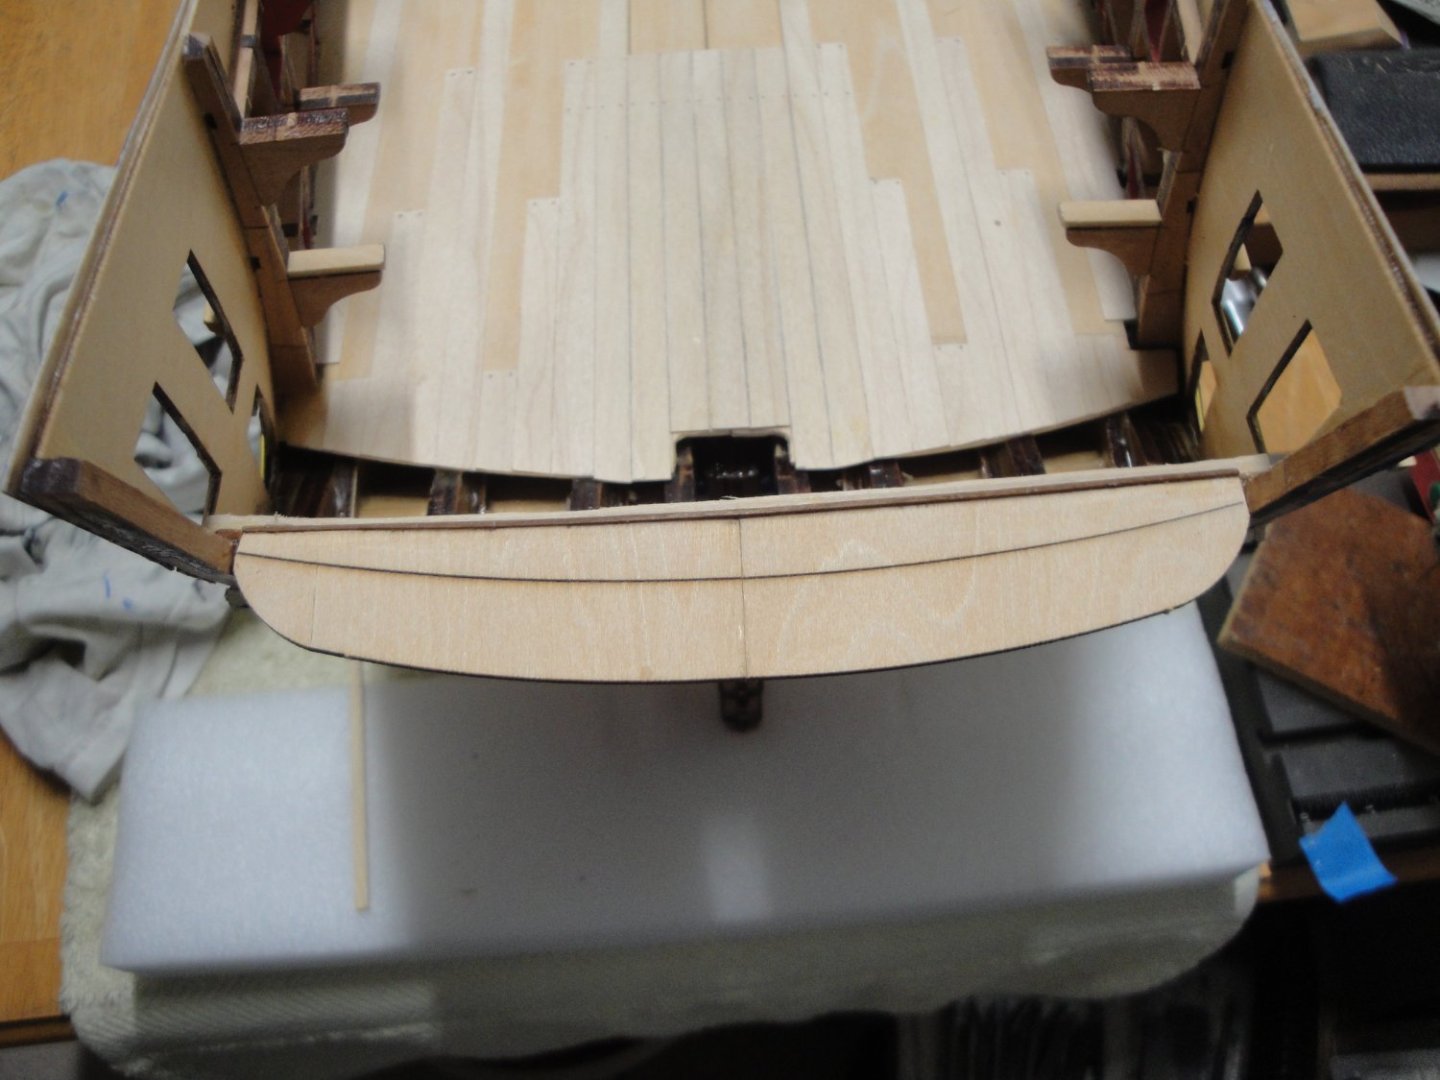
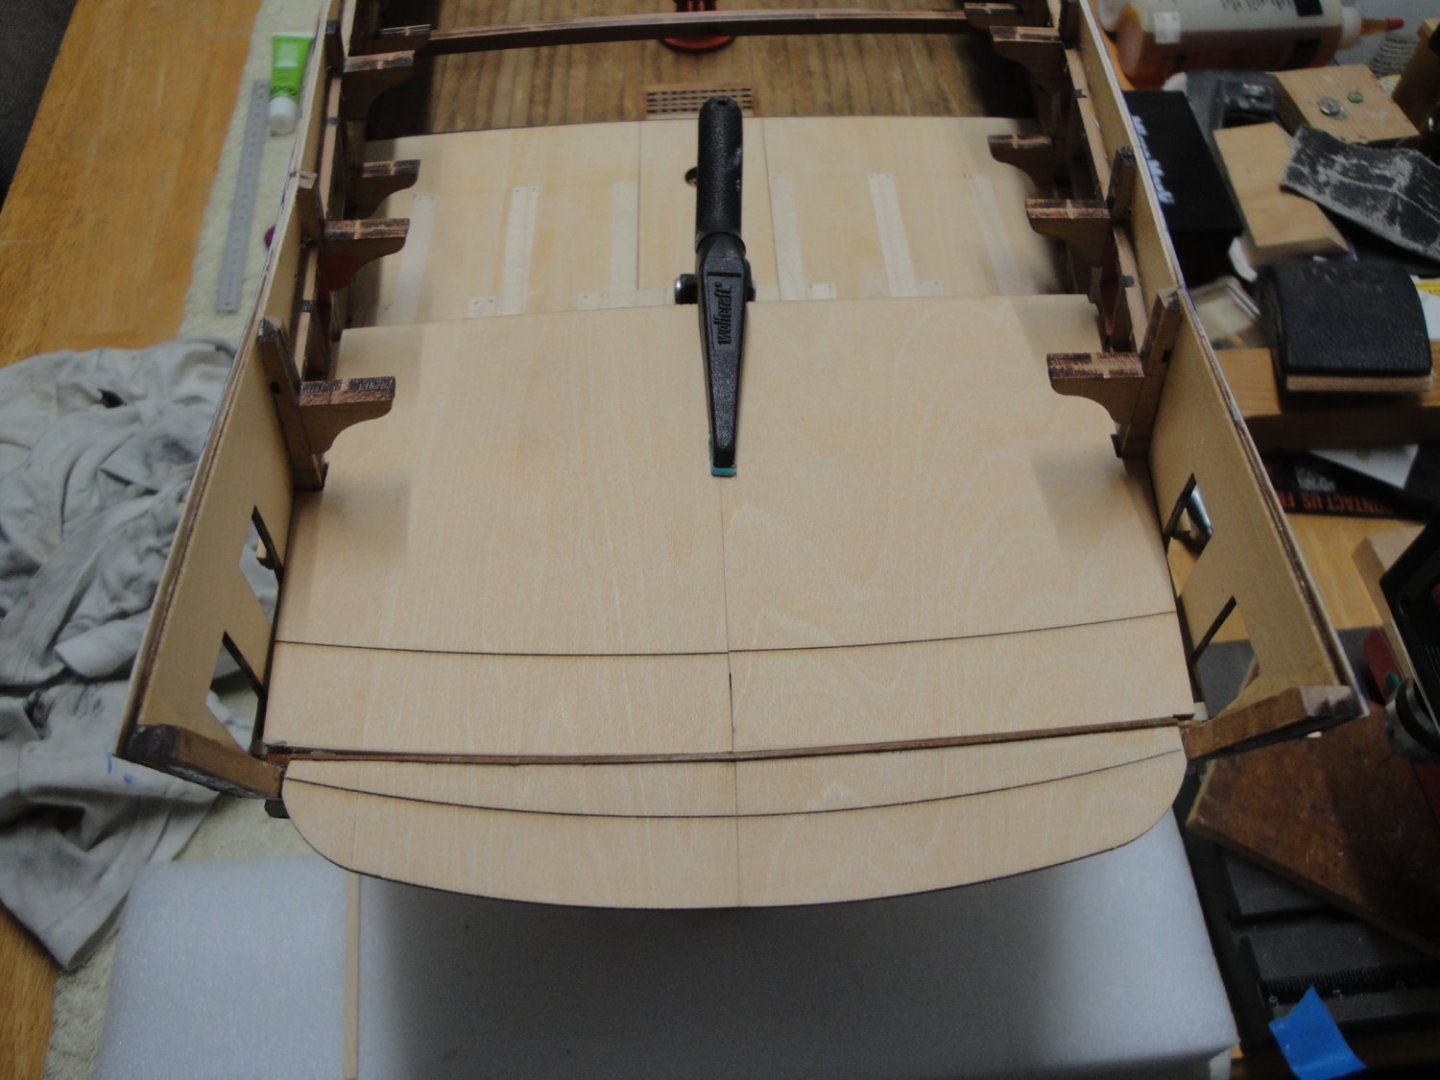
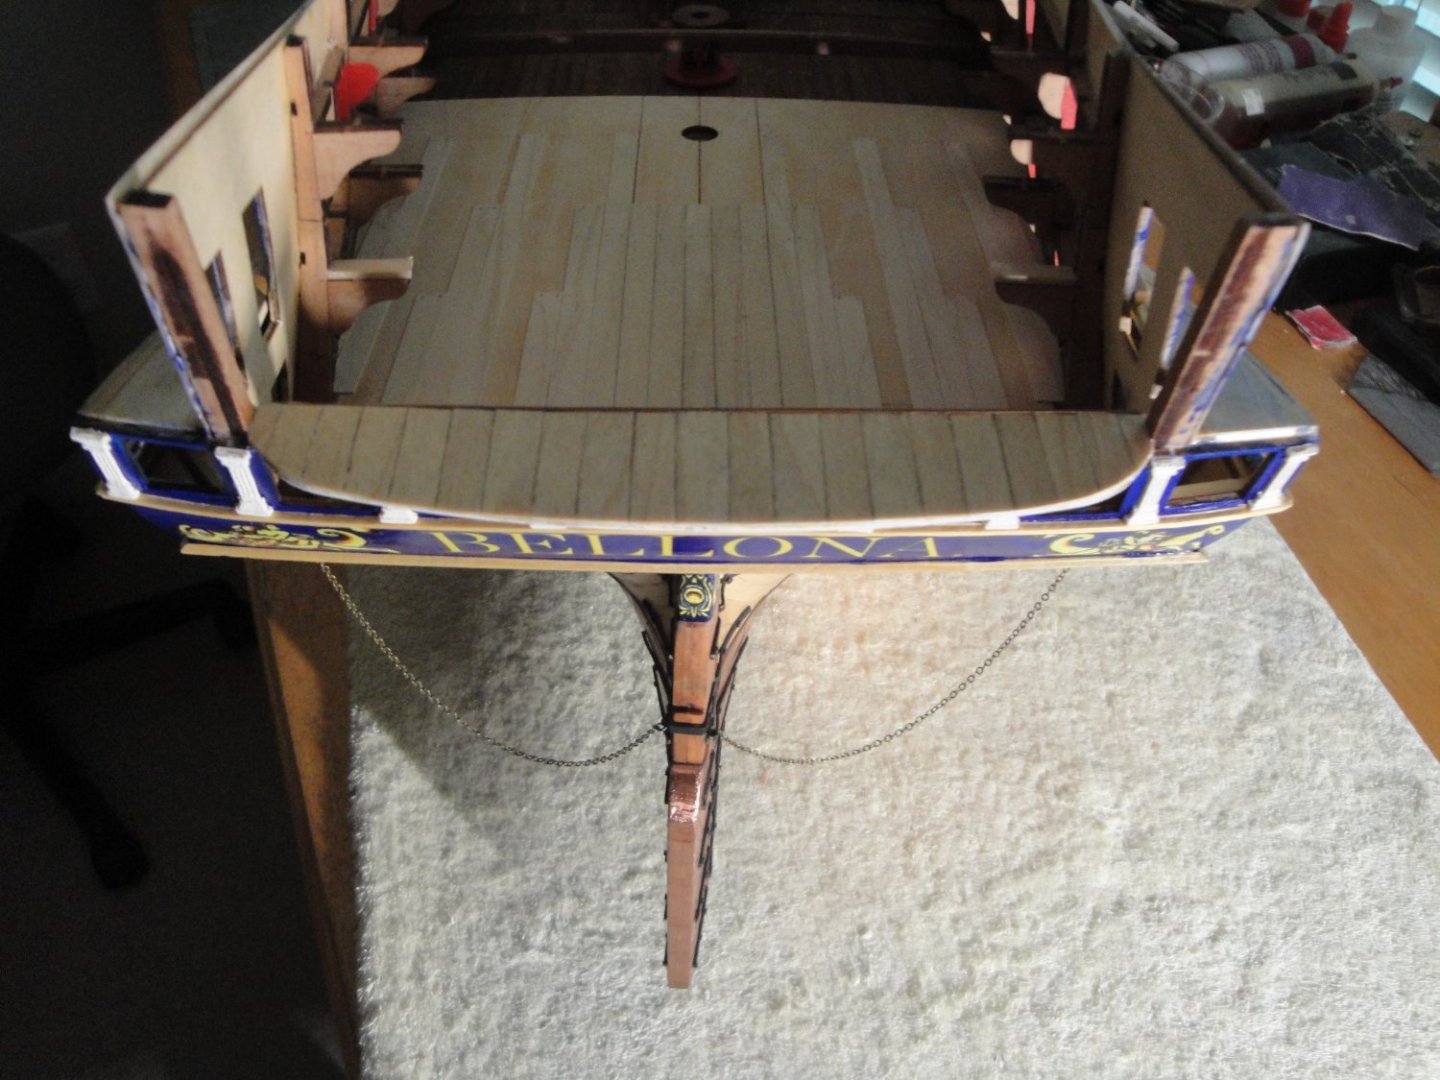
A quick update on the Bellona: I am back working on the rear section of the main deck. This is a mix of Session #3 (Planking of the deck) and Session #4 (building of the ward rooms and officers rooms). The Section "D" is added to the front of Section "E", placing a lid on the six 32 pounders guns recently installed: You can see the axle of the rear capstan, protruding out of the deck. Planking is then continued: I am using strip of about 20 cm long (10 meters in real life) and I hope it is not too long for such period ships. I am also trying to replicate the four planks staggered arrangement, traditional of these vessels. The Captain's Pantry and Wardroom Pantry is glued to the deck: The deck (at least the rear section) is treated with three coats of Wipe-on-Poly to darken the planks and make them more resilient. You can see the difference of colors on the pictures. We are now moving to Session #4 (I am no longer following the order of the CAF instructions). This part is the assembly of the Officers' cabins, also called canvas cabins, as they were divided by removable pieces of canvas. The walls are strengthened by some strips of wood. The glass panes are made with tracing paper. Yves


- 507 replies
-
- 20
-
-
-
MONTAÑES by Amalio
yvesvidal replied to Amalio's topic in - Build logs for subjects built 1751 - 1800
I love that rudder mechanism. So perfect and so realistic. Yves -
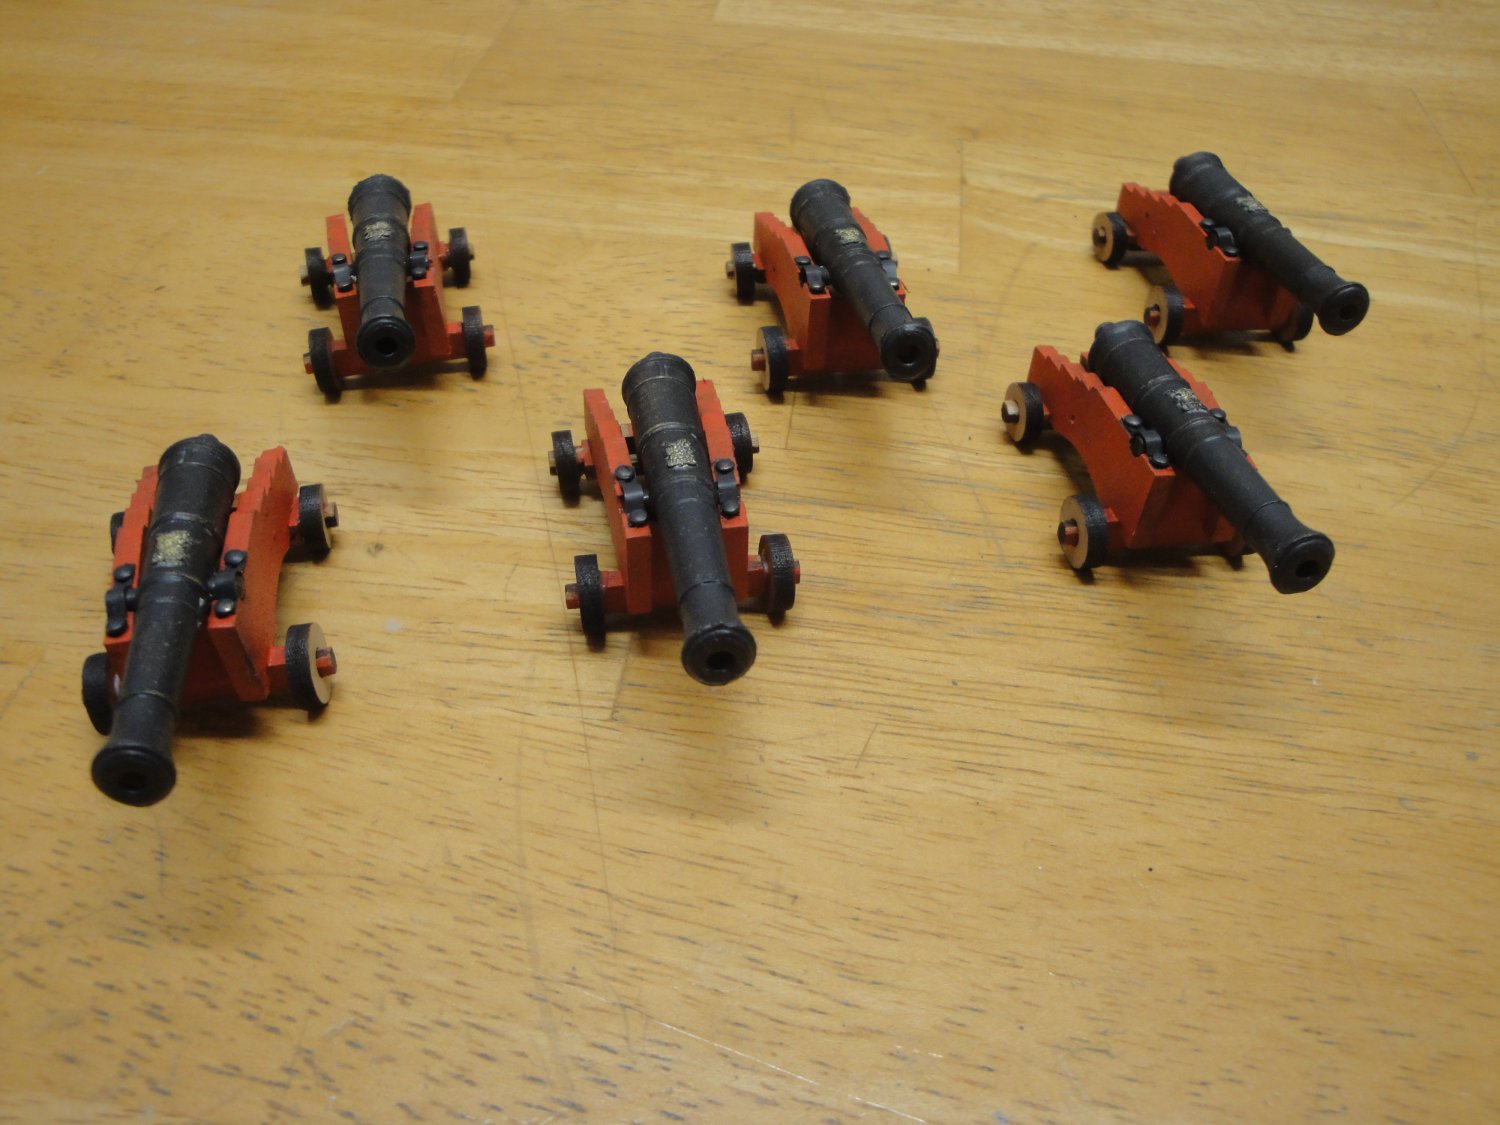
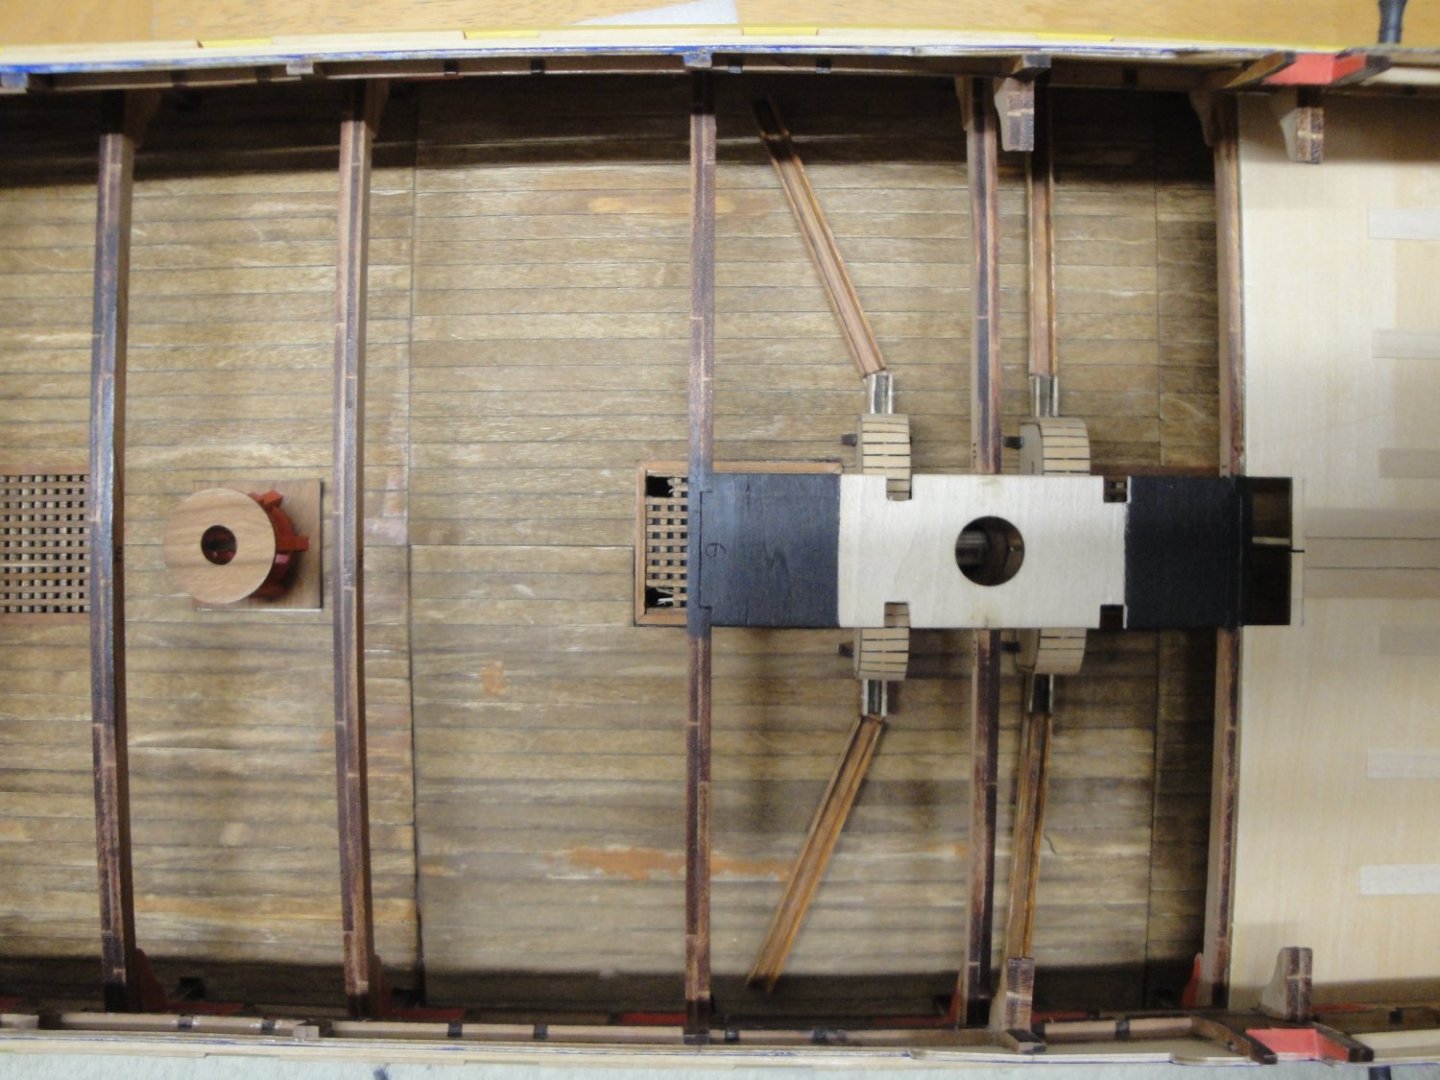
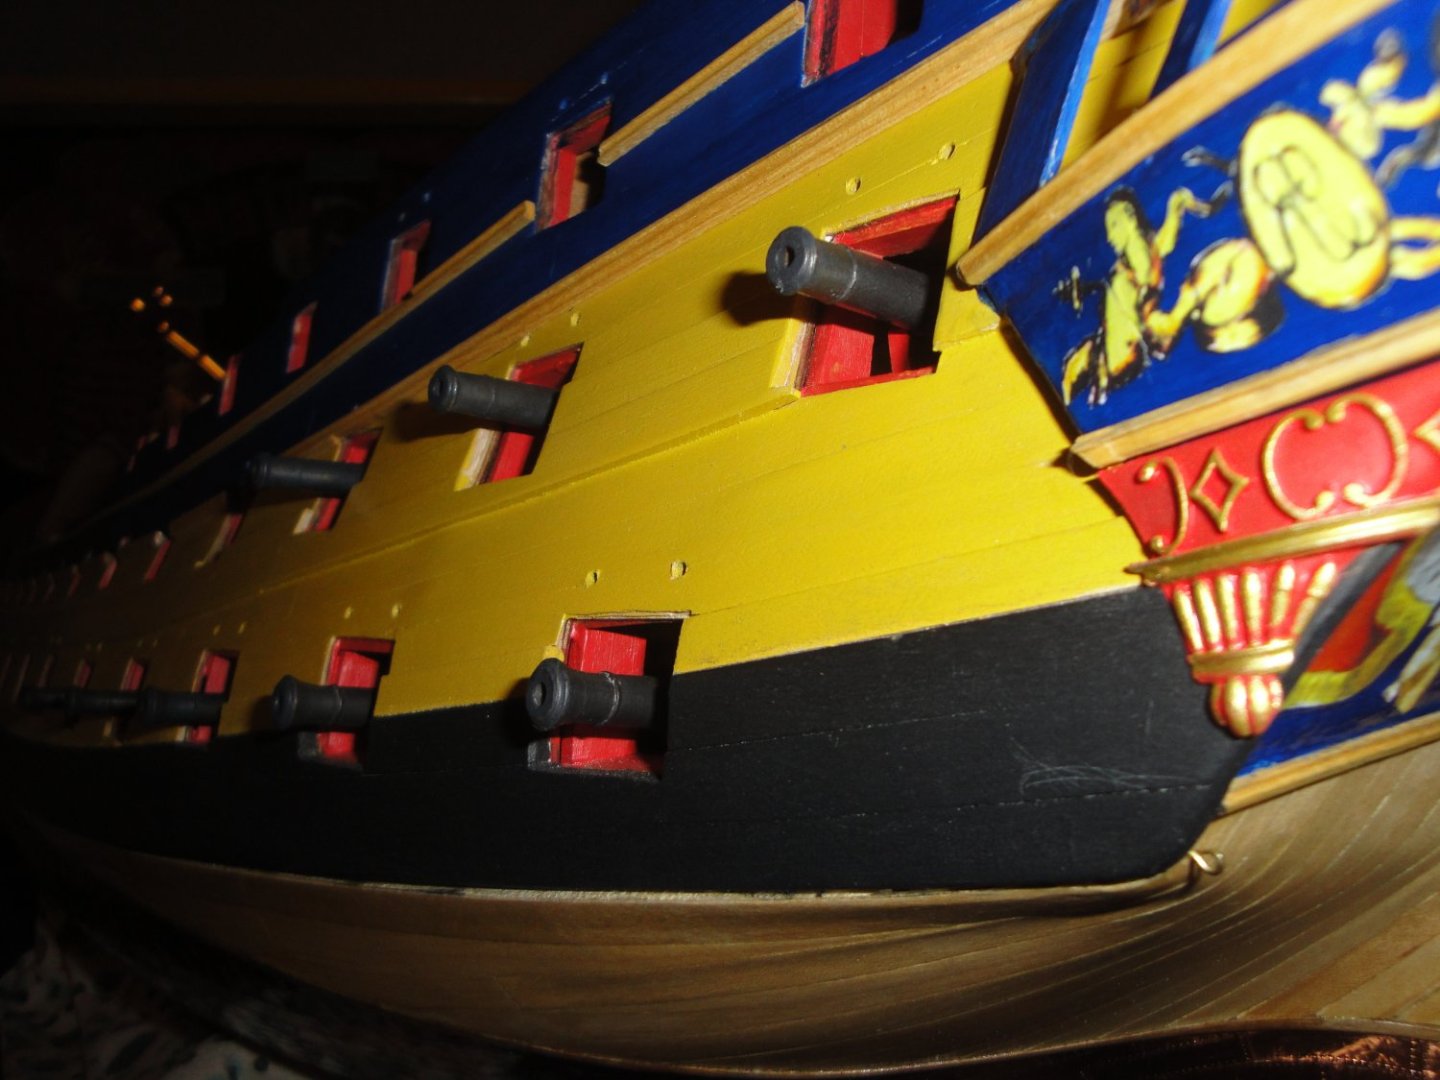
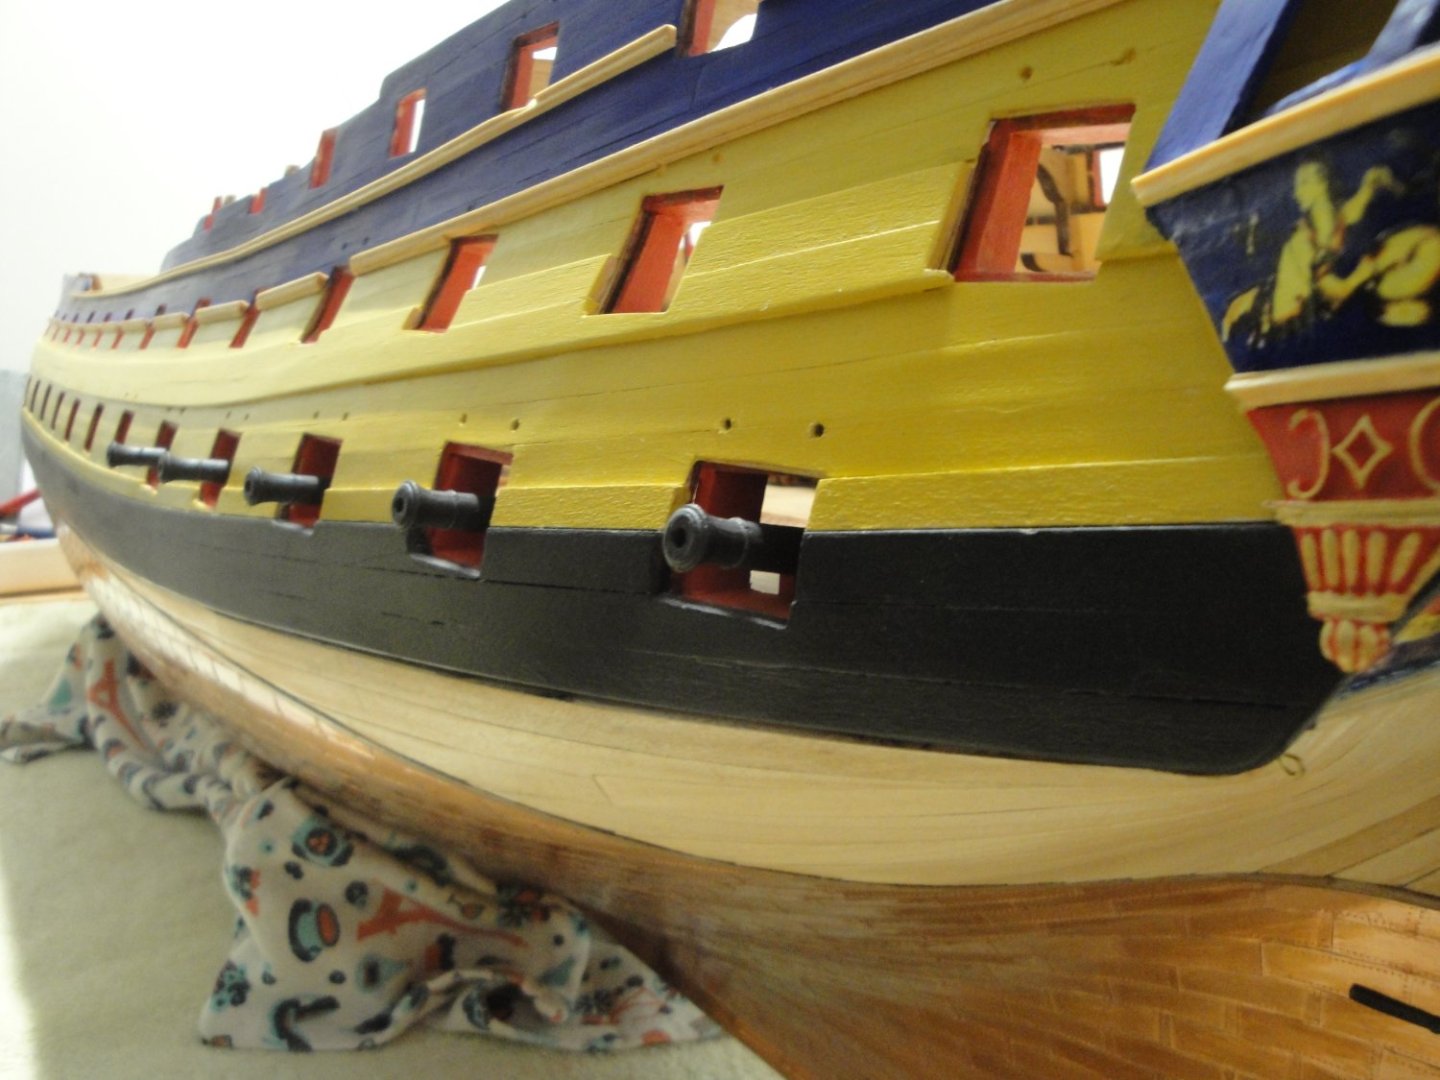
Time to go back to the Main and Gun decks: I have prepared six 32 pounders guns to install in the gun deck: The process is identical: Drilling the holes for the micro-nails, blackening of the barrels, tedious hand painting of the chassis and final assembly. The guns are resting on their four casters and a drop of CA glue is placed between the casters and the floor. The capstan is fully deployed and will be connected to the main deck Capstan, actually rotating both at the same time. From the outside, it is looking very ominous.... Now, I can resume the work on the main deck, at least towards the poop. Yves


- 507 replies
-
- 12
-
-
-
Yes, I do. I am using Future Floor (Pledge) before (2 coats) and after (2-3 coats). It is a tiny bit shiny at first, but the luster goes away after a few days and after gliding my fingers on the decals. You can see the Pledge bottle on some of the pictures. Decals are installed using Microscale-SET and SOL concoctions. Yves
-
With all these spare parts, I am starting to wonder if buying the kit is really necessary..... 🙂 Yves
- 203 replies
-
- 7
-

-
-
- Roma
- Micromaster
- (and 4 more)
-
The carving (CNC ?) of this wood panel is amazing. I wish CAF Model could consult with you.... and improve their parts. Yves
- 488 replies
-
- 7
-
-
- Indefatigable
- Vanguard Models
- (and 1 more)
-
Beautiful model. Thank you for presenting your Build Log. Yves
- 35 replies
-
- 1
-
-
- Artesania Latina
- Sultan
- (and 1 more)
-
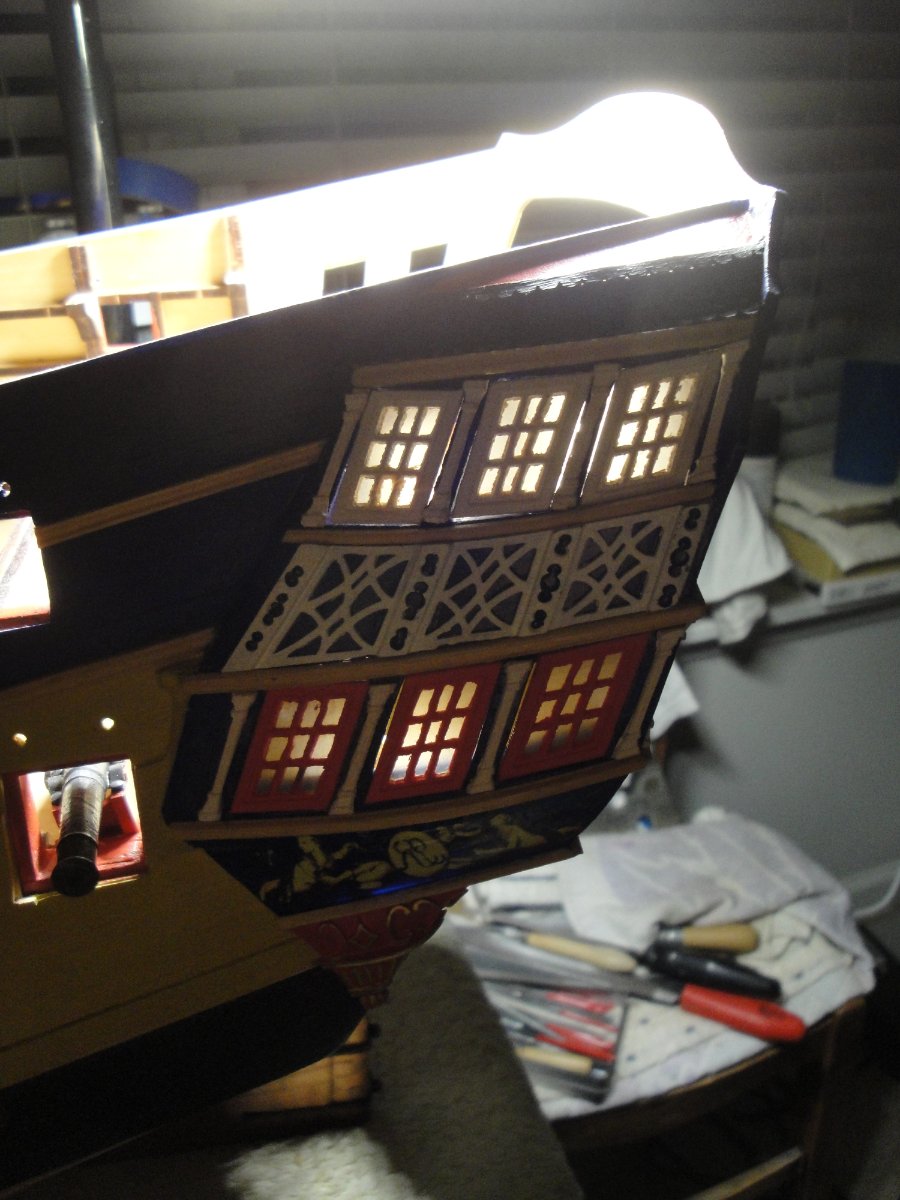
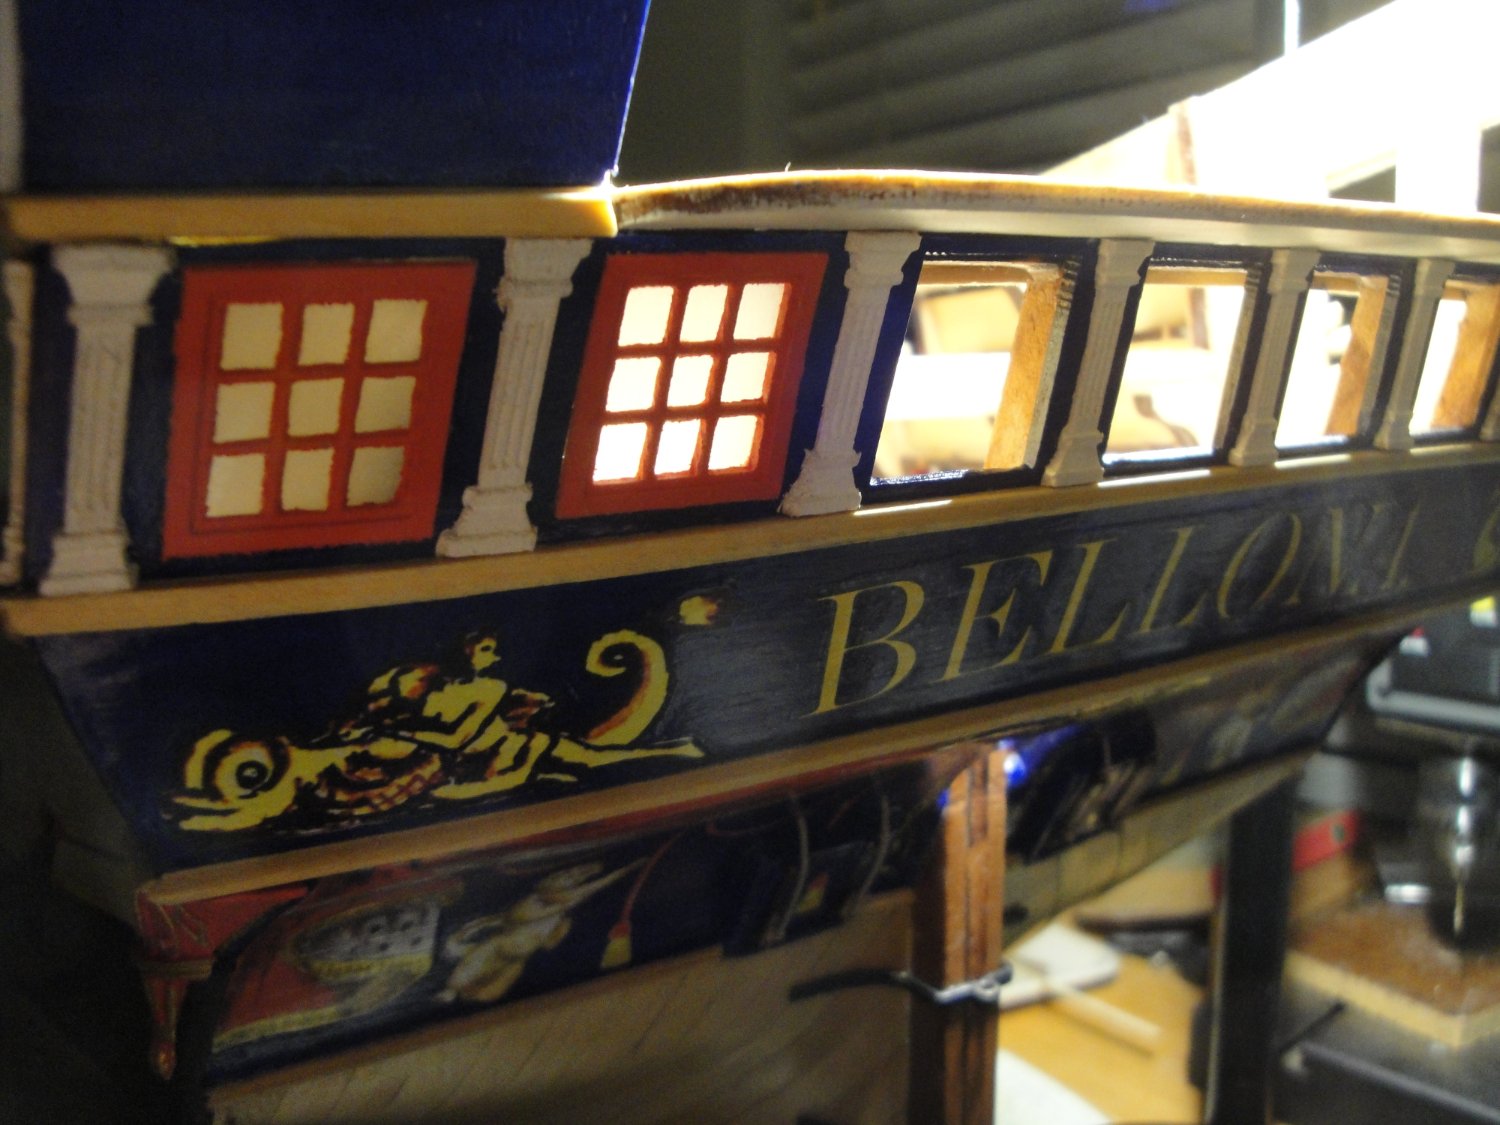
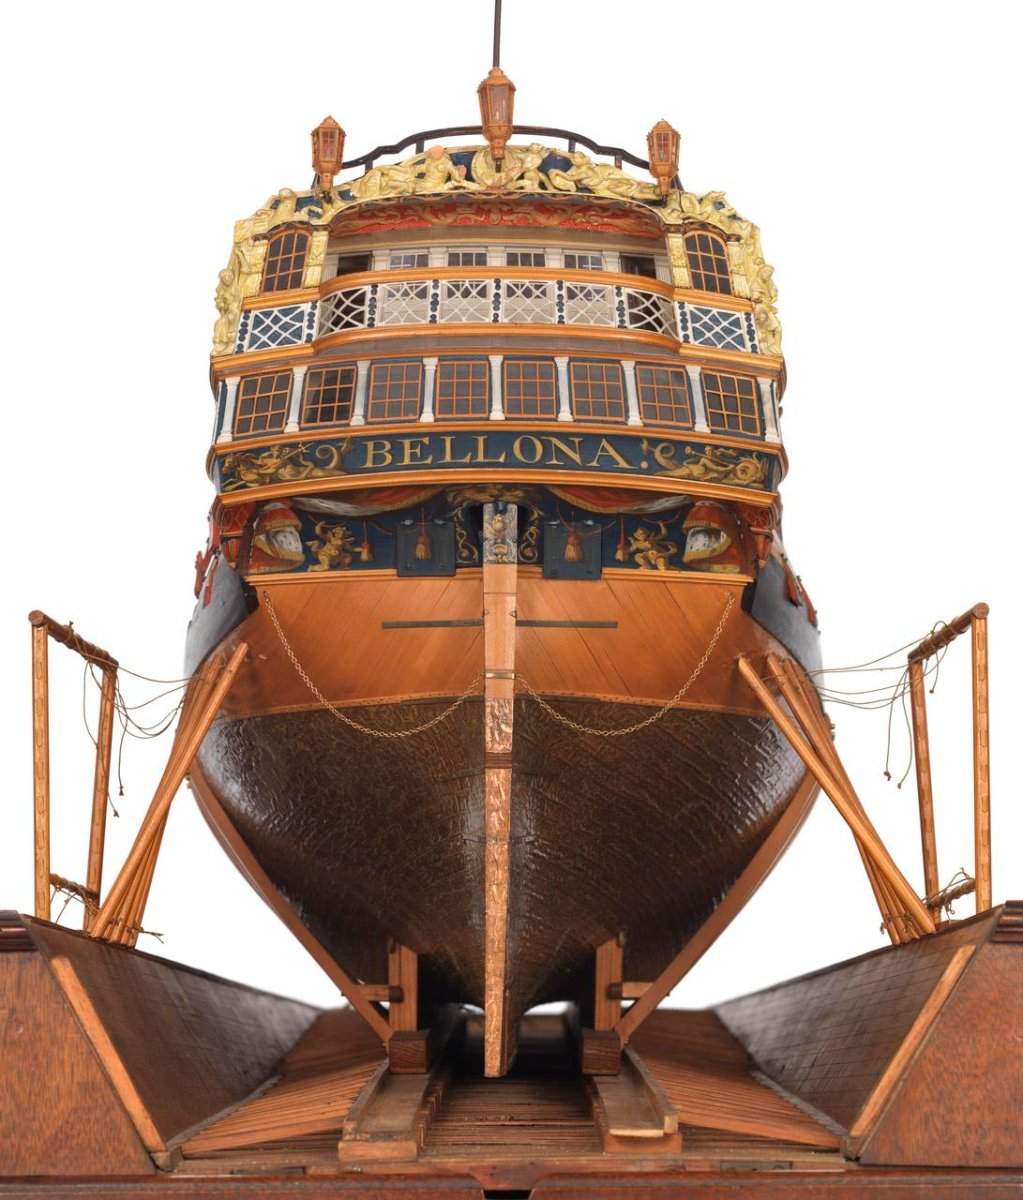
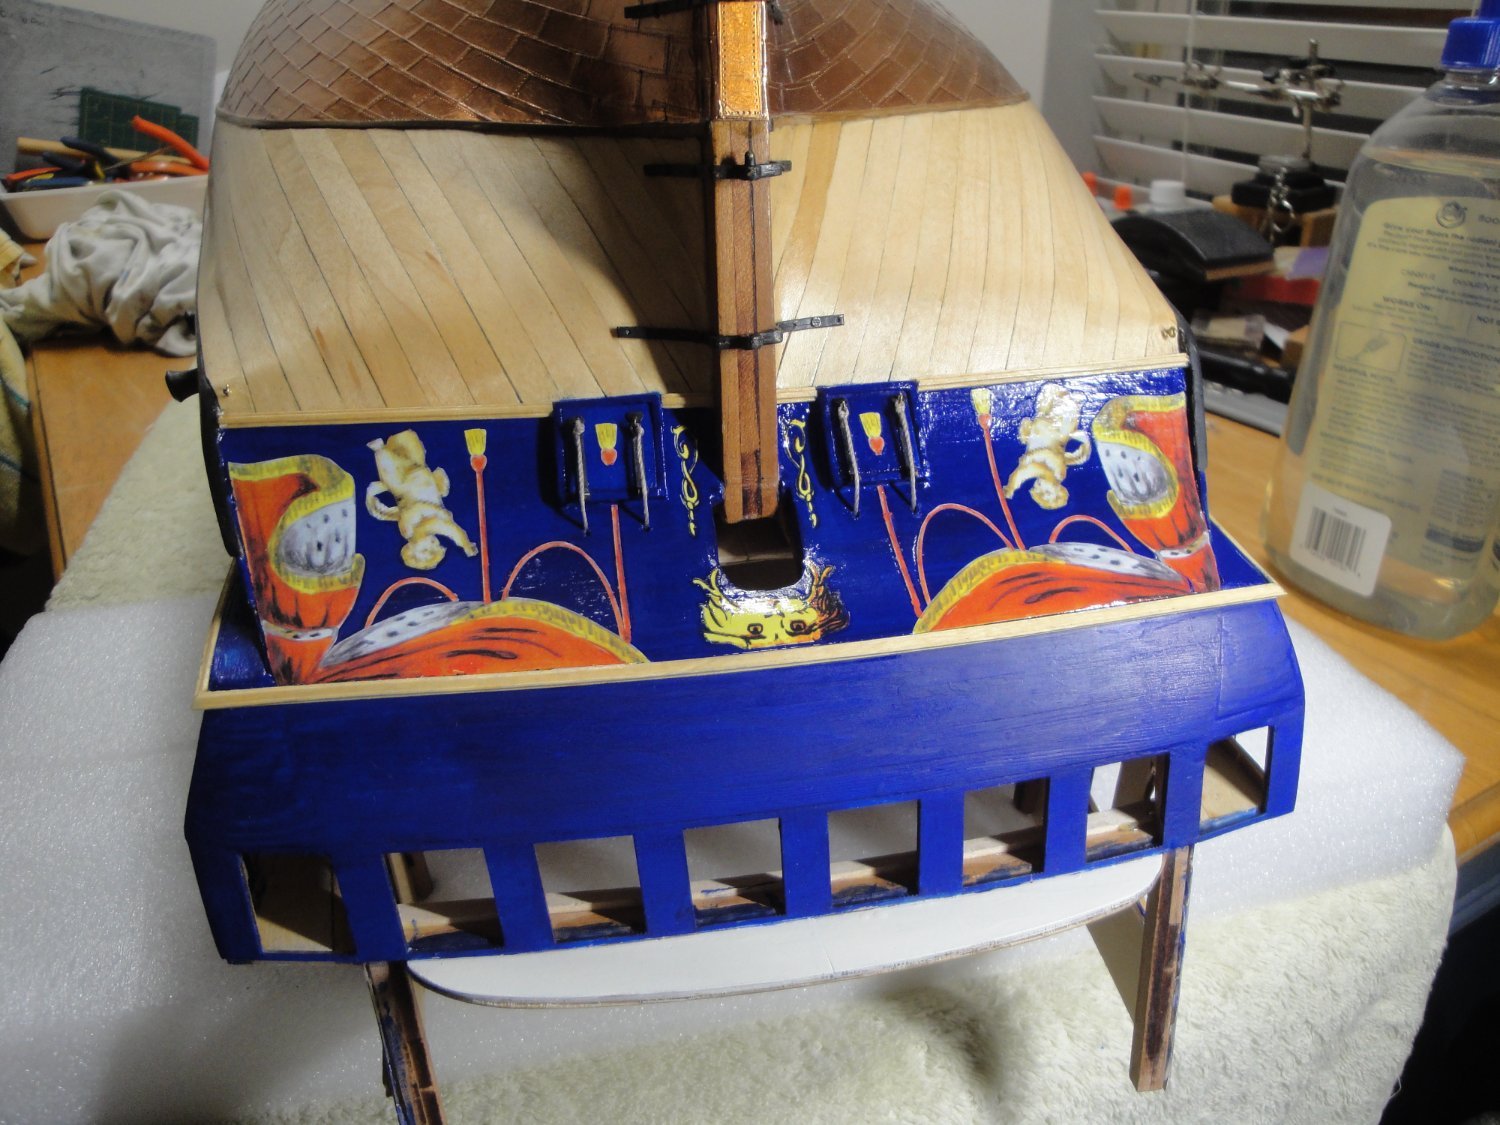
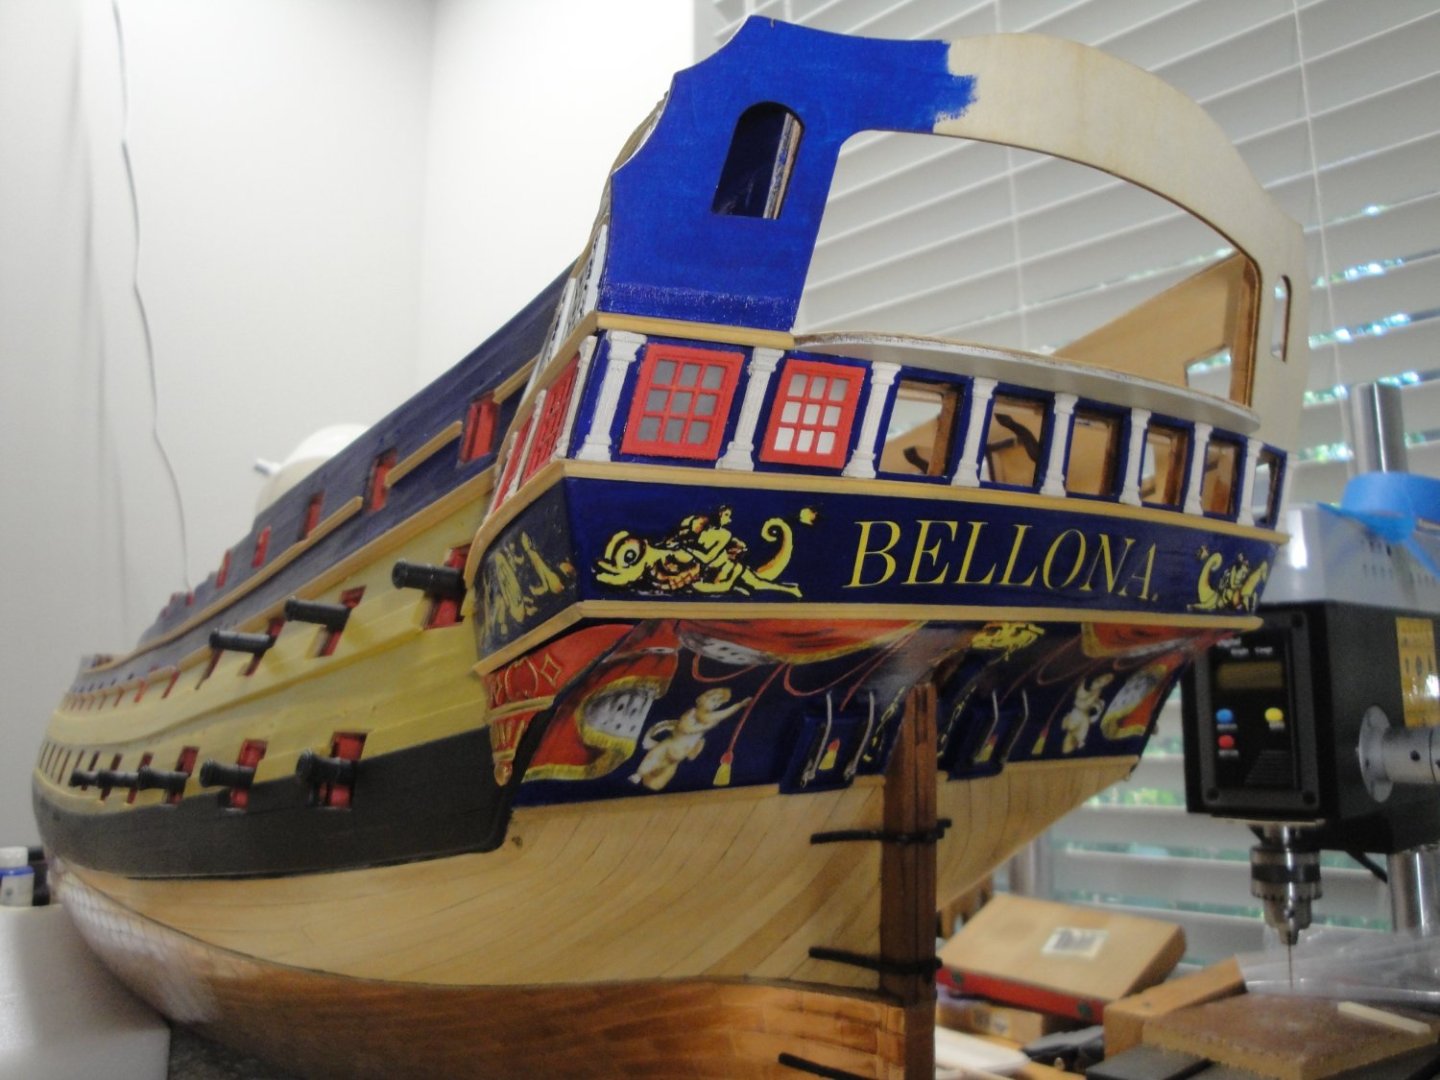
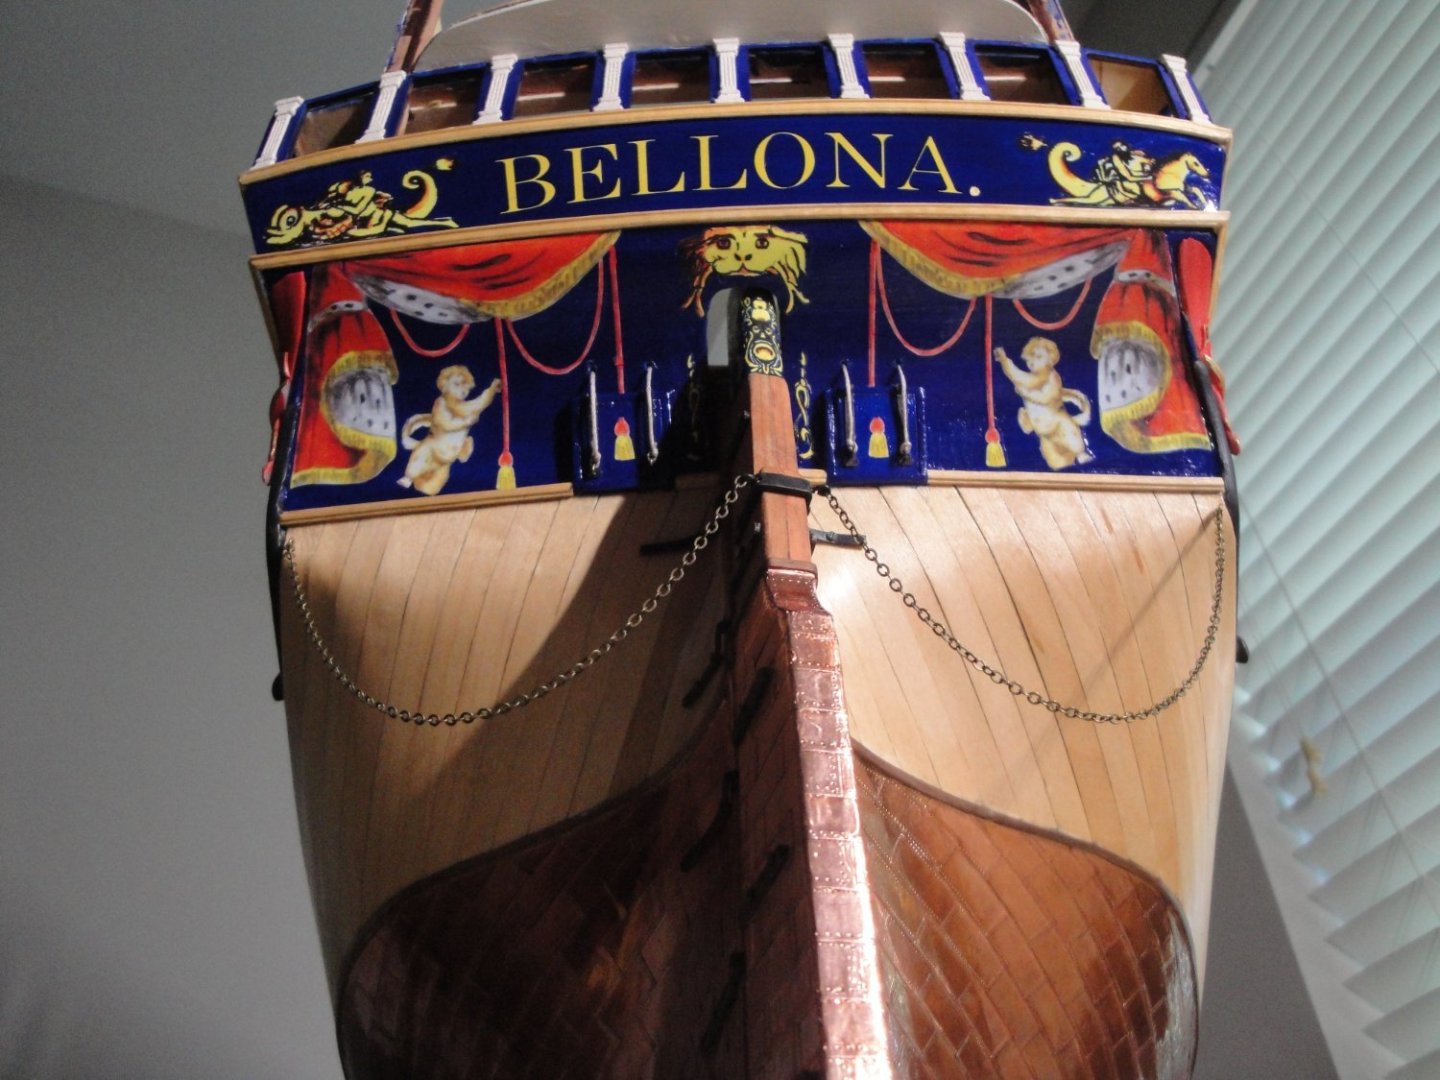
Tom of CAF Models was kind enough to send me some additional pictures to help the stern construction. They came a little bit late, as I had already started. I wish these pictures could have been included into the original instructions booklets: And of course, the famous National Gallery model, source of inspiration for the CAF Model kit: I used that picture a lot for the decals placement and the overall shaping of the stern. There are some mis-labelling for the decals, in the CAF instructions (Session #5). Beware..... Yves

- 507 replies
-
- 17
-
-
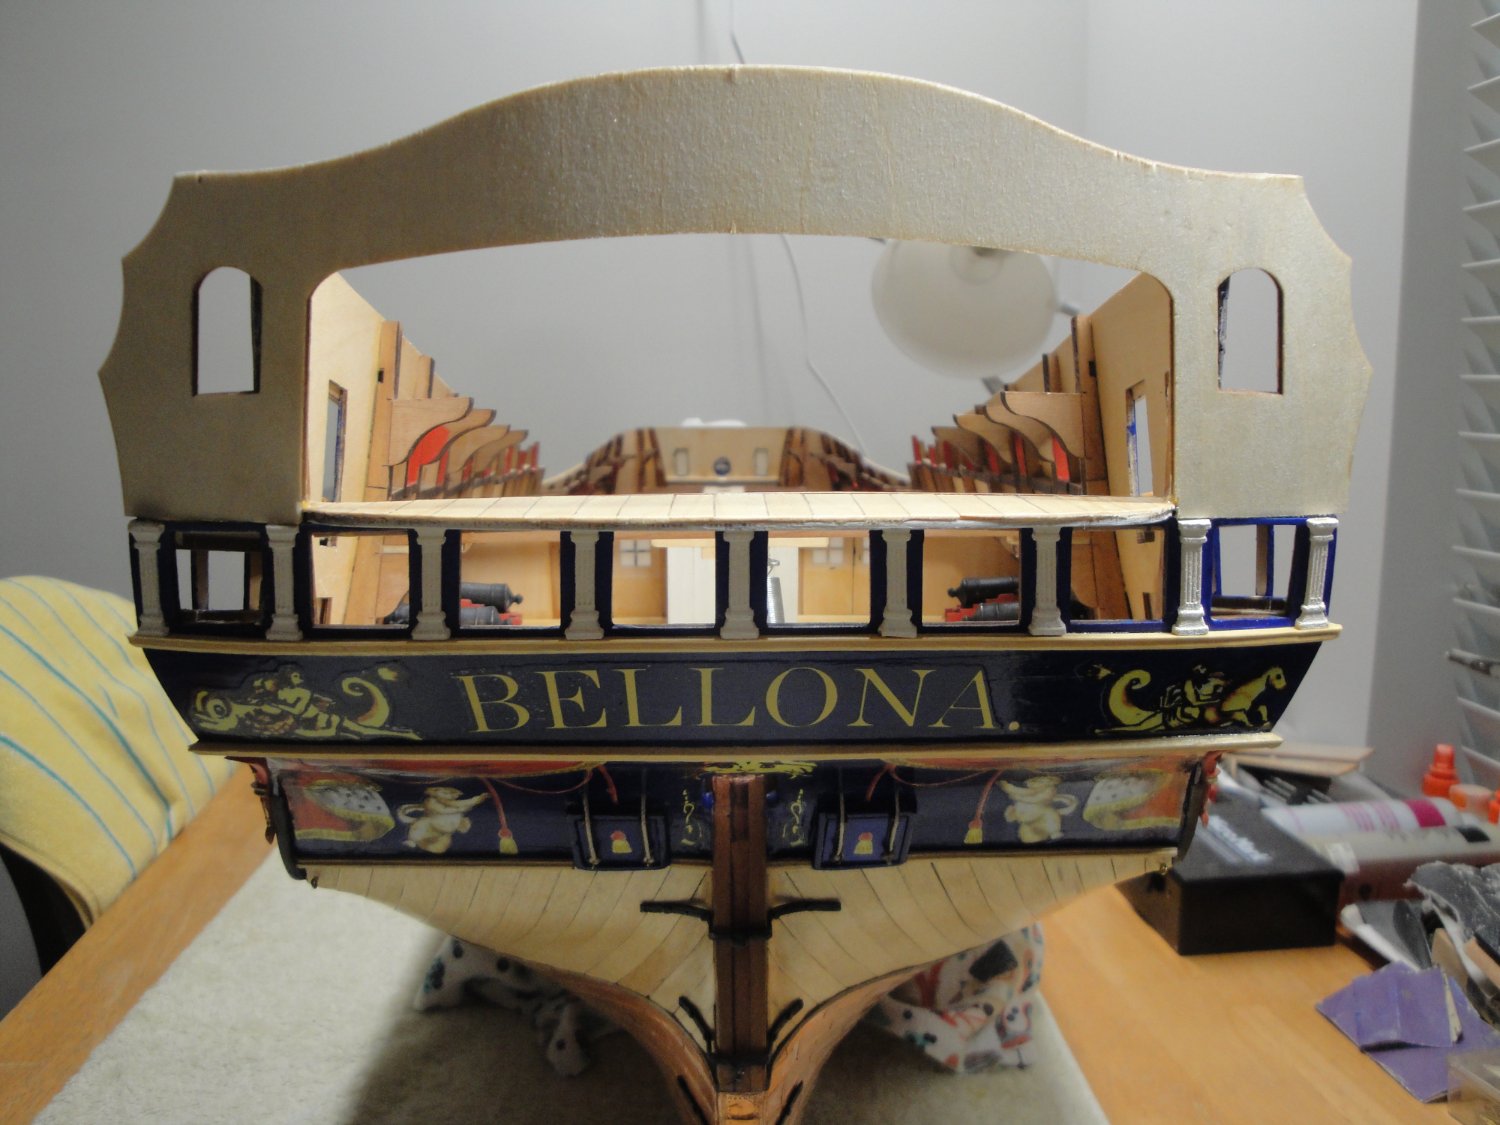
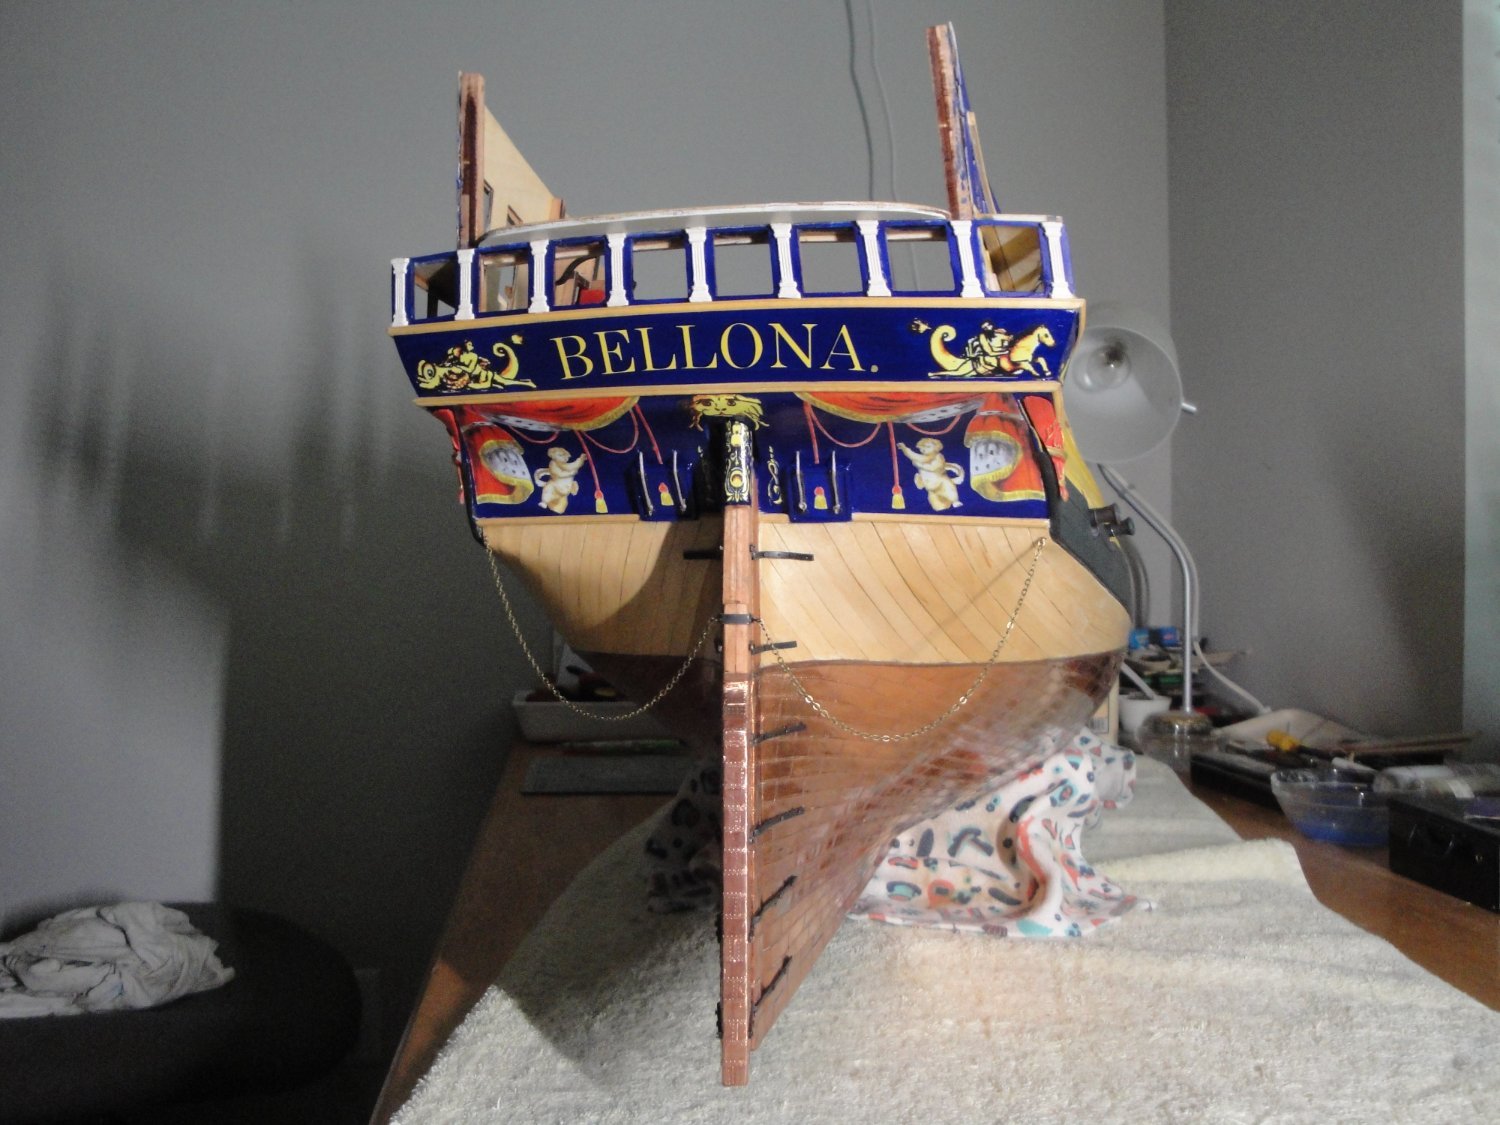
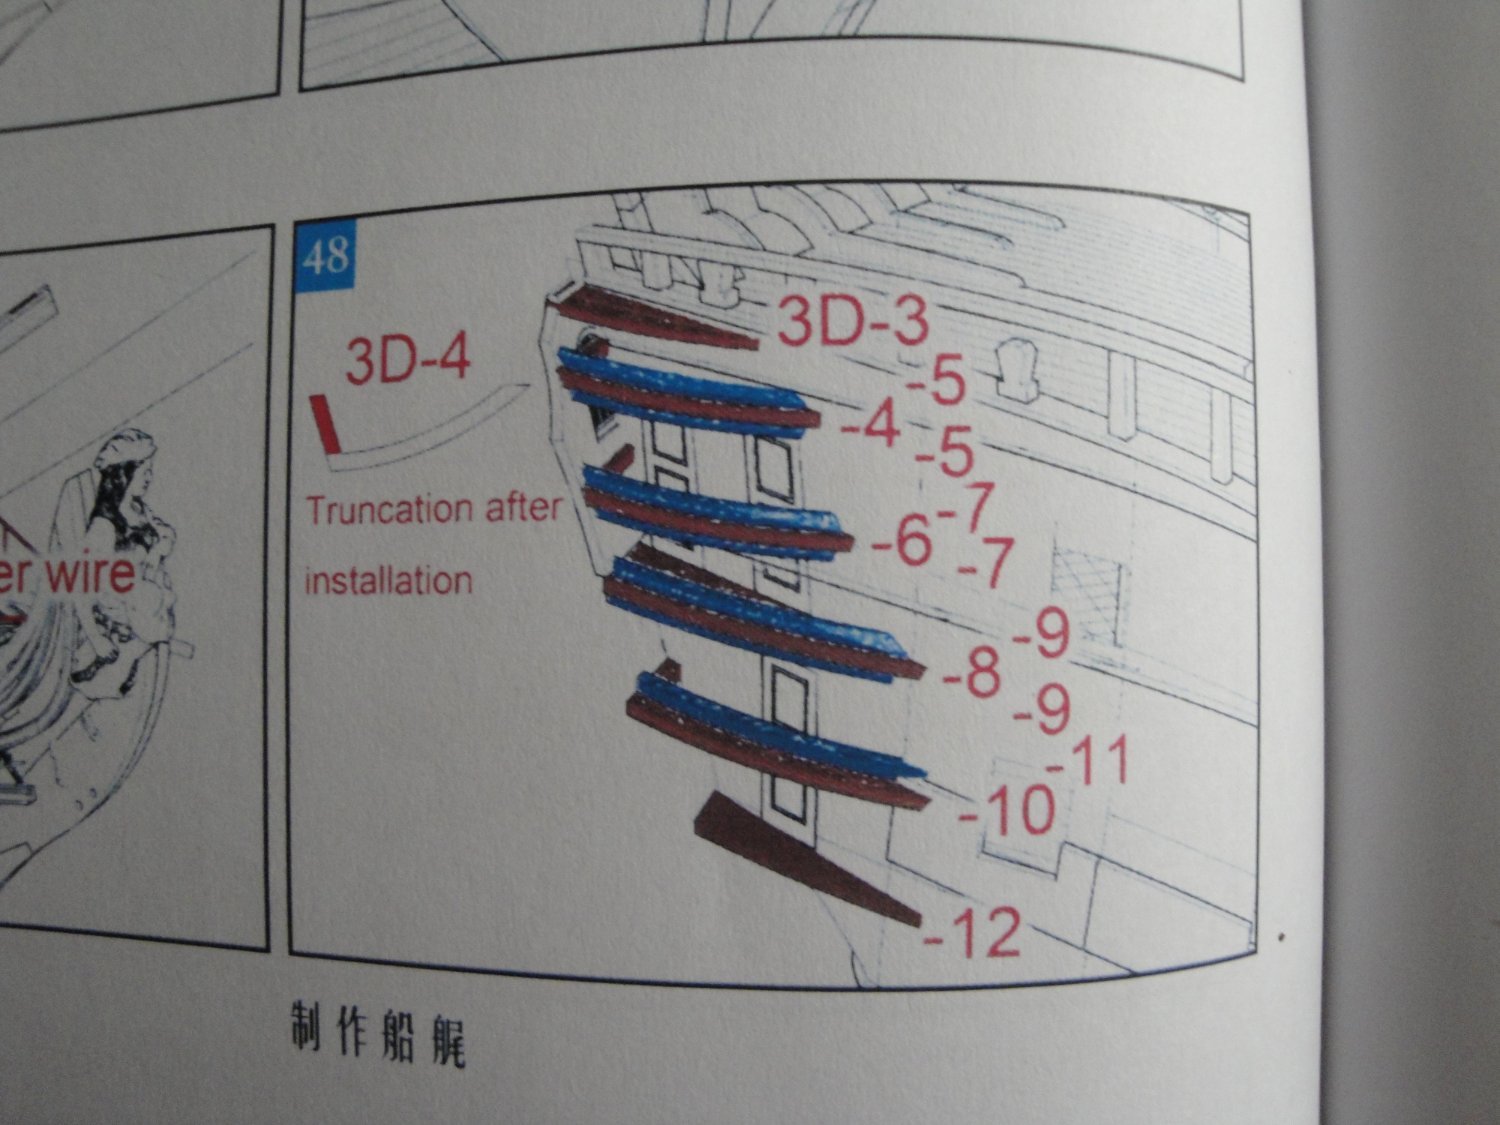
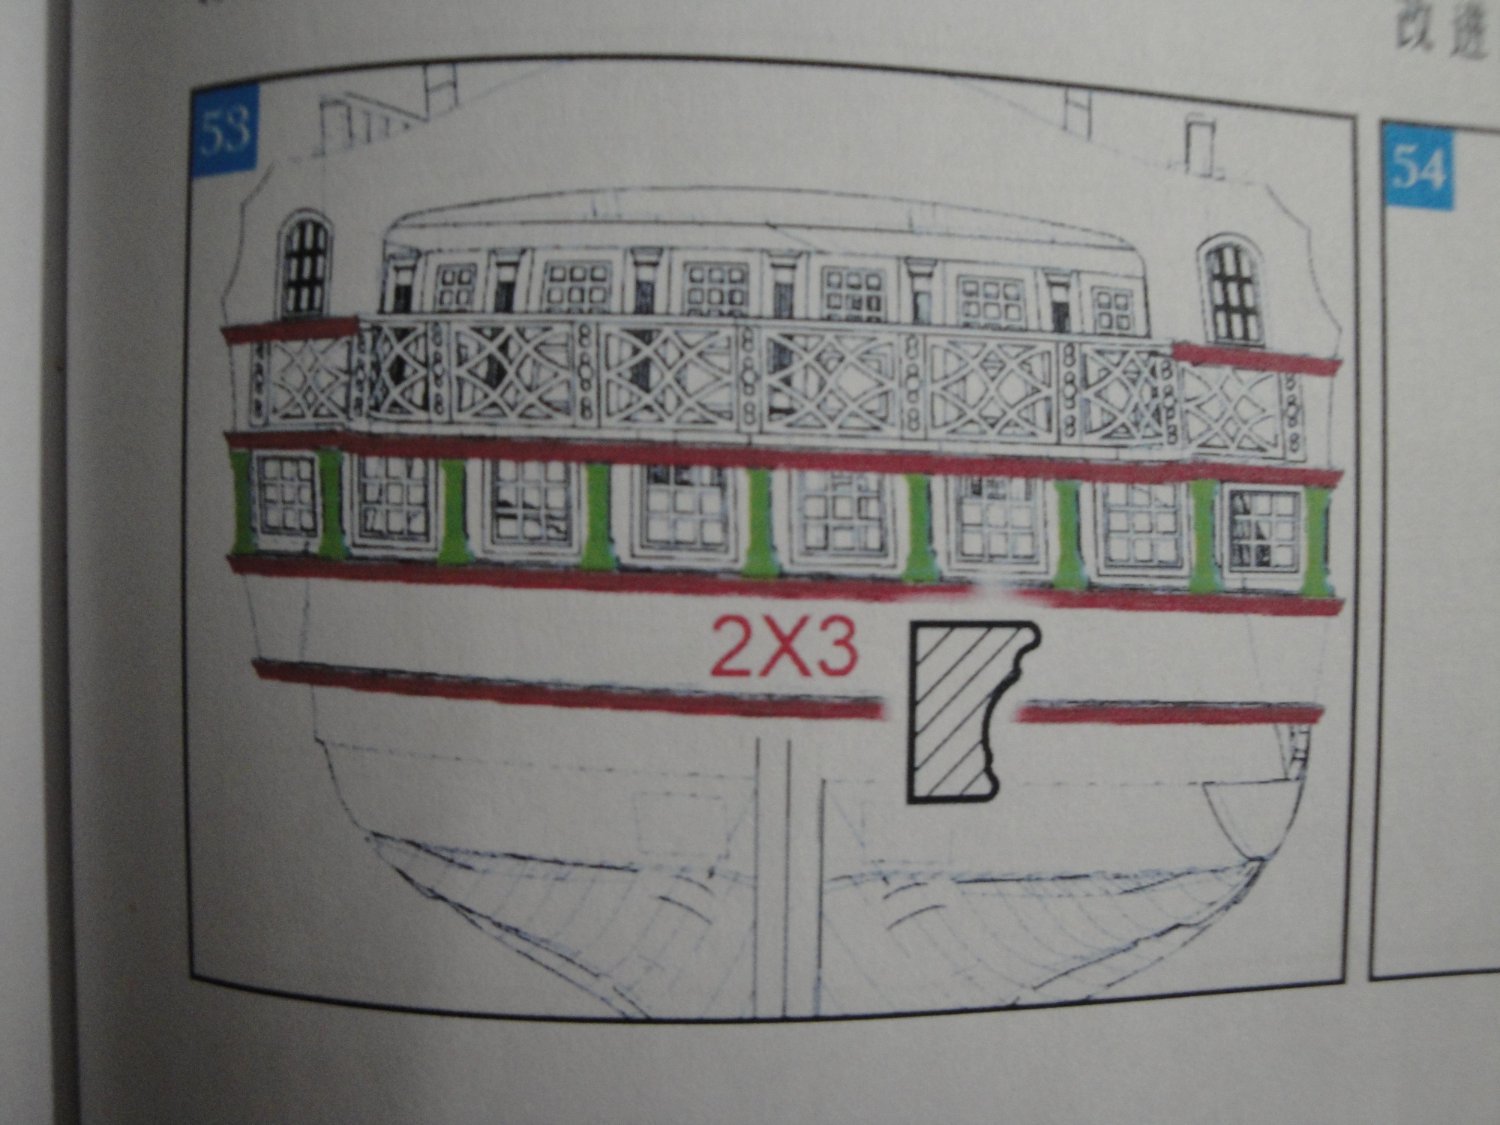
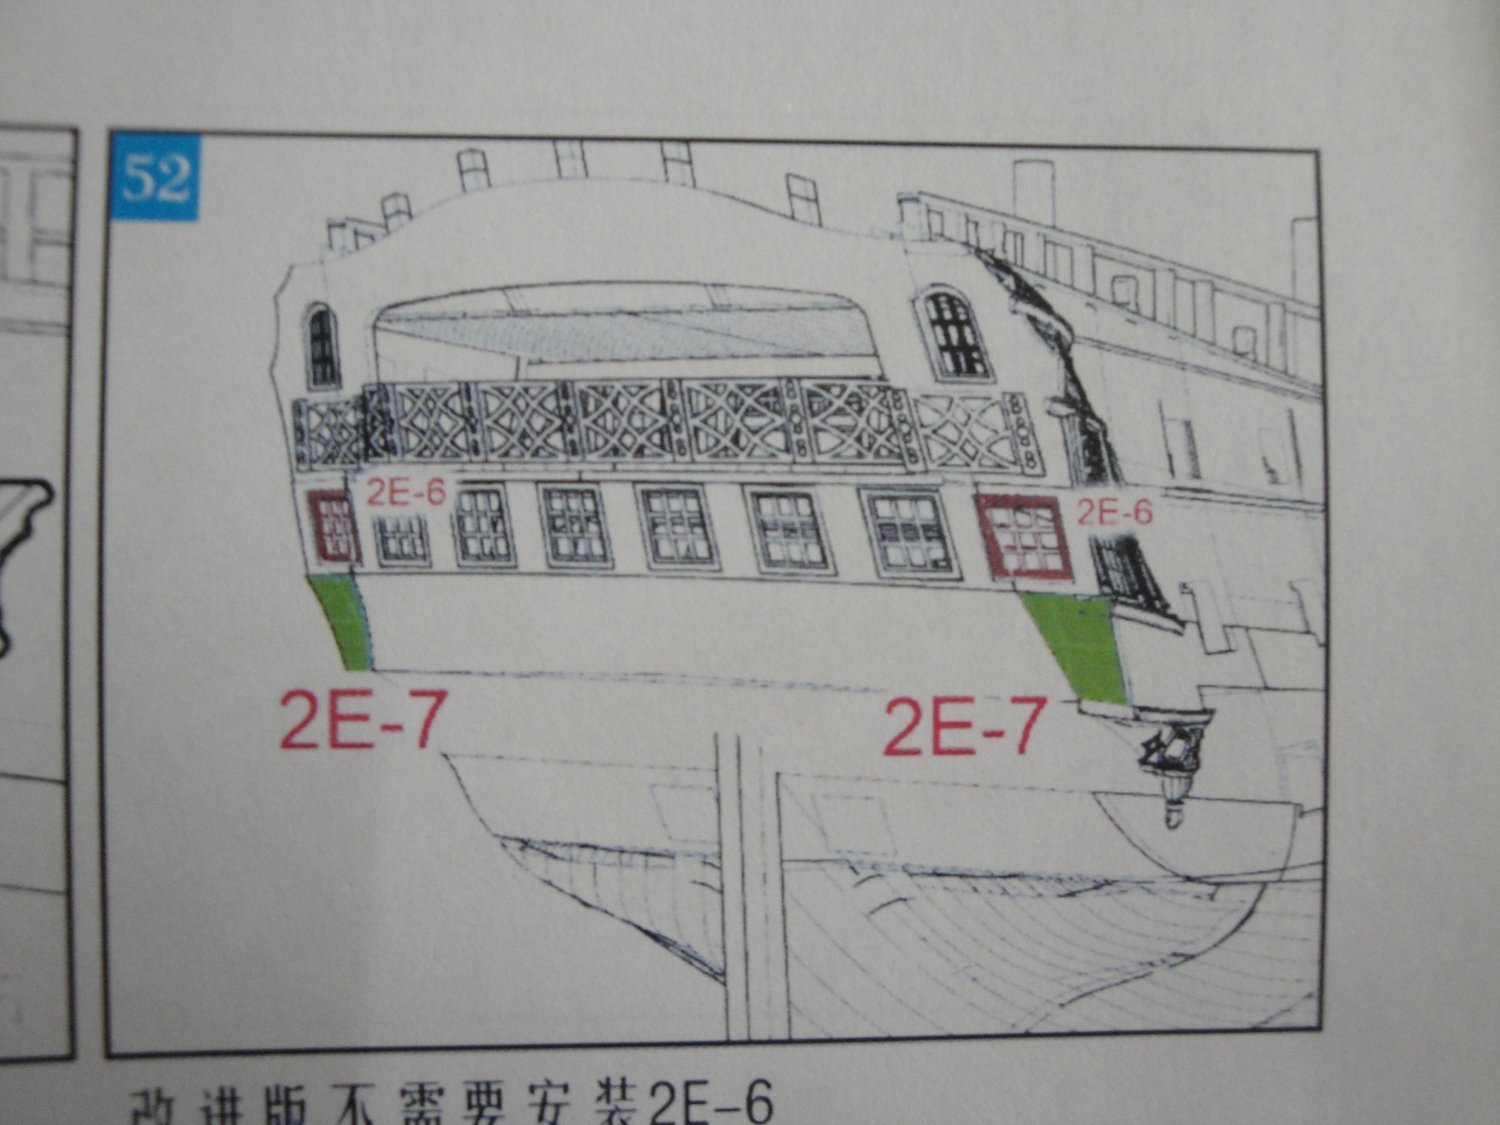
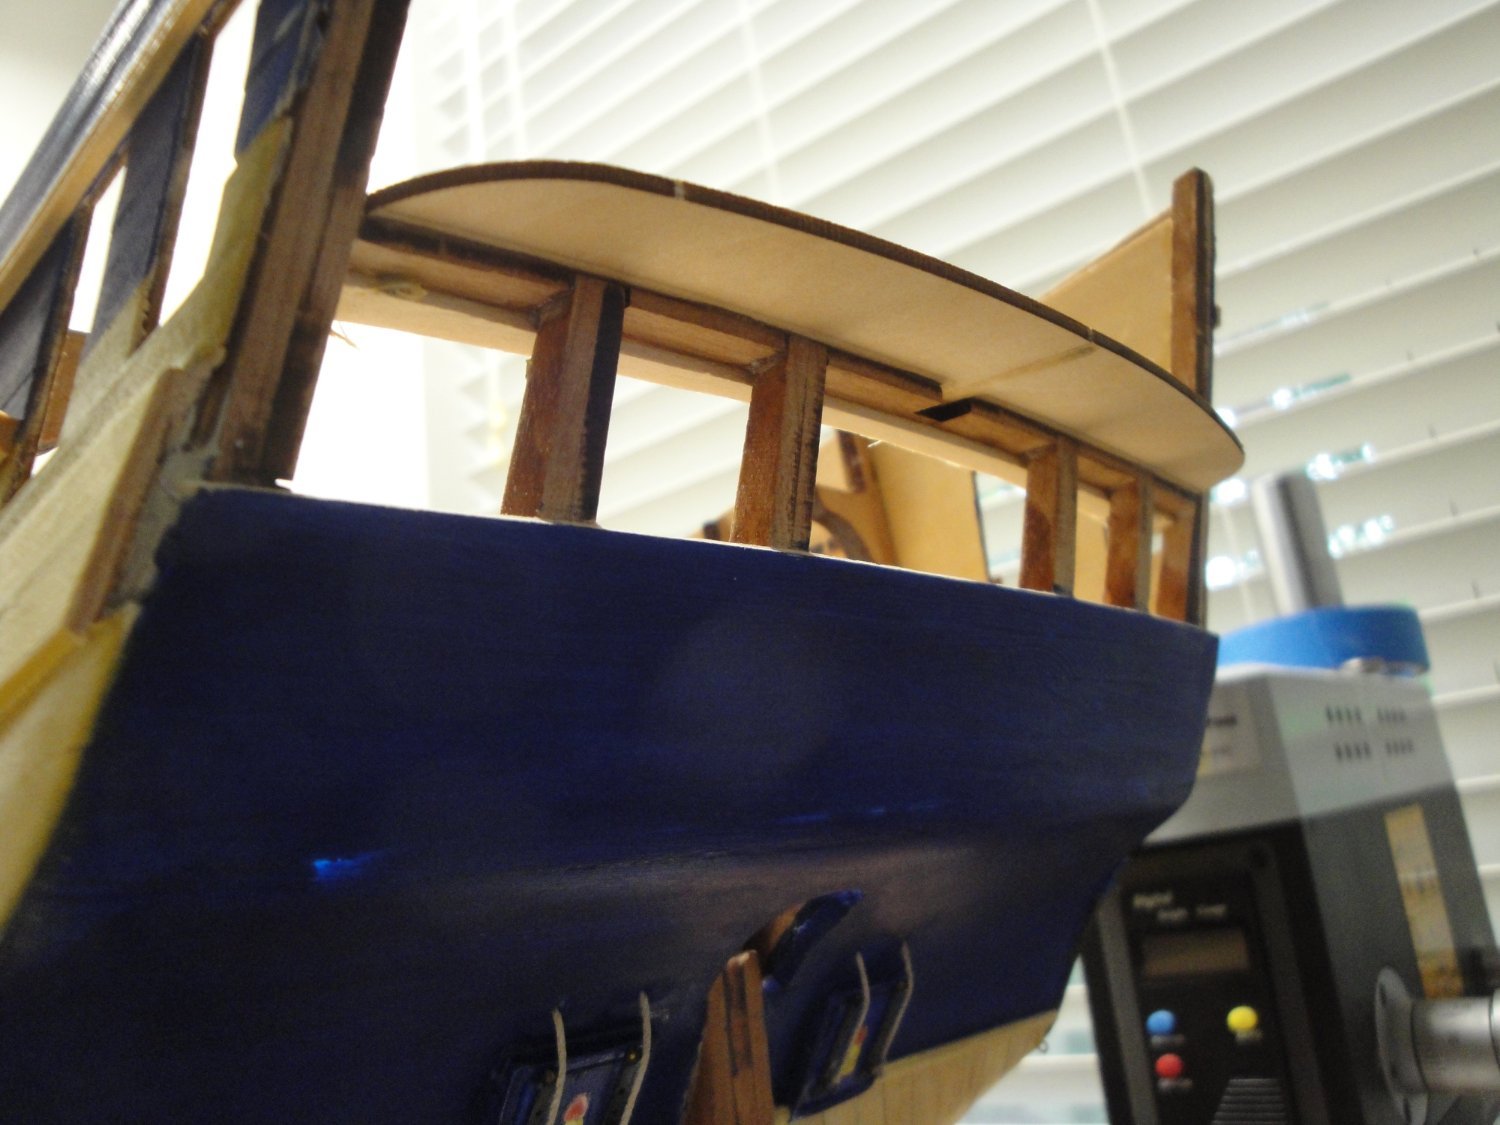
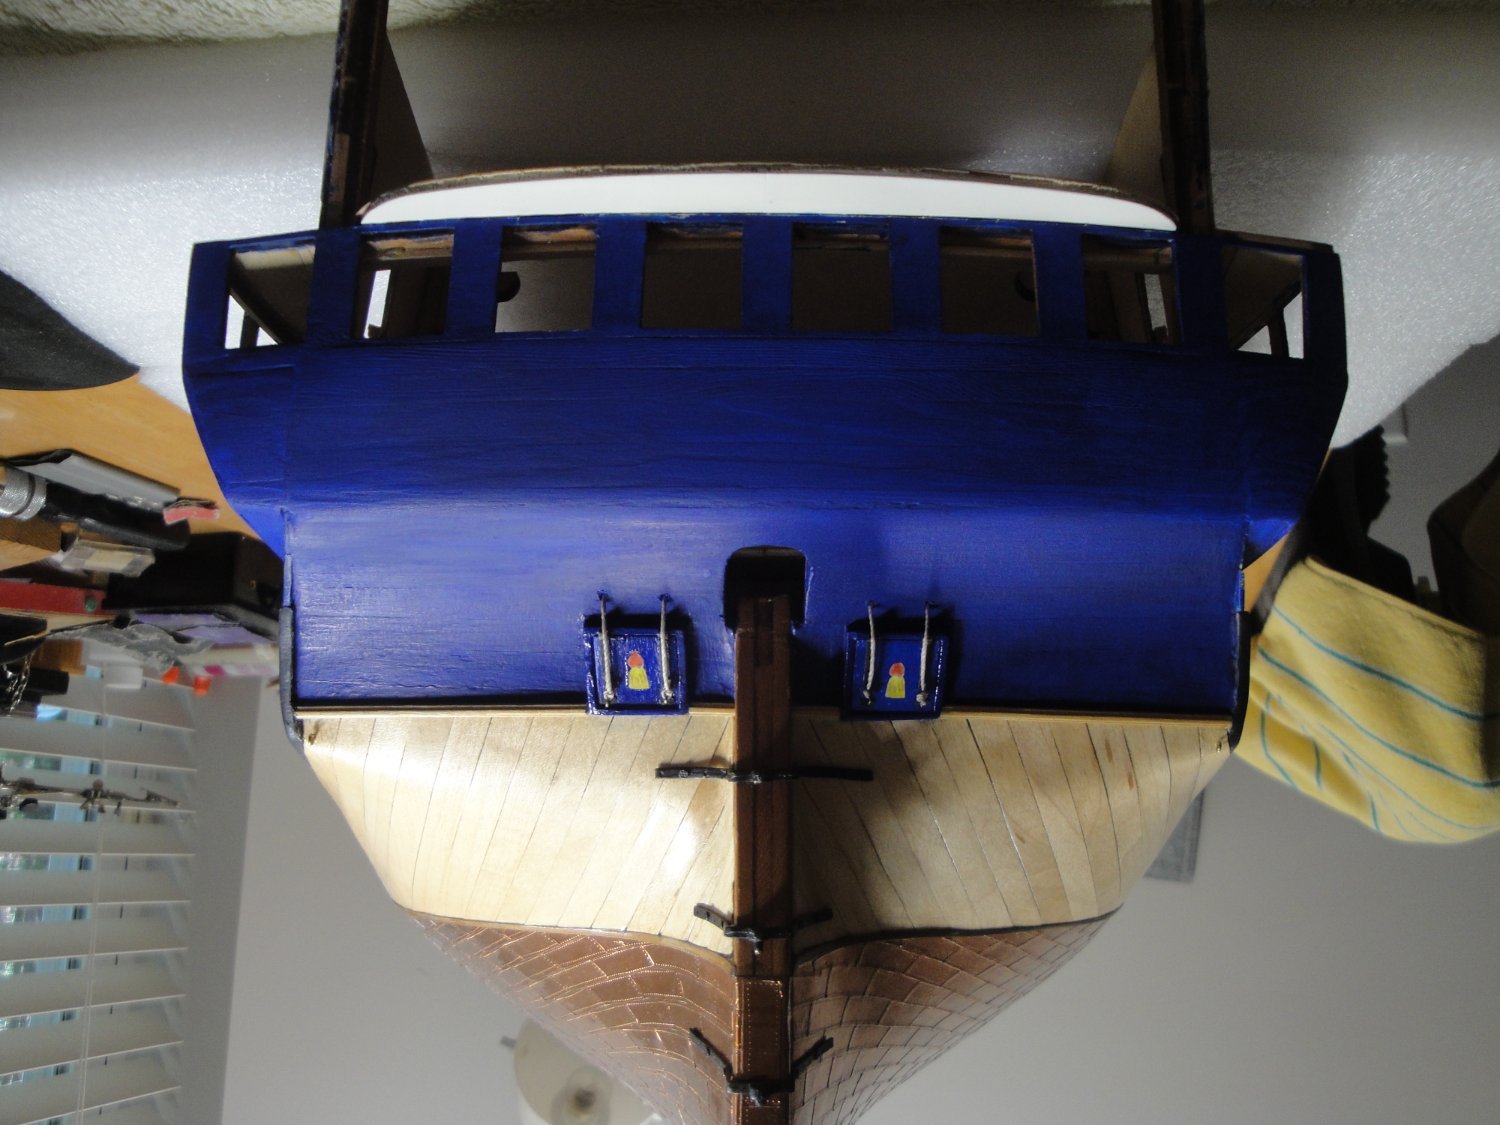
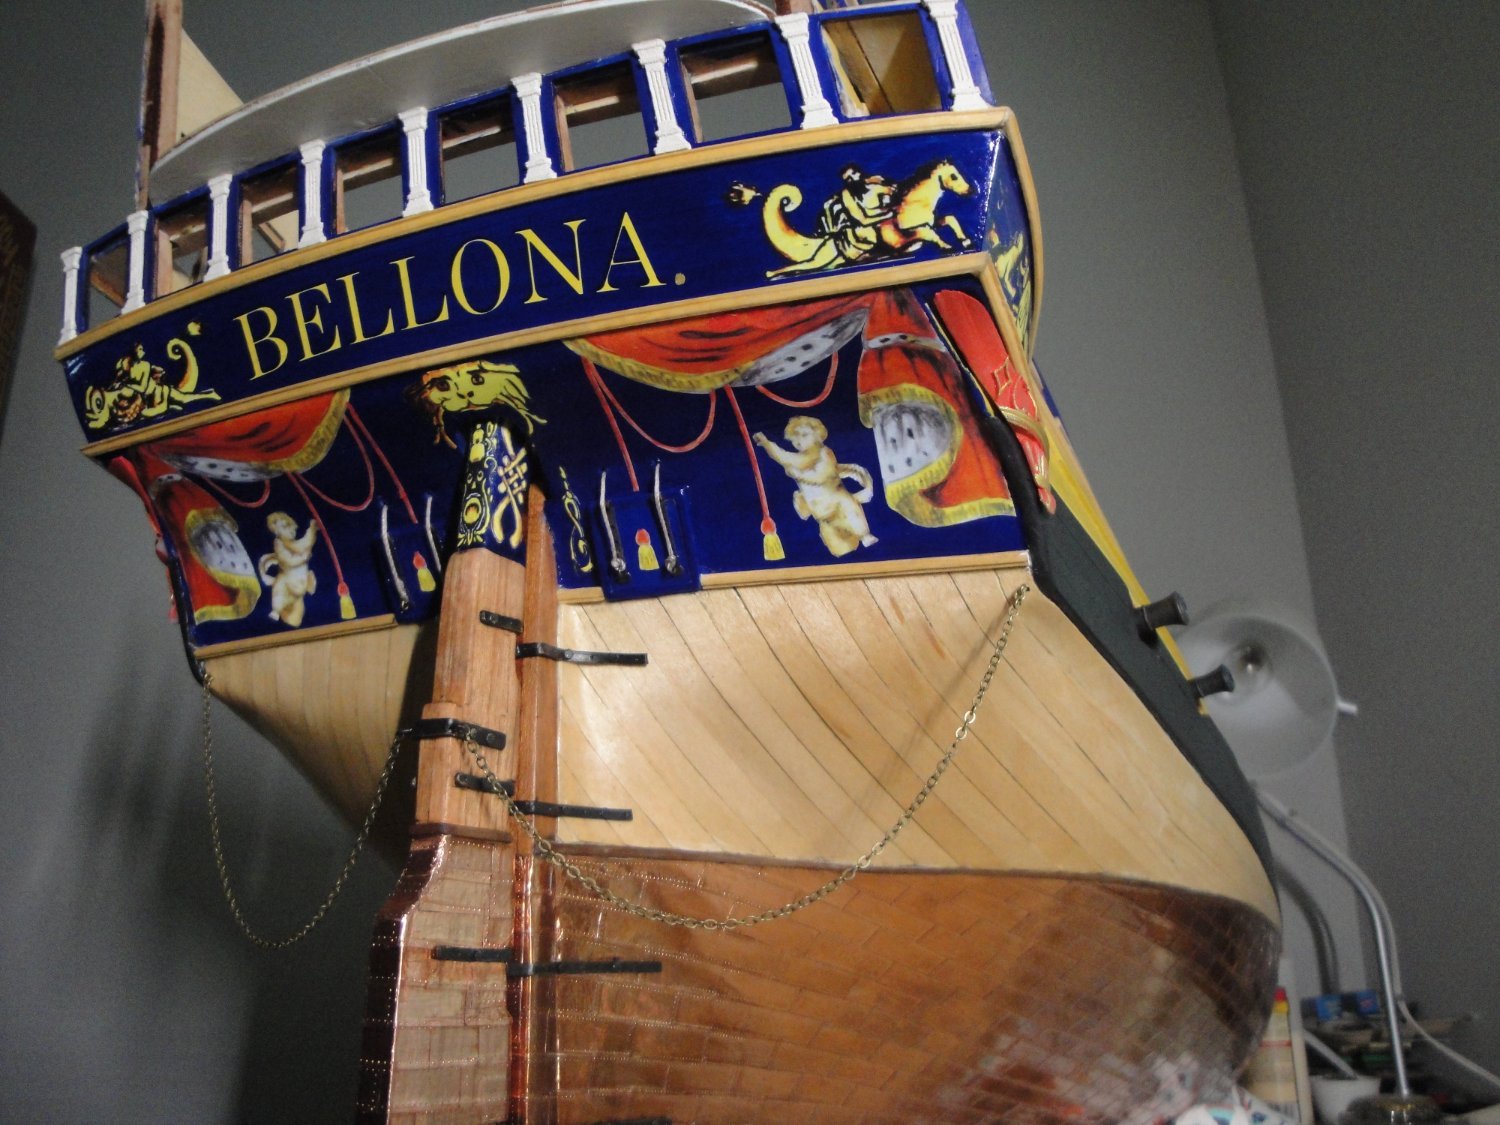
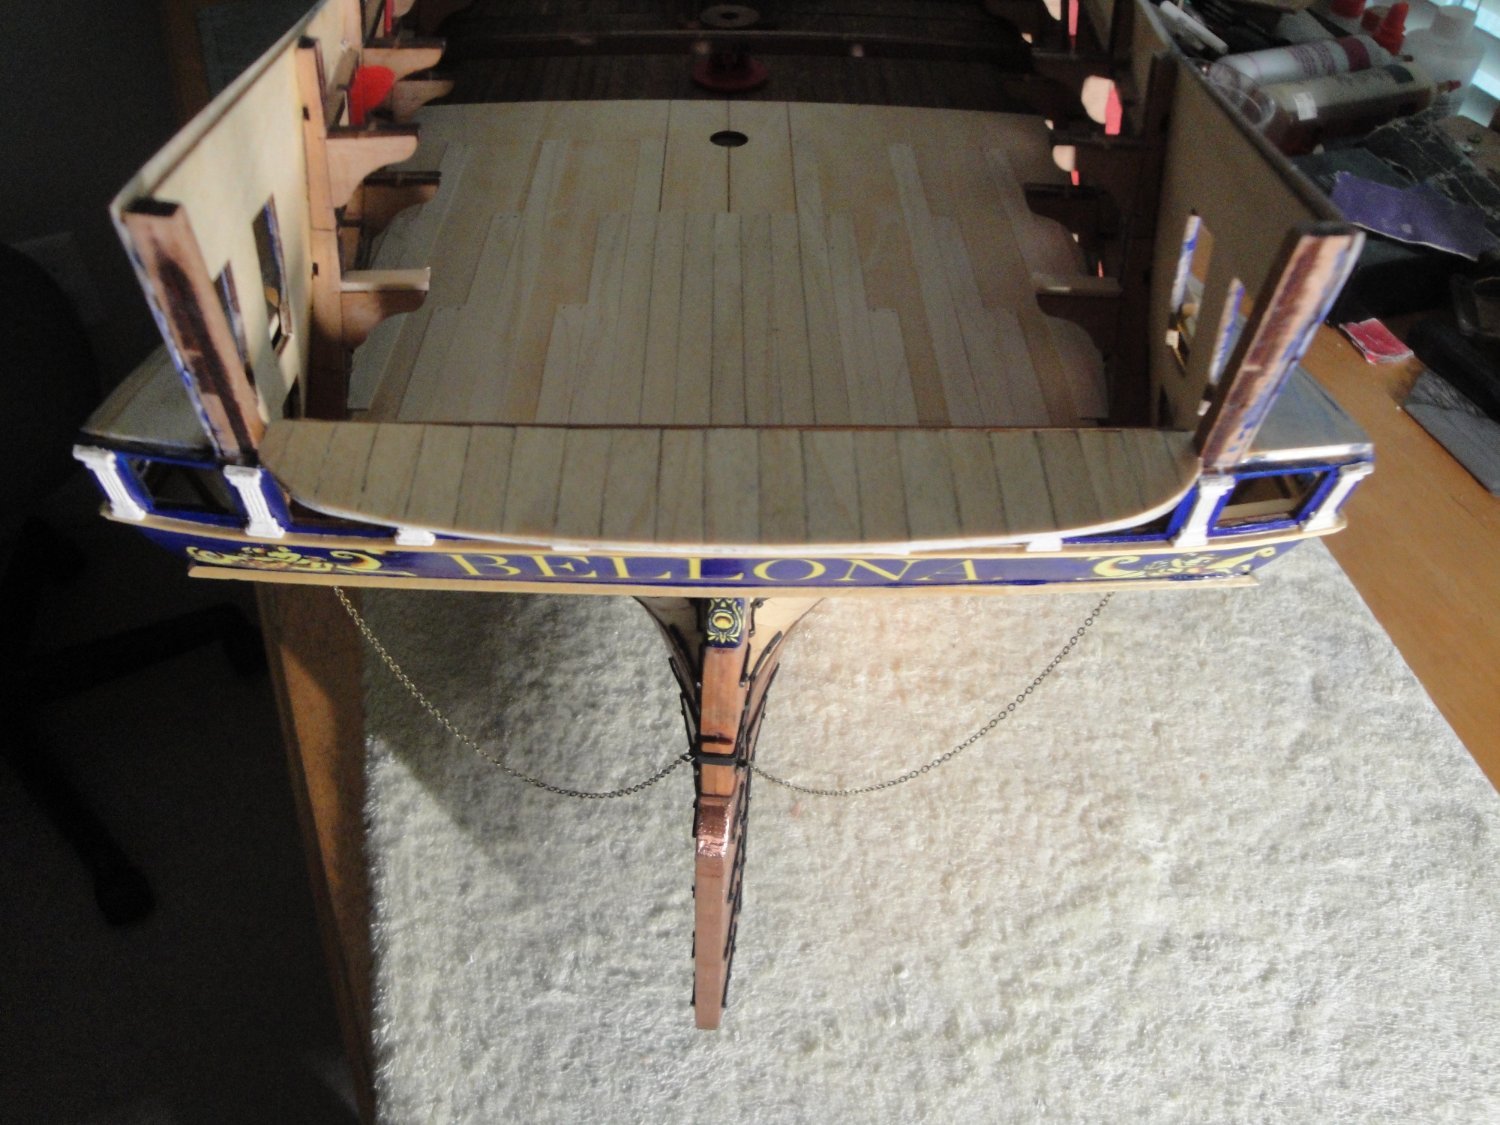
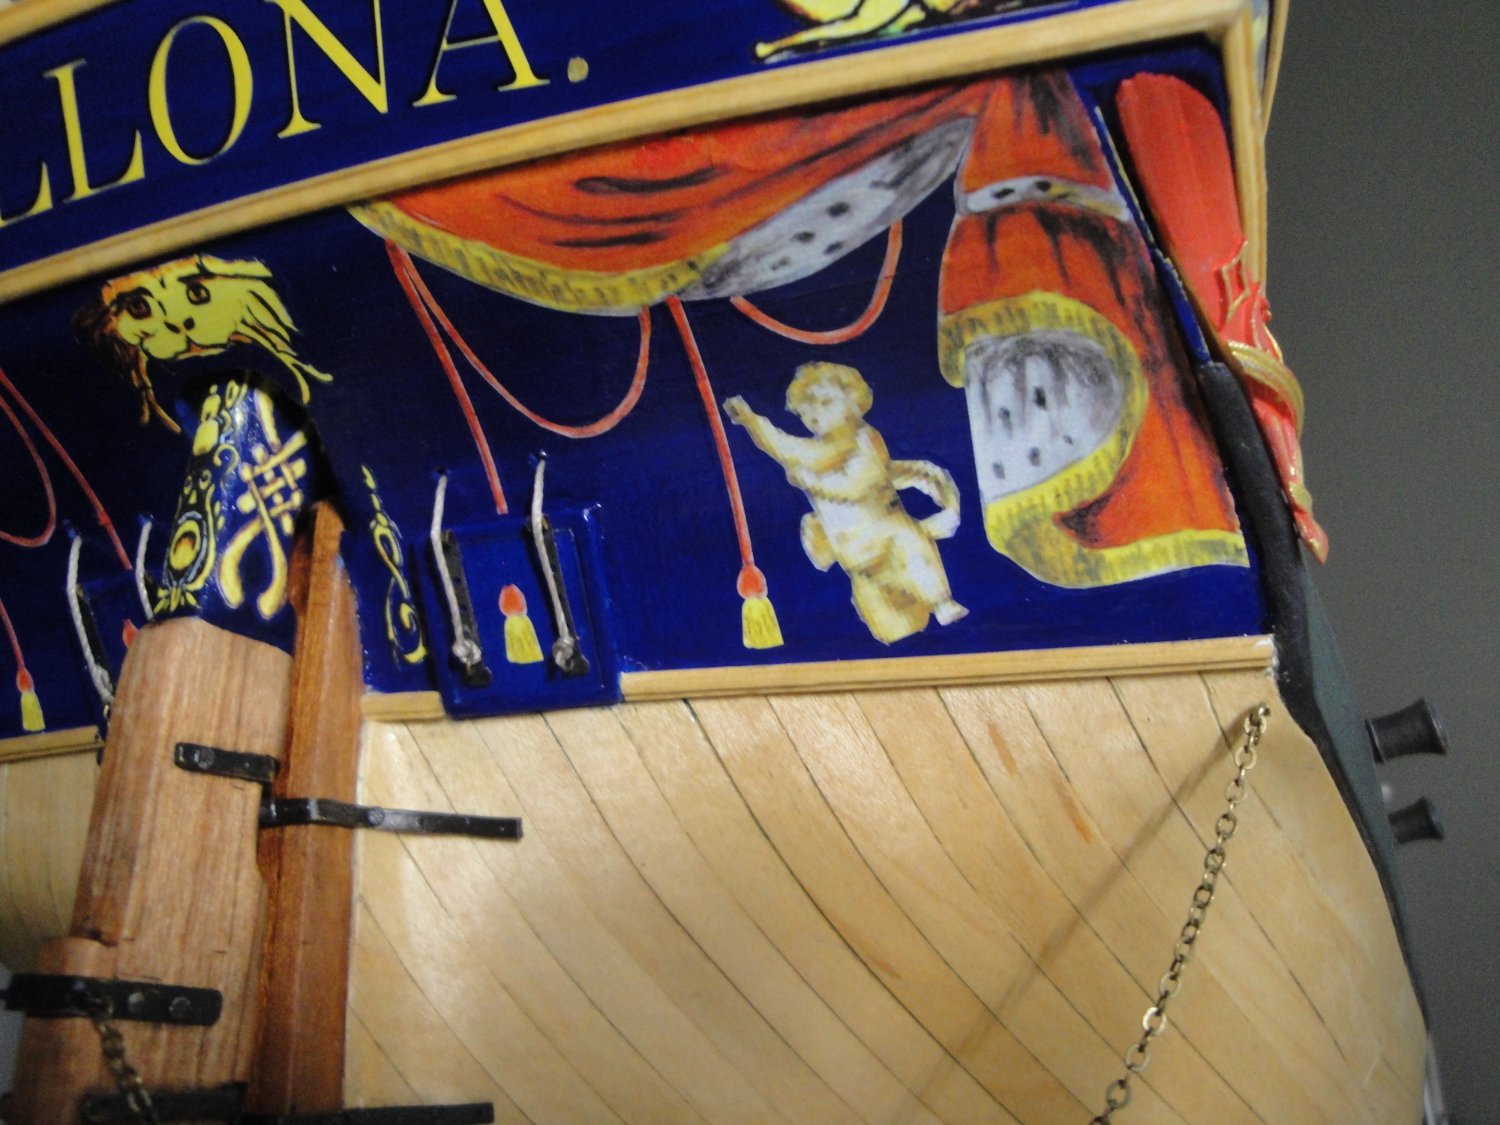
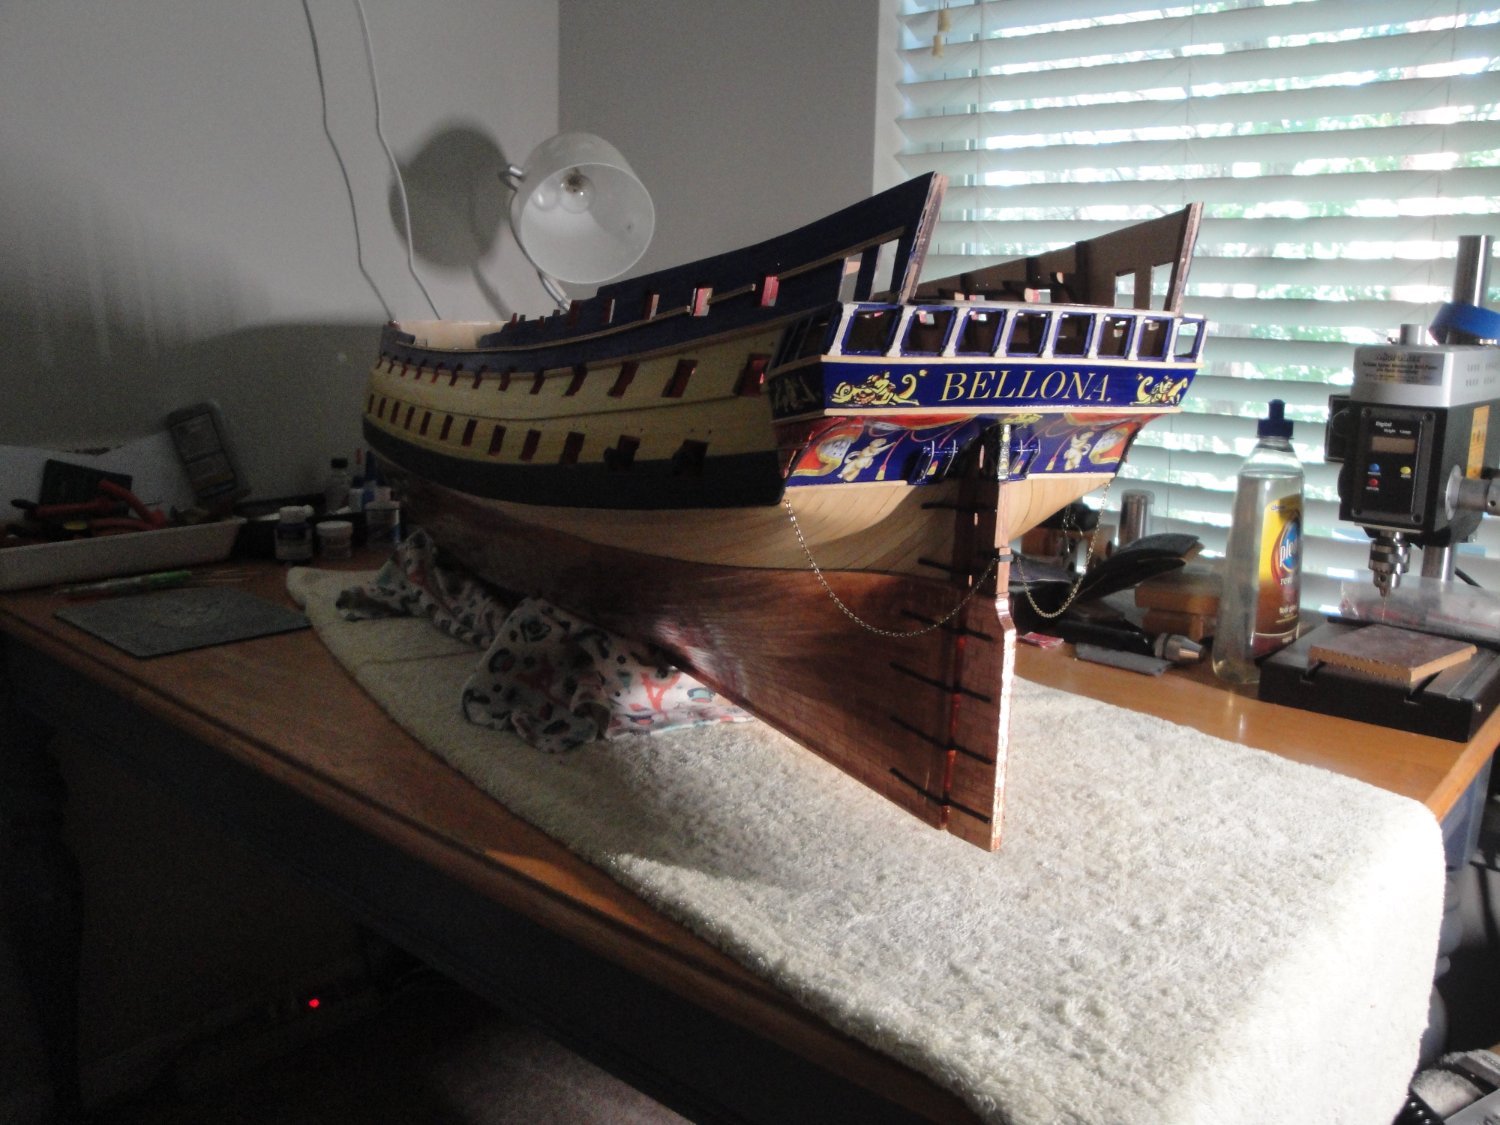
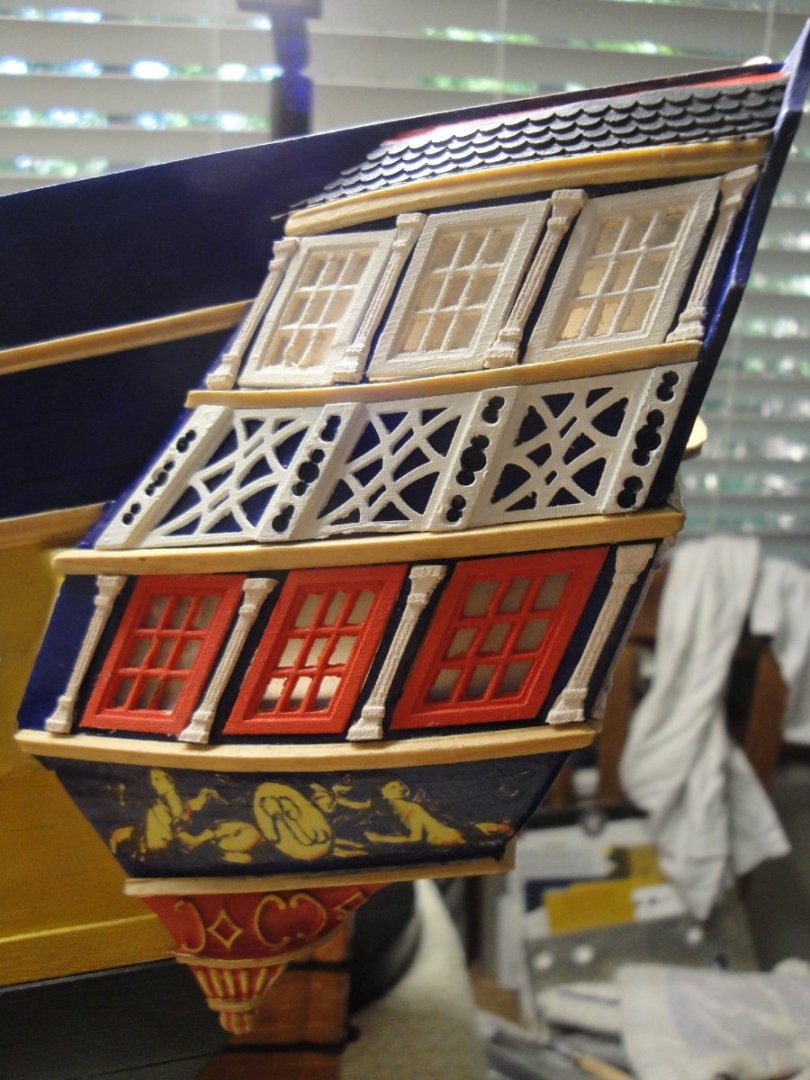
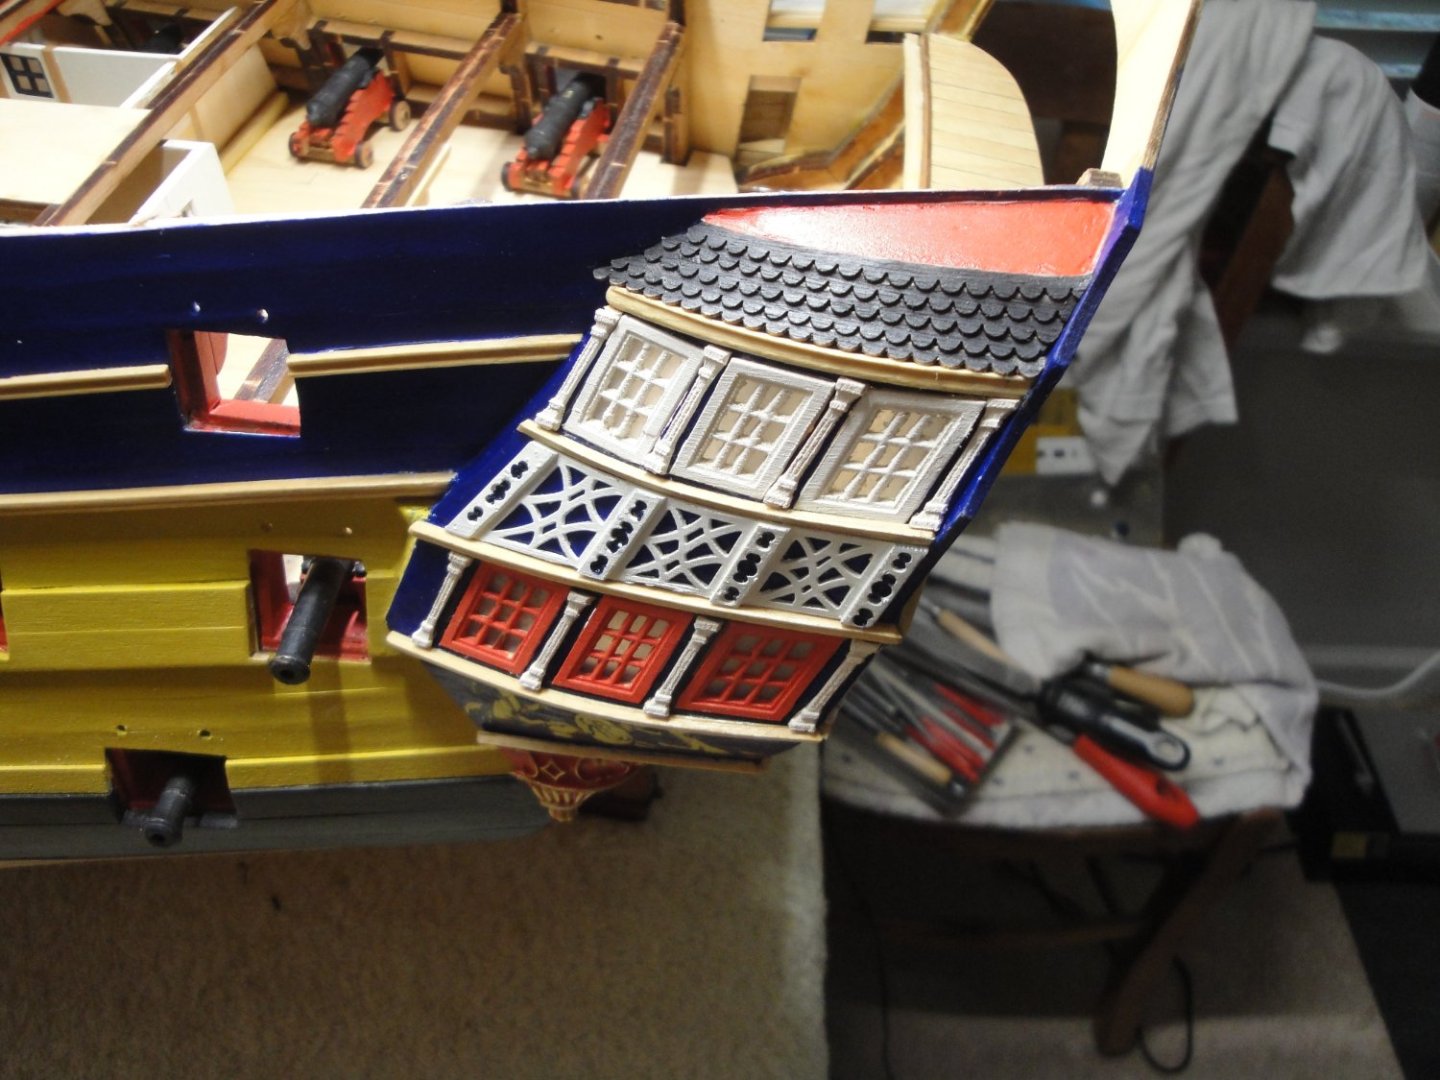
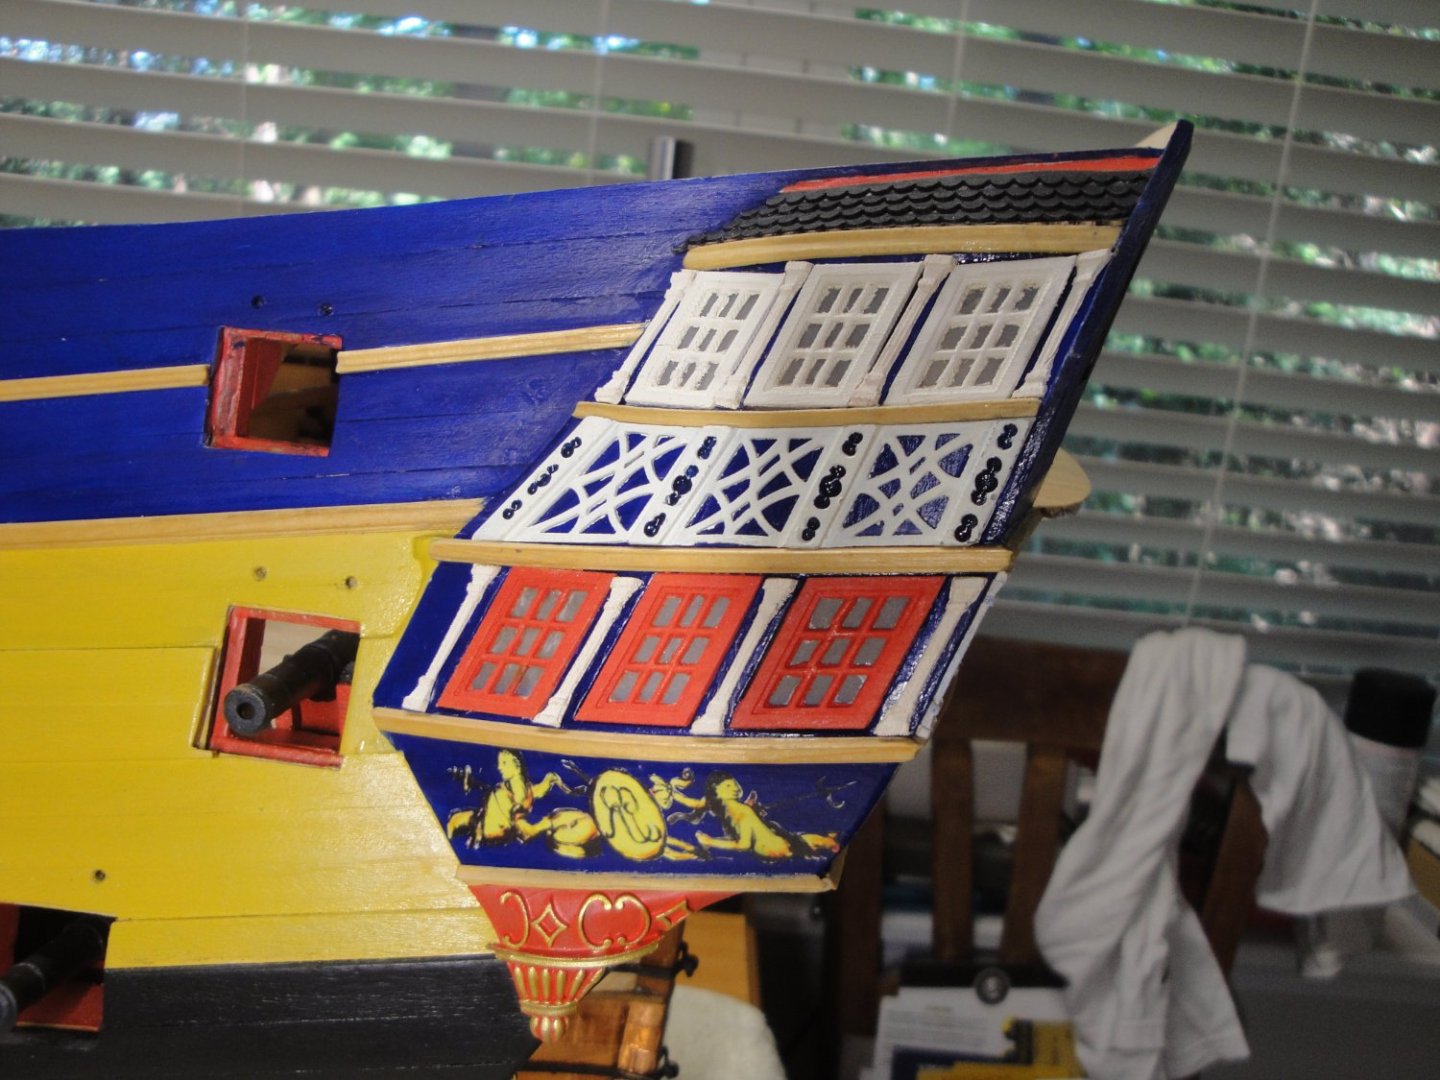
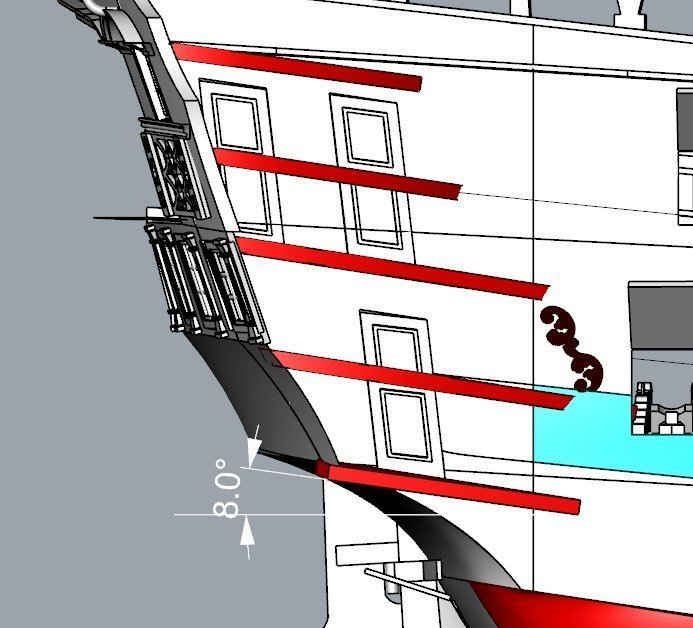
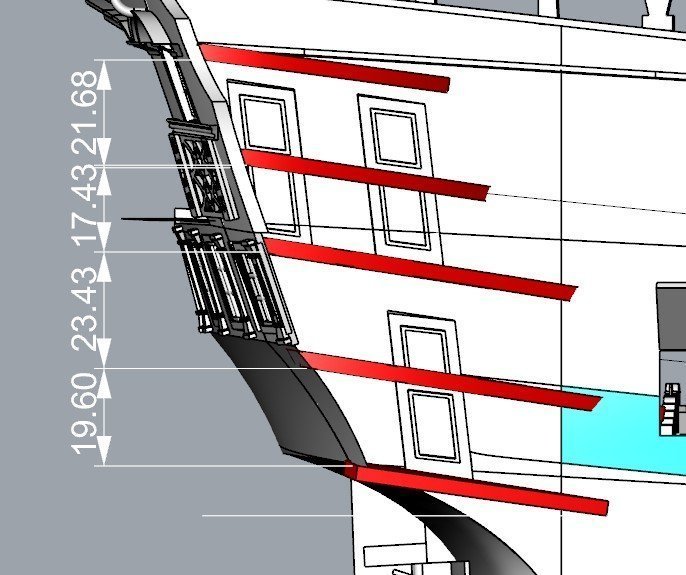
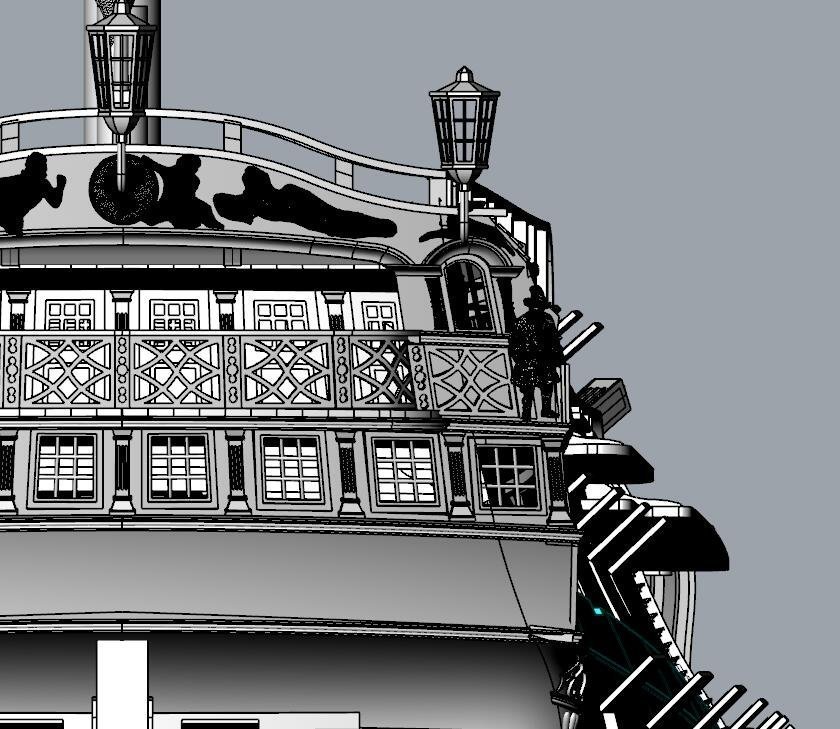
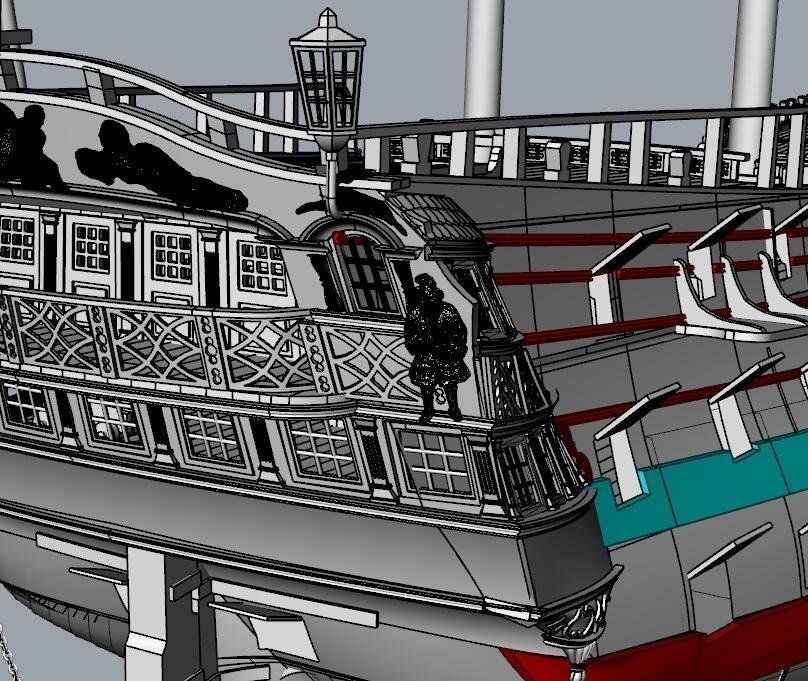
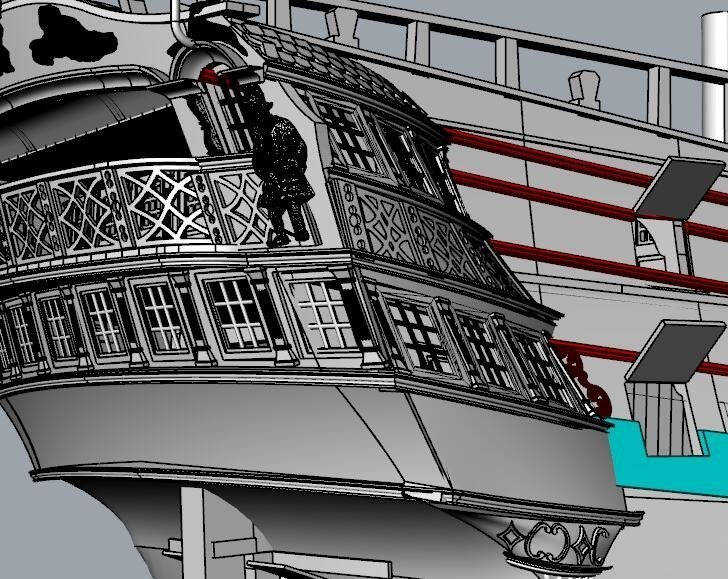
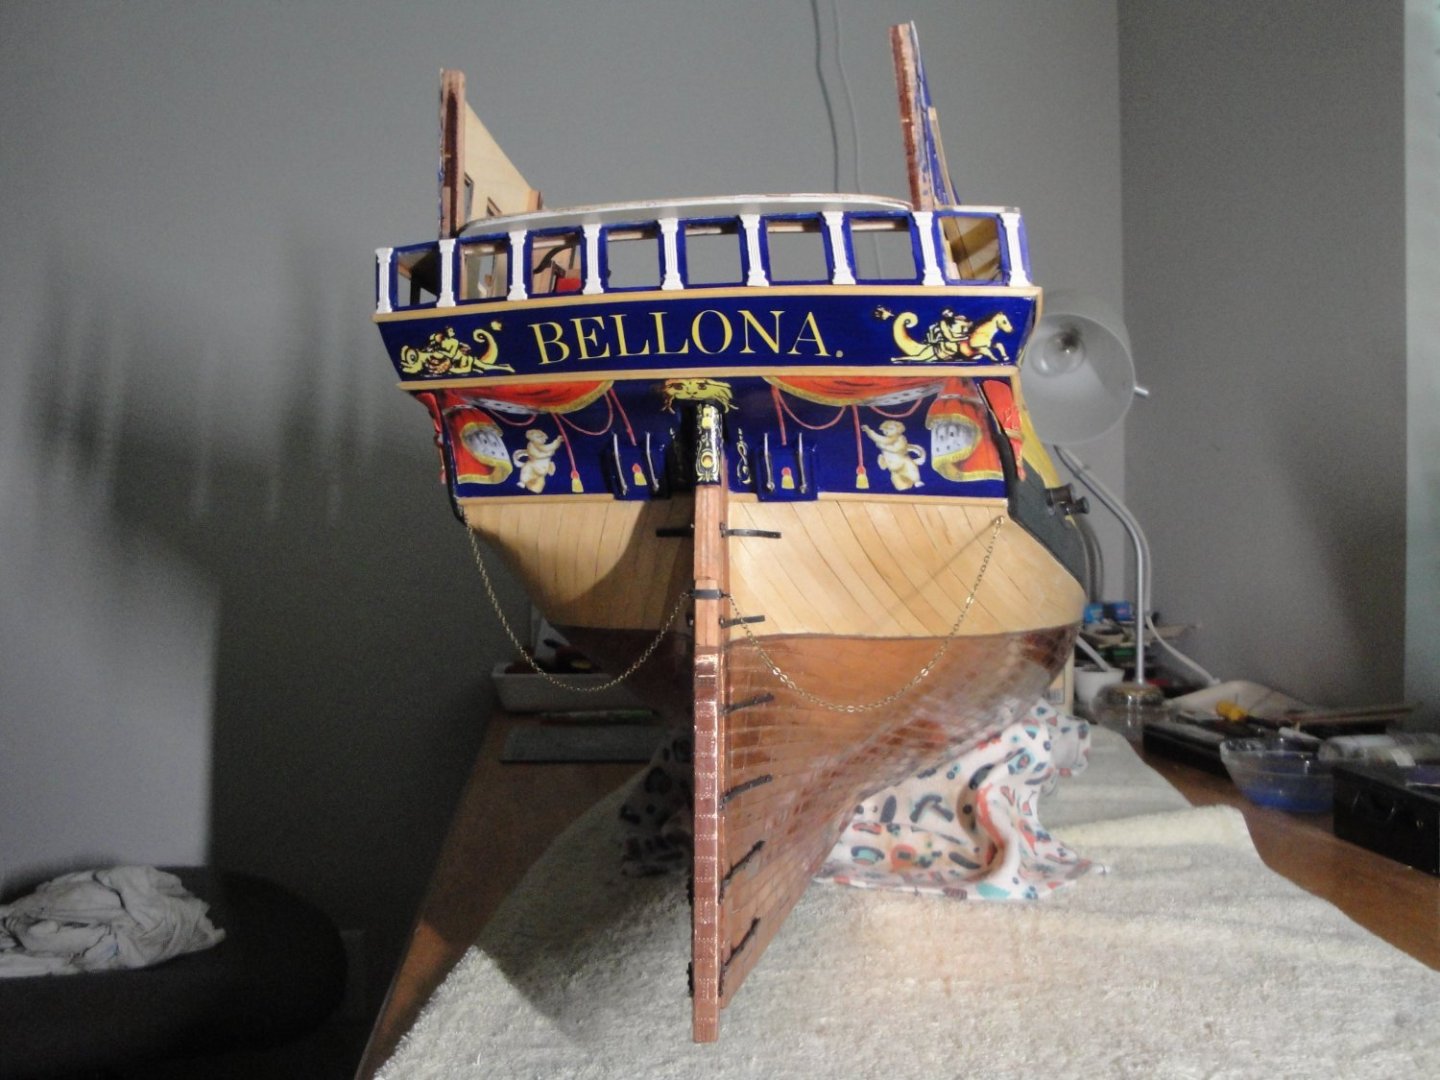
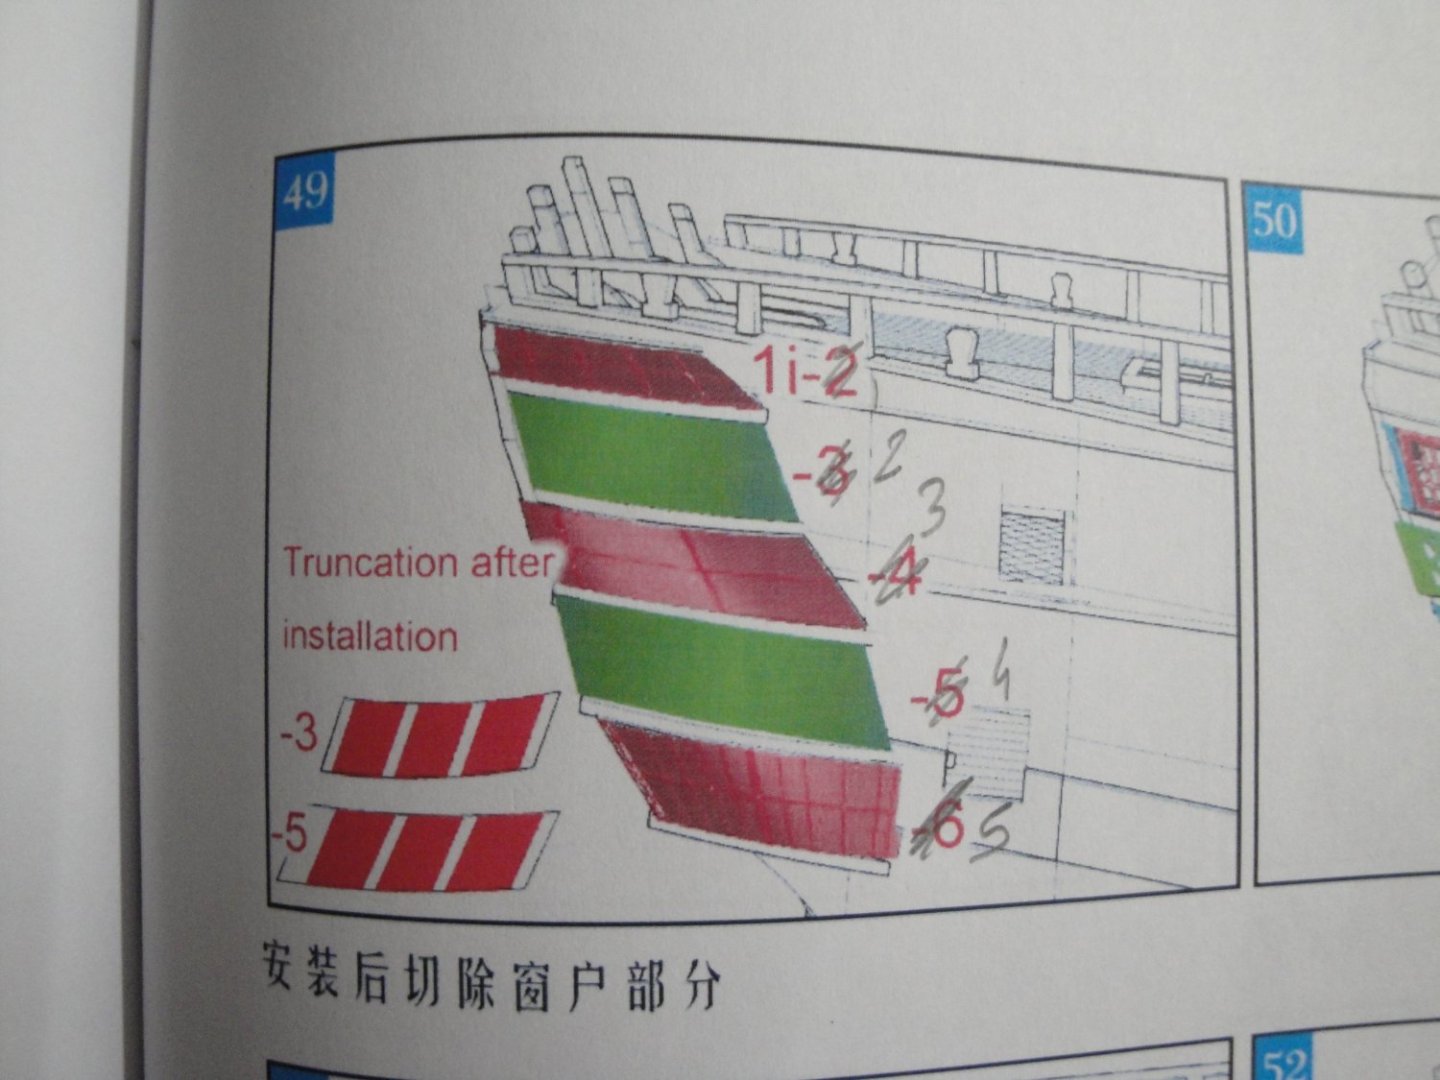
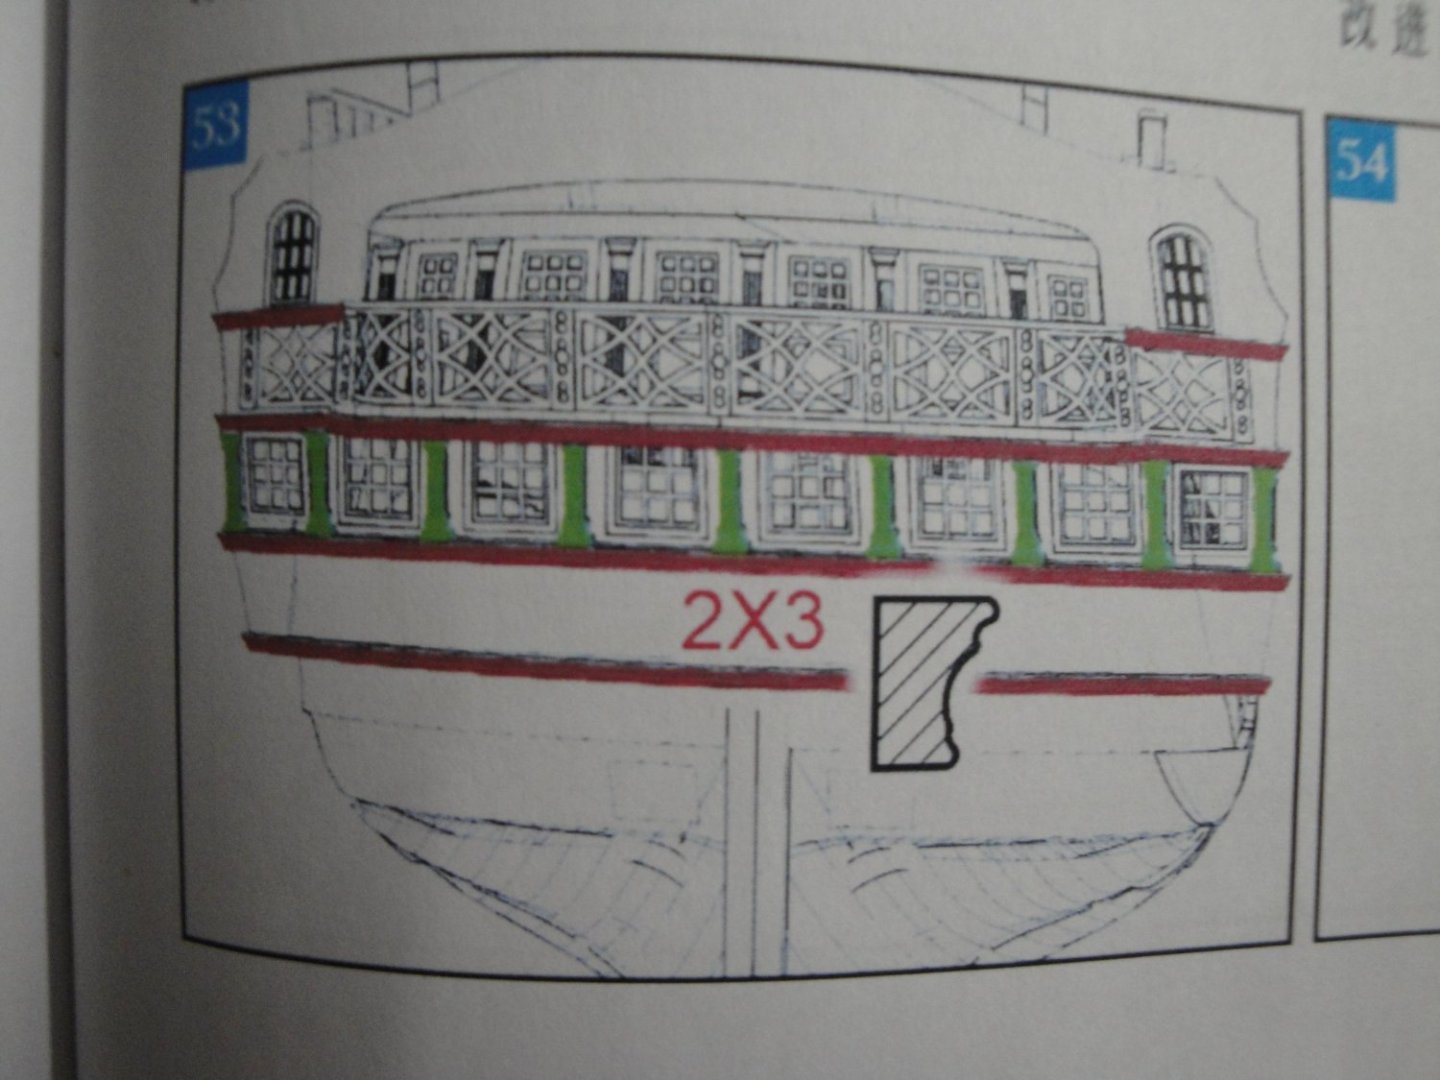
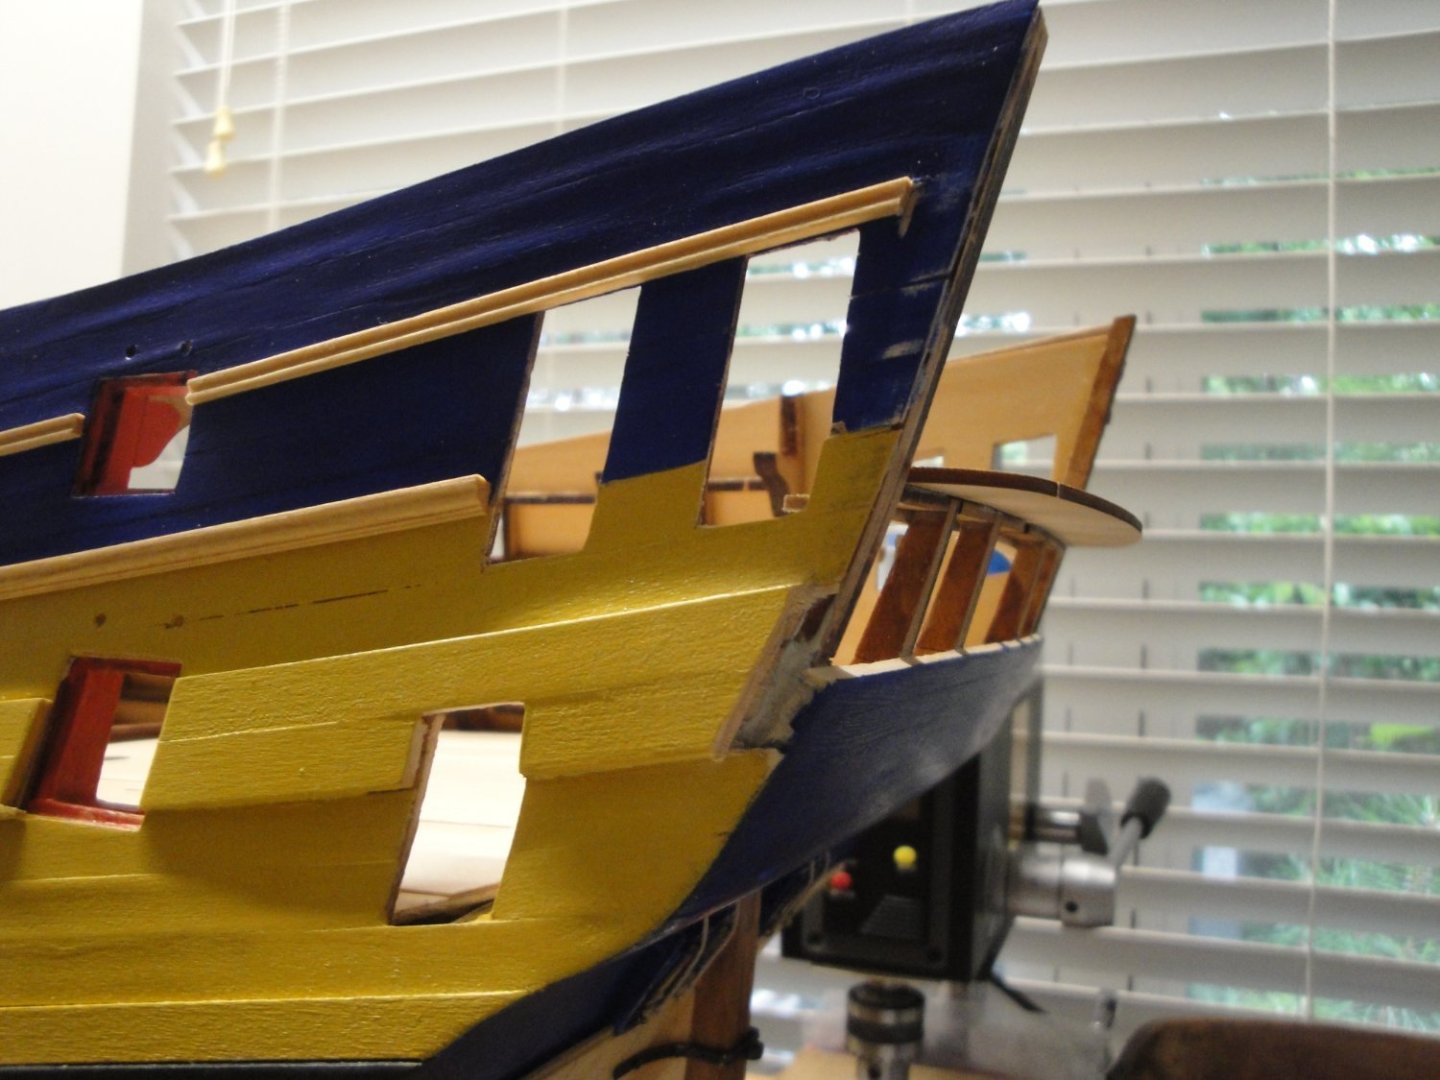
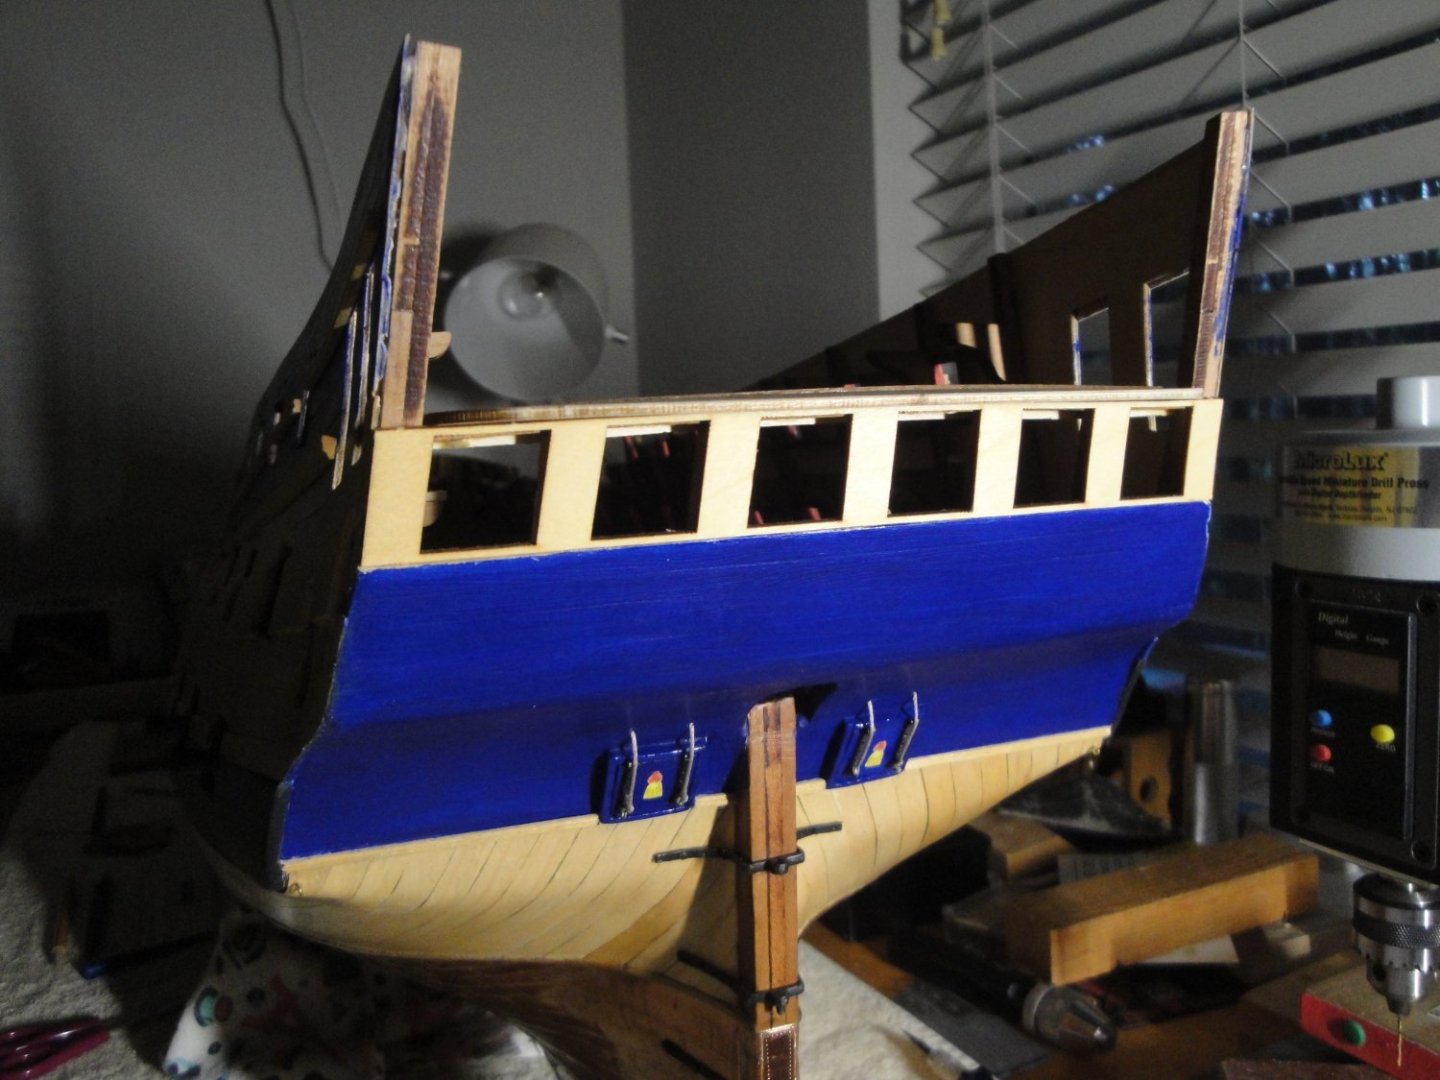
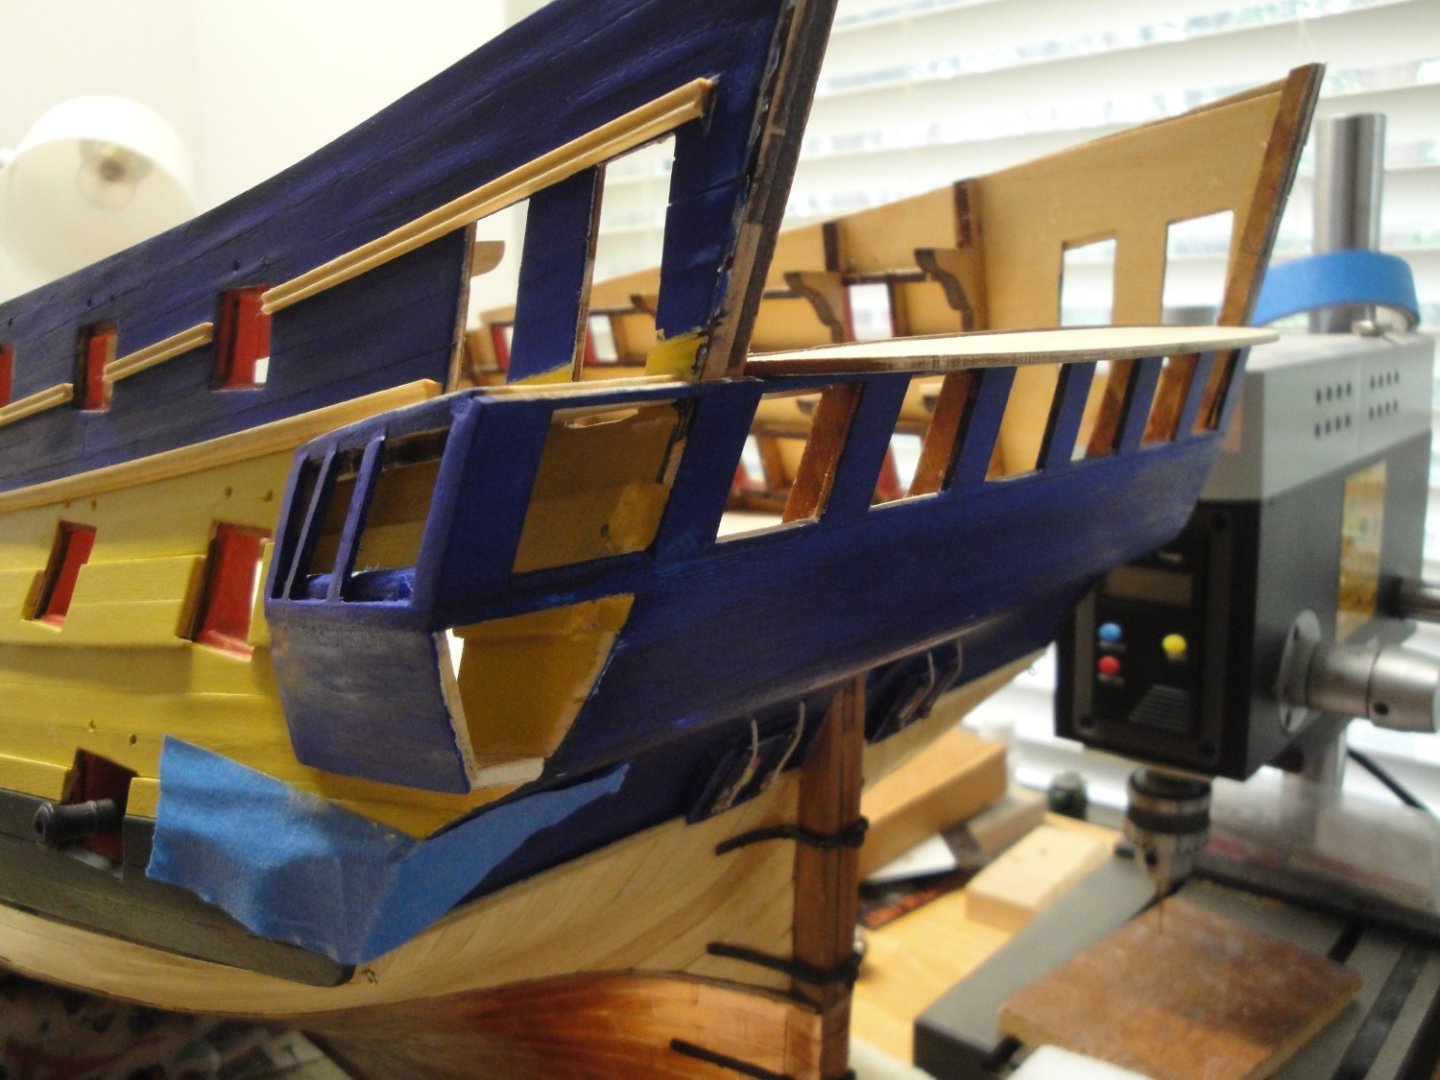
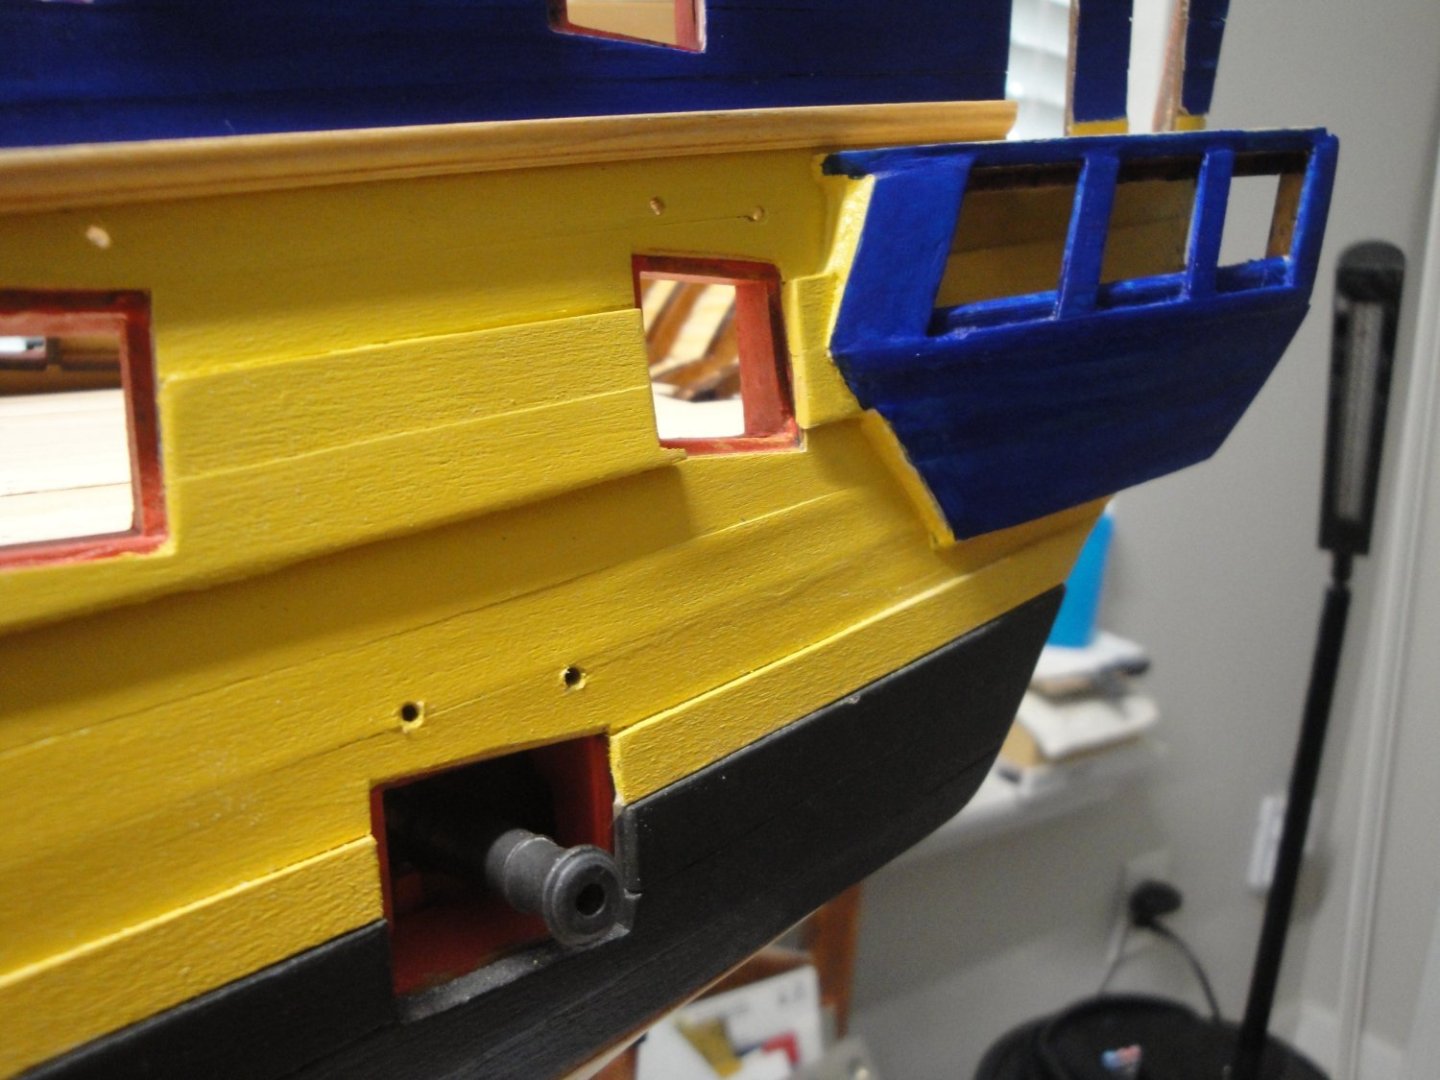
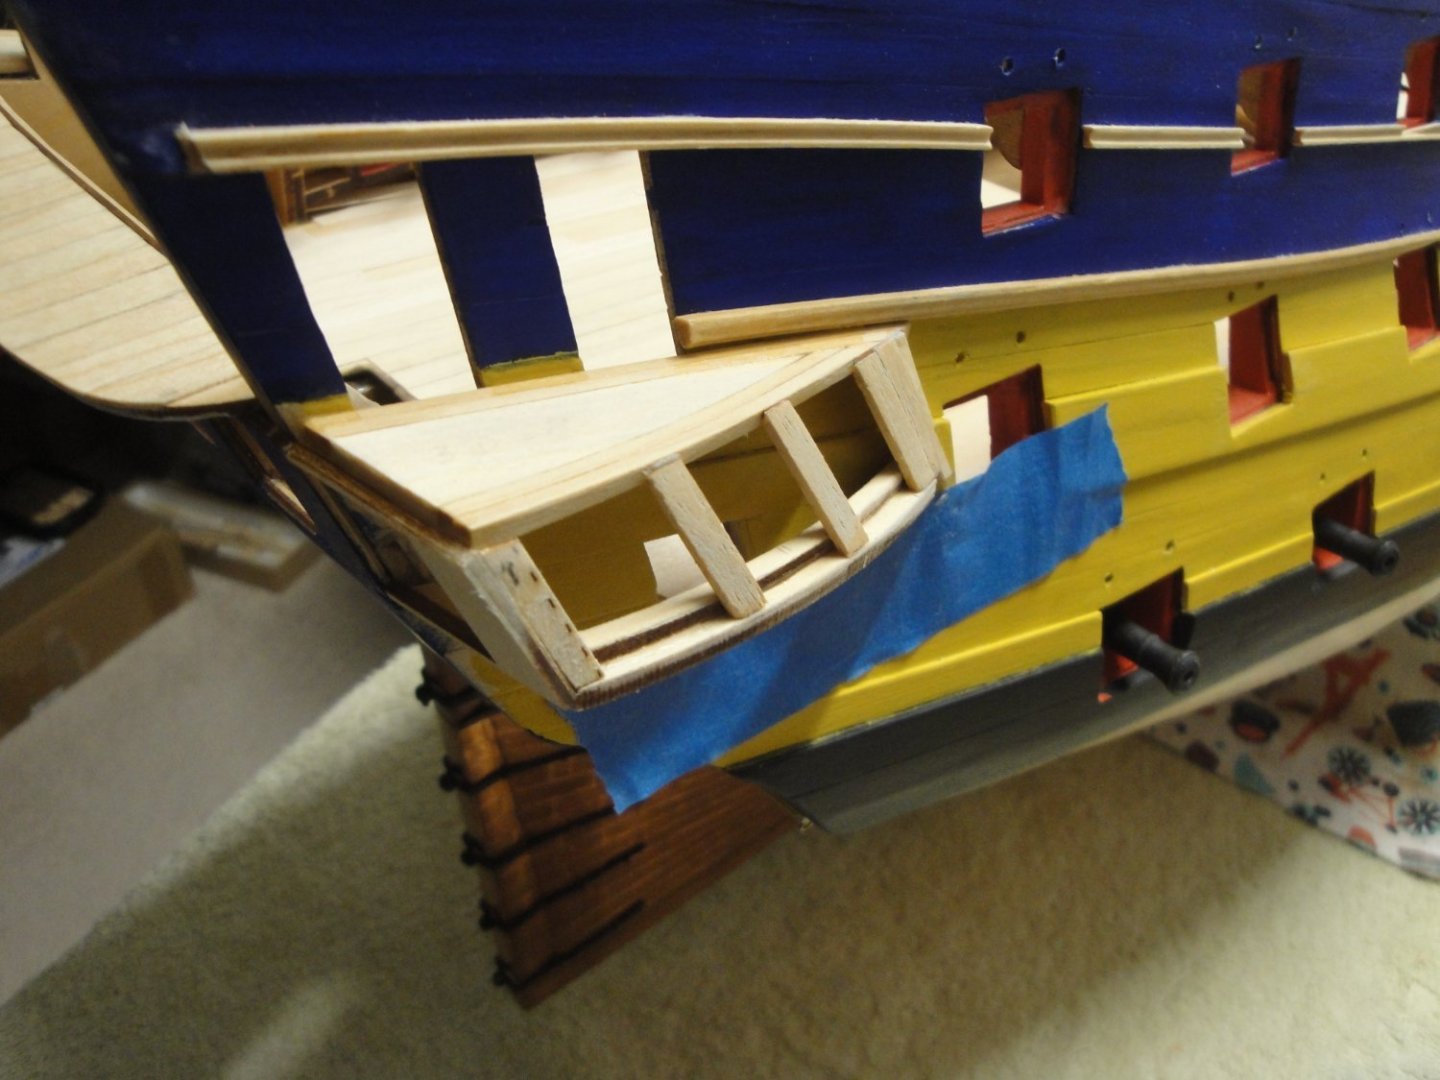
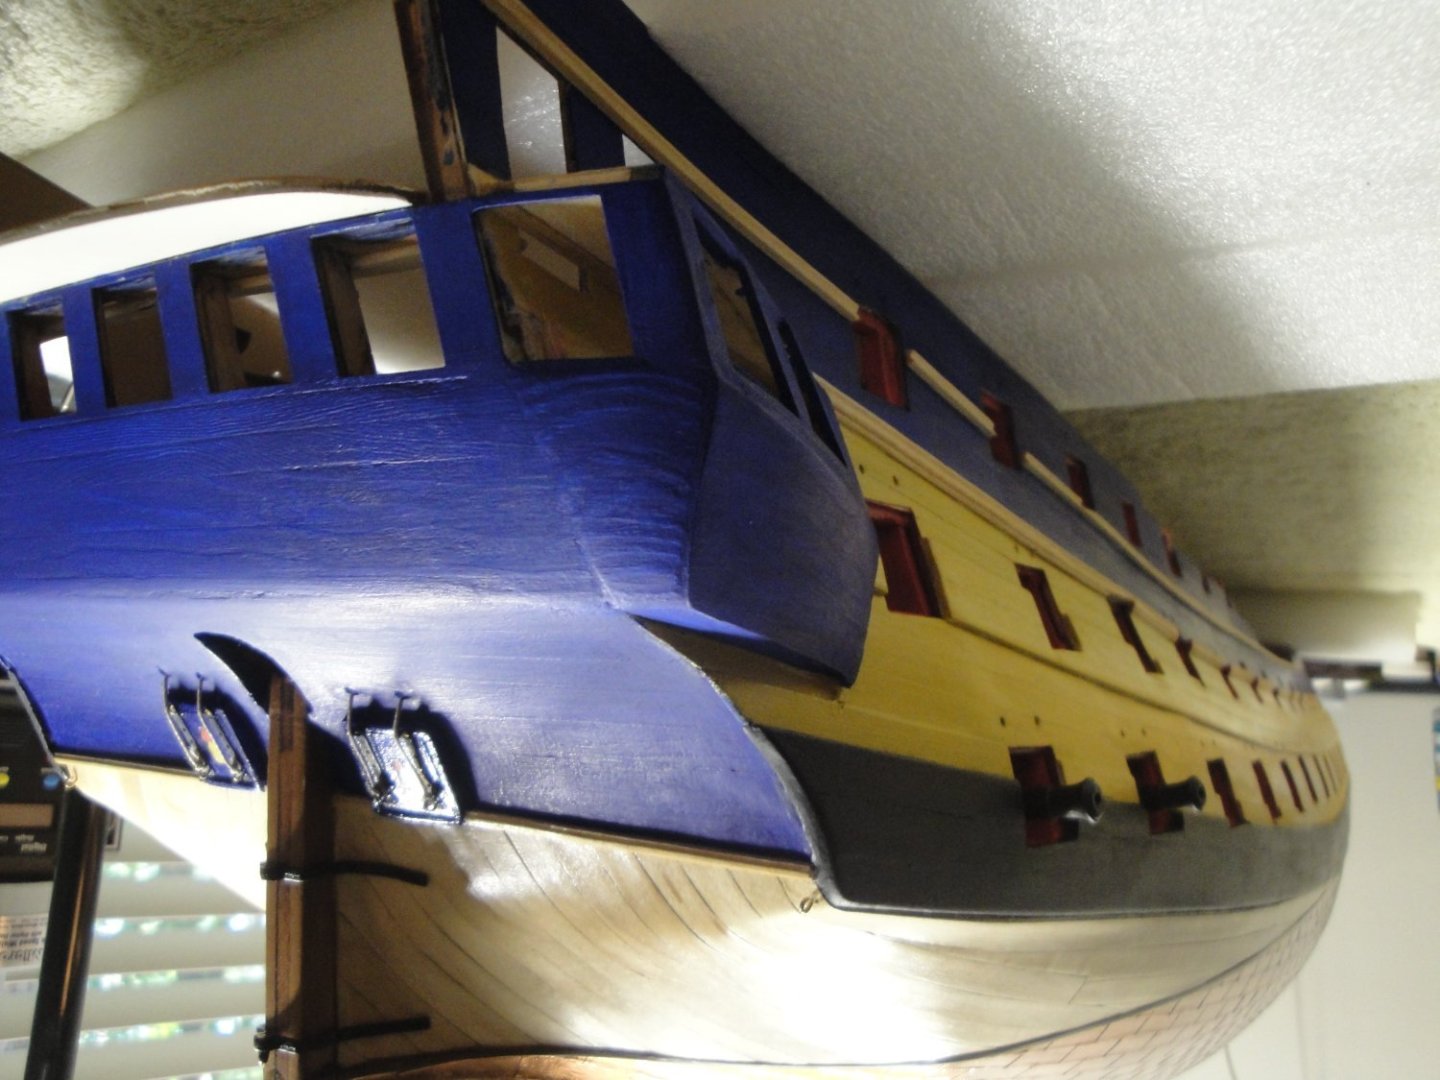
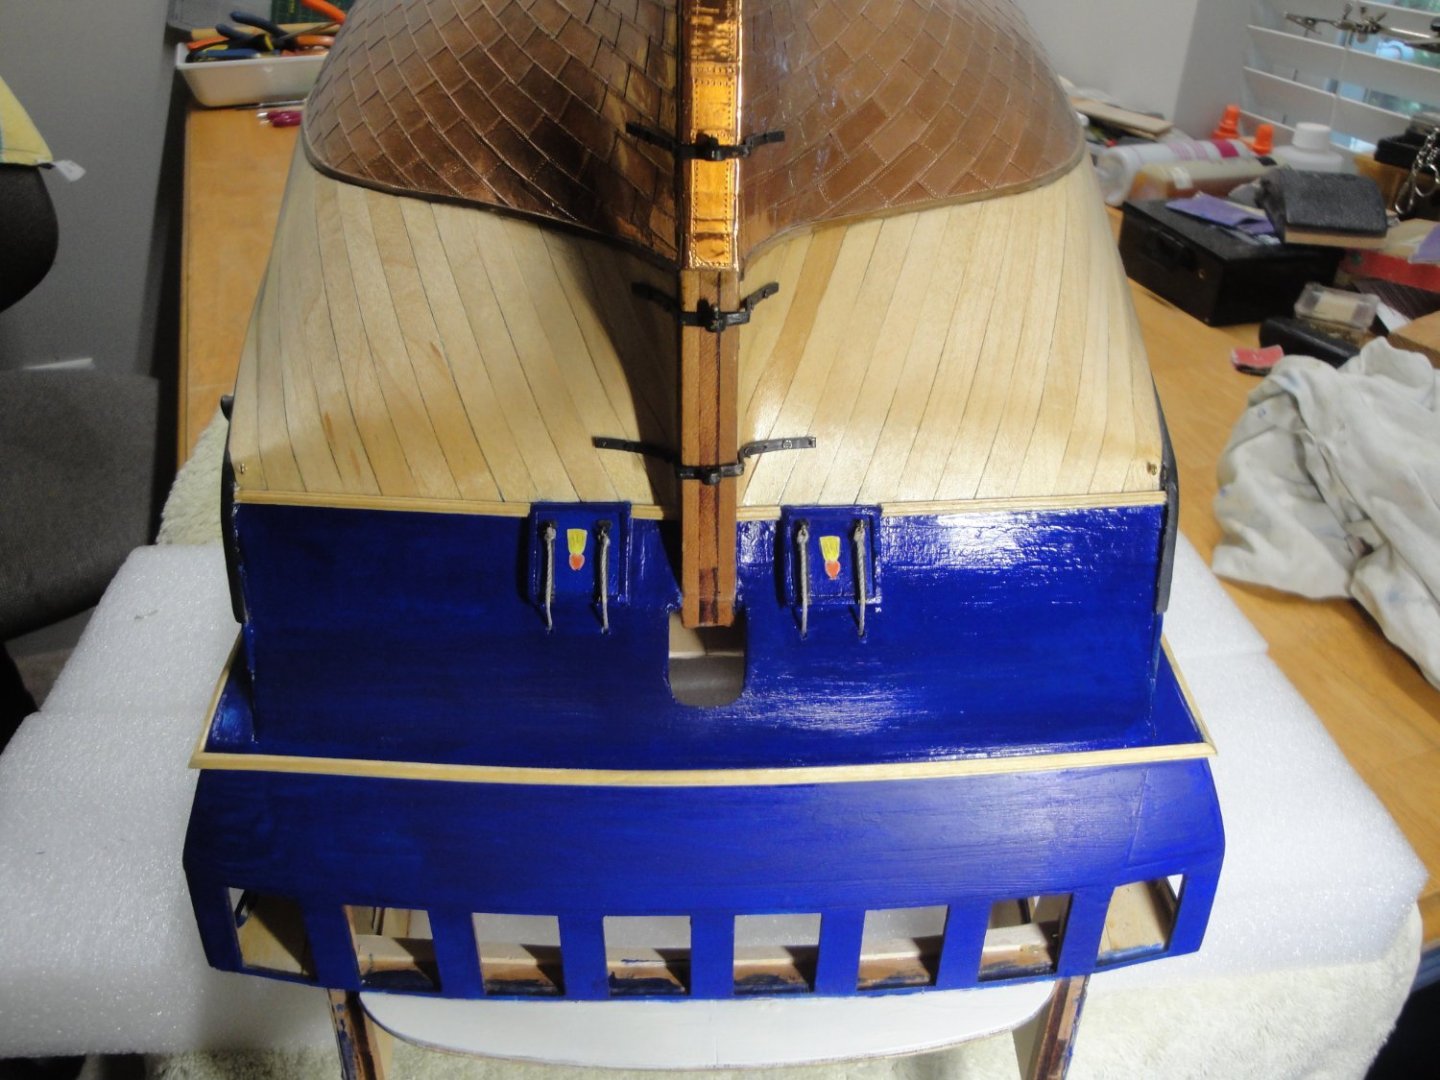
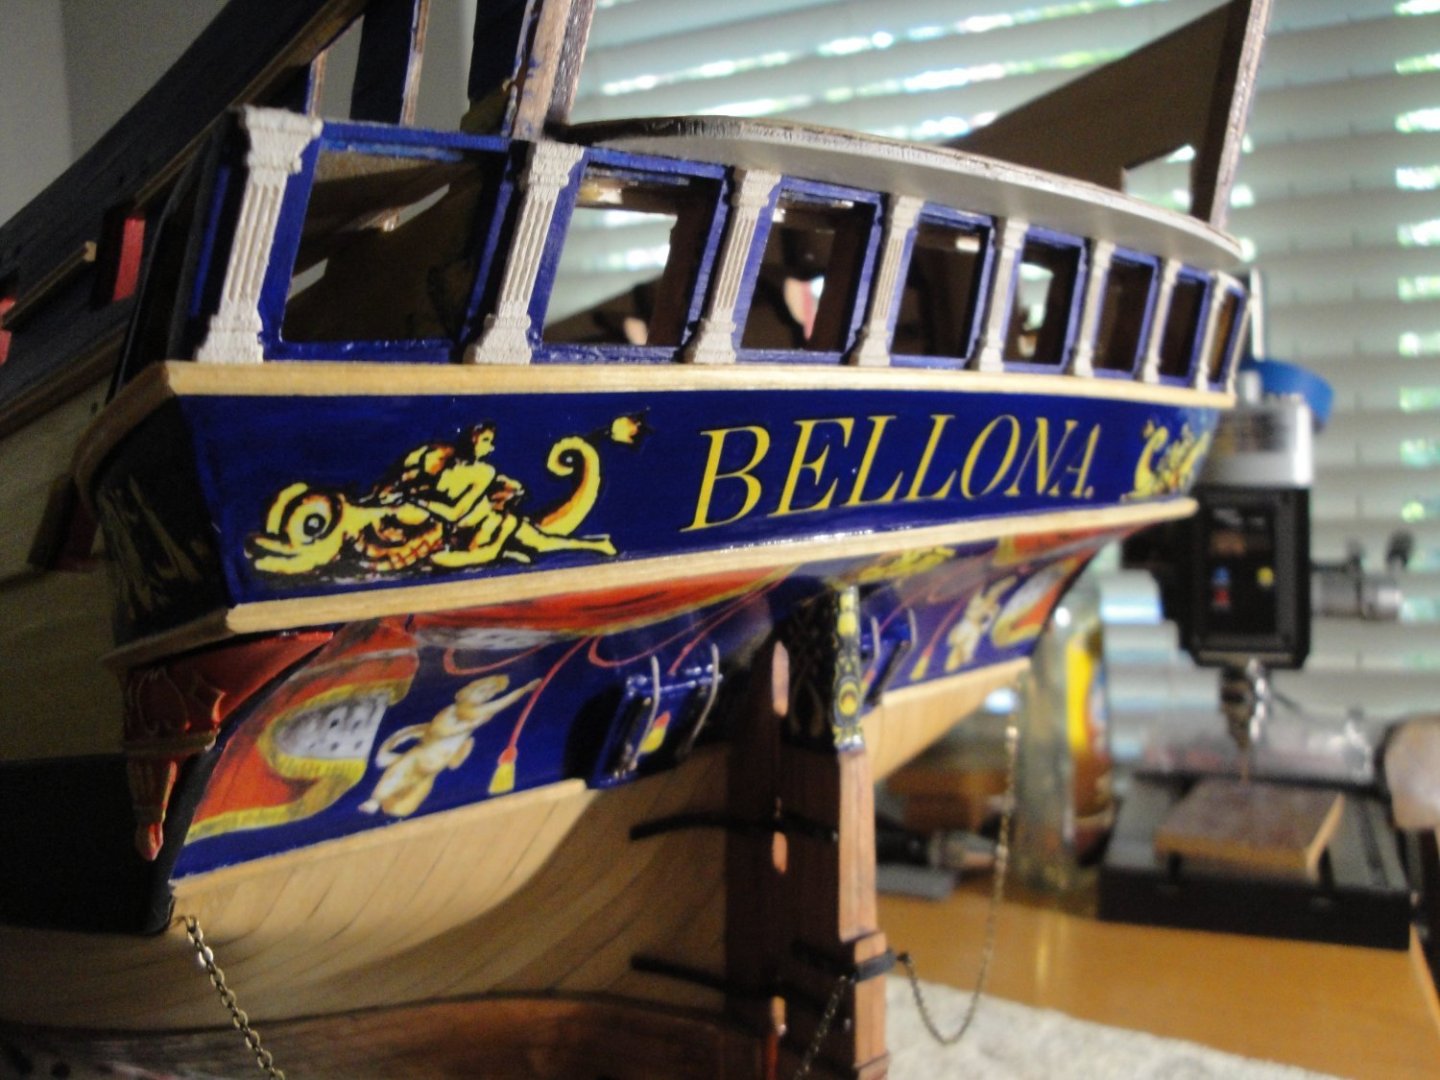
Time for another update. I have been working on the galleries and the decoration of the stern. It is very delicate work despite the use of 1/48th scale, due to multiple factors: The instructions are less than adequate and bring no precision to what has to be built. The parts are not exact in shape and dimensions. Because of these factors, a lot of research, creativity and building have to take place. Let's take a quick look at the instructions: I started with the installation of the balcony. This is essential in placing correctly both galleries (I am no longer following the CAF instructions overall). The balcony is delicately cut from the quarterdeck floor, and put in place separately. I have verified that the flooring of the quarterdeck will align and match perfectly with the balcony floor. This phase is essential to position correctly the rear wardroom lights and the upcoming pilasters. Below, you can see the quarterdeck floor in place: The wardroom lights framing is then glued in place: At this point, the galleries construction can be started. A lot of adjustments have to be done and quite a few parts were created, as I decided to not use the kit supplied parts, that are not fitting. After a lot of precise adjustment and work. Above, you can see how I increased the size of the 3D-8 parts, by adding four strips of 3x2 mm all around it.. Finally, we end up with something that looks like the stern of a Bellona: At that stage, we can start gluing the counter rails: And place a few decals. It is now coming to life: The wardroom lights will be installed later on as they are extremely delicate (carved in wood) and I still need to adjust the top fascia of the stern. For the time being let's enjoy some pictures of that delicate stage of the construction: I have added the "dot" after the name of the ship, as it was missing from the decal. The "drops" are made from resin (3D printed) and do require some filing to fit decently. Yves


- 507 replies
-
- 19
-
-
-
You will have to start a new Build Log, when you decide to tackle the kit. Yves
- 454 replies
-
- 1
-
-
- Union Steamship Company
- Stepcraft 840
- (and 3 more)
-
I share your torments. I started thinking if it was worthwhile installing them on my model as well. I even went down the path of purchasing the Longboat kit from Syren, to install on top of these beams.... If I was you, I would leave the beams bare and would remove the cradles. They distract the eyes and ruin the purity of the Navy Board style model you are trying to achieve (and succeeding at it). Yves
- 857 replies
-
- 5
-
-
- Sphinx
- Vanguard Models
- (and 1 more)
-
It reminds me of some difficult and delicate phases during the planking of my Bellona. The wood was softer on the Bellona kit, but it still required a lot of heavy tools to make it bend and stay in place. You are doing a great job, Kenny. Yves
-
B.E. your model is an endless source of marvels for me. You are pushing the perfection towards new boundaries. Yves
- 857 replies
-
- 3
-
-
- Sphinx
- Vanguard Models
- (and 1 more)
-
If you manage to have this engine spin, you are a champion. Yves
-
Diversifying Kevin, diversifying!!! After the paper, you are back to the wood. Great kit that you are putting together. Yves