yvesvidal
-
Posts
3,624 -
Joined
-
Last visited
Content Type
Profiles
Forums
Gallery
Events
Everything posted by yvesvidal
-
 Tobias, I wish you could publish more pictures of that nice room with all these models. Is it a museum or your own display room? Yves
 -
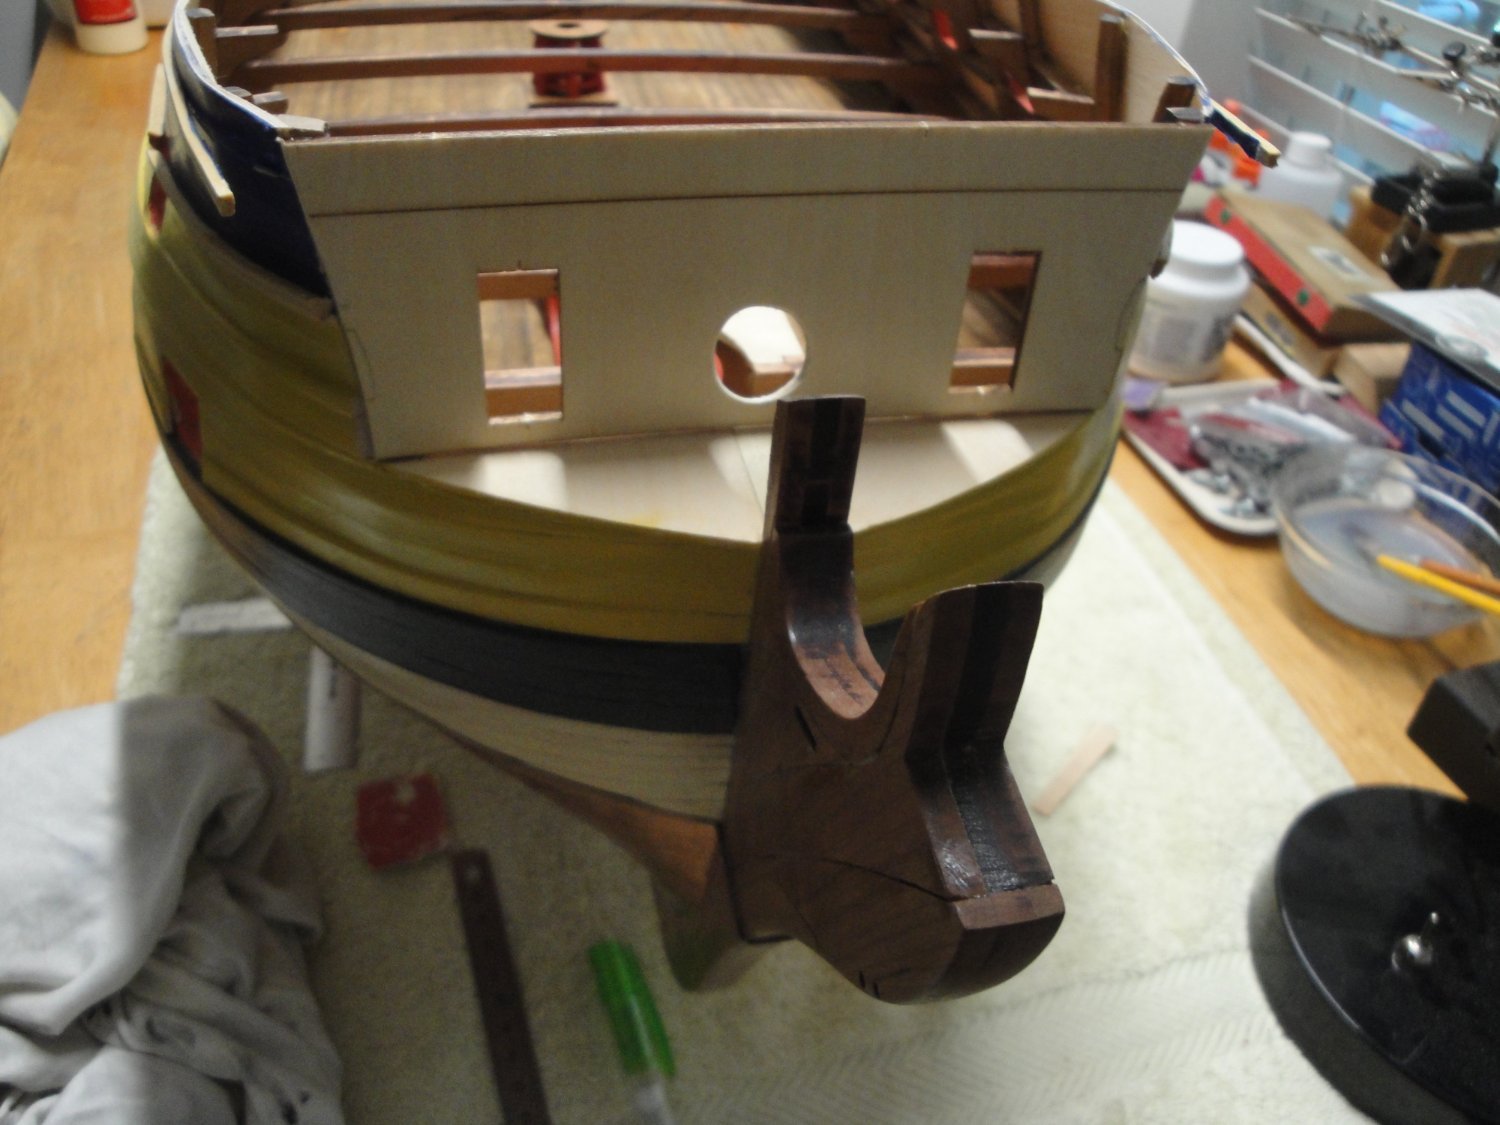
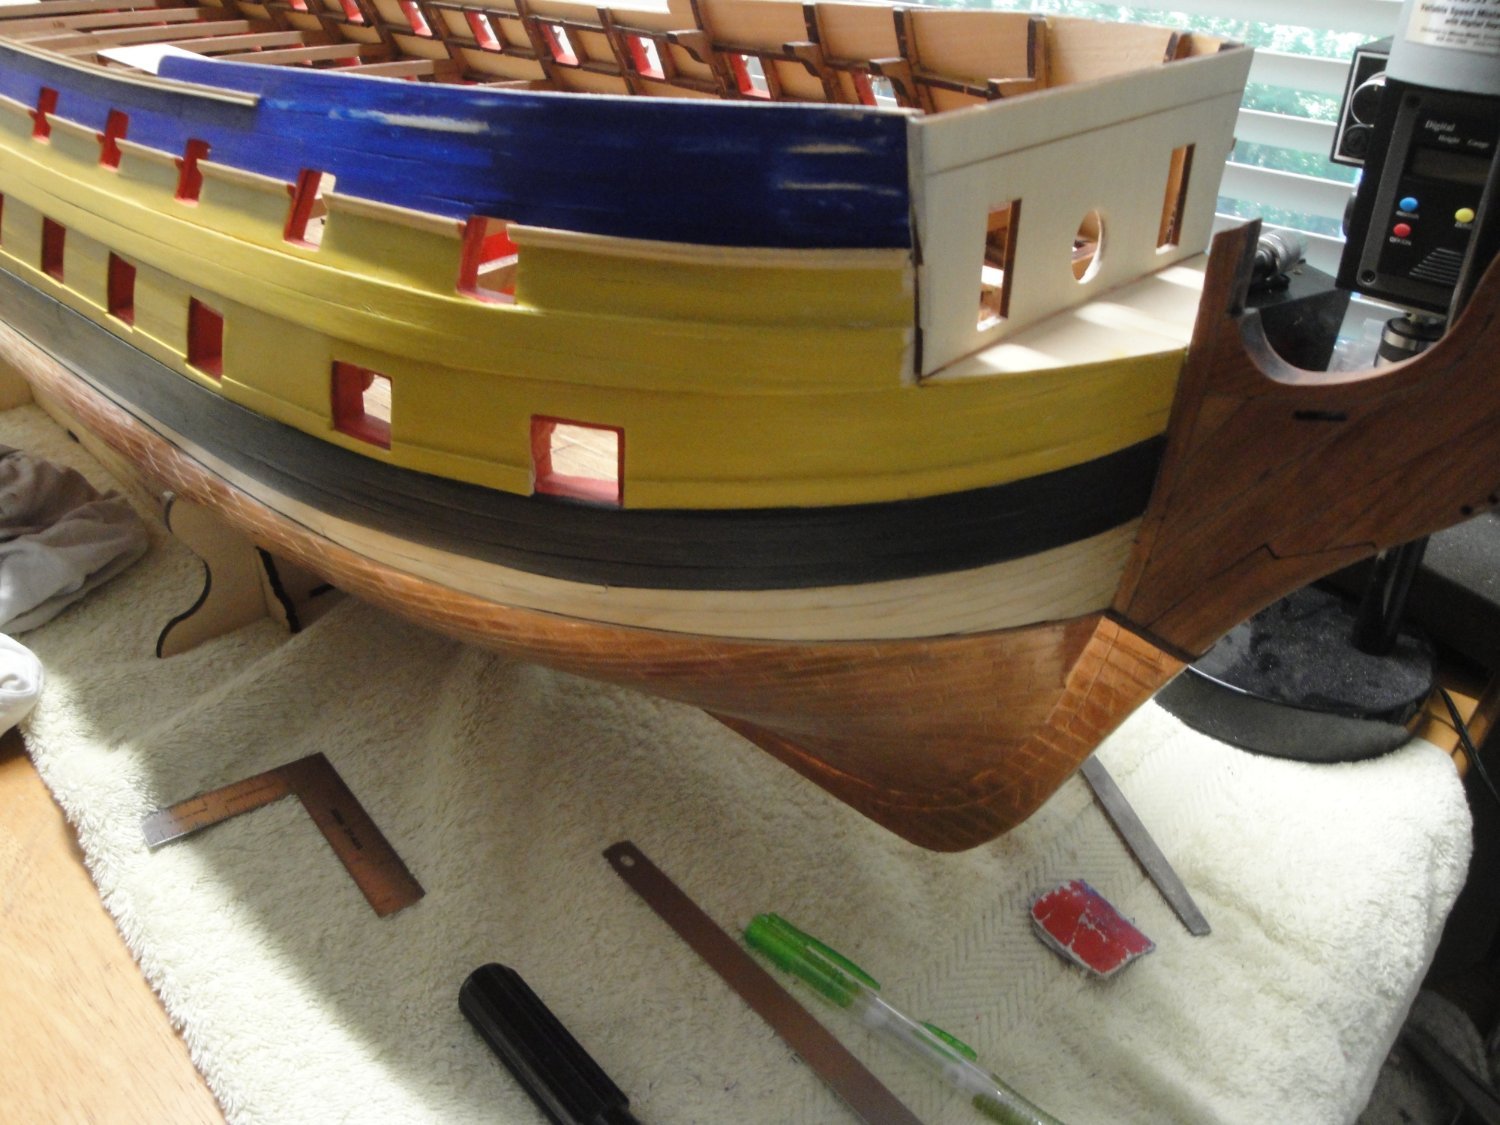
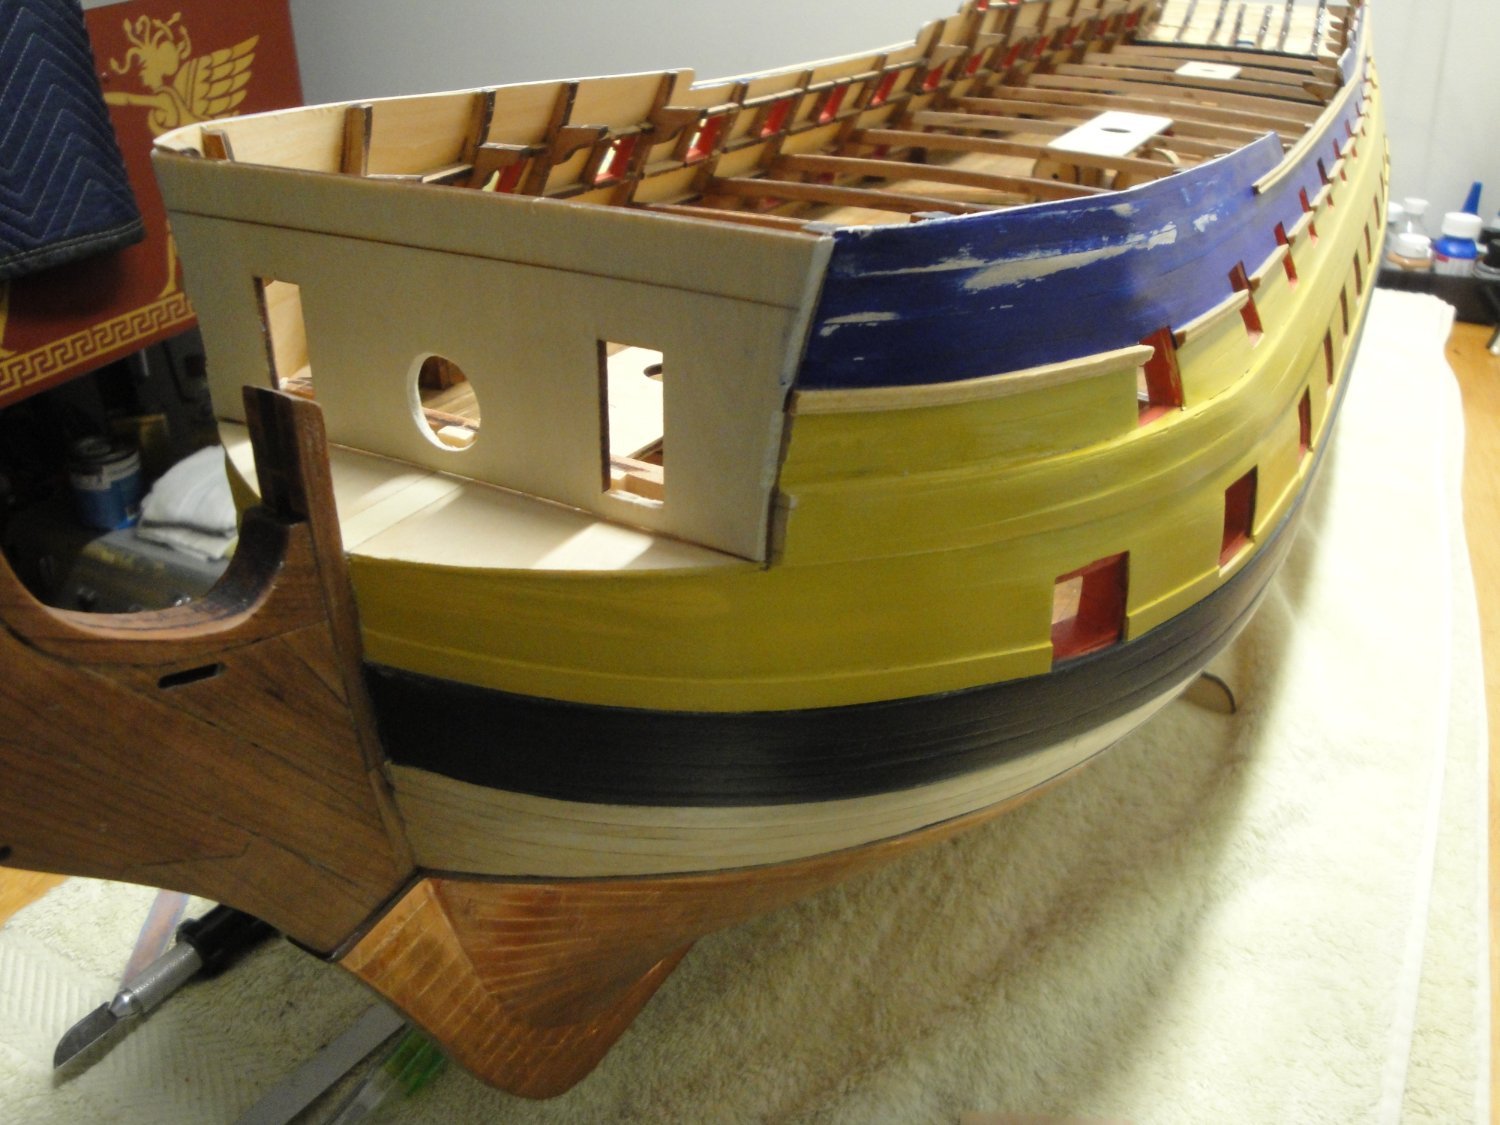
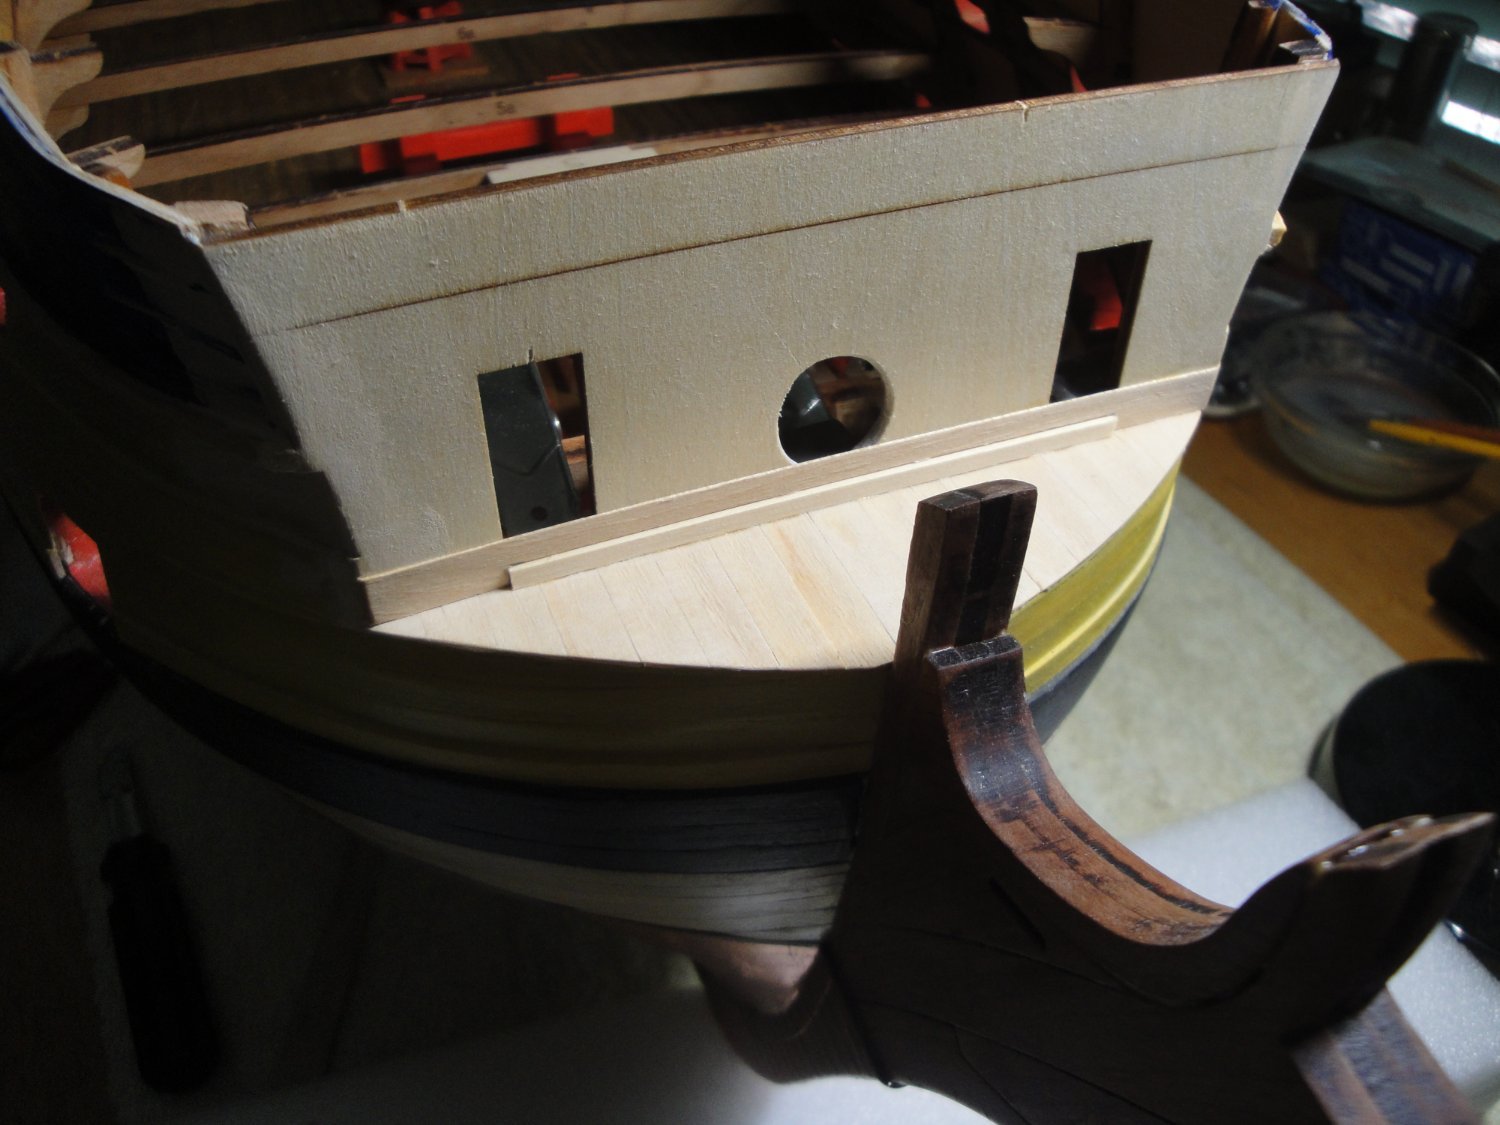
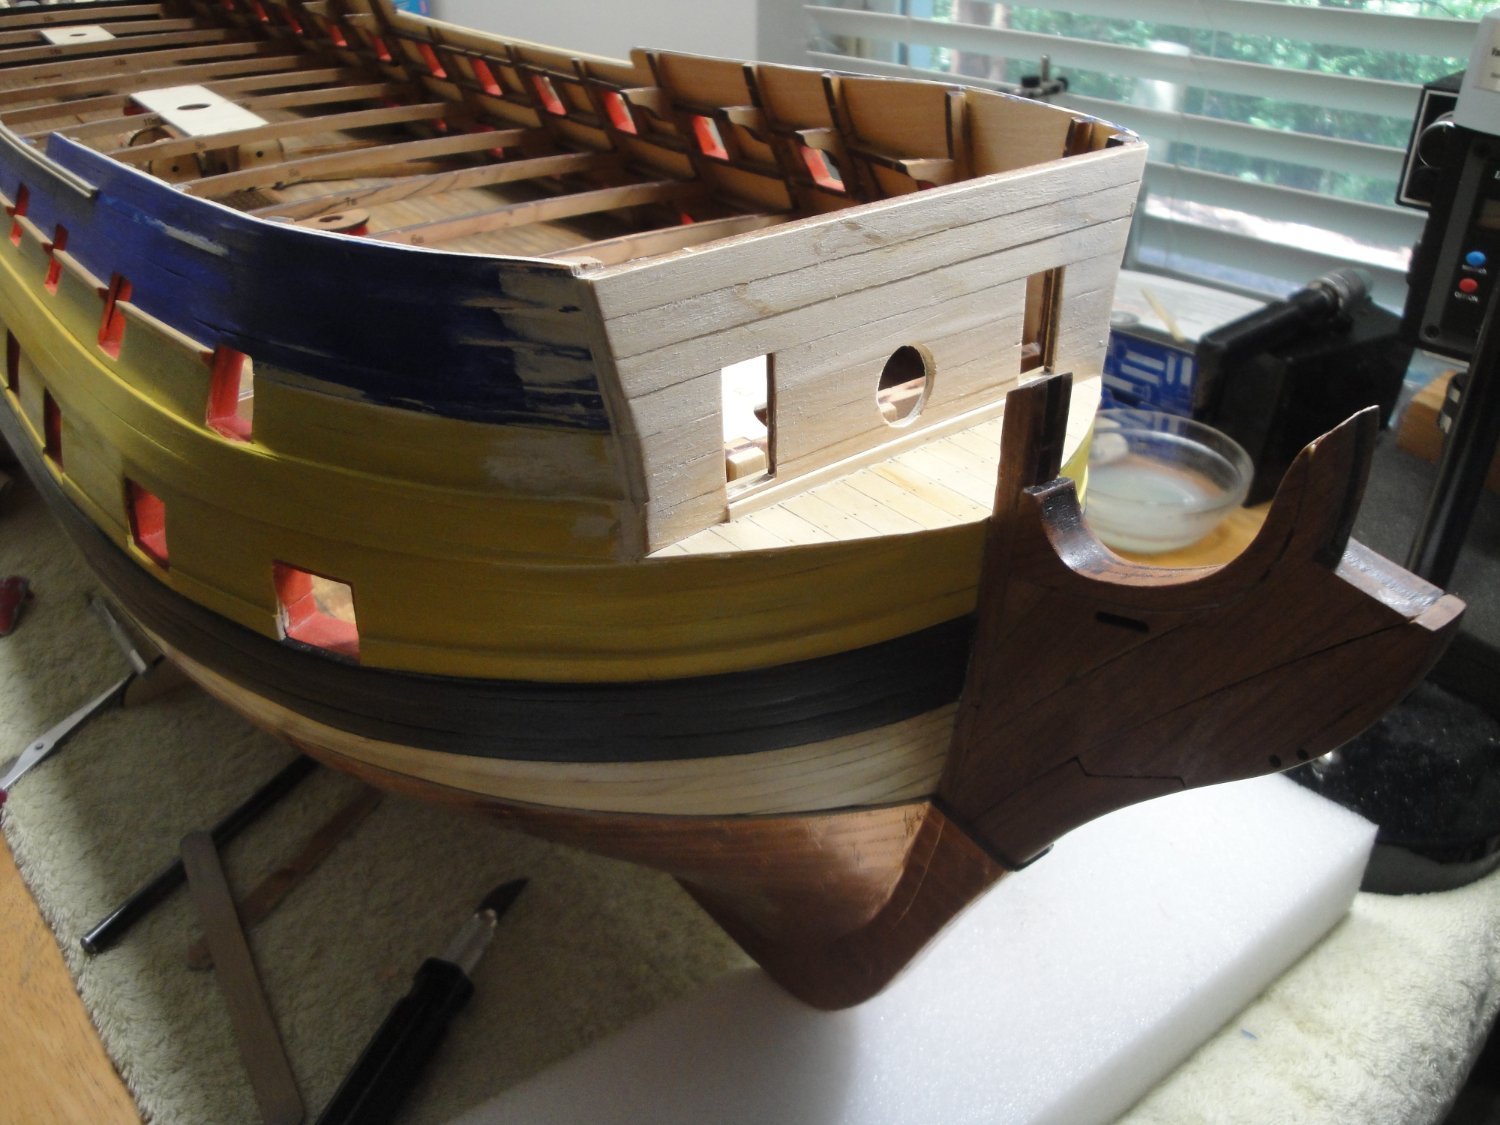
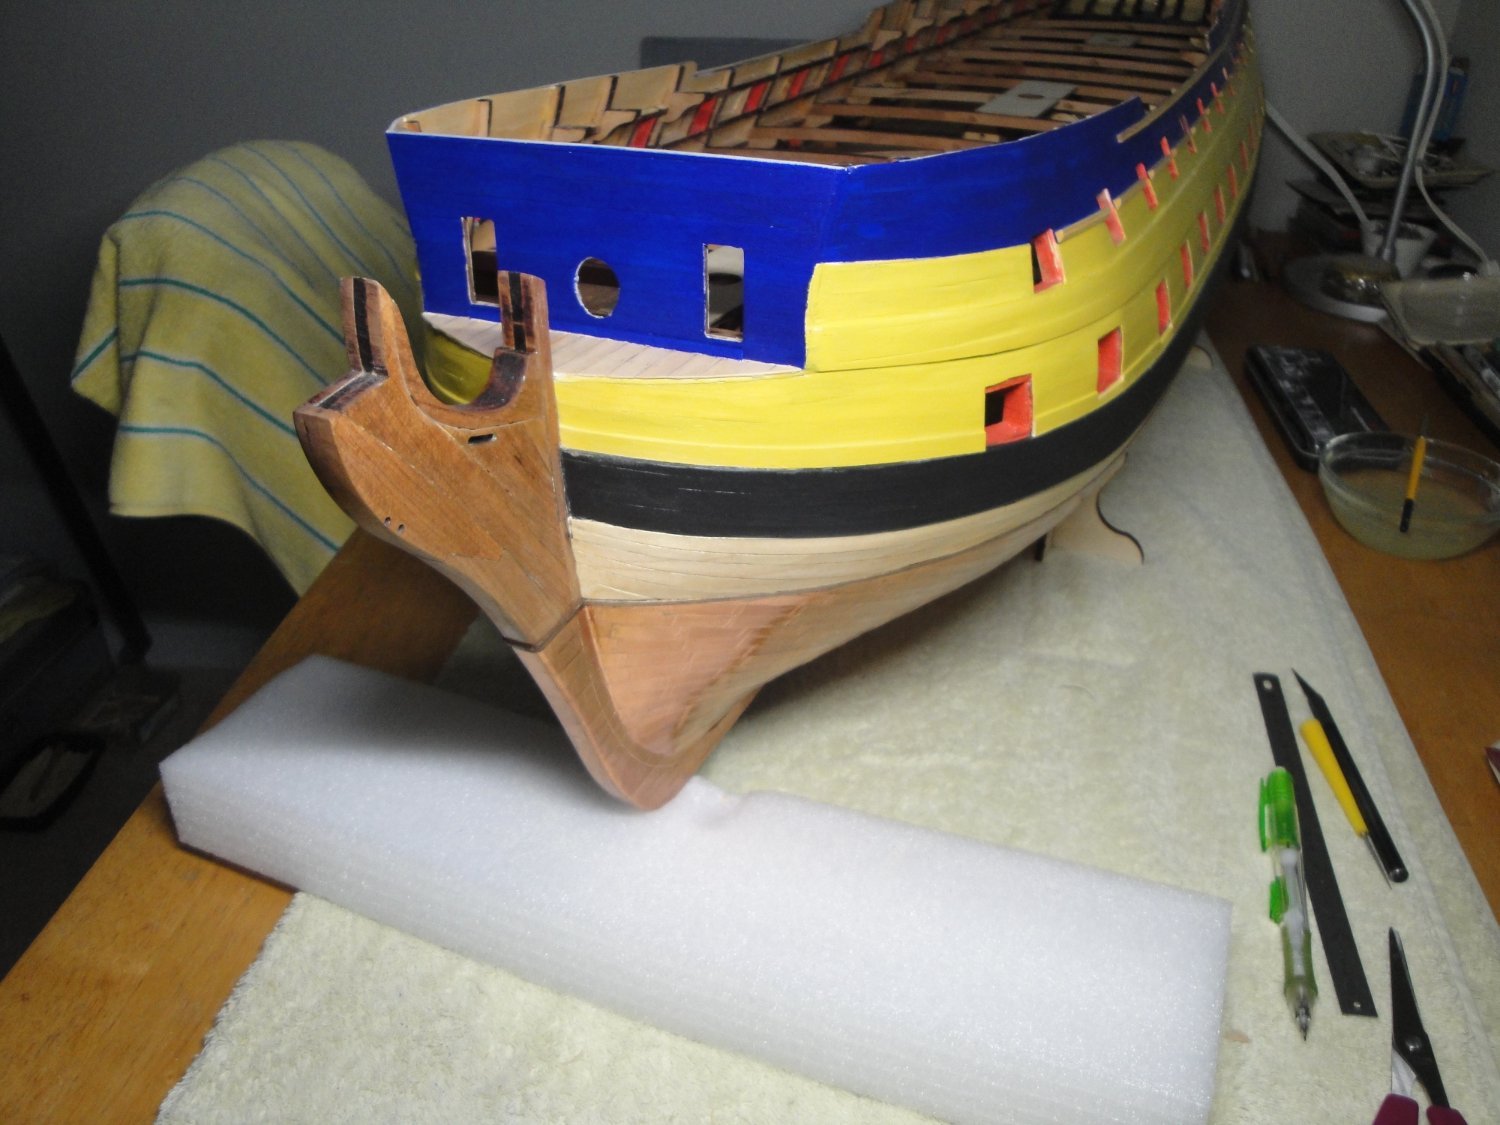
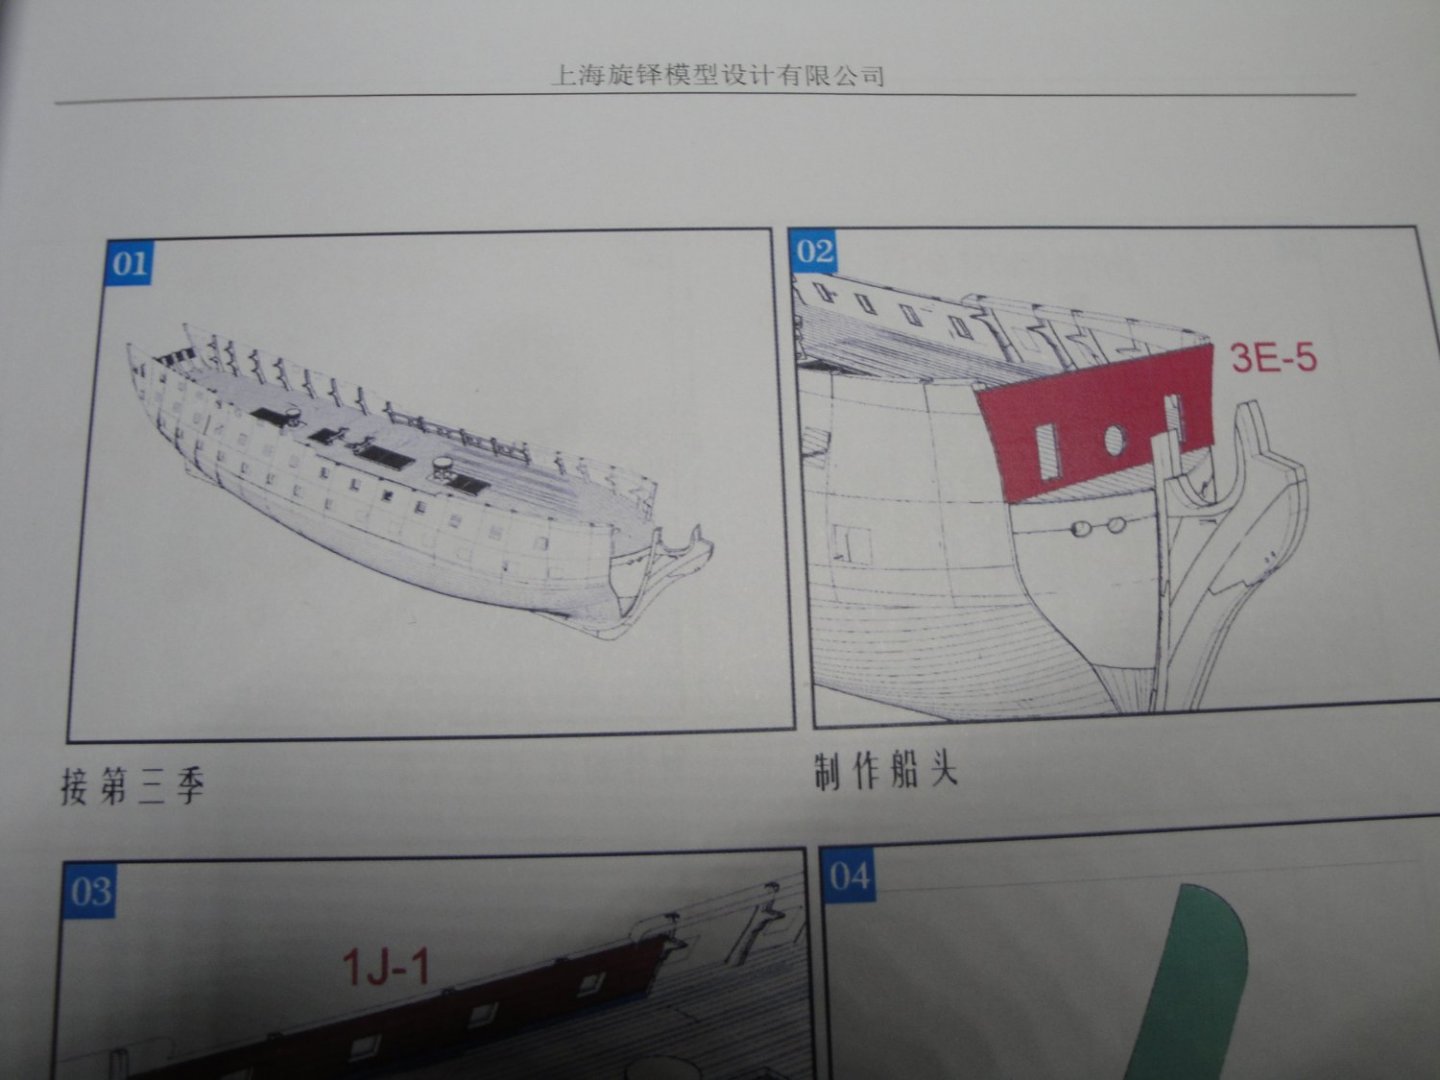
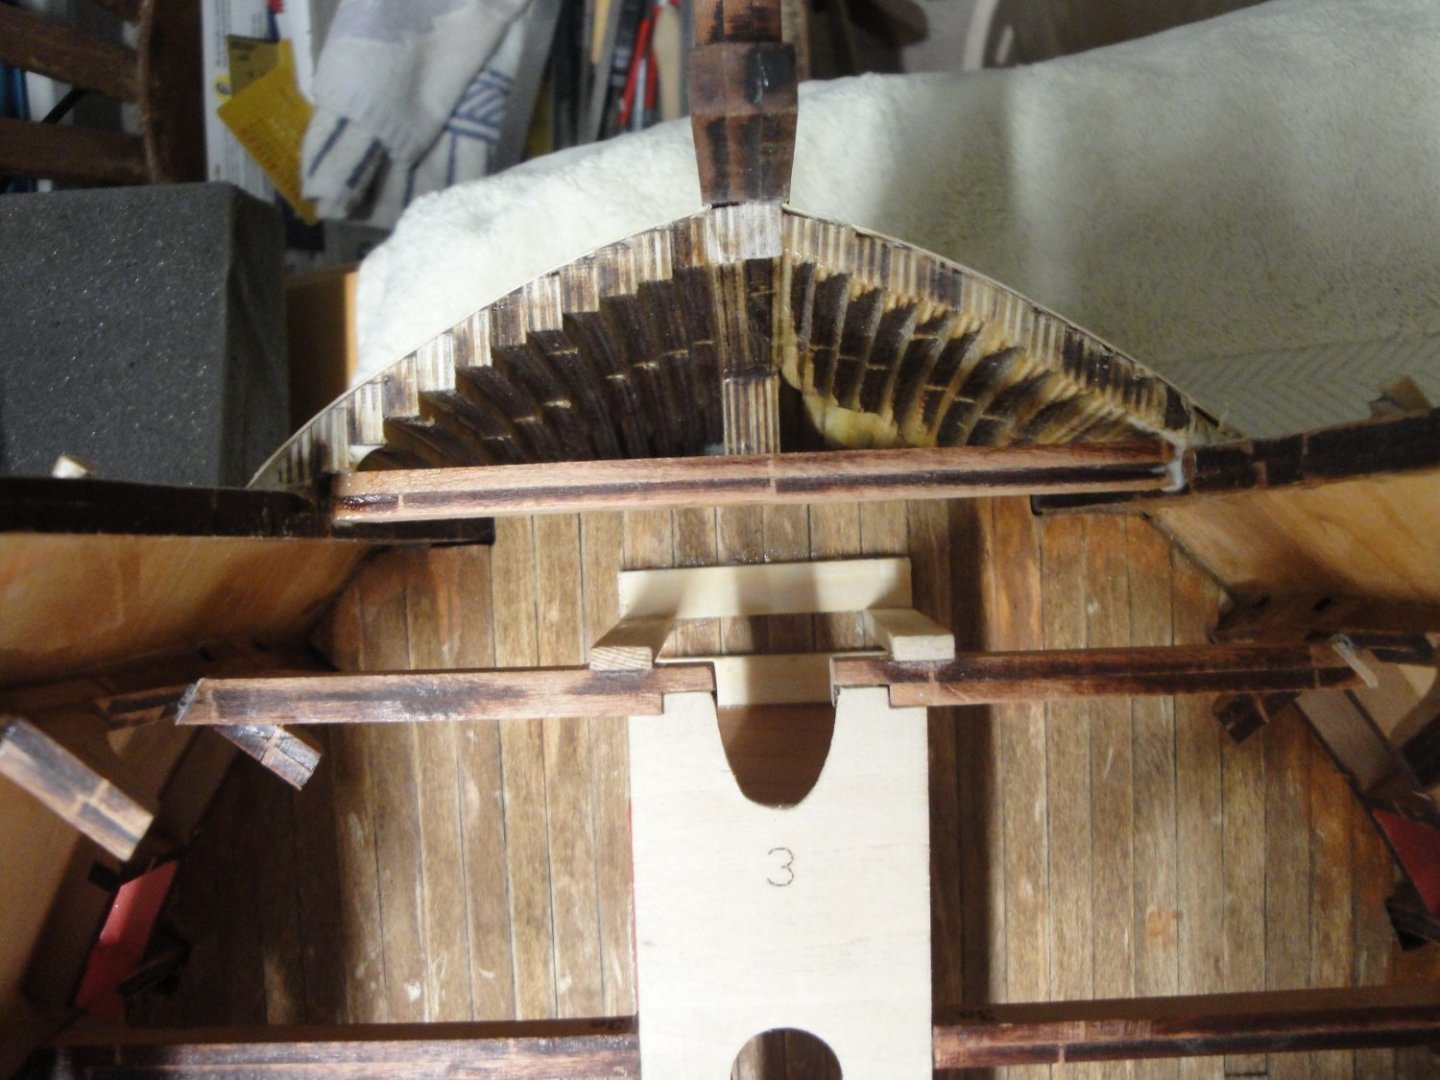
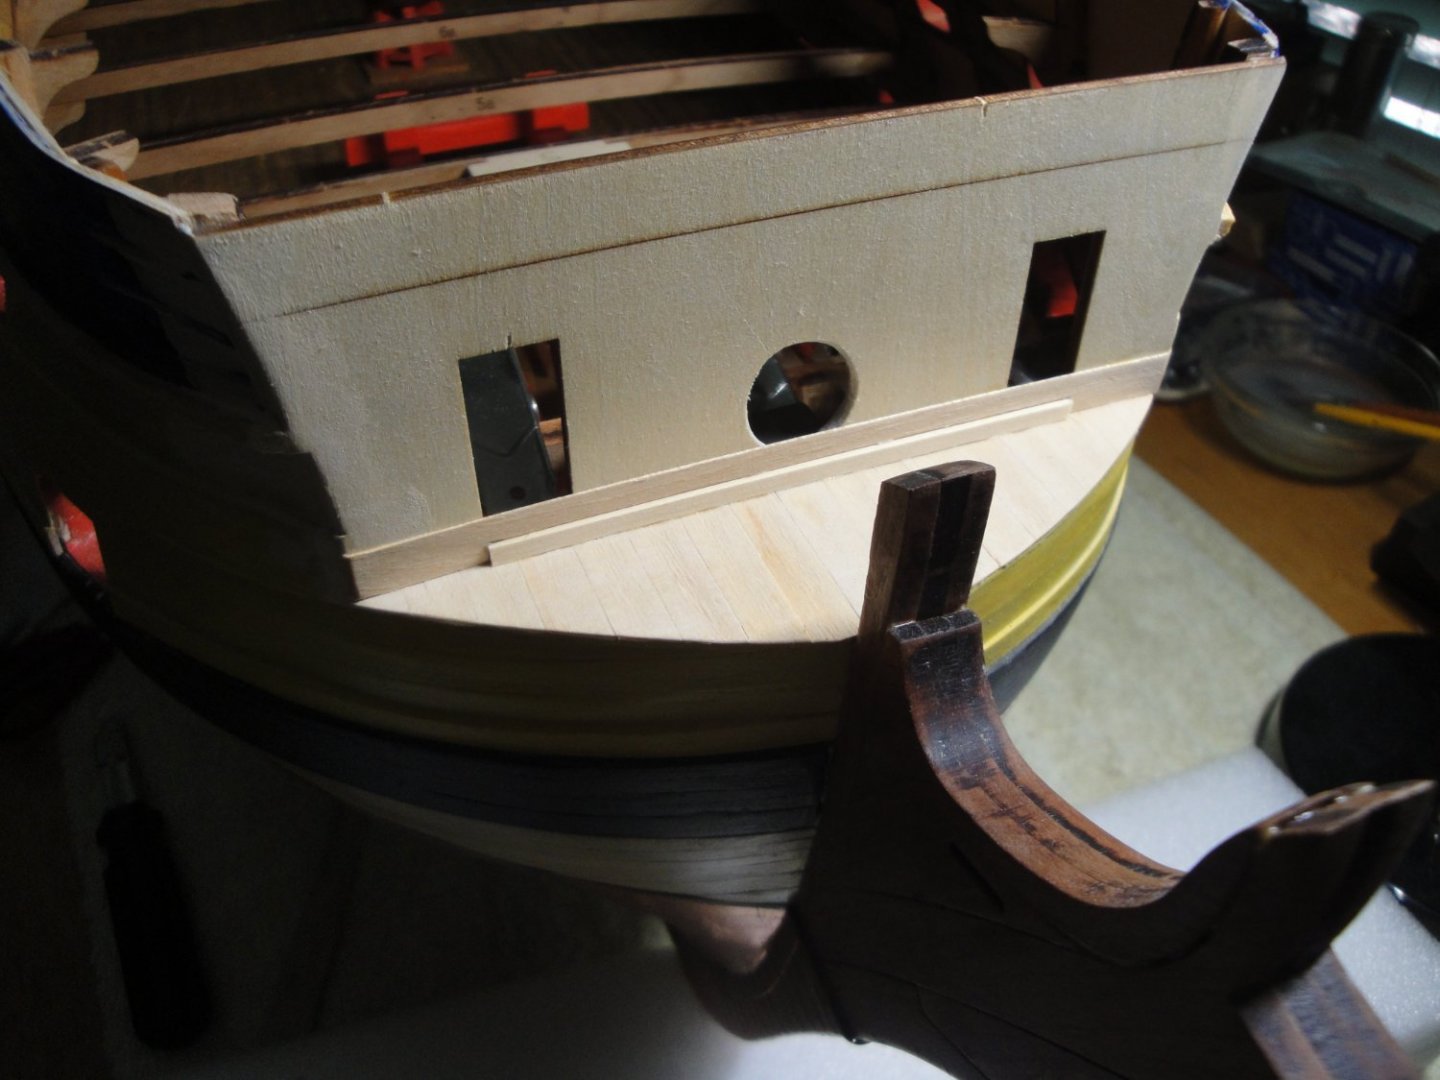
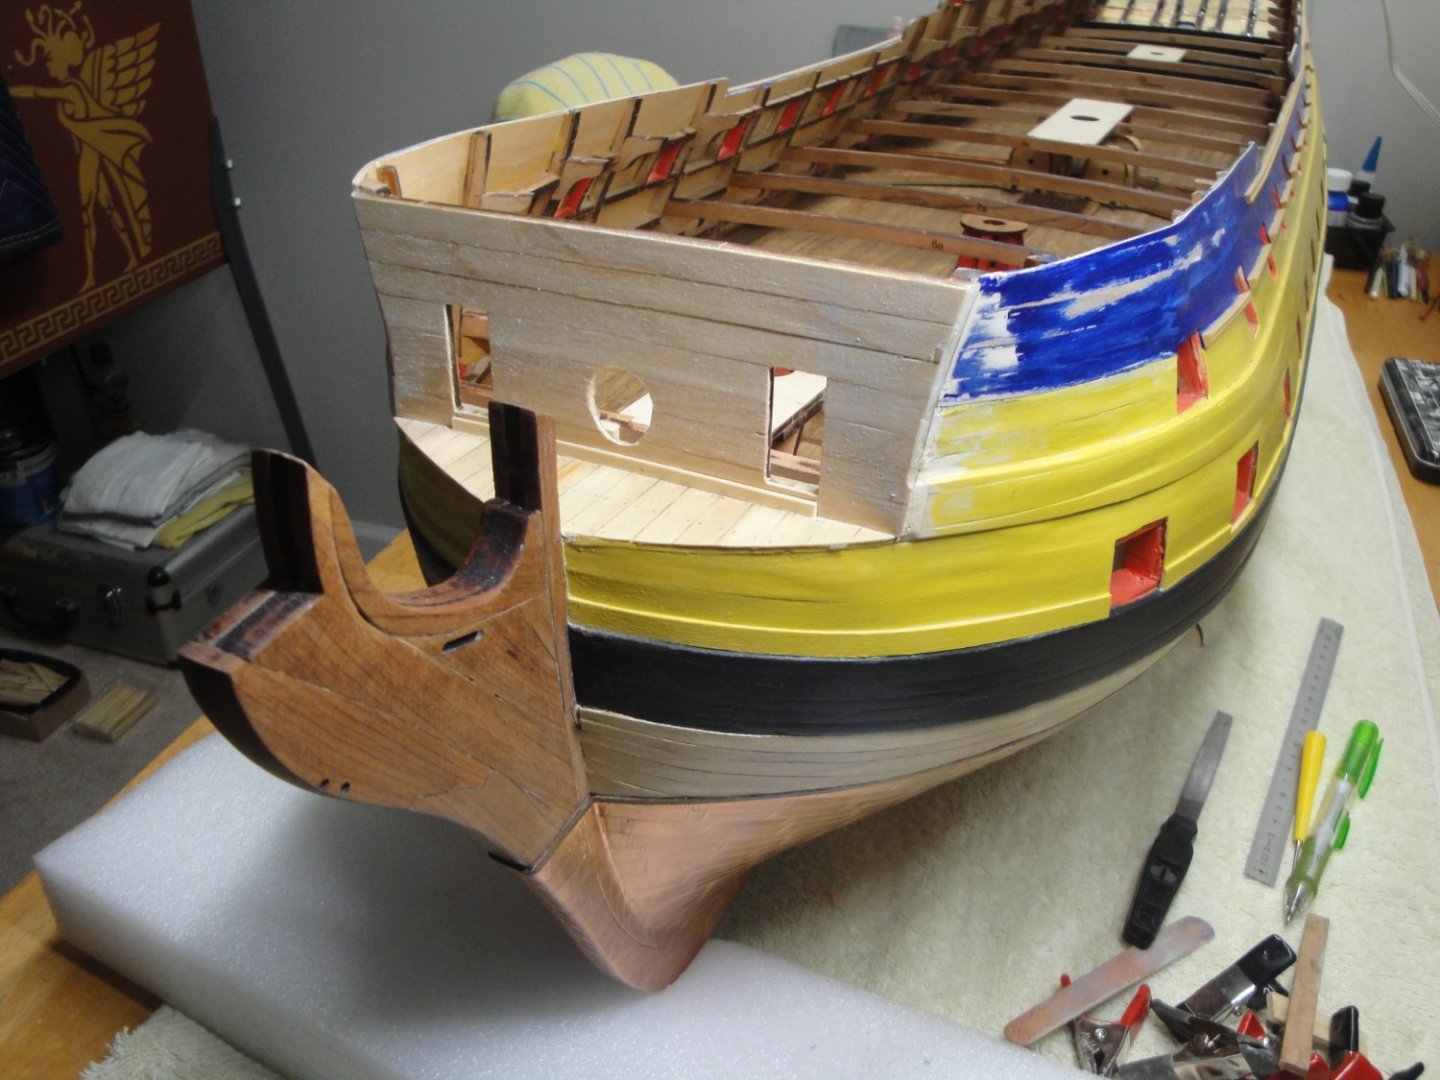
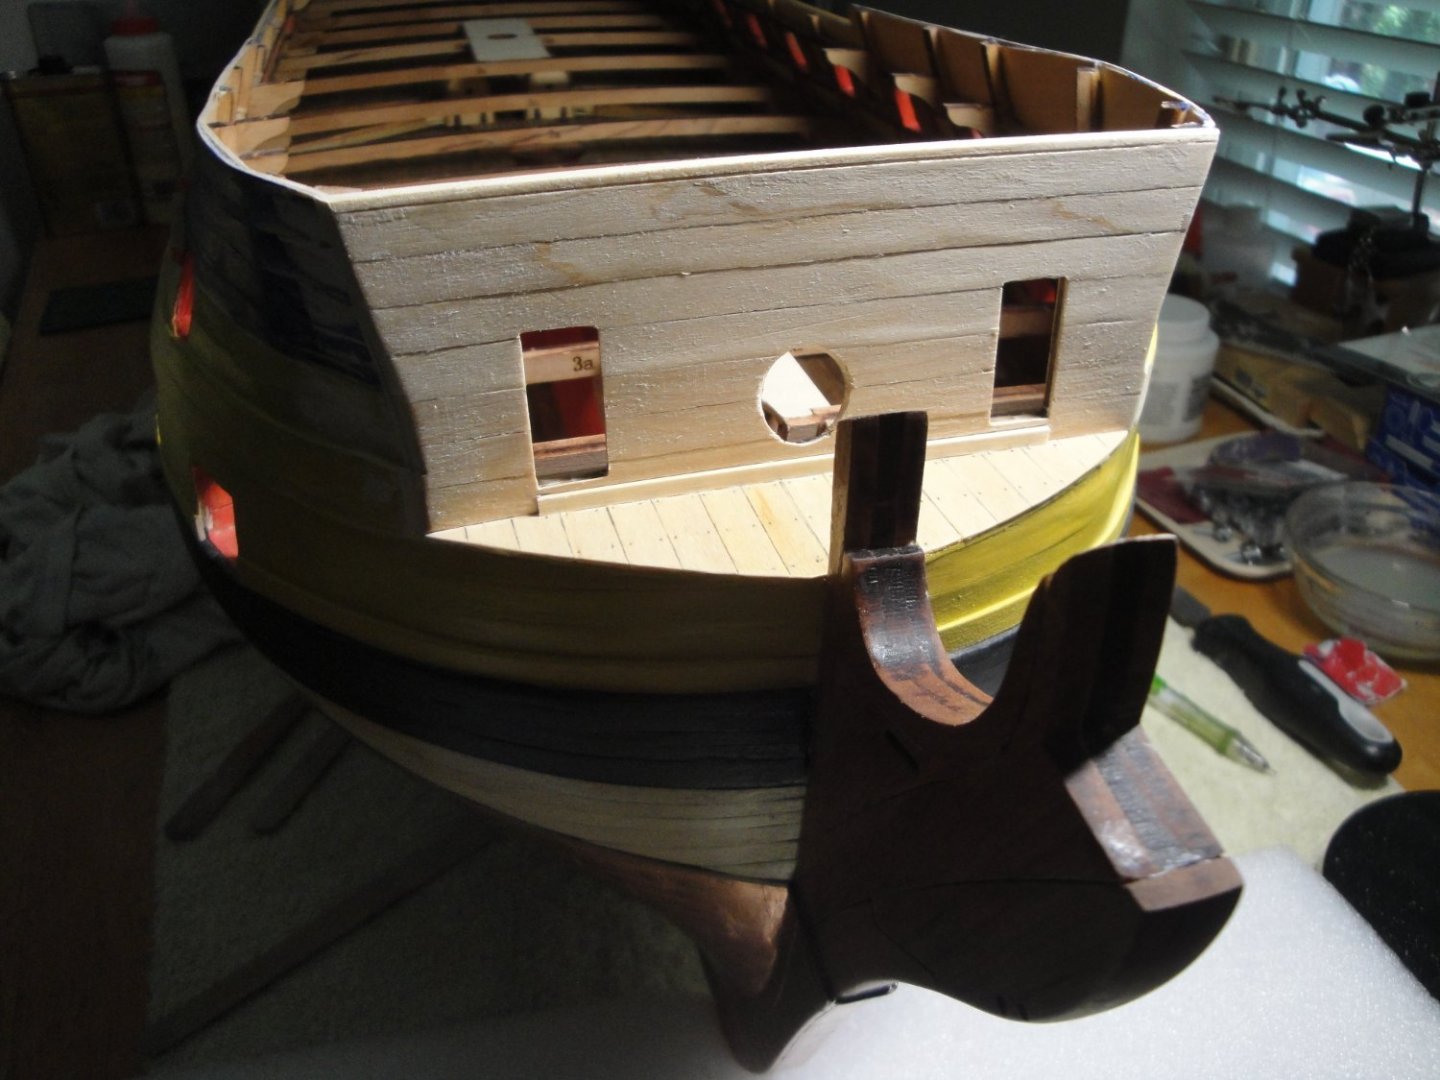
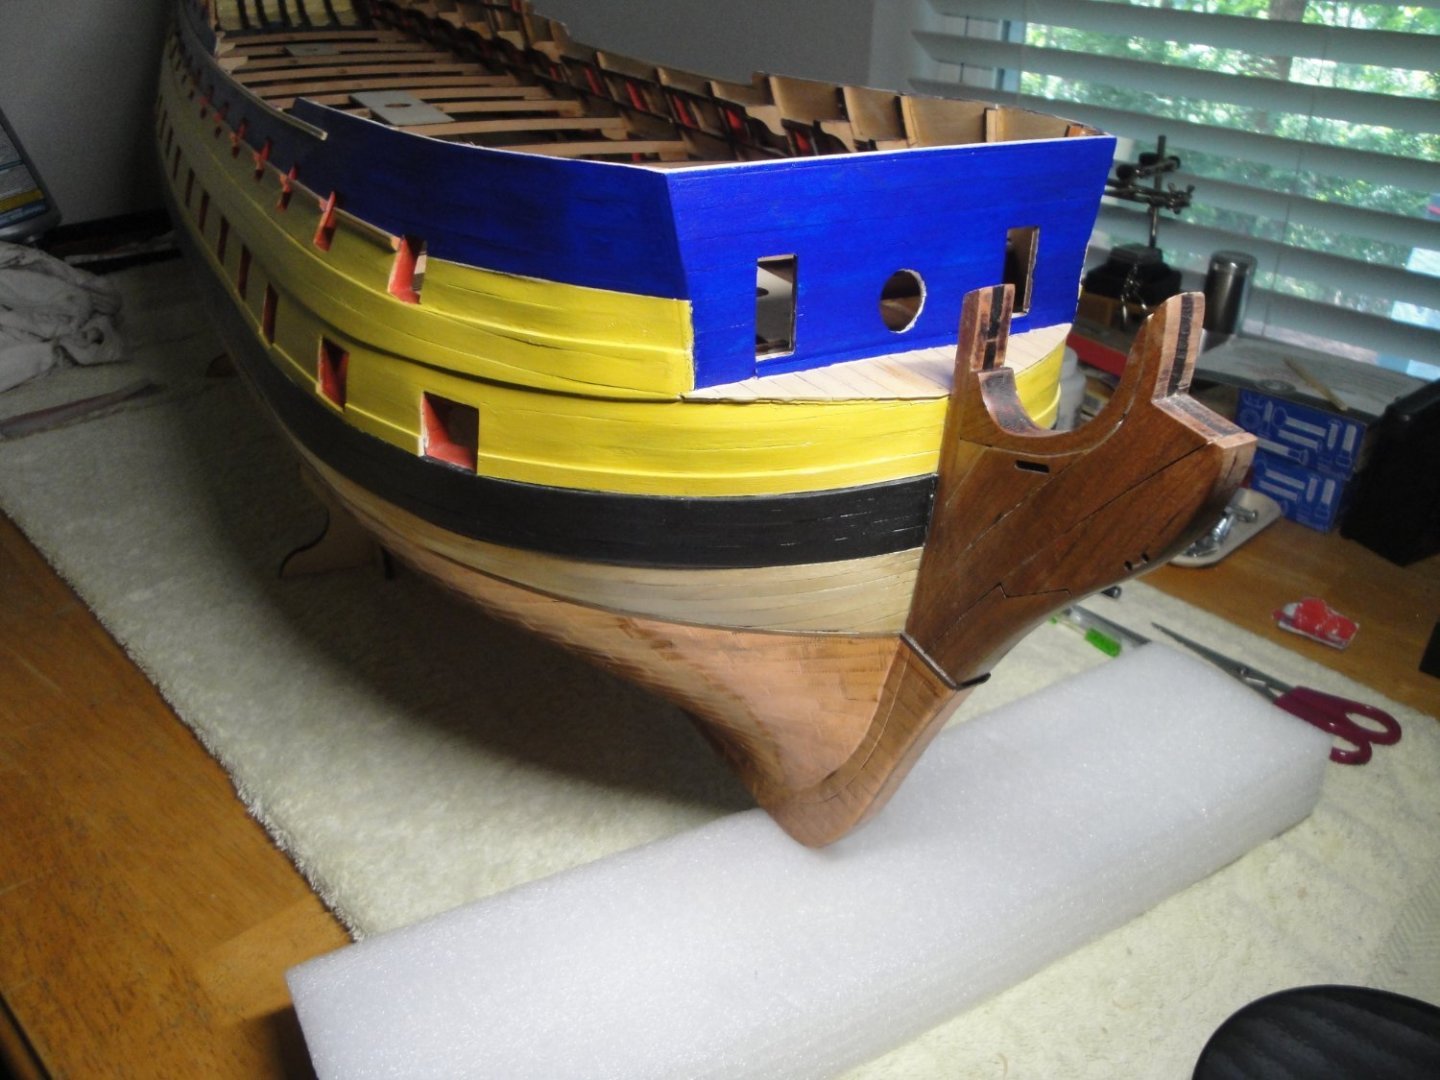
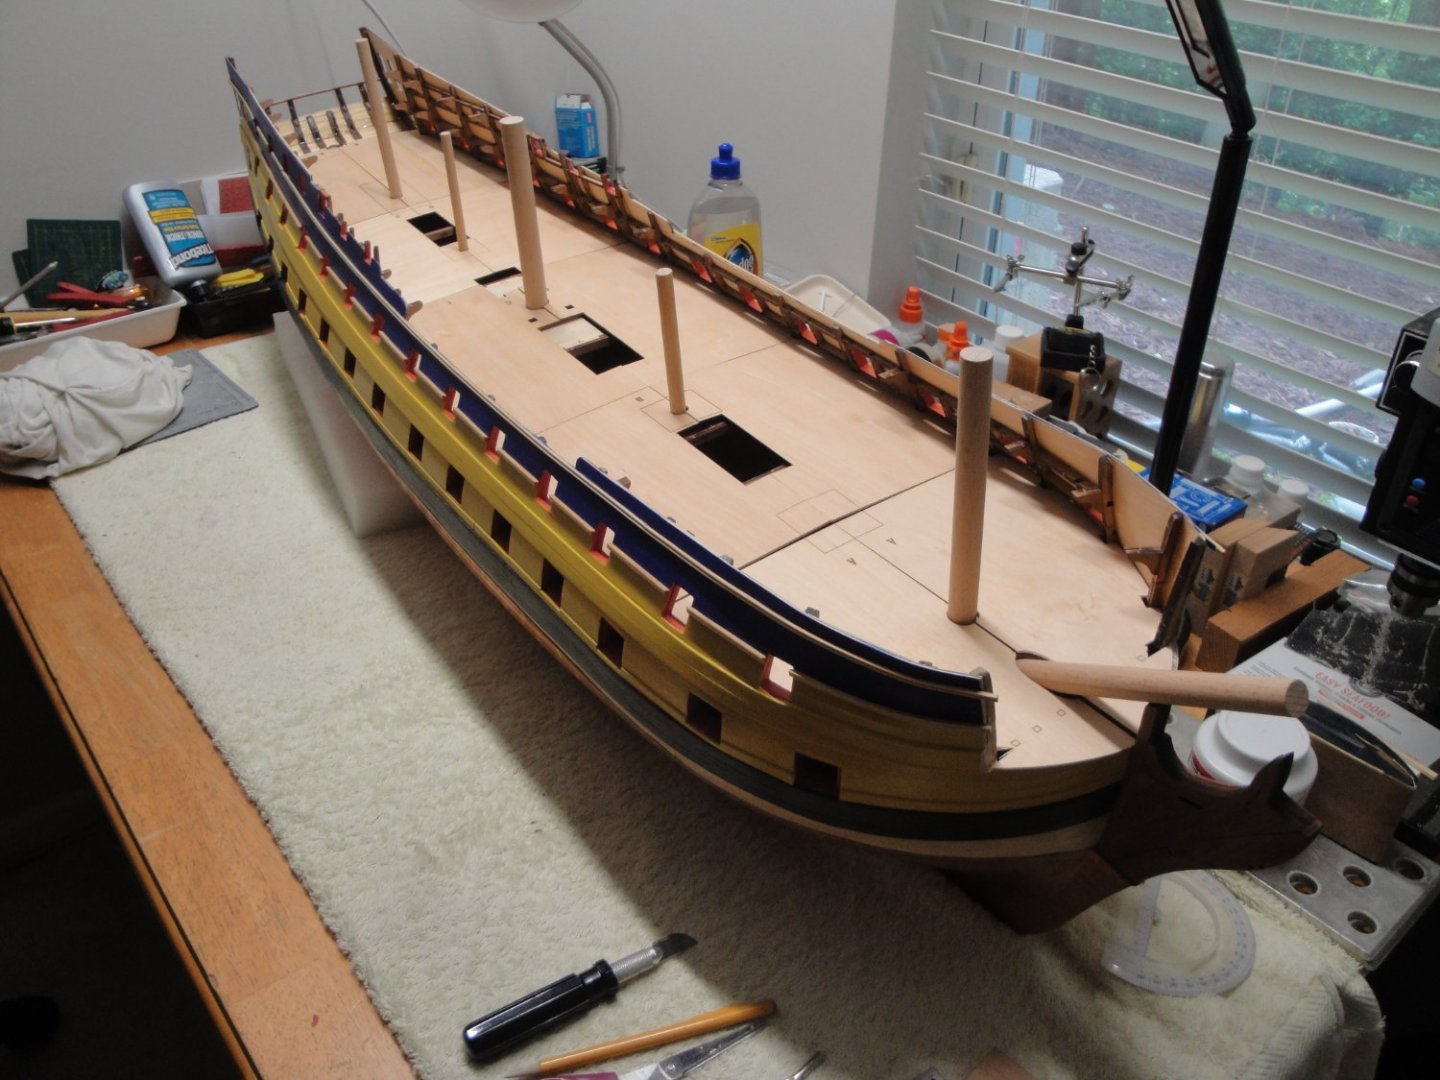
Some more progress, on the bow. Having the front of the ship open, was disturbing me. The front bulkhead only comes in Session #4 and in my humble opinion, it is too late as I will show in the coming description. They assume that the main/upper deck must be installed before setting the front bulkhead. I like to disagree and will propose a solution moving away from what CAF is recommending. The picture above shows the beginning of Session #4 instructions. The main deck and bow deck are not exactly at the same level (in the model). Using the 1a/1b beams, I glued them in place to match the level of the main deck: I then glued on top of beam "1a" only, a 2 mm strip of wood to put on the same level the front of the bow with beam 1a: This will create the front deck. I now have to cut from the main deck parts A, the sections which are used to plank the front of the ship: These two parts are then glued and a central piece is inserted to finish the deck. The remaining section of deck A, do fit perfectly, although 2 mm below. That is no problem at all. Using some 0.4 mm shims, I then position the front bulkhead (coming in Session #4): So far, so good. I like the fact that two sides are now joined by a very stiff piece of plywood. The decorative rails are not working very well and some "deconstruction" is necessary: I would strongly recommend to not install any of the front rails, until after building the front bulkhead and adjusting the round houses. The moldings on the round houses have to match these rails and that is not obvious to do. The front deck (crapper) is planked: The vertical surface of the bulkhead is covered with the 0.4 mm planking as well. Everything is finely sanded, the deck receives Wipe on Poly (multiple coats). I now apply the first two coats of Ultramarine blue: There is still a ton of work to be done in this area, but at least I am feeling better about the solidity of the model. Yves


- 507 replies
-
- 12
-

-
Oh, how much I agree with that. I could not do the BELLONA in 1/64th scale. I just love the 1/4 inch scale. Yves
- 488 replies
-
- 5
-
-
- Indefatigable
- Vanguard Models
- (and 1 more)
-
Amazing. I have always admired people who can place small models into bottles. This boat is not only unusual but the bottle is one of a kind that you do not see too often. Yves
-
An unusual subject. I am all for it. Yves
-
Very true!!! In my case, it was $100 of stanchions versus $60 of filament. Yves
- 460 replies
-
- 5
-
-
- Finished
- Flower-class
- (and 1 more)
-
You could use micro-bolts or micro-nails in brass. Micro-Mark sells some of these. You could also go to Tichy Train who manufactures plastic bolts in 1/48 and 1/32nd scale for trains and cars. It will be a very tedious and long job, but you are obviously shooting for a very nice and detailed model and it may be worth the investment in time and labor. Yves
-
Very nice model. You really added a lot of details and it is now a very faithful copy of the real ship. Yves
-
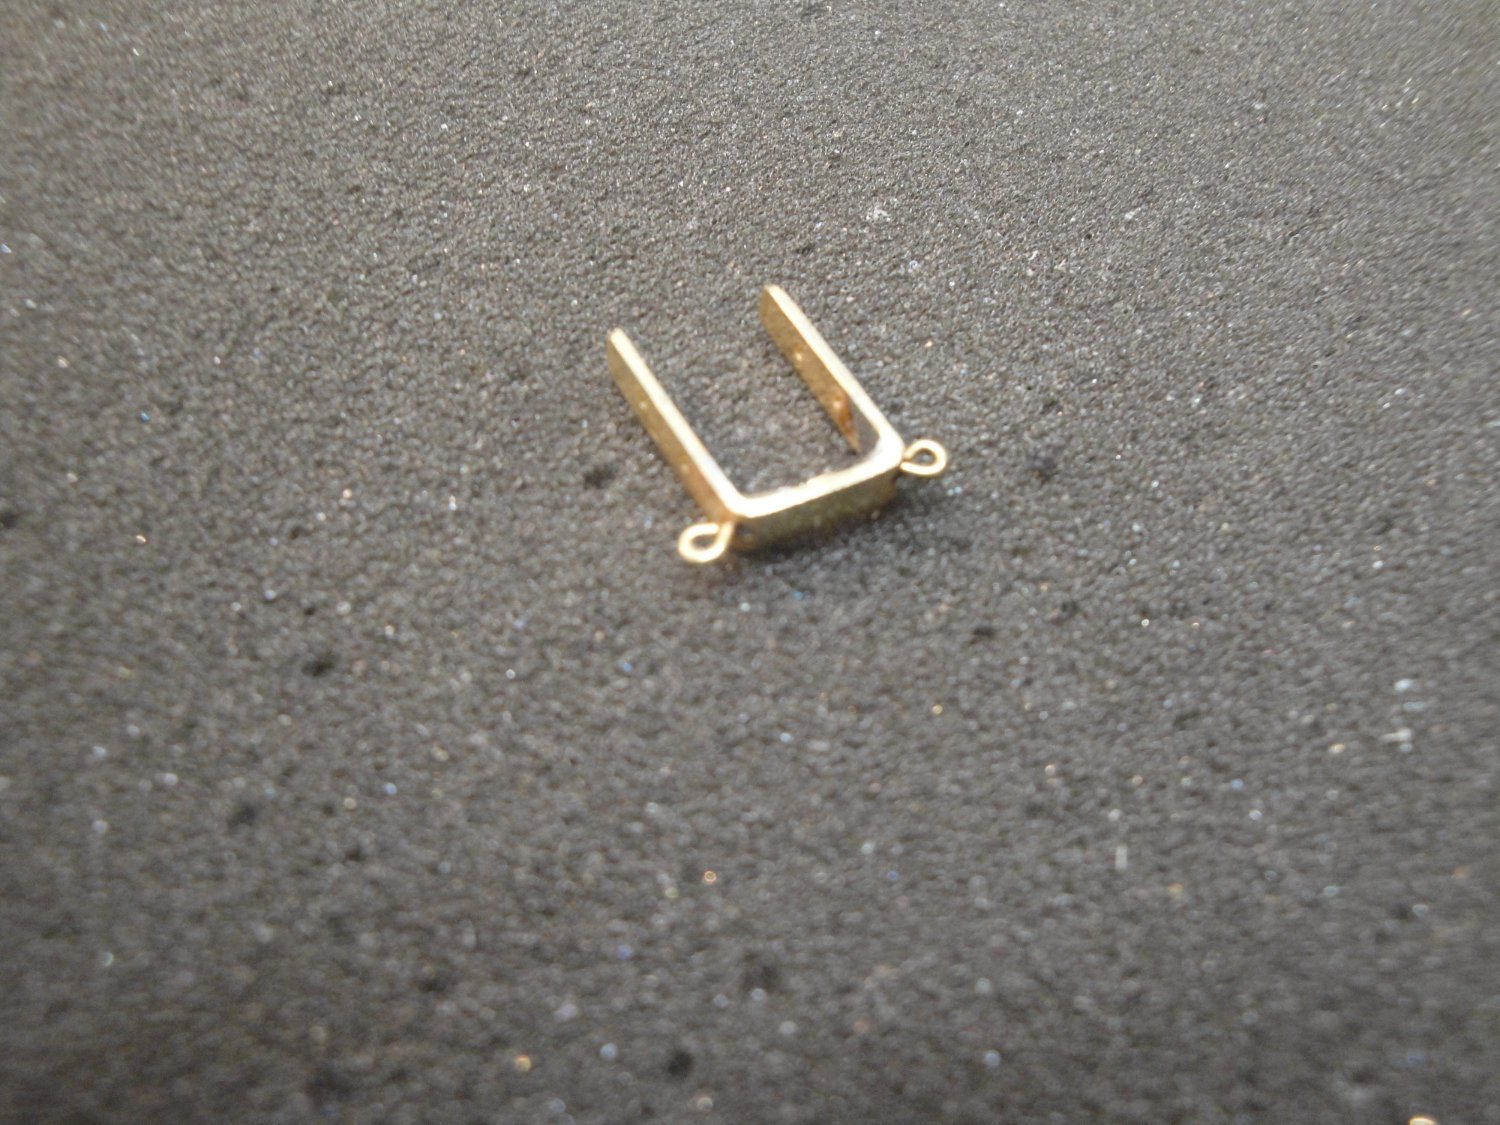
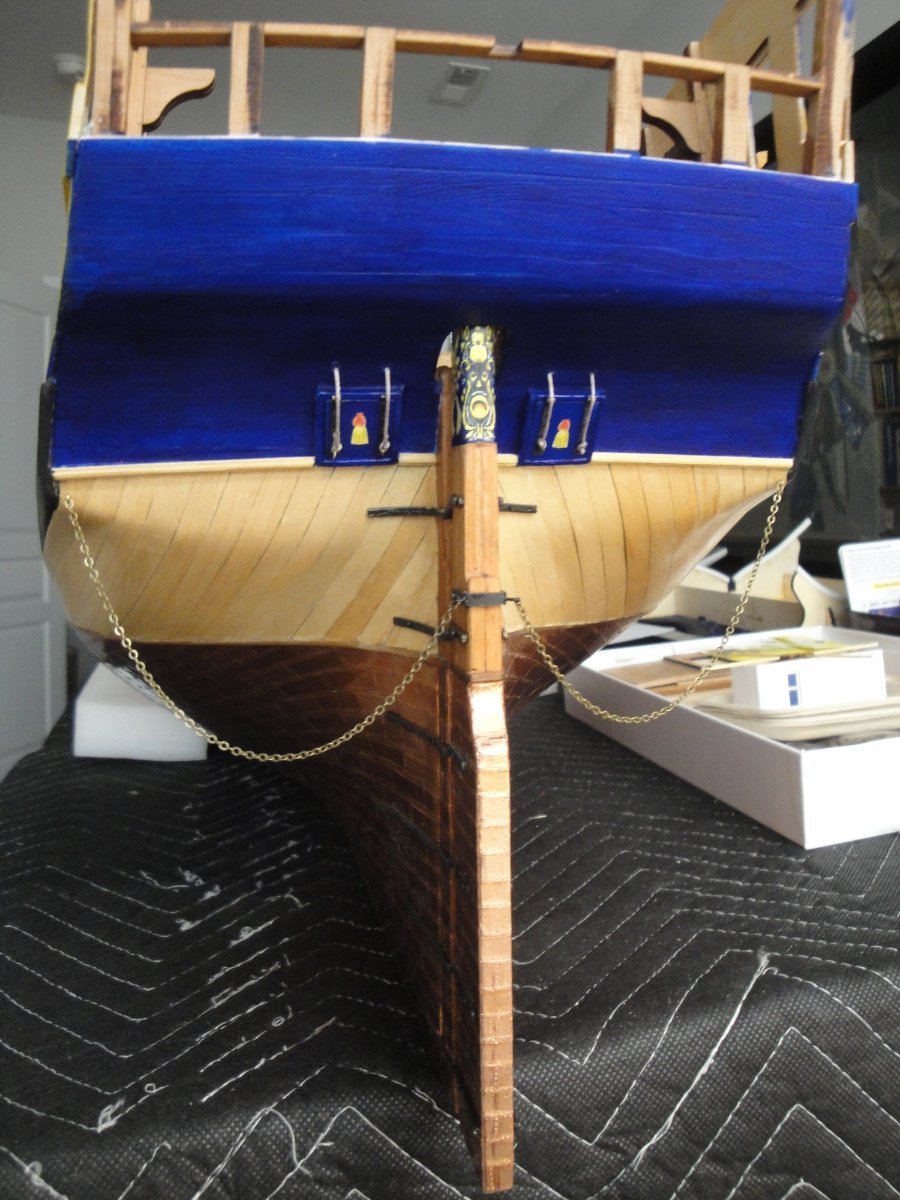
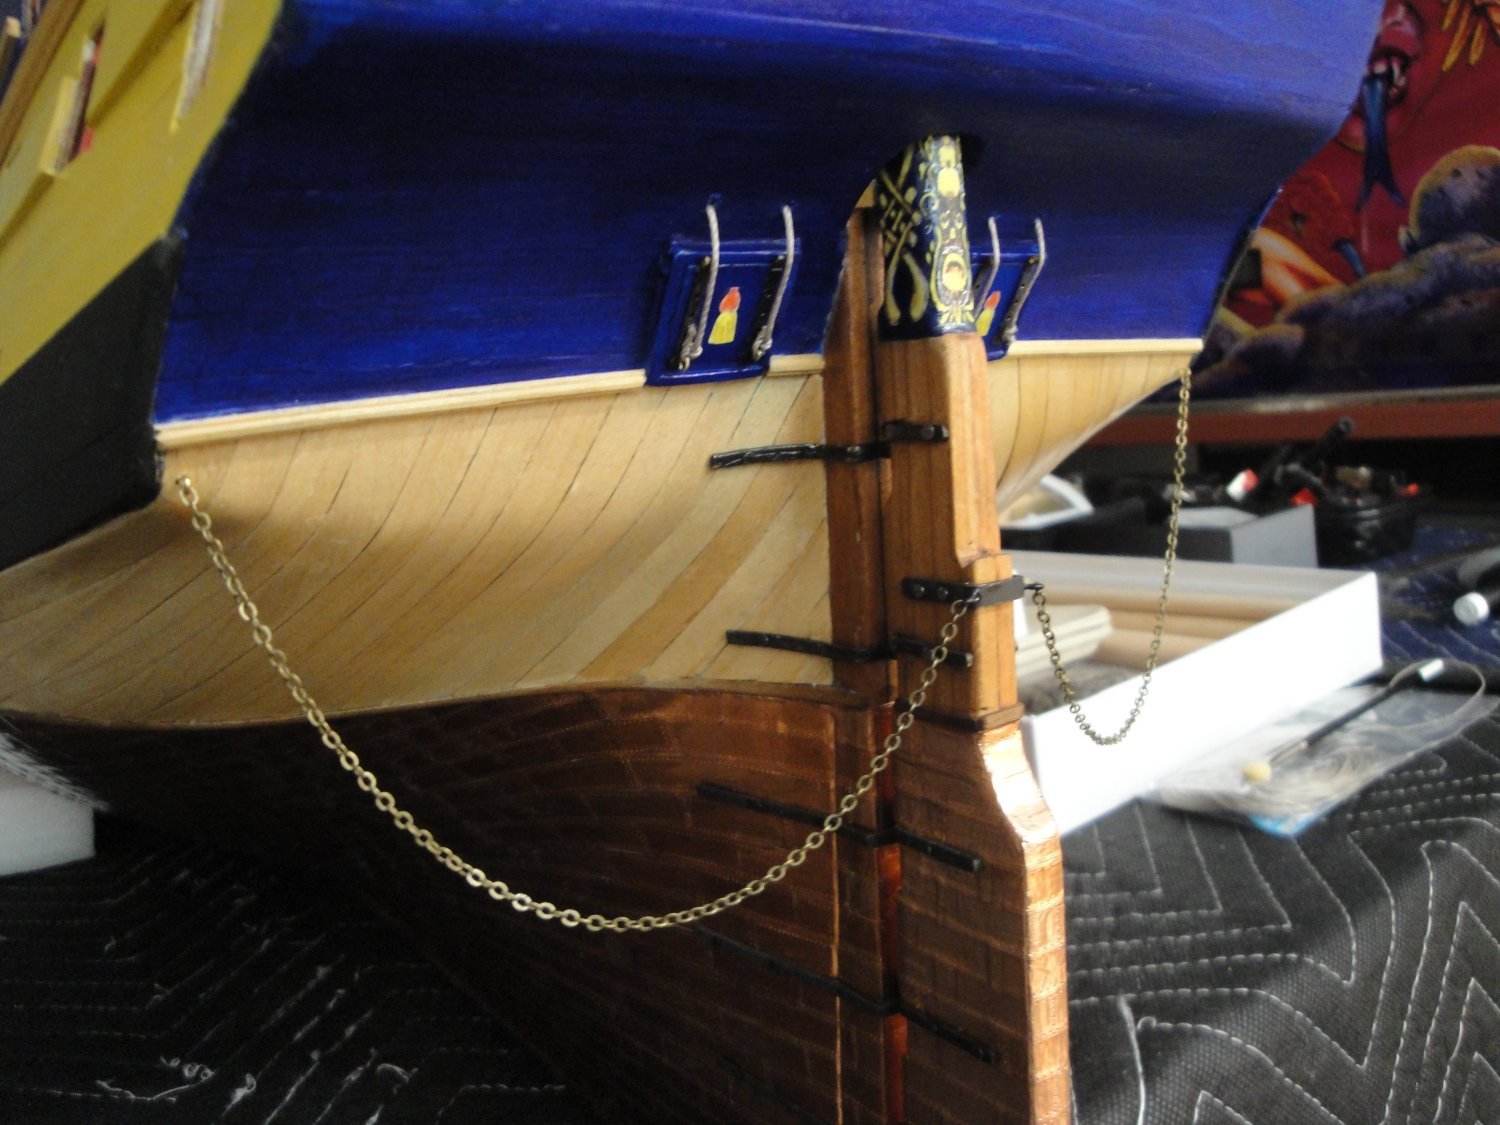
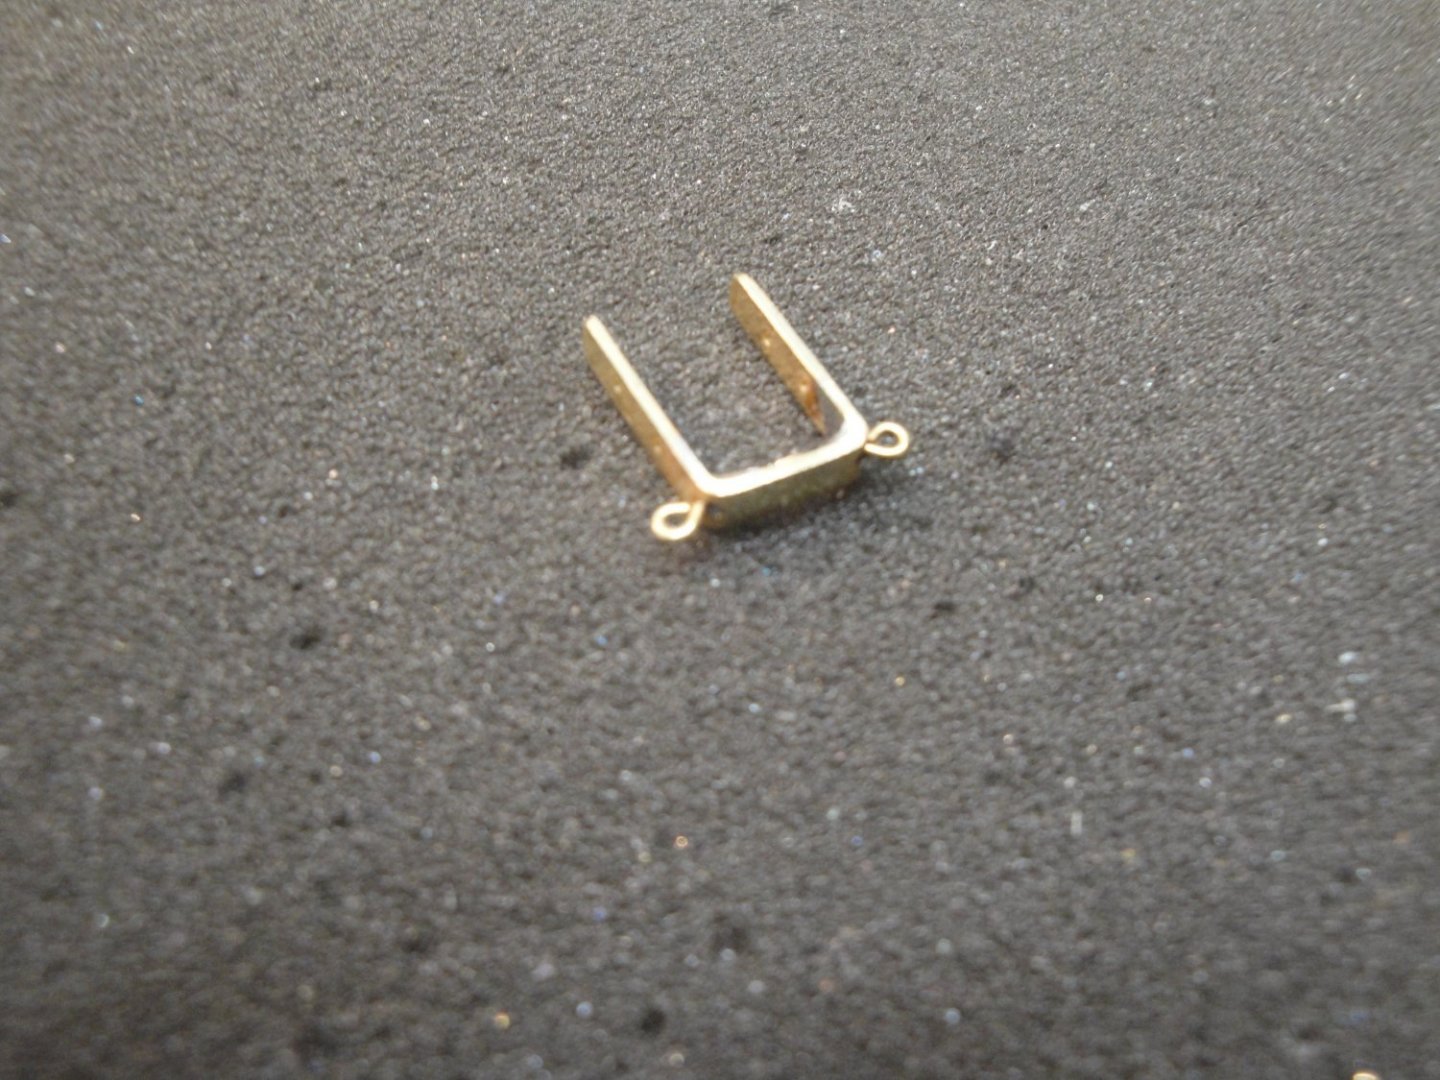
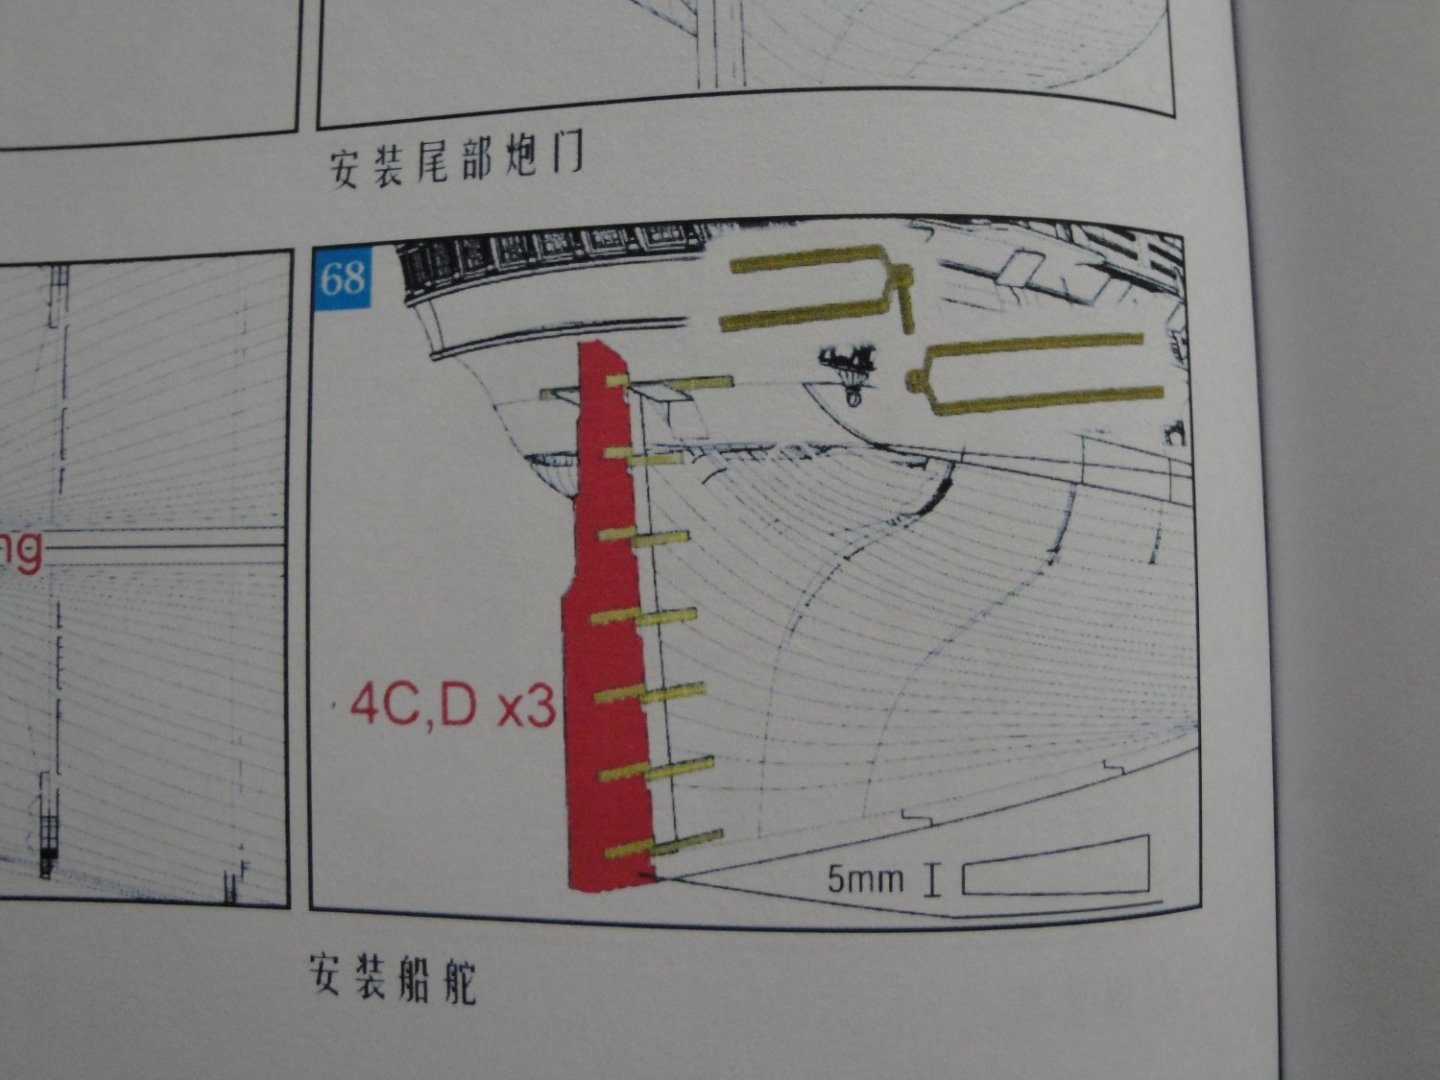
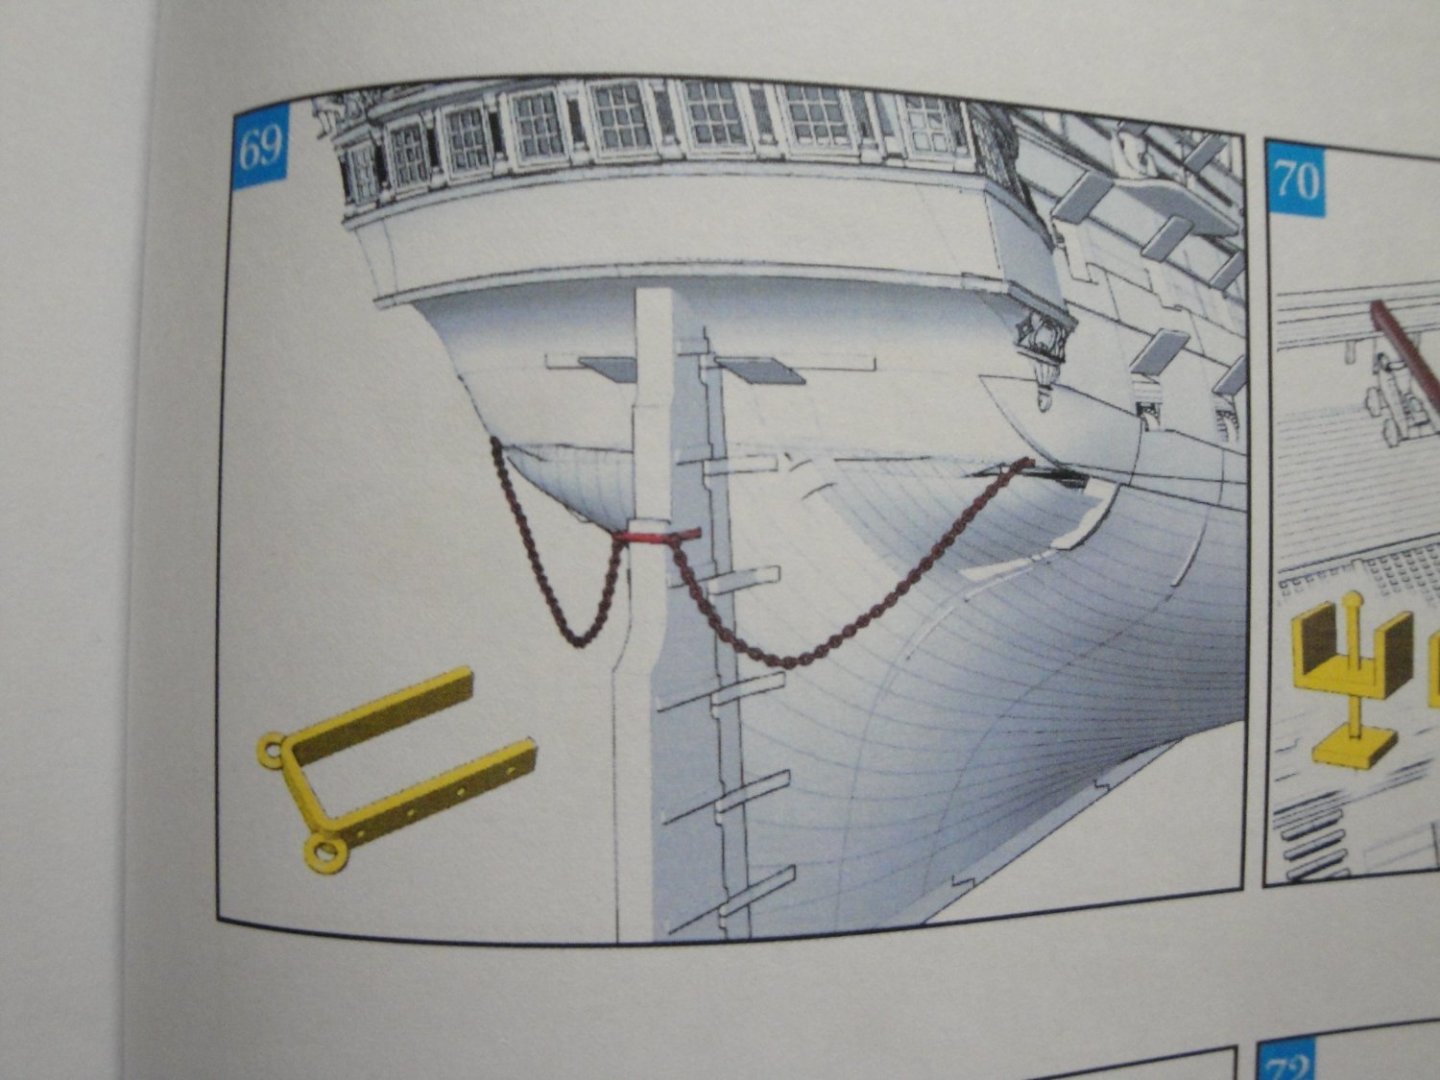
Final touch on the rudder. The part was missing from the kit, so I used a strip of brass and two brass eye pins that I drilled and soldered. The part is then soaked into the Black Brass chemical and pinned to the rudder, with four micro nails. The chain is provided in the CAF Model kit and cut in half. It may seem a tad too long and I will adjust the length when the model is completed. That is all for now, regarding the poop. Rudder and chains can be removed easily and we can now move to another part of the hull, before going back to the "official" Session #3 instructions. Yves


-
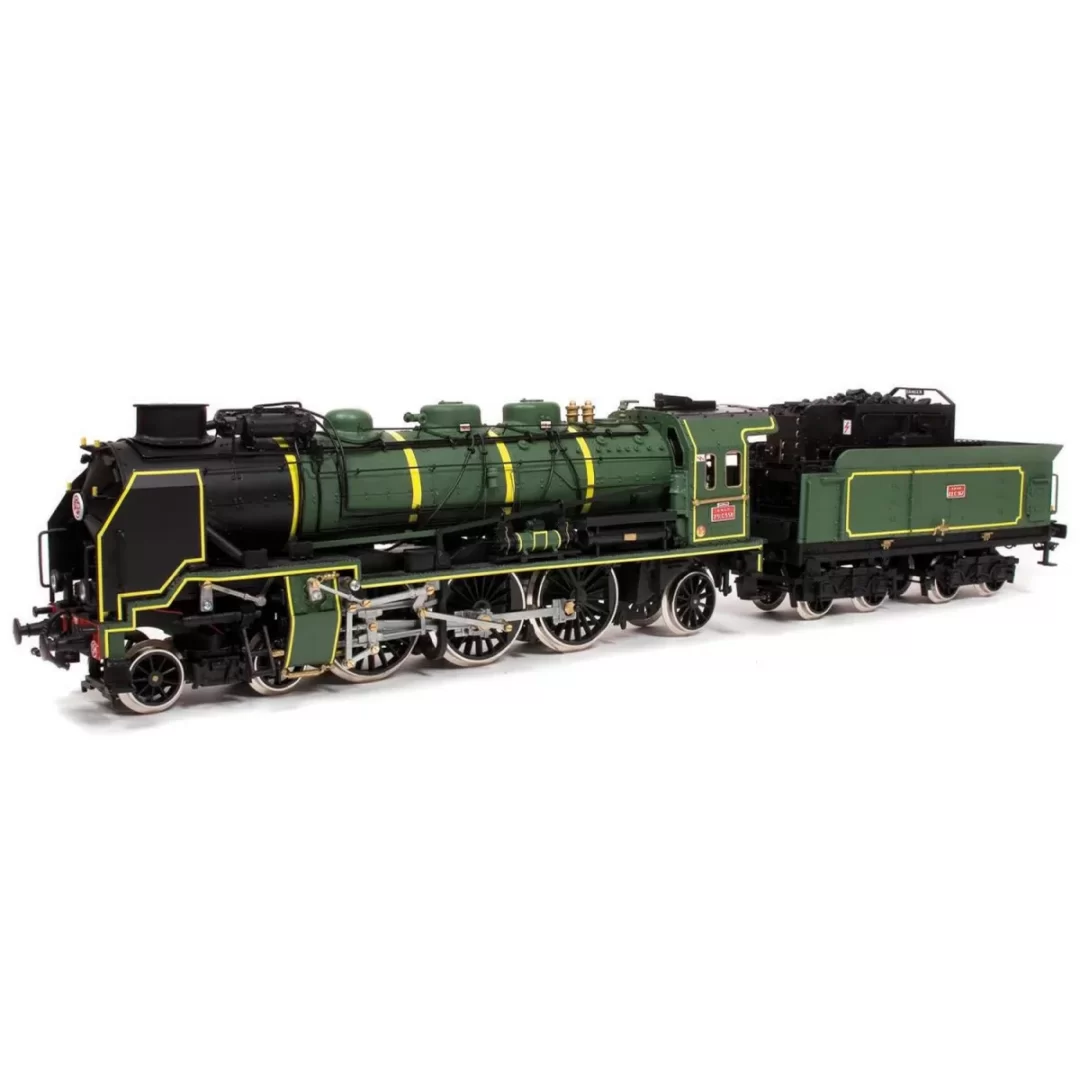
This is a superb model. Now, you need an engine in the scale of 1/32nd to pull it. If you can afford a very expensive SNCF Pacific 2-3-1 from LEMACO, FULGUREX or MARKLIN at 1/32nd scale, that would be perfect. Otherwise, OCRE proposes a Pacific steam engine for a few hundreds euros, that you may be able to turn into a little jewel, with your skills. Yves
- 293 replies
-
- 10
-
-

-
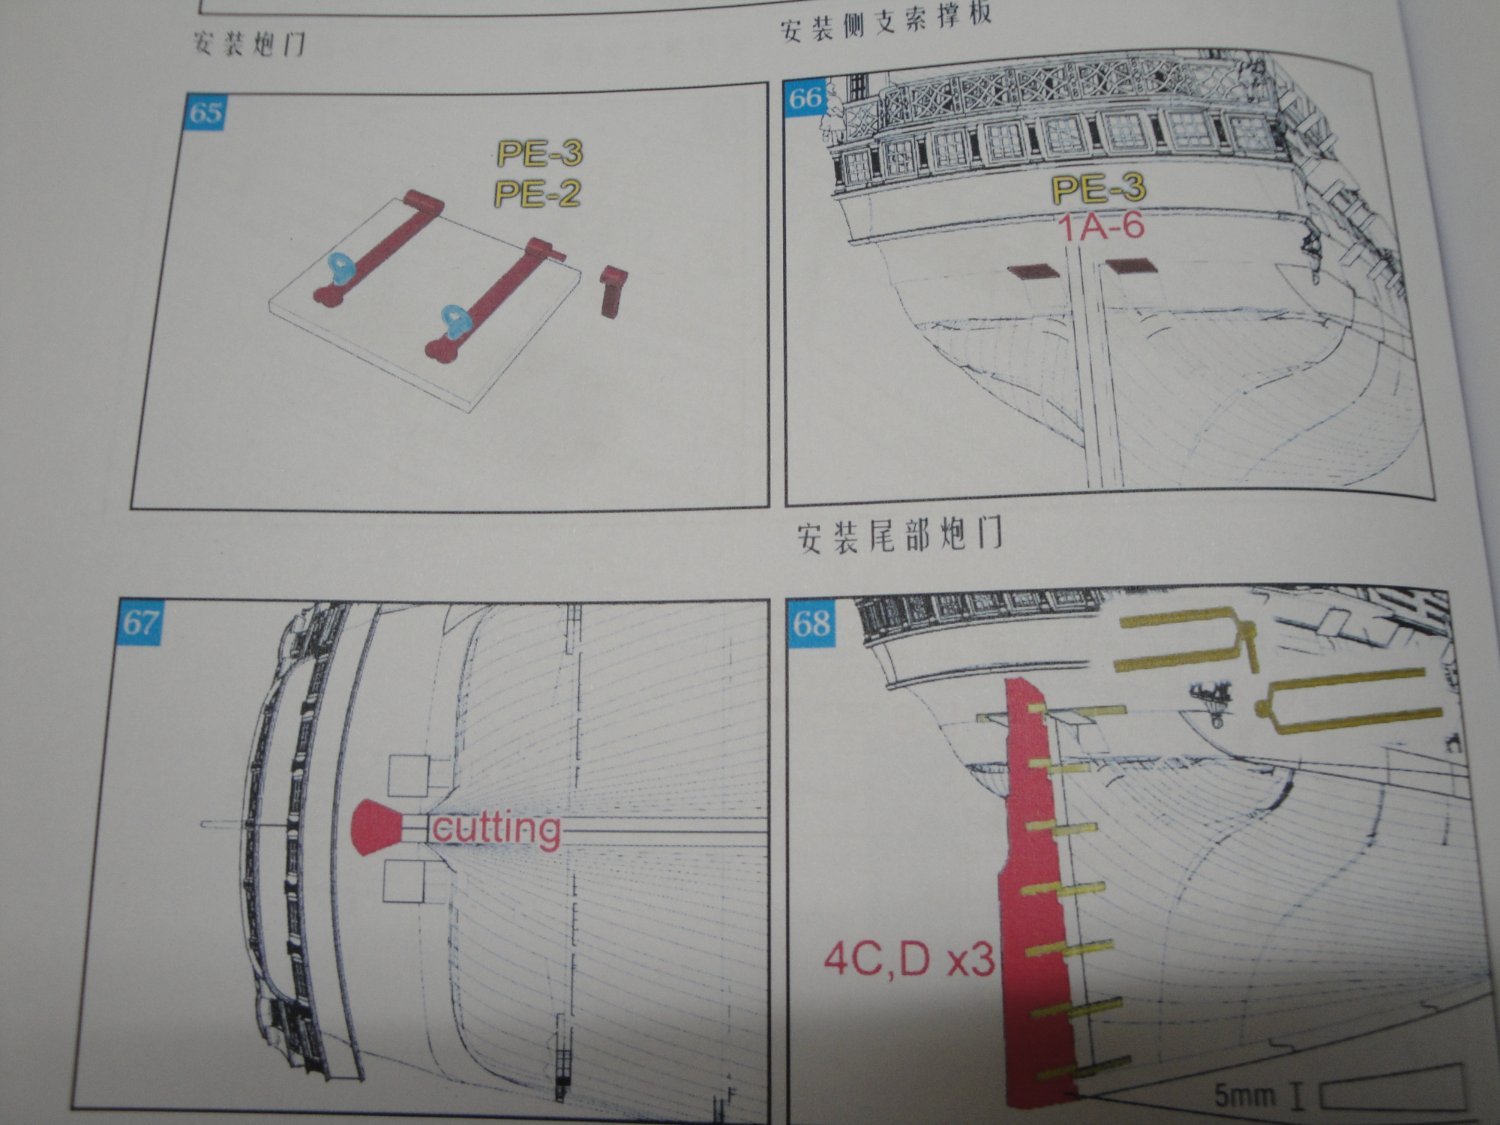
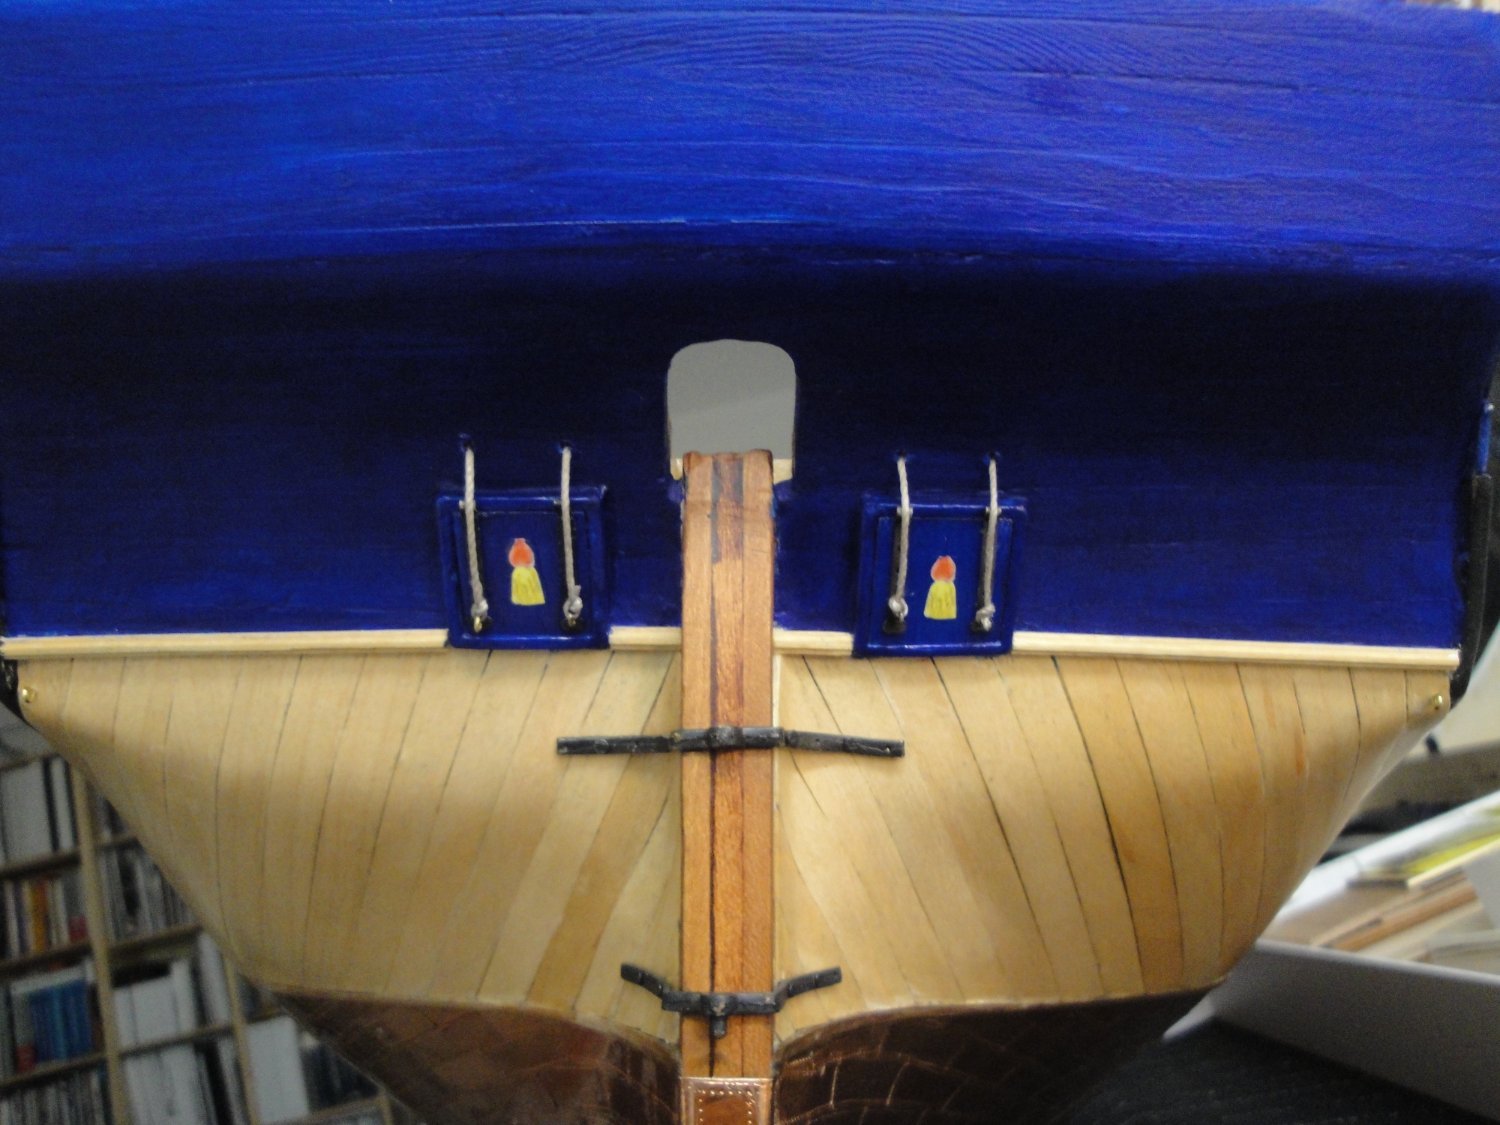
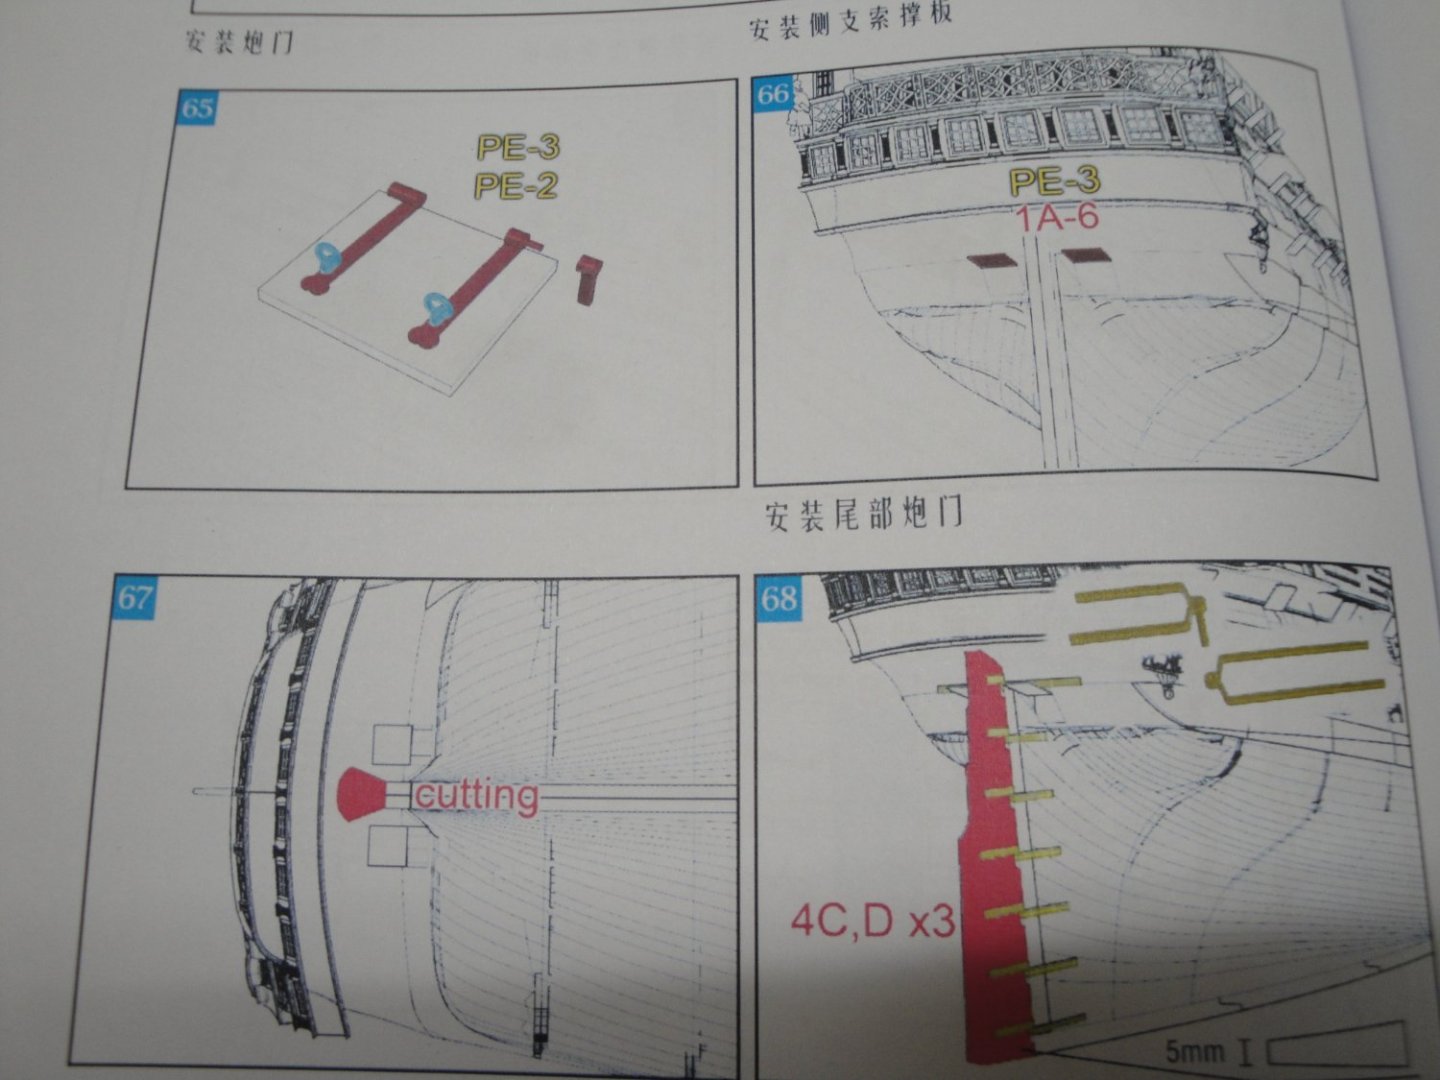
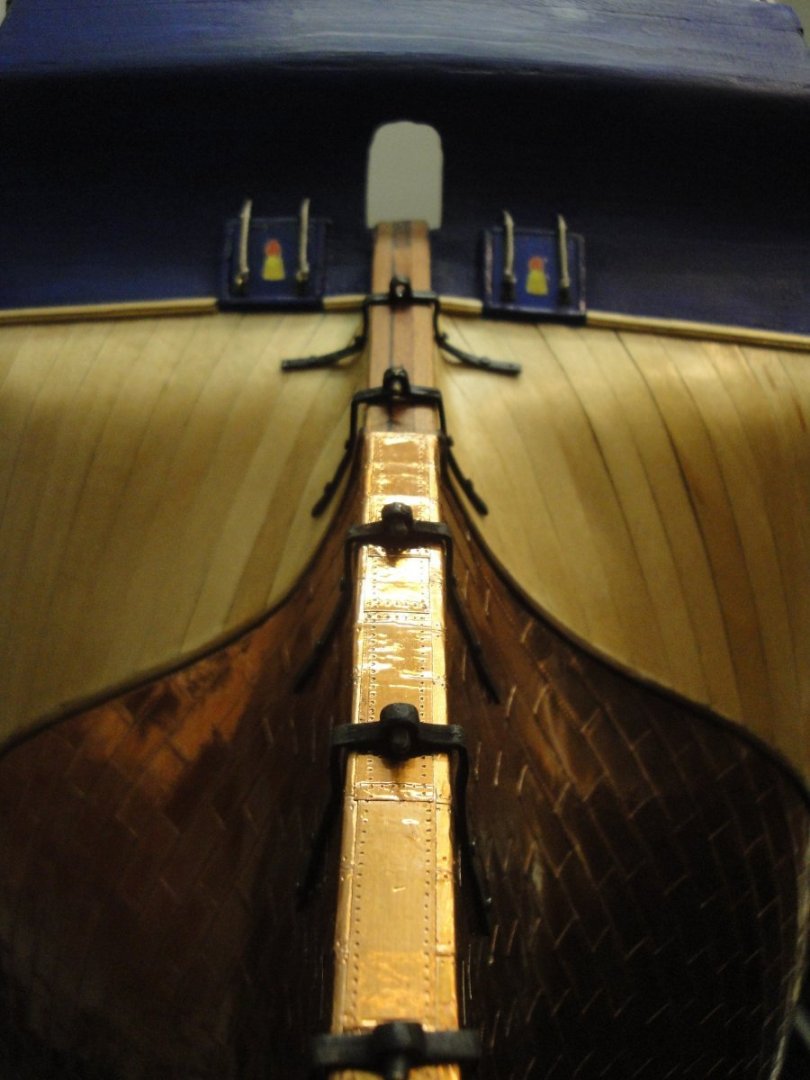
A small but noticeable progress on the poop: The rear gunport lids. Once again, you can admire the lack of instructions....very spartan, to say the least. The rope is not provided in the kit. The brass eye pins are from Model Shipways, as I find the pins provided with the kit way too large for a gunport lid. The other parts are from the kit PE sheet. All parts and CAD drawings are from the Session #5 box. Yves

- 507 replies
-
- 12
-
-
Mike, yes the decals are water transfer, like regular decals. They are simply a lot thicker than what you find in plastic model kits. By the same token, they are also more robust. To apply: I use Future Floor Pledge as a base coat, to make the paint and the wood more receptive to the flat surface of the decal underside, I place the decal, let it dry and coat is with another light application of Future Floor pledge, by brush. Yves
-
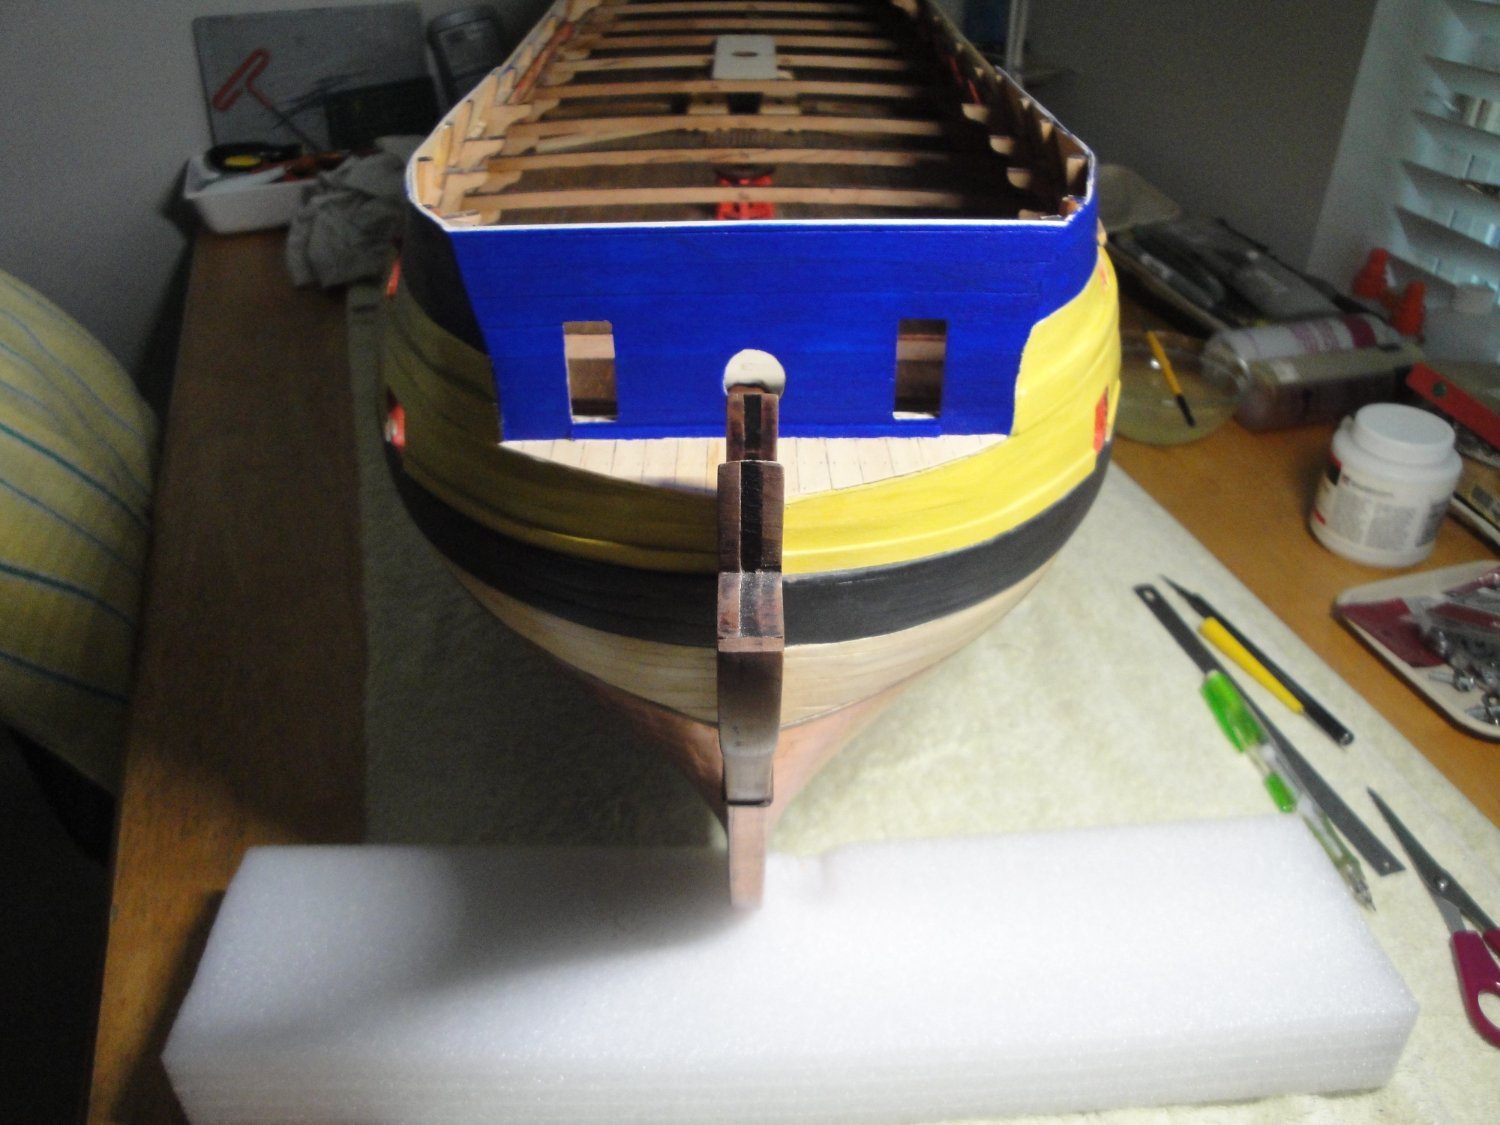
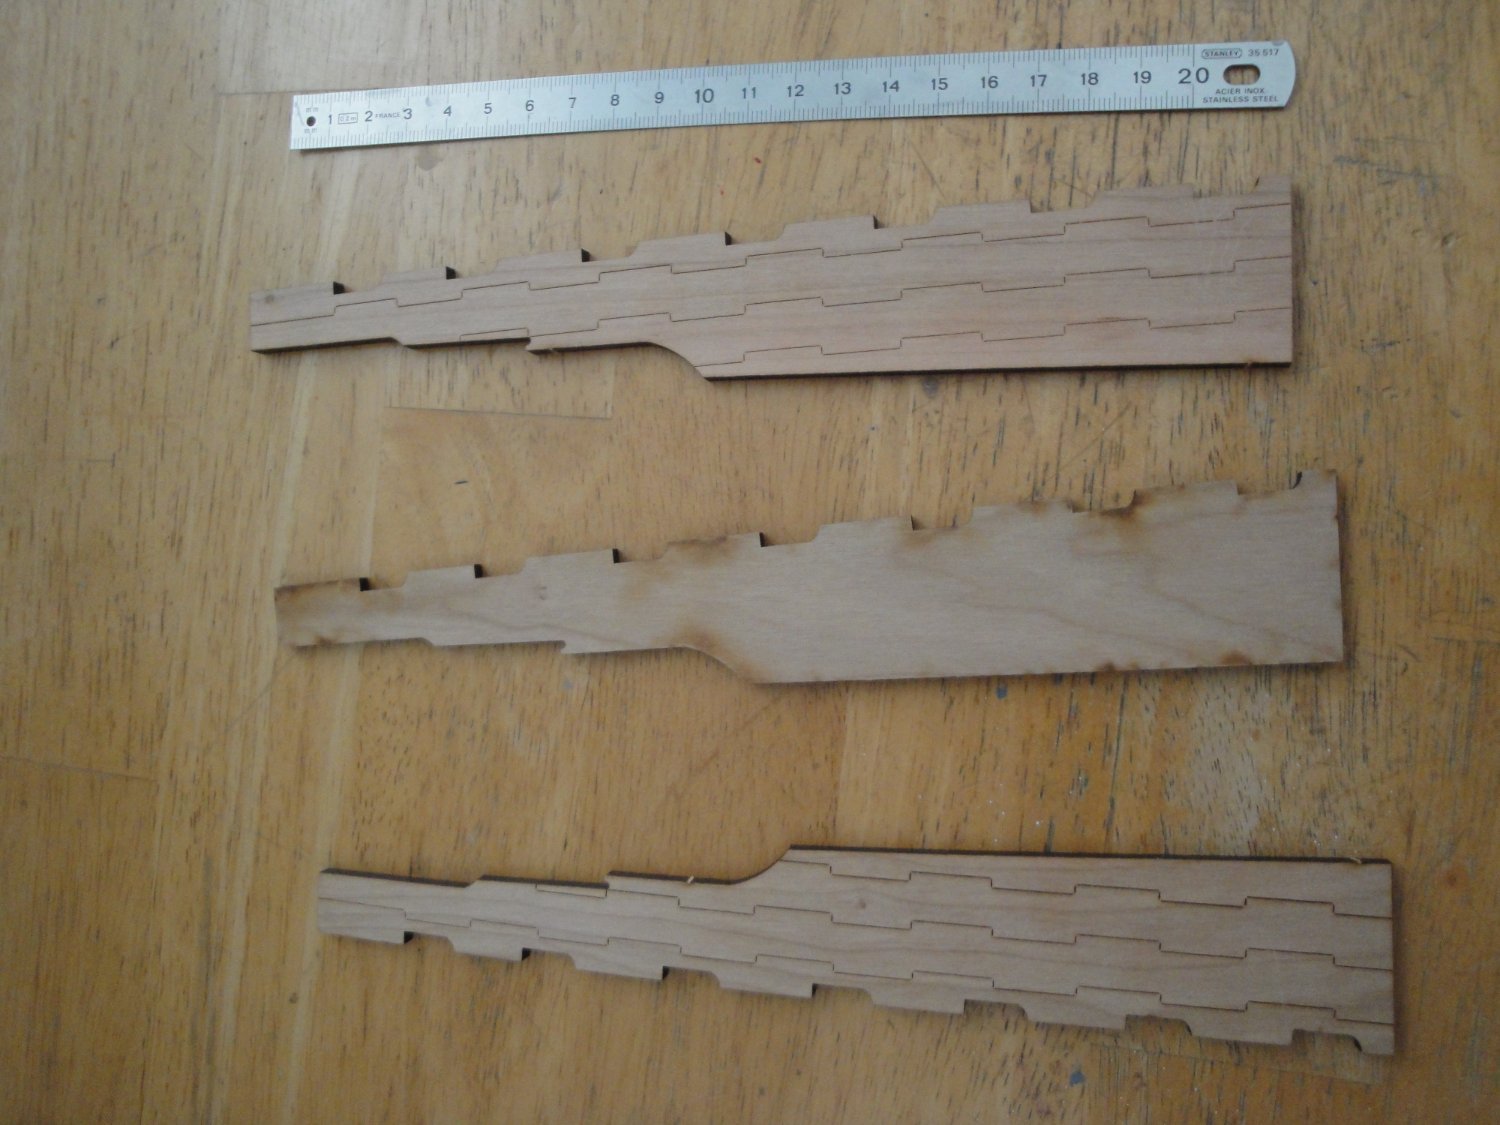
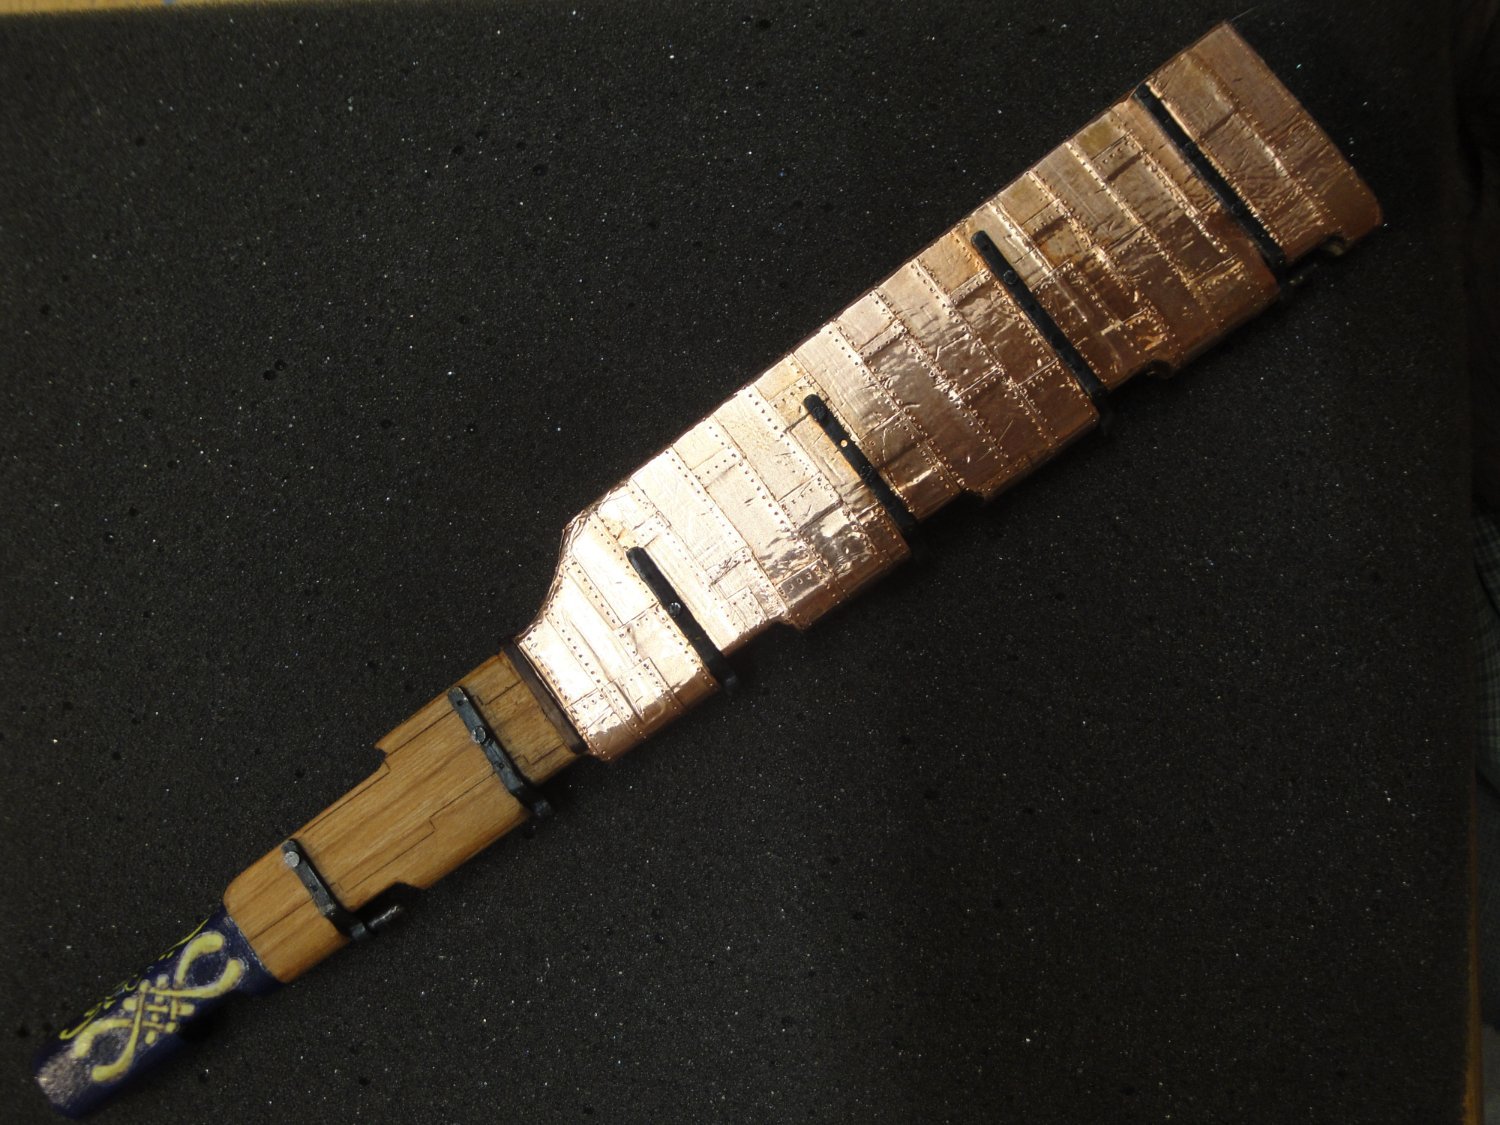
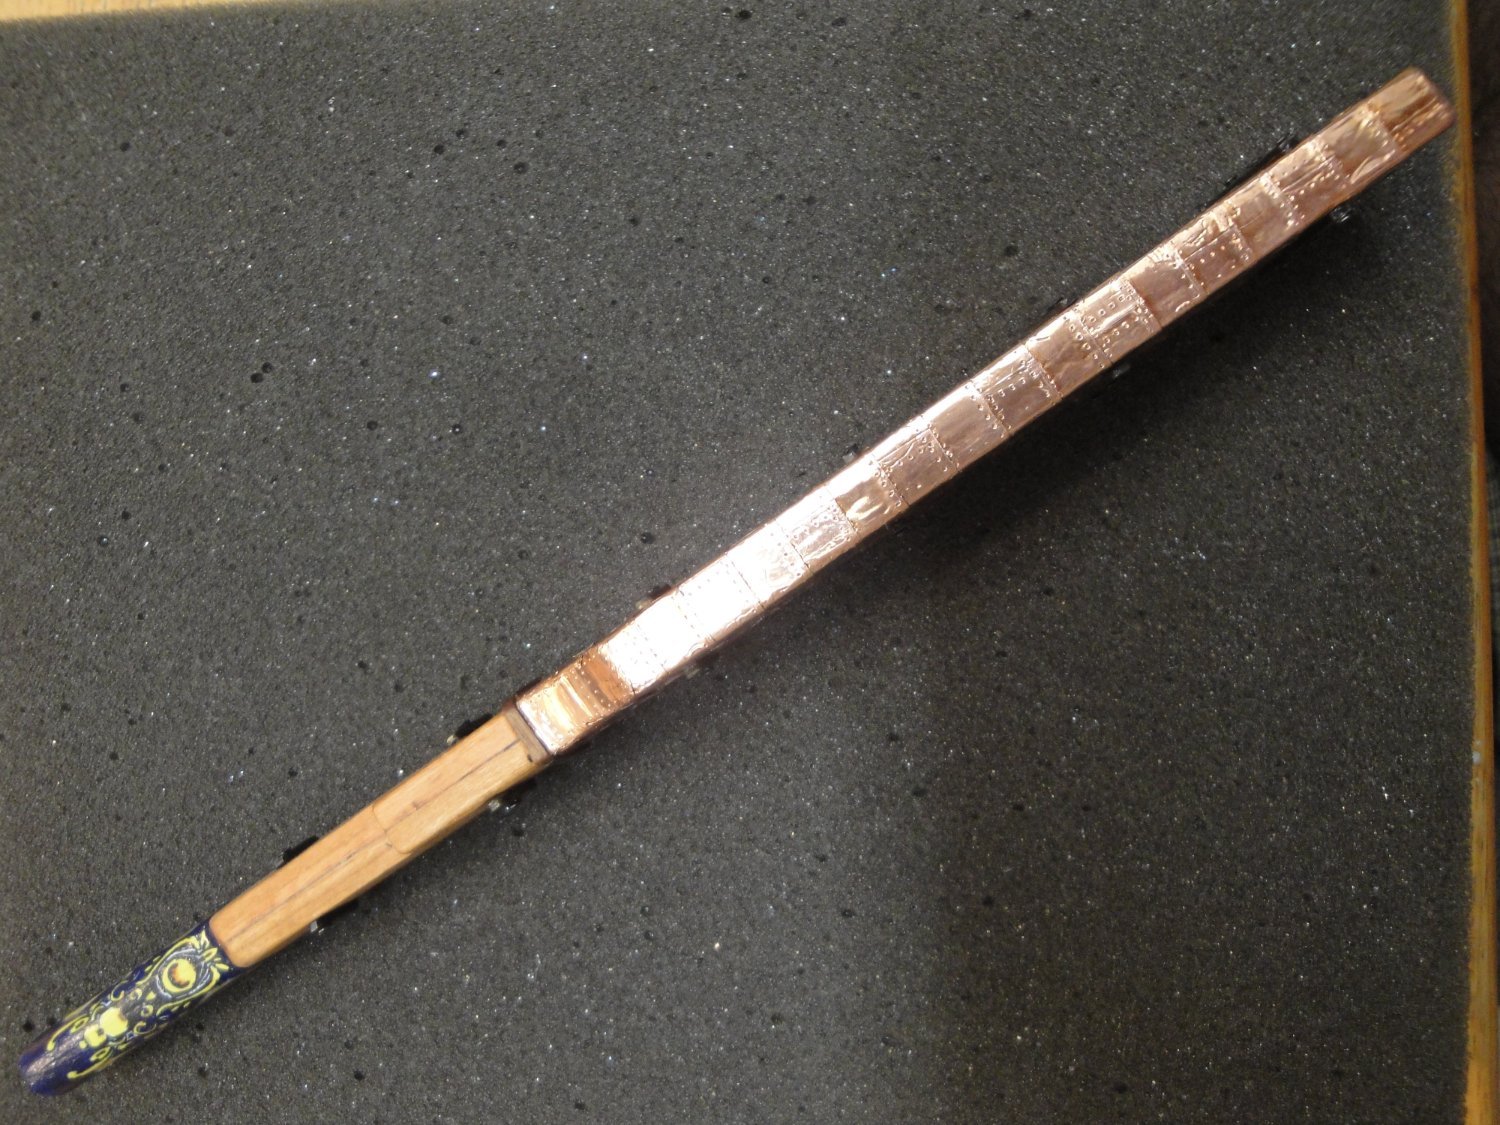
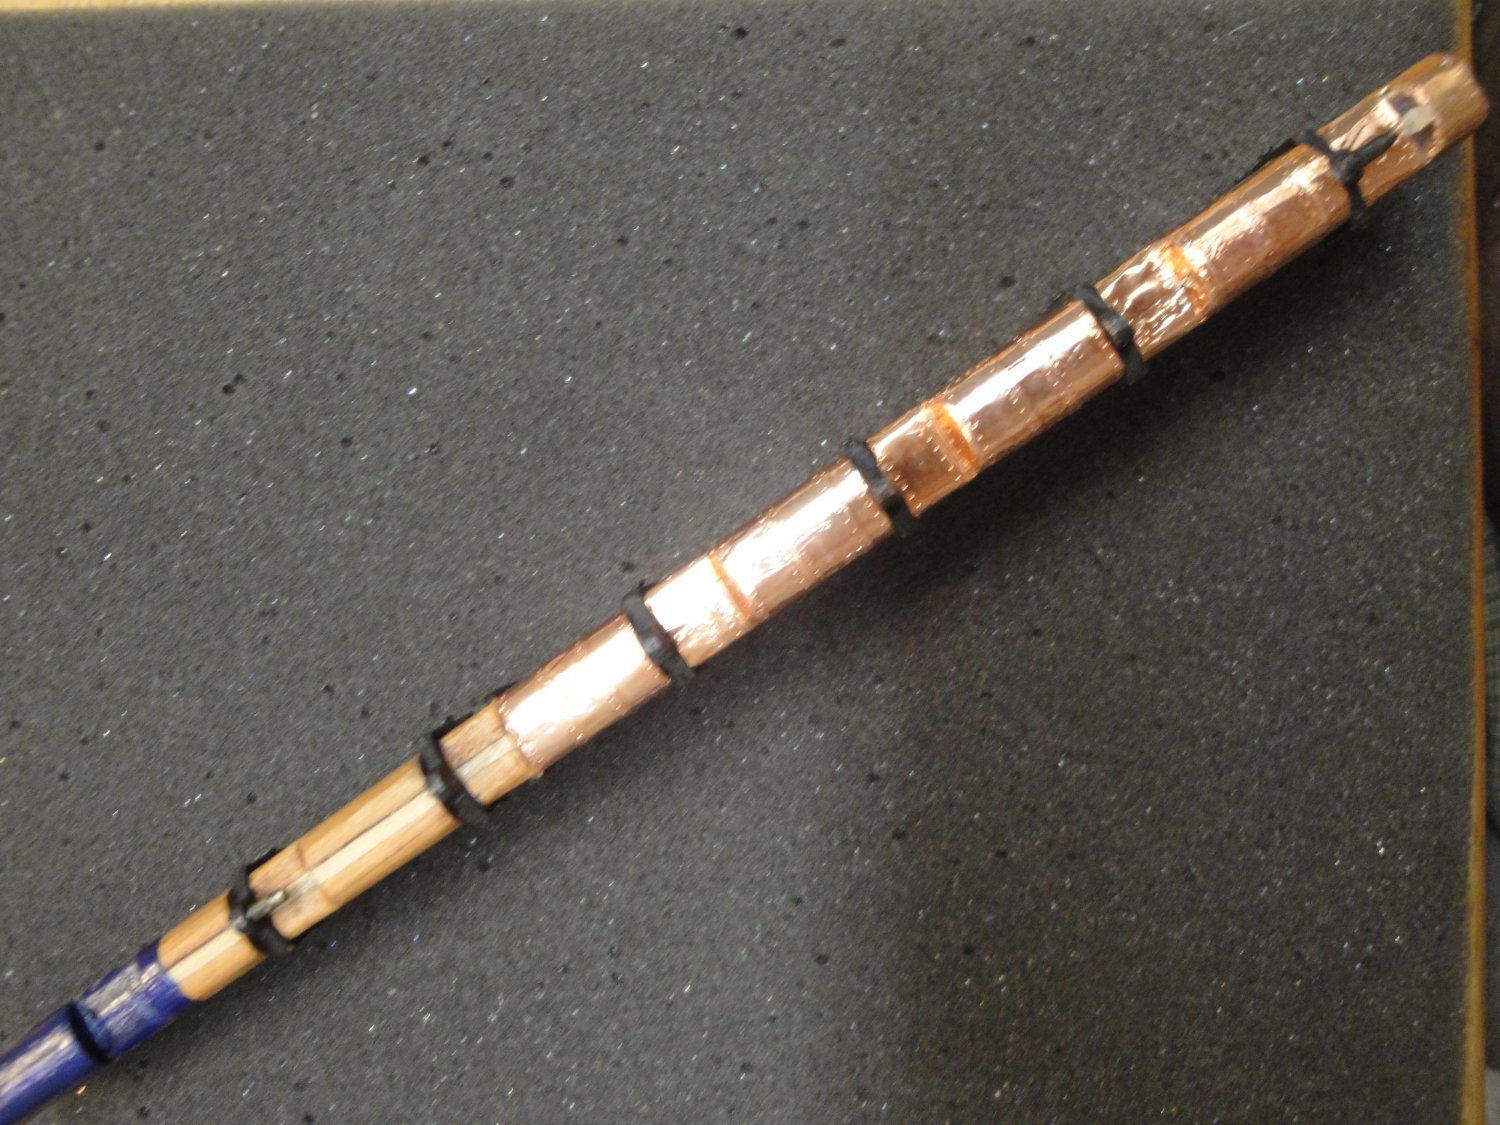
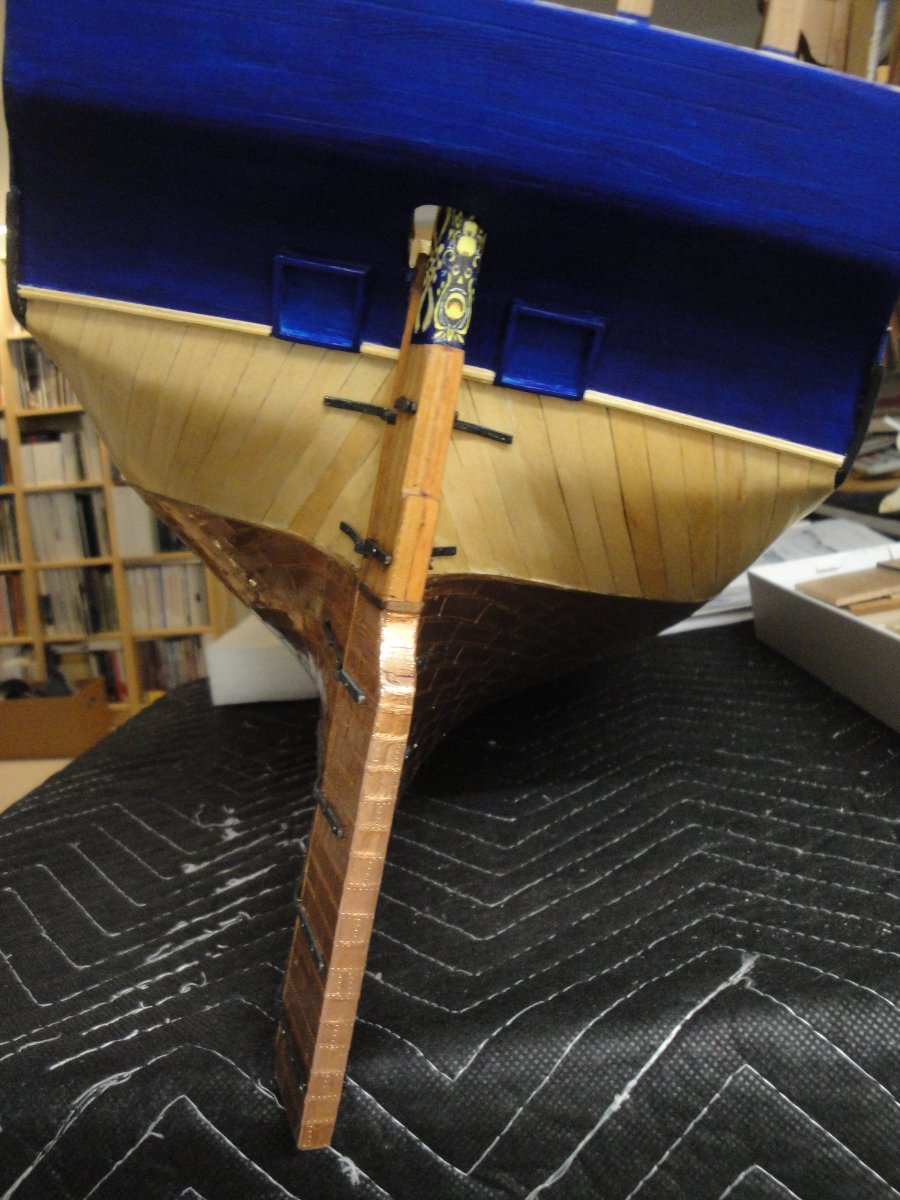
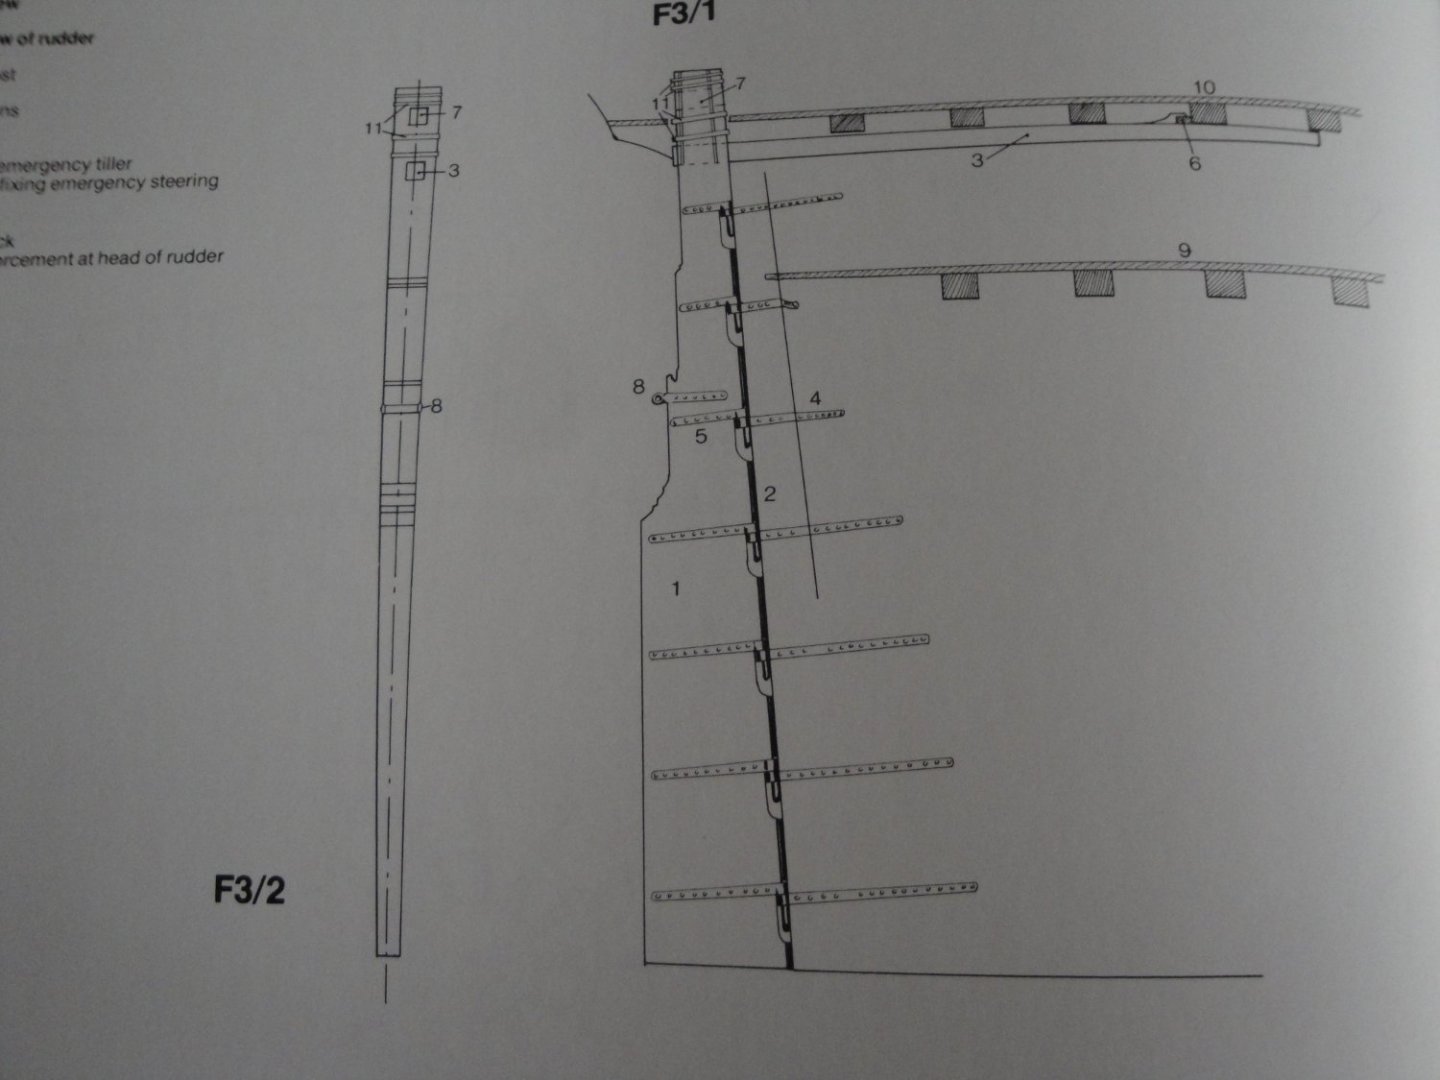
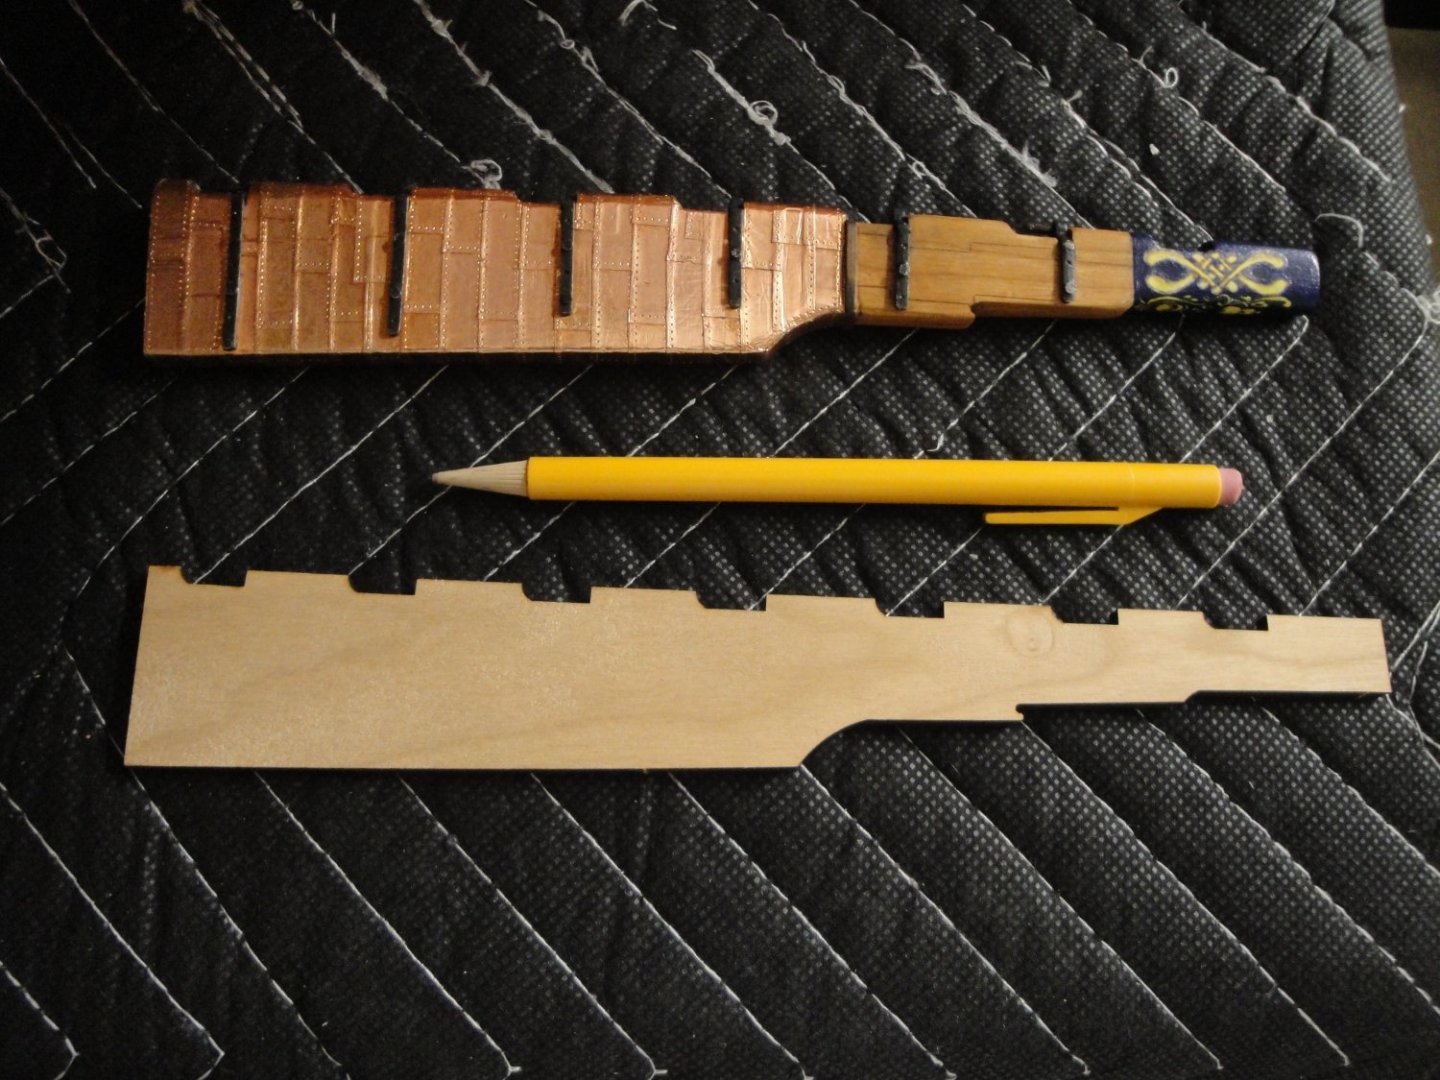
We are now entering Session #2.5 (somewhere between 2 and 3). It actually uses a lot of the parts located in Session #5. The goal of this intermediate session, is to build all the details of the hull and gun deck before moving to the main deck with Session #3. Honestly, I think it would be foolish to wait and assemble all the details about the hull in Session #5. There are a lot of things that have to take place before you can close the lid on the main deck and because of the sheer size (and weight ) of the hull. With that in mind, we chose randomly the rudder, fully described and provided in Session #5. The part above is missing from the kit. I will have to build it since it will take a long time to come from China. And from the book Anatomy of the Ship: My goal is to make the rudder movable and ultimately (if I manage to do it), controlled by the wheel. There are 7 pivots/hinges that are supporting the heavy rudder of Bellona. The kit provides a sandwich of three layers of cherry wood: The end result is way too thick and will prevent the rudder from rotating, unless you open the "grand canyon" on the transom. Instead of using the middle part, I am using a 2 mm strip of wood to create the triangular shape of the rudder. This allows me to keep the laser engraving of the external sides and saves me a ton of sanding. Aligning six or seven pivots can be made but it presents a serious challenge and most likely, the end result will be very stiff and hard to rotate. Instead, I only use the top and bottom support for the articulation and all the other supports are playing a fake role. You can see (above) the finished rudder, with the copper tiles and some of the decals provided in the kit. Above, notice the top and bottom supports. All the other ones are fake and not mechanically active. You can also see the strip of wood inserted at the heart of the sandwich. Rest assured, nothing is visible and in retrospect, I wish I had a 2mm strip of cherry to match the sides of the rudder. The completed rudder, installed on the stern of the ship: The rudder rotates freely and I have some hopes to make is steerable using the wheel. It will not be easy as I have to cross through multiple levels of deck. The decals are quite thick, not the kind that you find in plastic model kits. I use Future Floor Pledge as a sub-layer to glue them and another coat of Pledge on top, to seal the decals. It seems to work rather well which is good news, as decals are usually very fragile. Yves


- 507 replies
-
- 20
-
-

-
Impressive. You are getting there. It will be interesting to see that beast in your test tank in your backyard. Yves
- 454 replies
-
- 3
-
-
- Union Steamship Company
- Stepcraft 840
- (and 3 more)
-
I have used all the fittings provided by Billing Boats. The hull requires a significant amount of lead/weight to be in its flotation lines. My boat has sailed on the Mediterranean sea (inside a harbor) and never capsized. You should be perfectly fine with the brass barrels. Yves
- 58 replies
-
- 3
-
-

-
- Calypso
- Billing Boats
- (and 1 more)
-
That is a massive build Kevin. You and I like large models.... 🙂 How stiff is it? Will you have to present it on wood blocks on a flat board? Yves
- 201 replies
-
- 3
-
-
- SD 14
- Marcle Models
- (and 1 more)
-
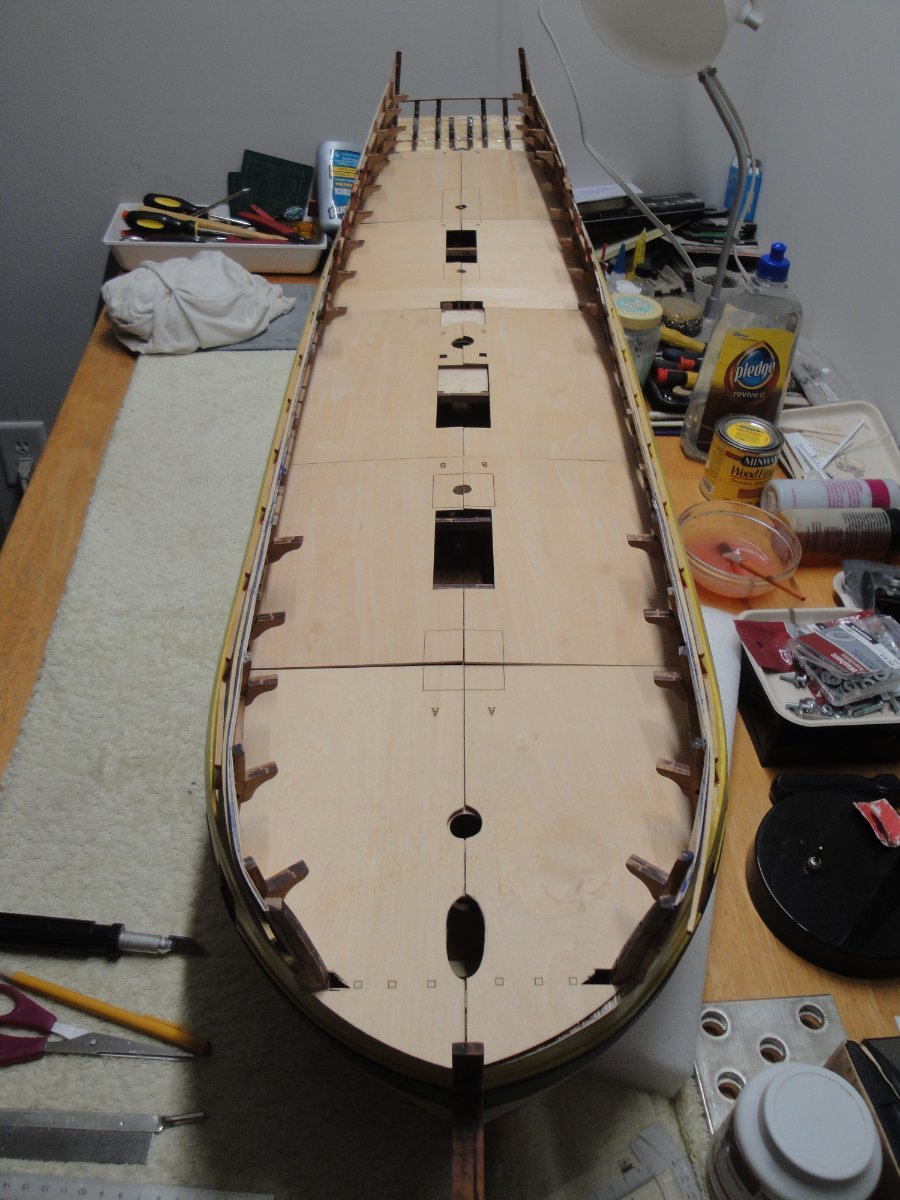
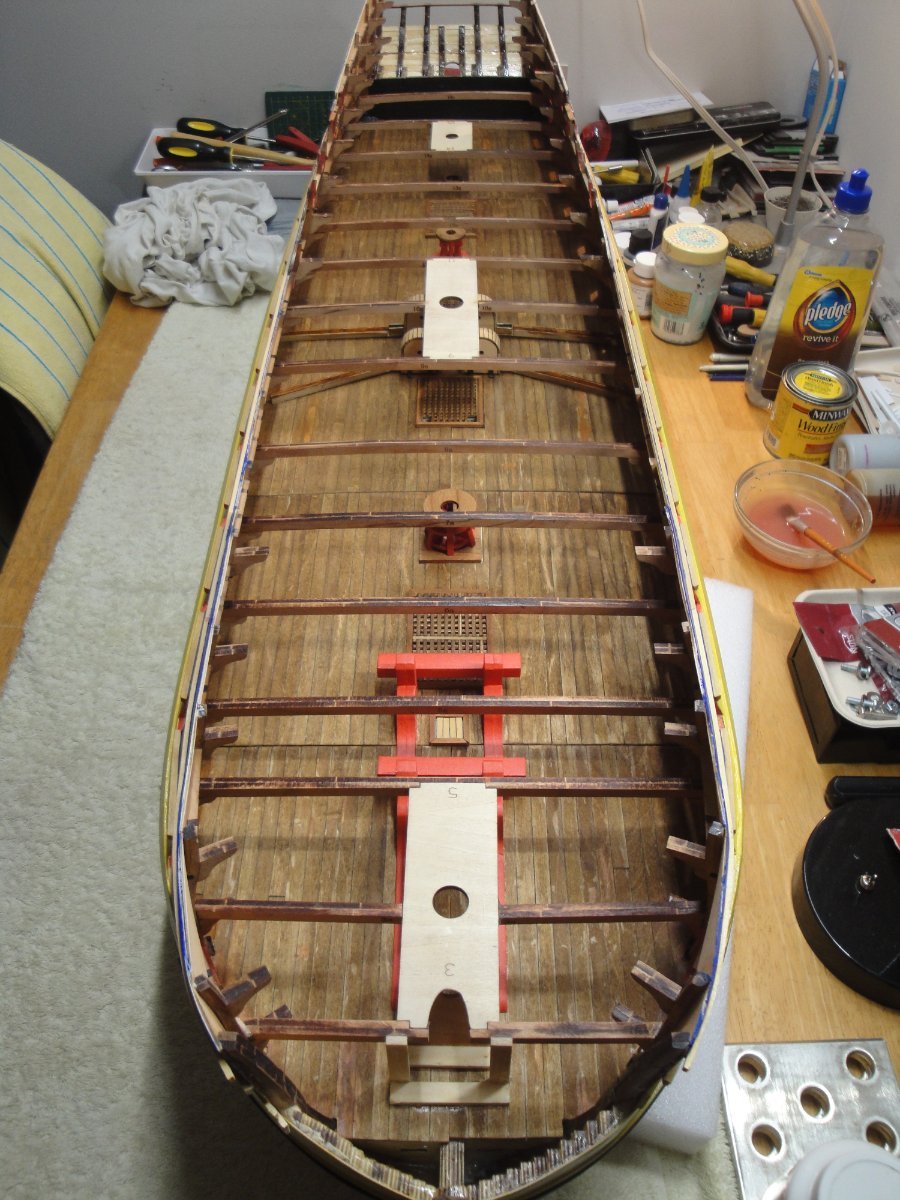
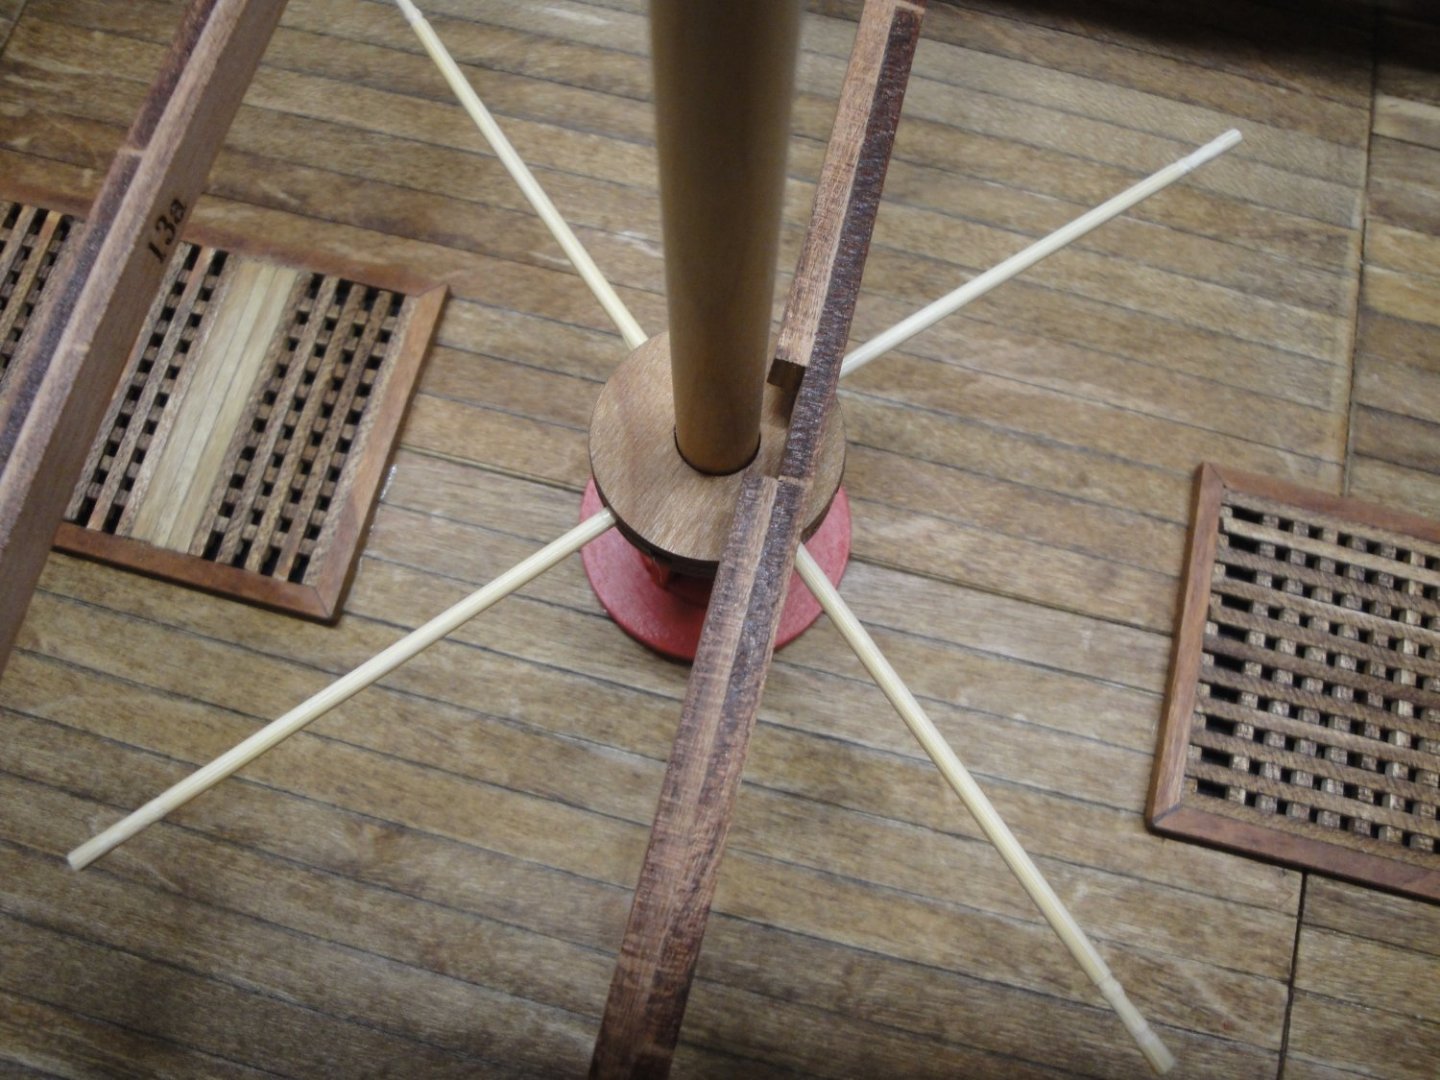
Before moving to Session #2.5, I adjusted the floor pieces for the main deck. A total of 10 thin plywood plates, delicately cut. They do require some adjustments mostly against the inner side of the hull and sometimes to accommodate the thickness of the frames. Some final sanding will be required to make them fit without stress or tension, but most of them are perfectly flat and in place. A final view with all the masts and capstan axles: Yves
- 507 replies
-
- 16
-
-
-
This little vessel is coming along nicely. I love the colors Yves
-
Mike, you are correct. The guns can be installed very easily with no conflicts. The hull is large and relatively easy to access internally. Guns rigging? Only if you are masochistic and need some pain. Yves
-
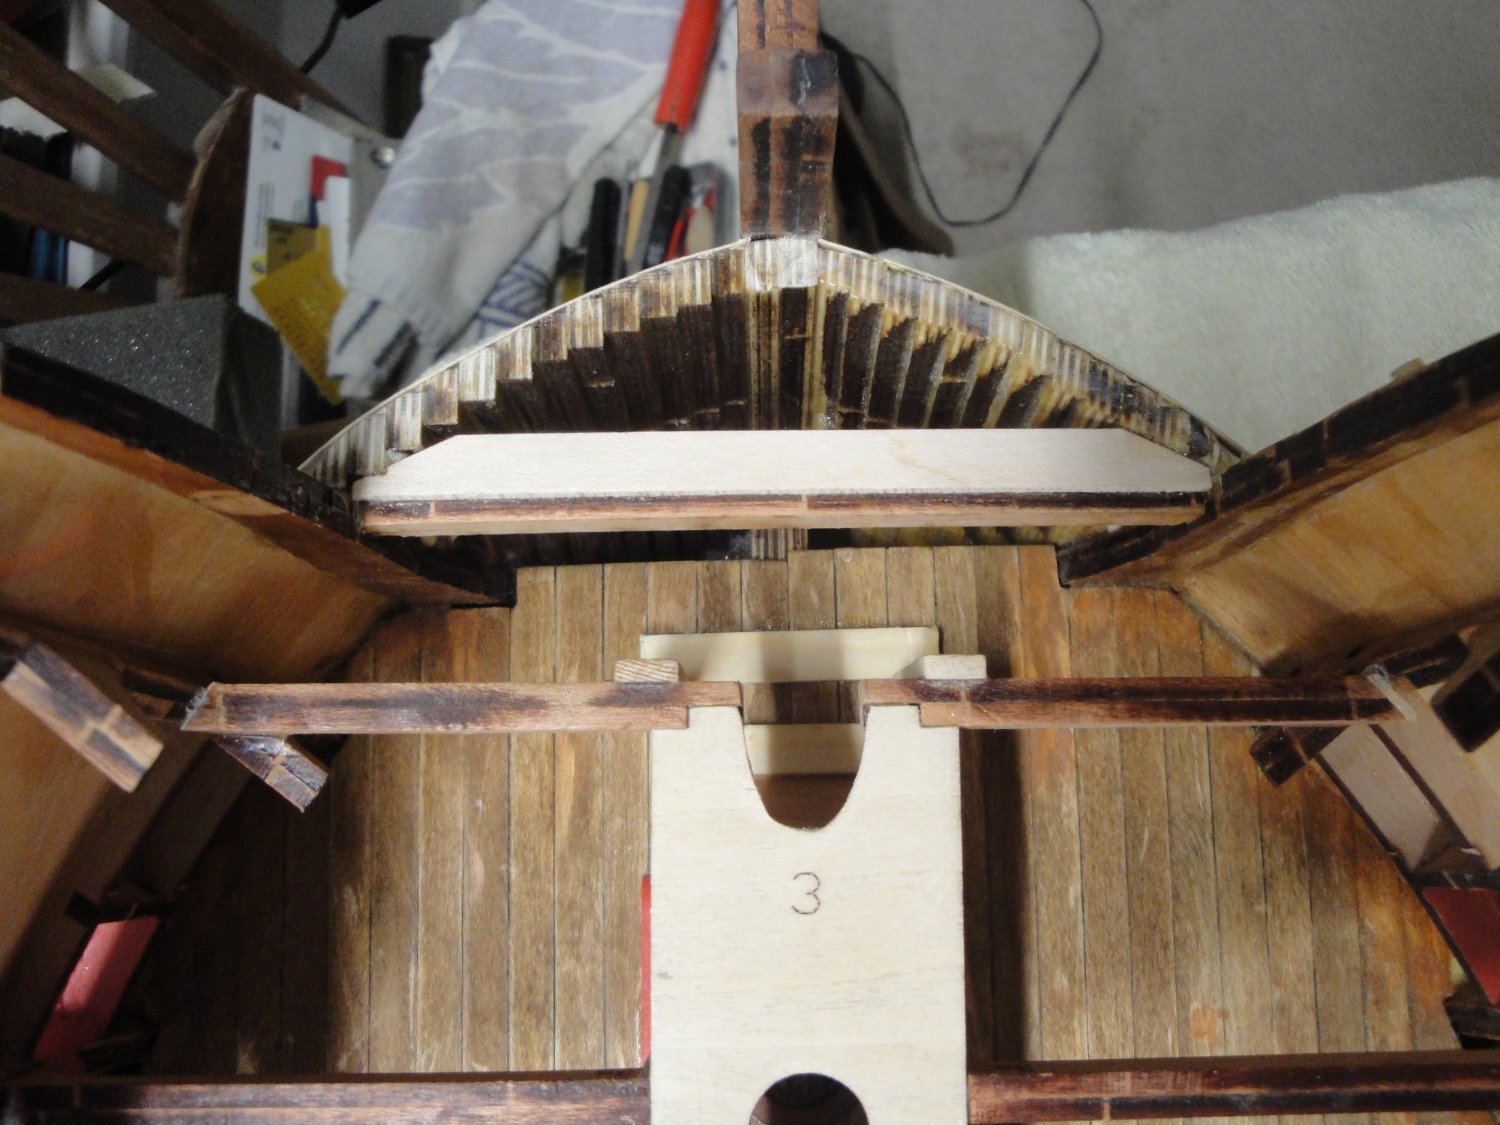
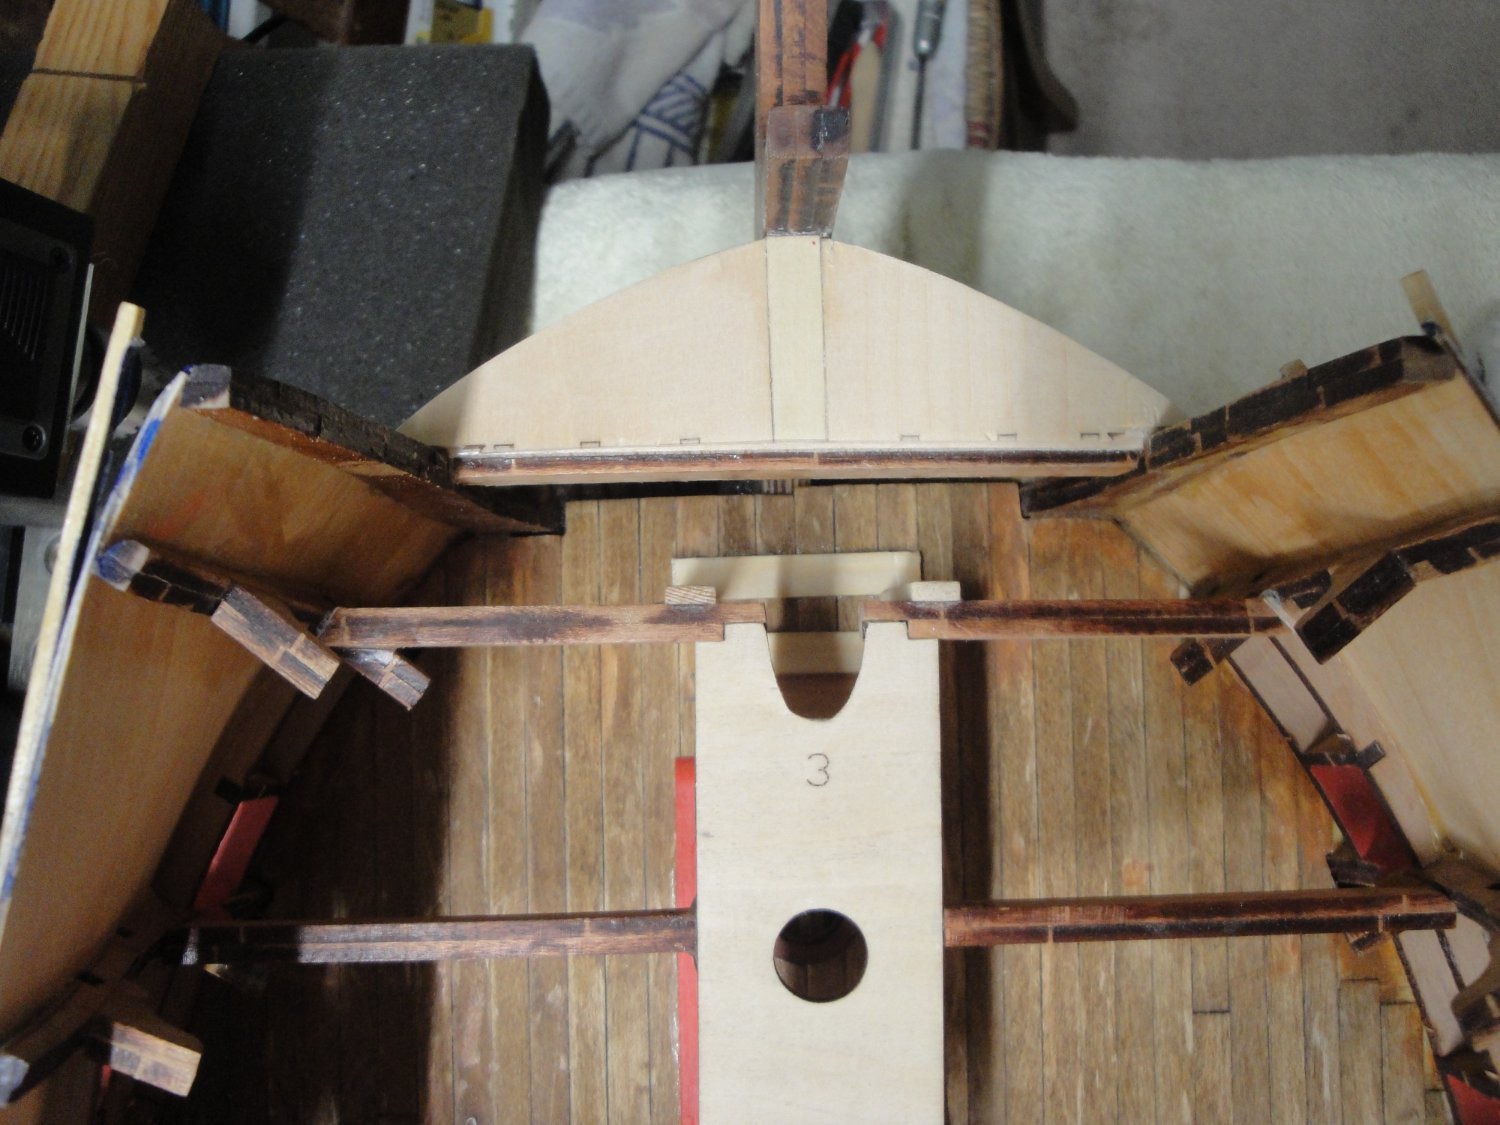
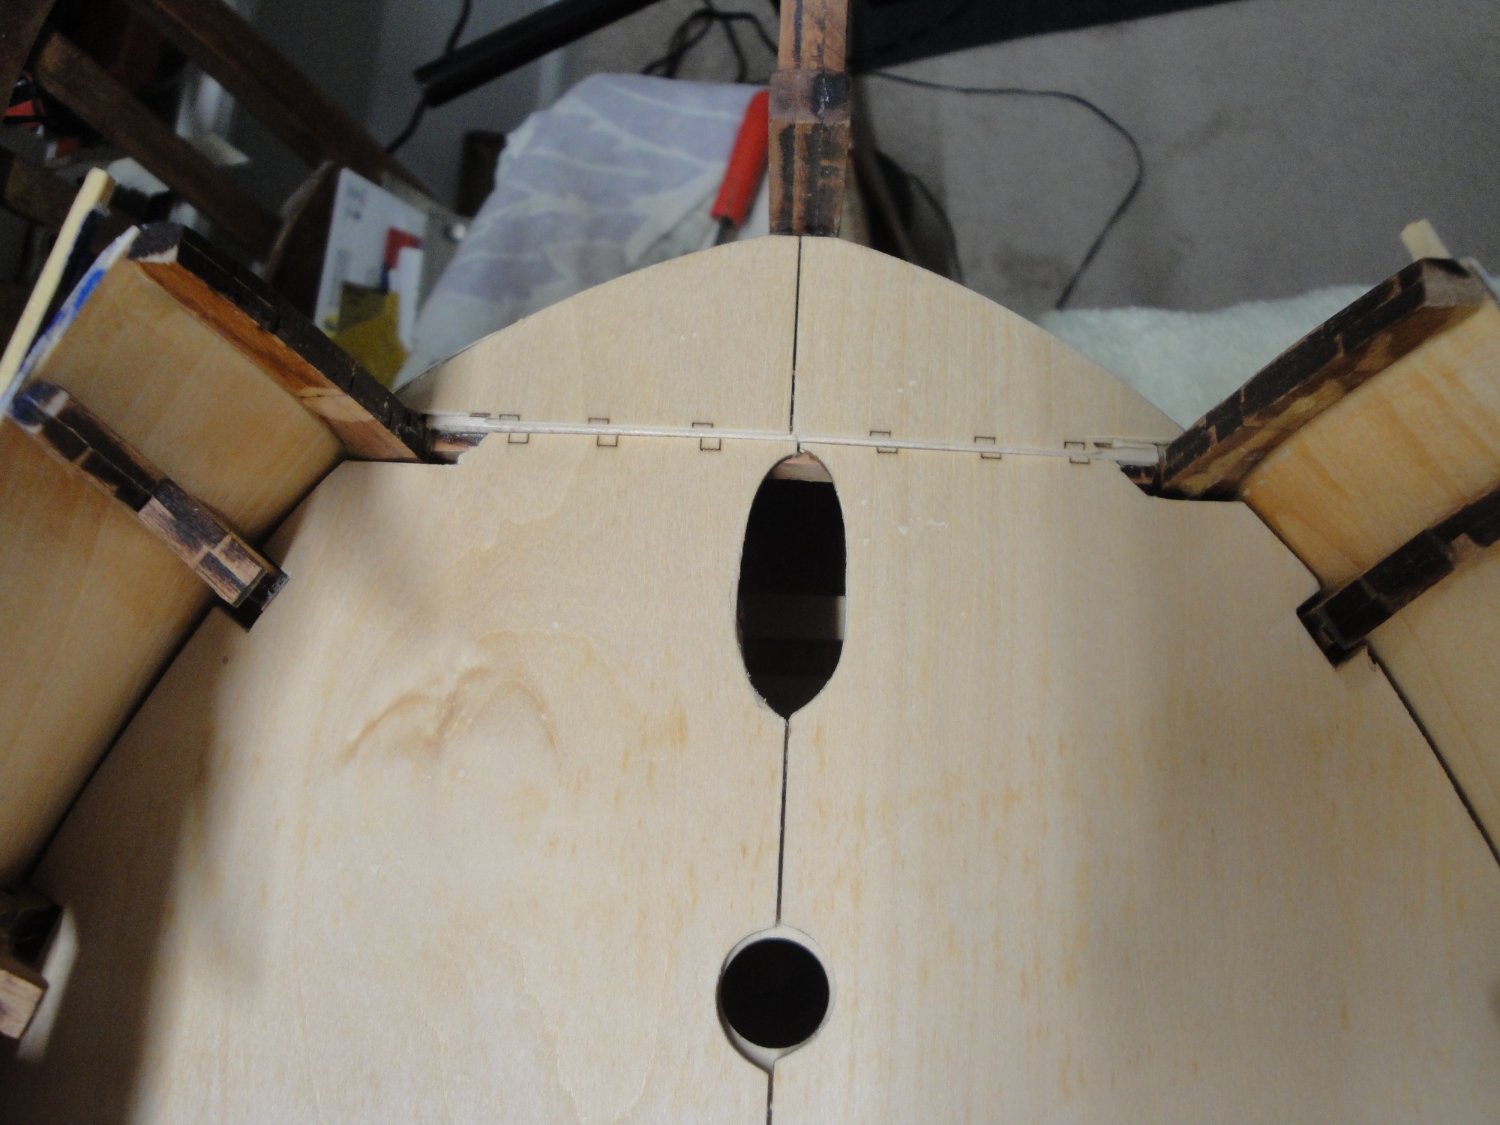
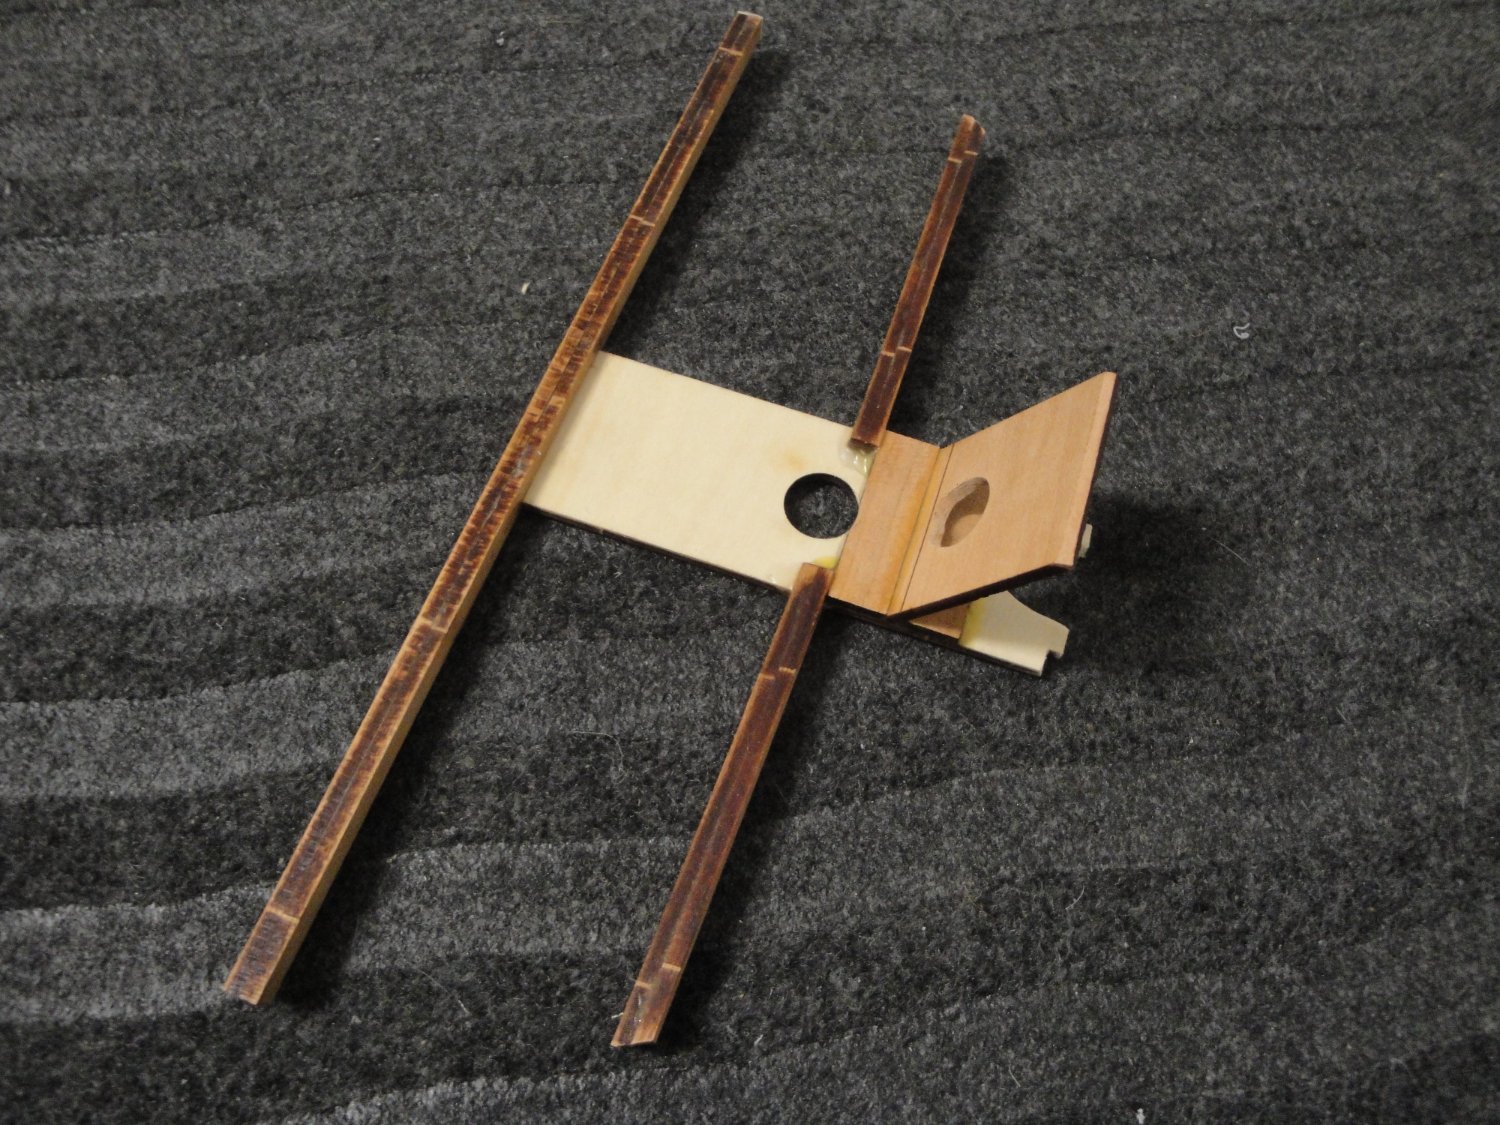
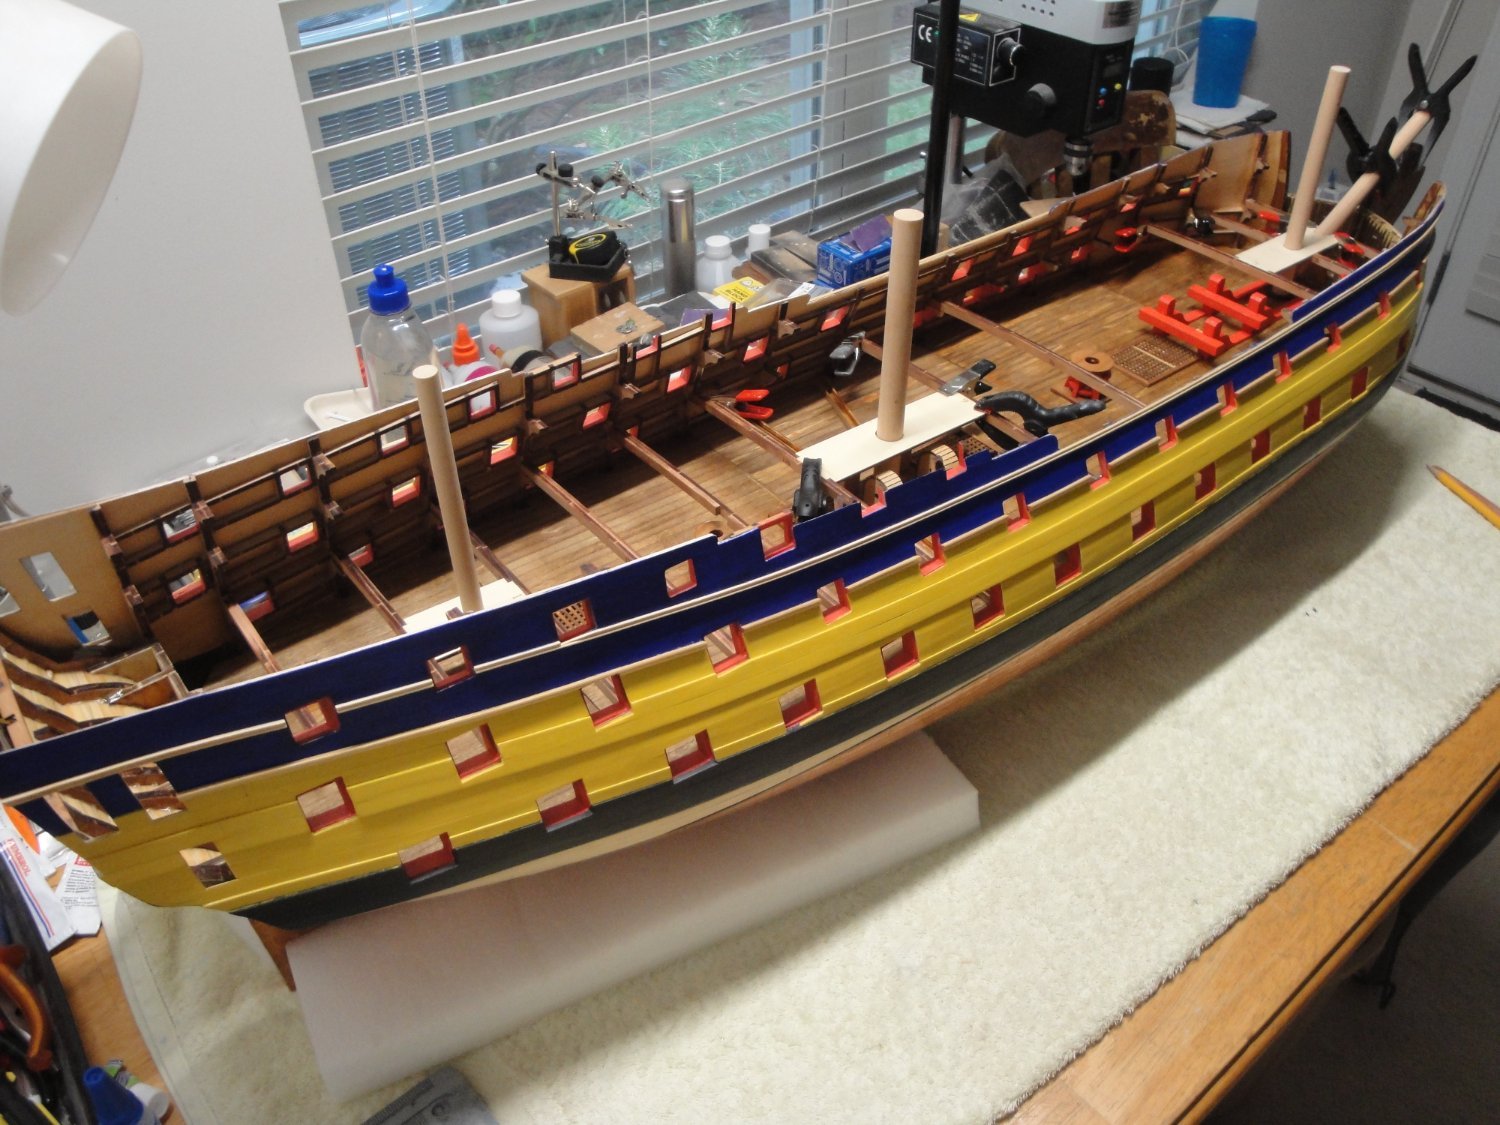
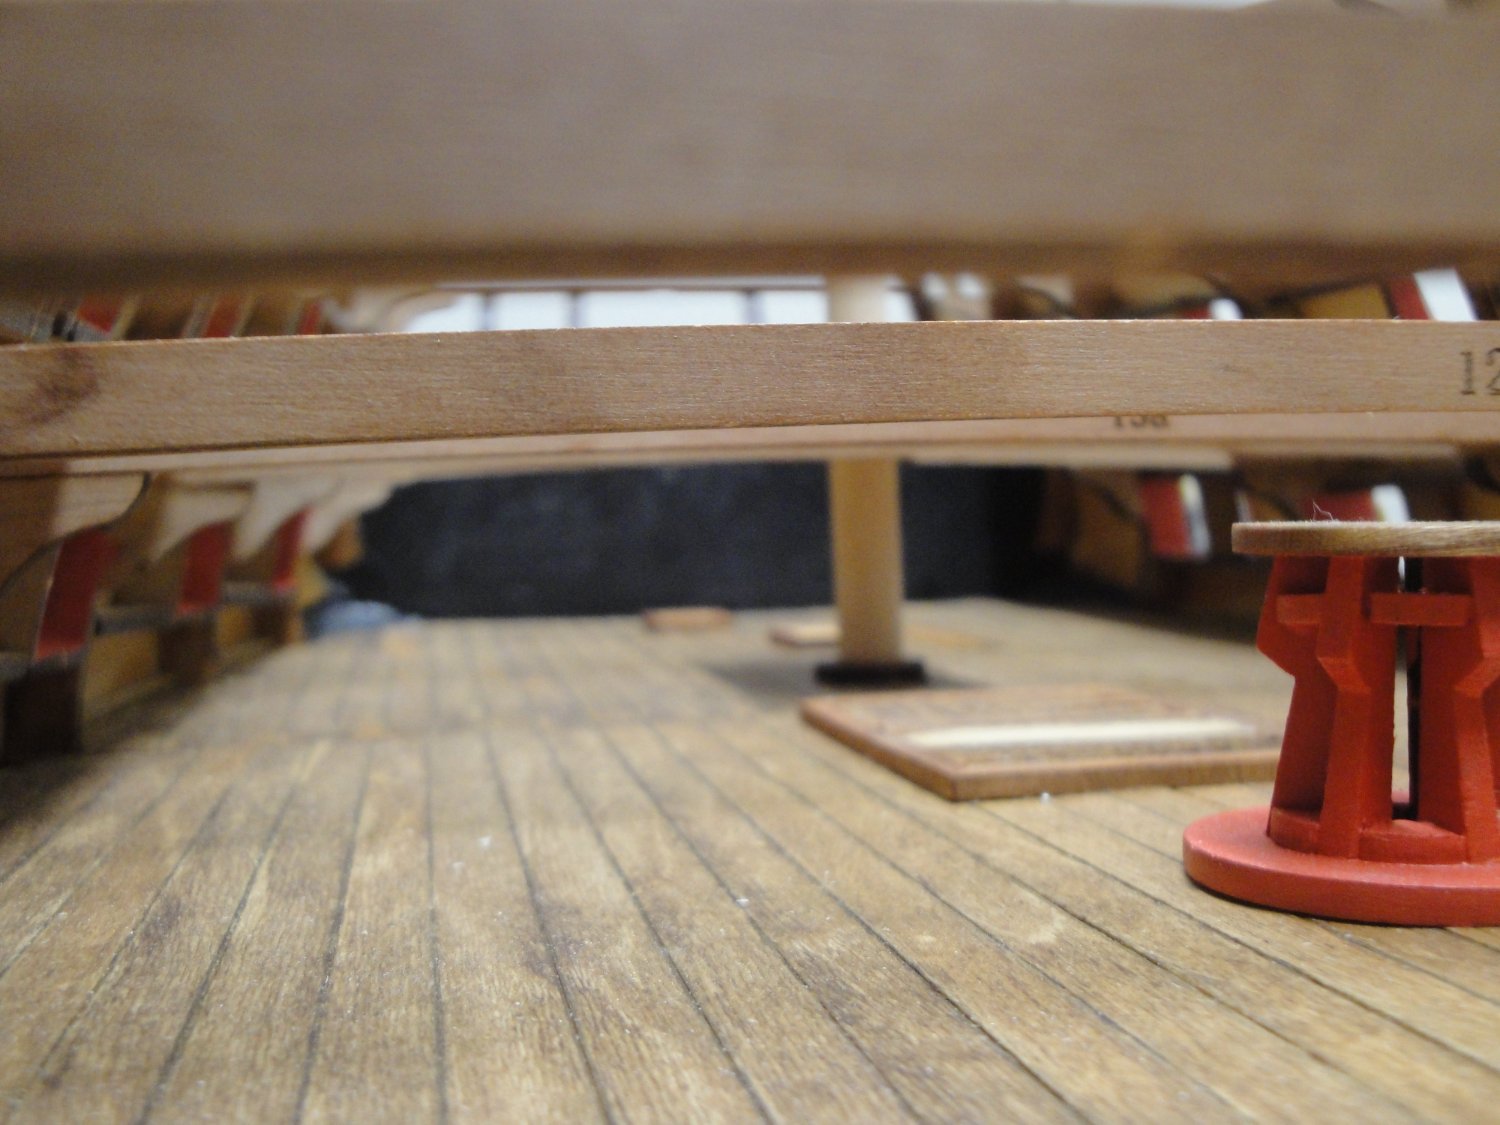
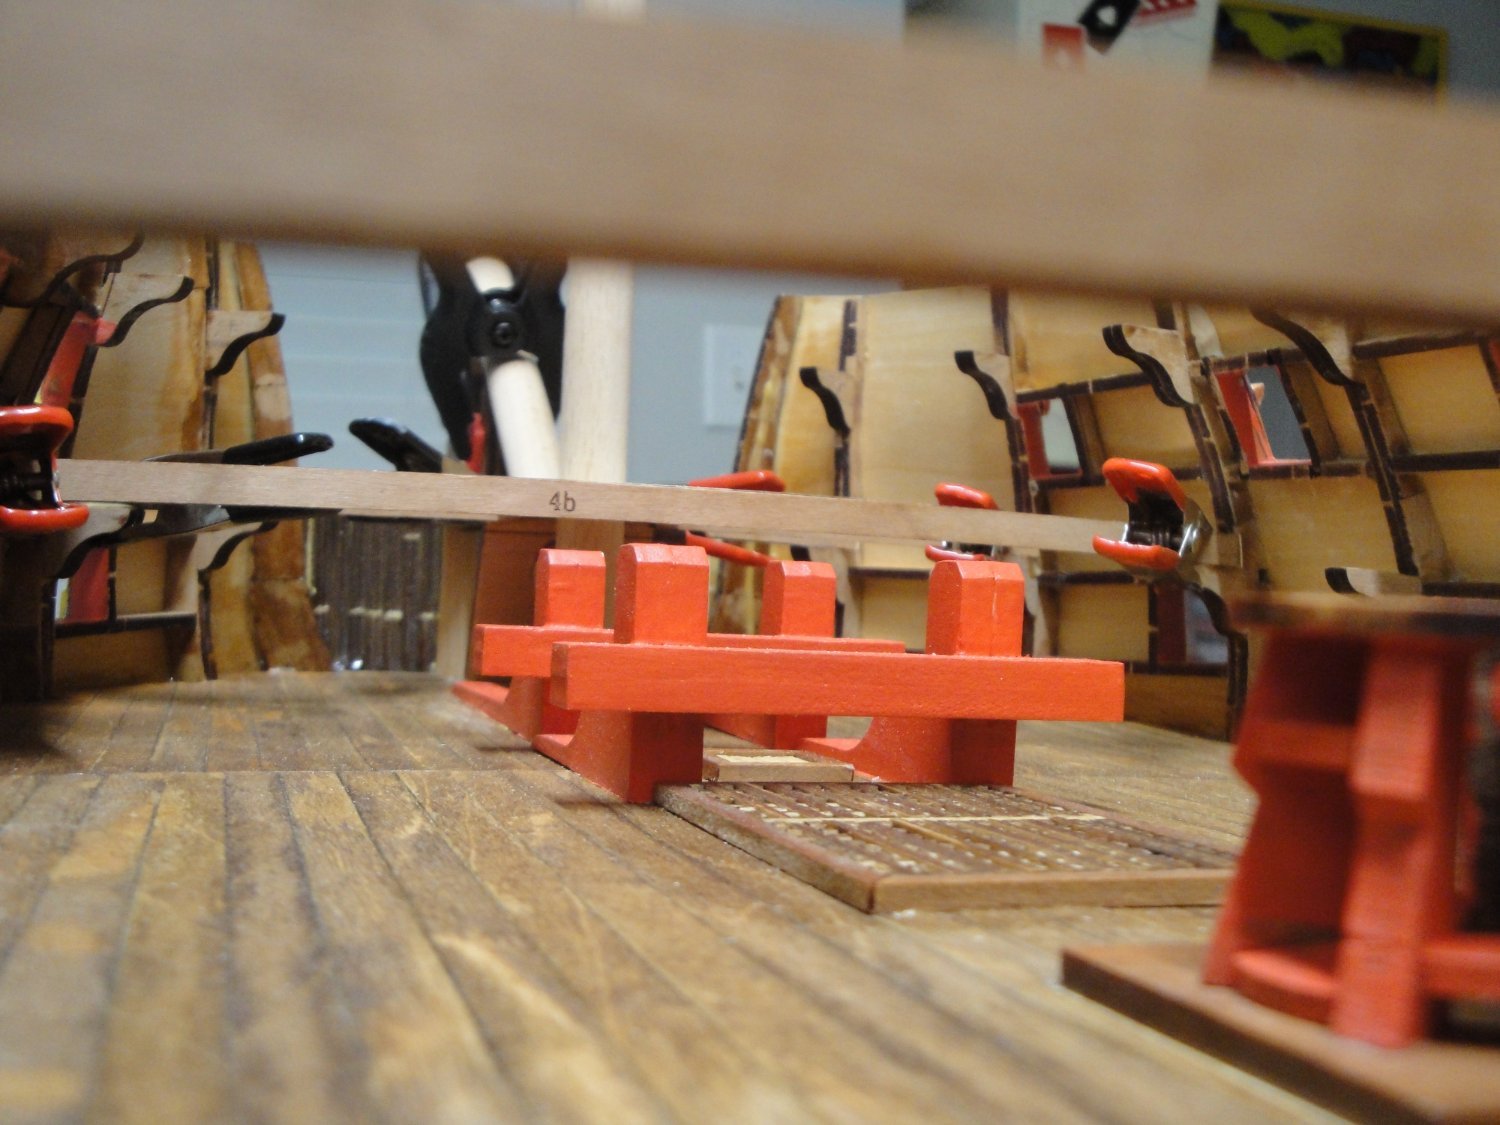
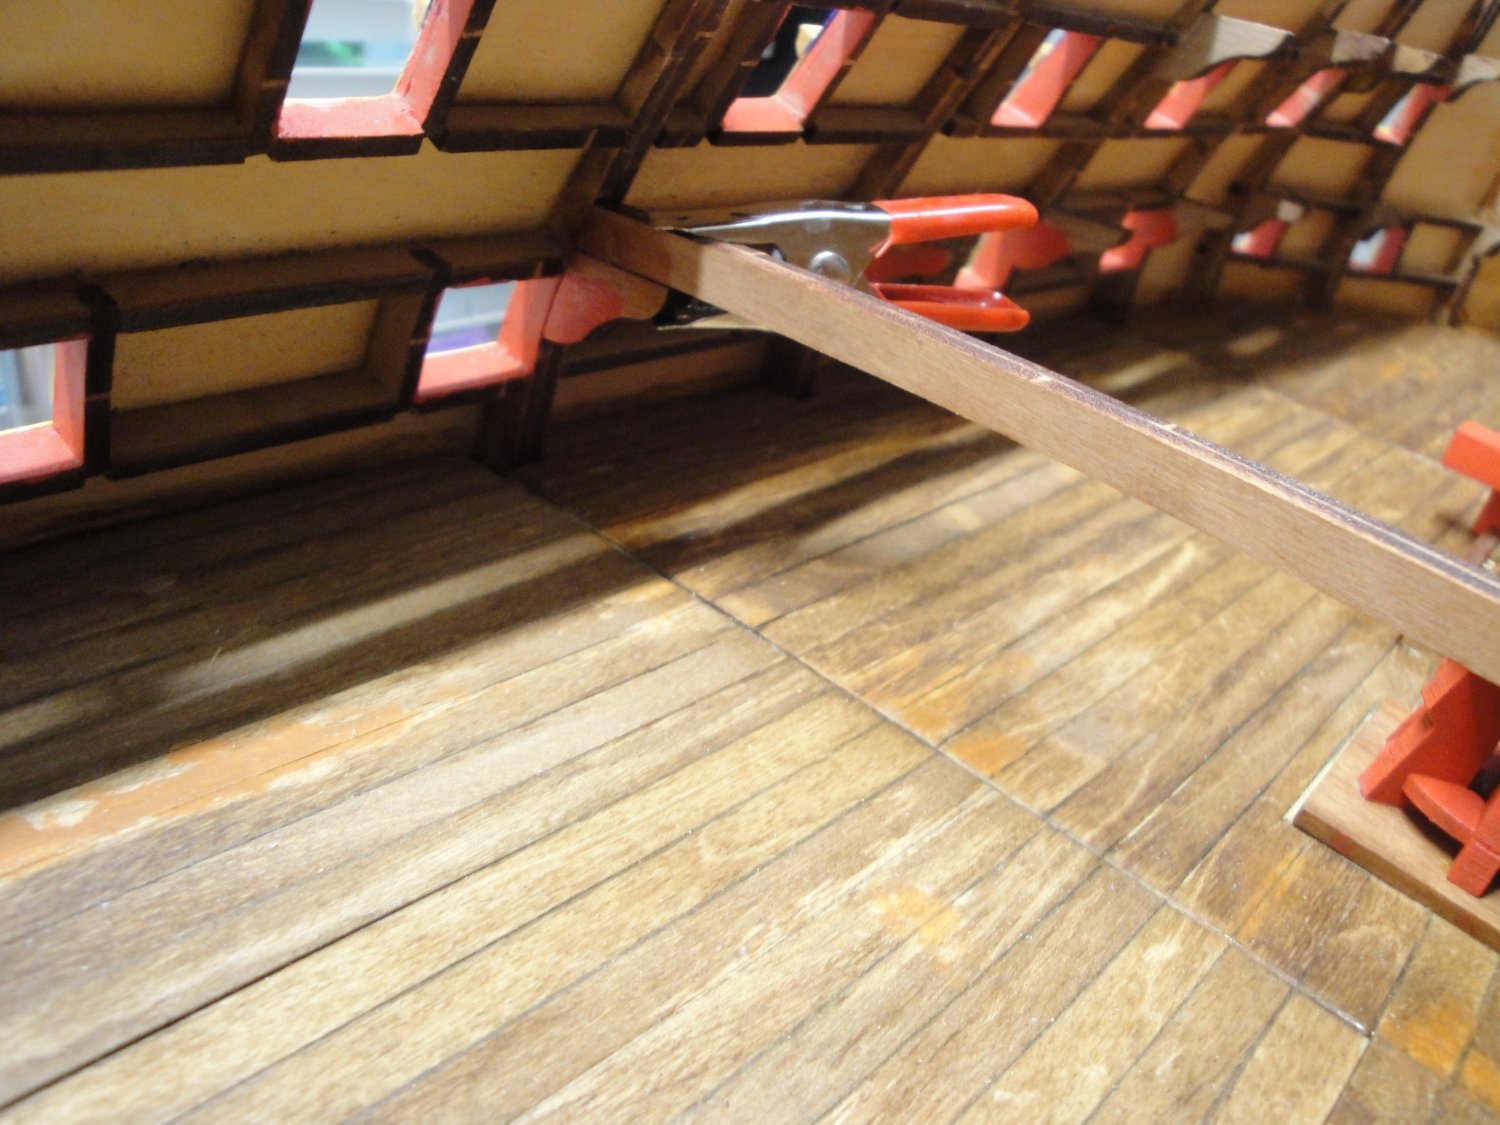
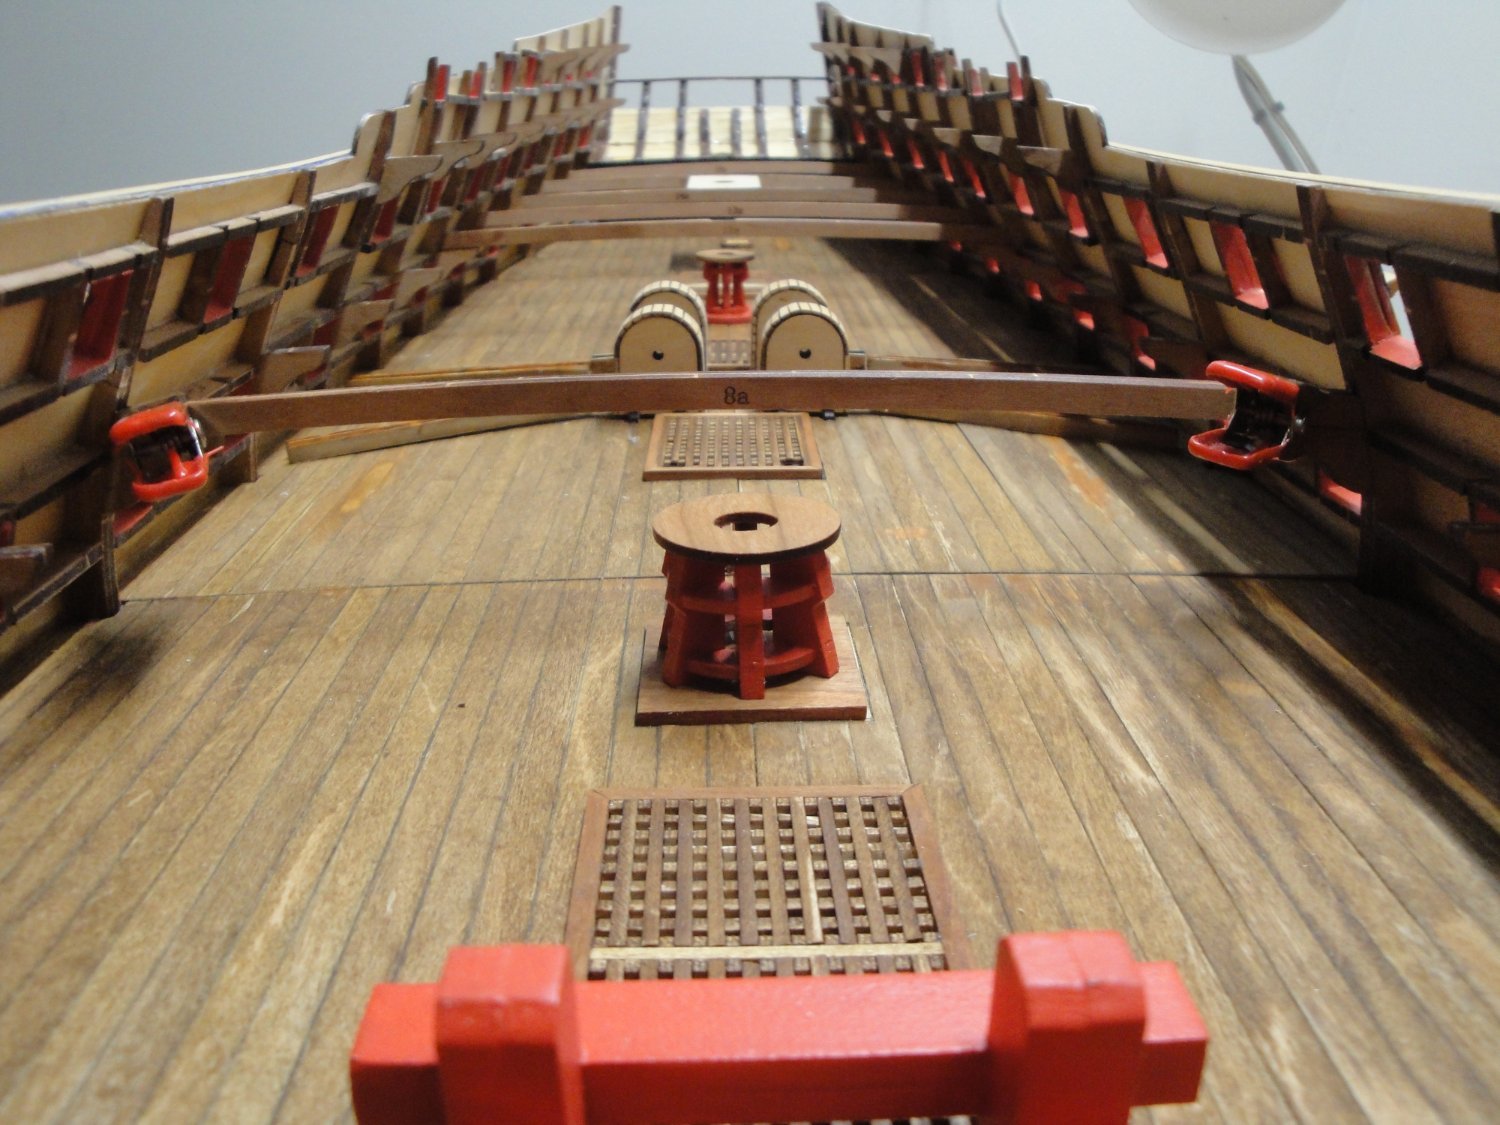
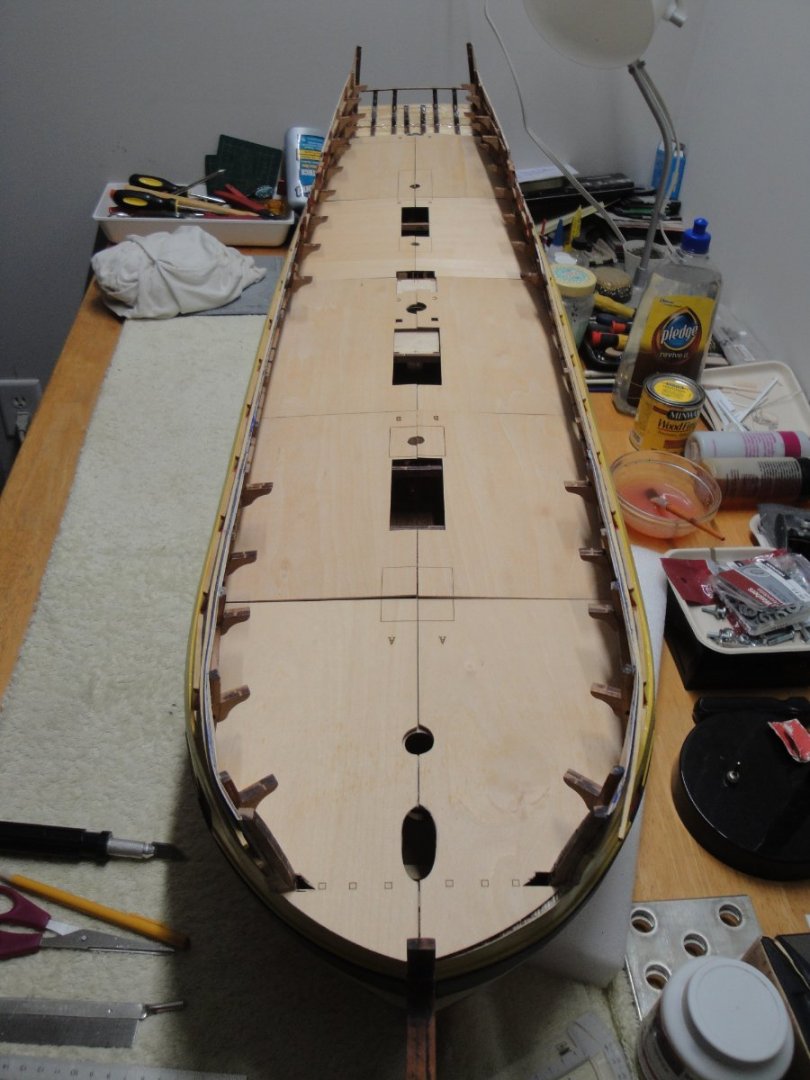
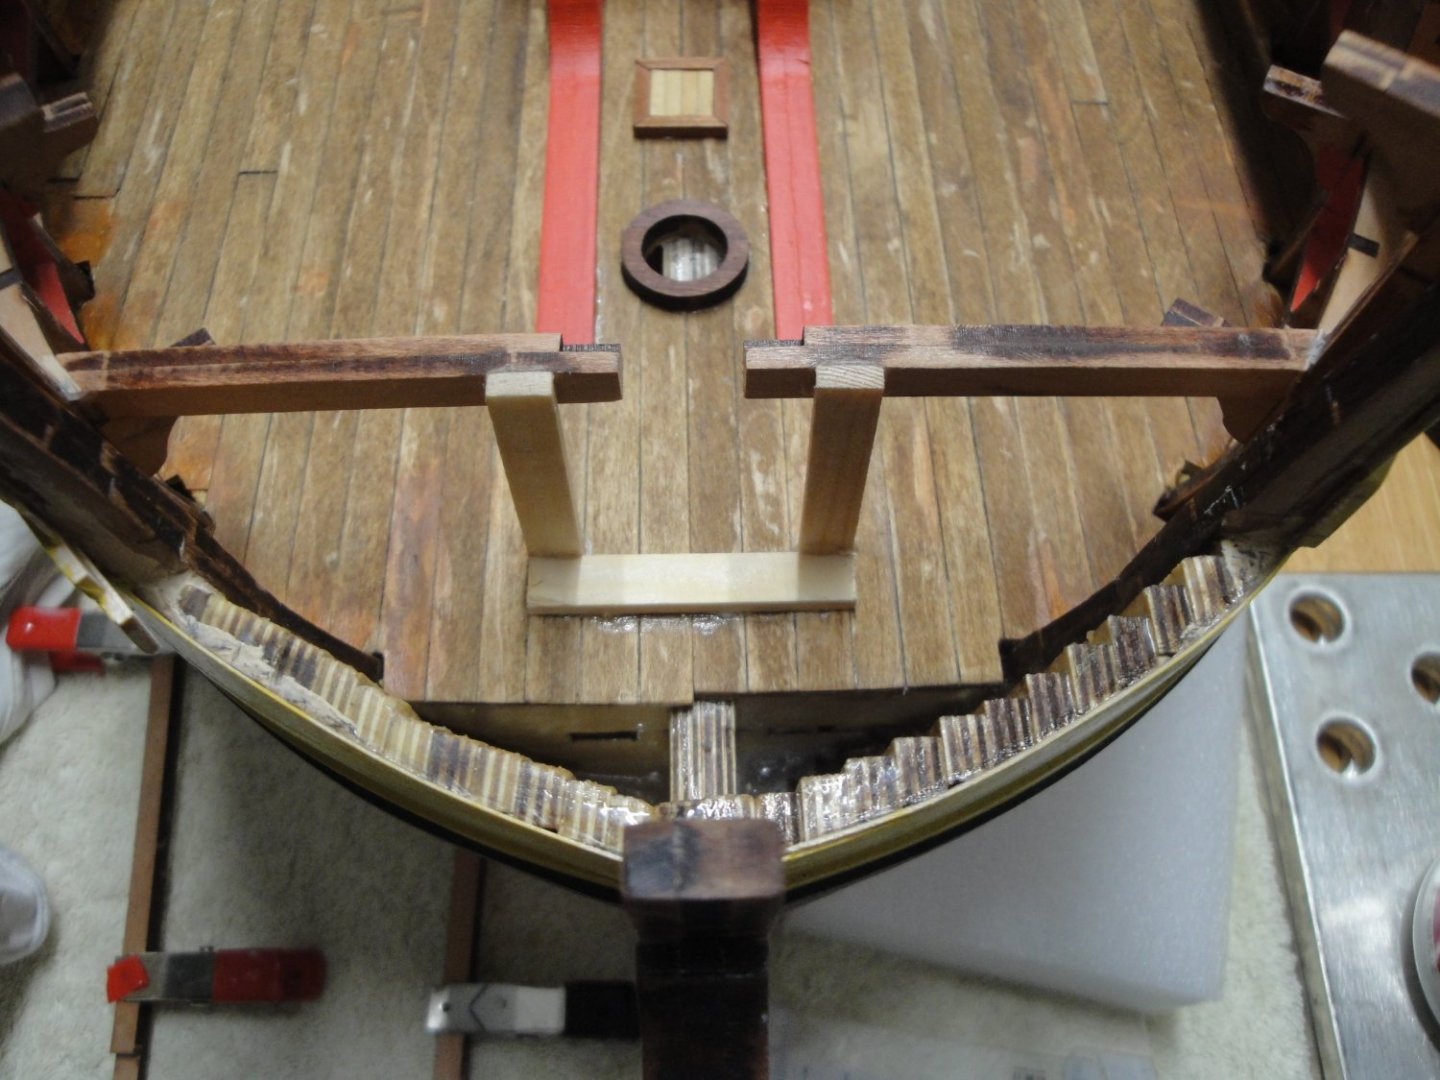
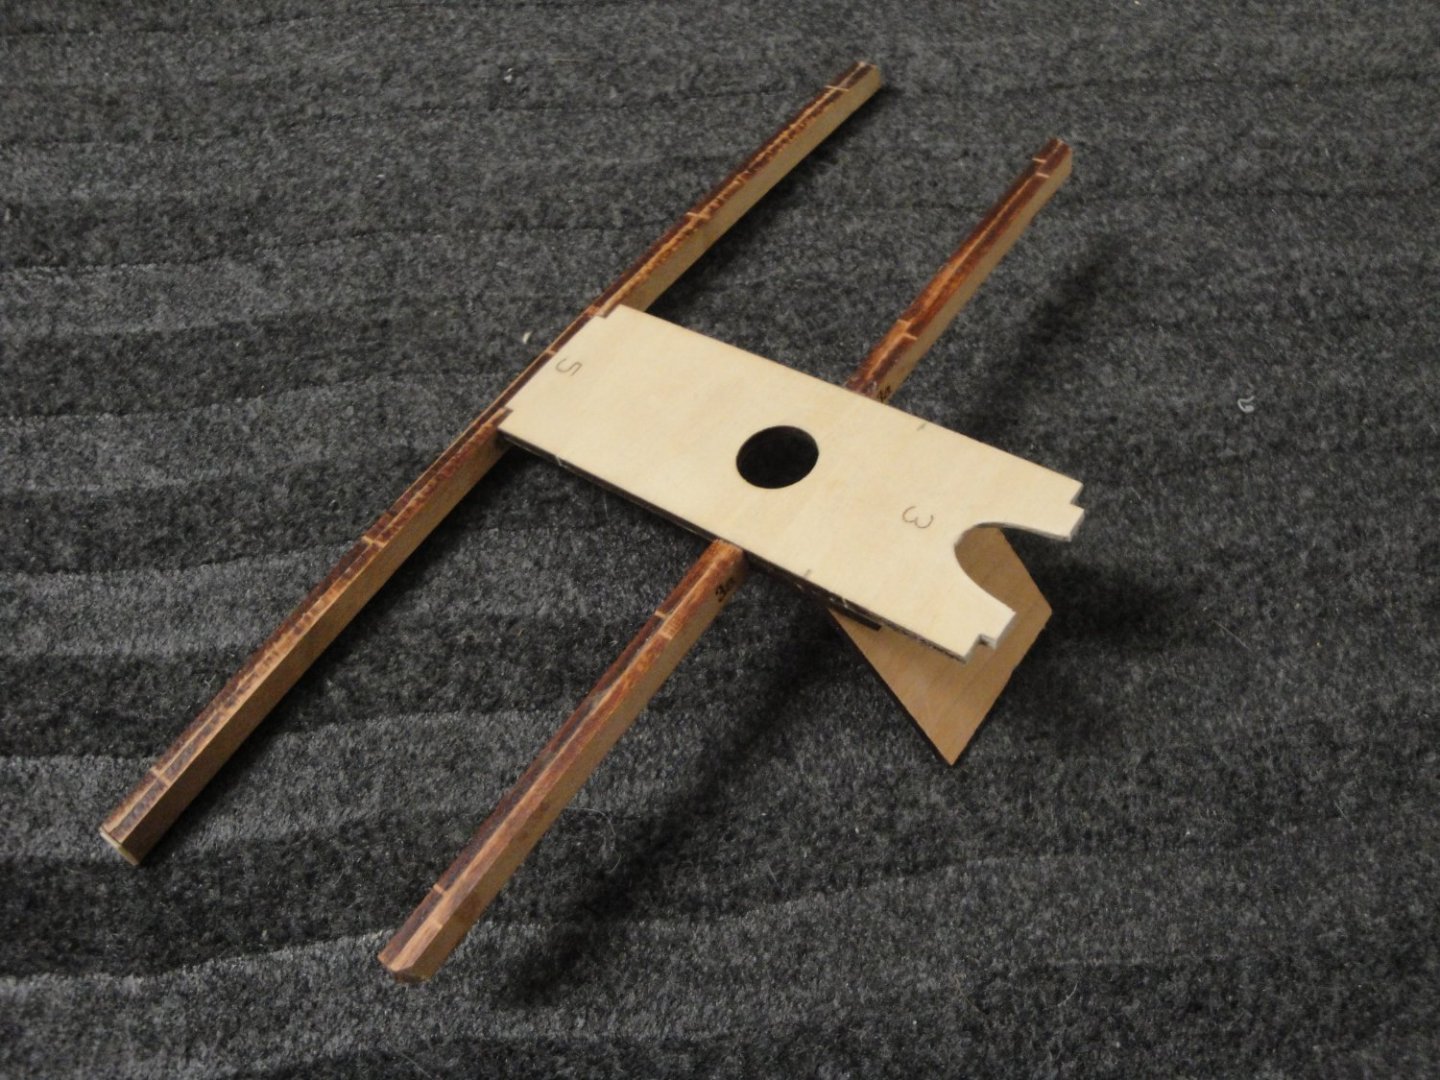
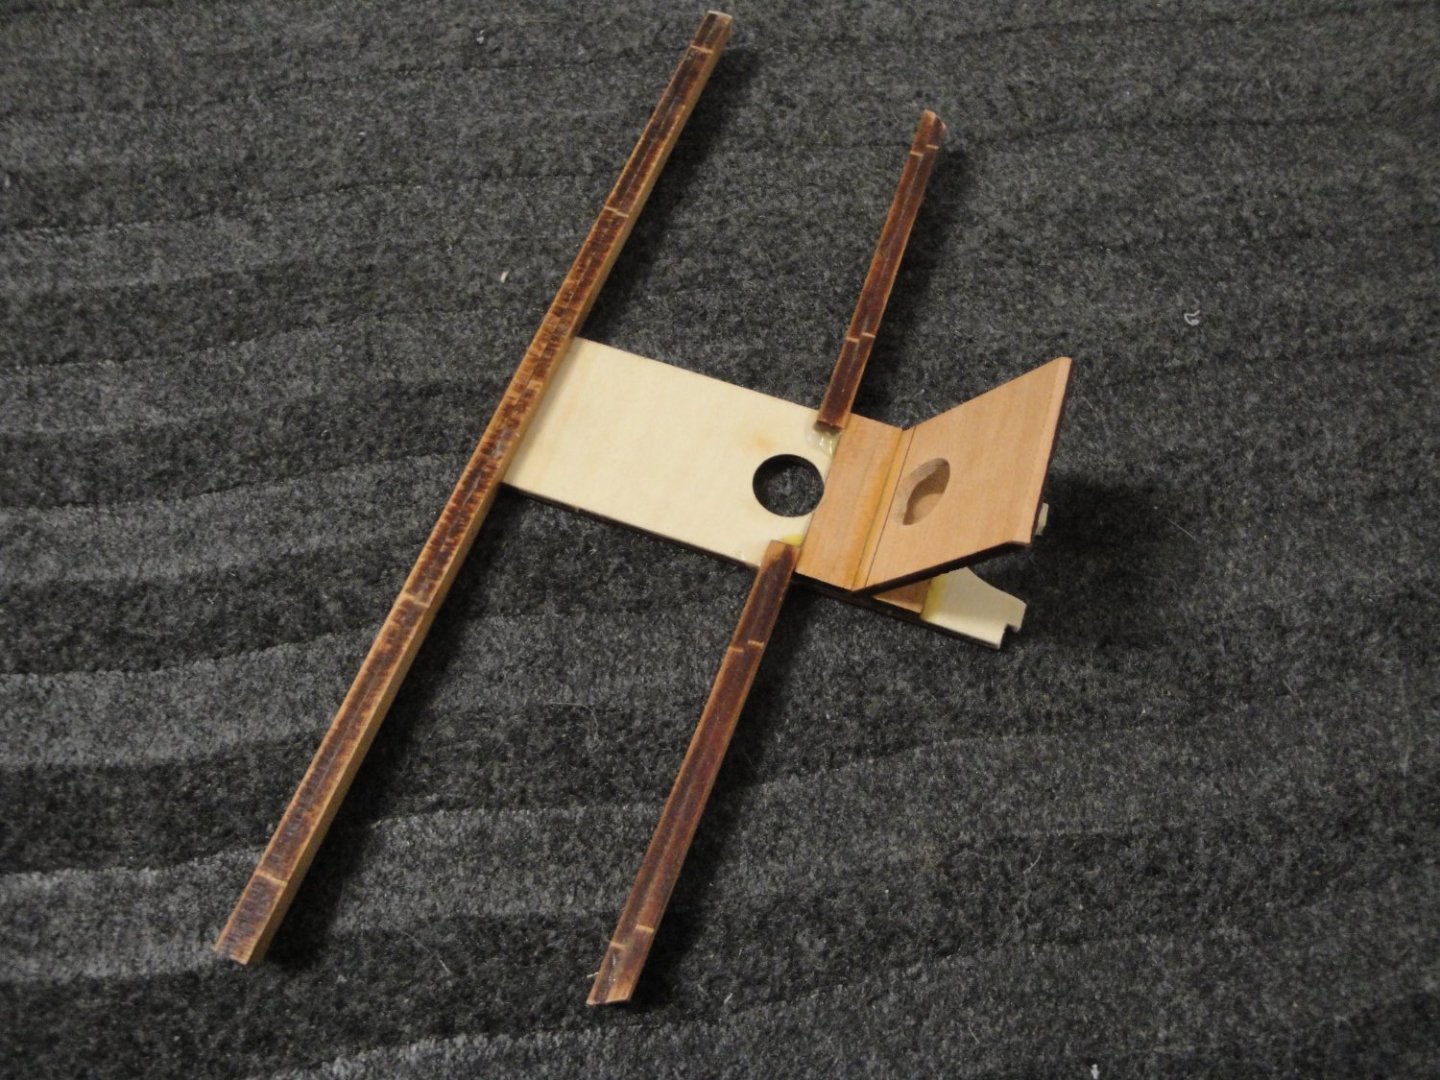
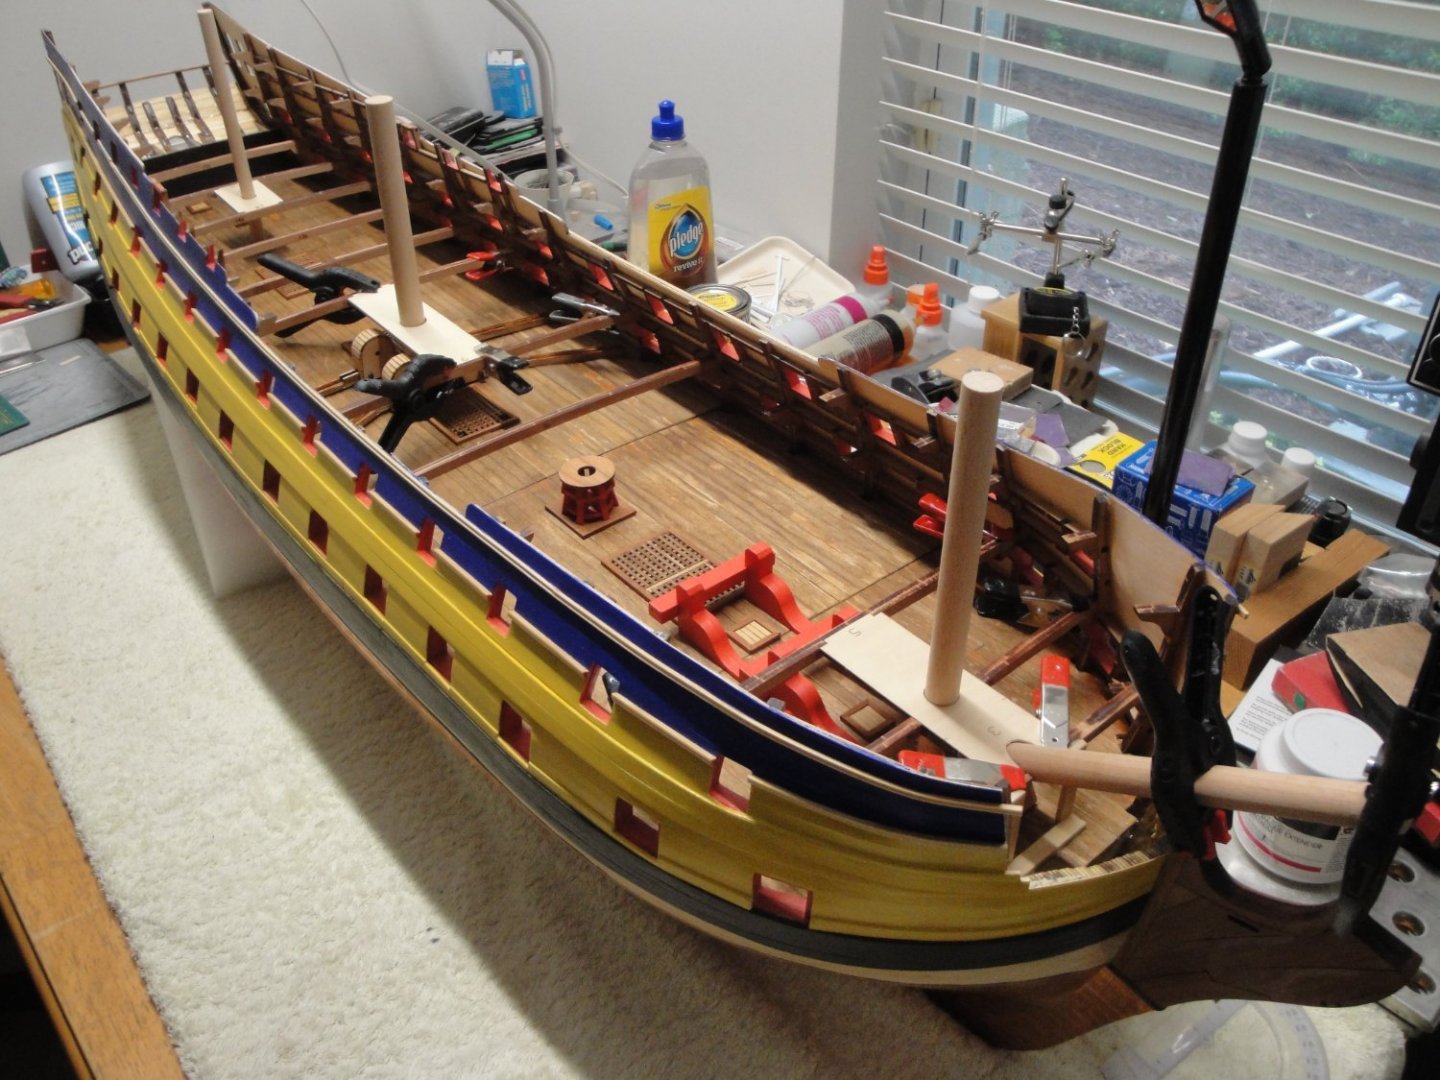
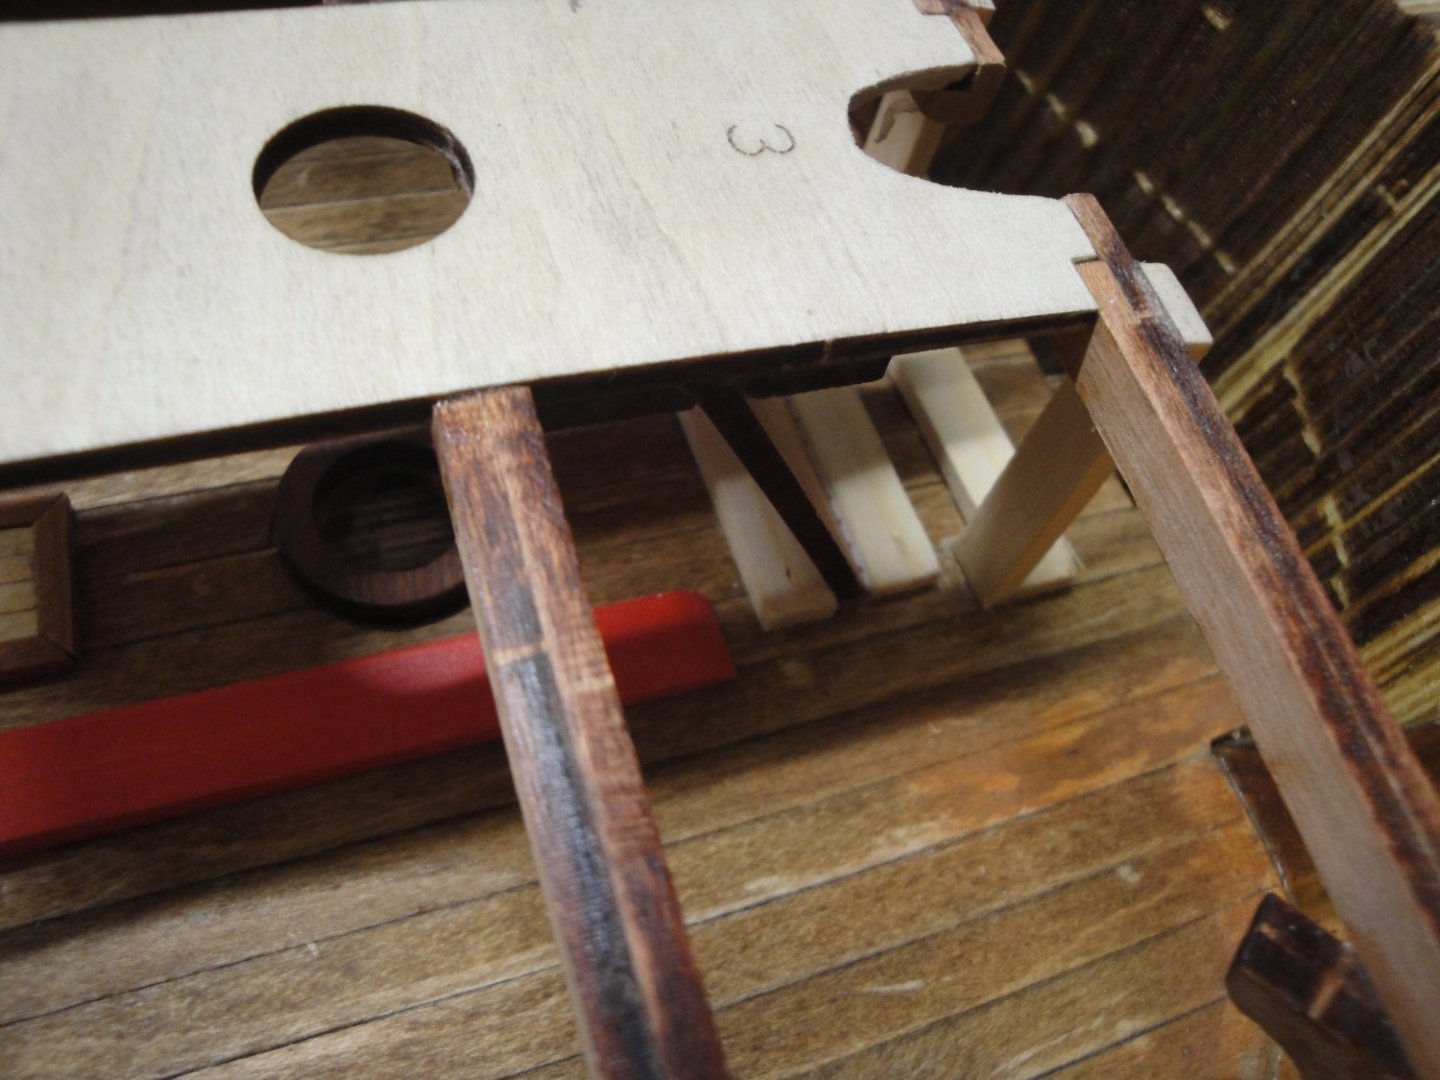
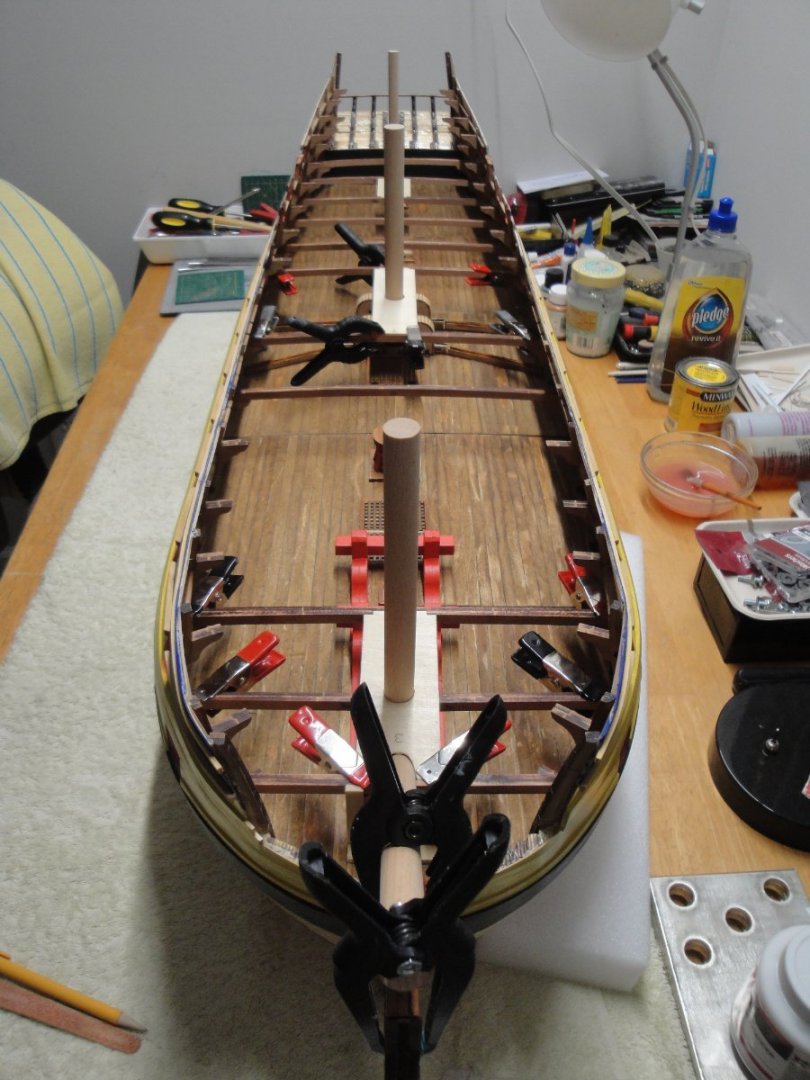
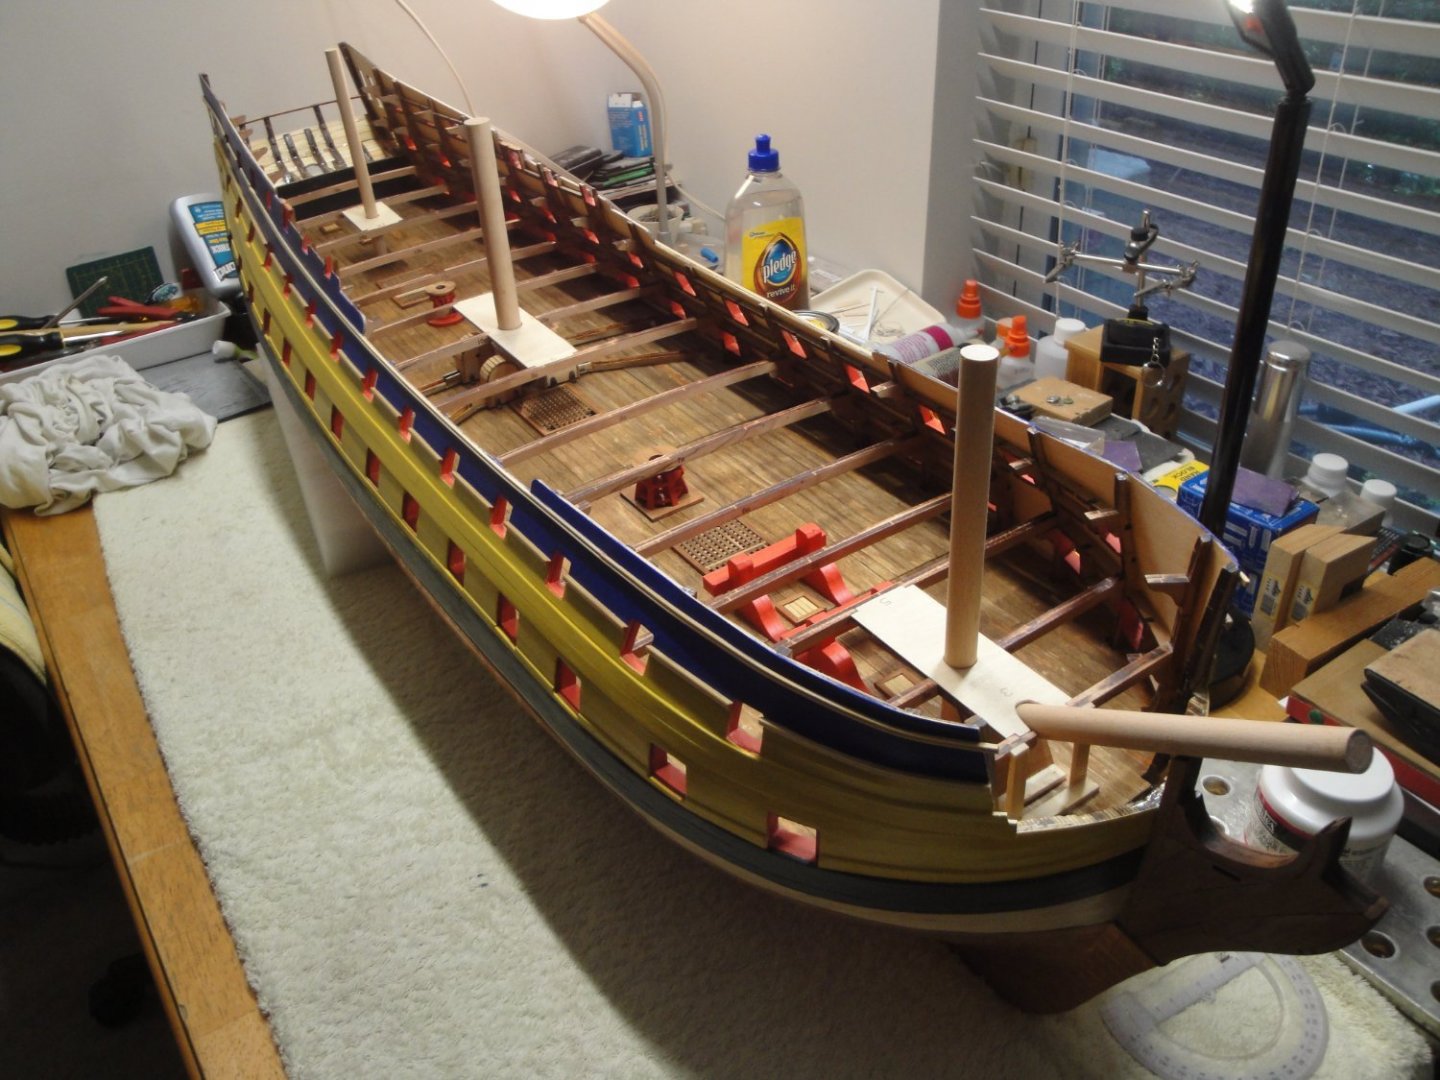
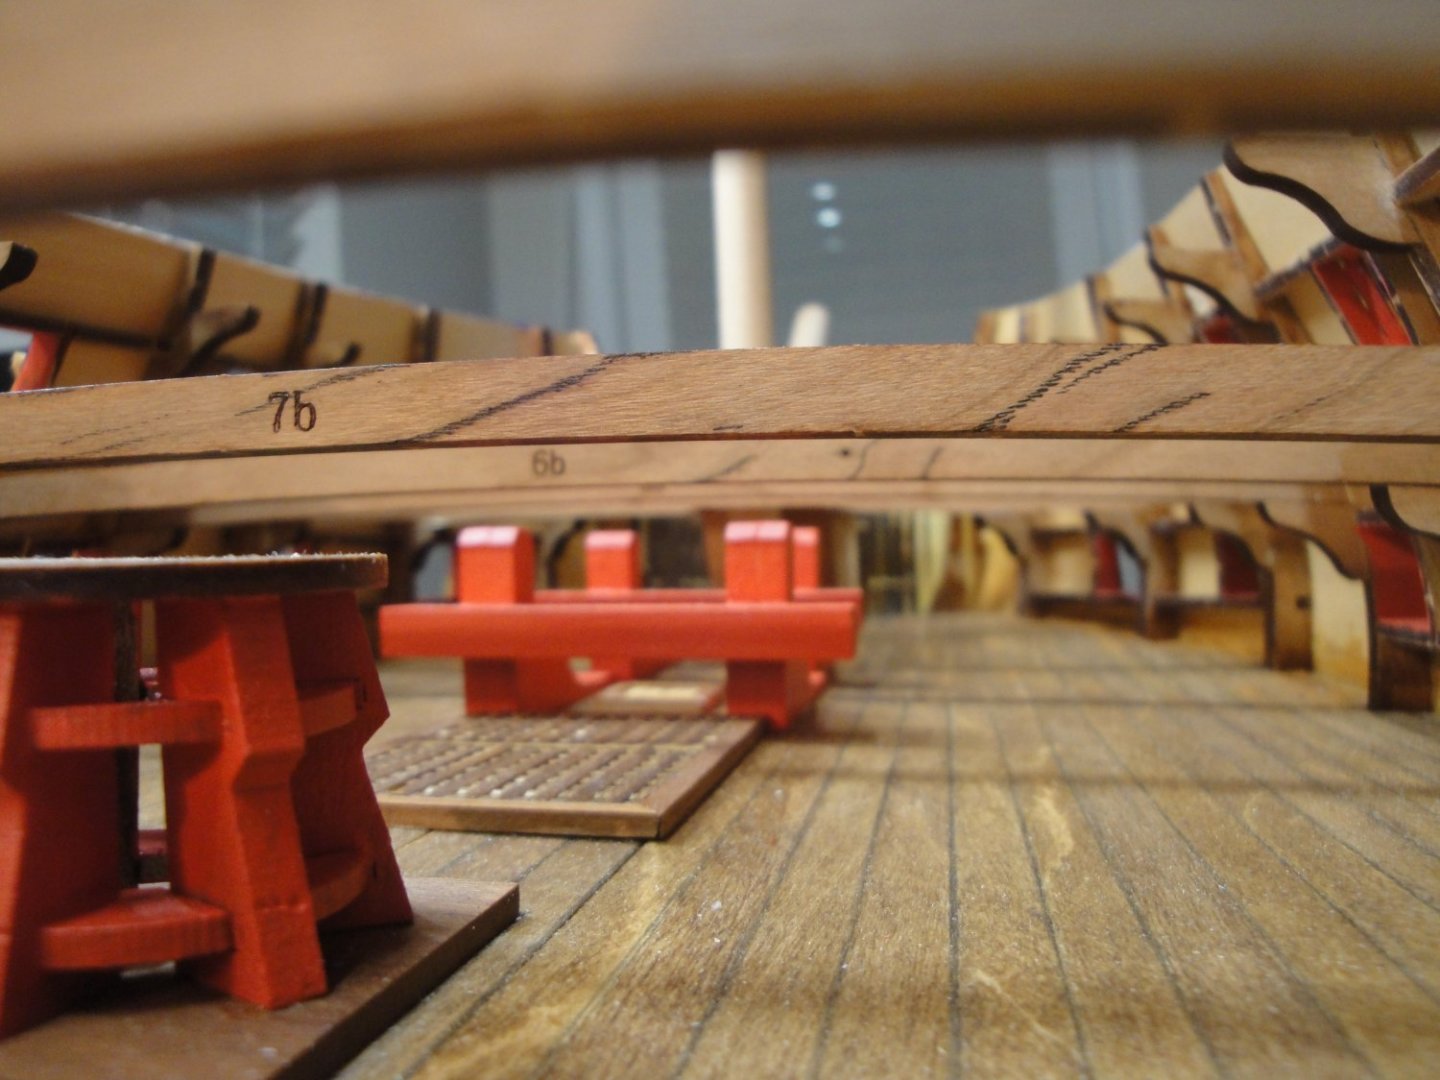
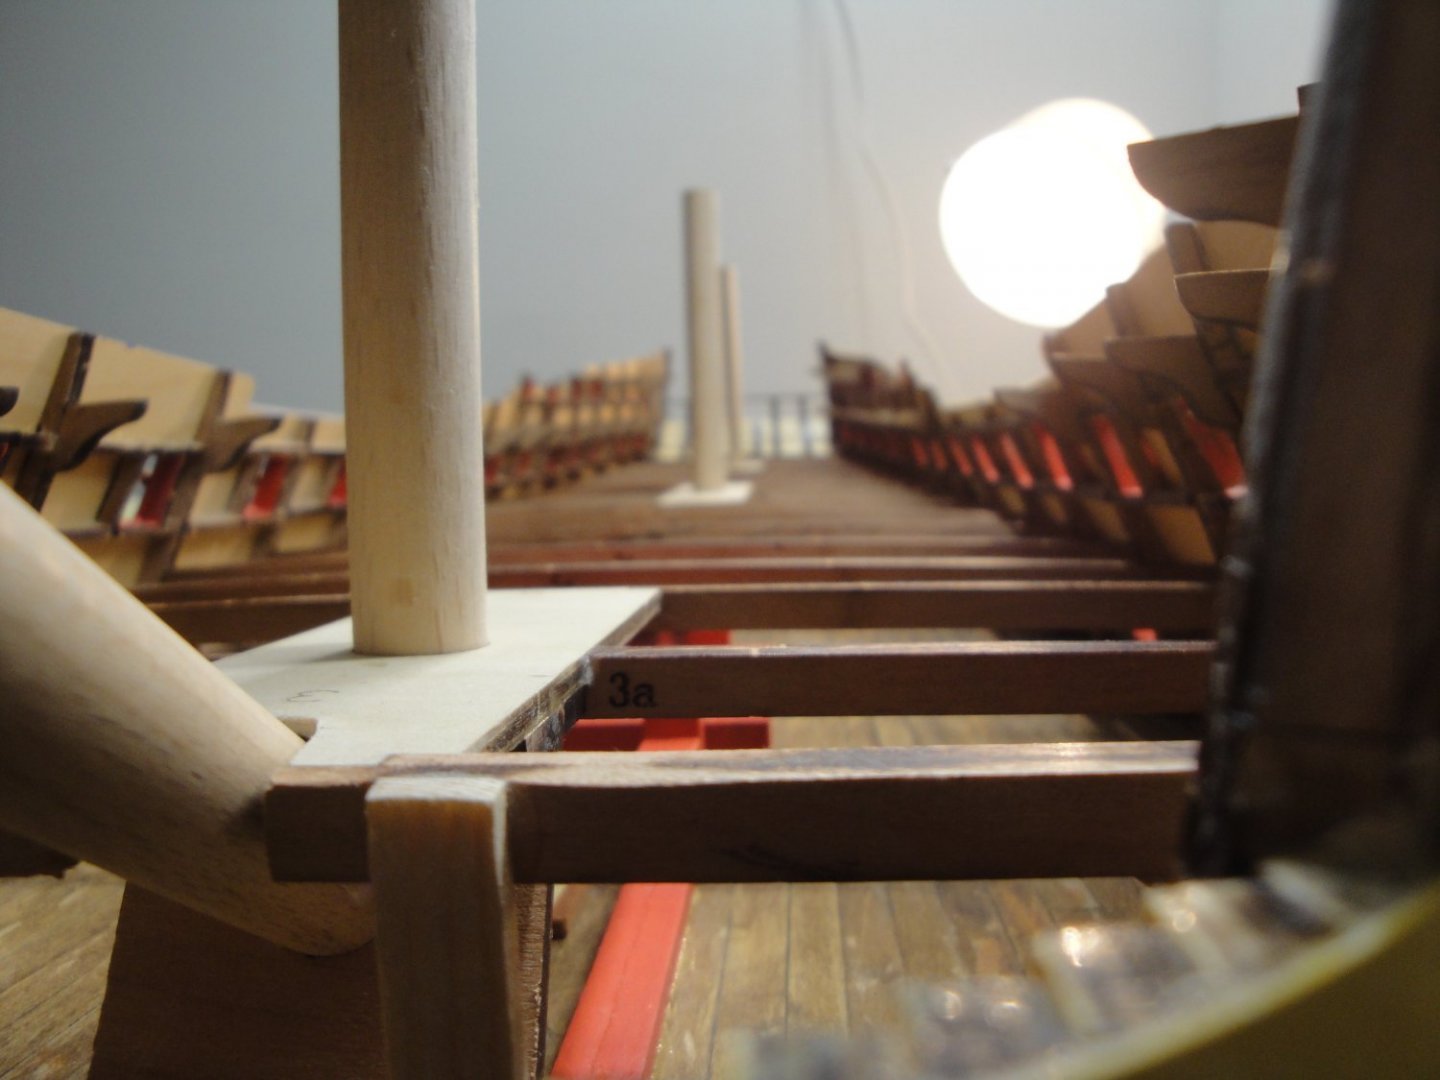
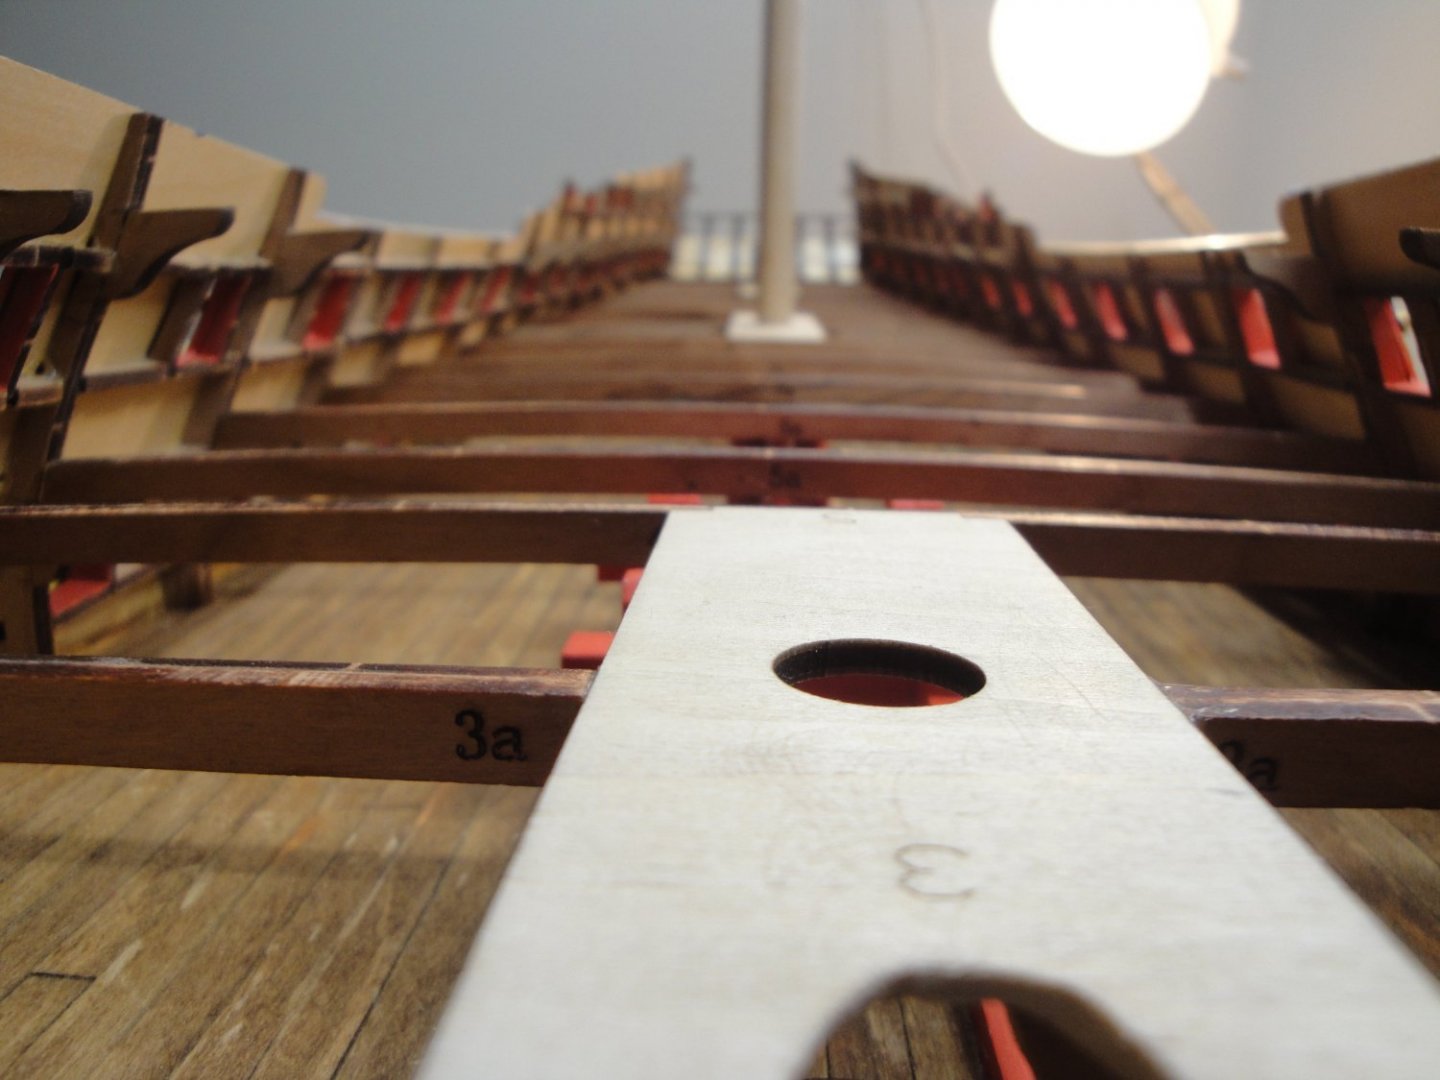
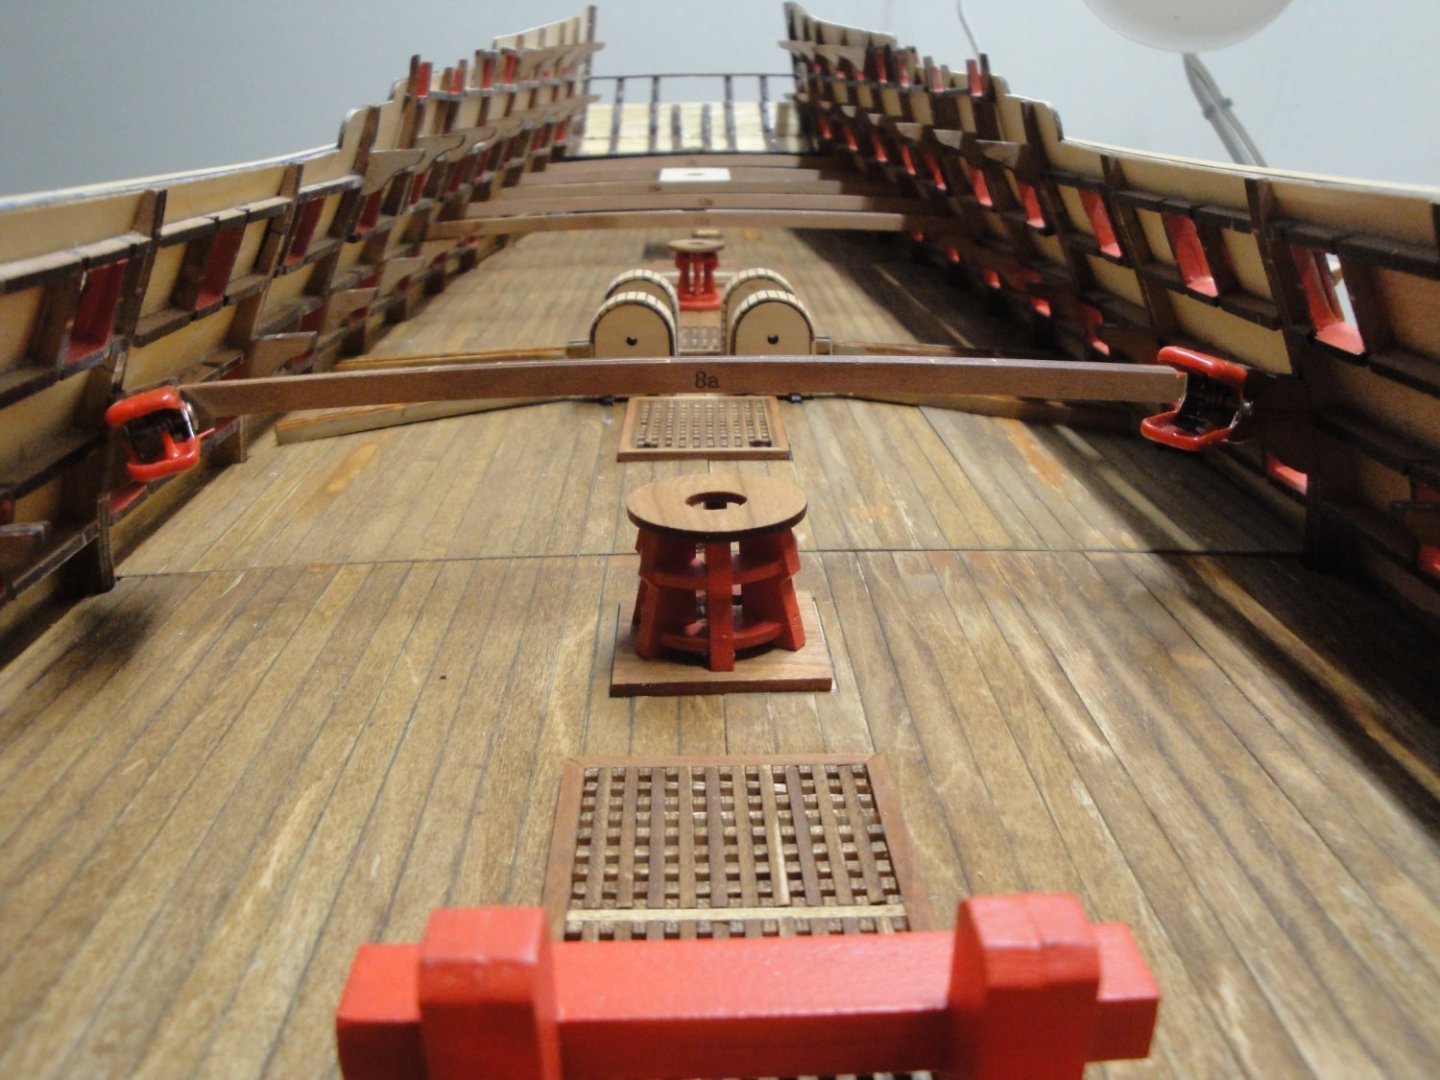
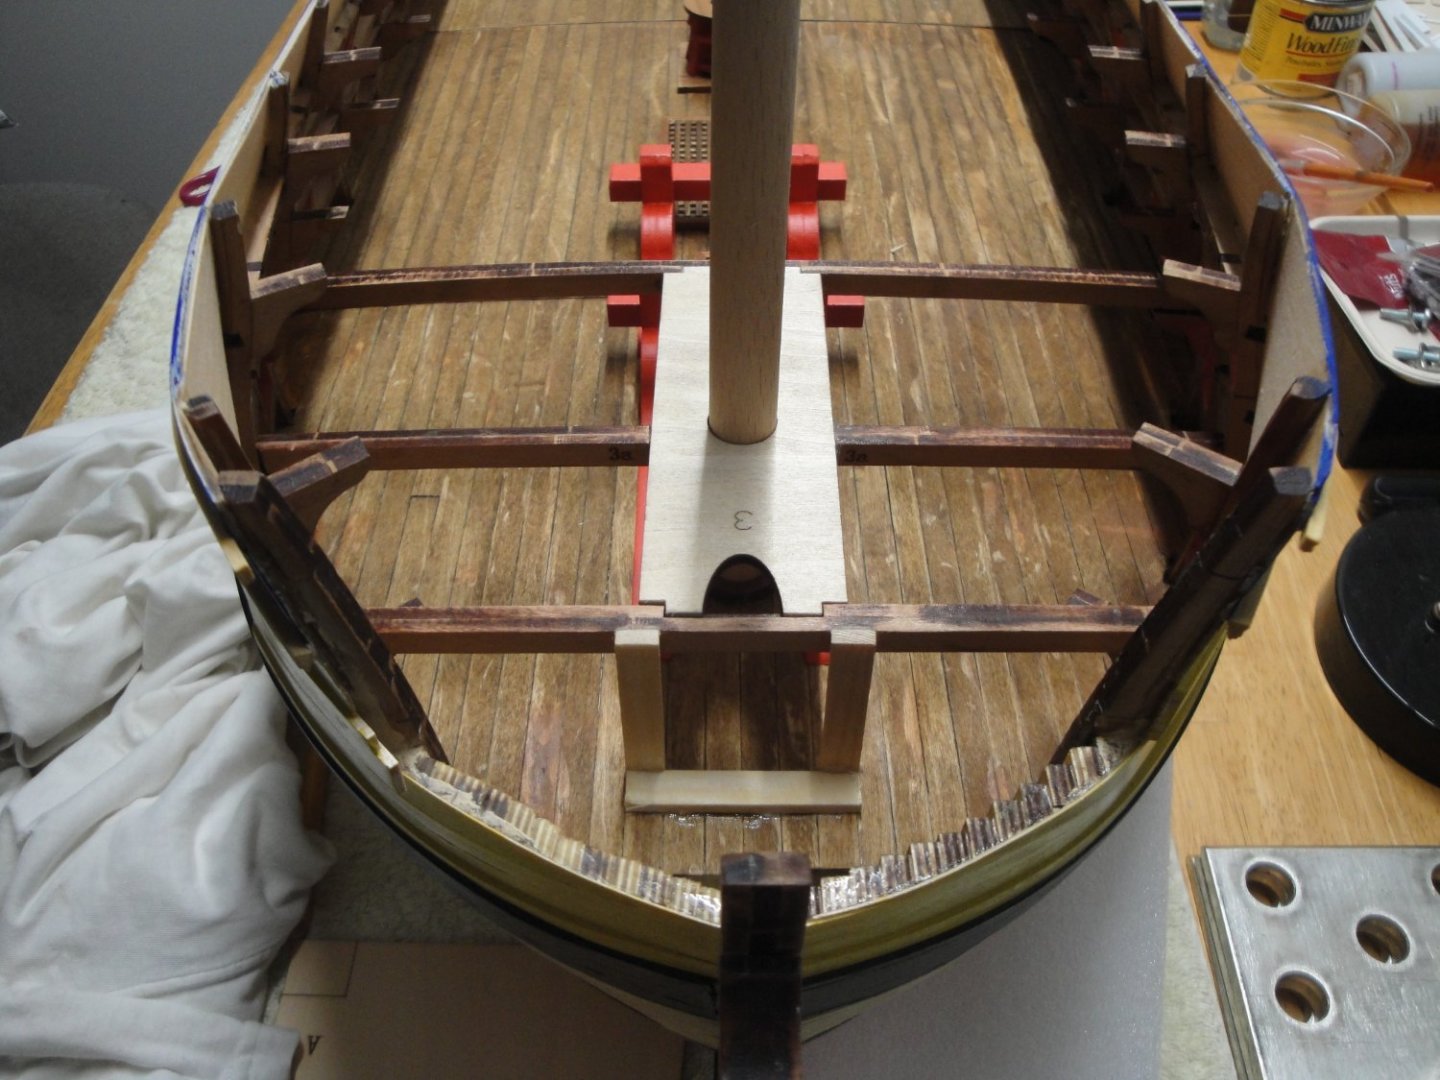
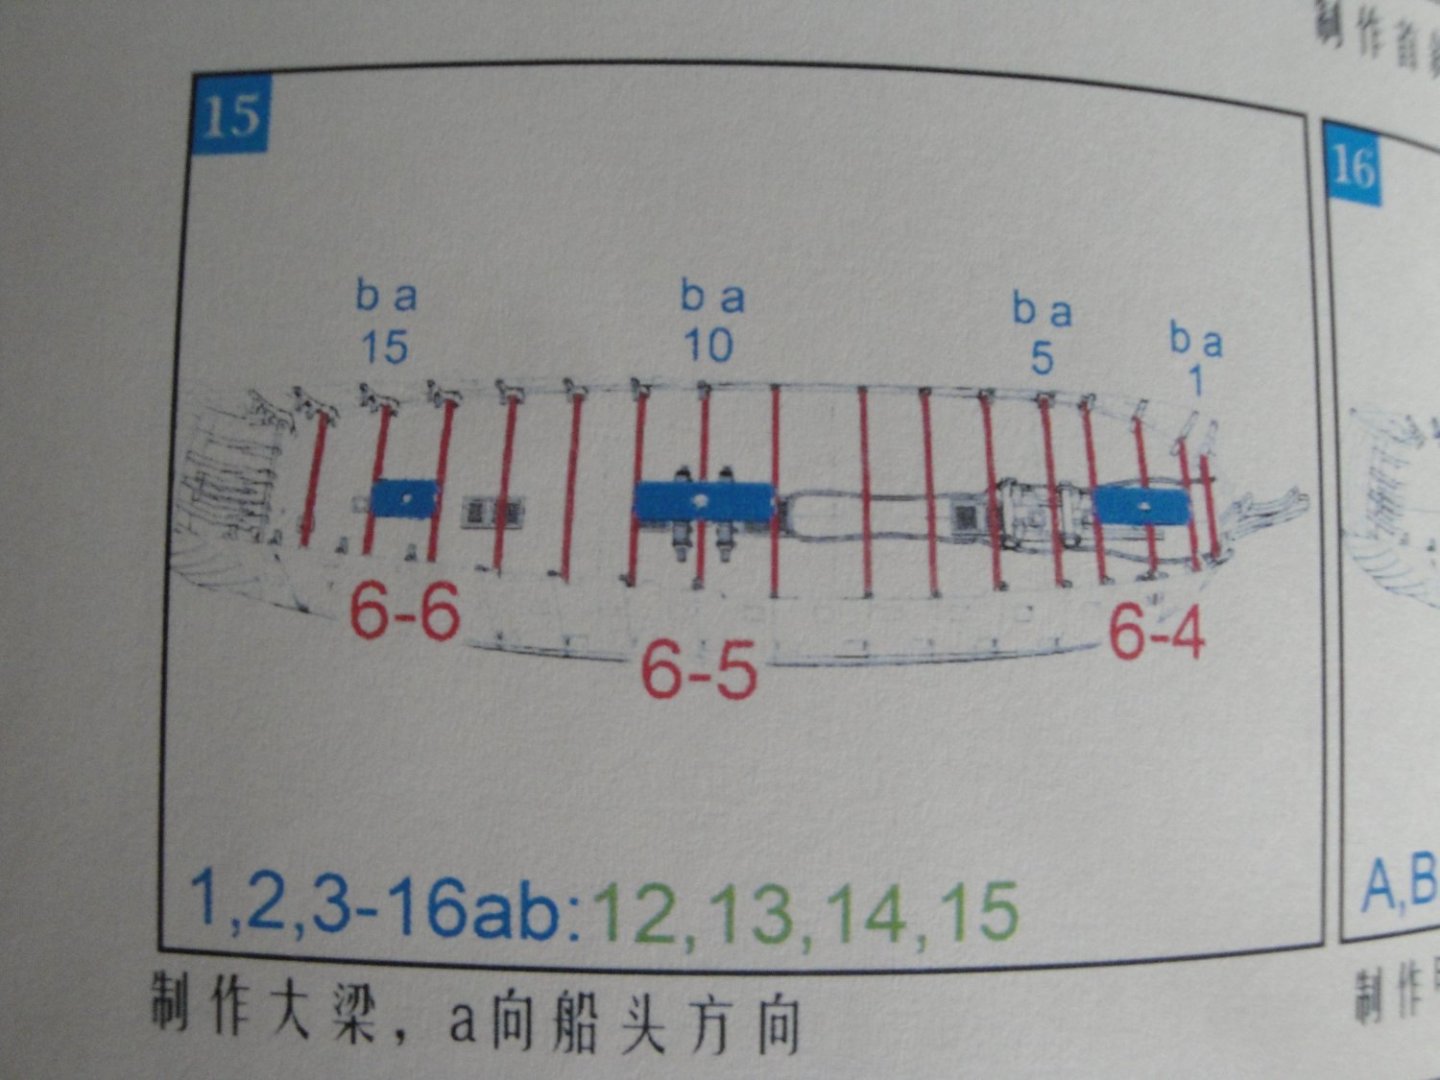
I am installing the main deck beams, within the context of Session #3. The beam #2 is cut to let the bowsprit pass through: I would highly recommend doing the reinforcement as I pictured it. That beam (#2) is essential to the right positioning of the front mast. The plate holding the front mast is glued to Beams #4 and #3 (notice the wrong markings on the plate - It should be 2 and 4). The piece underneath is angled at exactly 30 degrees. It takes a lot of fine tuning to get that part right, but once done, it fits perfectly and can be glued in confidence. To make it really solid (if one day I decide to build the bowsprit) I placed two pieces of wood on the deck to make the bowsprit holder very rigid and well anchored: The remaining beams are glued very easily. I am amazed by the precision of the parts and how well they fit. Even though some beams are longer than 270 mm, they do fit perfectly with no cutting or sanding. Once again, the careful assembly of the frames is paying off. Let's hope the same will be true for the upper decks. All the beams have been installed: And a few goofy sailor's perspectives: Oh, I forgot to talk about Beam #12: it is passing very close to the axle of the capstan and I decided to cut it for a better and free rotation of the axle: This way, when the main deck capstan is rotated, the lower one will rotate in concert. So far, Session #3 is moving along nicely and I think it is time to go back to the outside of the hull and do all the preliminary work (Session #2.5). The main guns will be installed at the very last minute and not a second early. Yves


- 507 replies
-
- 12
-
-
-
So beautiful, it almost hurts. Fantastic job worth of a Museum. Yves
-
The front beams are a little bit more delicate to install and precise adjustments are required to make the mast vertical in all directions. Beam 2A and 2B will have to be cut to allow the passage for the bowsprit. That is really a bummer as this beam is very sturdy and provides a nice anchor for the plate holding the front mast. I decided to install two pieces of wood to hold that #2 beam, which will be cut later on. Hopefully, that will reinforce it and prevent the front mast from losing its (perfect) alignment. Yves
- 507 replies
-
- 10
-
-
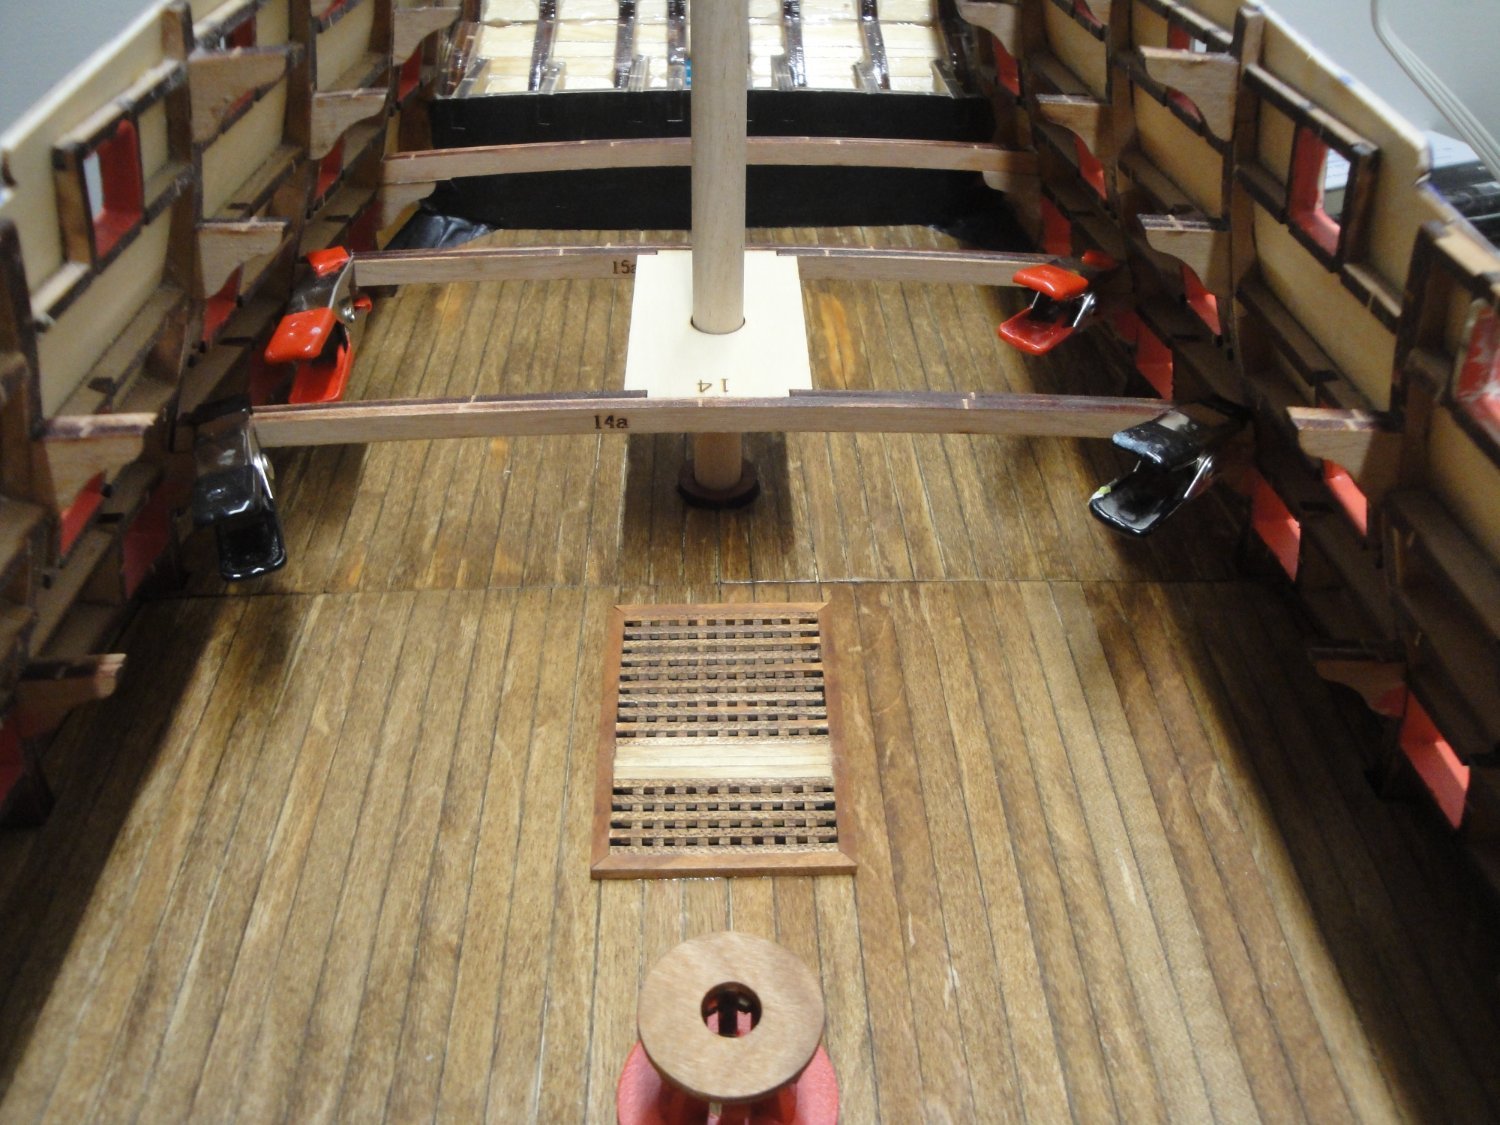
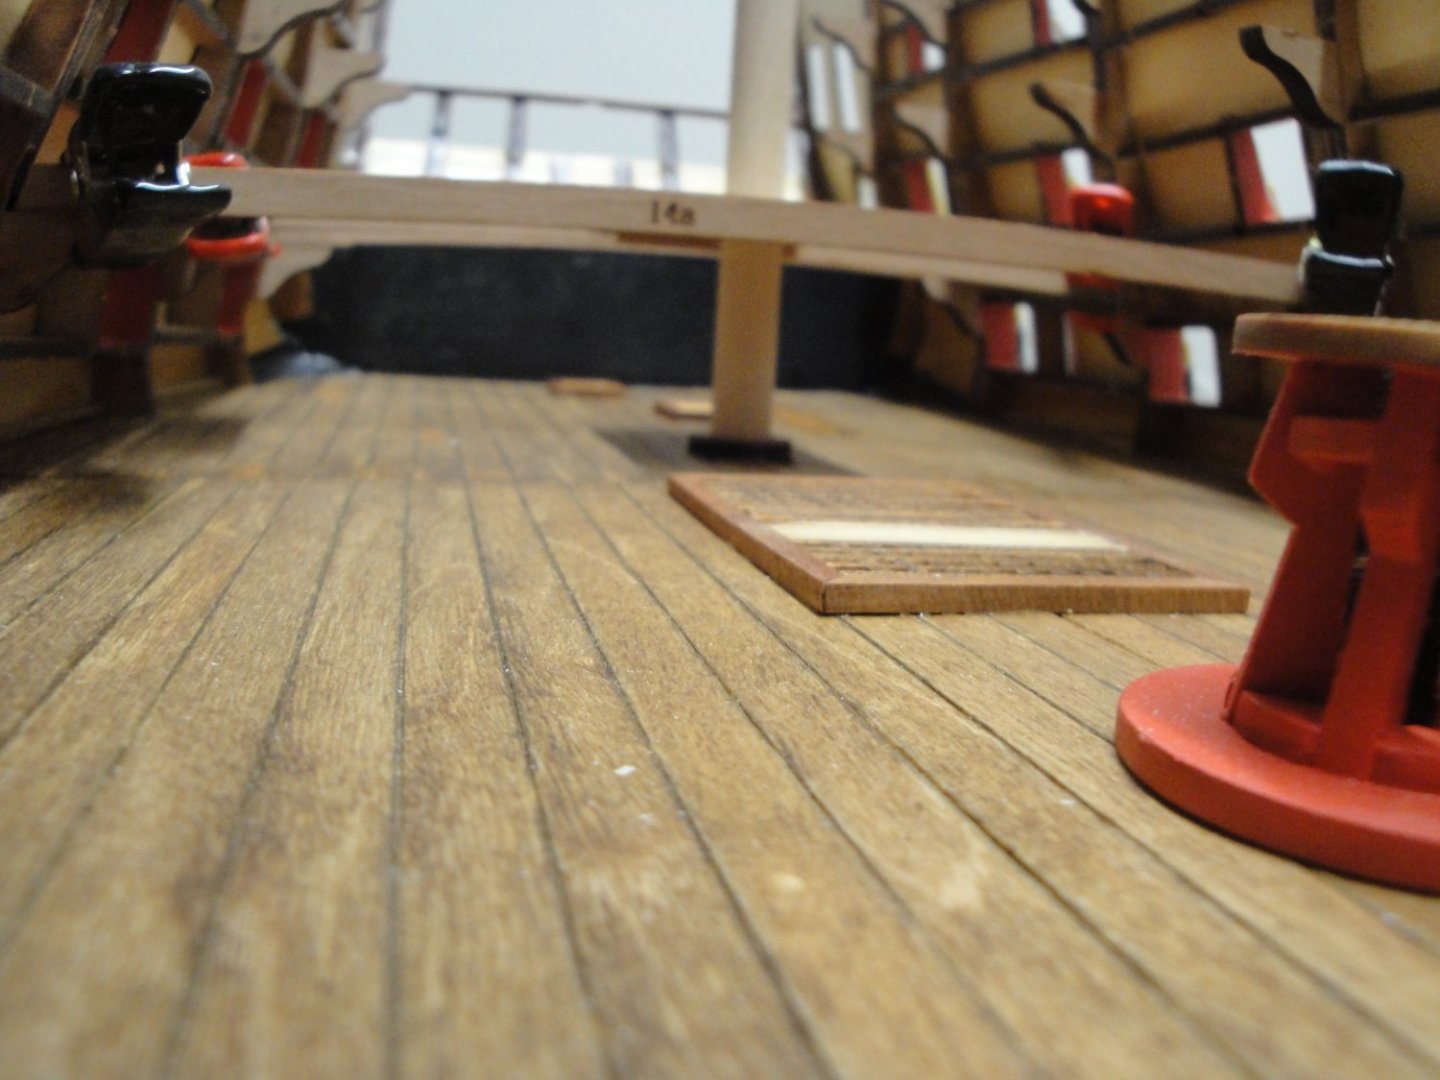
The instructions in Session #3 are urging you to install and secure the large guns, on the gun deck. In my humble opinion, one should wait the very last moment to do that, as all these 28 guns protruding from the hull are presenting a little disaster in themselves. Plus, installing the main deck beams will automatically create some sawdust and the guns will be in the middle. Therefore, I will install (and build...) the large guns at the very last minute, before closing the coffin on the gun deck. The first few pictures were about drilling the hawses on the bow of the ship, to pass the anchor ropes. I will do that later. First, I want to see how these beams are fitting in the hull: Beams 16A and 16B have been installed. The fit is perfect and just tight: impressive, when you know that the entire hull was built without any templates. I am trying to make sure they are horizontal as much as possible. Then installation of beams 15A/B and 14A/B to hold the mast of artimon: Finally, a sailor perspective: Yves


-
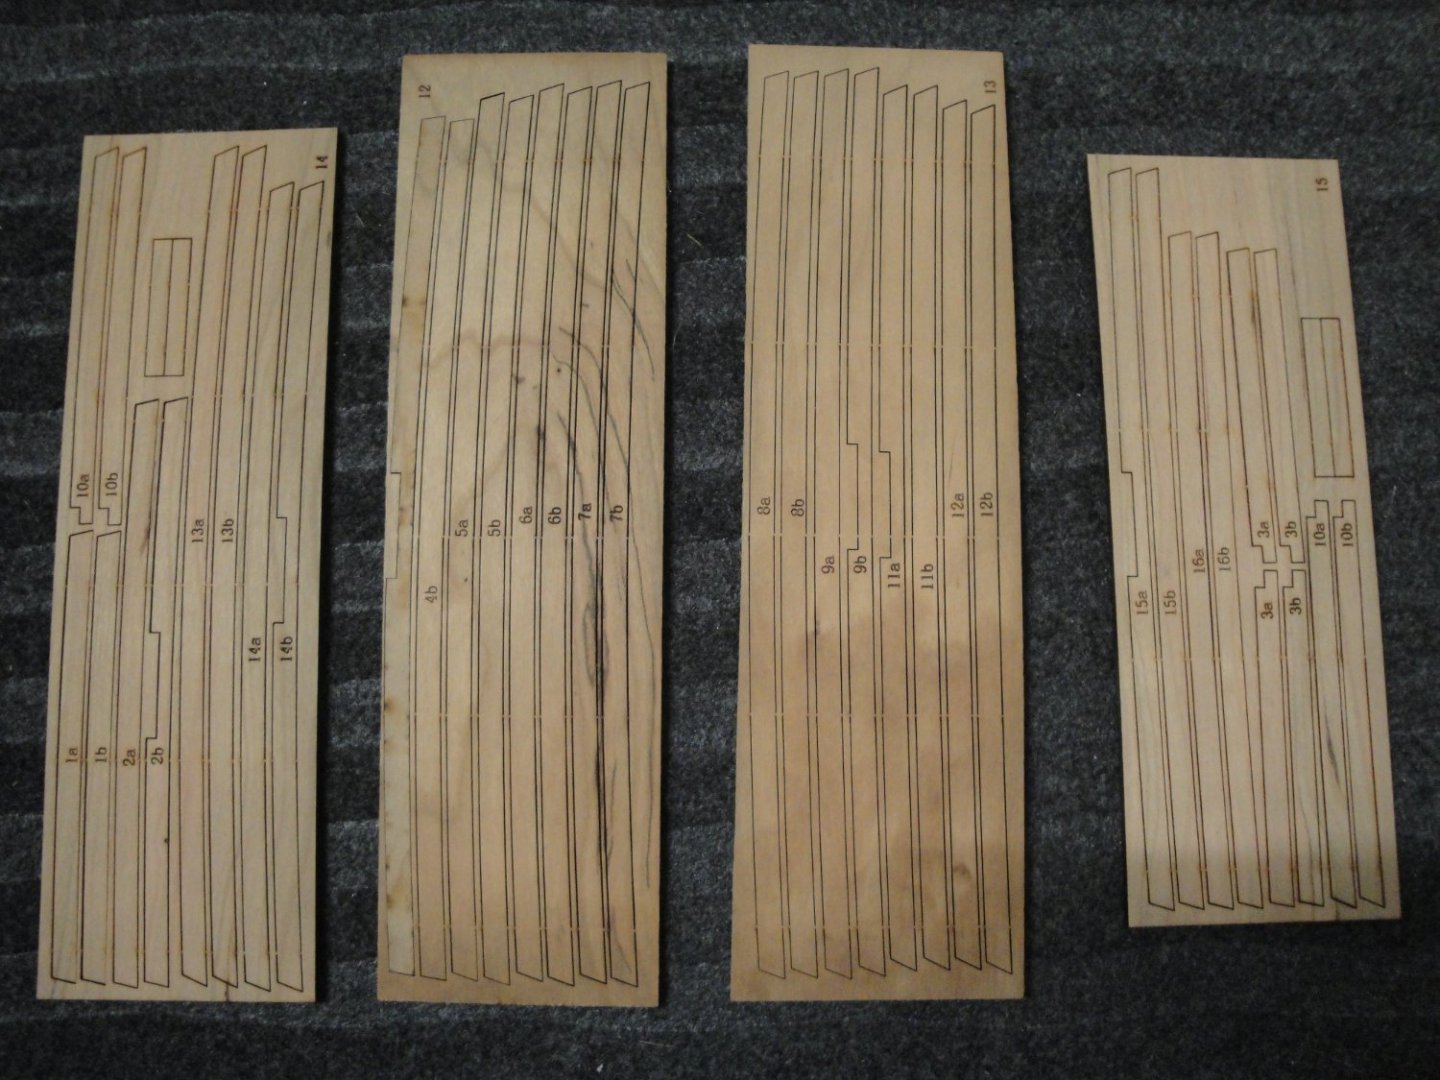
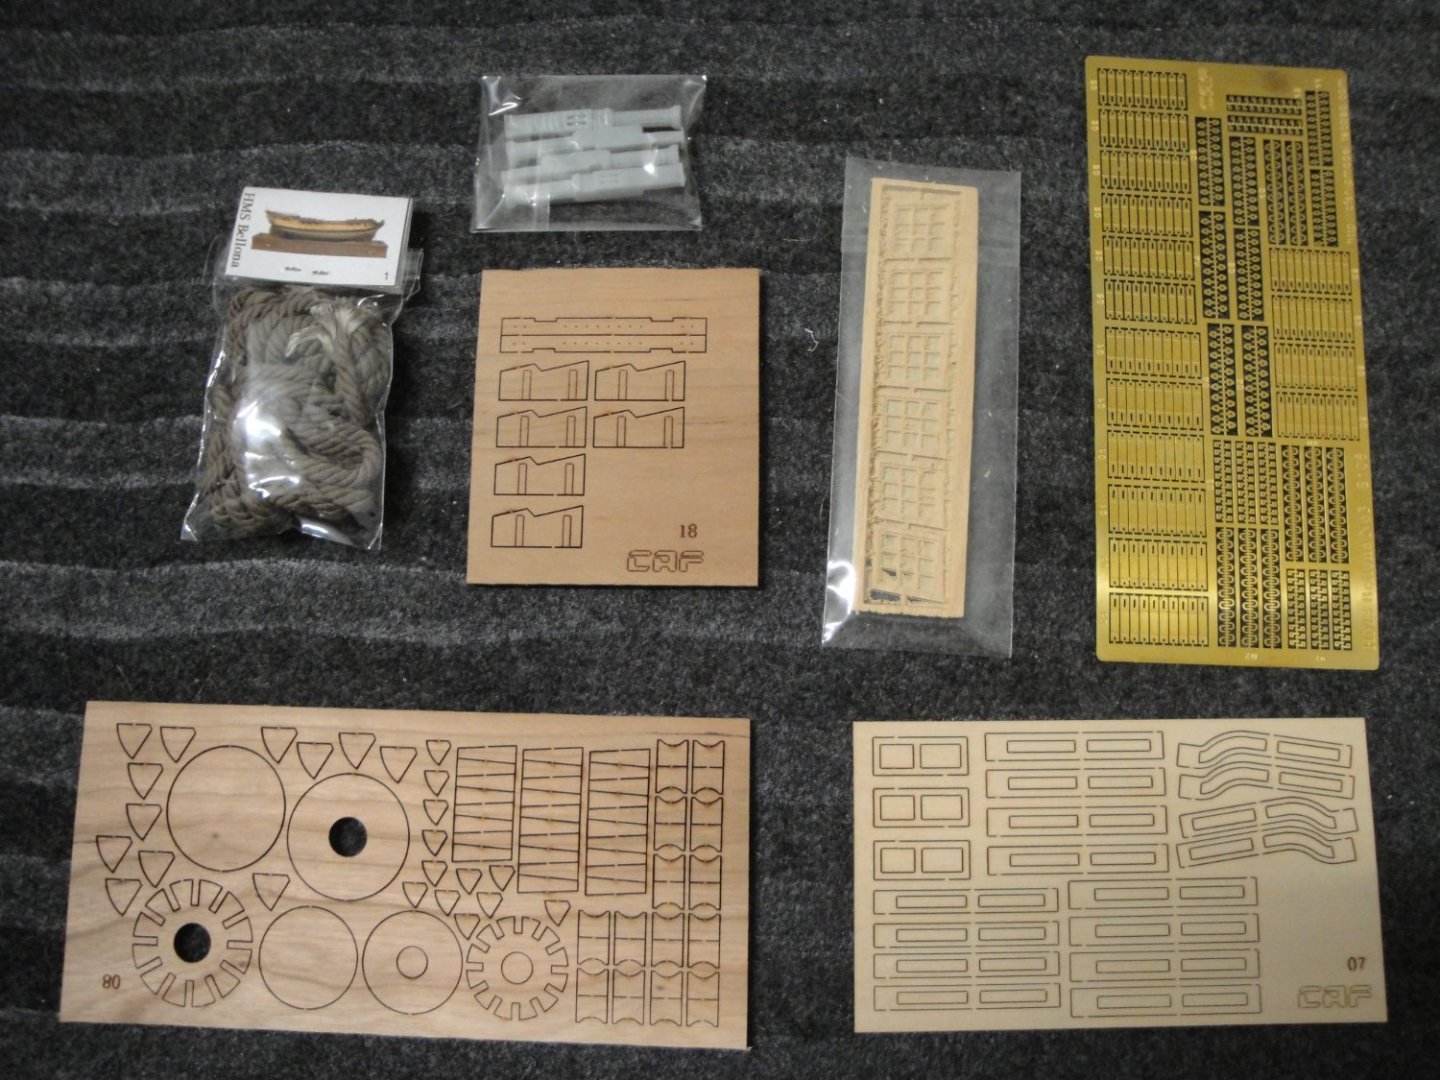
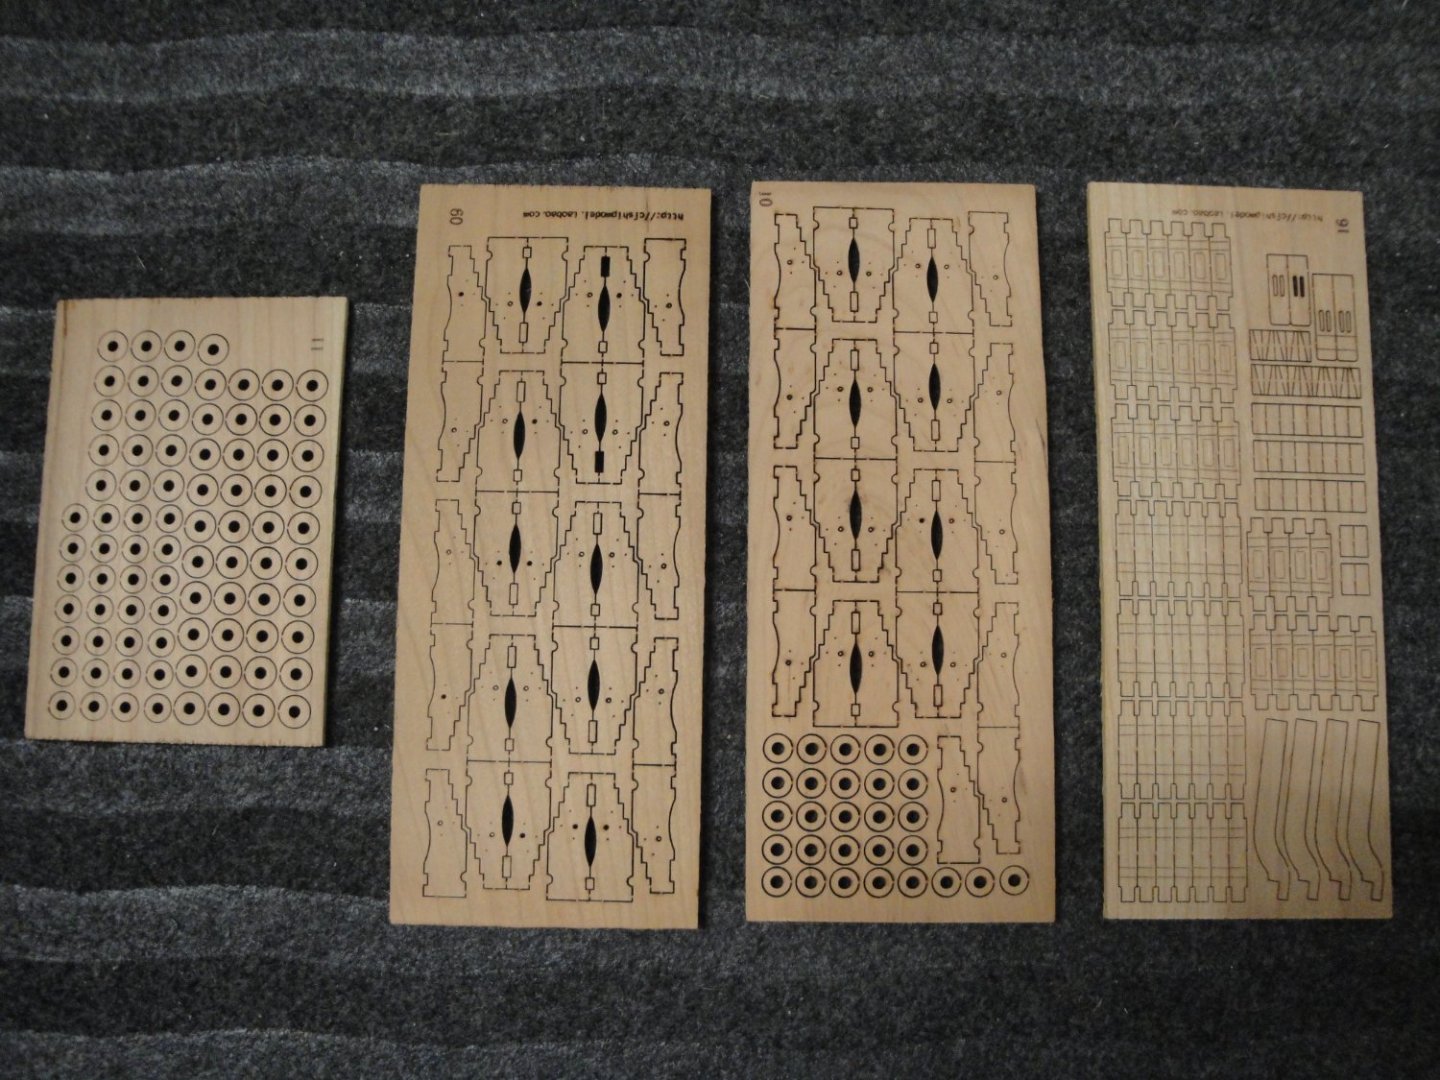
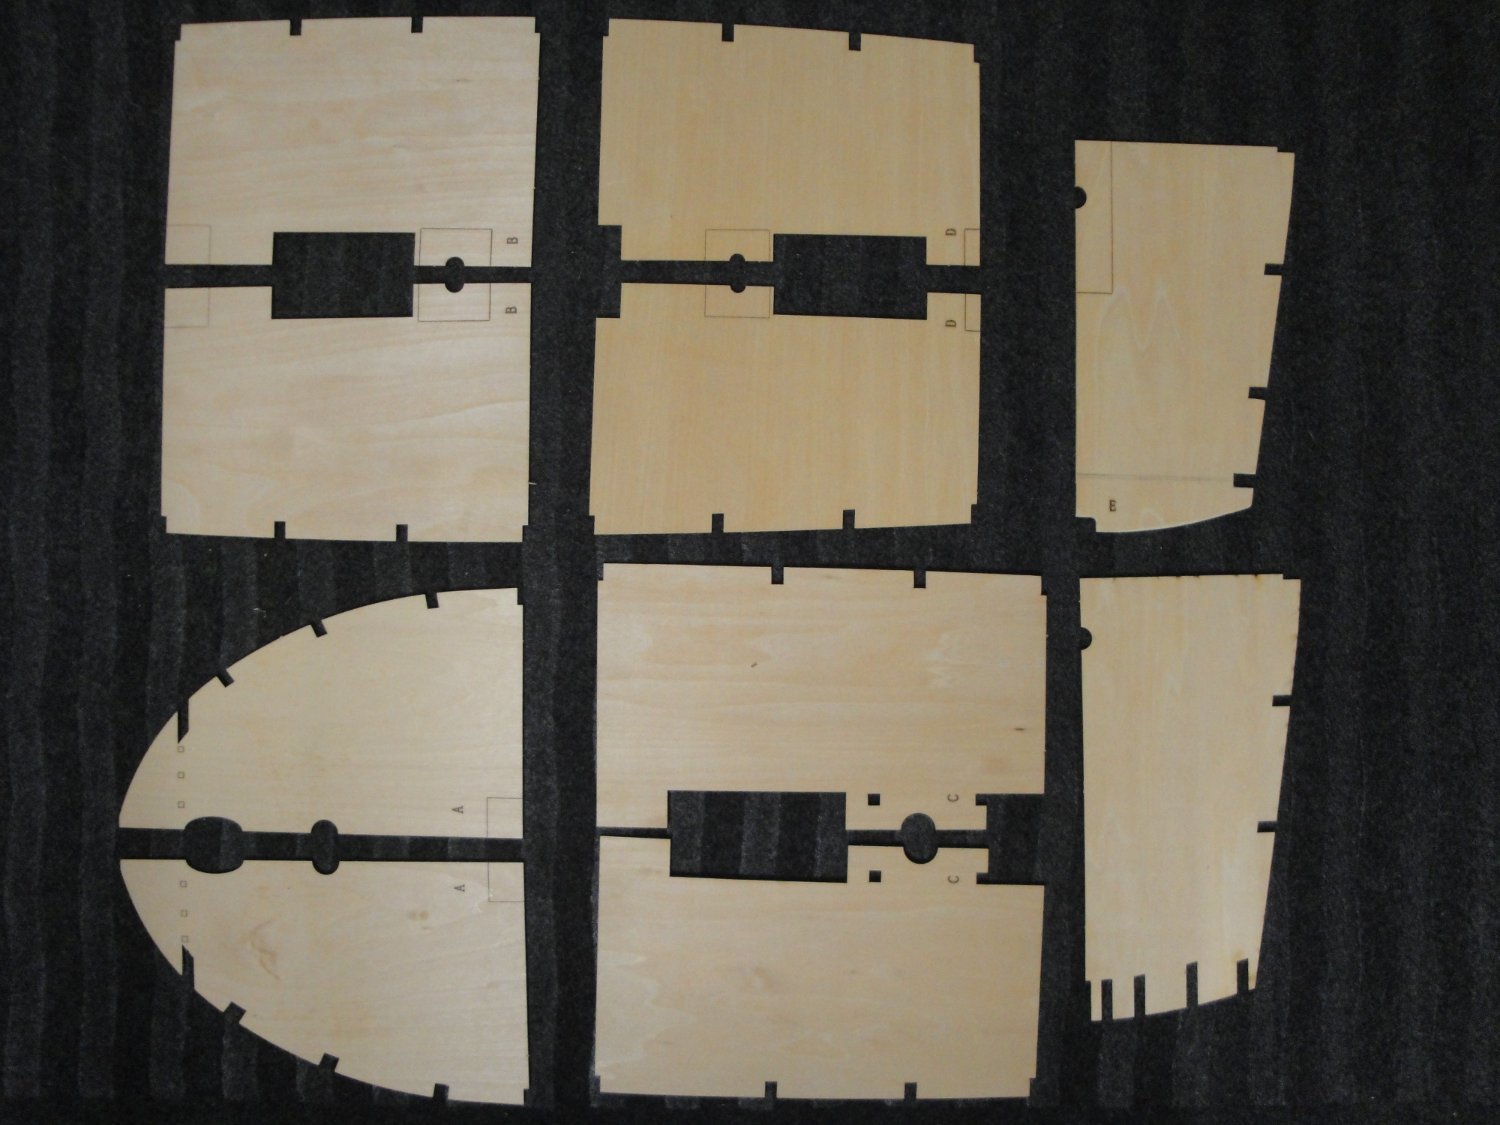
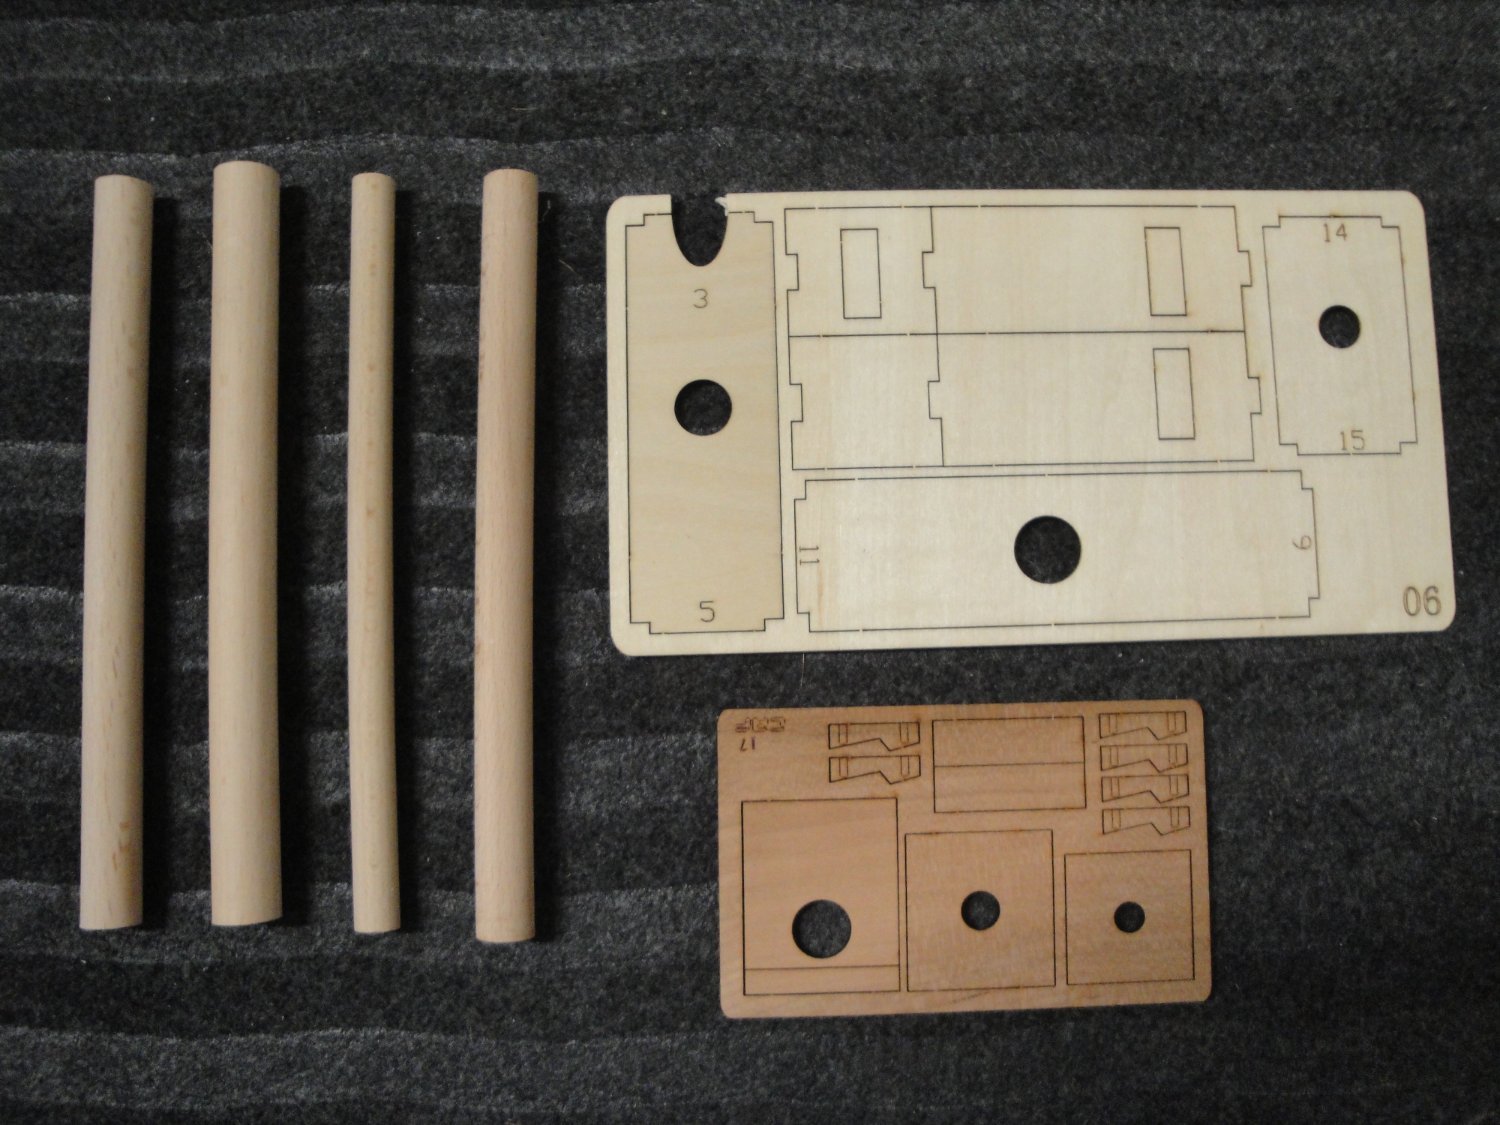
SESSION #3 Folks, I am starting a little bit Session #3. I have decided to leave Session #2.5 (my own...) for a later date, as I want to move forward and see how the main deck is going to fit. From now on, I will read.. (actually browse ) at the instructions and decide if I may take a different route. I think that in a lot of cases, it will be safer and clever to not follow exactly what CAF is suggesting. However, as promised, here is the review of Session #3 with all its parts: You can see that I started cutting the rear deck E, on one side. and all the wooden parts required to assemble the mid-size guns on the main deck. The larger guns parts were delivered in Session #2, without the brass barrels. Same here, no brass guns. As you can see in the pictures above, it is all about the main deck. Yves