yvesvidal
-
Posts
3,624 -
Joined
-
Last visited
Content Type
Profiles
Forums
Gallery
Events
Everything posted by yvesvidal
-

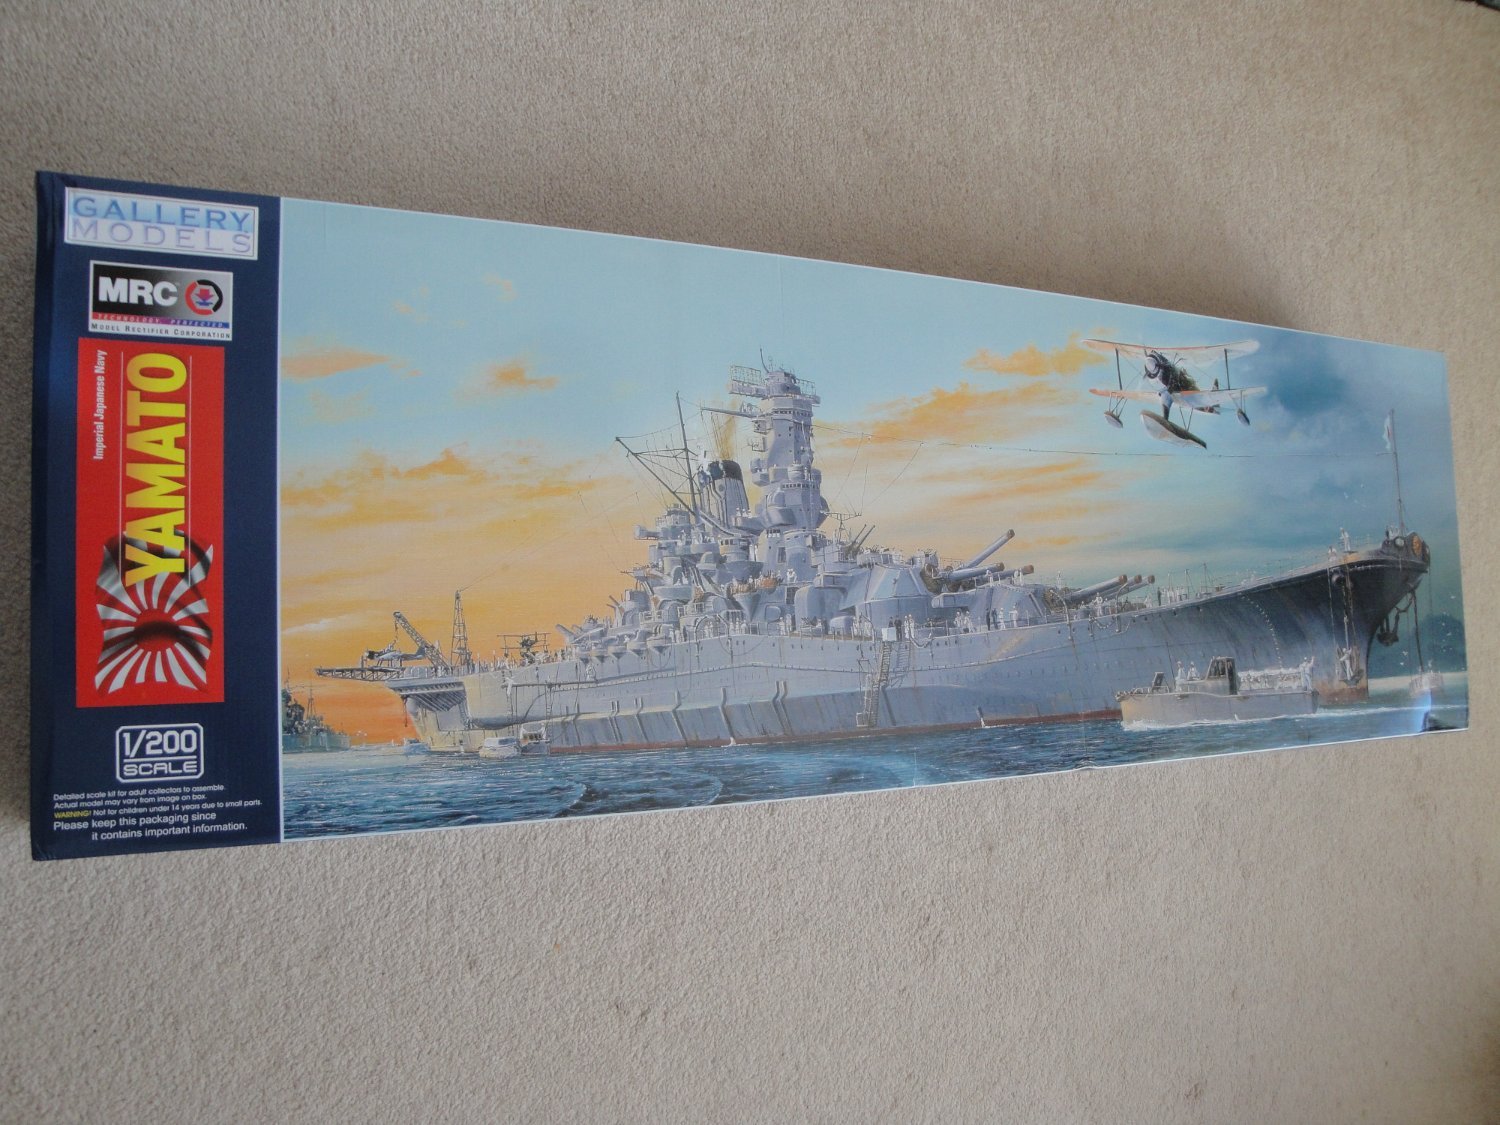
1/200 Trumpeter IJN YAMATO - issued by MRC/Gallery Models
yvesvidal replied to yvesvidal's topic in REVIEWS: Model kits
The rigging is never indicated by Trumpeter. It is typical of them and they don't care. Obviously, additional reference books will be required to turn this model into a realistic model. Yves- 104 replies
-
- 4
-

-
- MRC/Gallery
- Yamato
- (and 1 more)
-
Nothing beats a few lead batteries to hold things in place. I use this technique a lot..... Yves
-
What a beautiful hull !!!! Yves
-
That is surprising from Trumpeter. I was looking at the Yamato 1/200 hull, which is made of two parts. Because of the aluminum bracing that is securing the two halves, it is hard to see the junction. If you don't pay attention, you would think the hull was molded of one part. I wonder if ROMA is an old kit..... Maybe it was done by a different team. Yves
- 203 replies
-
- 6
-
-
- Roma
- Micromaster
- (and 4 more)
-
1/200 Trumpeter IJN YAMATO - issued by MRC/Gallery Models
yvesvidal replied to yvesvidal's topic in REVIEWS: Model kits
Joshua, There may not be a discussion about this topic on that forum, but the consensus is that the old Nichimo kit was showing its age and that plastic injected models have made so many progress recently, that the old kit would not compare too favorably. FUJIMI introduced a complete revamp of the superstructure and guns of the Nichimo kit, and that helped a lot modernizing/improving the original kit. I suspect that the Nichimo kit requires a lot of extra work to turn it into a scale model as it was developed to navigate, before all. Most likely, PONTOS, MK and a few others will be offering add-ons and PE kits for the YAMATO in 1/200 scale. That will give you access to a vast pool of parts if you decide to build or improve your Nichimo kit. Yves- 104 replies
-
- 8
-
-
- MRC/Gallery
- Yamato
- (and 1 more)
-
1/200 Trumpeter IJN YAMATO - issued by MRC/Gallery Models
yvesvidal replied to yvesvidal's topic in REVIEWS: Model kits
Chris, the box is gigantesque ! Just make sure that your better half is away when it arrives at your home. :-) Yves- 104 replies
-
- 8
-
-

-
- MRC/Gallery
- Yamato
- (and 1 more)
-
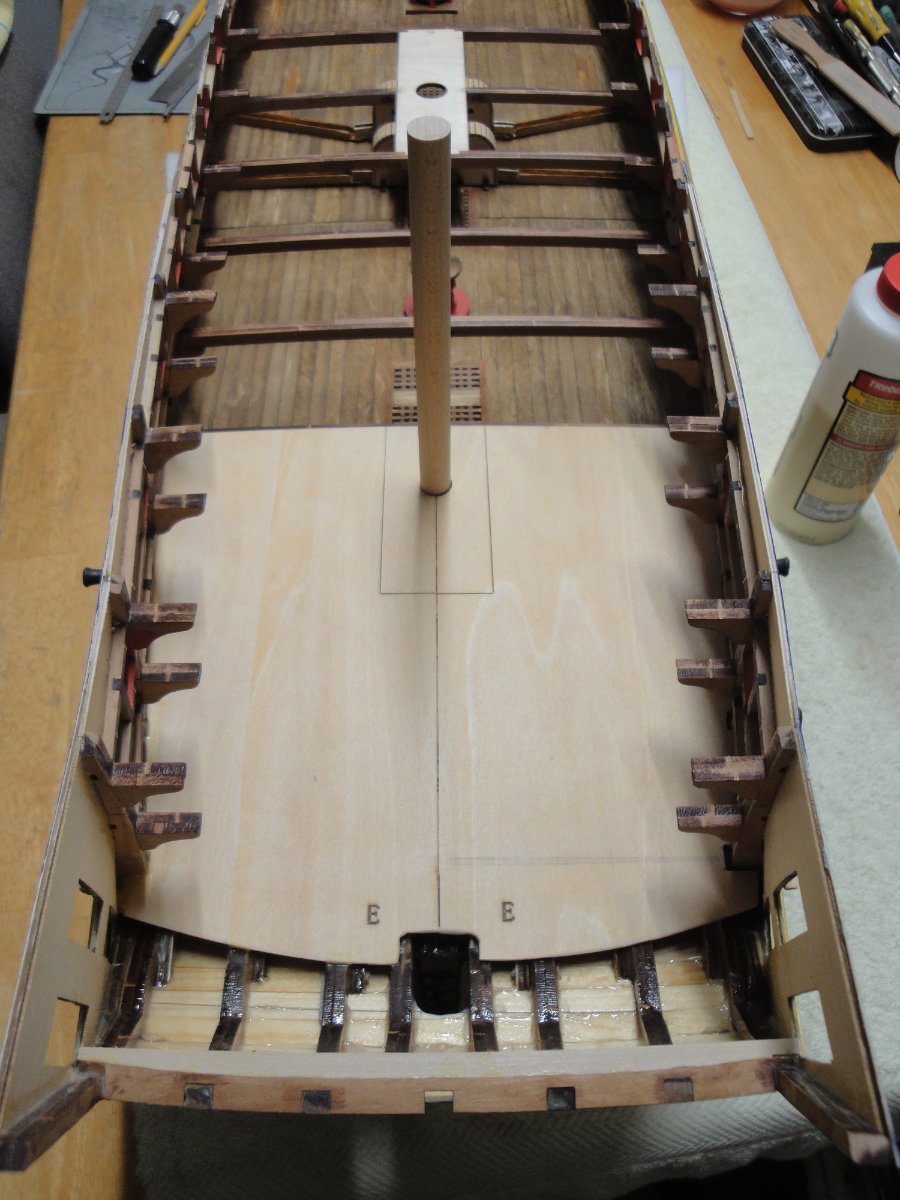
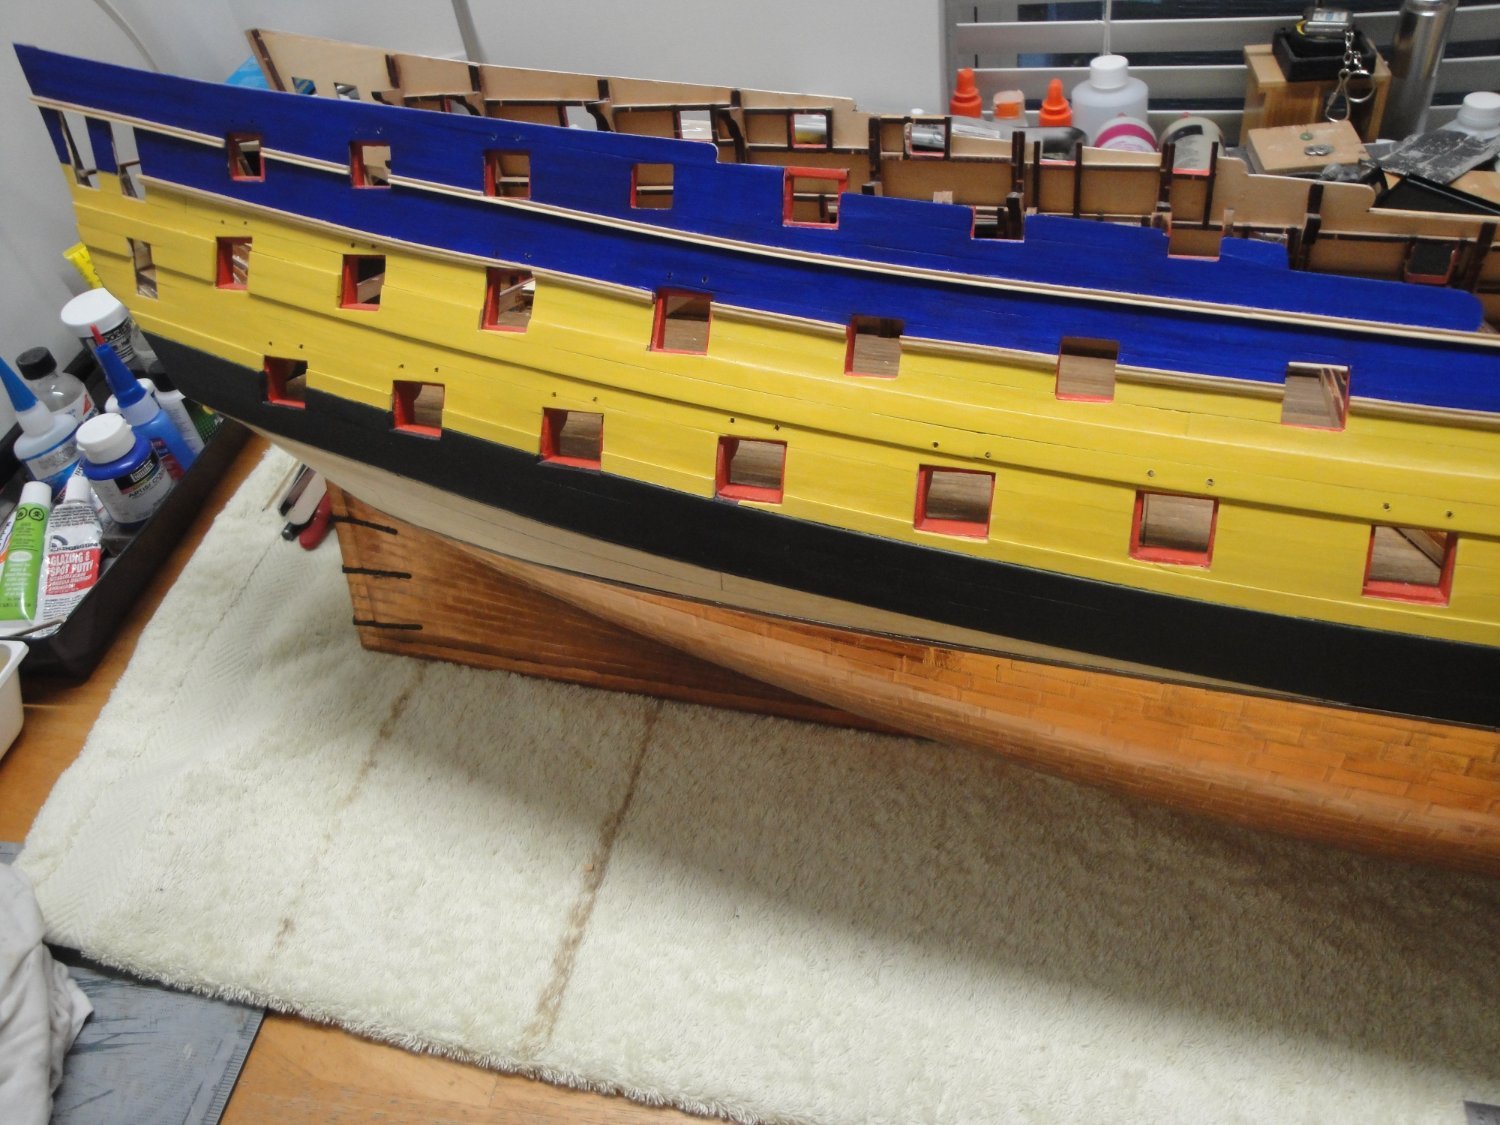
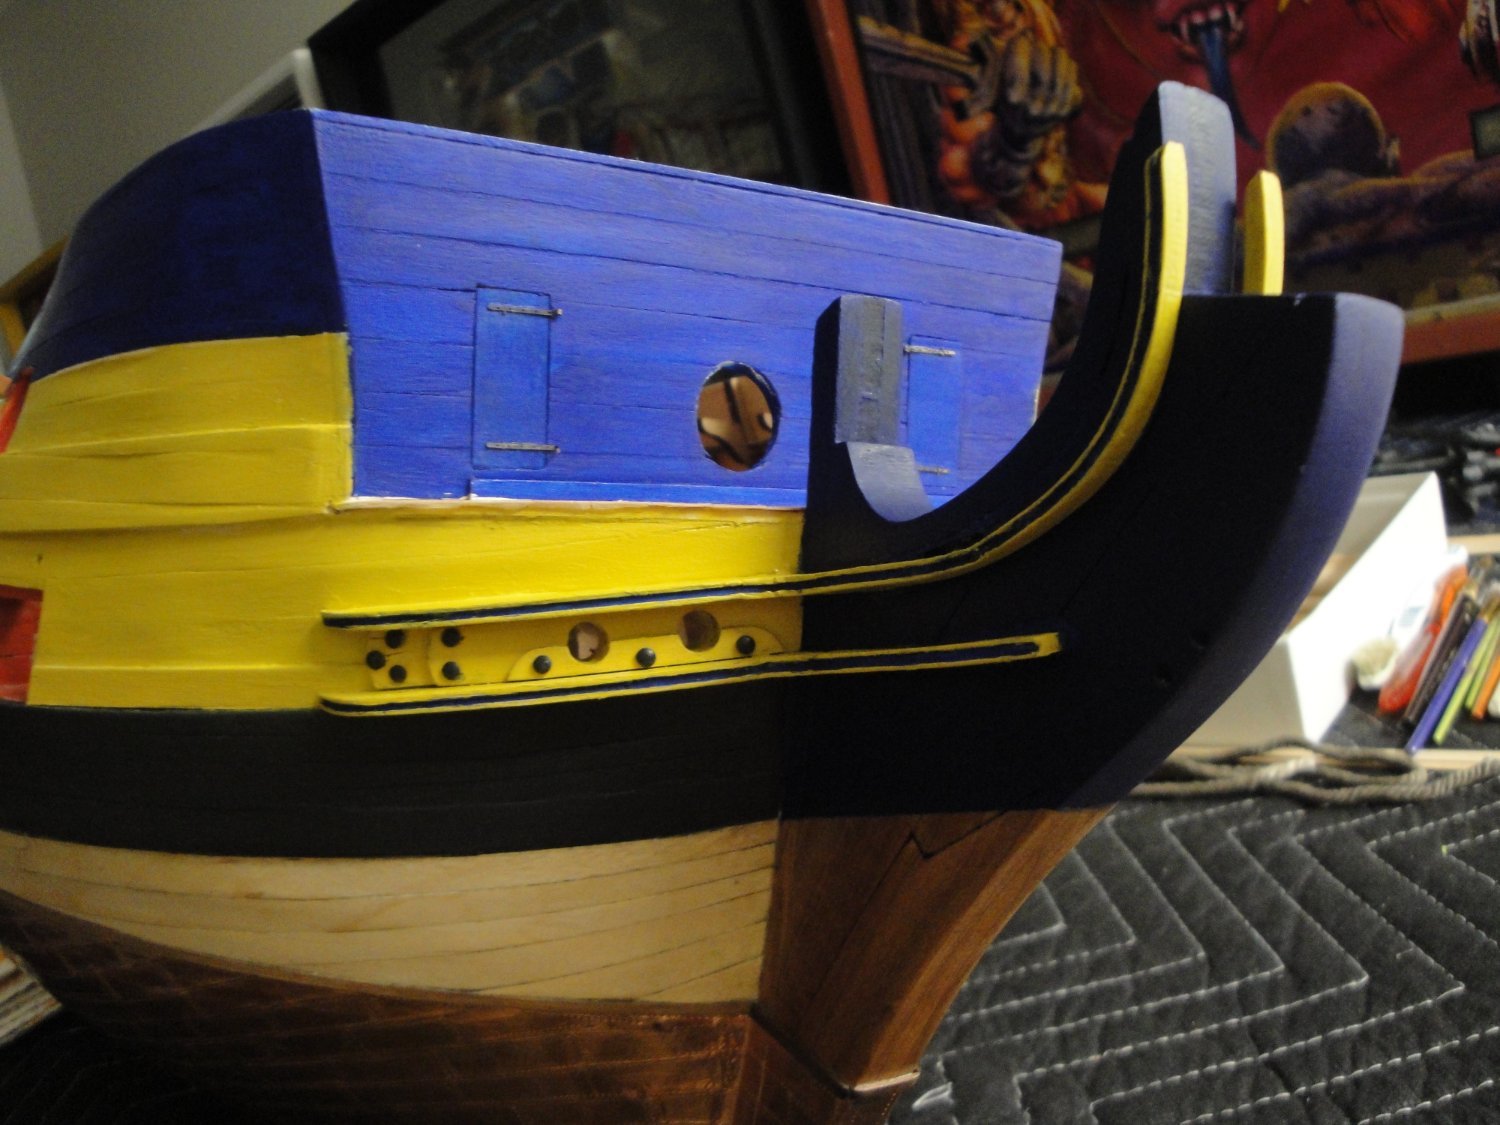
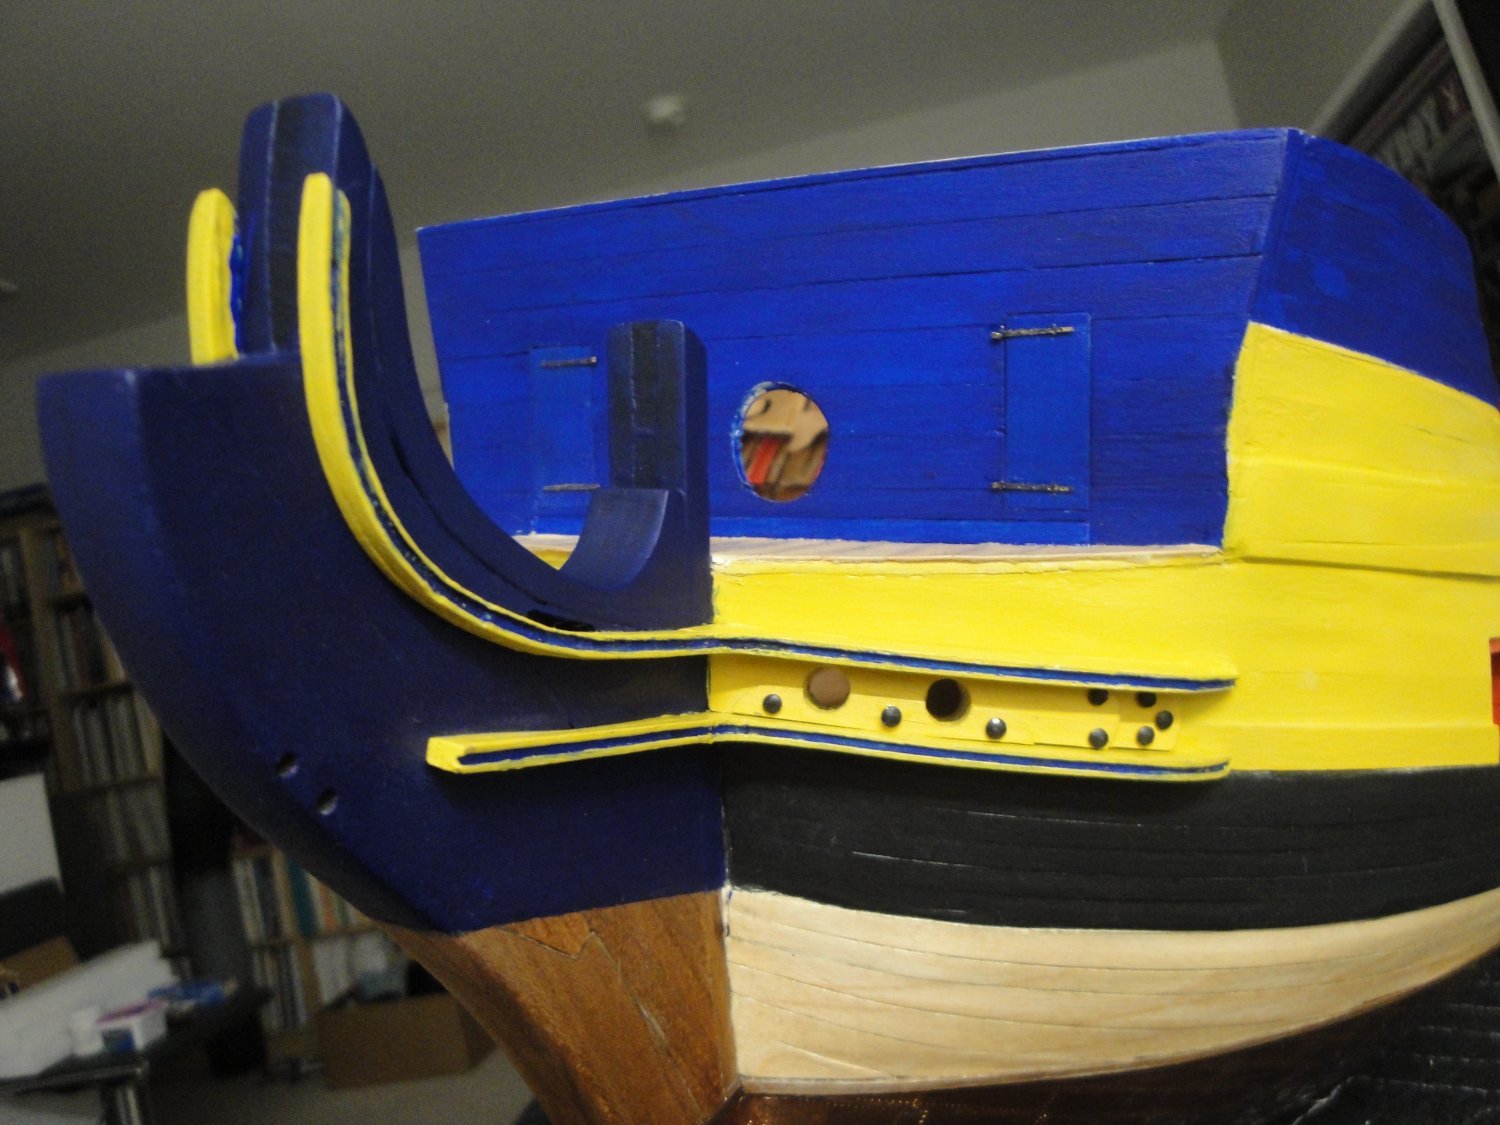
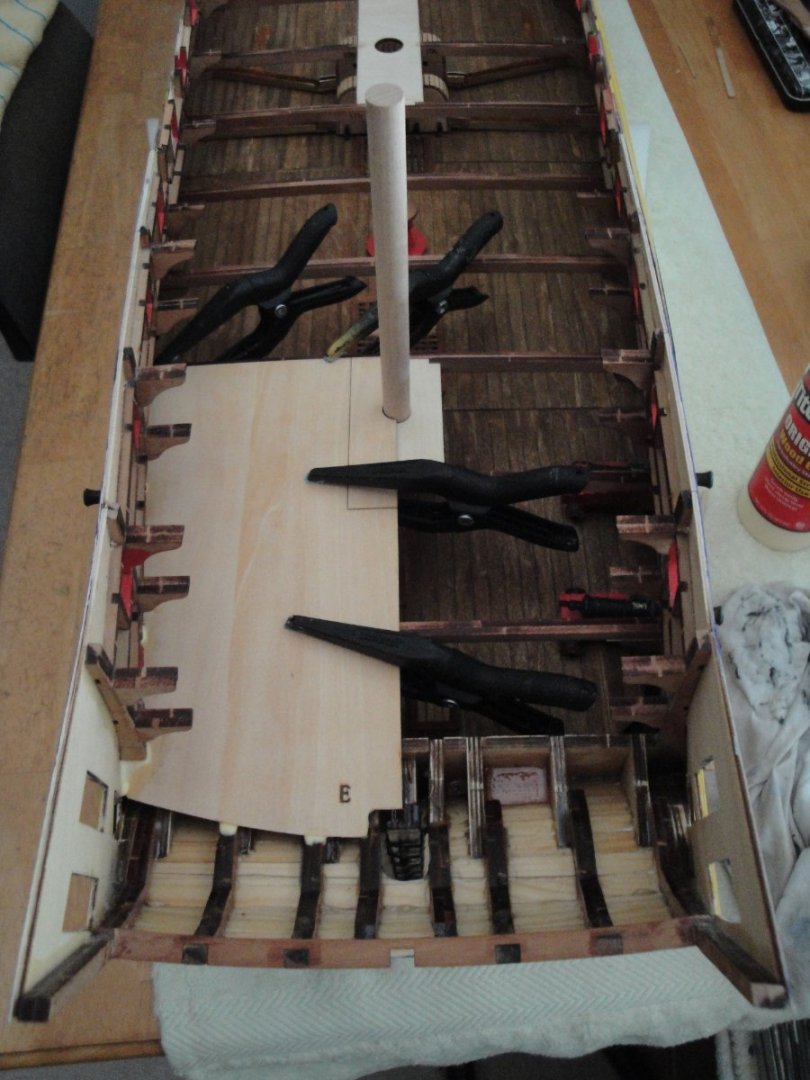
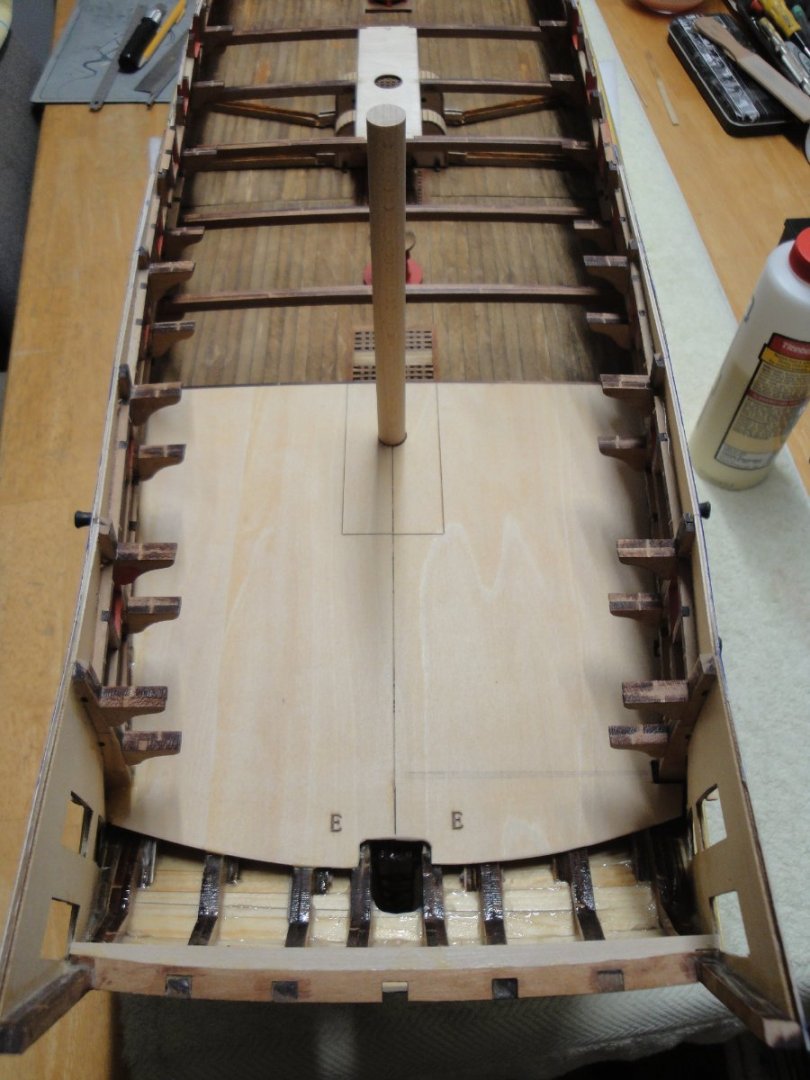
"Alea Jacta Est" as the Romans used to say: The stern section of the ship has been covered with the main gun, and no access to the large guns is possible in this area: You can see how the Main deck section "E" had to be altered to fit the hull: Now, I will be working on the Quarterdeck positioning and hopefully get a clearer picture of the stern ornaments and galleries. Yves
- 507 replies
-
- 14
-
-
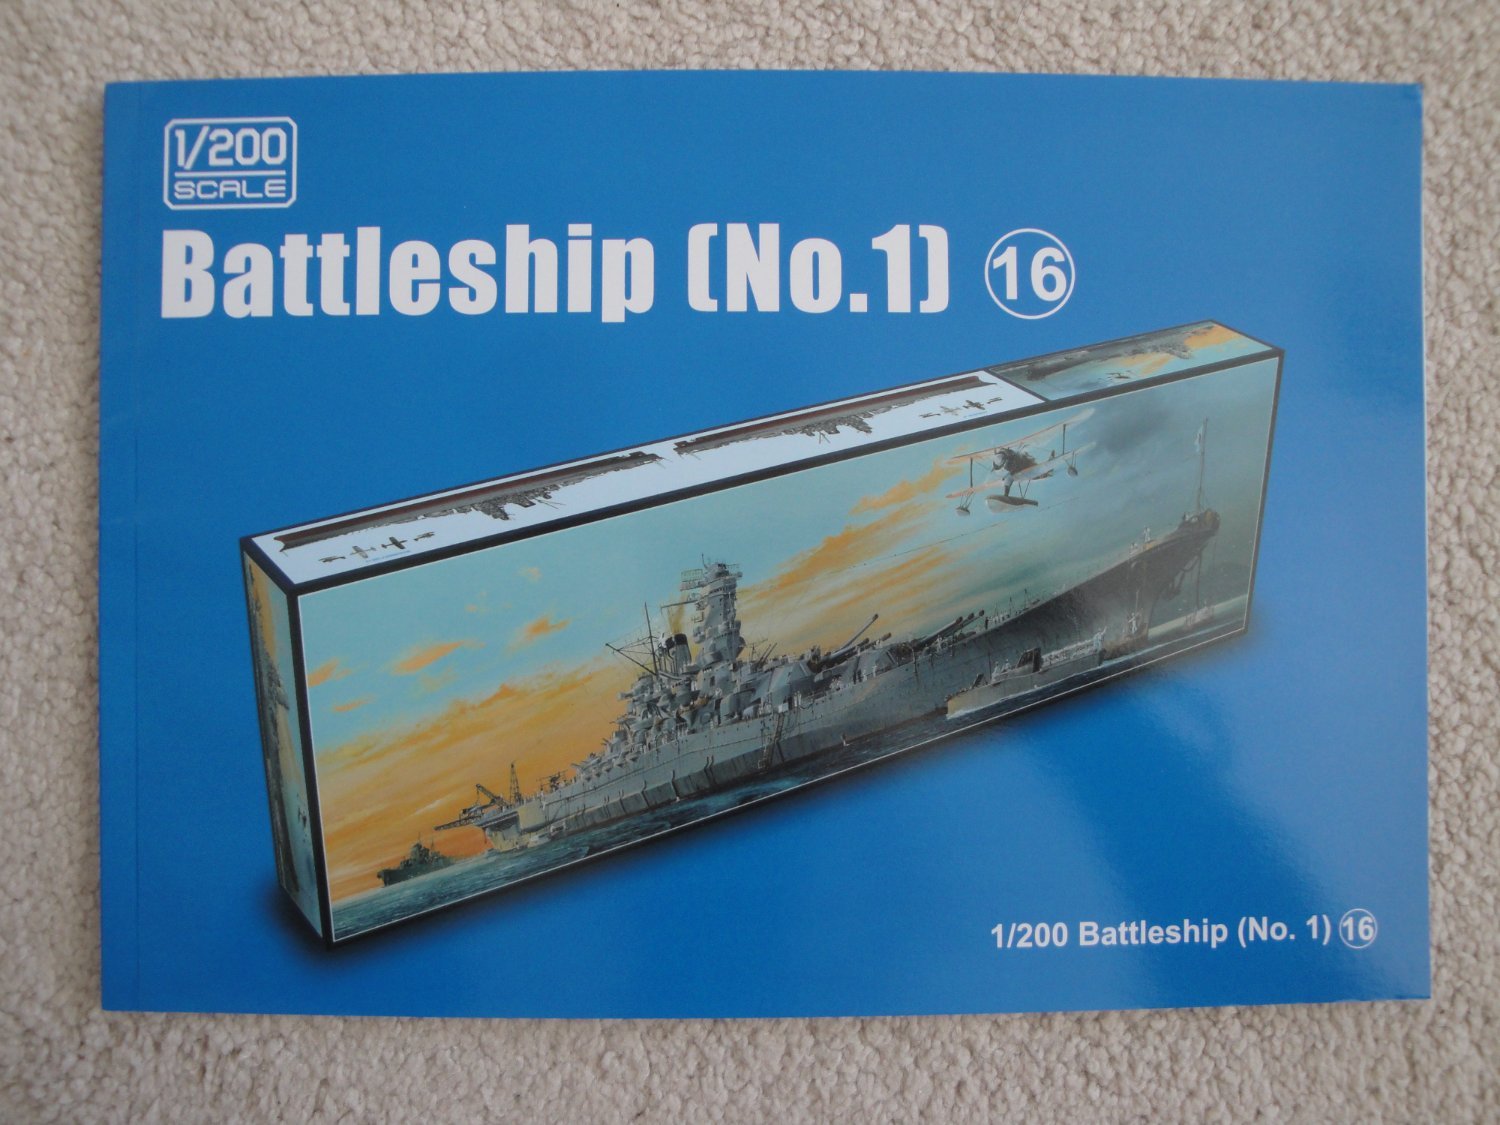
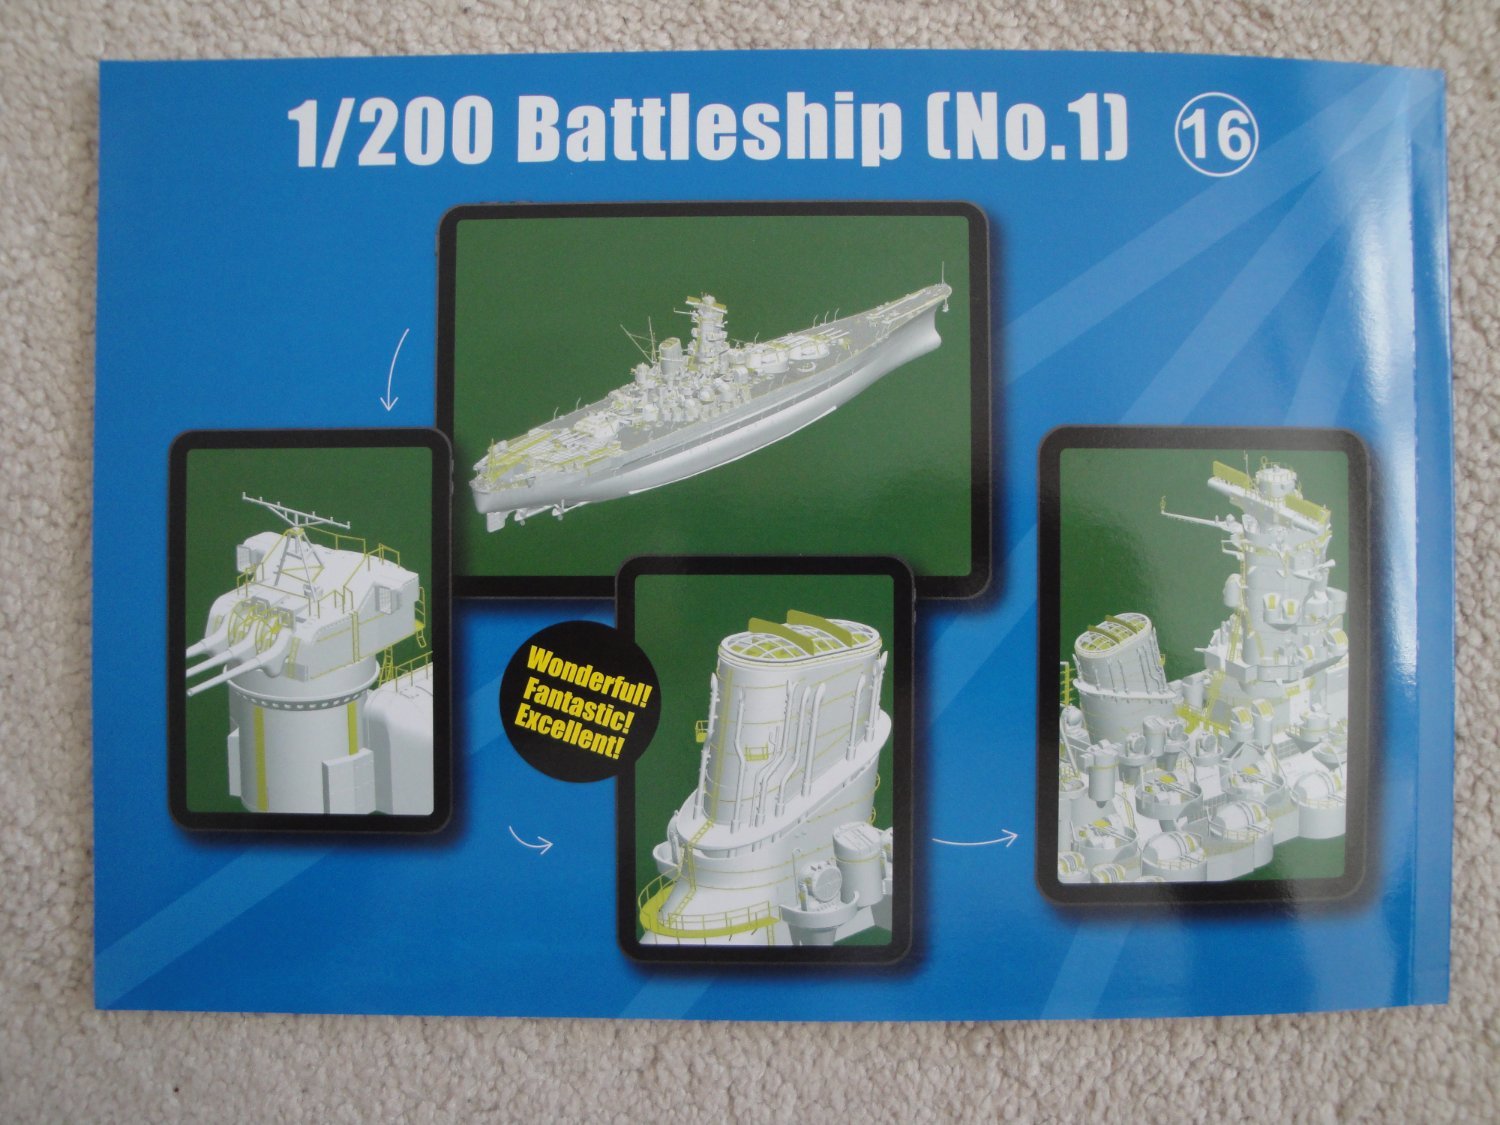
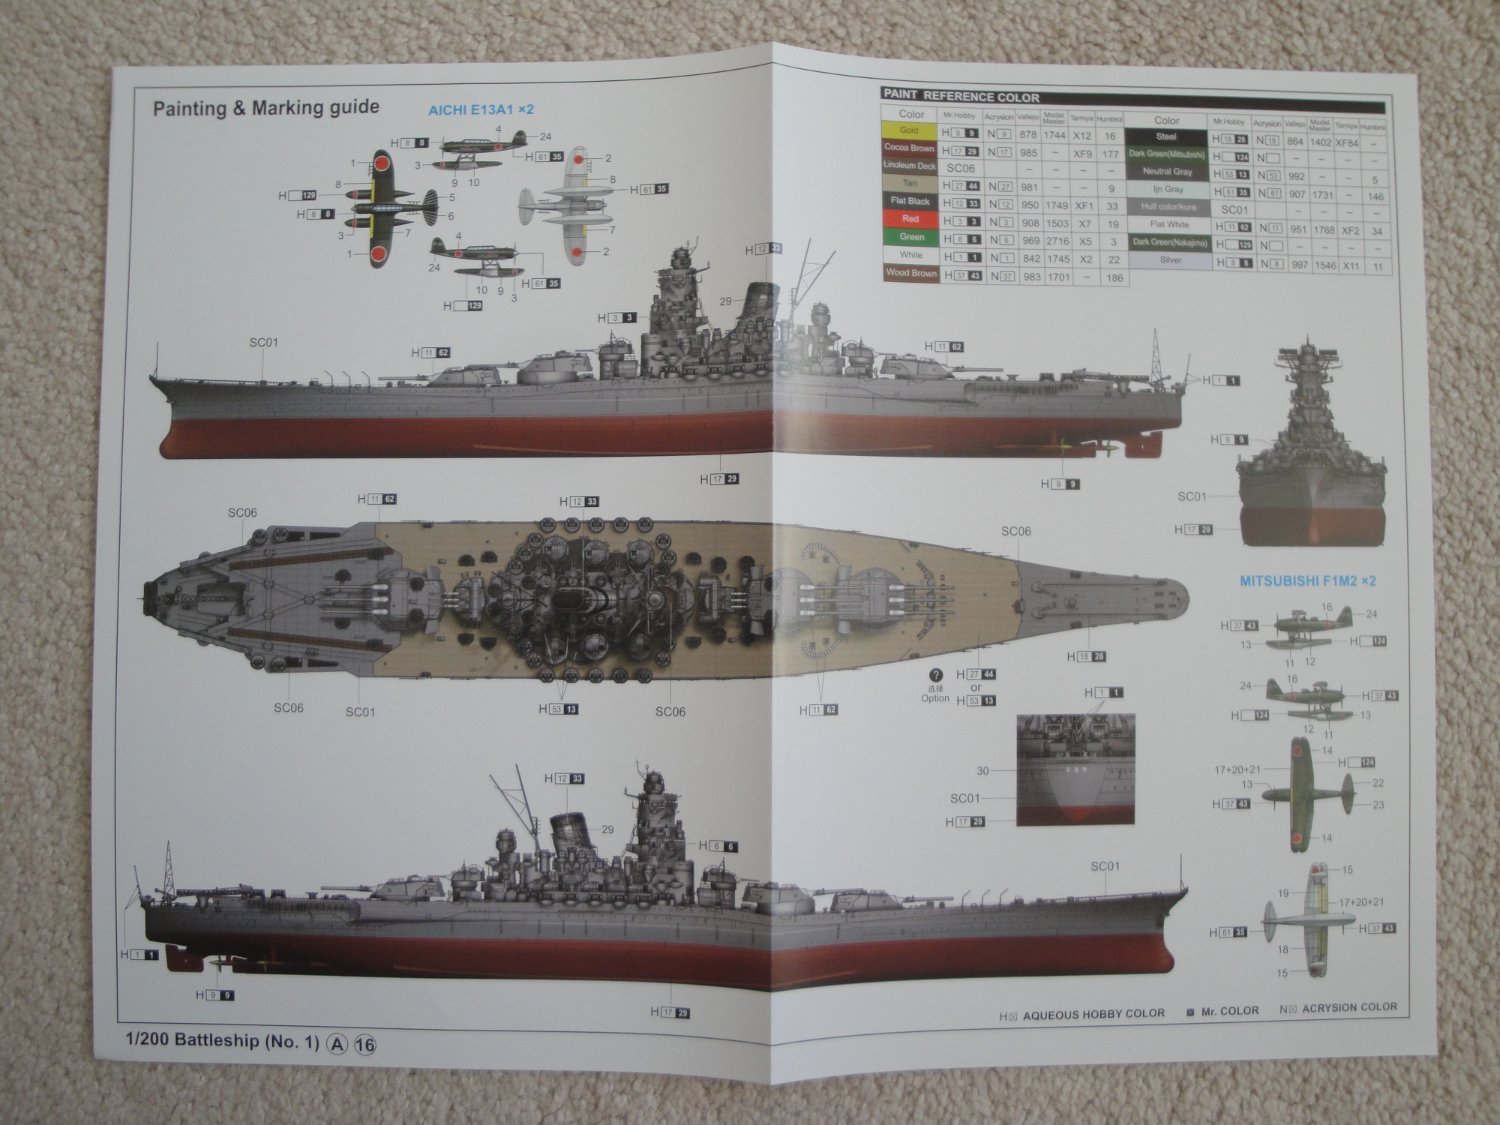
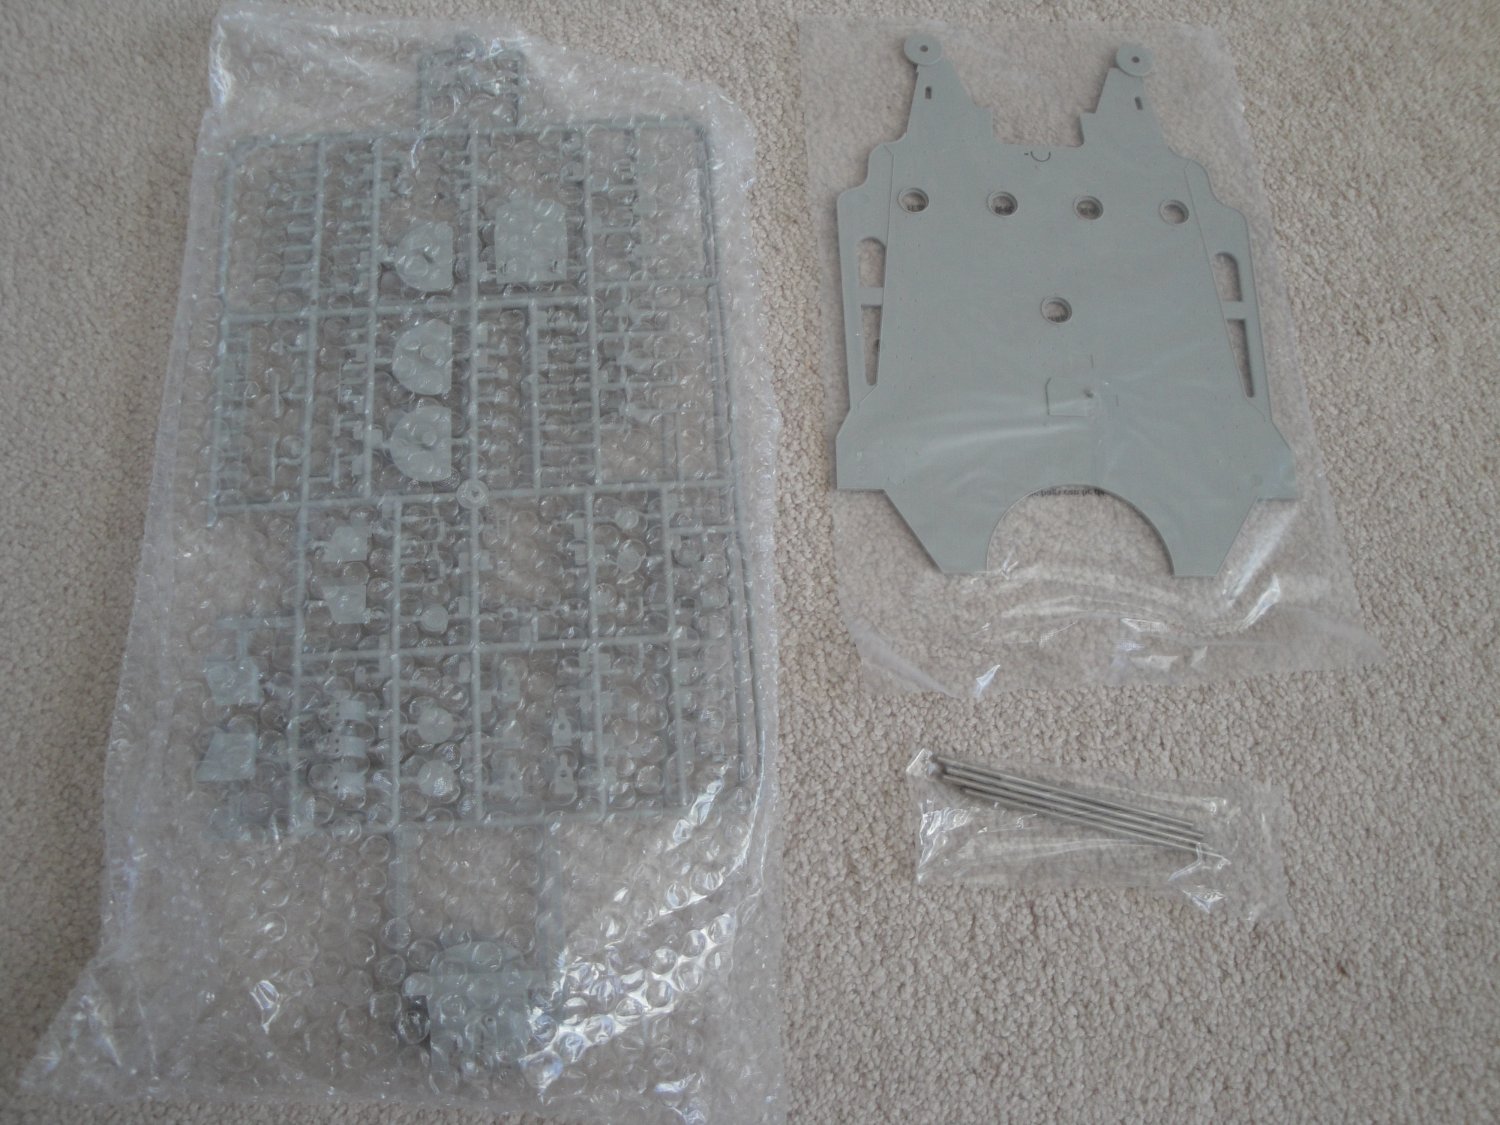
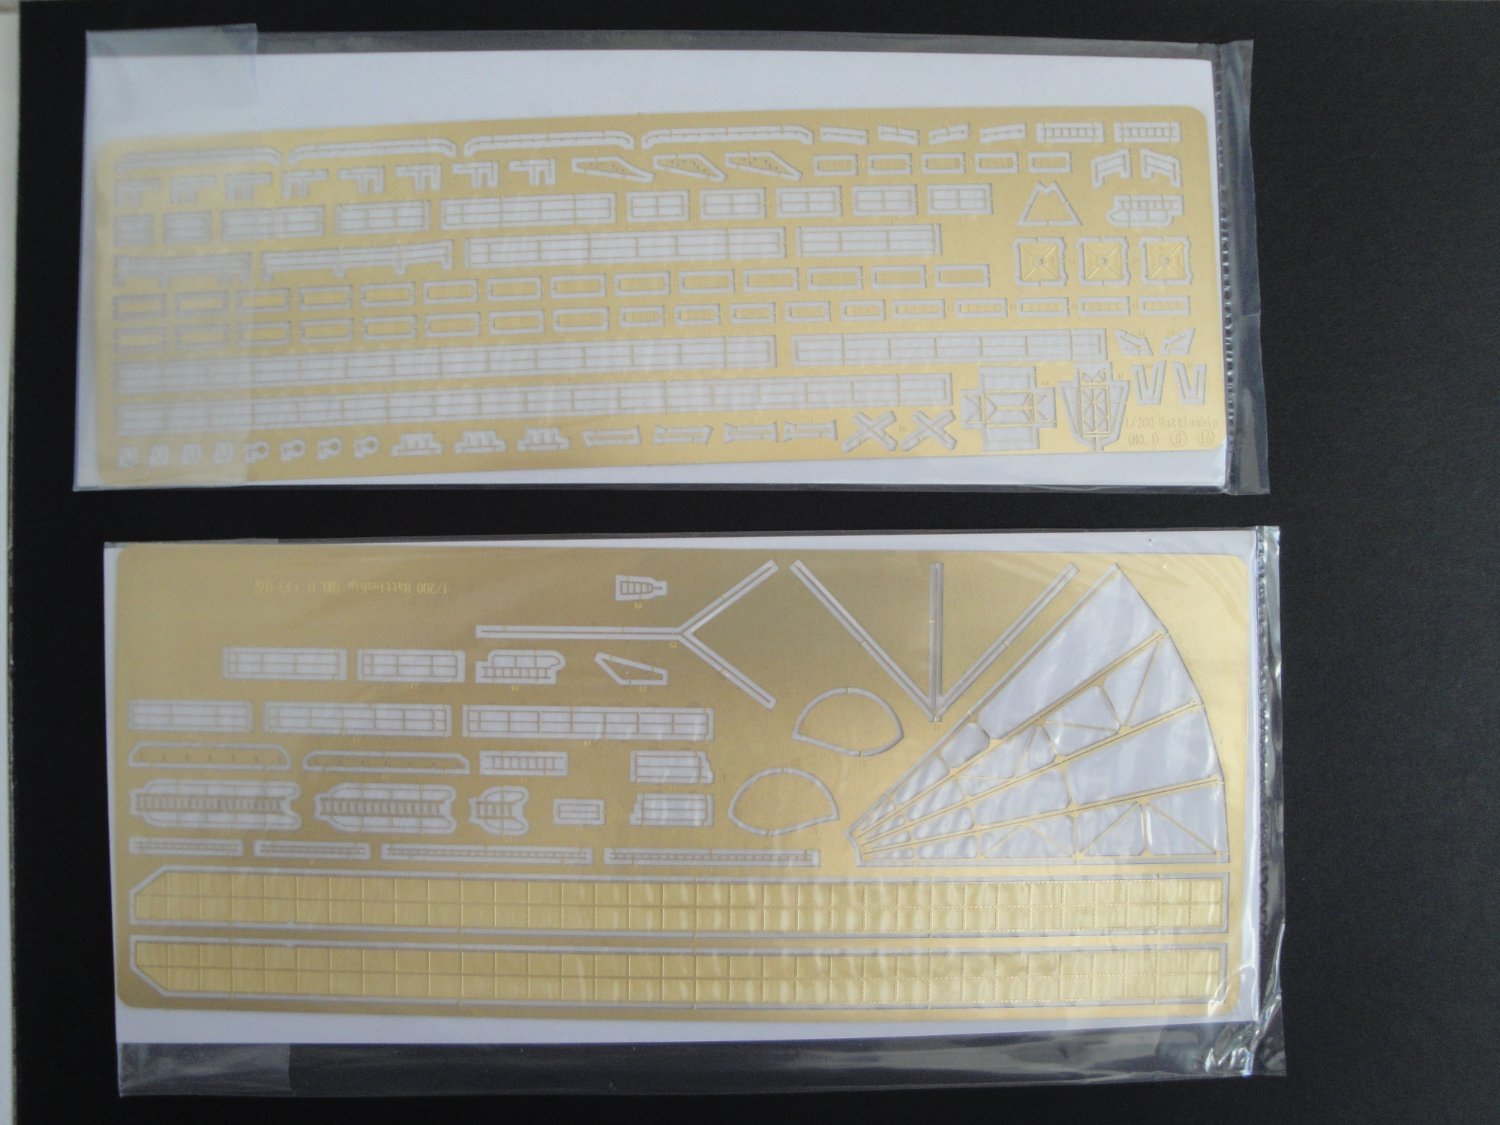
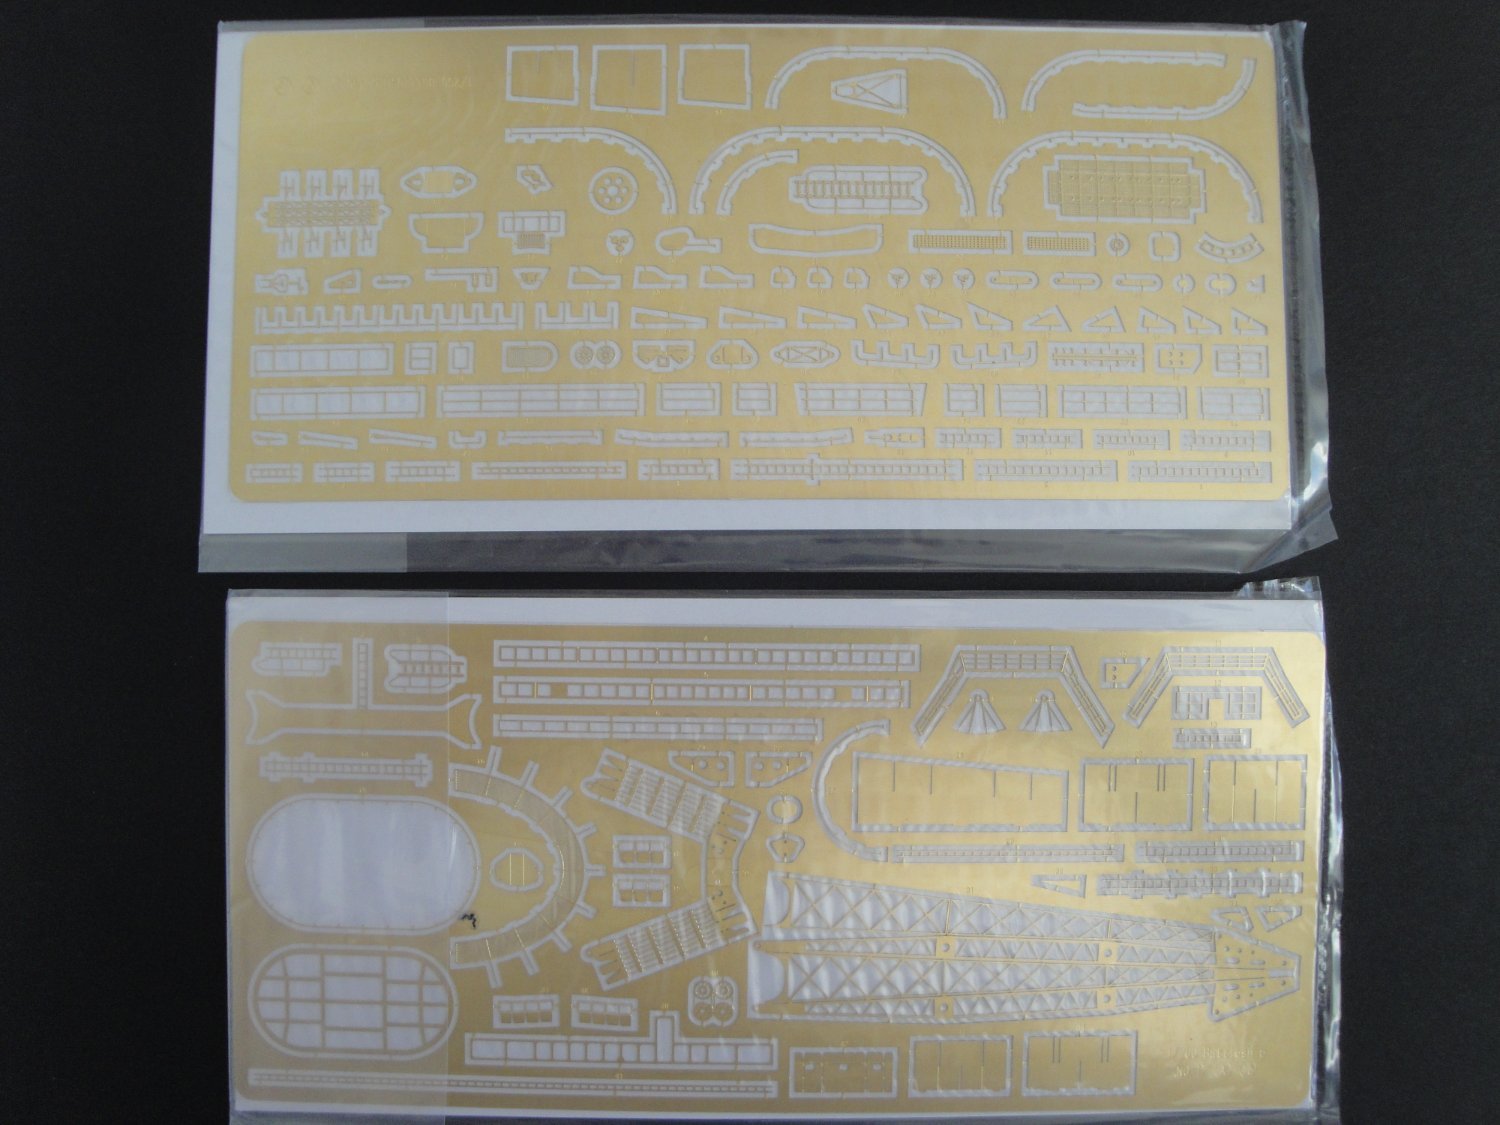
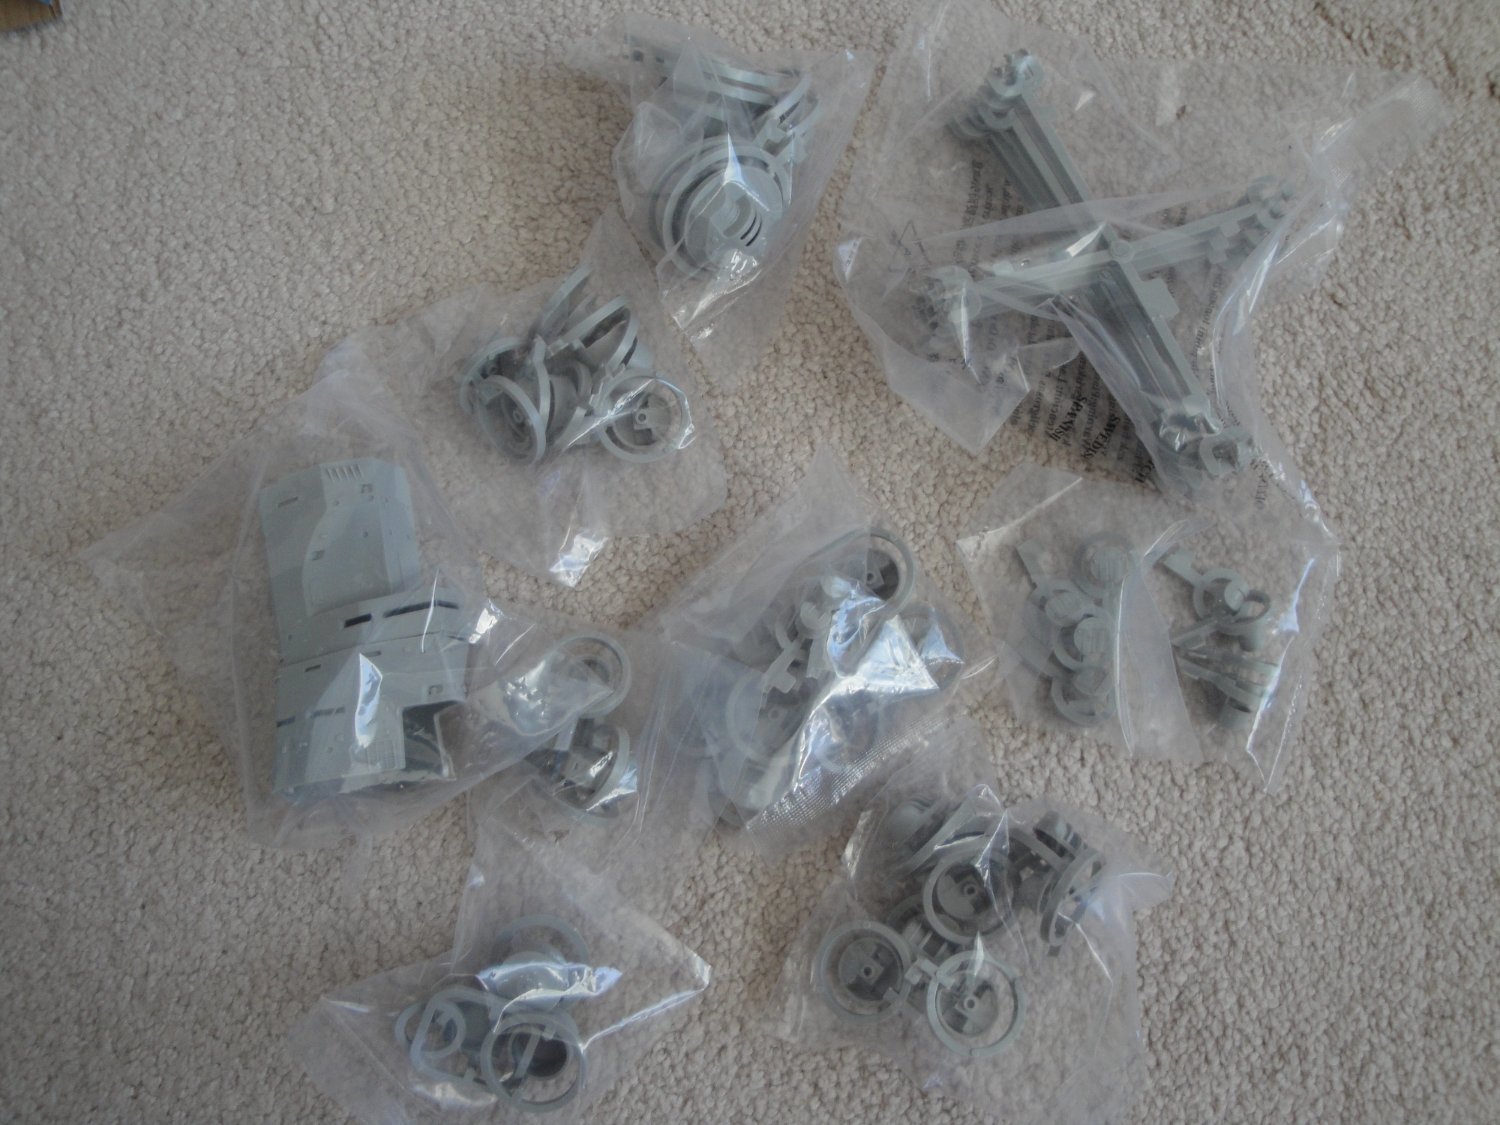
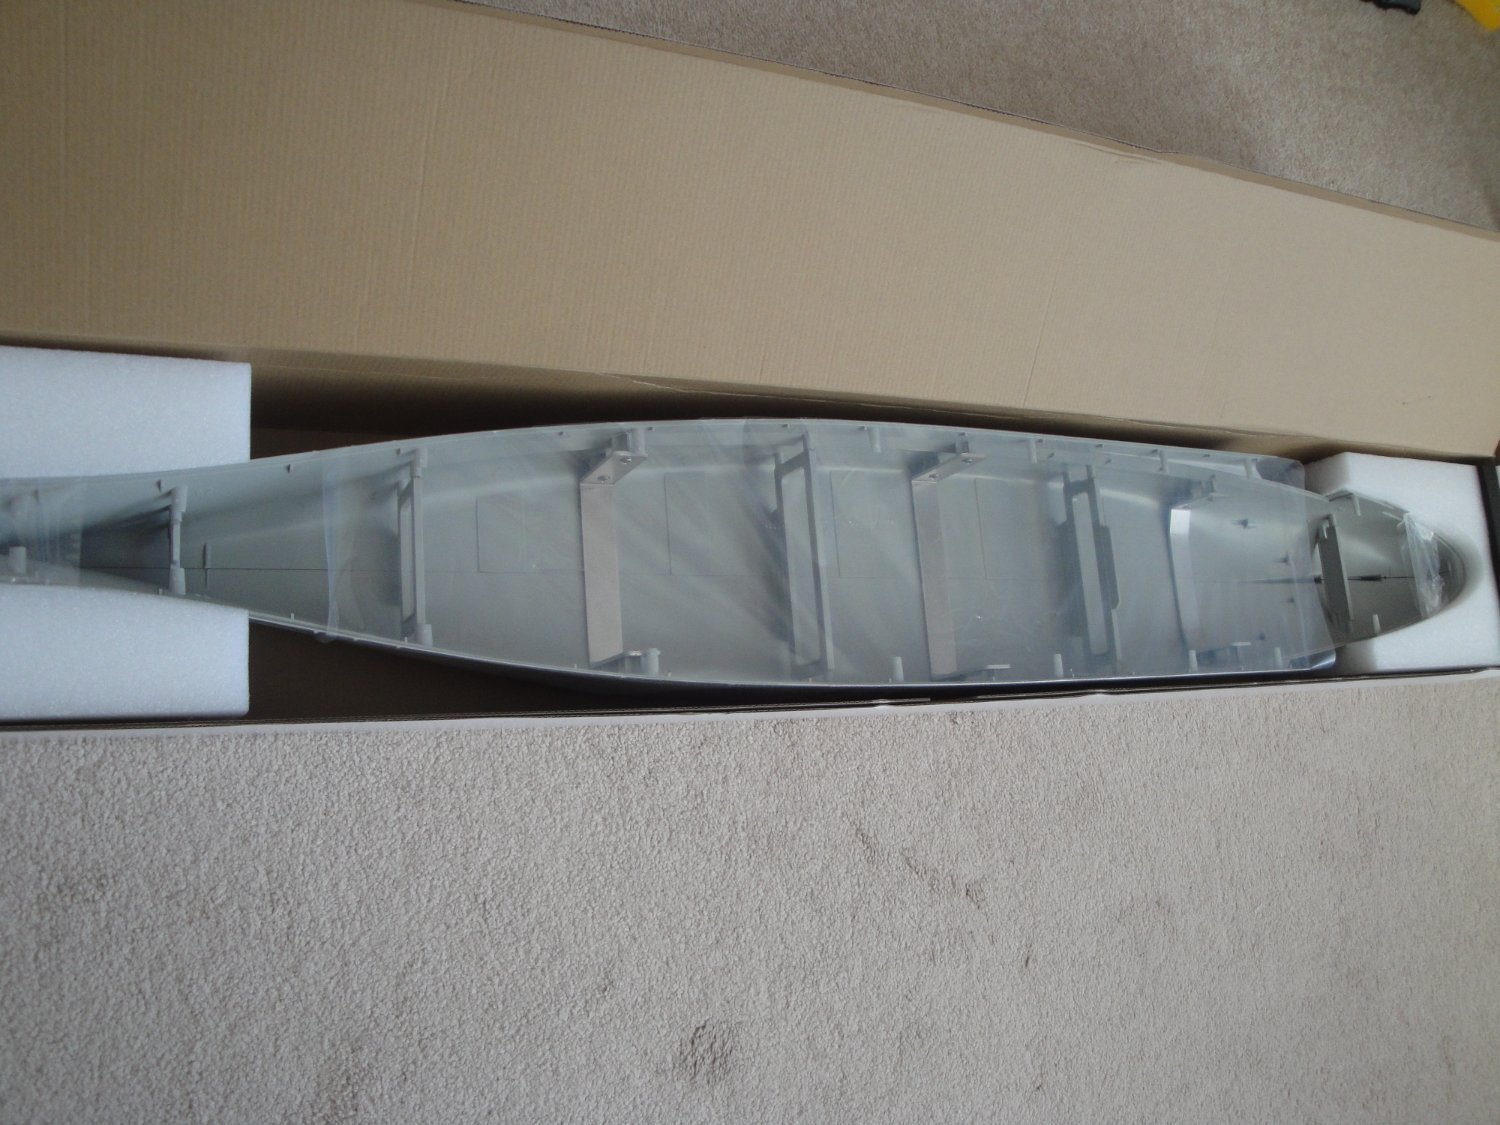
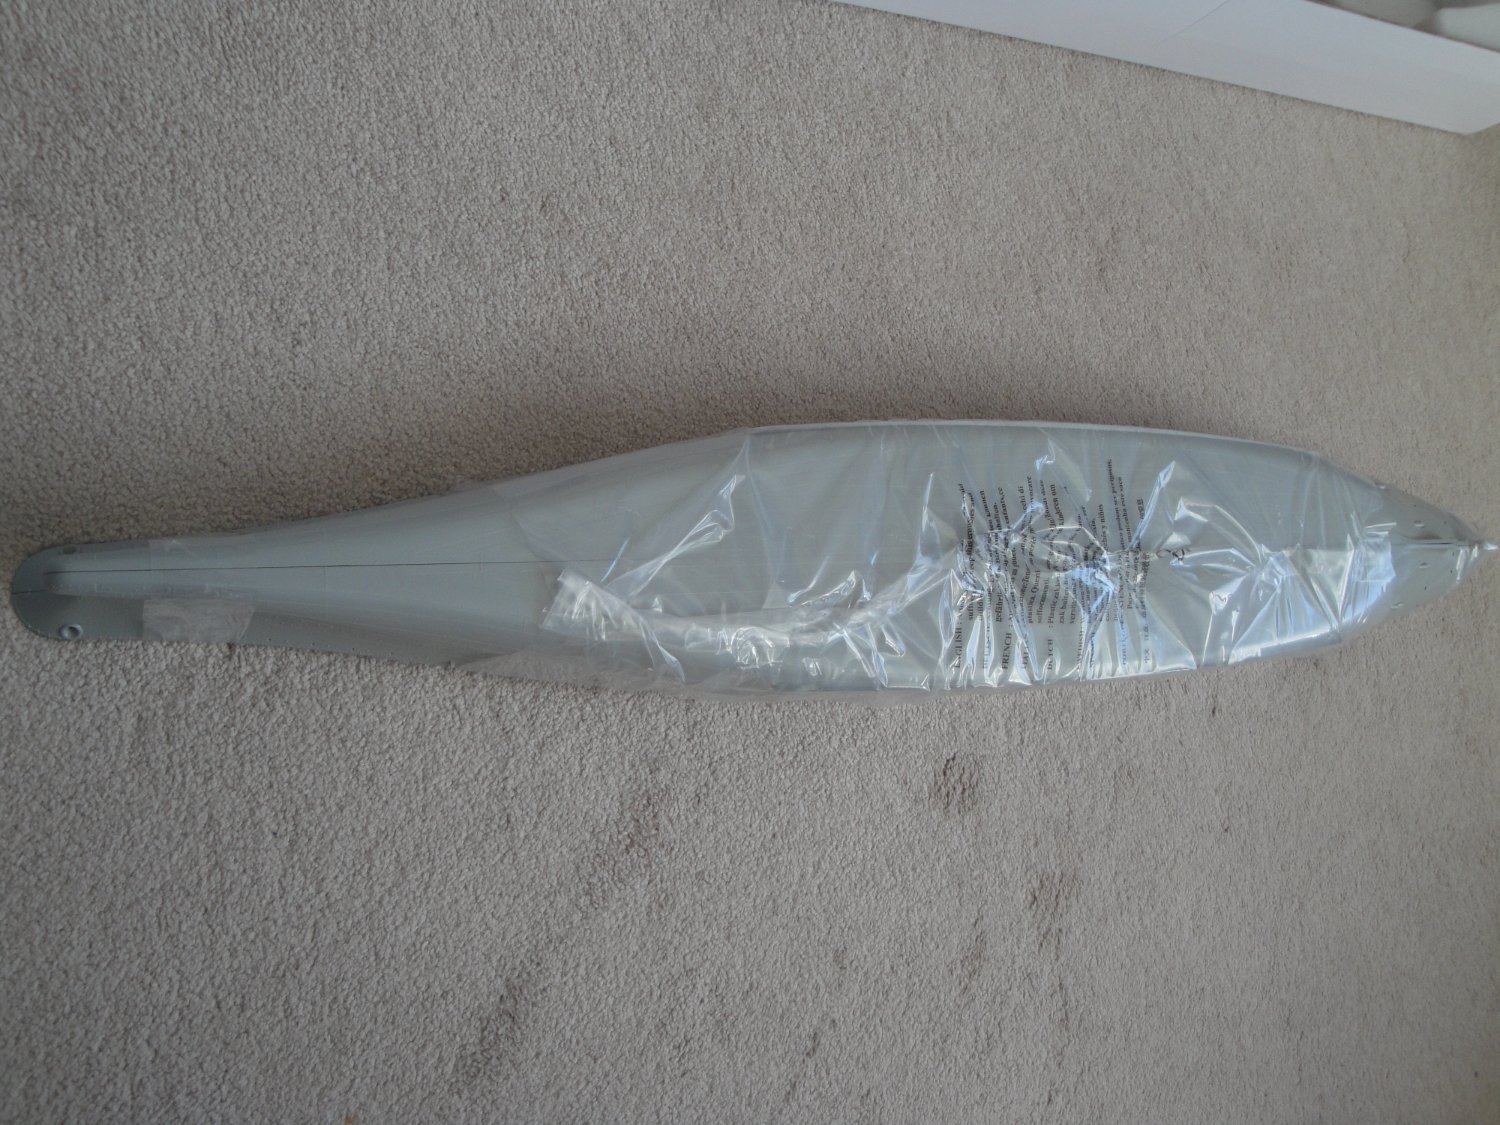
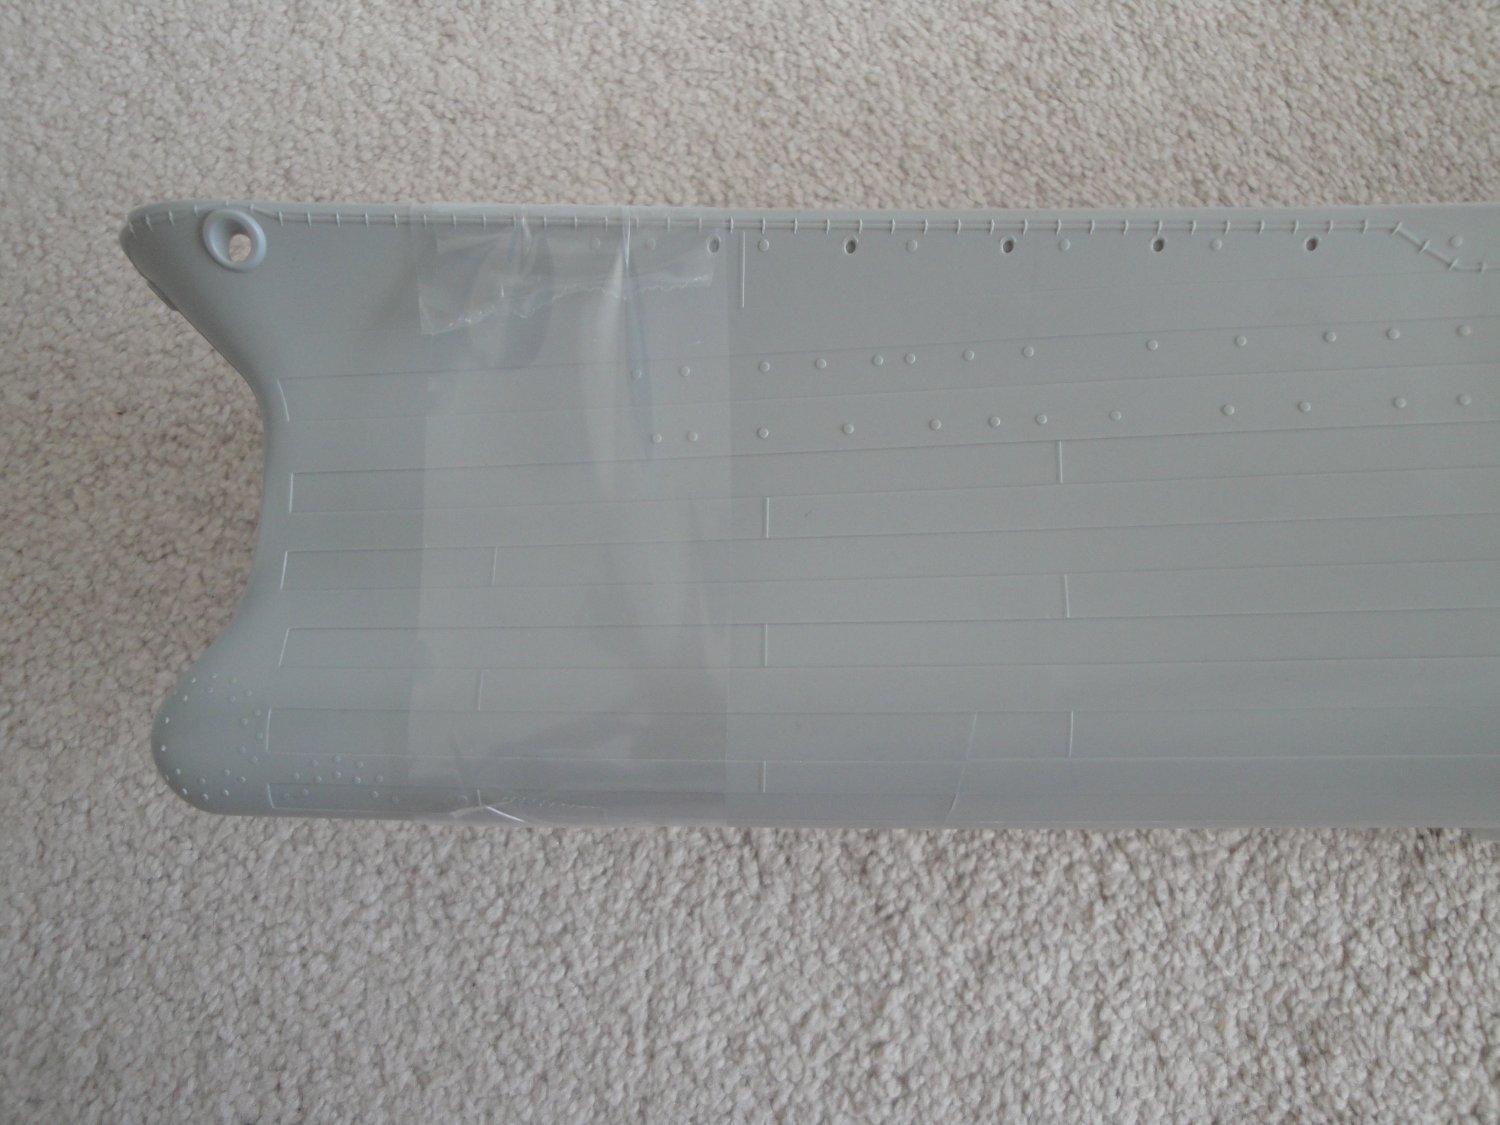
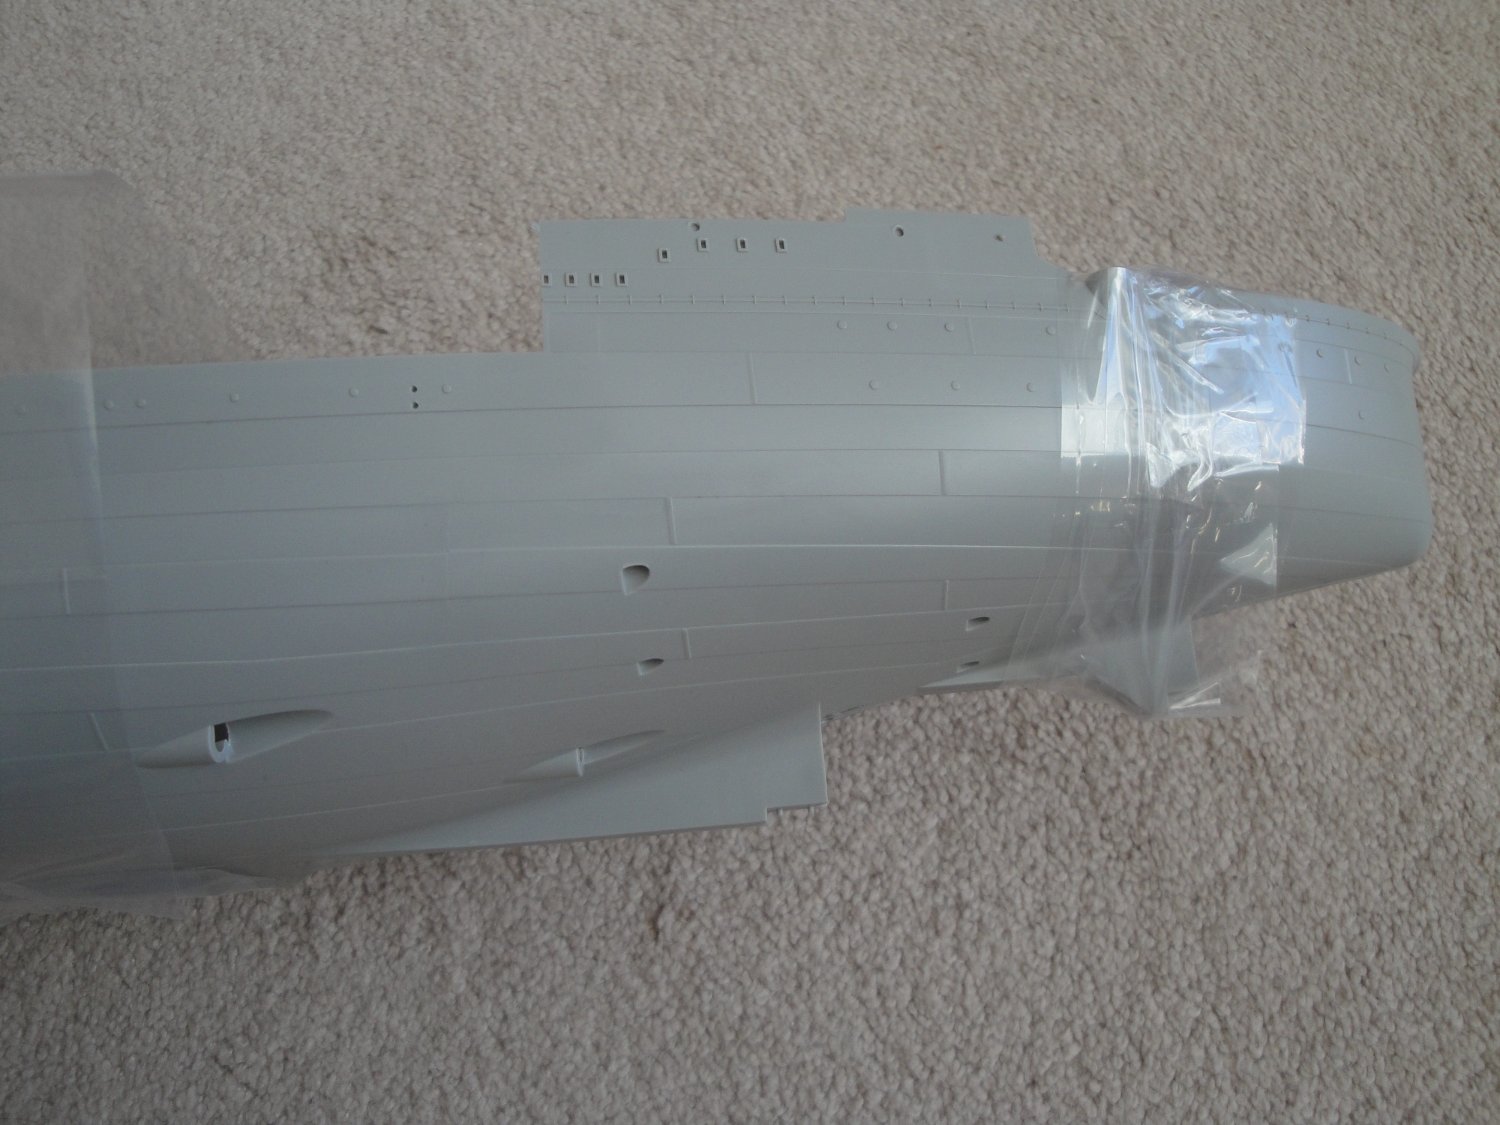
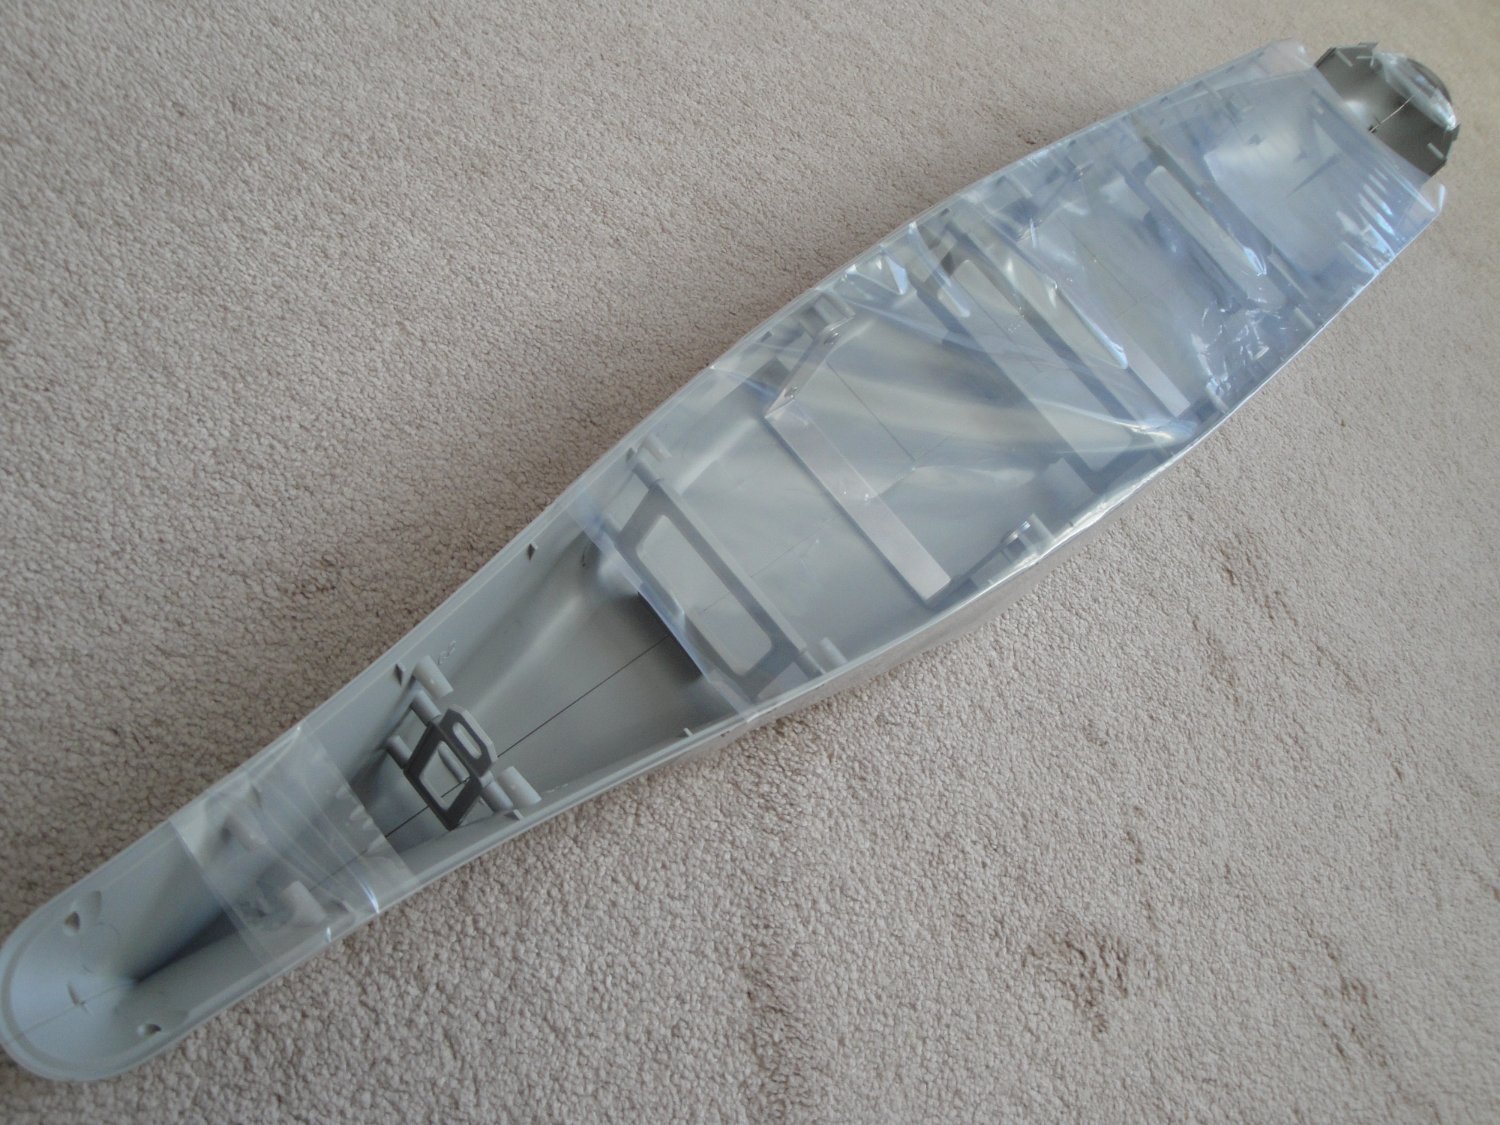
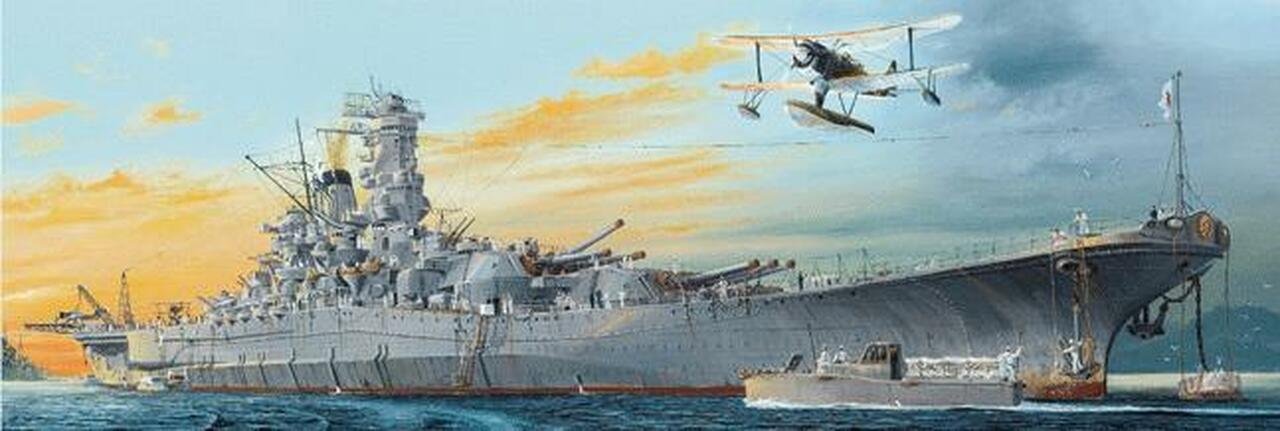
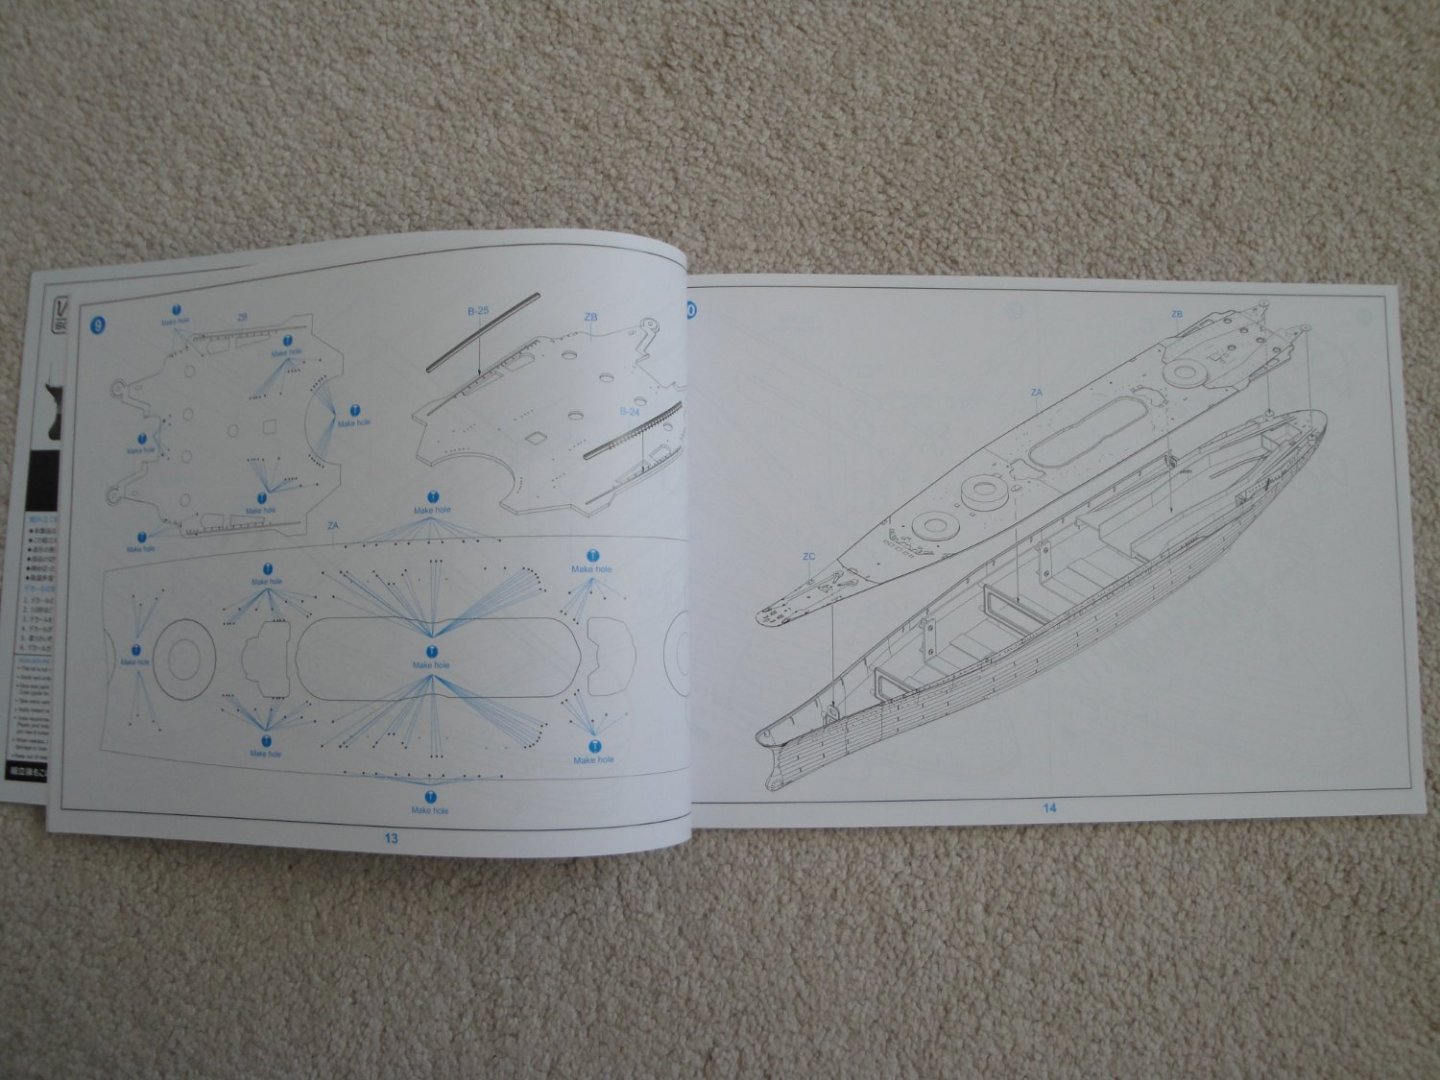
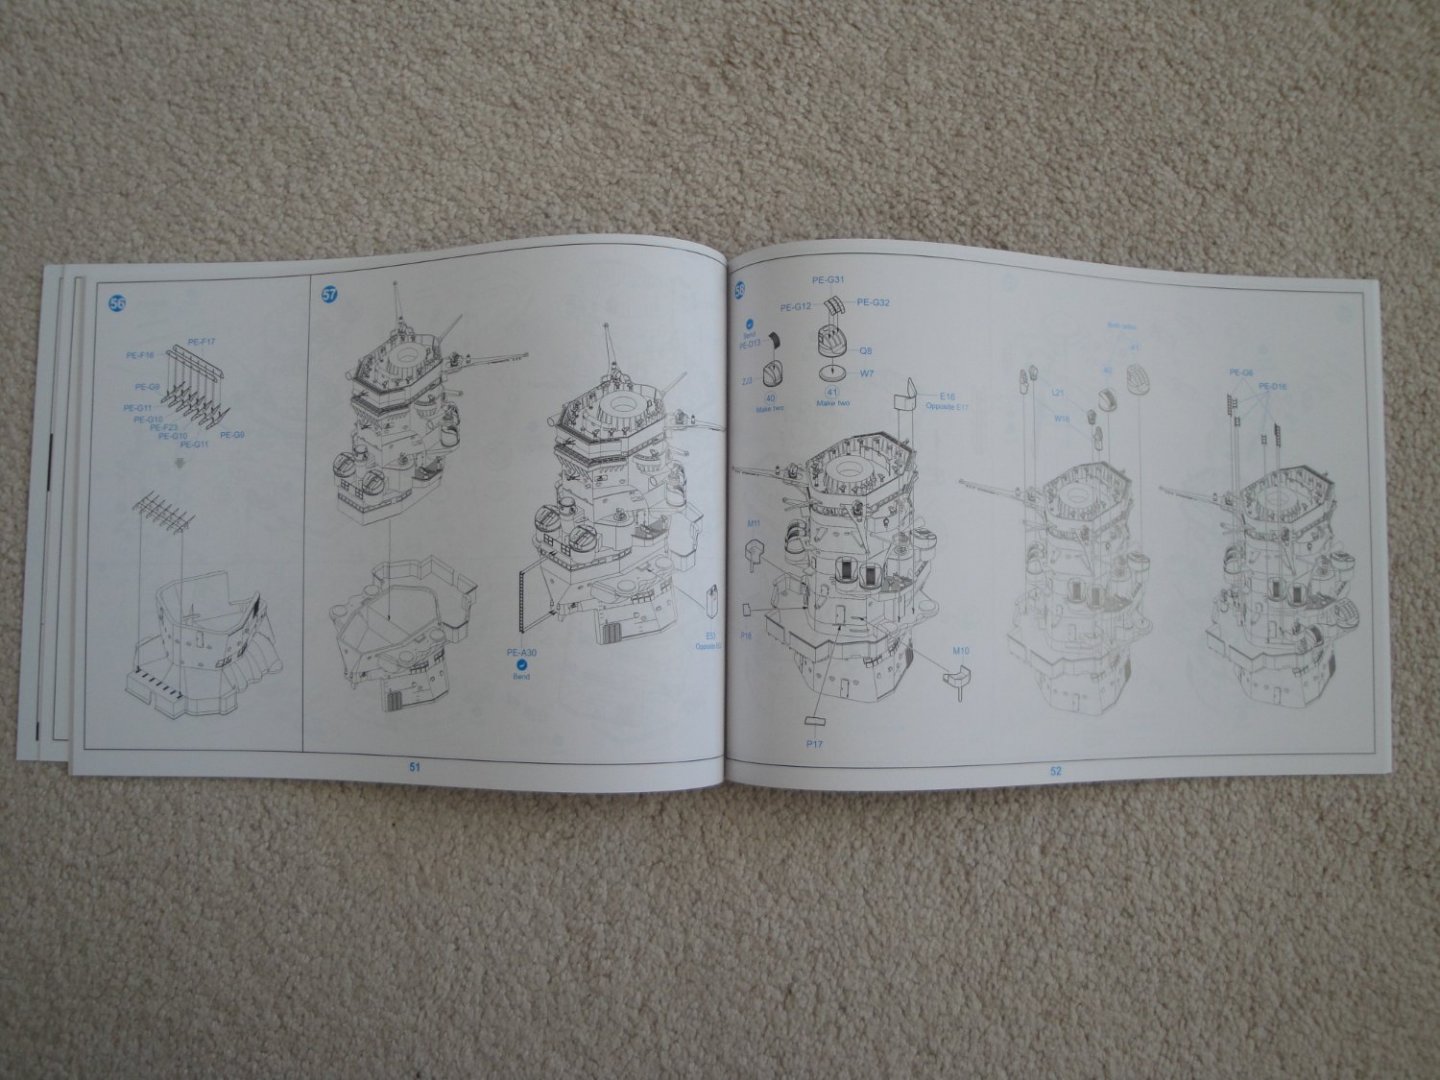
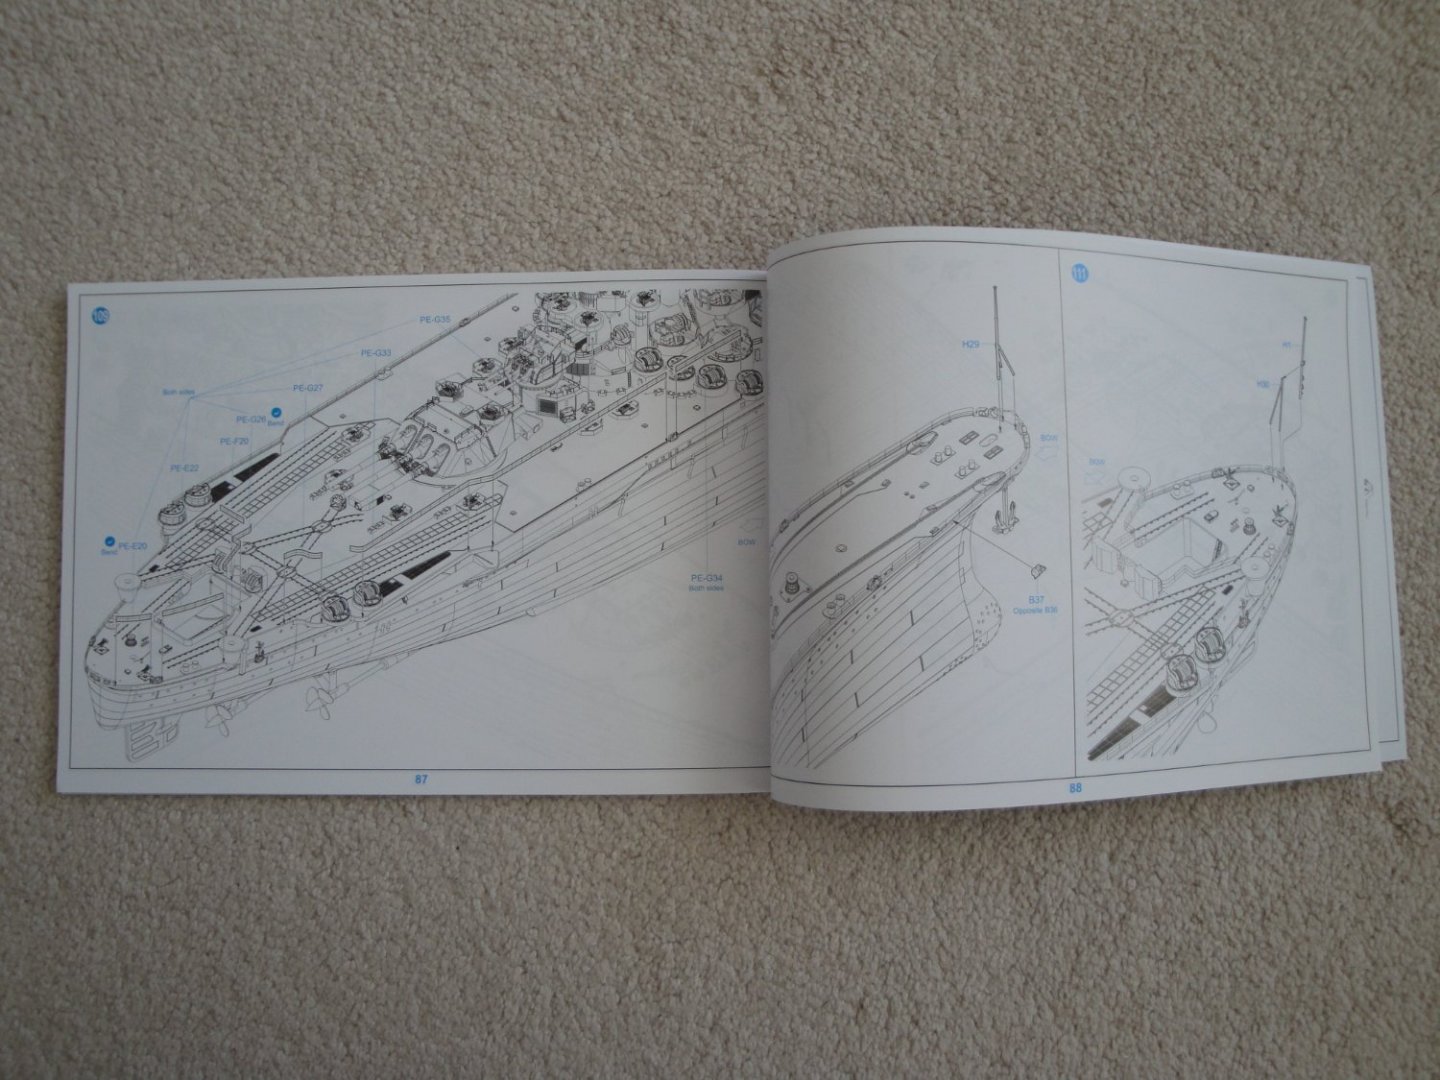
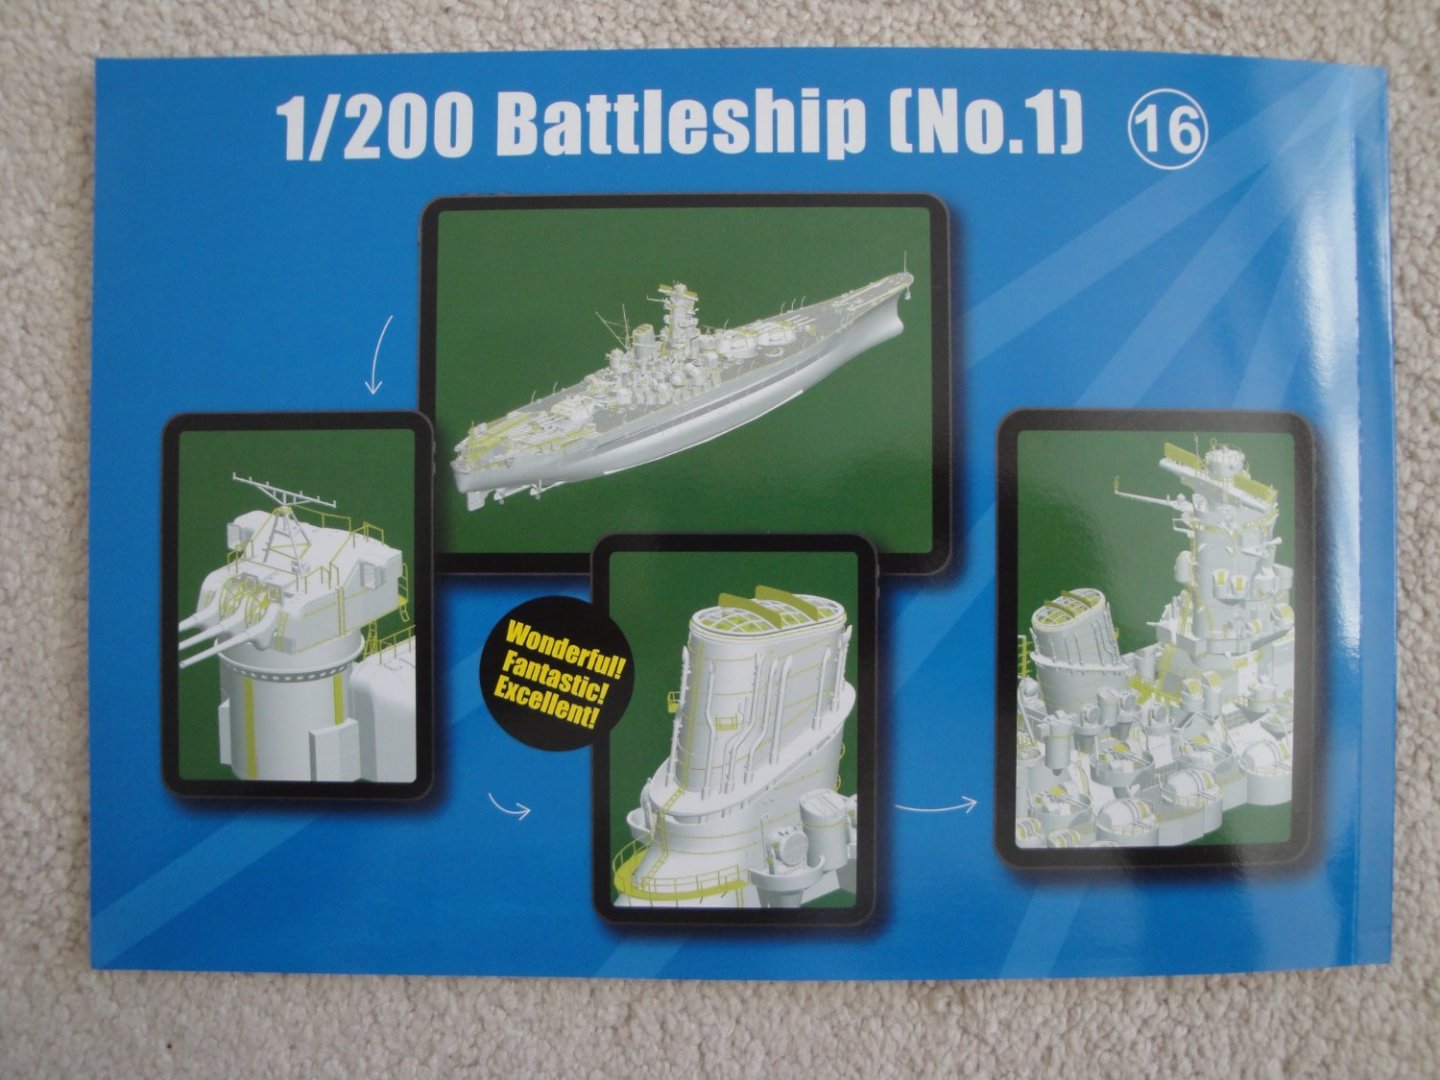
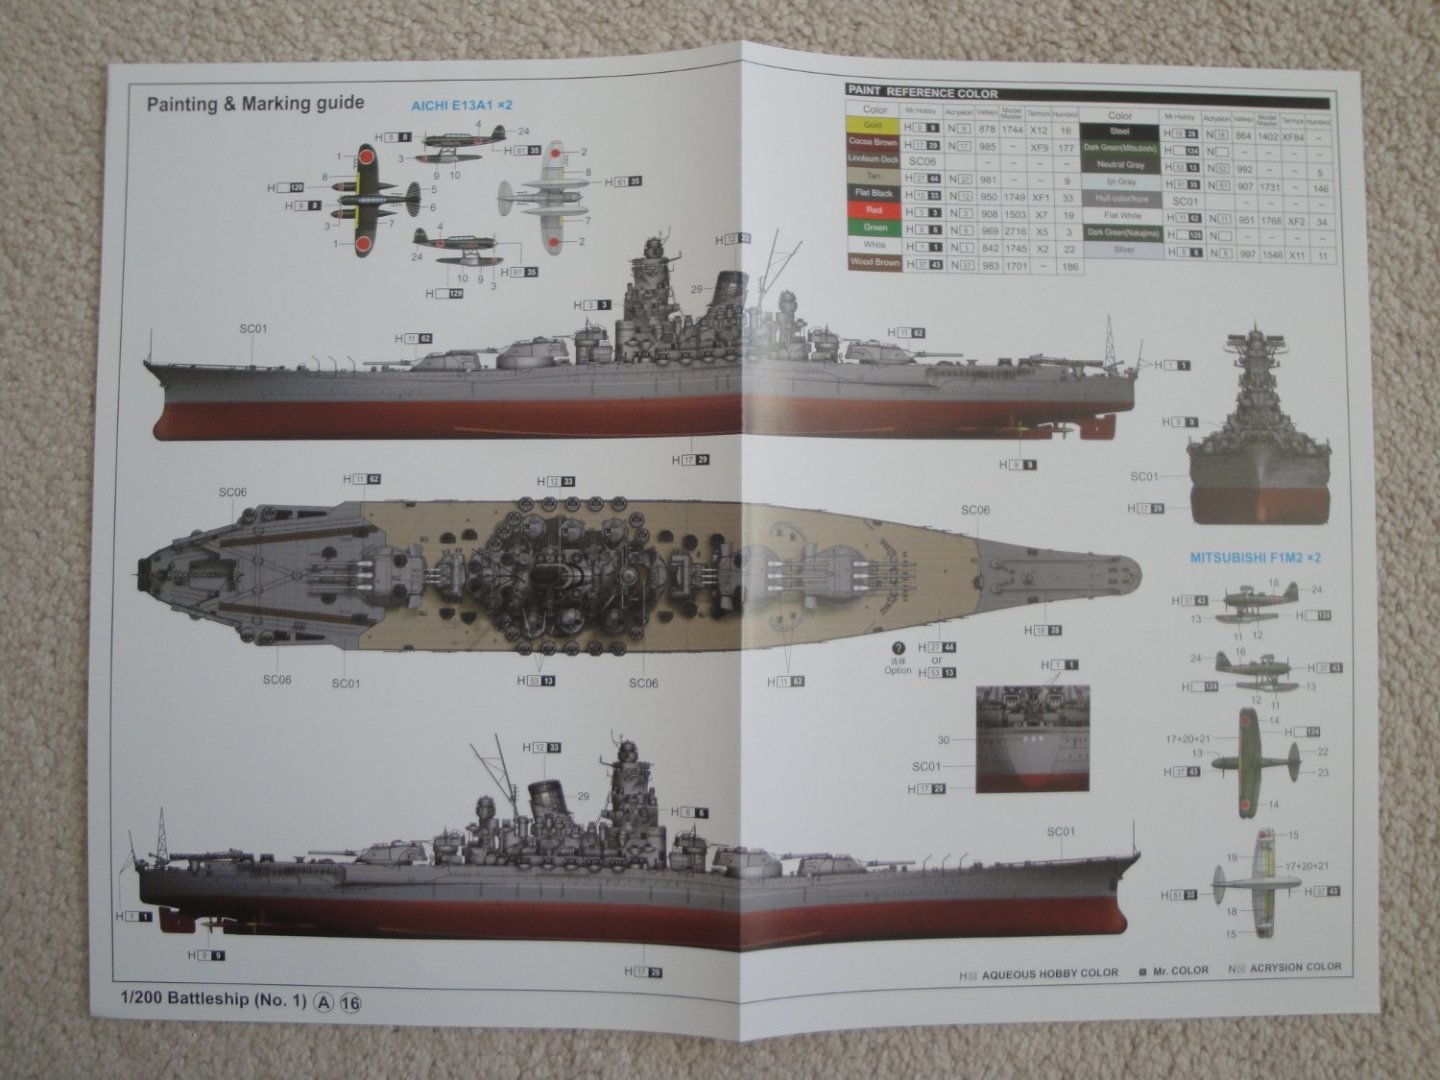
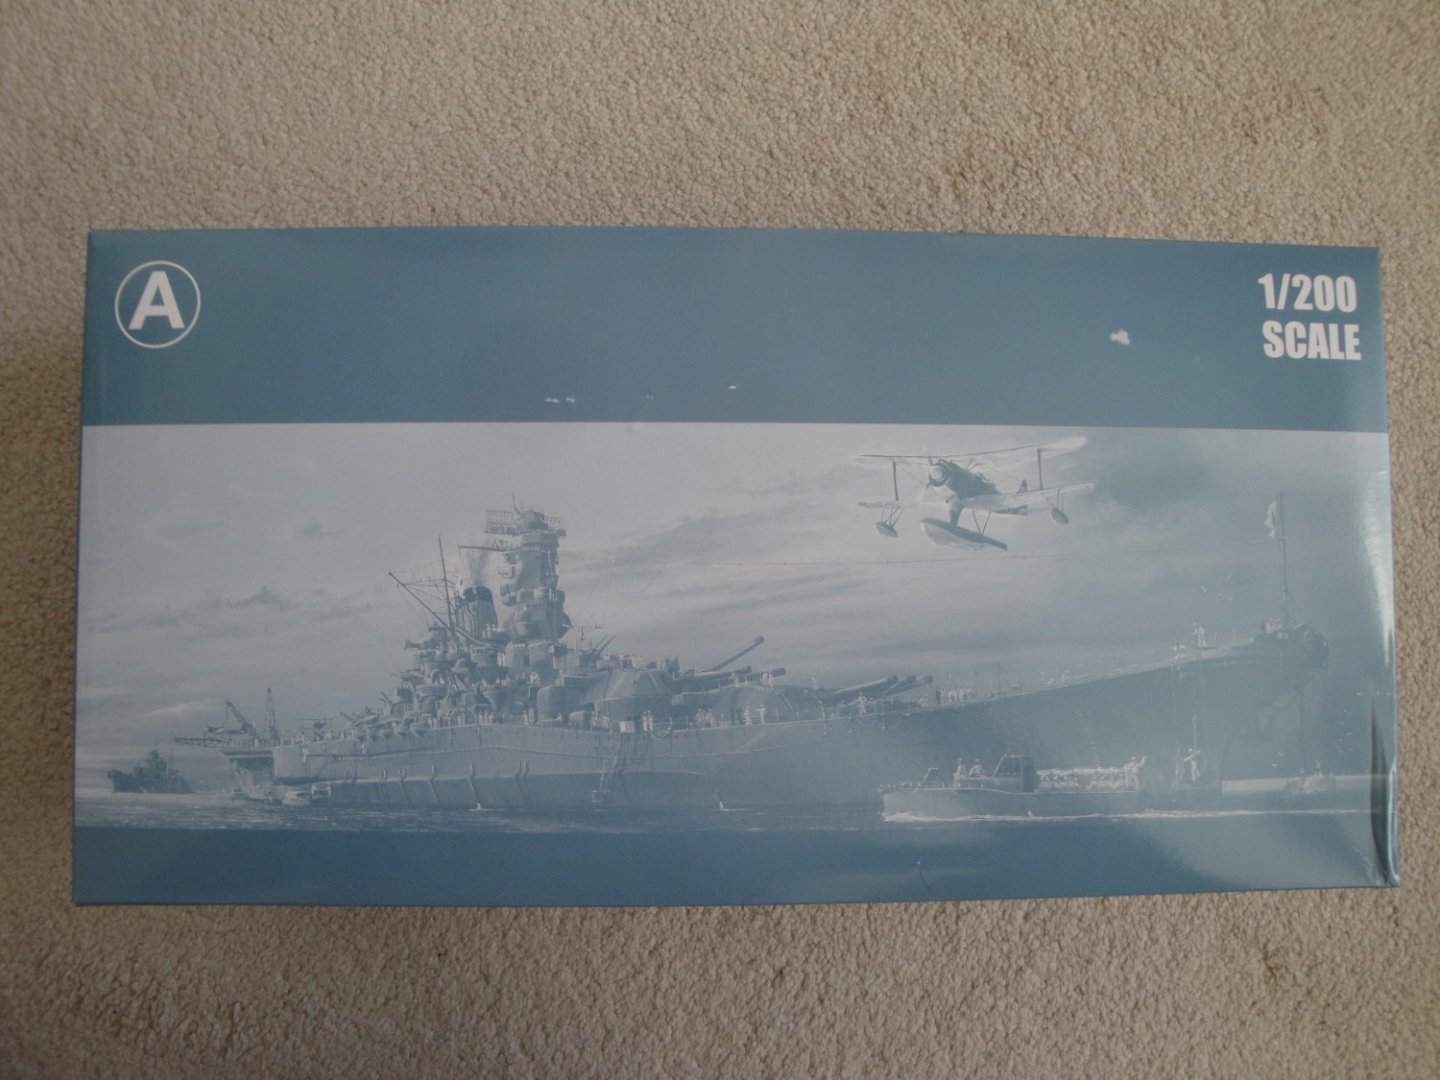
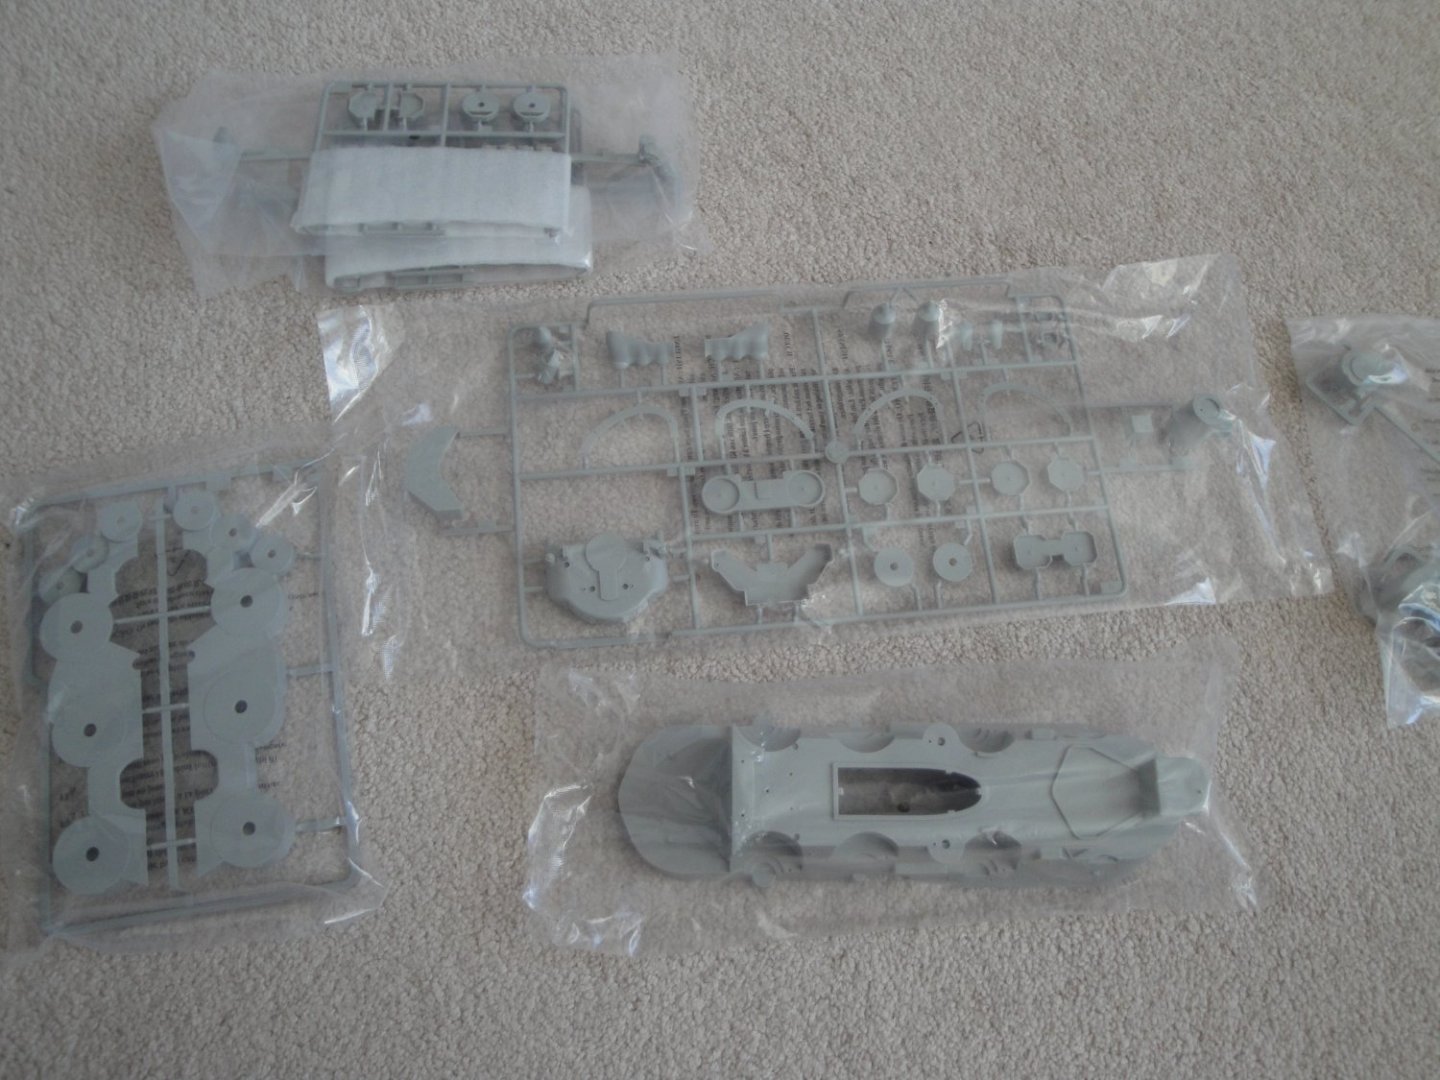
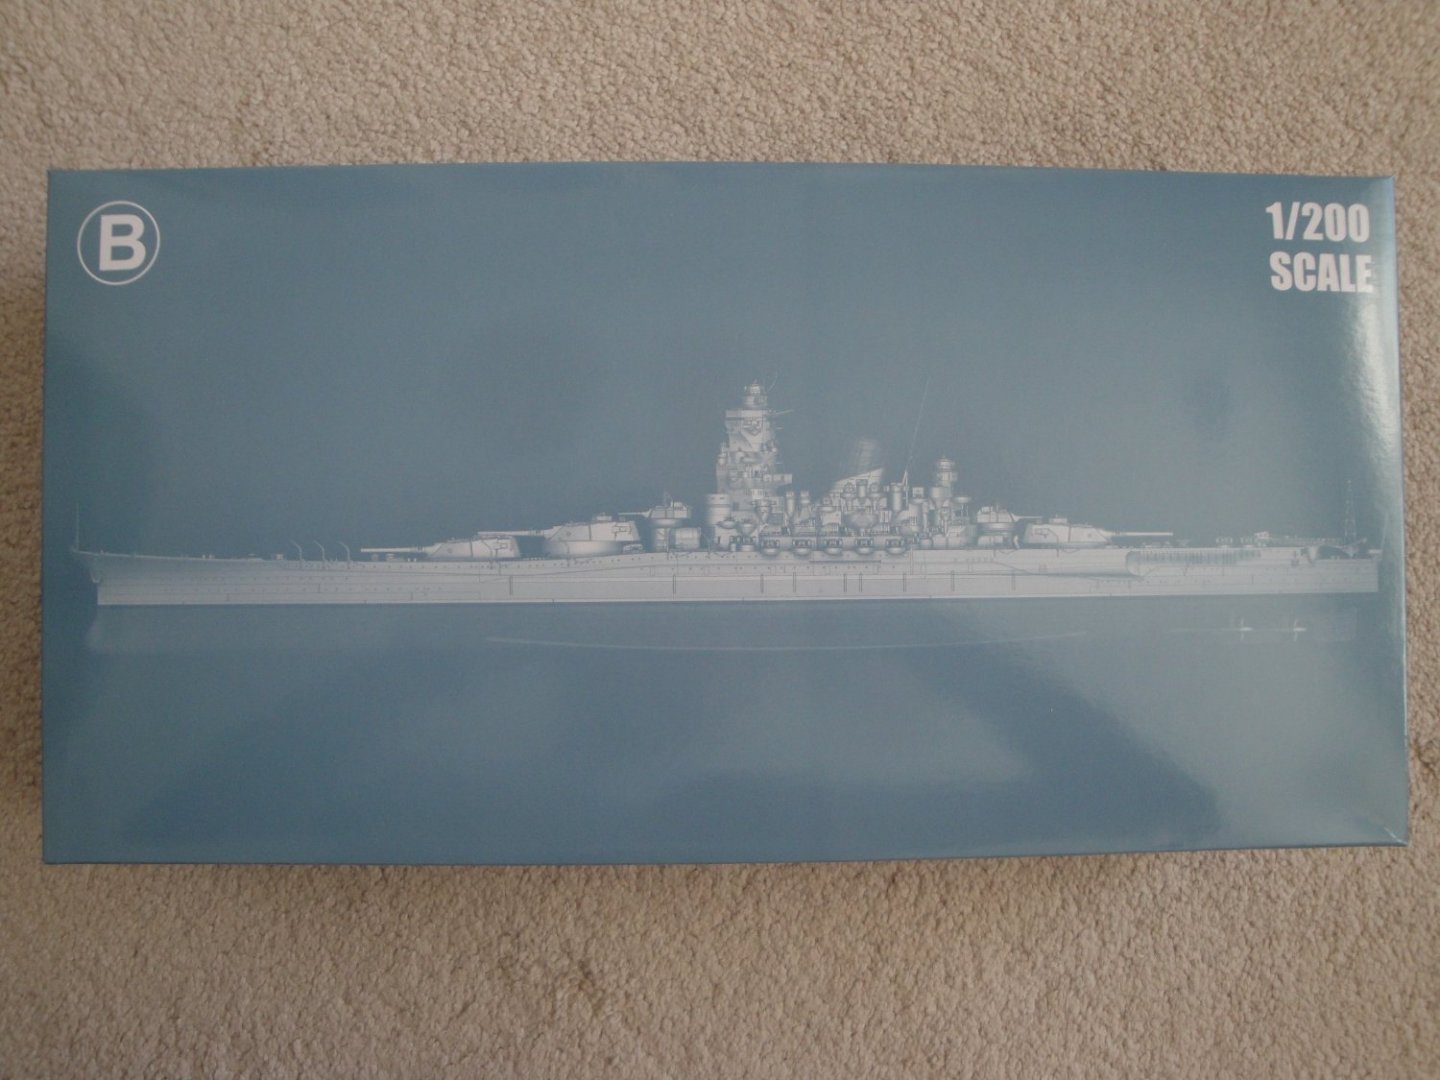
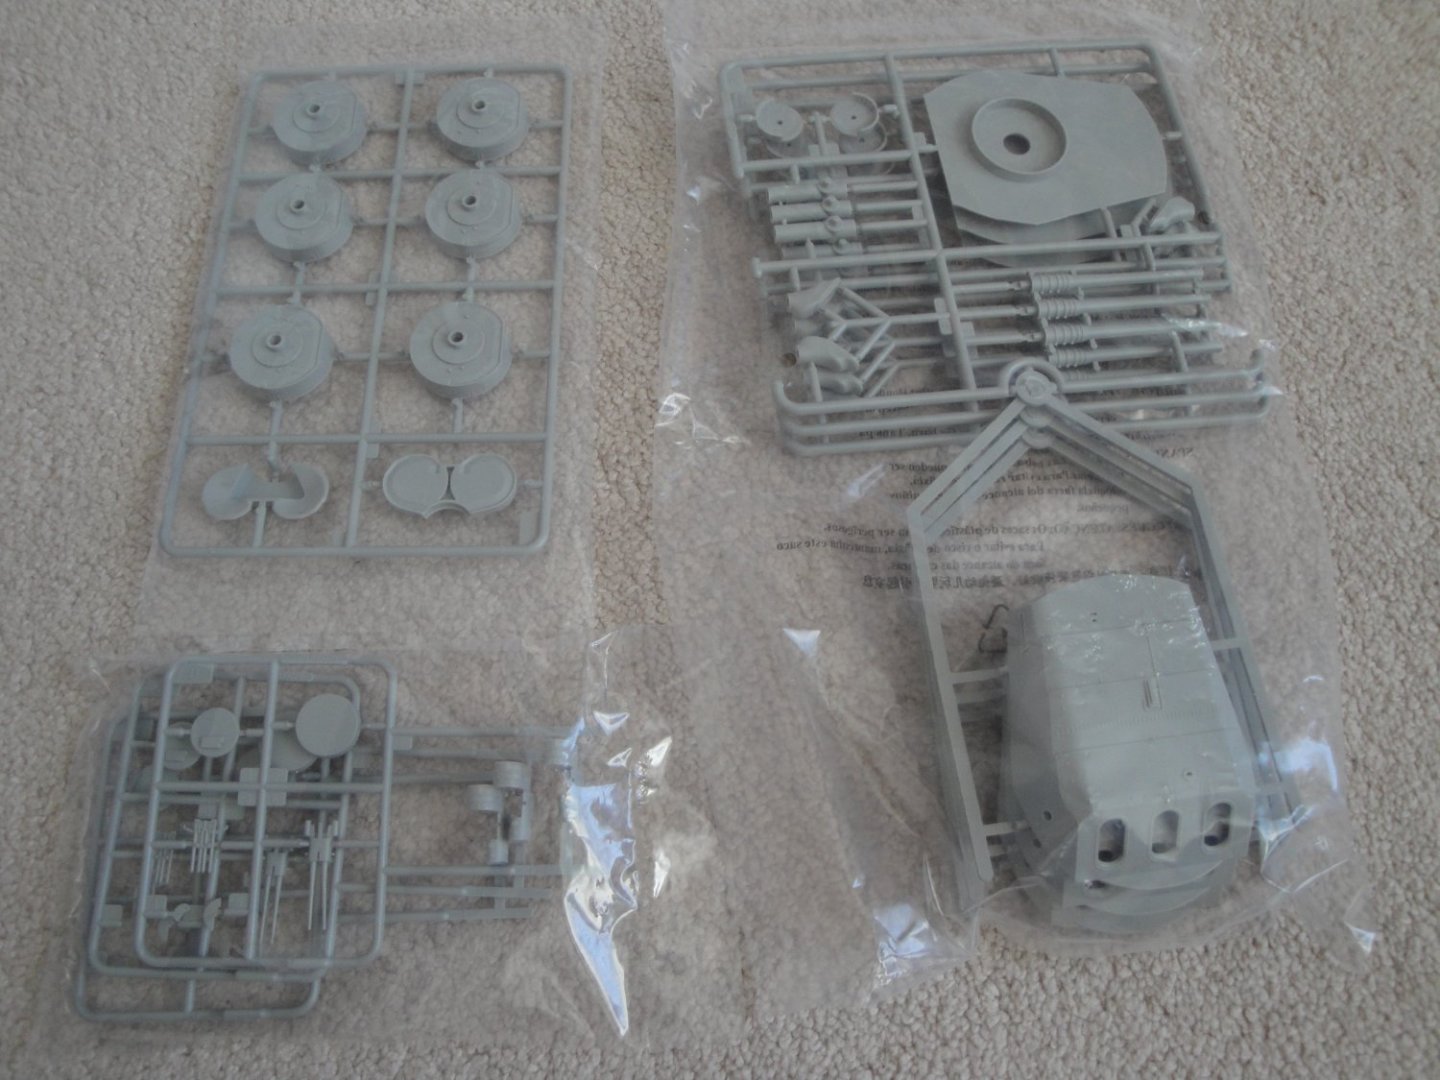
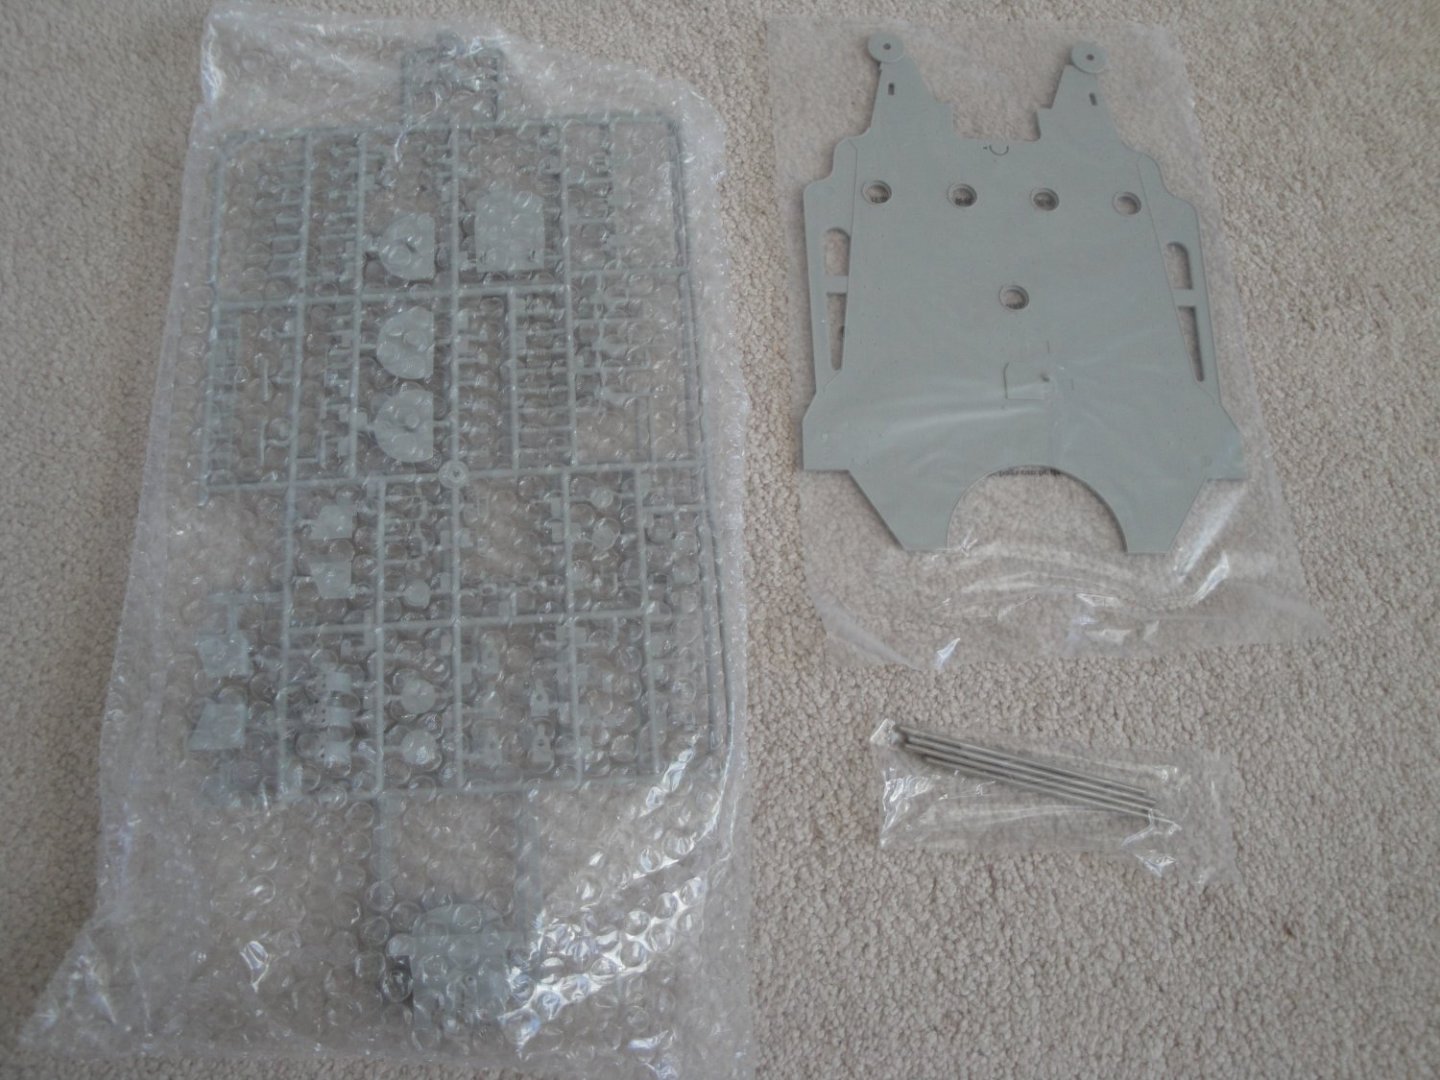
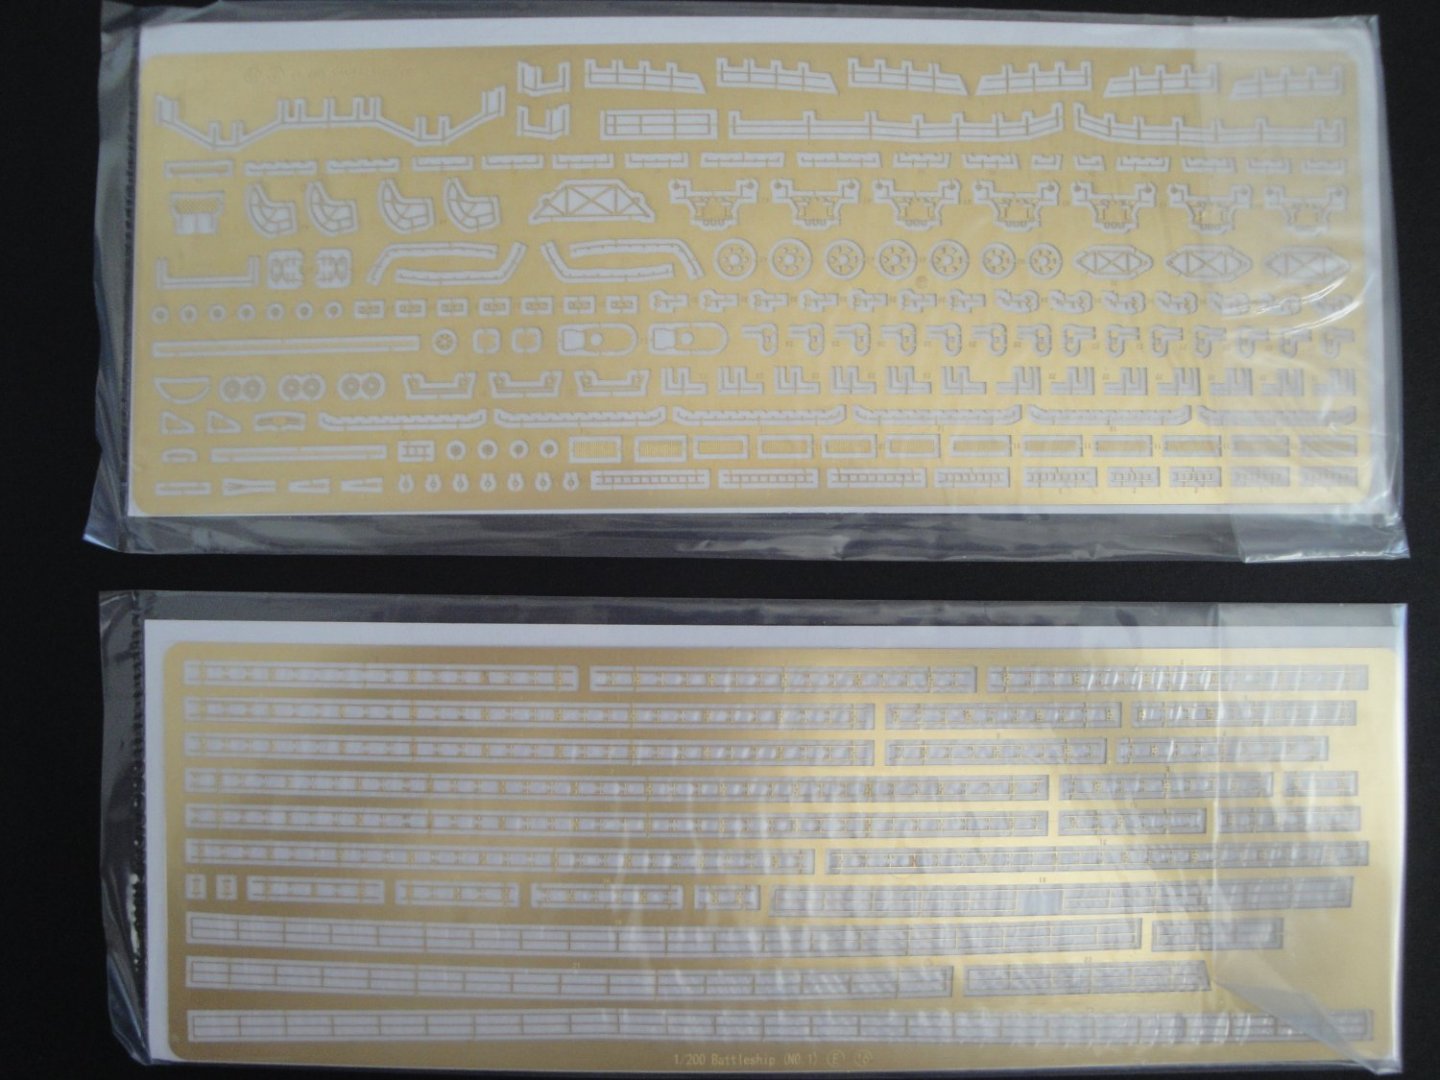
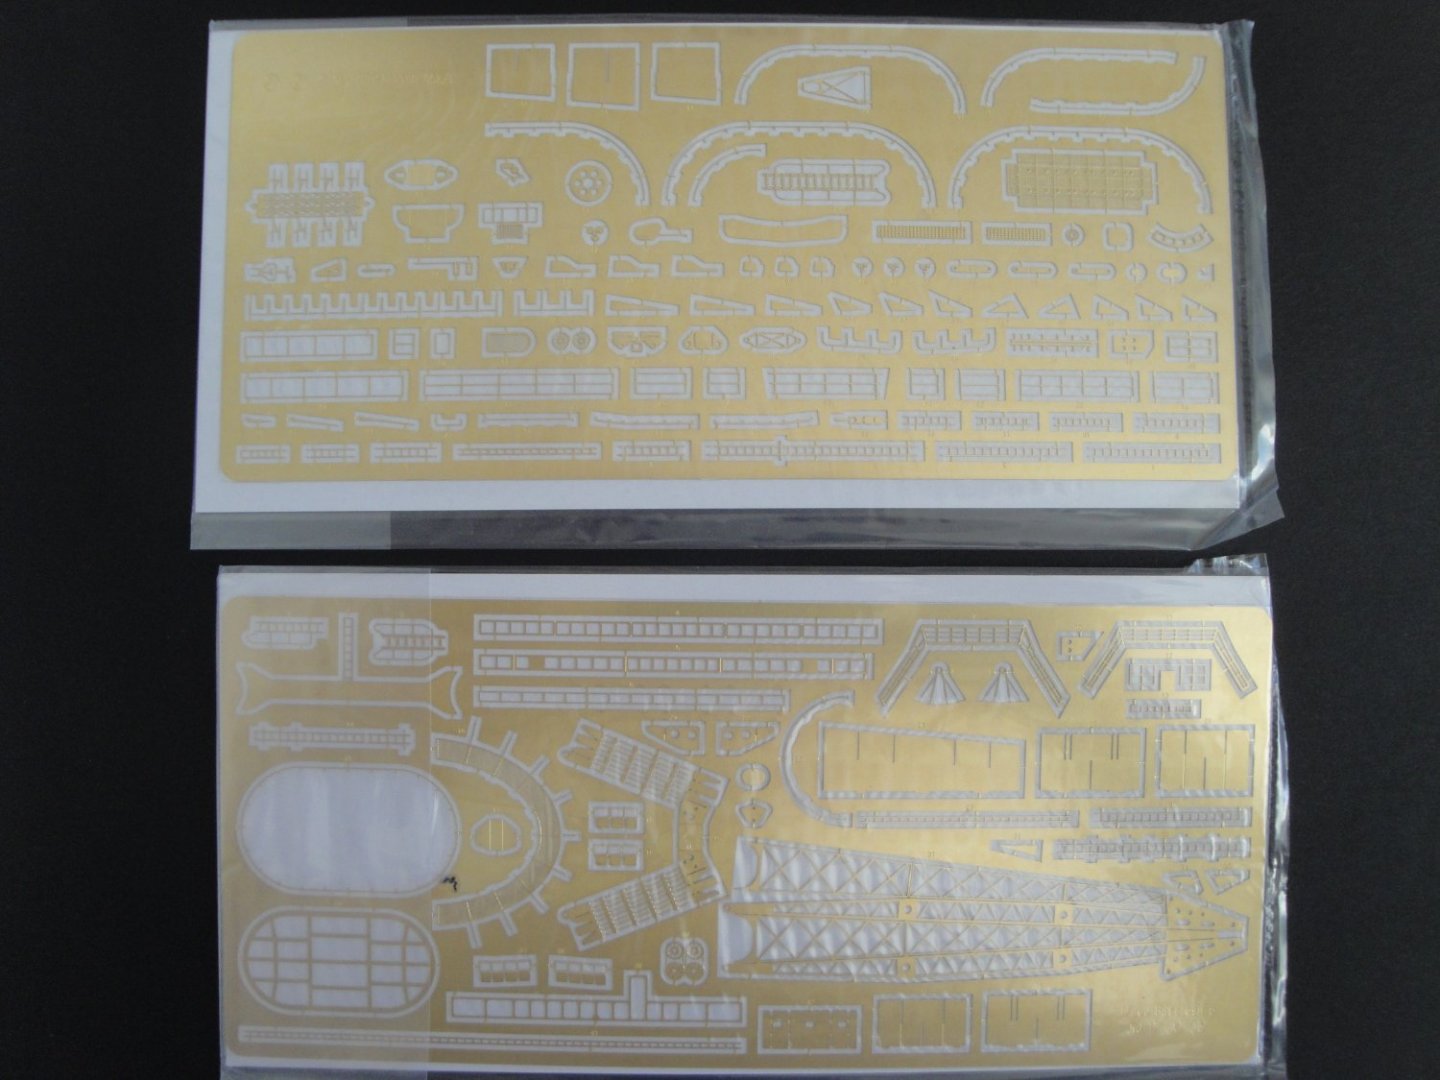
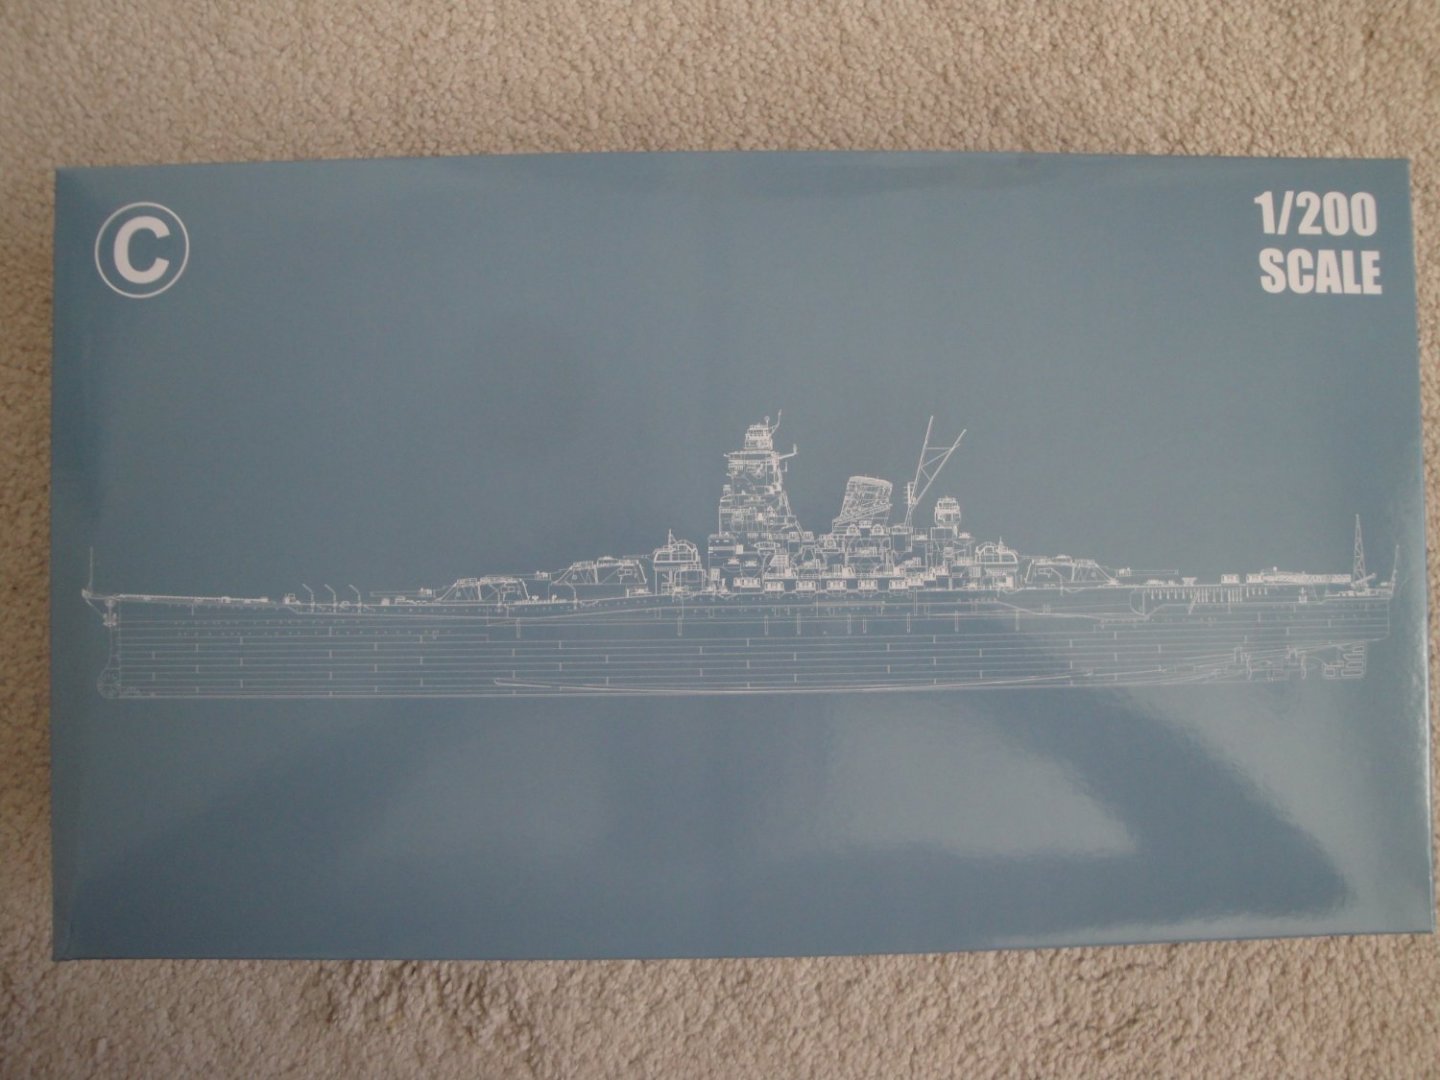
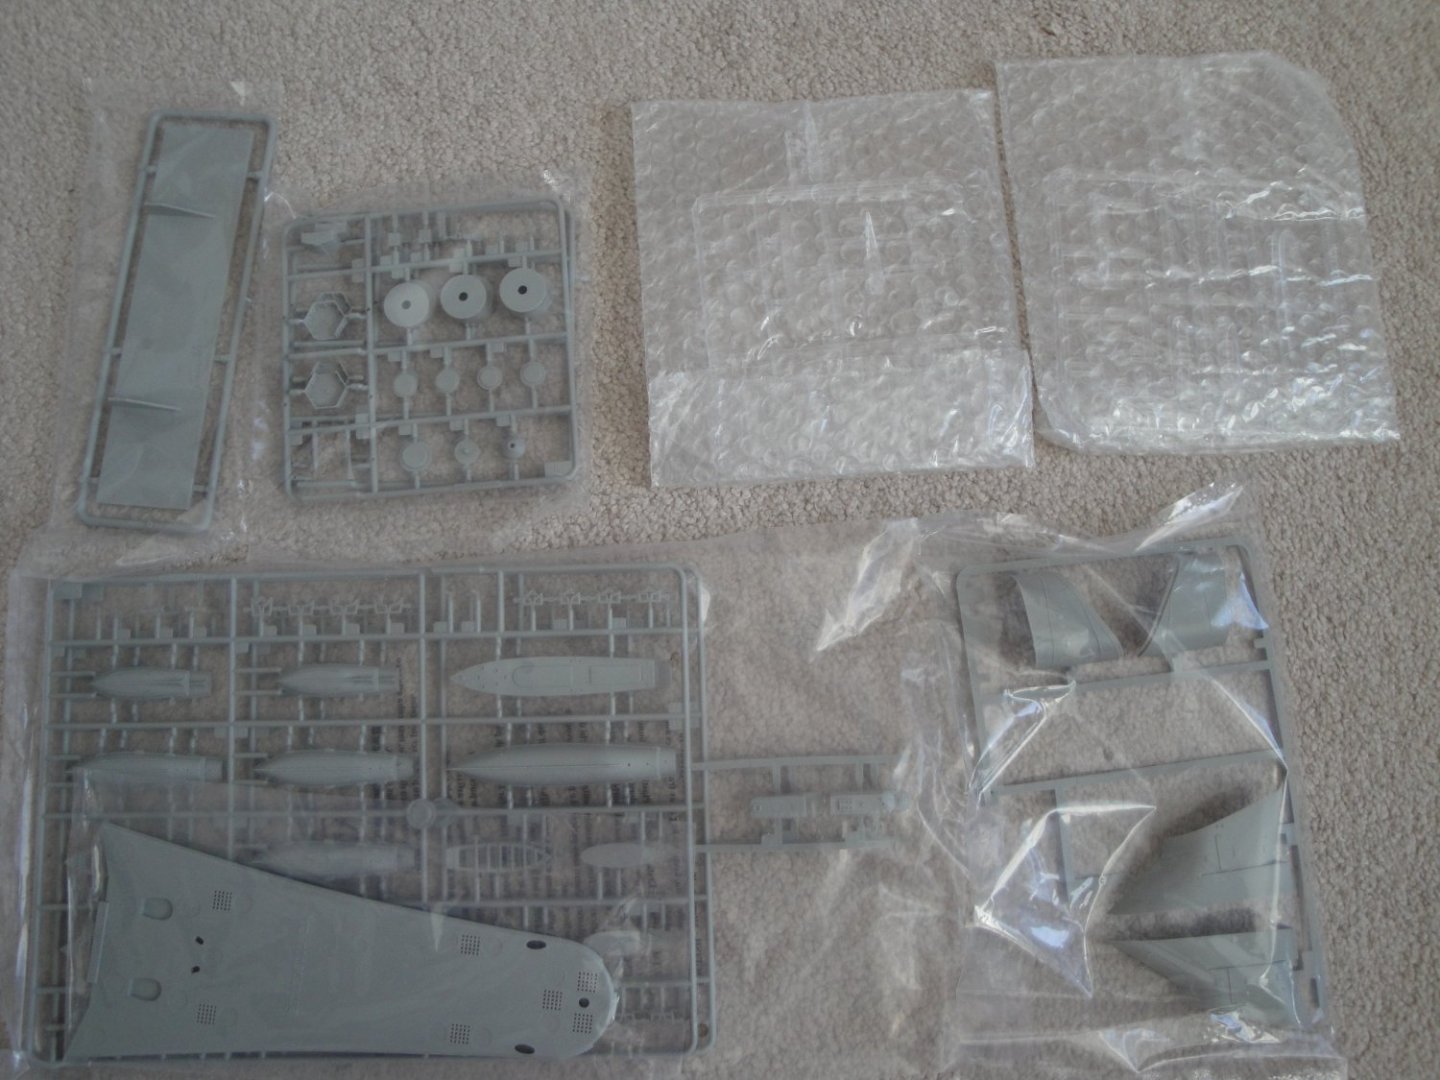
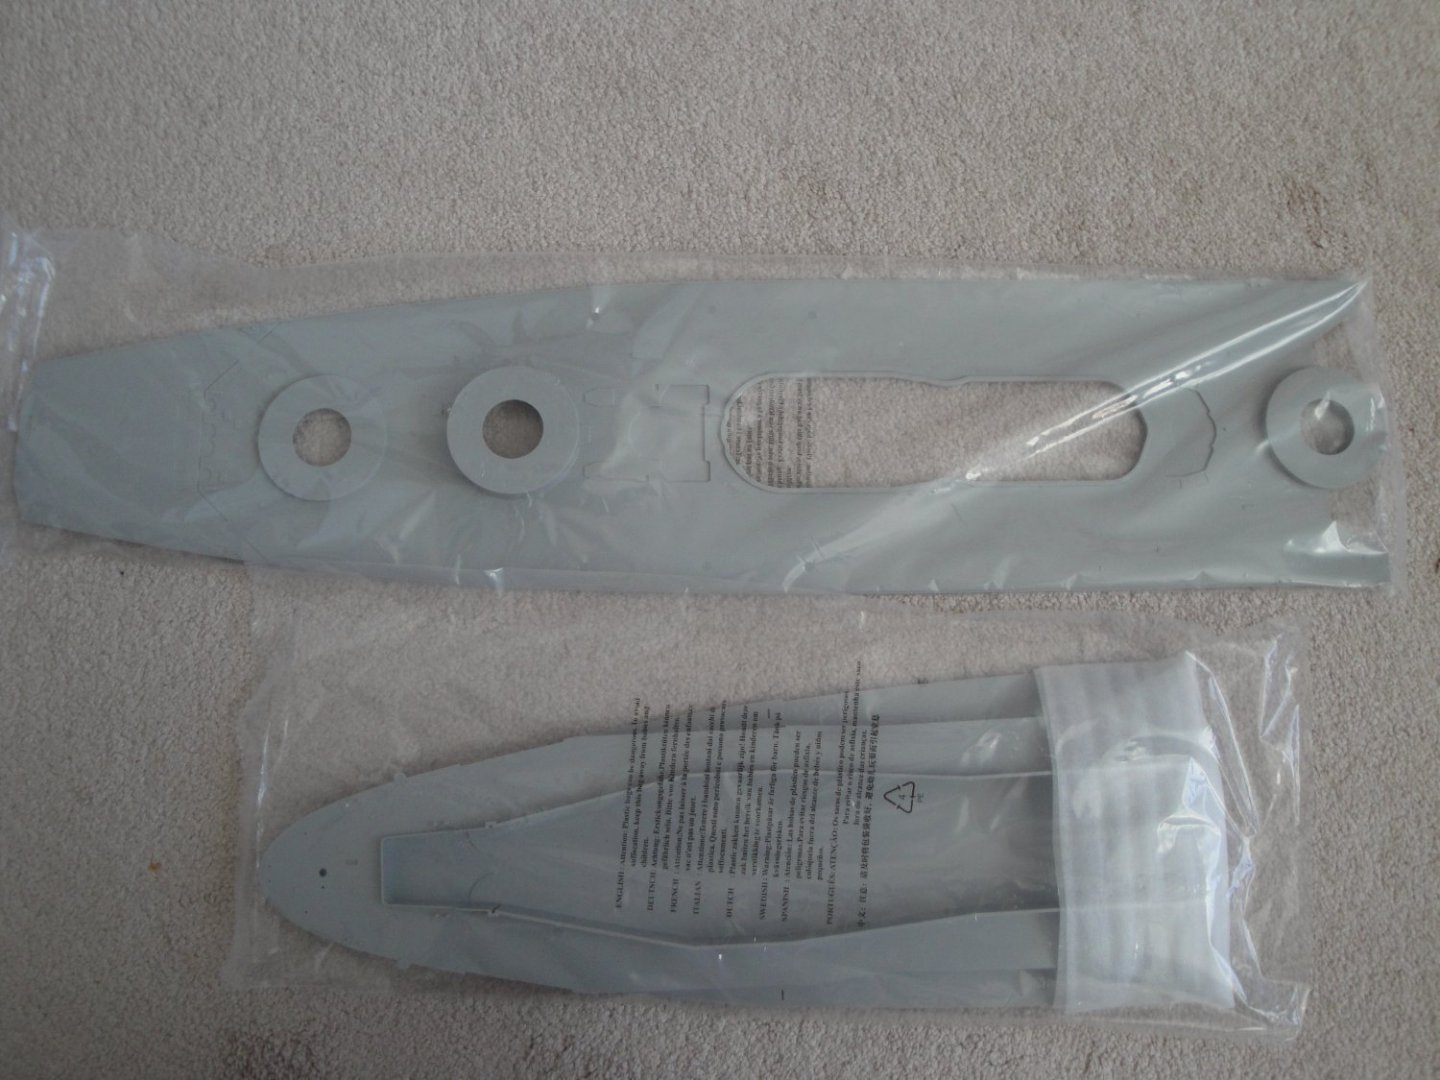
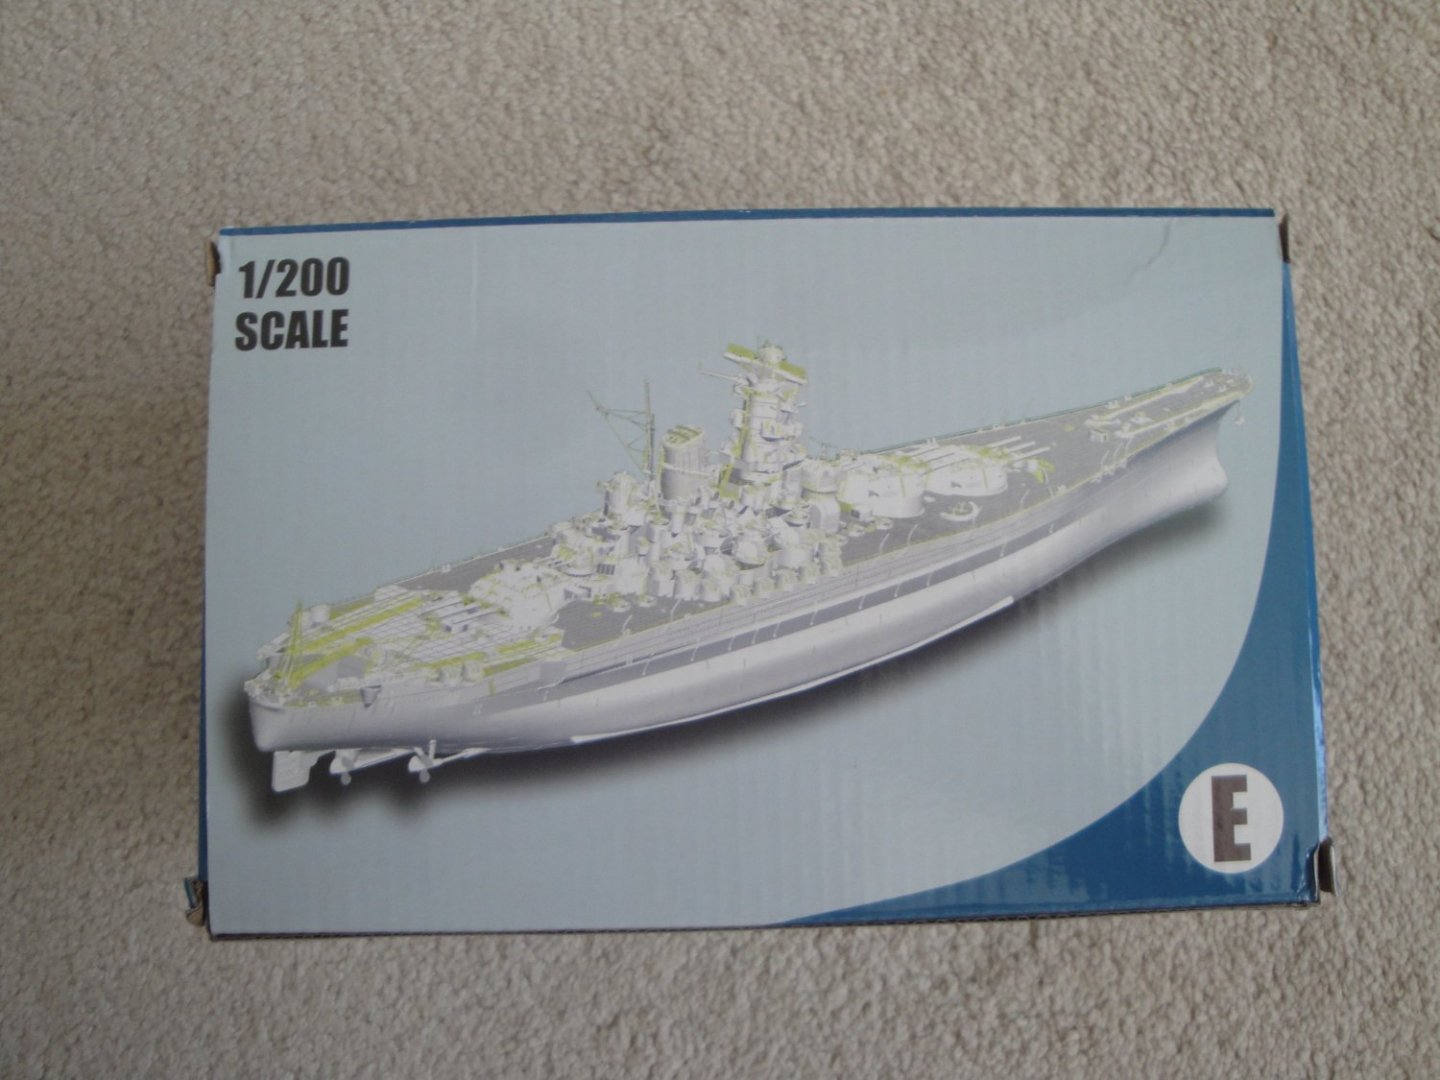
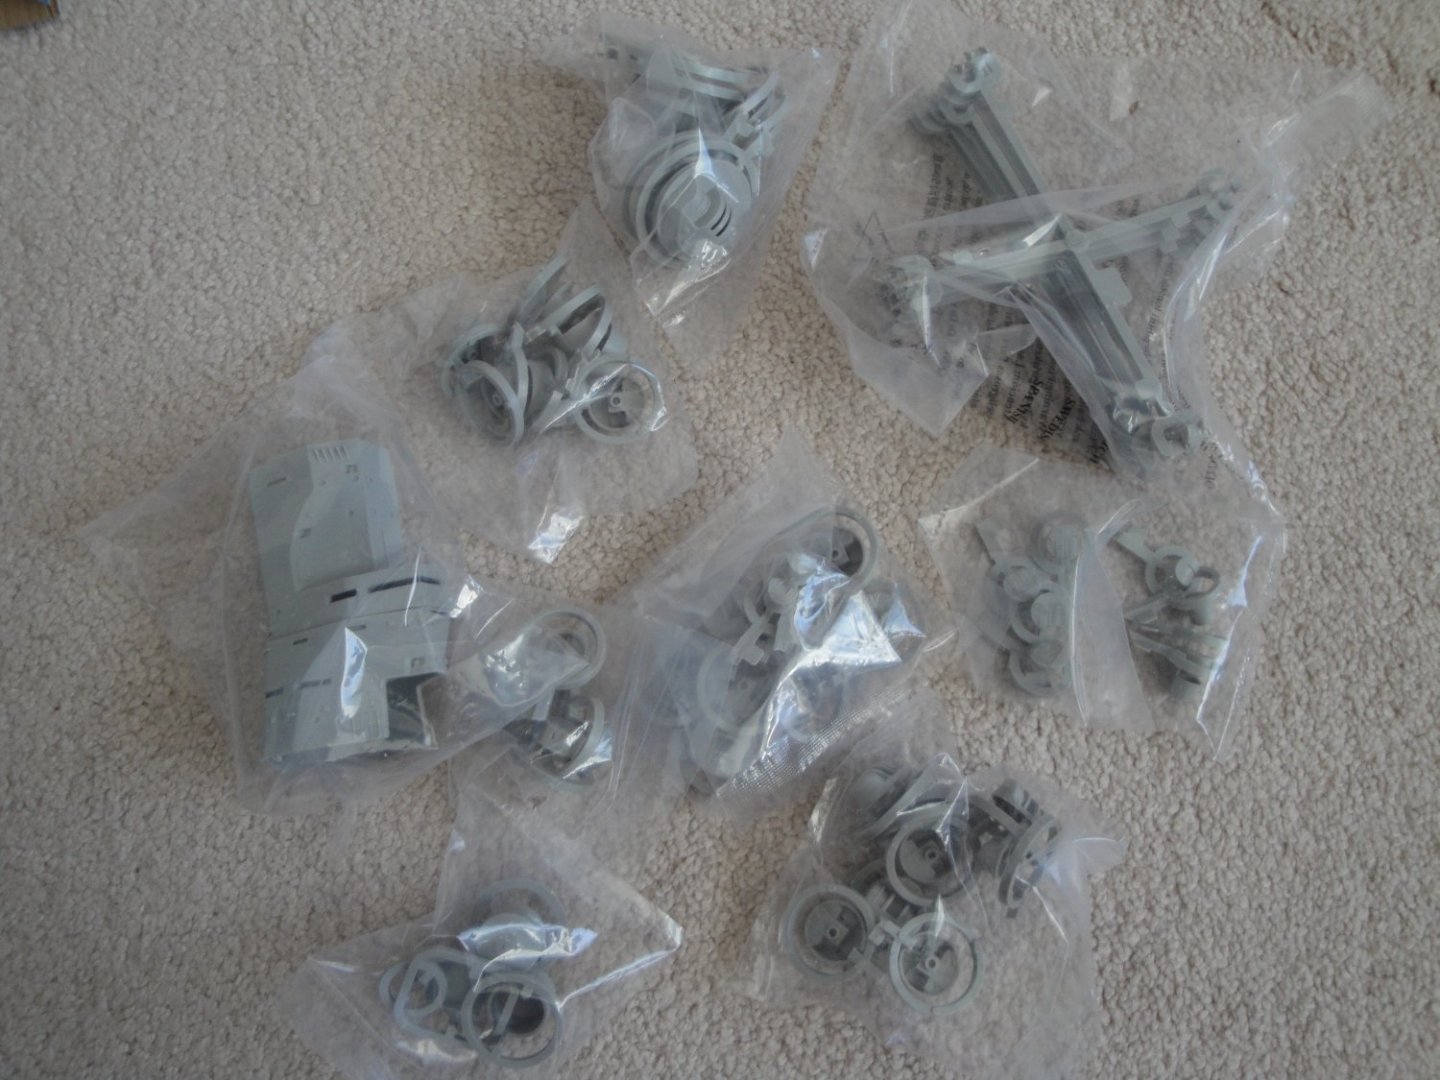
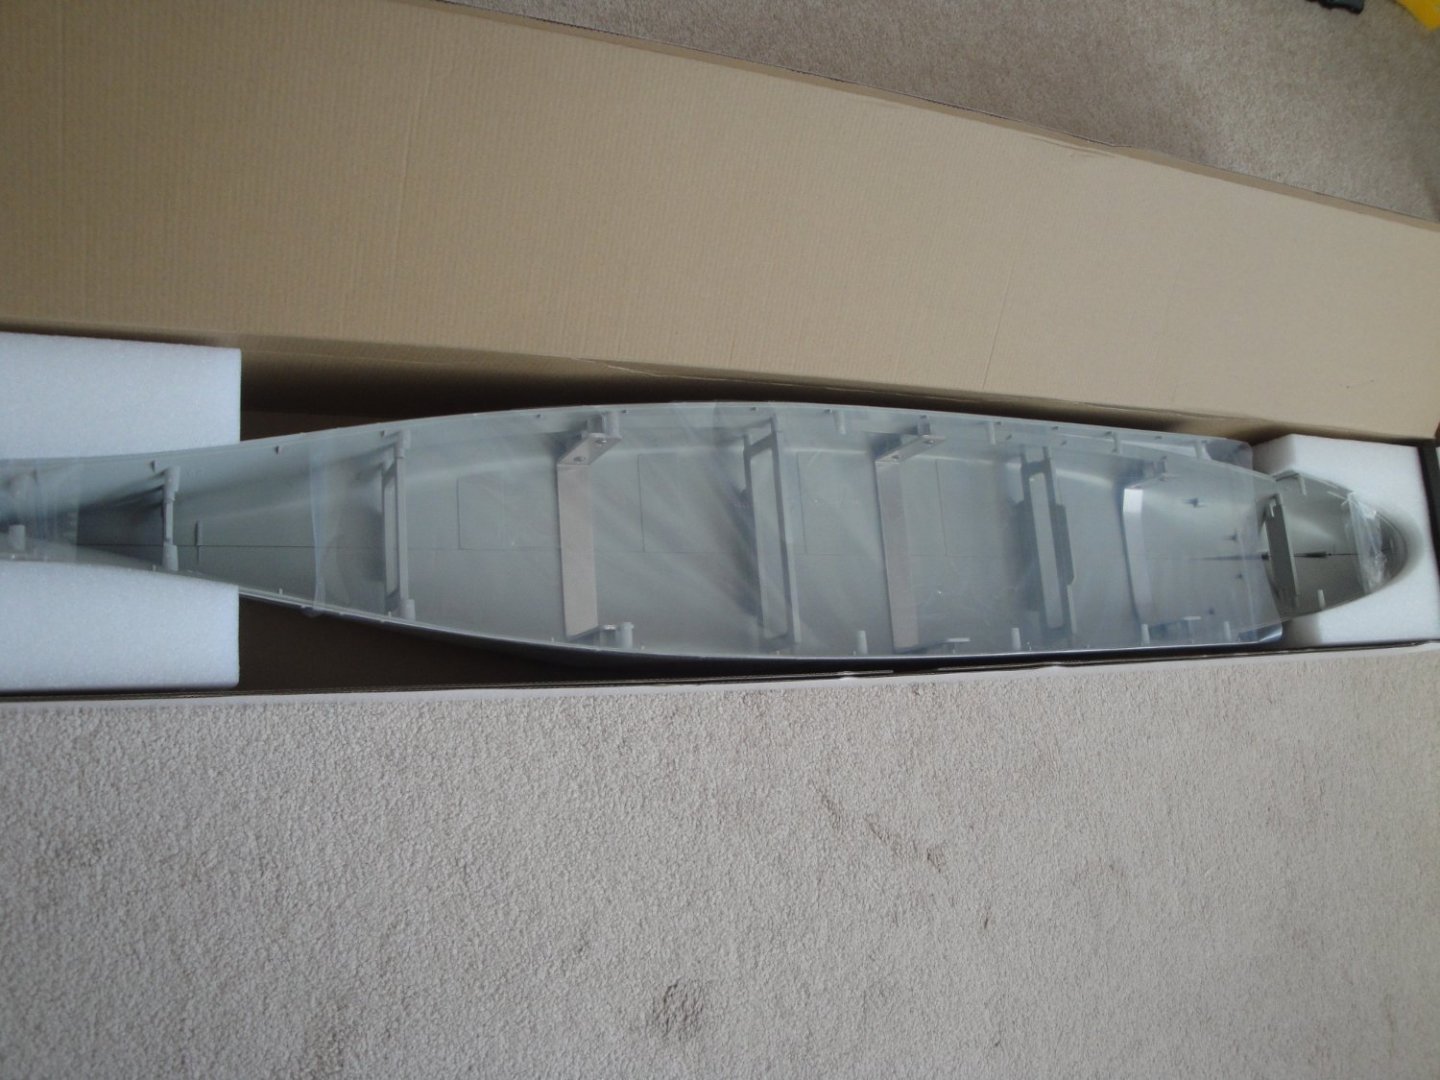
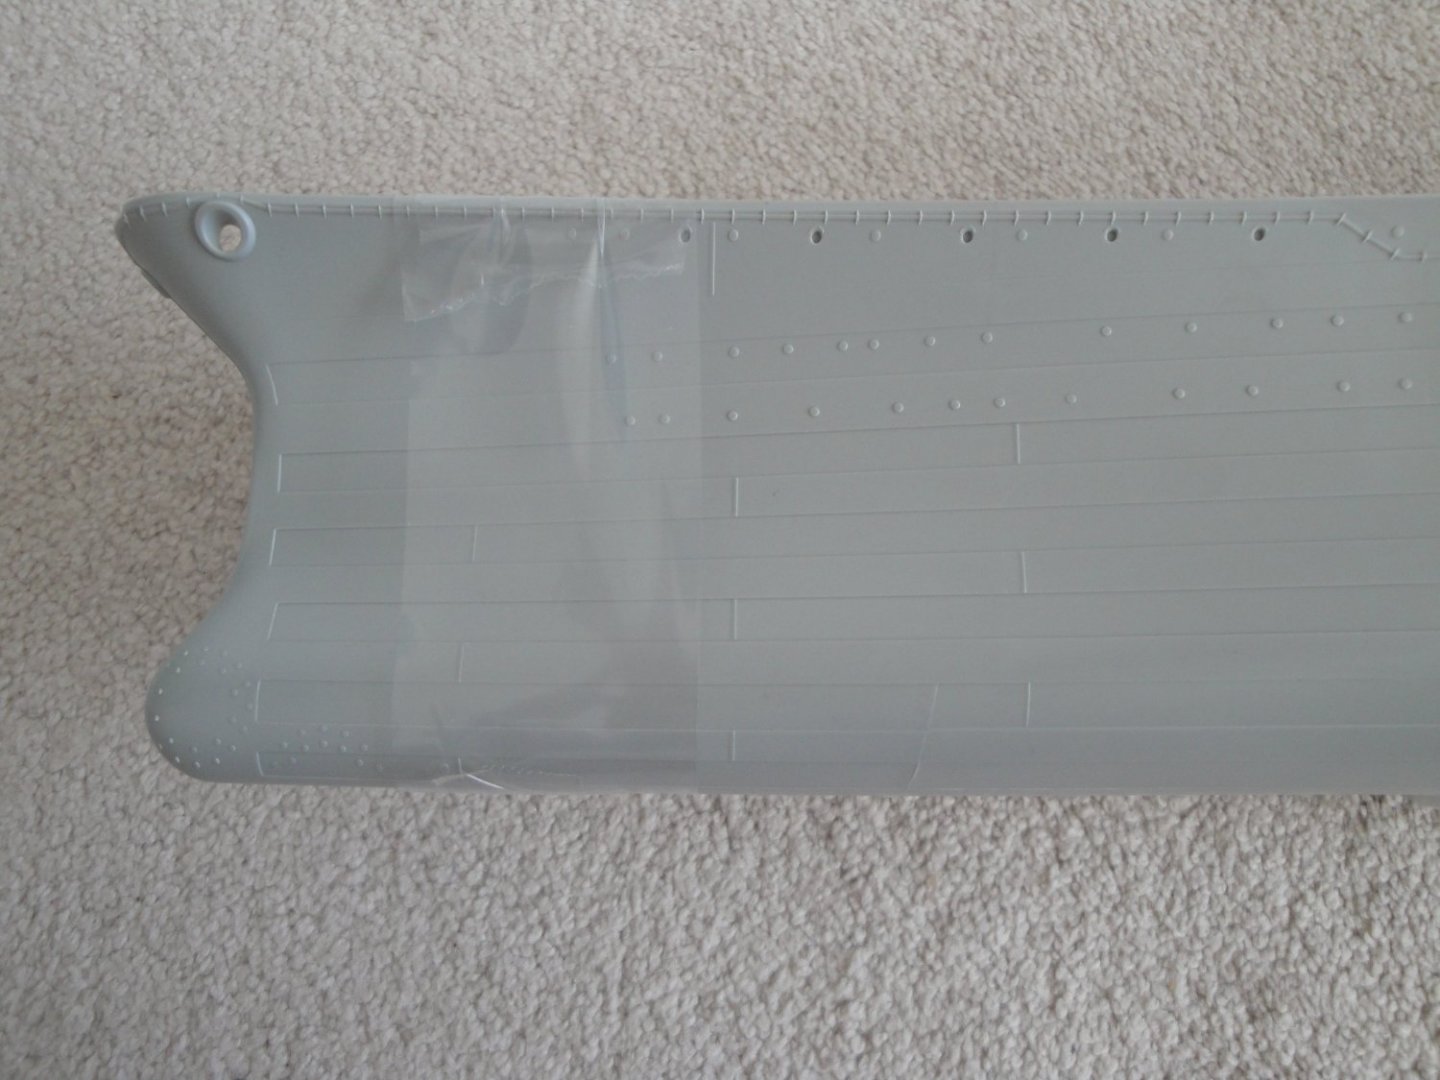
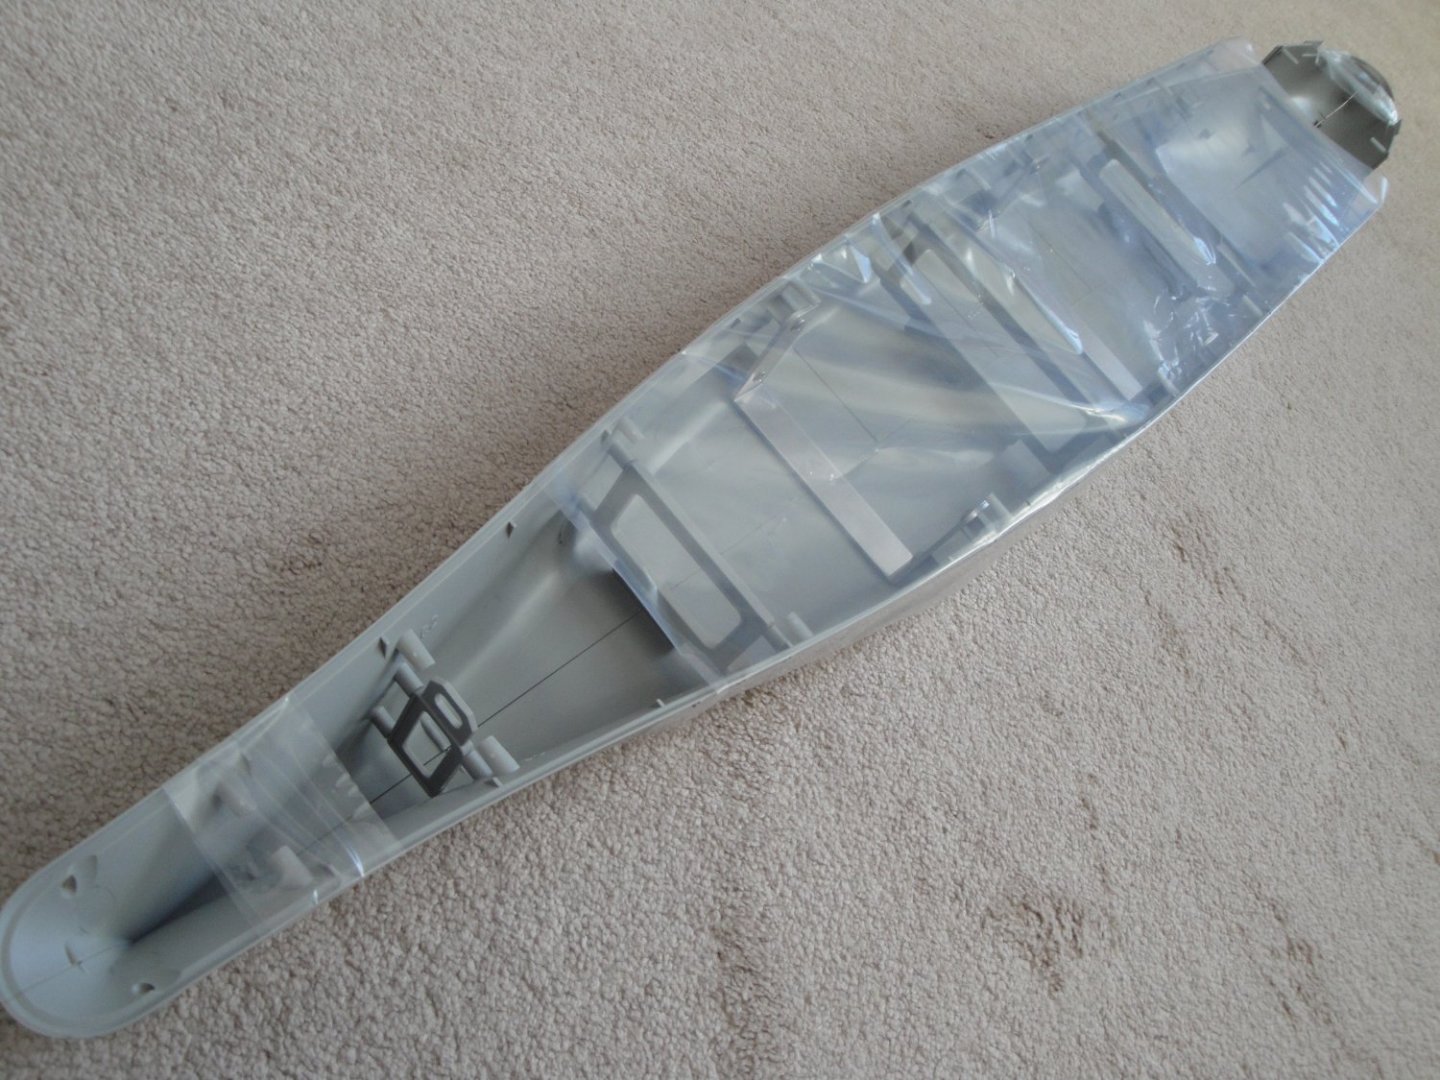
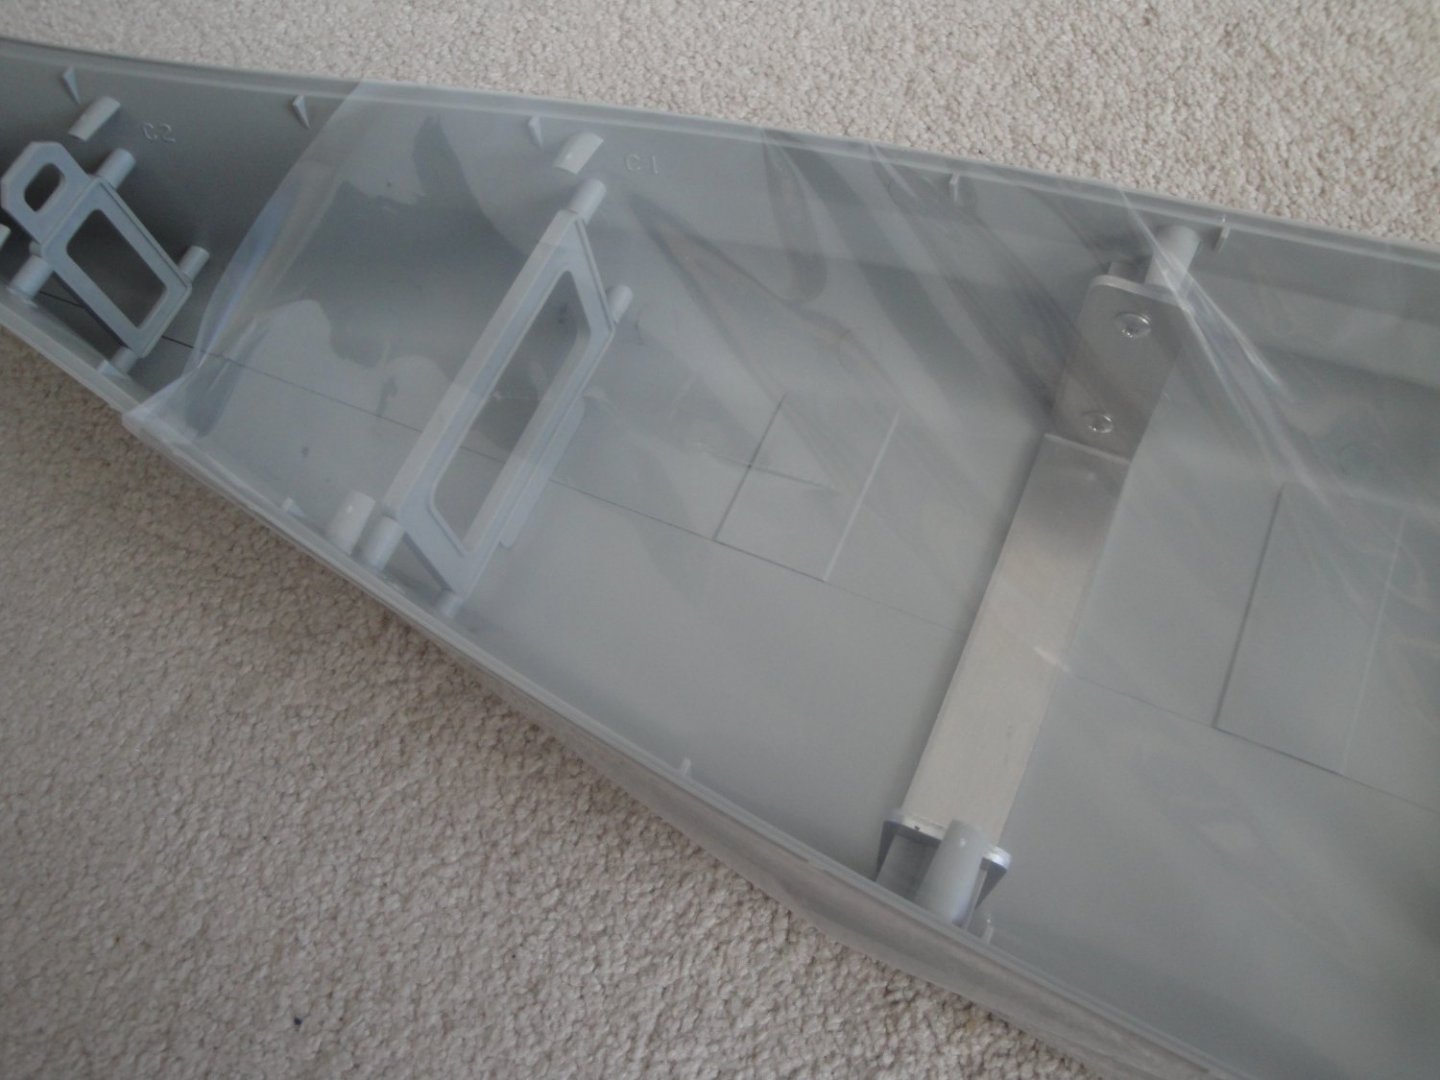
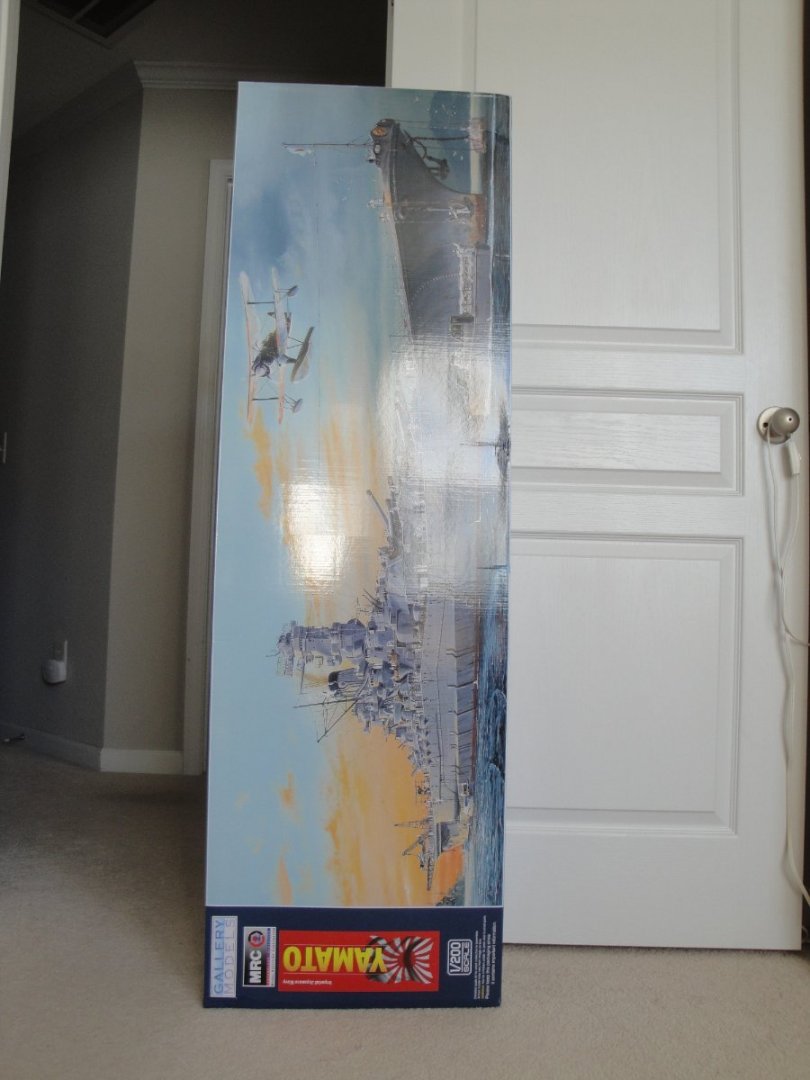
Folks, this is the kit that many many many modelers have been waiting for a very long time: a replacement for the old and so incorrect NICHIMO kit of the 1/200 YAMATO legendary Japanese battleship. When I started receiving offers to pre-order that model, I jumped on it. I had always considered getting the NICHIMO kit plus the additional FUJIMI kits to improve it but was turned off by the prices. Today, we have a much better substitute thanks to Trumpeter and MRC/Gallery Models which are distributing this massive model on the Western market. I pre-ordered my kit from Squadron for $579, free shipping, no taxes. The kit was made available on June 14th in the USA and was at my door on the 16th. It cannot be better. After a quick look at the kit, I would say that it is a very impressive work, only missing one thing: the wooden decks and perhaps metal guns. Those are already made available by Scaledeck apparently and I am sure the usual PONTOS and MK folks will jump on the bandwagon to add countless details to this 2800 parts kit. I am not an expert of YAMATO and thus, I will limit myself to presenting the kit. It comes in a very large and beautiful box (Trumpeter style), with gorgeous artwork: No mention of Trumpeter can be found on the box or any included literature, but for those who have built Trumpeter kit, it makes no doubt that it is their creation. Inside the kit, we have 7 separate boxes, packed to the hilt: The Assembly manual is 117 pages long: A nice color sheet is also included with decals for the ship and the planes: Let's jump into each one of the seven boxes: This one is fully packed and contains most of the superstructures: Box B contains the guns and all the PE parts: I am not showing all spruces as there are way too many to display. Box D contains the two decks pieces: Box E is dedicated to anti-aerial defense: Finally, the last and biggest box is the massive 5 foot long hull, cast in two parts. The two halves are secured to each other with aluminum parts and plastic parts and provide a very strong and precise alignment. This is it for now. I have placed everything back in the box and will perhaps start a Build log one day. I did not want to miss on that kit, which I am sure will quickly become rare and coveted. I hope you have enjoyed that quick introduction. There are a few beautiful implementations of this ship on the forum that can be used as a guide for improving on the kit. I know that I will be using RGL's build log of his gorgeous 1/350th Yamato for my reference, when the time comes to build that monster. Yves


- 104 replies
-
- 21
-
-

-

-
- MRC/Gallery
- Yamato
- (and 1 more)
-
They will be fine. They may be some delays in their daily operations but they will survive fine. I have to say that they offer today some of the most interesting and unusual models and I wish them all the best. Yves
- 49 replies
-
- 11
-
-
-
This type of hull is probably the most difficult to paint. You did a very good job overall, and once you fix the couple of mistakes, it will look really good. Yves
-
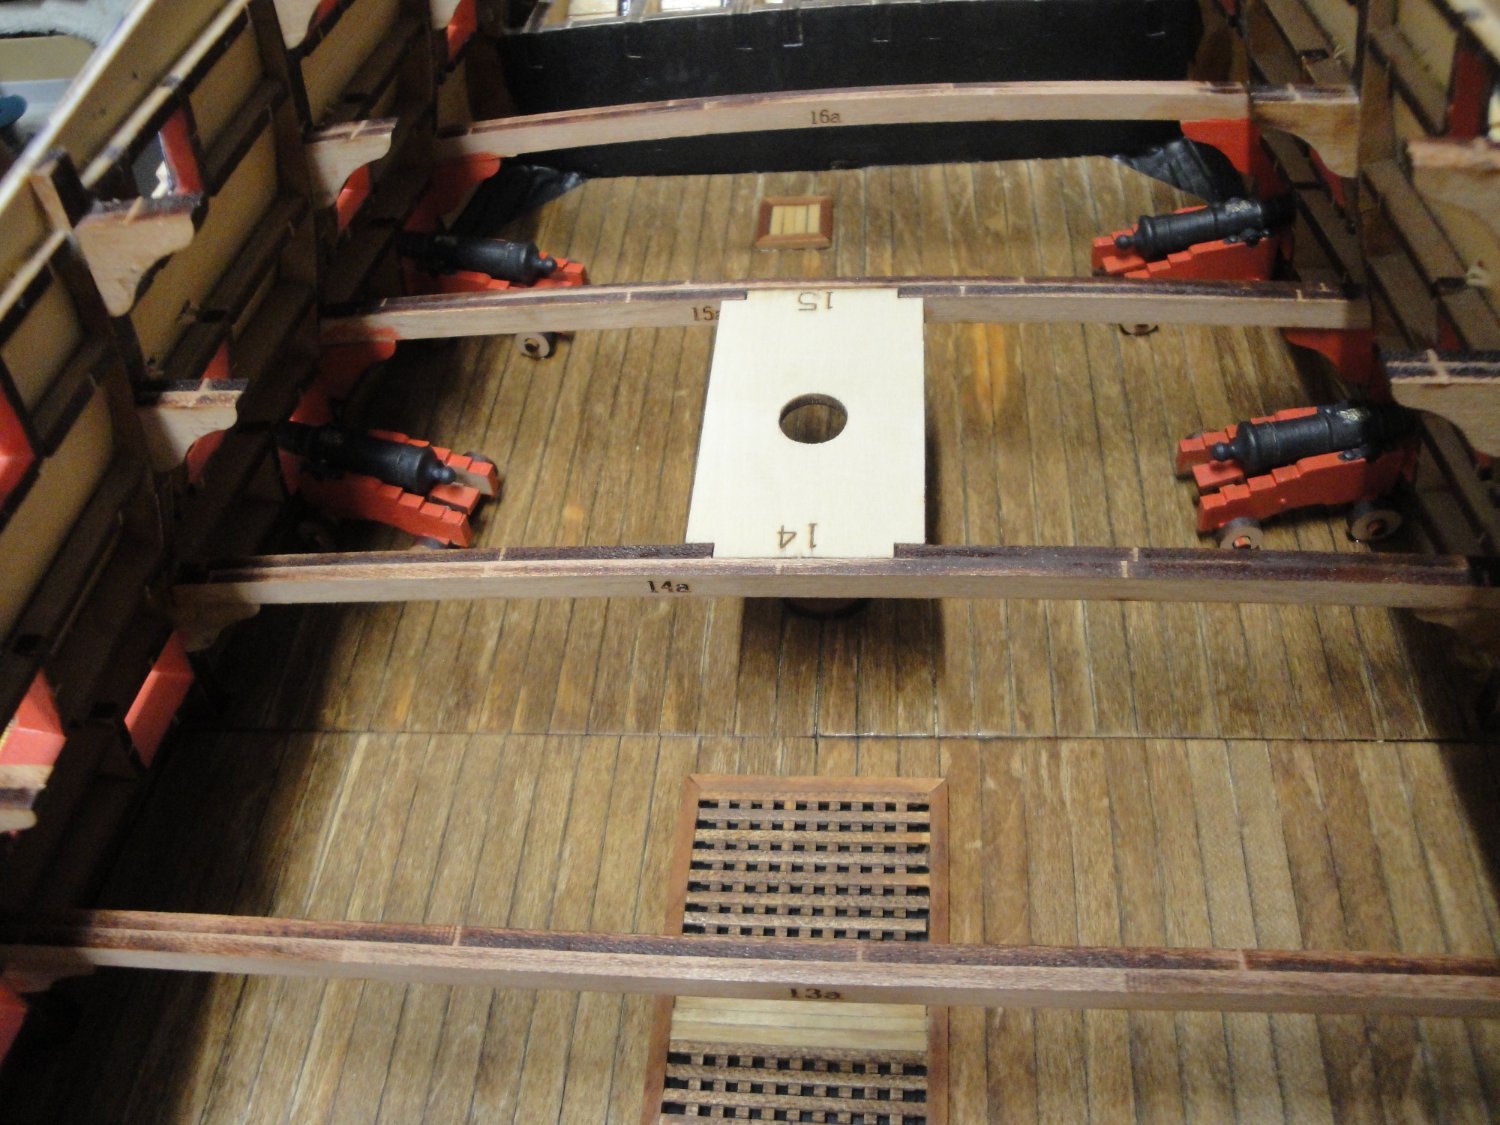
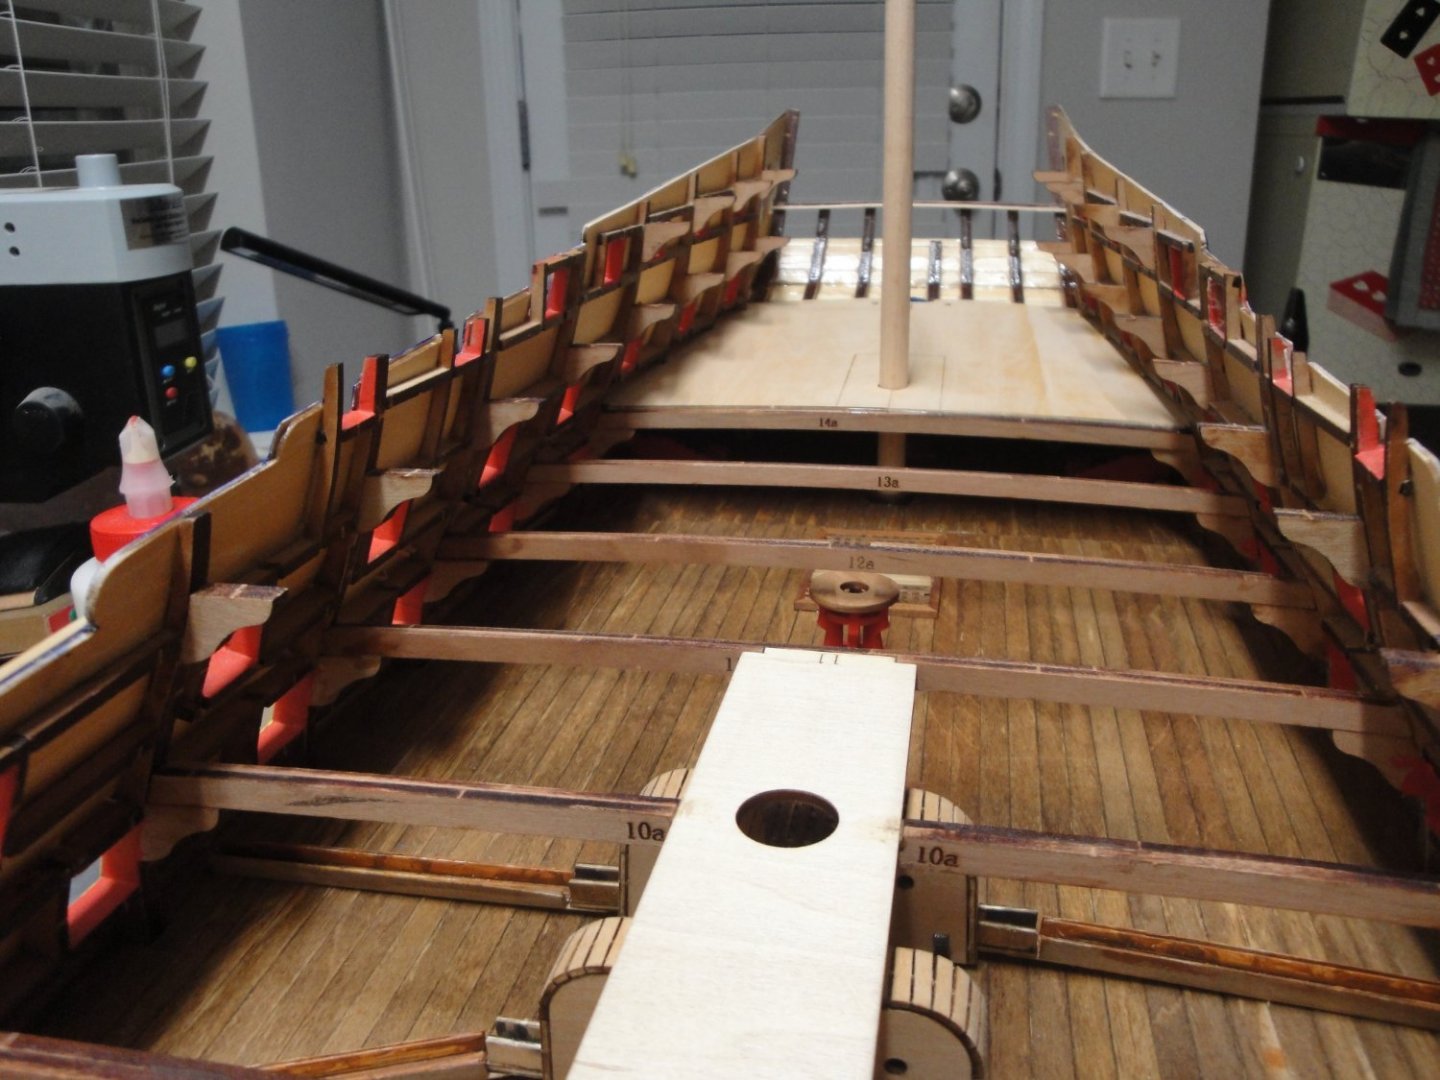
The delicate task of installing the four guns has been done: They are attached to the gun deck, by using a large drop of CA glue under each wheel.I am hoping that will be enough to hold these heavy pounders. With these four guns in place, I can now start putting together the Main Deck Section "E" and continue building on top with the Quarter deck. This should allow me to have a better picture on how to install the galleries and all the ornaments on the stern. A few goofy pictures: I hope you are enjoying that complete departure from the CAF instructions. Yves


- 507 replies
-
- 15
-
-
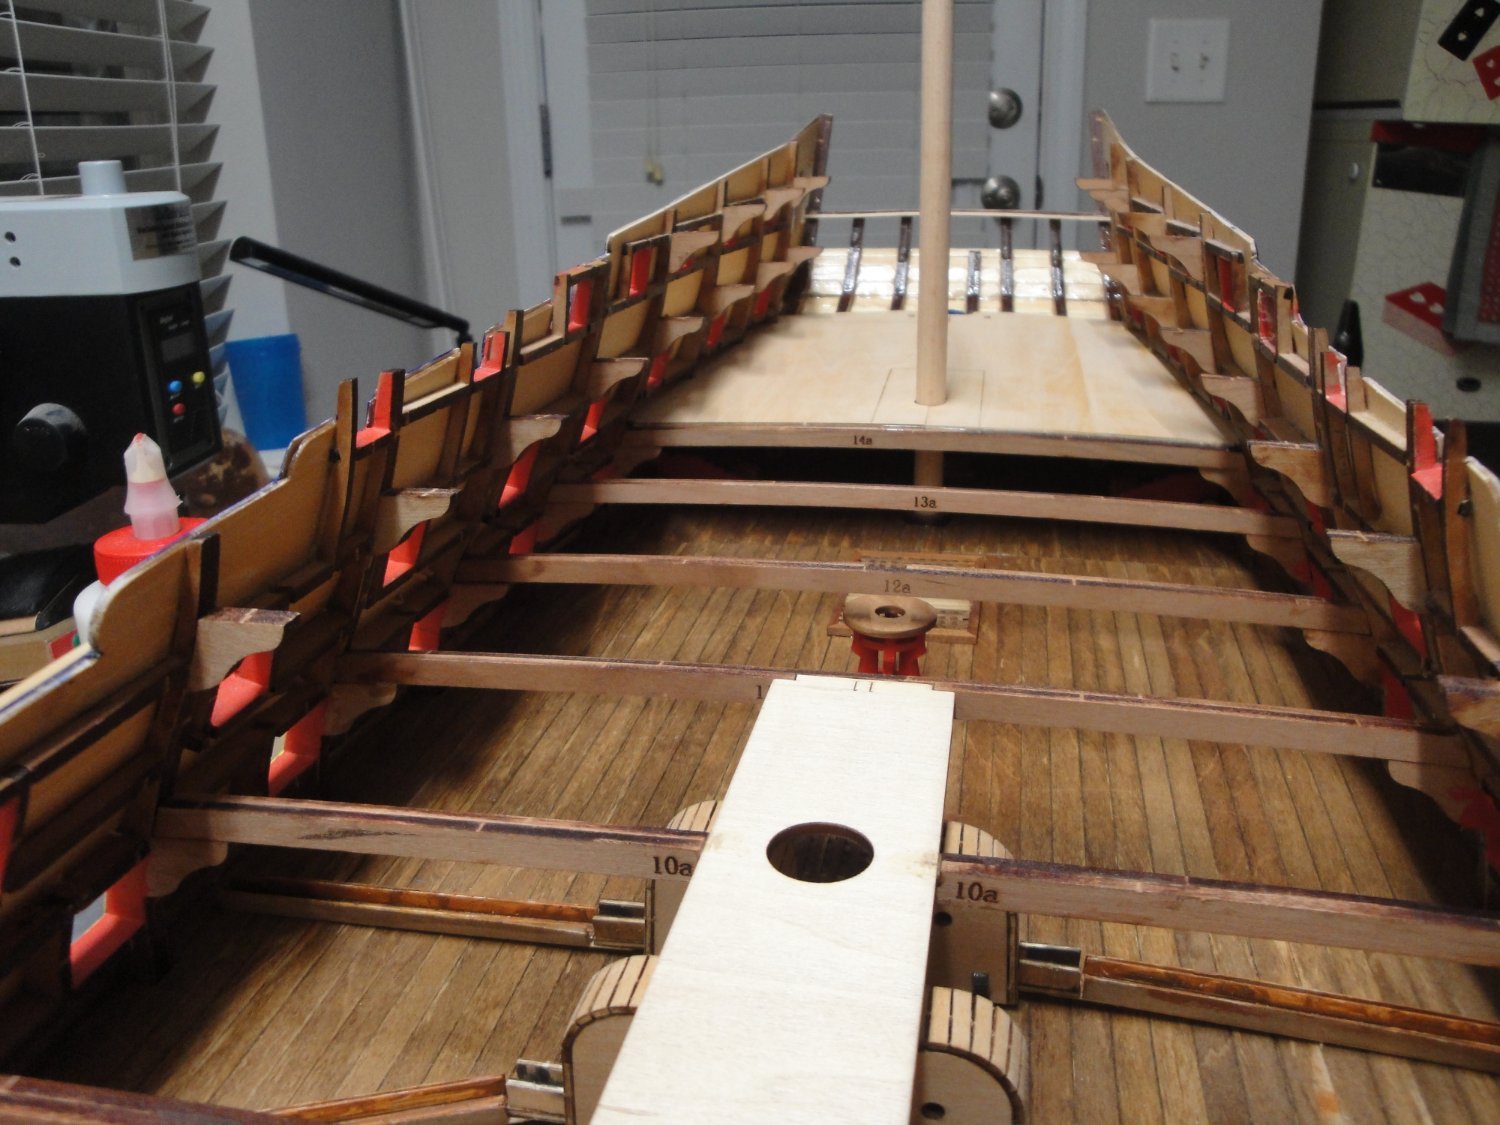
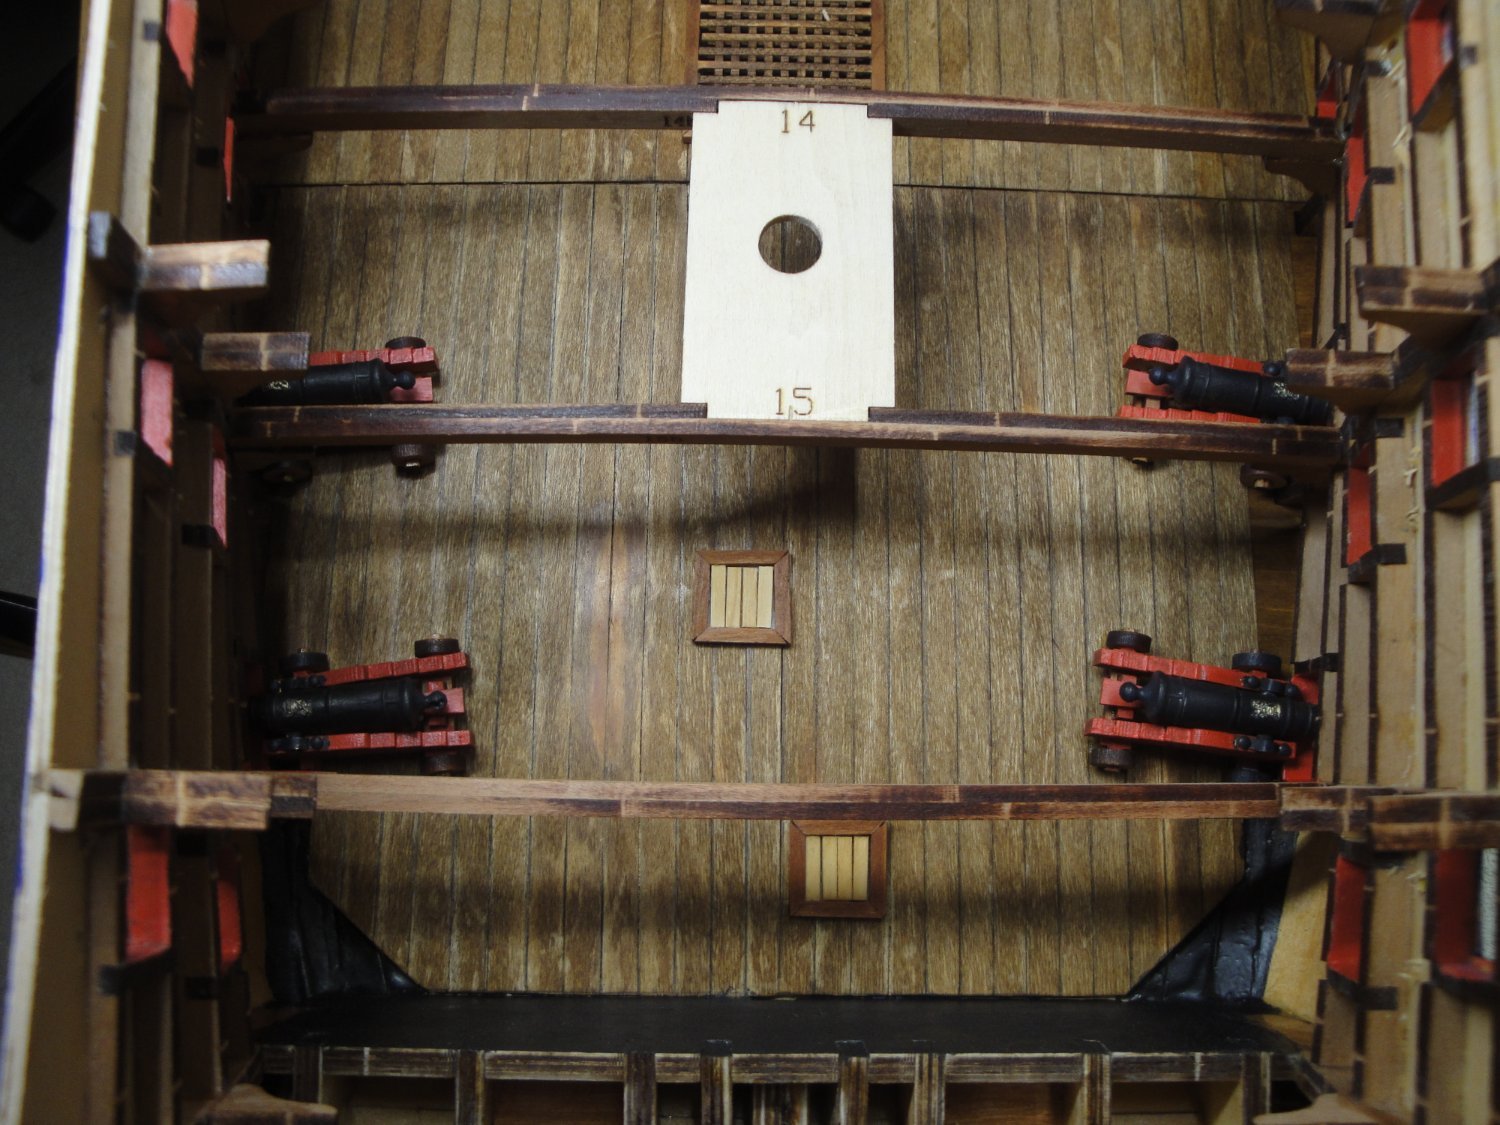
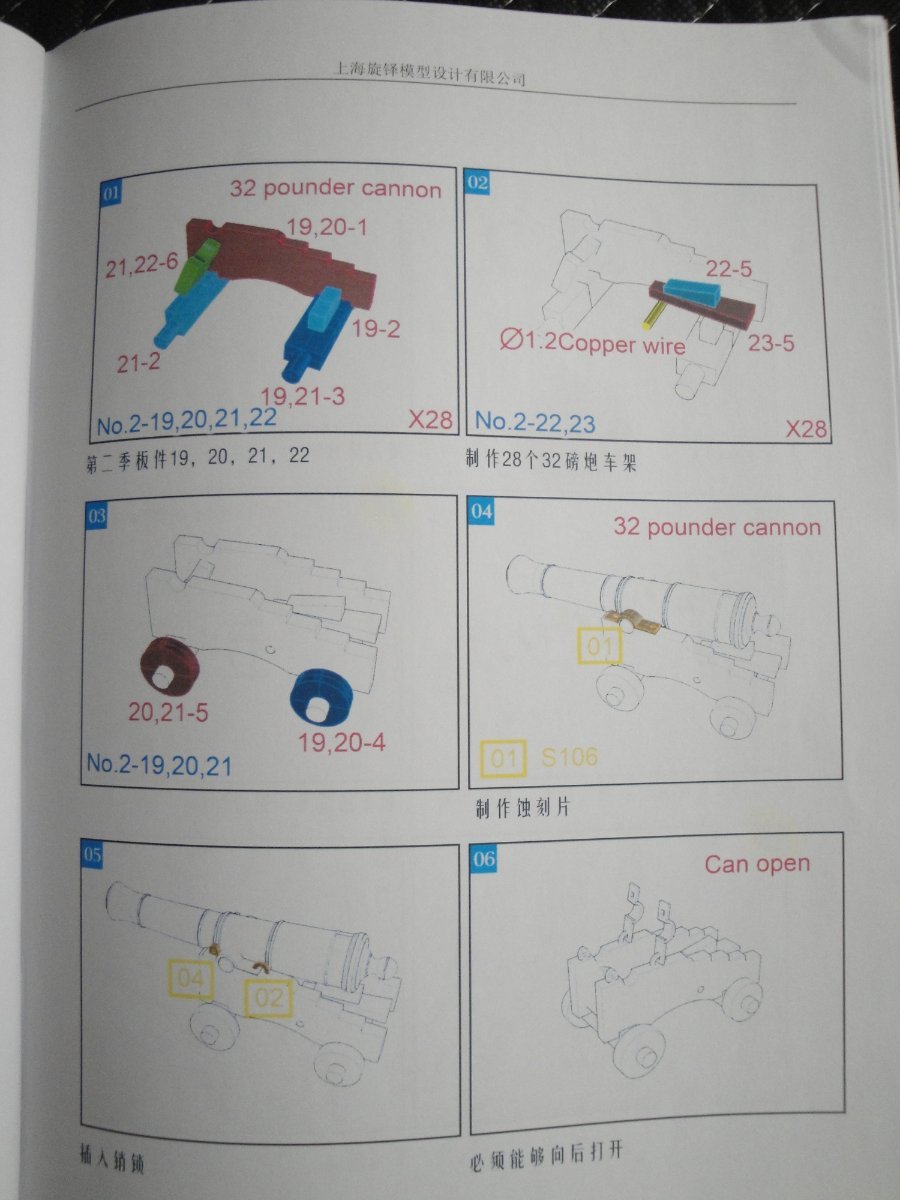
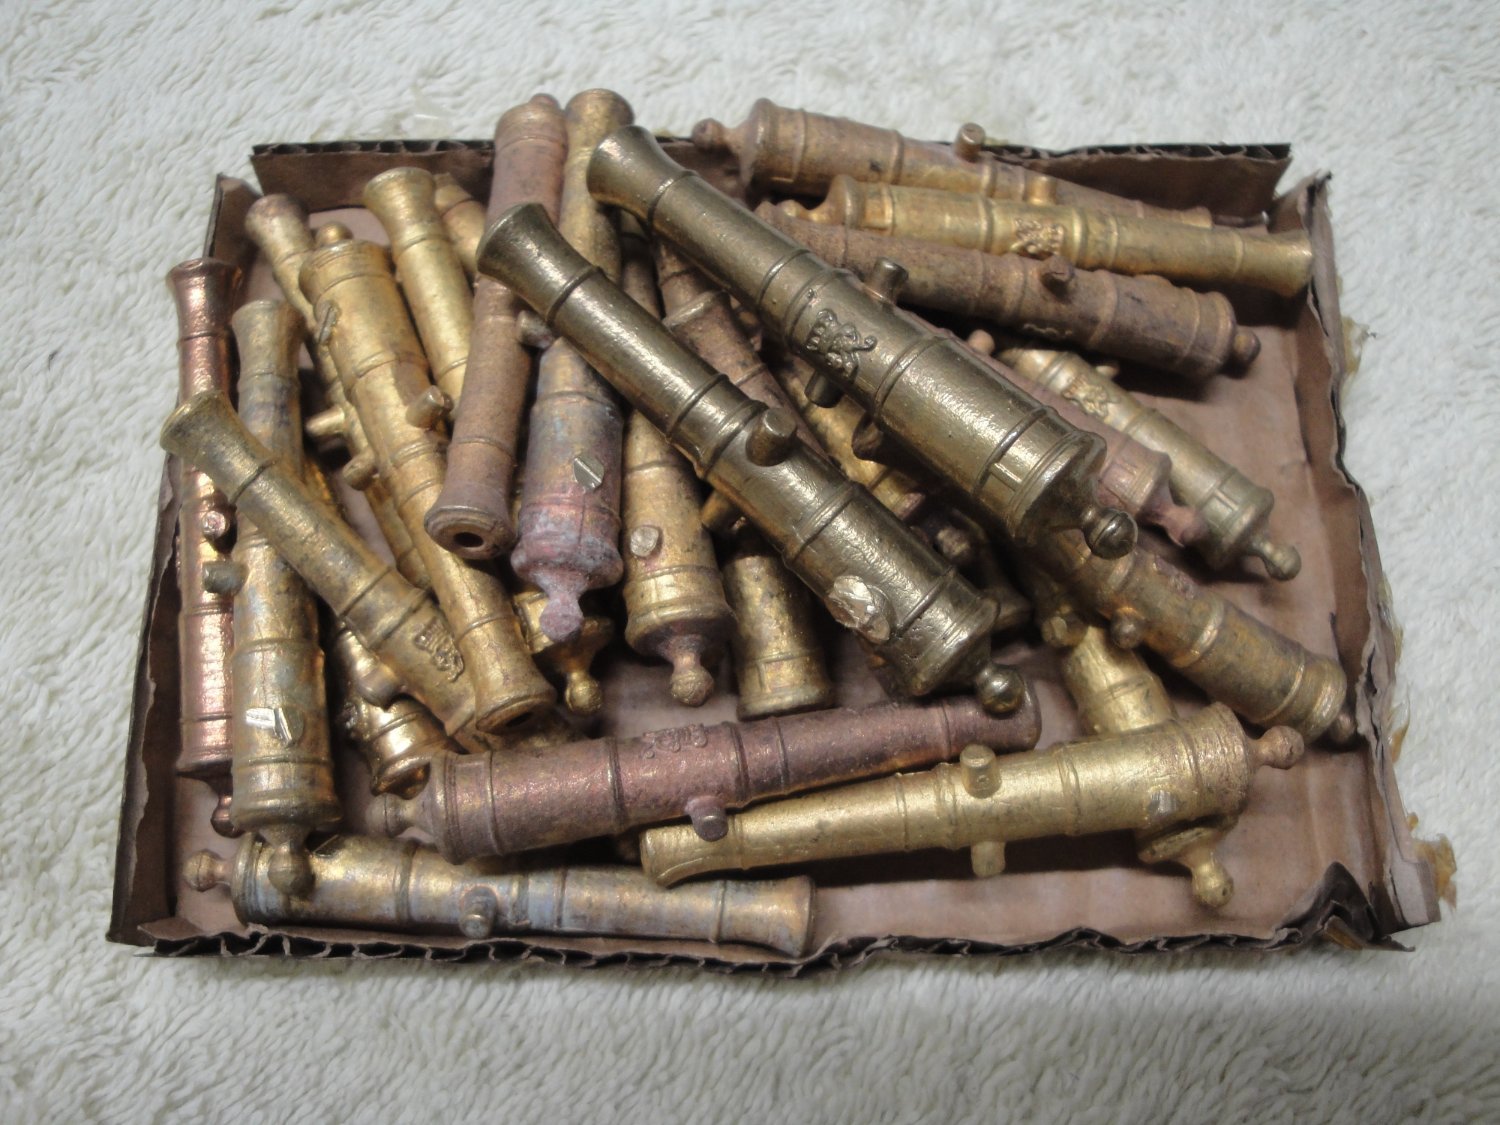
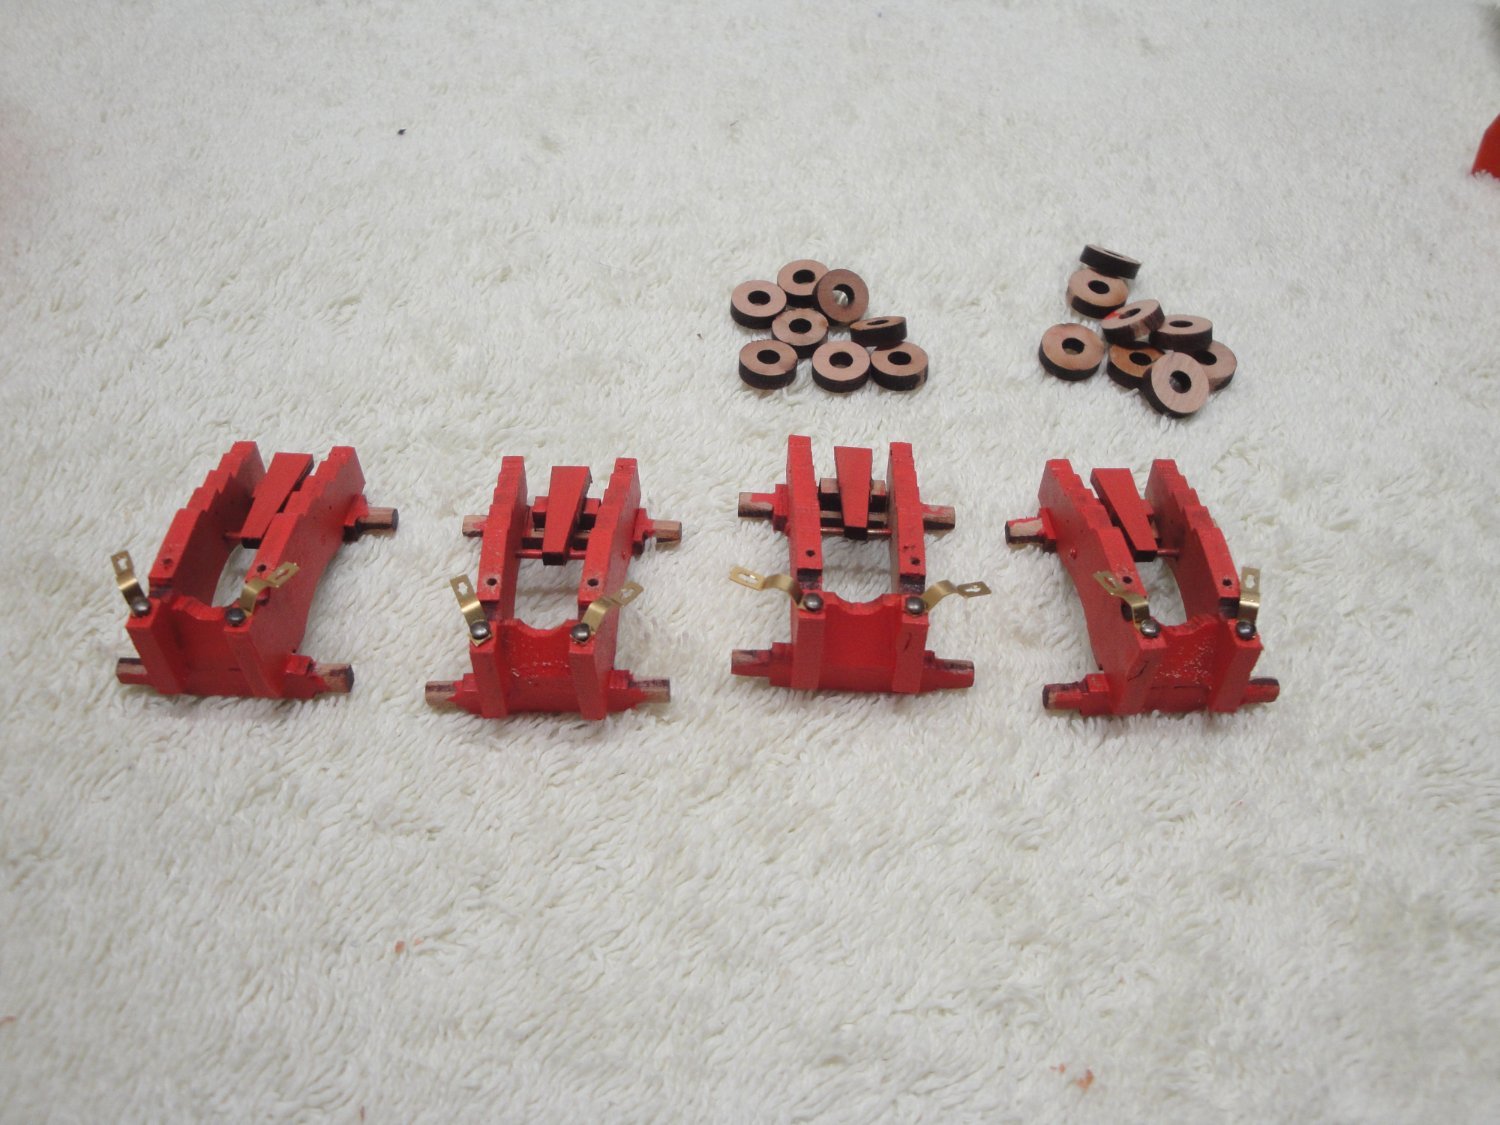
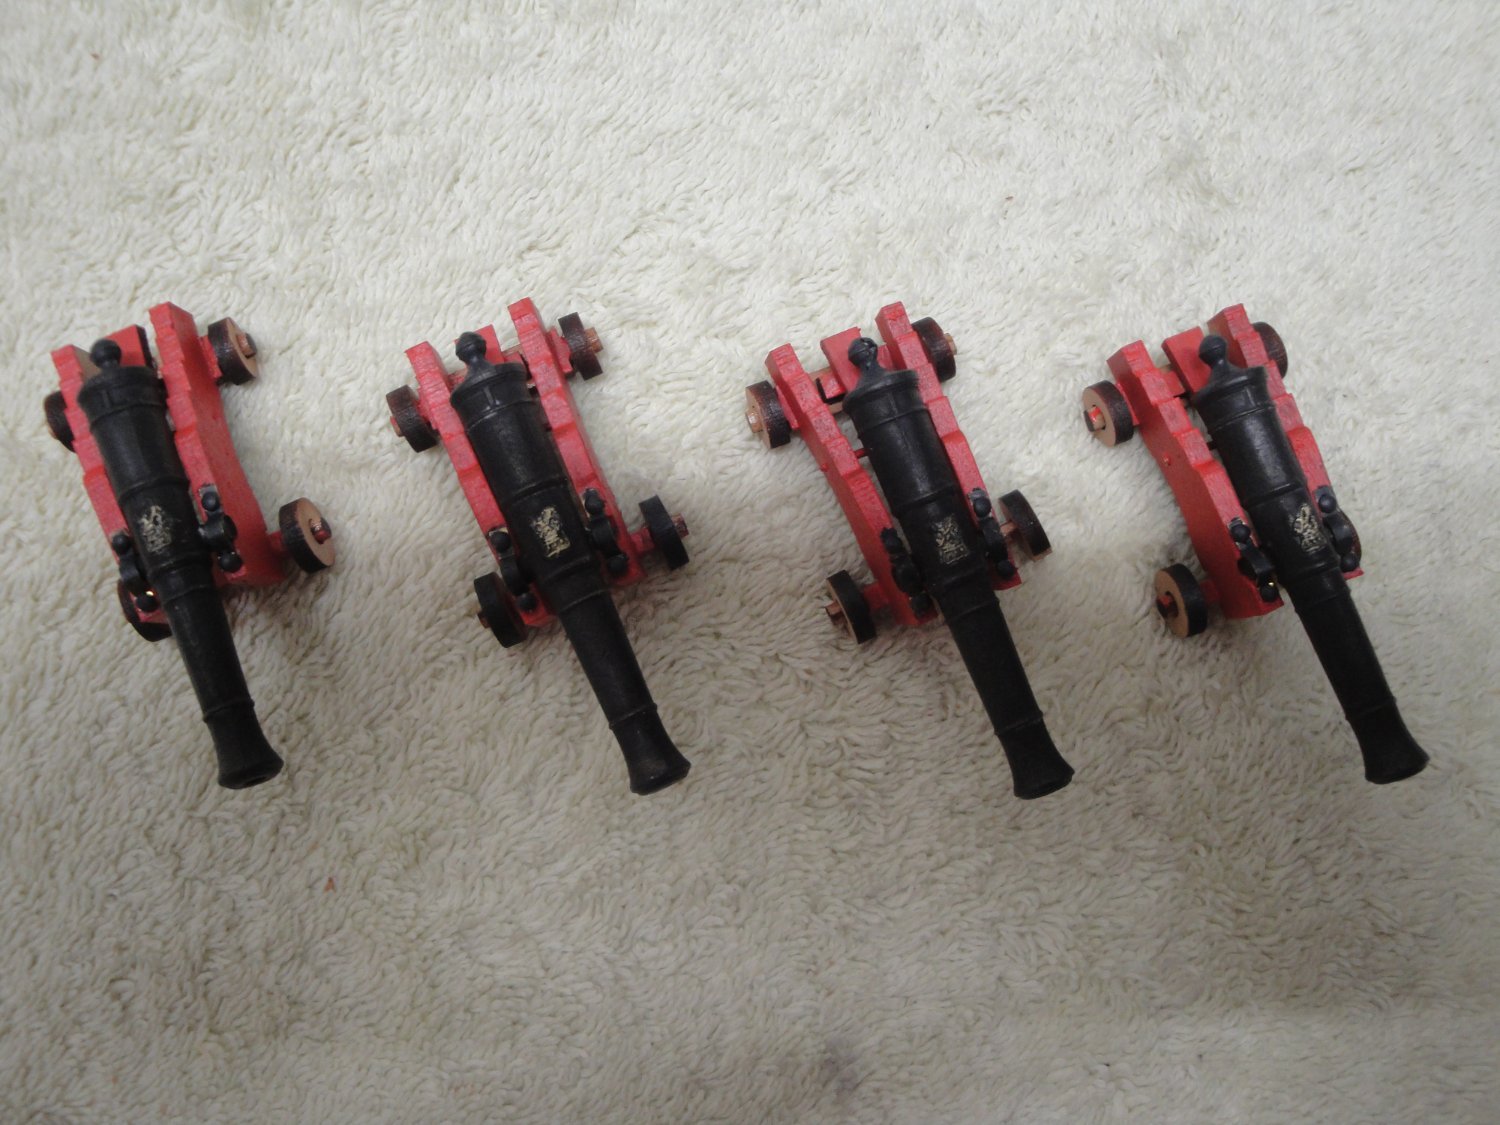
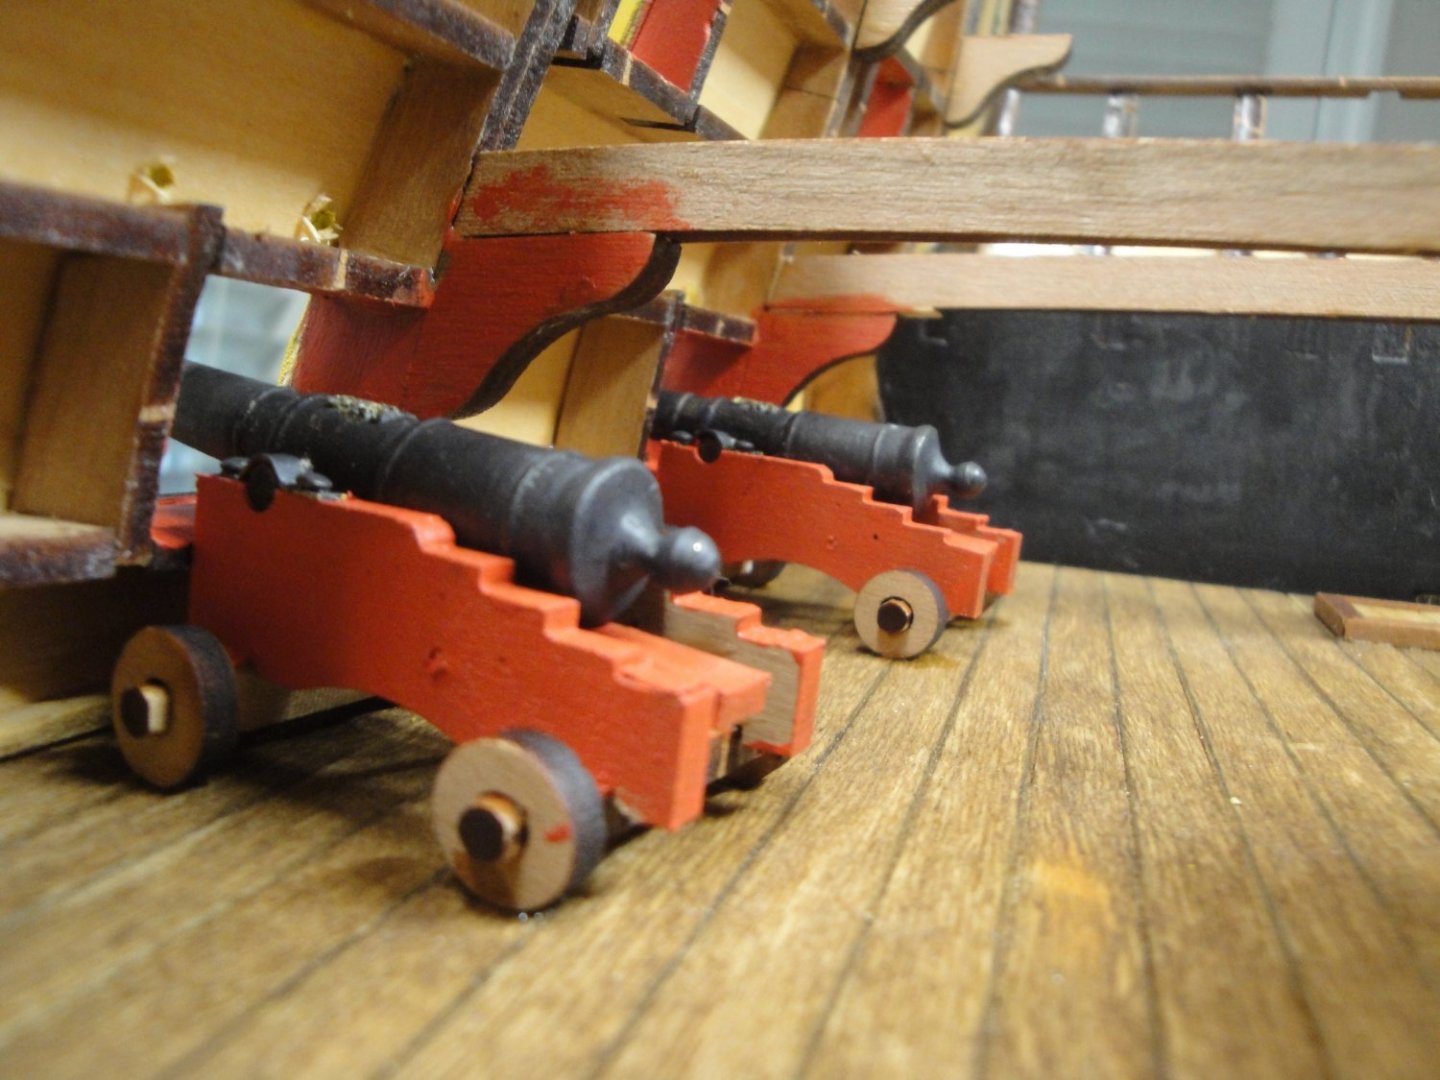
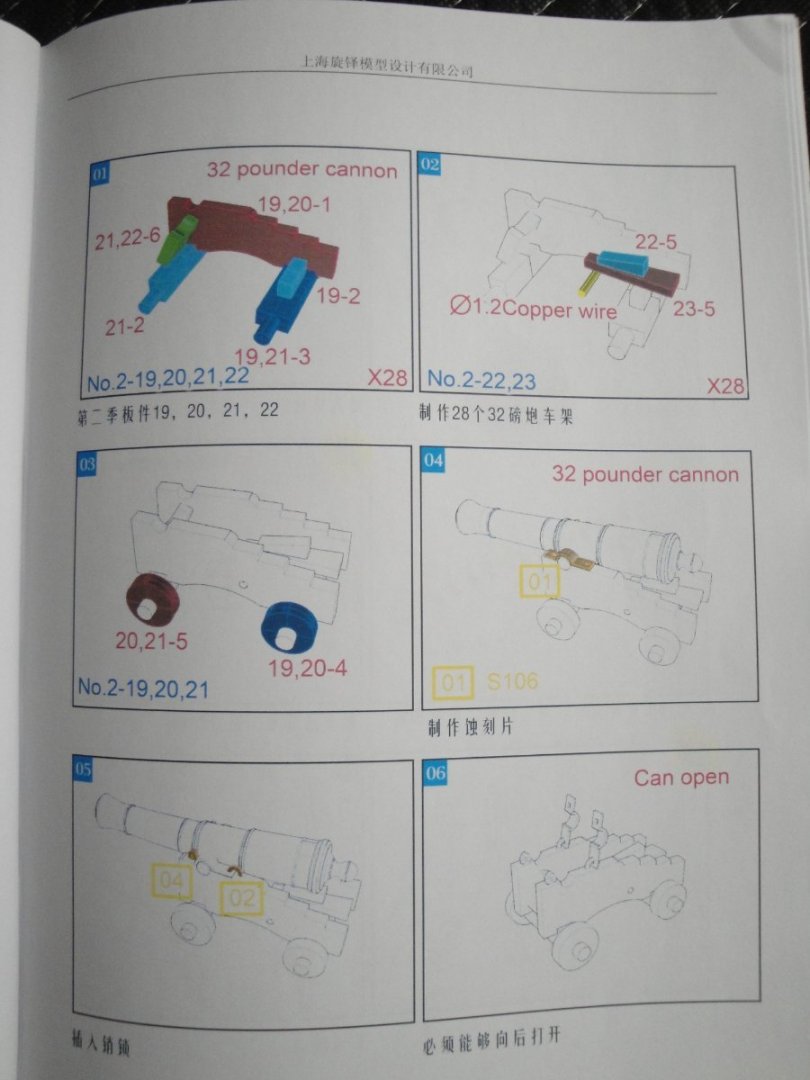
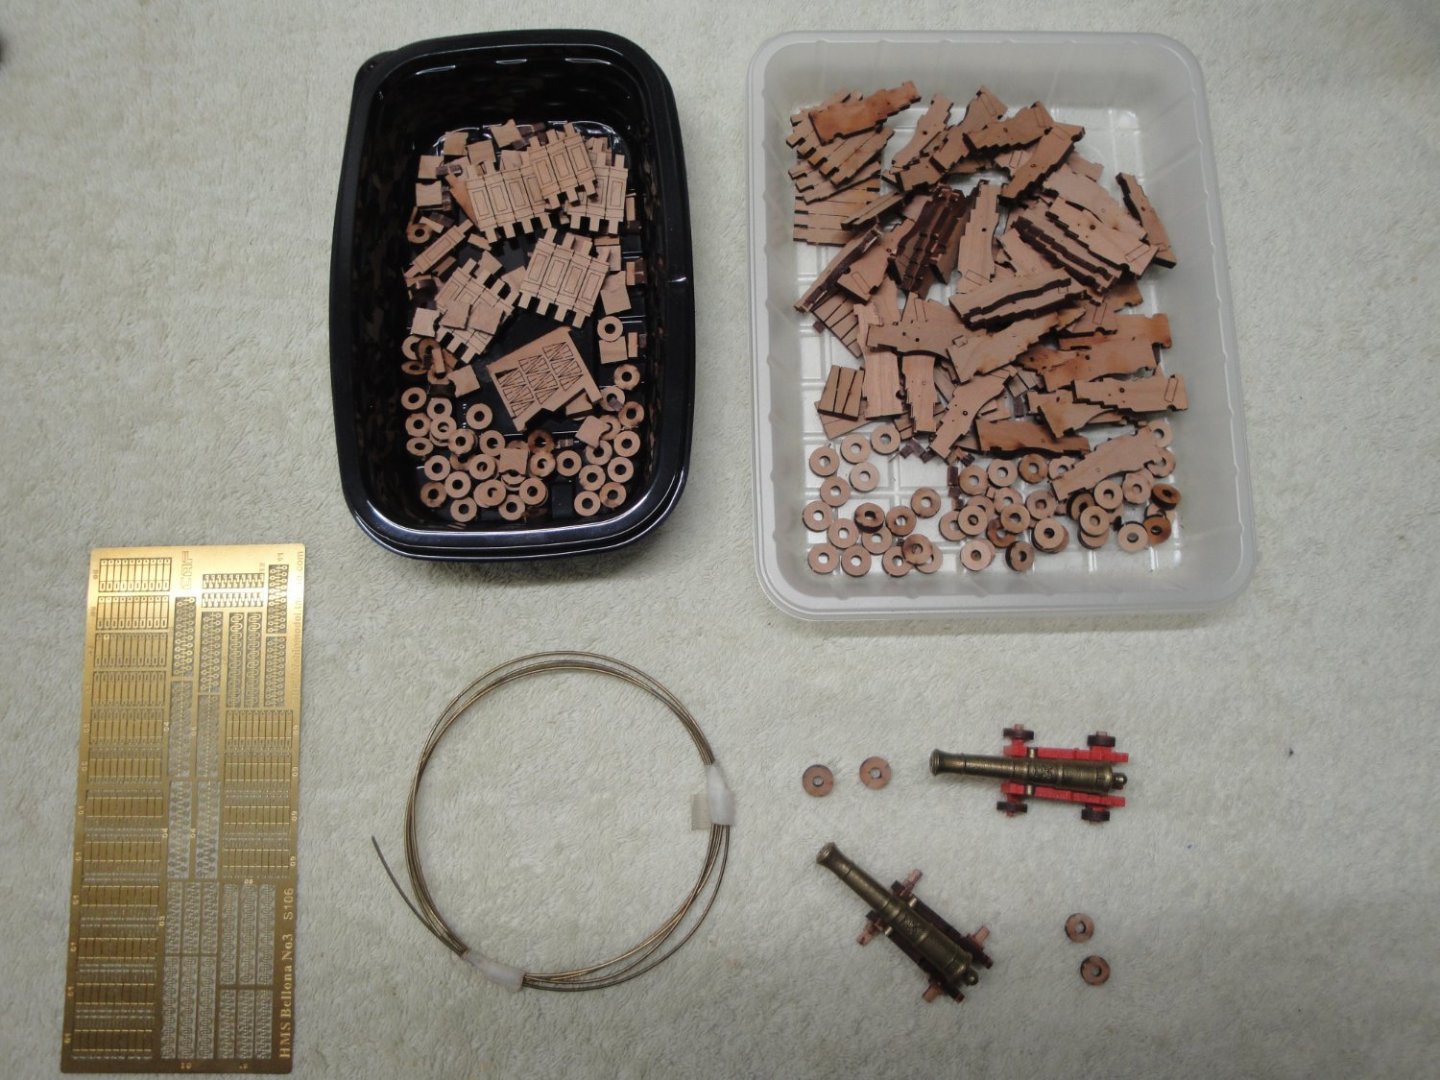
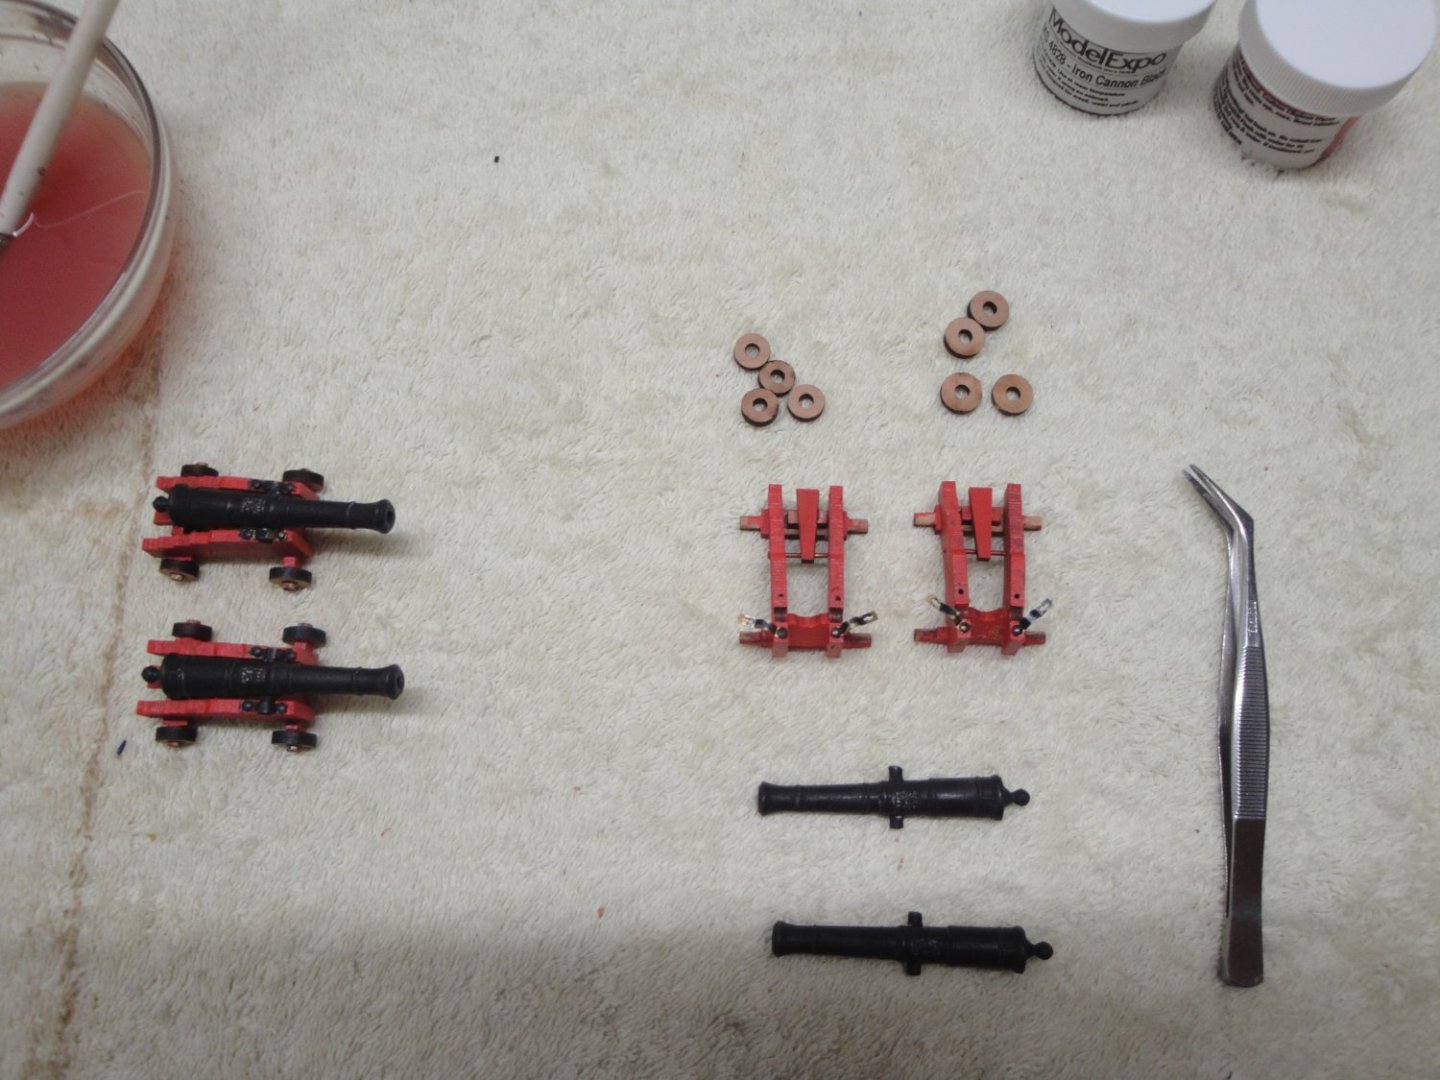
After working on the Bow of the ship, I feel that the Stern is requesting some attention. Nothing can be built yet, as I have to lay the floor of the main deck and also study a solution to control the rudder from the wheel (wishful thinking....). At this stage I can start building the main deck on the rear section only. But before that, I have to assemble at least four large guns, to go underneath the "E" section of the main deck. Technically I have to build 28 large guns.....but I hate repetitive tasks. So, I am going to build what I need to move through one section at a time. That will offer a pleasant diversion from the repetitive assembly of 28 large guns at once. The guns are made of a mixture of wood, brass barrel and PE parts. To build 28 guns represents a lot of parts: The guns are glued with CA glue. The barrels are cleaned in a mixture of vinegar and baking soda and left soaking for 10-15 minutes. They are then rinsed in warm water and soaked for a couple of minute into the Black-Brass chemical. They are rinsed again and left to dry, before receiving a light coat of wax. Touch-ups are done with Black Barrel acrylic paint from Model Shipways. Holes are pre-drilled where the black nails are located. I am not using the insanely small and fragile PE parts from CAF. Black nails are much more solid and safer for the heavy barrel. Finally, we have our four guns, that will be placed in the stern section: Just 24 more large guns to go.... At this stage the barrel azimuth can be adjusted. Most likely, I will glue them to their chariot before long. Yves


- 507 replies
-
- 11
-
-
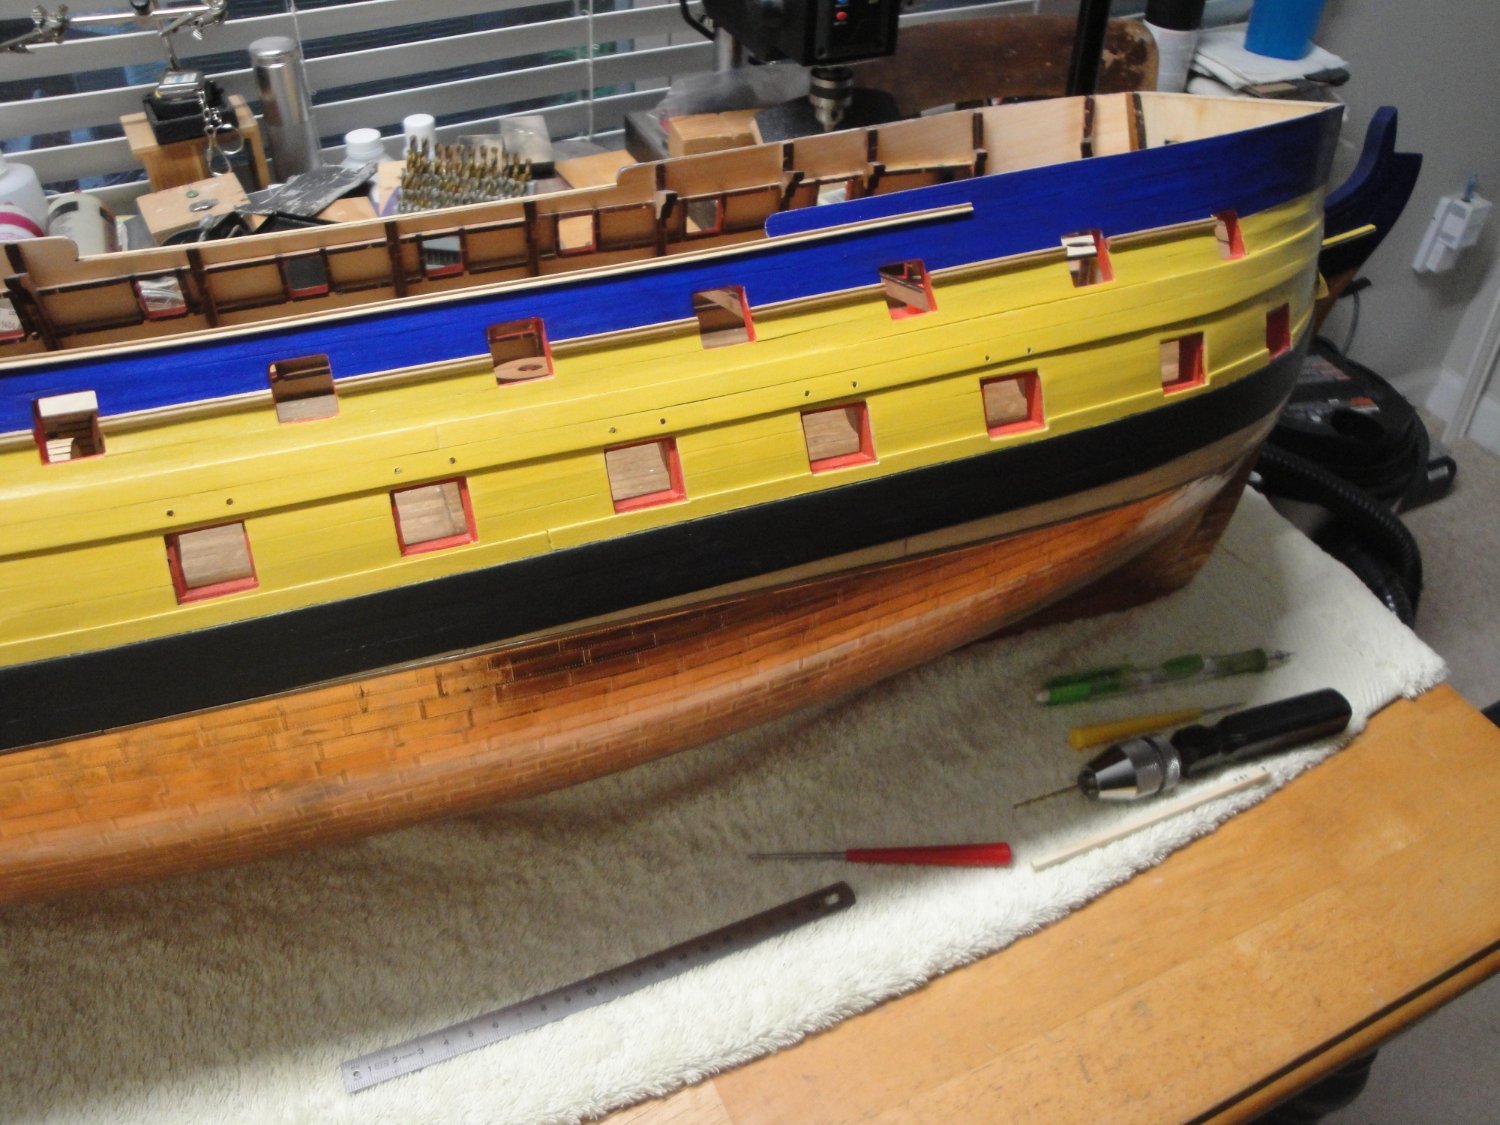
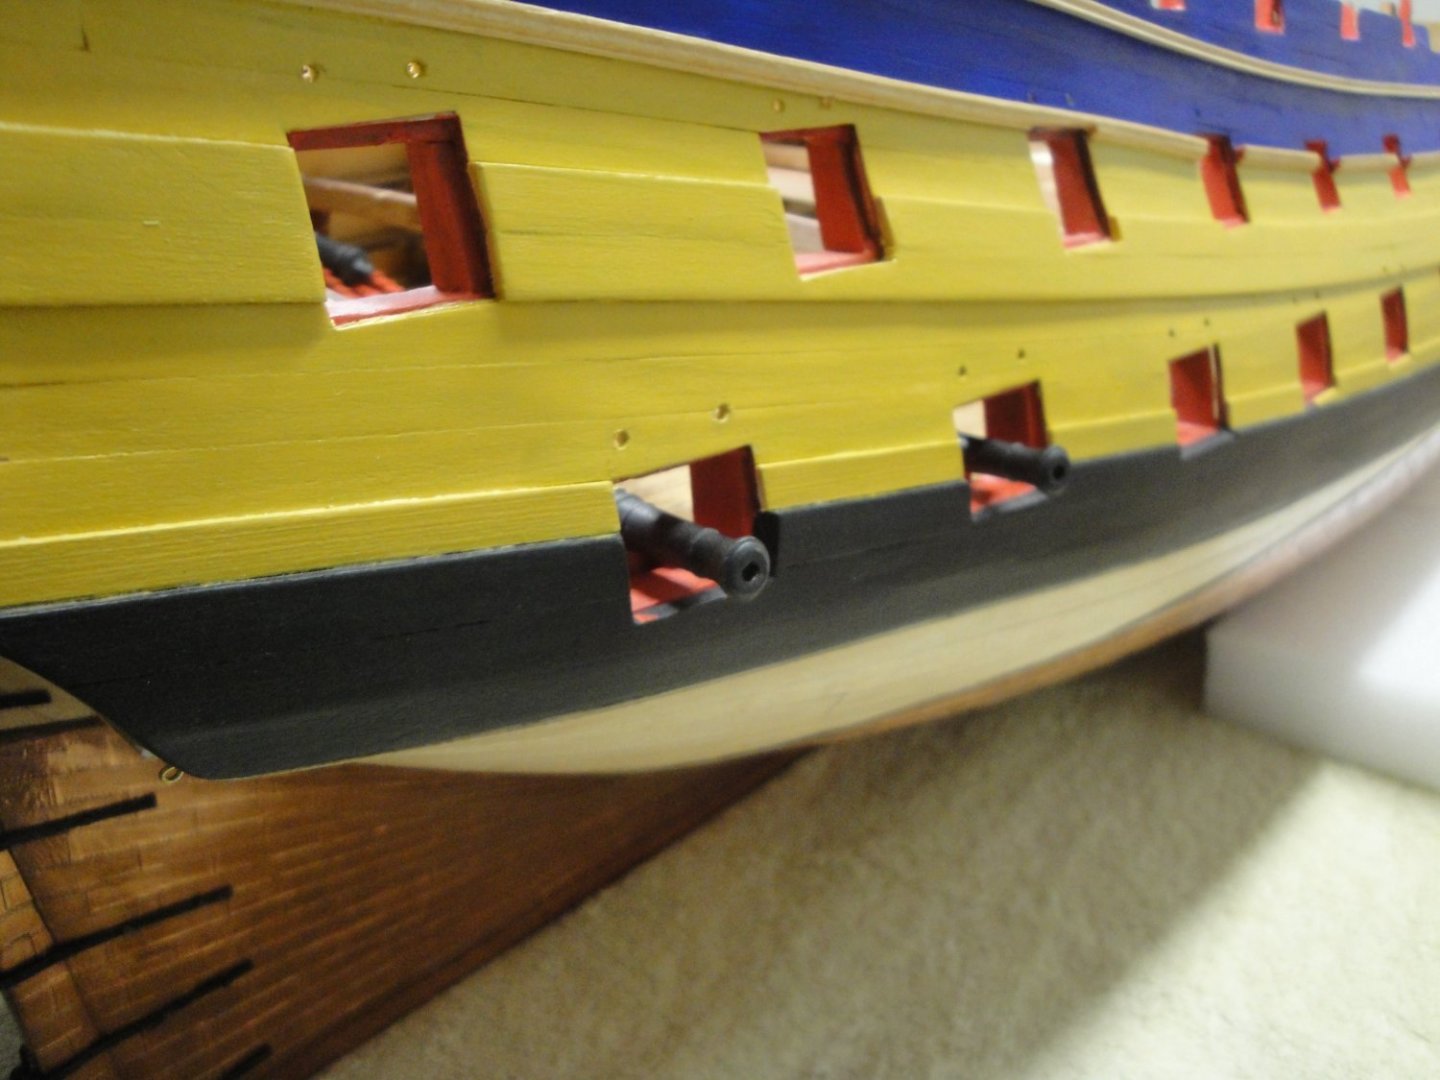
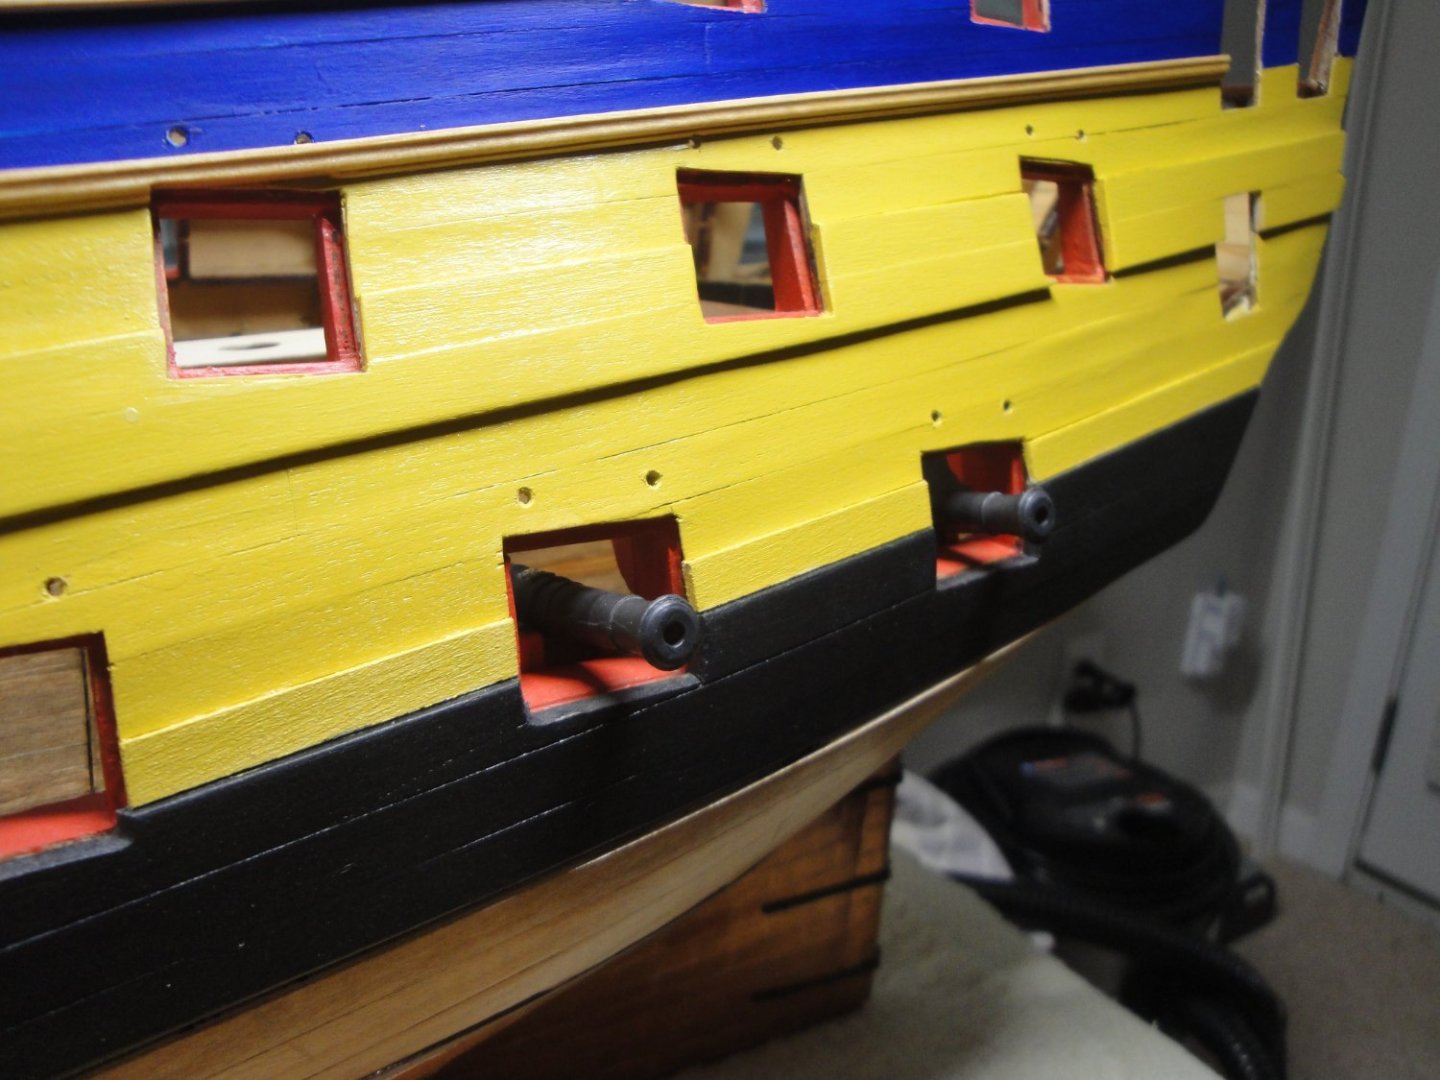
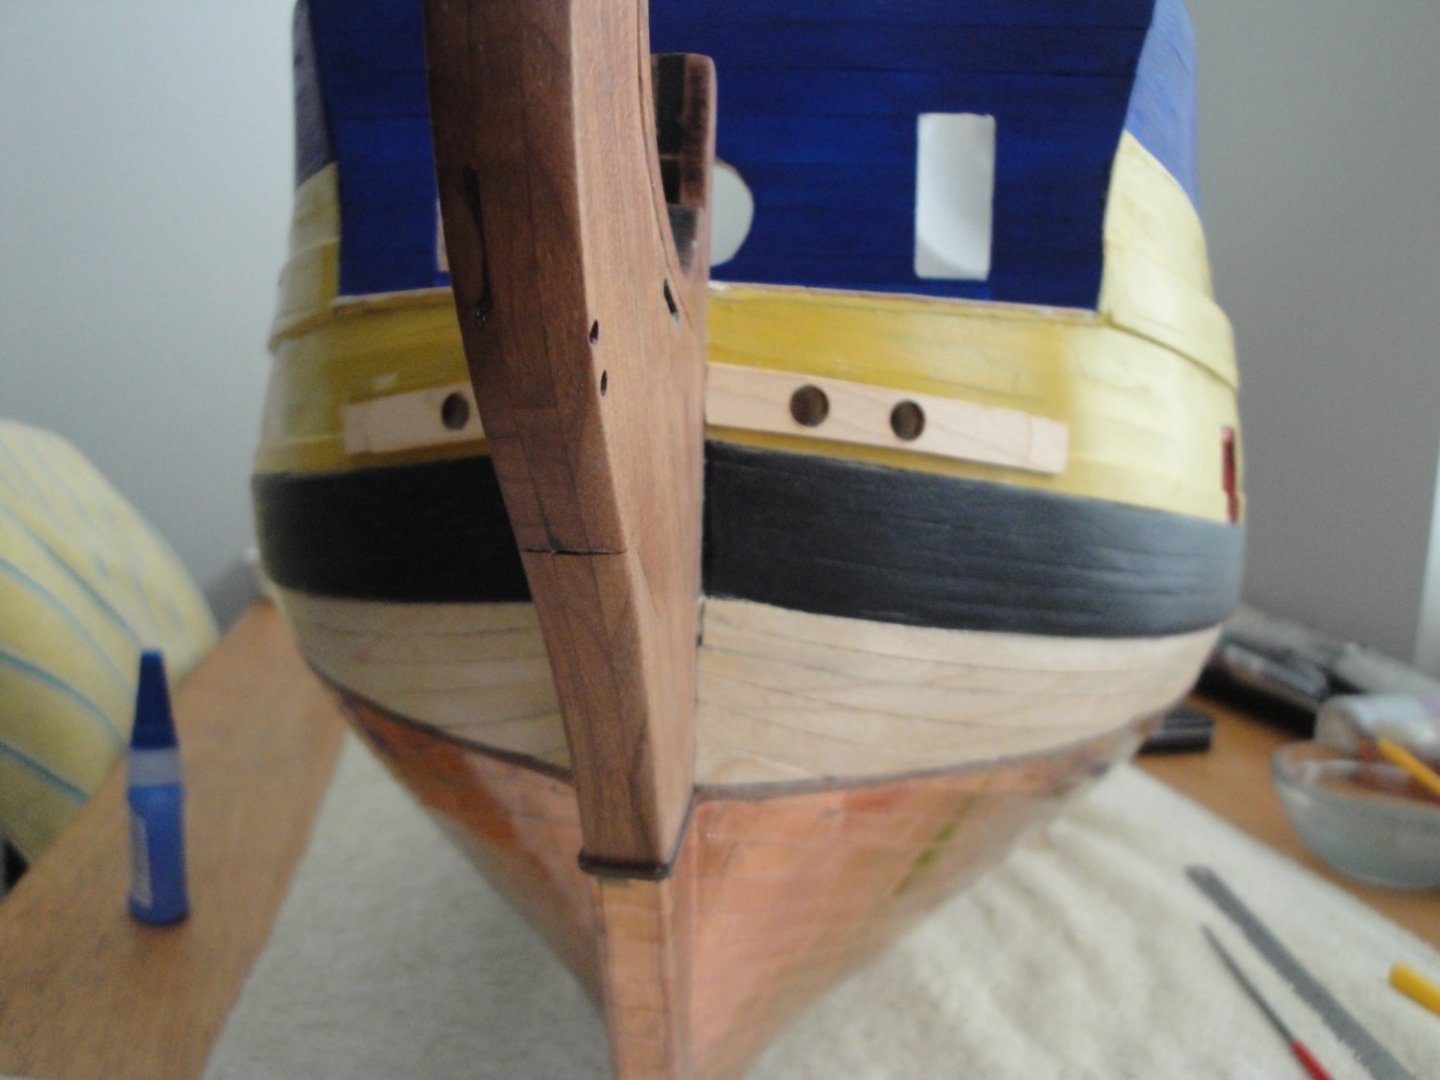
I am trying to finish the outside of the hull and add a few details which are not included in the kit. This is done in a much easier way, without any of the guns installed. First the holes used to lift the gun-port lids. Even though the kit provides for all lids and associated hinges, no rope is provided to build that feature. The holes are about 1 mm in diameter, which may be a tad too large for the real ship. The Anatomy of the Ship book is not very generous with details. The next holes will be the scuppers, used to evacuate the bilge and deck waters. COREL shows their approximate location on the plan of the Bellona kit, but CAF has no mention whatsoever. I will be using COREL instructions to install the six pipes on each side. Yves


-
I definitely hope some figures in 1/48th scale will become available. I am not sold on the Amati figures of 35 mm.... Yves
- 488 replies
-
- 7
-
-
- Indefatigable
- Vanguard Models
- (and 1 more)
-
Incredible !!!! Until I saw your fingers, I thought you were displaying pictures of the real thing. Absolutely beautiful and perfect. Yves
-
It must have been heart wreaking to cut that nicely shaped bulb at the bow, to install the front rudder.... Yves
- 454 replies
-
- 2
-
-
- Union Steamship Company
- Stepcraft 840
- (and 3 more)
-
Allan, yes the kit (lack of) instructions, makes a brief mention of tapering. I decided to not reduce the thickness of the knee of the head. Instead, I filed the figure to make sure she fits on the head. Artistic license.... I suppose. Yves
-
I like these half hulls build, by Billing Boats. Yves
-
Thanks to the modern technology (3D printer and associated software), you are turning this otherwise unfinished model, into a very nice and realistic model. Congratulations. Yves
-
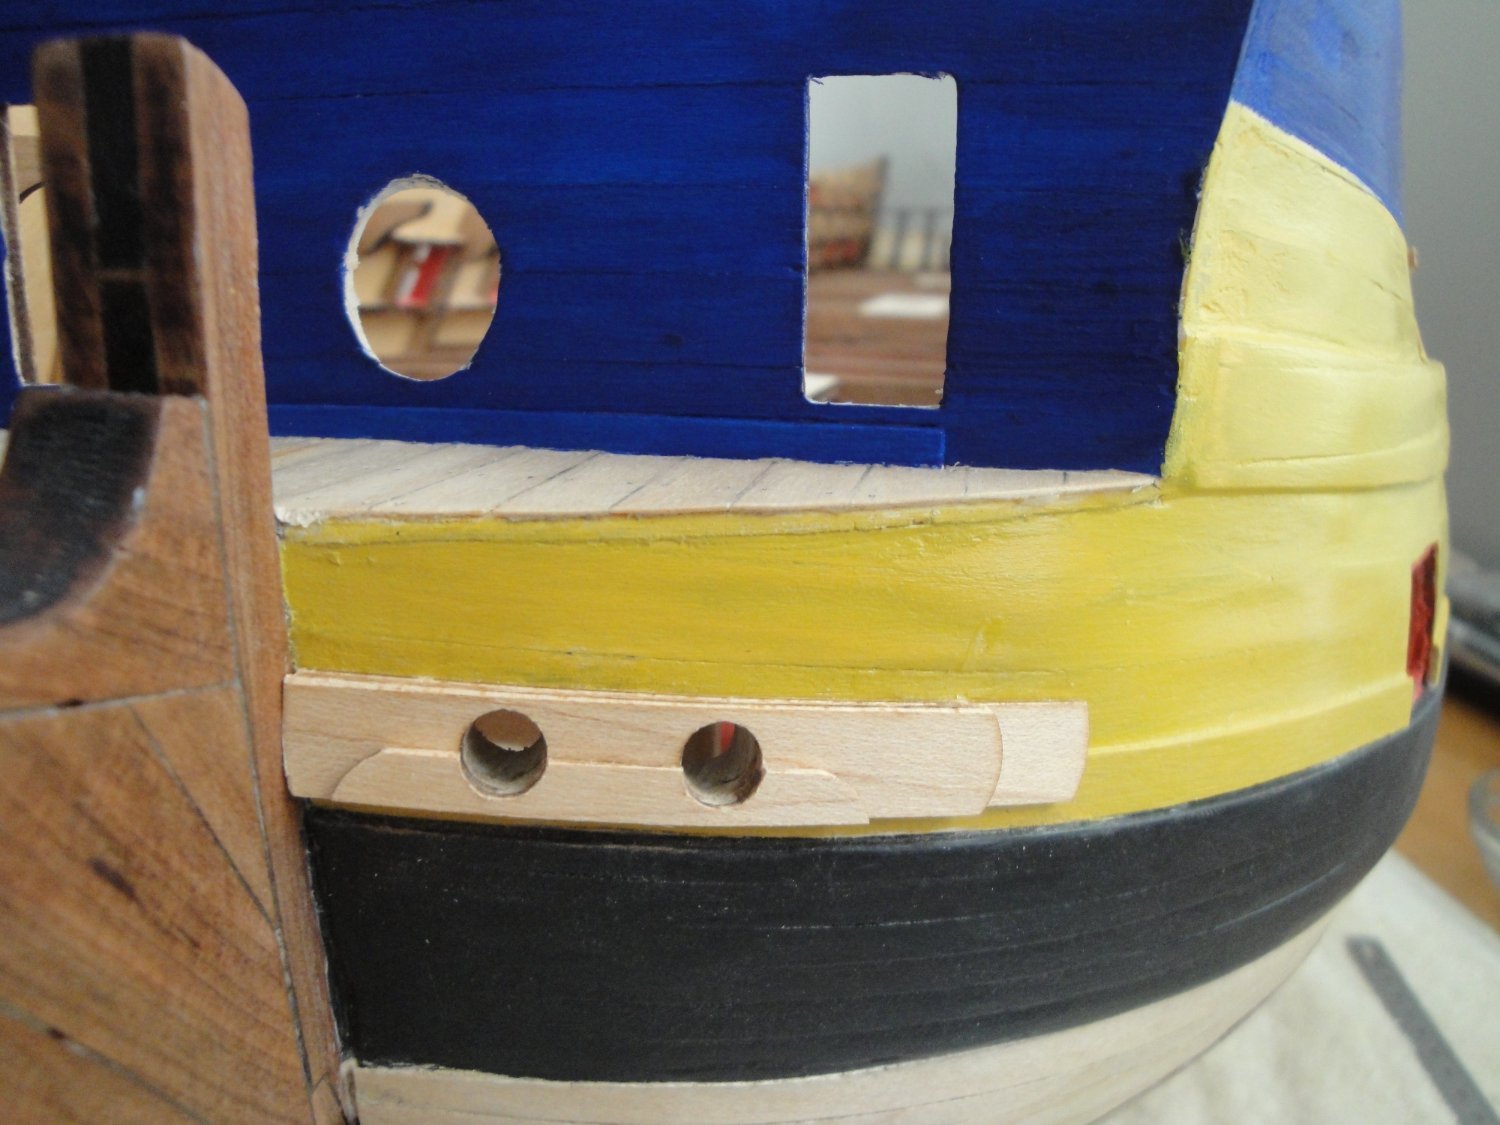
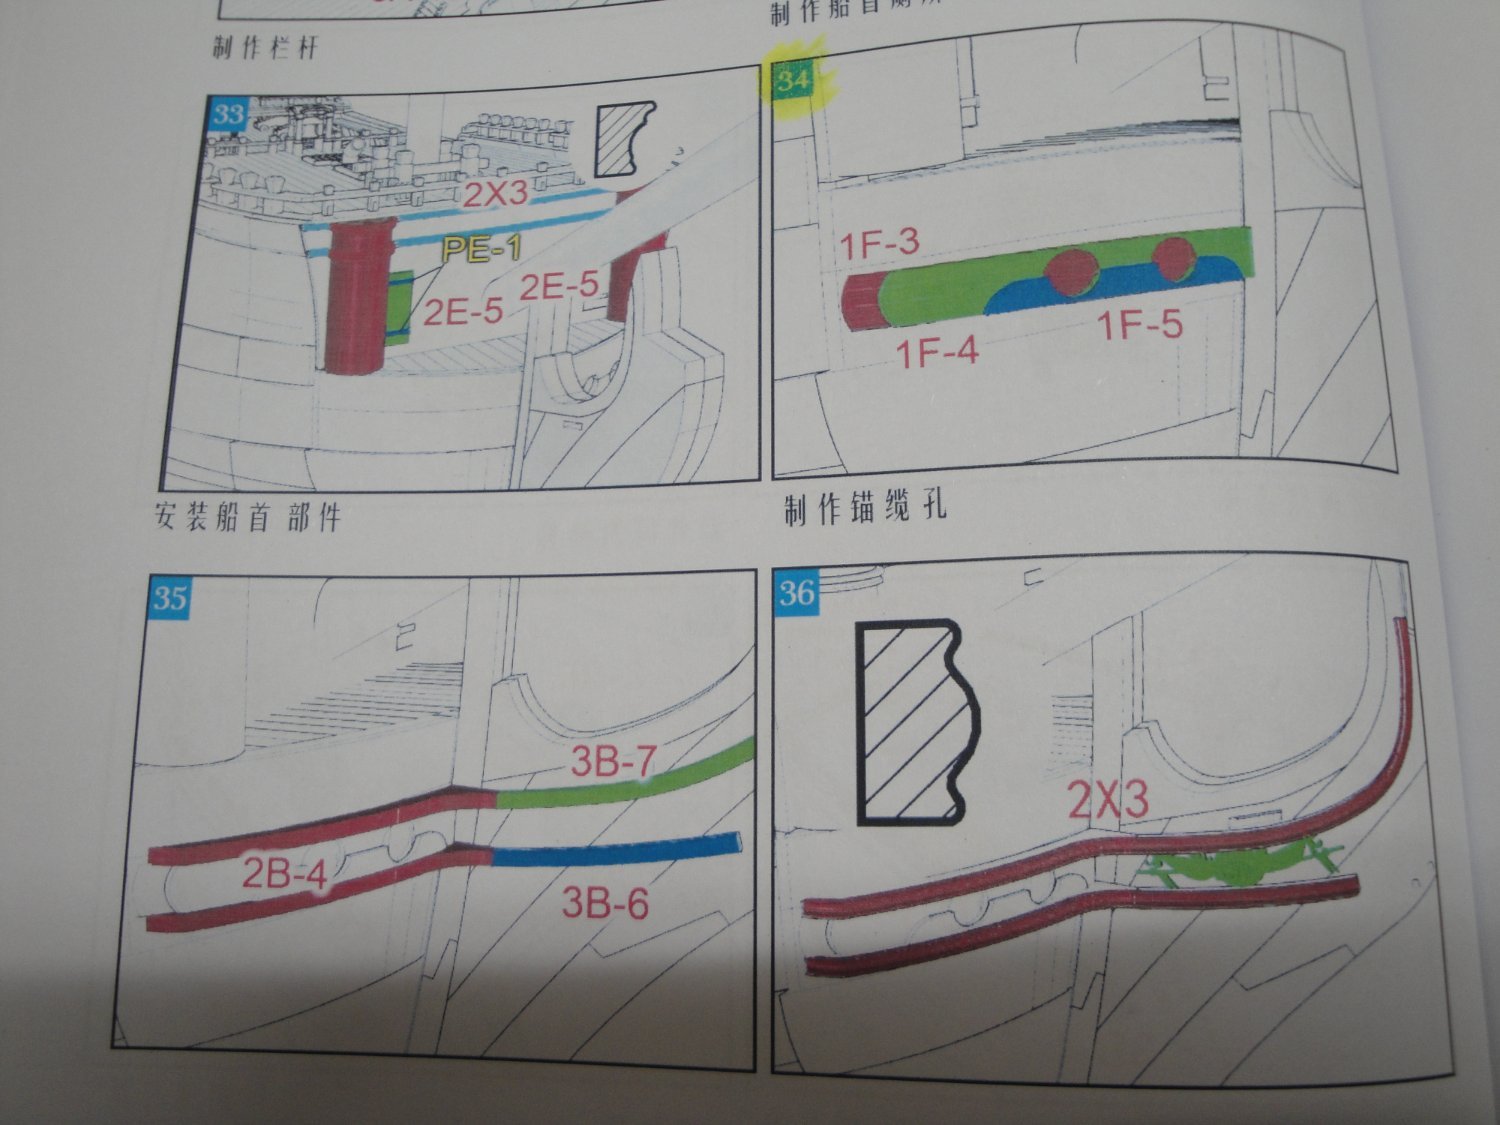
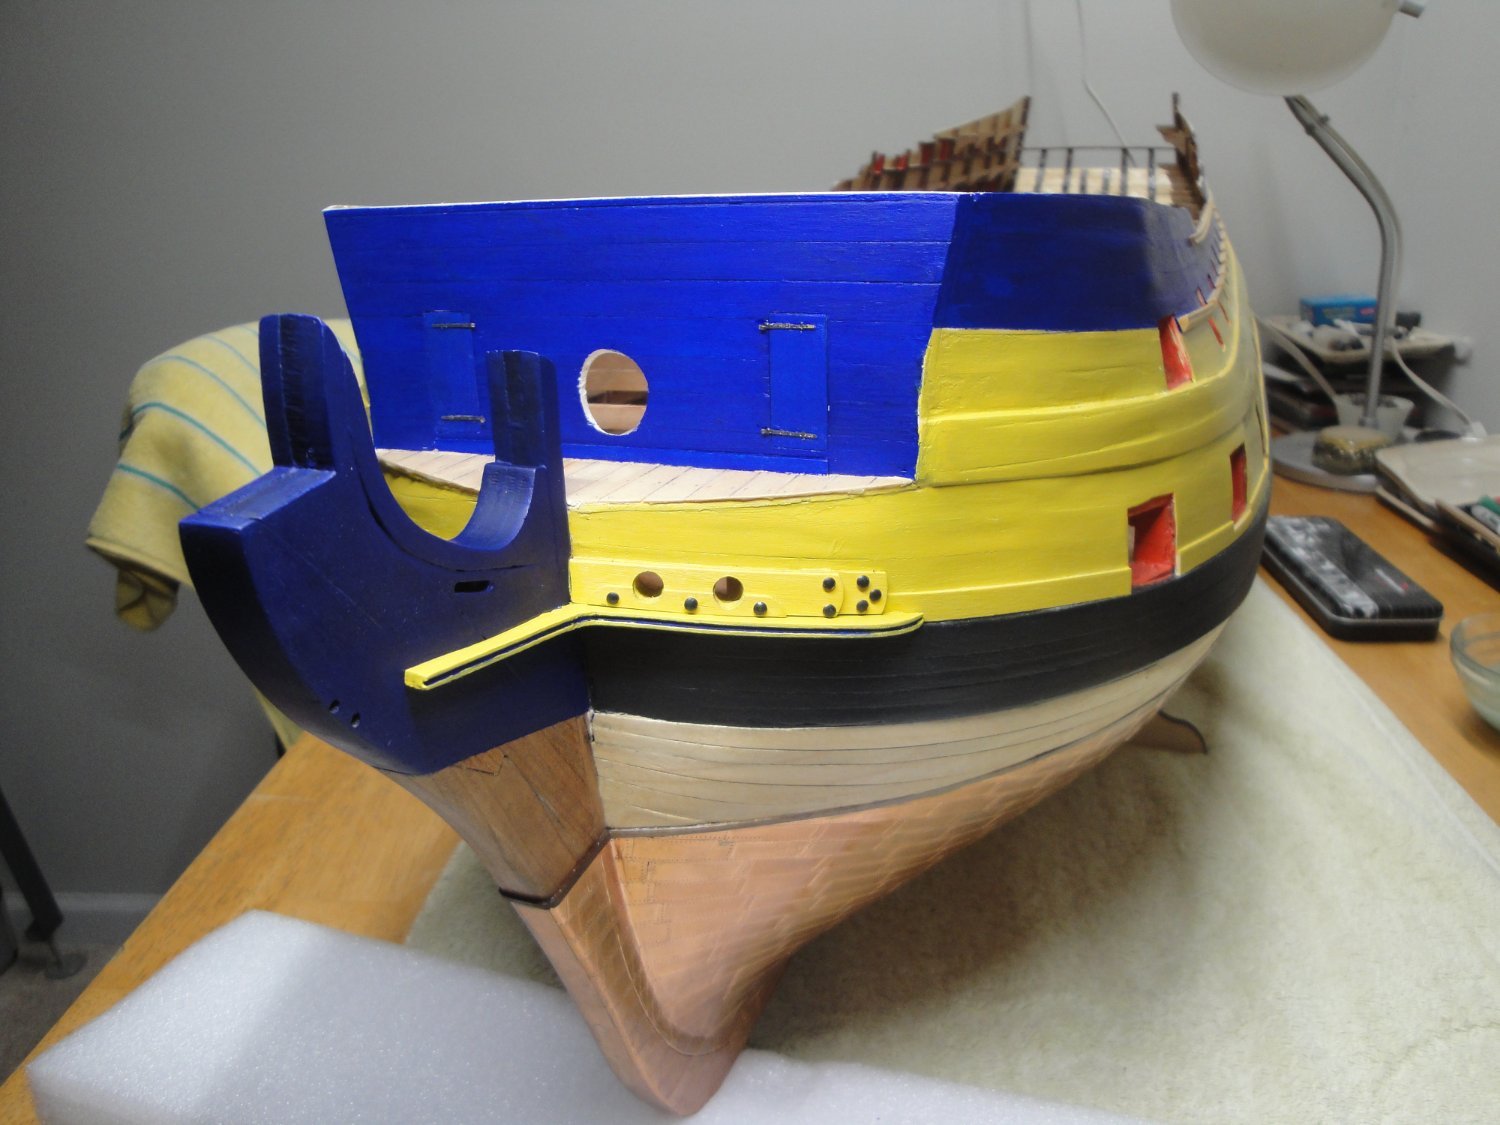
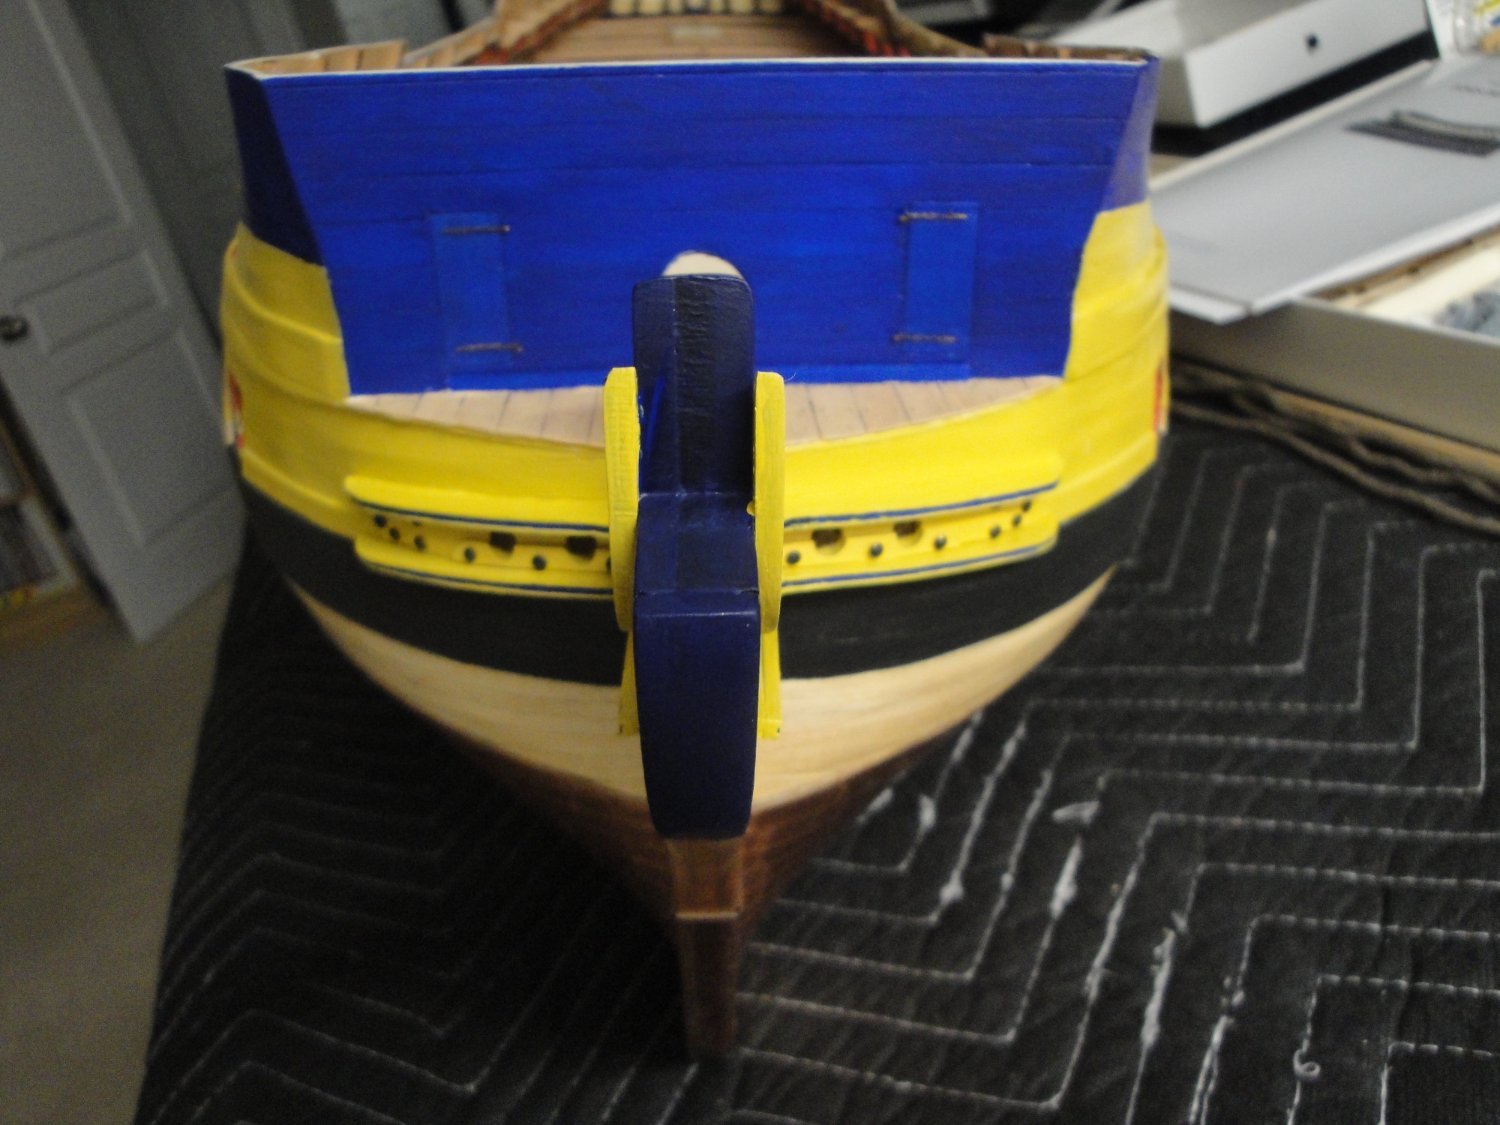
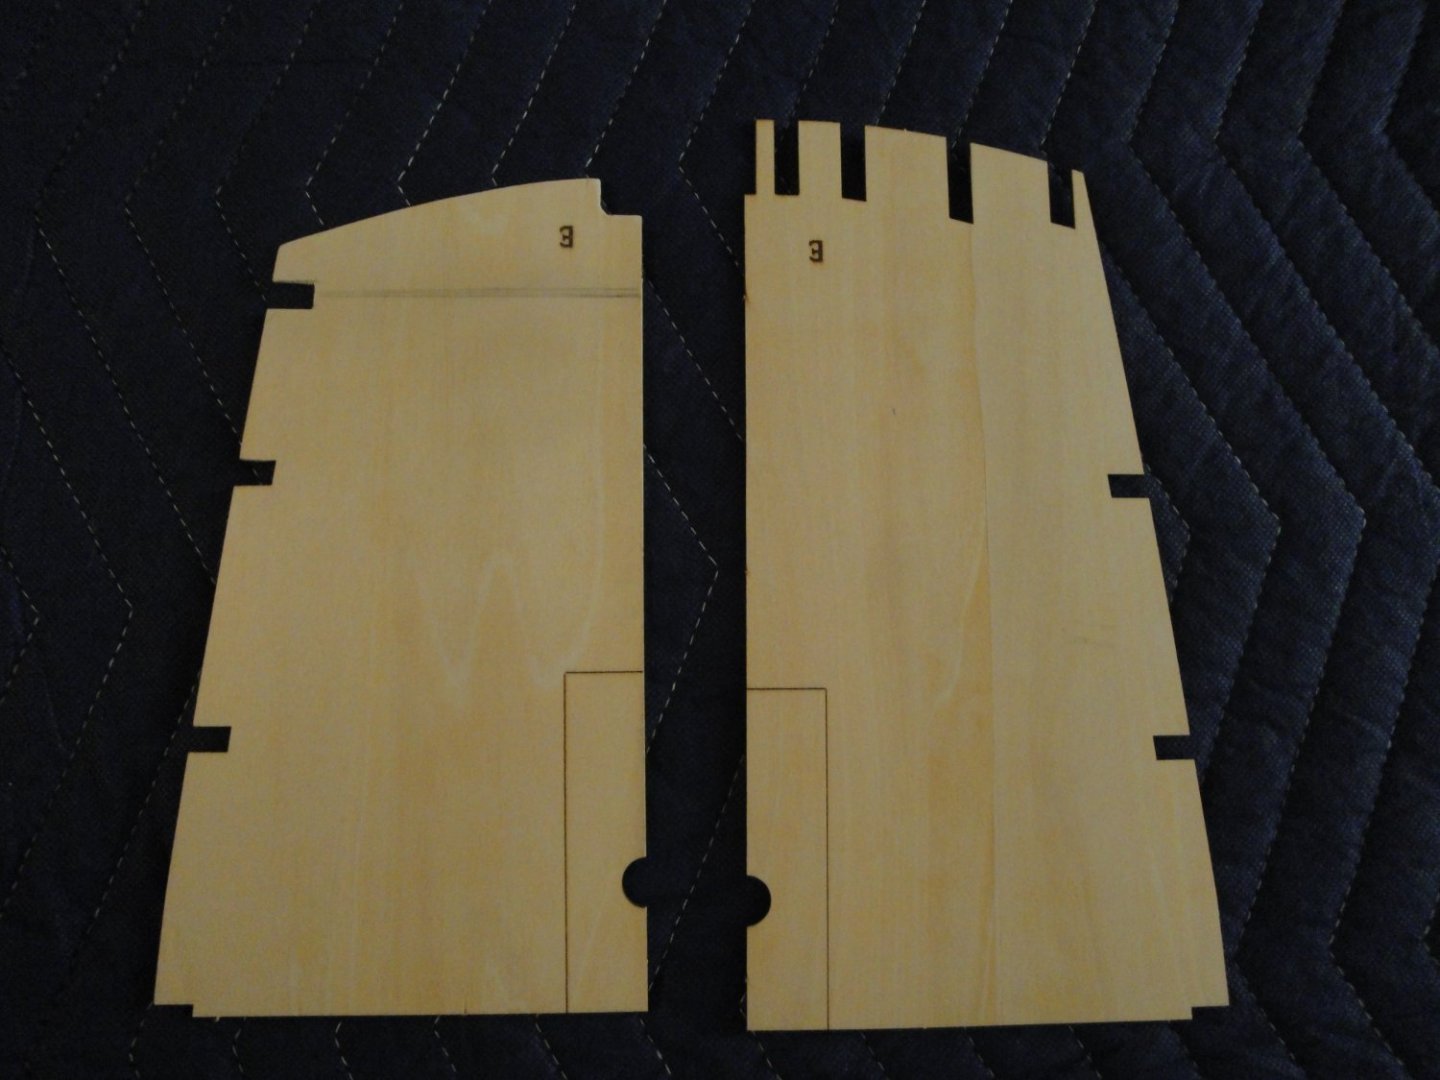
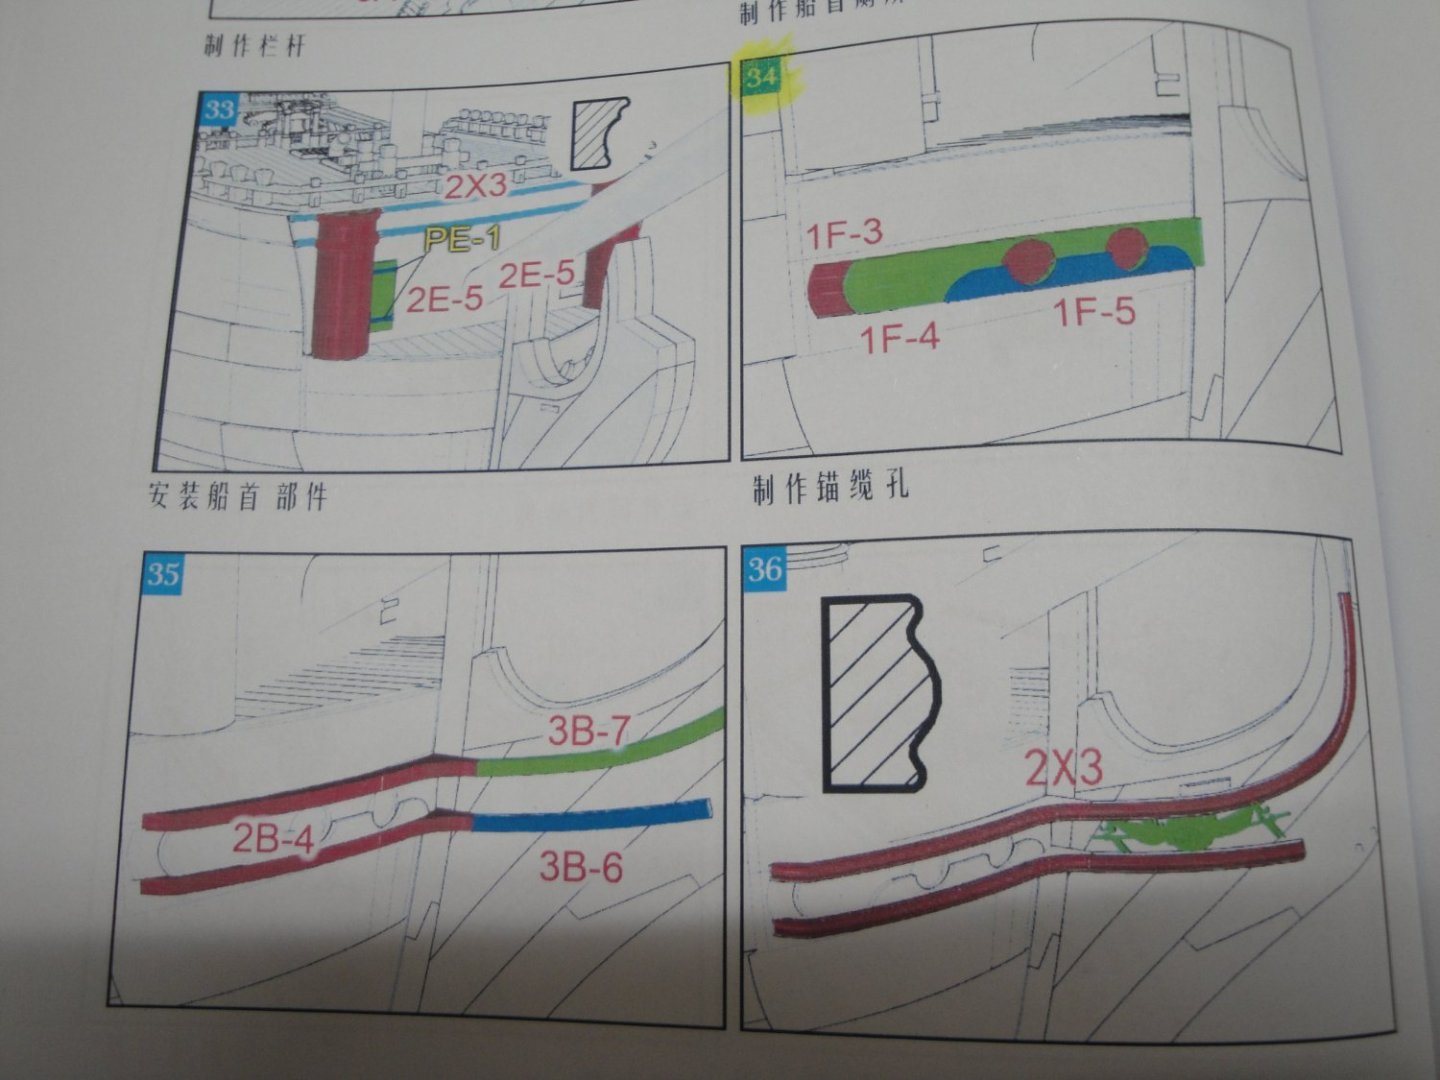
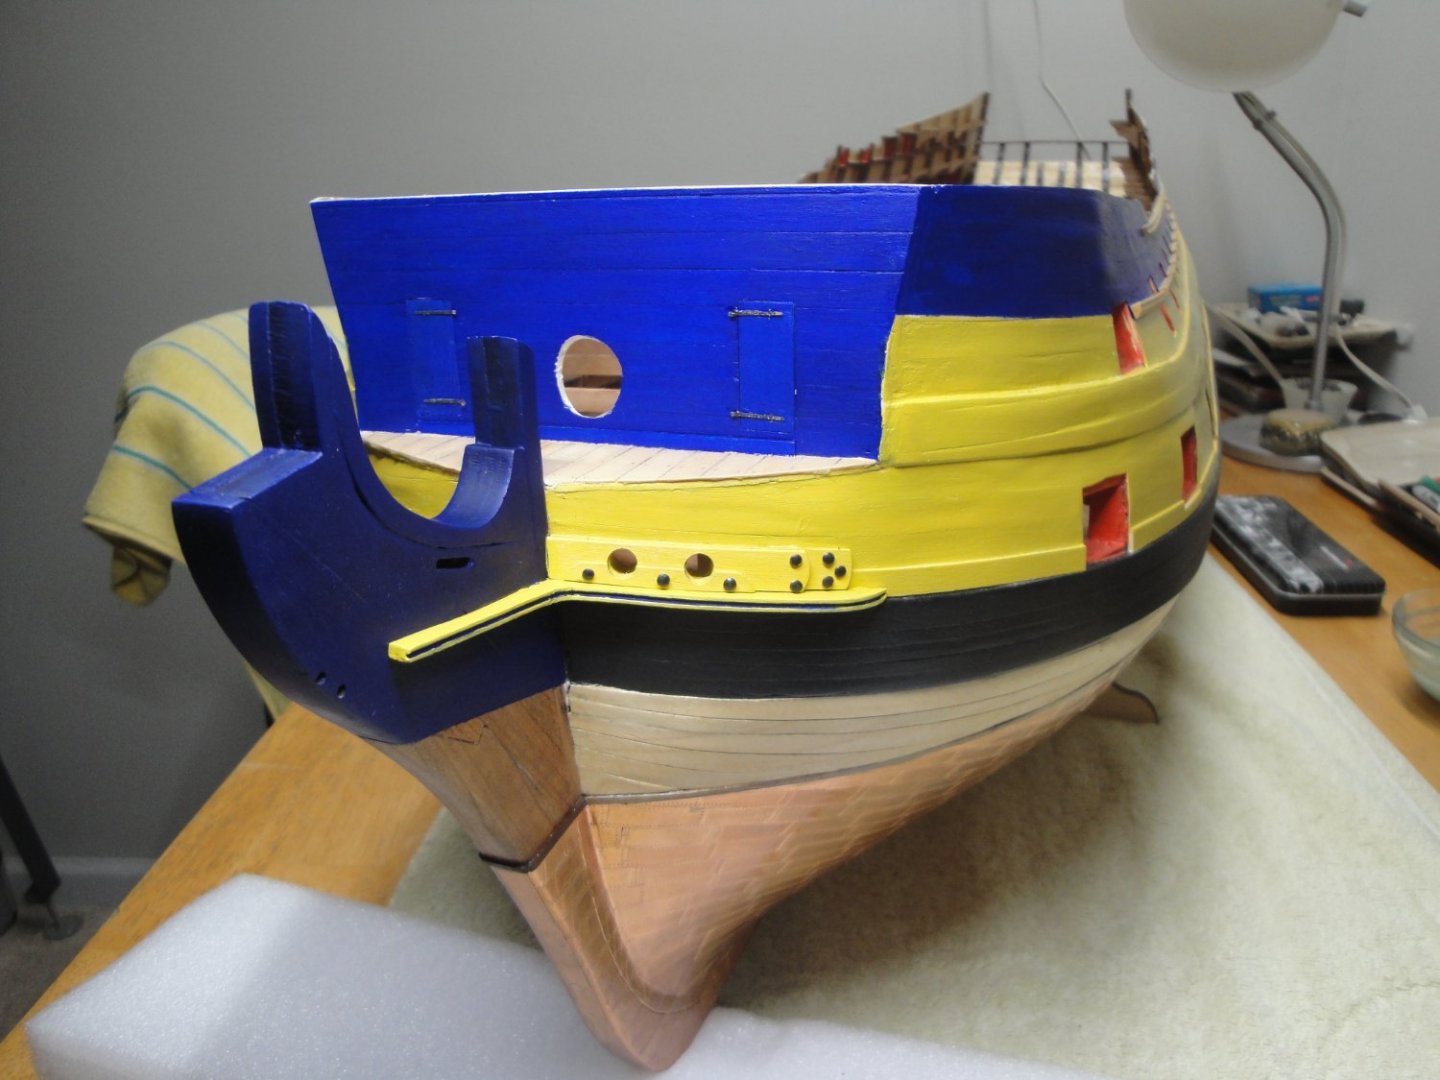
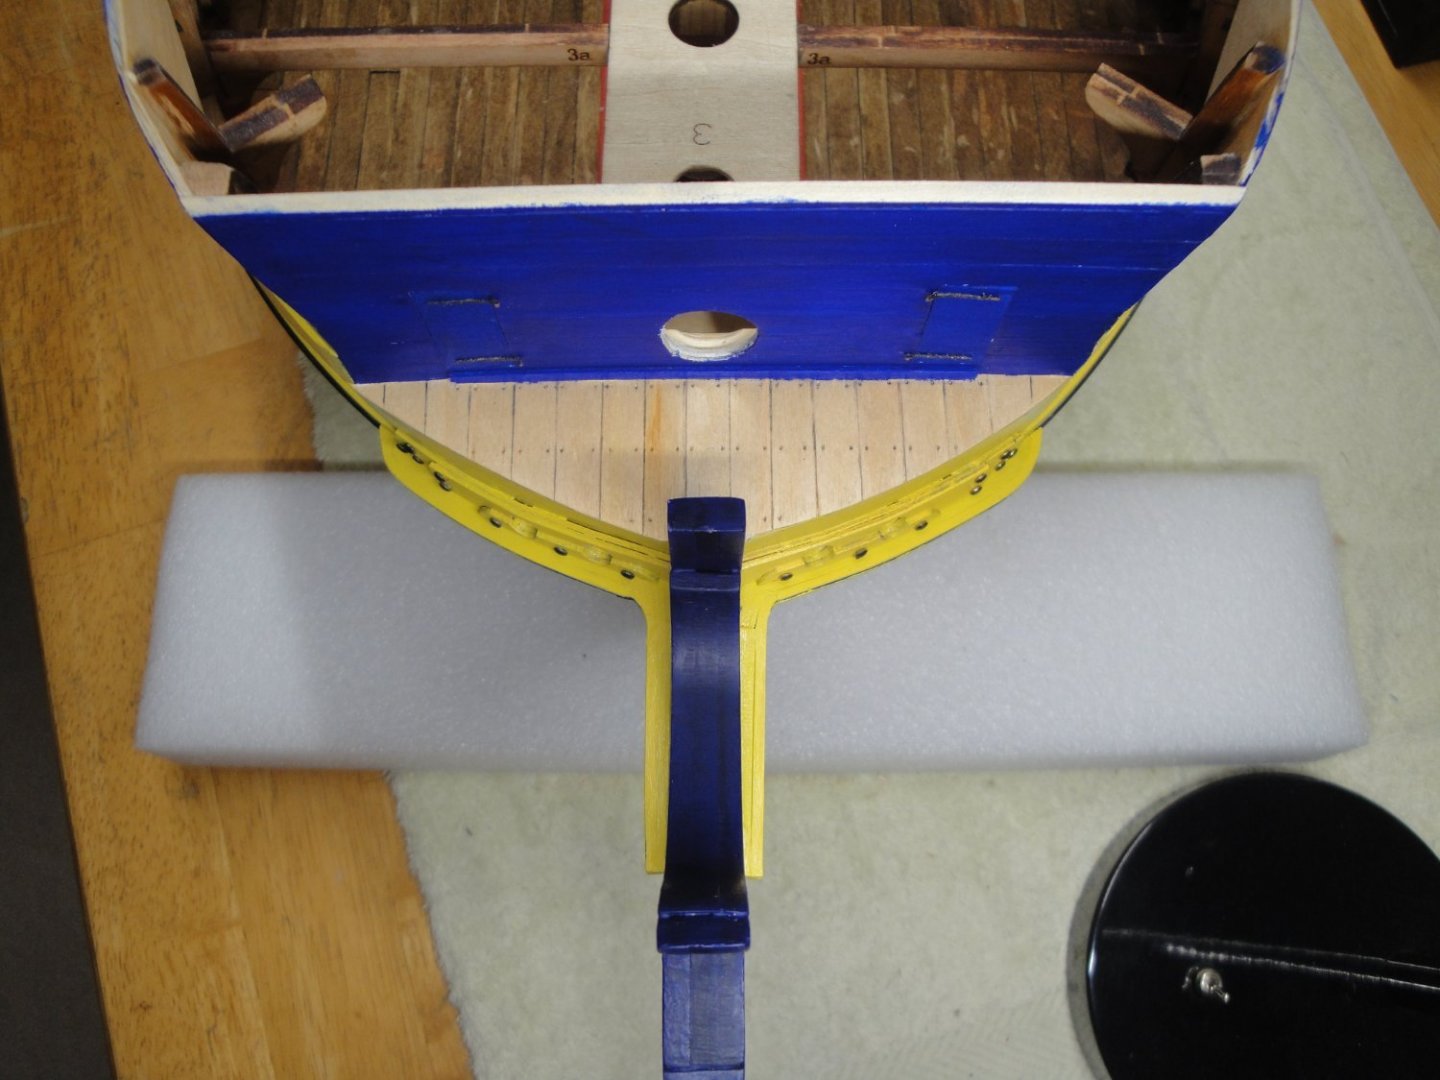
More work on the Head of the ship, with the installation of the hawse holes and cheeks. At the beginning of Session #3, there are some recommendations regarding the drilling of the hawse holes. Being cautious, I went to my Session #5 box and pulled out the Hawse plates, set them in place on the bow and marked the holes with a pencil. Then I went back to the Session #3 instructions and compared the dimensions. I am glad I proceeded the way I did, as the indications given in Session #3, are not at all right. Again, we have reached a stage in this kit, where owning all Sessions (3 to 5) is essential to avoid major mistakes. Then comes the assembly of the upper and lower cheeks. These are made of four parts: two are cut by laser and the other twos have to be carved, bent and refined for a decent fit. You can see below on pictures 35 and 36 how it is done. This has been a tedious task, requiring a lot of precision, sanding, filing, painting and gluing. I am glad it is behind me and even though it is far from being perfect, this is the best I can do at this moment: Upper cheeks are now in place: I think I will go back to work on the stern, for a change of pace..... Yves


- 507 replies
-
- 14
-
-
-
Nice progress on the hull. Compared to a period ship, that hull seems relatively easy to plank... 🙂 Yves
-
That is amazing Tobias. Thank you so much for publishing these pictures. As a matter of fact, you should start a new thread relating the event with all your pictures. Besides the National Galleries in Barcelona and Annapolis (Maryland), I have never seen a larger collection of exquisite models. You guys have incredible skills and patience. Yves