yvesvidal
-
Posts
3,624 -
Joined
-
Last visited
Content Type
Profiles
Forums
Gallery
Events
Everything posted by yvesvidal
-
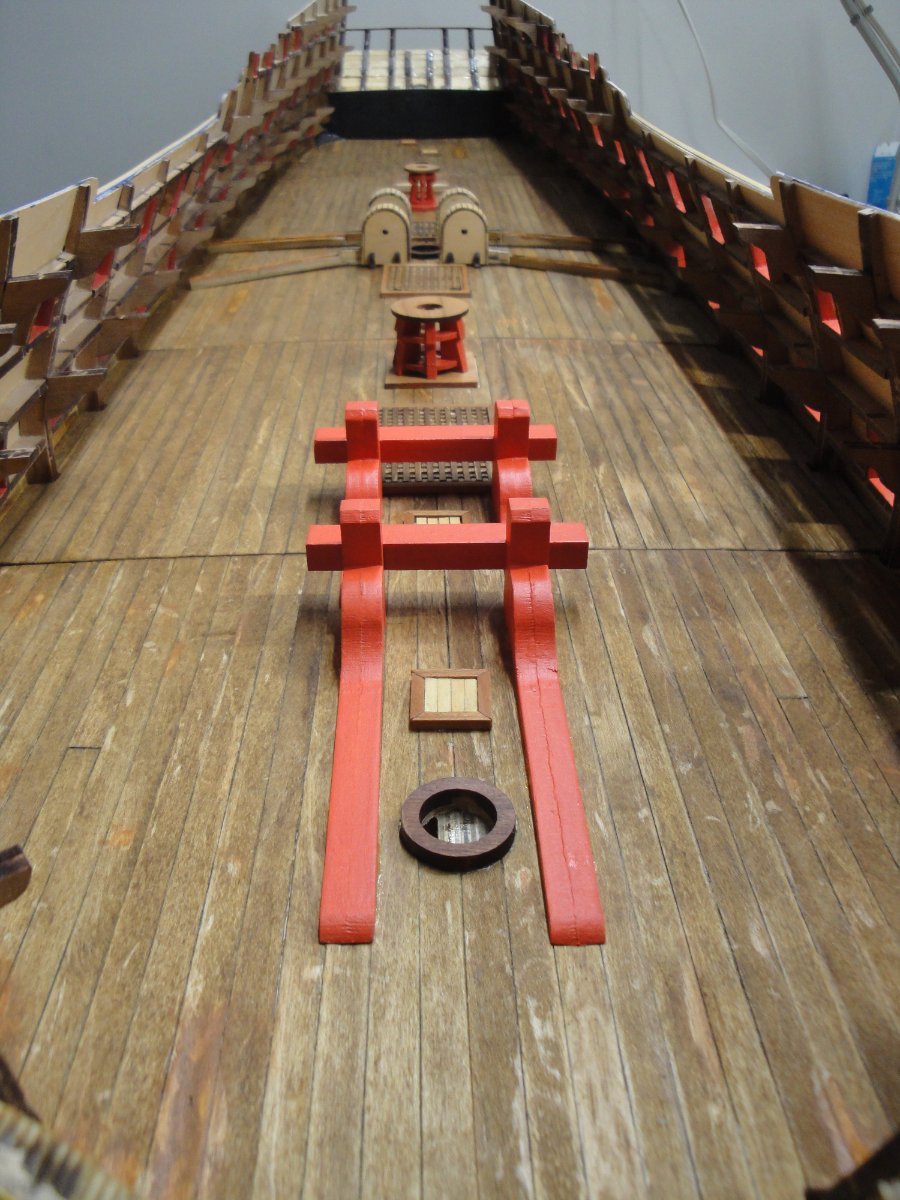
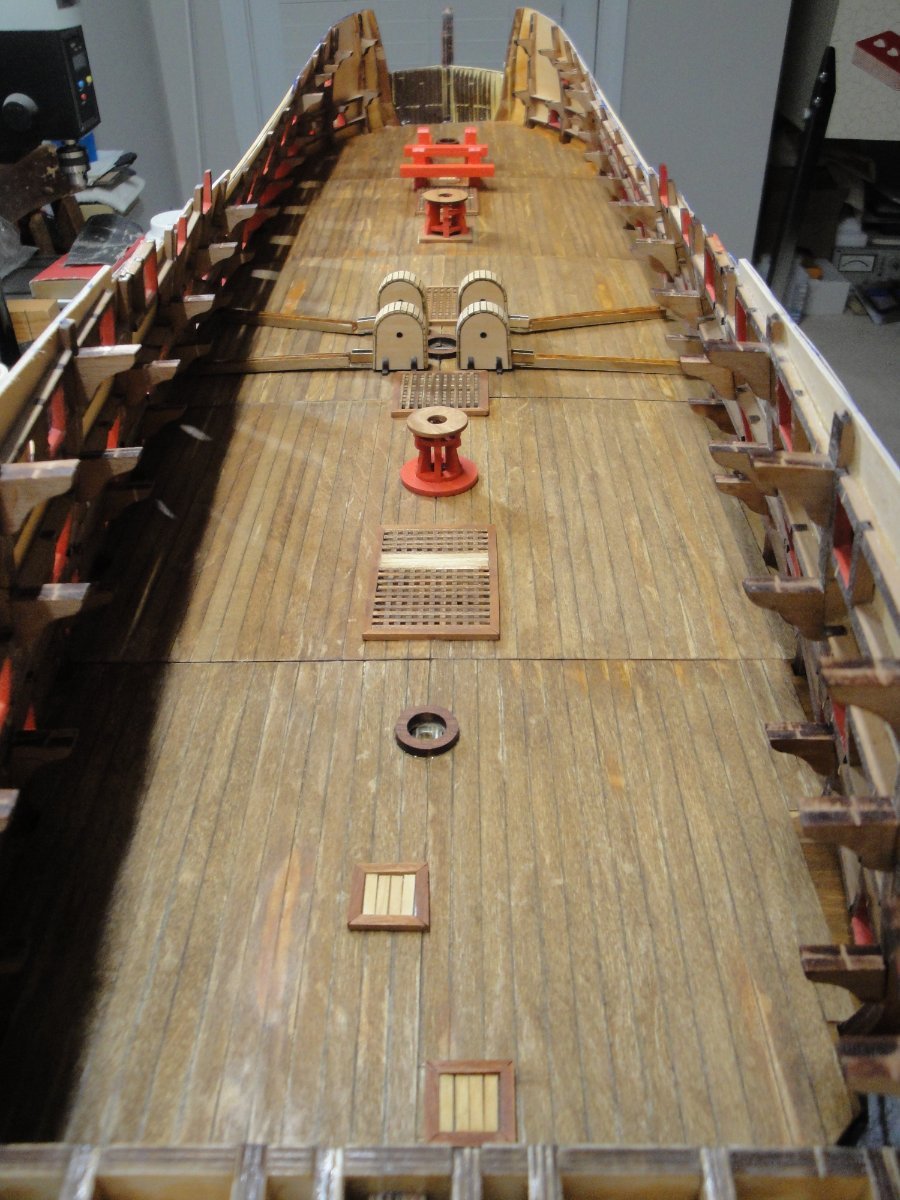
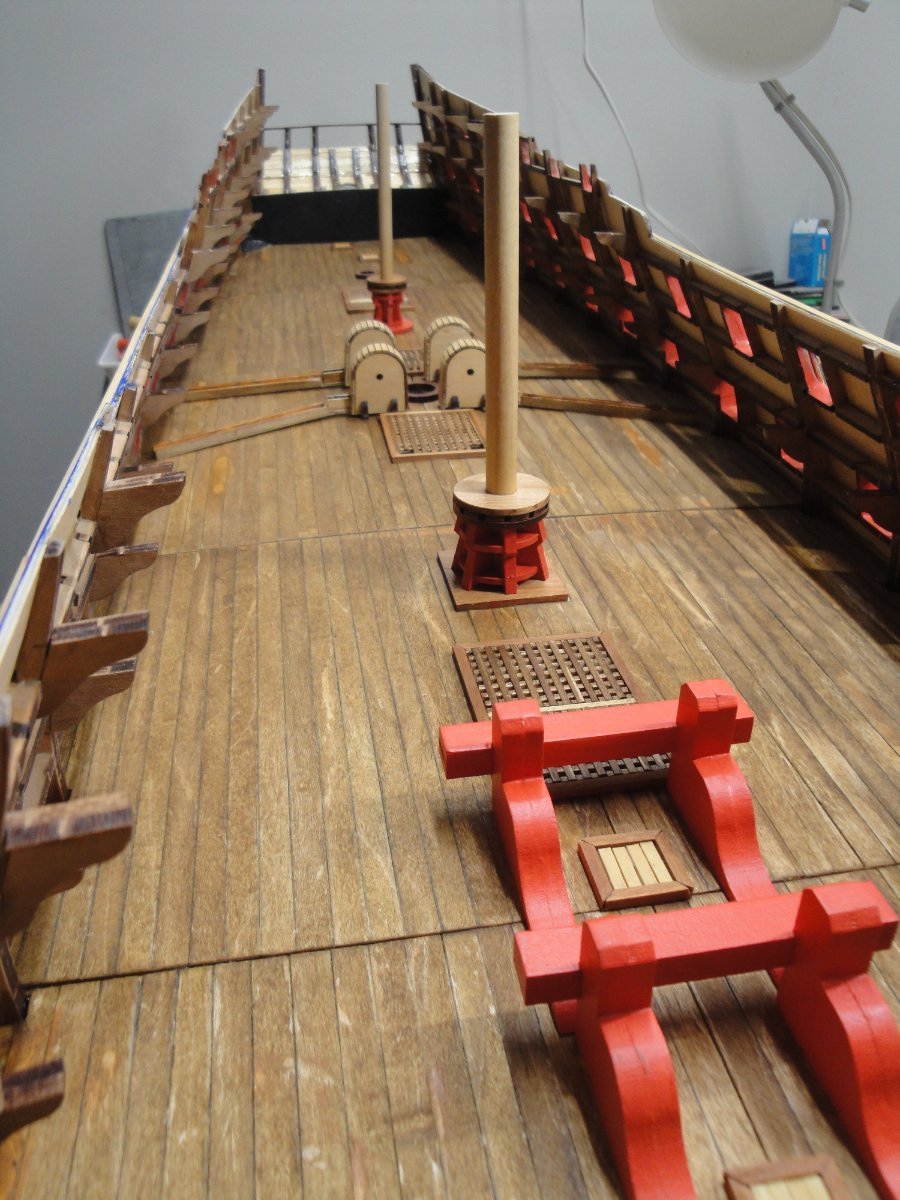
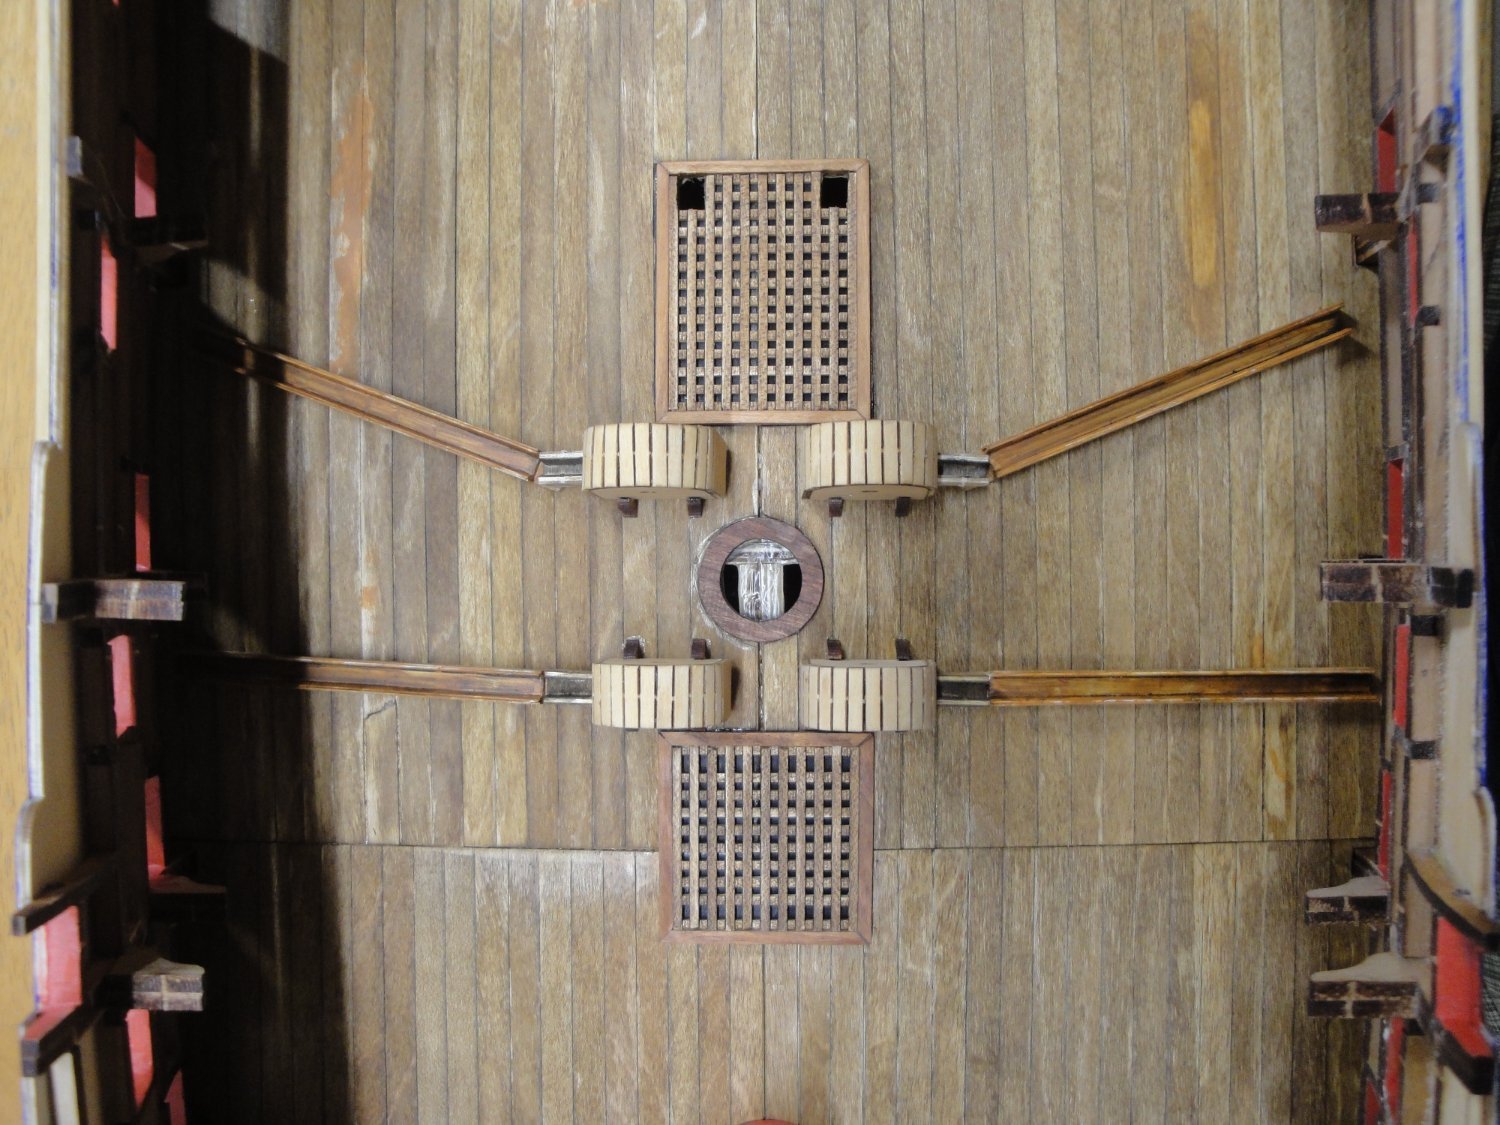
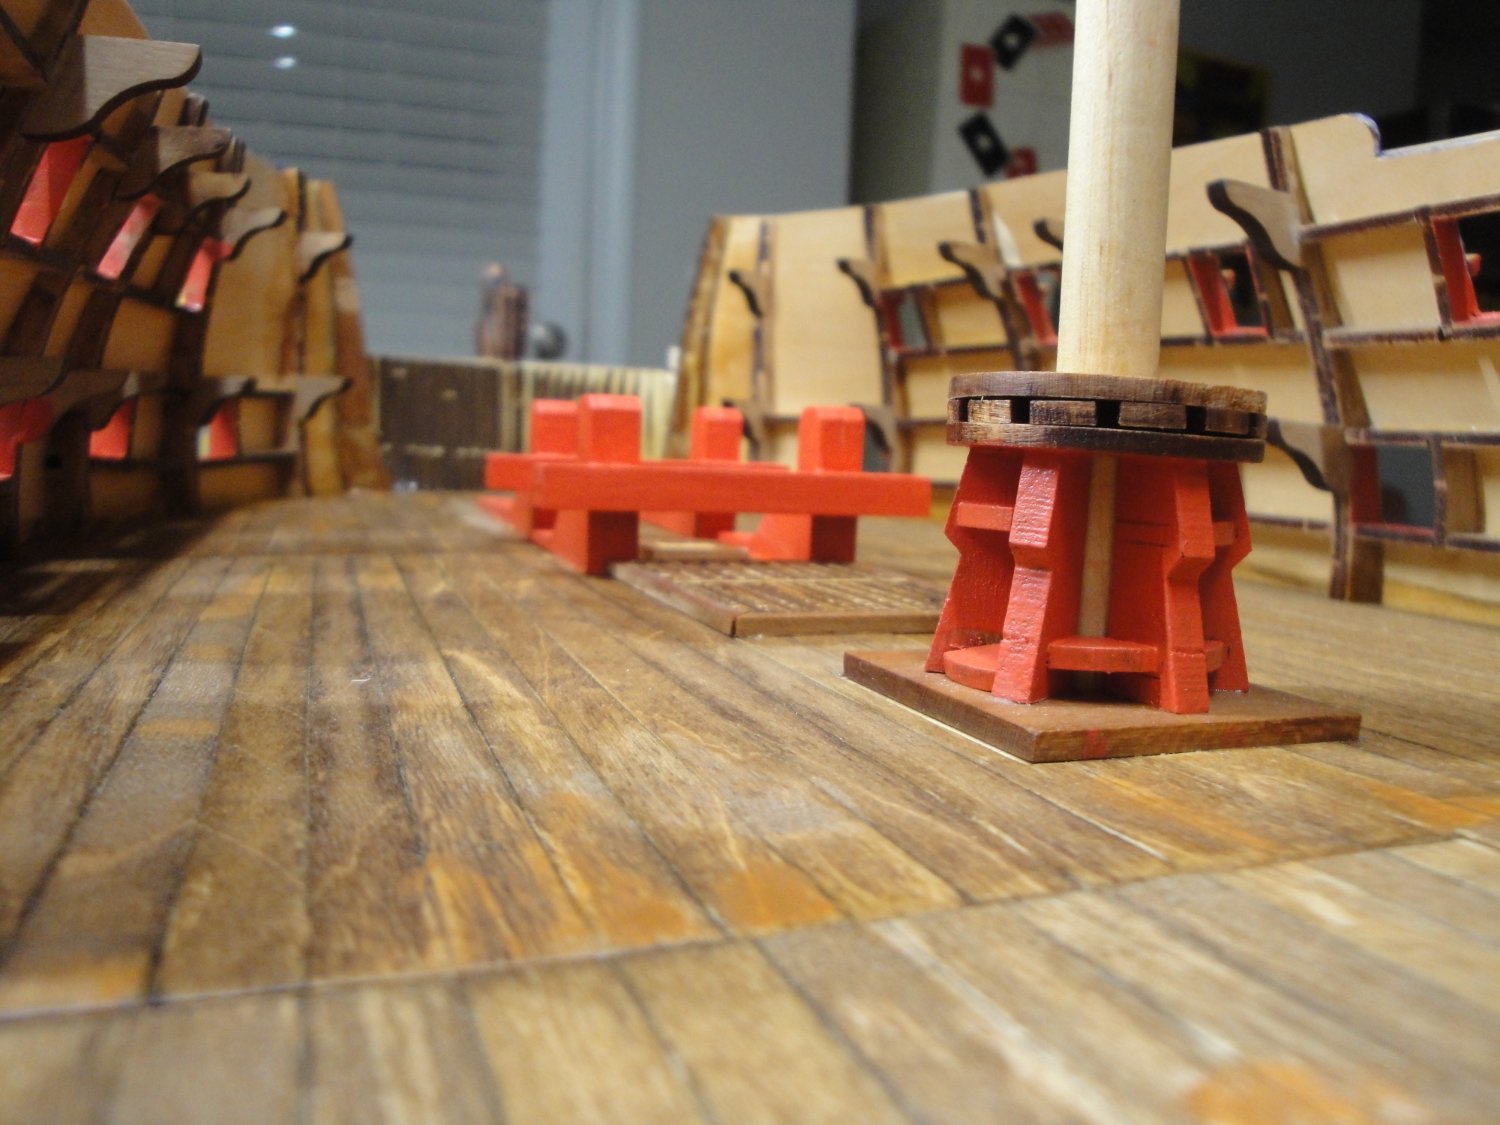
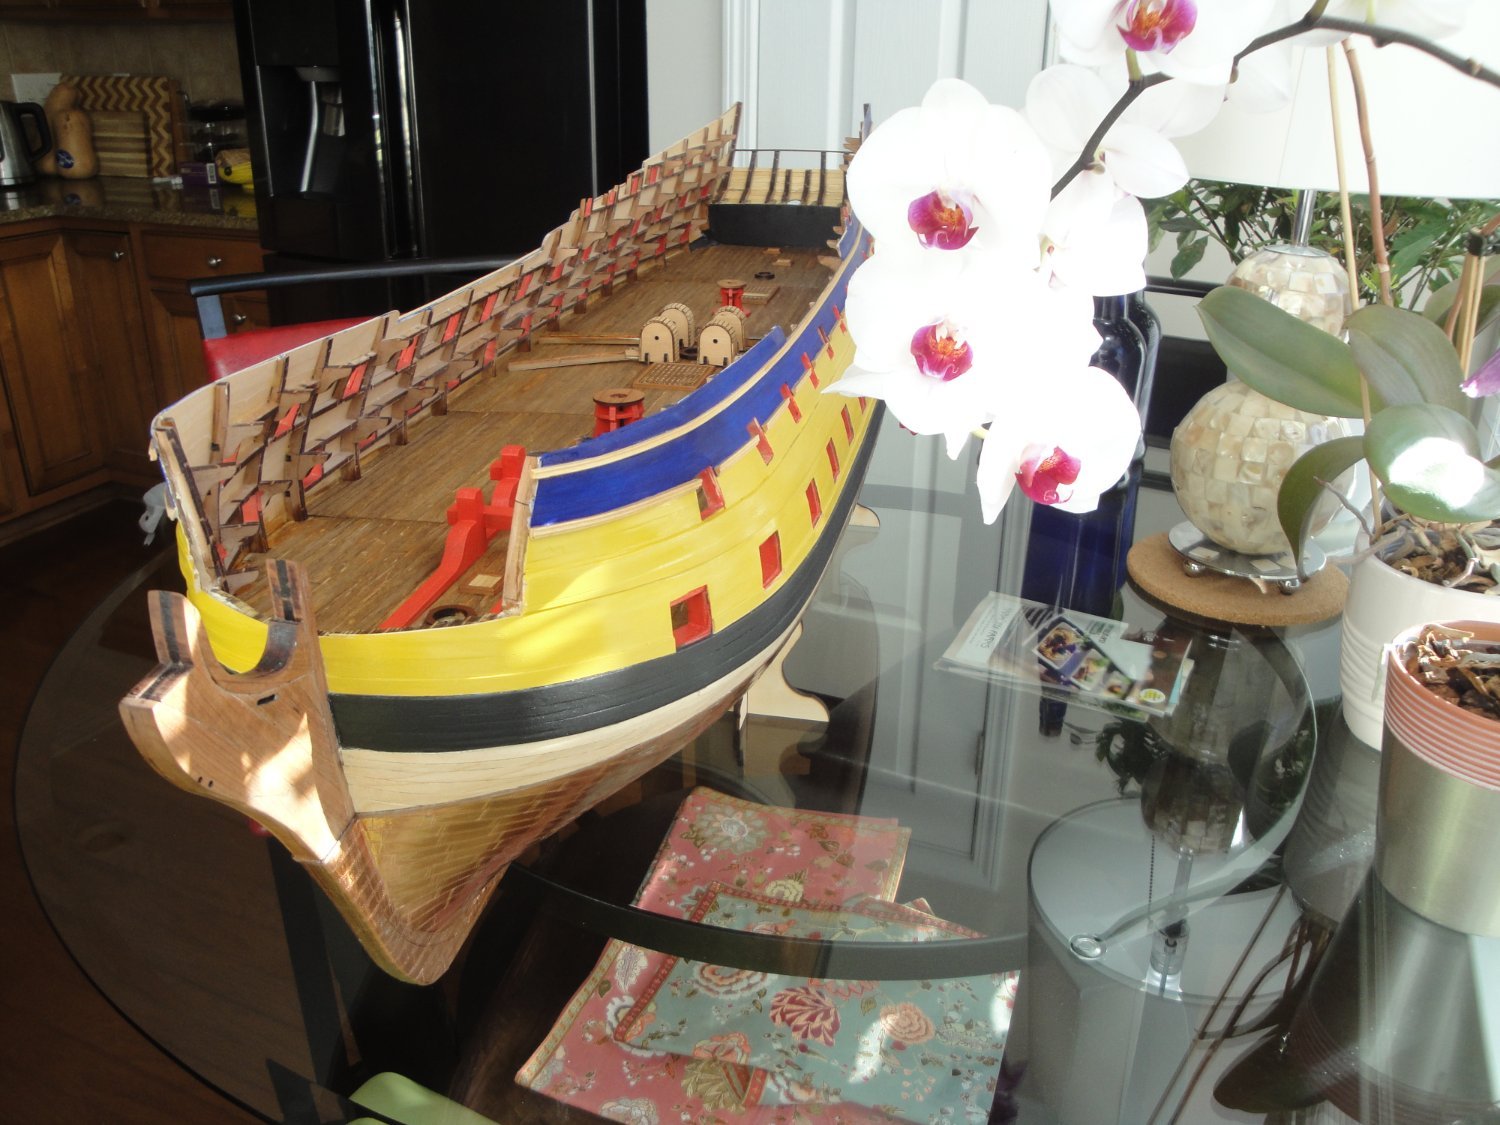
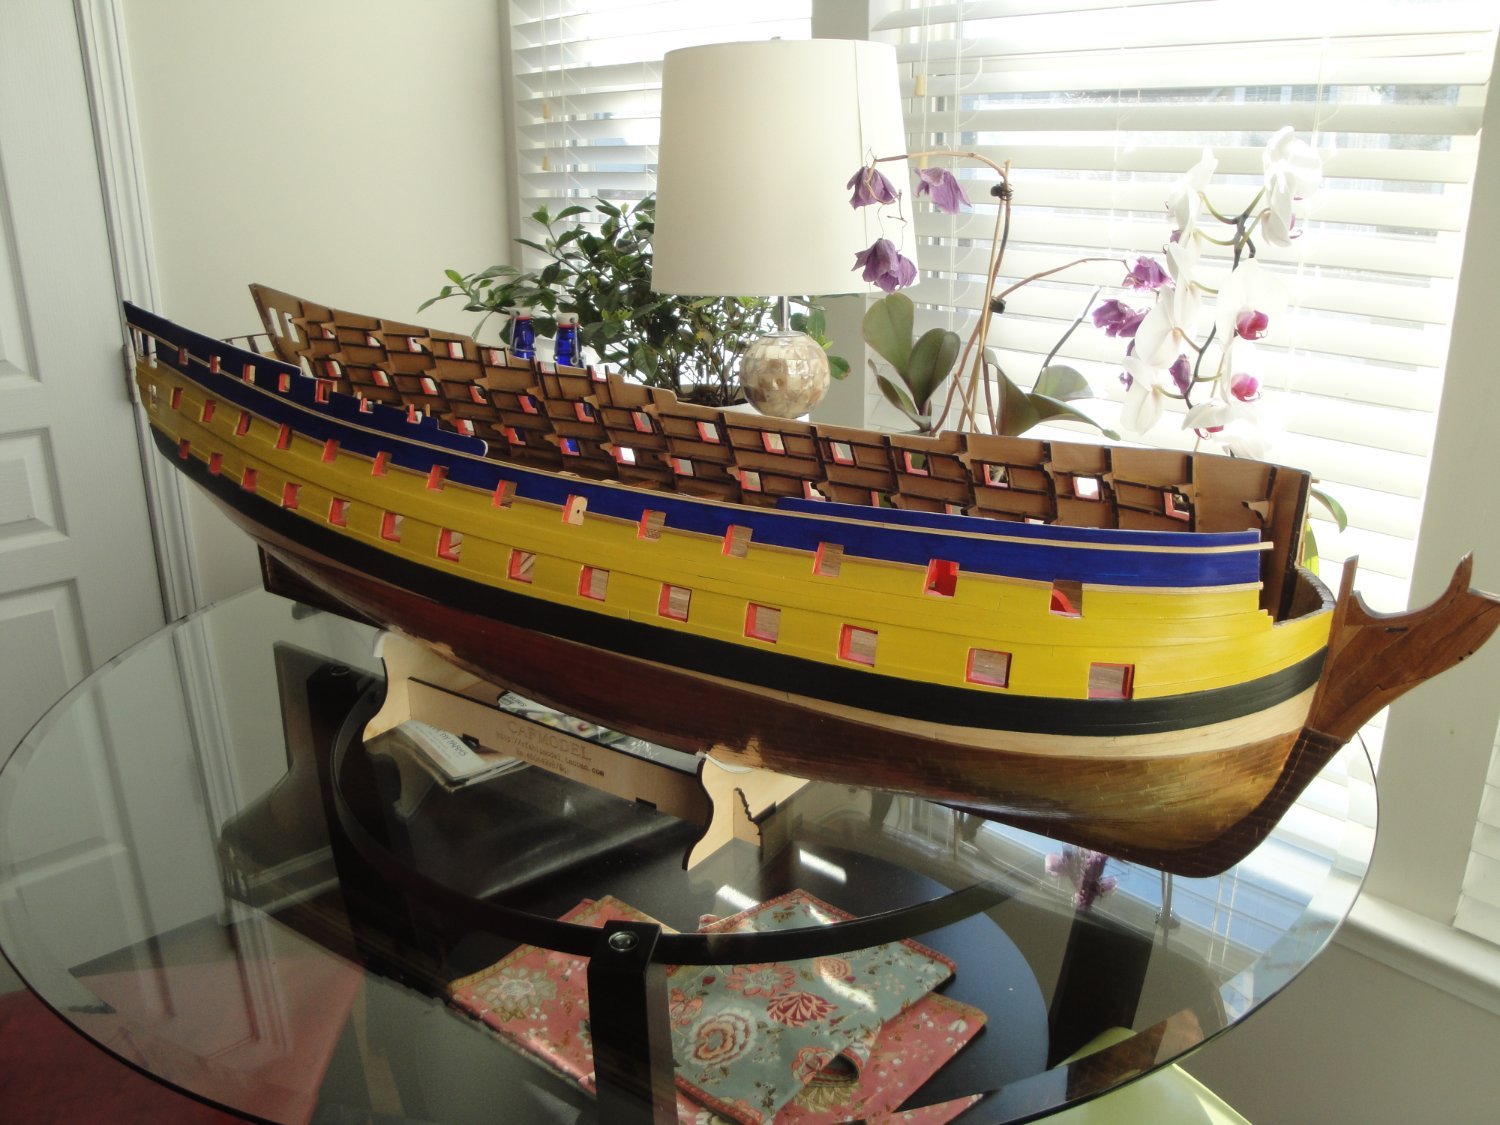
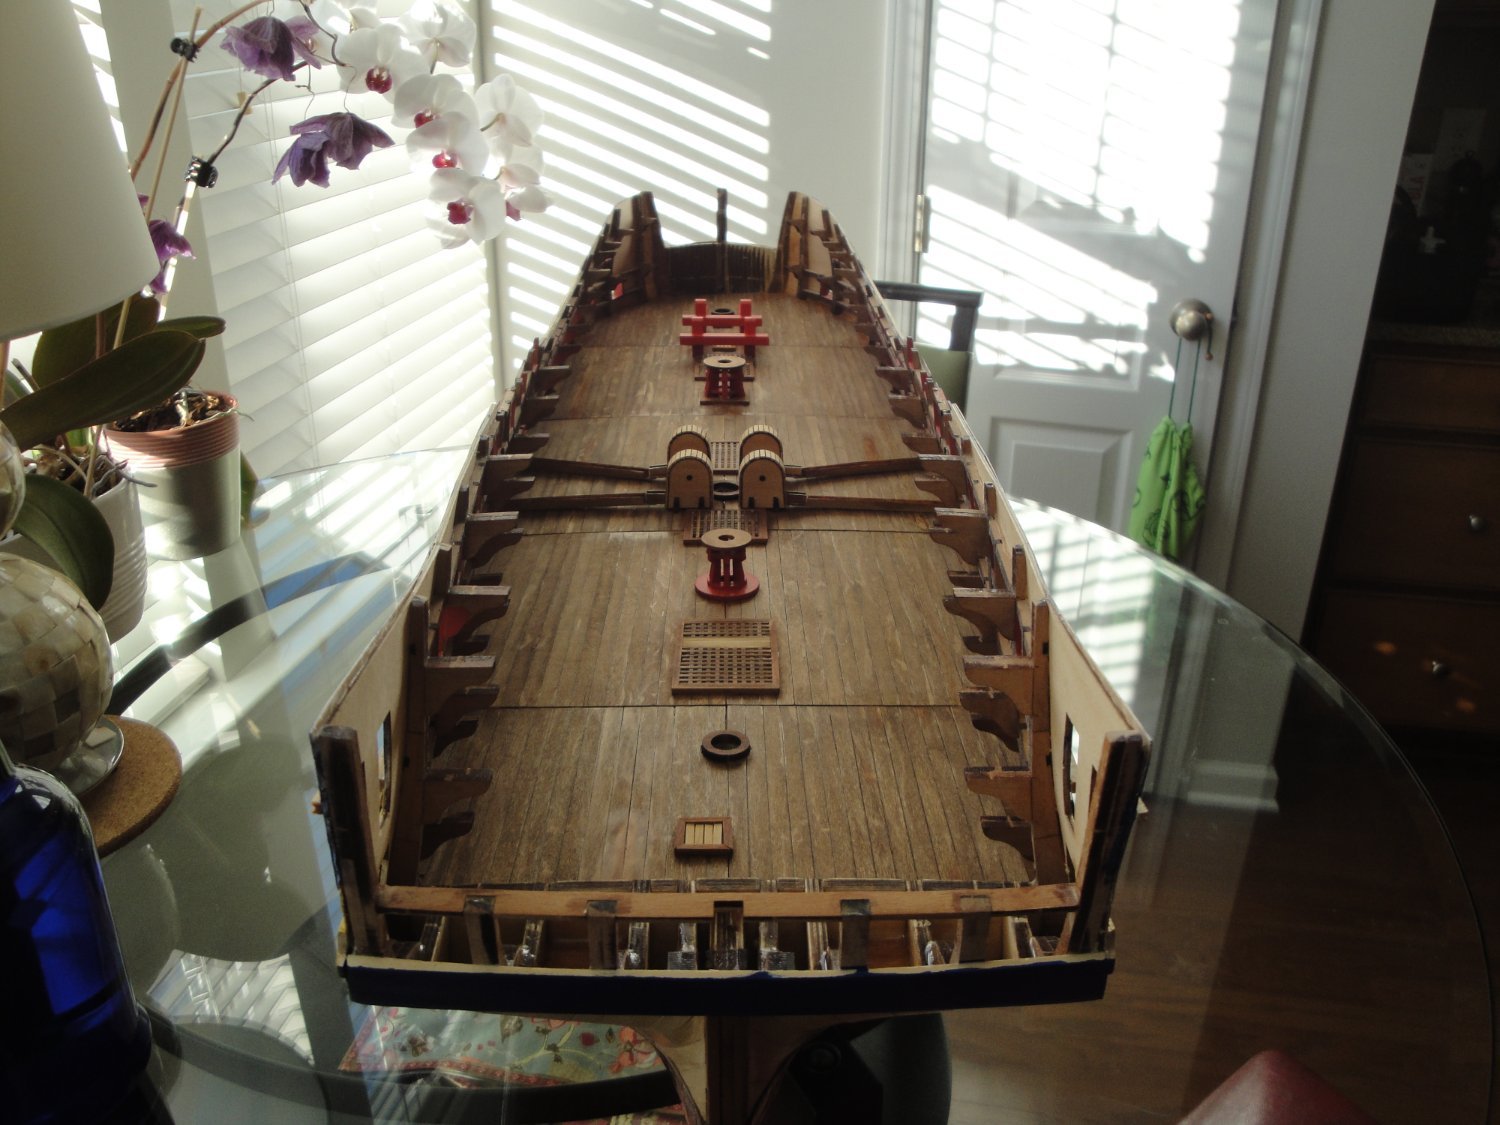
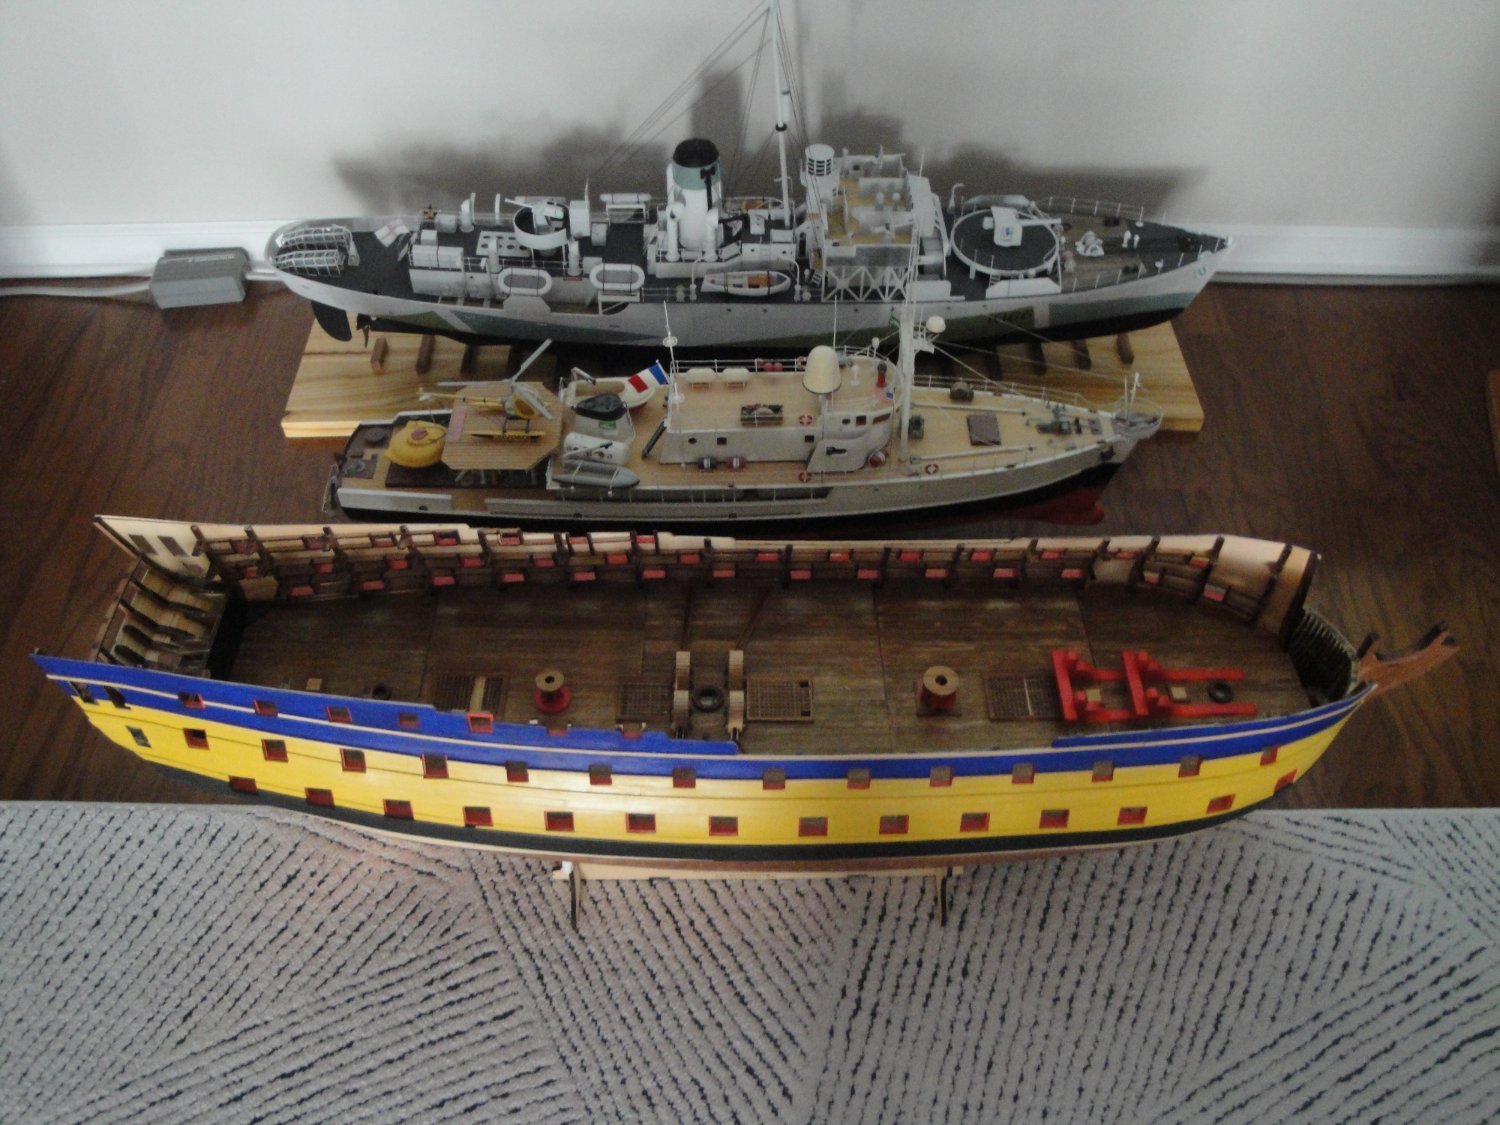
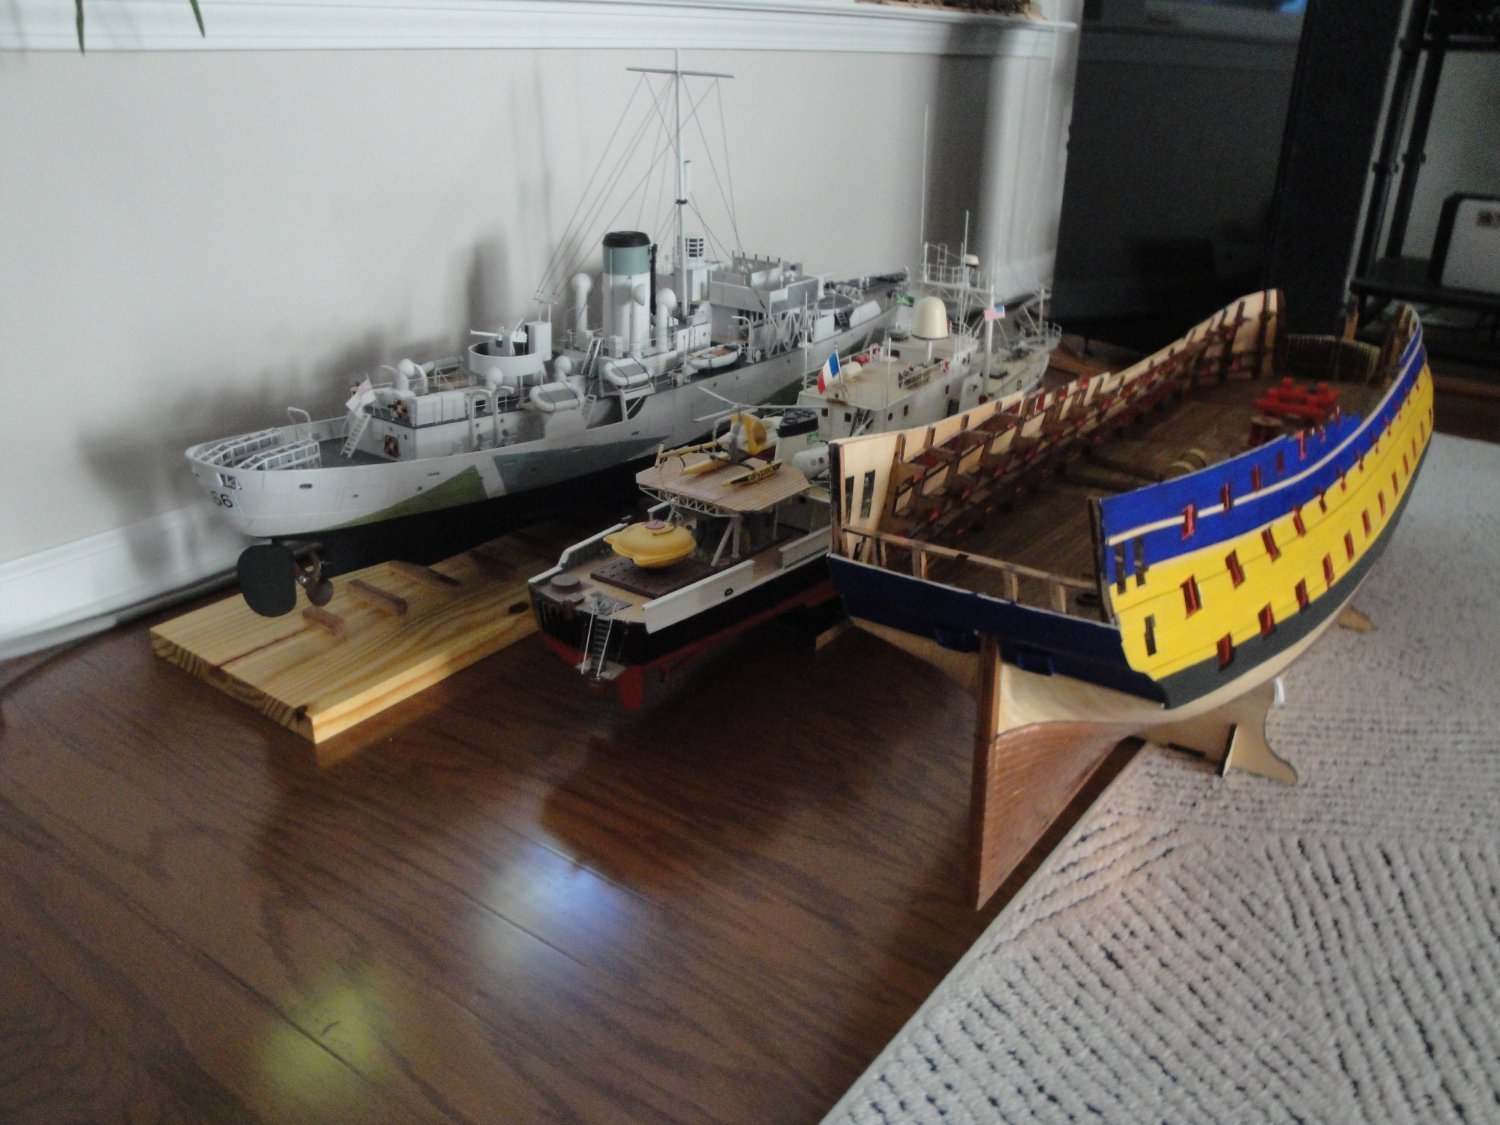
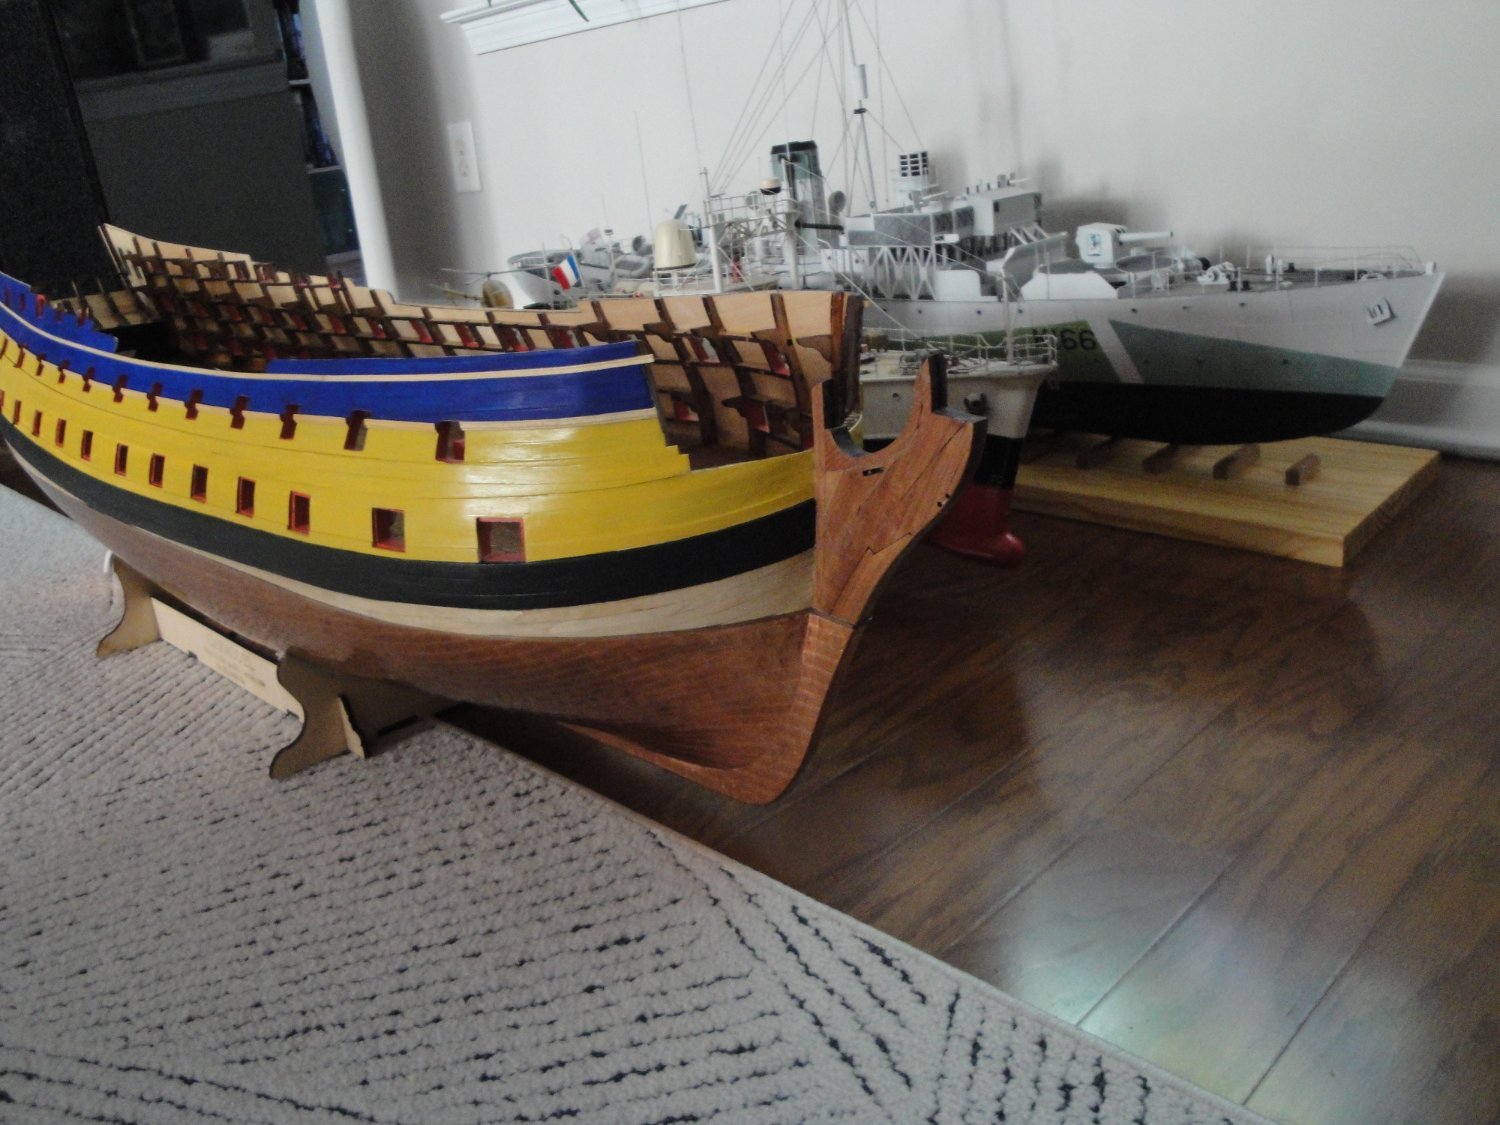
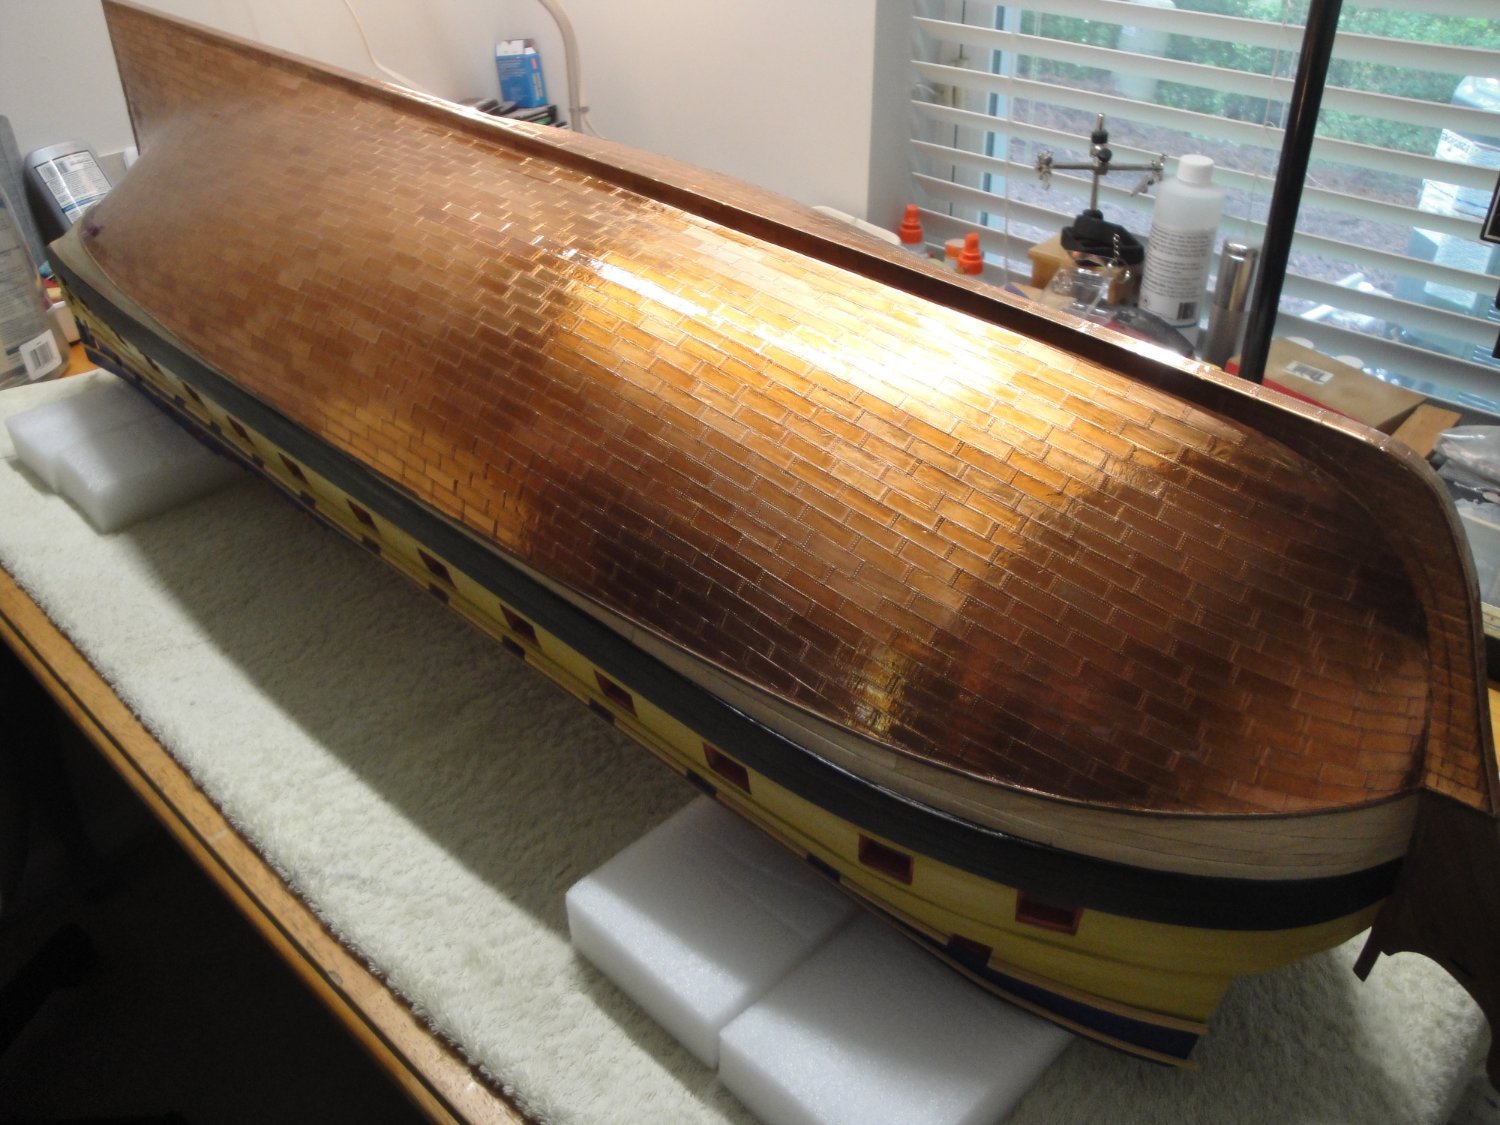
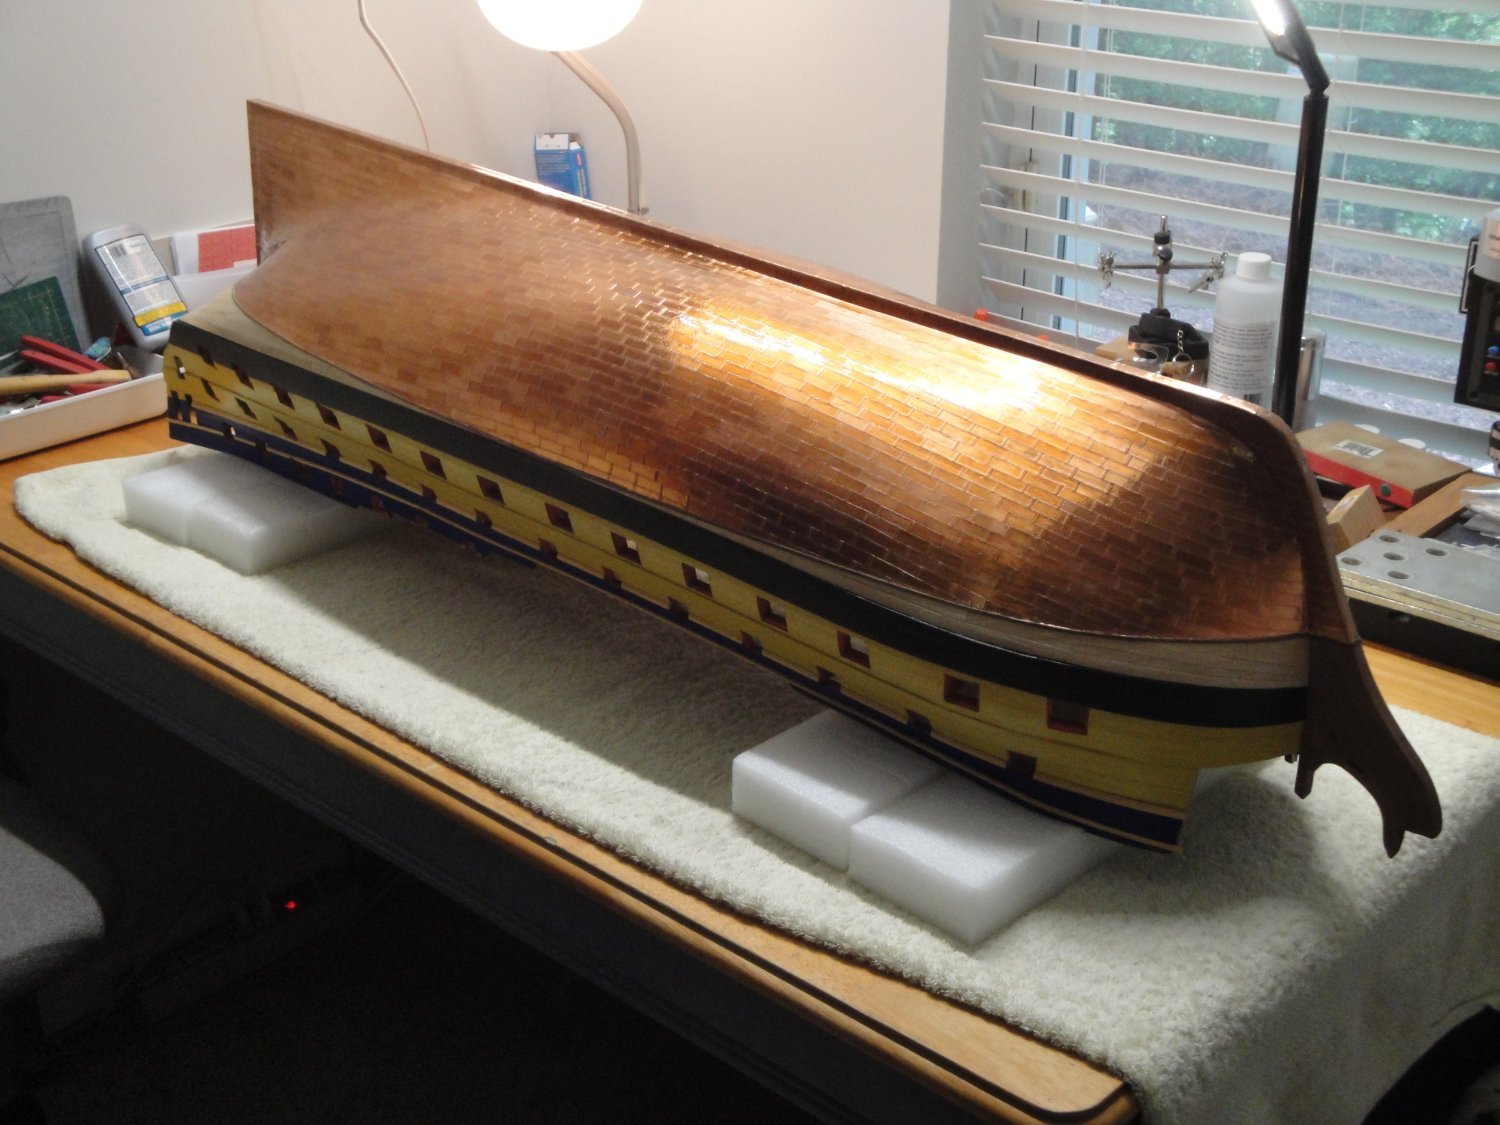
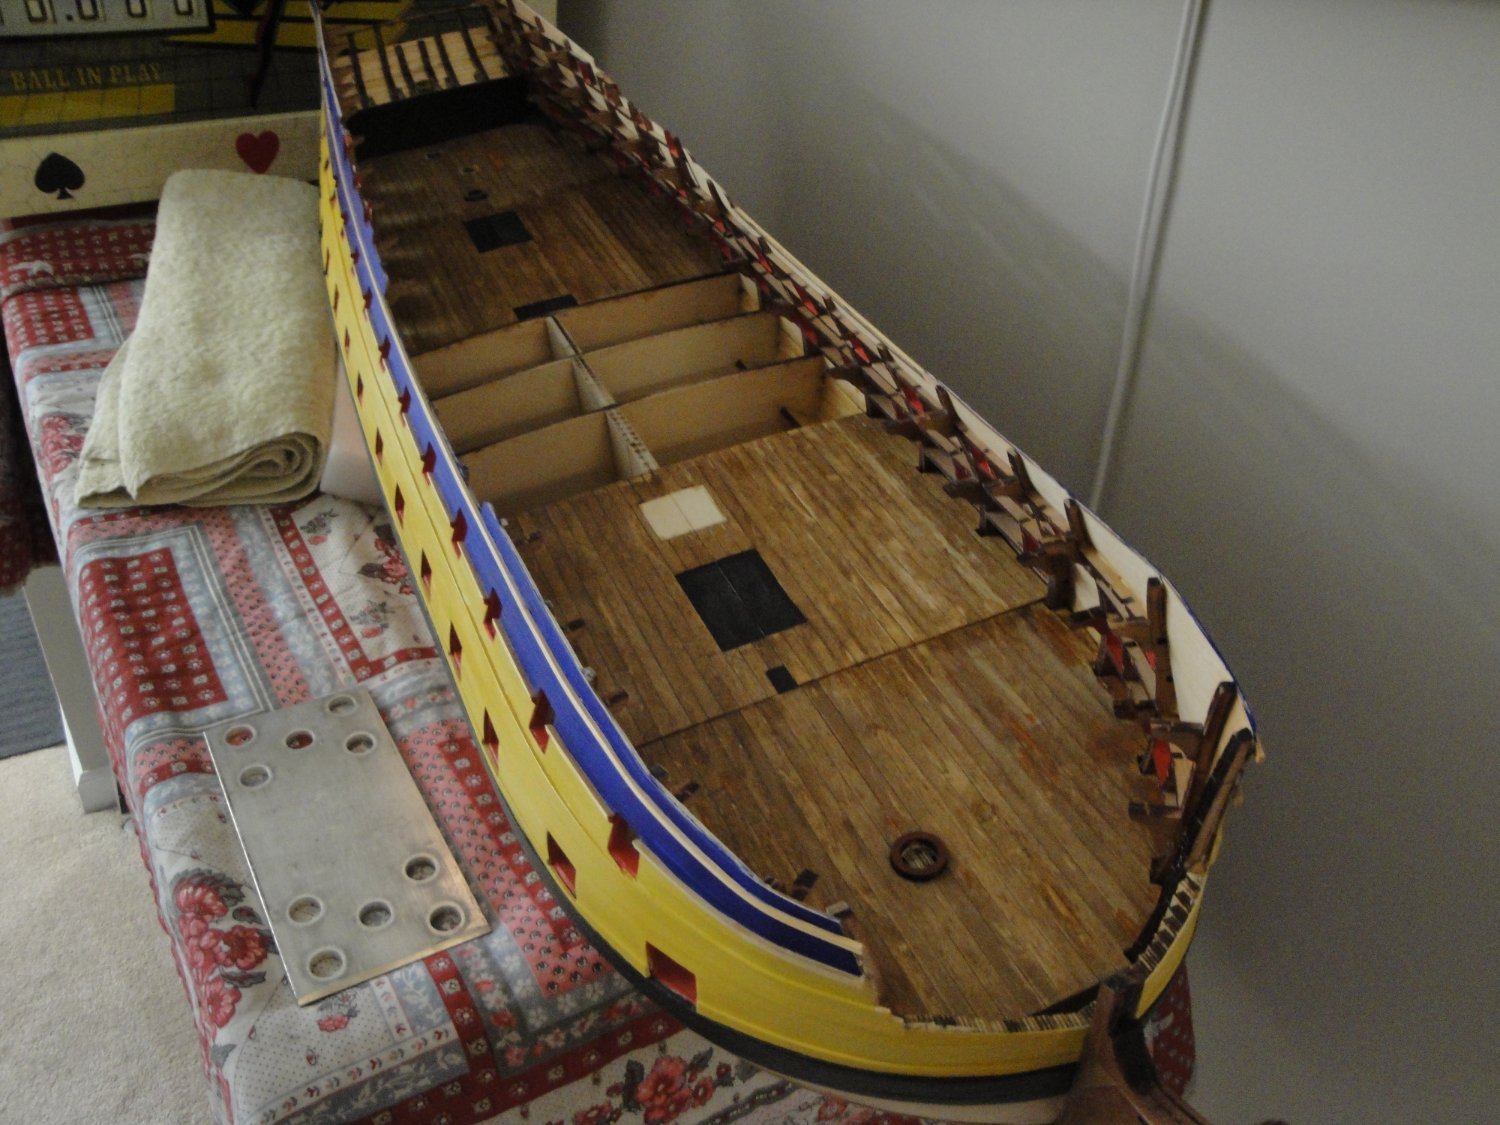
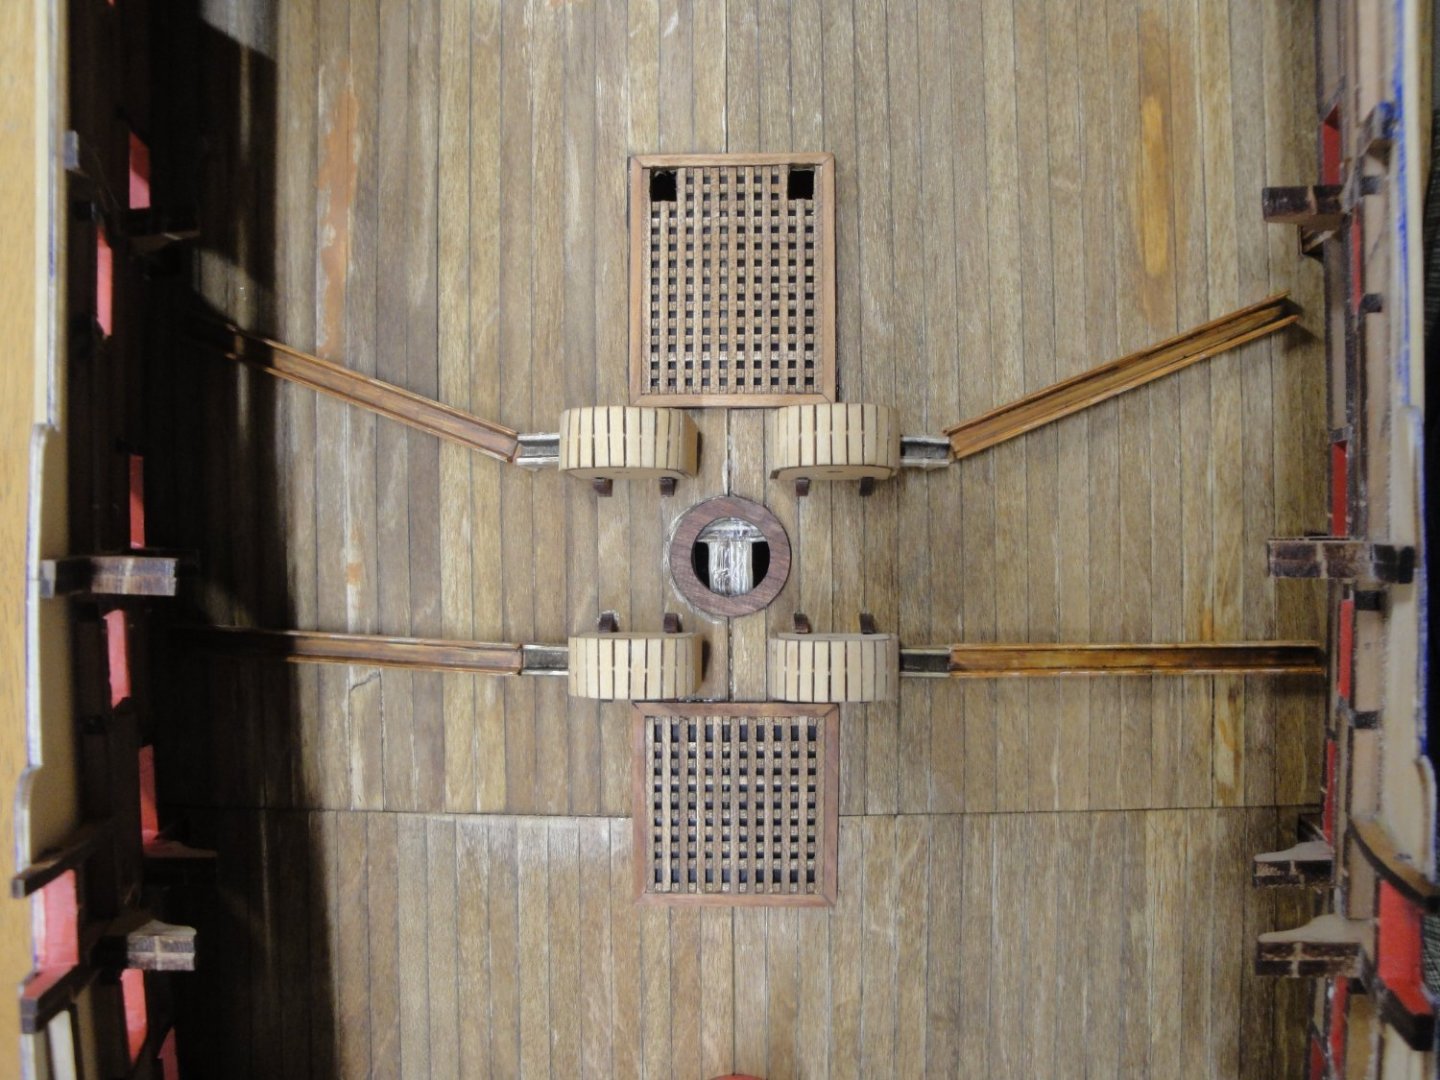
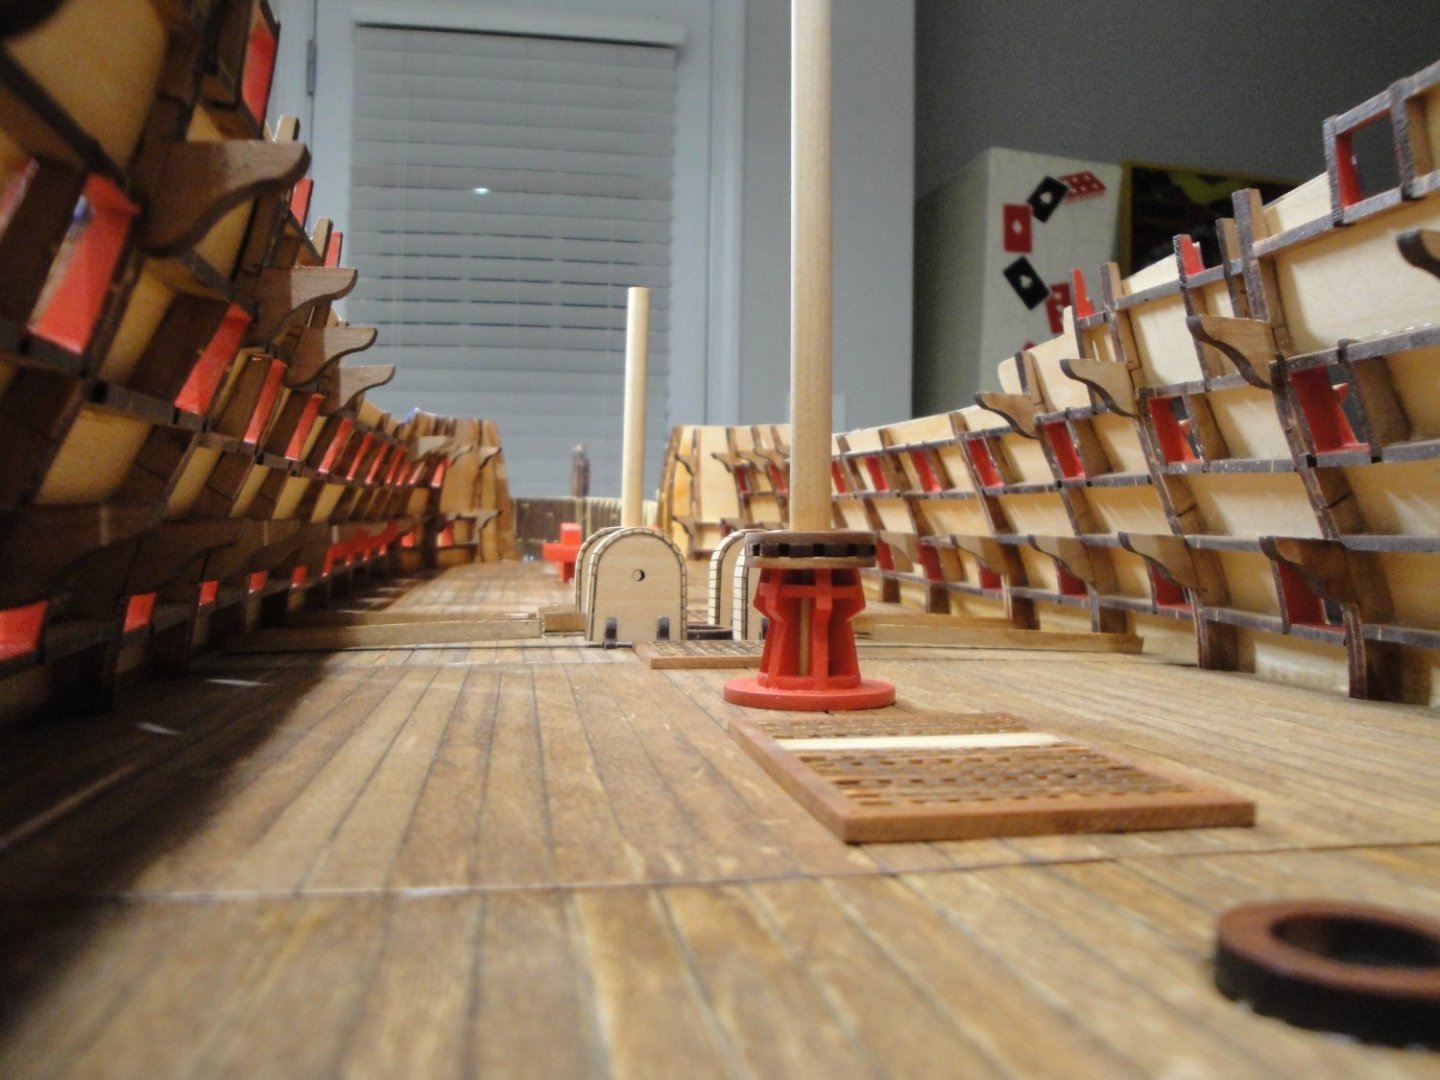
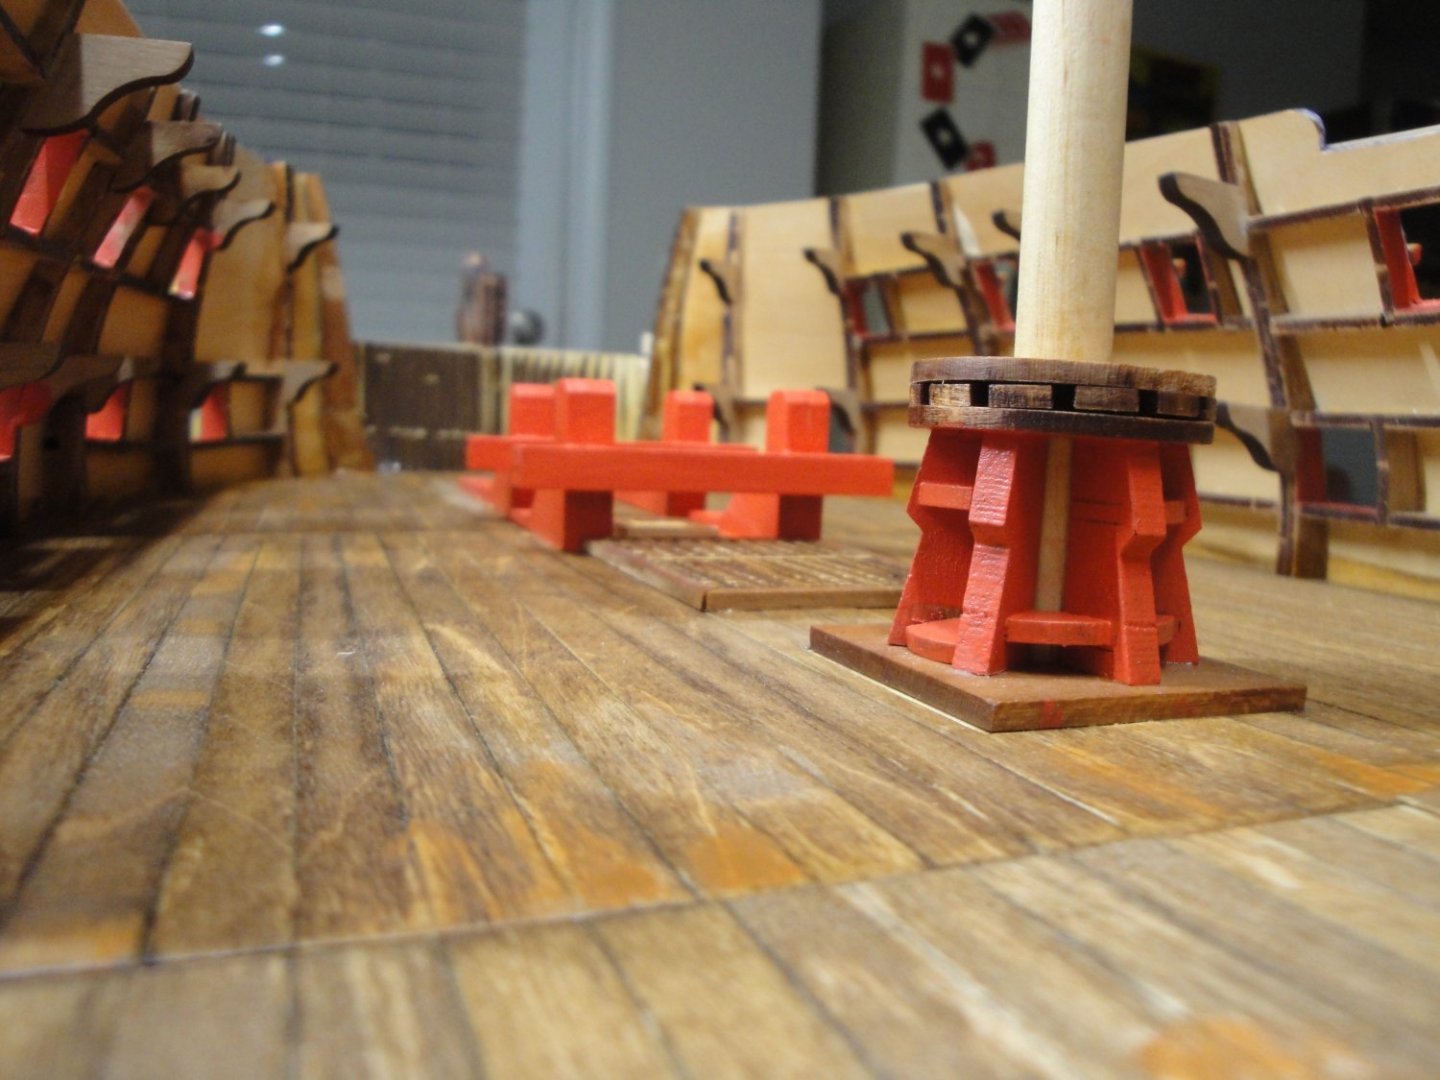
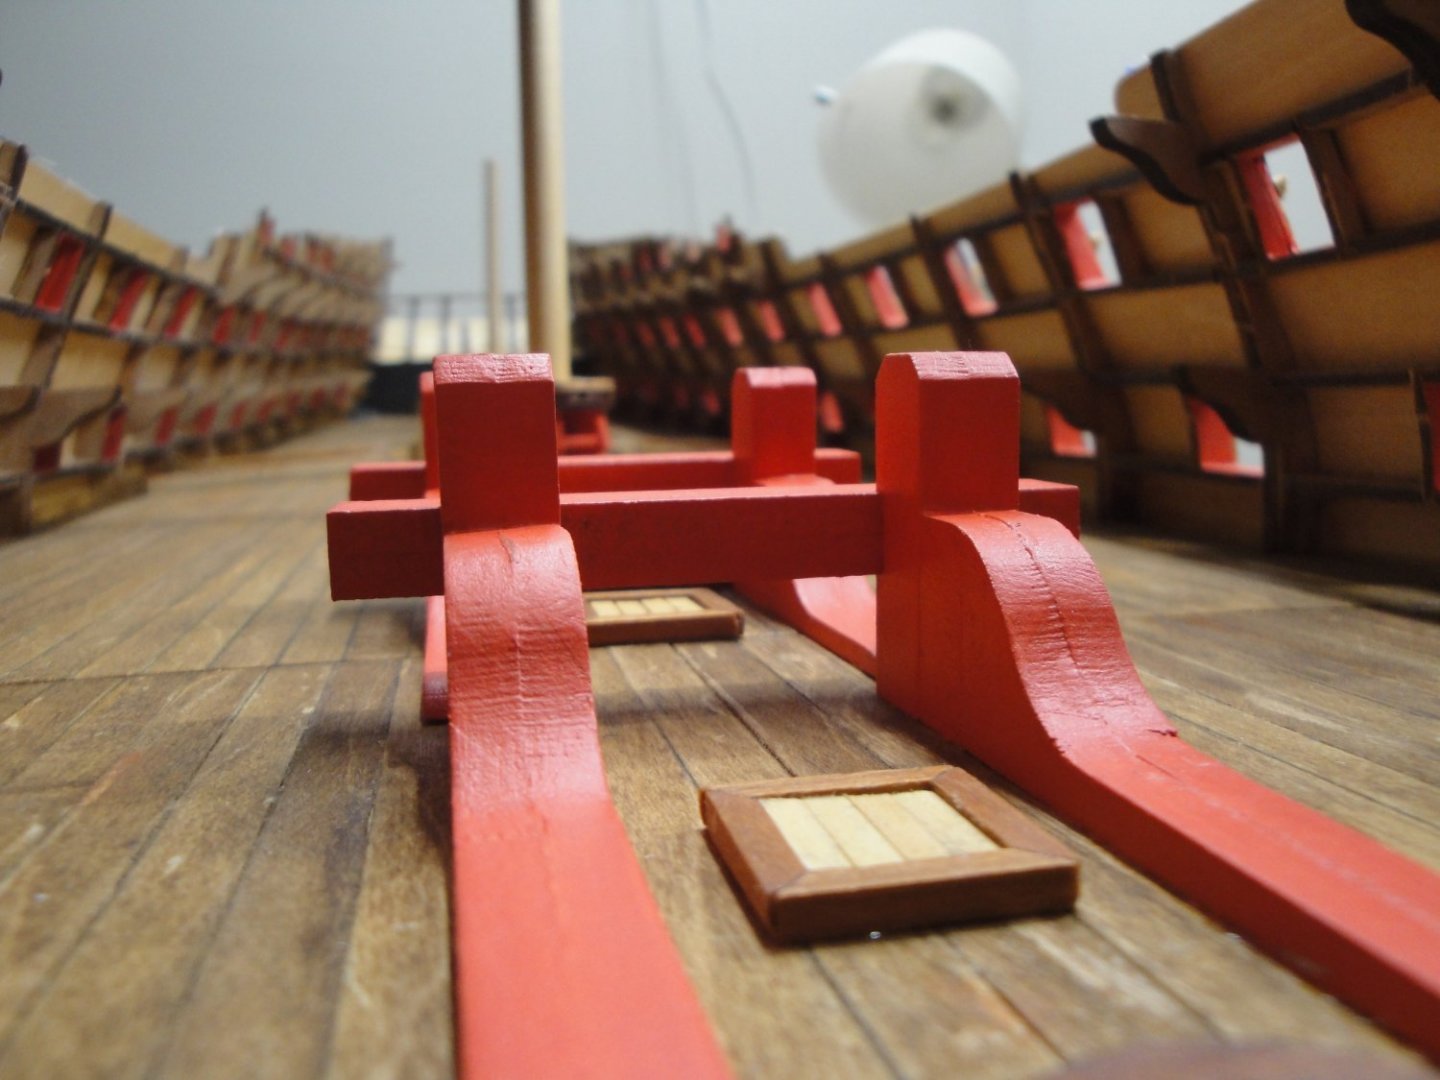
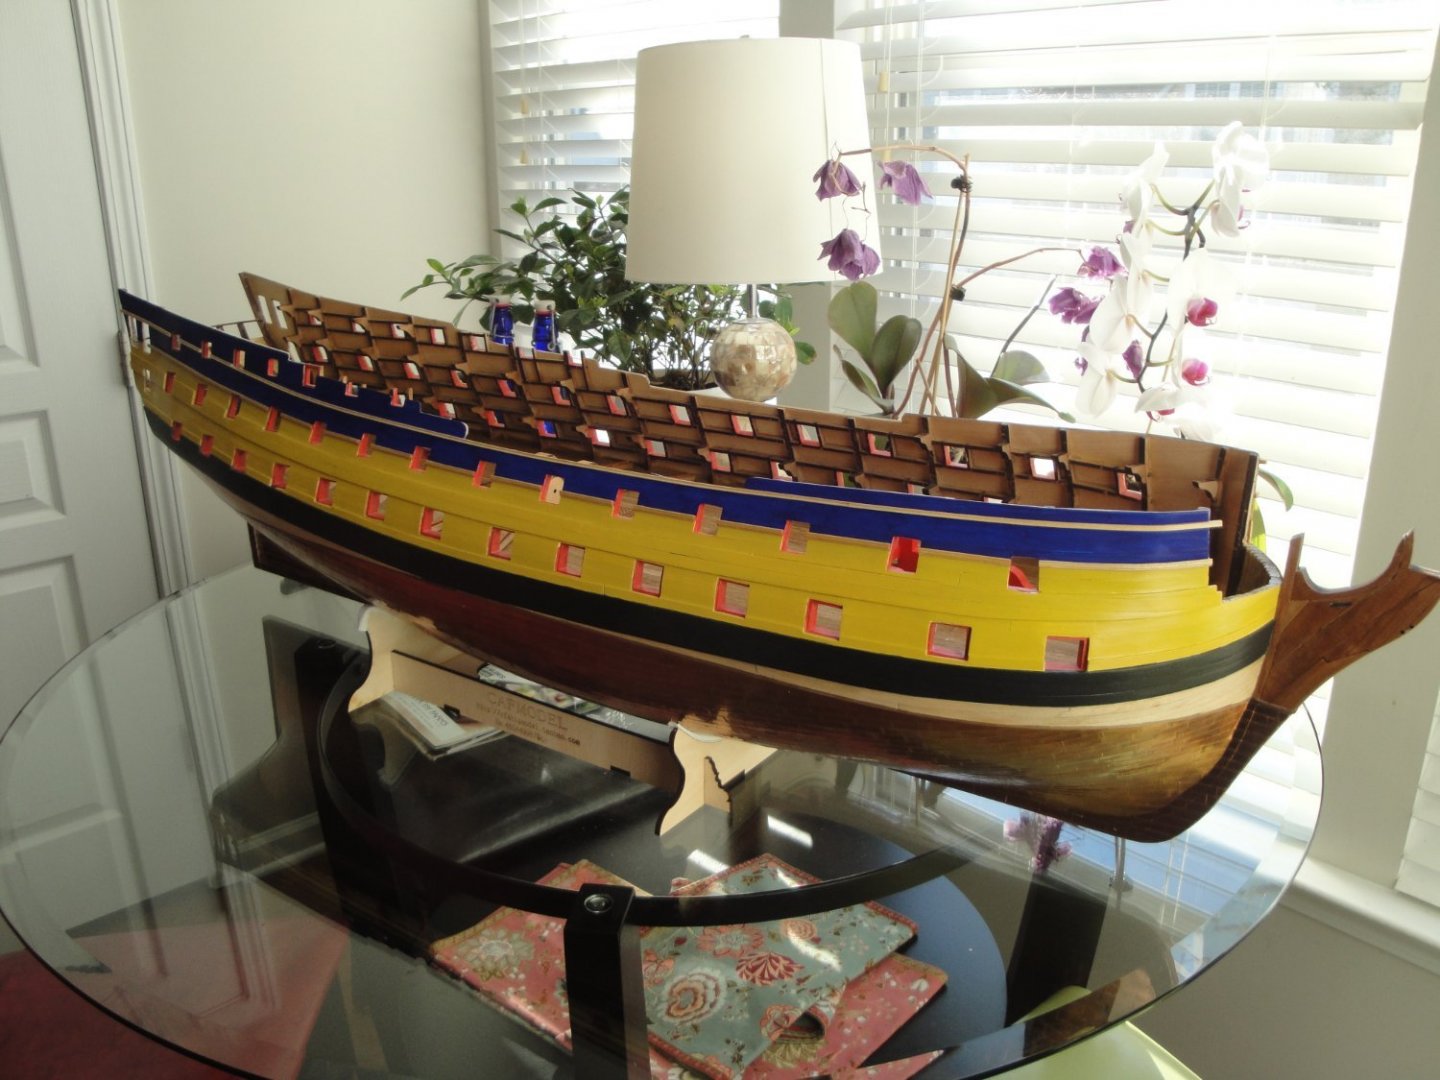
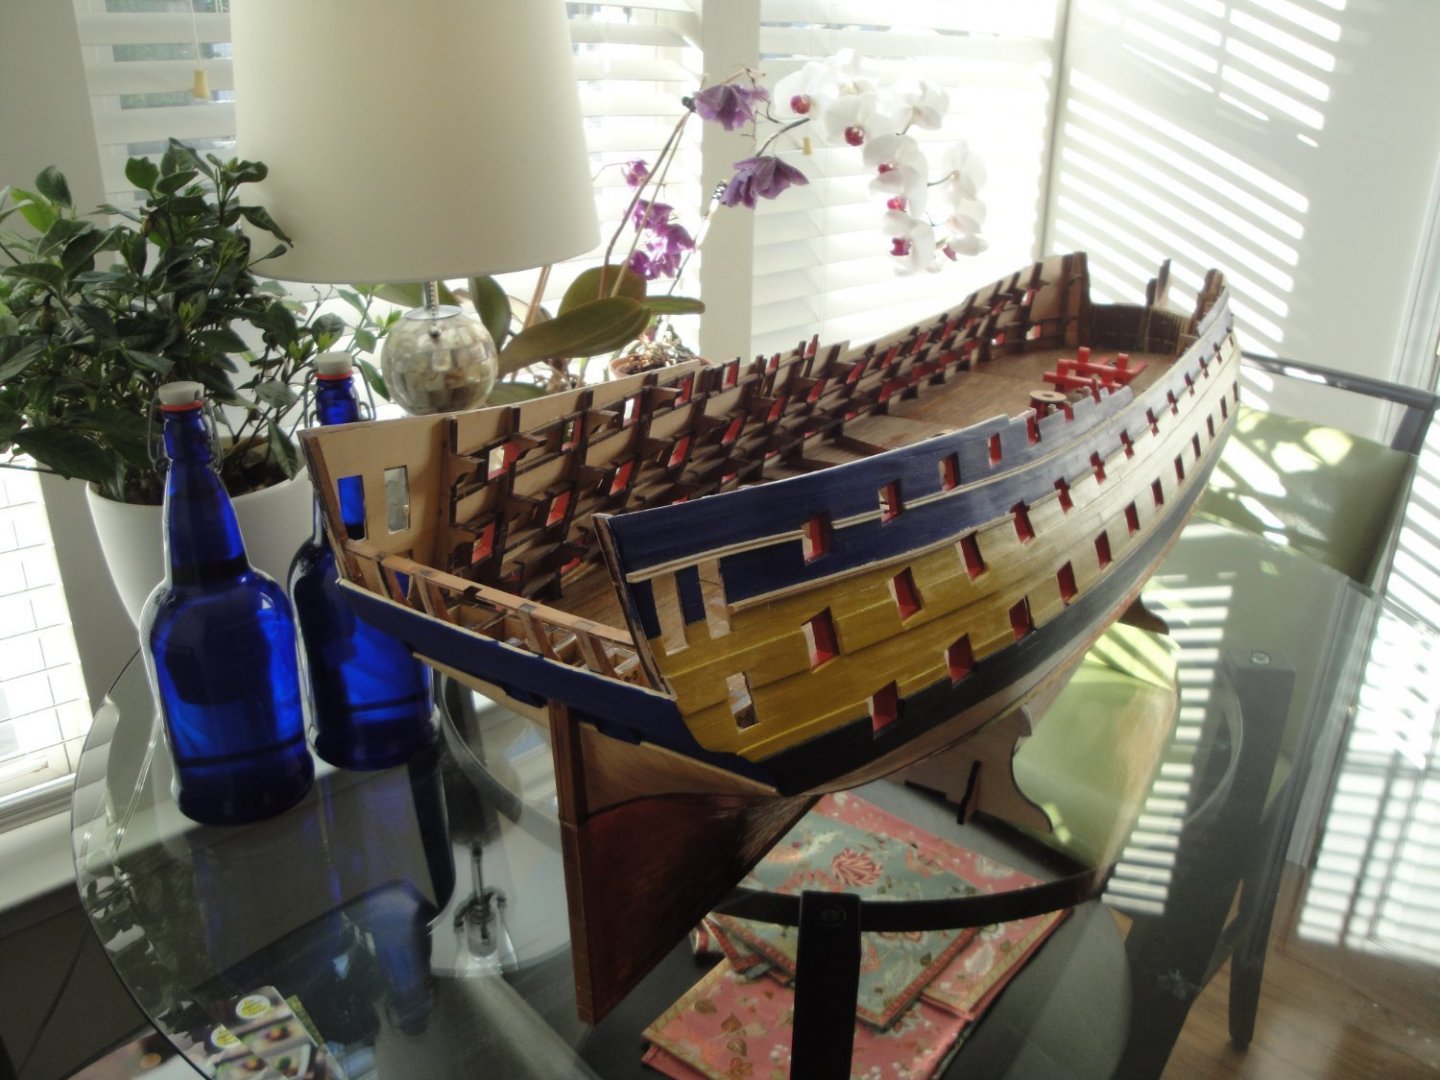
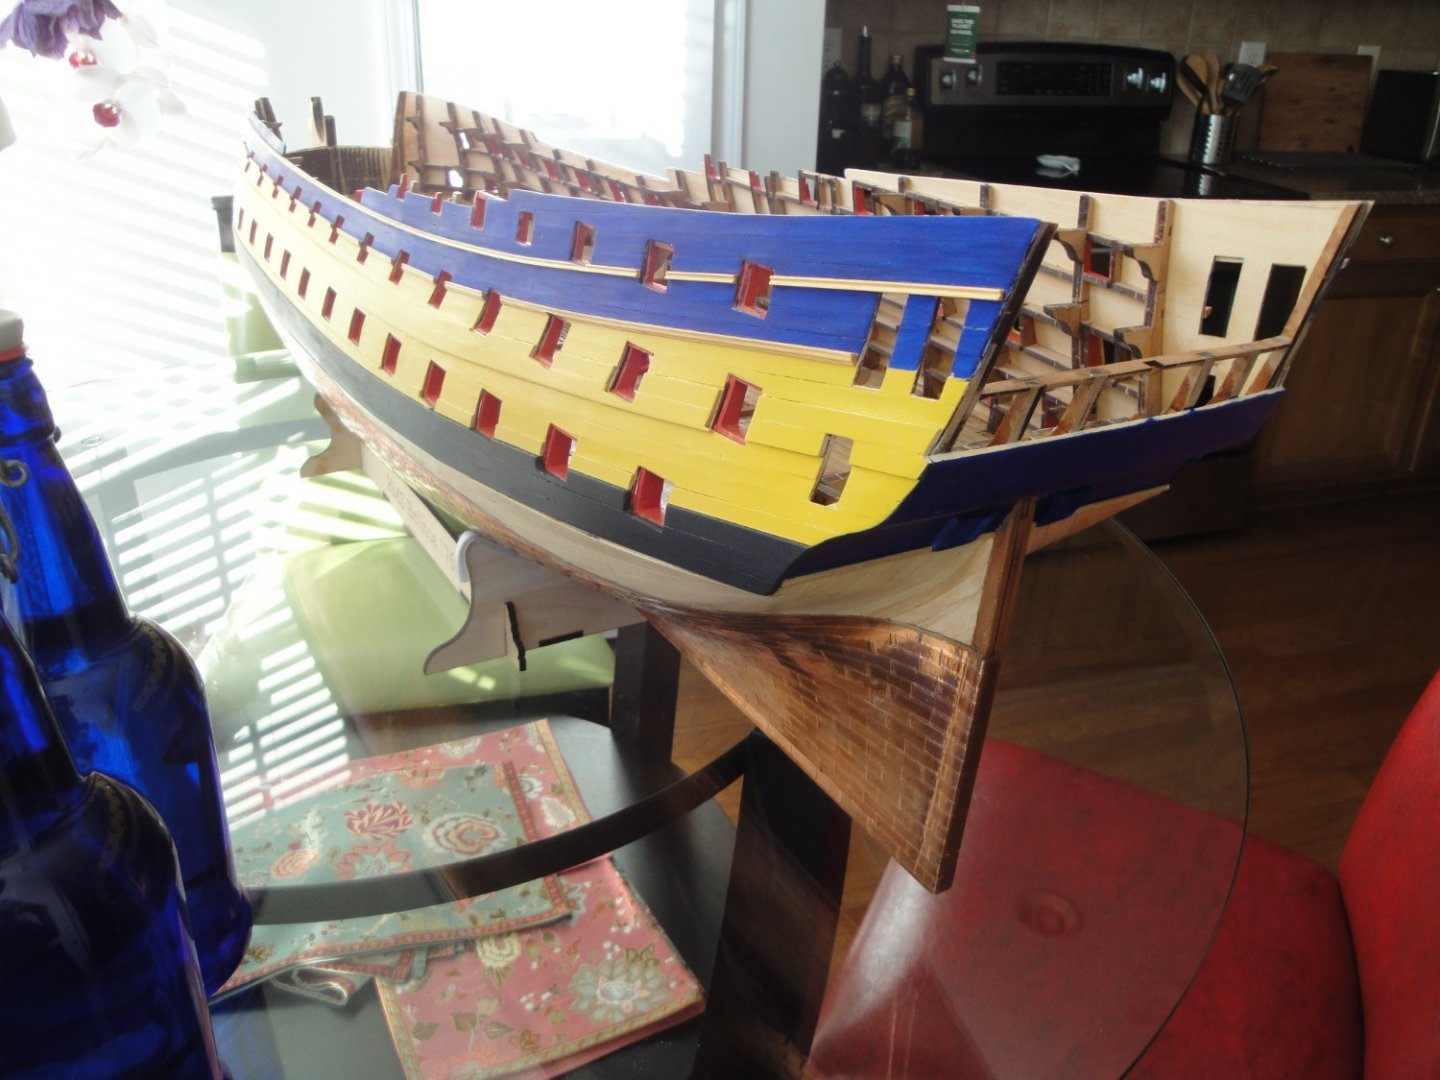
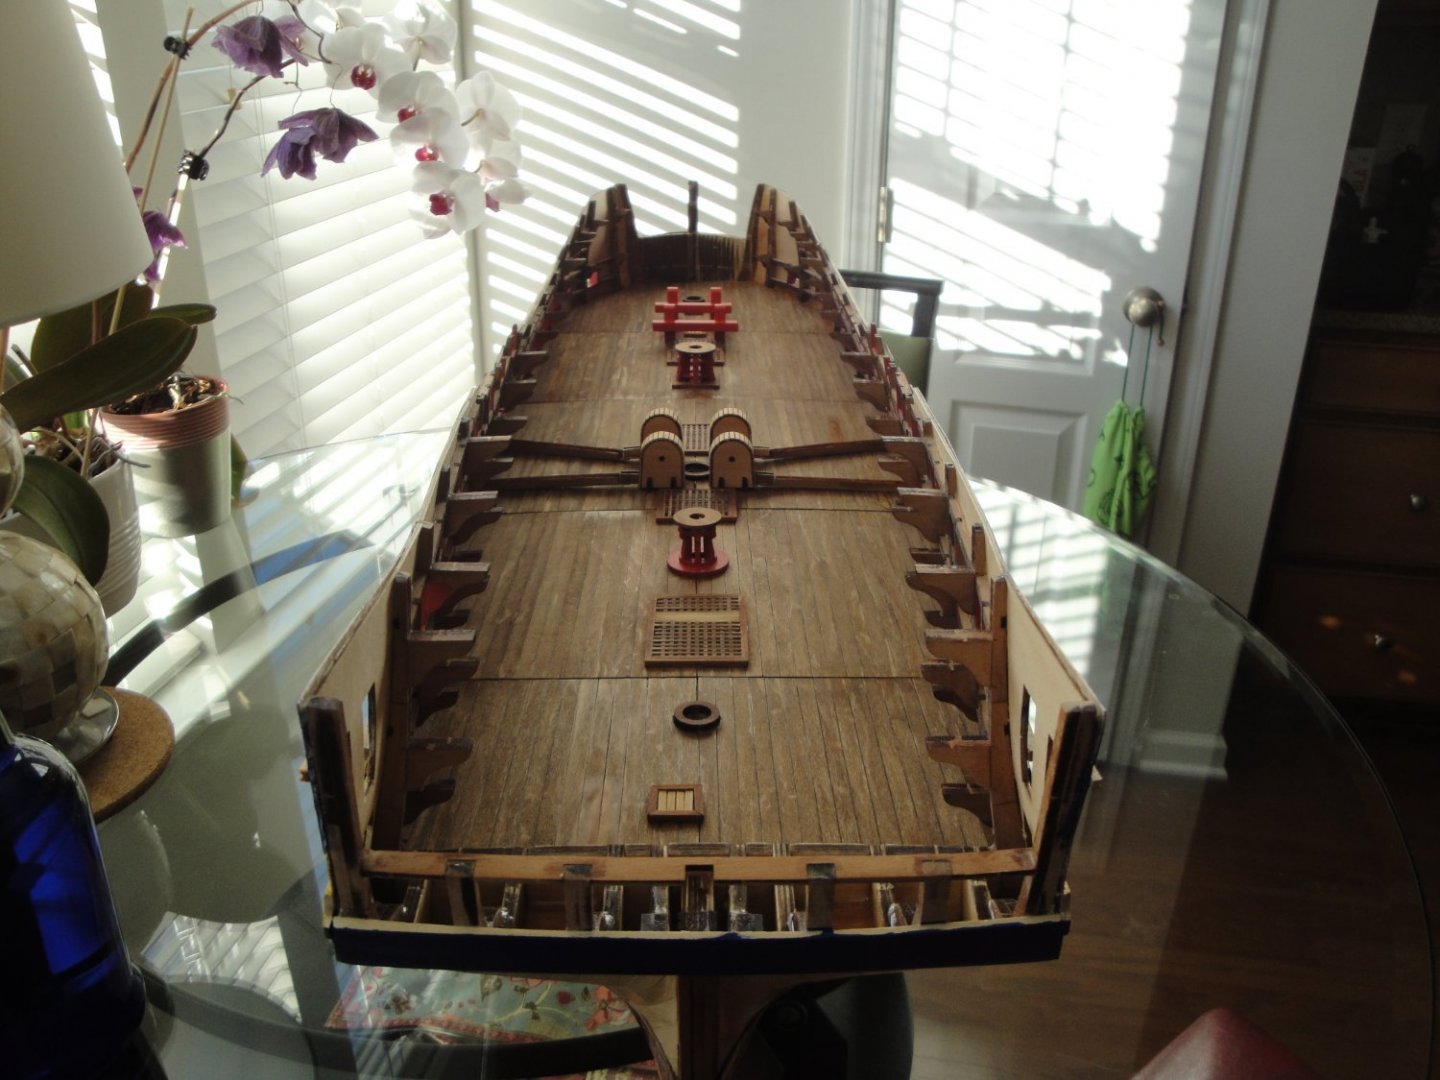
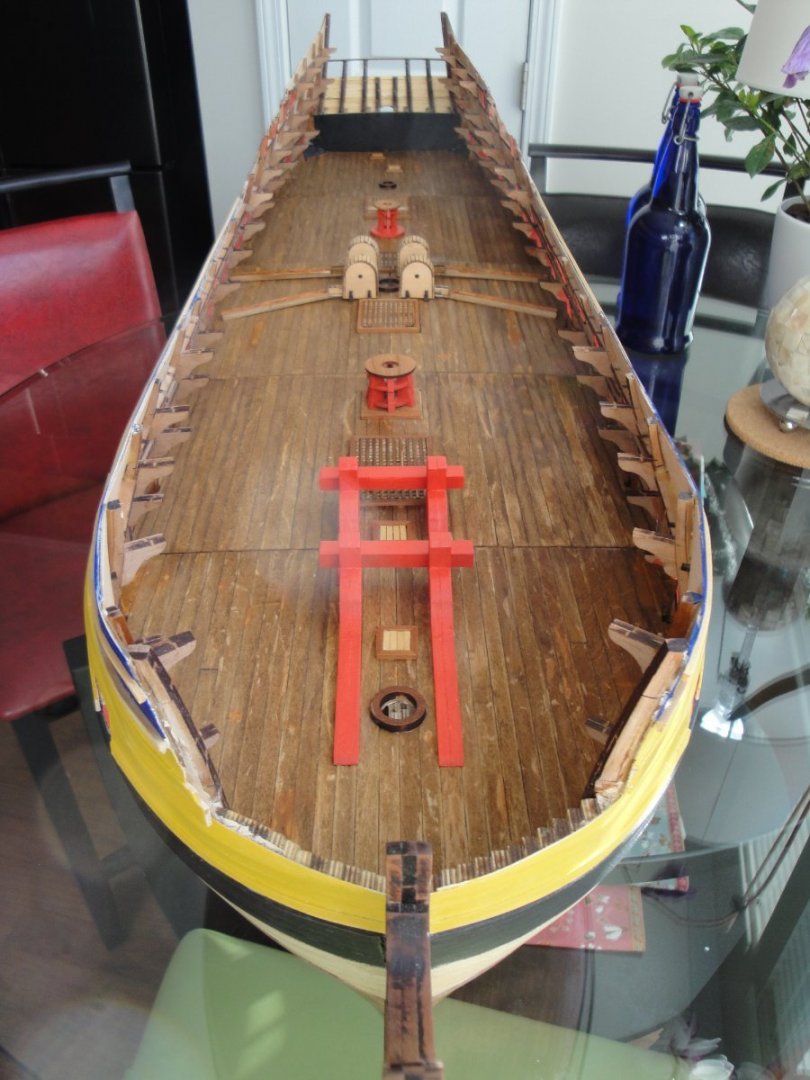
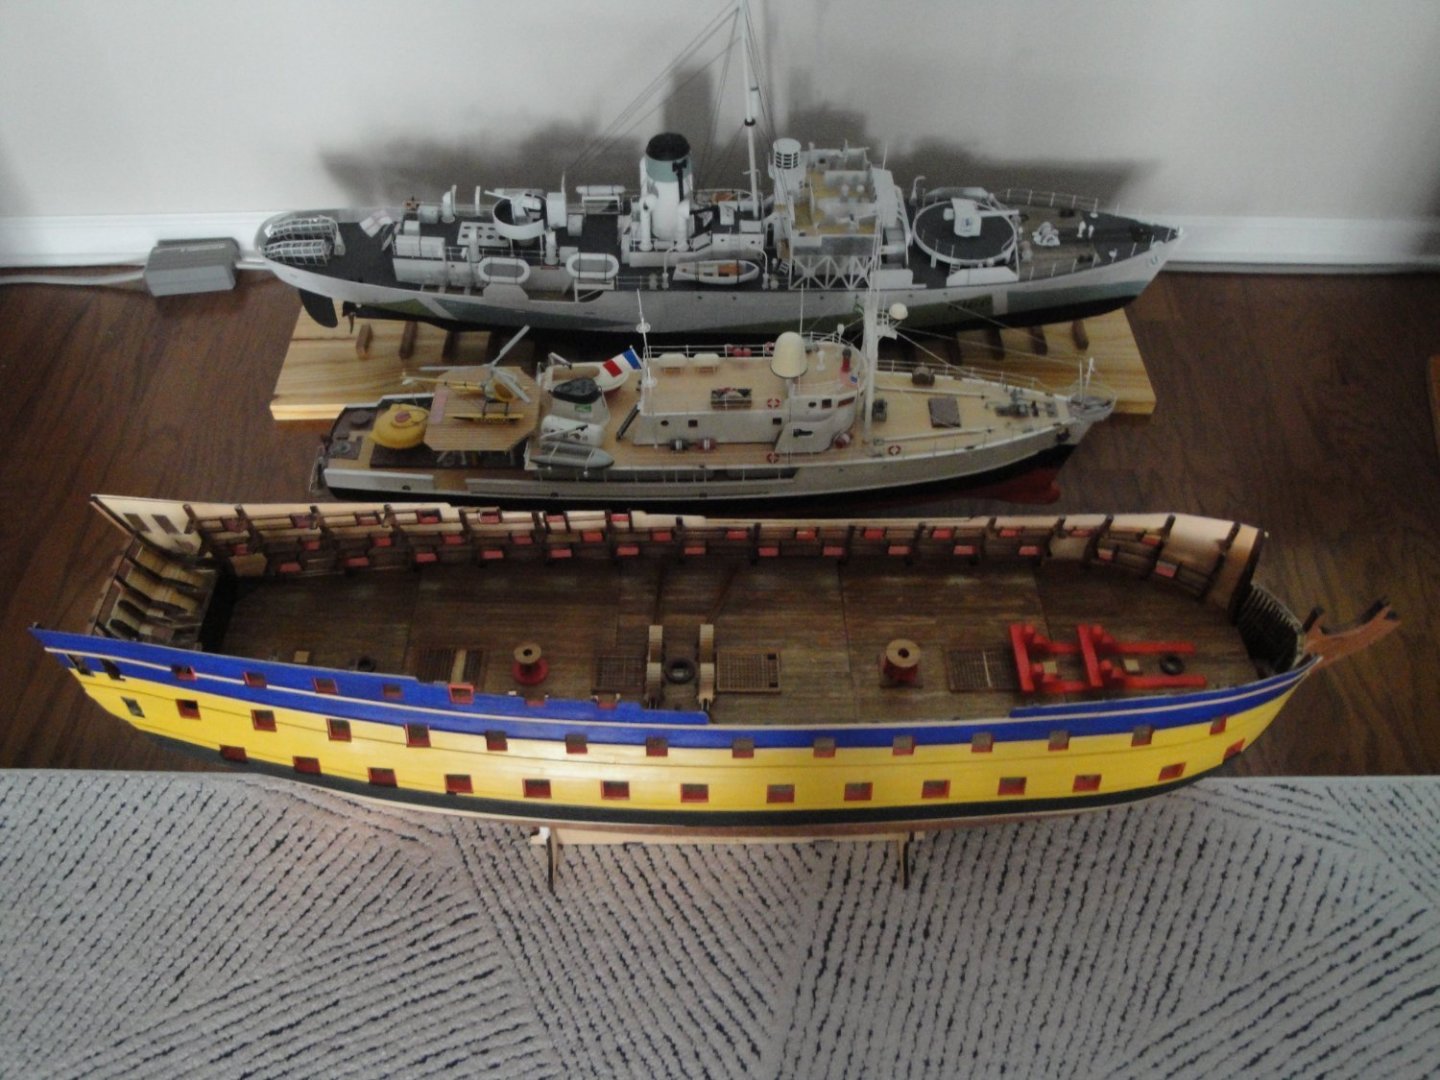
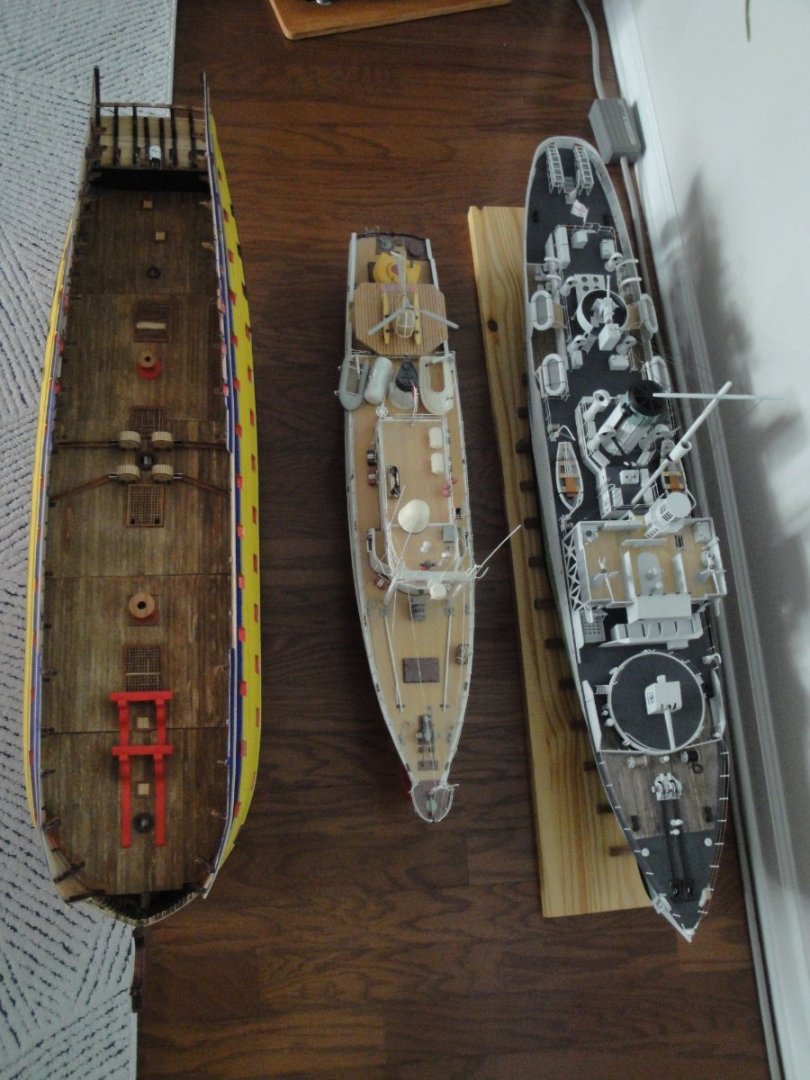
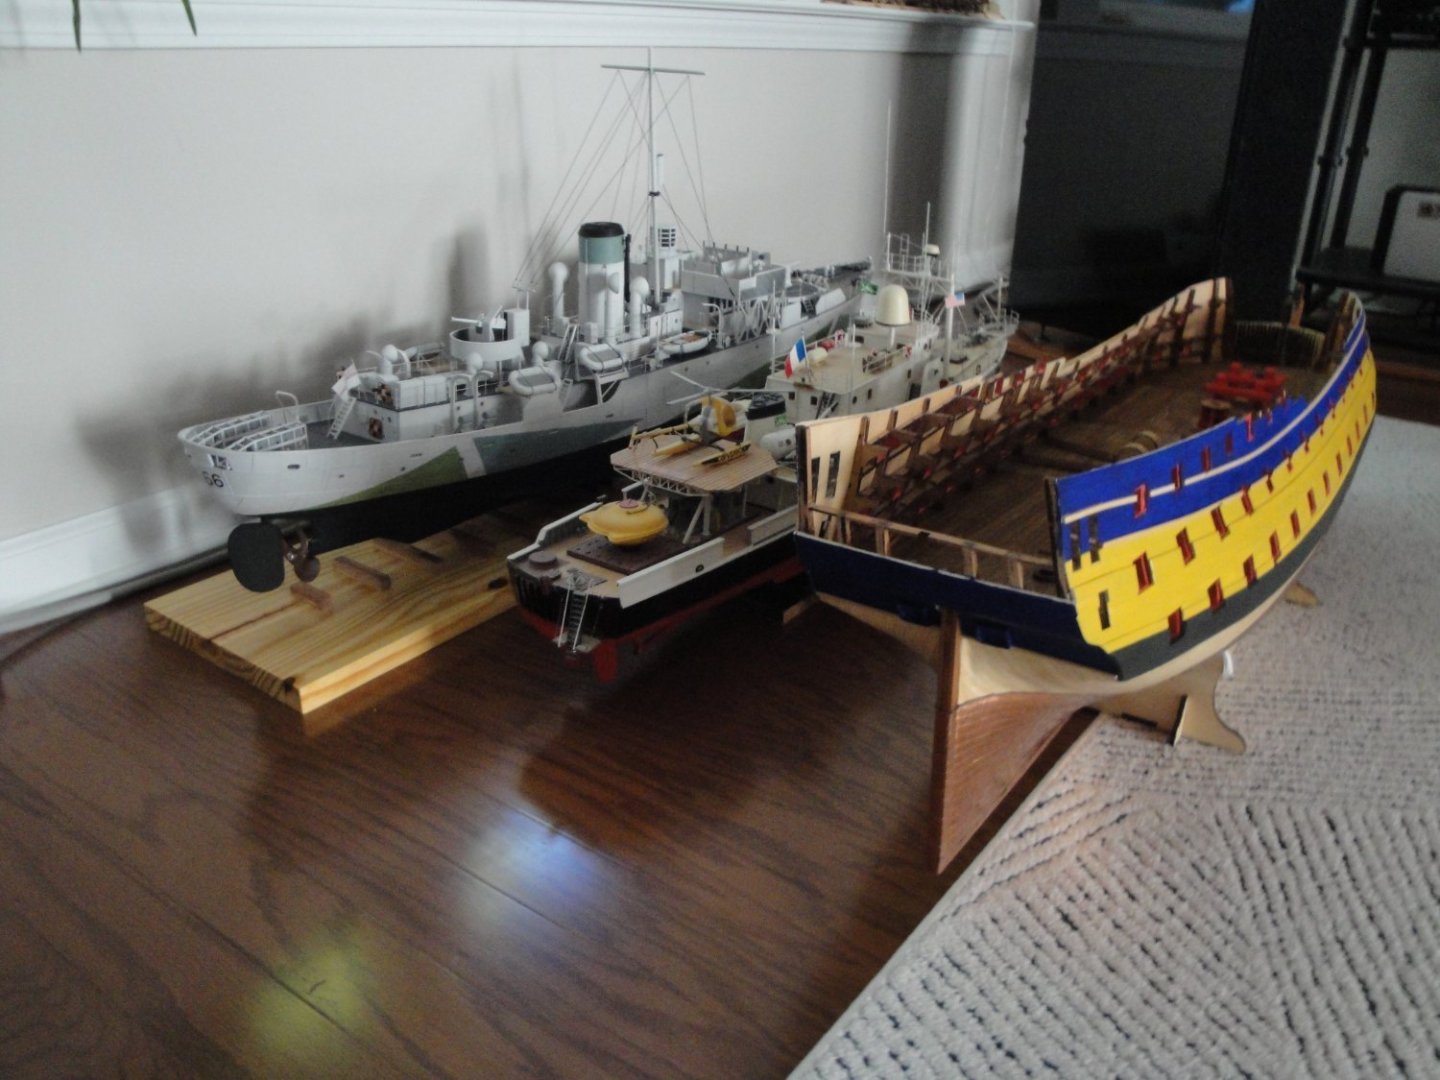
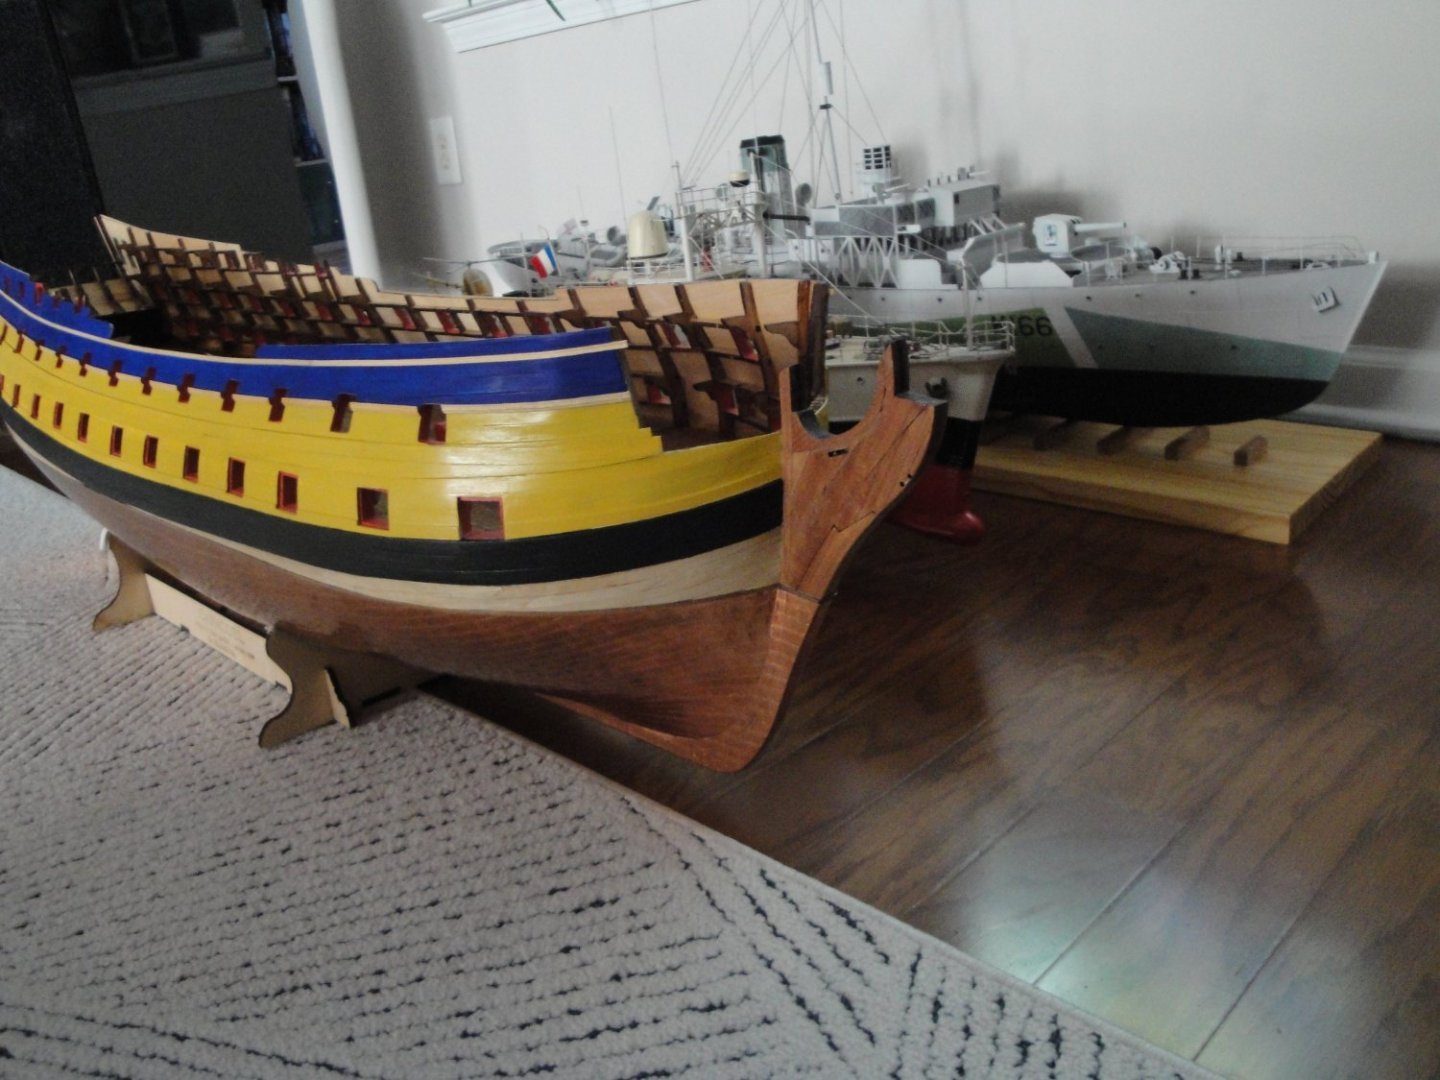
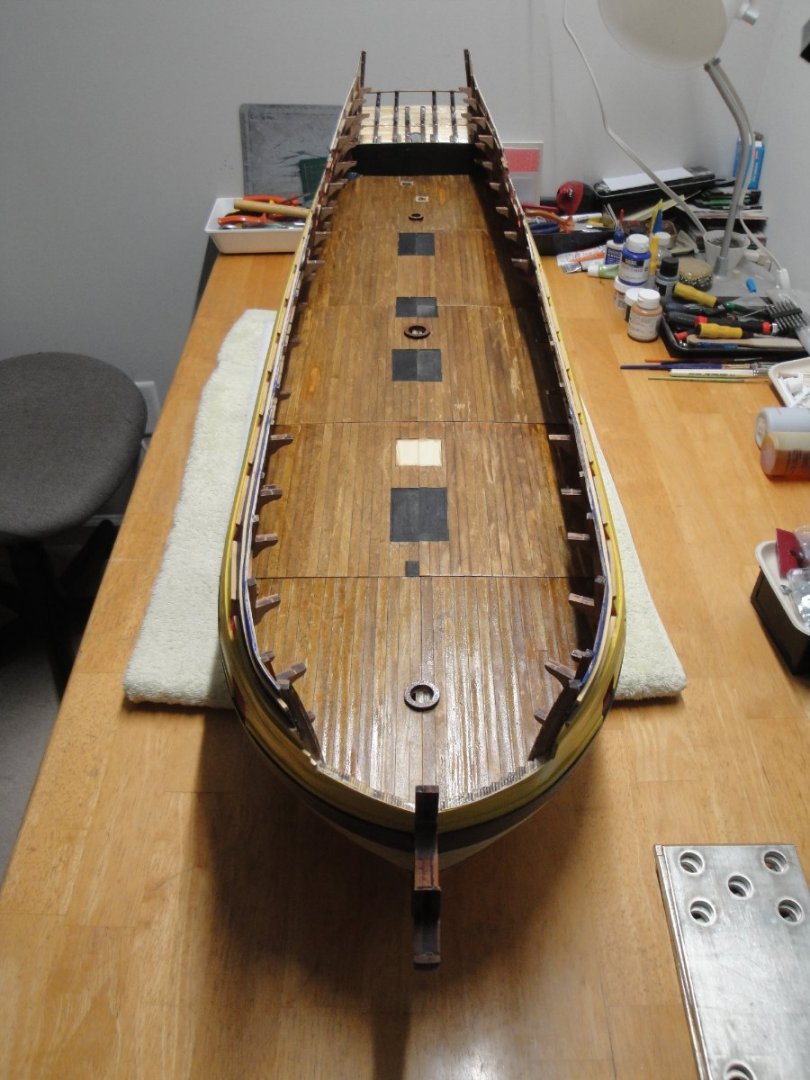
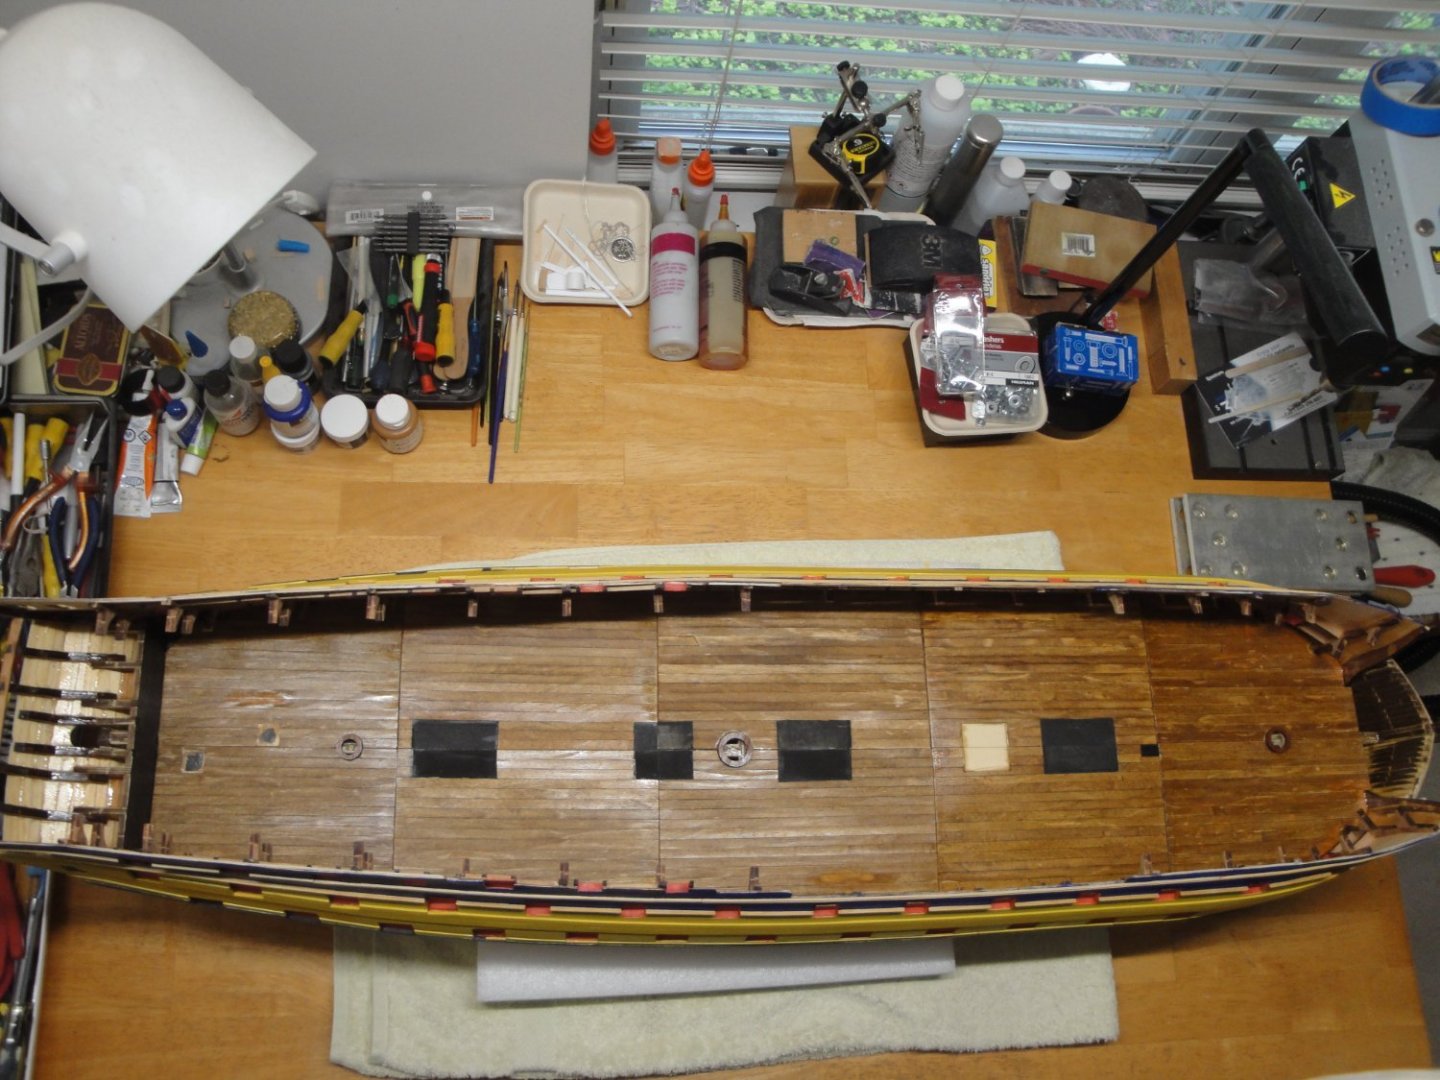
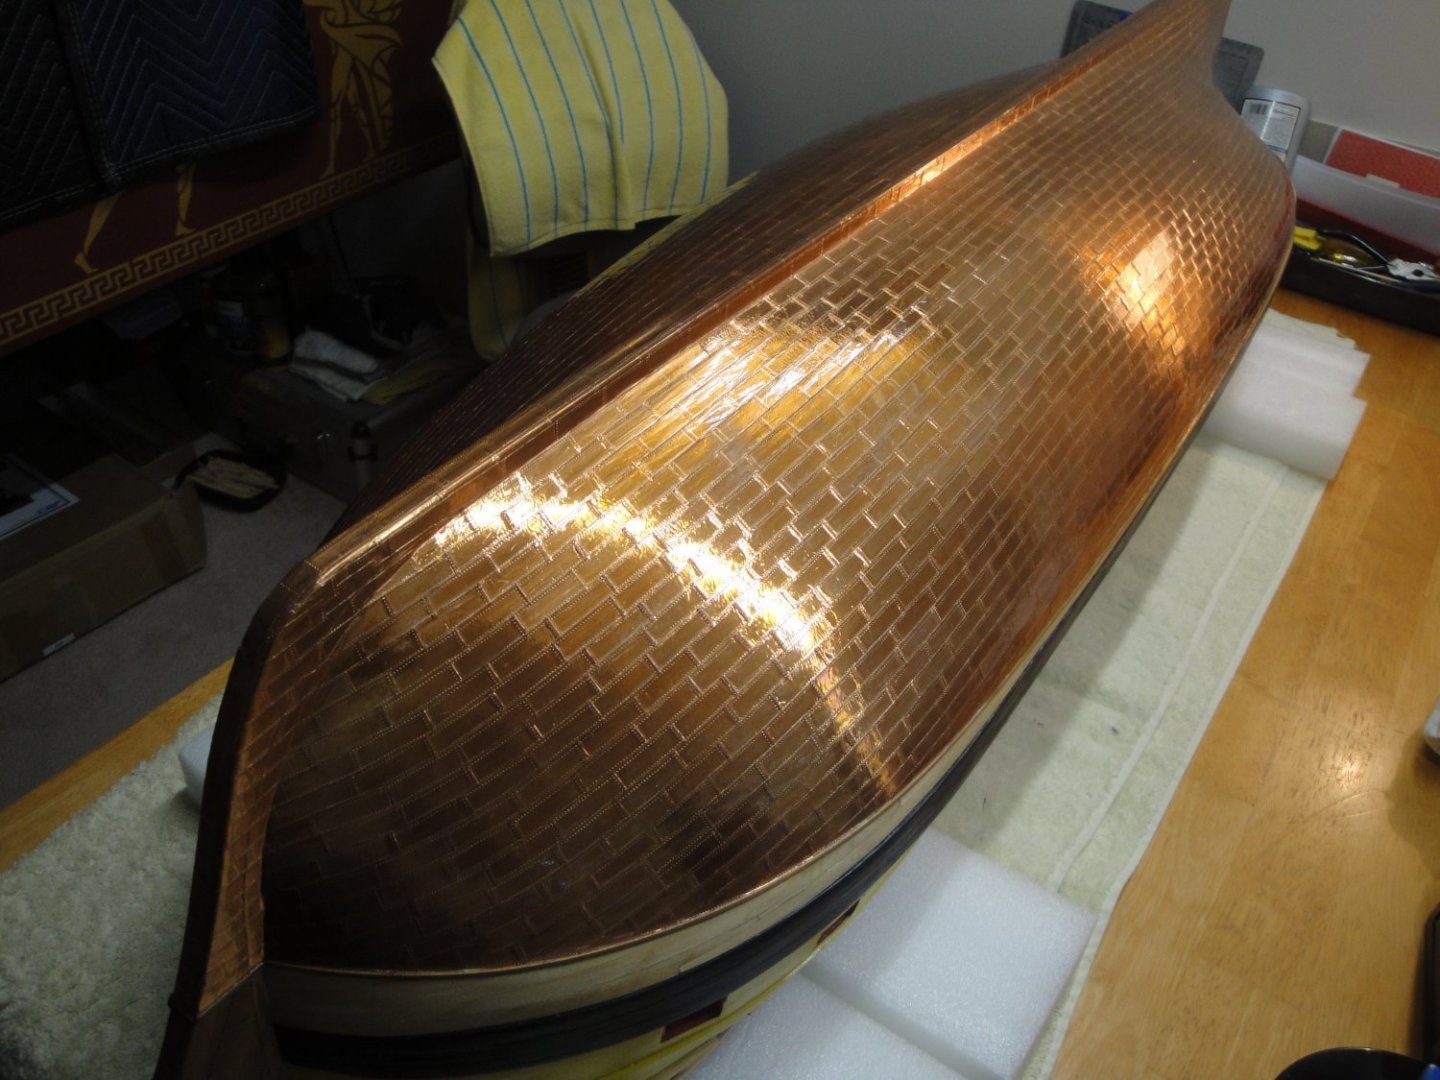
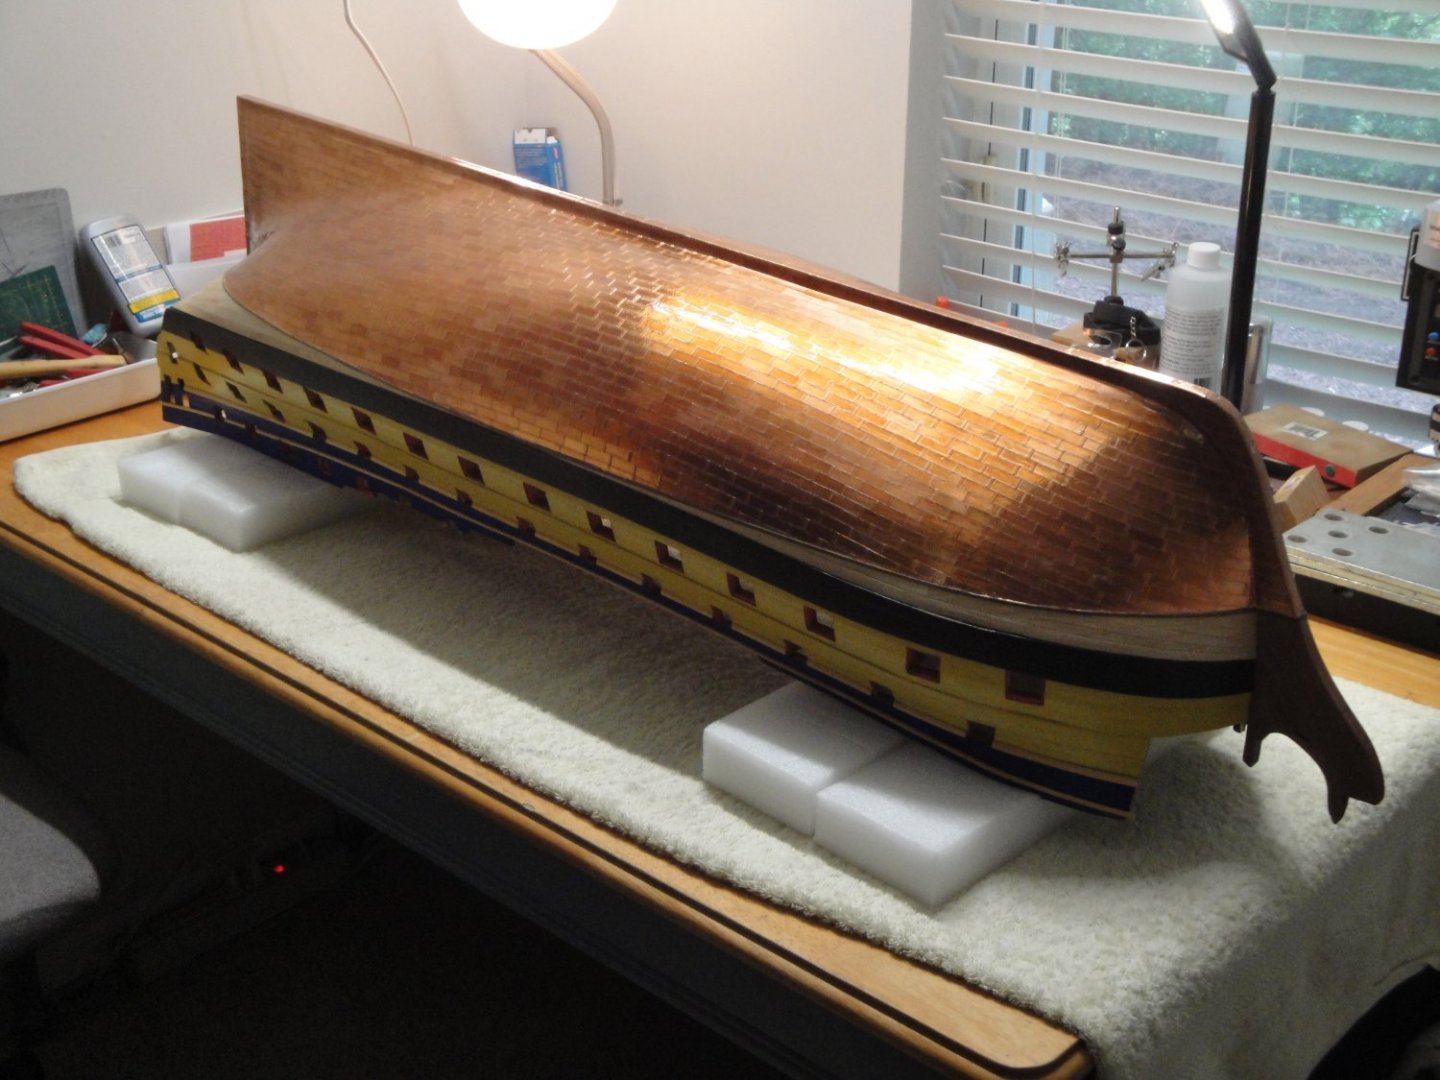
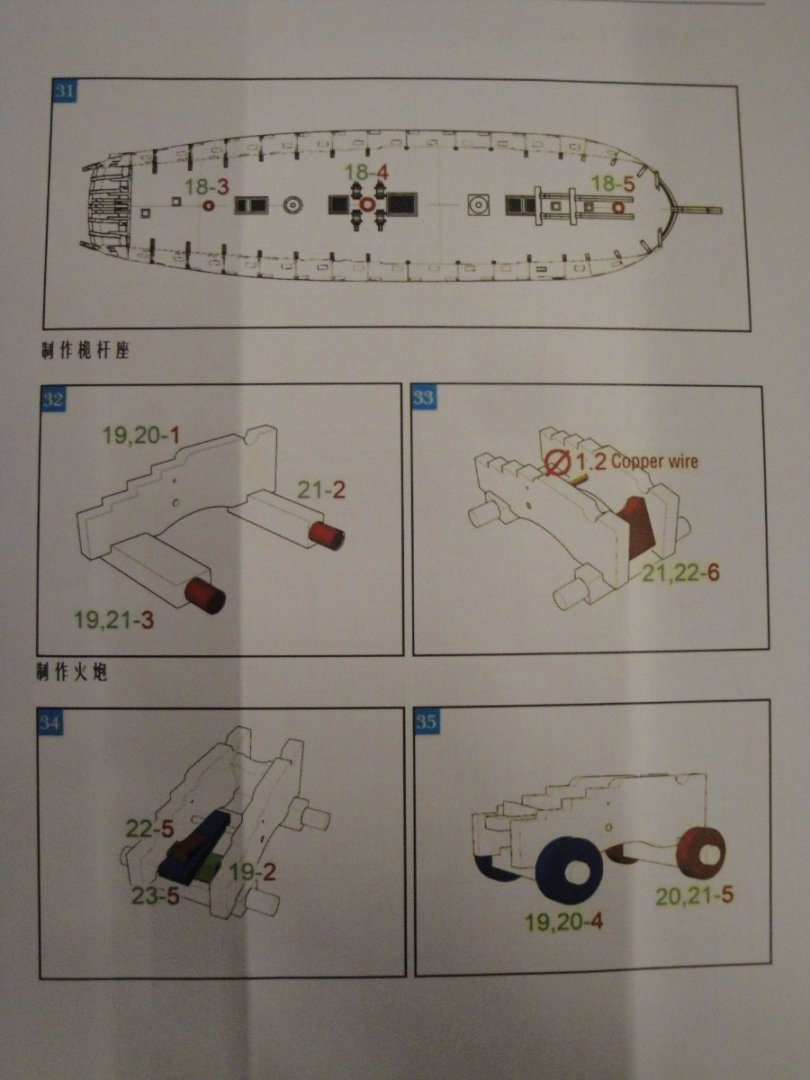
 - SESSION #2 is now completed - Session #2 is now completed. This was by far the largest, longest and most difficult session with 90% of the hull being built. The original (read early...) CAF Session #2 kits included all the material and parts required to build the 28 large cannons (wood and brass). However, when I received my kit, the contents of Session #2 had been modified and the gun barrels in brass were no longer provided in the kit. They are now part of Session #5. I suspect it is a ploy to make you purchase all the sessions at once.... Thus, even though I have all the parts to build the guns, I will not include them in Session #2 and move them to Session #3, which is the building of the main deck. These large guns will have to be built before you can close the gun deck and cover it with the main deck. First, a few images of the gun deck. It is simplified in a way, as 95% of it will not be visible in any ways: I have added some wood gutters to direct the dirty water pumped out from the base of the main mast (bilge). These are not provided in the kit. I did not build the crankshaft and handles required to operate the pumps as nothing will be visible. There is plenty of "visible" work to be done and I did not have the patience and energy to build this kind of details. A few pictures taken from the gun deck: The plan is to make the capstans rotate, when the main deck capstan are turned by hand. They will be coupled. At this stage, the model weights close to 5 Kgs or 10 pounds and 11 ounces. It is heavy, large and will present a challenge to manipulate when the main guns are in place. The Future Floor provides a nice protection for the copper tiles and so far, I did not have any mishaps. A few pictures showing the overall lines of the hull and where we stand at the end of Session #2: Let's talk briefly about the quality of the kit: The white wood to plank the hull is okay. I think it is Lime wood and is overall of decent quality. The 3 x 8 mm planks are hard to bend and will require some pre-bending on a jig after soaking them in isopropyl alcohol. Some of the planks are irregular in size (10 mm instead of 8 mm) and sometimes the thickness varies. Overall, CAF is rather generous and there is plenty wood left over to correct mishaps or to select the planks. For the copper tiles, I believe I should have convinced our readership to not go with the CAF tiles (expensive and too small) and use the 3M copper tape instead. The gun deck parts will require a significant amount of adjustments to make them fit in the hull. The planking of the gun deck could have been done inside the hull, with the risks of breaking all the knees used to hold the other decks. It is a lot easier to plank these outside of the hull. A better job than mine could have been done, but you have to choose your battles and realize that nothing will be visible beside the muzzle of the guns or the closed lids. The wales could have been laser cut instead of being simply made of strips. it is unfortunate that on such big kits, CAF does not provide you with pre-cut wales like Vanguard does on some of their models. The respect of the dimensions and exact assembly of the frames in Session #1 is paramount to the success of Session #2 and following sessions. What irritates me the most is the complete lack of instructions and guidance. The manual is just a collection of 3D computer based renderings and does not provide much help. Fortunately, I am learning a lot from the various people building these gorgeous and very well designed Vanguard kits. The kit does not call for any tree nailing and I like that approach. I have looked at a few pictures of restored period ships and cannot see any nails in the hull. I respect the desire by some modelers, to drill thousands of oversized holes in their models and fill them with small extruded bamboo nails, but it is simply not something for me. I will definitely do it for the main deck and upper decks but it does not make sense to do it on the hull, in my humble (and lazy) opinion. A few final pictures, showing the beast next to other 1/48th scale models: I will not start Session #3 immediately. There is plenty to be done on this hull, none of it being covered by the absence of instructions. I call it my Session #2.5 ☺️ Drill the scupperways on the wales. I will use the COREL plans to get an idea of their locations. Drill all the small holes for the gun lid lifting ropes. Brush an nth coat of red on the gun ports. Decide which ports will be closed and which one(s) will be open. Build the 28 large pounds guns and fix them permanently on the gun deck. Only after doing that, will I be in a position to start session #3. I also suspect that with Session 2.5 and 3, I may not be able to follow exactly the (lack of...) instructions and will have to introduce many parts normally assembled (and only available...) in Session #5. We will have to be creative and careful. Yves
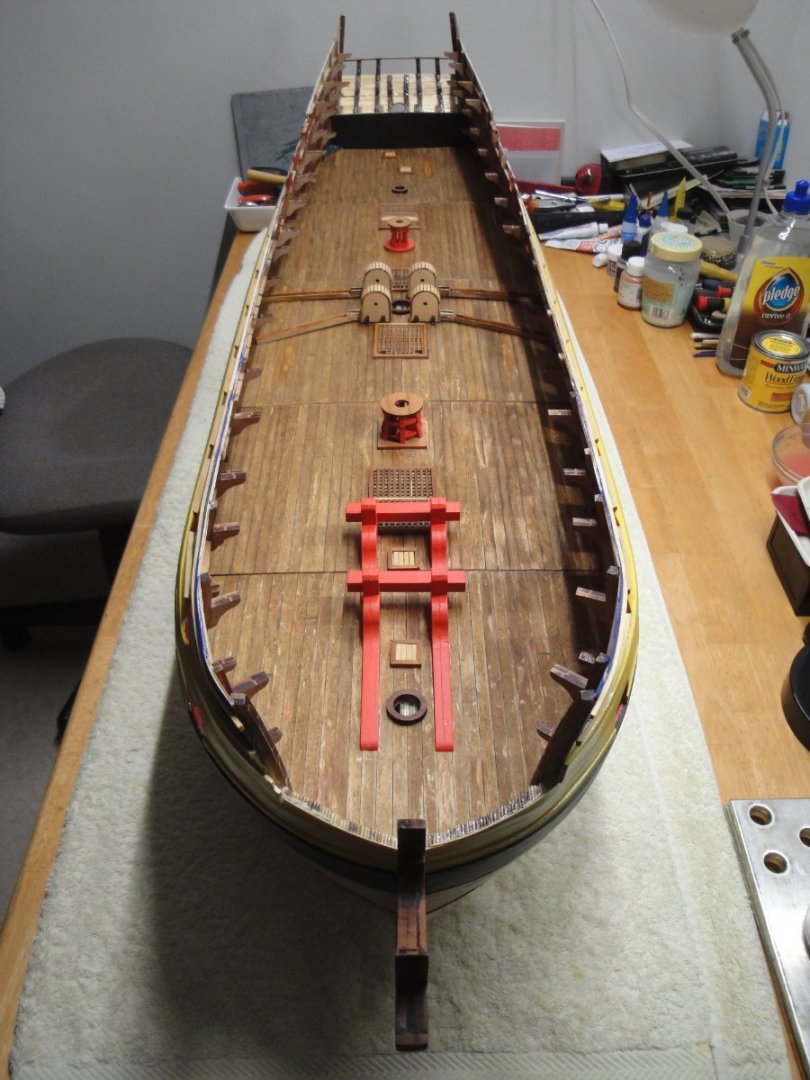


- 507 replies
-
- 14
-

-

-
Great work. Some people have used inflated balloons to get the proper shape of the sails. Another idea to toy with.... Yves
-
Well, you are not building a yacht. This is a fishing vessel and as such, it does not have to be perfect in appearance. Perhaps, some of the imperfections can be fixed with caulking or putty and a new paint coat sprayed on top of the other one. Do not forget to sand in between paint coats. Yves
-
Hobie Cat by phebe - Dumas
yvesvidal replied to phebe's topic in - Kit build logs for subjects built from 1901 - Present Day
Marvelous!!! It brings back a lot of fun memories when I was sailing this boat on the Riviera..... Lots of cap-sizing and excitement. Yves -
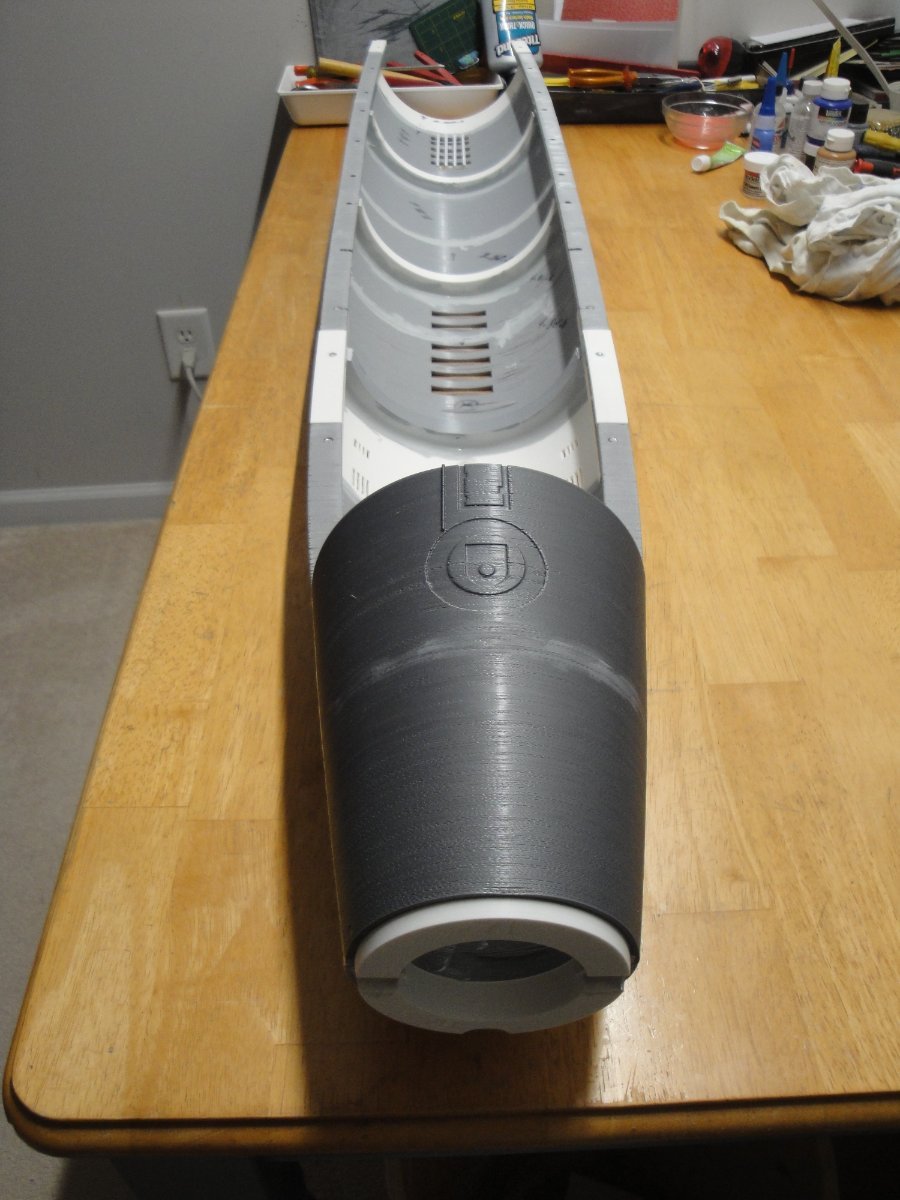
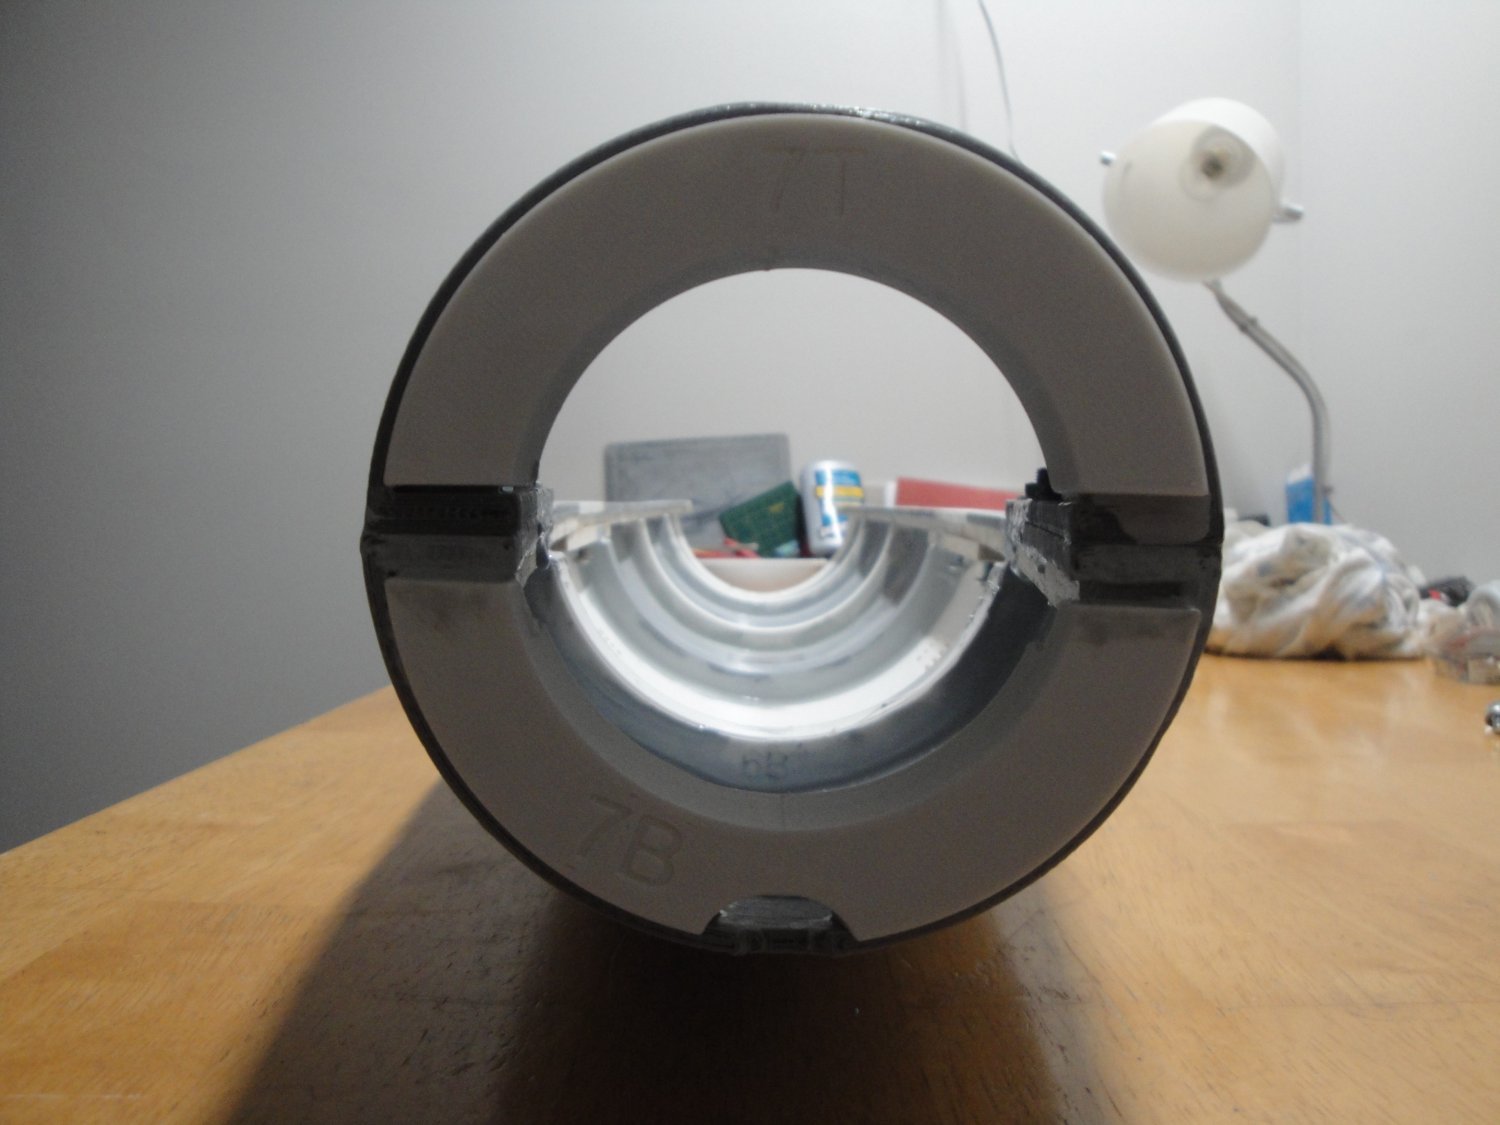
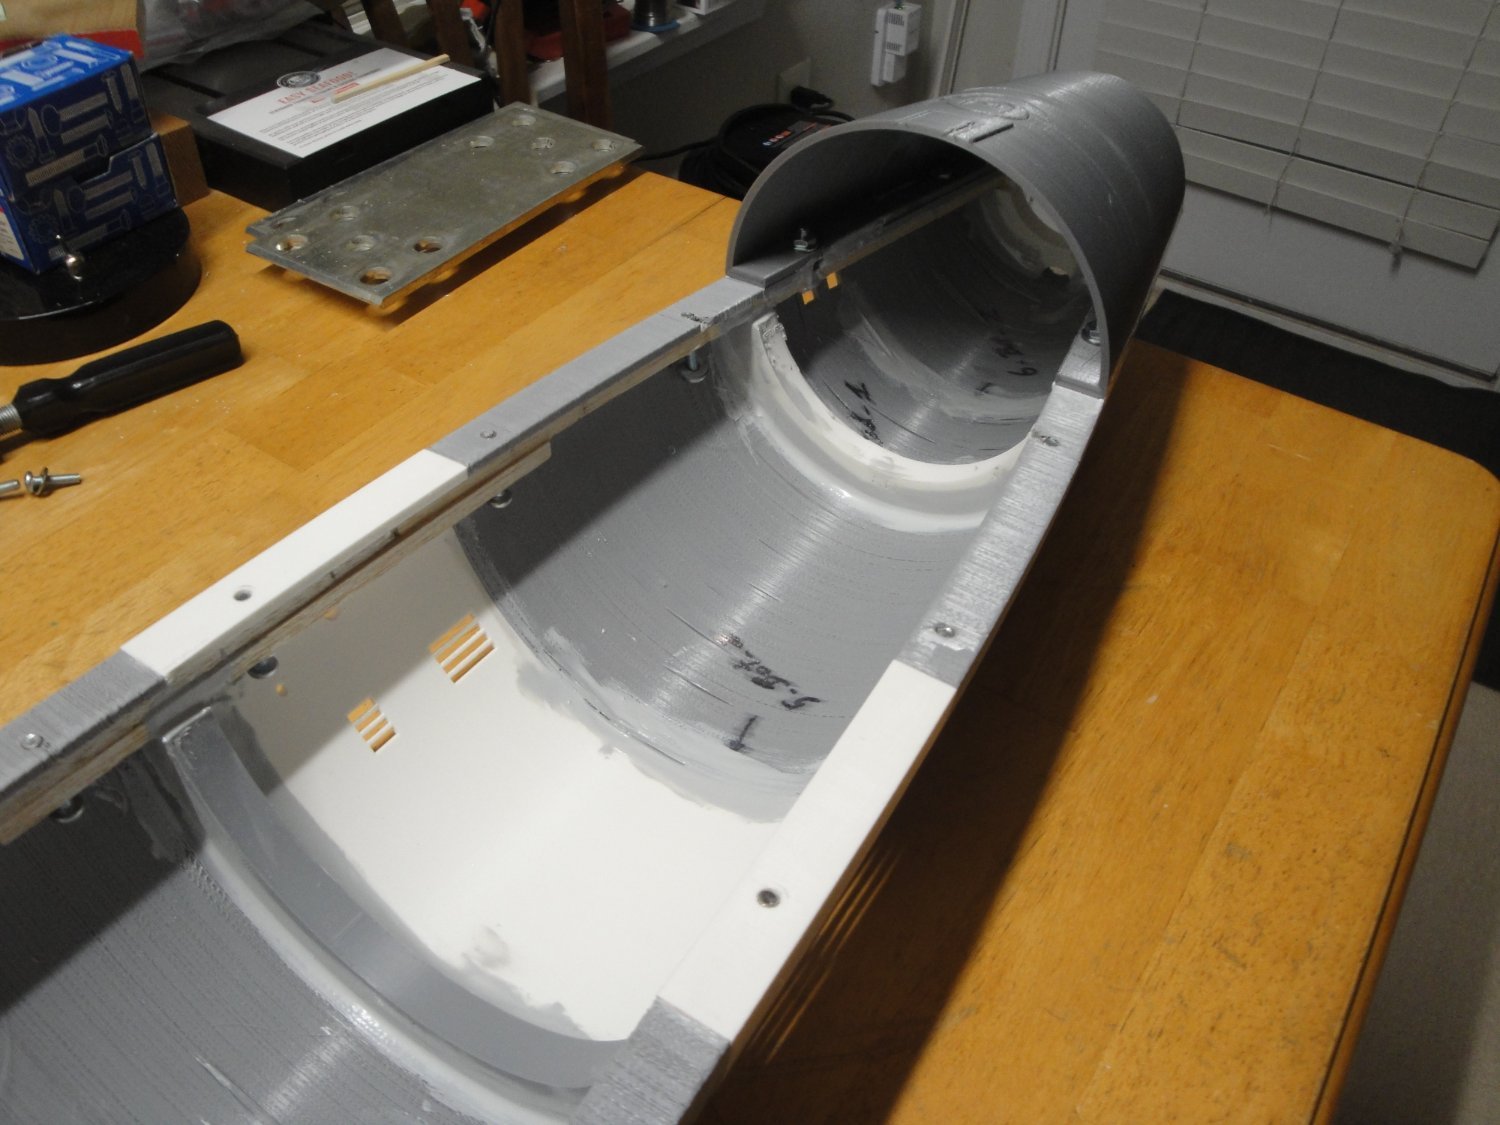
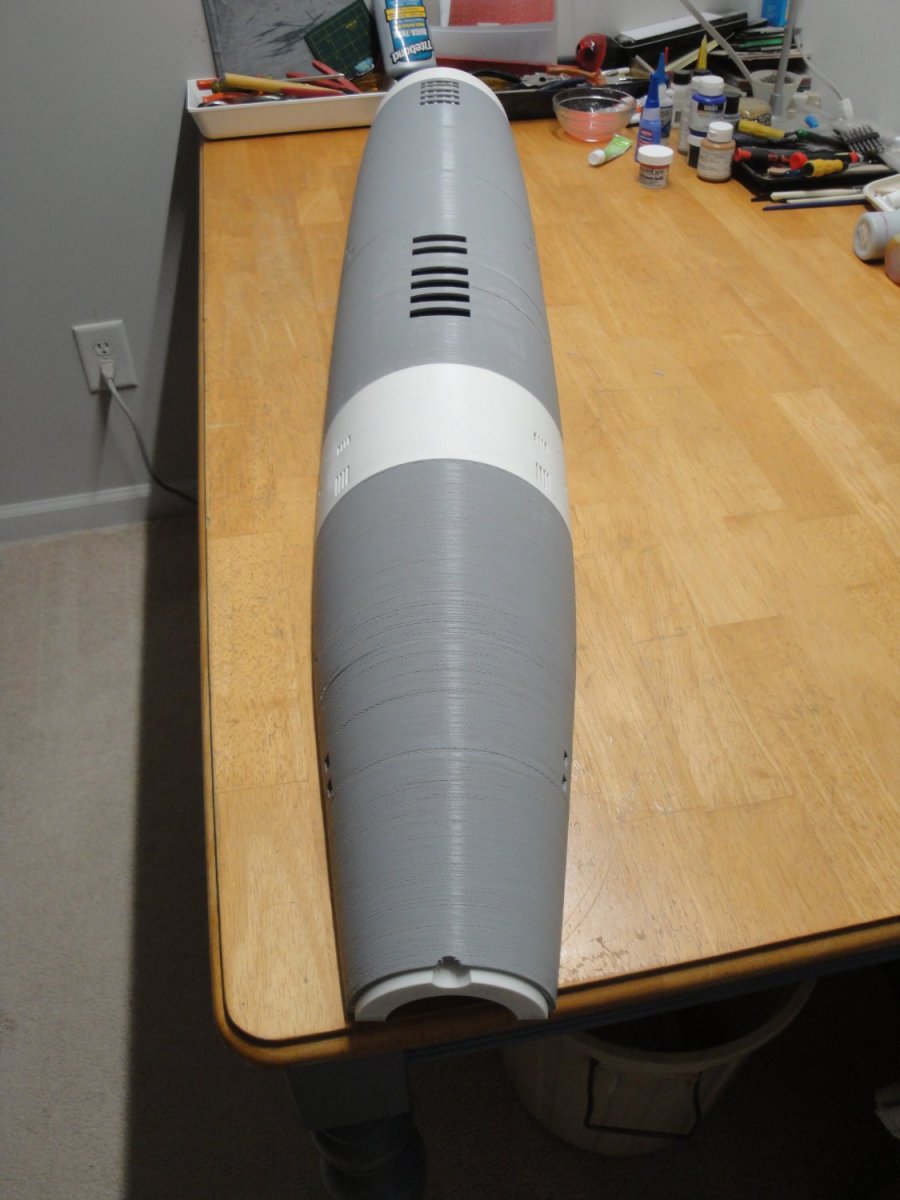
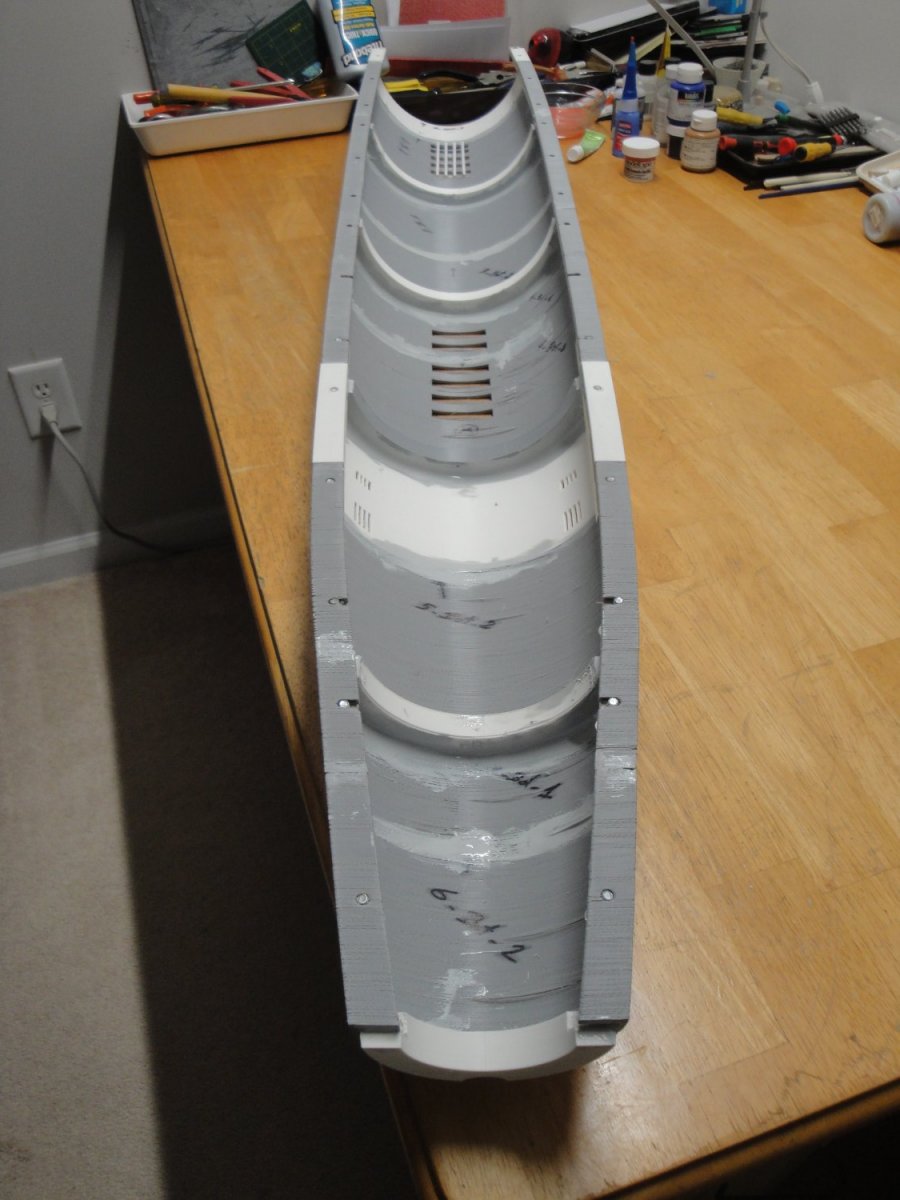
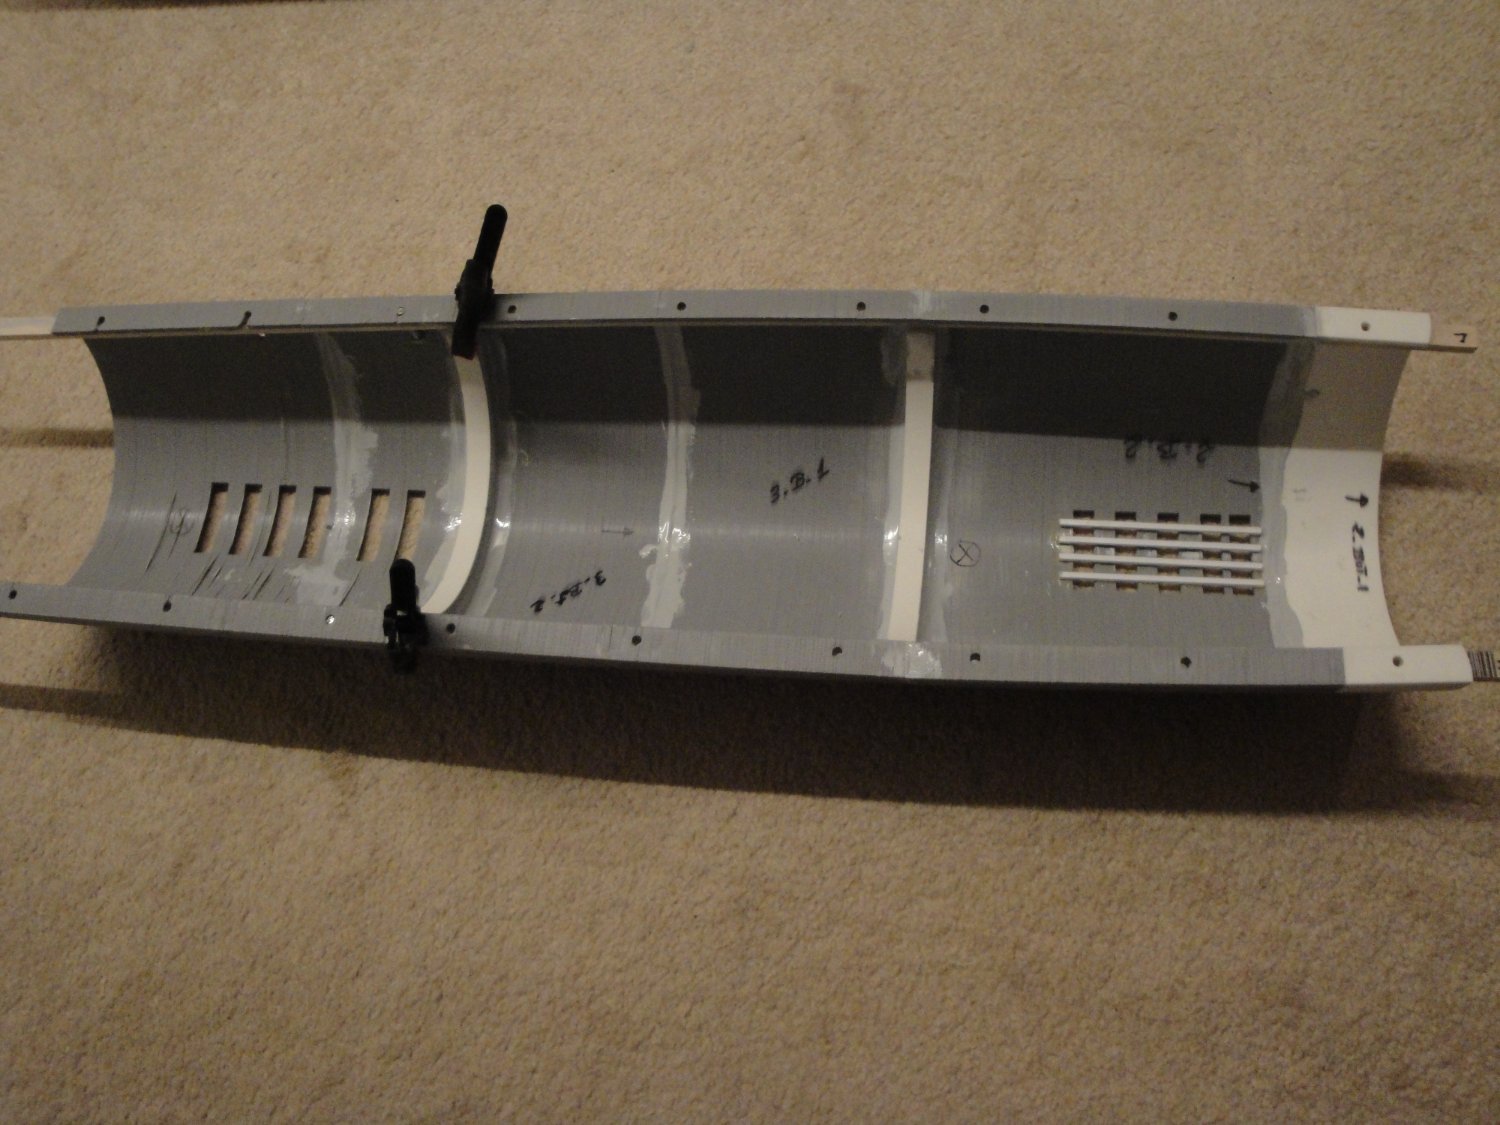
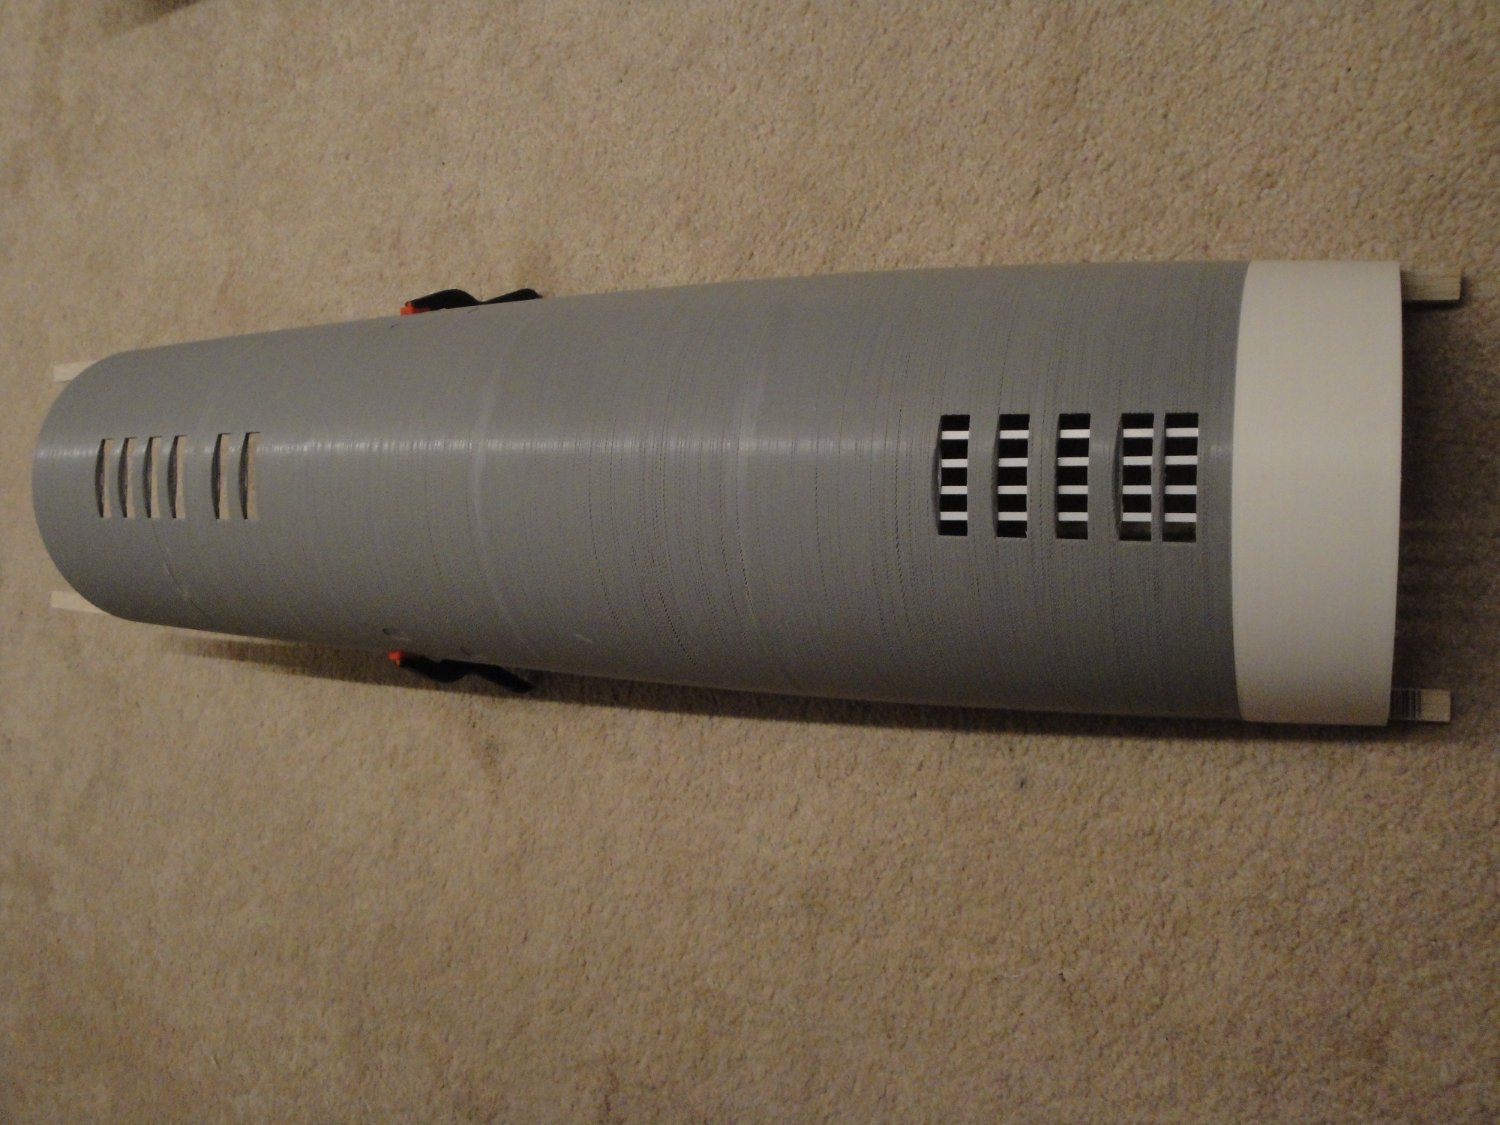
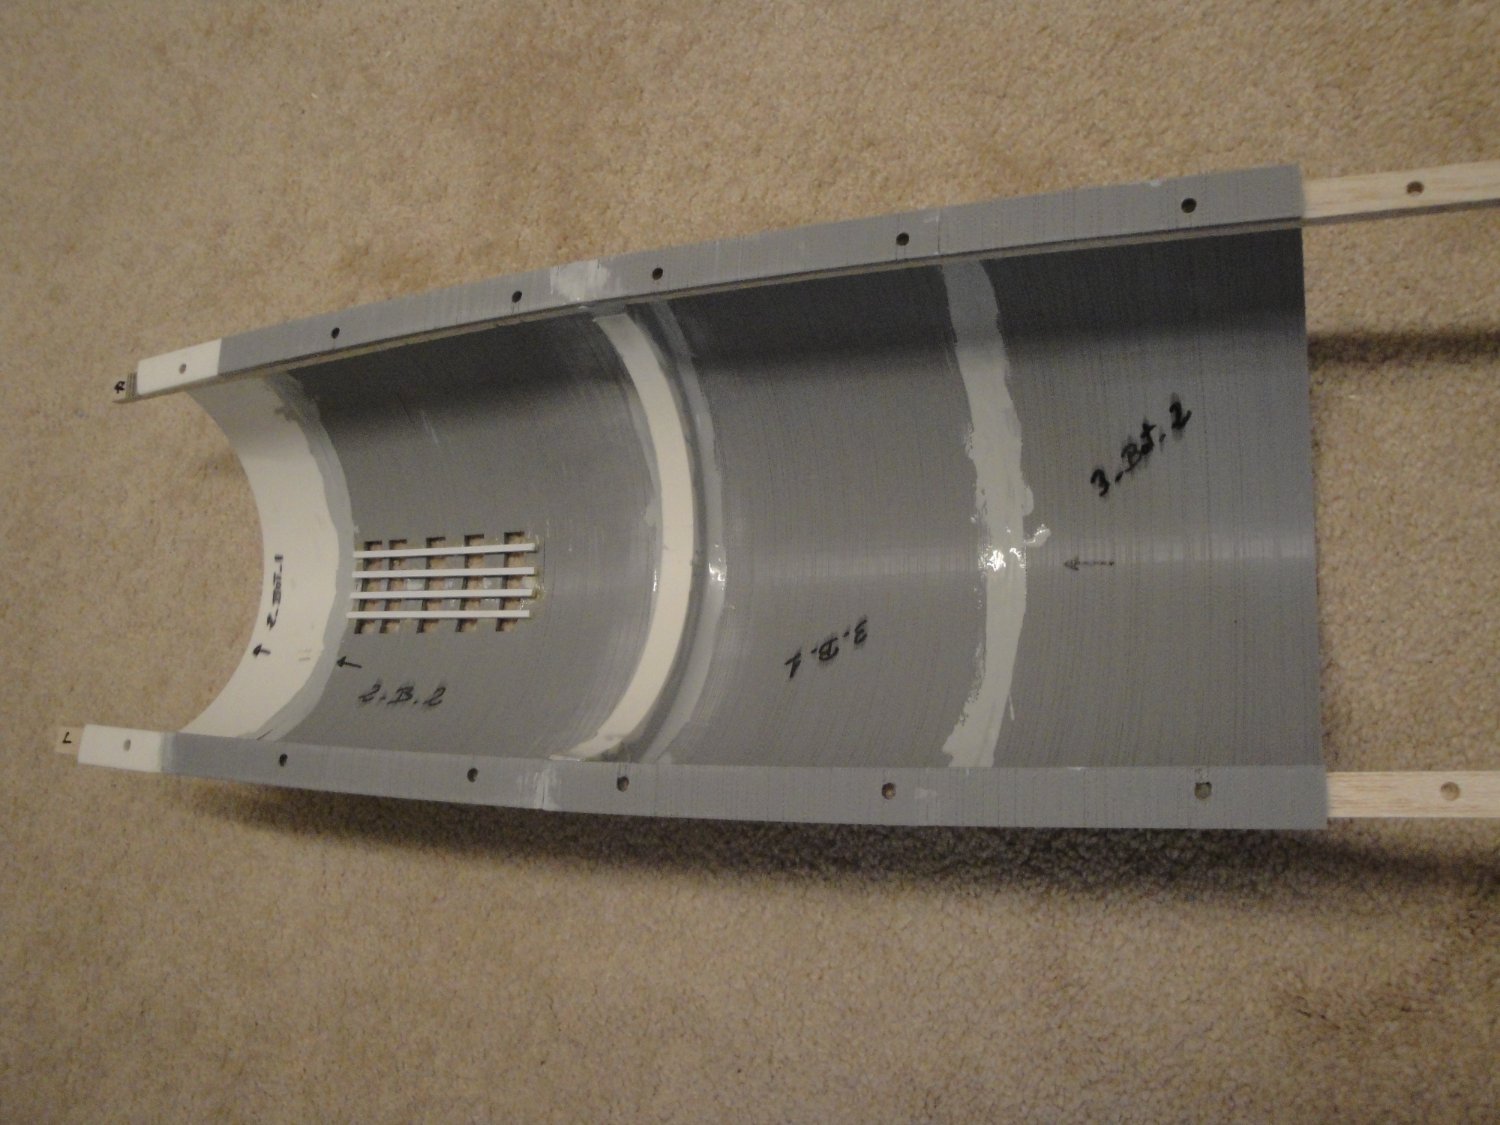
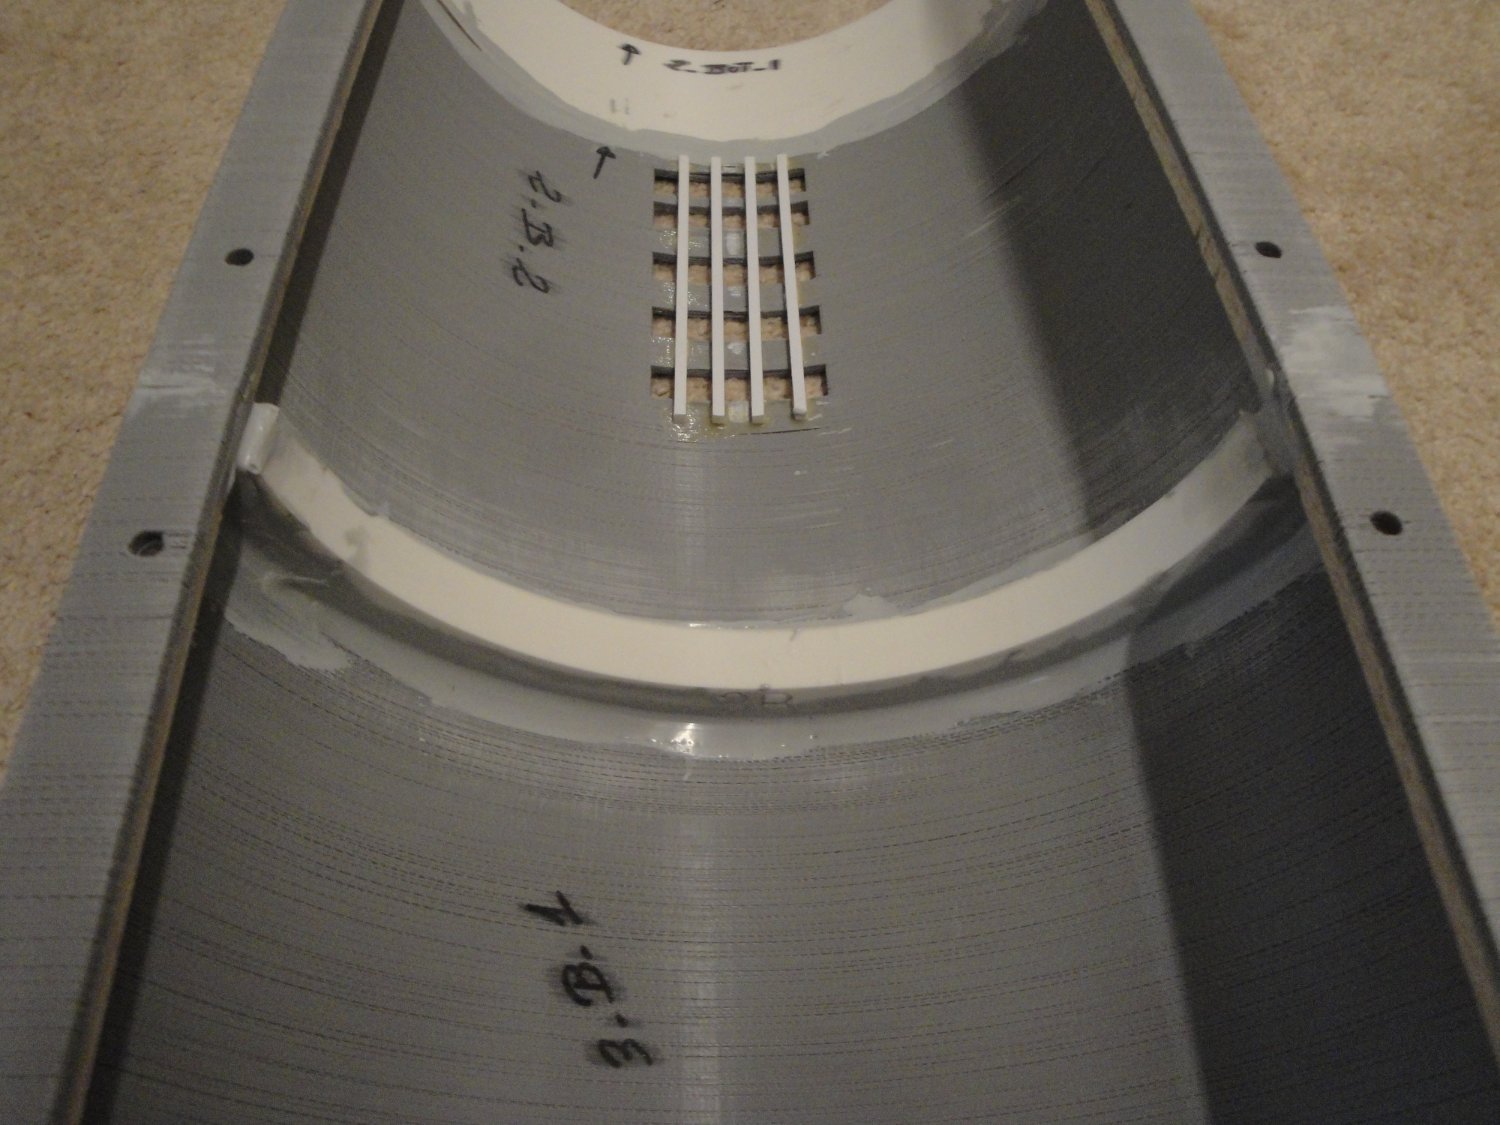
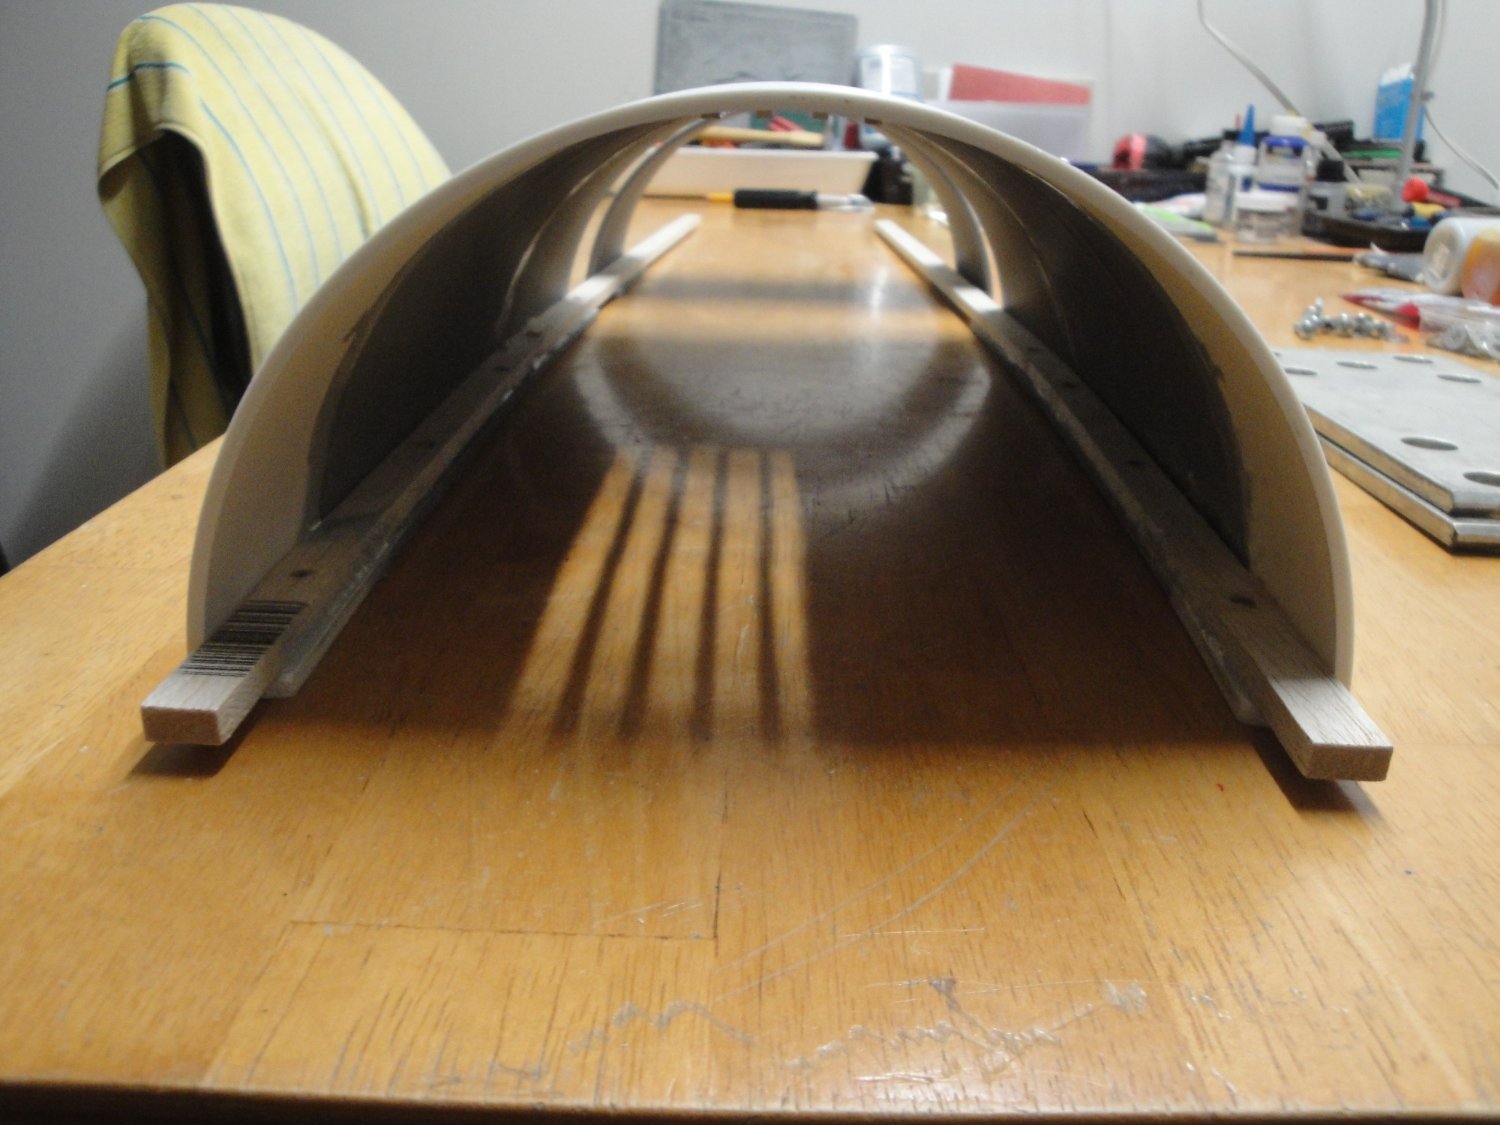
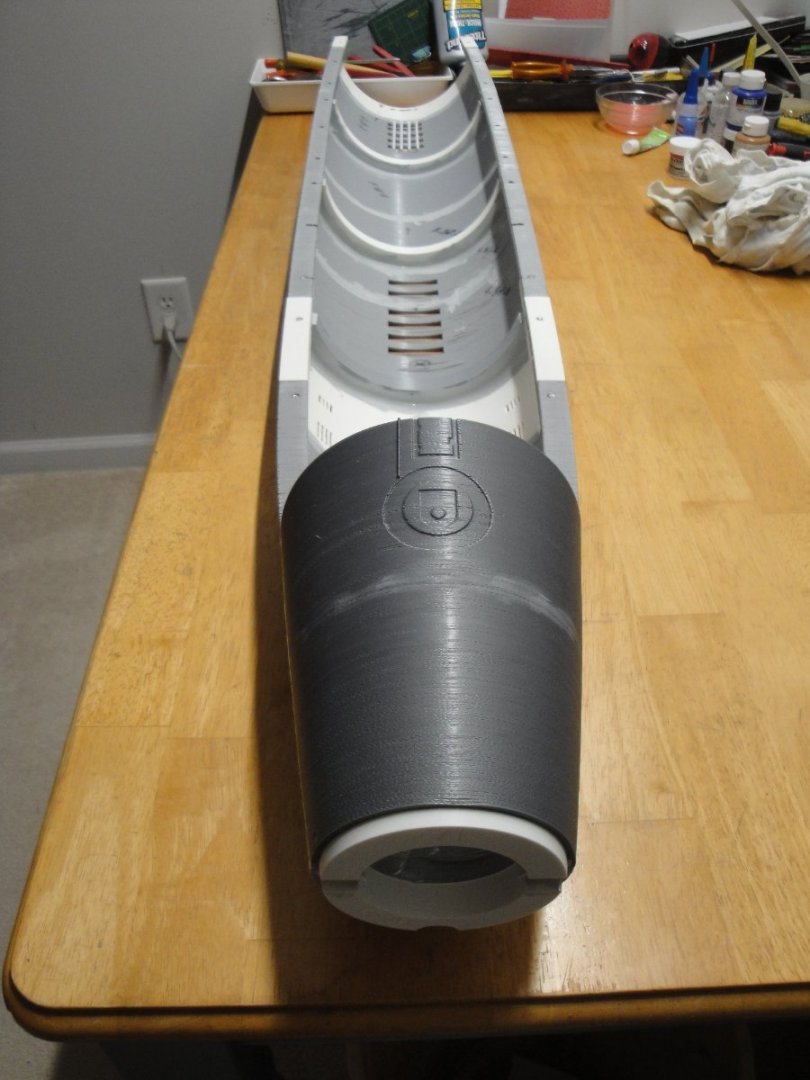
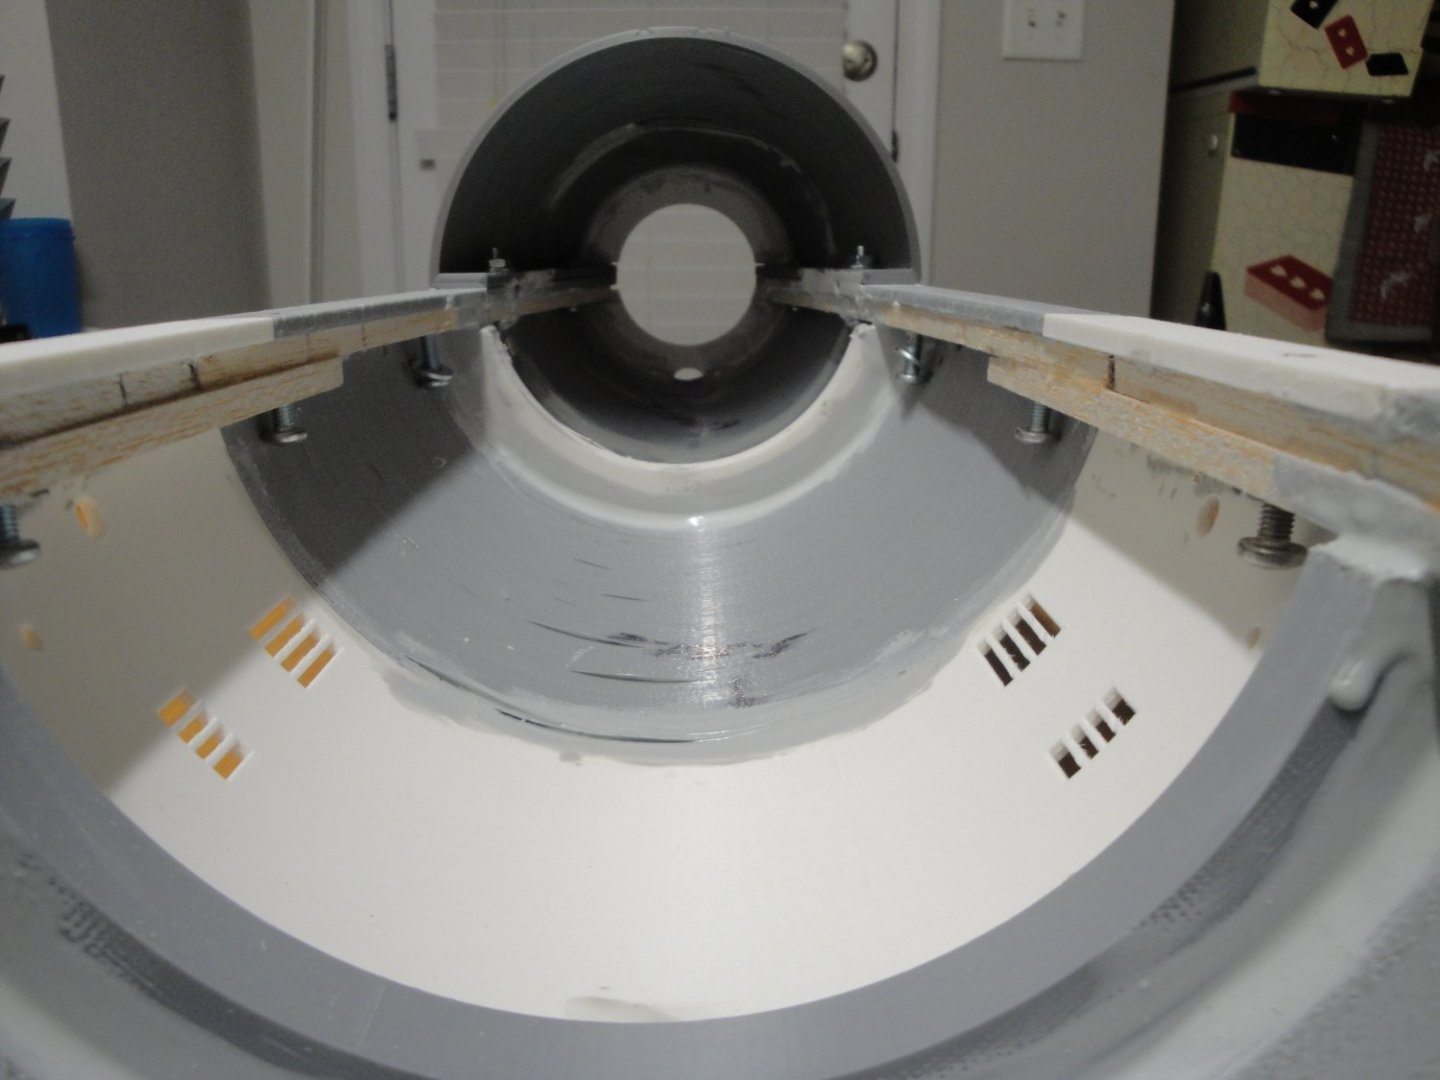
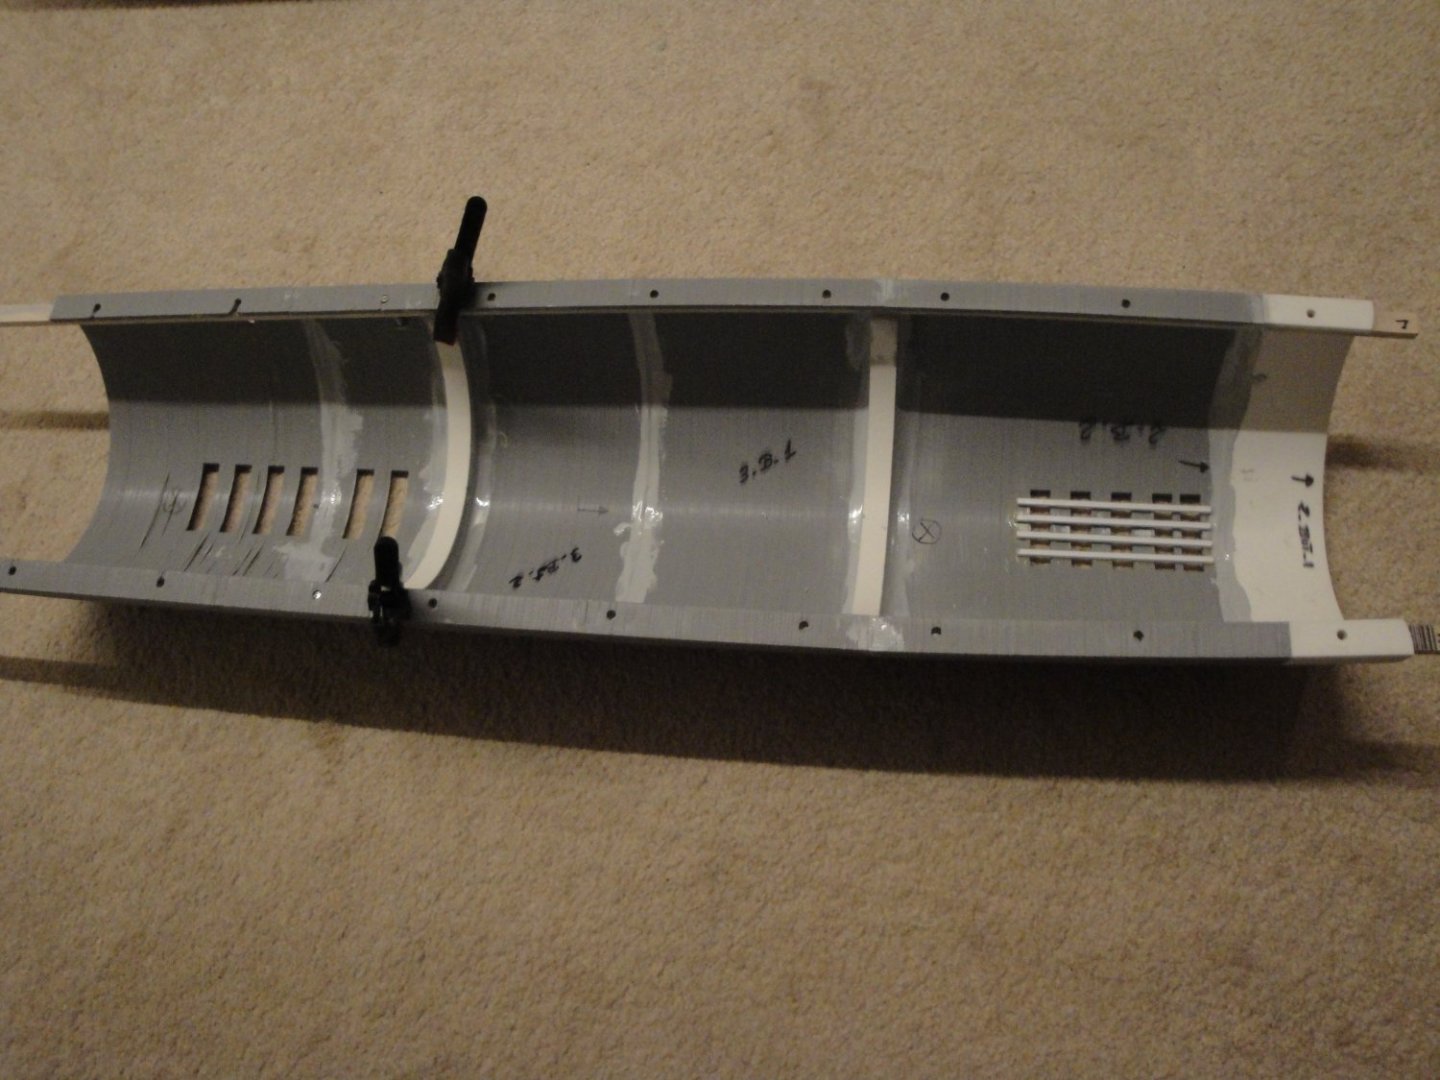
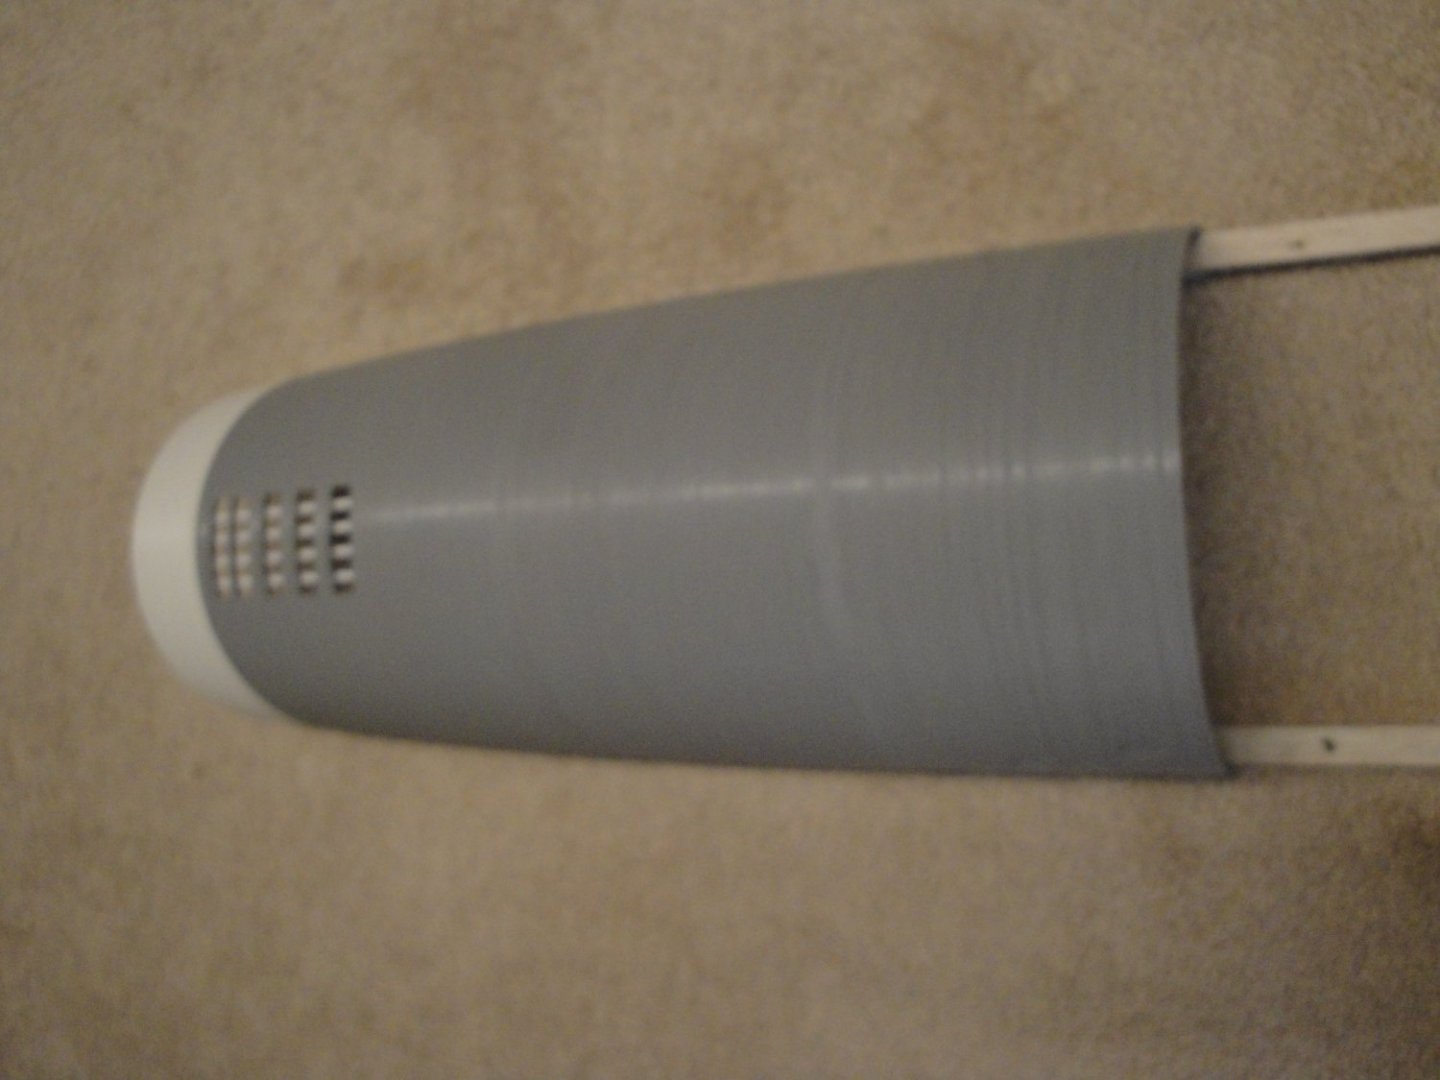
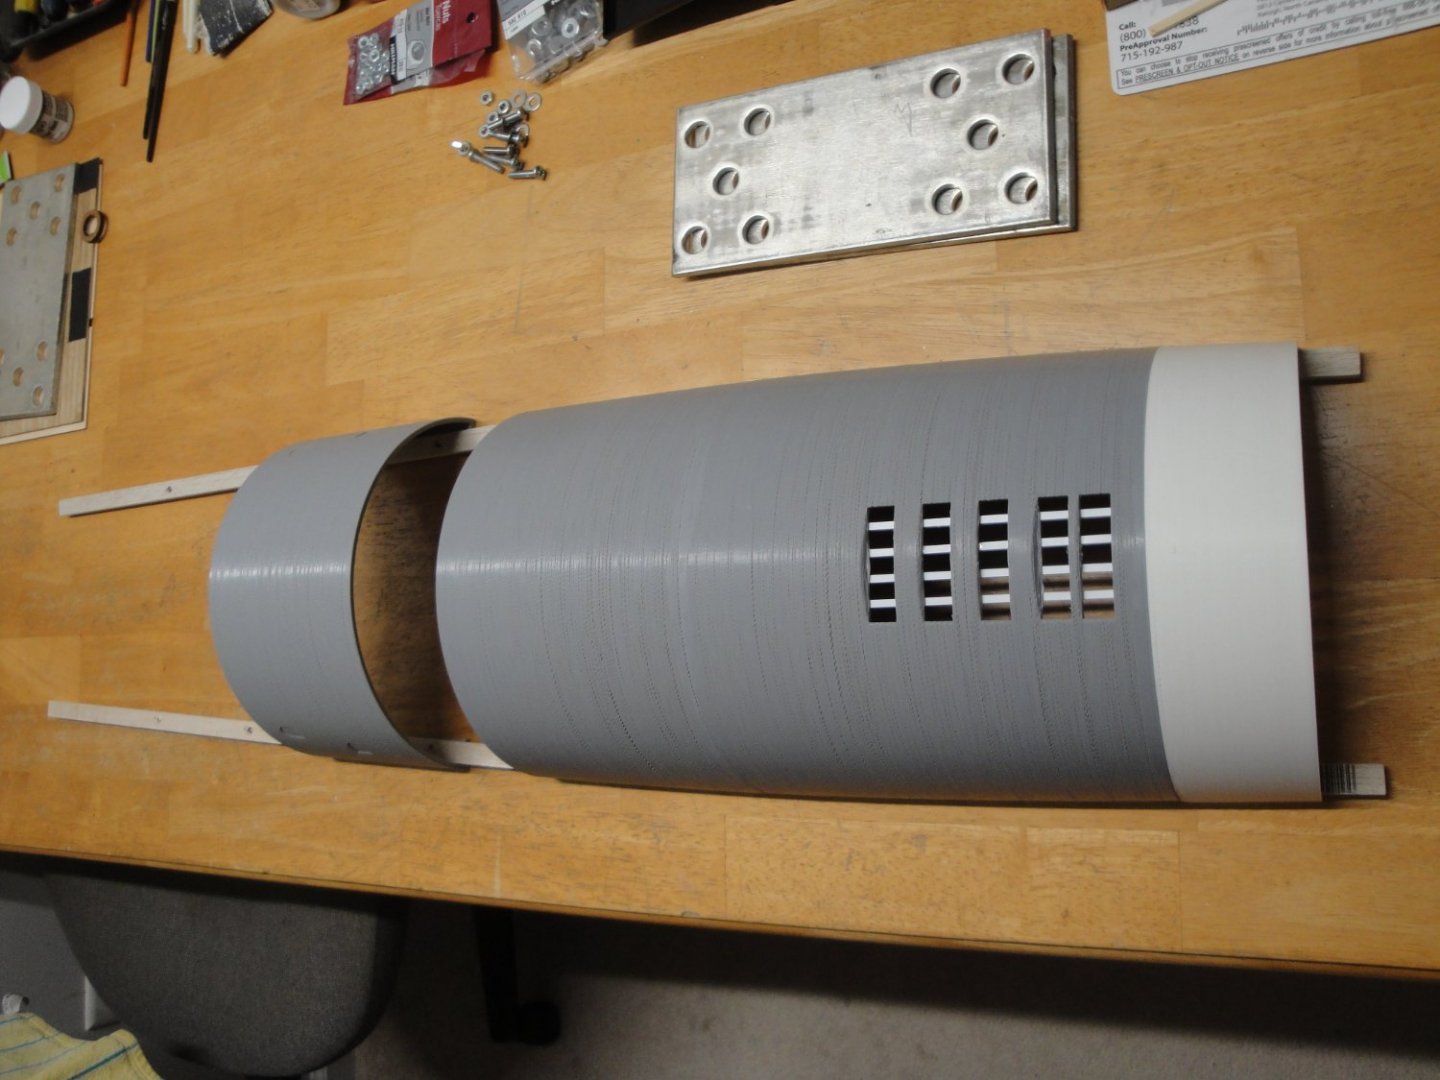
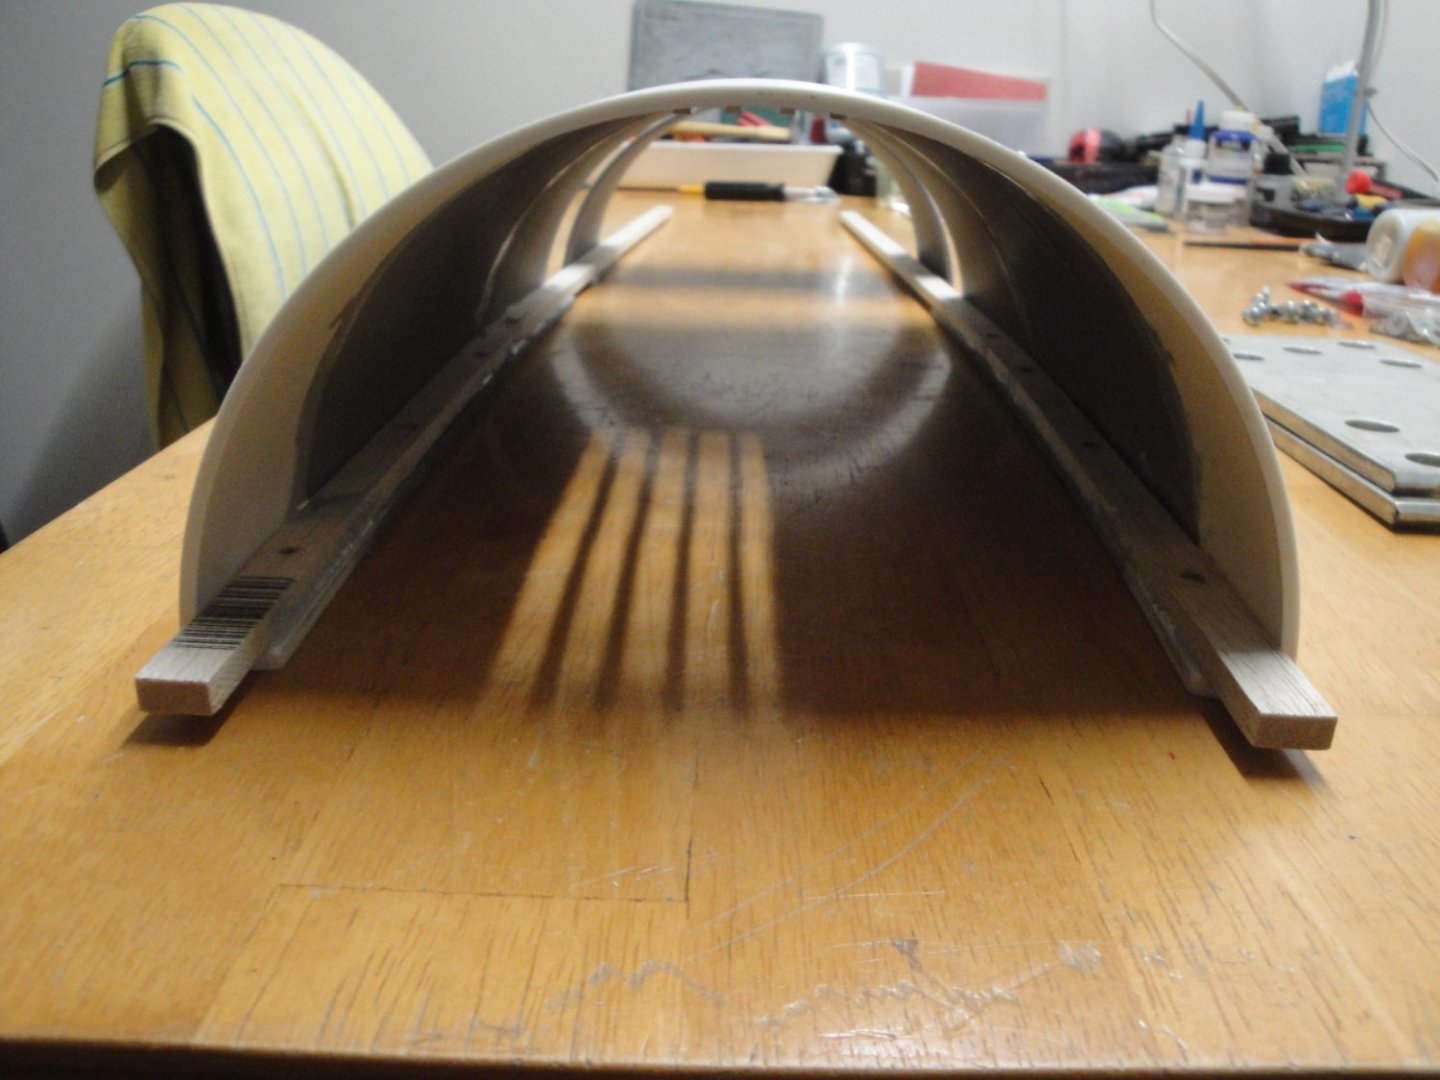
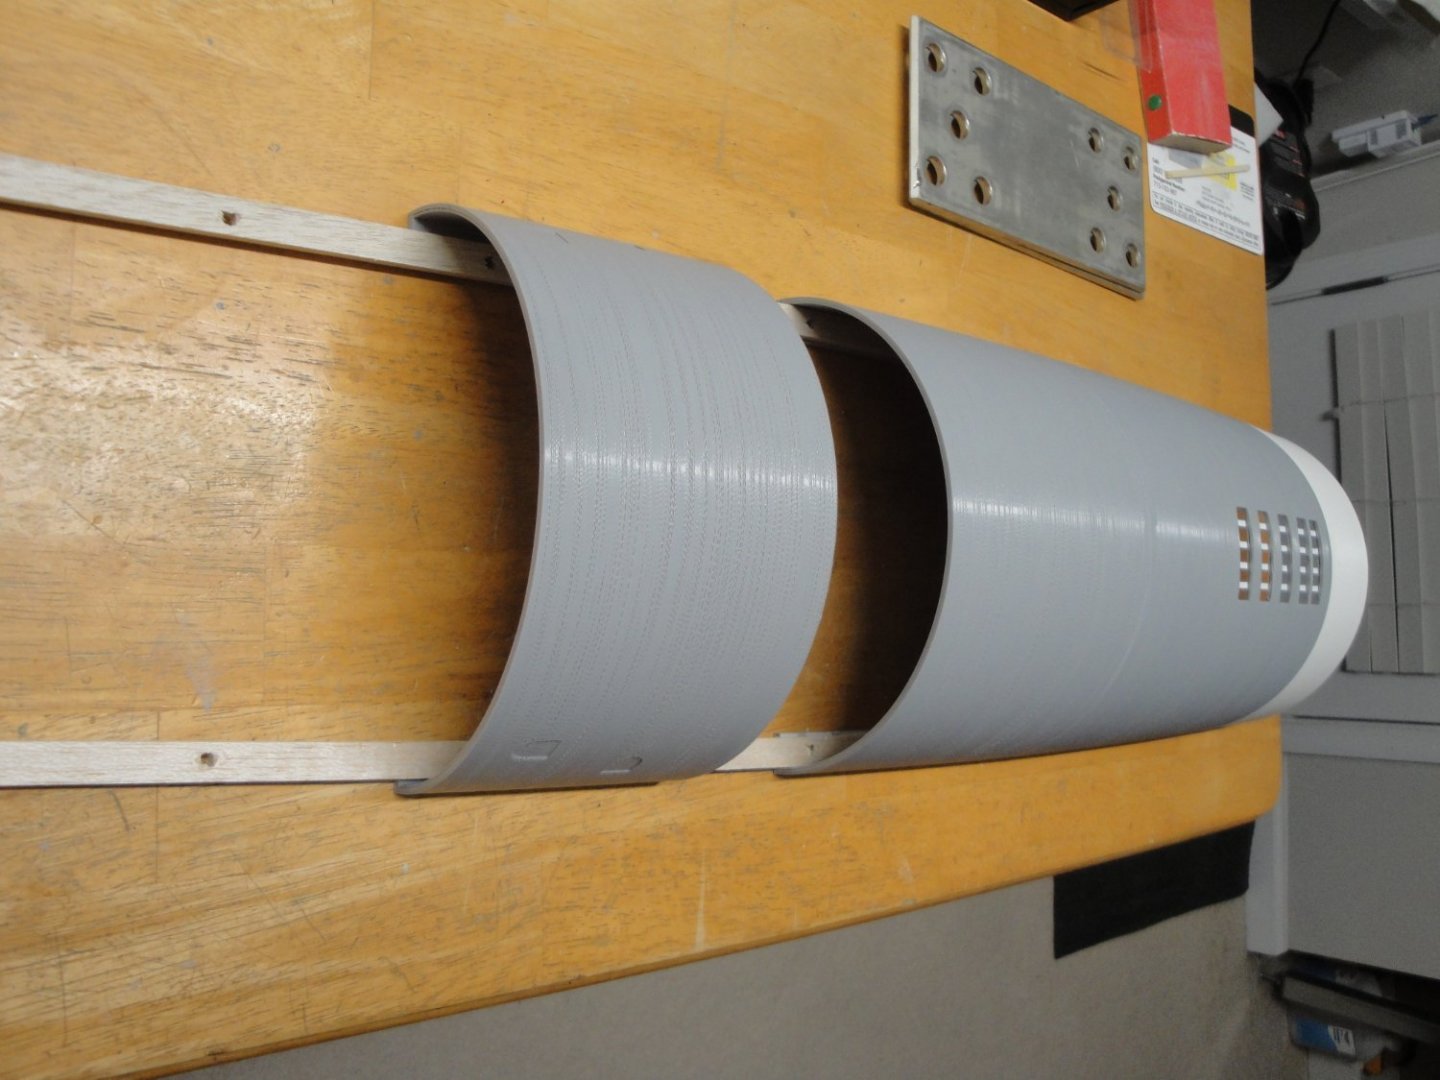
In order to assemble and install the stern, I need to start putting together the rear sections of the submarine. Therefore, the installation of the Section #6 top hull is done, after gluing the coupler part designed for the rudder and diving planes section. The top parts of Section #6 are small and only required 19 hours and 15 hours of printing time, respectively: You can start seeing some of the nice details engraved on the top of the hull. For this section, the extrusion was giving me some headaches and is not as sharp as the other top sections as you will see later on. The two white parts on the very end are the couplers used to attach the stern and propeller (see picture below): A view from mid center: Top and bottom sections are glued and bolted for alignment and extra strength. I use 10-32 x 1 inch long bolts. As you can see, a lot of sanding and filling will have to take place. I suspect I may spend 3 to 4 cans of primer, on that large hull. Yves


-
You are making great progress. It is looking really sharp. Yves
- 476 replies
-
- 4
-
-
- sphinx
- vanguard models
- (and 1 more)
-
Interesting and unusual kit. It will be very interesting to follow you. Yves
- 14 replies
-
- 2
-
-
- Bosphorus Cutter
- Turk Models
- (and 1 more)
-
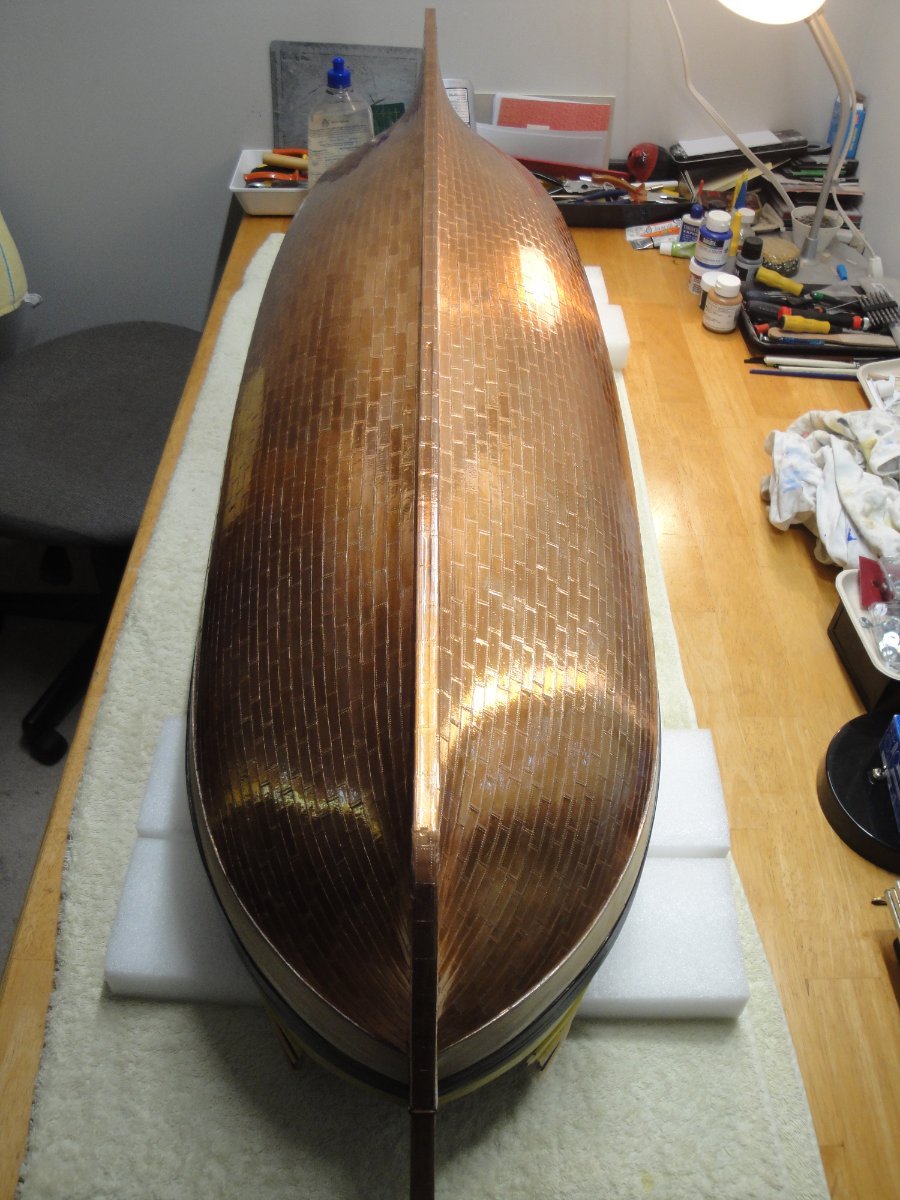
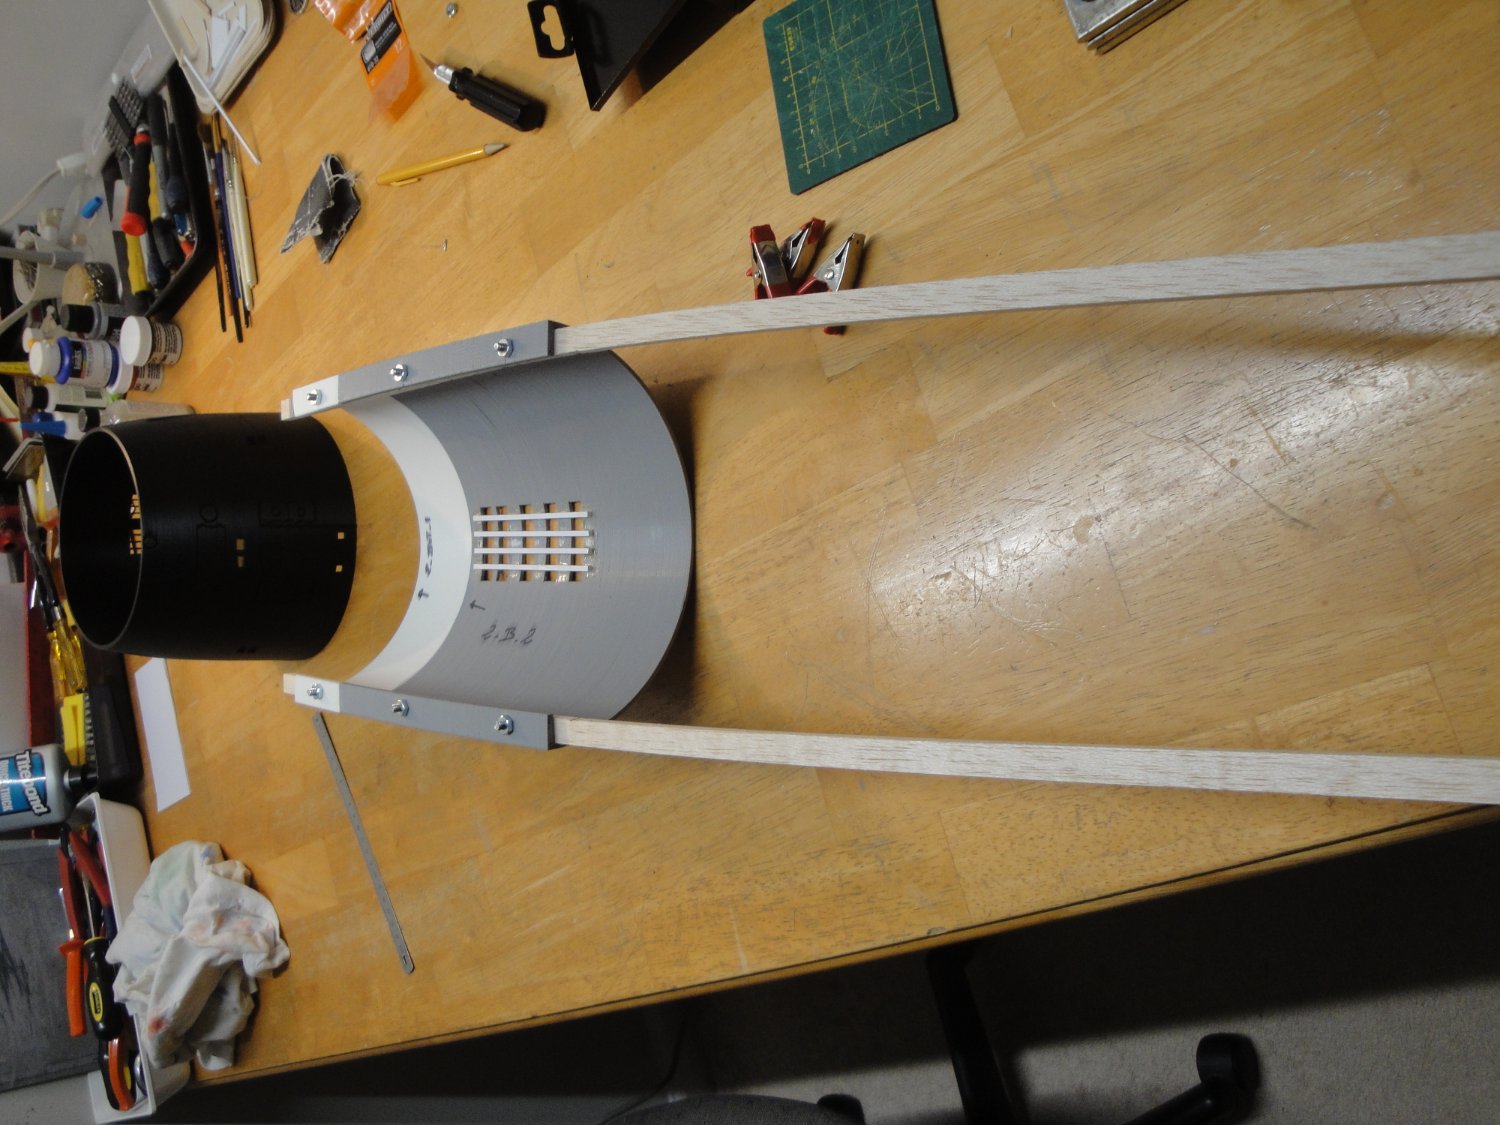
I now have to think of a way to display and hold this massive beast. I probably will present it, resting on wood blocks. It is not very heavy but certainly very large and long. Yves
-
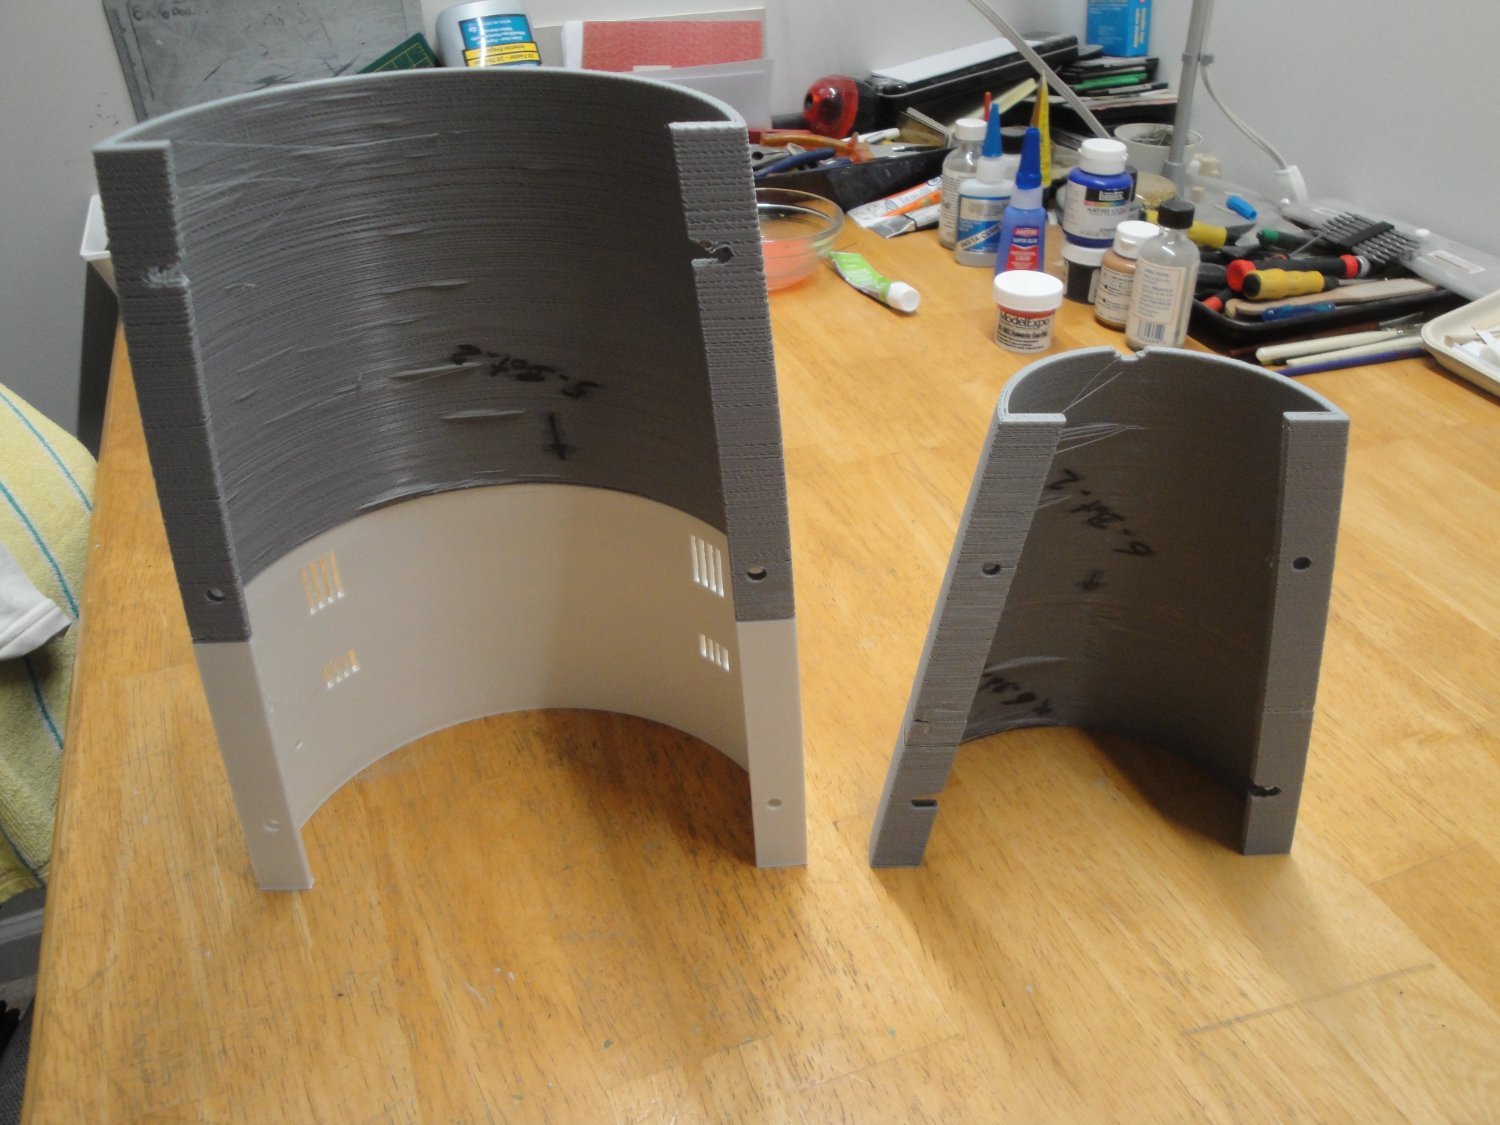
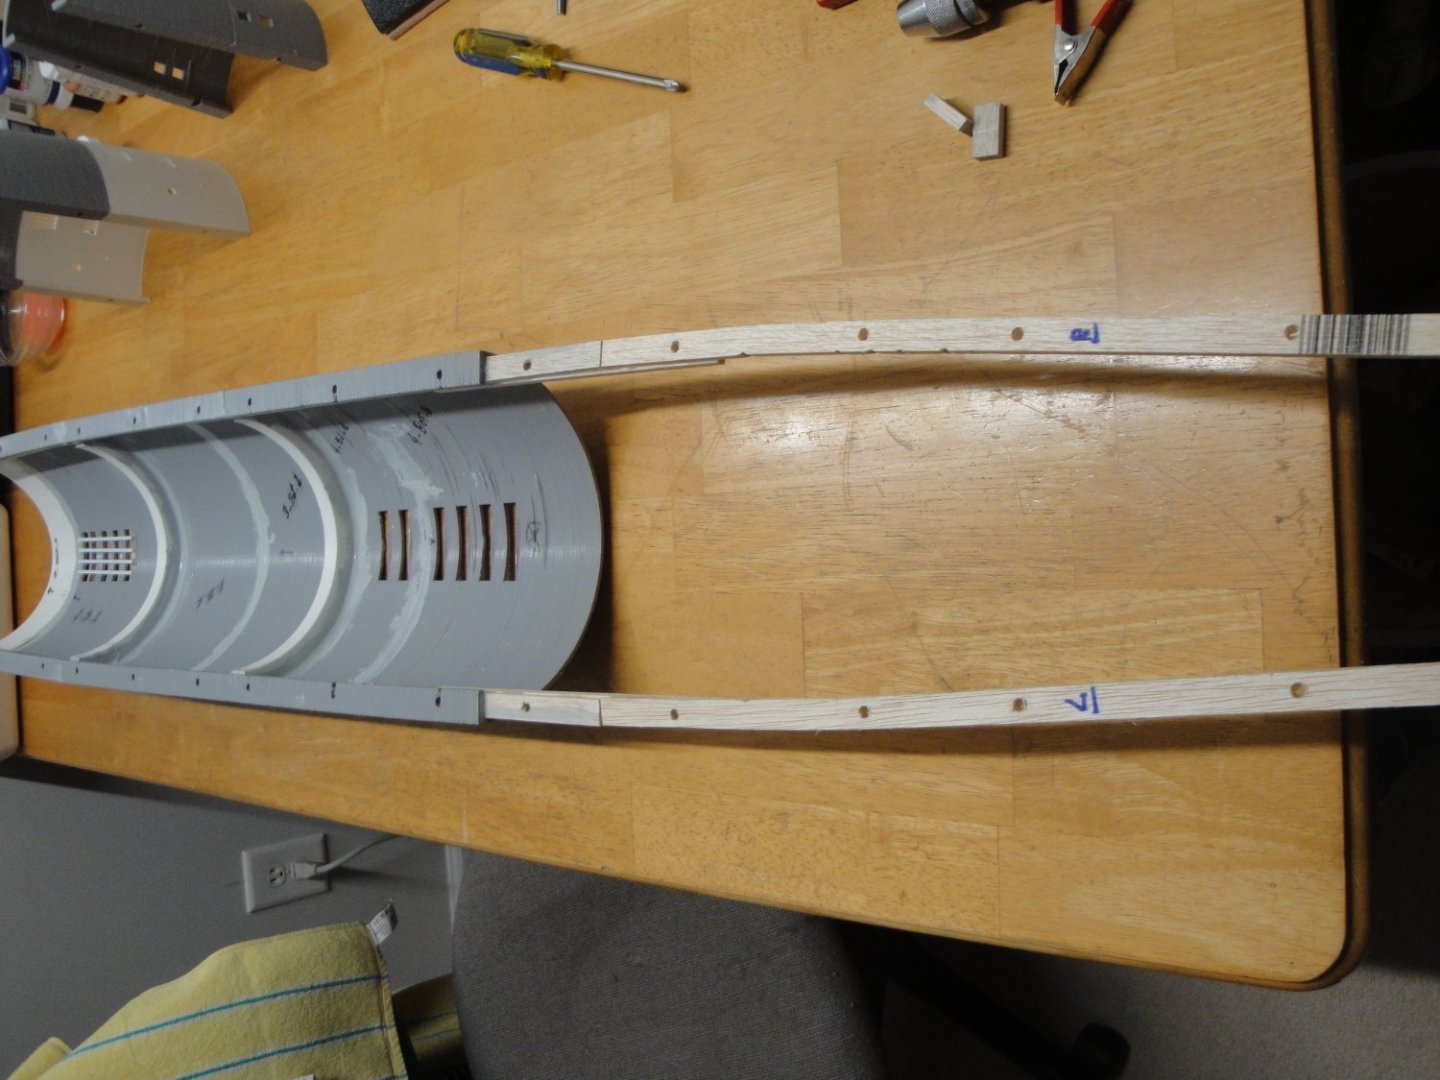
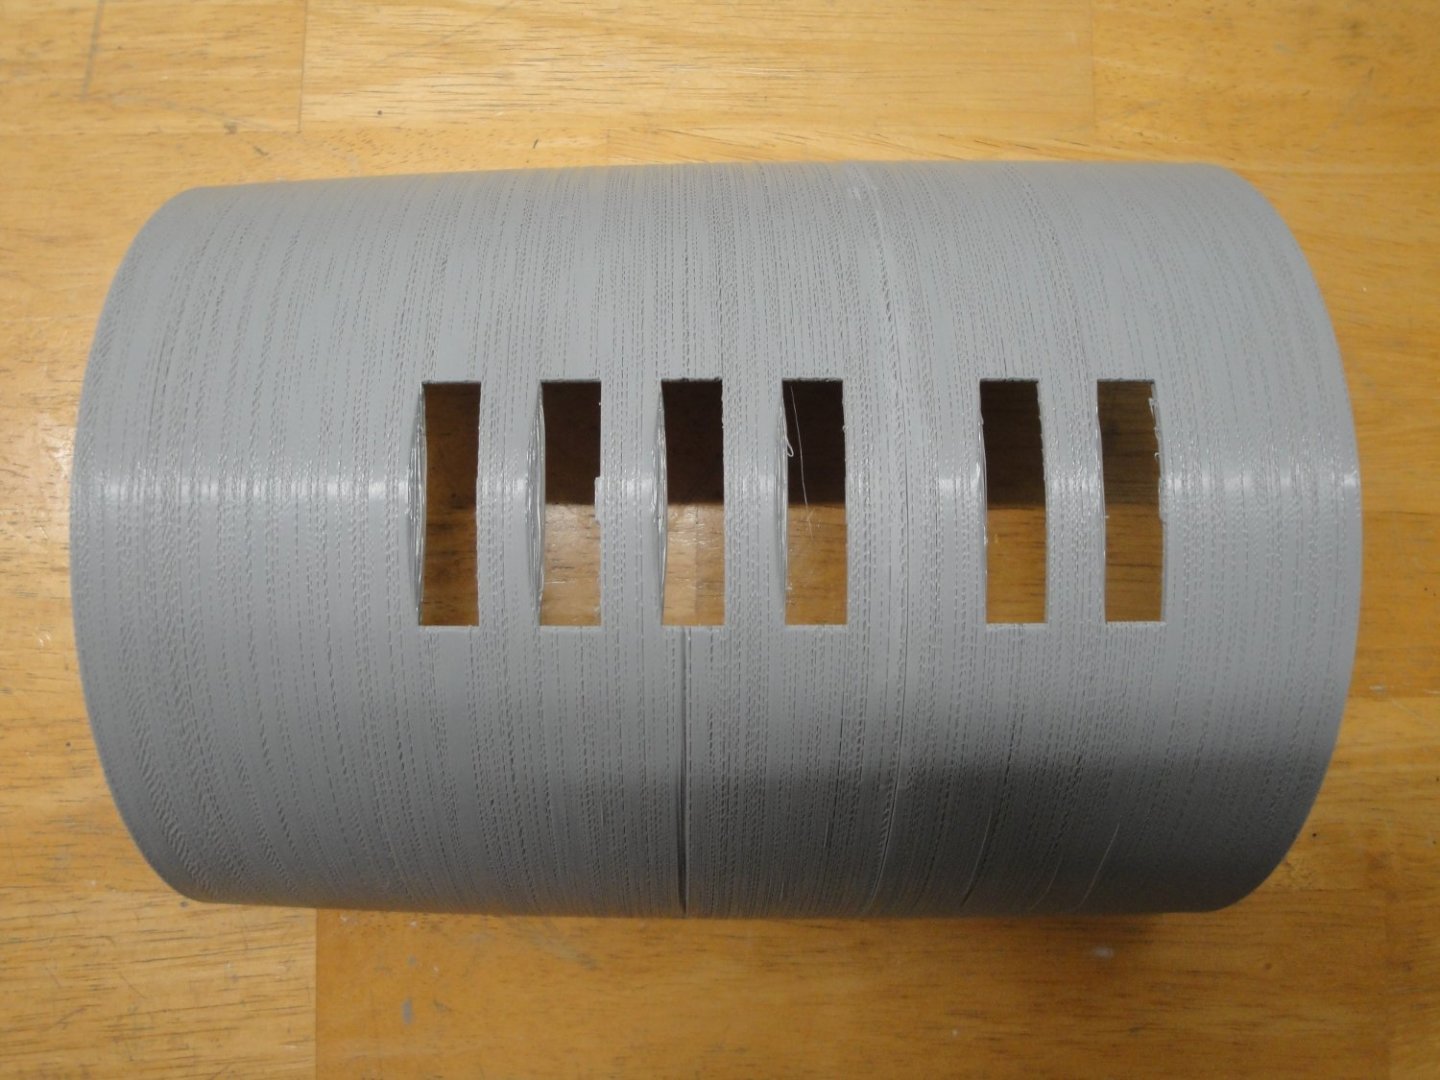
Sections #5 and #6 have been glued as well as all the connectors between them: This represents 49 inches of PLA tubing !!! Section #5 took 38 hours and 32 hours of printing. Section #6 took 19 hours and 15 hours. Couplers were printed with 100% filing (they are very hard) and took between 13 hours and 5.5 hours for the smallest. All parts are secured/positioned with a dab of CA and reinforced with epoxy resin. The result is very strong and sturdy. The half hull lays perfectly flat on the table, which is a good omen for the rest of the build. Yves


-
That is so beautiful. Yves
-
A warship is the perfect location for these evil possessed females. What an horrible music !!! Yves
-
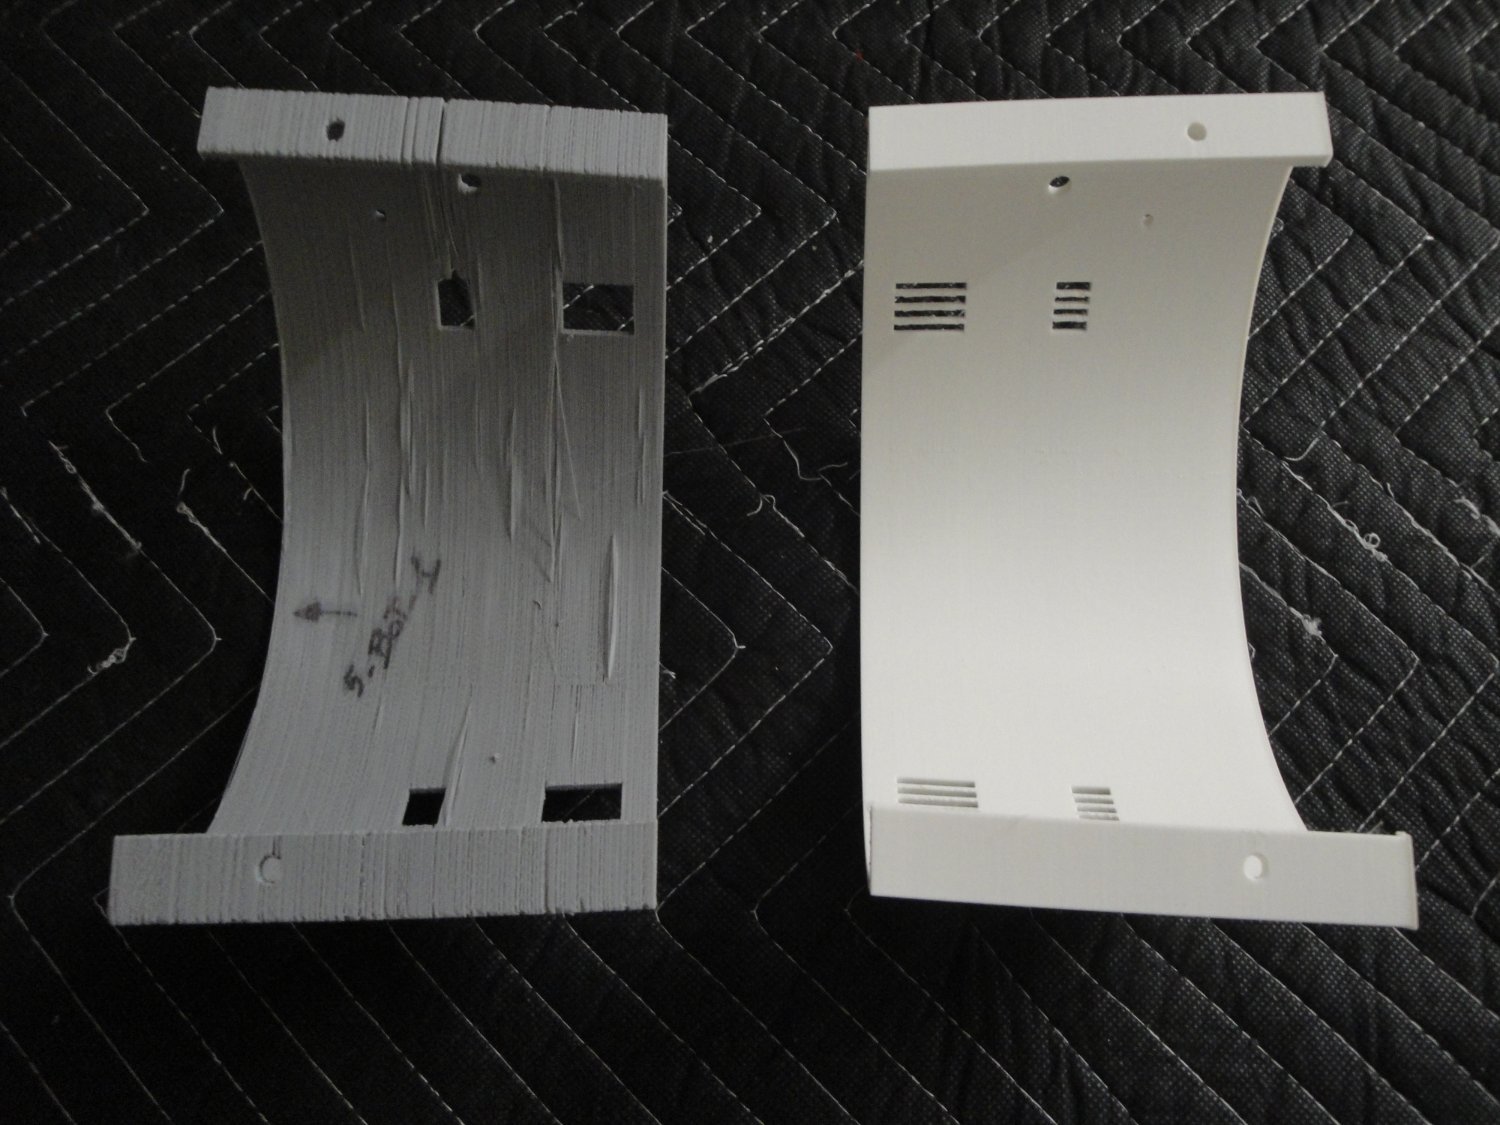
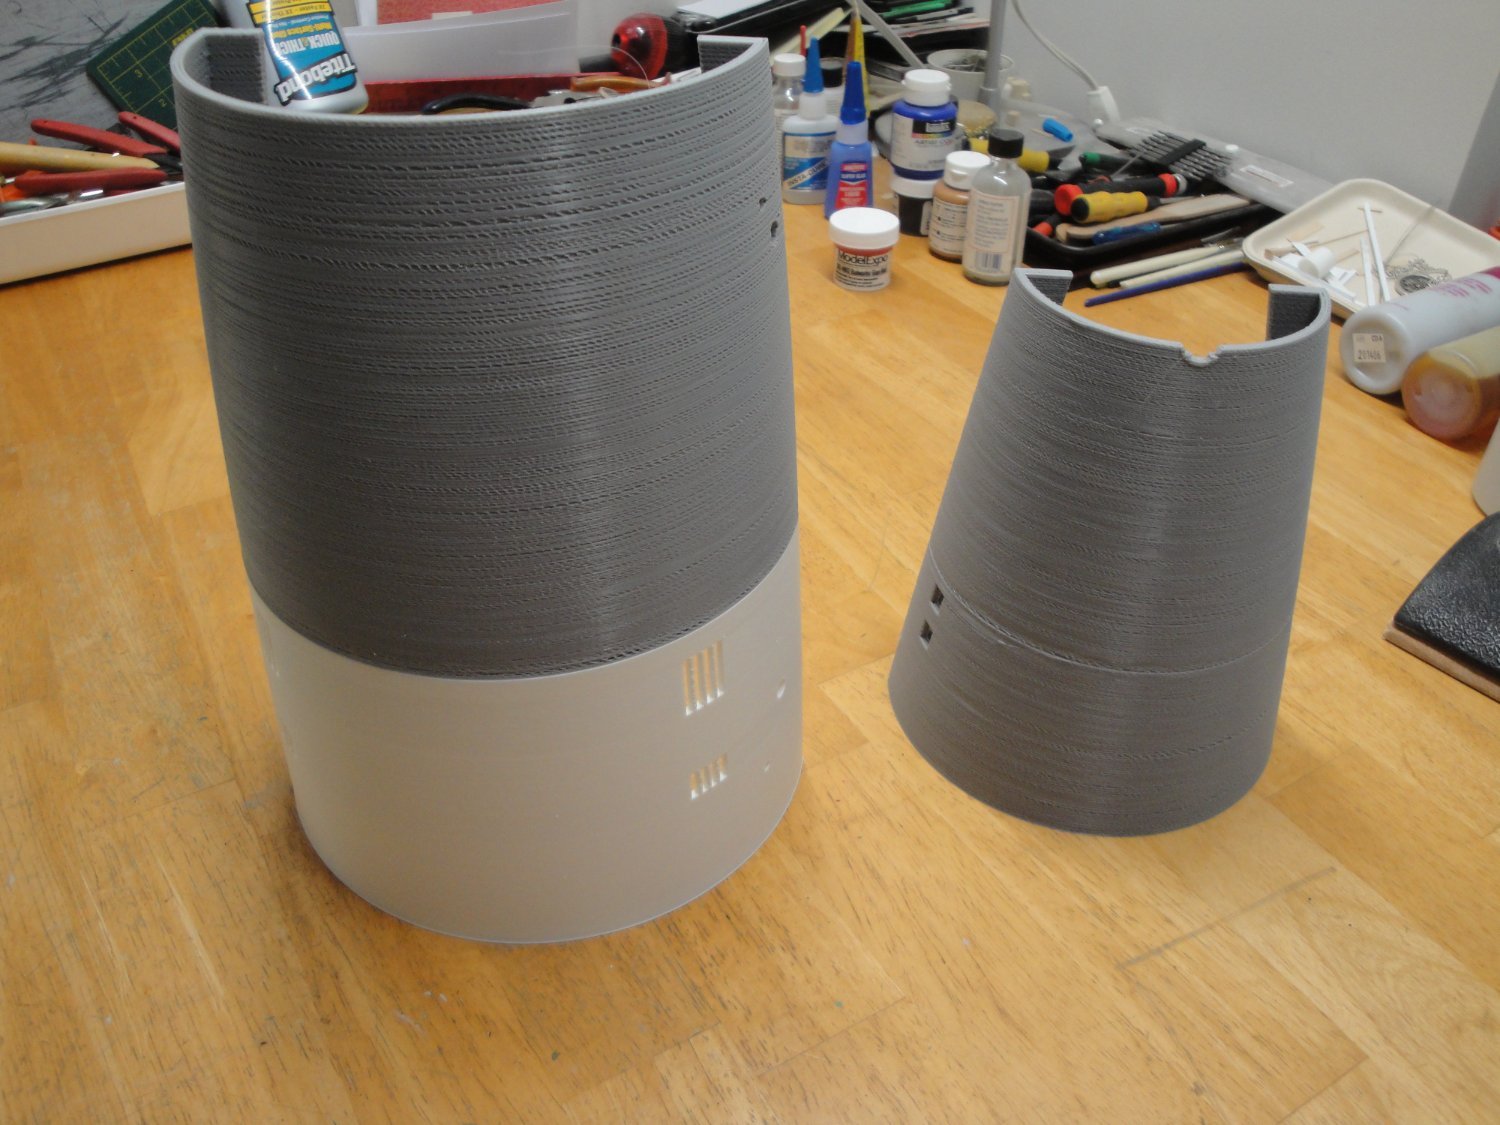
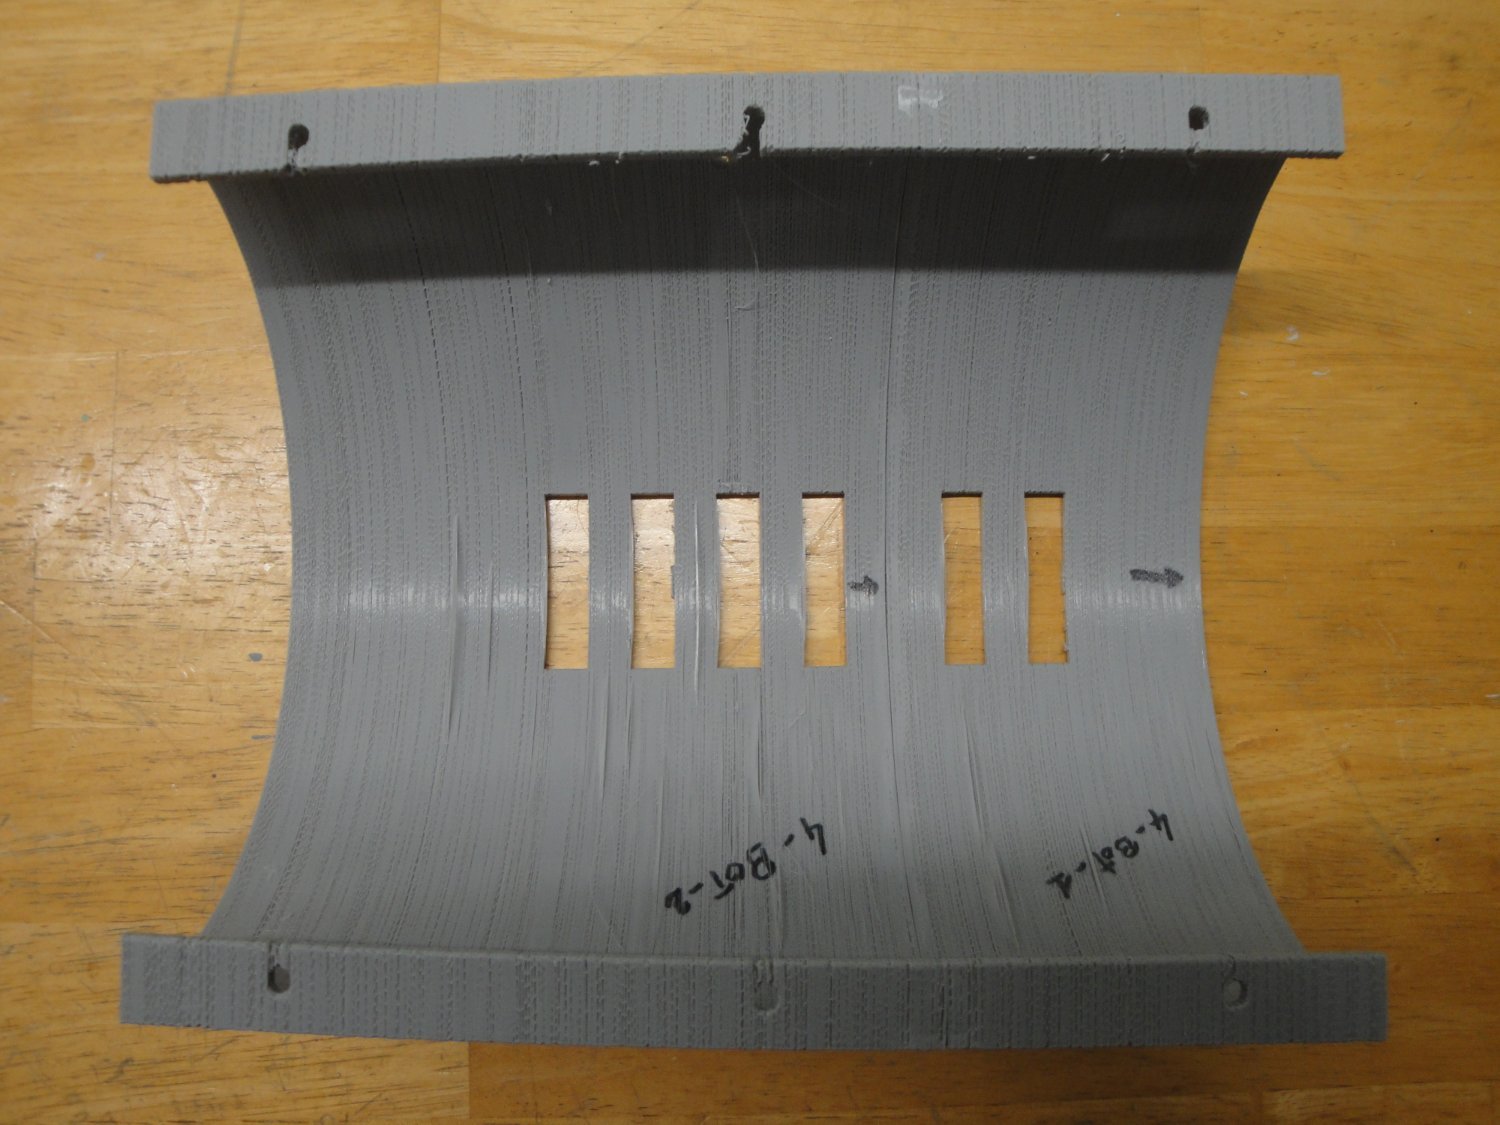
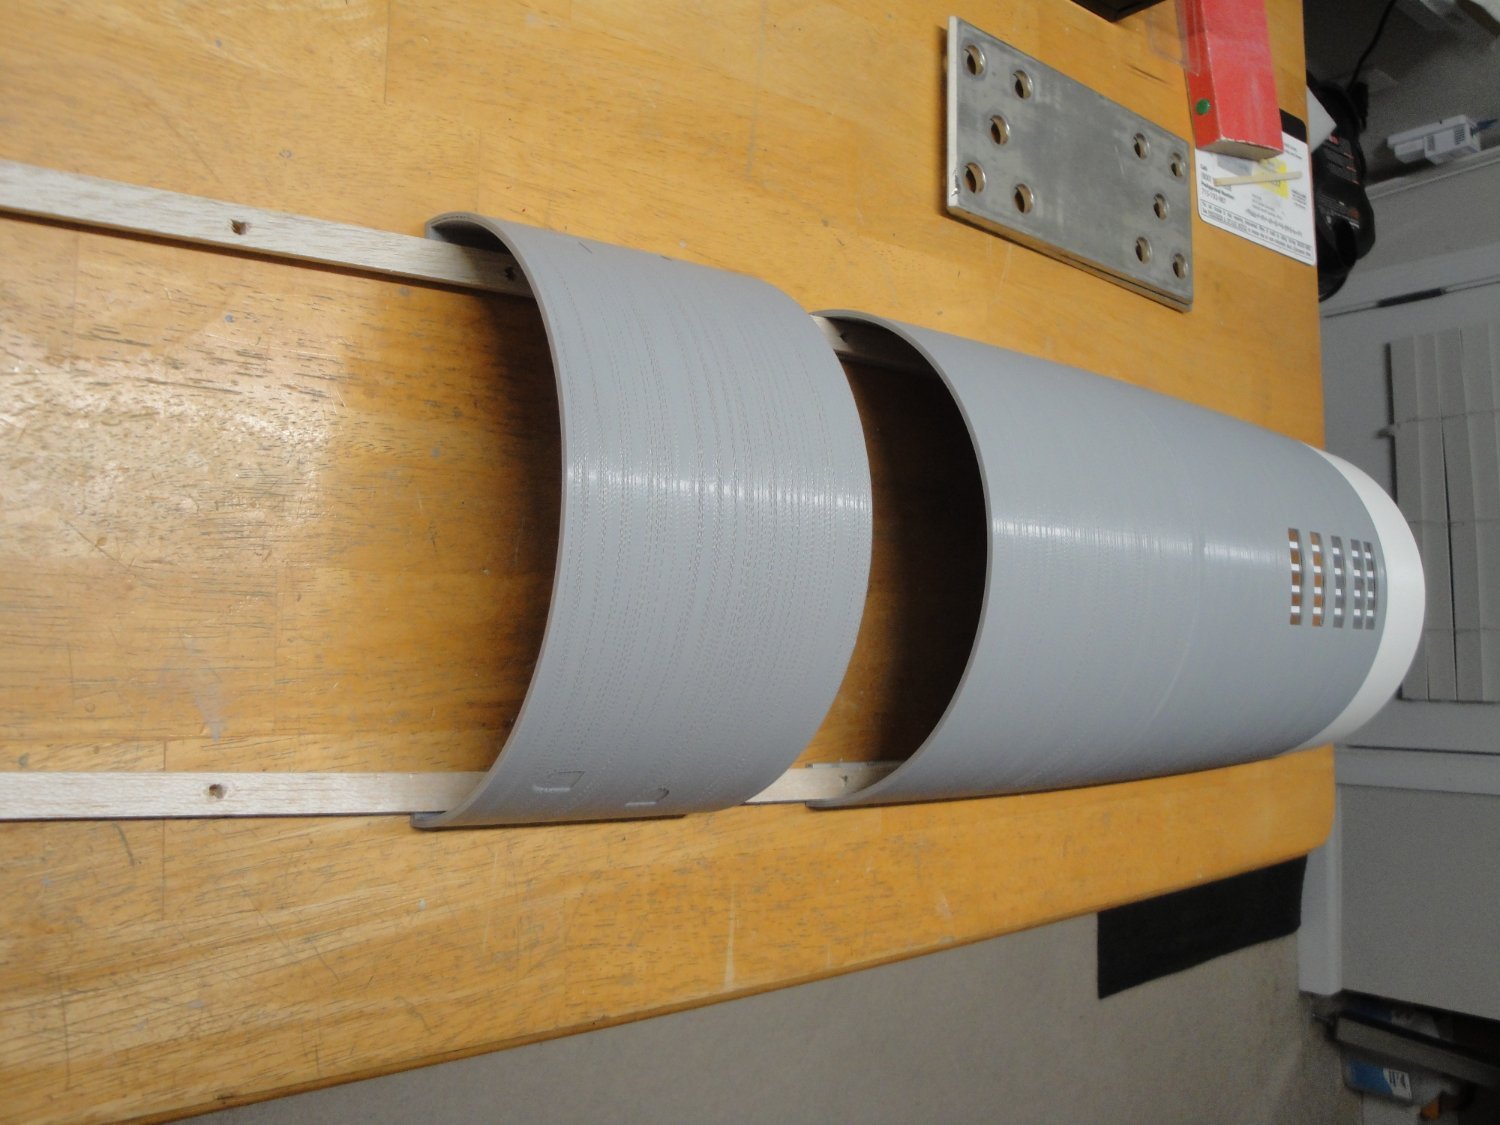
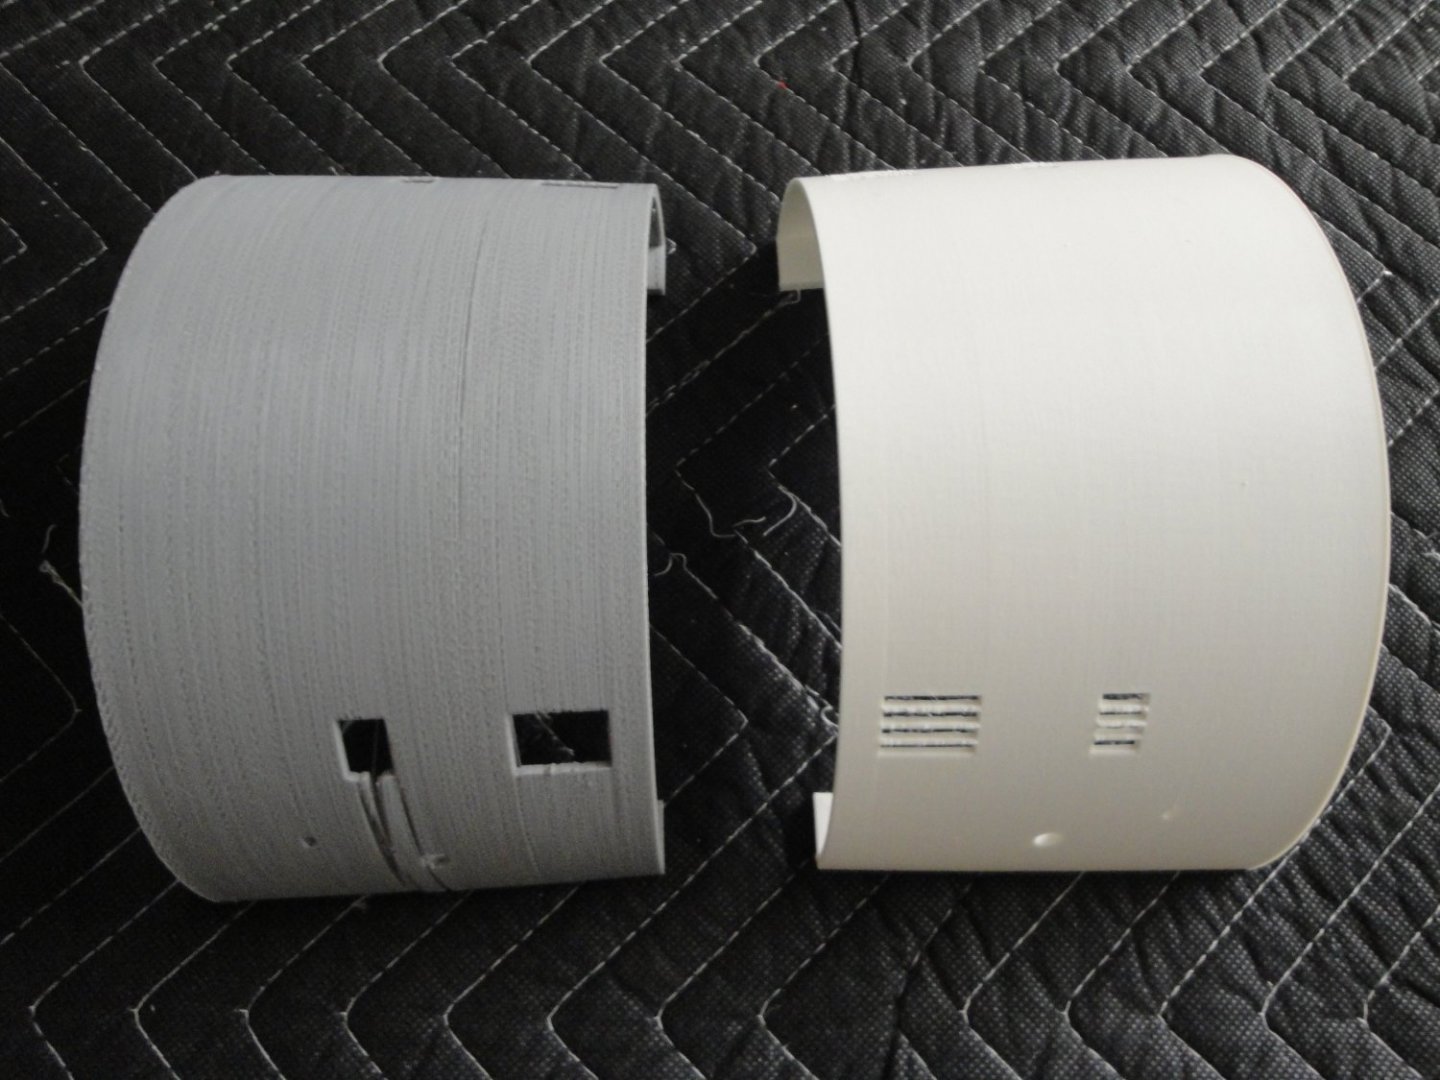
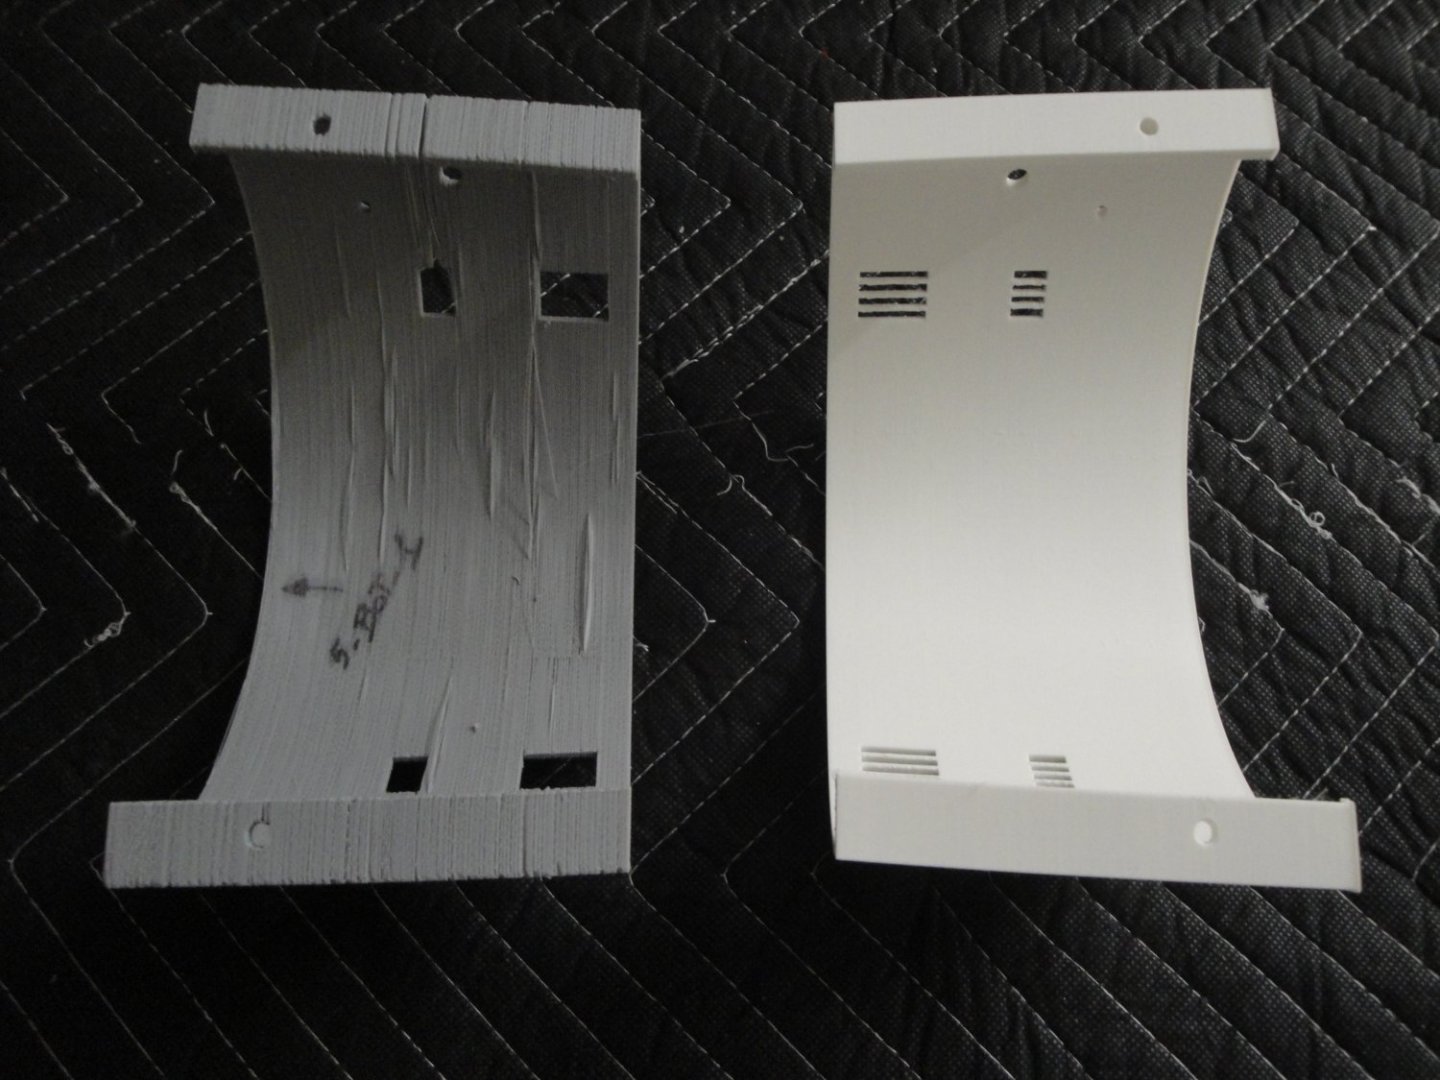
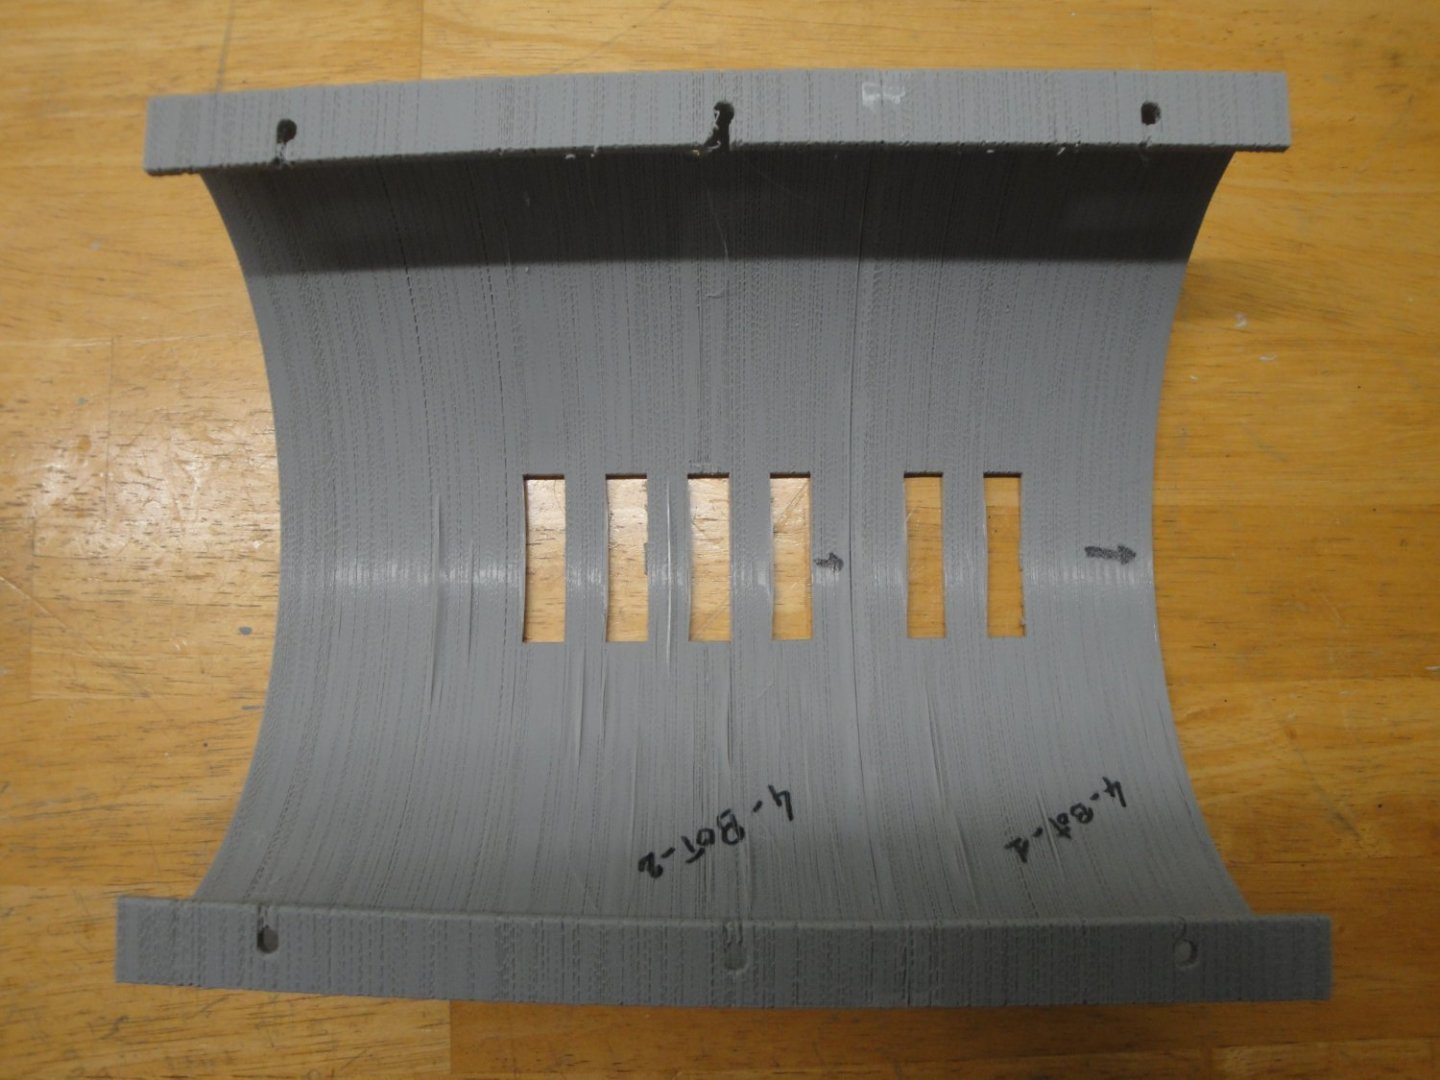
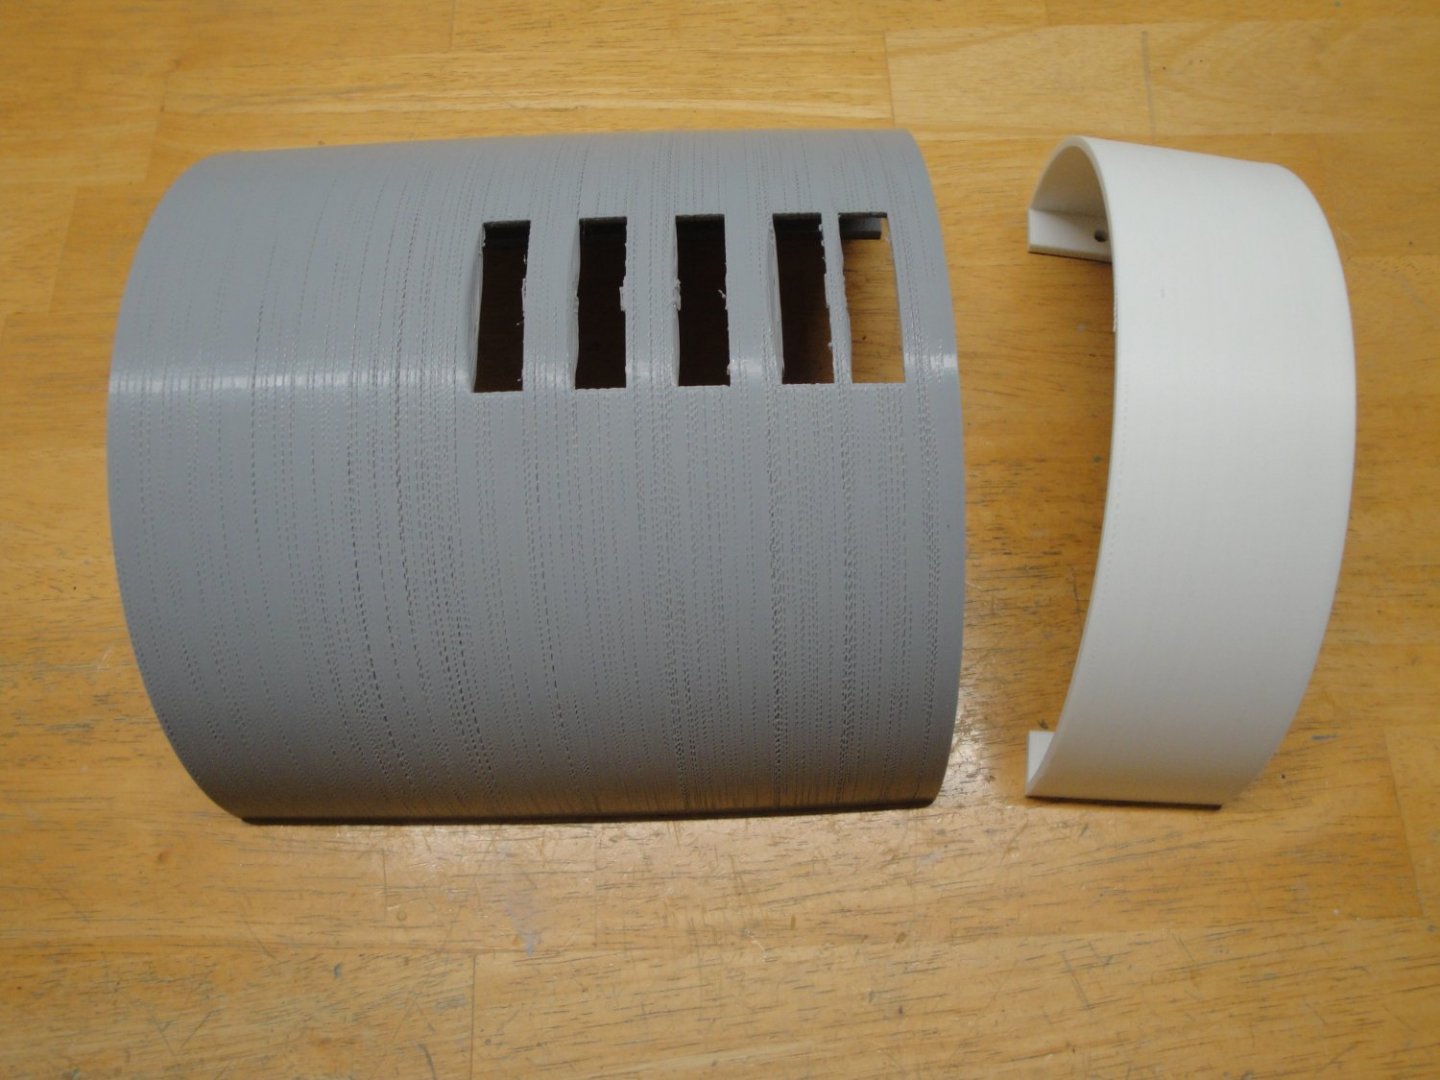
Still working on the bottom of the hull. This time, I am preparing Section 5 and Section 6 of the hull. Originally, the bottom part of Section #5 was printed with extrusion problem. I decided to re-print it over the weekend and got a considerable improvement with the new metal extruder: You can see the differences easily. The white part is ten times more solid than the grey part. The grey part can be broken by hand so easily. It will be thrown in the trash and will get recycled in the next 50 years, by mother Earth. Section 5 and Section 6 have been glued. Each sectio is always mode of two or more parts, to fit on the 250 mm maximum height of the Creality Ender 3 V2 printer: Then, an extension of the wood strips is done to align correctly Section 5 and Section 6. Yves


-
Session #2 is coming to a closure soon. The decks have been installed and a couple of oak stain coats, applied. A gun deck reeks of powder, blood, urine and fear.... It just cannot be clean and of a light color. I still have to build the capstans, pumps and the various grates to really call Session #2, completed. In the meantime, a second coat of Future Floor on the copper tiles to prevent them the urge to run away, during the manipulations of this massive hull. Et voila... Yves


- 507 replies
-
- 18
-
-
-
Still working on the gun decks: Some people may notice that the sections are not connecting. This is intentional, since this whole part of the vessel will be invisible once the main deck is built. In addition, it would be very impractical to plank in that deep hull and the risks of breaking the knees are not worth the trouble. Through a closed gun port or by poking a gun in your eye, you will not be able to see much of the gun deck. That is the nature of the beast. Yves


- 507 replies
-
- 13
-
-
Another exciting update, with the same exact thing repeating: Section #4: Again, two large pieces glued together with MEK and then Epoxy resin. Printing time? 34 Hours and 49 Hours !!! You can see the extrusion problem starting to show up, before I could diagnose the crack in the lever. To remedy the incorrect feeding of the PLA, I was reducing the speed to 50%. Section #4 is then MEKed to the existing lower hull and later on re-inforced with epoxy resin and the 3-4 coupler part: The central bottom hull section made of sections #2, #3 and #4: Almost 3 feet long at this stage. I am sure all this PLA parts are getting you excited, right? It will get more interesting once we move to the upper hull. Yves

-
Those pumps look very sharp. Their capacity of 1.2 gallons per minute is way greater than say, a windshield washer pump that I have used in the past for ballast tanks. At this rate, it will take less than 3 minutes to empty your ballasts, and probably even less. Yves
- 454 replies
-
- 4
-
-
- Union Steamship Company
- Stepcraft 840
- (and 3 more)
-
Moving along with the lower hull. Installation of the lower section #3: That section is comprised of two parts (always) that required 31 hours and 24 hours of printing time, respectively. Between each section, a coupler stiffens the hull and provides for a very strong assembly. I use MEK first and then epoxy resin for a solid coupling. I know, it looks sloppy but it is very solid. From the outside: Another coupler will go between Section #3 and section#4. There is not much to see at this stage and the interesting part will come later. Yves


-
F-86F-30 Sabre by Egilman - Kinetic - 1/32nd scale
yvesvidal replied to Egilman's topic in Non-ship/categorised builds
I can see a Sabre jet engine kit being produced, very soon. And you can pick up the scale... 🙂 Yves -
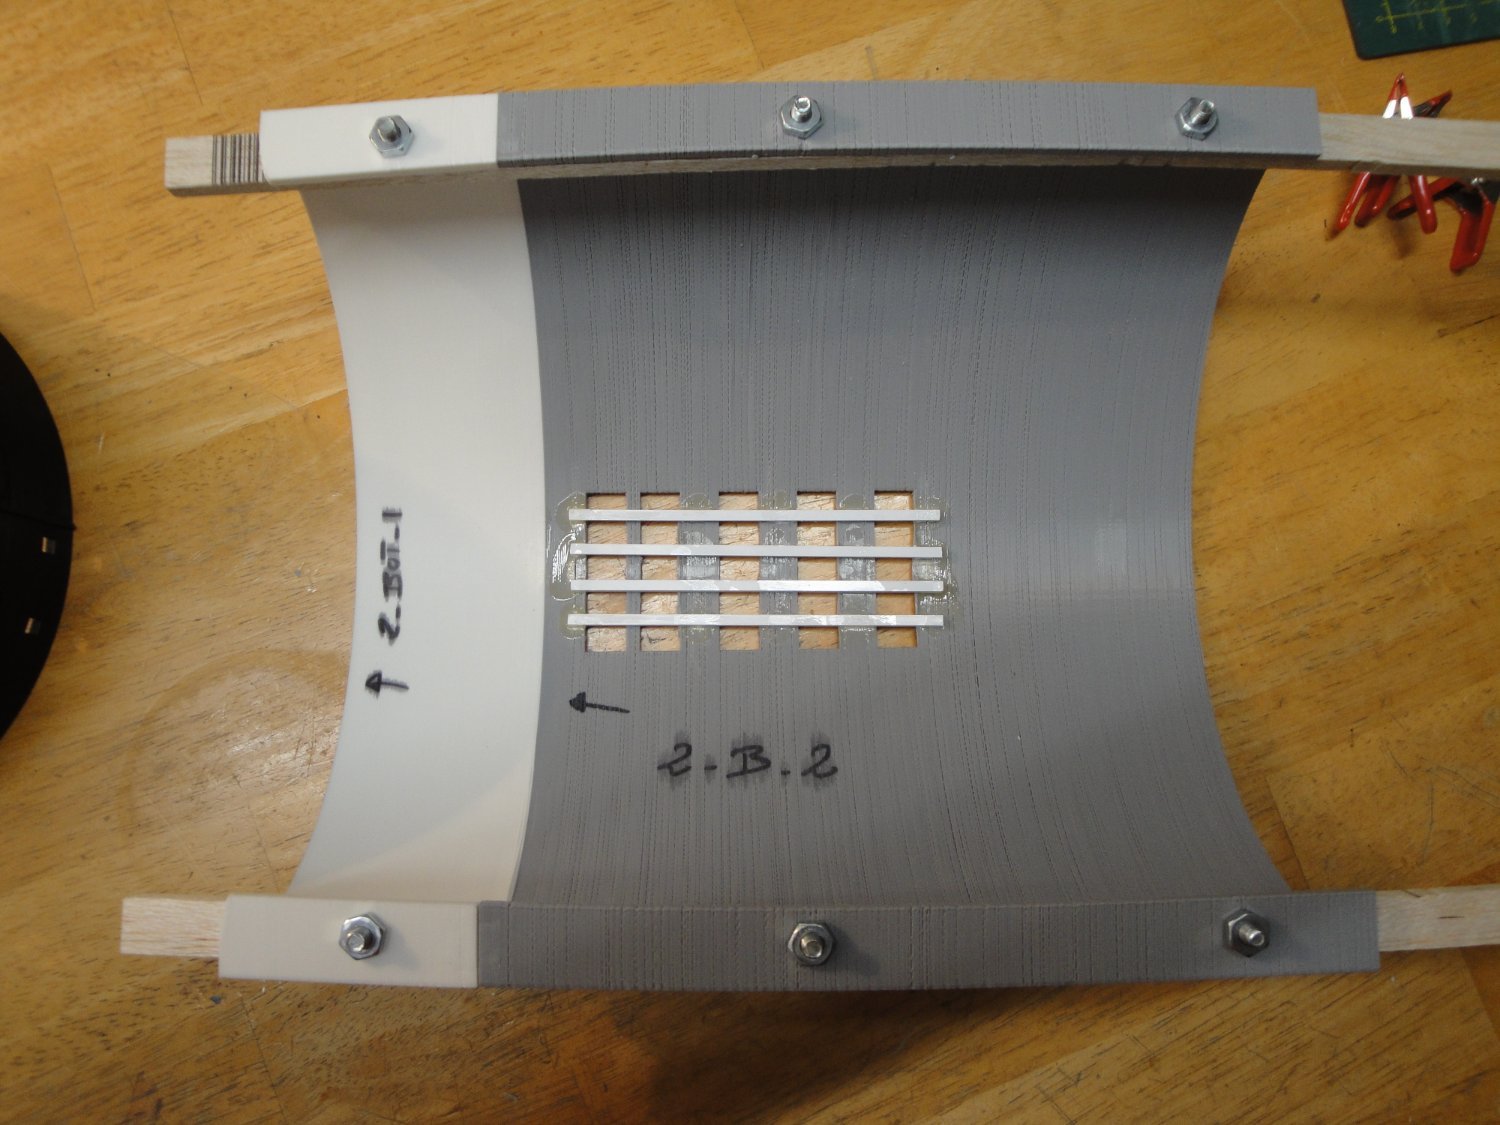
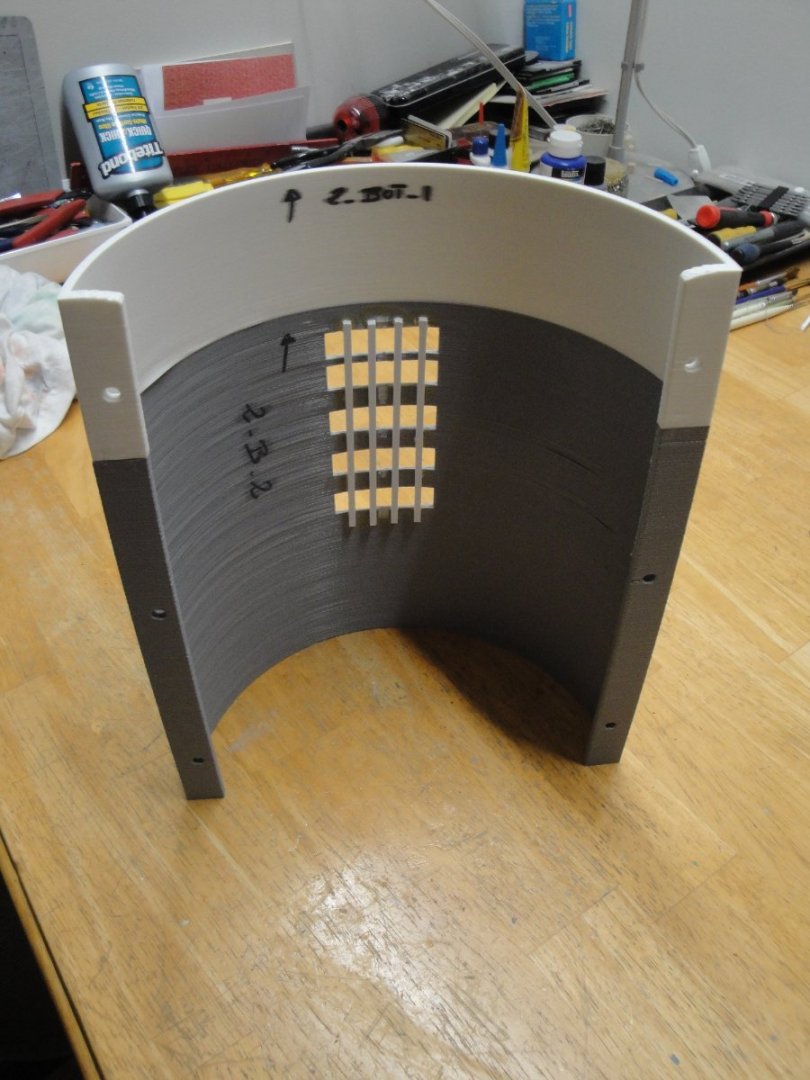
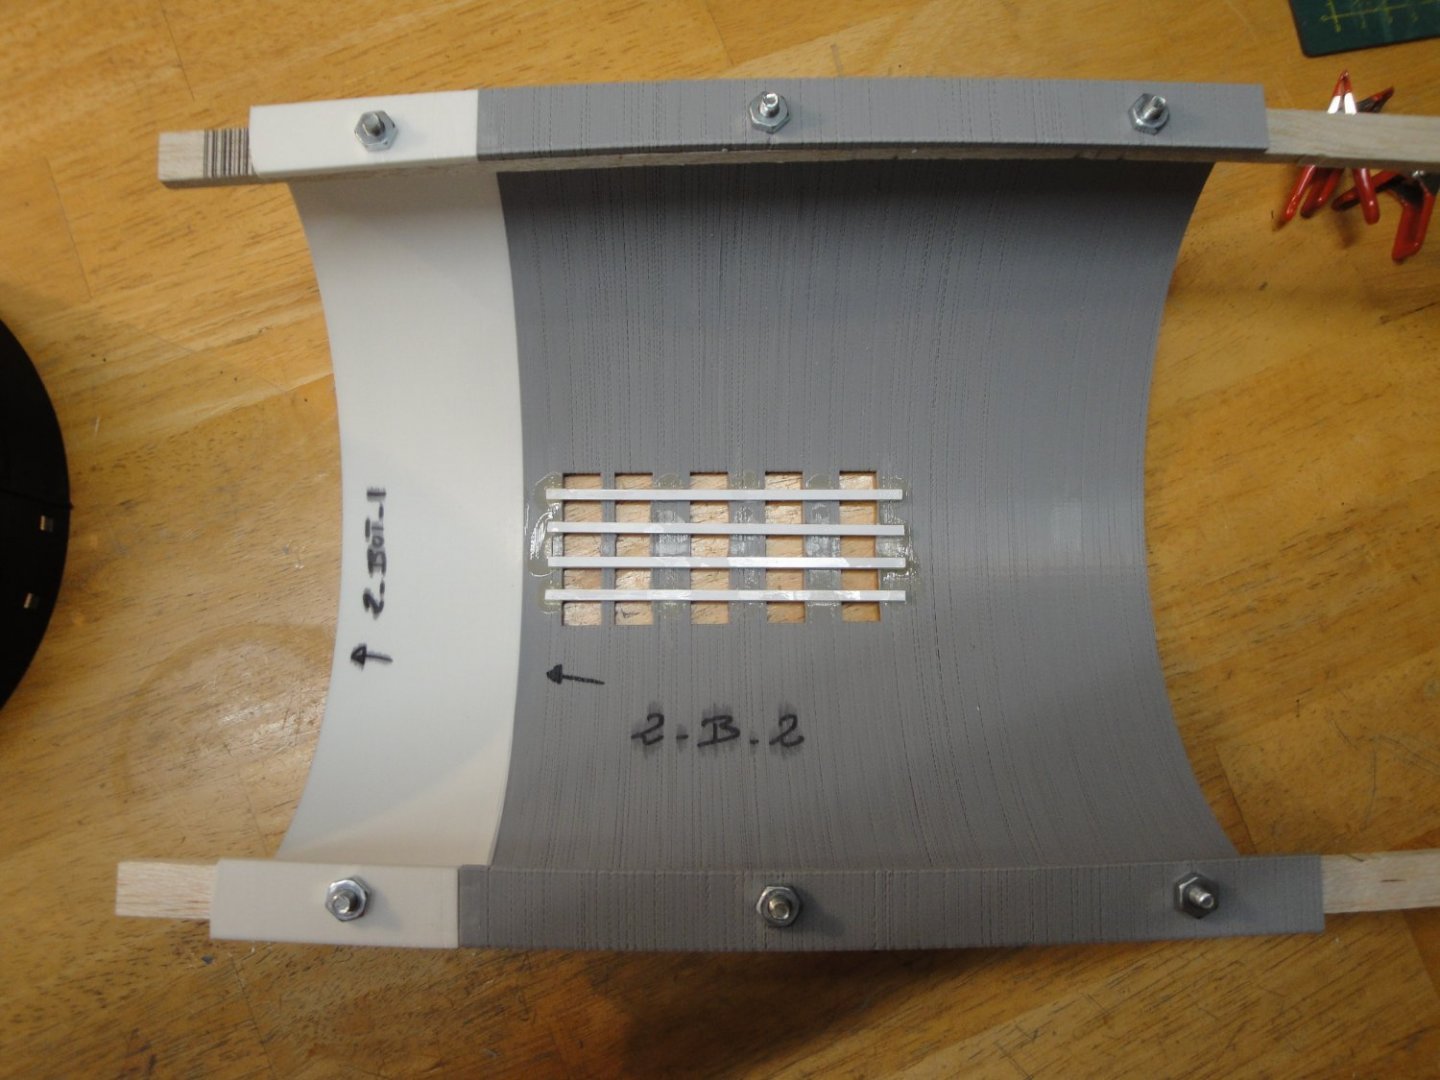
A few small progress, with the building of the lower hull, Section #2 and #3: Bottom Section #2 (refers to the overall view of the submarine if confused...) is made up of two parts: White that took 17 hours to print at low speed The light grey one with the openings that took 42 hours. The reason why these were printed at low speed is because of some extrusion problem on my 3D printer. It took me a while to figure out that the extrusion lever was cracked internally and not putting enough pressure on the filament when feeding. I should have known better, but could not see the damages from the outside. Bottom Section #3 is shown as well, with one light grey part glued to Section #2 and the second part of Section #3, waiting to be glued... Bottom Section #3 took 31 Hours and 21 hours to print..... This view shows how the various parts are being glued together. The overall assembly is perfectly flat and rests on the table. The diameter of the submarine is of about 200 mm. It will be very large at 1/48th scale. Yves
-
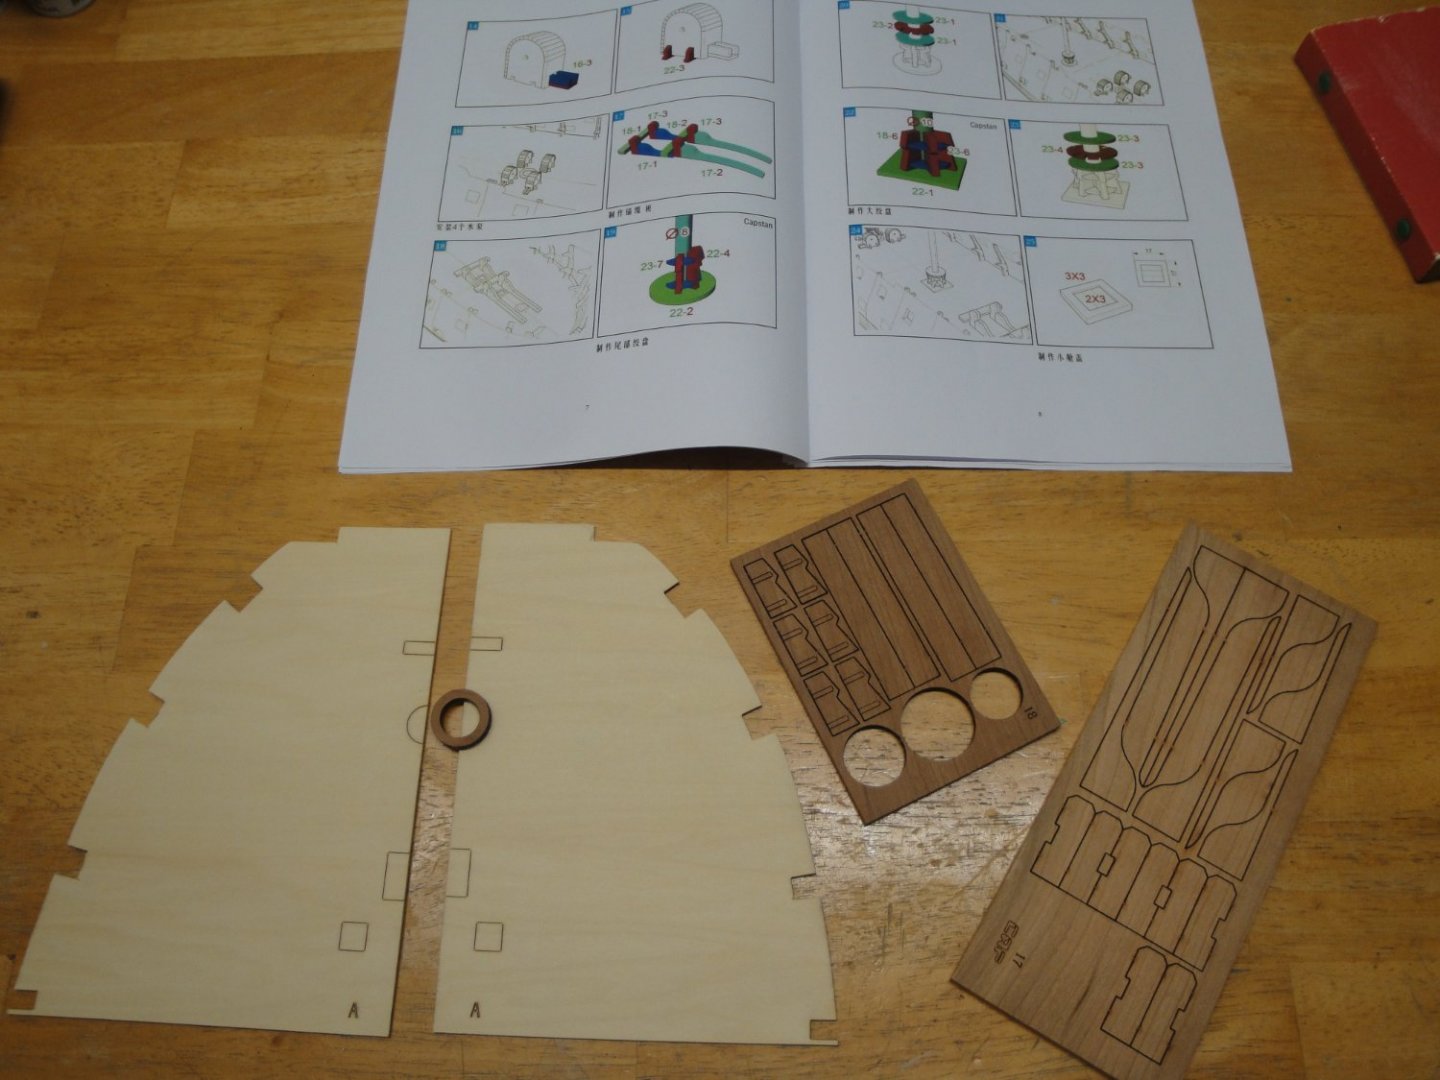
A quick update for a change of pace from the HMS Bellona. This model will be static and thus will be built differently from what the kit is suggesting (not that they give you a lot of information....). I will start with the bottom section of the hull, using pre-shaped large balsa strips of 1/4 inch by 3/4 inch, for rigidity. There are 7 sections in this submarine and none of them can fit on my 3D printer along the Z axis (height). Thus, they are all split in two pieces that need to be glued and aligned together. Again, I am using the MEK to solder the parts, but these are large and will likely require epoxy glue for a solid and sturdy assembly. The lower section is put together by using the two hard balsa strips and #10 screws with washers and nuts: The following parts are placed and all holes are drilled with precision: Nothing is glued yet. I need to prepare a large quantity of epoxy to make sure that everything is sturdy, straight and solid. Yves


-
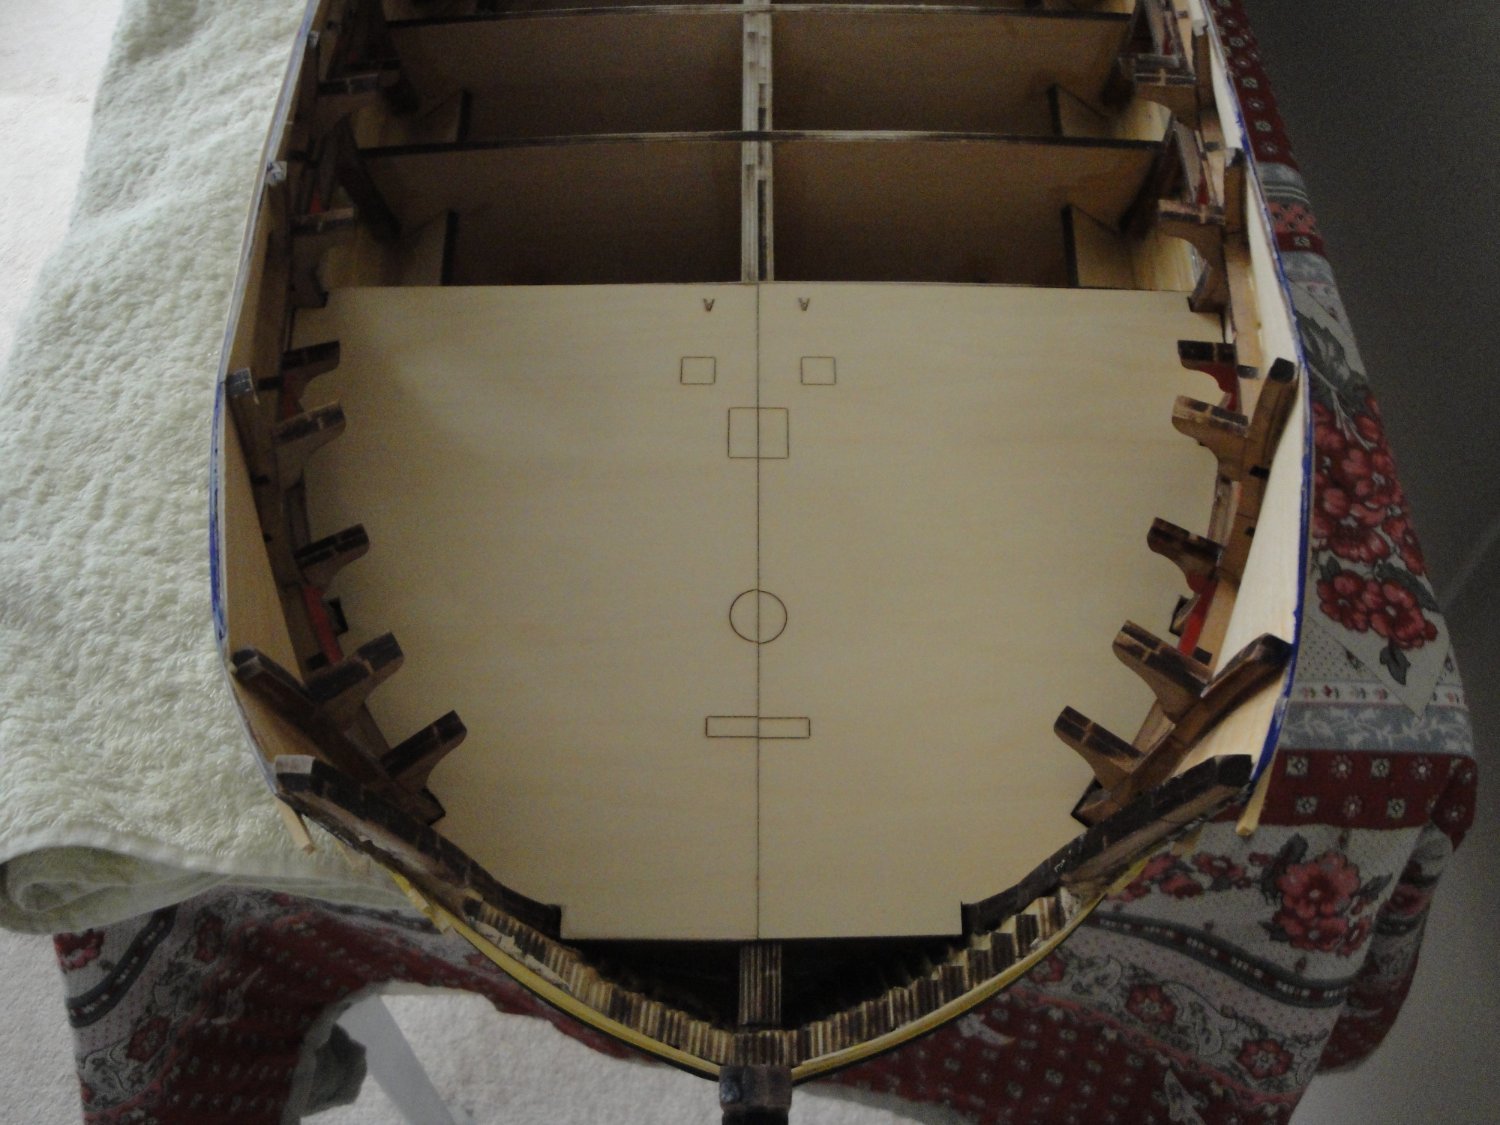
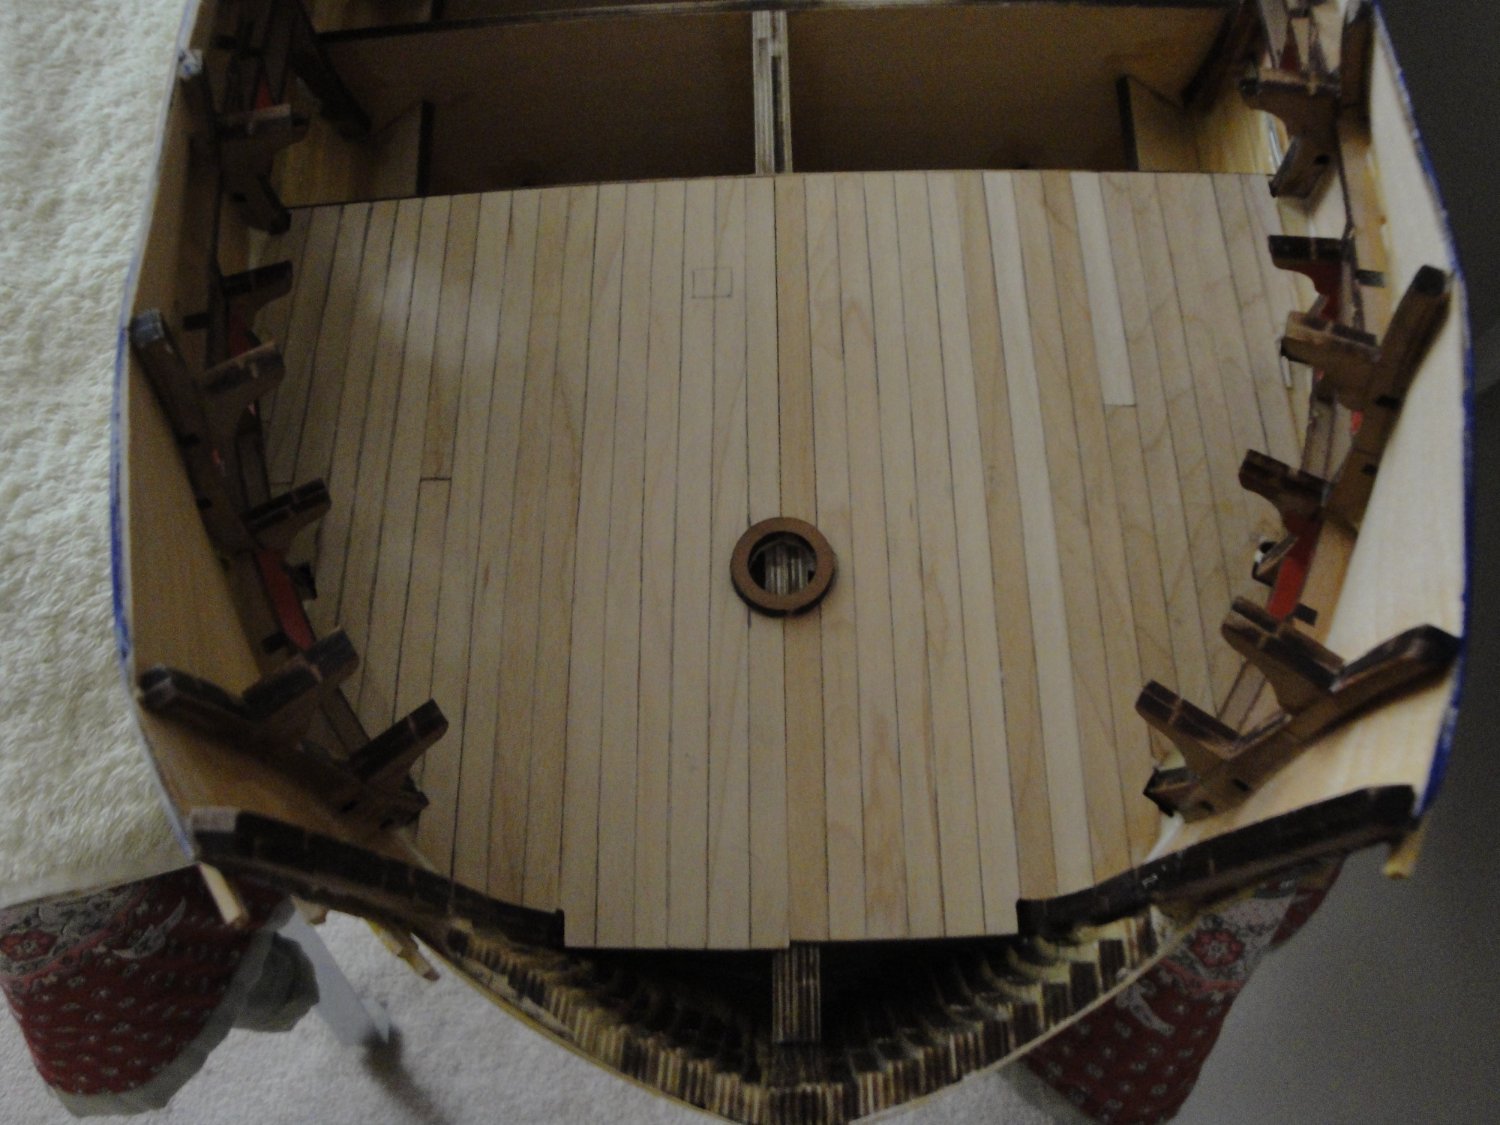
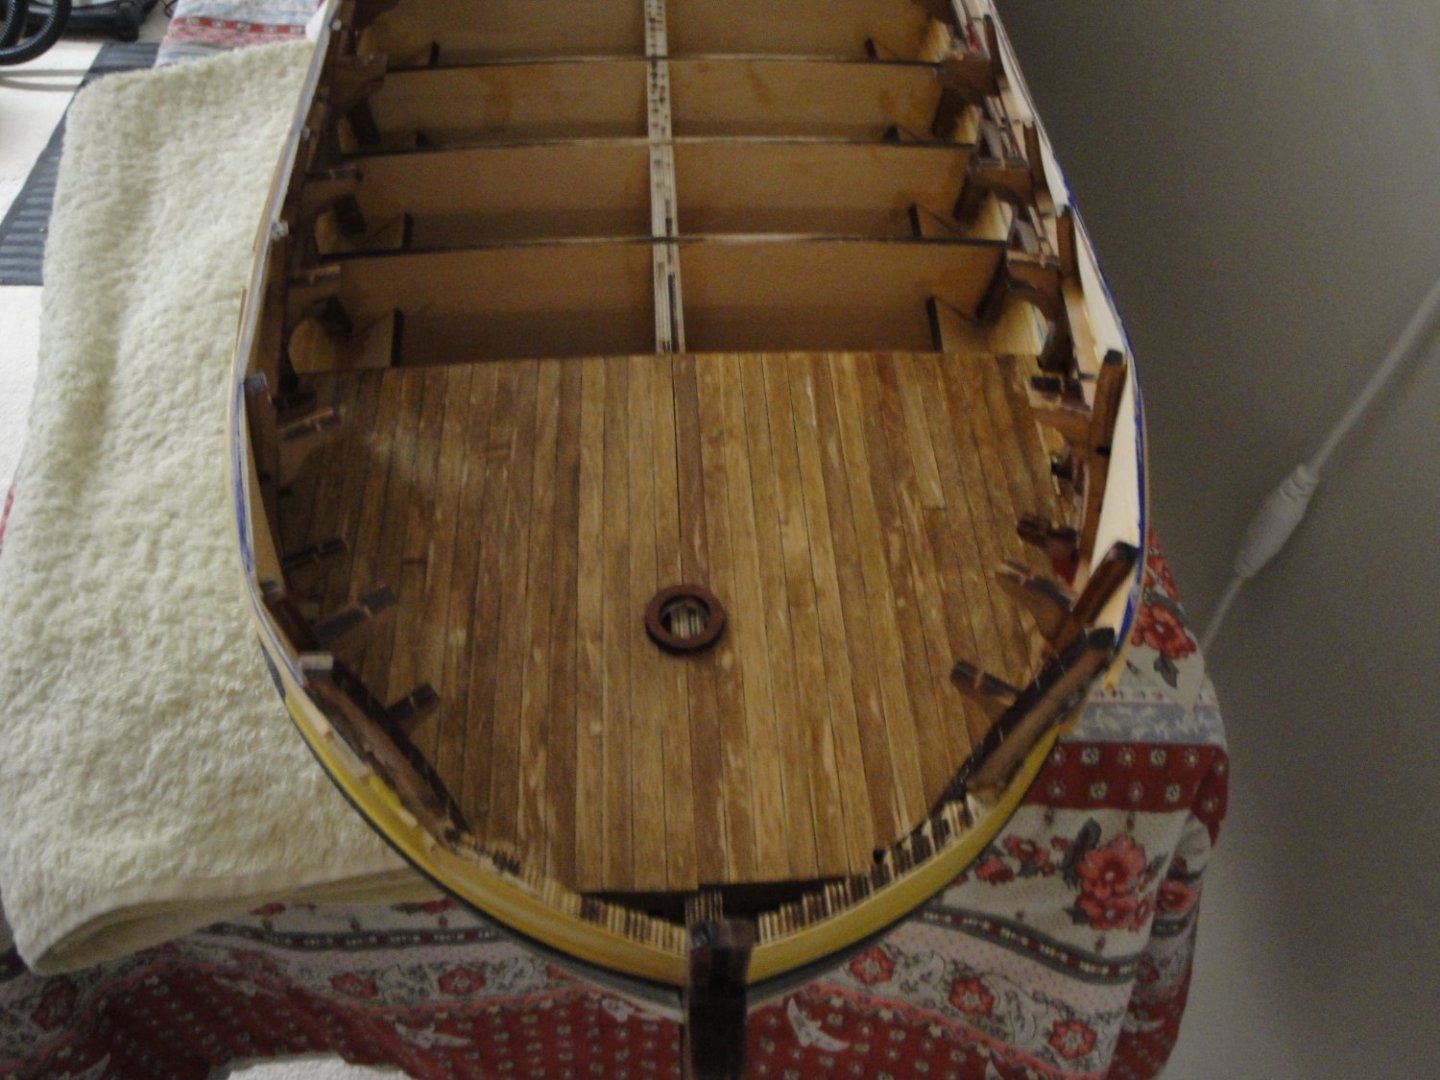
The bow section of the gun deck is now completed: Bitts and front mast holder. And with a coat of oak wood stain: The overall color will become dull with time, matching the stern gun deck. Yves


- 507 replies
-
- 14
-
-
-
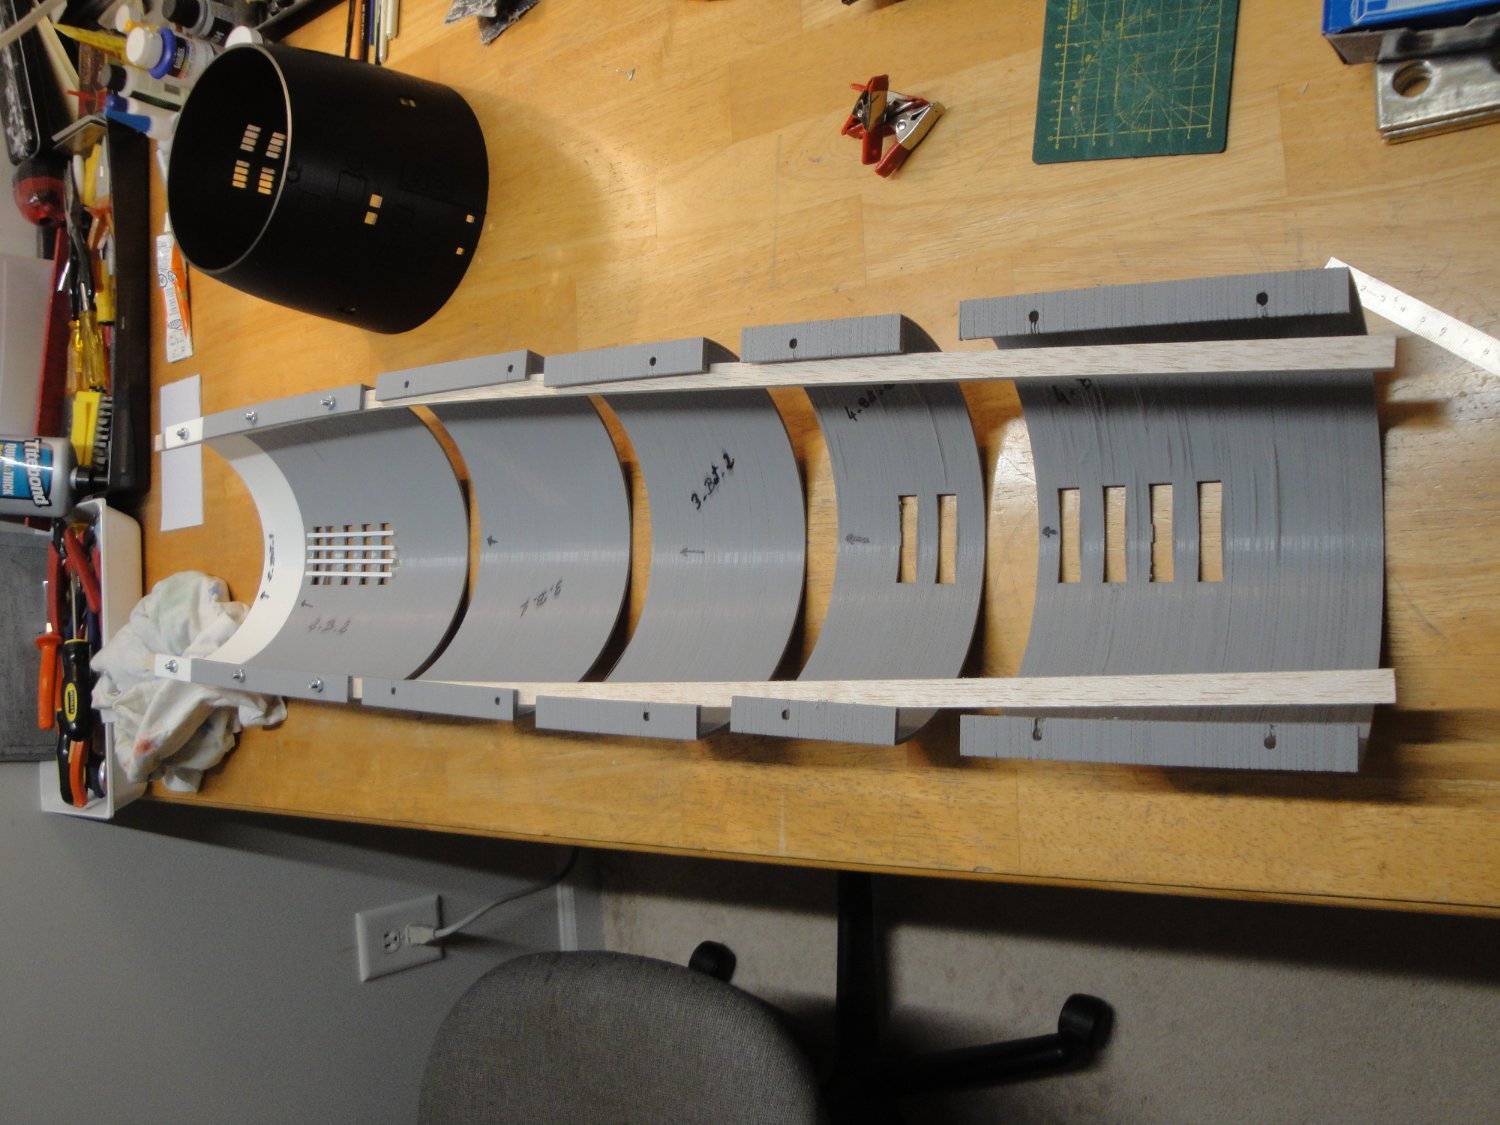
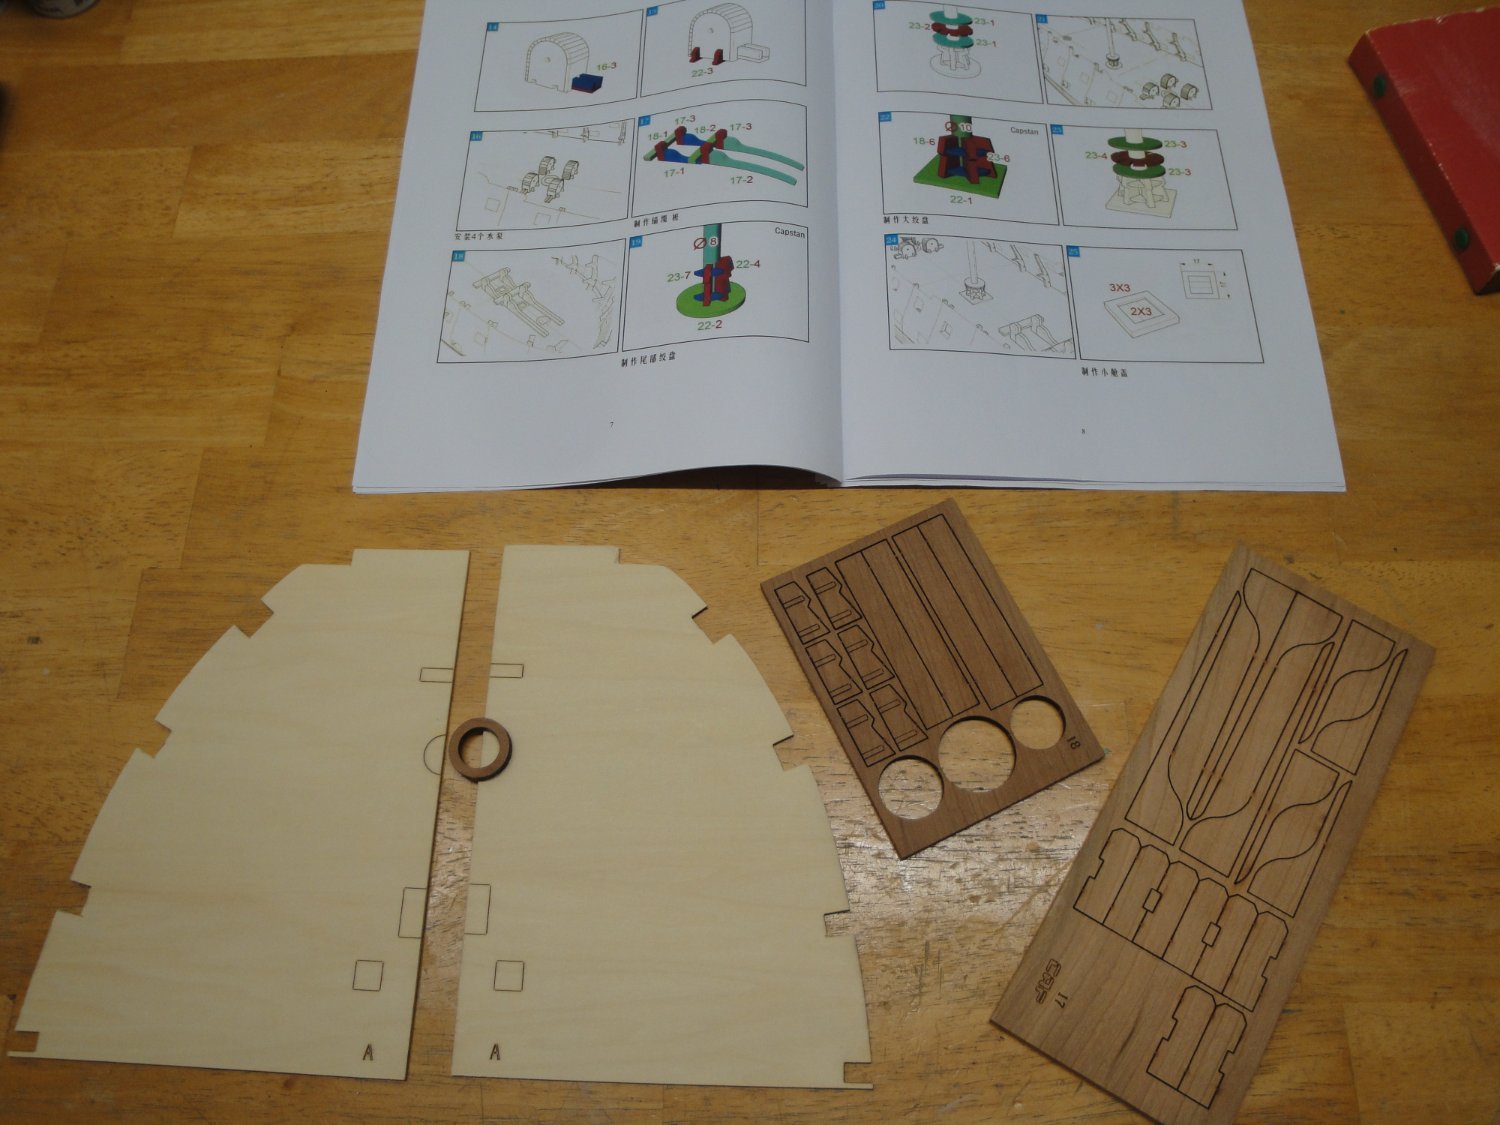
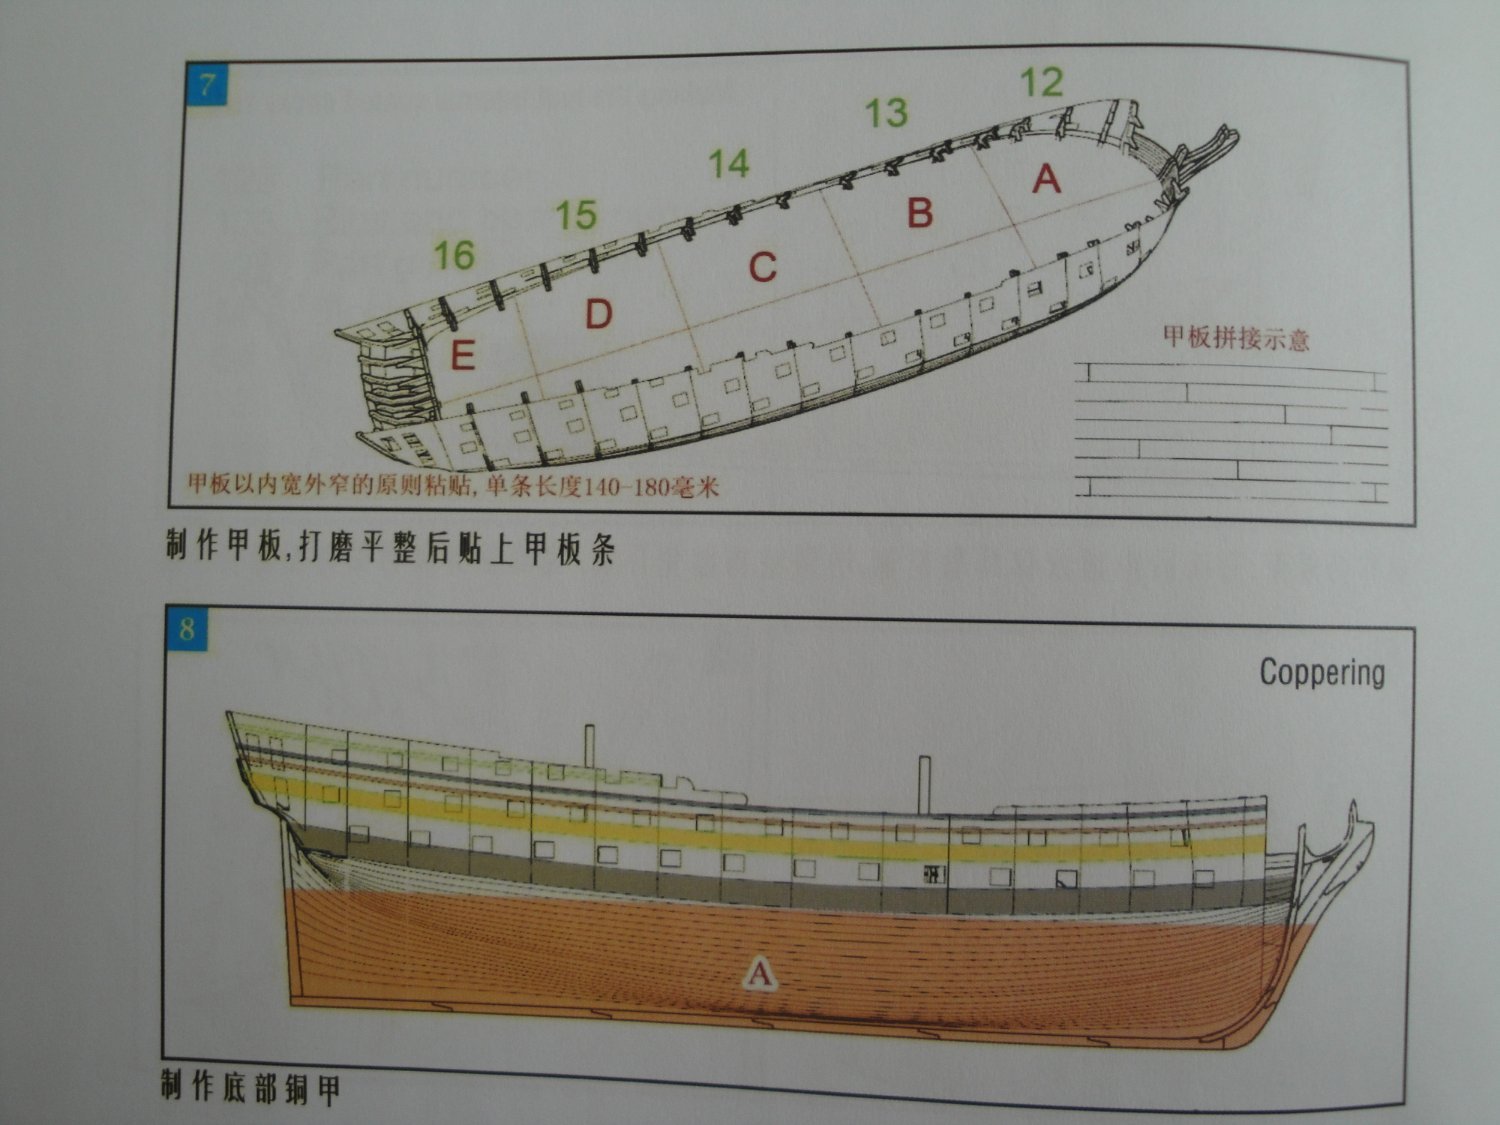
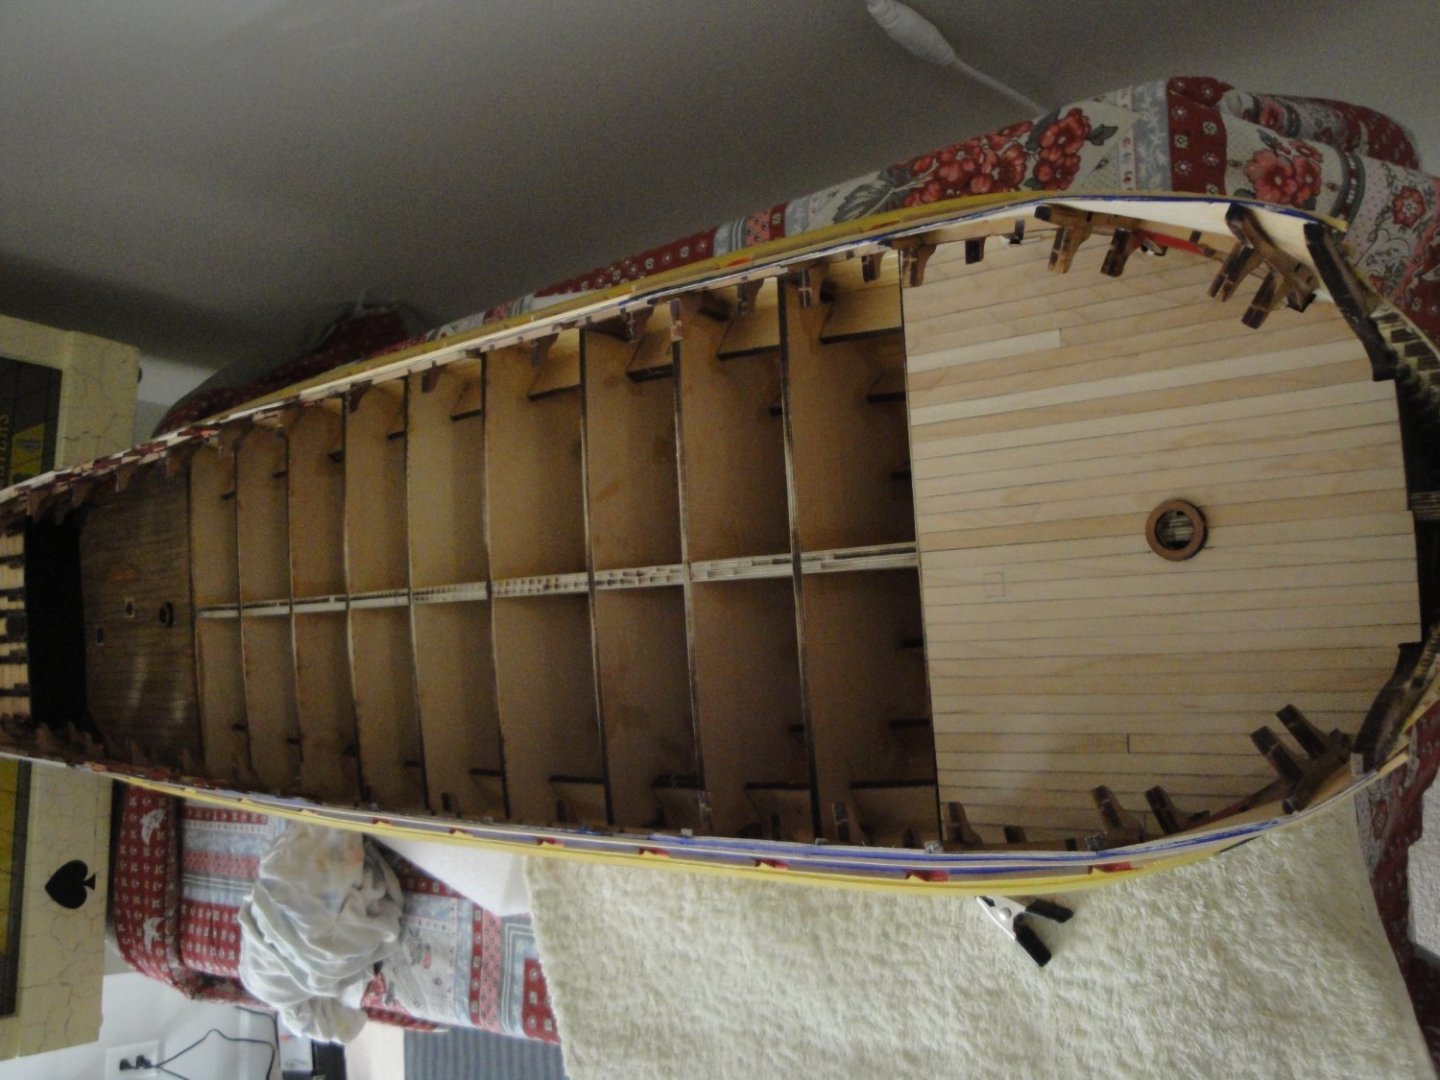
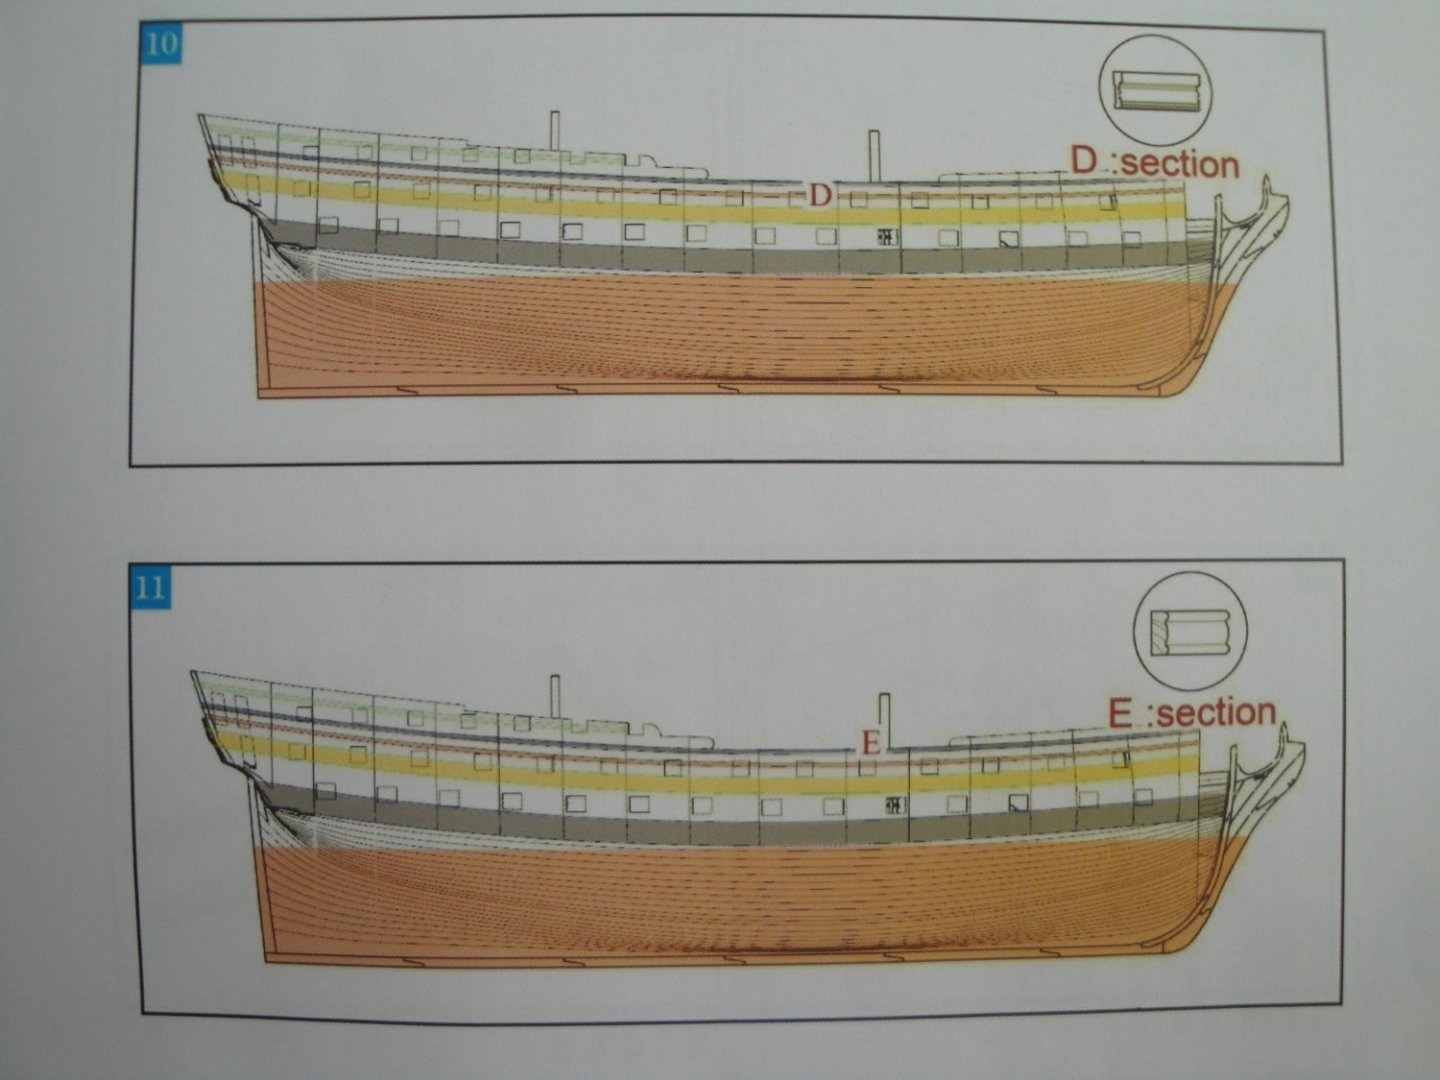
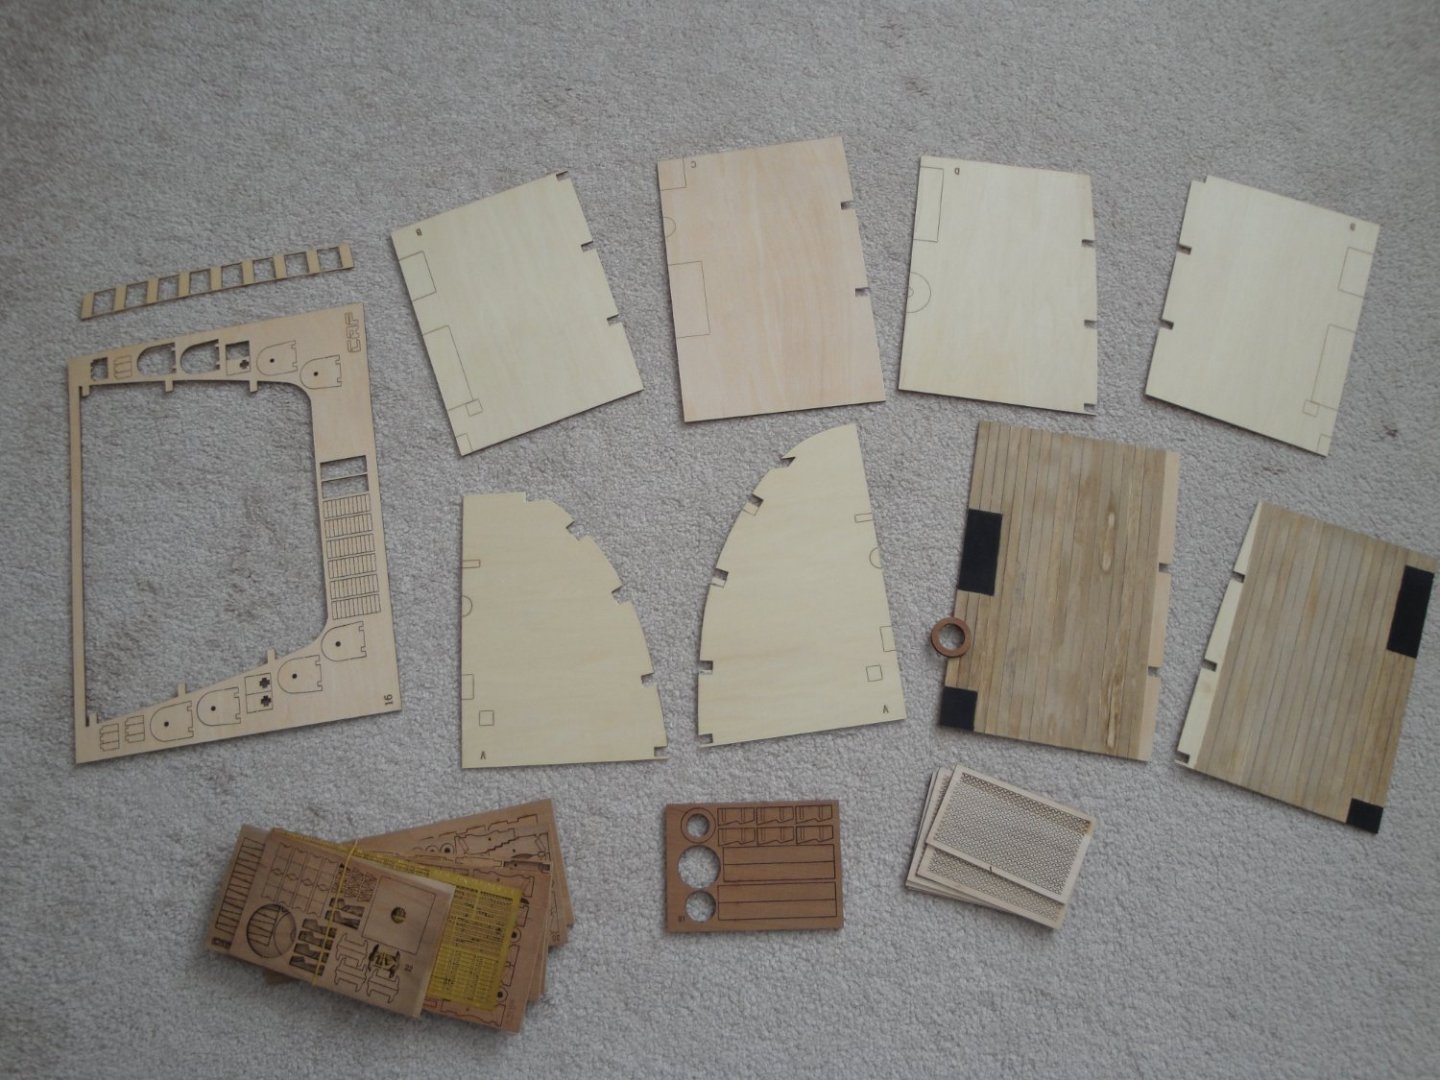
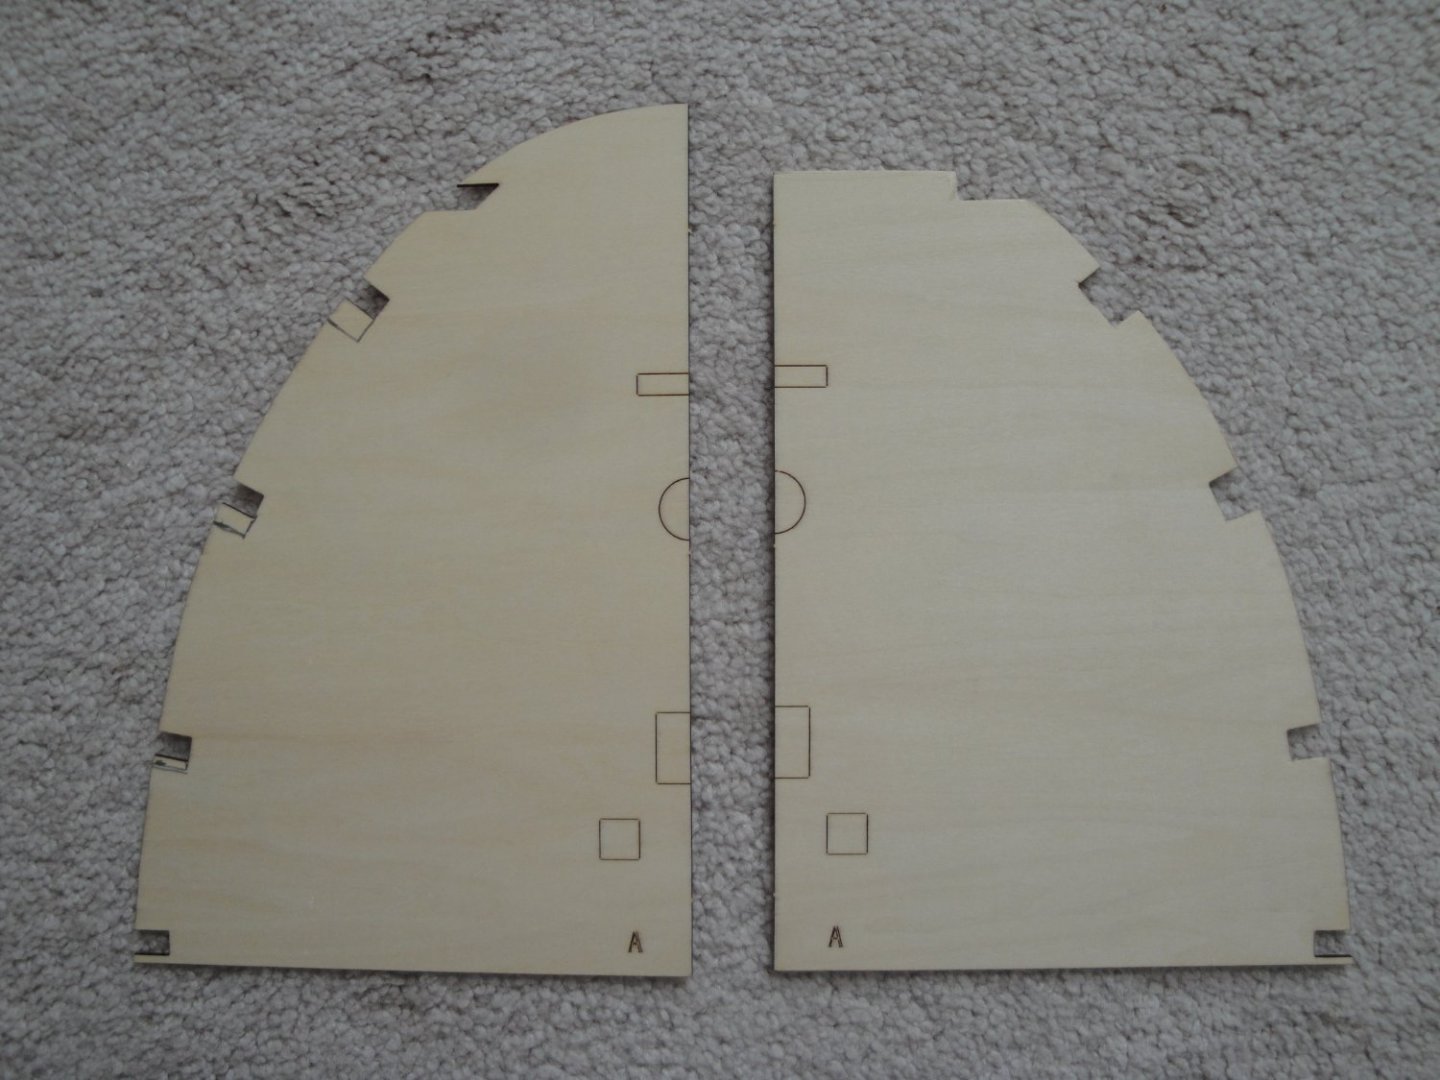
Time for a little check point on this long and delicate Session #2. The hull is partially completed although there is still a lot of detailing work to be done. We still have a lot of parts left for Session #2 and tons of delicate work with the interior of the hull and the gun deck: I am going to start decking from the bow, since the stern deck (E) has been already put in place. The front deck requires some reworking and the CAD design does not exactly fit my model: Nothing major as you can see, just some adjustments necessary on such a large model. I will plank these decks outside of the hull for multiple reasons: Comfort of working and precision. The hull is deep and access is not easy. I do not want to place unnecessary stress on the hull, while trying to fiddle with the decks. It is easy to break parts, especially inside the hull. Once completed, the gun deck should look like the picture below: As you can see below, I changed the order of assembly and kept the deck(s) installation for the end. So, let's get started with the bow.... Yves

- 507 replies
-
- 14
-