MORE HANDBOOKS ARE ON THEIR WAY! We will let you know when they get here.
×


yvesvidal
-
Posts
3,550 -
Joined
-
Last visited
Content Type
Profiles
Forums
Gallery
Events
Everything posted by yvesvidal
-
 Yes, you need to rest your eyes and your hands....so, the 1/200 scale seems like a good candidate for your sanity 😁 To be honest, I cannot wait to see someone build the Titanic from Trumpeter....especially someone with your skills and attention to details. Yves
- 55 replies
-
- 3
-

-
- Blue Ridge Models
- Normandie
- (and 2 more)
-
Superb model. So realistic.... It takes me back to my childhood.... Yves
-
I am glad you tried the water in the pool. It makes for a big difference and an eye catcher. Yves
- 55 replies
-
- 3
-
-
- Blue Ridge Models
- Normandie
- (and 2 more)
-
Thank you Tom. Yes, it does help and I still have to play with Future Floor. I have heard a lot of wonderful thing about it, but never gave it a try. I know that experts use it for gluing, and preparing the foundation coat for their decals, on plastic models. Yves
-
I am amazed at how you put together these small PE parts. For me, it is a constant struggle. Would you care telling us what kind of tools and glue you are using for such a perfect result? Thanks Yves
-
I like the small 1/700 scale model of the Rodney, next to the 1/200 scale. Quite a difference.... ! Yves
-
Excellent choice on that newly released kit. And what a wonderful display of clean and fresh brass..... I feel like it is going to be a pity to paint all these beautiful parts. Your craftmanship is absolutely beautiful, clean and precise. Bravo!!! Yves
-
What a great build. I love the Flower Corvettes and you are covering a very unique ship, with your build. So far, your progress are nothing less than outstanding. Yves
-
Route master double decker bus by kpnuts 1/24 revell
yvesvidal replied to kpnuts's topic in Non-ship/categorised builds
Superb results. The extra work on the glasses, pays off a lot. I like the Rod Stewart posters for his upcoming Musical.... Nice touch. Yves -
This is getting better and better. Yves
-
So clean. Perfection. Yves
-
I think it looks perfect, the way it is. These were industrial boats and the decks were not maintained as well as on yachts. Yves
-
You work at an incredible pace.... ! Superb hull. Are you going to paint it, like the real boat ? Yves
-
Beautiful planking and gorgeous hull. I used the same technique on my little (by comparison) Emma C. Berry: CA glue for the planks, with a good lather of PVA diluted glue on top. Yves
-
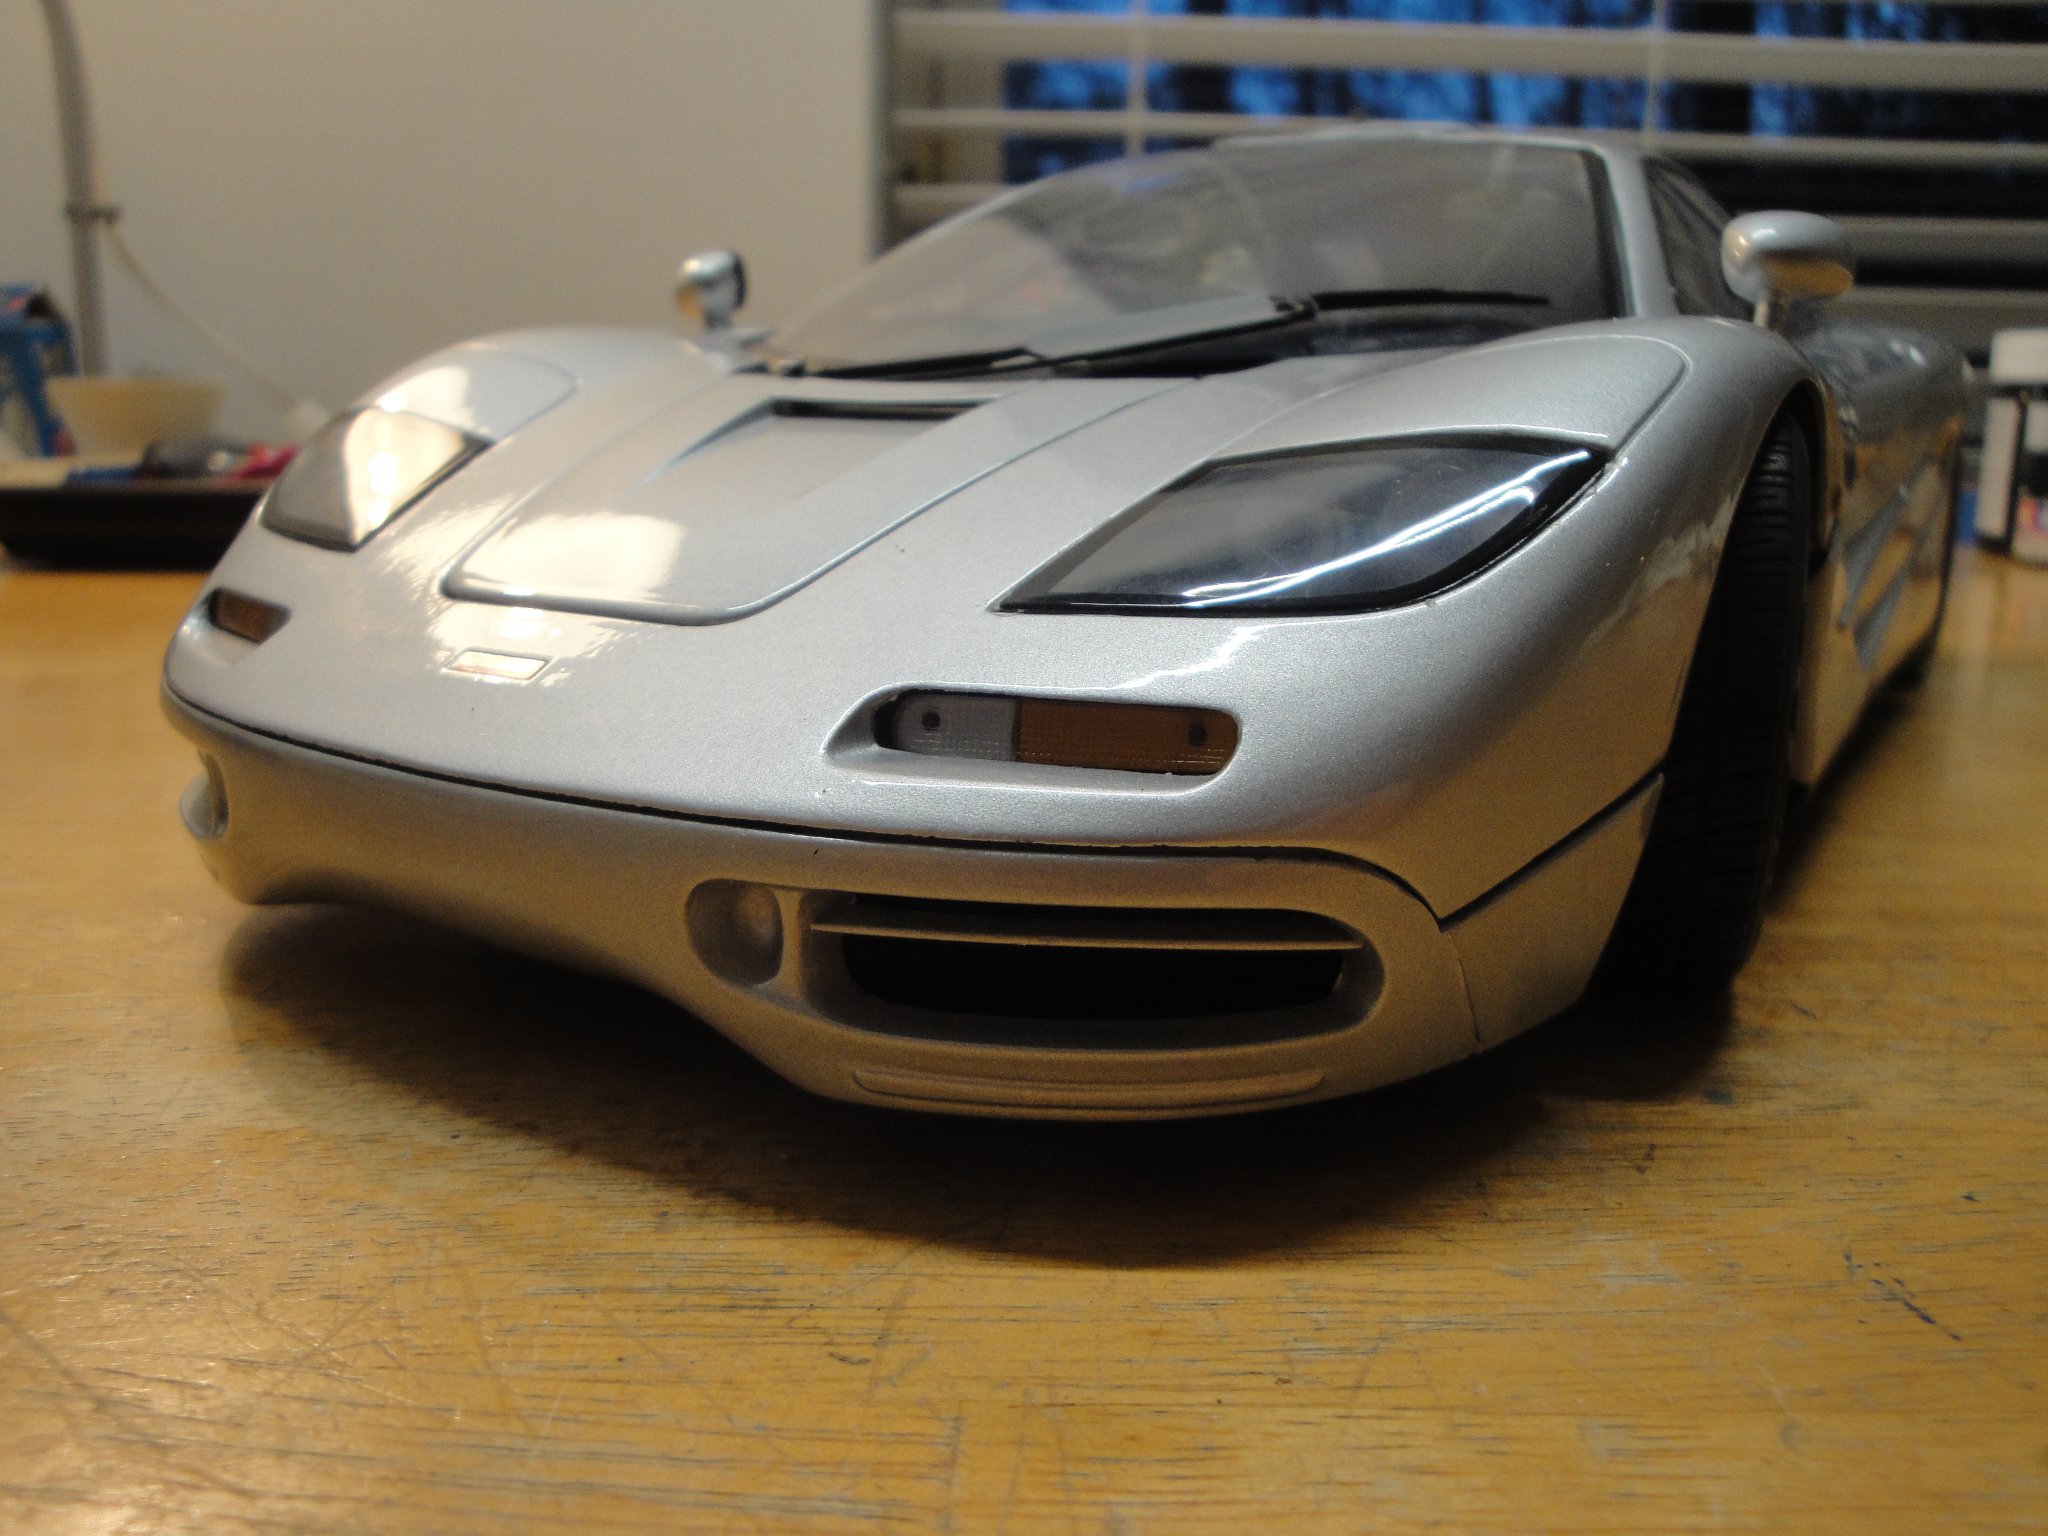
Final trivia question for the McLaren F1: What is the least expensive part on this car? The side mirrors ! They are sourced from the 1990's Volkswagen Corrado. Yves
-
The final presentation of the model on that "piece" of sea, is stunning. The model becomes so realistic at that point, and your attention to details and the crew needs to be commanded. Yves
- 211 replies
-
- 5
-
-
- prince of wales
- tamiya
- (and 2 more)
-
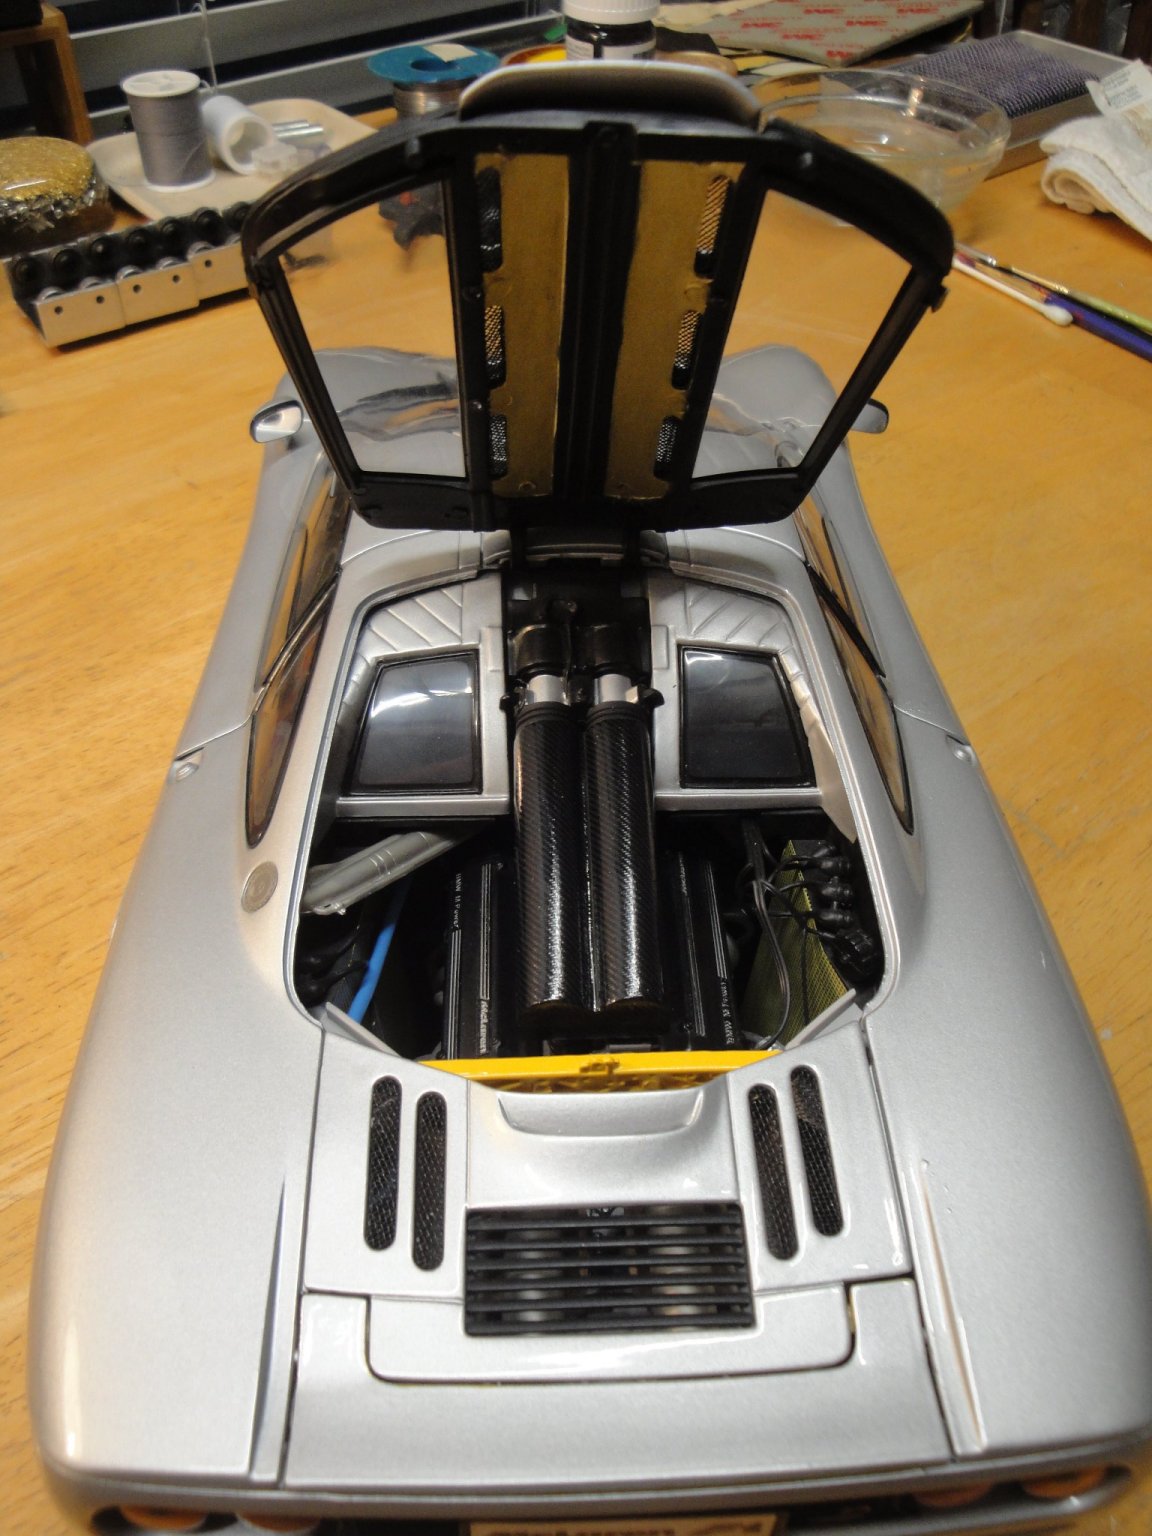
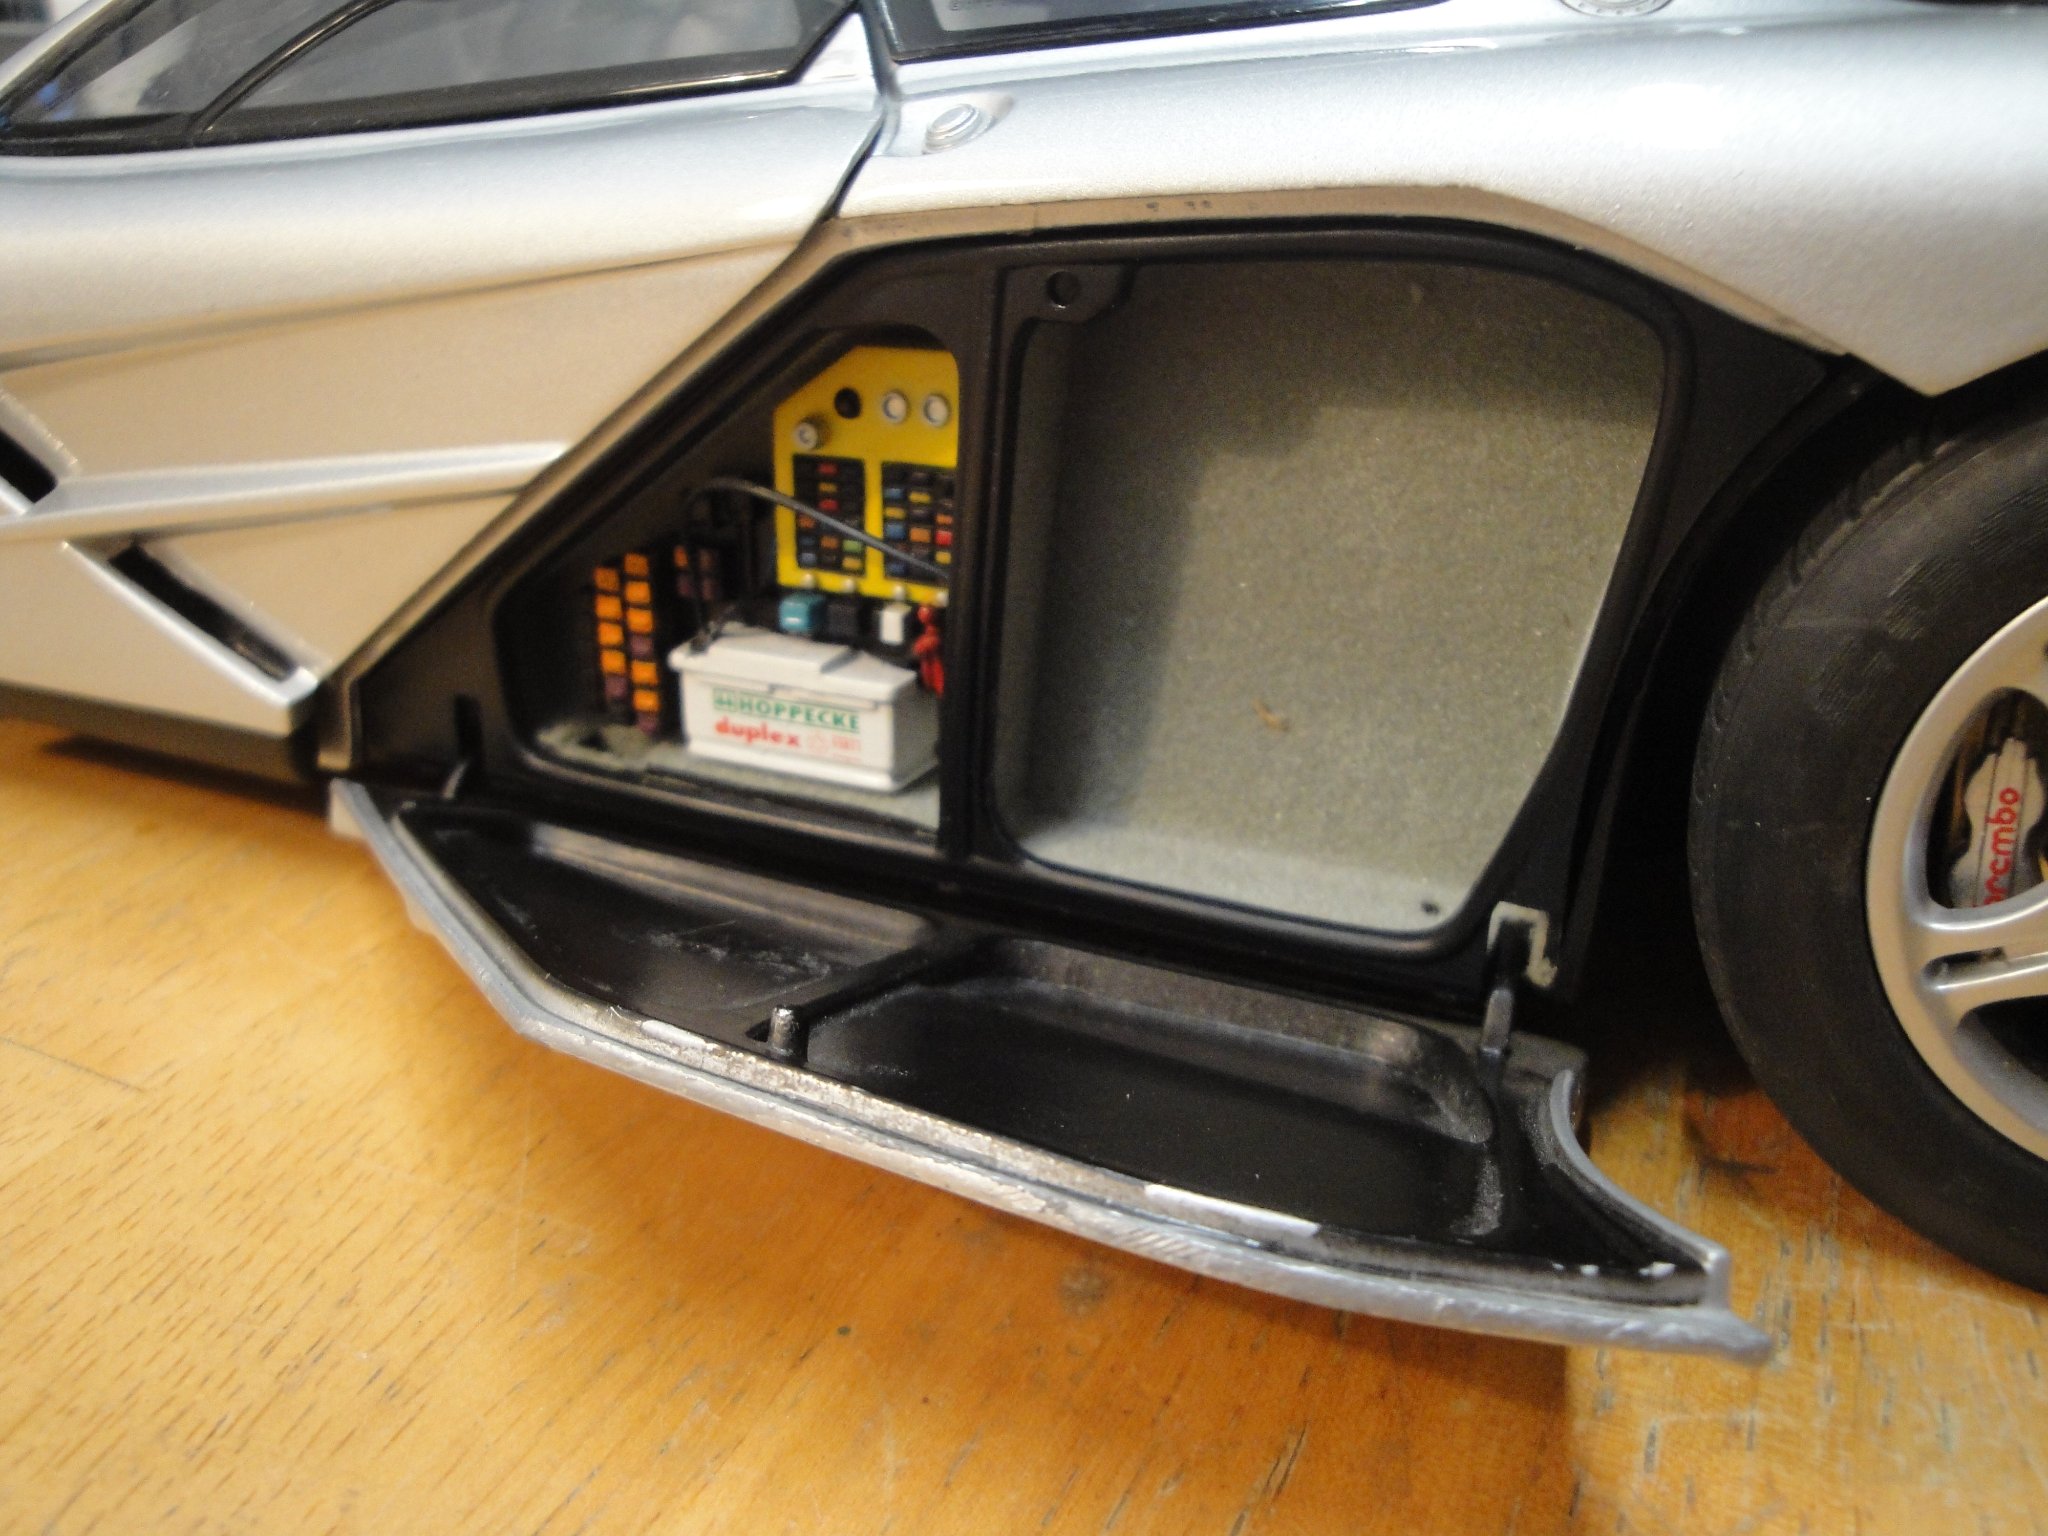
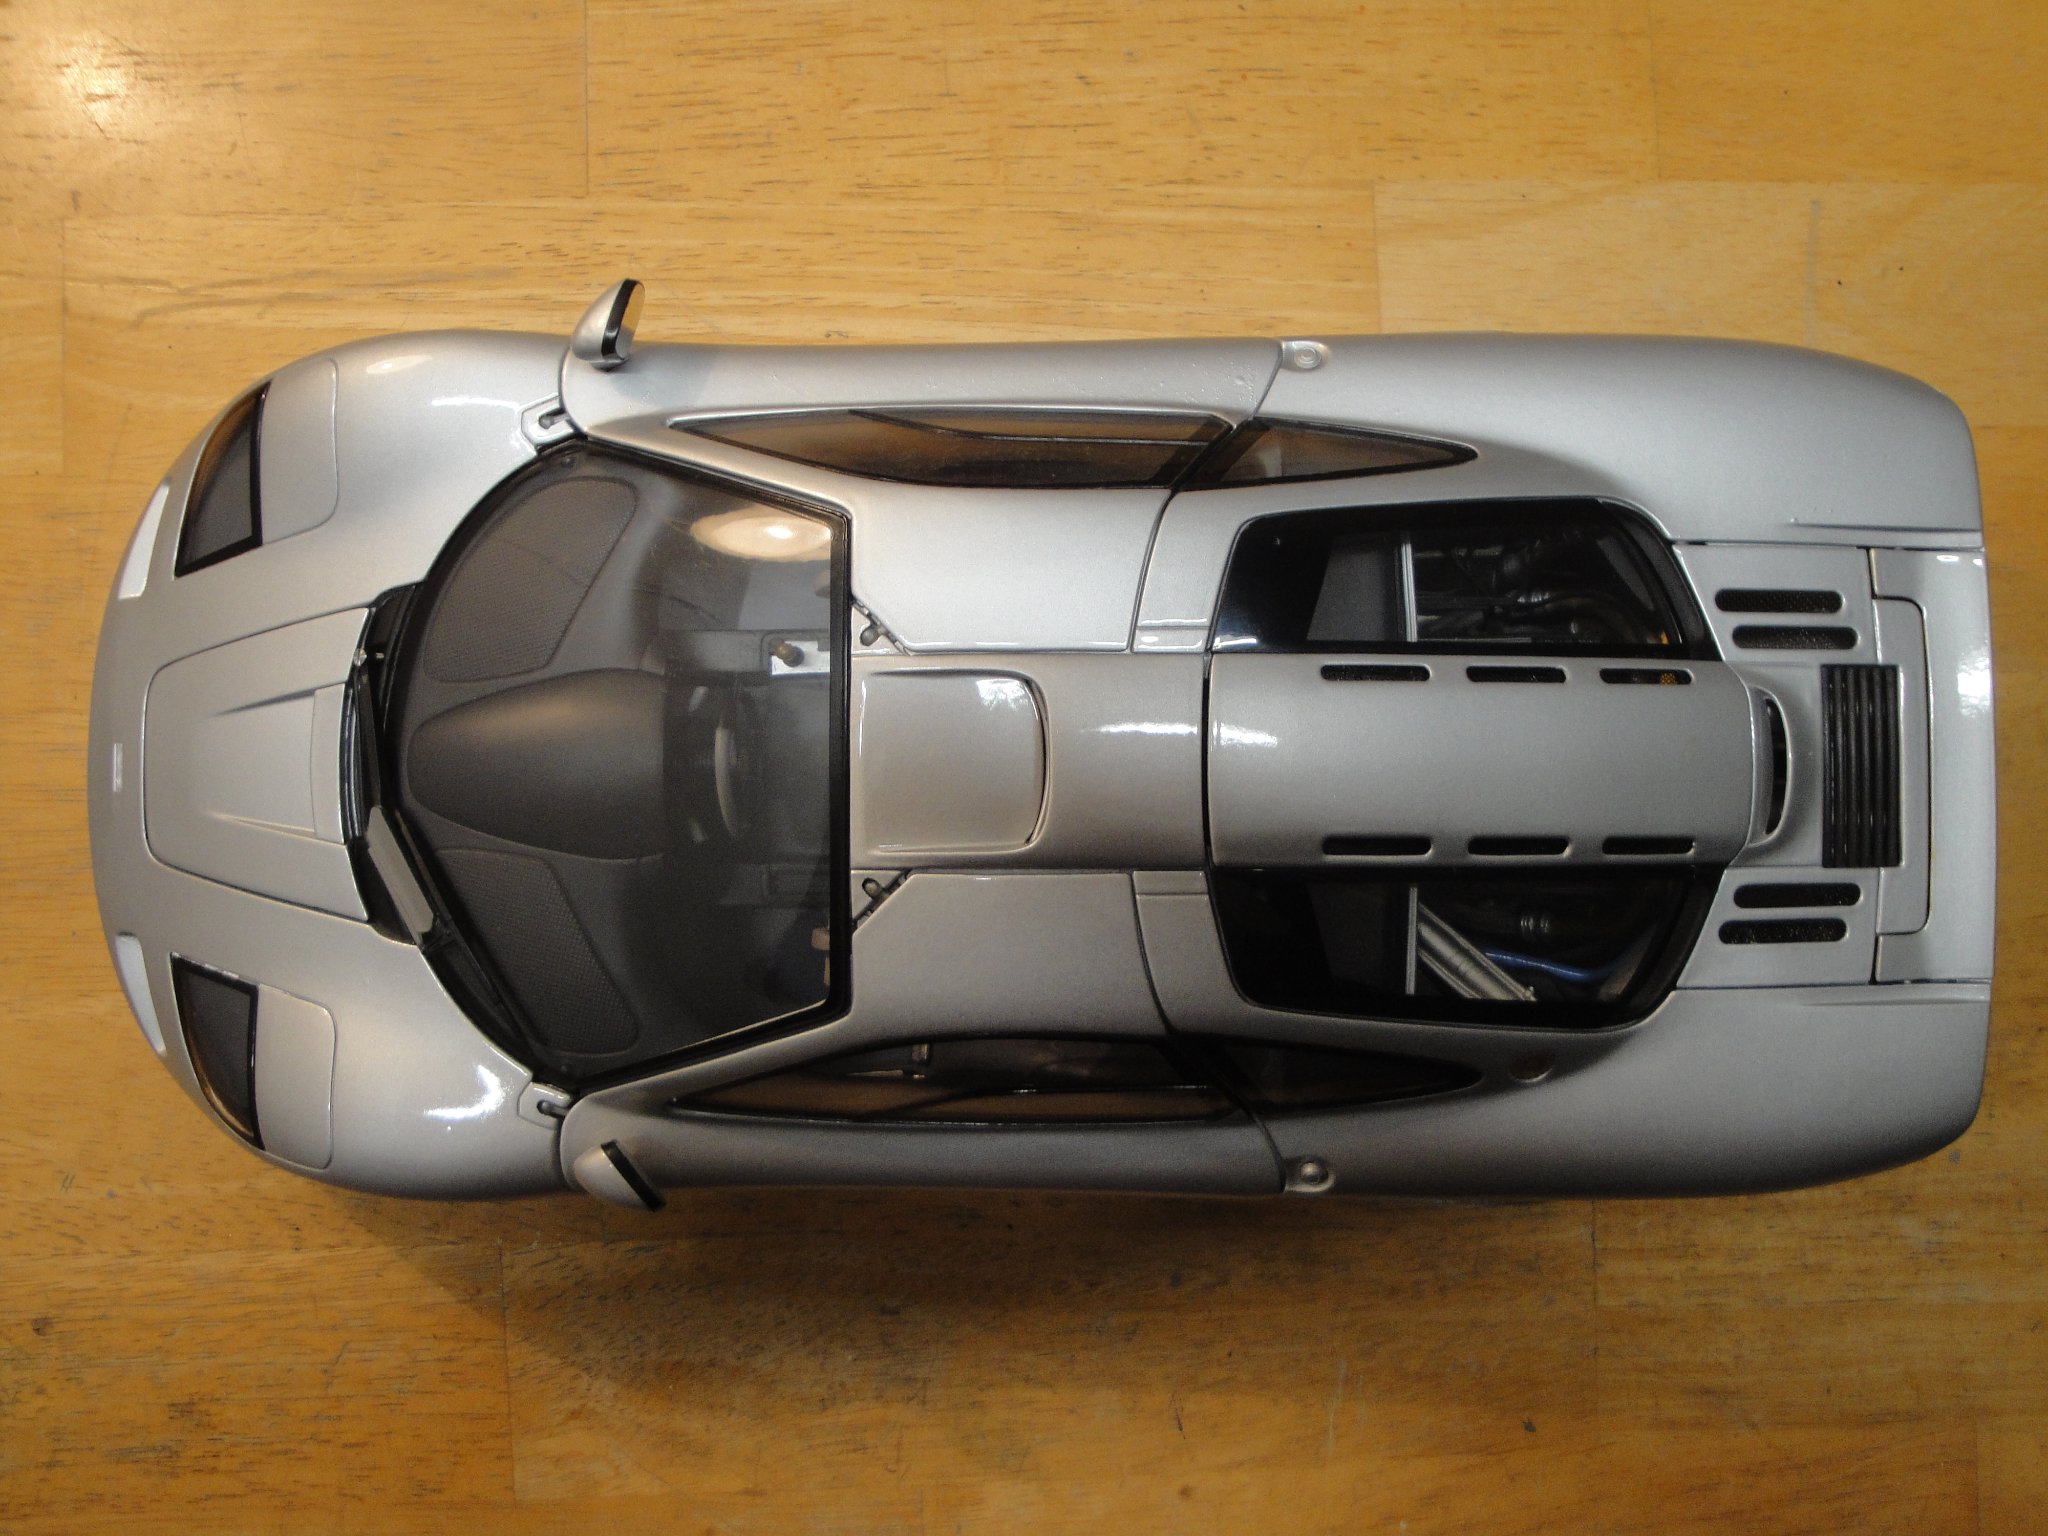
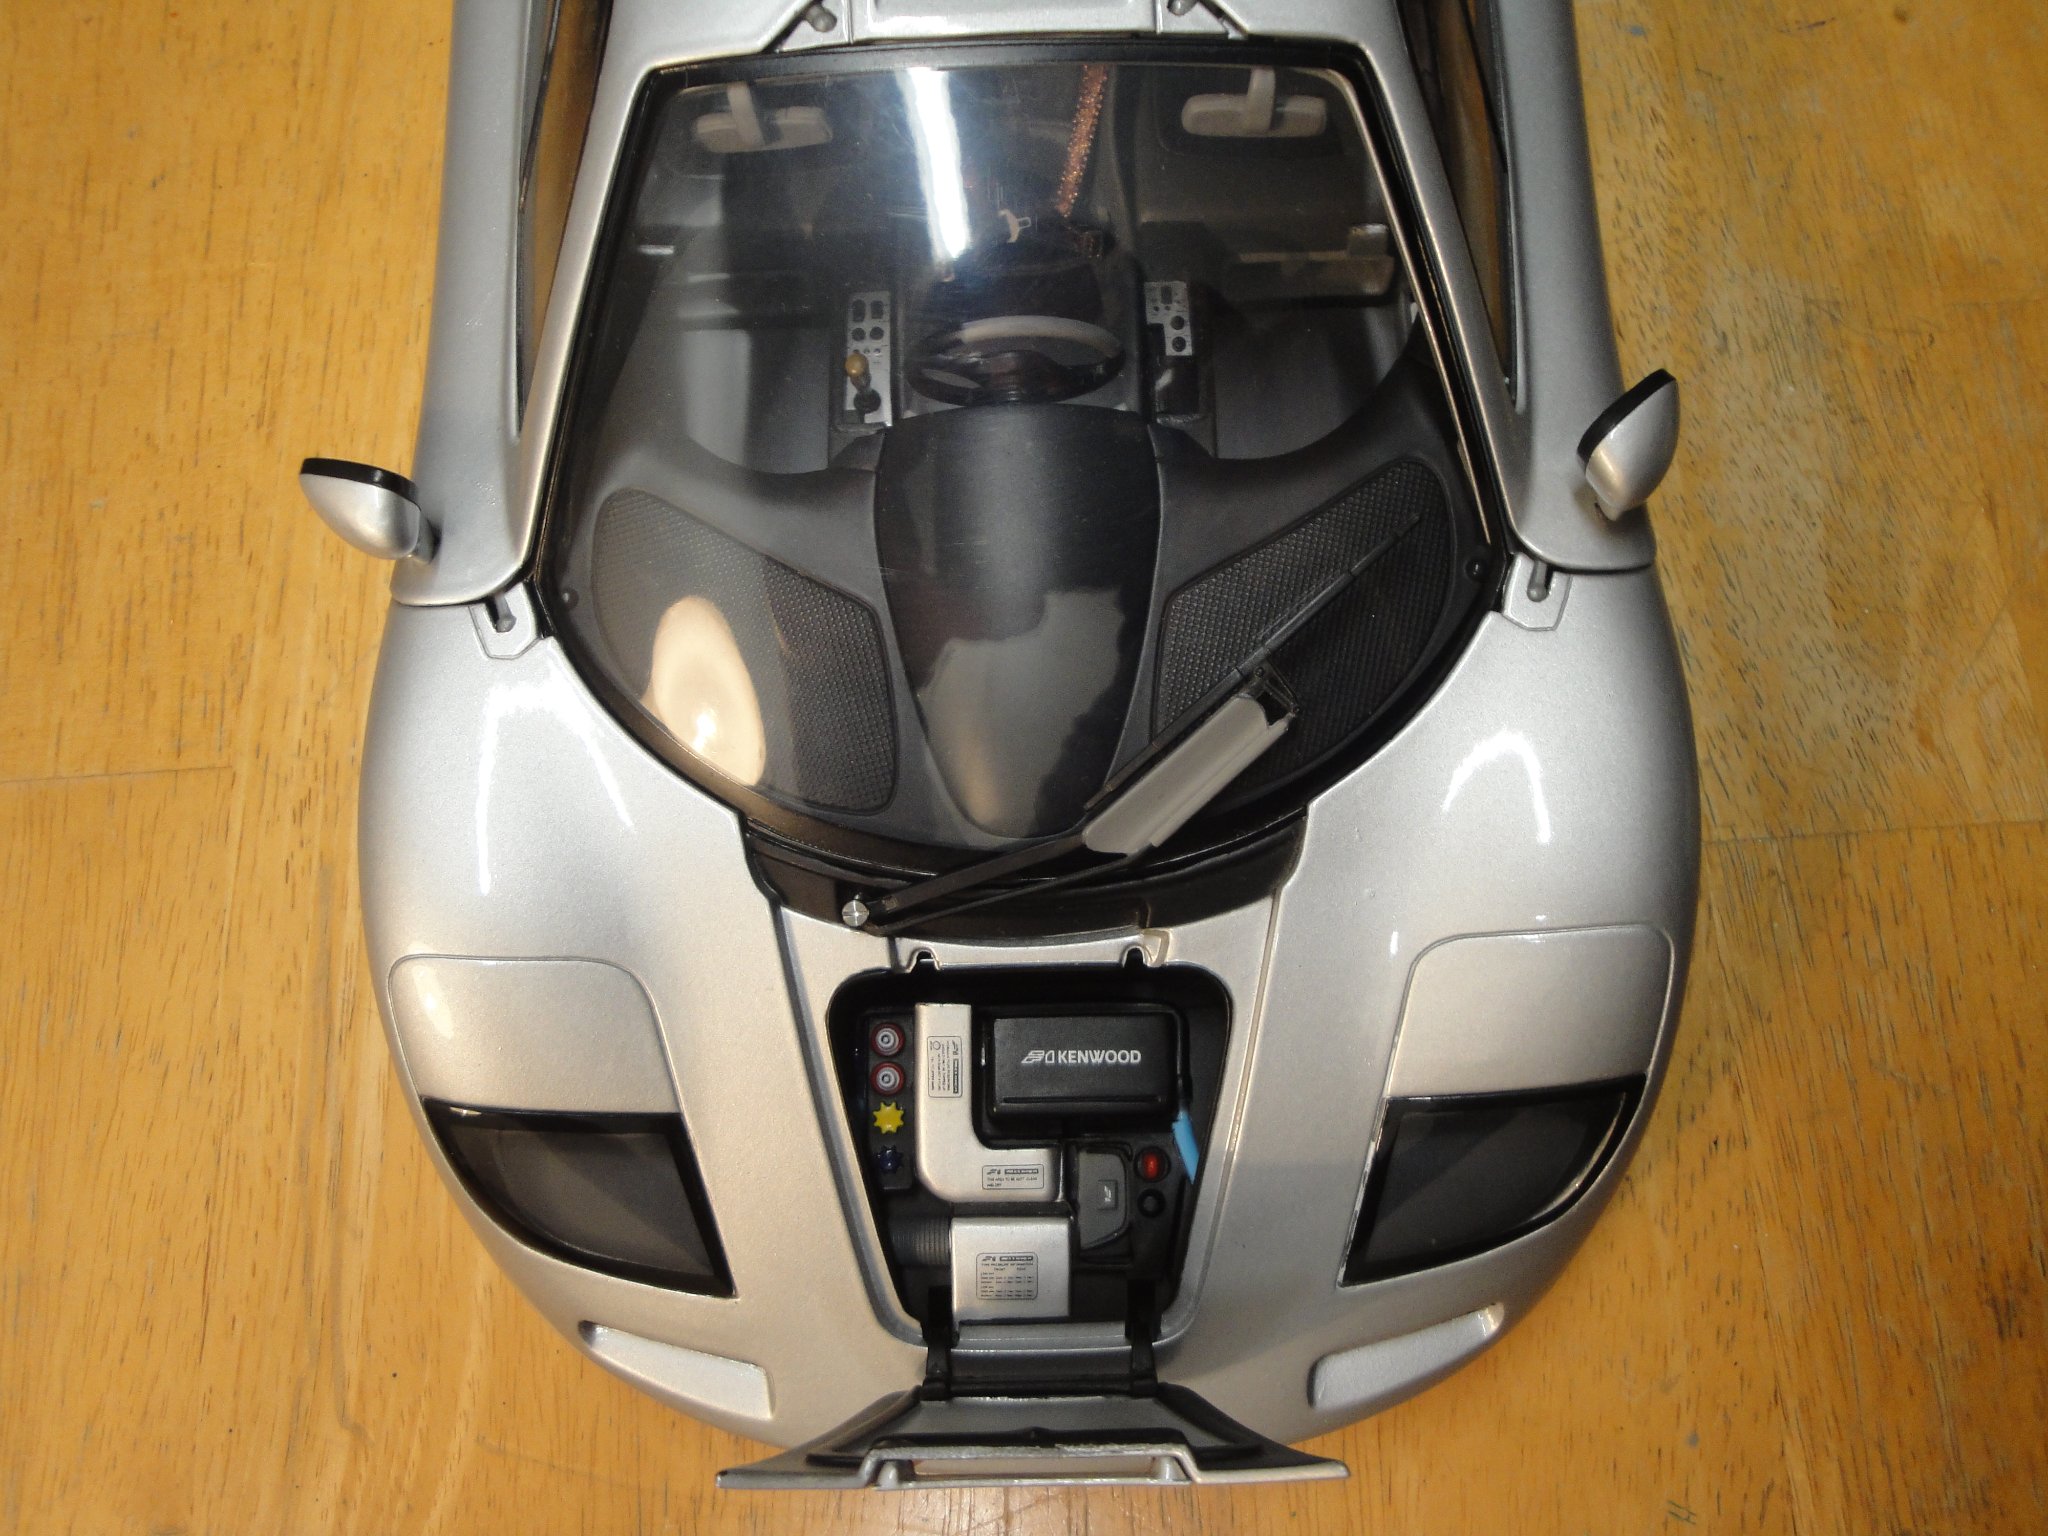
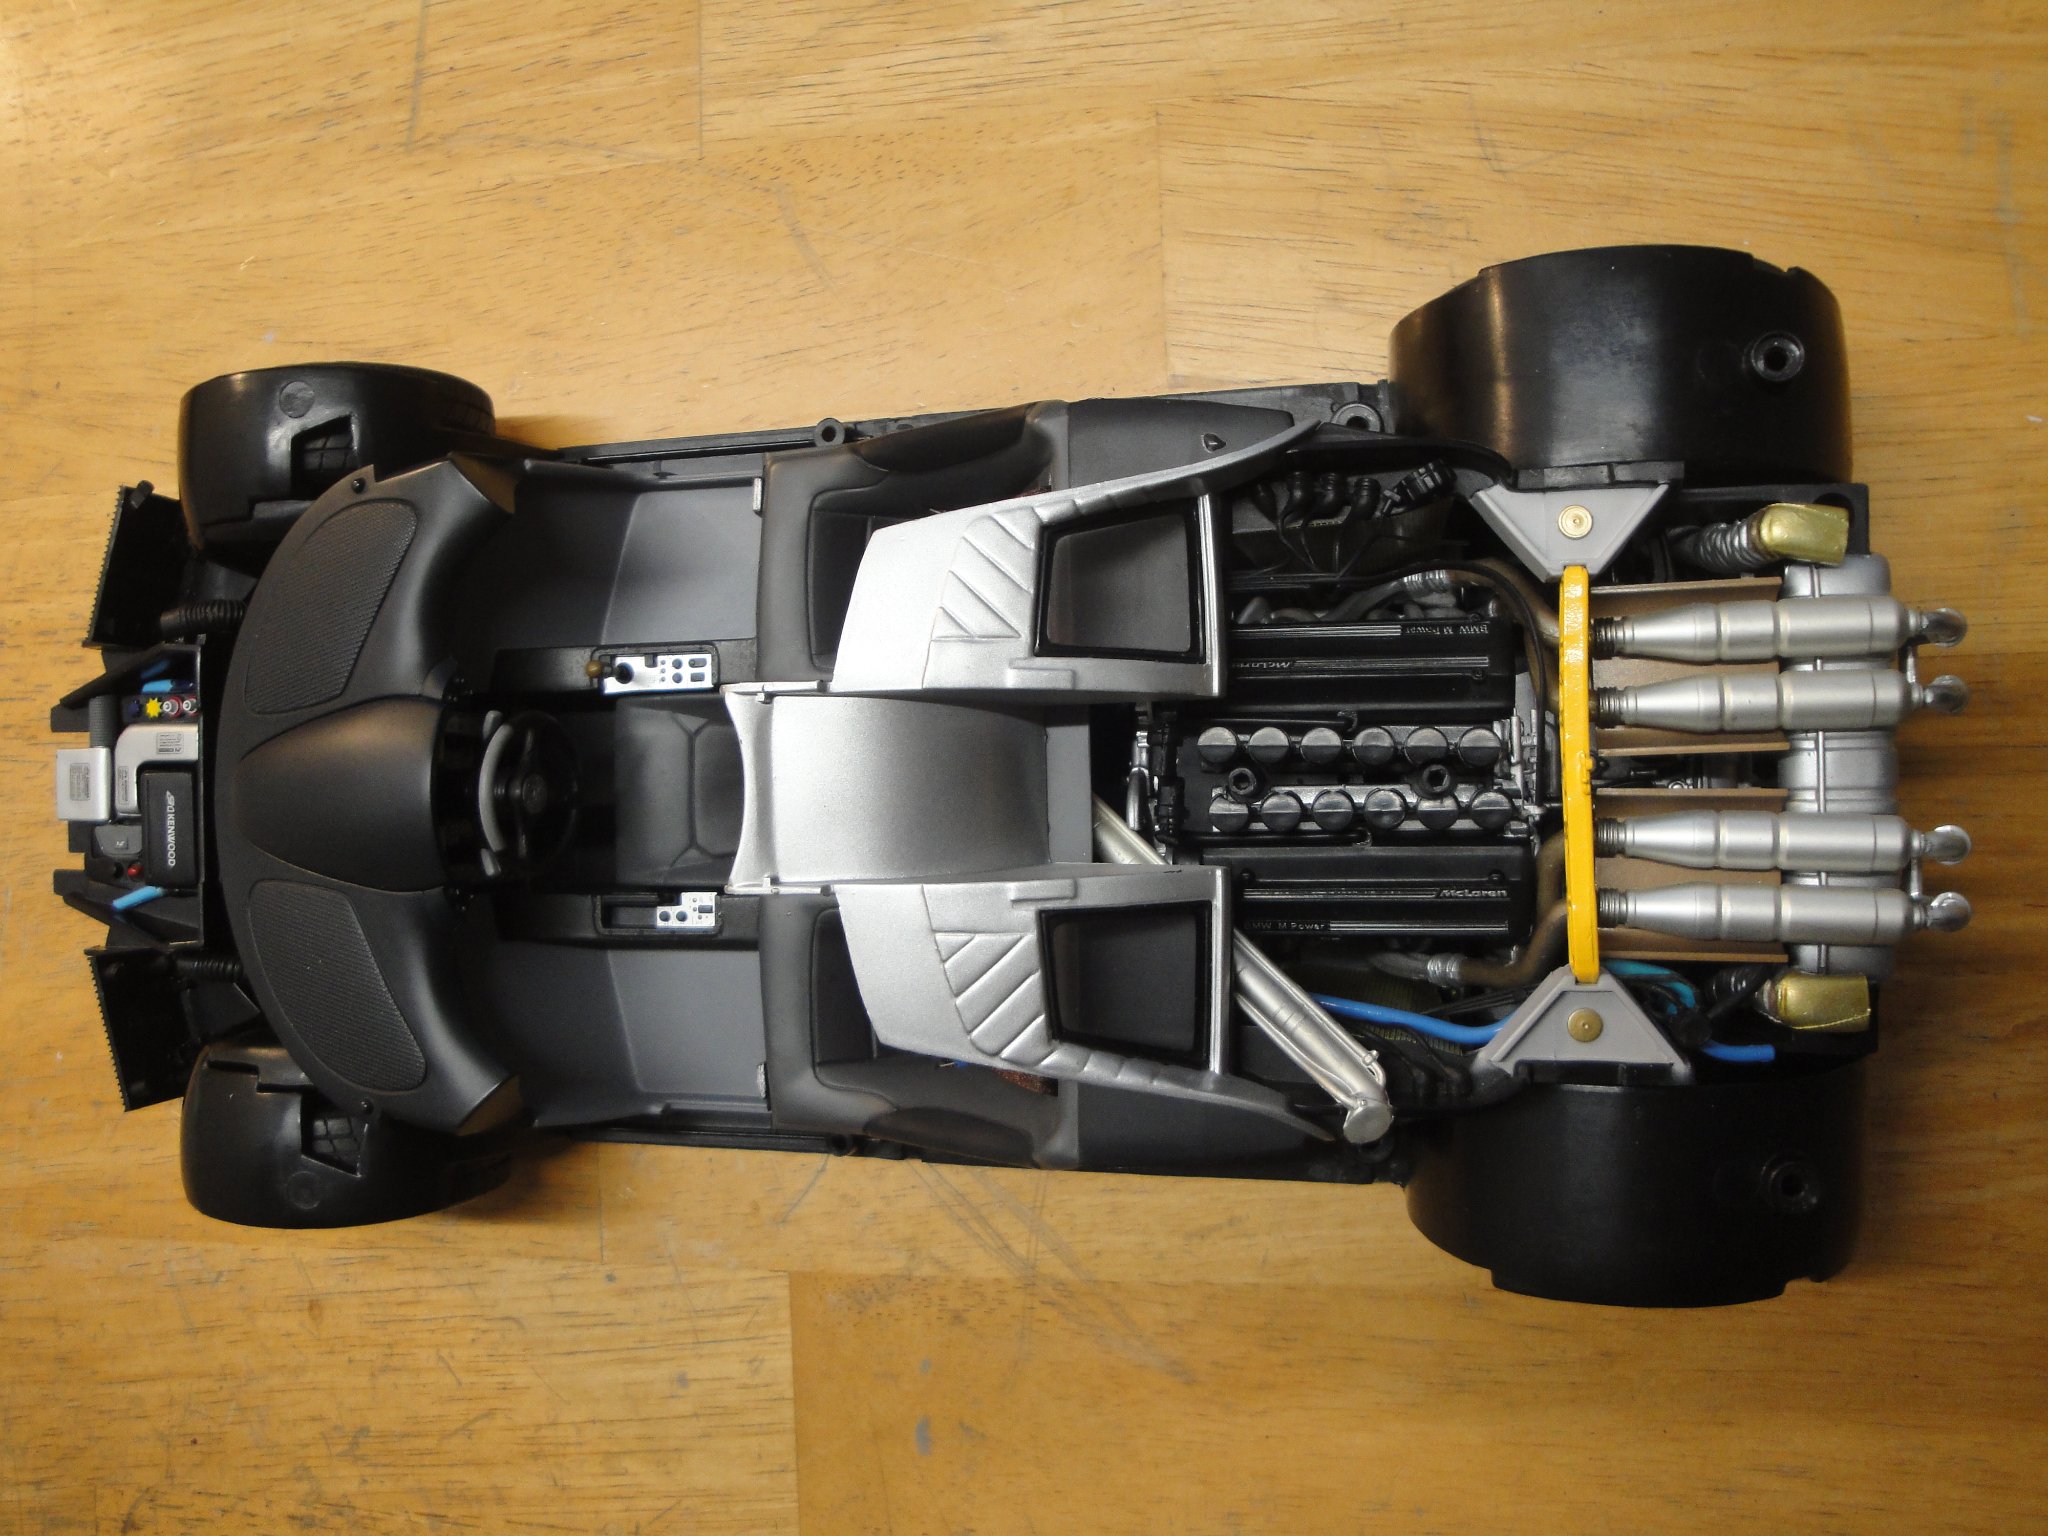
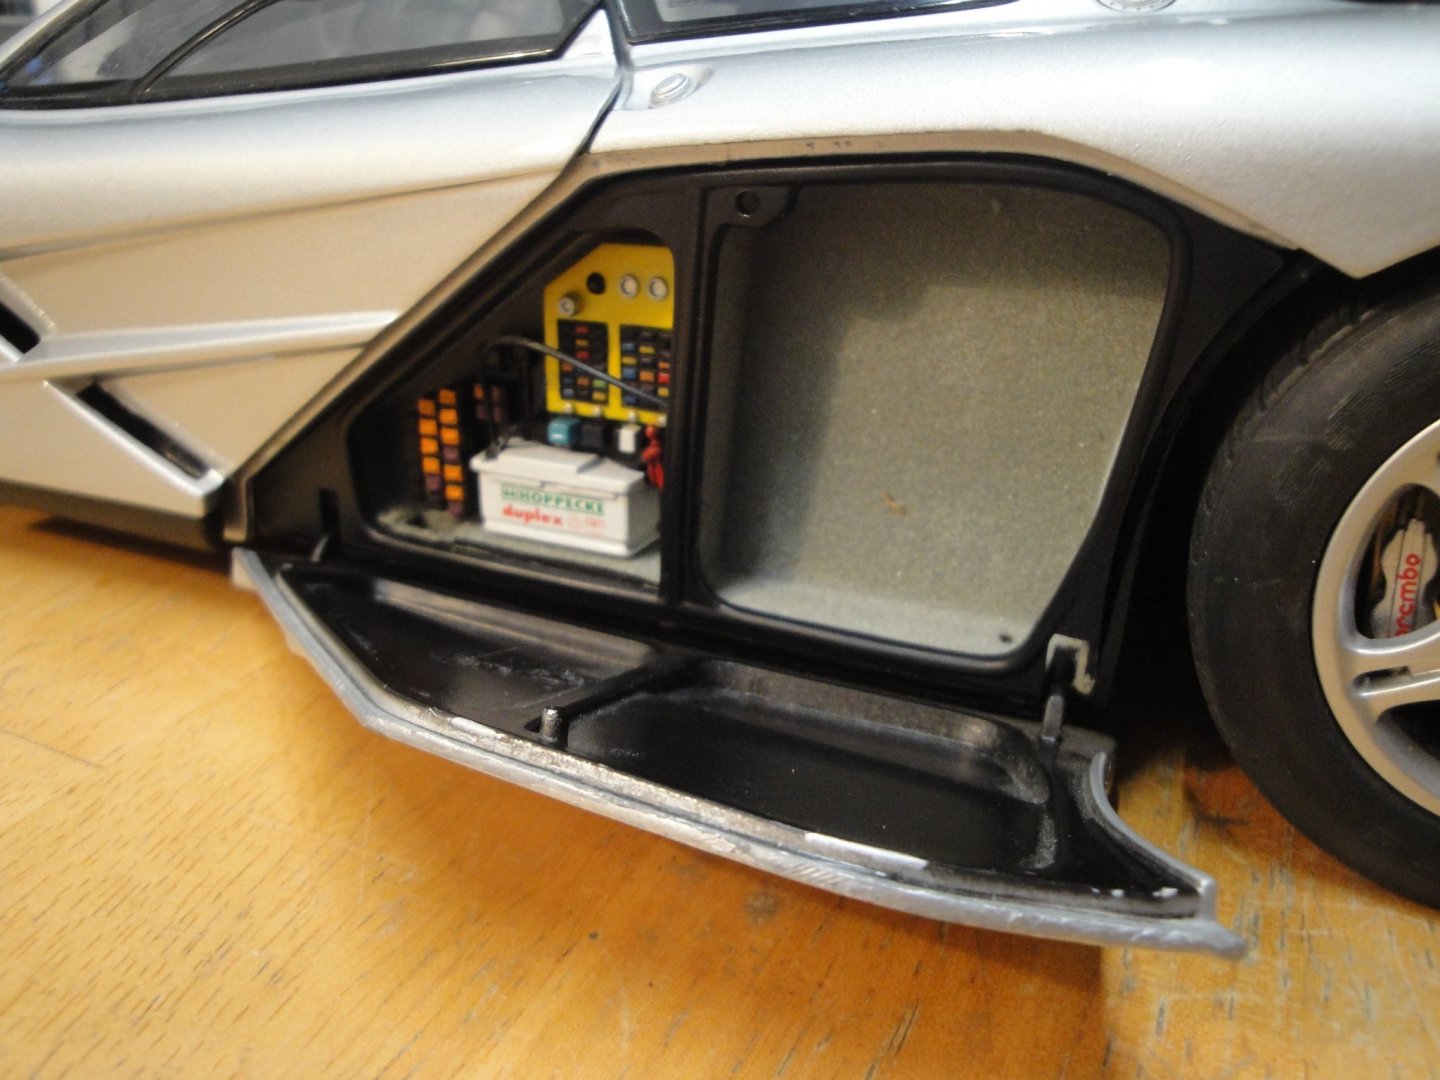
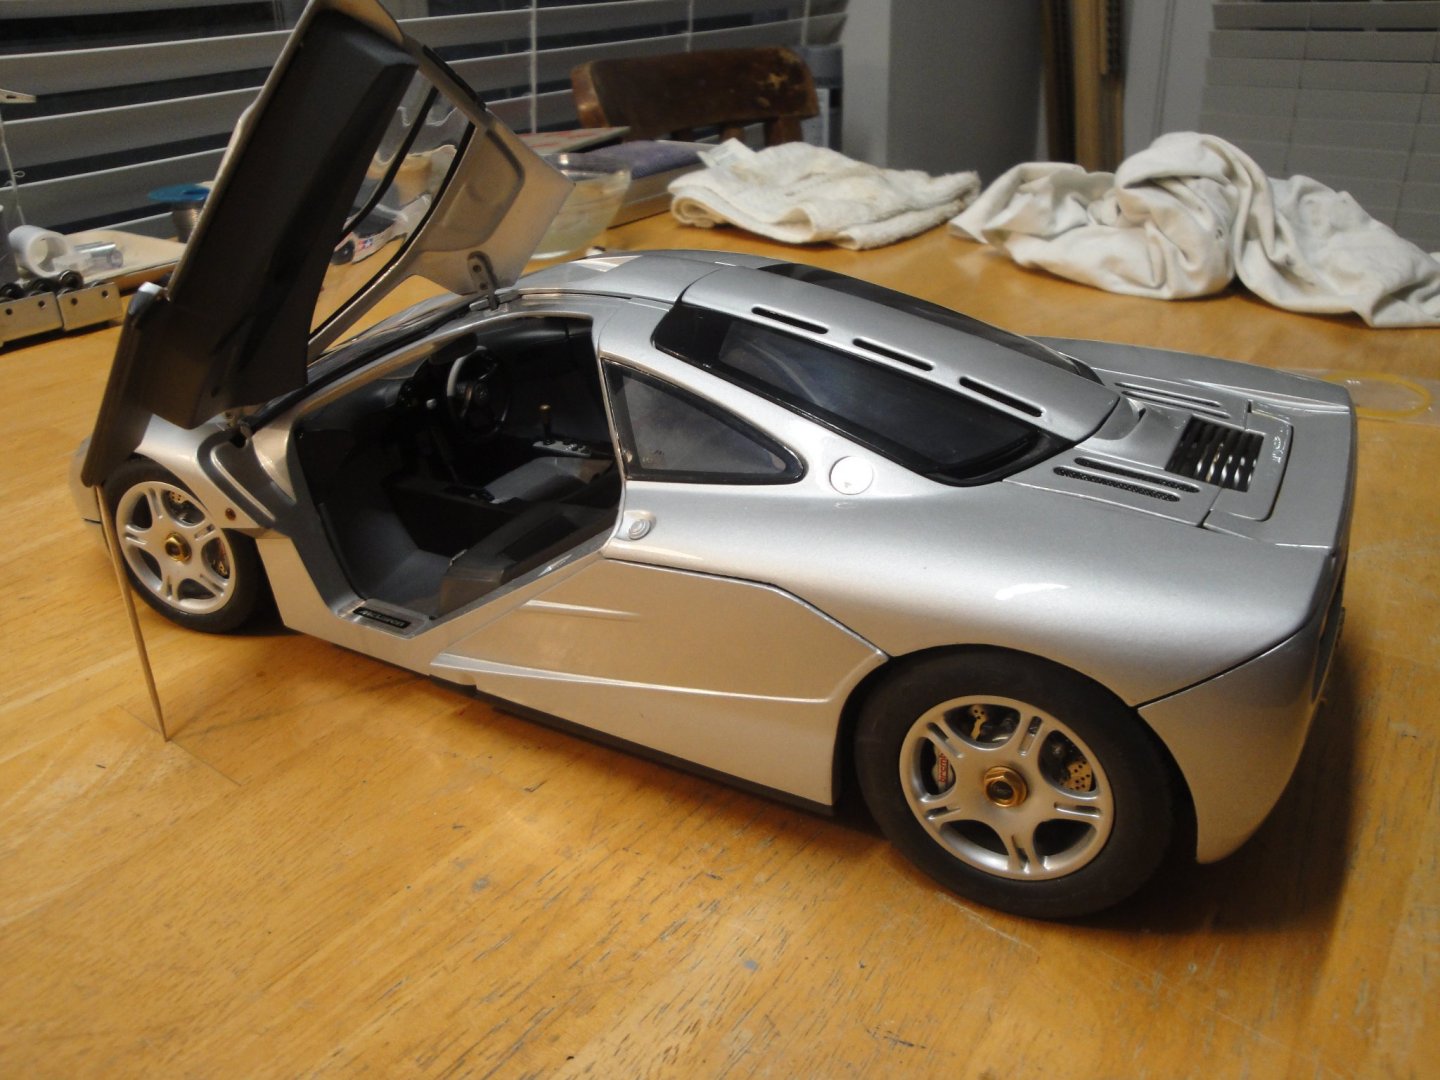
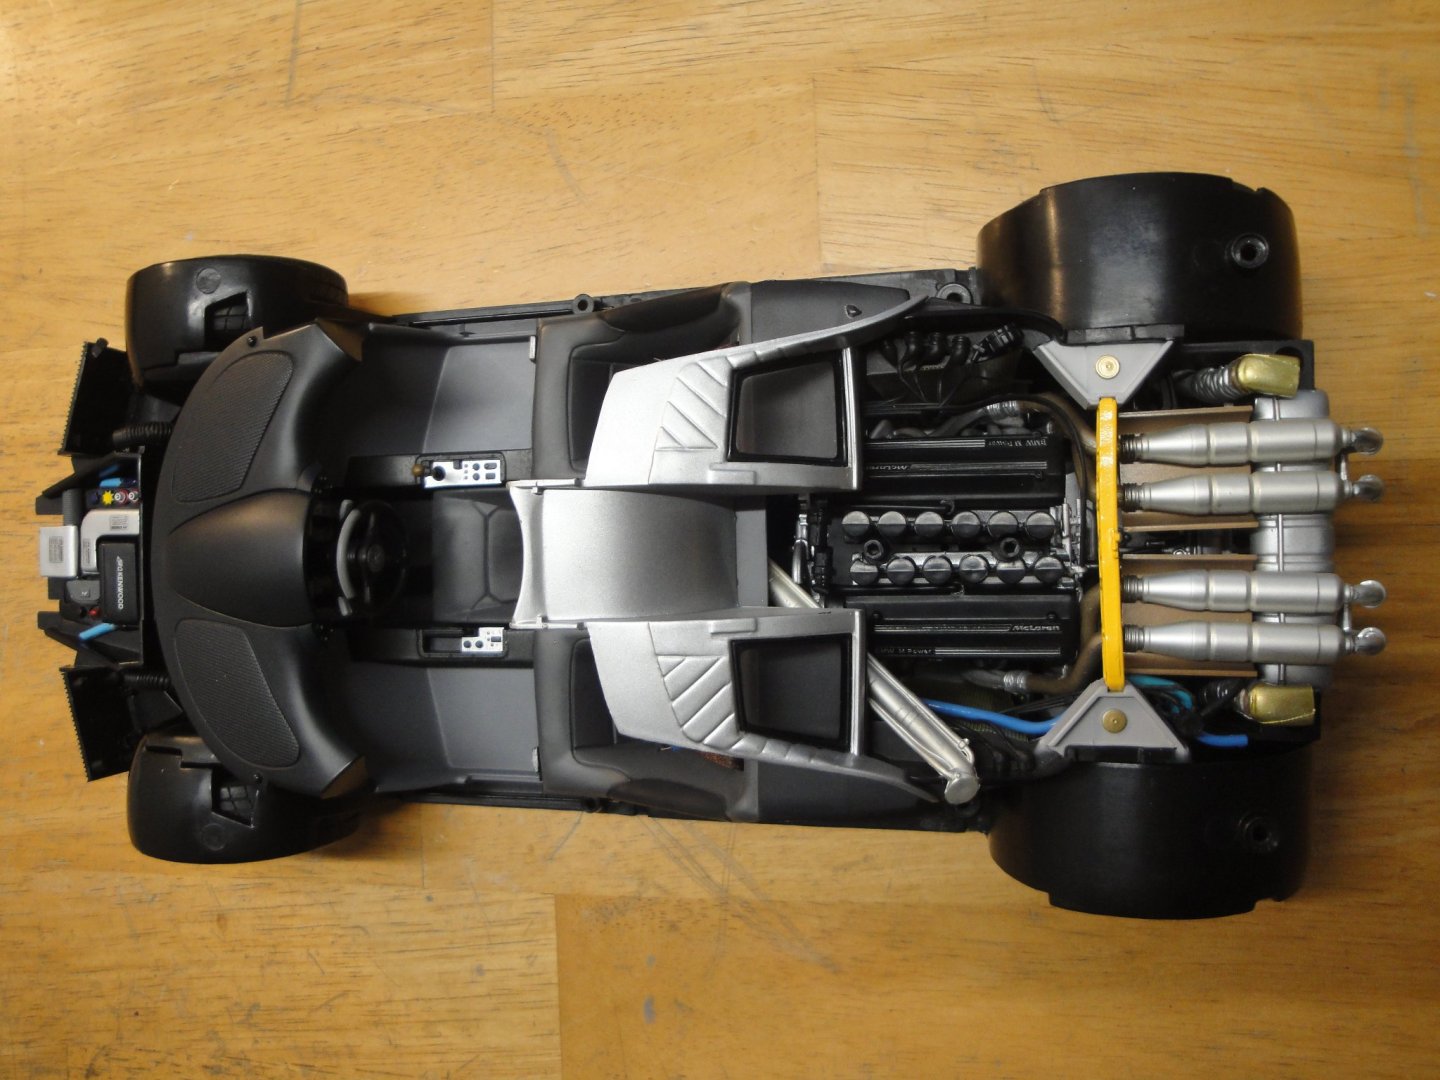
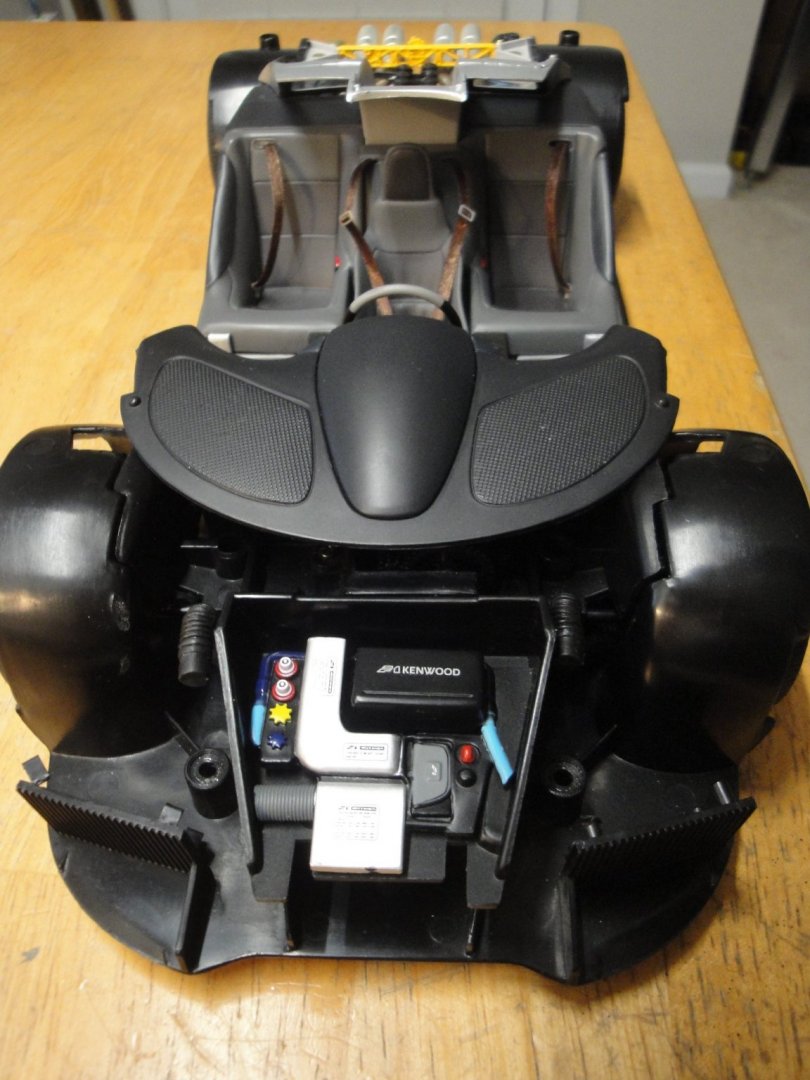
The finished model - After carefully inserting the rear engine in the body and locking the numerous screws, we can finally admire the model, fully restored: The view below shows the rear air brake designed by McLaren to slow down the "rocket" from 240 MPH to a more civilized speed. The on-board computer is in charge of the air brake and will not deploy it under 40 MPH. However, certain owners knowing that it was lined up with pure gold foil, intended to show their wealth, even when stopped at a red light. By tweaking the Computer program, you could actually deploy the brake even while standing still and simply by pushing the brake pedal..... Showing the Gold.... The most common view of the McLaren F1 on the road, at least for a second or two.... Above is the electrical and luggage compartment. McLaren was offering (or proposing) a set of luggage that would fit both compartments and allow a couple of people to go on a weekend trip. You could even place a golf bag, by using one of the passenger seat. The door articulation and mechanism is directly inspired of the Toyota Sera (not sold in Western countries): Sliding in the middle seat requires some agility and a good back. Notice the two mirrors, since the rear middle section of the car is used for the air intake. I hope you enjoyed the step by step restoration of the precious and rare model. It will now it with my small 1/12 collection of motorcycles. Yves


- 30 replies
-
- 18
-

-
-

-
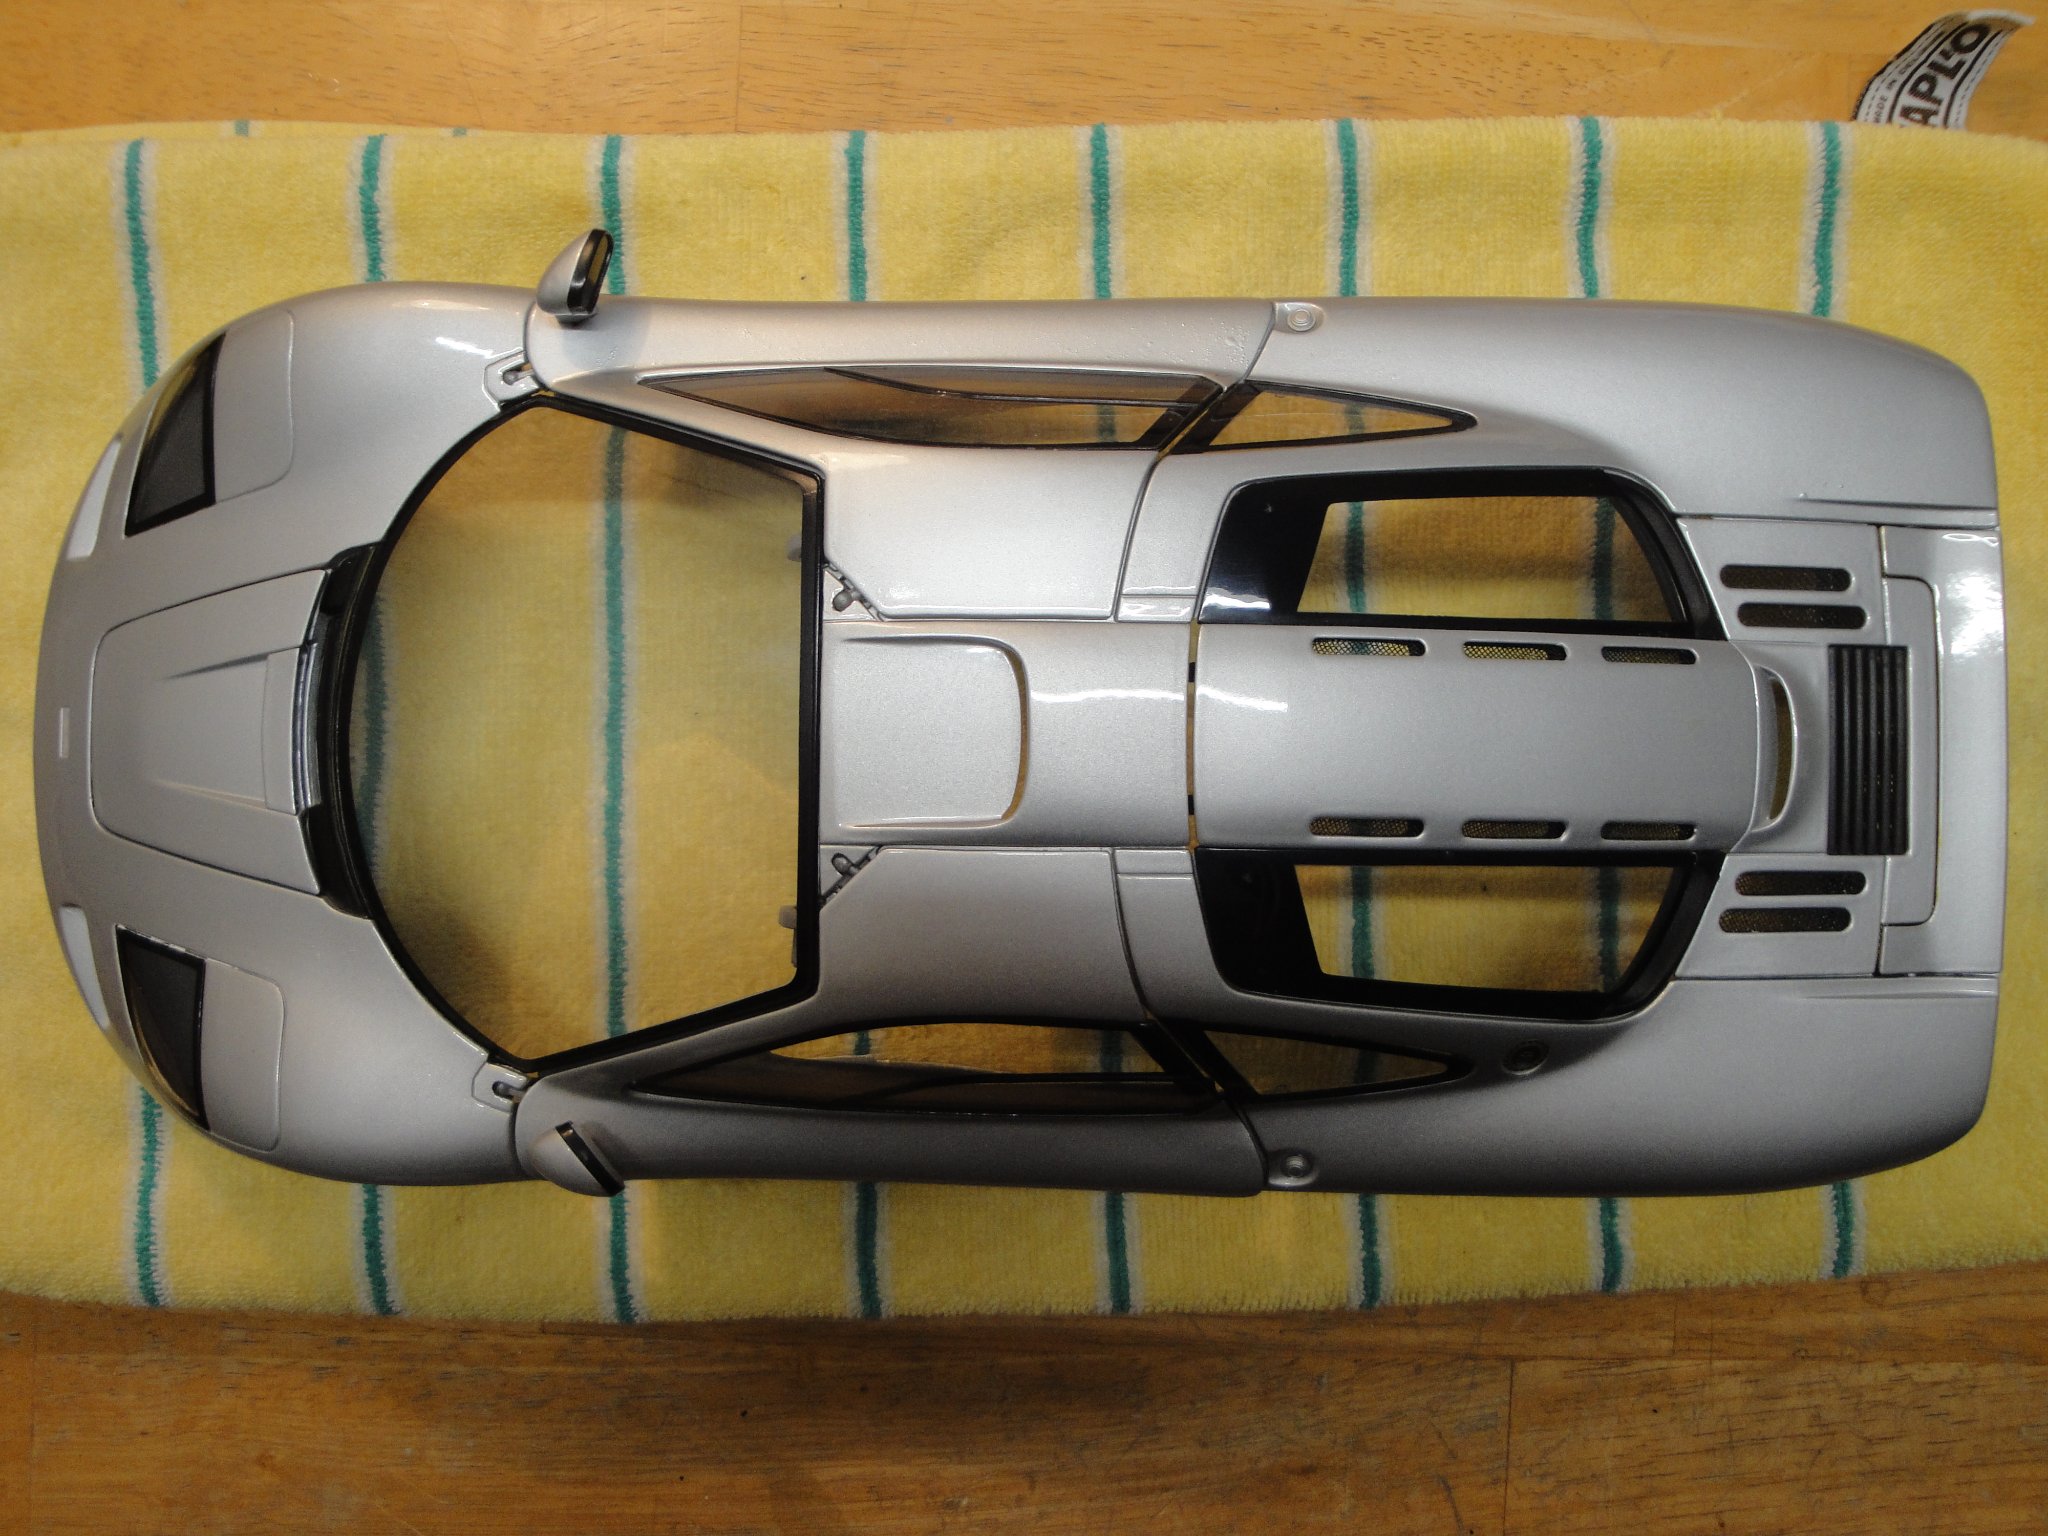
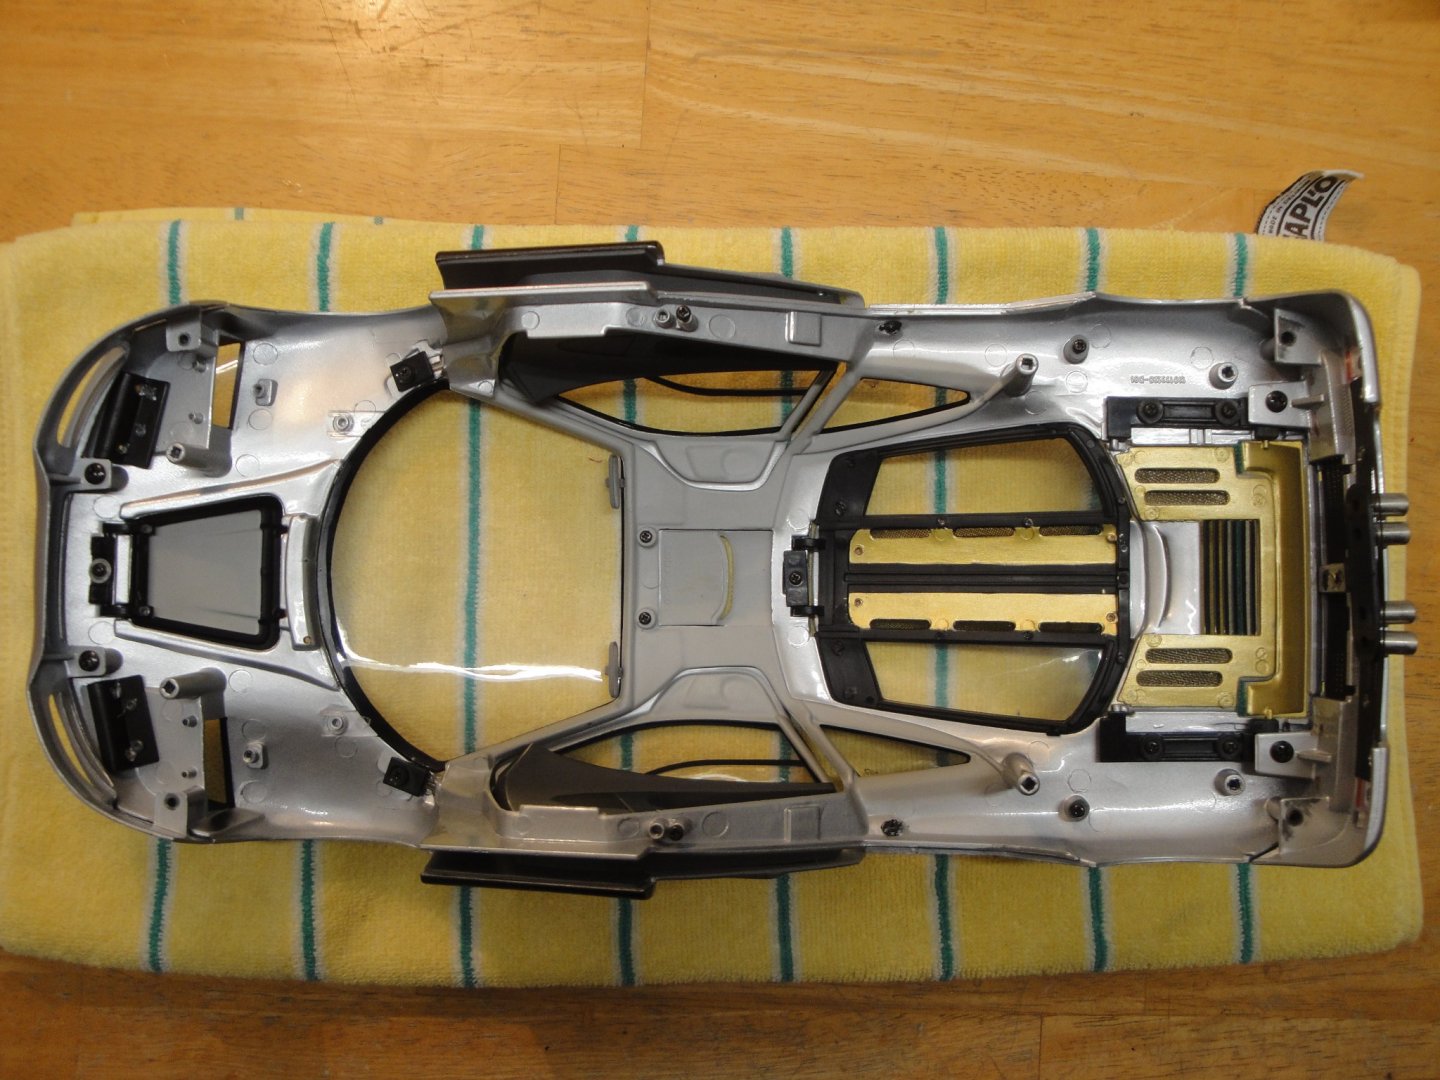
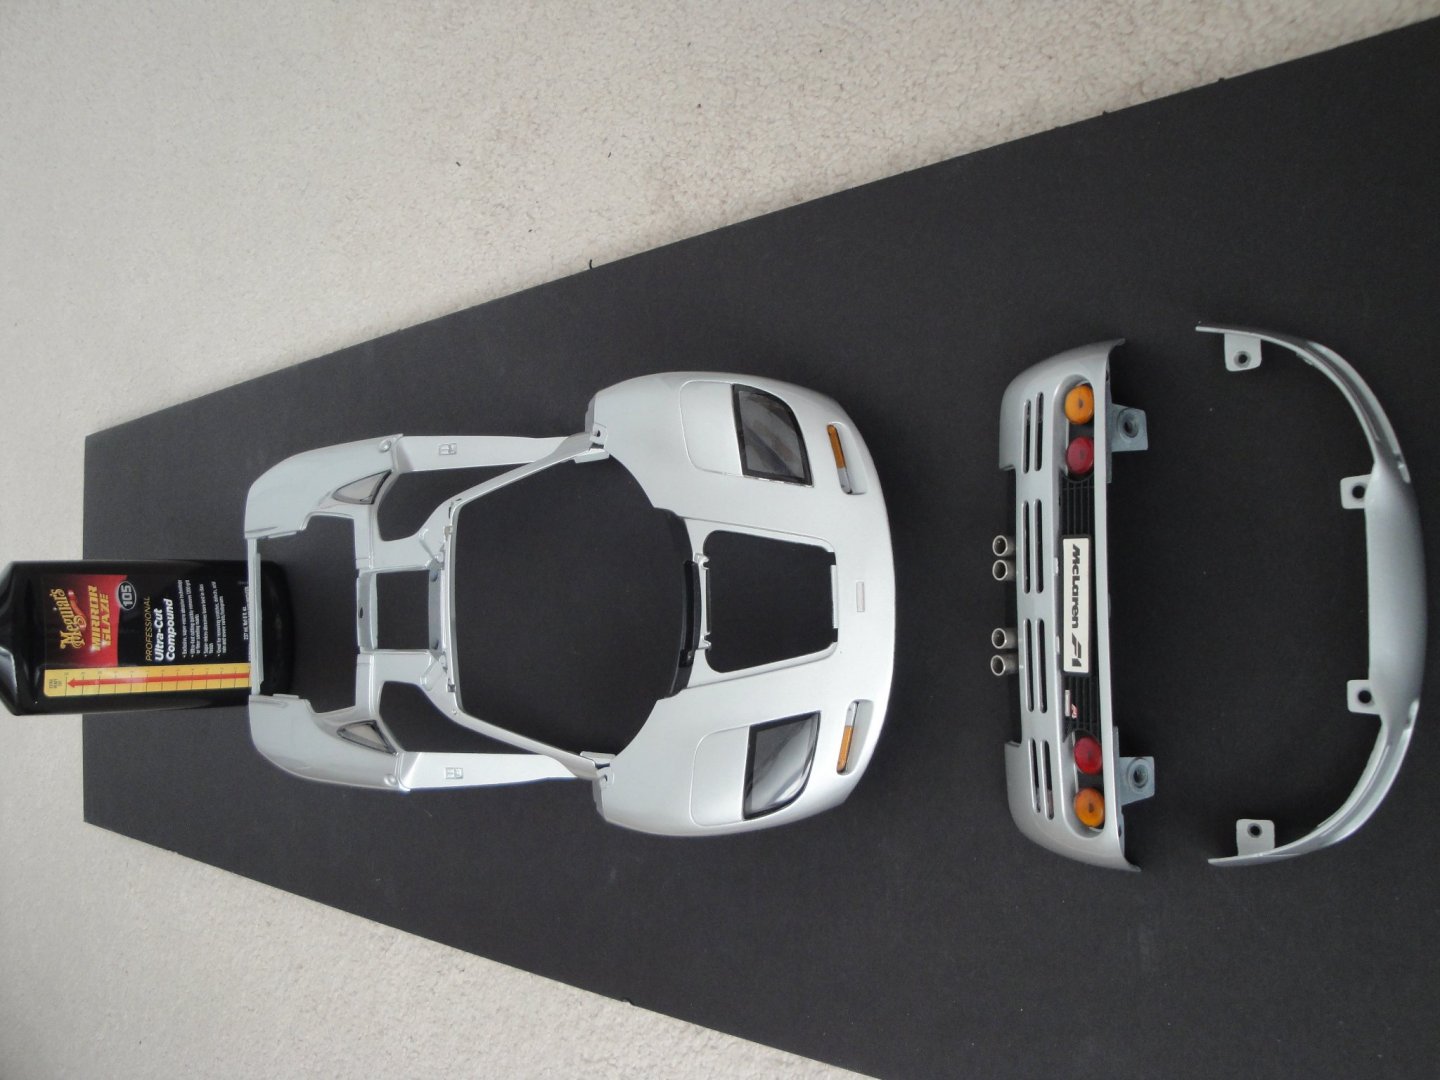
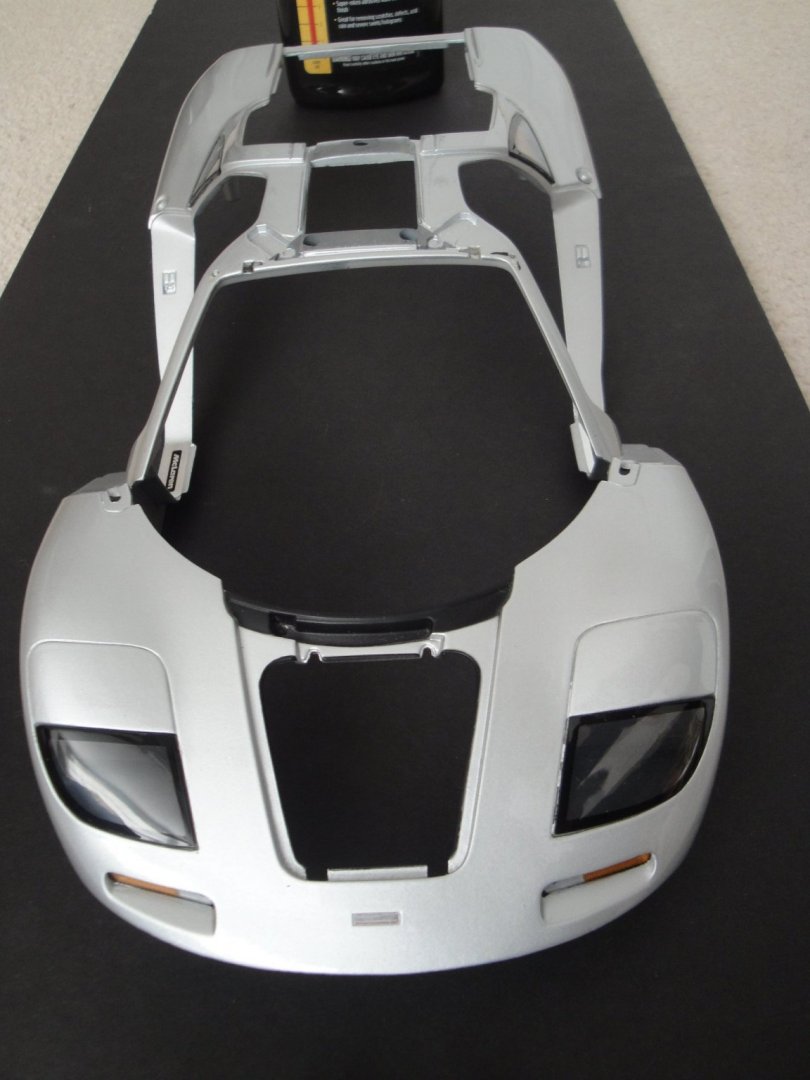
Assembly - Putting together all the body parts is actually the most delicate part of the restoration. Doors and panels have only one will: to get open! The windshield is glued back to the main frame, as in the real car. I use acrylic glue (Gator) which gives me plenty of time to position the "glass". This view show all the doors and panels put together. The gold coating in the rear is what McLaren used to protect the Carbon Fiber body from the intense heat generated by the 620 HP V-12 engine. Close to one ounce of laminated gold was used on the real car. I tried to glue real gold foils on the various parts but had no success and fell back to Tamiya Gold Leaf paint. The model is absolutely beautiful and the casting of the body is incredible. Yves


- 30 replies
-
- 10
-
-
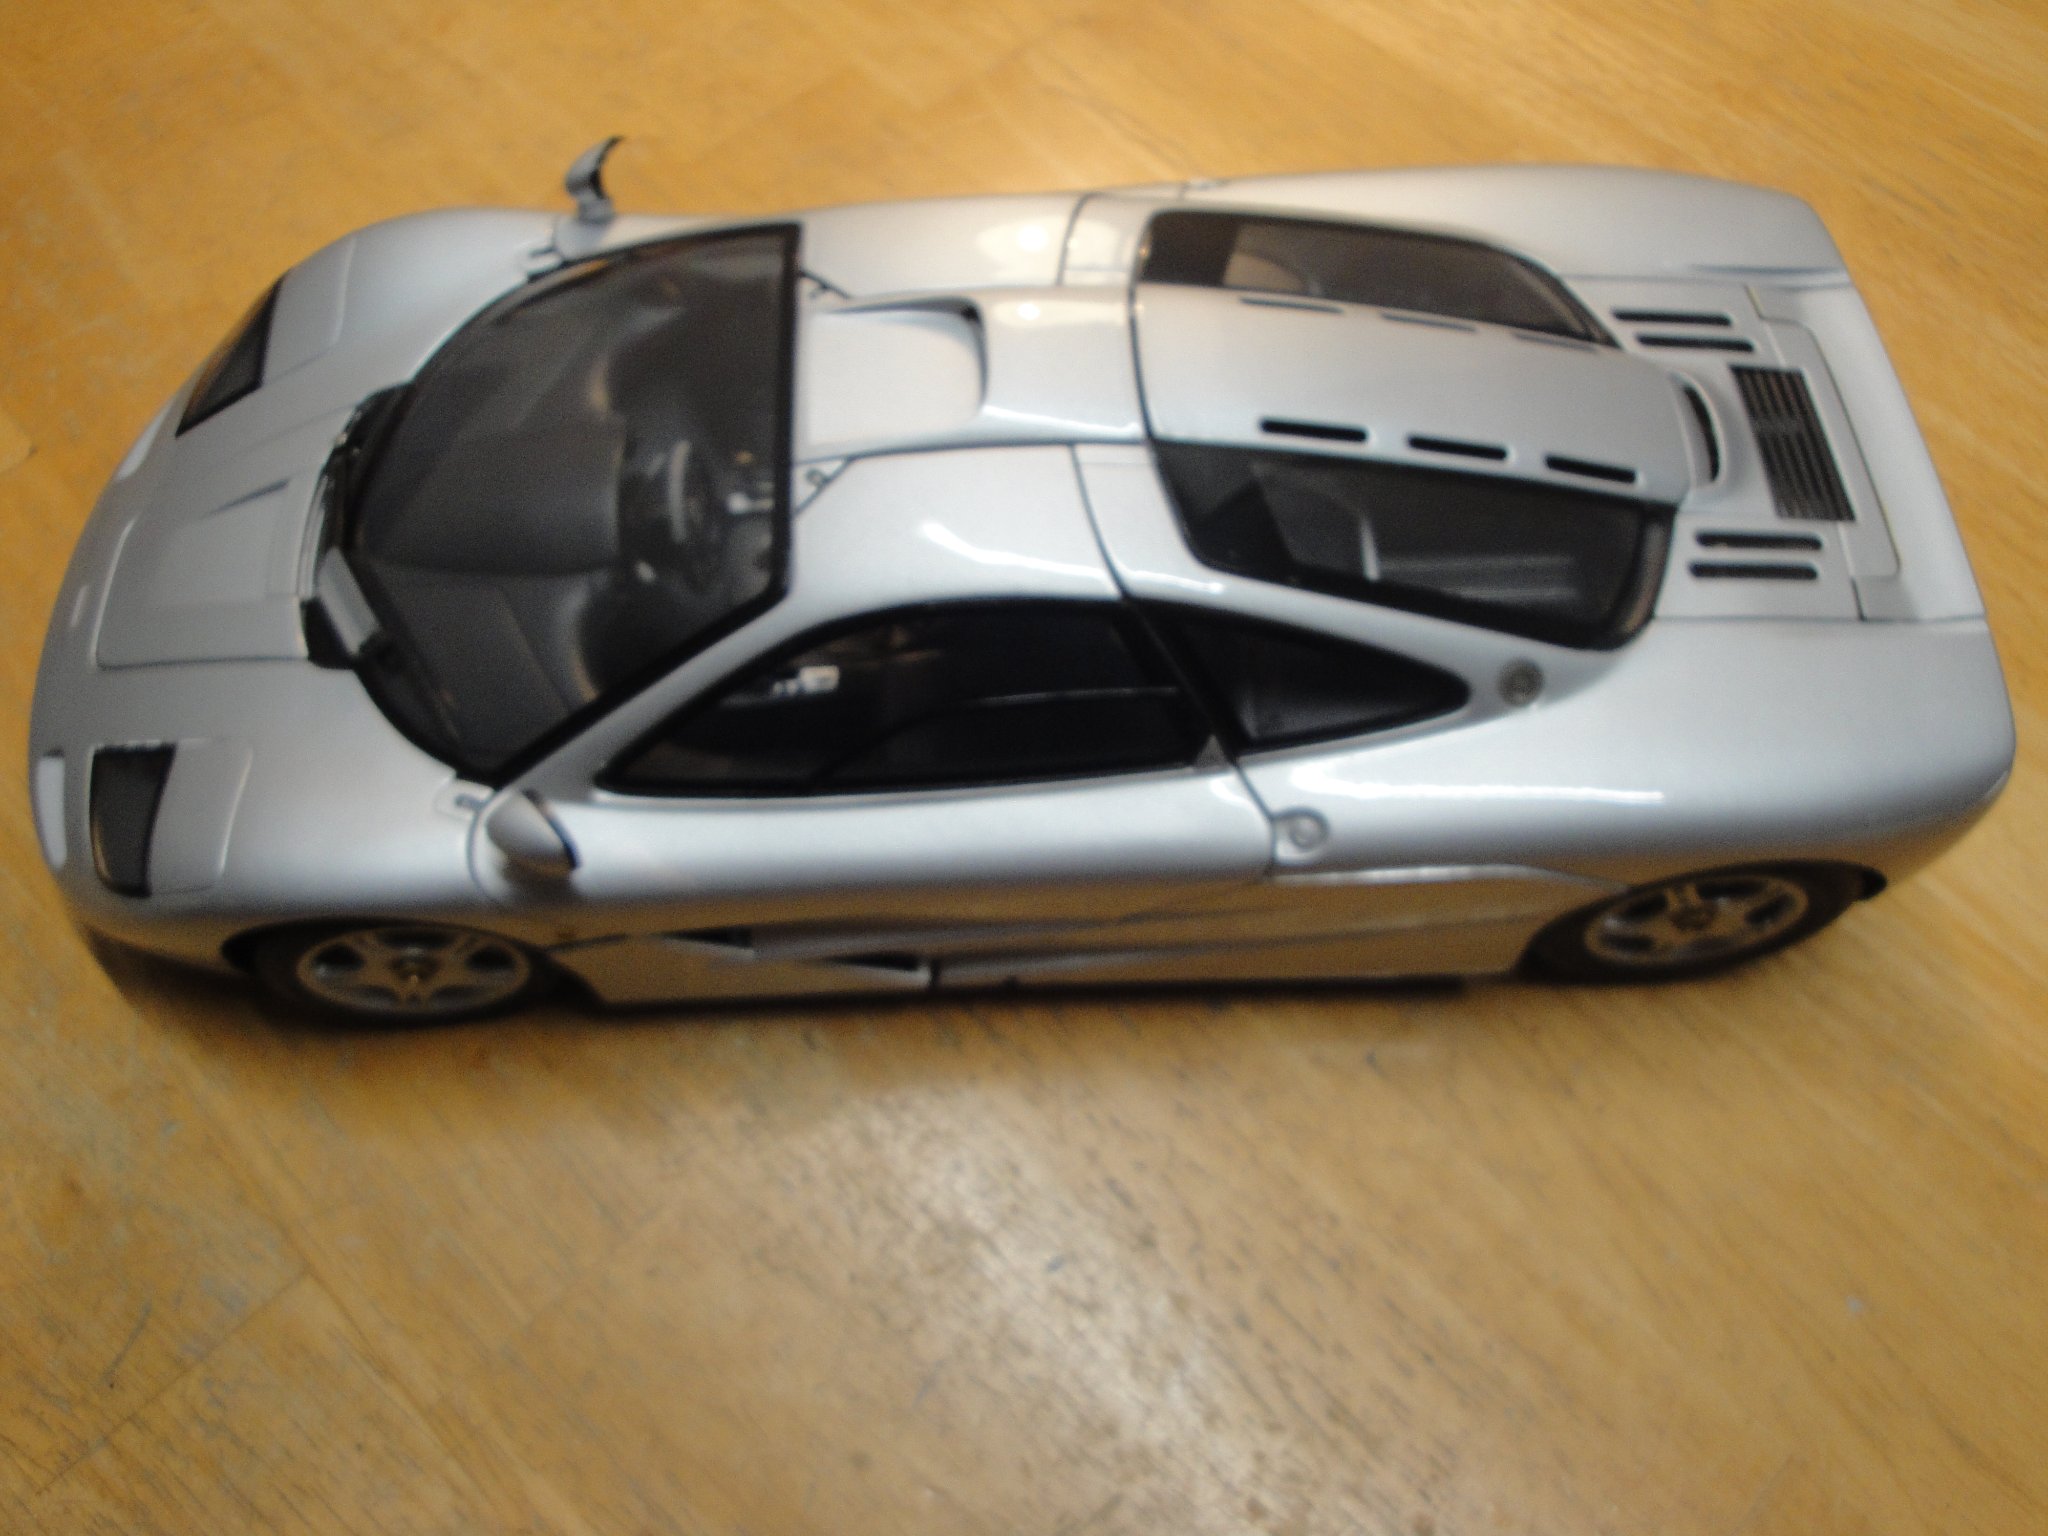
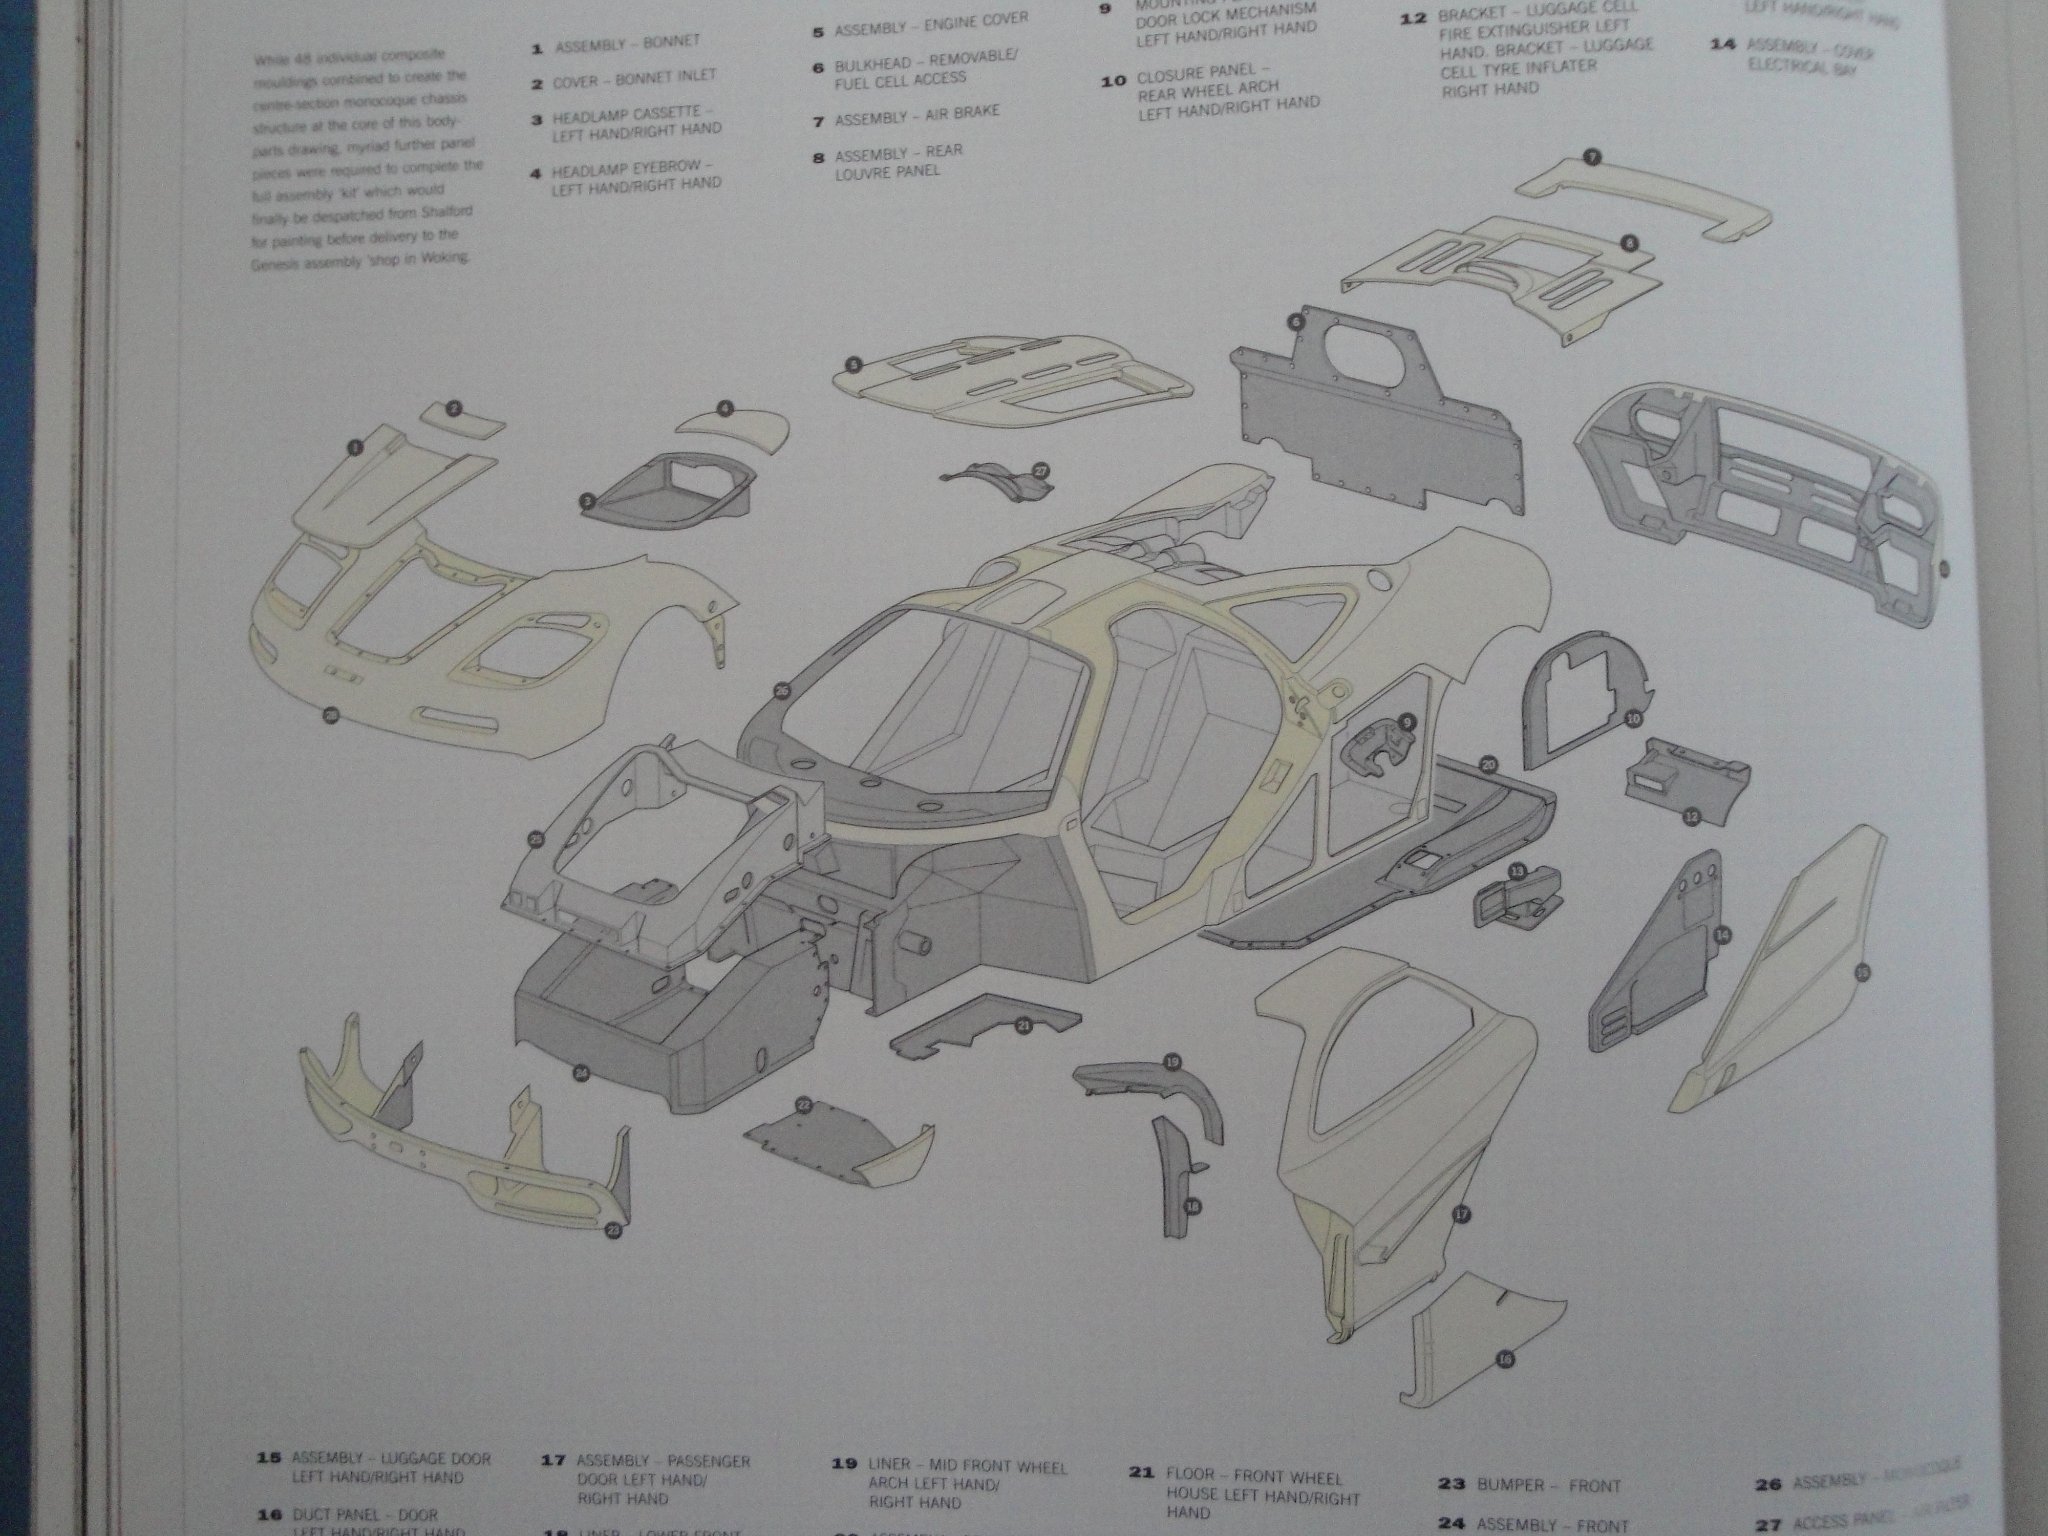
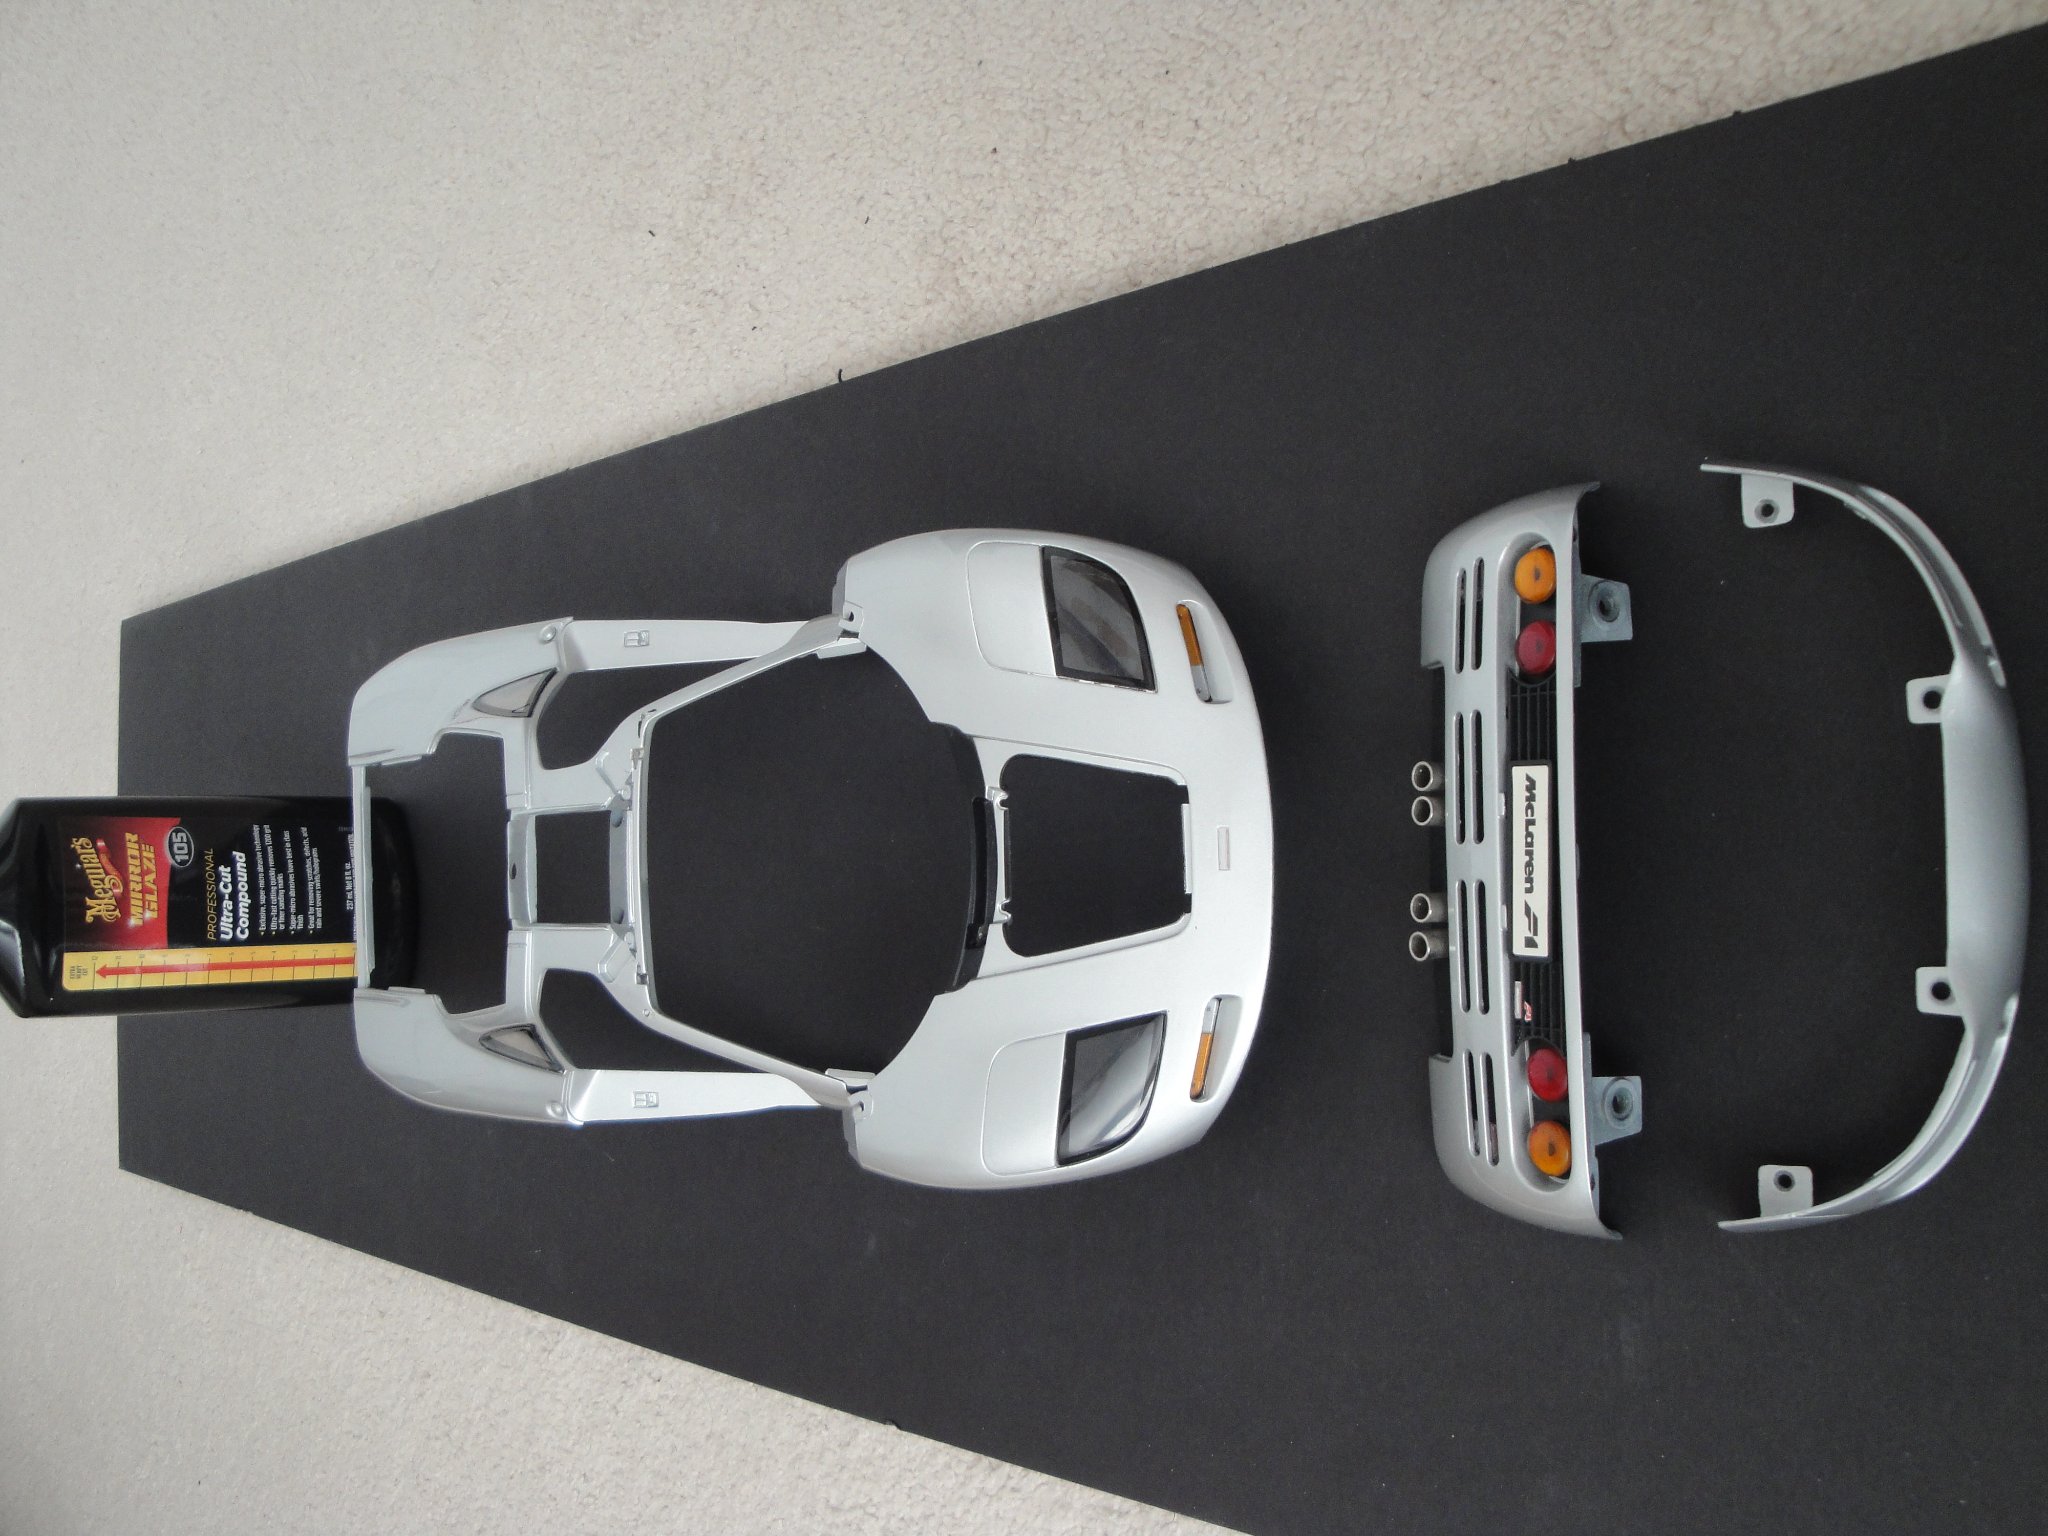
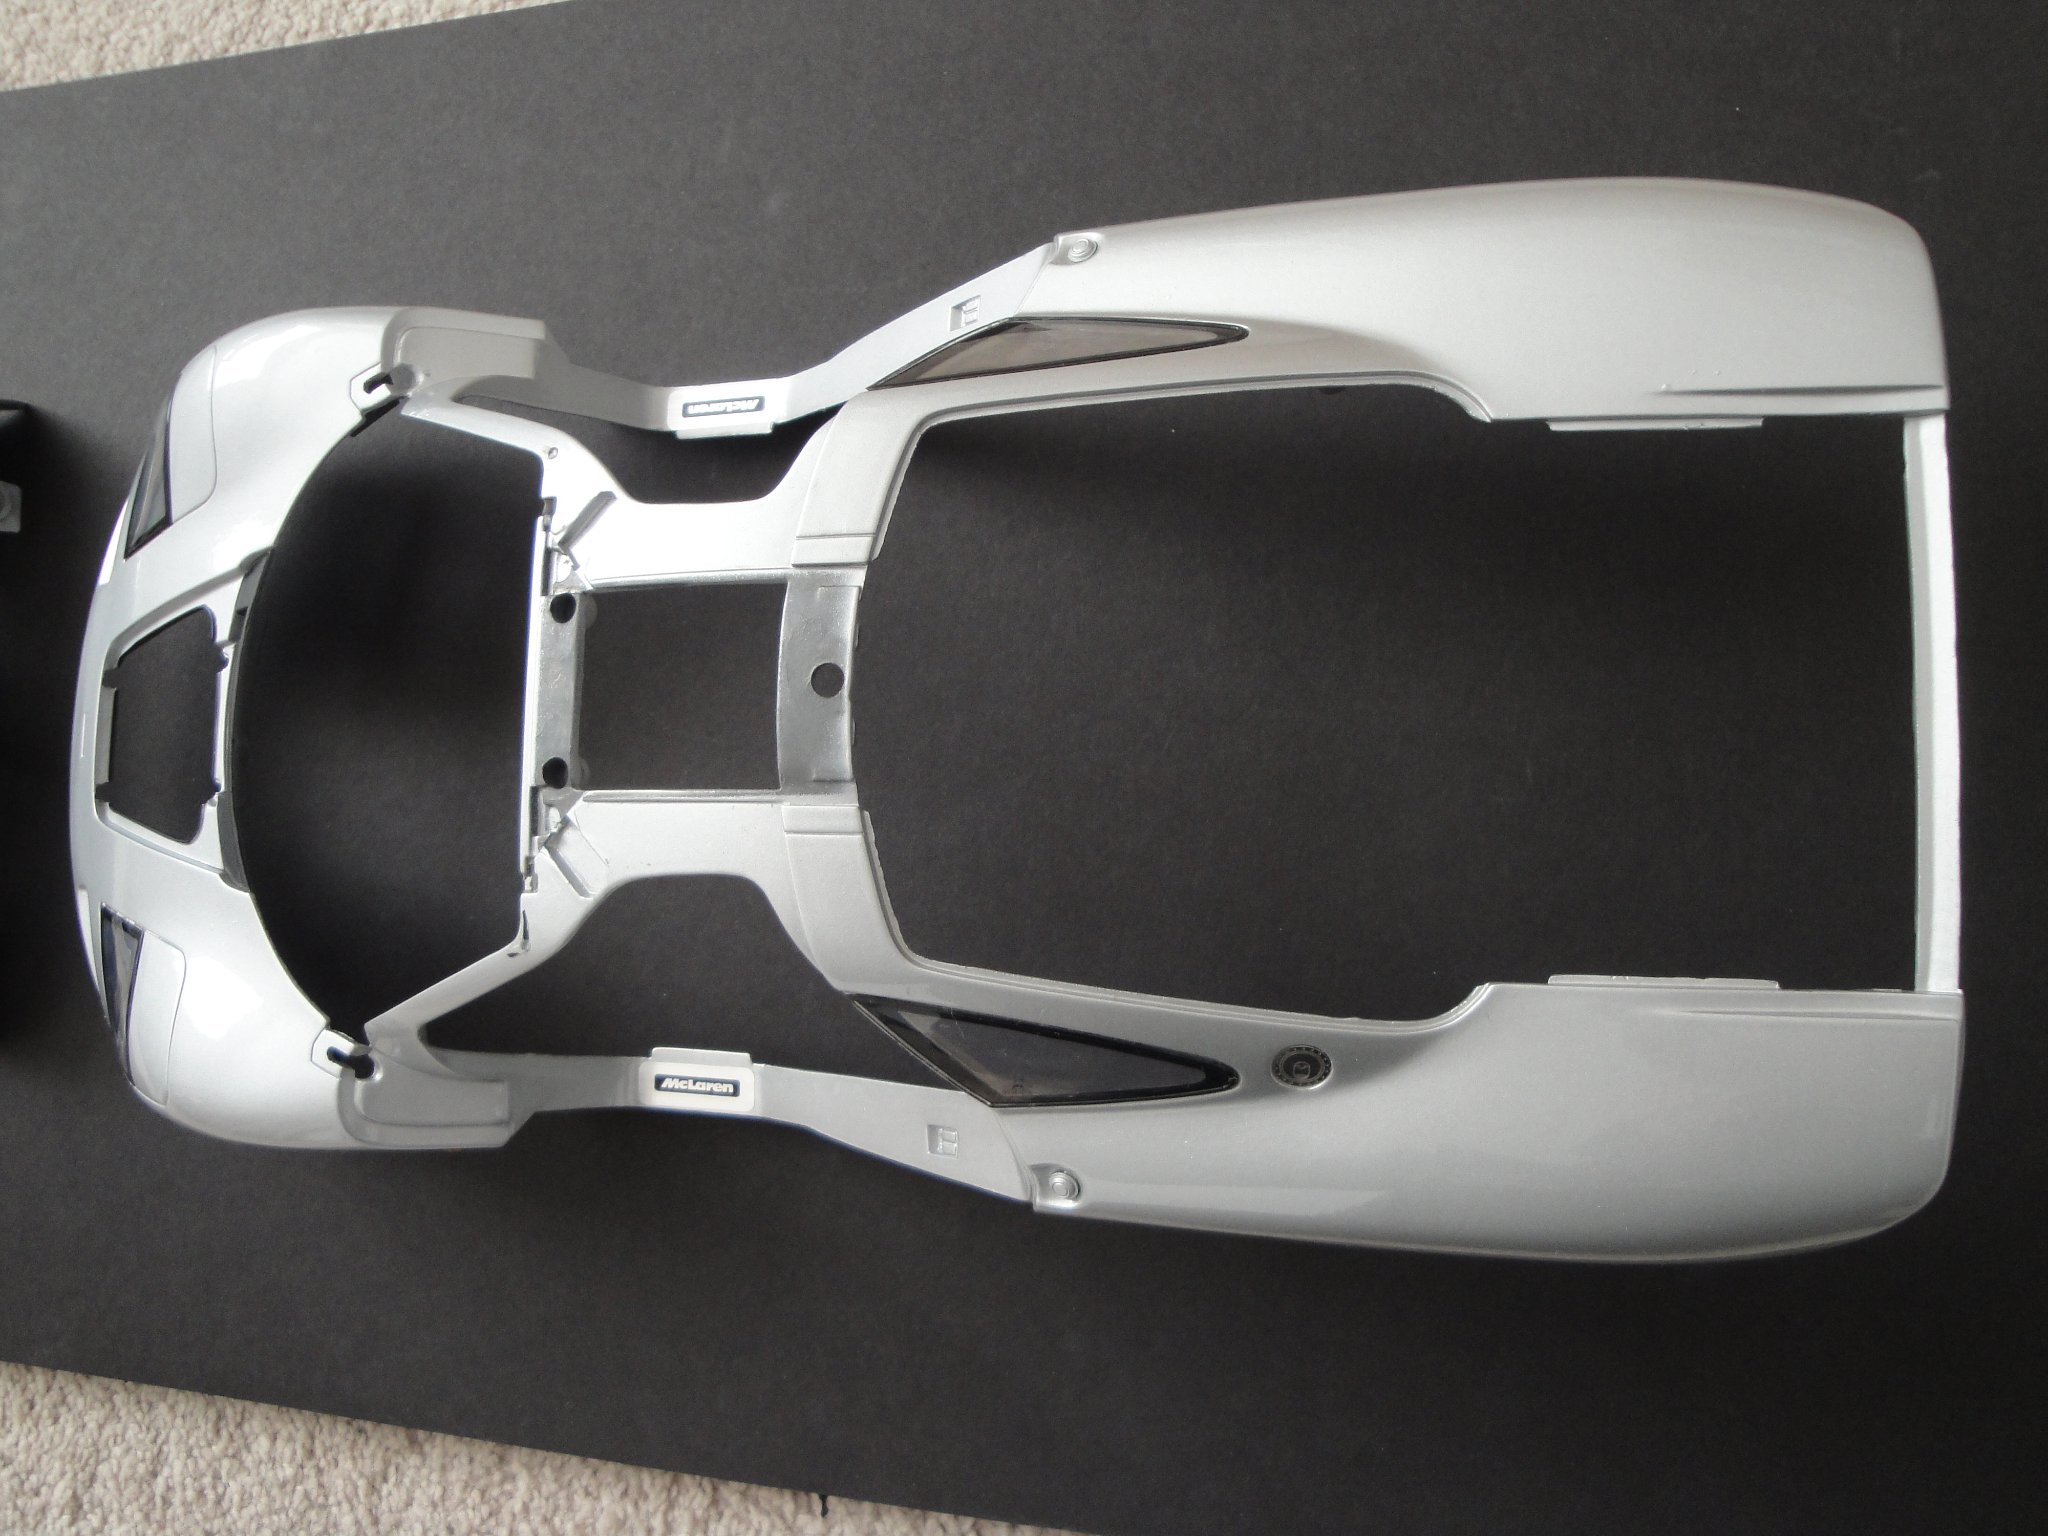
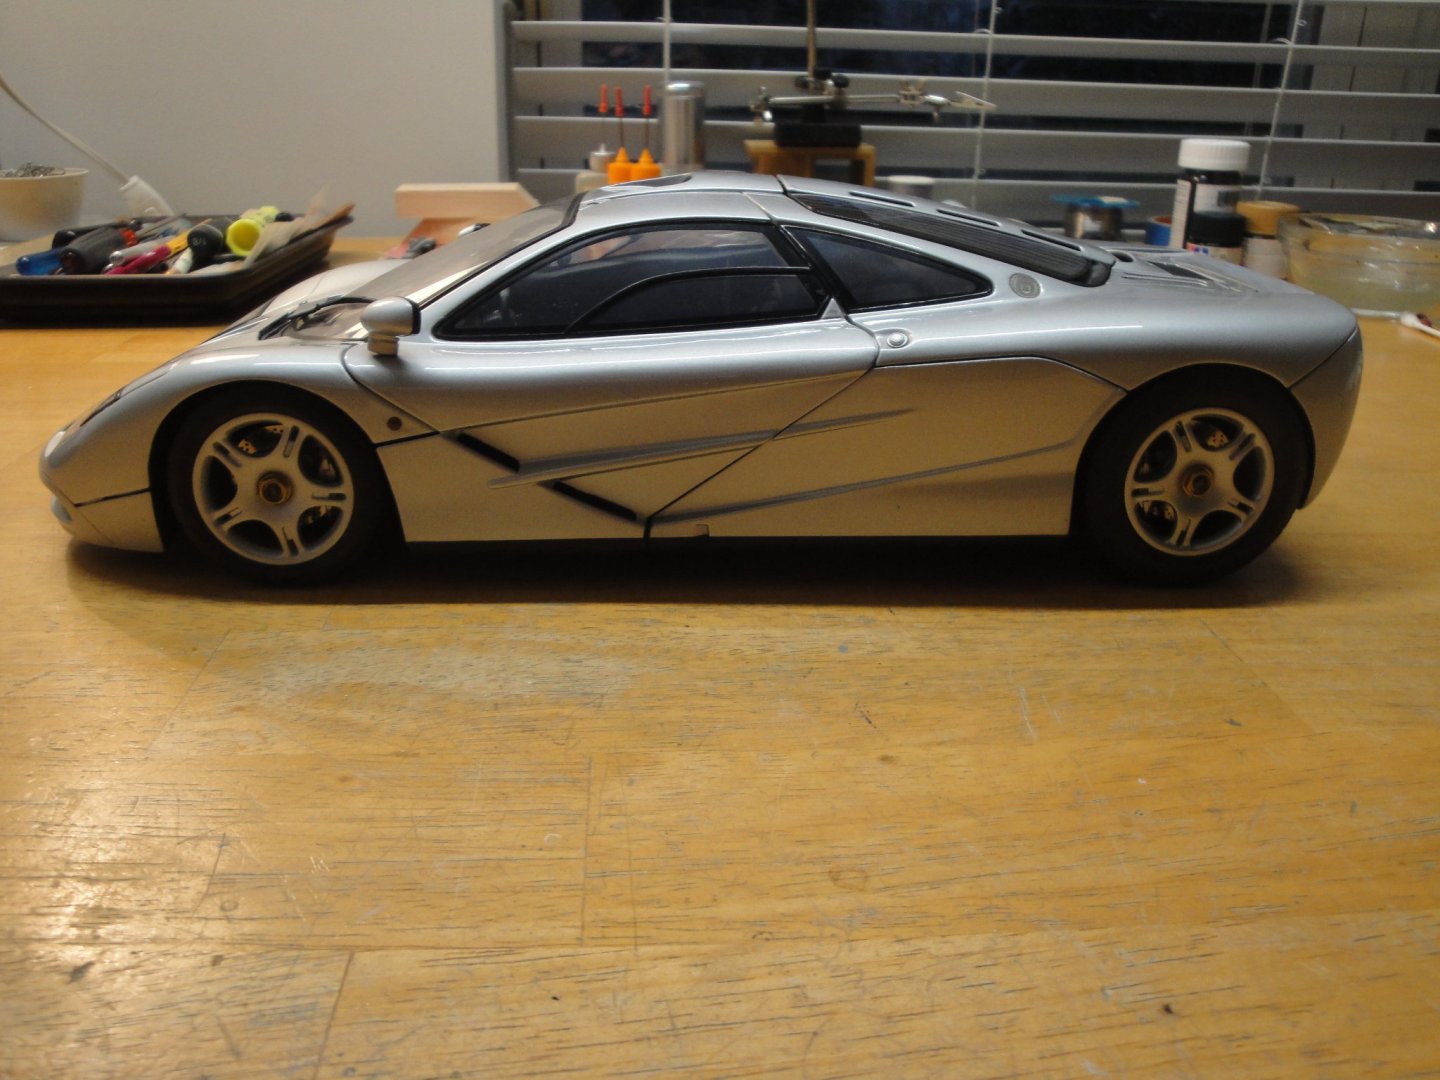
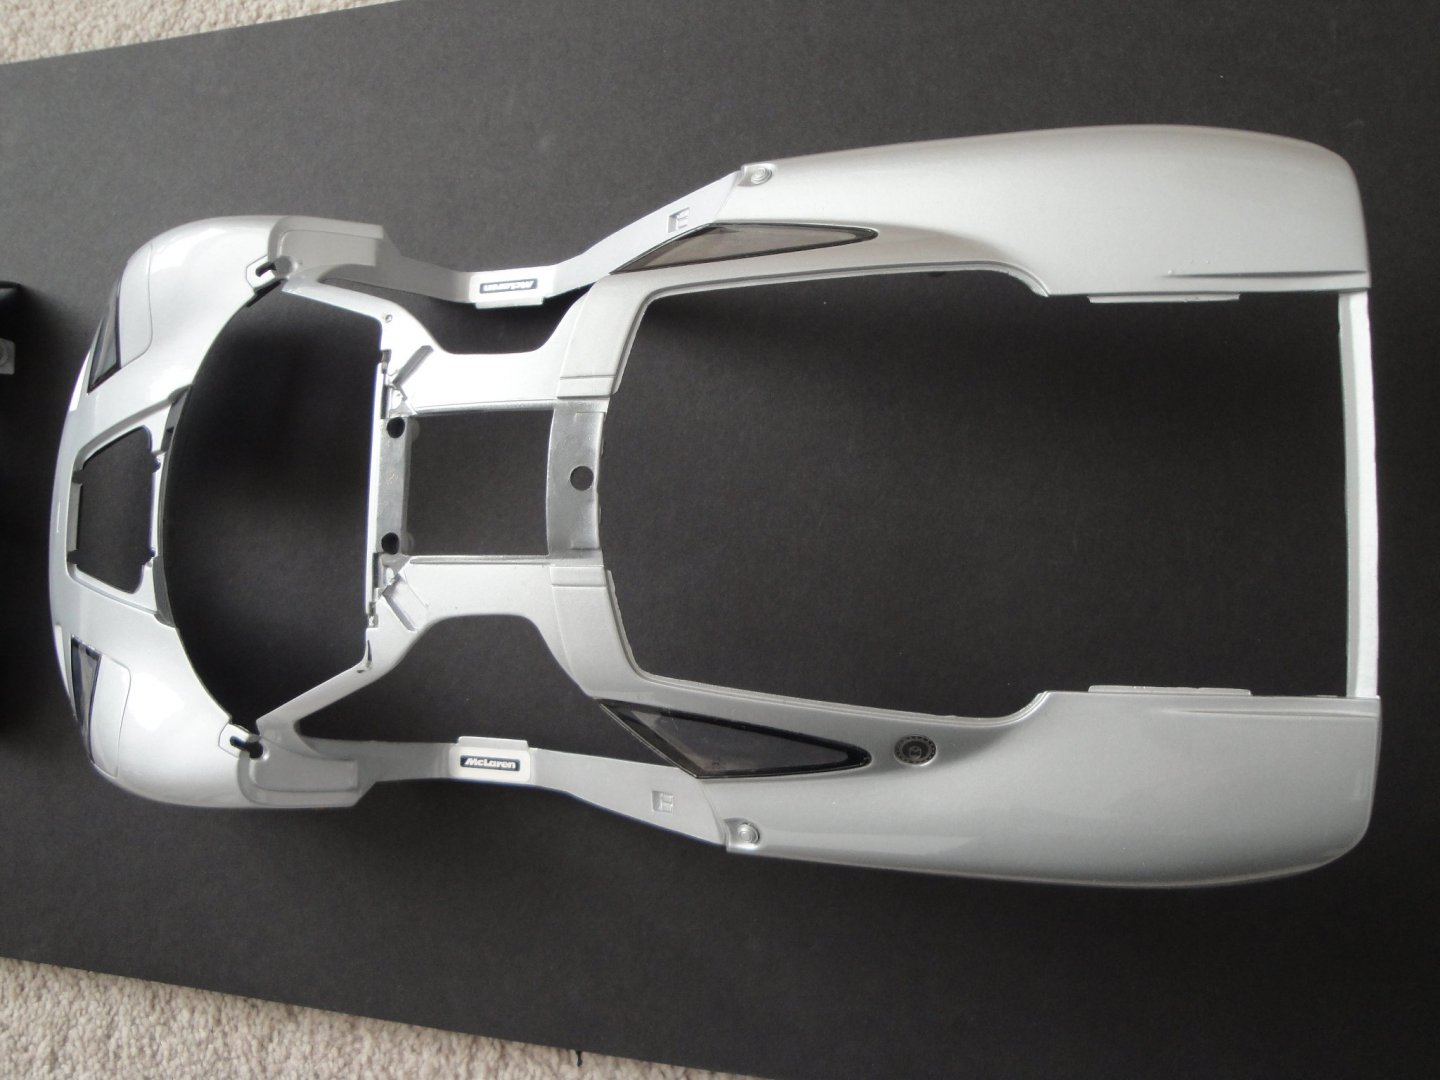
The Body - Now is time to put everything back together. The original car is entirely made of carbon fiber parts, assembled together in the following way: The model is of course, different and simplified. Instead of carbon fiber, Paul's Model Art is using some kind of alloy metal, relatively heavy. The casting is very precise and clean provides an incredibly precise appearance of the real car: All the parts are polished with fine grit Meguiars 250 polishing cream. Fortunately, most of the body is perfect and no full repaint is required. One door is showing some traces of slight corrosion under the paint, but we will live with it. Yves

-
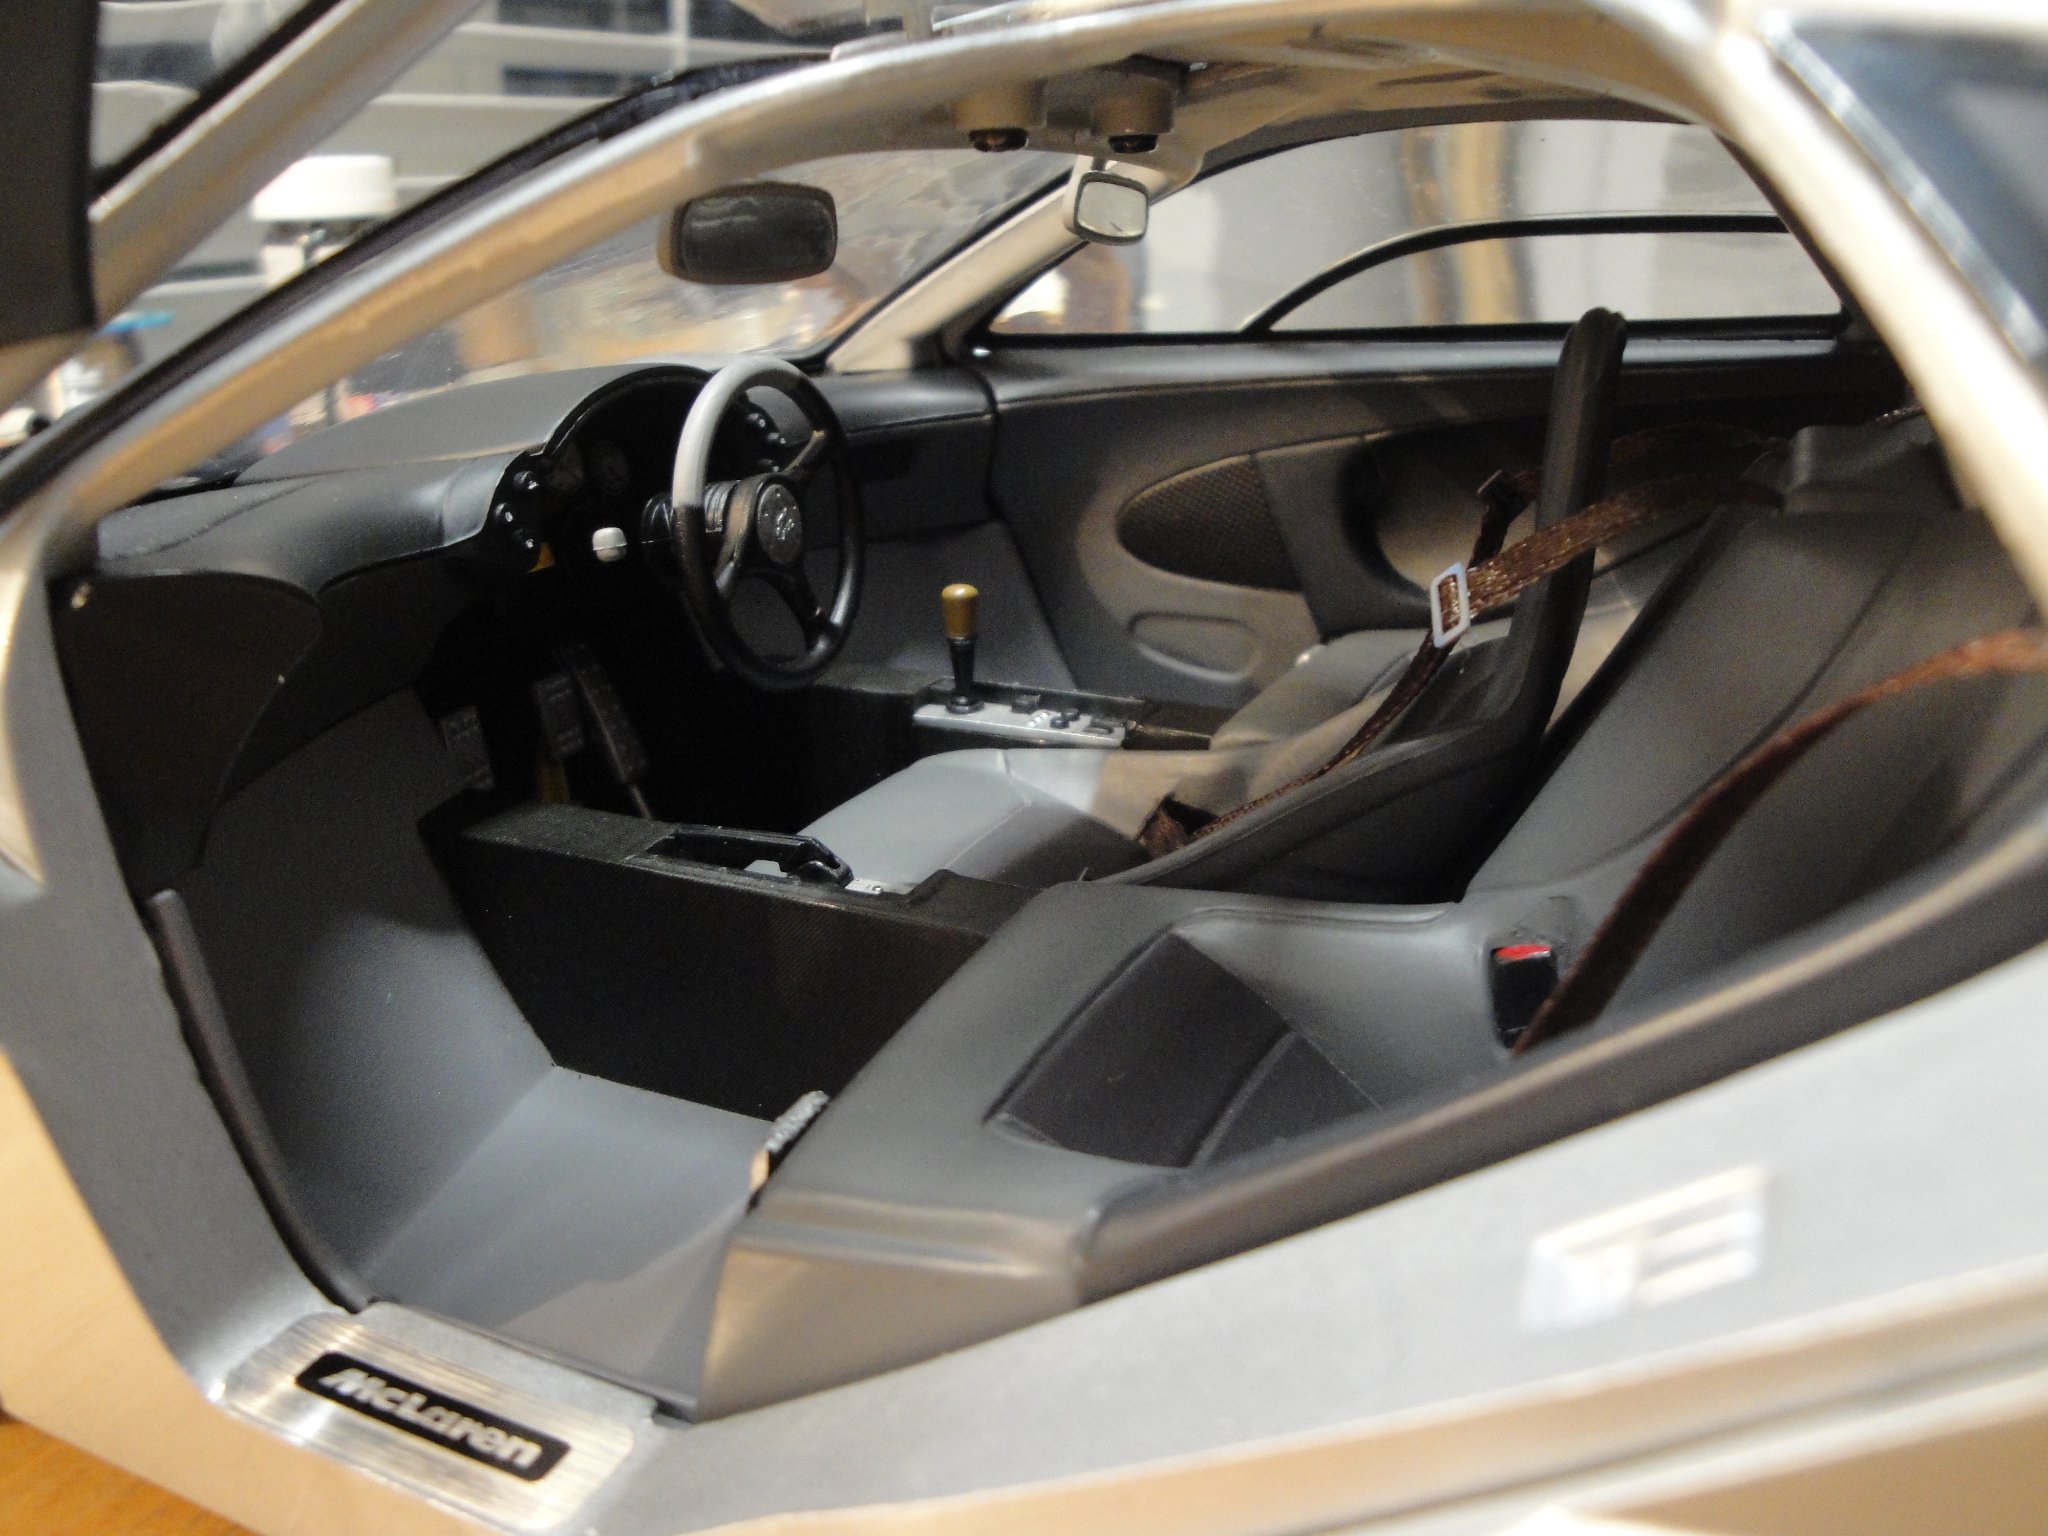
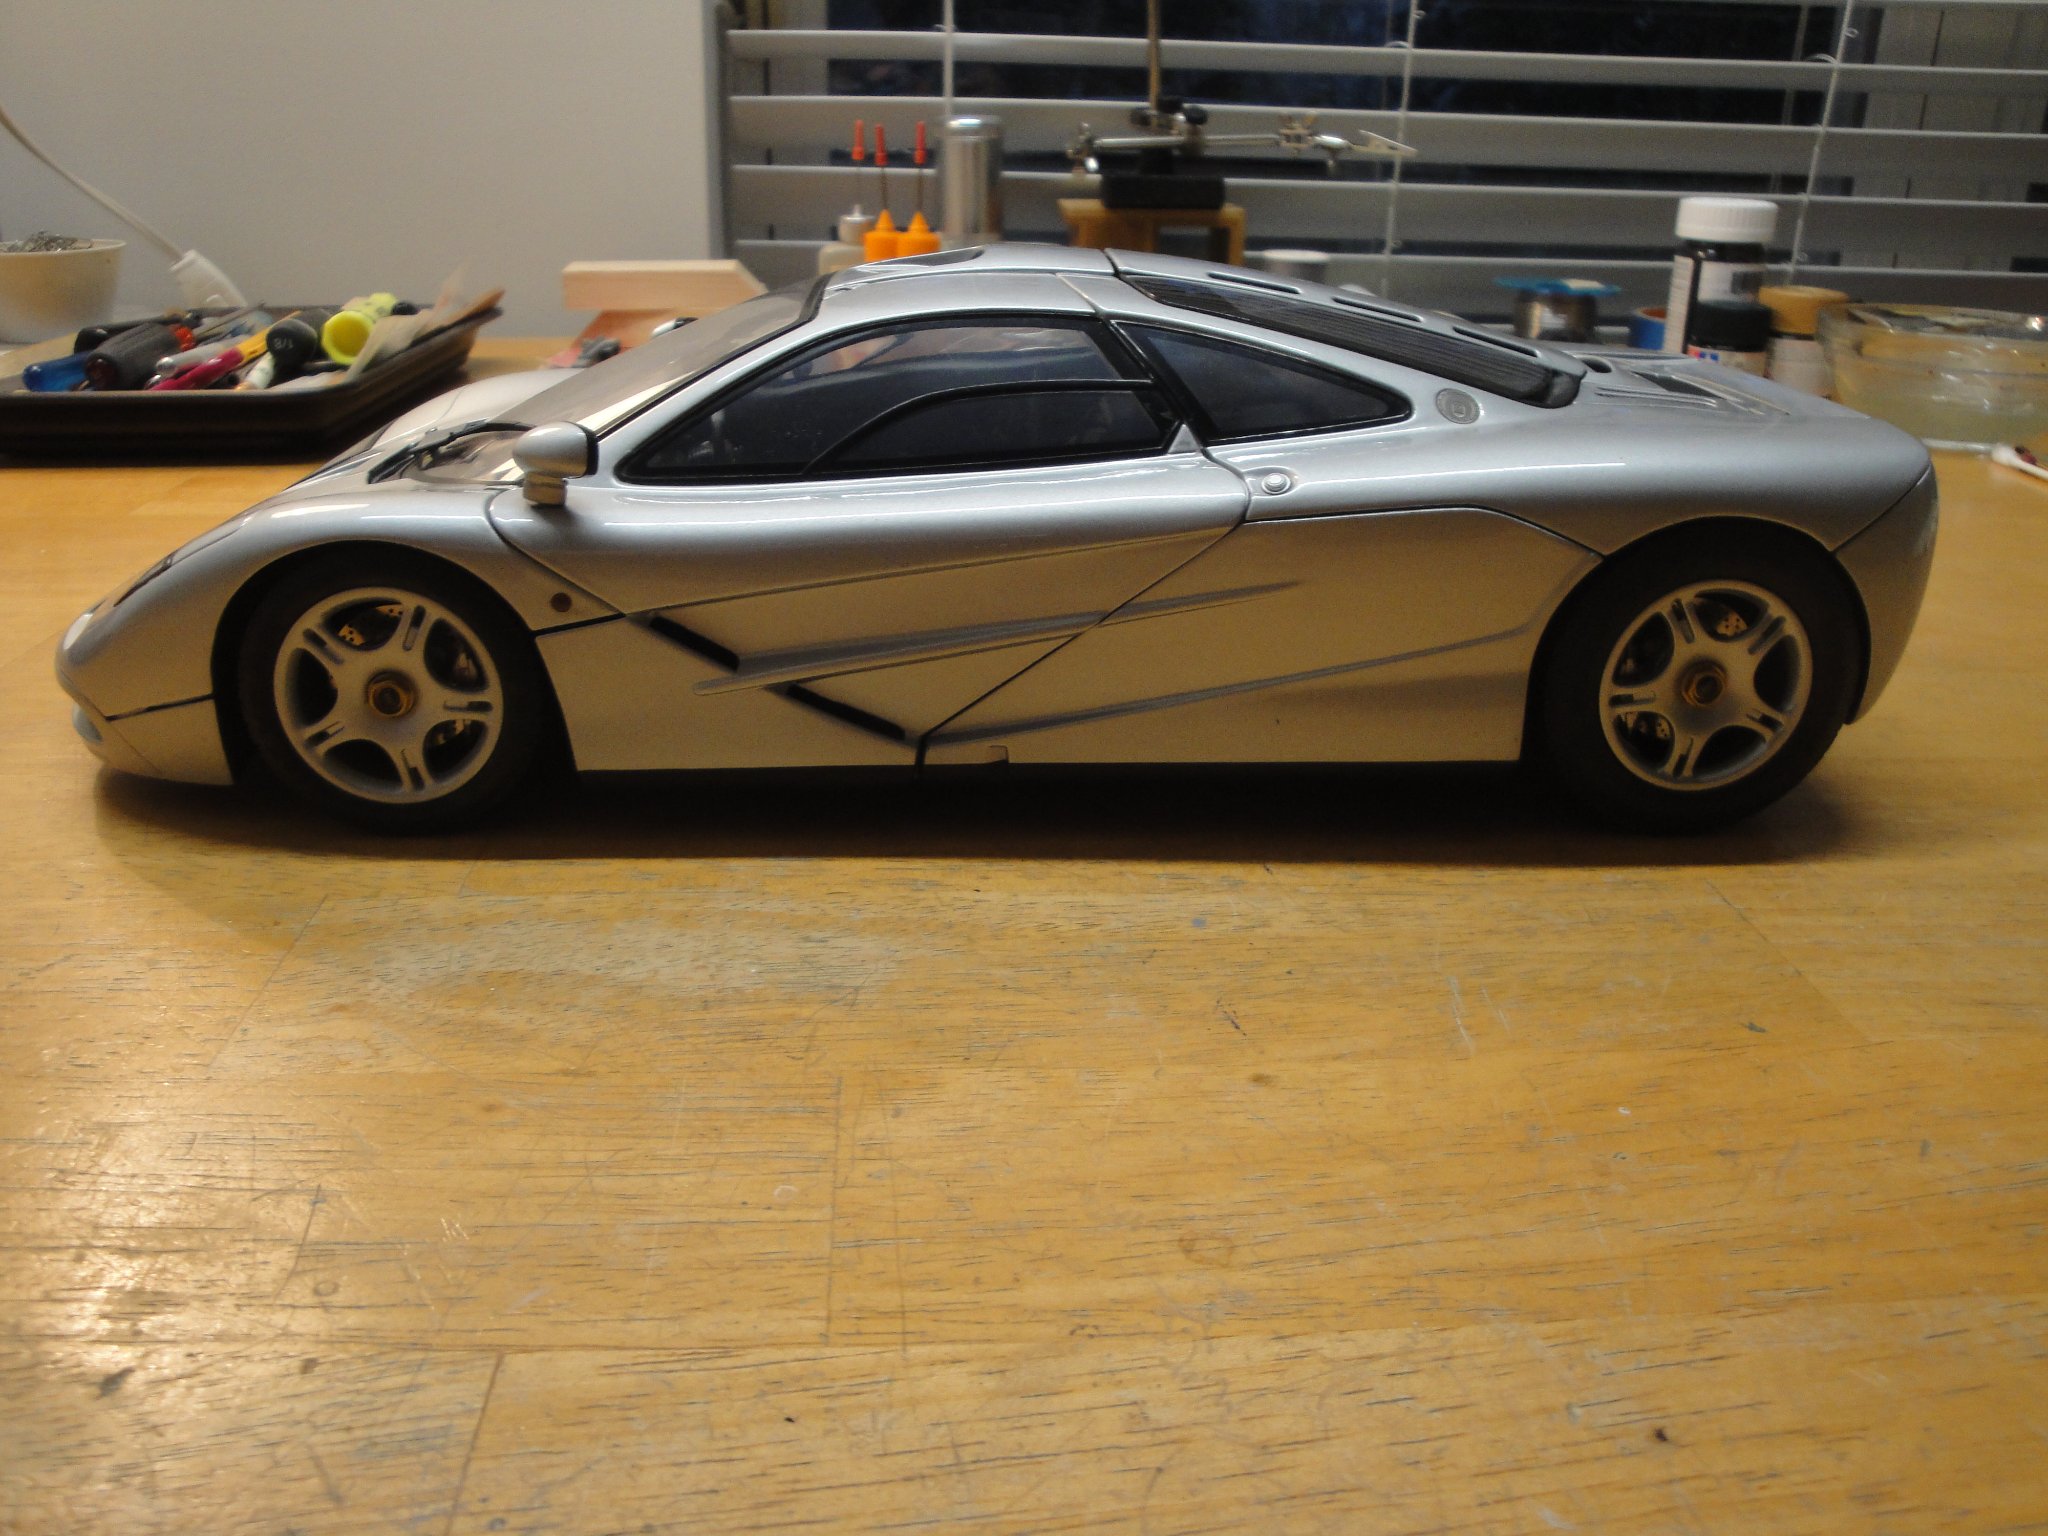
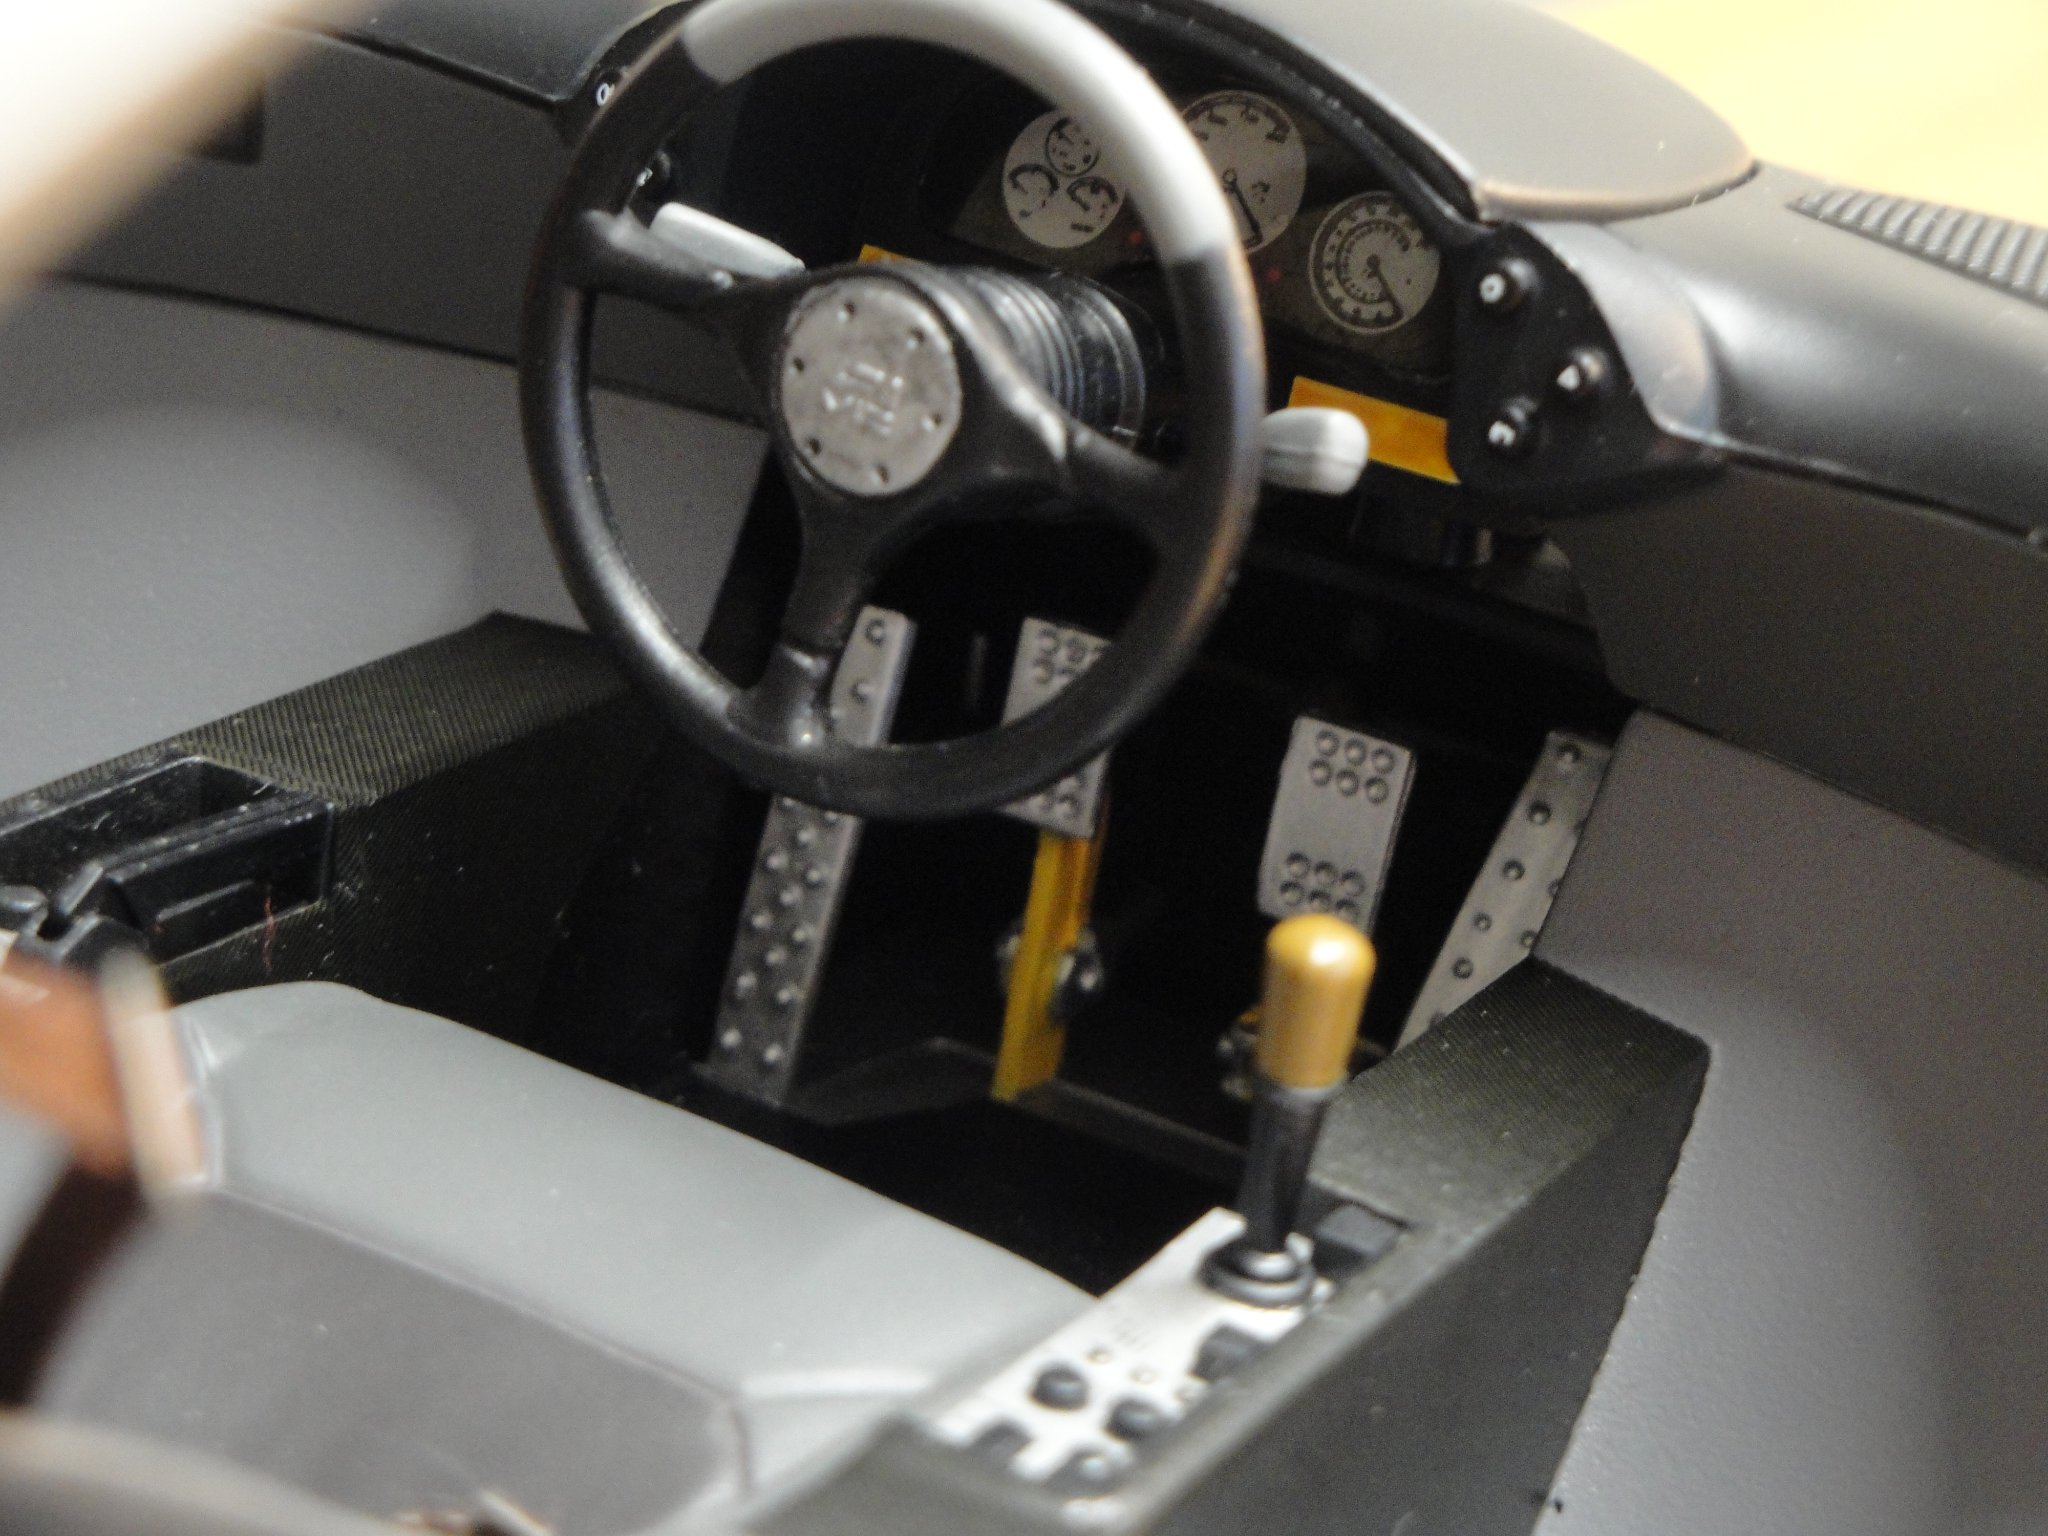
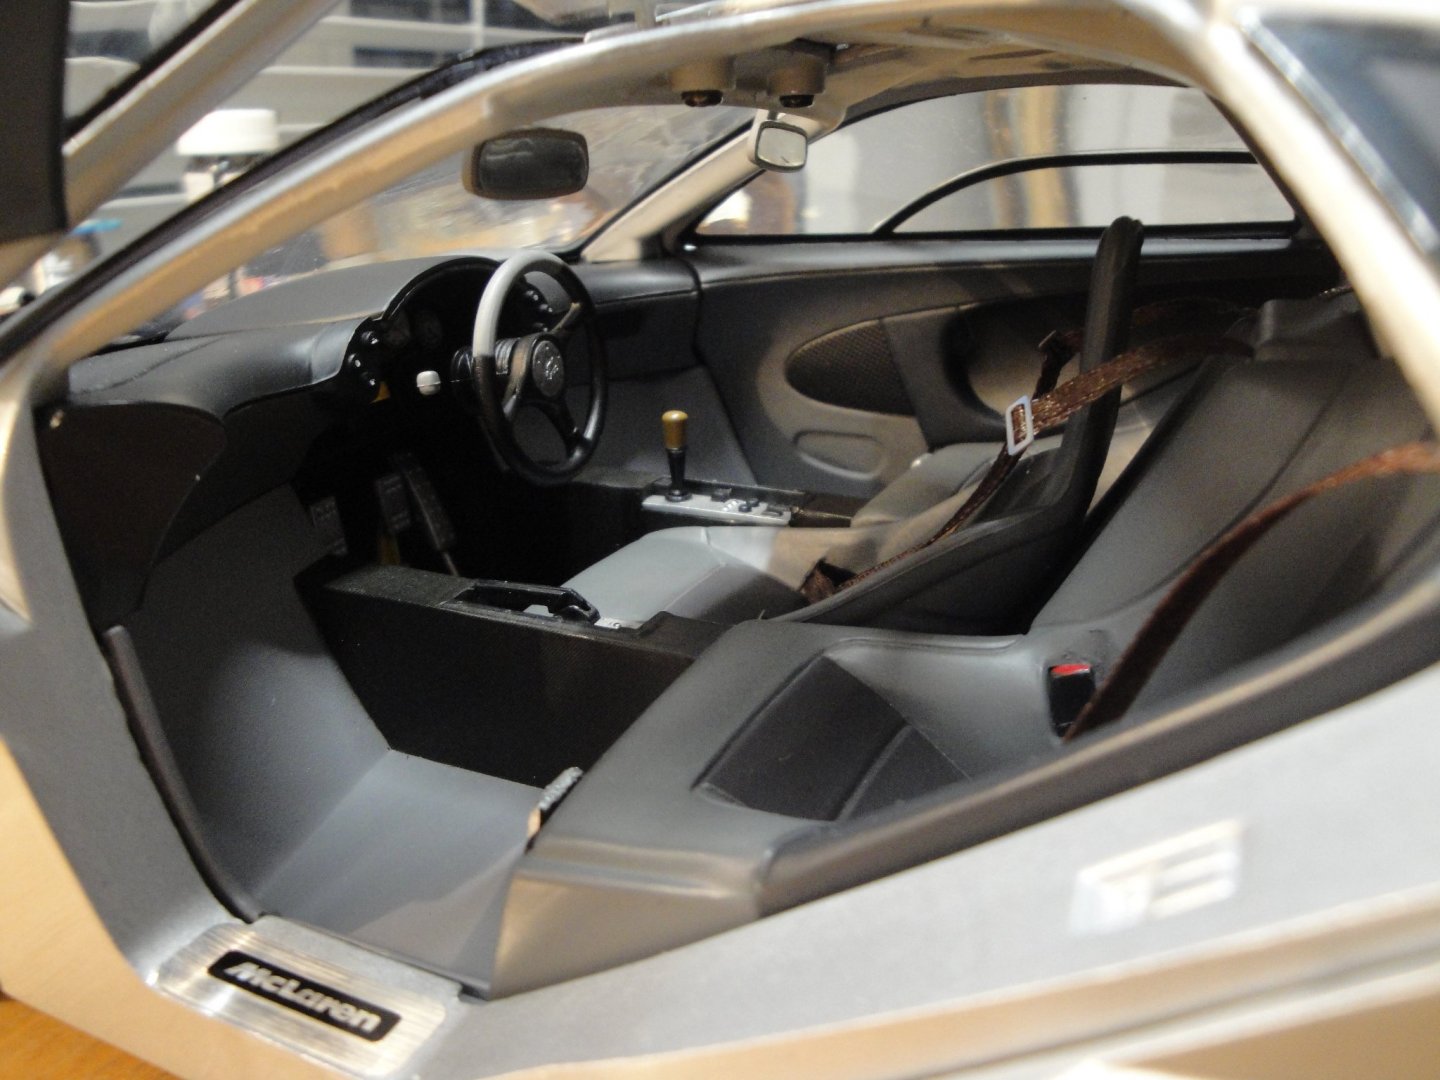
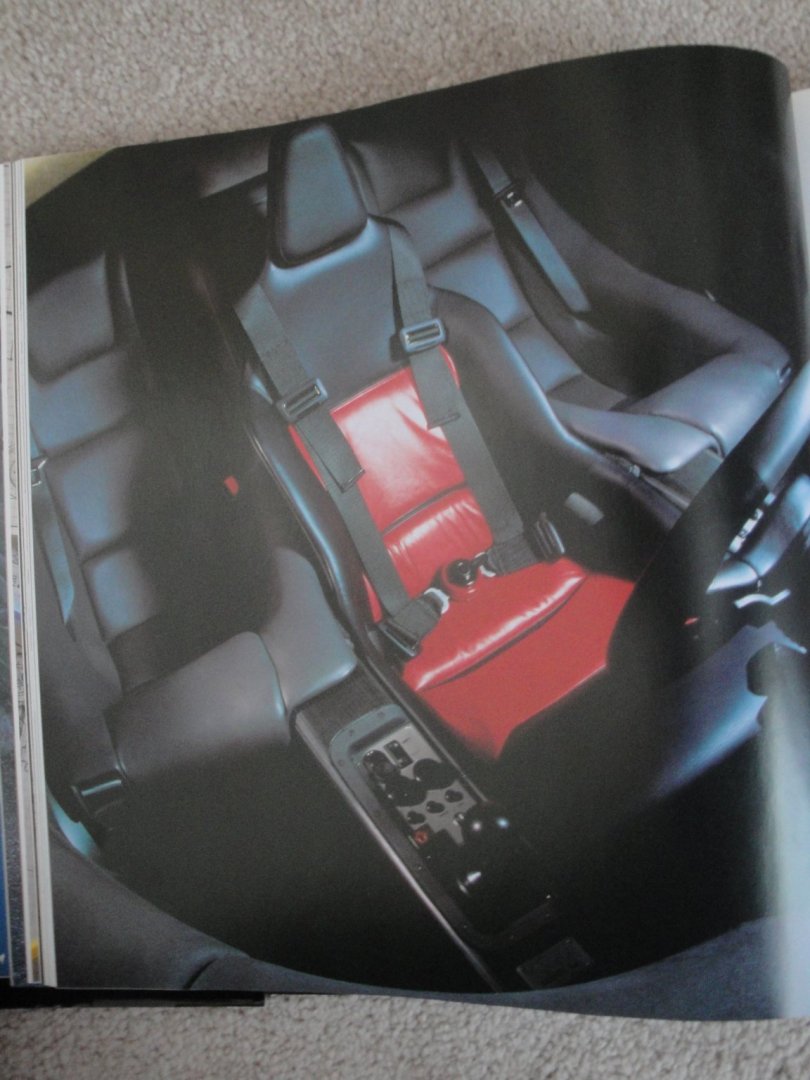
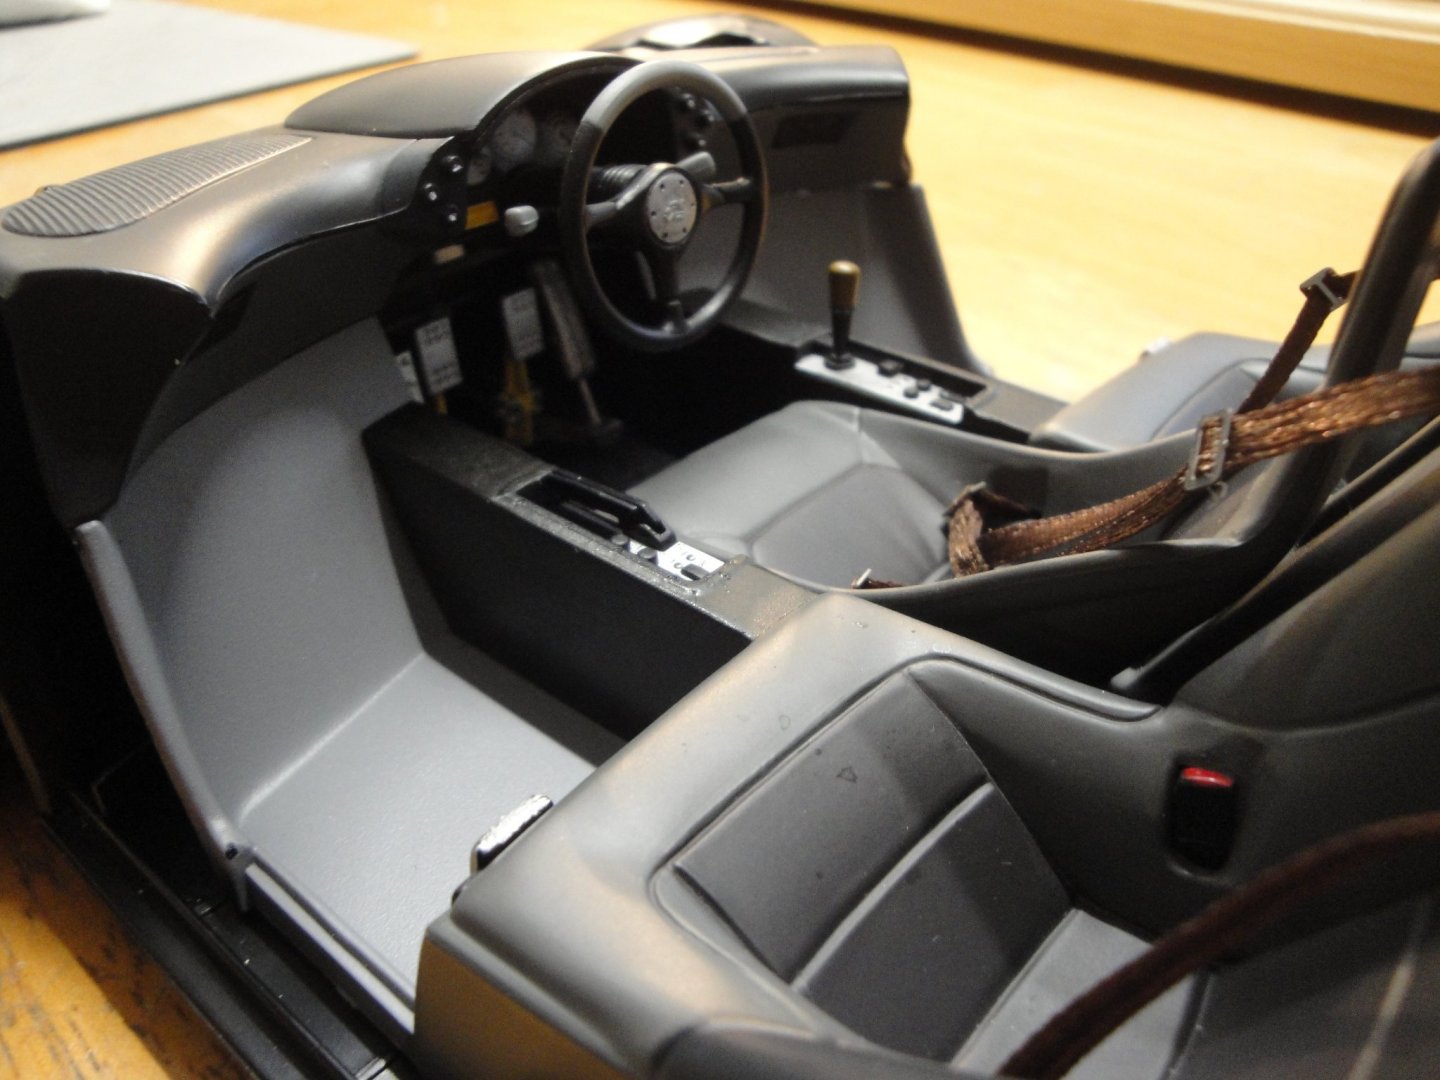
The cockpit - The unique feature of the F1 is its three seats arrangement. To my knowledge, only FIAT with its Multipla model, is the only manufacturer of modern cars, that tried the 3+3 arrangement for seating people. The central position of the driver in the F1 and the incredible and panoramic view, devoid of A pillars, was and still is an incredible asset, when driving this automobile. The model provides a very faithful rendition of the original car: Missing on the model, are the two LCD displays, located on each side of the steering column. These displays have a yellowish backlit, typical of the early 90's displays. I added them with two small pieces of evergreen, painted with Tamiya clear yellow. Yves

- 30 replies
-
- 11
-
-
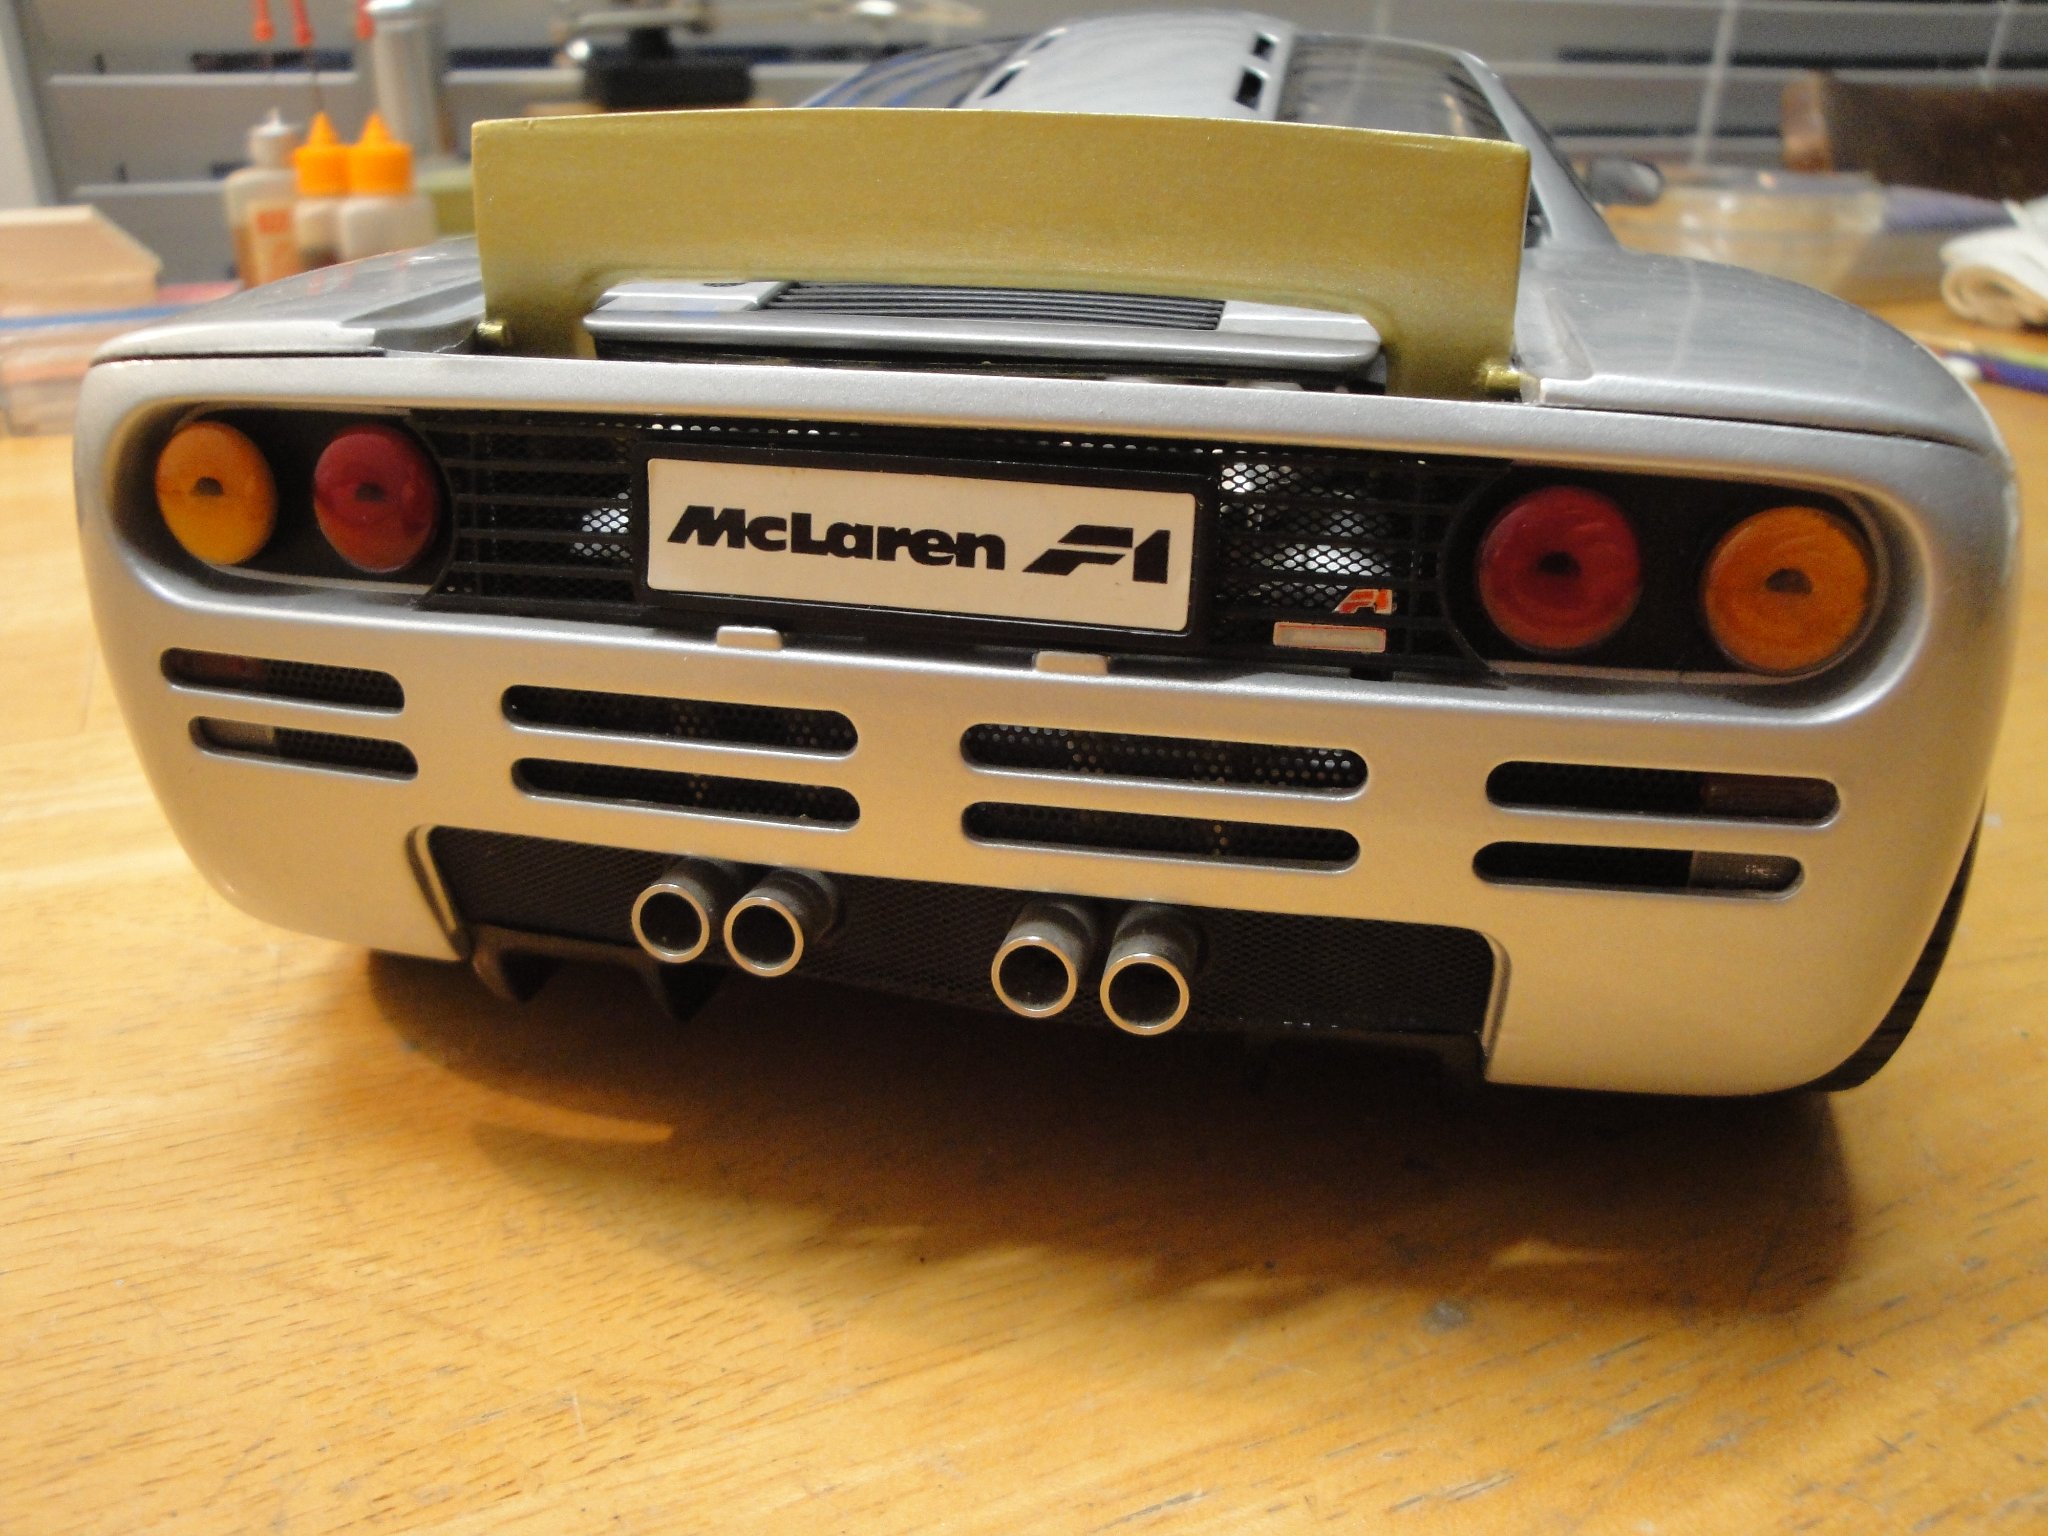
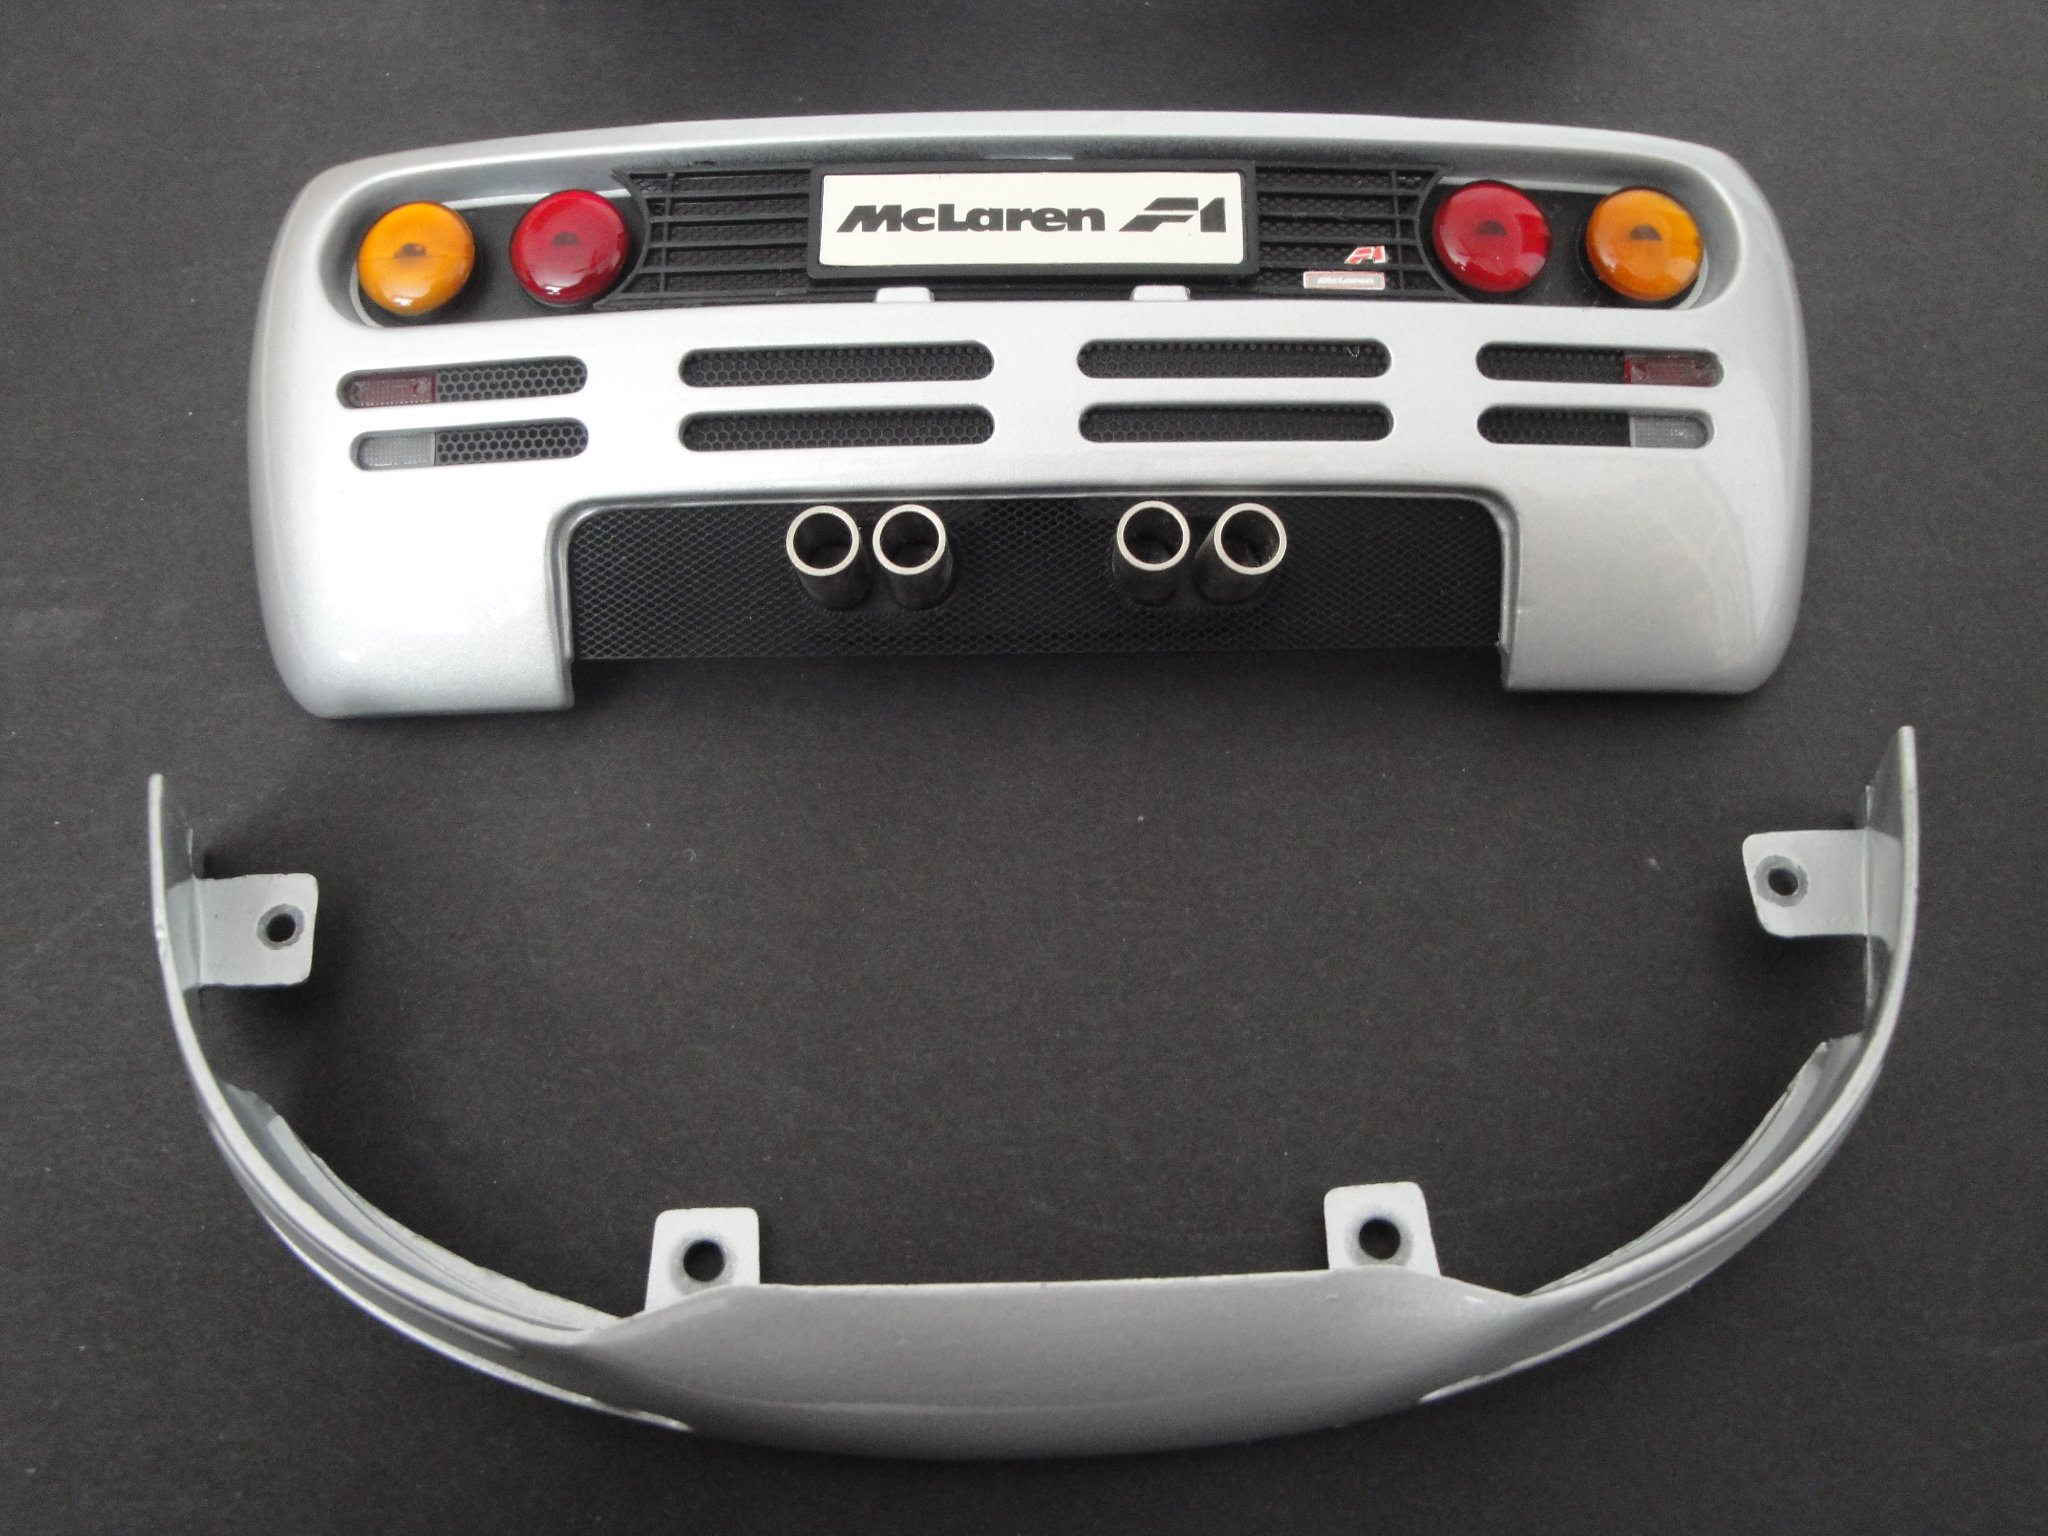
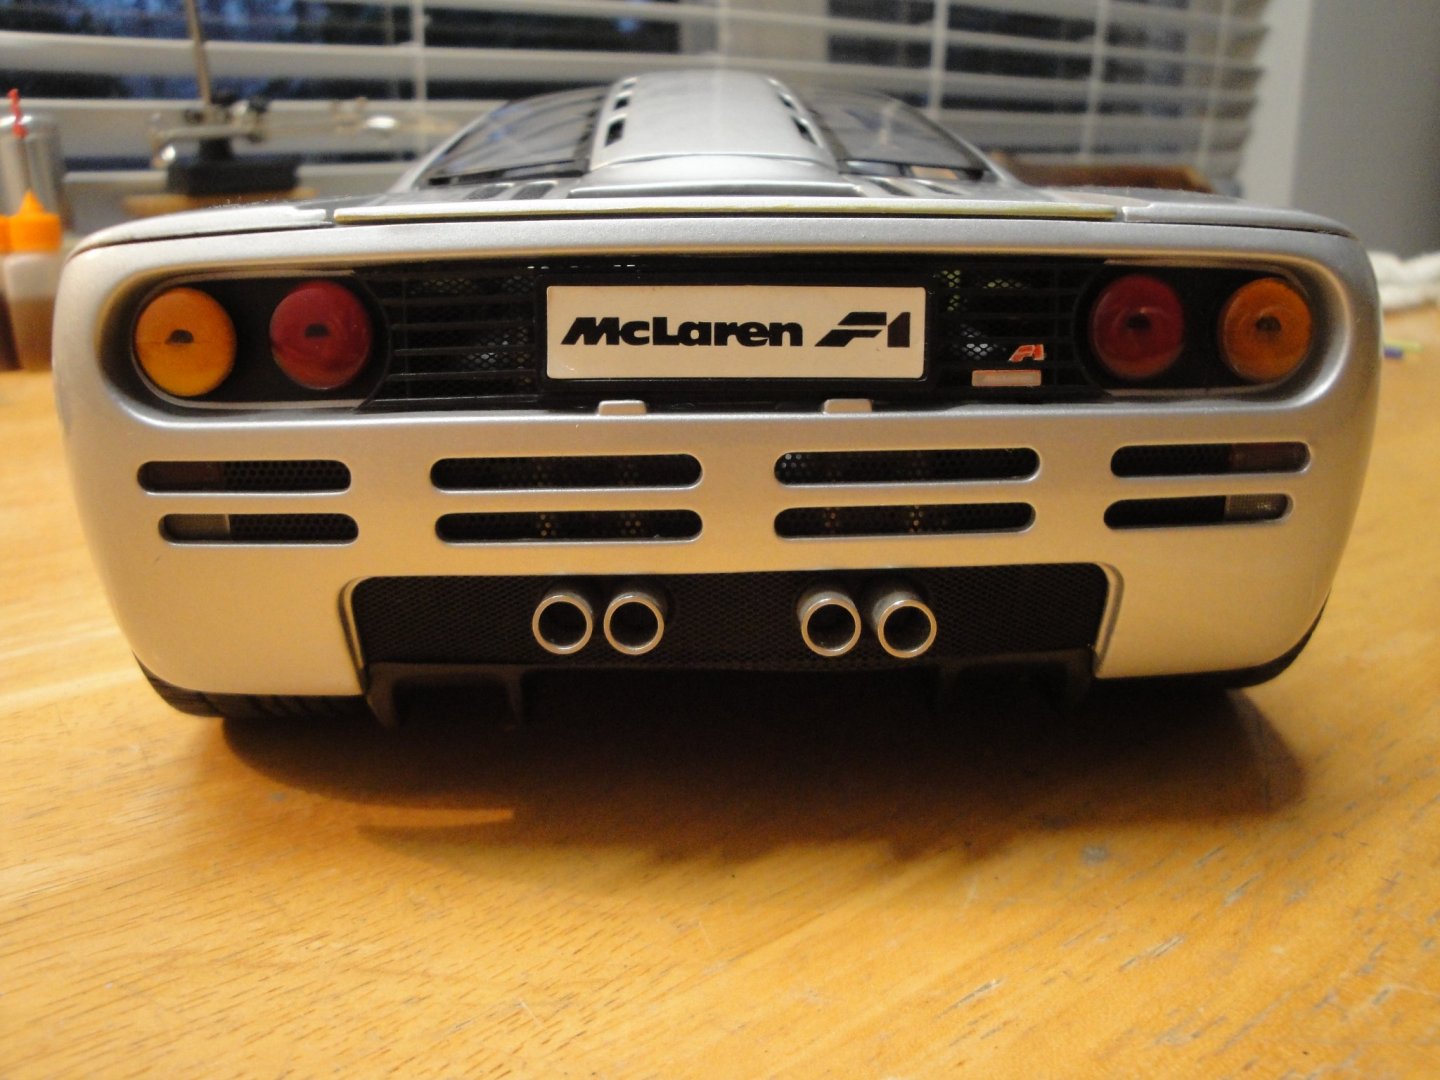
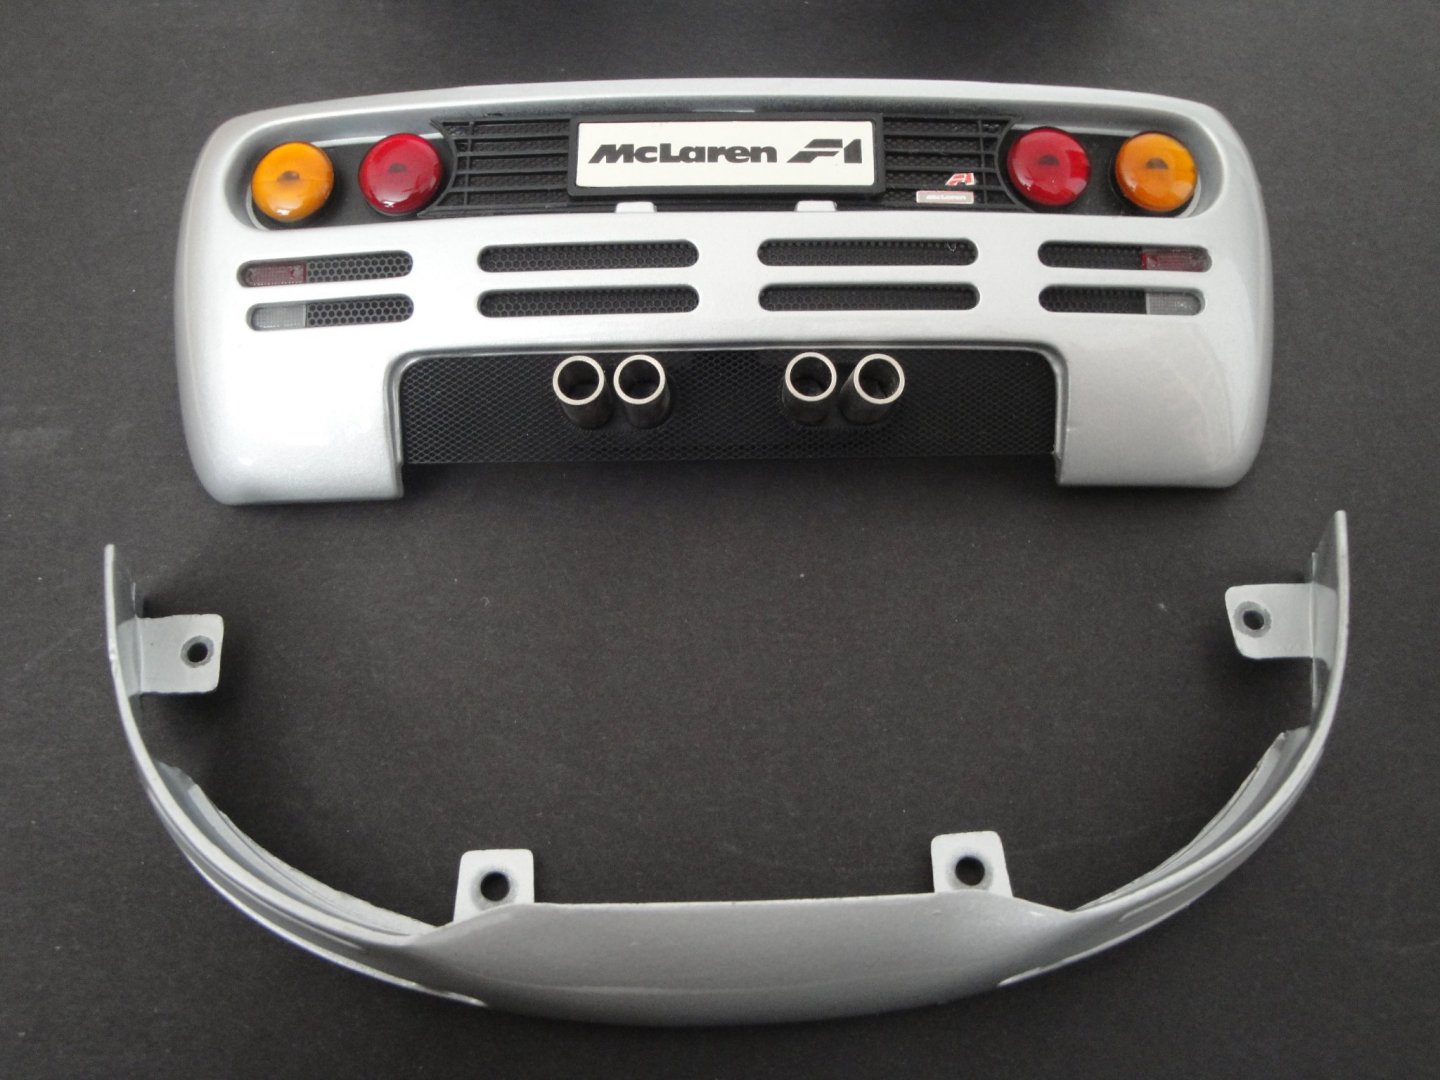
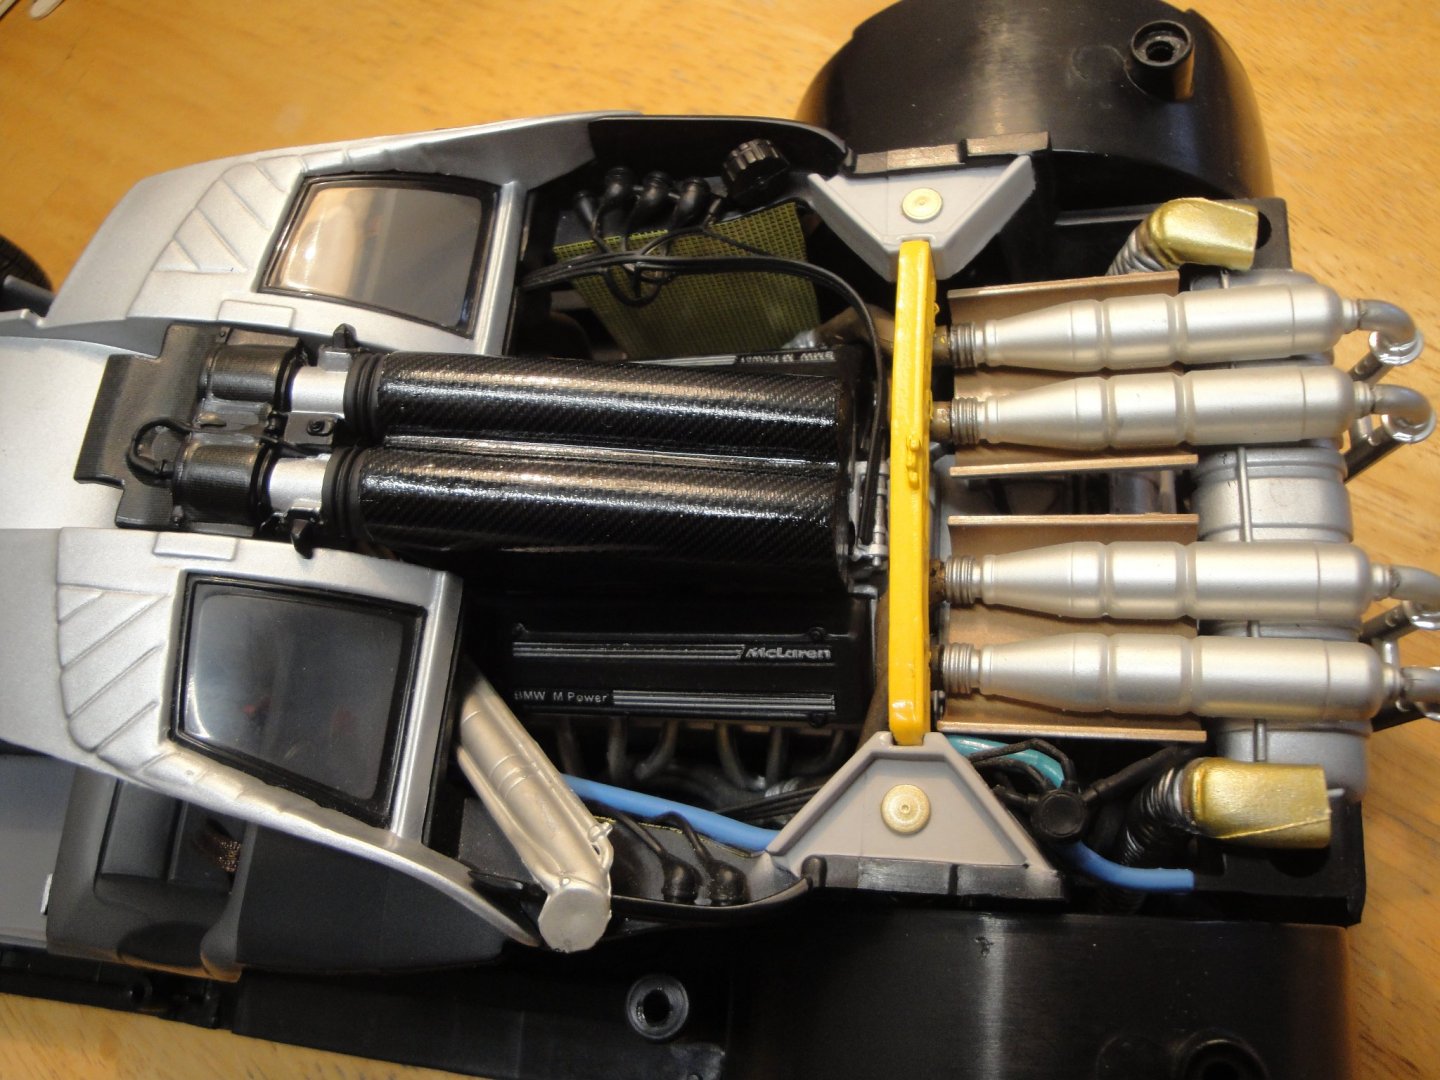
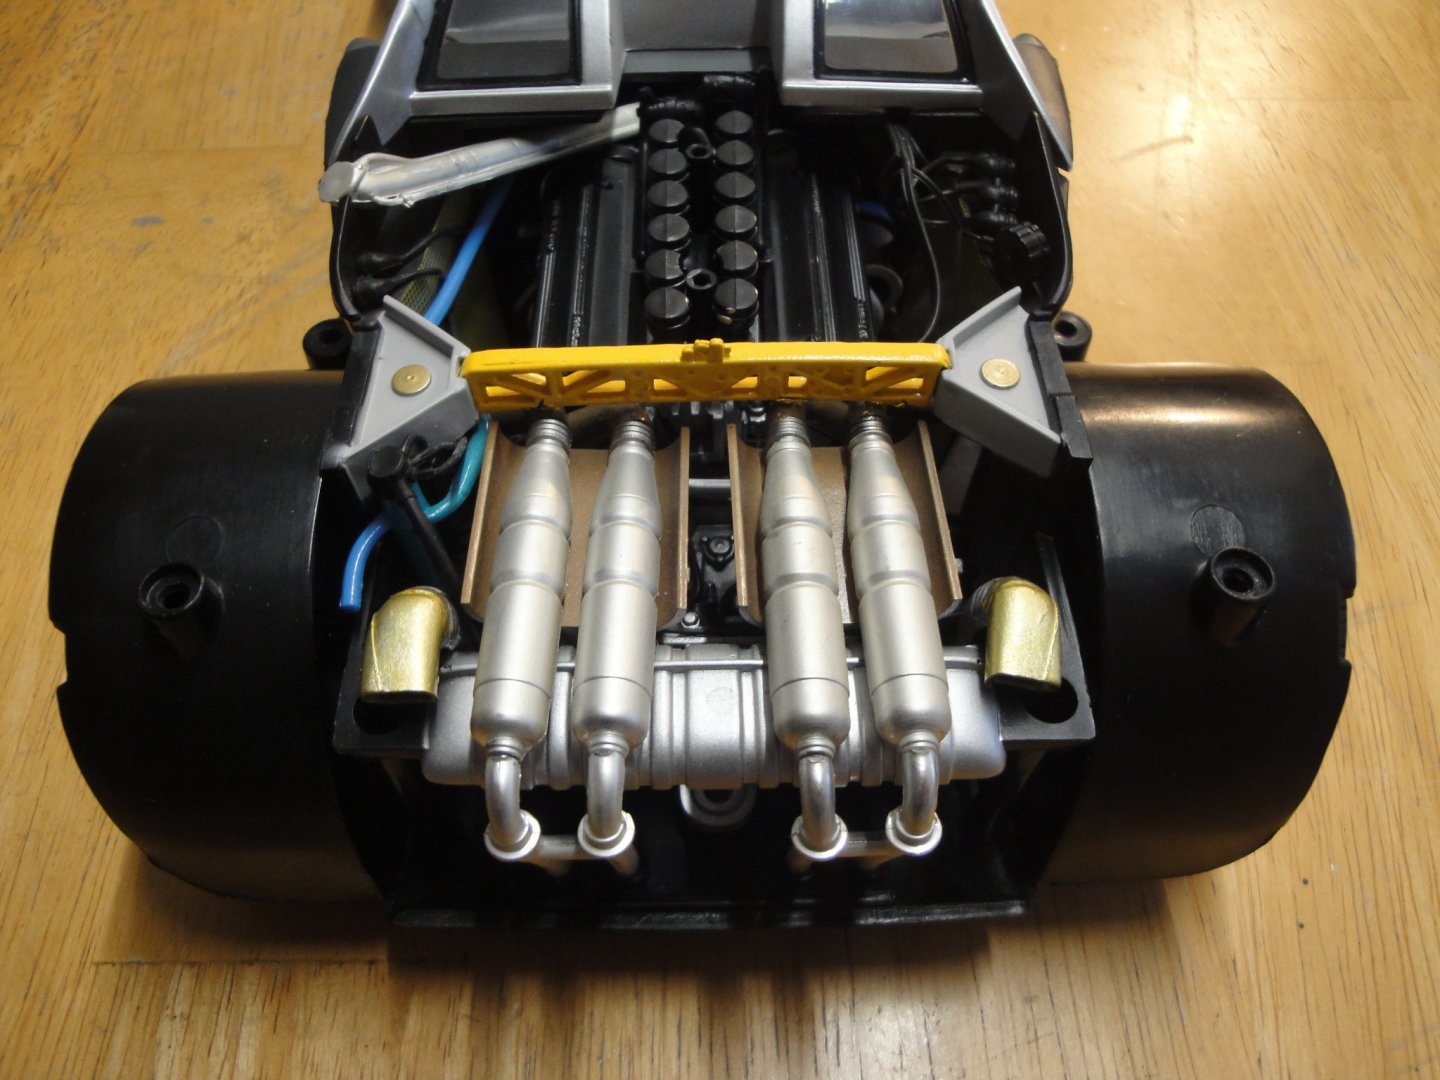
The original air intakes are not decorated as carbon fiber. Actually, there is a very subtle scrubbing of the plastic, but it does not render the appearance of Carbon fiber. It took a little while, but I finally received some Carbon Fiber decals from Tamiya. I have to say that Tamiya products are expensive, but the quality is amazing. These decals with some Solvaset are hugging the original plastic parts, like there is no tomorrow. Some clear coating on top, and the appearance of the polished carbon fiber parts is revealed in full. Now, one can admire the beautiful color patches of carbon fiber, gold foils, stainless steel and rubber parts. Trivia question: McLaren did not have a crumpling zone for the rear of the car and were having problems with the Transportation Safety office. They decided to modify and enlarge the enormous muffler, which then became the crumpling safety device. When rear-ending a McLaren, you'd better have a really good insurance with a one million dollar full umbrella attached to it. Yves


- 30 replies
-
- 10
-