HOLIDAY DONATION DRIVE - SUPPORT MSW - DO YOUR PART TO KEEP THIS GREAT FORUM GOING! (83 donations so far out of 49,000 members - C'mon guys!)
×


yvesvidal
-
Posts
3,607 -
Joined
-
Last visited
Content Type
Profiles
Forums
Gallery
Events
Everything posted by yvesvidal
-
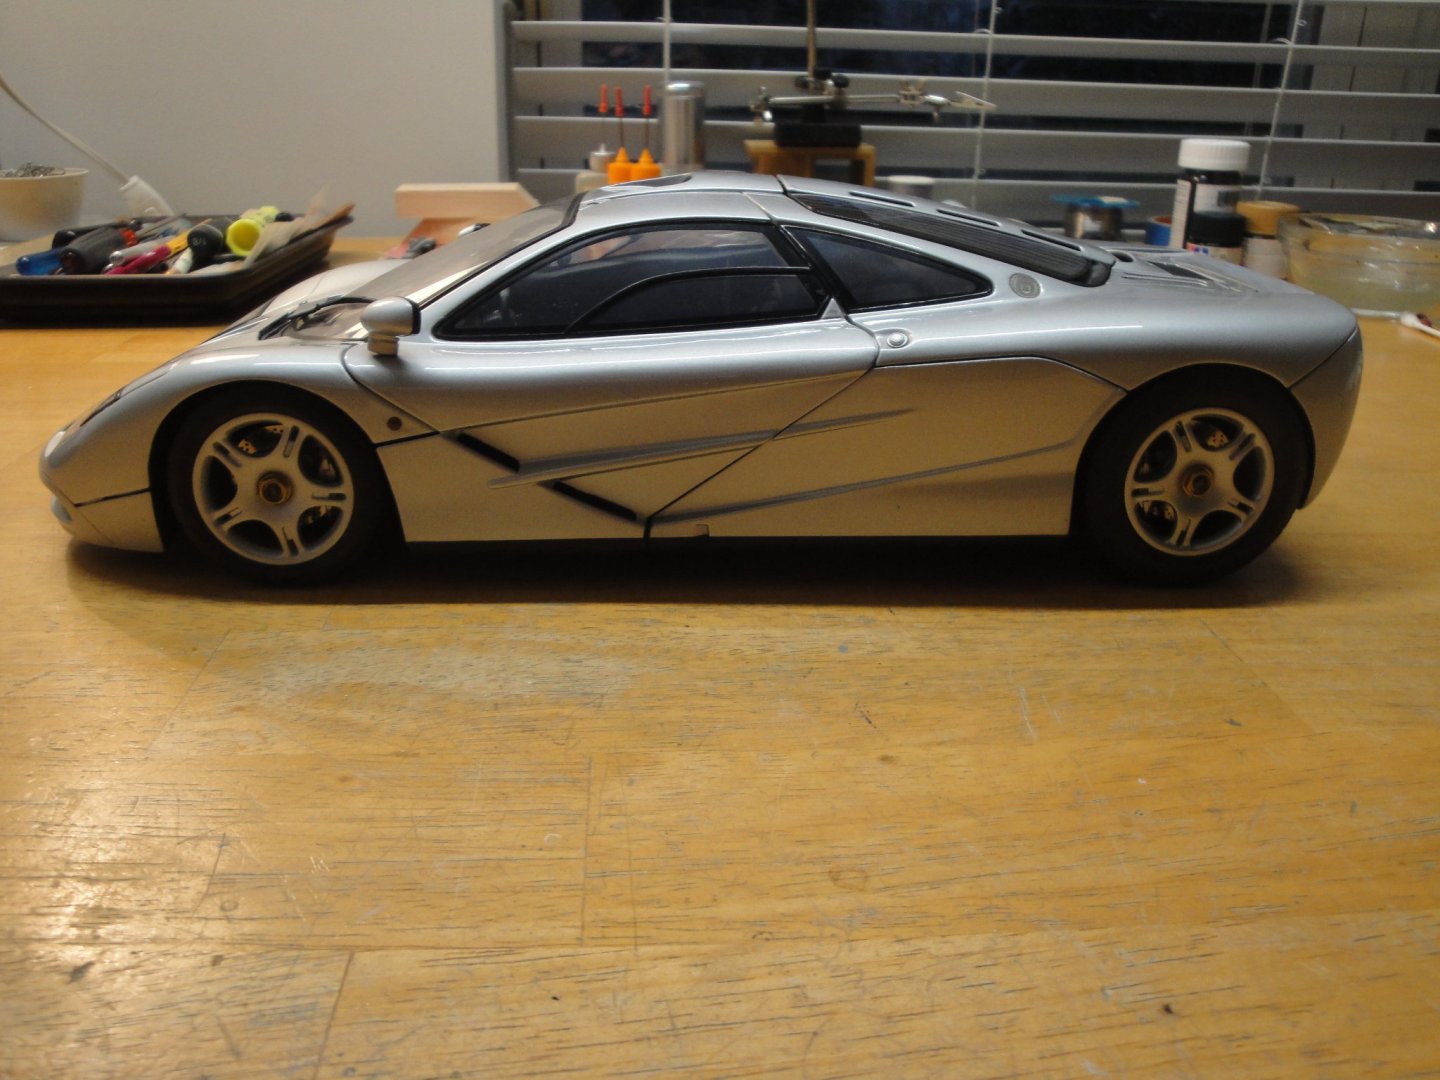
 Final trivia question for the McLaren F1: What is the least expensive part on this car? The side mirrors ! They are sourced from the 1990's Volkswagen Corrado. Yves
 -
The final presentation of the model on that "piece" of sea, is stunning. The model becomes so realistic at that point, and your attention to details and the crew needs to be commanded. Yves
- 211 replies
-
- 5
-

-
- prince of wales
- tamiya
- (and 2 more)
-
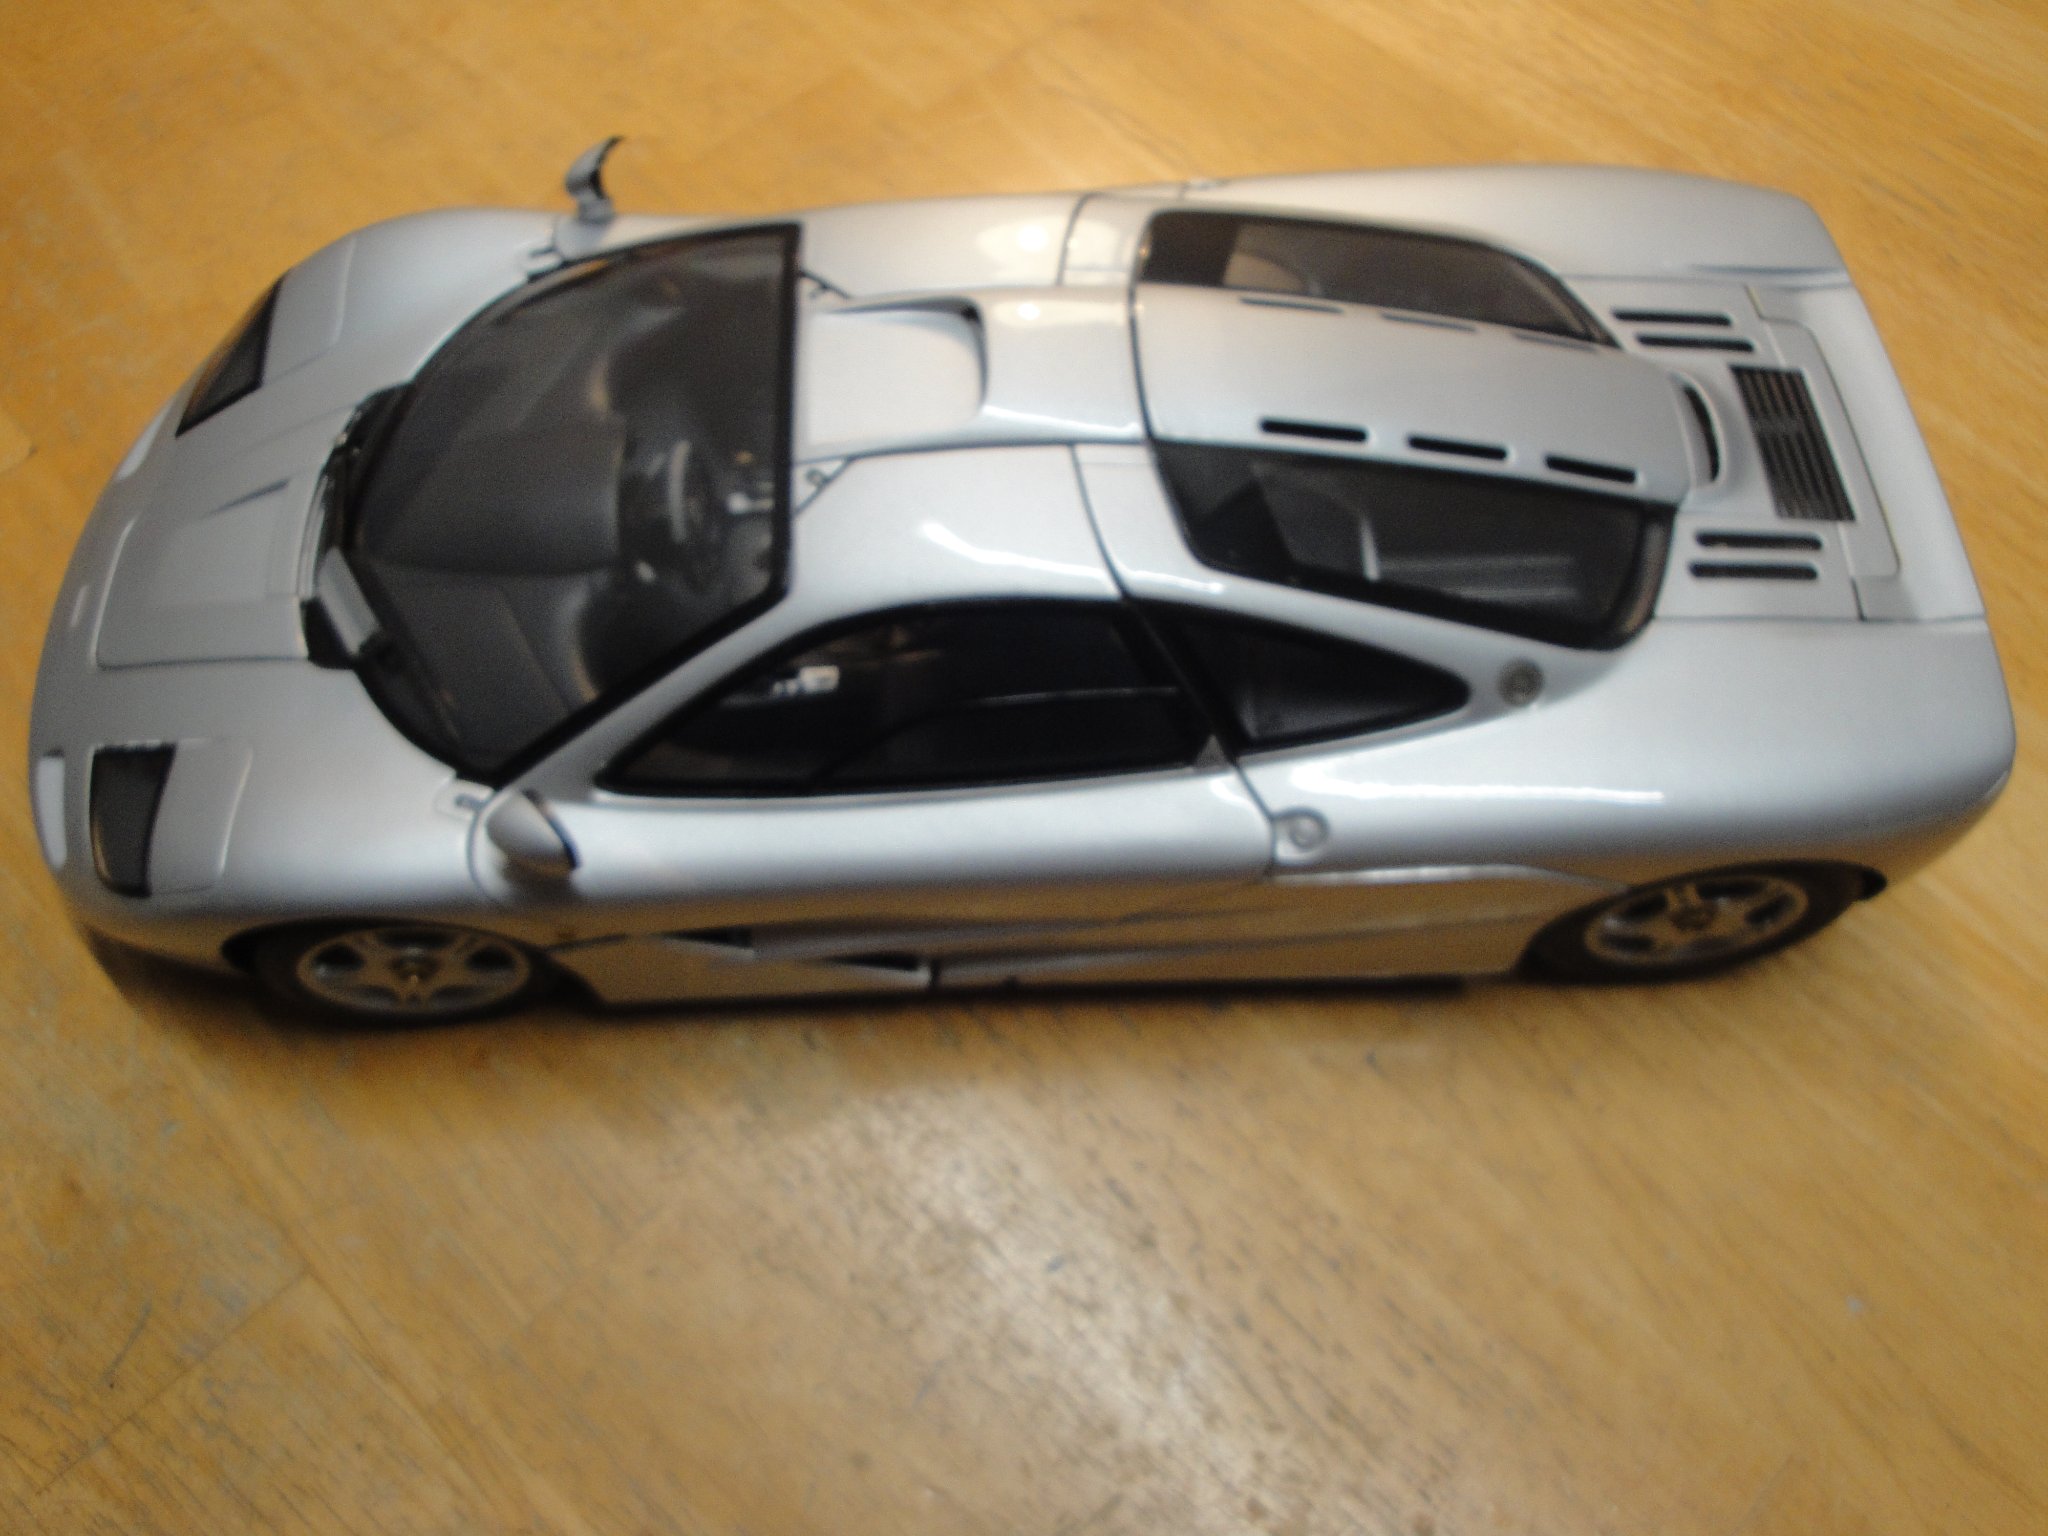
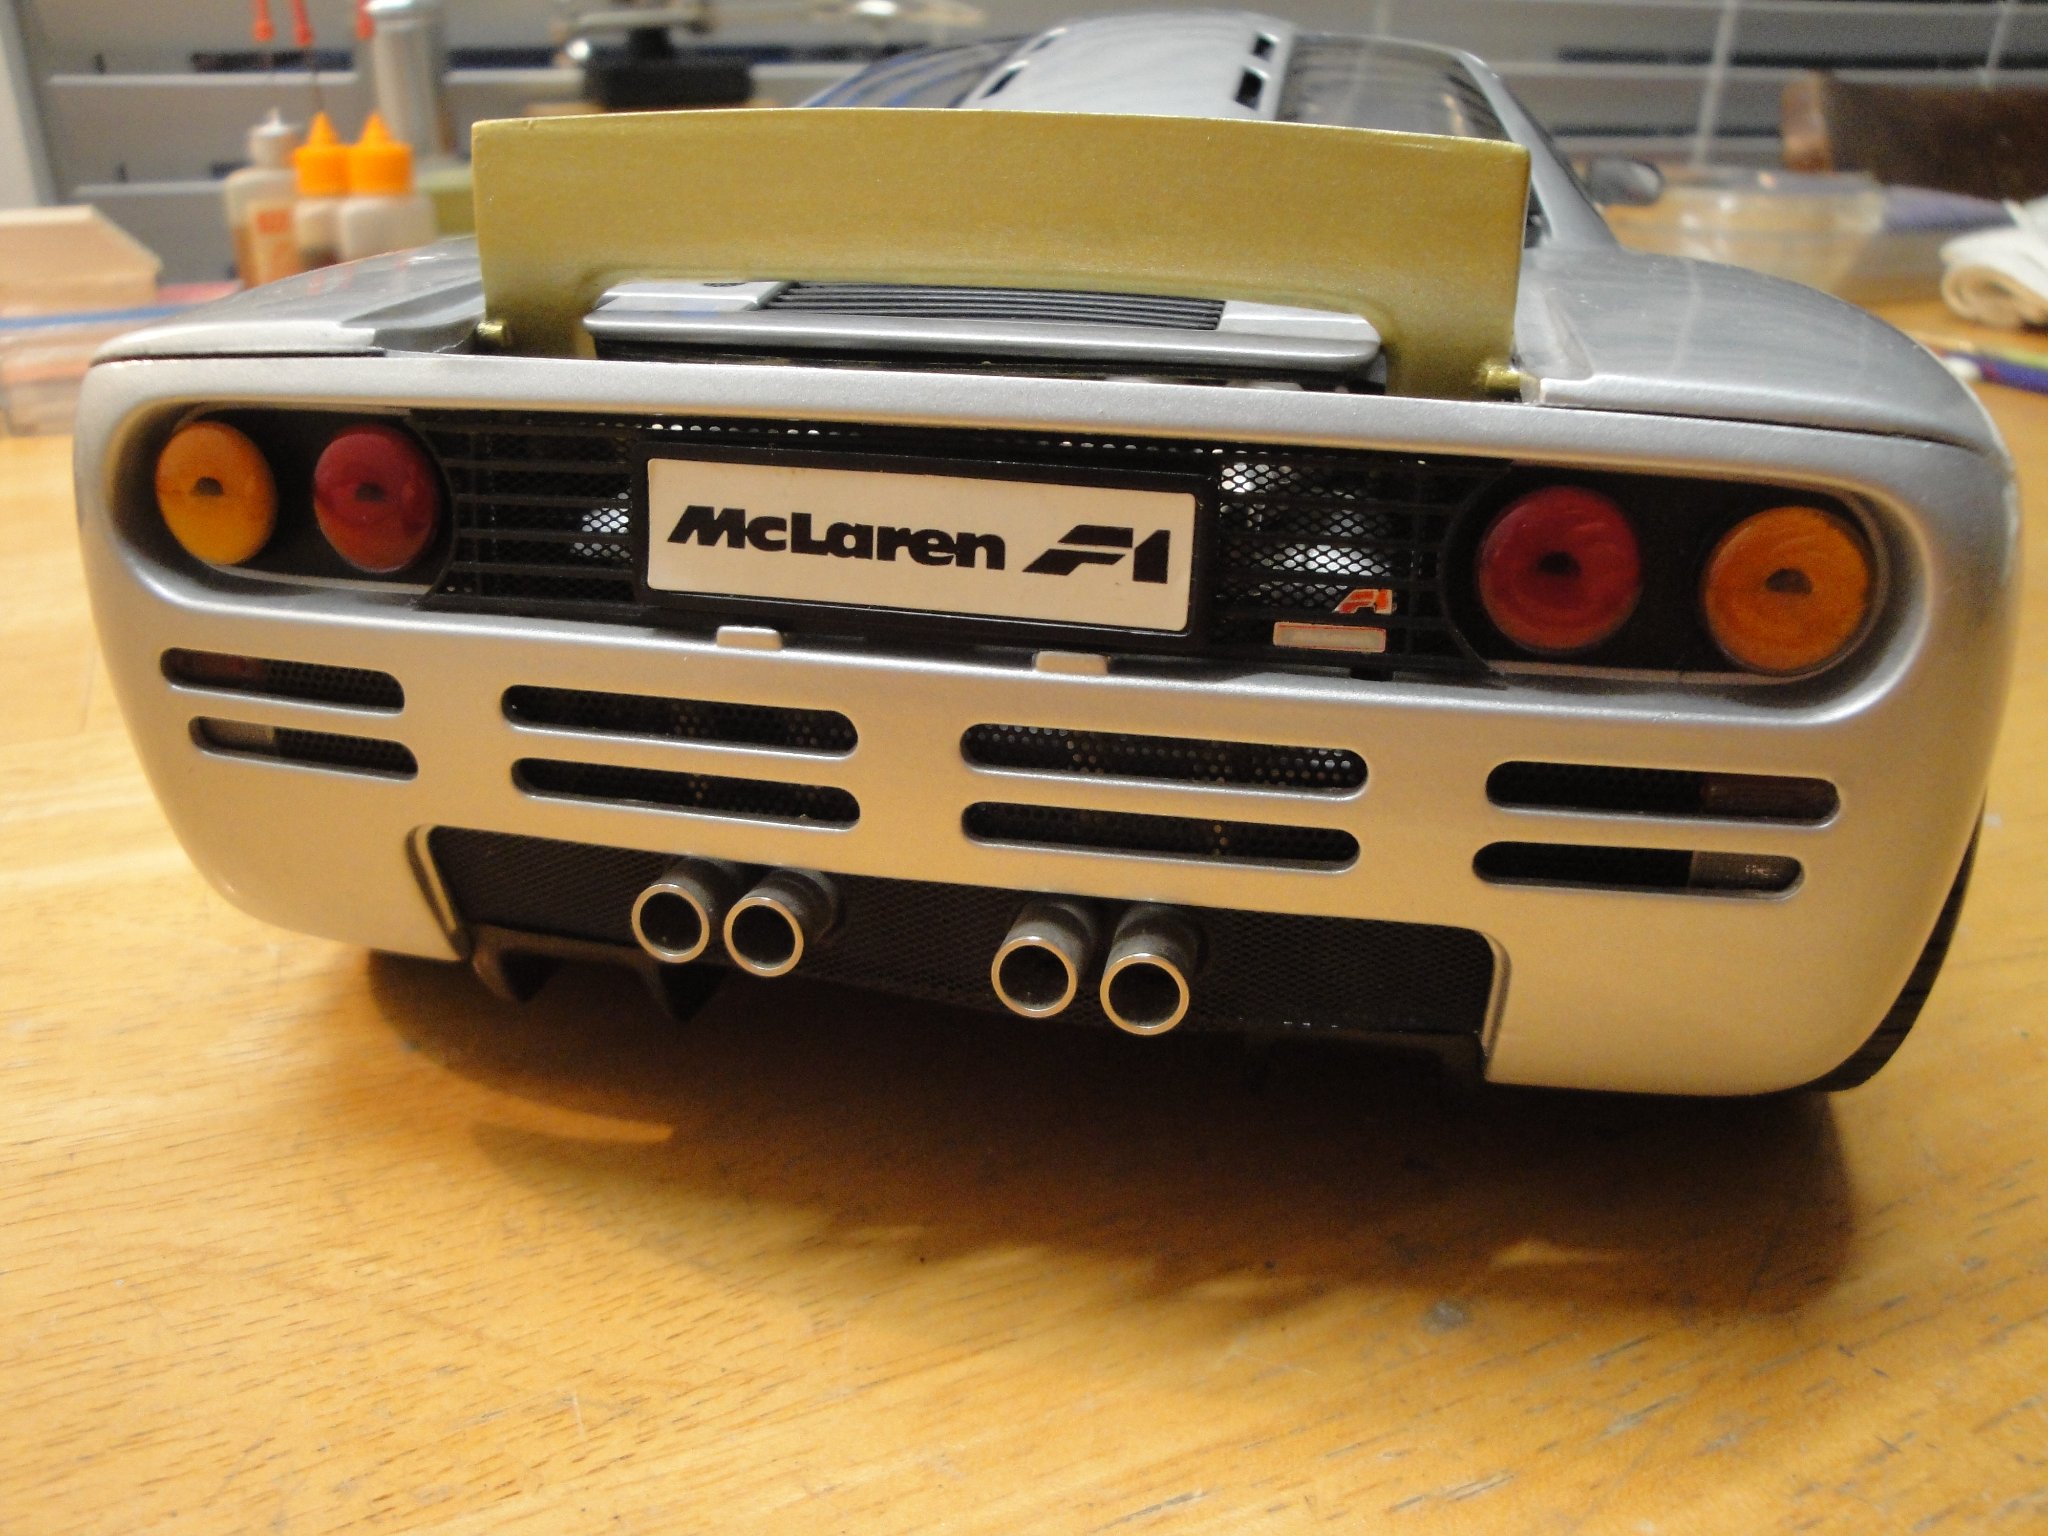
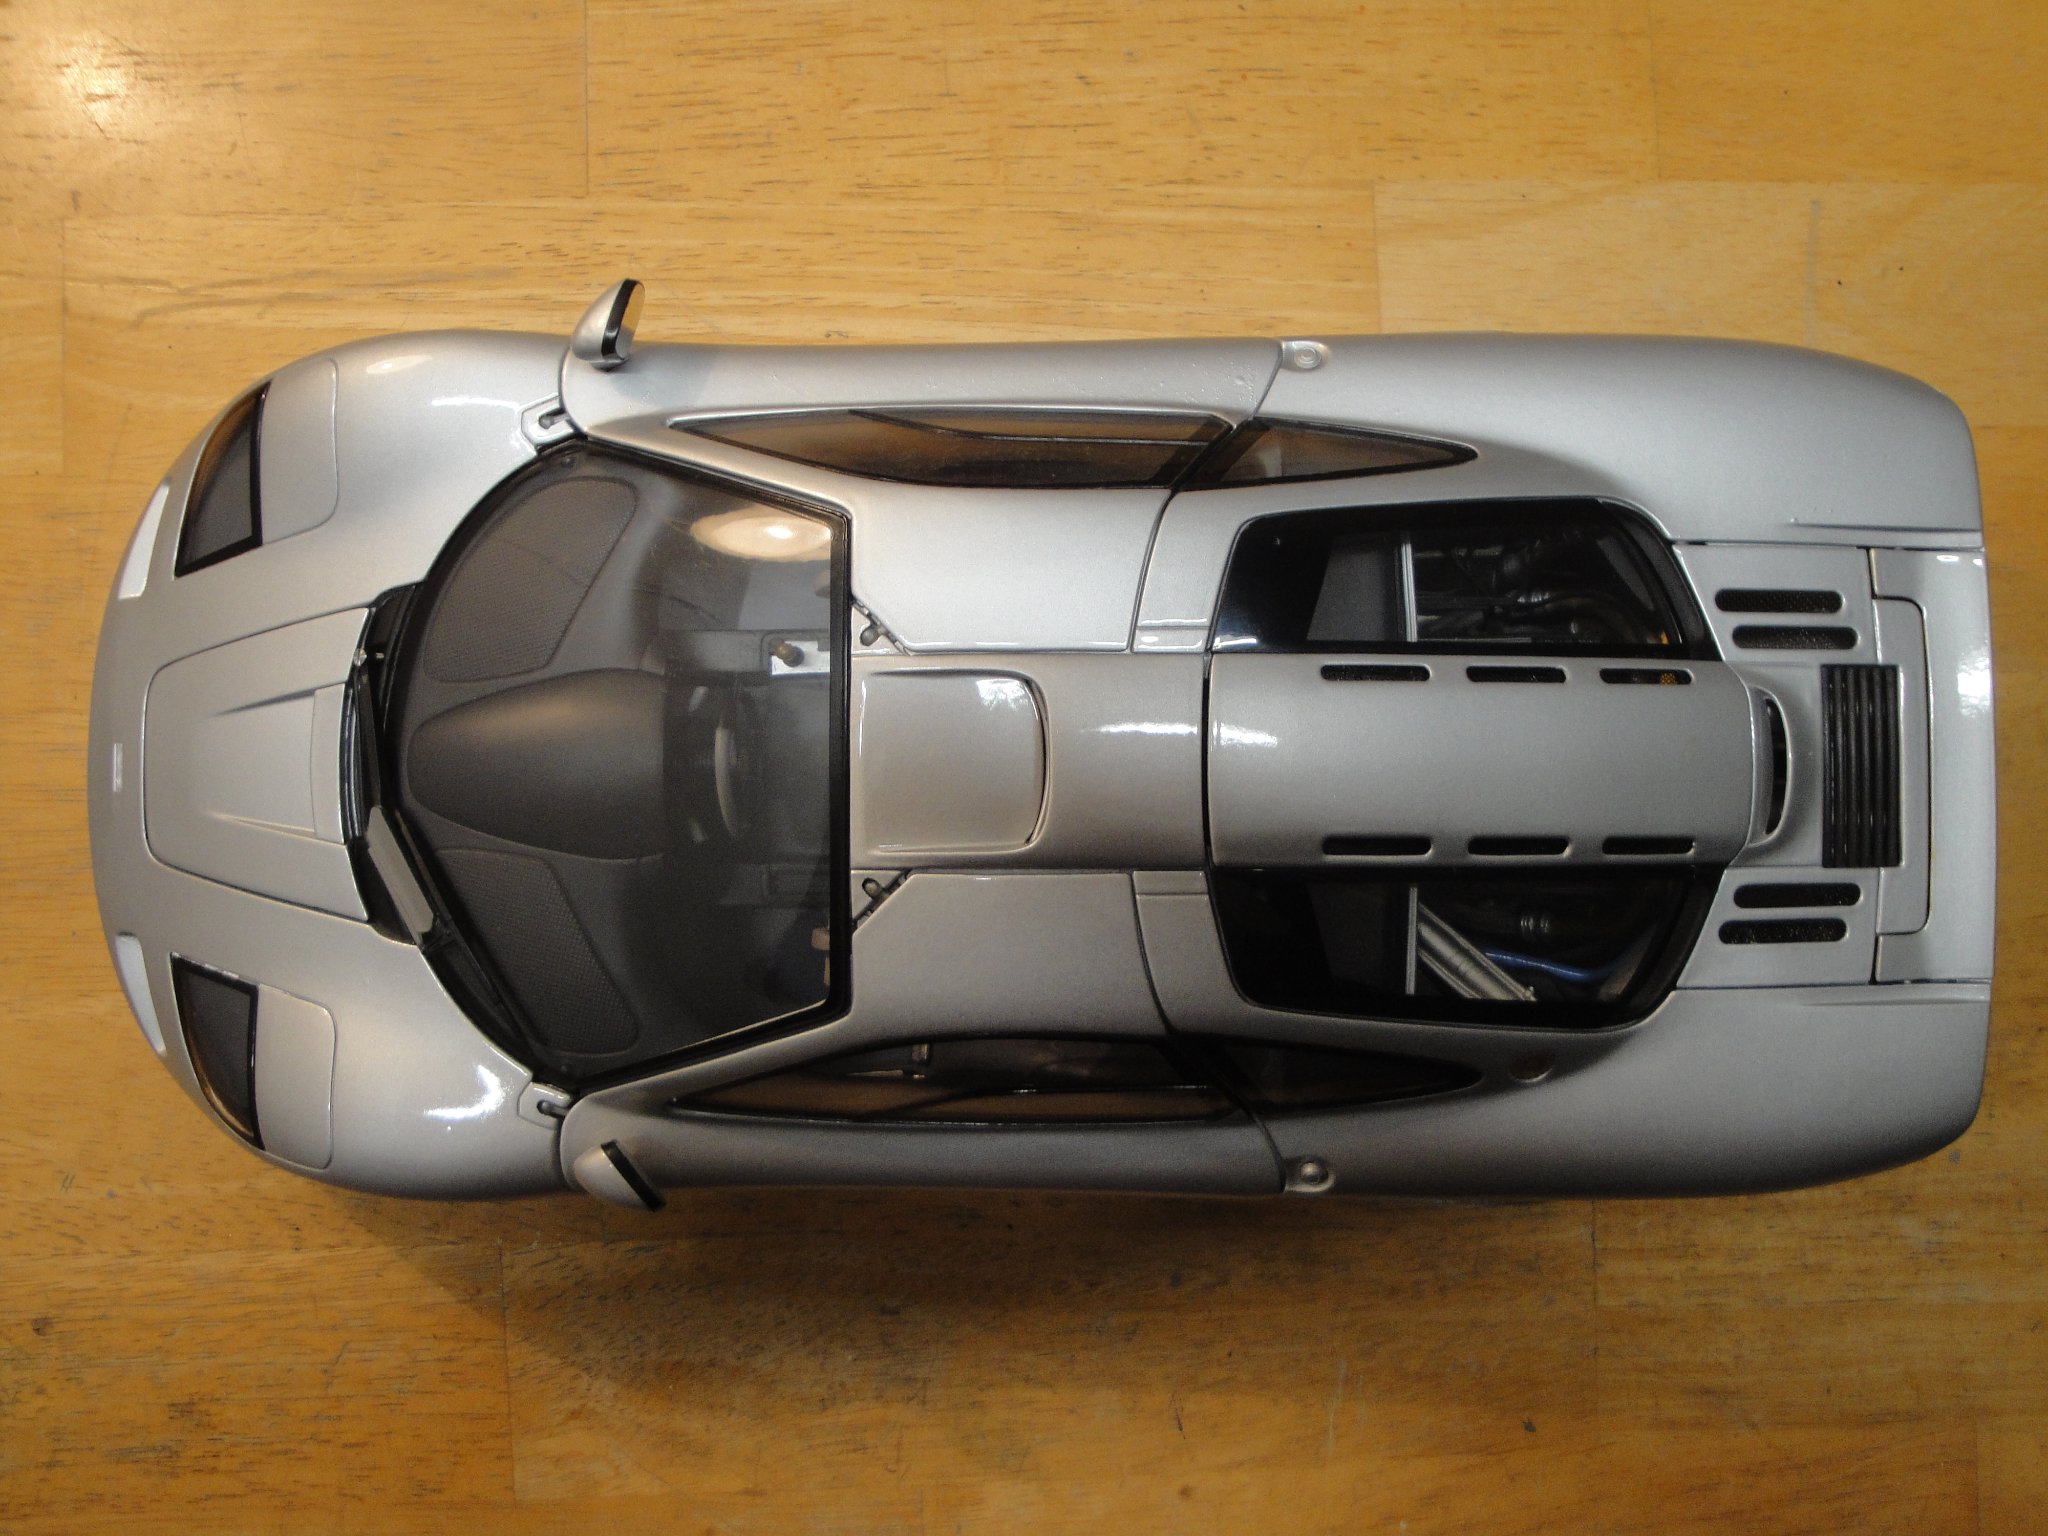
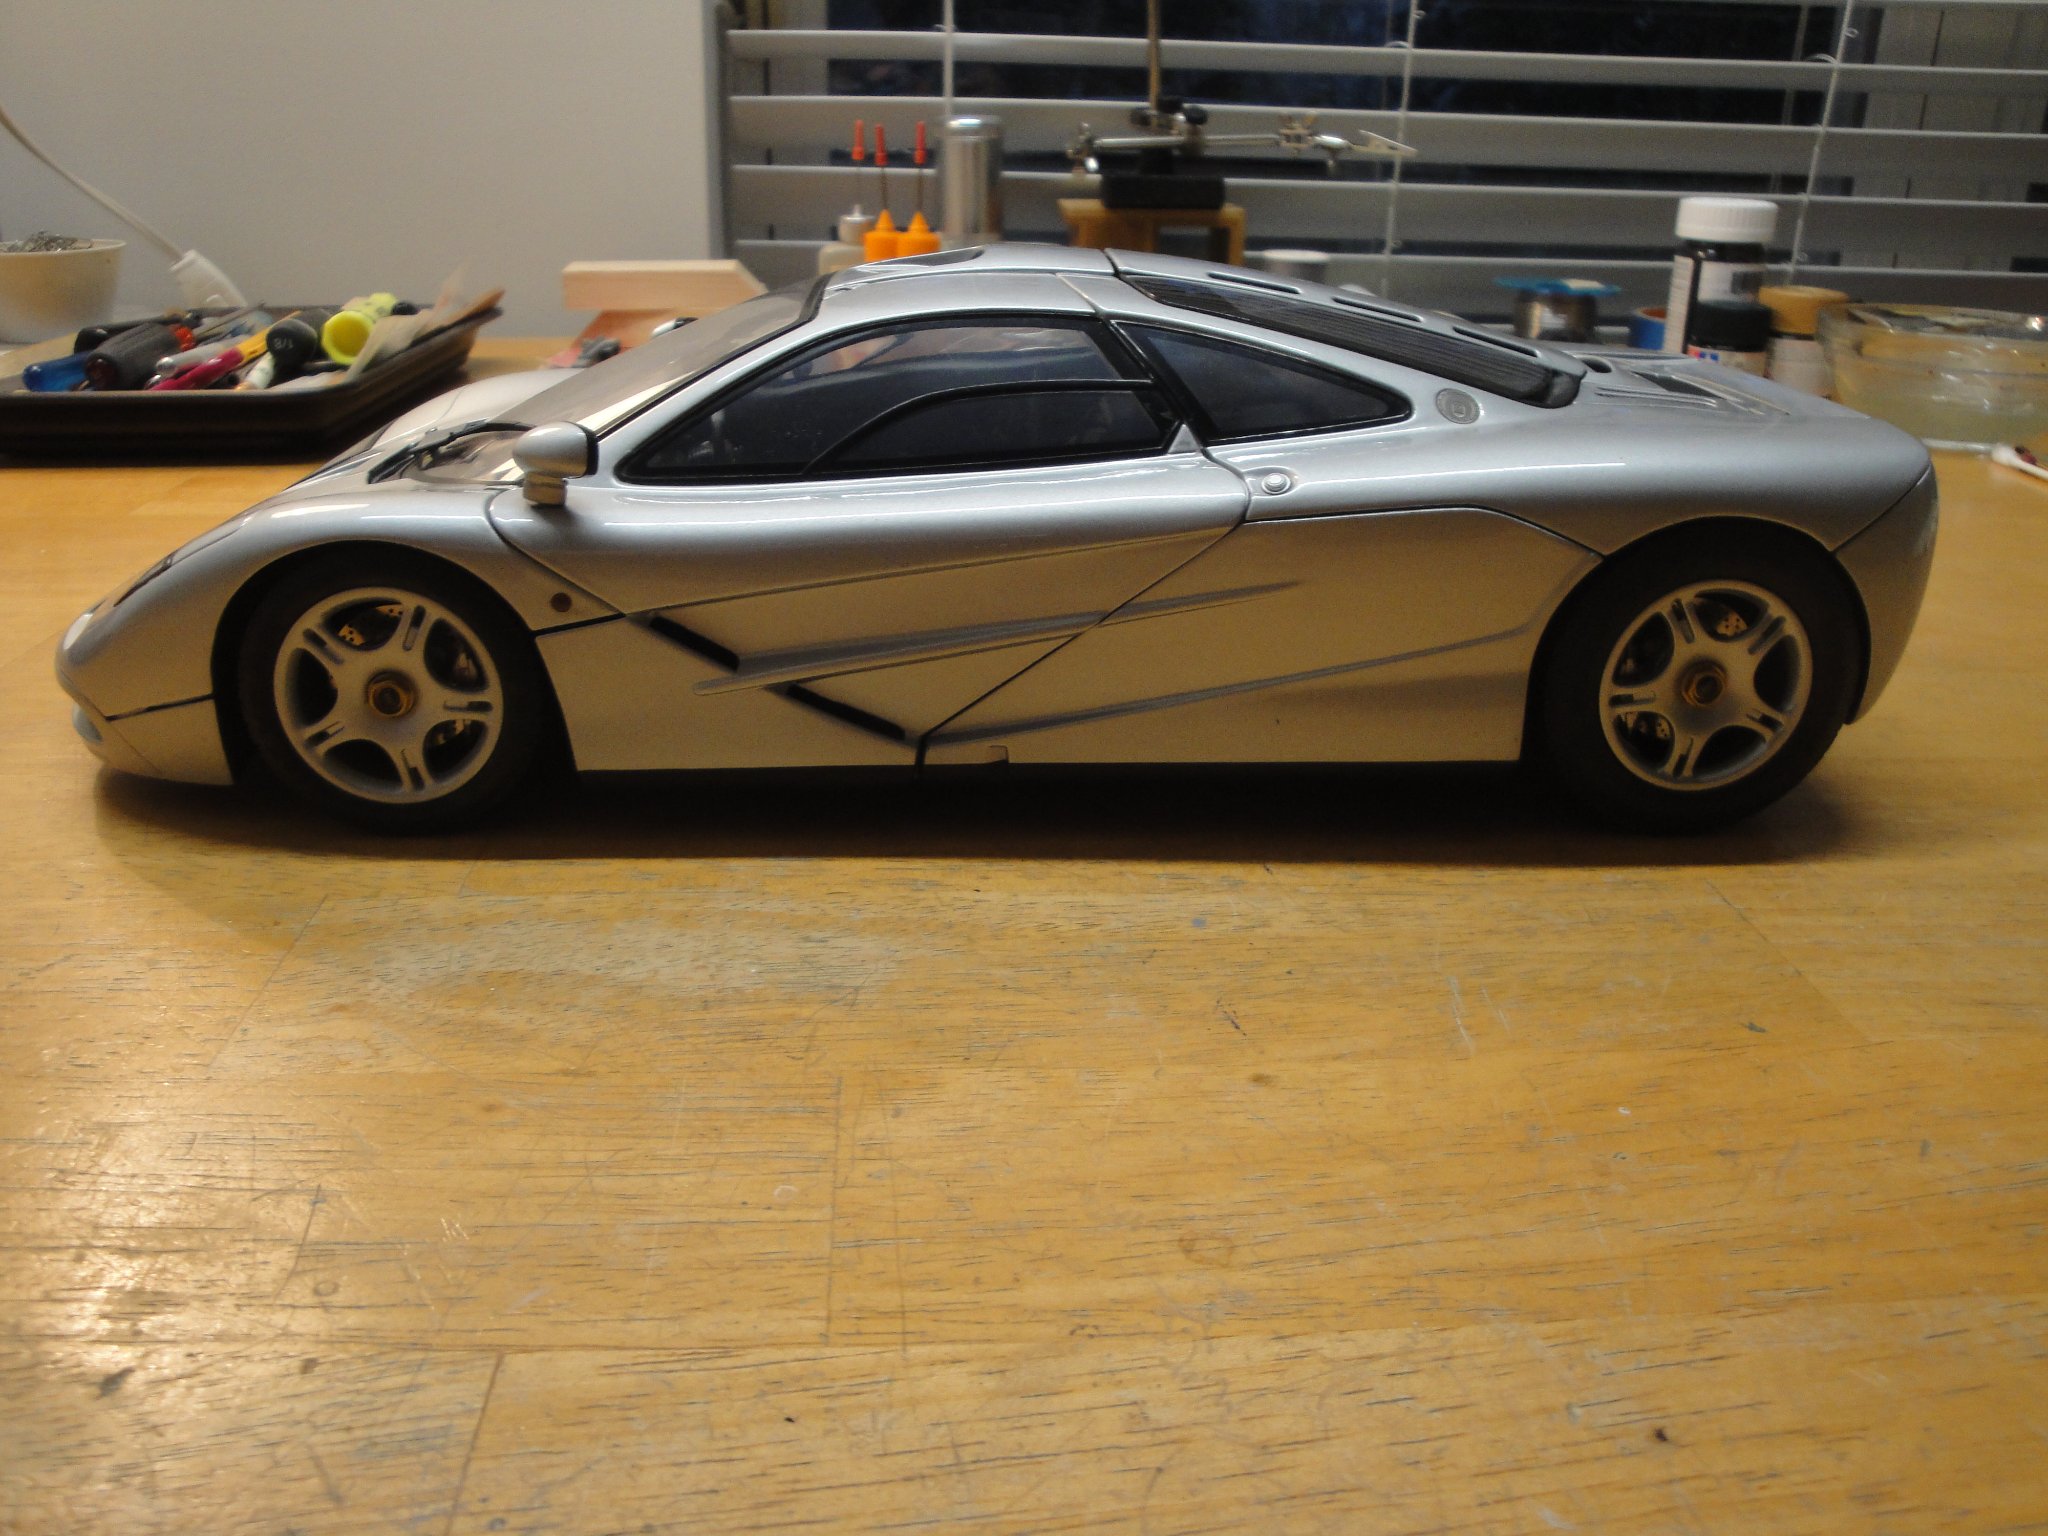
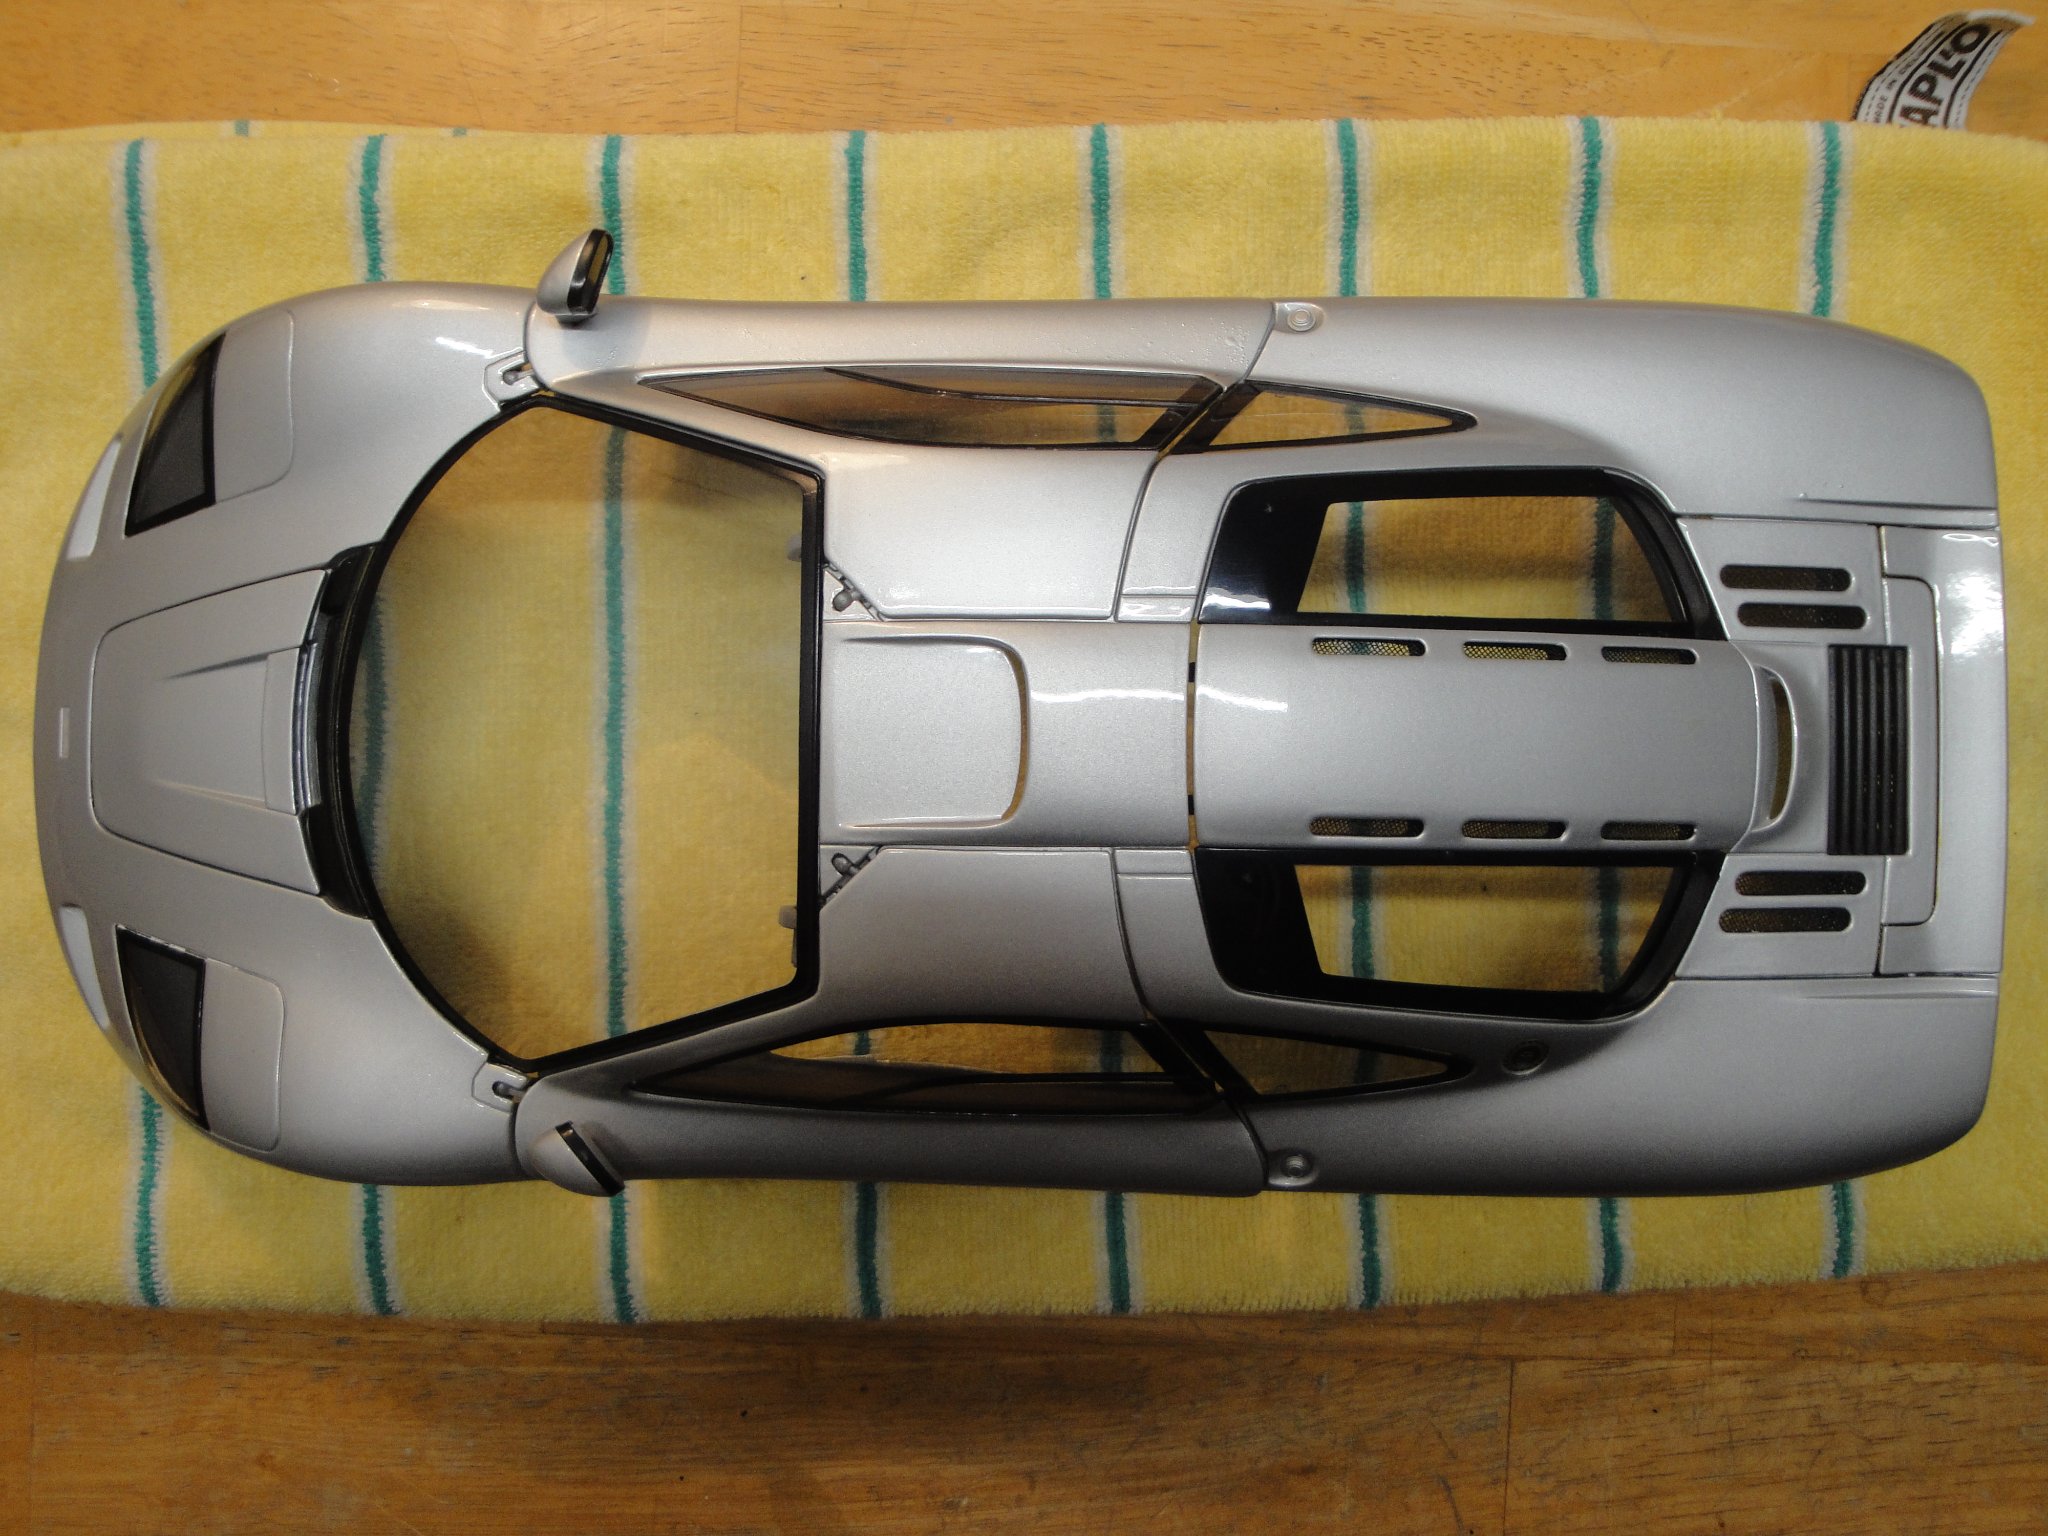
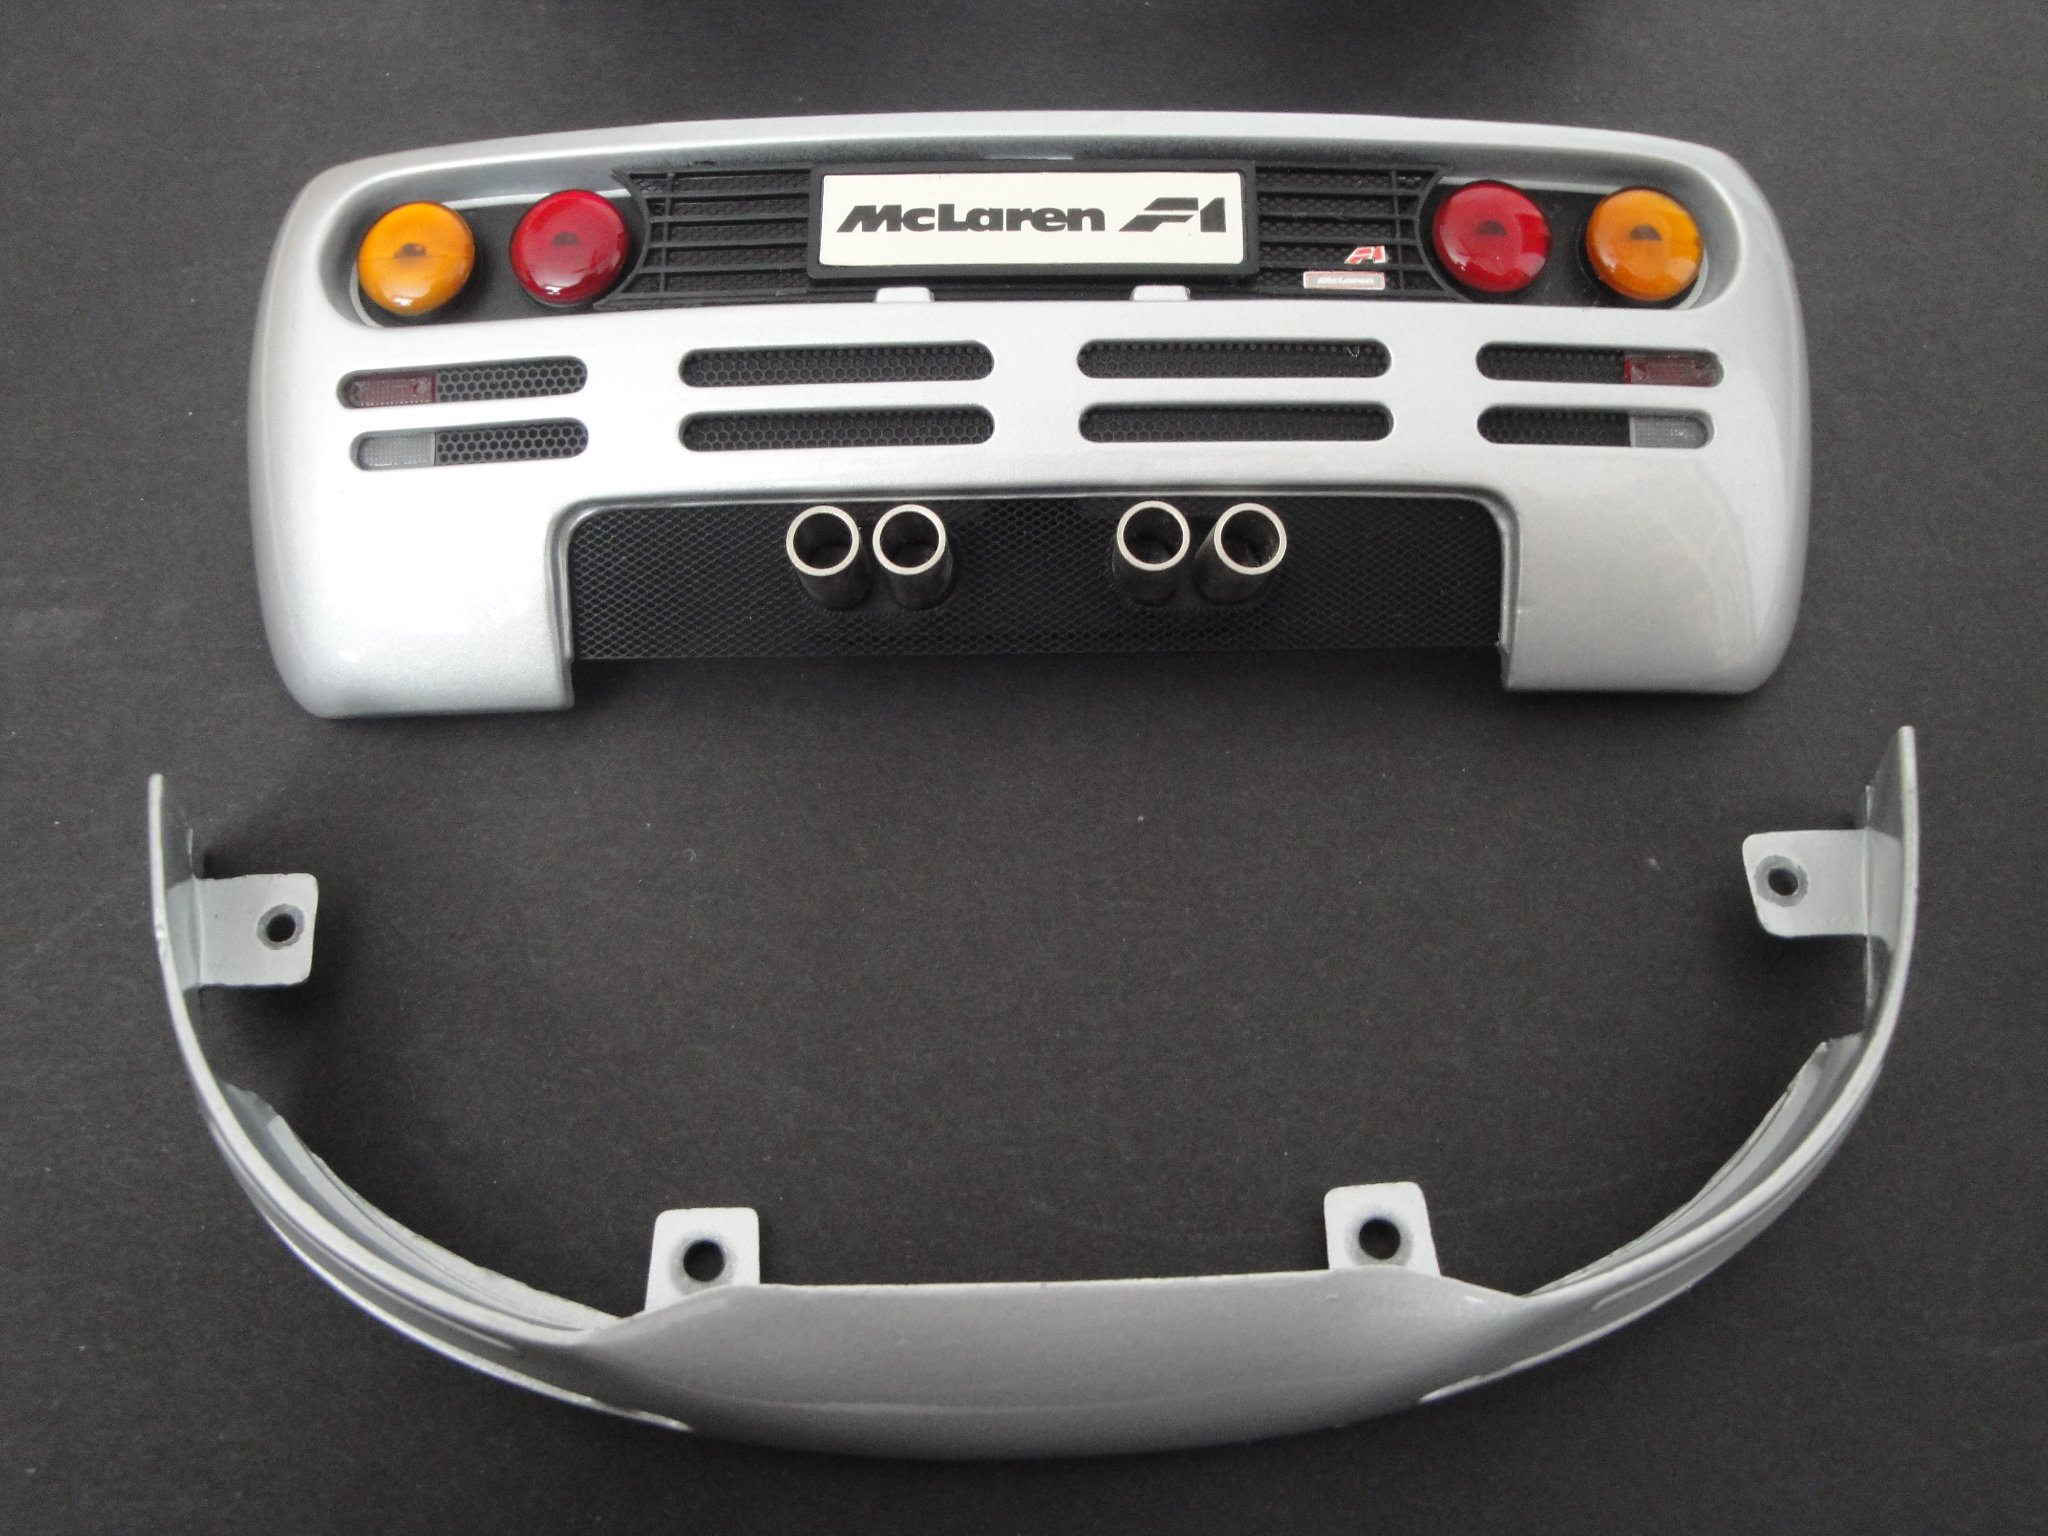
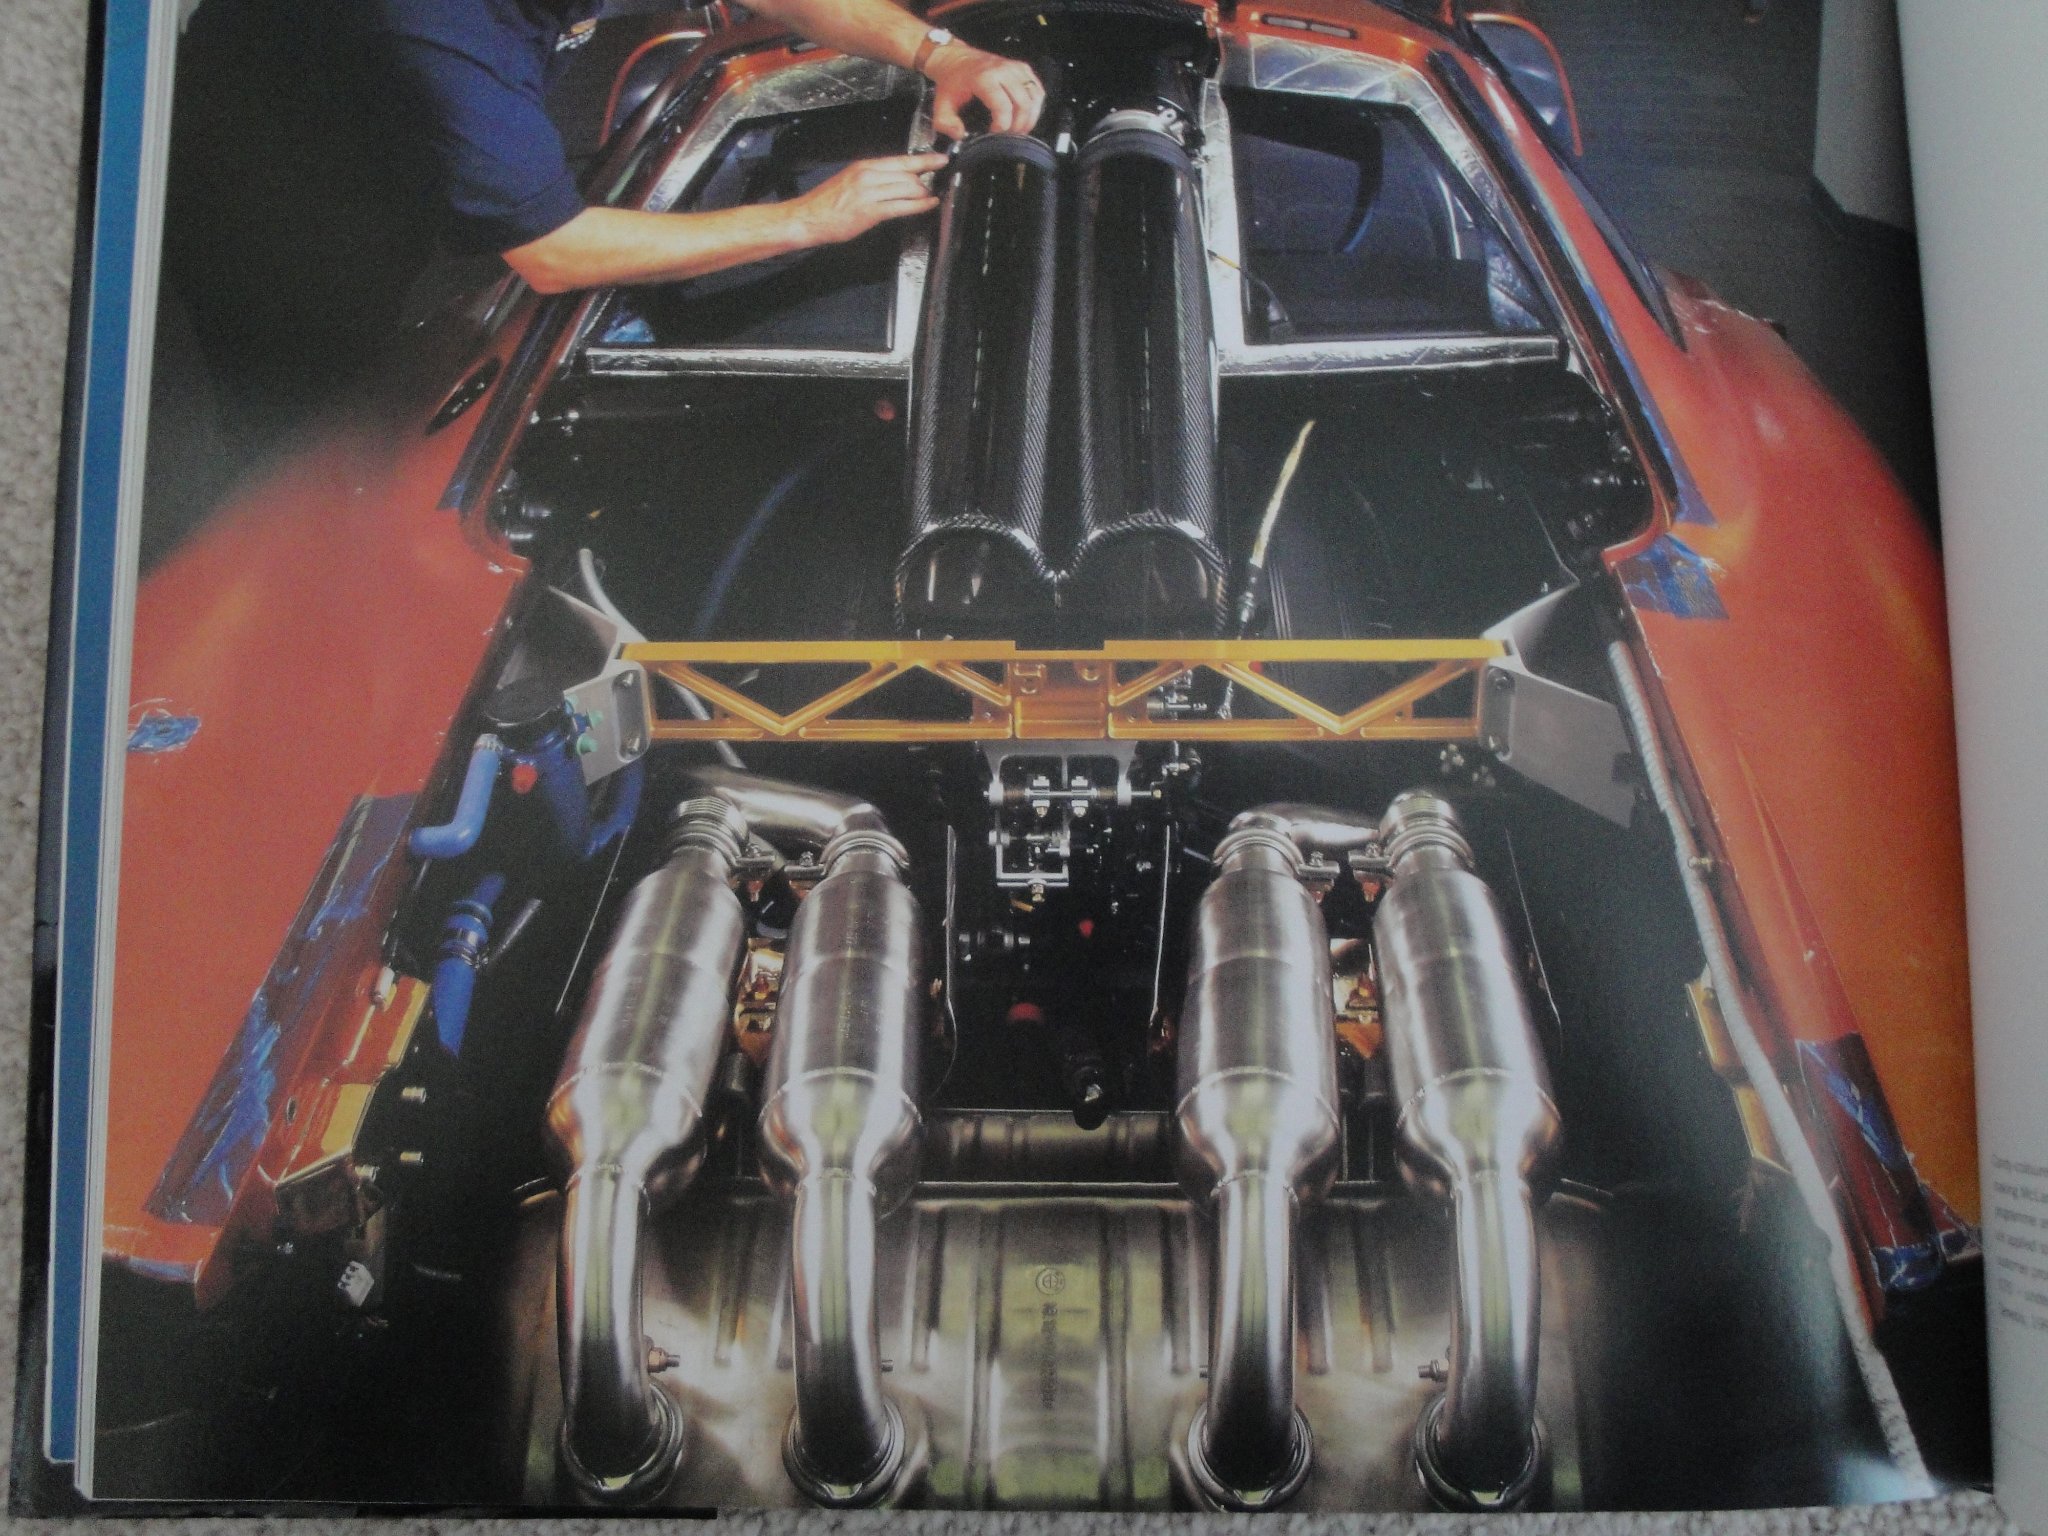
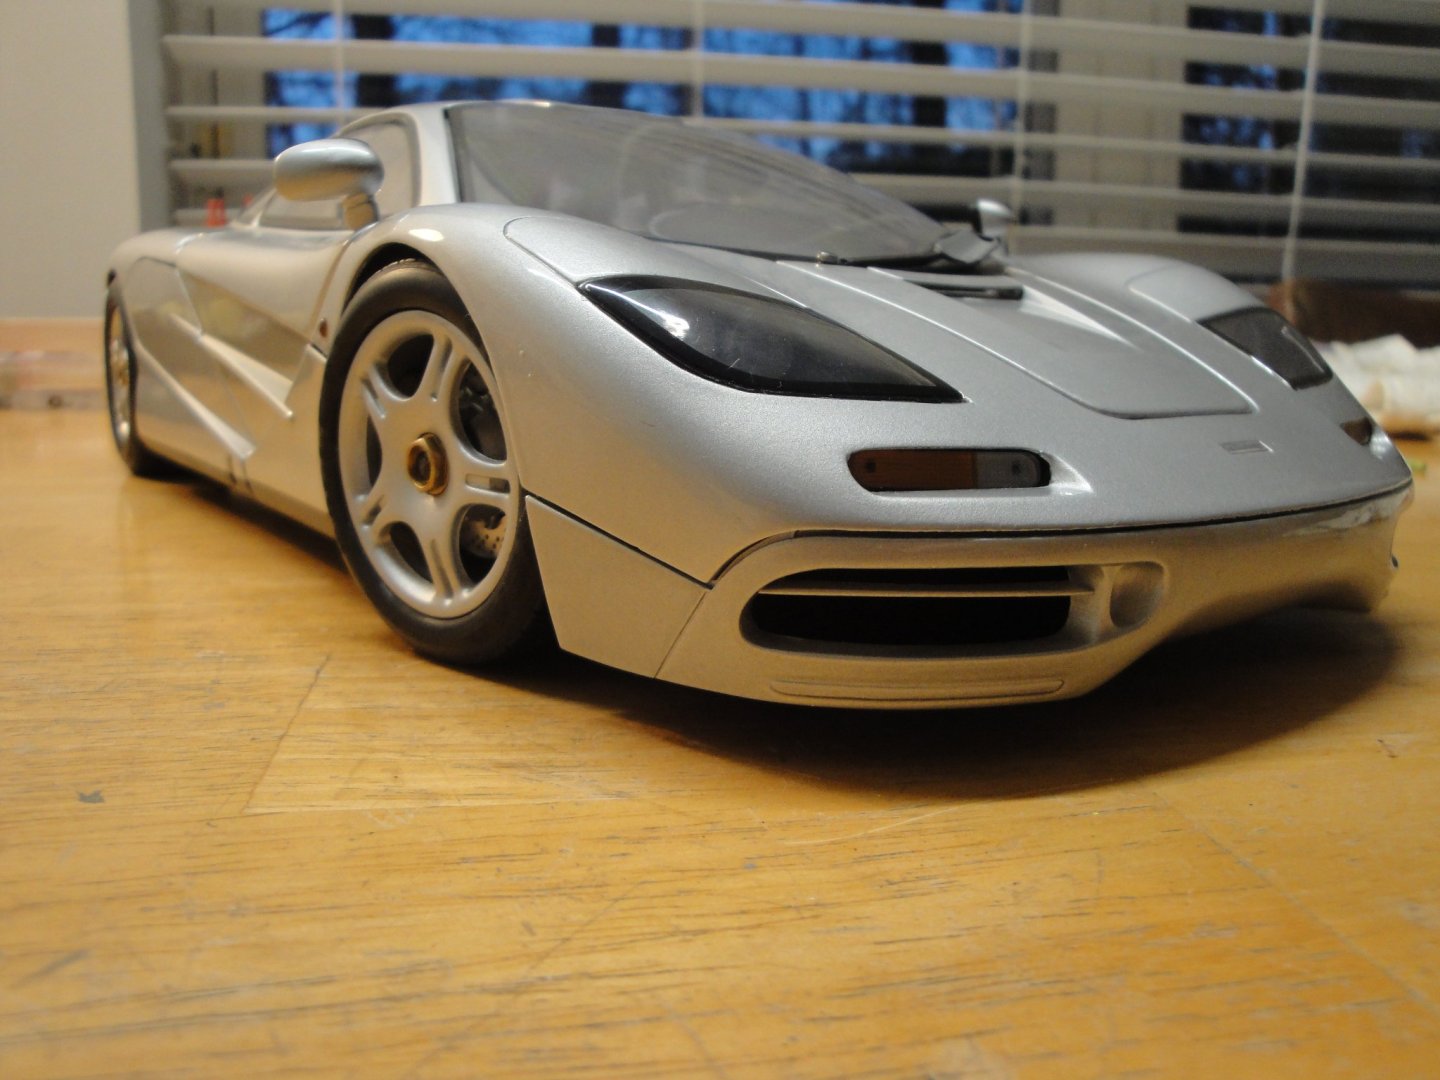
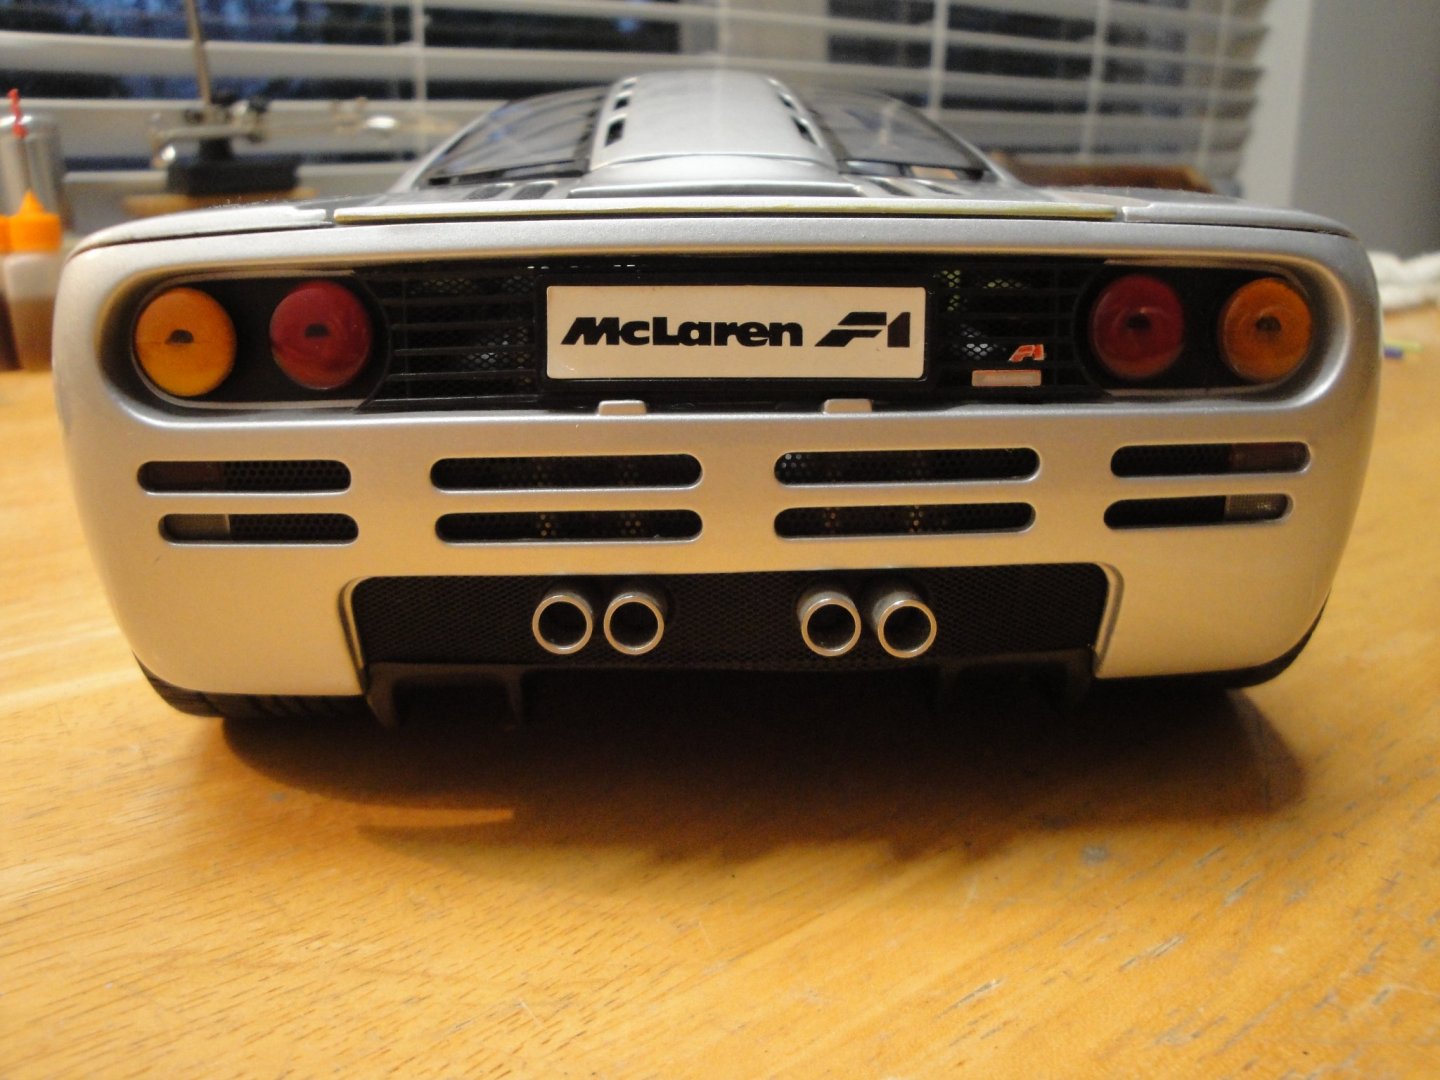
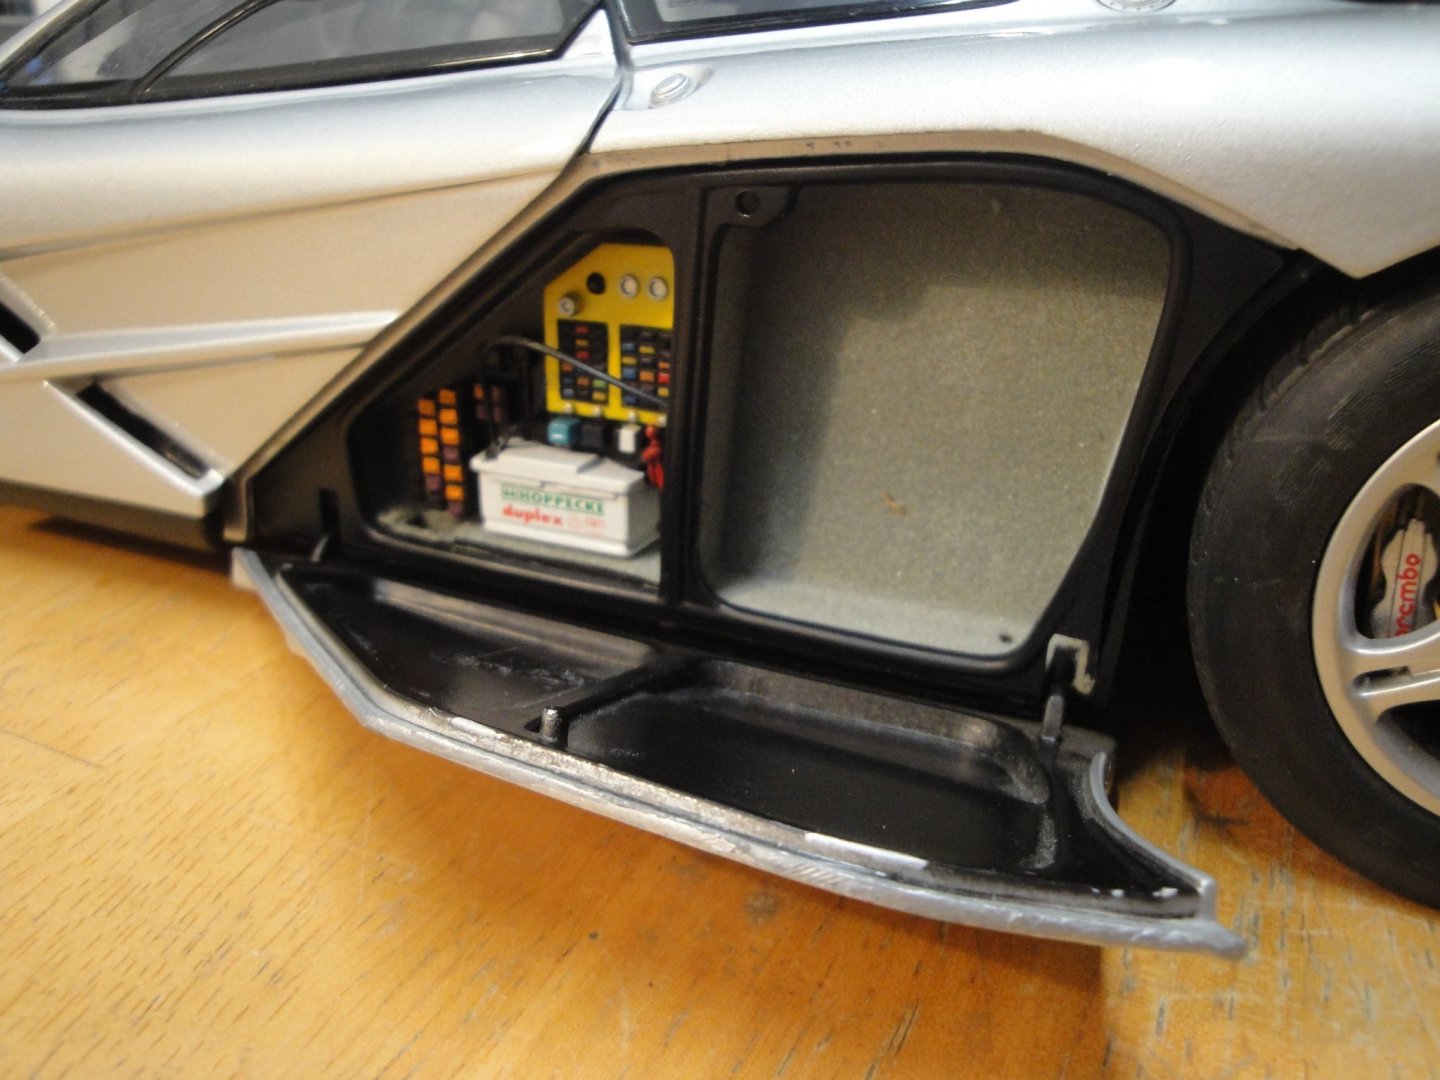
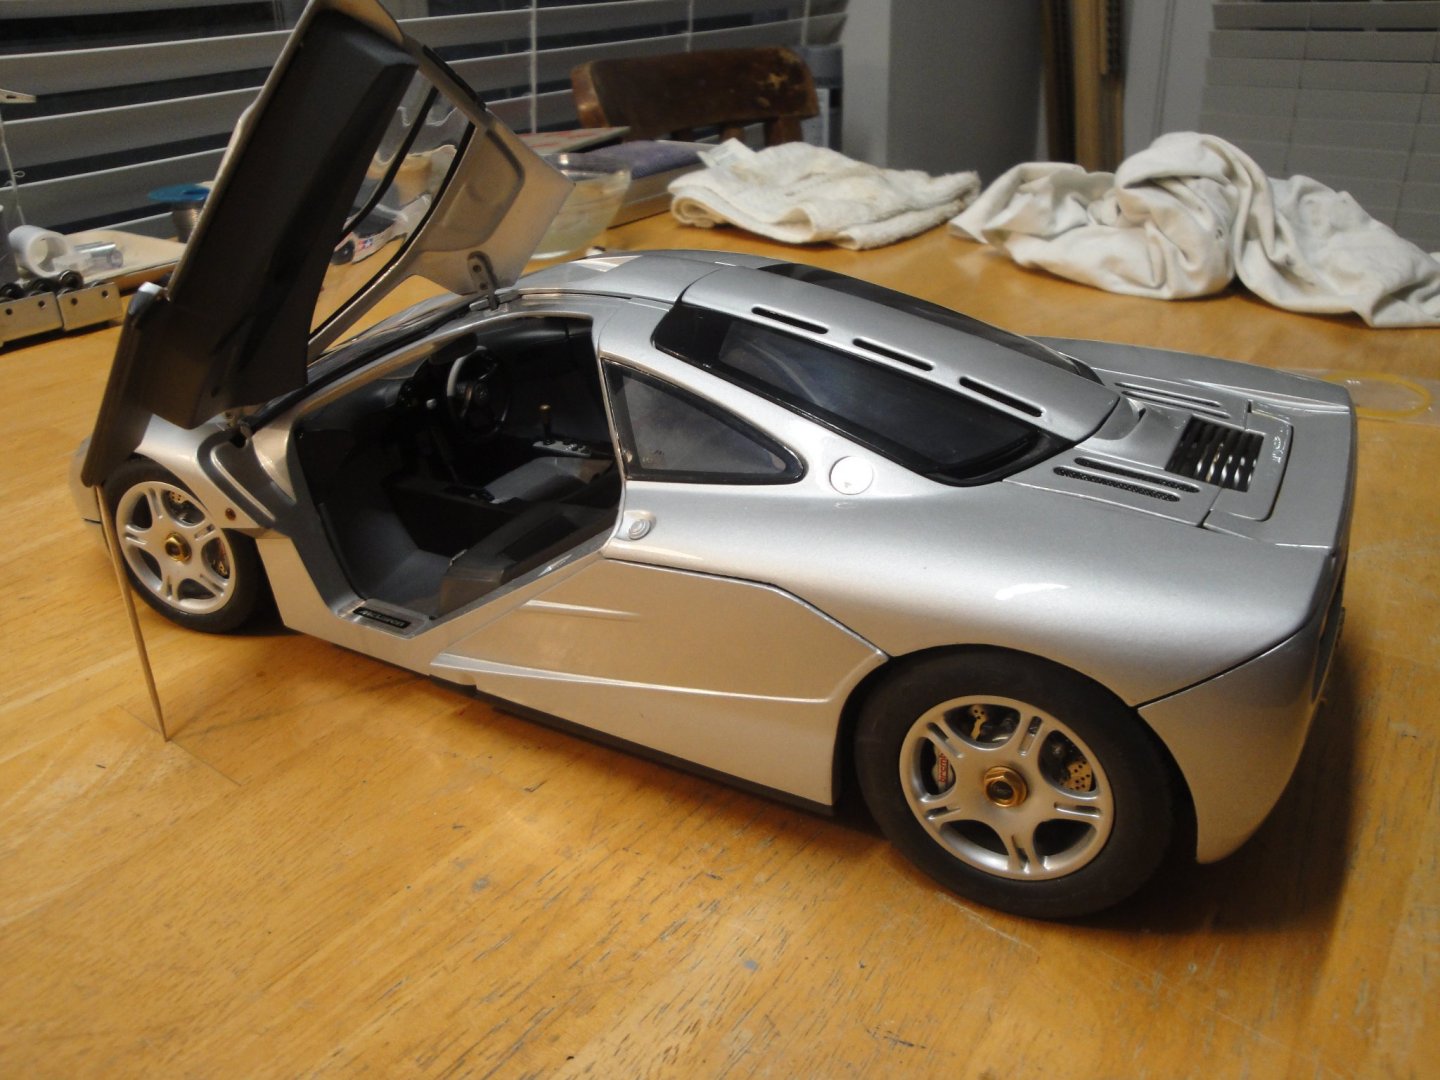
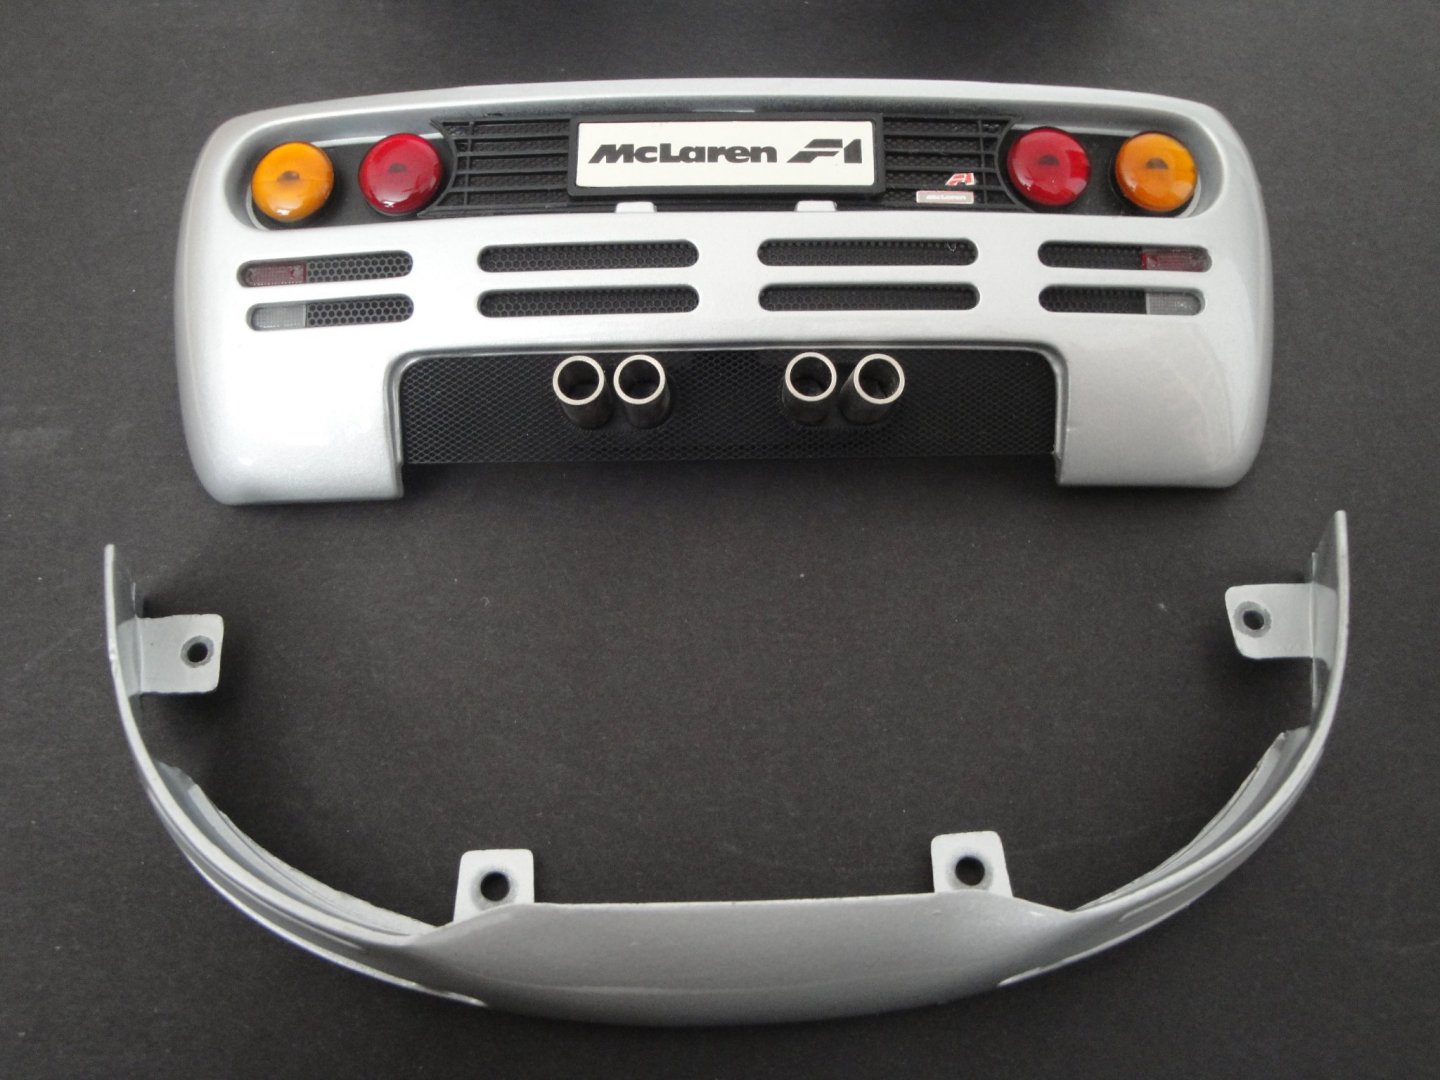
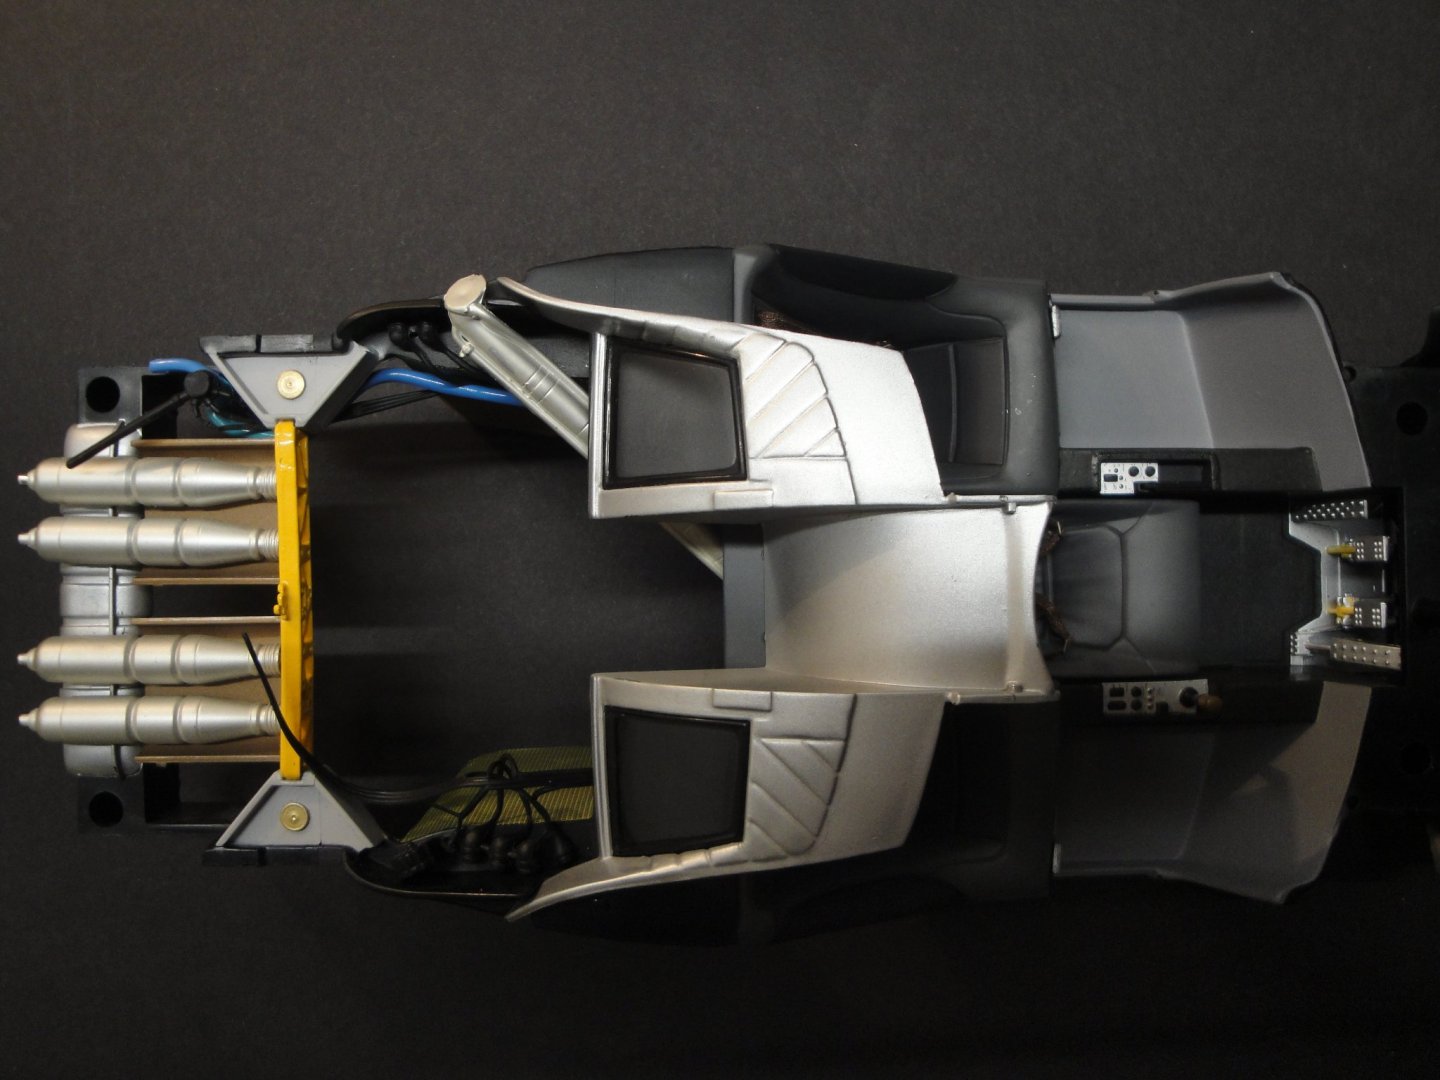
The finished model - After carefully inserting the rear engine in the body and locking the numerous screws, we can finally admire the model, fully restored: The view below shows the rear air brake designed by McLaren to slow down the "rocket" from 240 MPH to a more civilized speed. The on-board computer is in charge of the air brake and will not deploy it under 40 MPH. However, certain owners knowing that it was lined up with pure gold foil, intended to show their wealth, even when stopped at a red light. By tweaking the Computer program, you could actually deploy the brake even while standing still and simply by pushing the brake pedal..... Showing the Gold.... The most common view of the McLaren F1 on the road, at least for a second or two.... Above is the electrical and luggage compartment. McLaren was offering (or proposing) a set of luggage that would fit both compartments and allow a couple of people to go on a weekend trip. You could even place a golf bag, by using one of the passenger seat. The door articulation and mechanism is directly inspired of the Toyota Sera (not sold in Western countries): Sliding in the middle seat requires some agility and a good back. Notice the two mirrors, since the rear middle section of the car is used for the air intake. I hope you enjoyed the step by step restoration of the precious and rare model. It will now it with my small 1/12 collection of motorcycles. Yves


- 30 replies
-
- 18
-

-
-

-
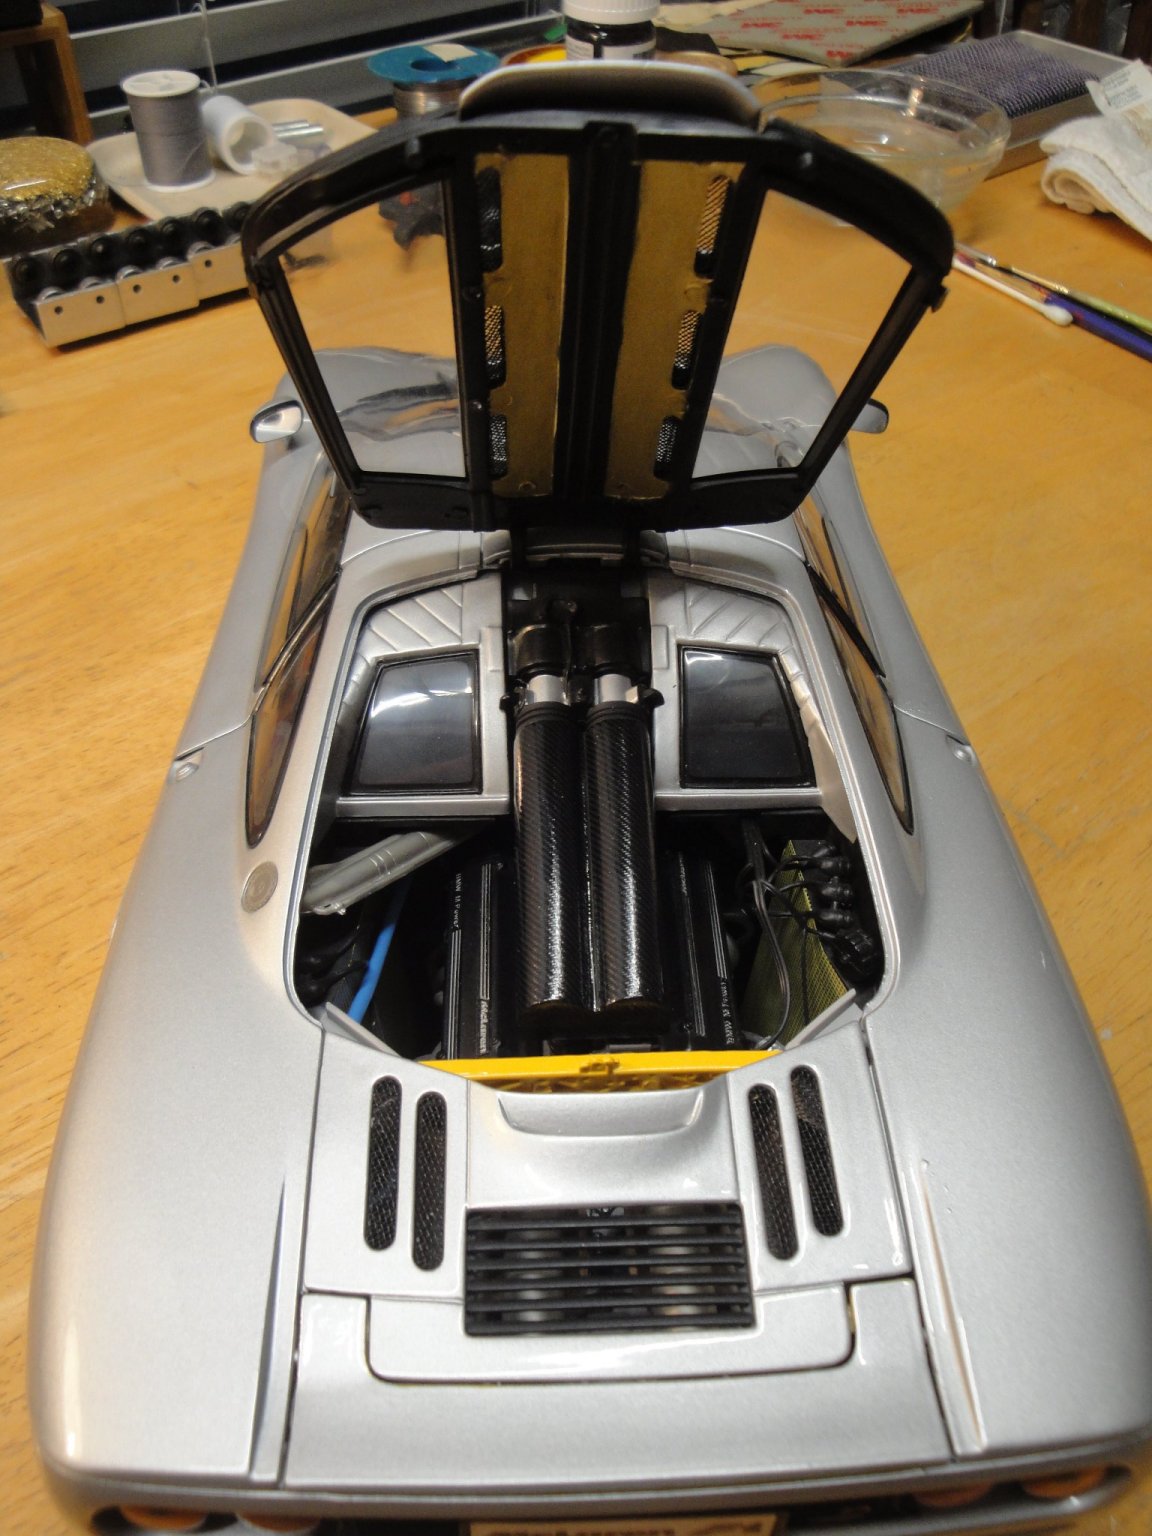
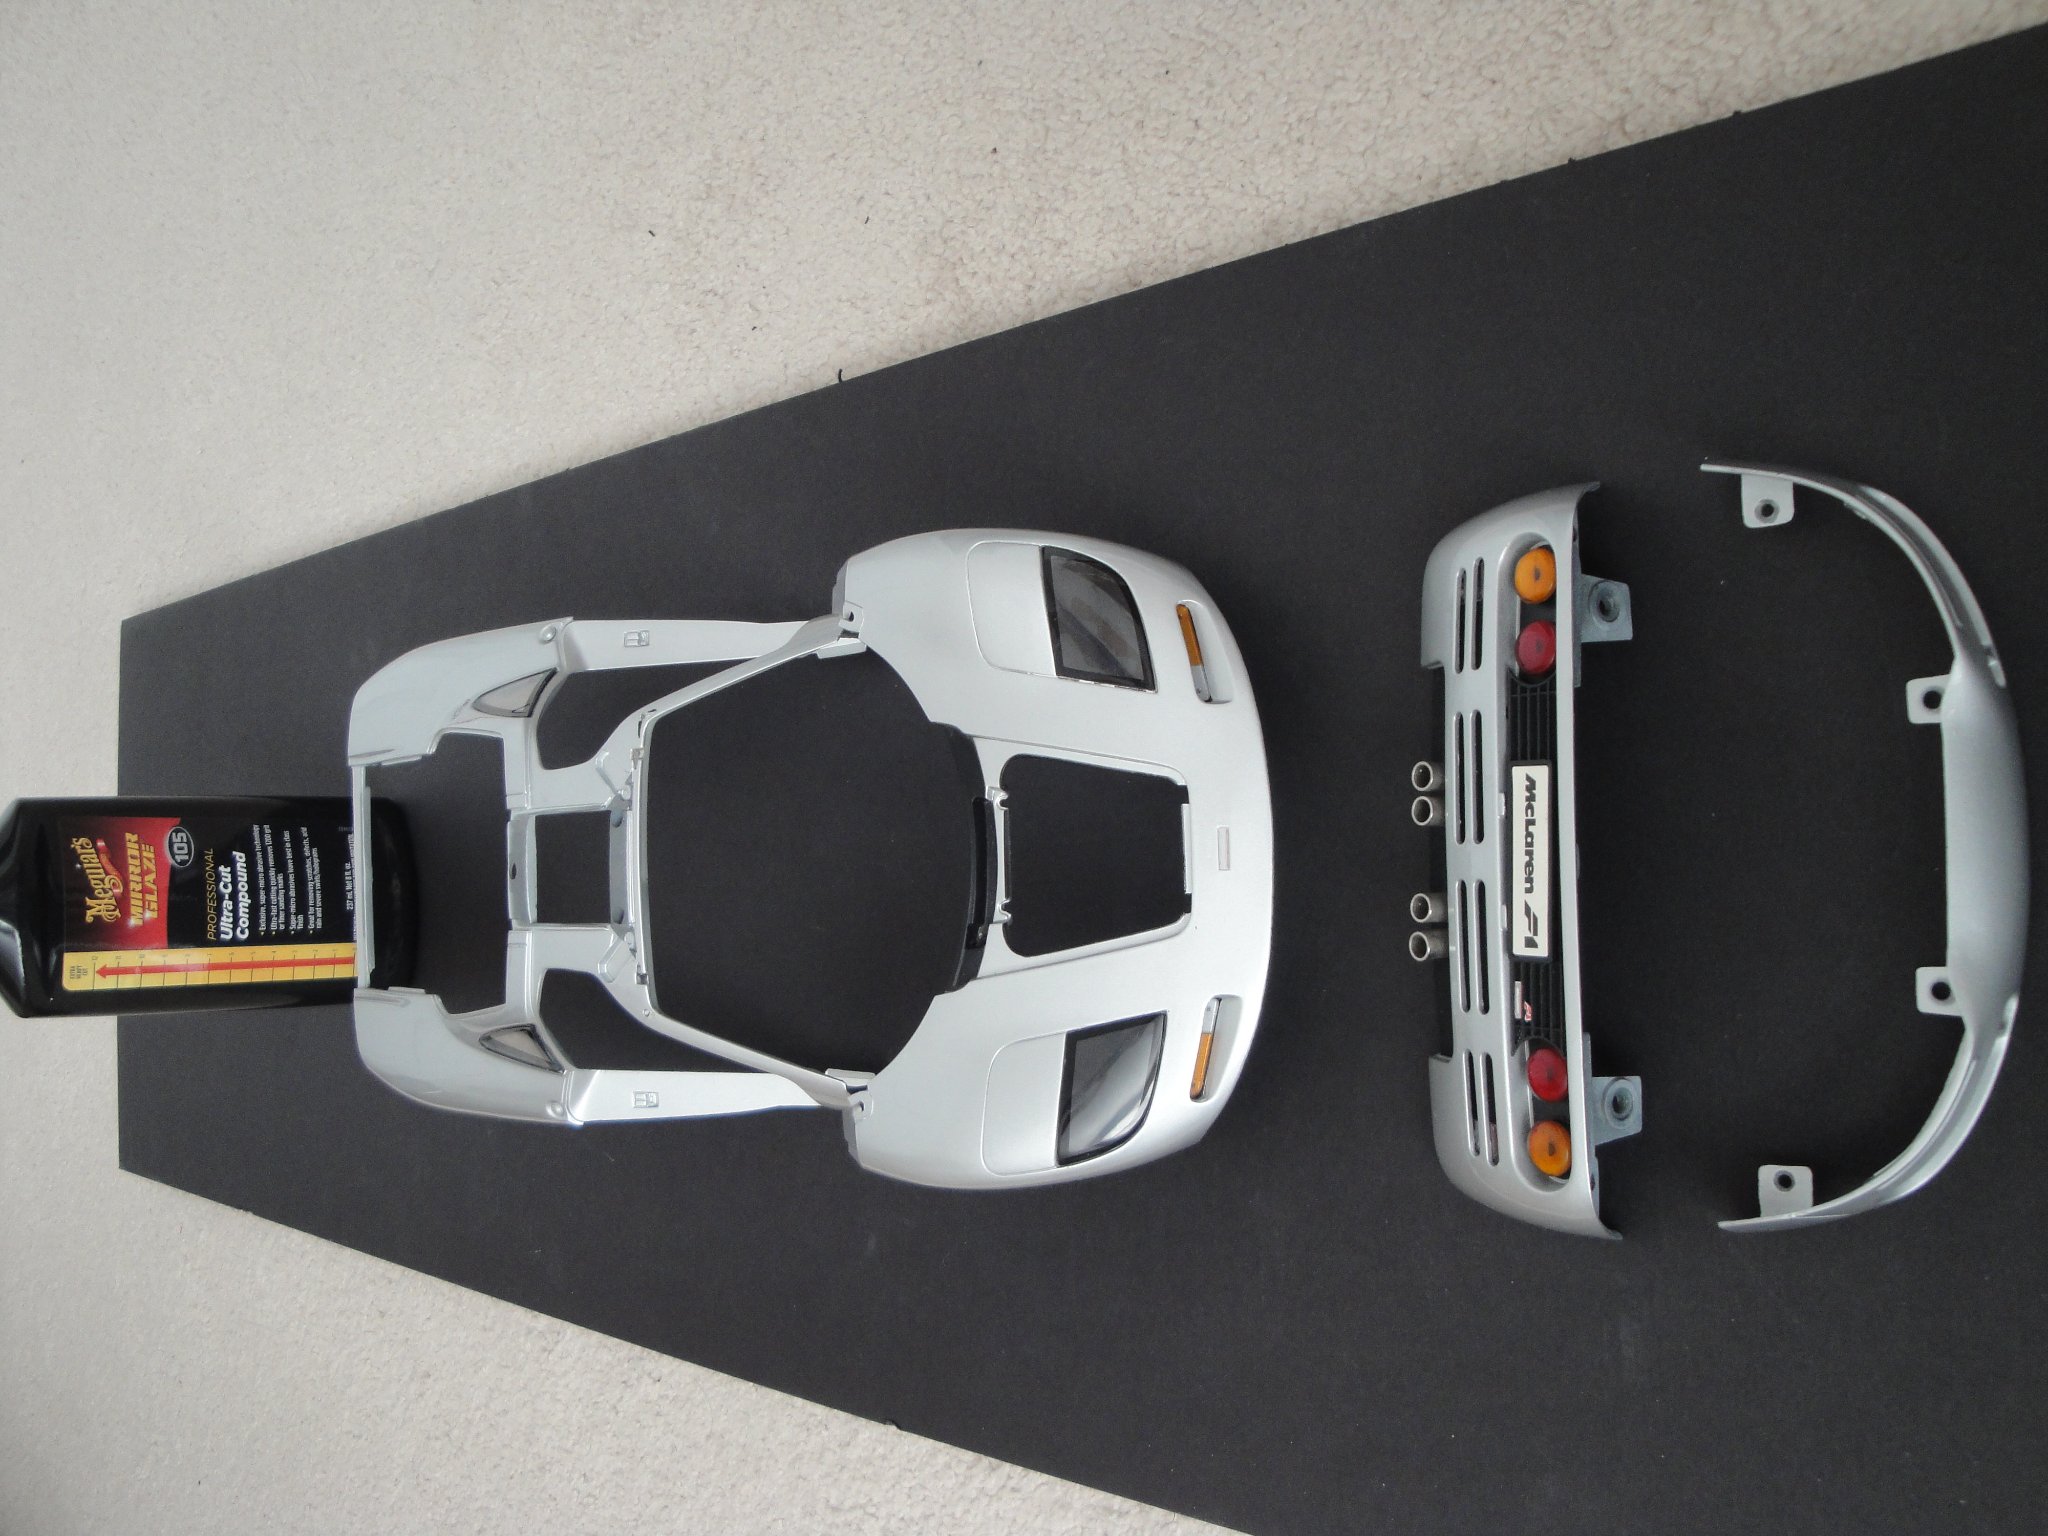
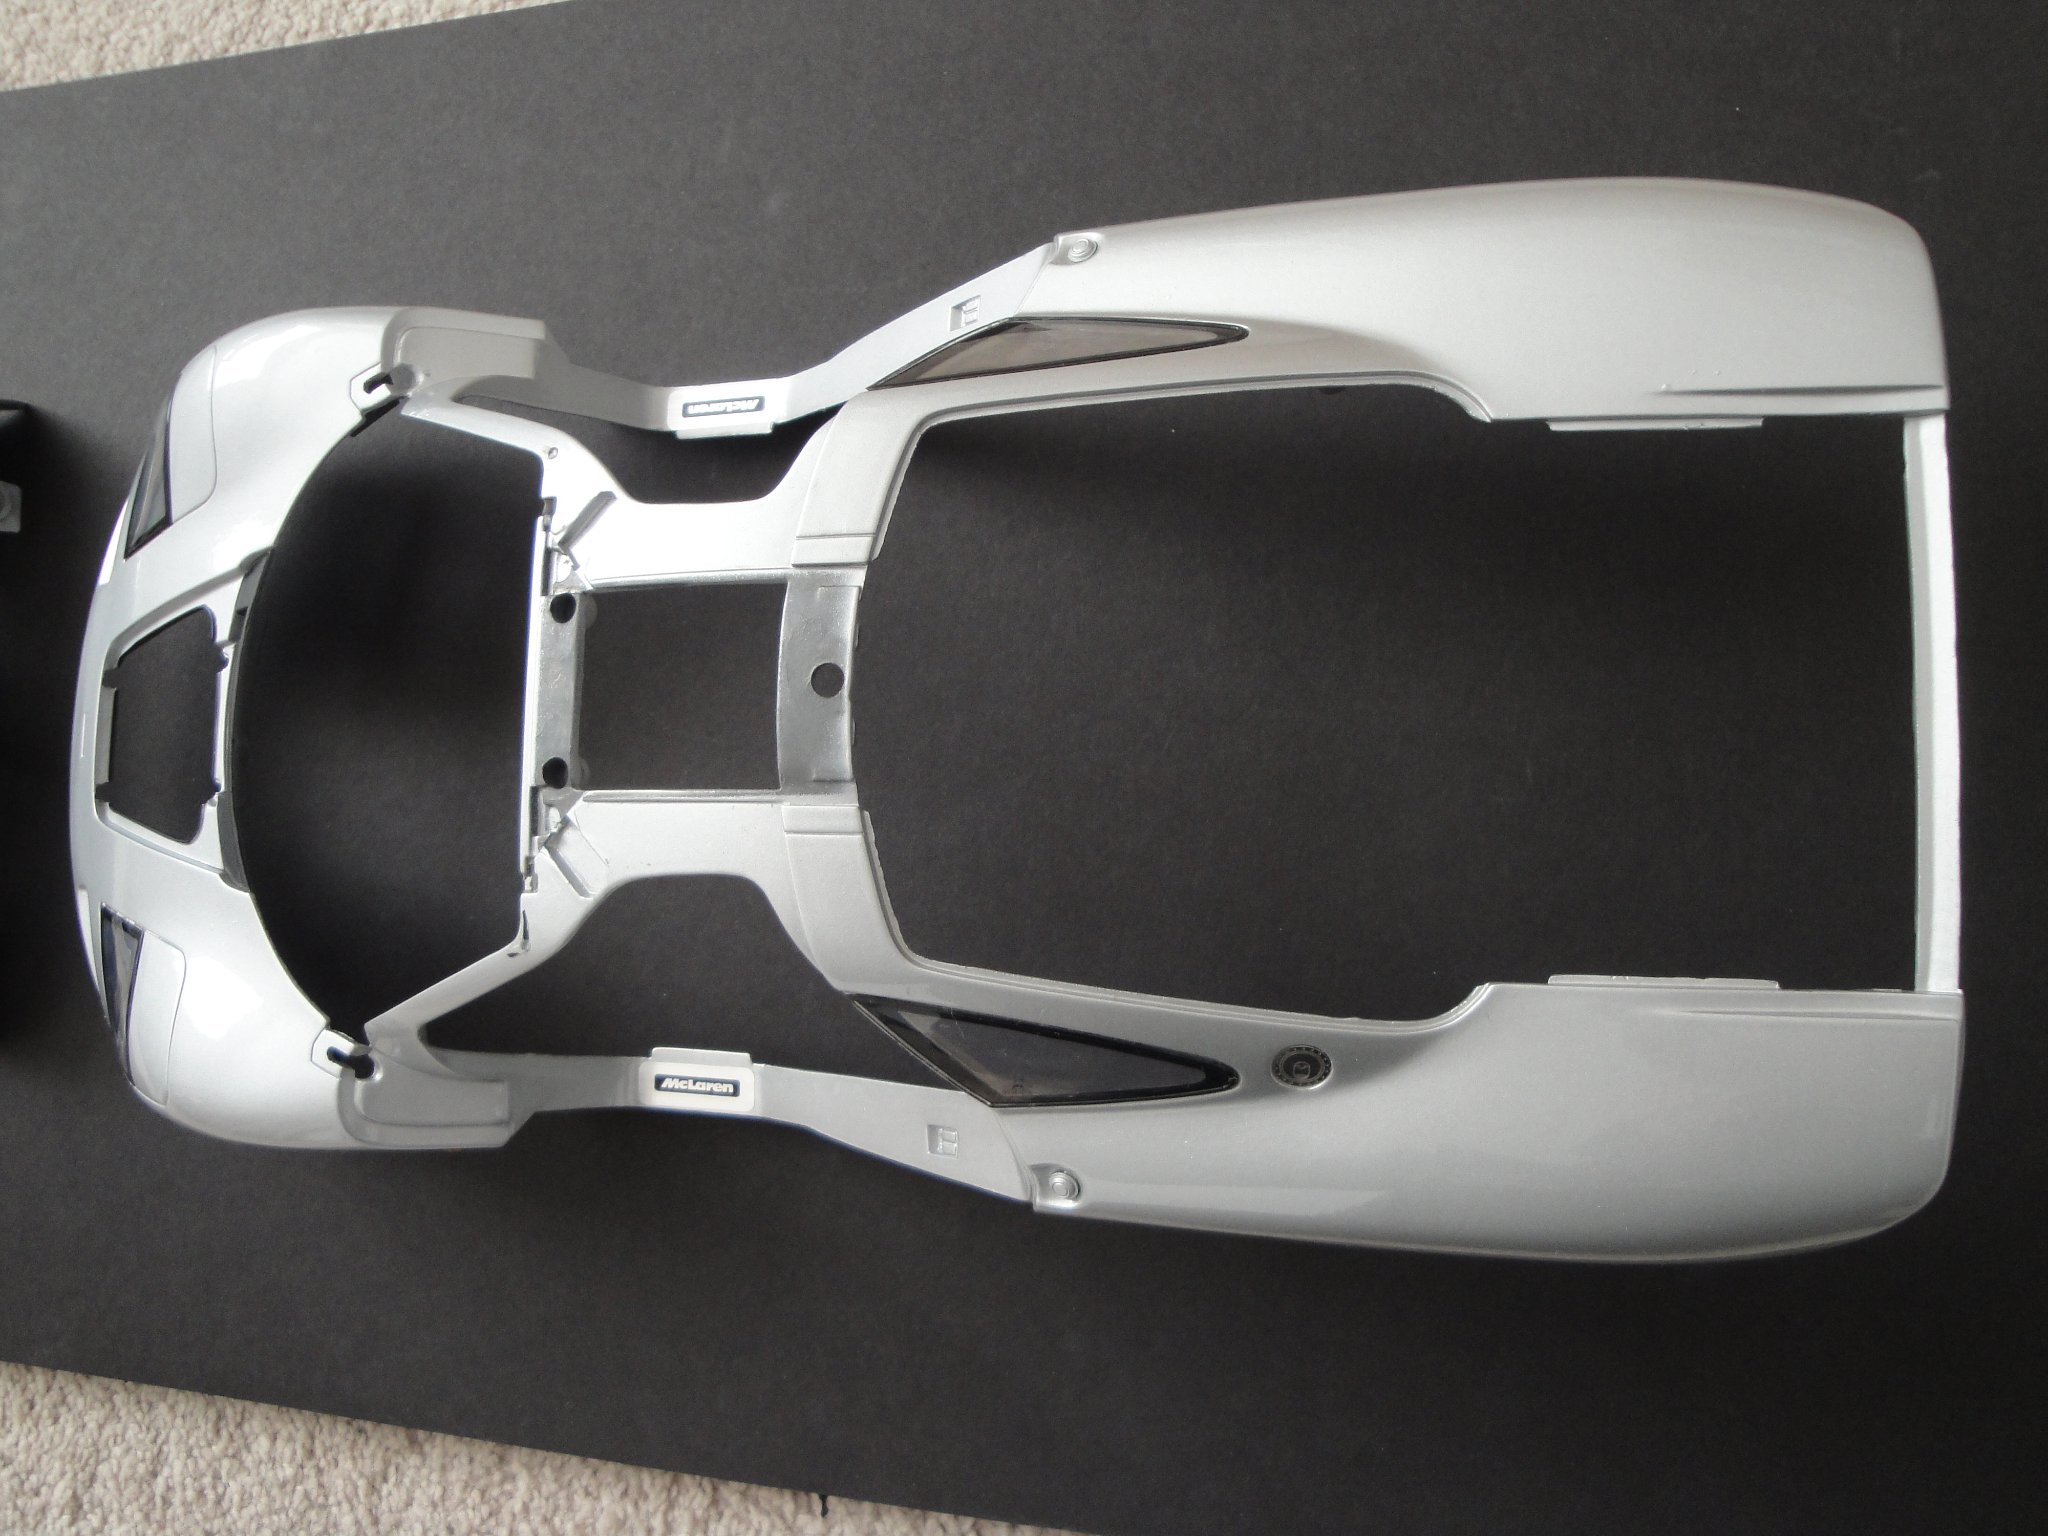
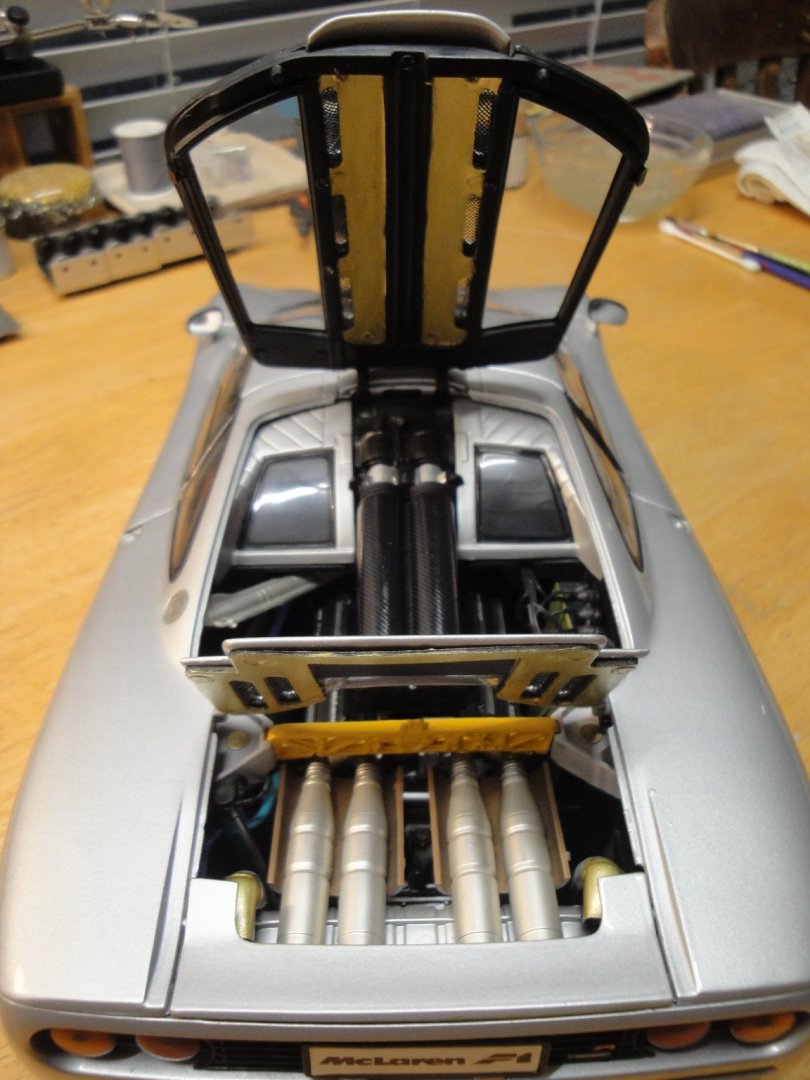
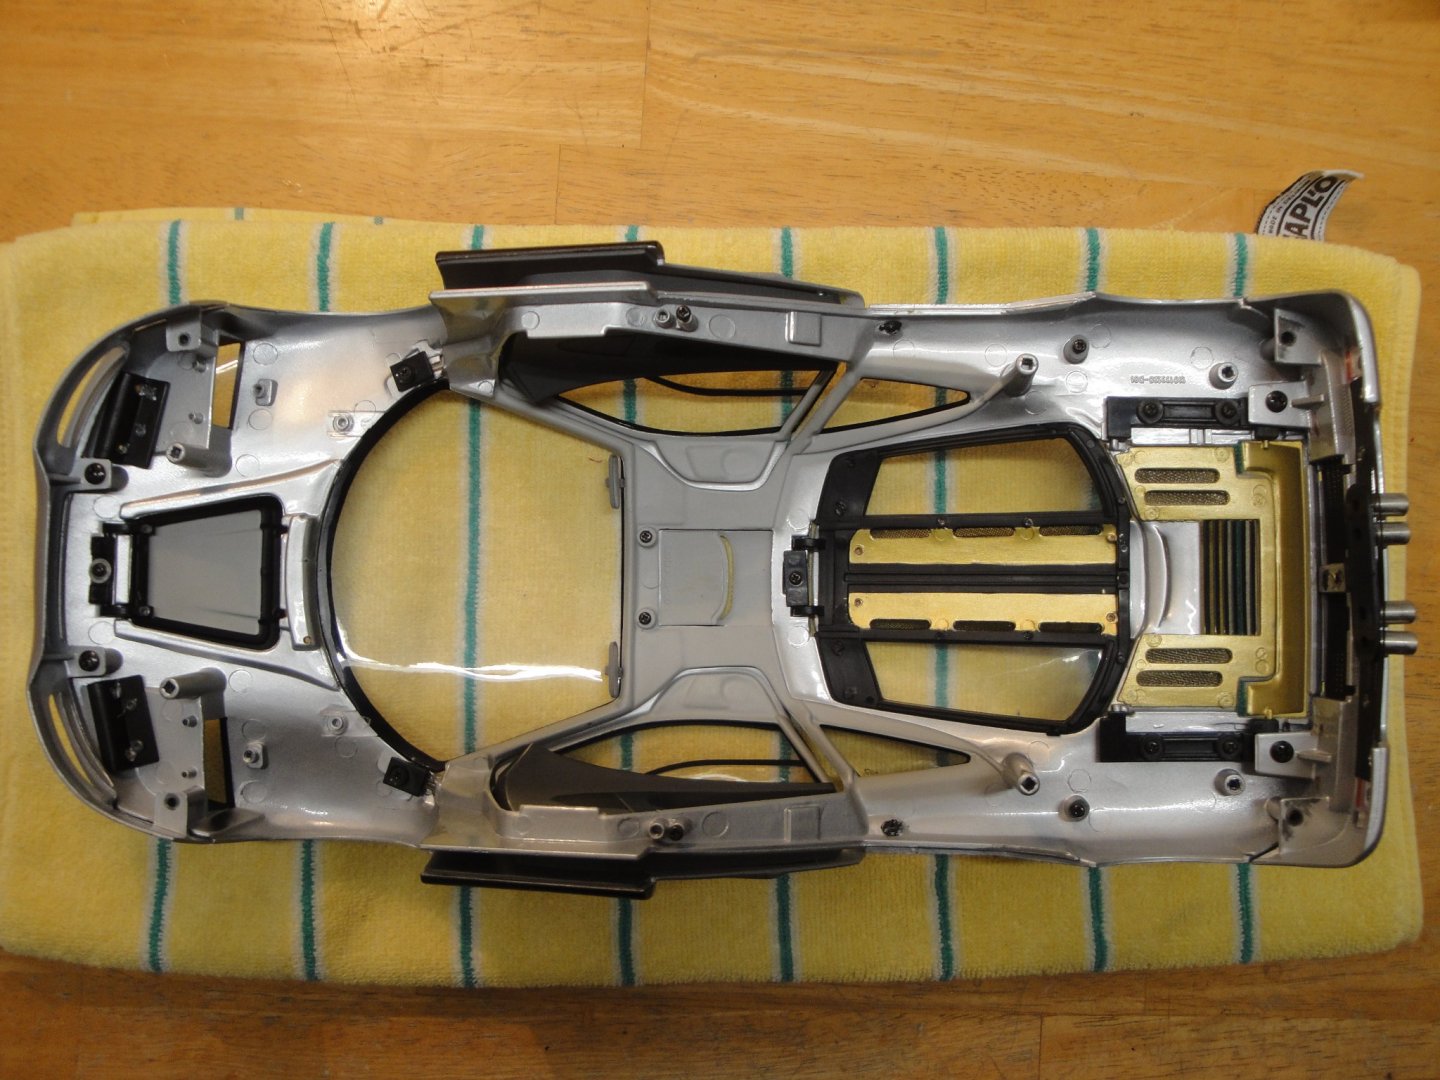
Assembly - Putting together all the body parts is actually the most delicate part of the restoration. Doors and panels have only one will: to get open! The windshield is glued back to the main frame, as in the real car. I use acrylic glue (Gator) which gives me plenty of time to position the "glass". This view show all the doors and panels put together. The gold coating in the rear is what McLaren used to protect the Carbon Fiber body from the intense heat generated by the 620 HP V-12 engine. Close to one ounce of laminated gold was used on the real car. I tried to glue real gold foils on the various parts but had no success and fell back to Tamiya Gold Leaf paint. The model is absolutely beautiful and the casting of the body is incredible. Yves


- 30 replies
-
- 10
-
-
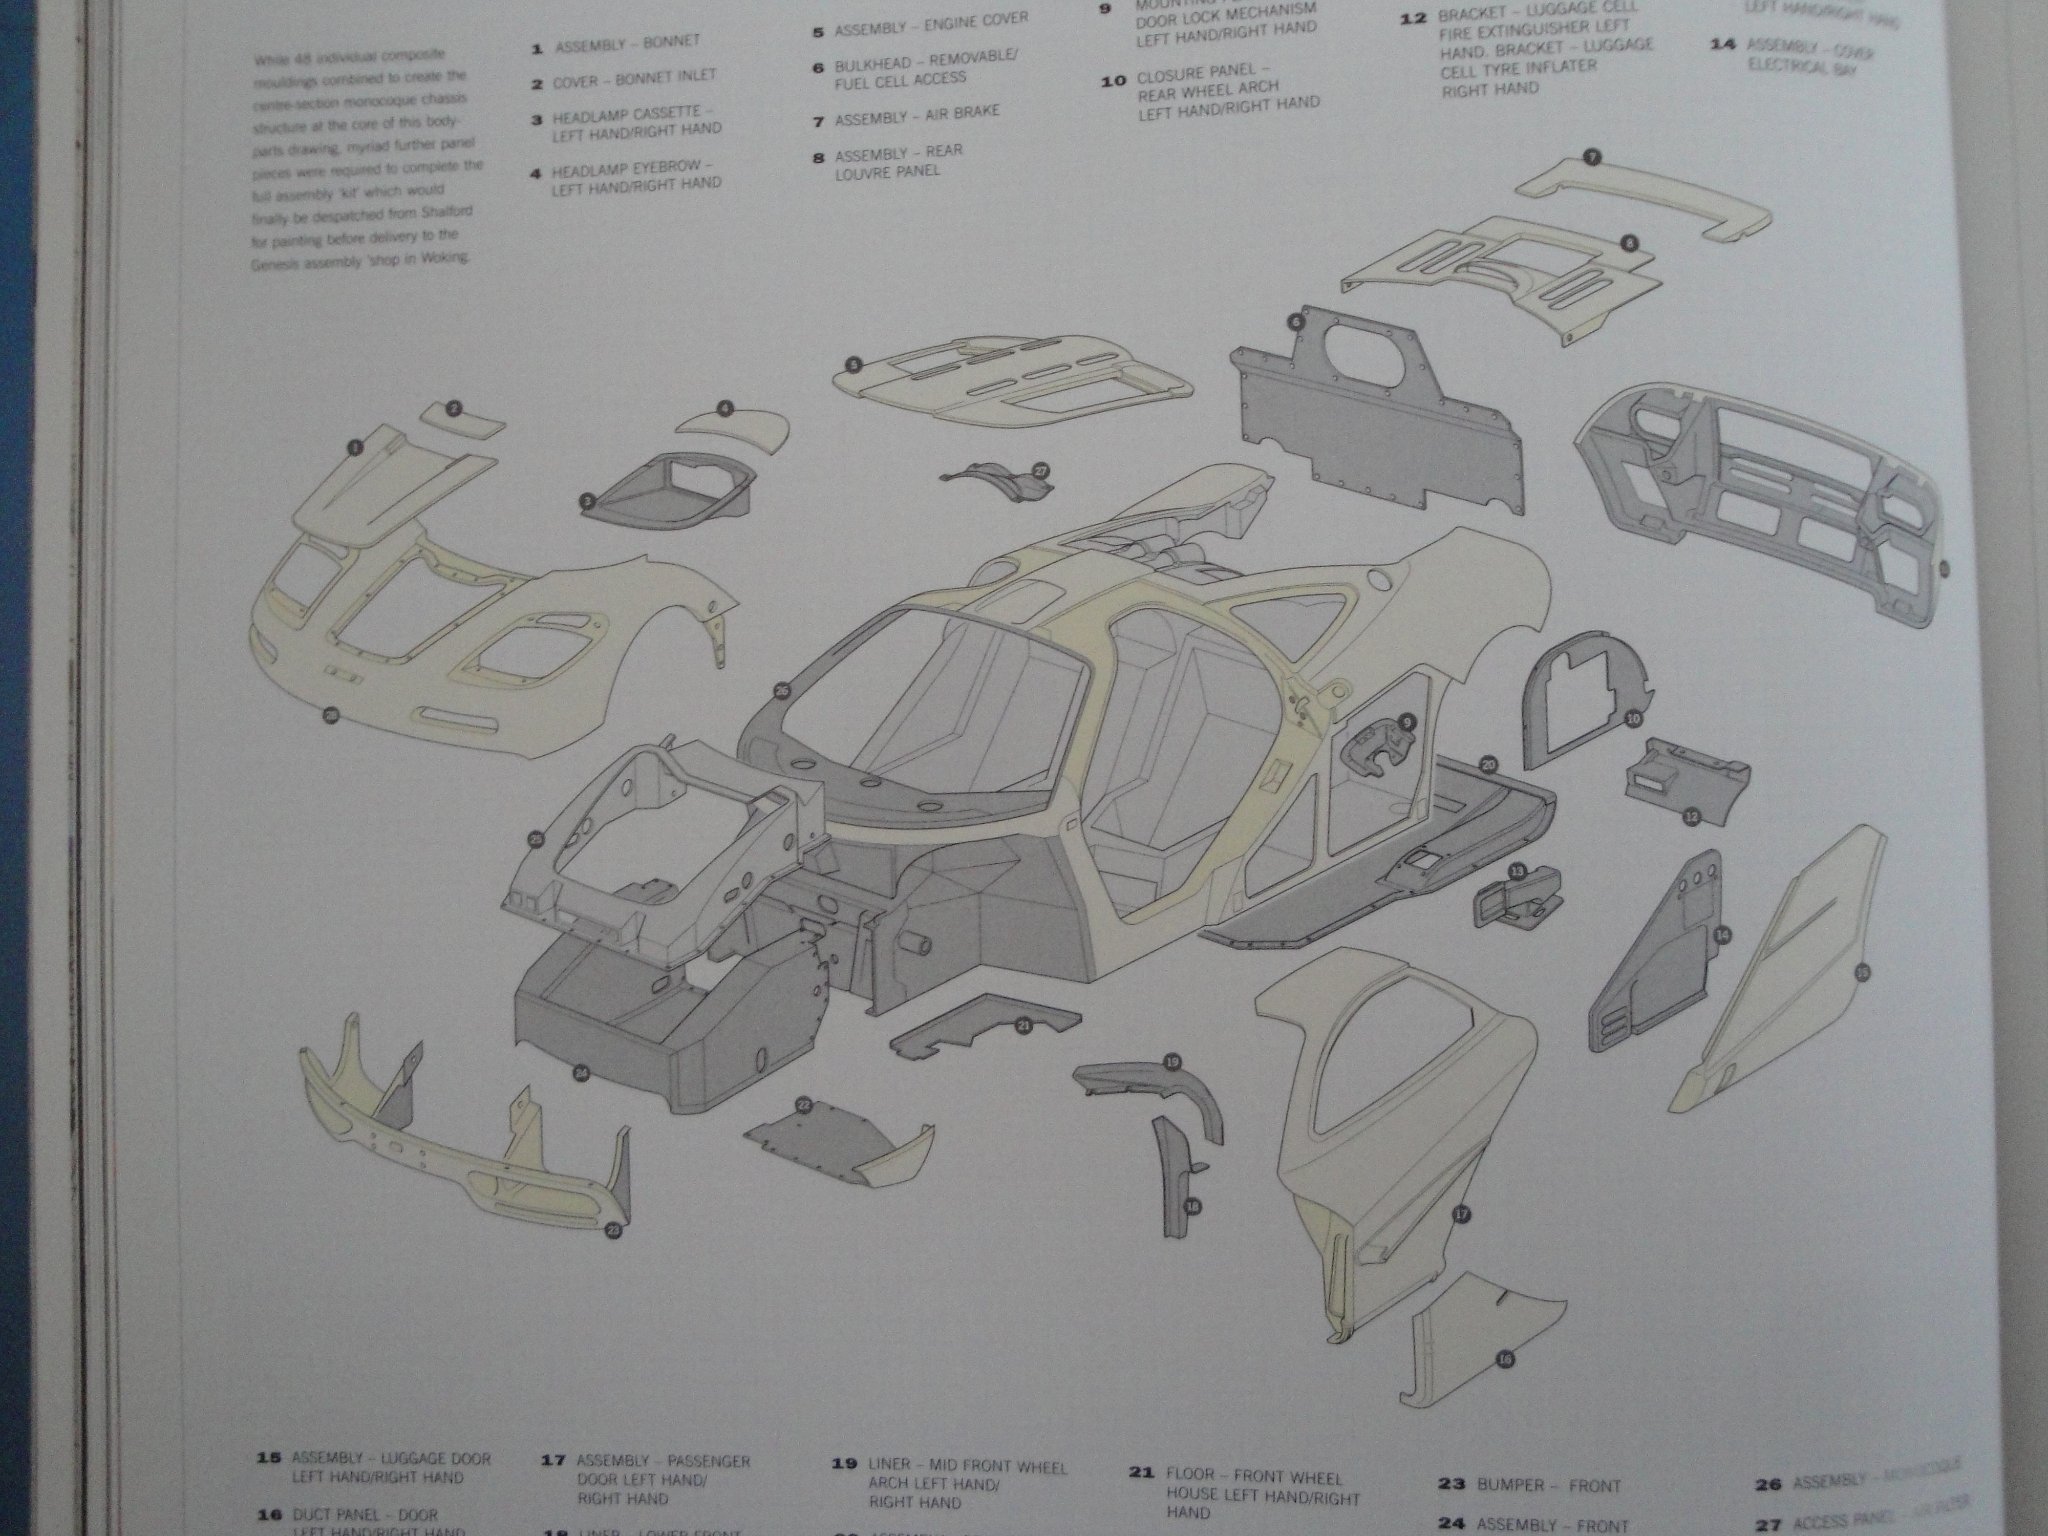
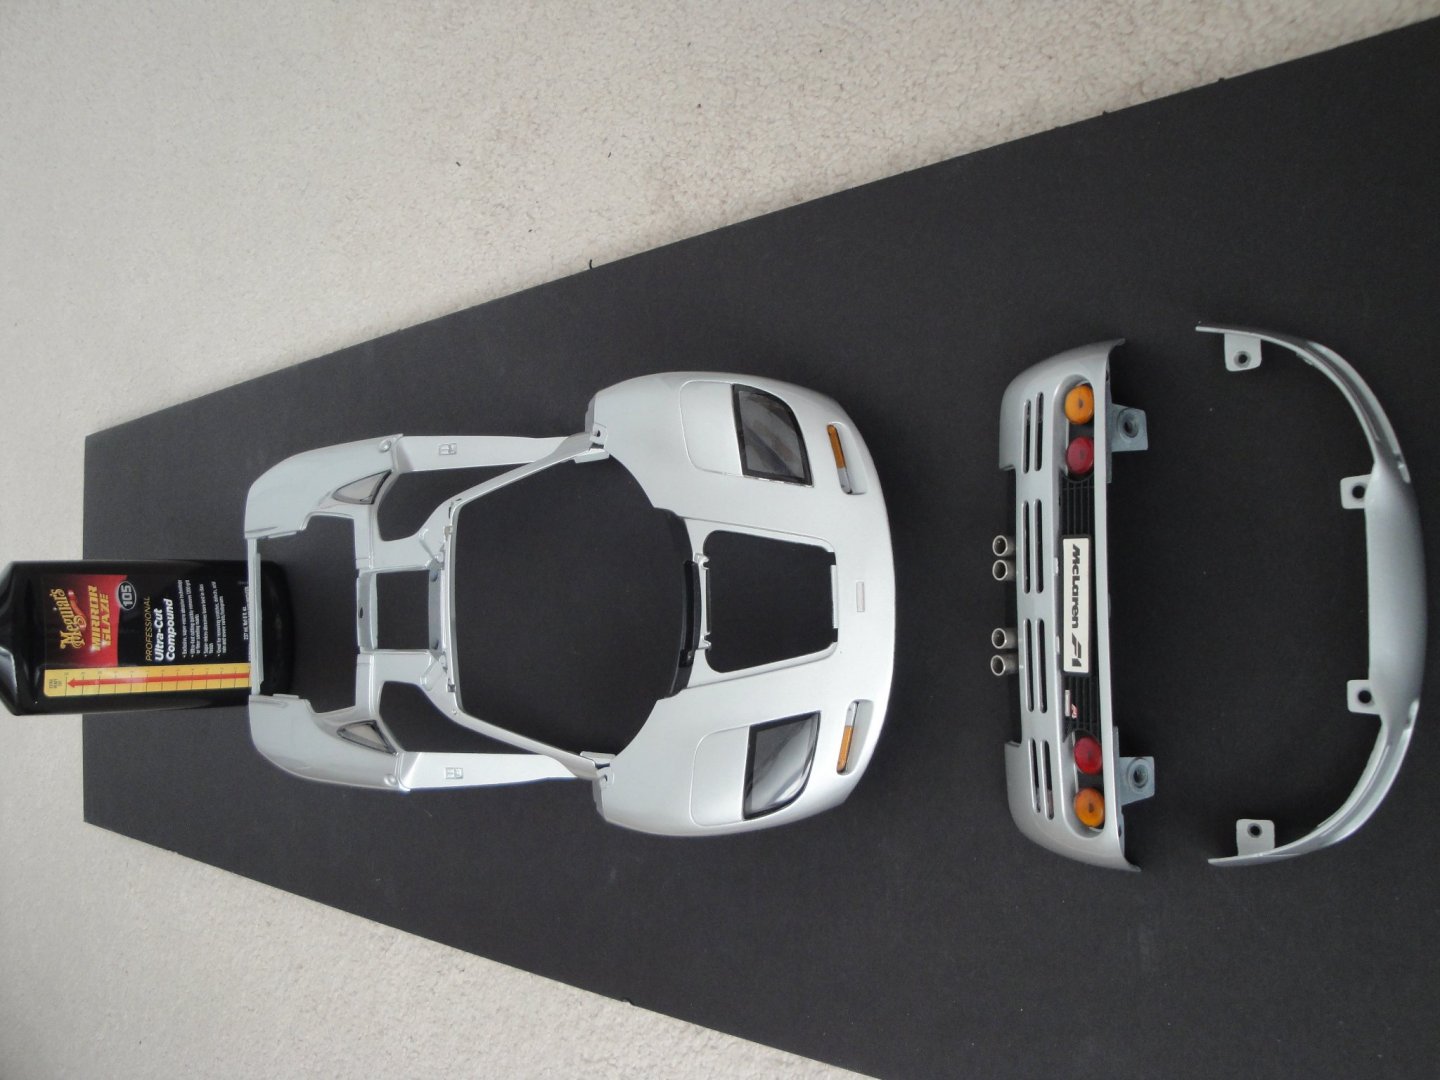
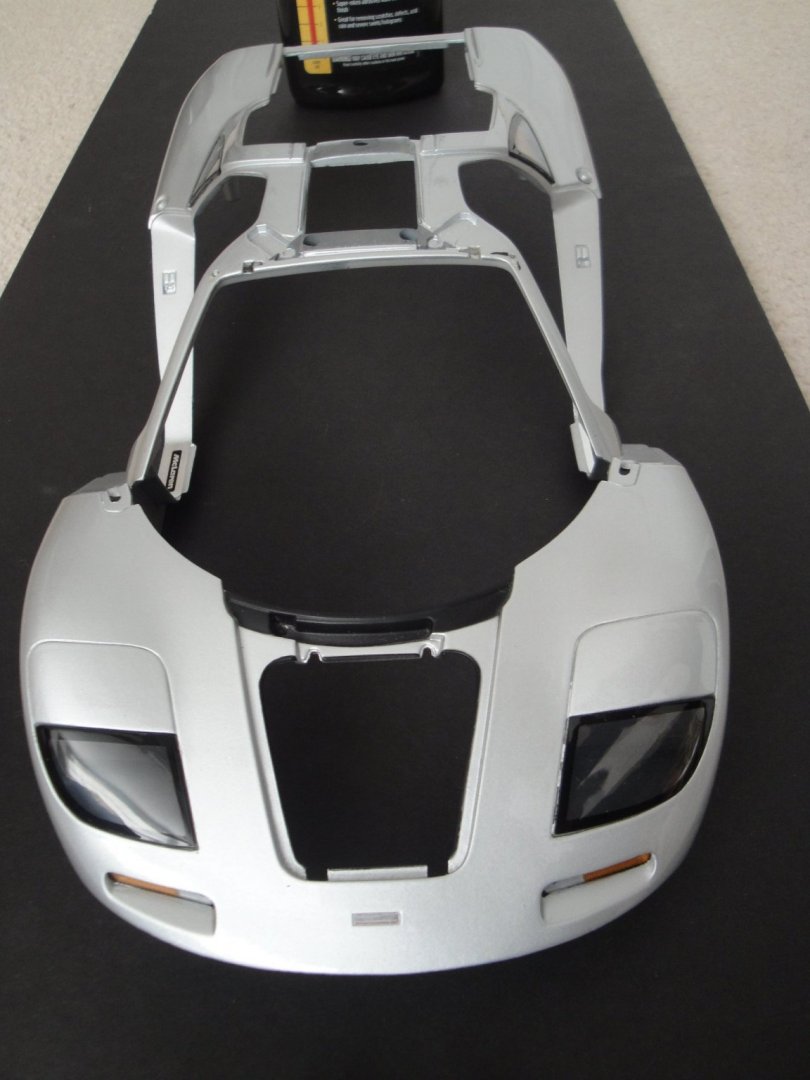
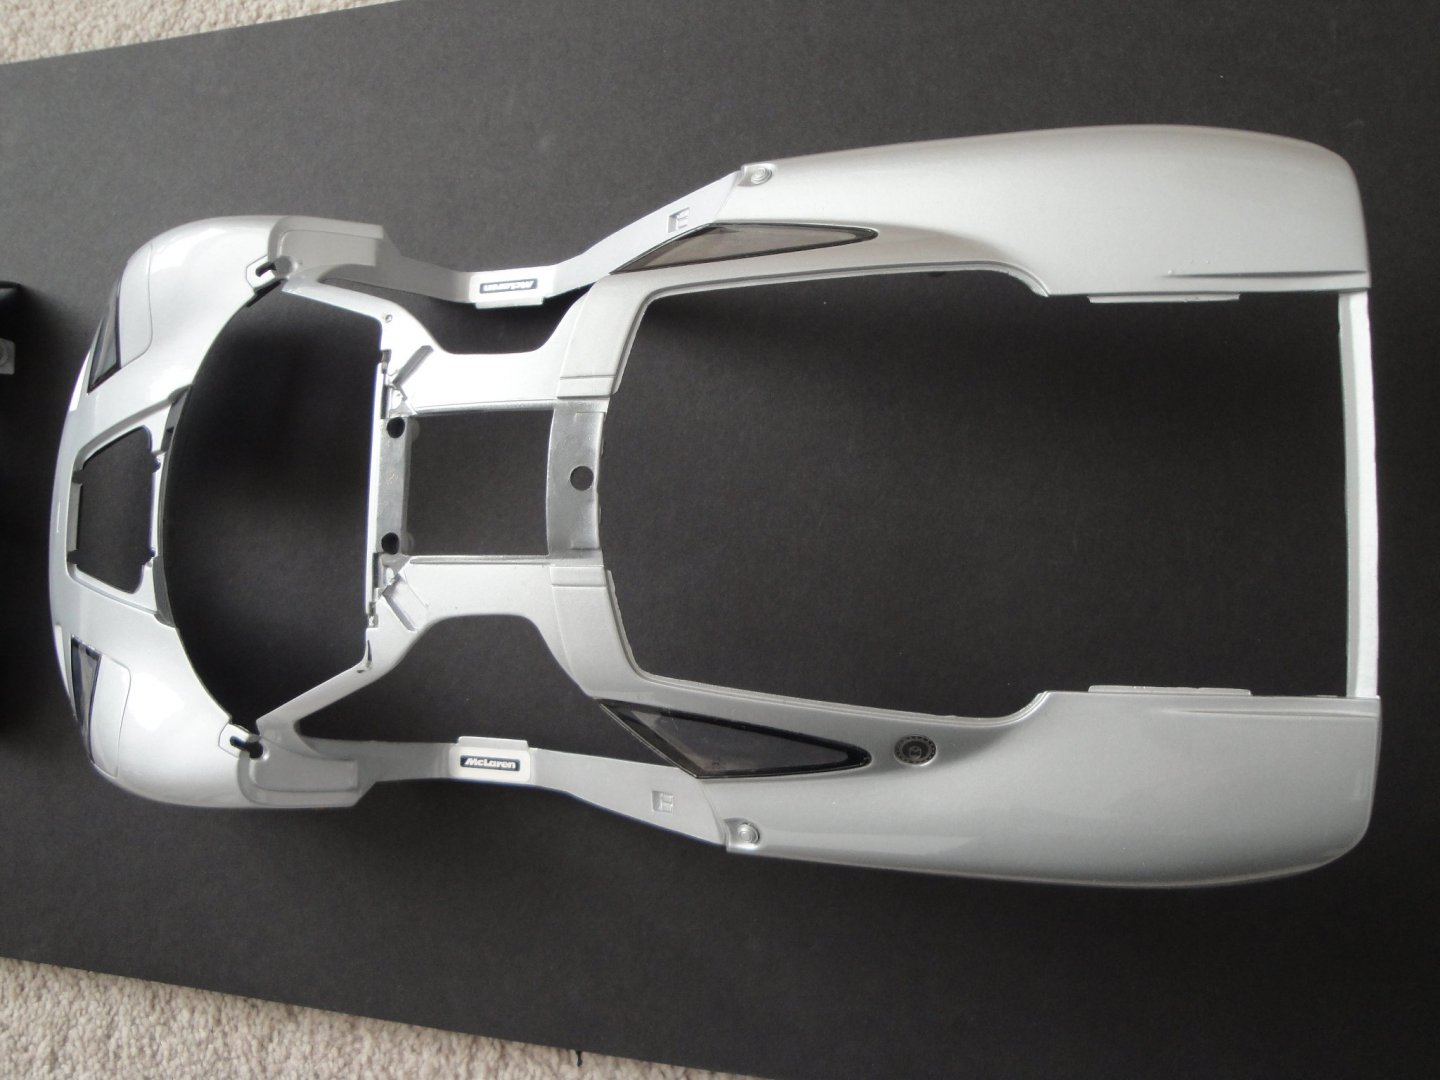
The Body - Now is time to put everything back together. The original car is entirely made of carbon fiber parts, assembled together in the following way: The model is of course, different and simplified. Instead of carbon fiber, Paul's Model Art is using some kind of alloy metal, relatively heavy. The casting is very precise and clean provides an incredibly precise appearance of the real car: All the parts are polished with fine grit Meguiars 250 polishing cream. Fortunately, most of the body is perfect and no full repaint is required. One door is showing some traces of slight corrosion under the paint, but we will live with it. Yves

-
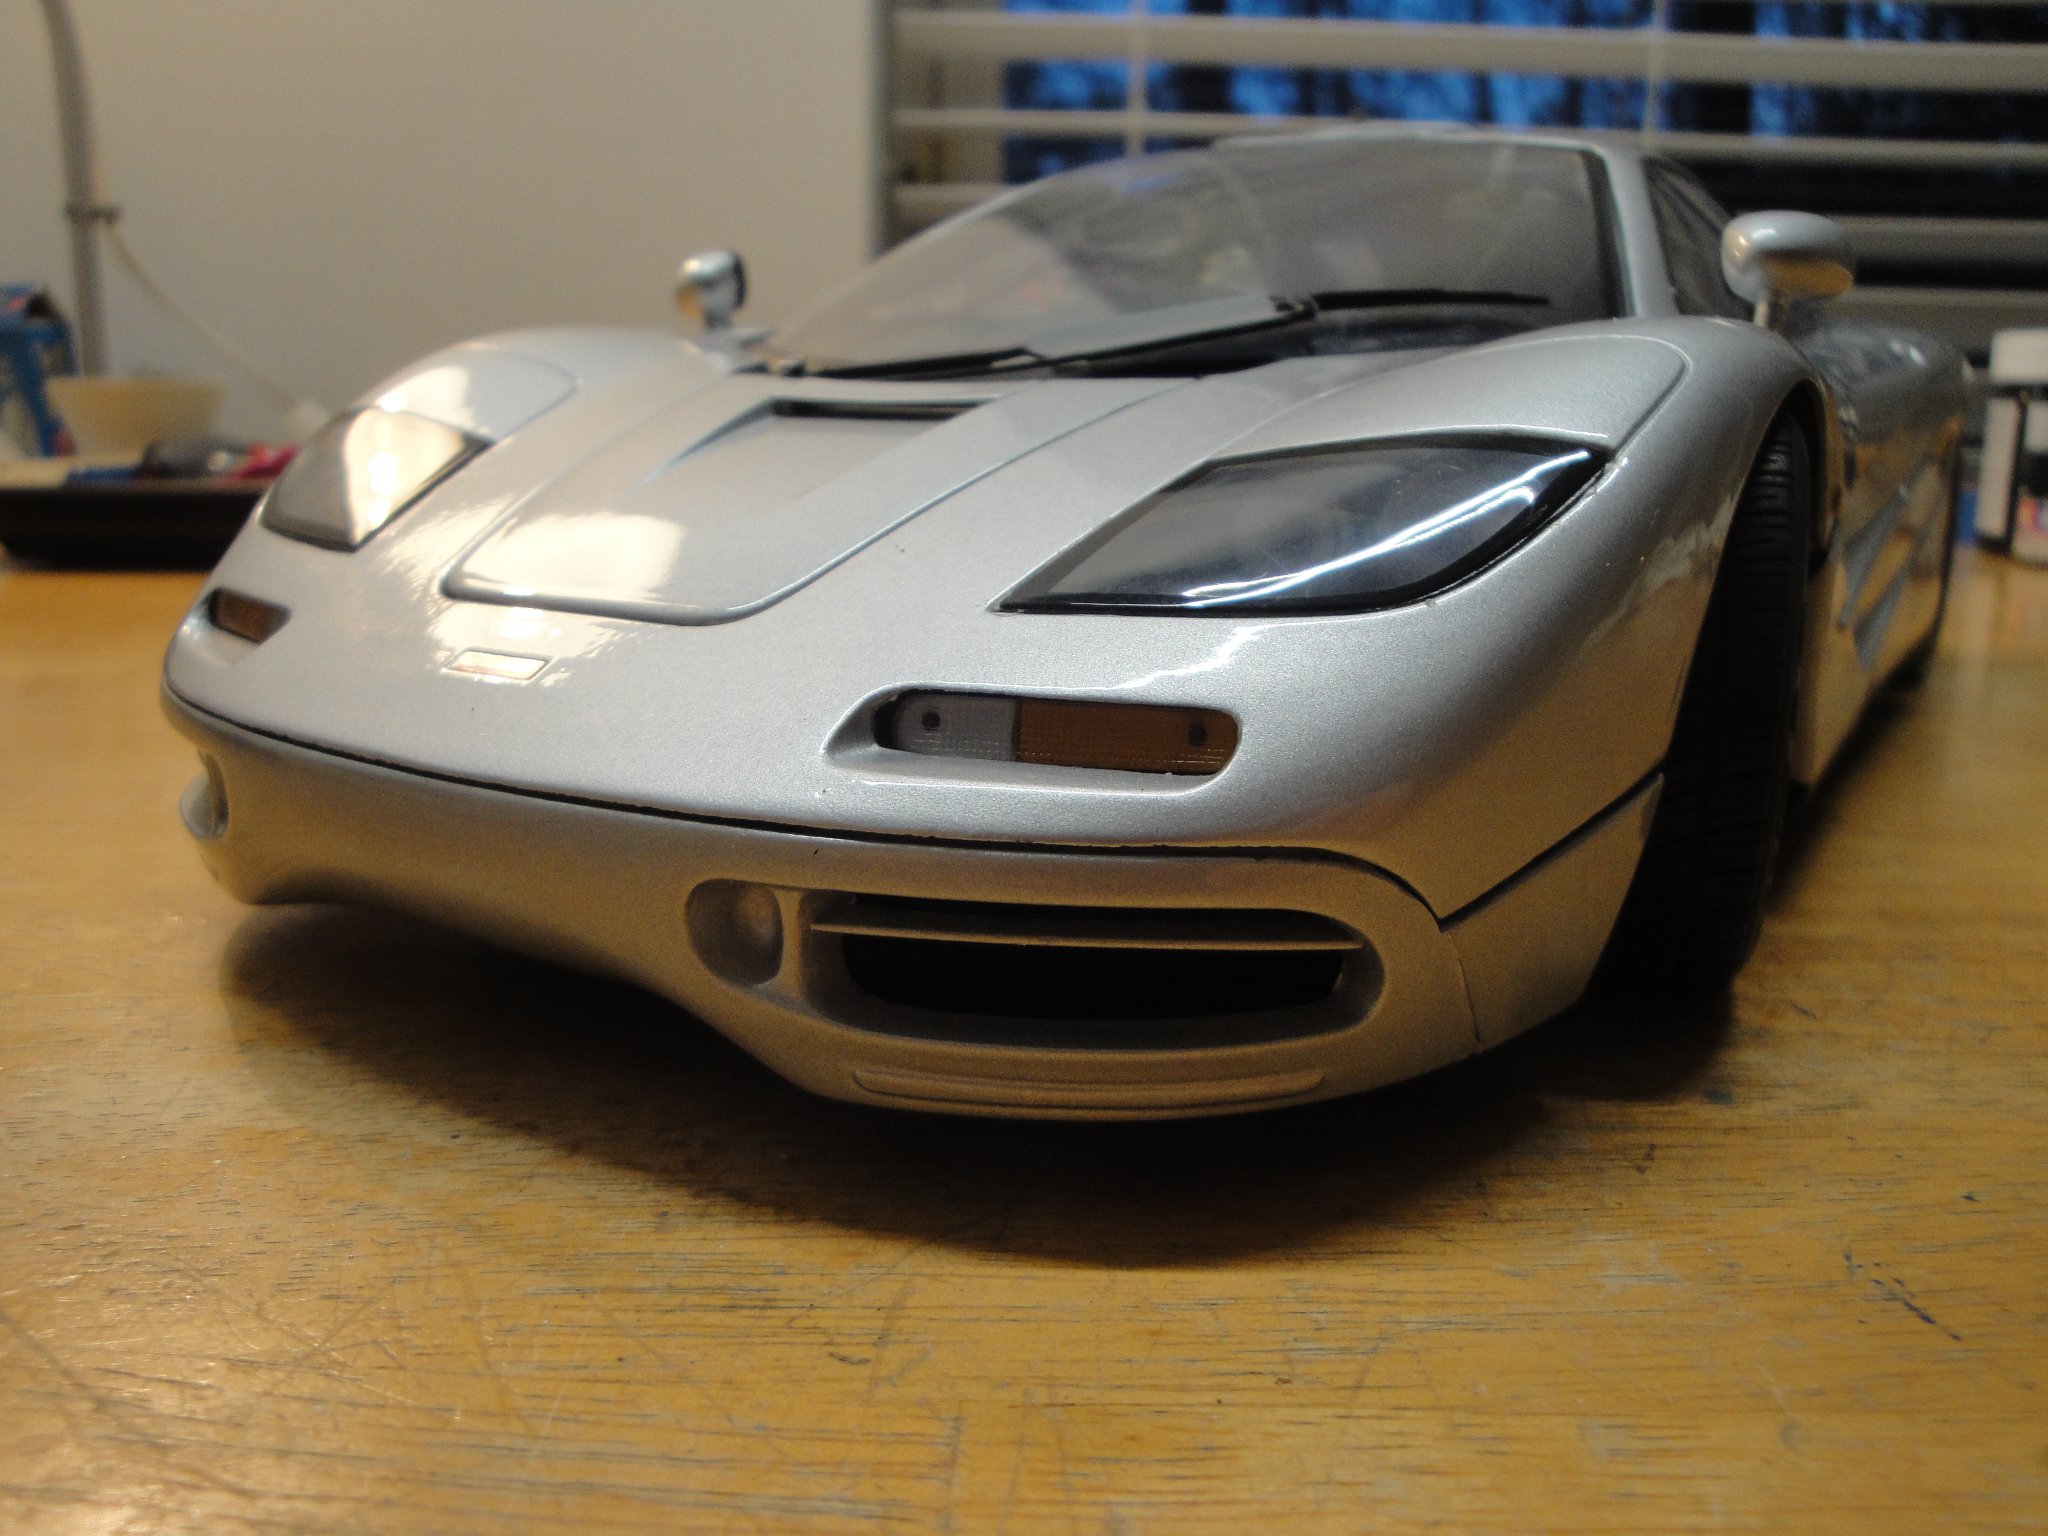
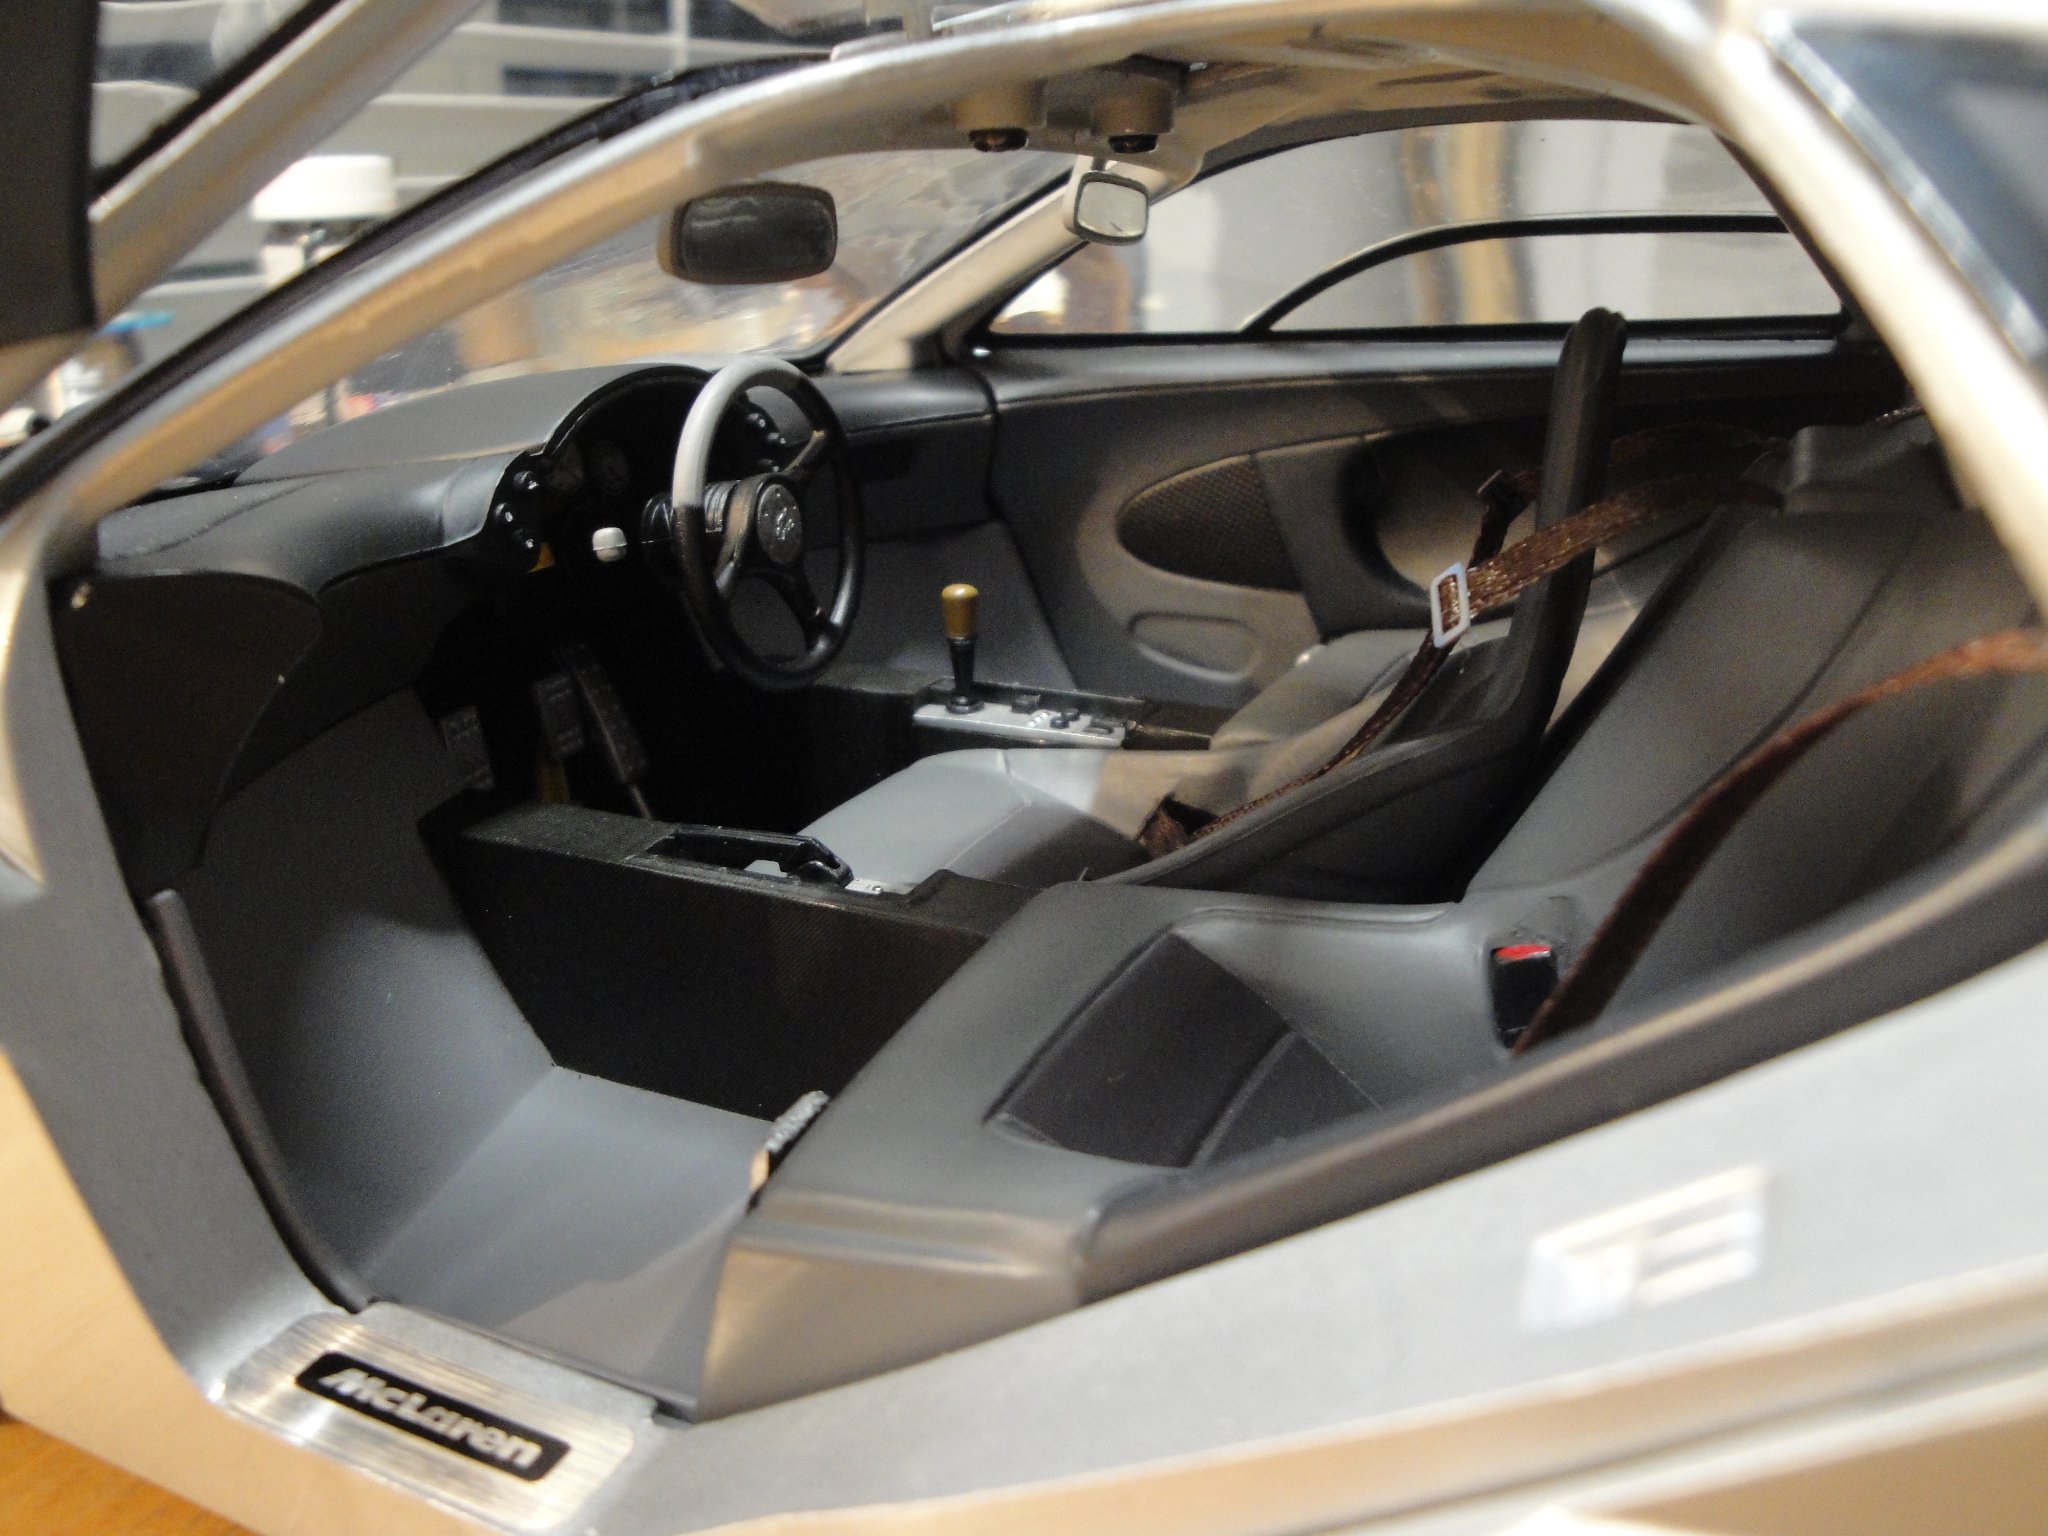
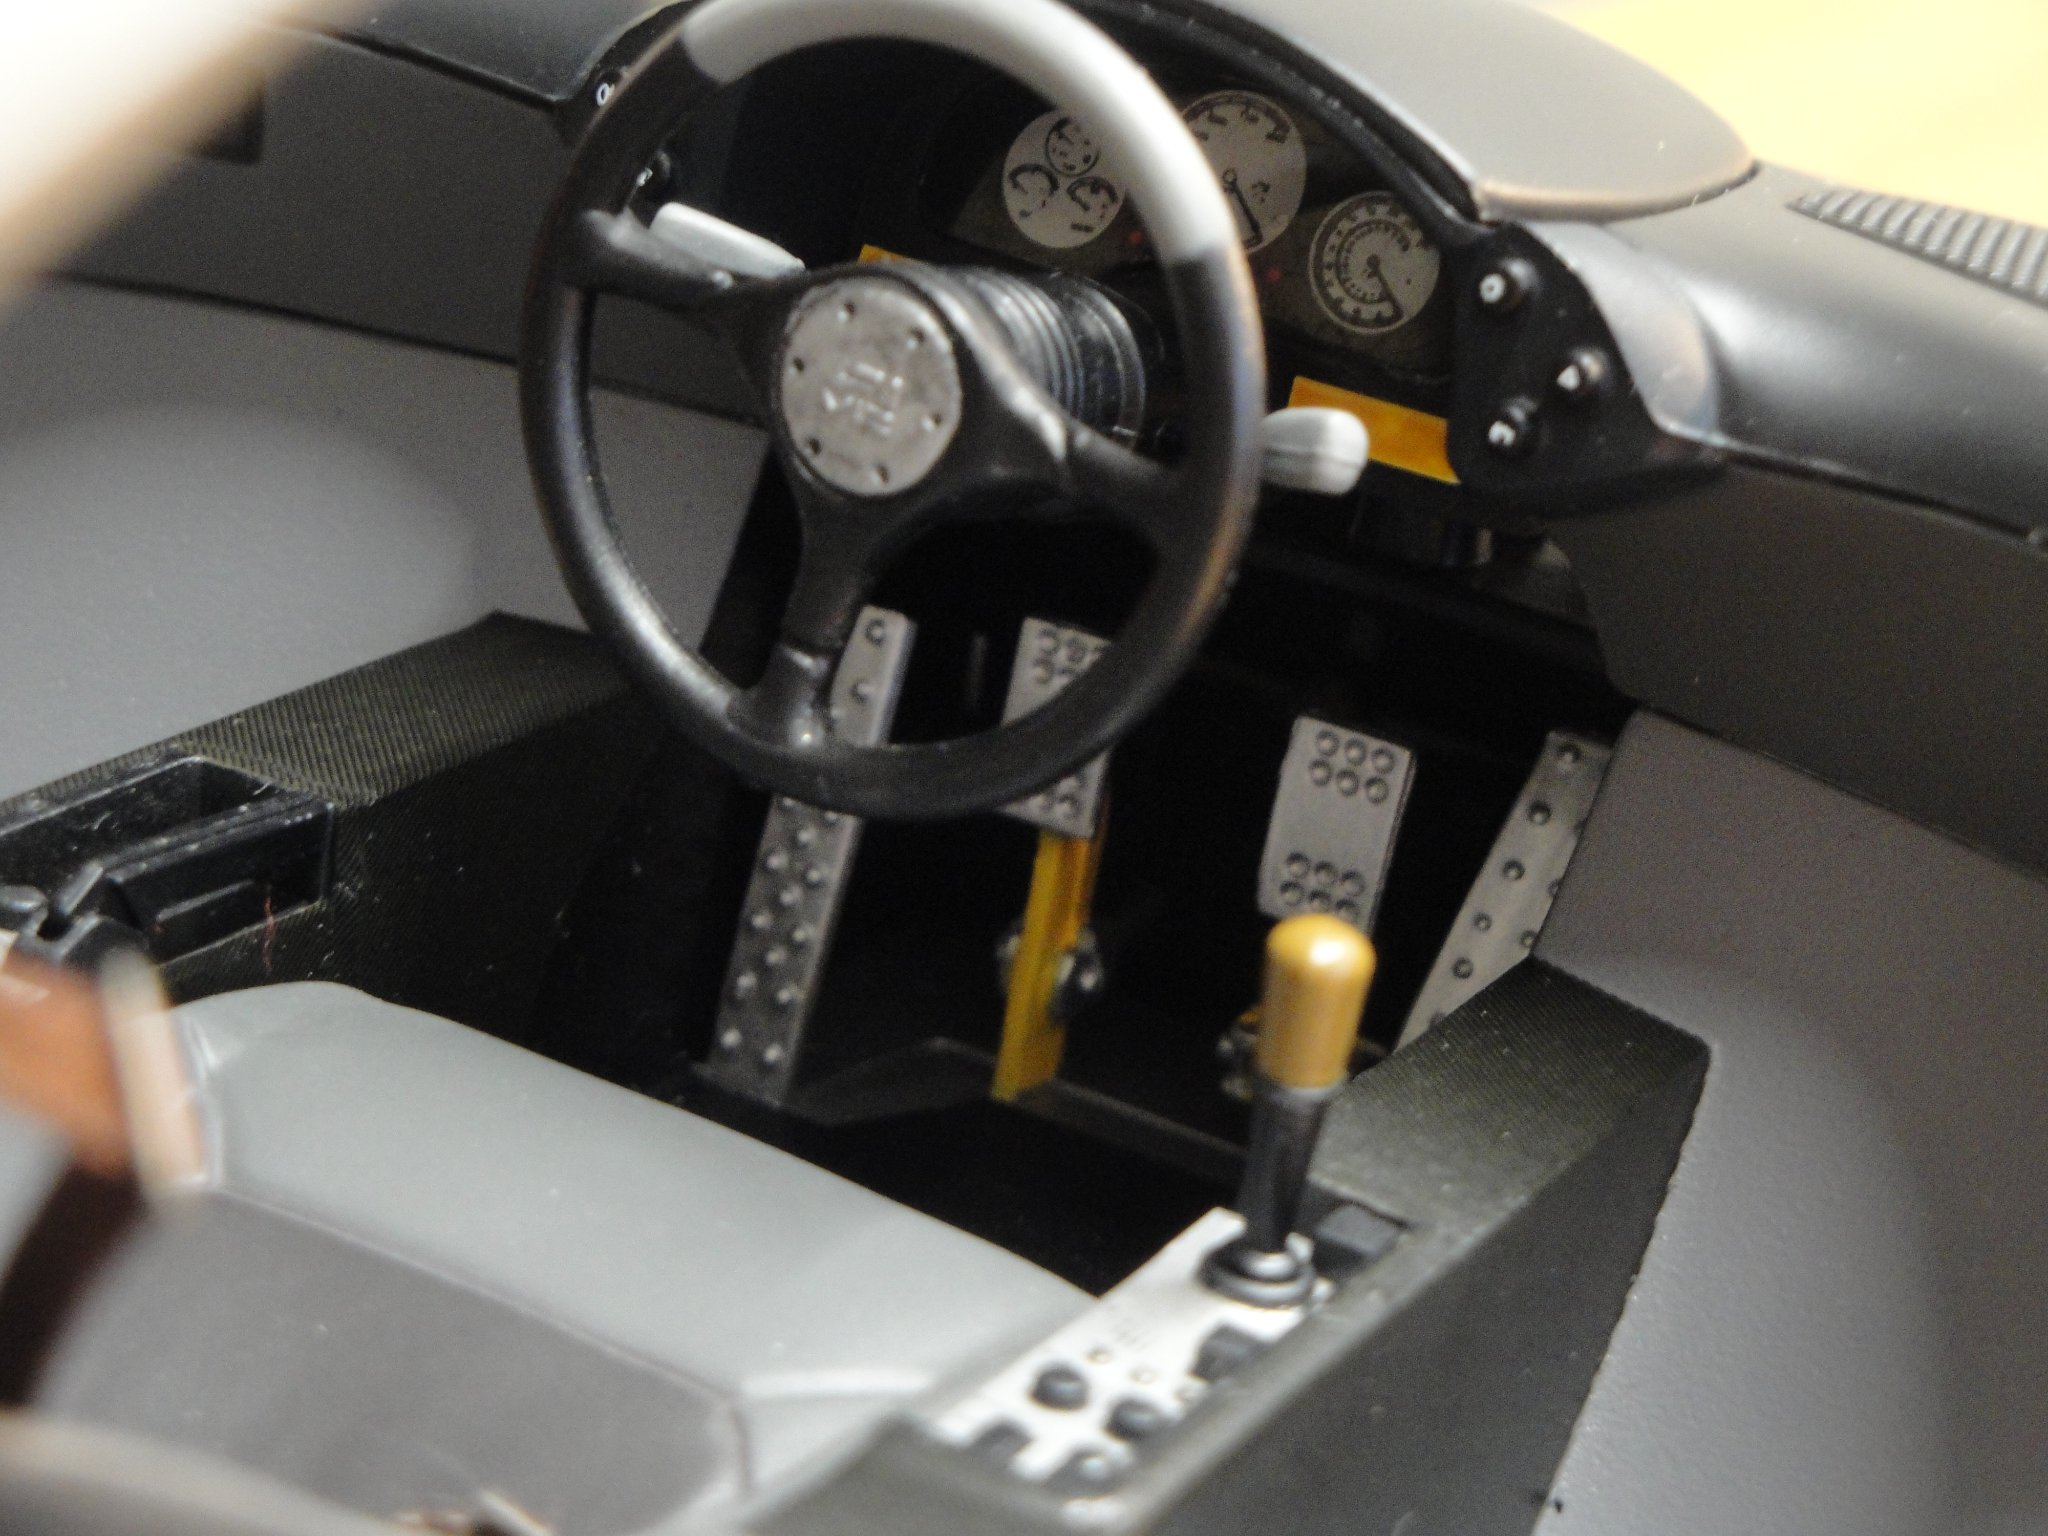
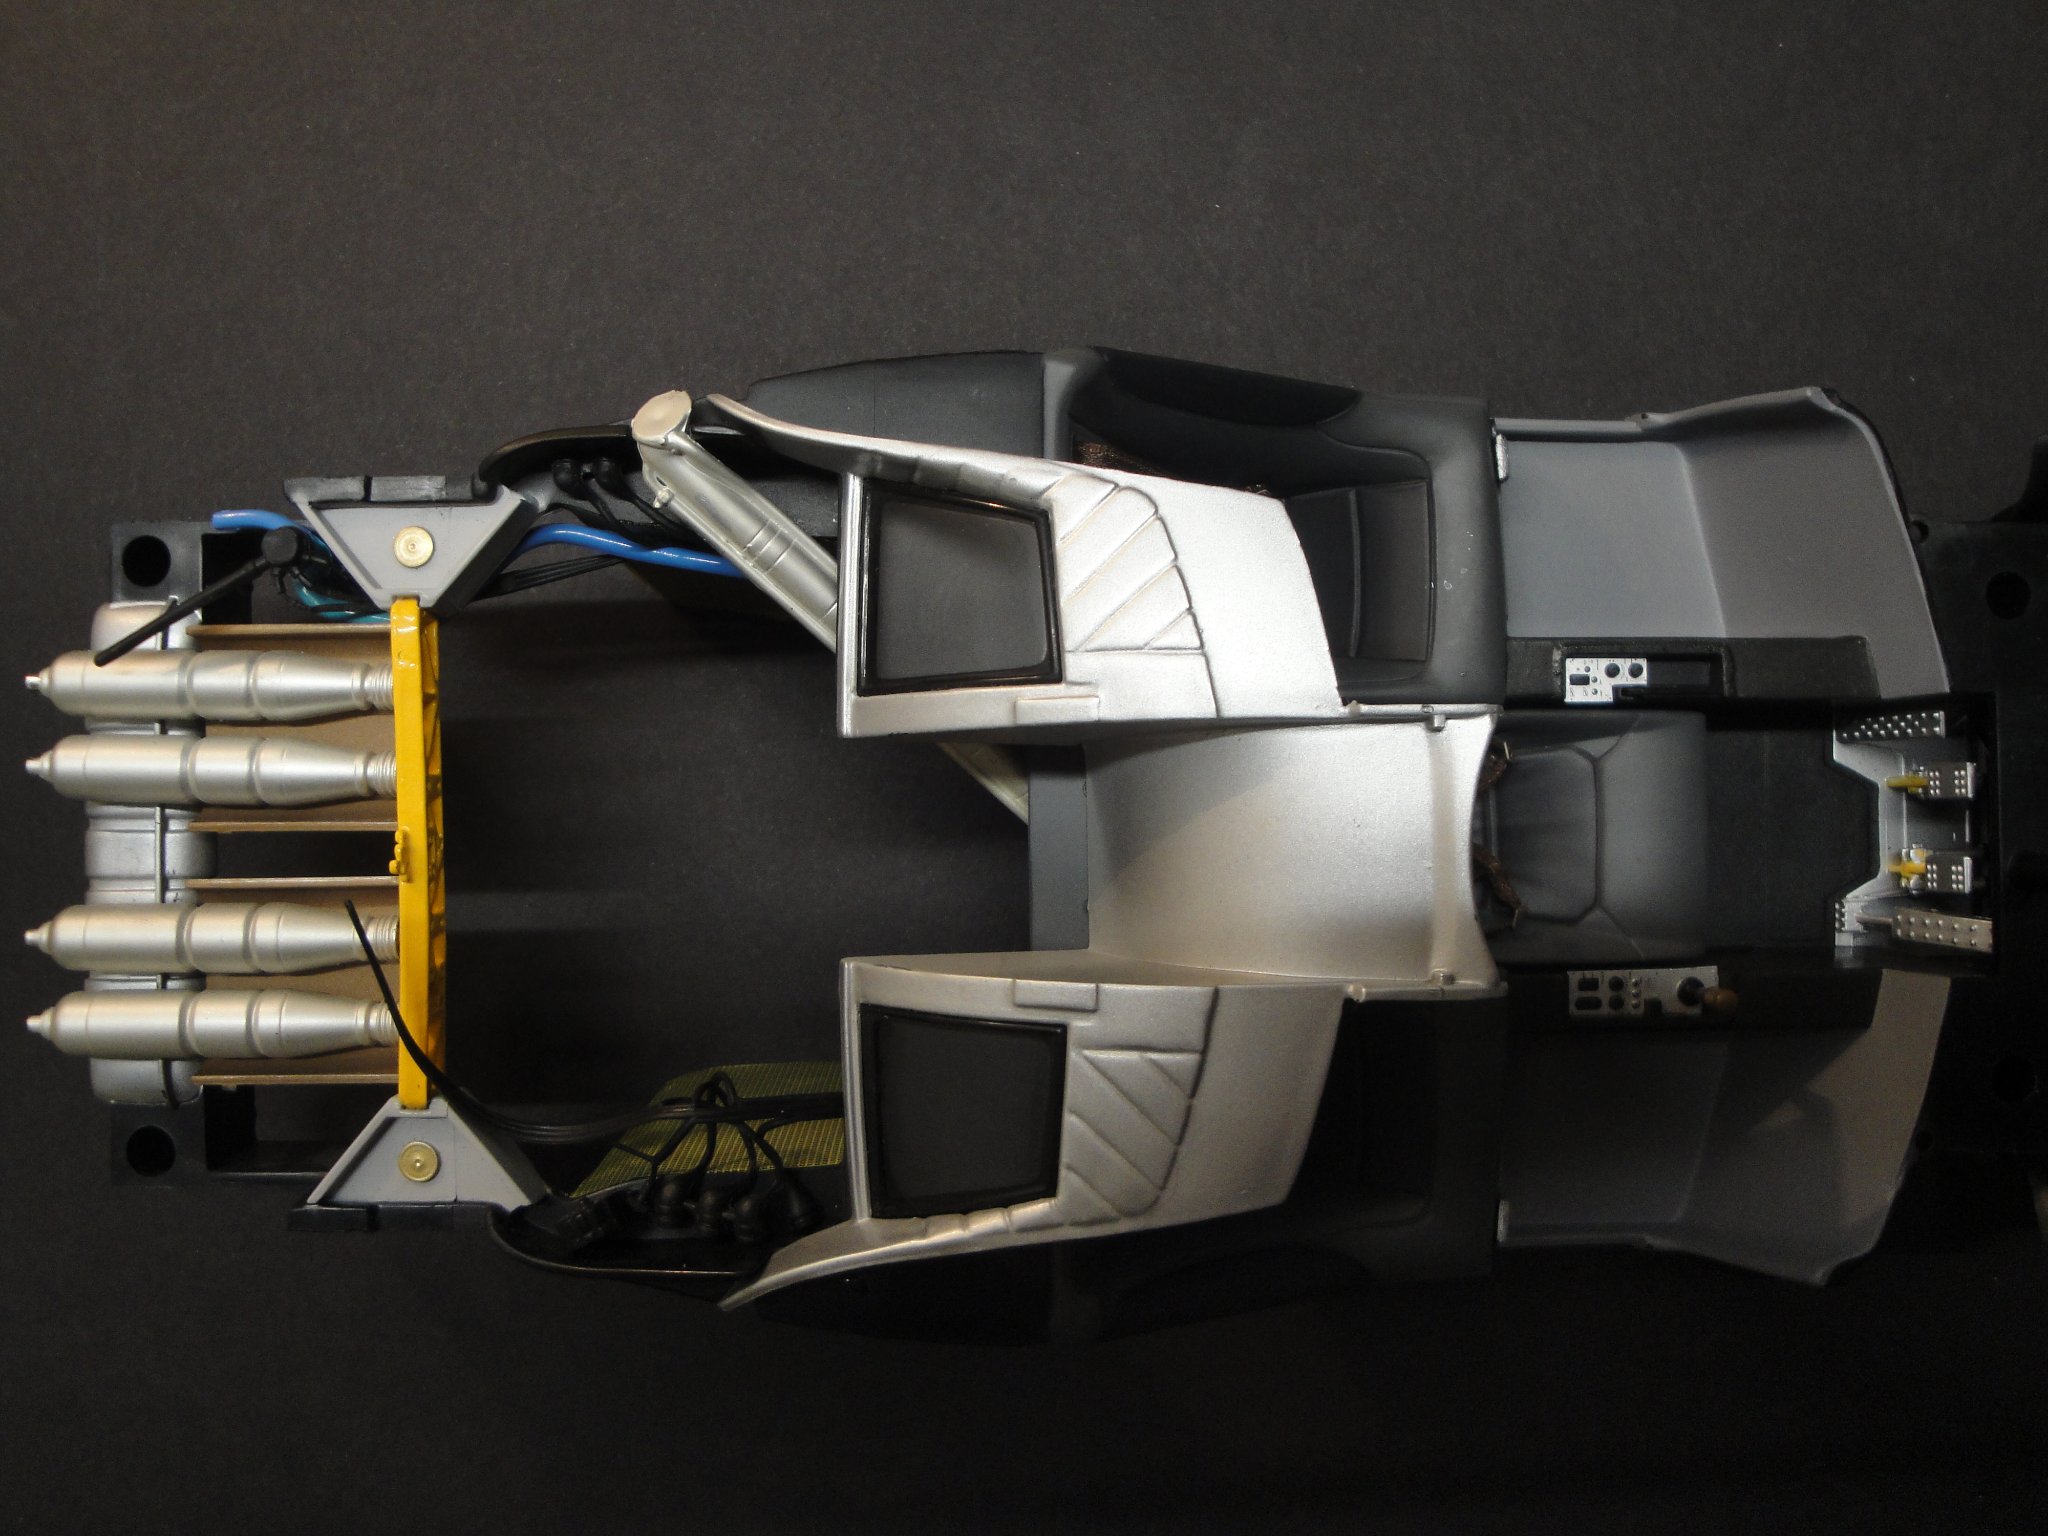
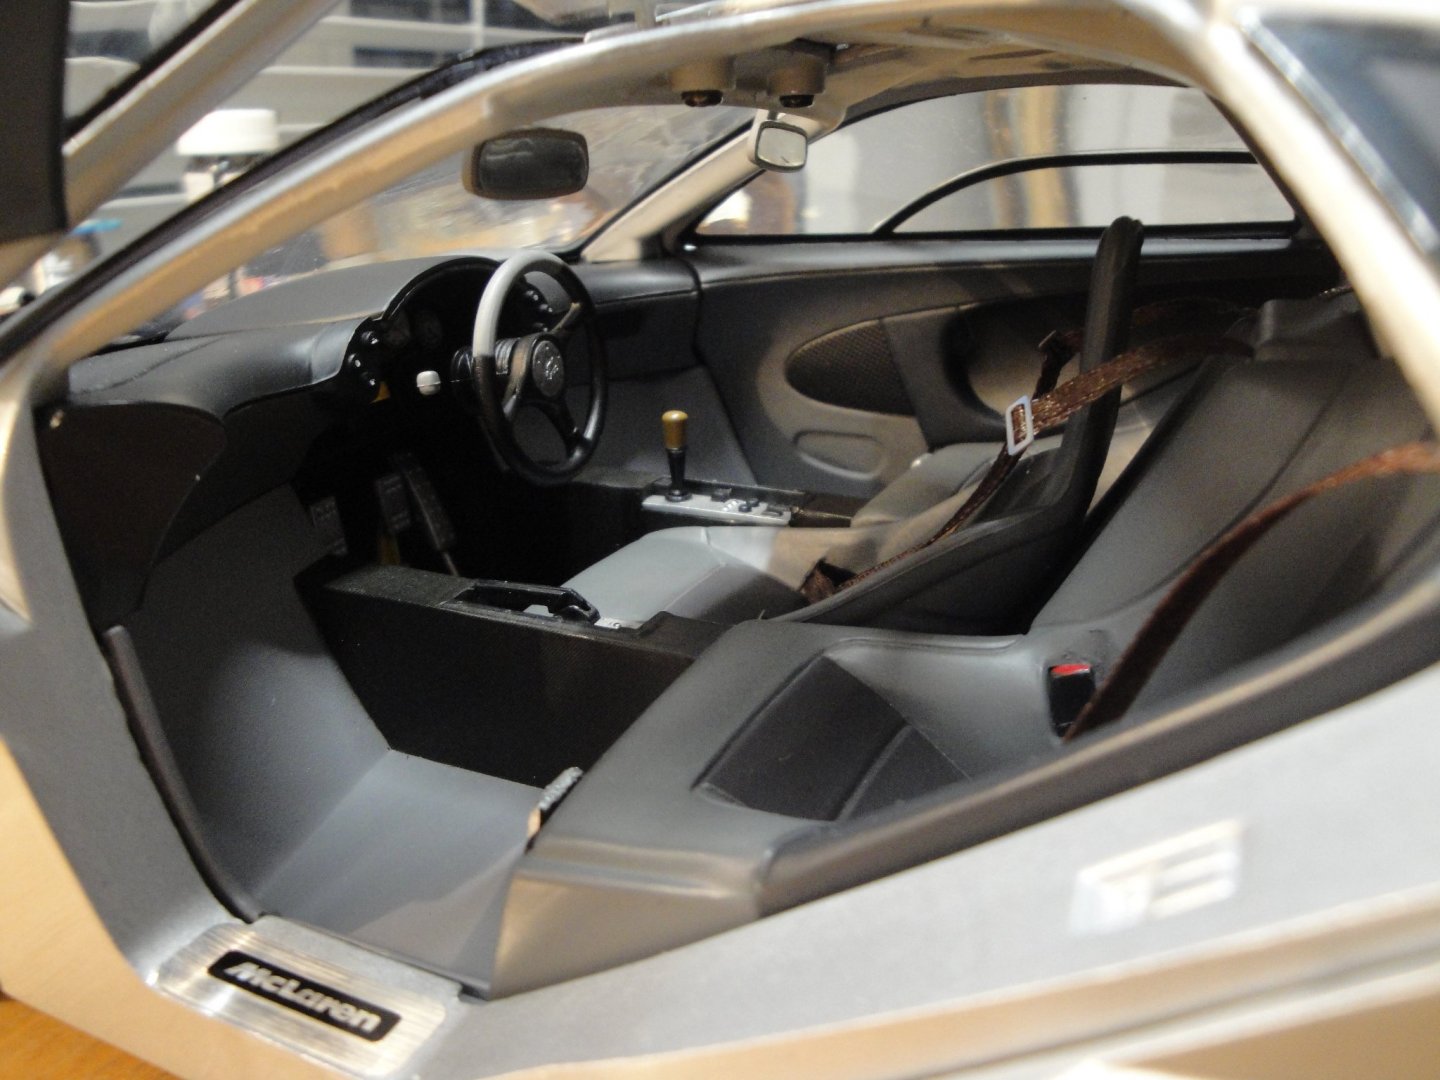
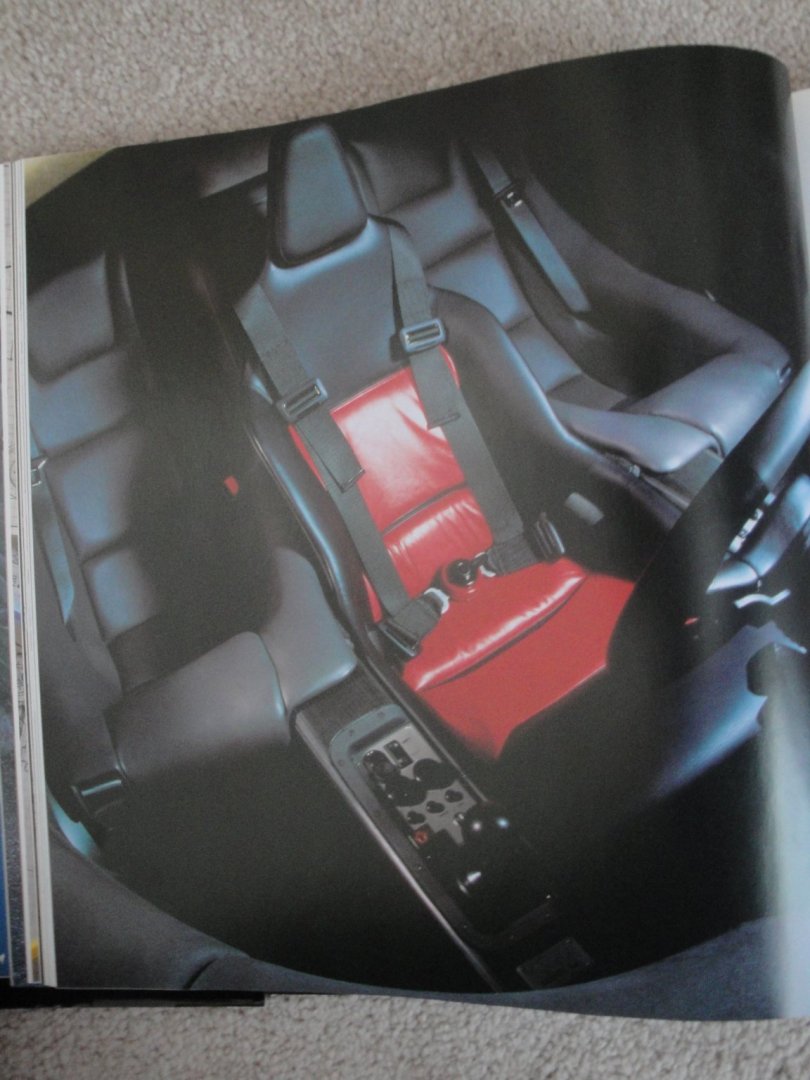
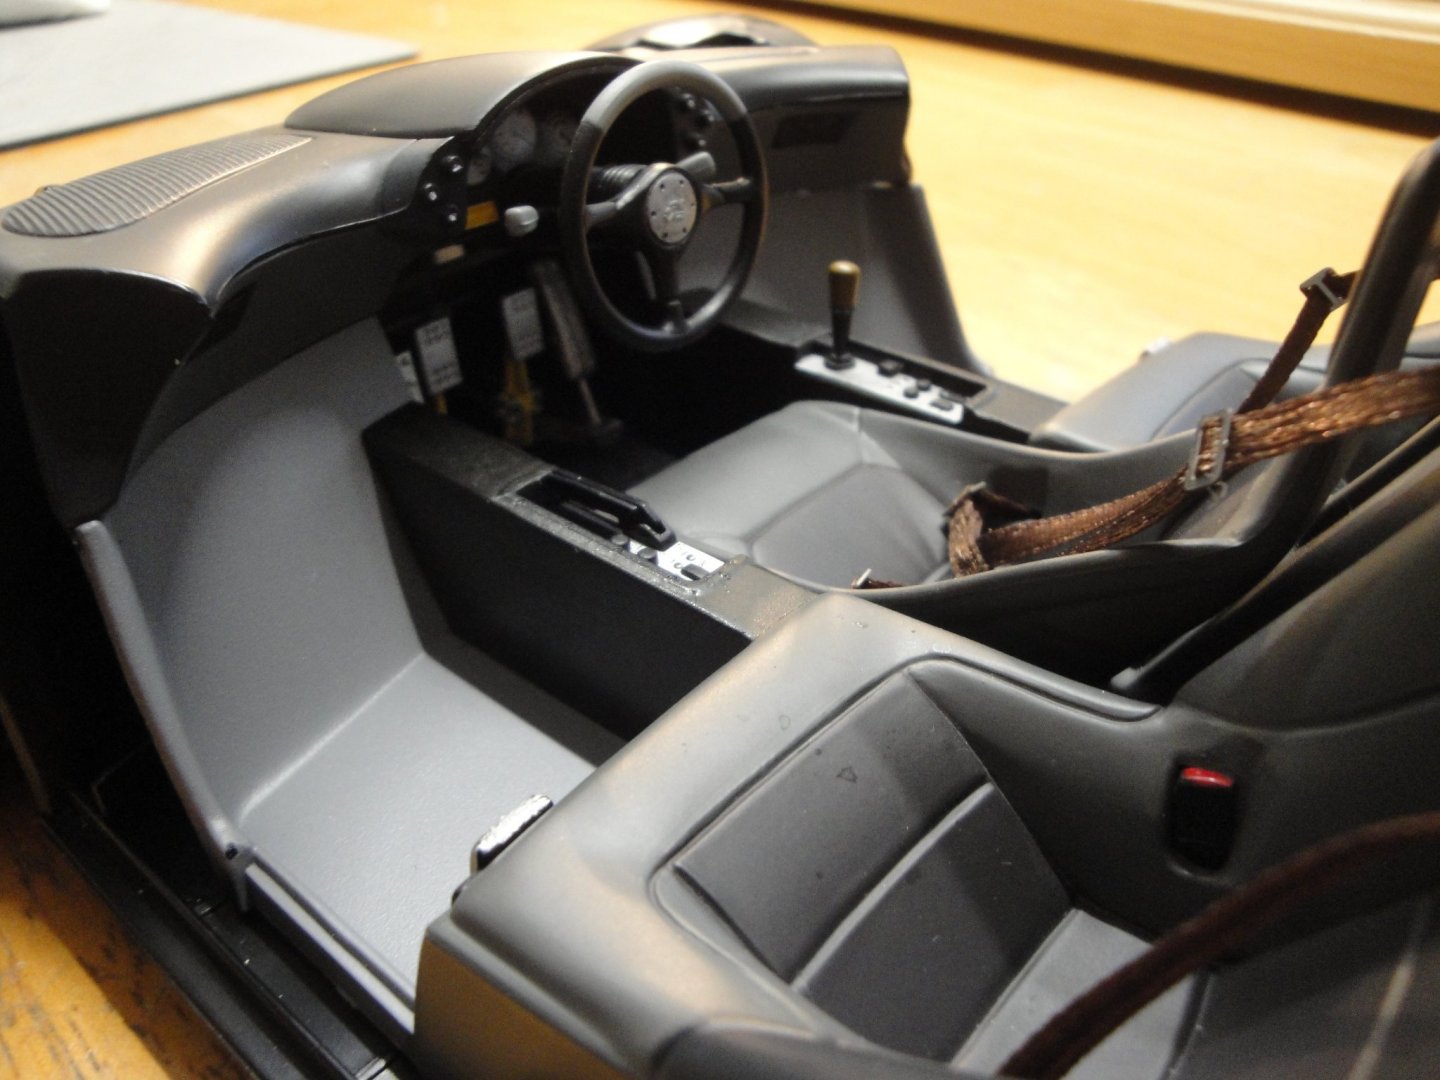
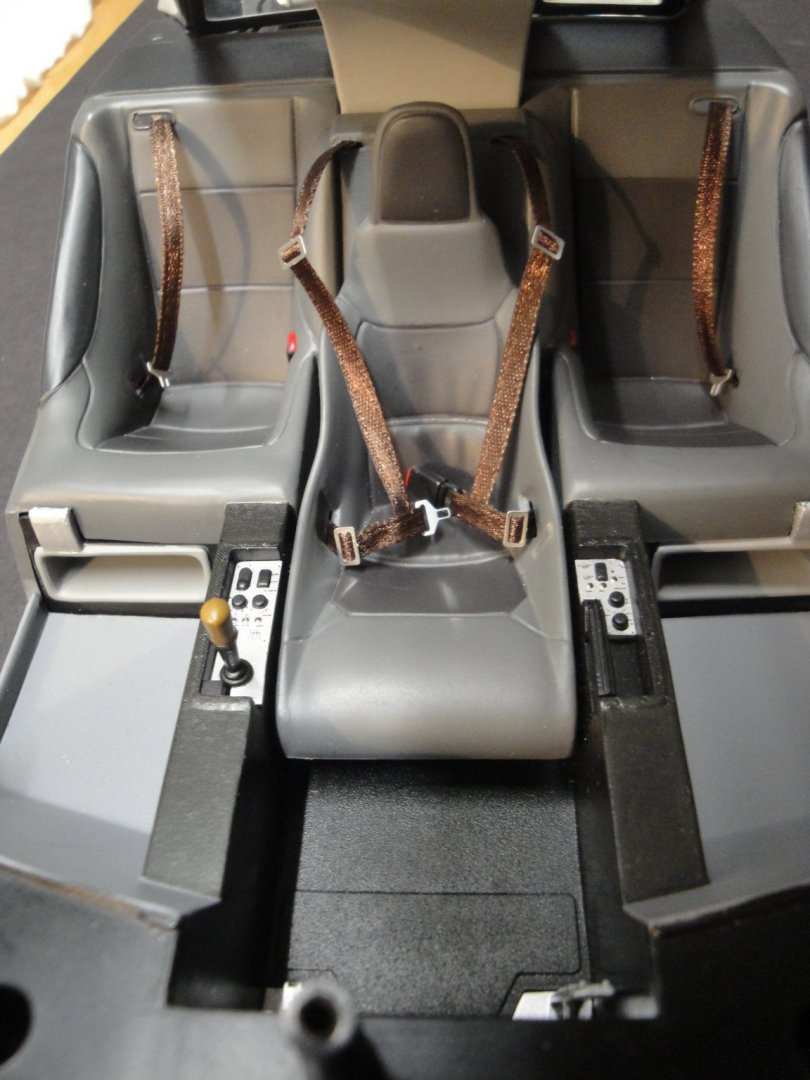
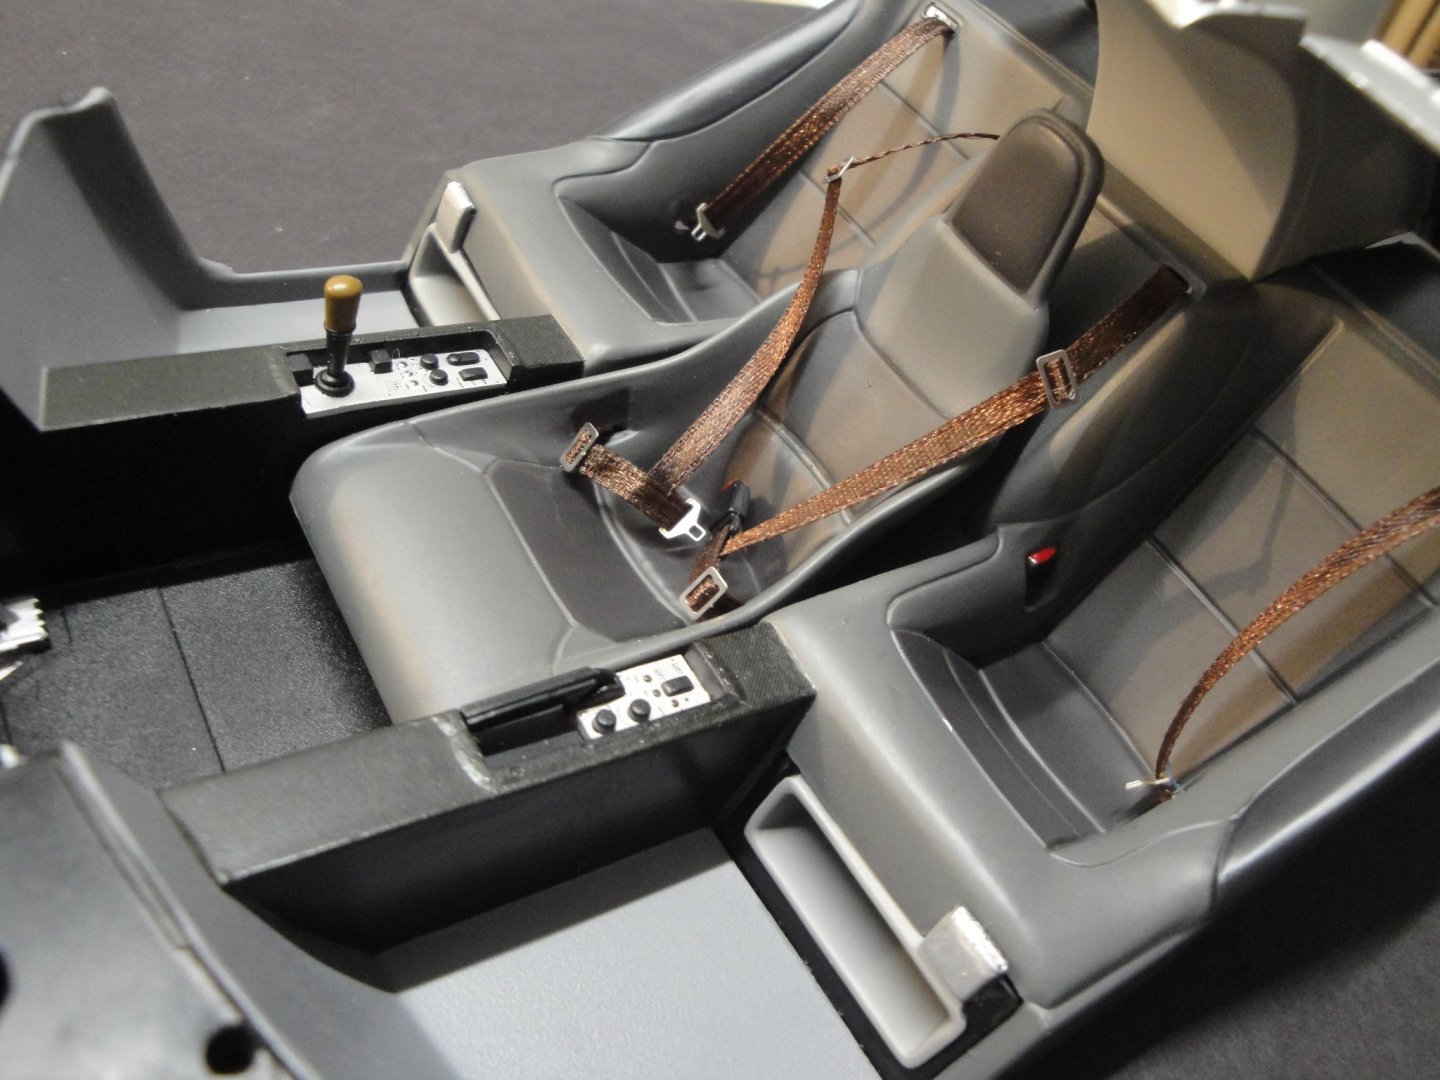
The cockpit - The unique feature of the F1 is its three seats arrangement. To my knowledge, only FIAT with its Multipla model, is the only manufacturer of modern cars, that tried the 3+3 arrangement for seating people. The central position of the driver in the F1 and the incredible and panoramic view, devoid of A pillars, was and still is an incredible asset, when driving this automobile. The model provides a very faithful rendition of the original car: Missing on the model, are the two LCD displays, located on each side of the steering column. These displays have a yellowish backlit, typical of the early 90's displays. I added them with two small pieces of evergreen, painted with Tamiya clear yellow. Yves

- 30 replies
-
- 11
-
-
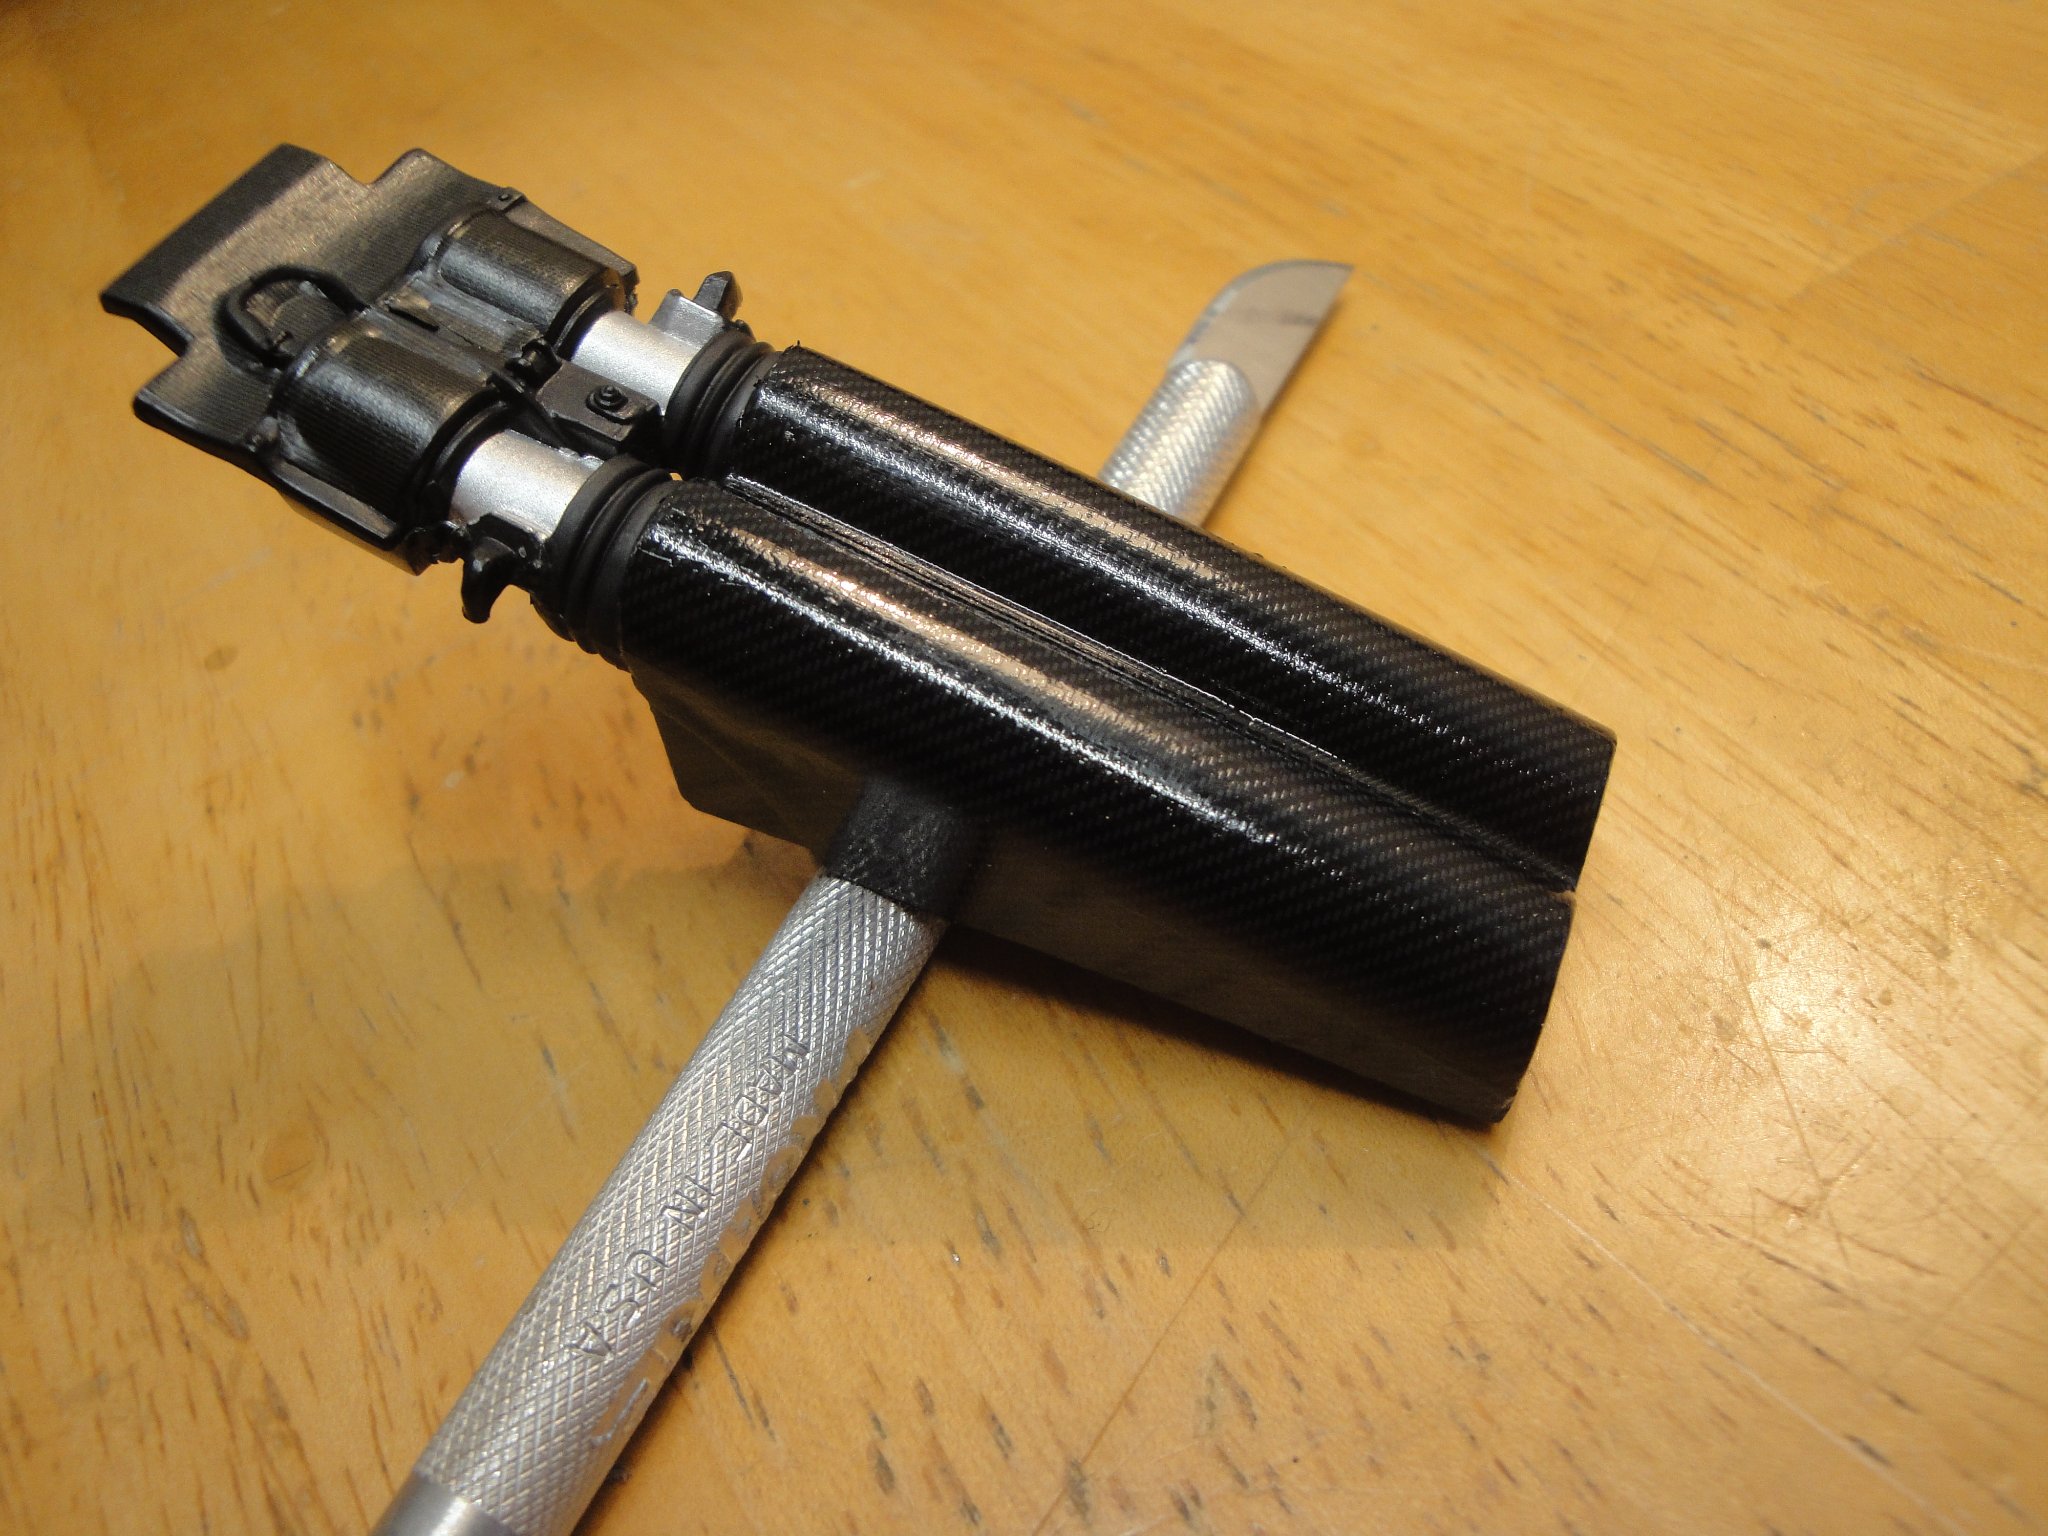
The original air intakes are not decorated as carbon fiber. Actually, there is a very subtle scrubbing of the plastic, but it does not render the appearance of Carbon fiber. It took a little while, but I finally received some Carbon Fiber decals from Tamiya. I have to say that Tamiya products are expensive, but the quality is amazing. These decals with some Solvaset are hugging the original plastic parts, like there is no tomorrow. Some clear coating on top, and the appearance of the polished carbon fiber parts is revealed in full. Now, one can admire the beautiful color patches of carbon fiber, gold foils, stainless steel and rubber parts. Trivia question: McLaren did not have a crumpling zone for the rear of the car and were having problems with the Transportation Safety office. They decided to modify and enlarge the enormous muffler, which then became the crumpling safety device. When rear-ending a McLaren, you'd better have a really good insurance with a one million dollar full umbrella attached to it. Yves


- 30 replies
-
- 10
-
-
Excellent choice, that seems very popular nowadays. Plus it is the perfect sequel to the Emma C. Berry and allows you to remain within fishing vessels at the same scale. I have myself considered building that same kit, but for the moment have way too many projects going on. Yves
-
Good catch Miles. When I built my Calypso, 35 years ago, there was not much info available and there was no Internet. If I ever go back and restore my model, I may add this feature. I suspect that Billing Boat designed the boat in this fashion, to allow a better and larger access to the inside of the hull, since this model was created first for Remote Control and navigation. Yves
- 70 replies
-
- 2
-
-
- calypso
- billing boats
- (and 1 more)
-
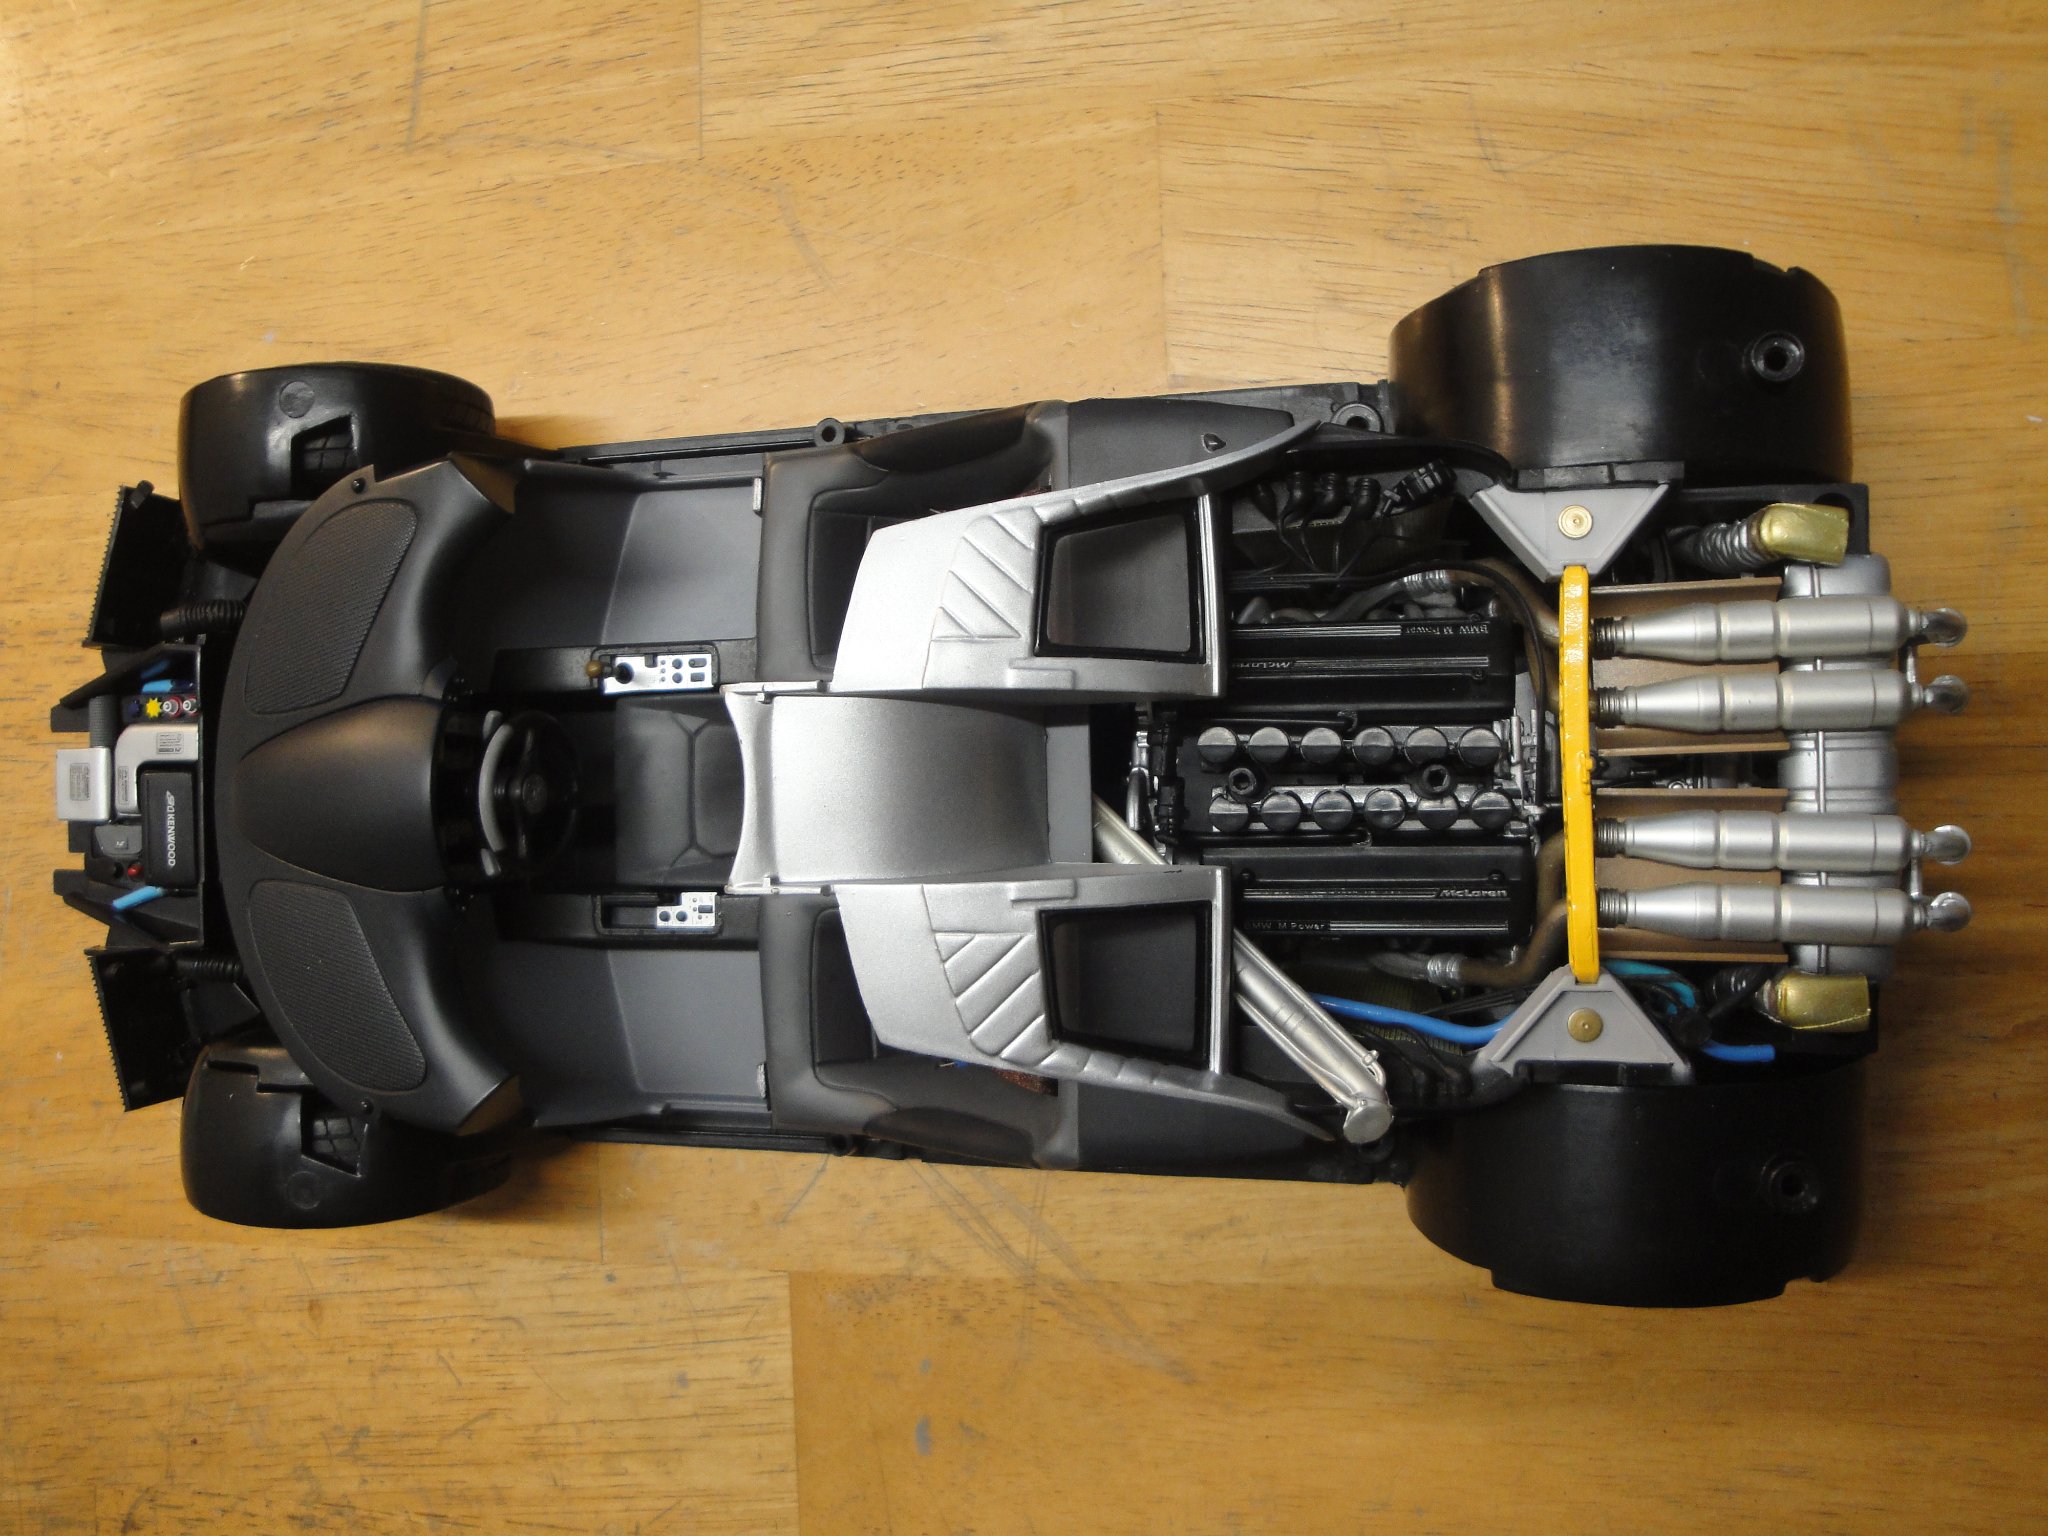
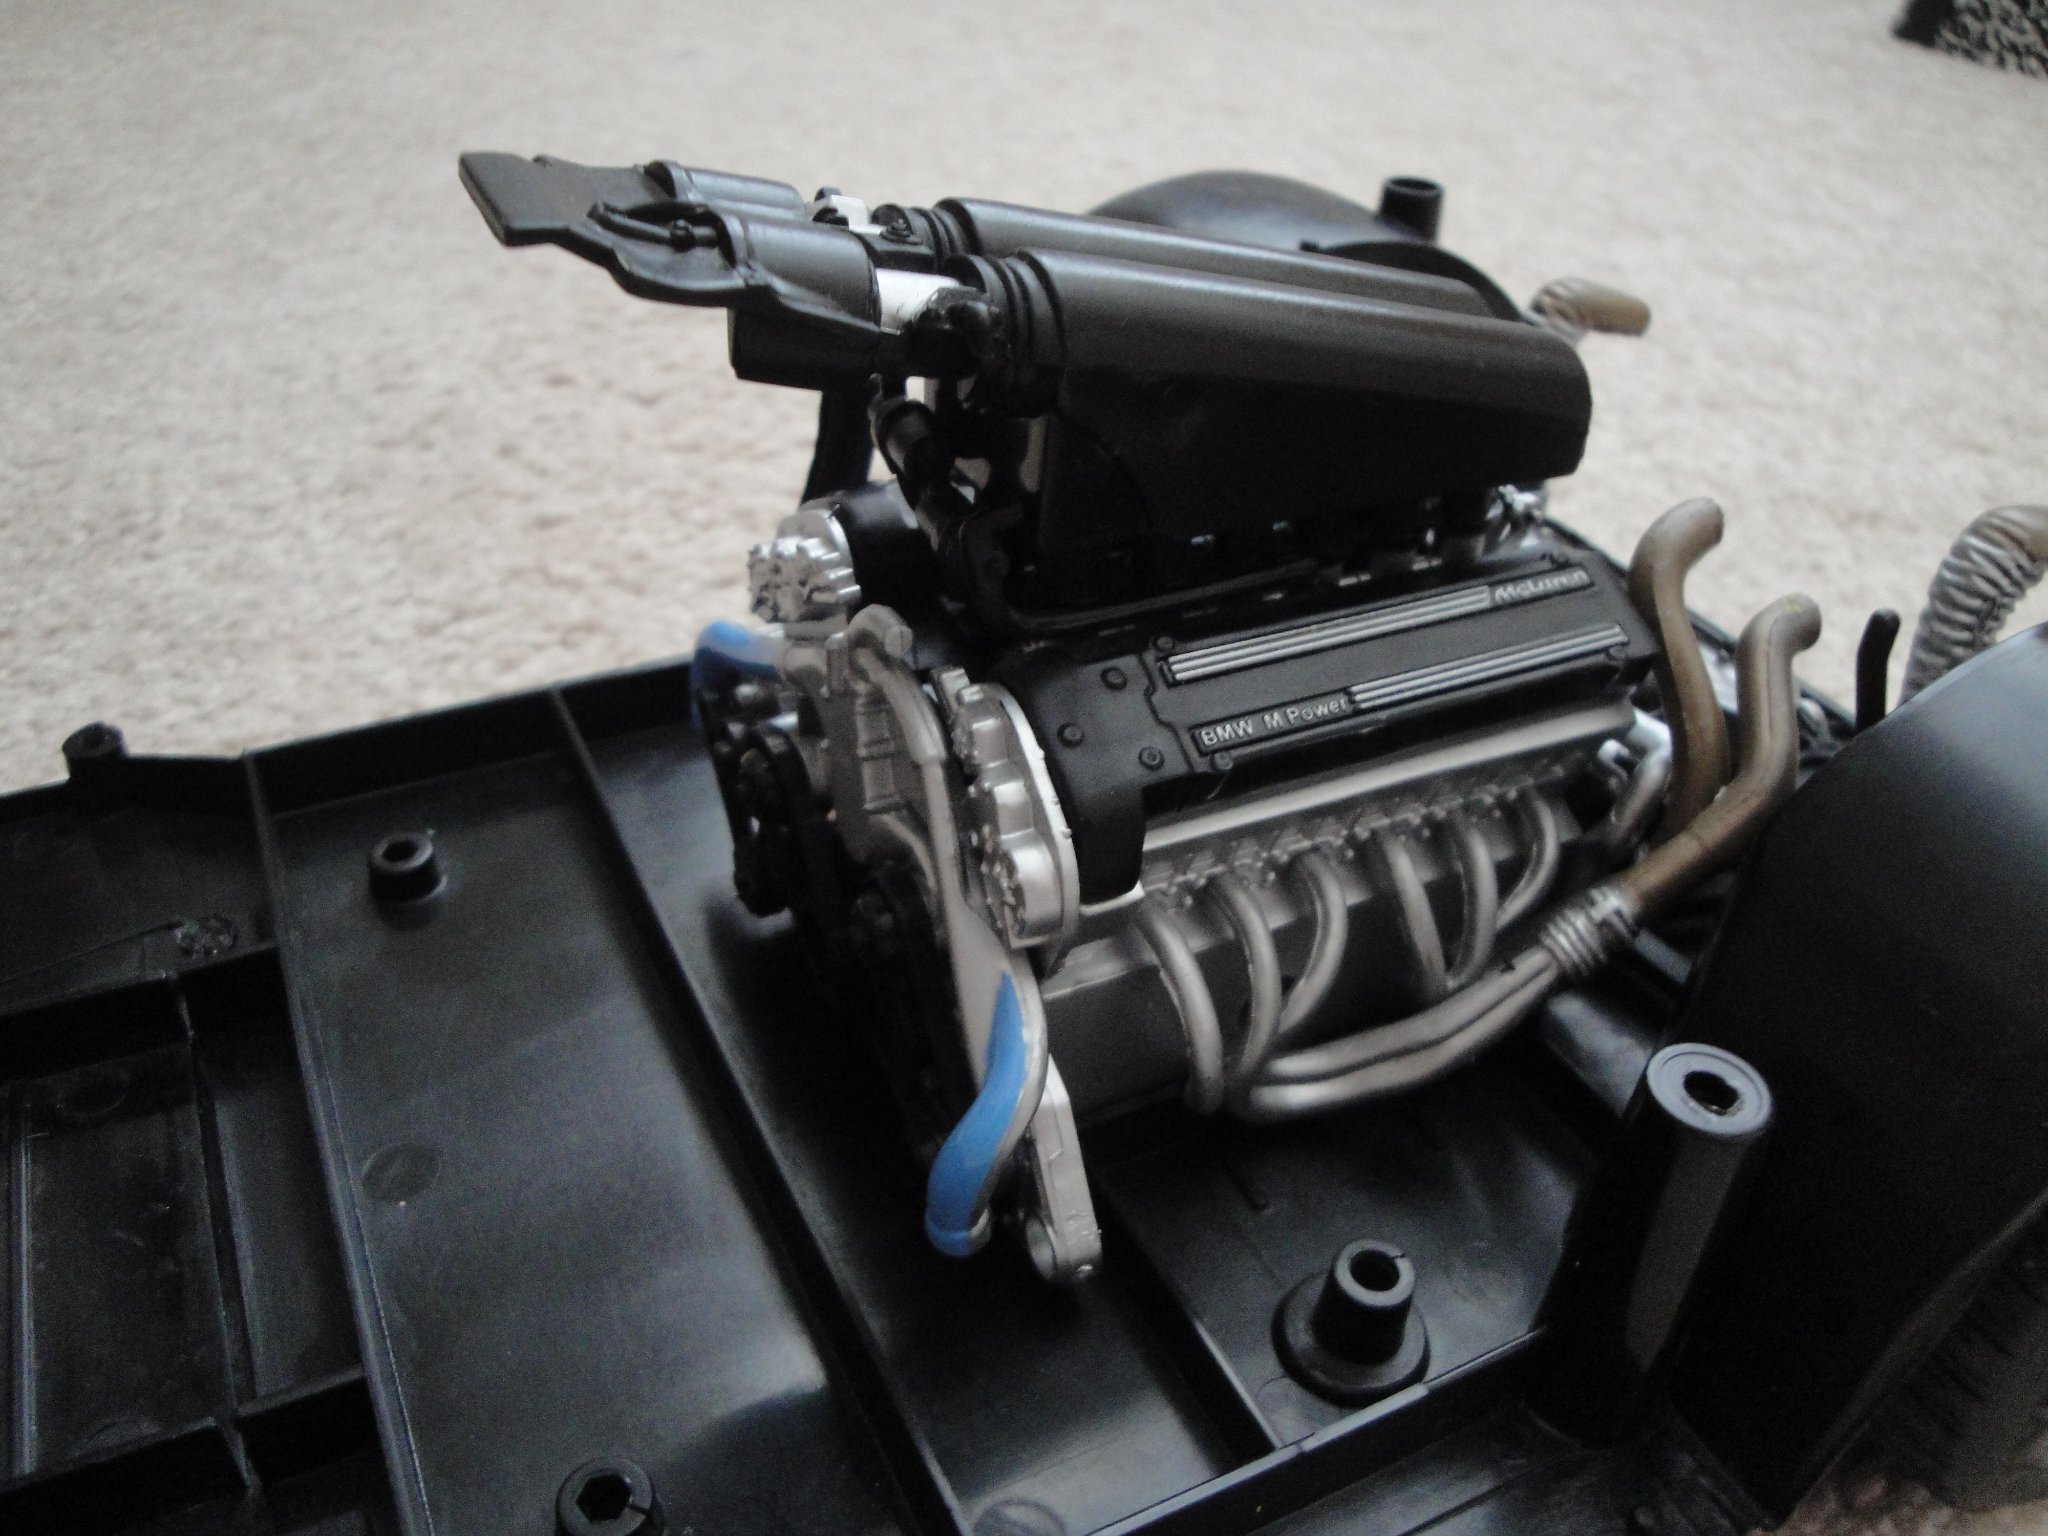
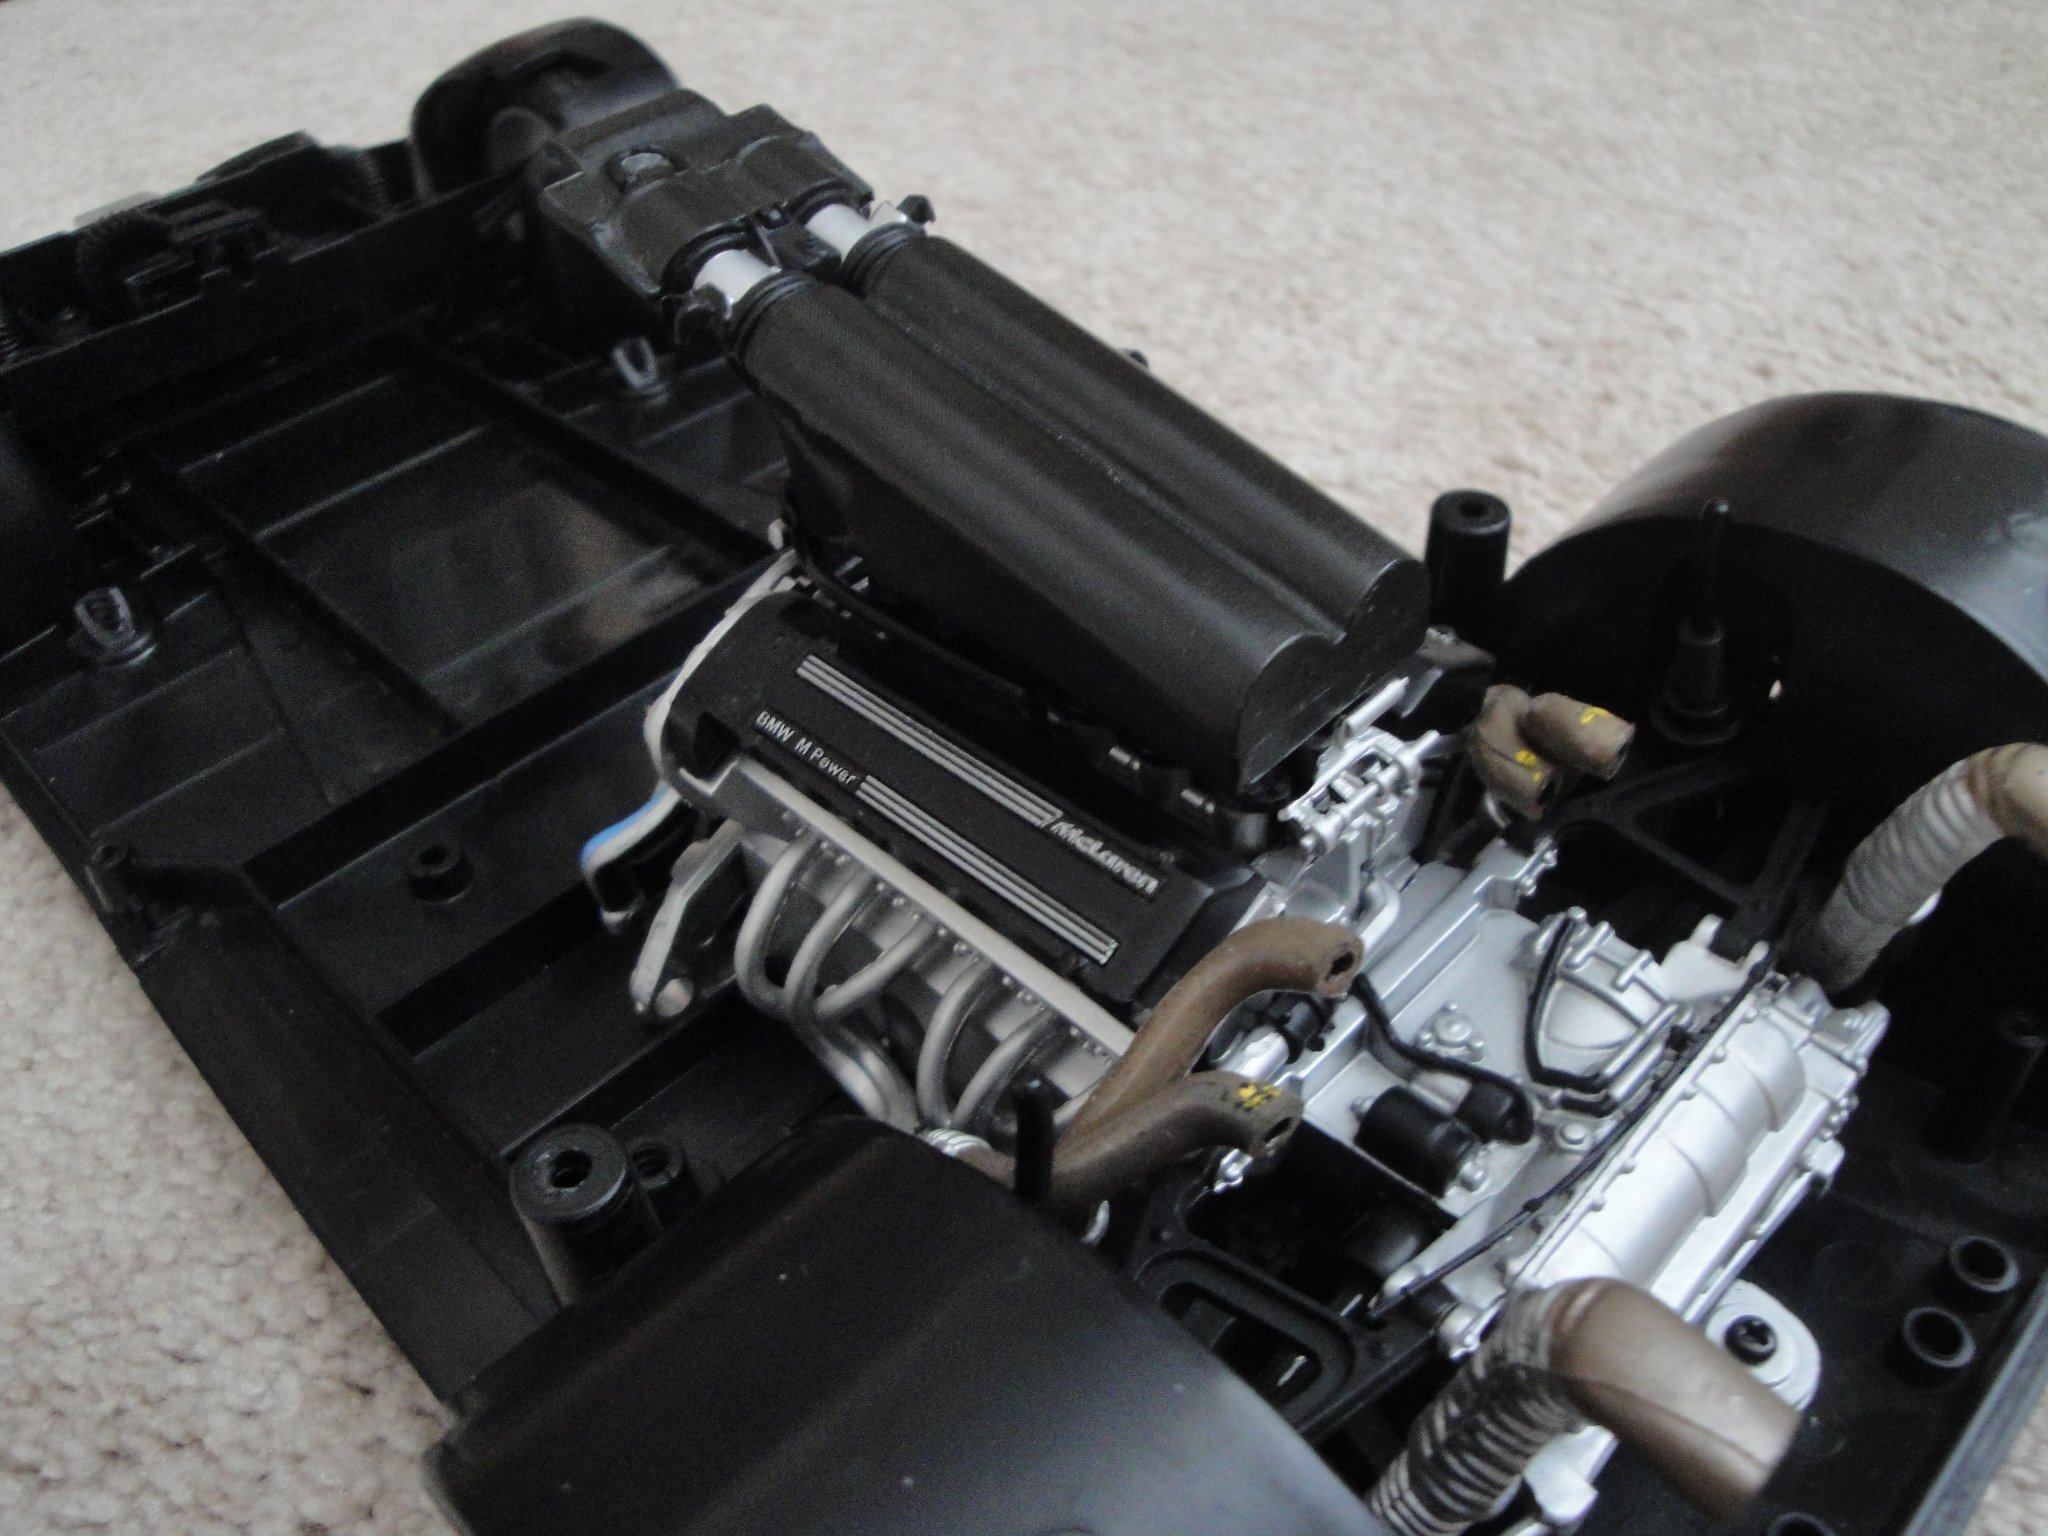
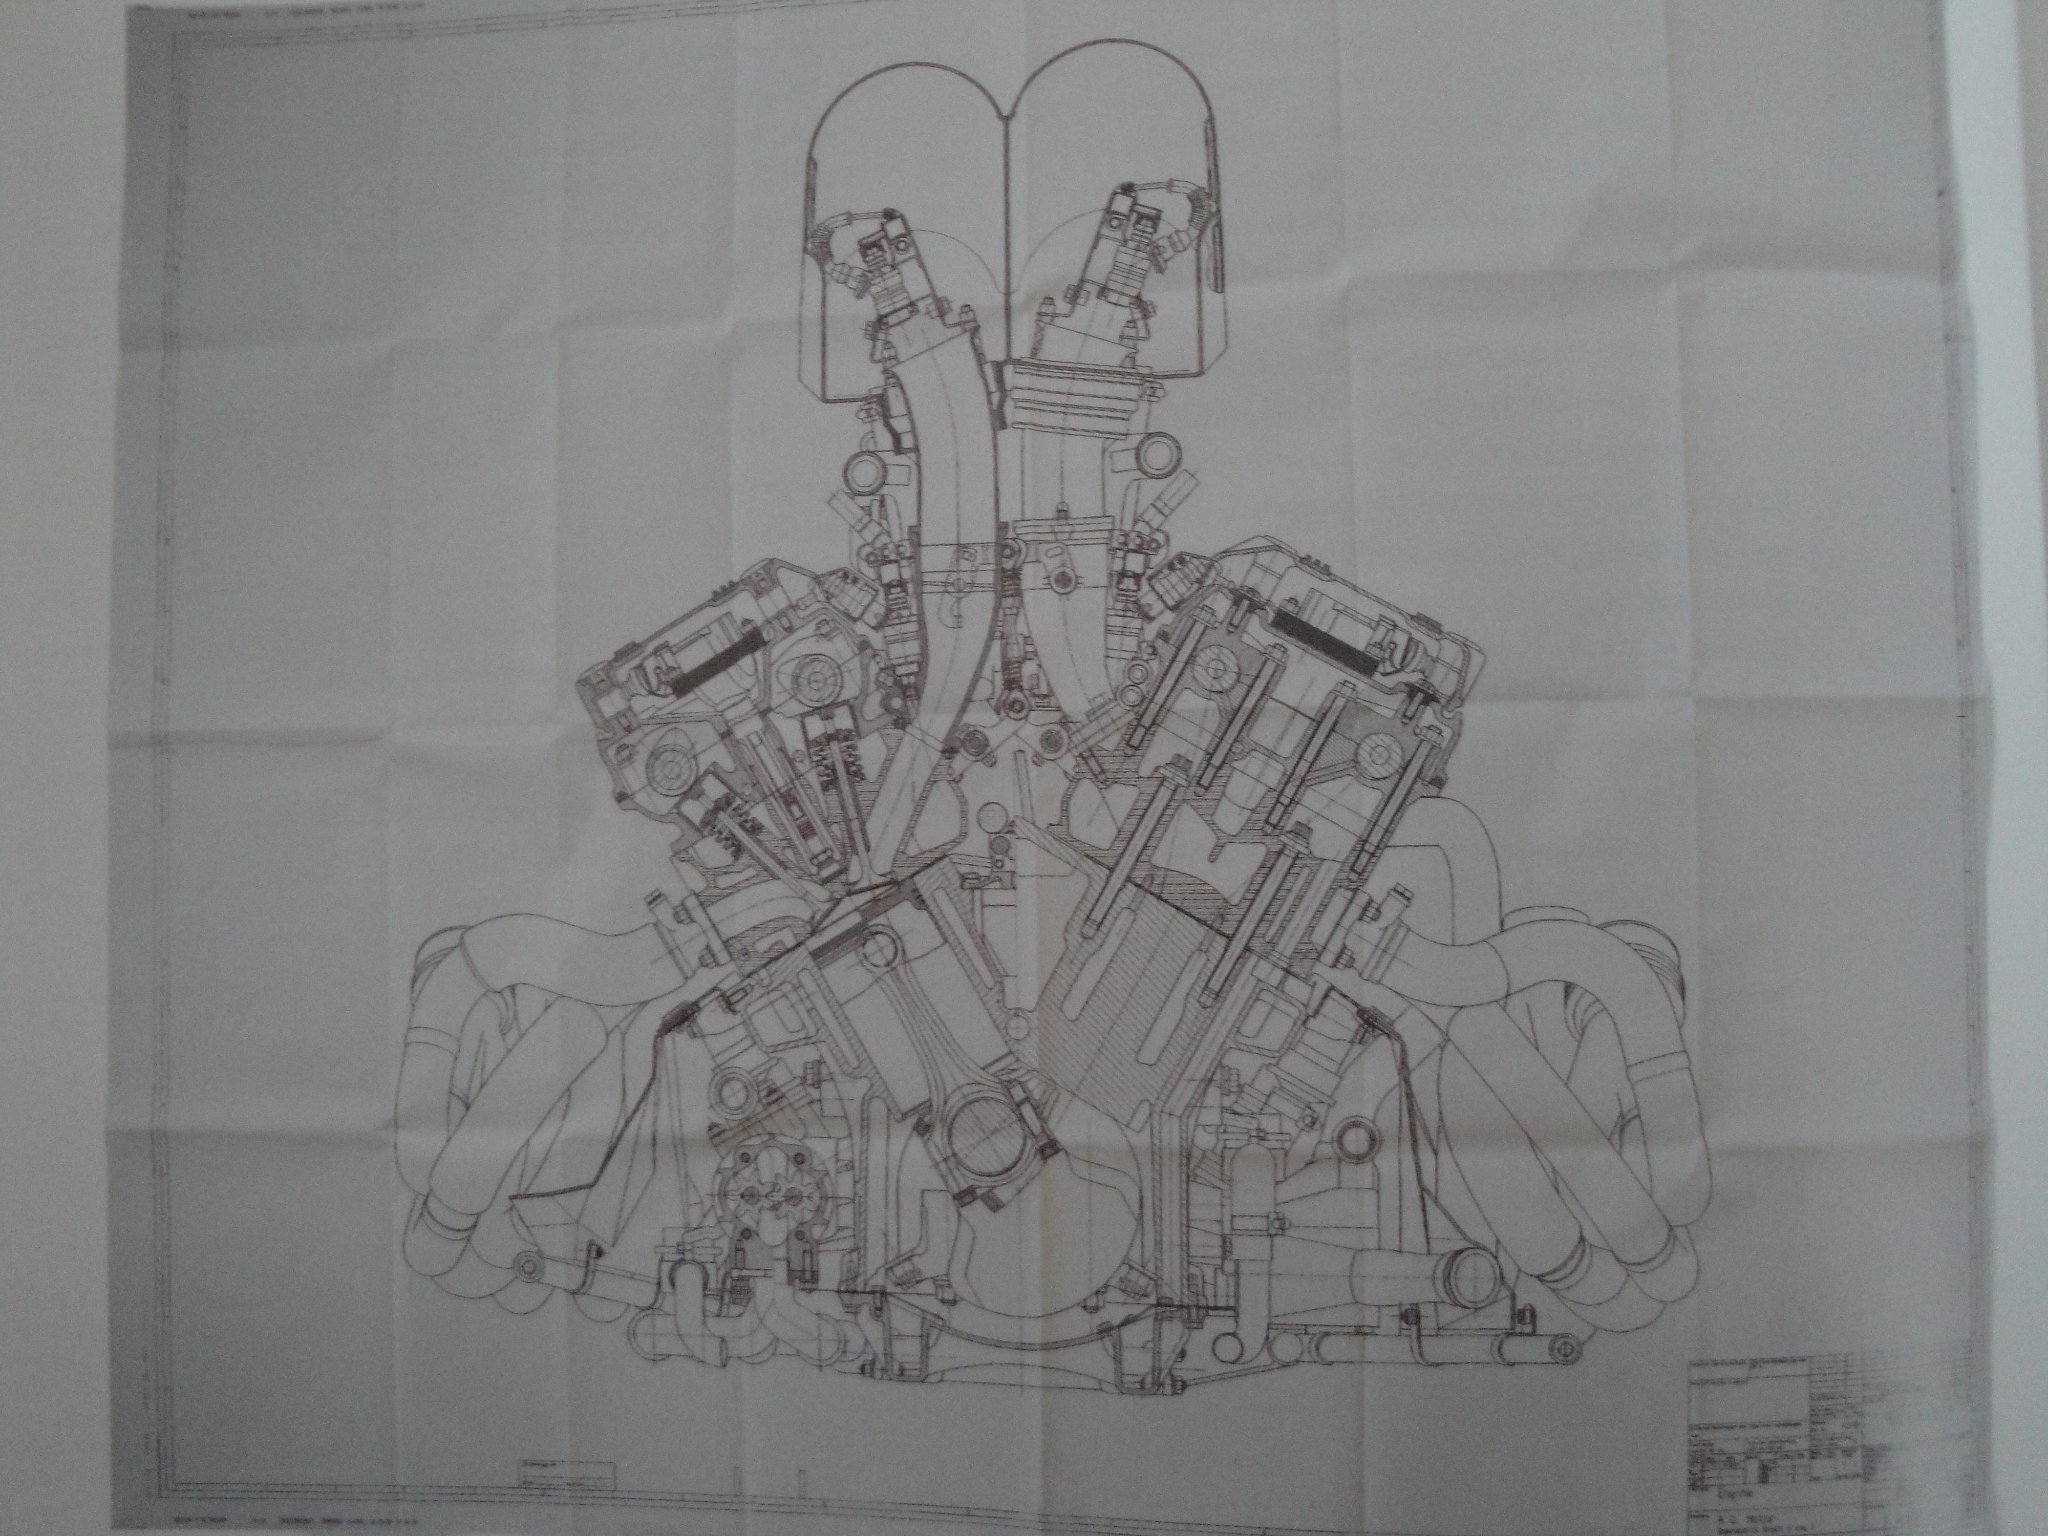
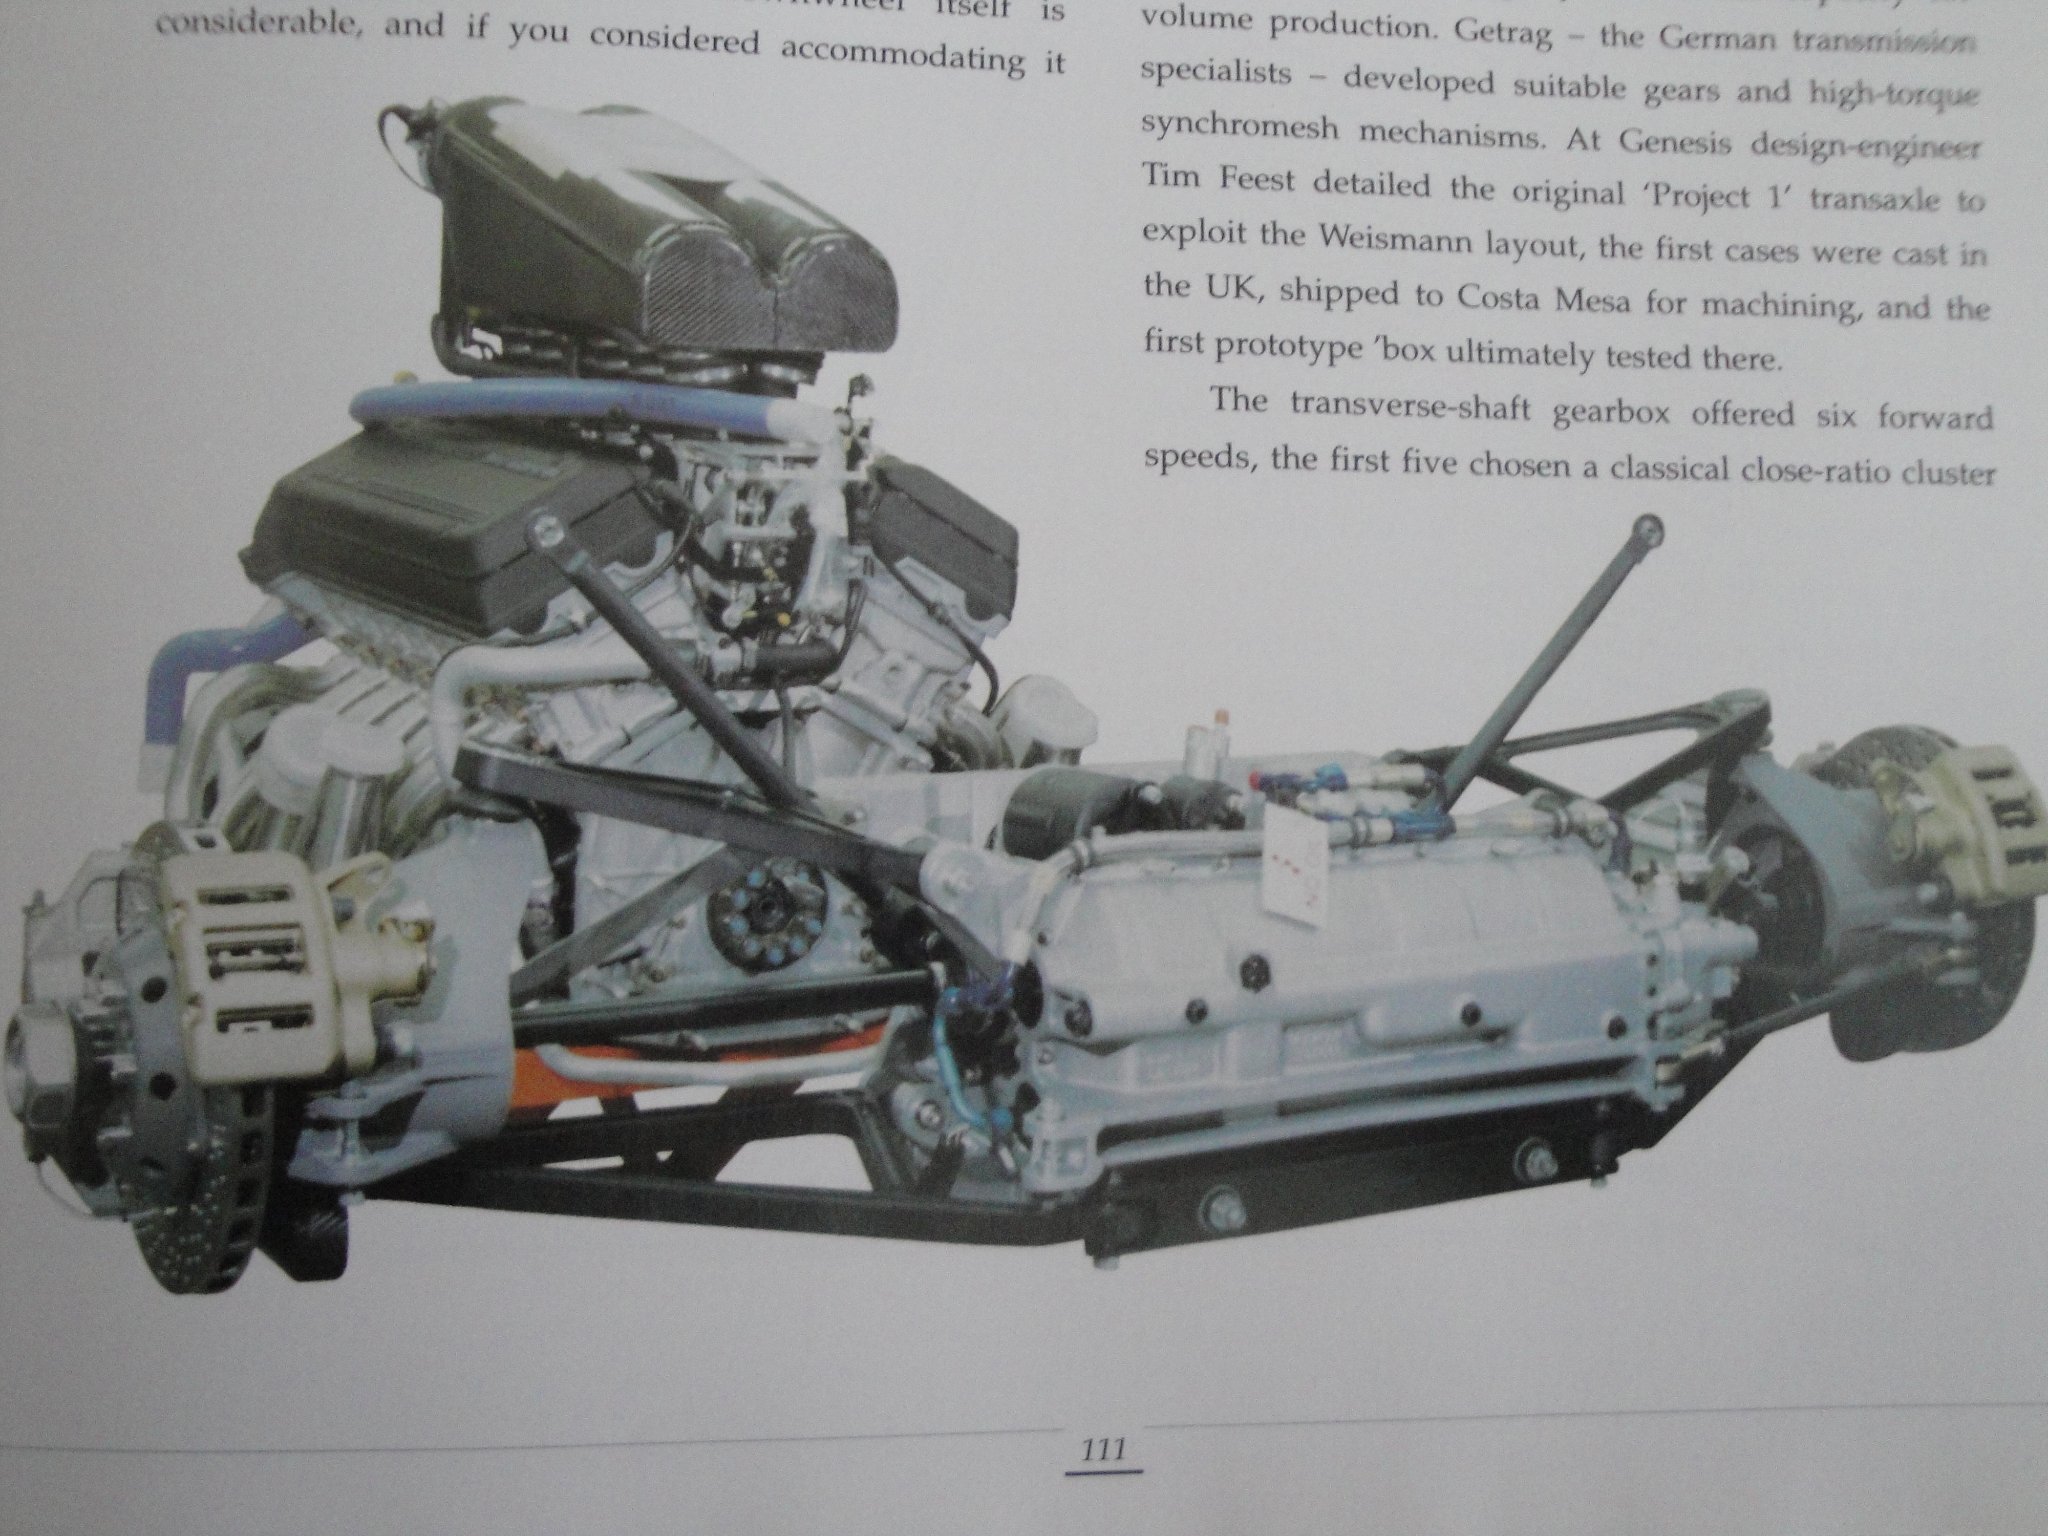
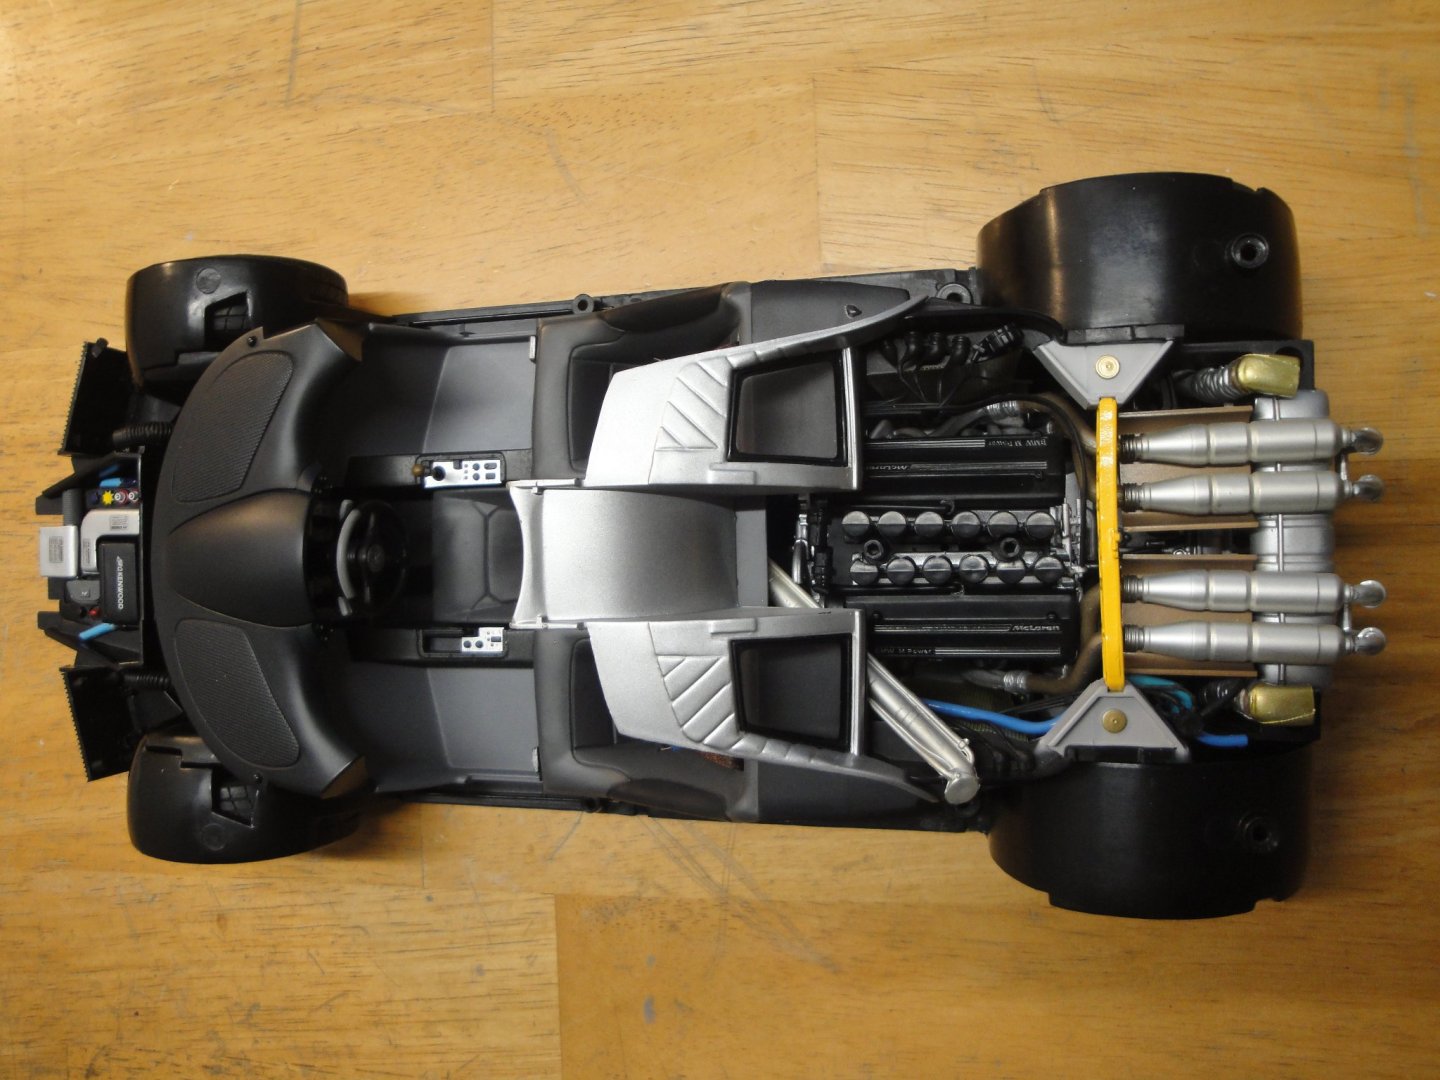
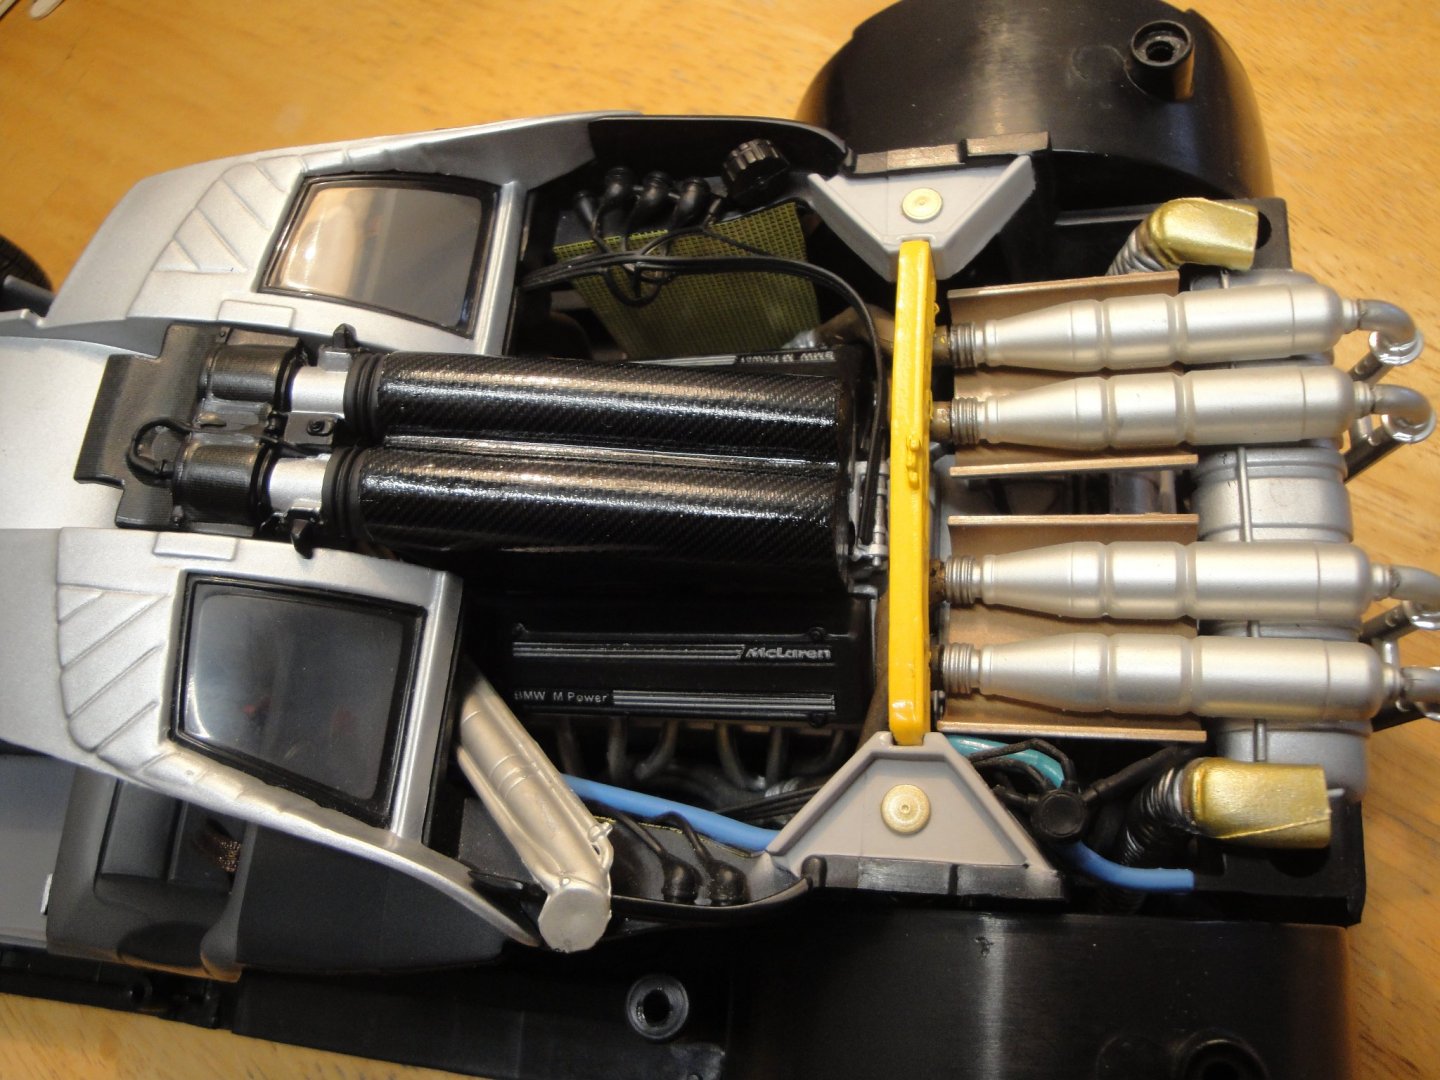
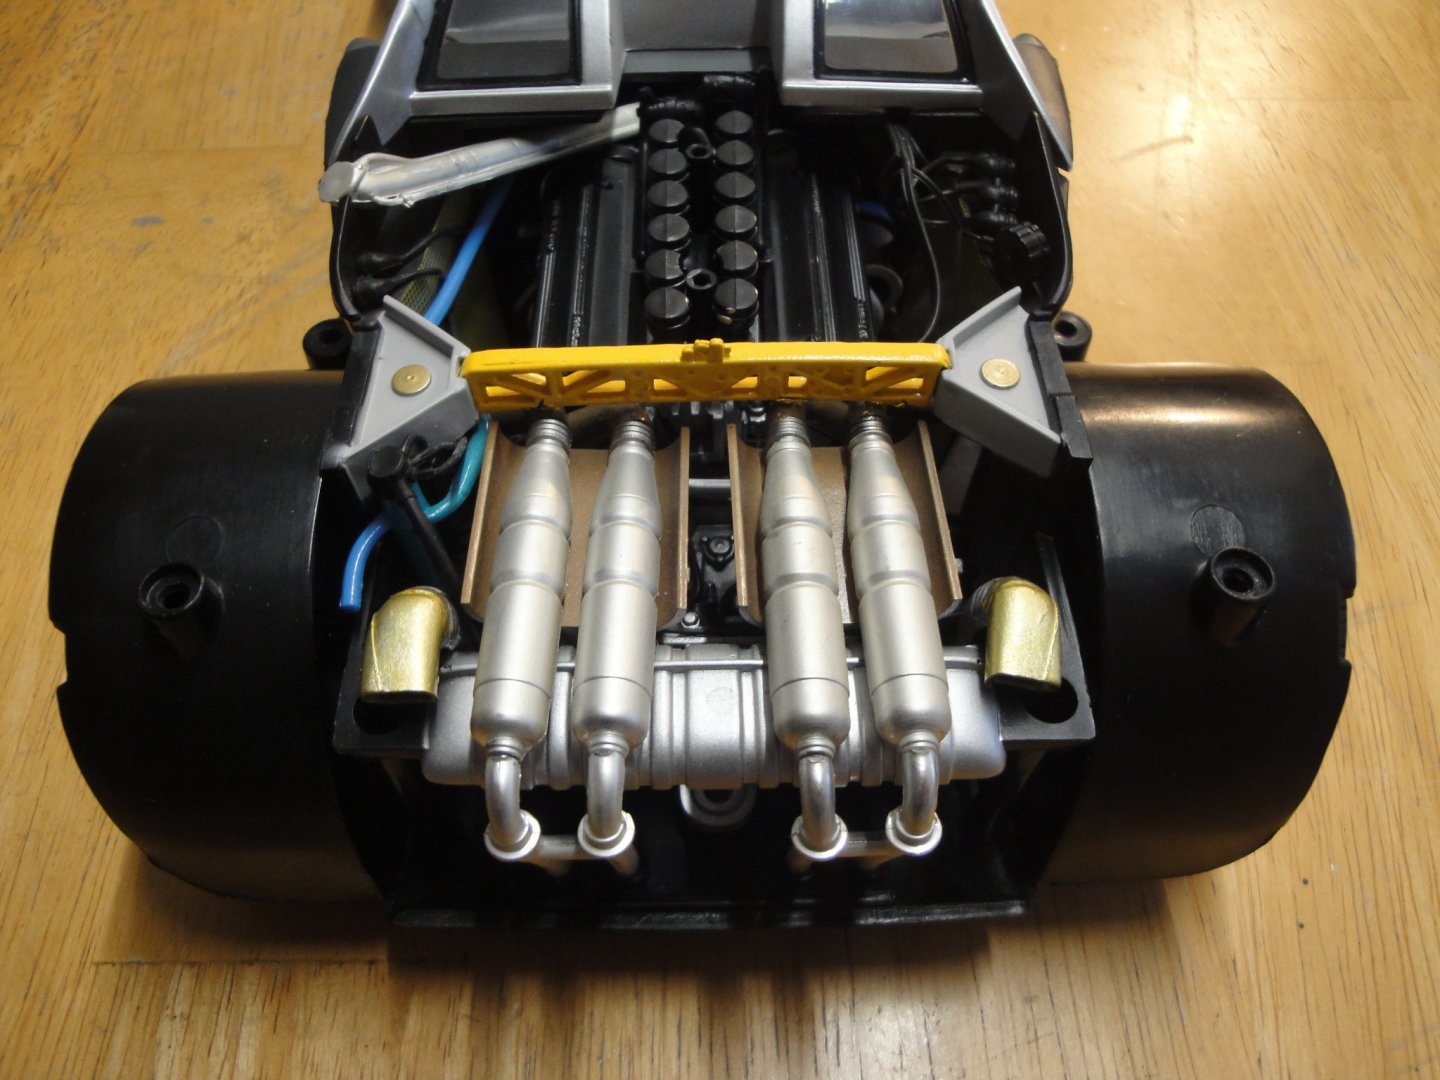
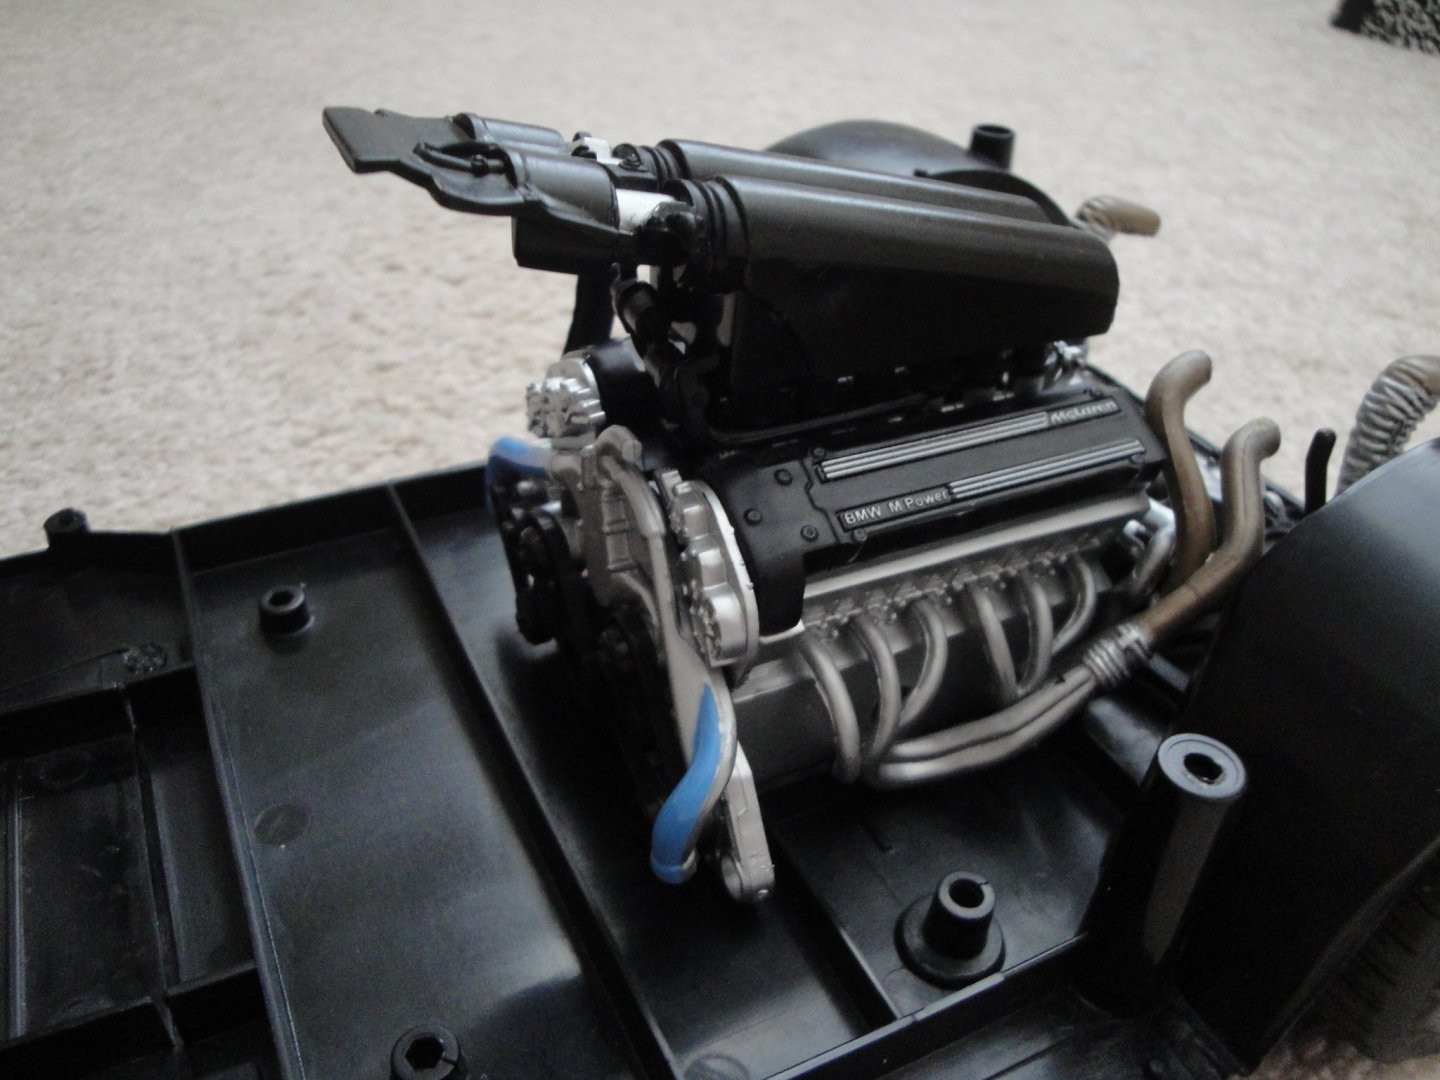
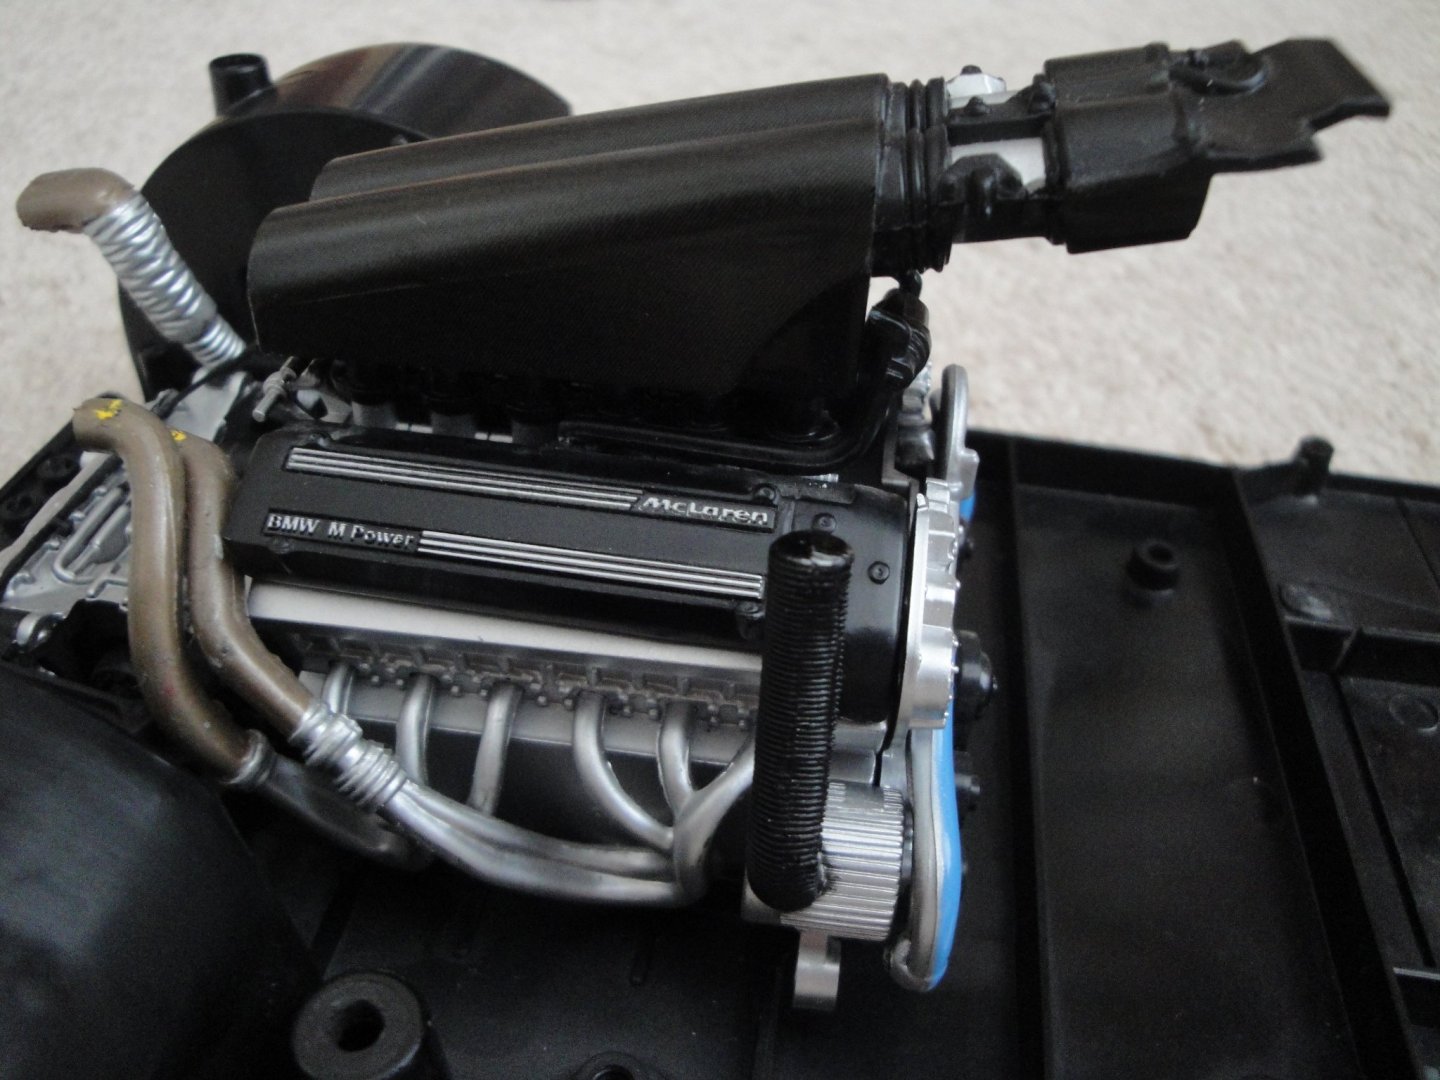
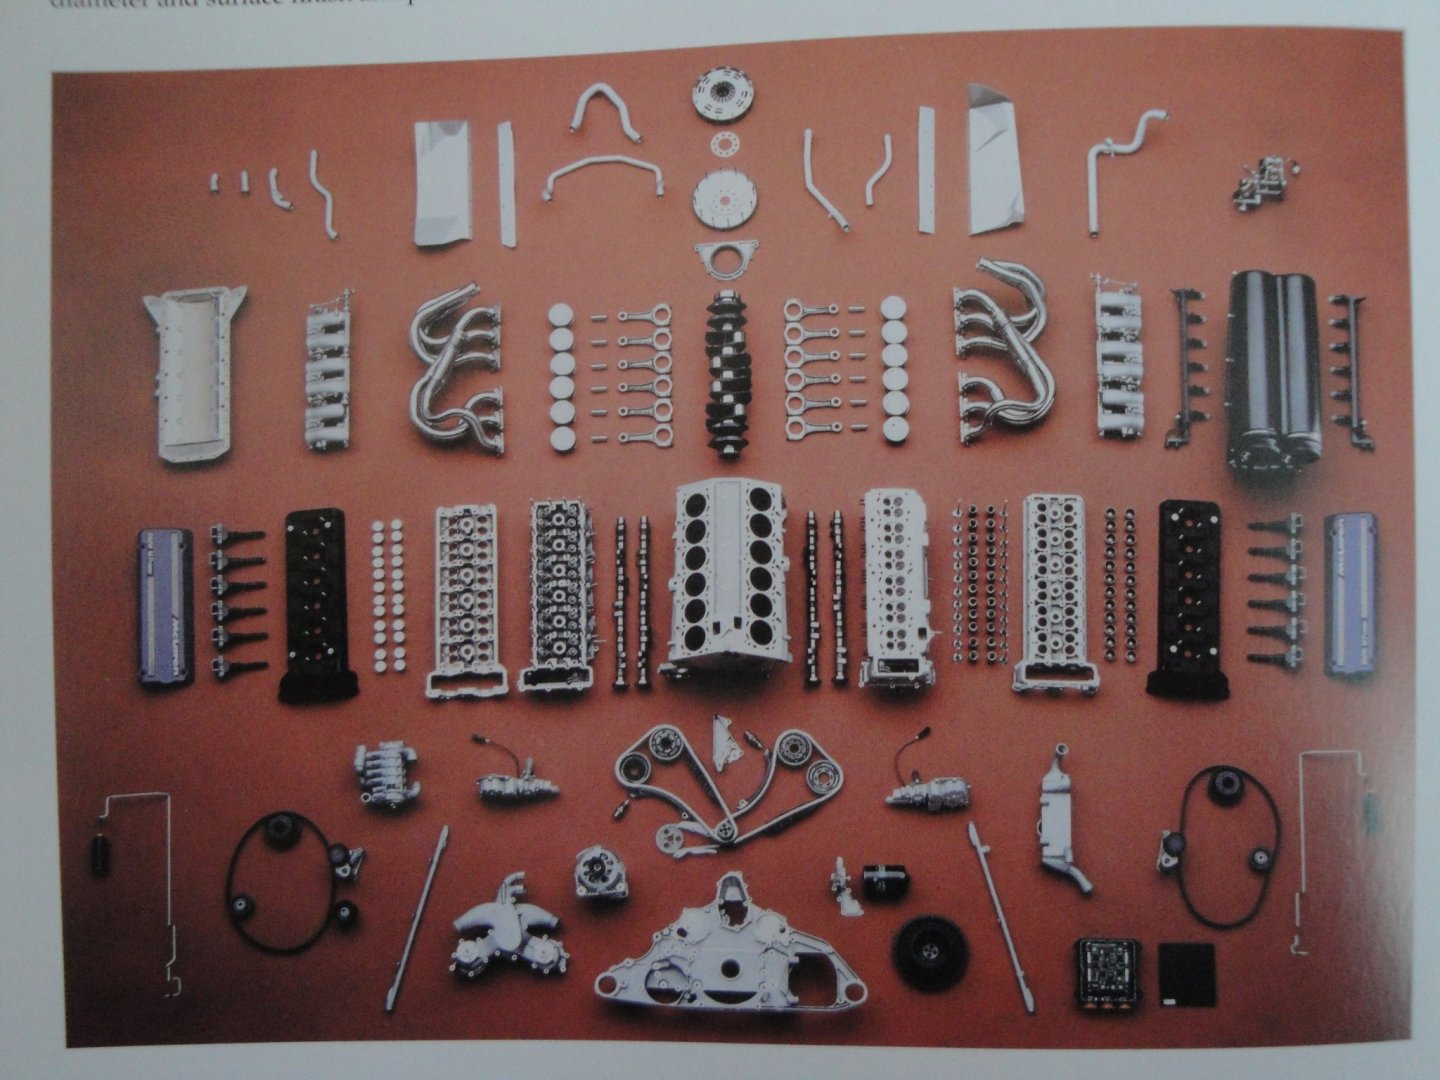
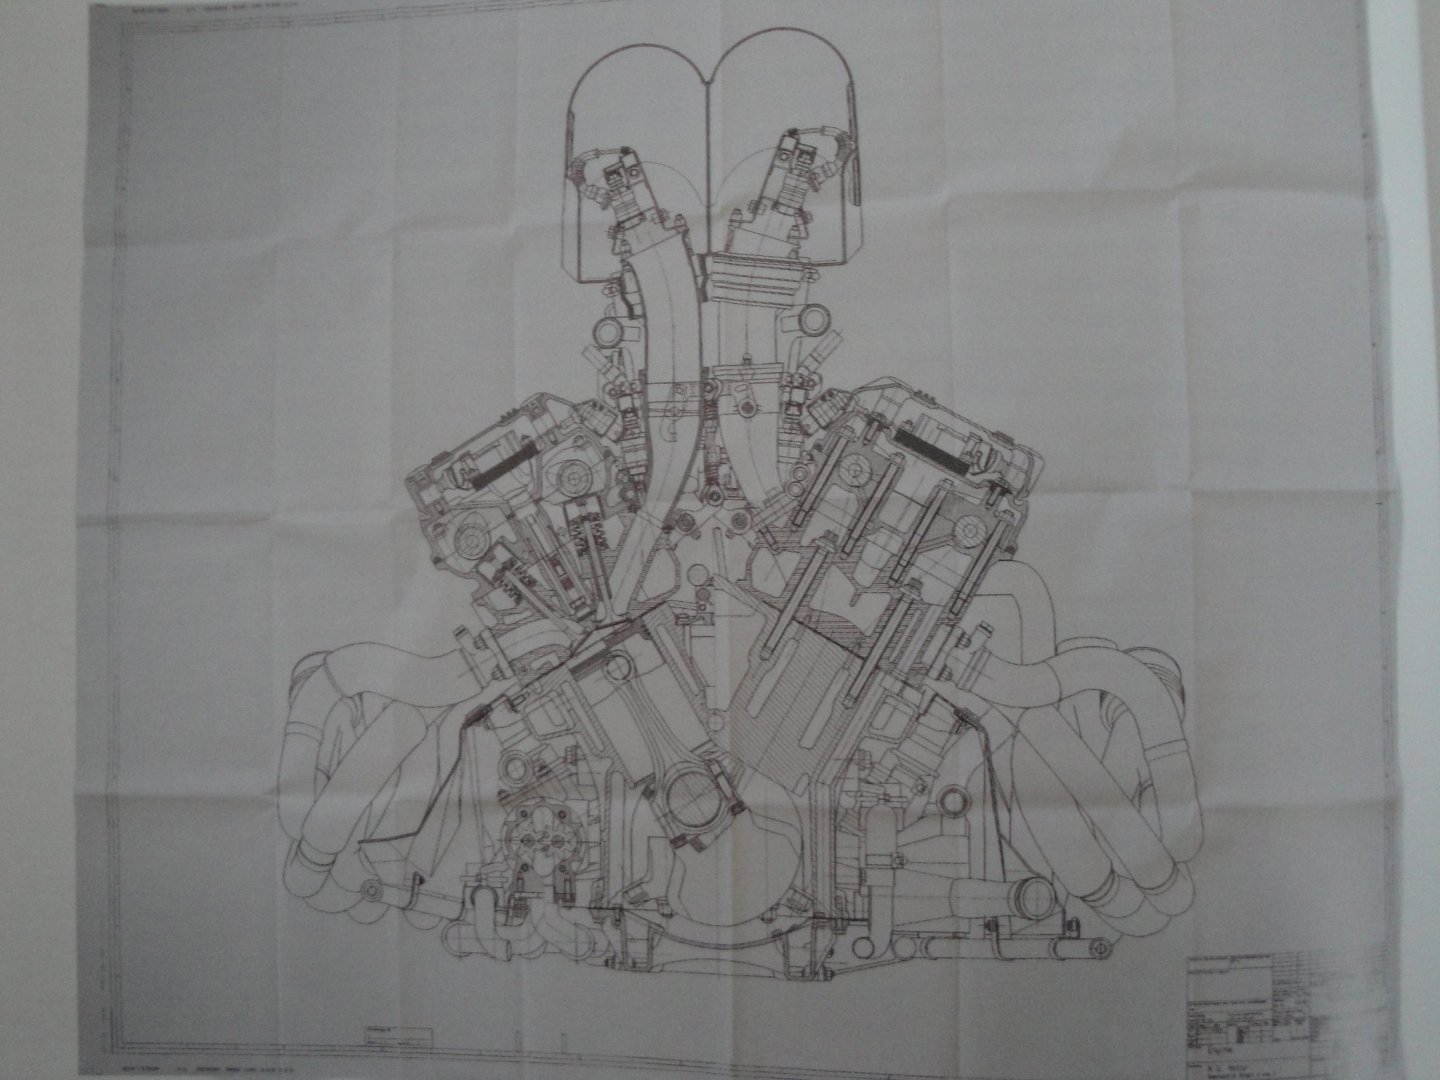
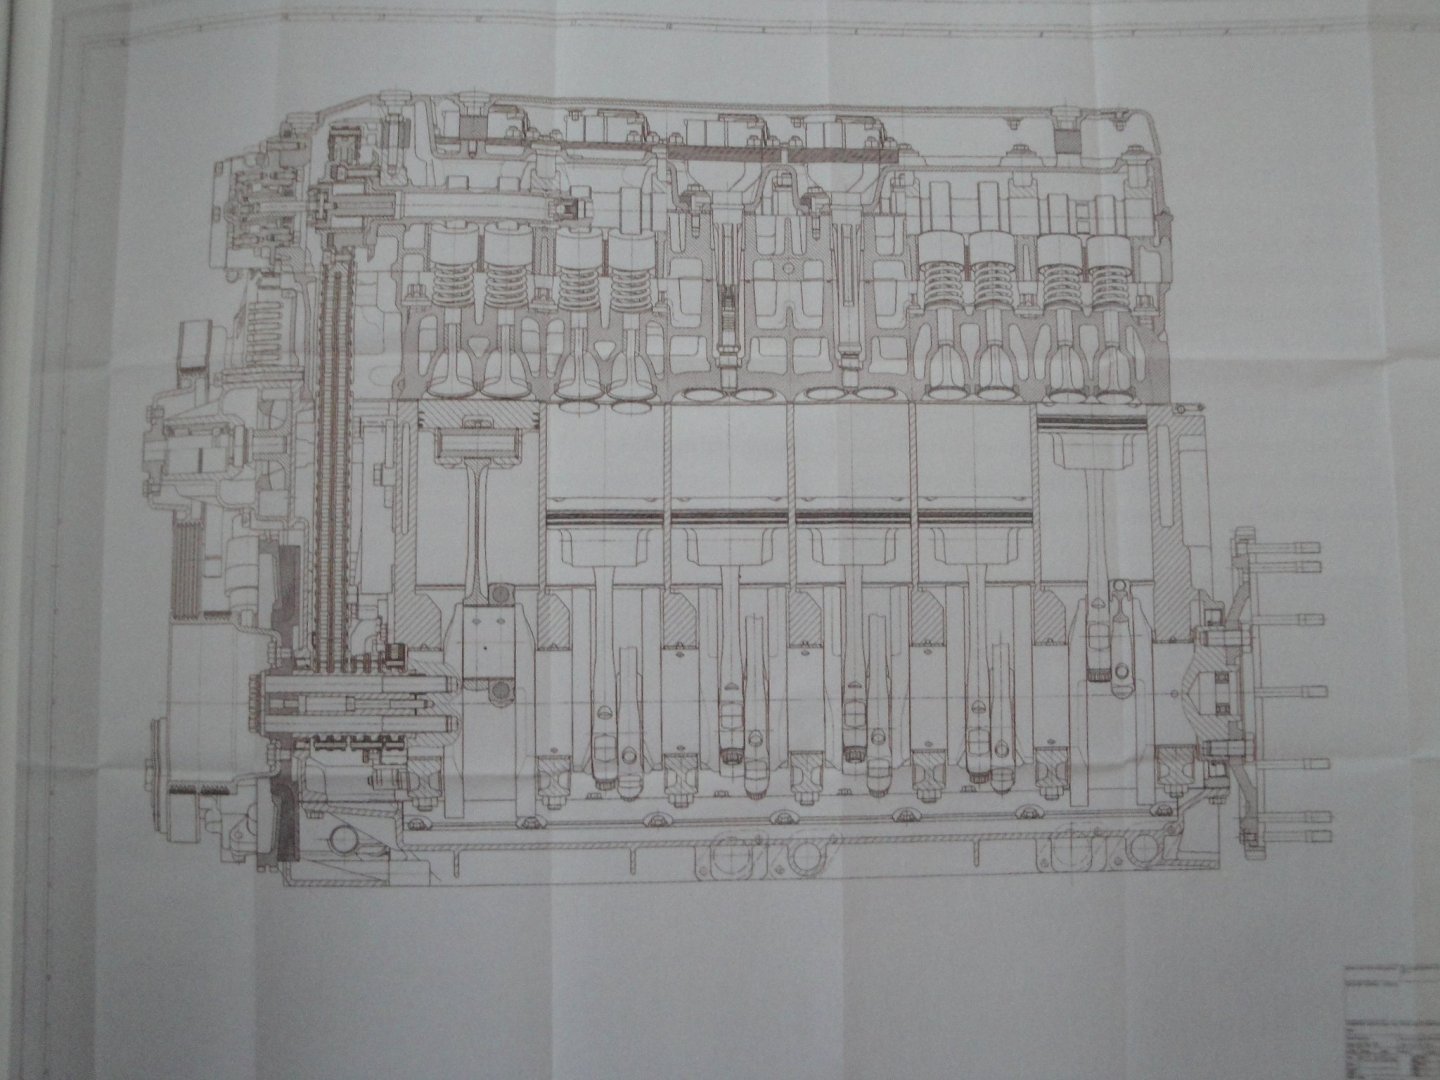
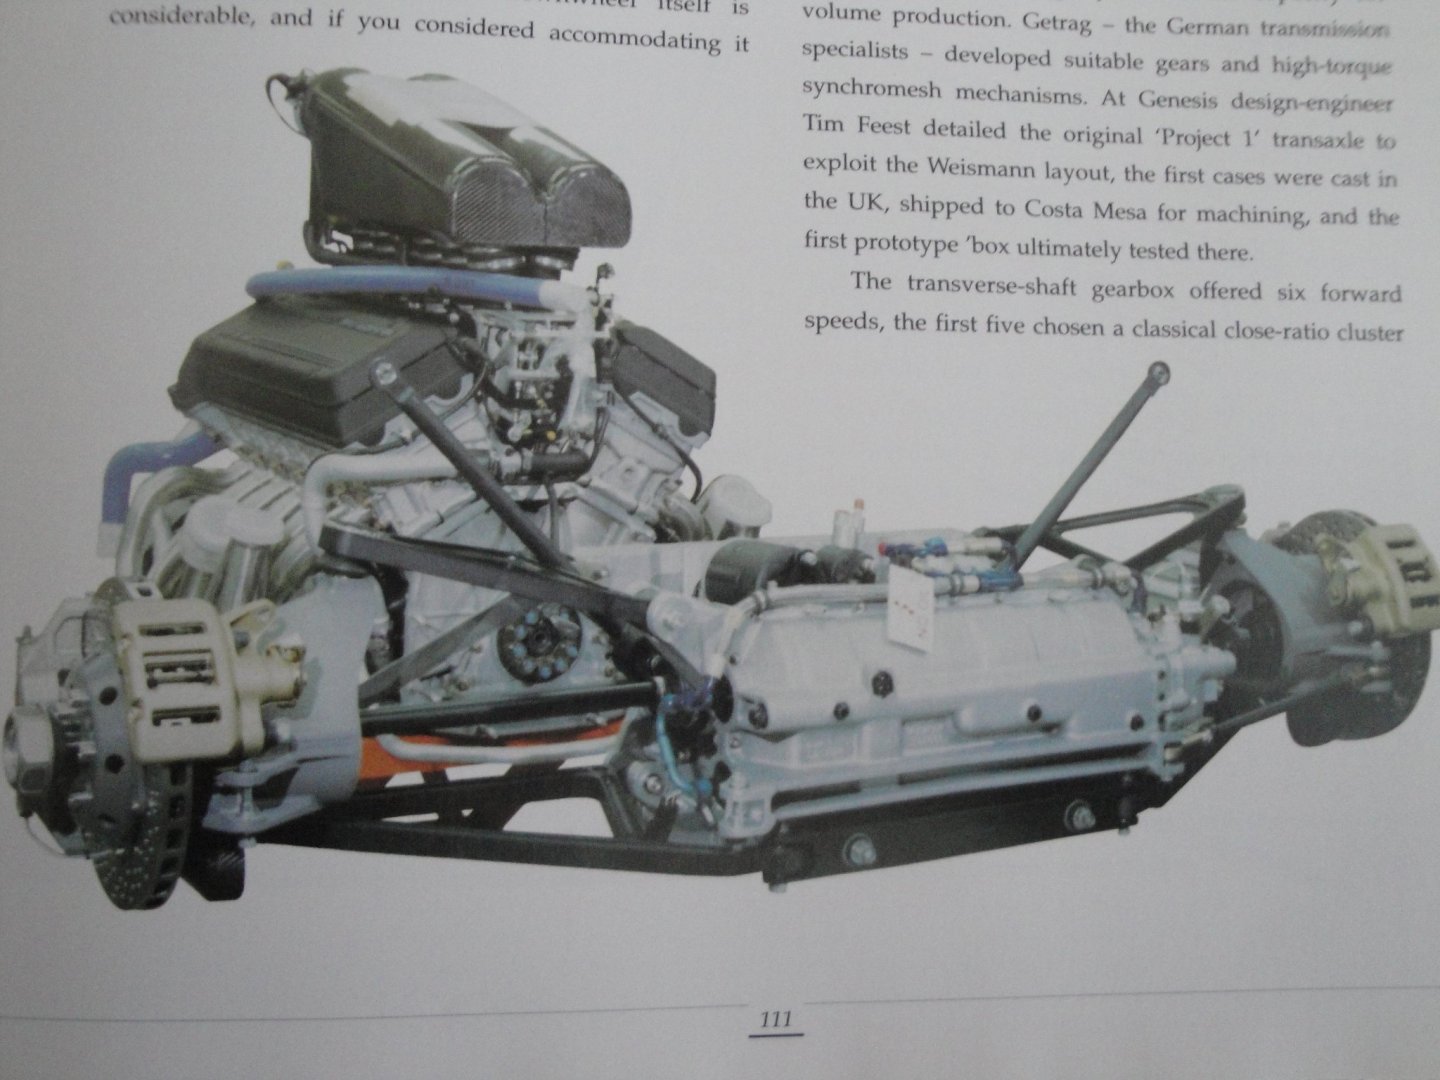
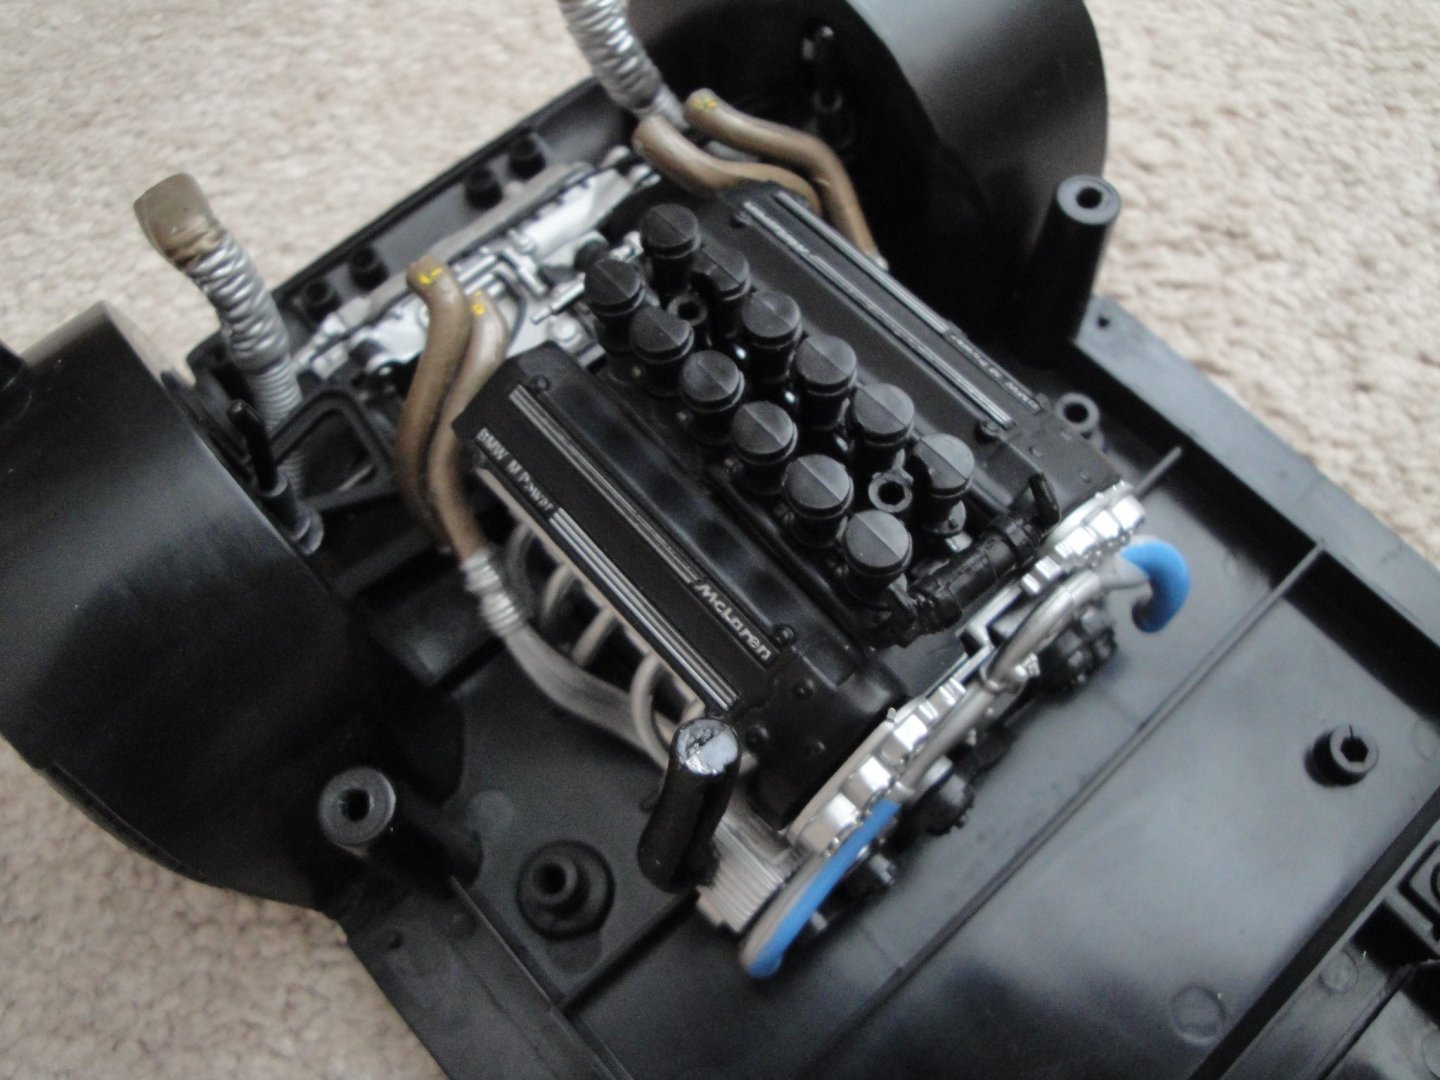
I have not posted for a few days, but a few progress have been made. First, the engine: When McLaren (Gordon Murray and his team) were creating the F1, they looked for an engine that would produce about 600 HP (this is early 1990's) and be incredibly light (less than 250 KGrs). Honda was first envisioned (Gordon Murray used to drive an HONDA NSX) but later on the choice moved to BMW, which had an incredible V-12 engine that may fit the bill. To obtain such amazing performances and such light weight on a normally aspirated engine, required Magic. And this is exactly what happened when McLaren contacted the Wizzard of Bavaria, the legendary Paul Rosche, the only man in the world capable to extract more than 100 HP for each liter of displacement on an internal and normally aspirated engine. In a record time, BMW Motorsport division adapted their terrific V-12 for the F1, and presented to McLaren, a marvel capable of 620 HP for just above 6 liters of displacement and a weight less than 250 KGrs. A special 6 speeds manual gearbox was created to fit the power plant: Yves


- 30 replies
-
- 10
-
-
Good choice for the poster.... Yves
-
I have absolutely no regrets. For multiple reasons: - I want to be able to display the inside of the vessel. Building the ceiling would detract the observer and even prevent him/her from peeking inside the hull. - It is a lot easier to not build it.... 😉 - The renovated vessel does not have the ceiling as indicated by the booklet covering the restoration. - With the opening in the hull and on the well (that I am representing), the ceiling would seem out of place. - I am not sure the kit would provide enough planks to build the ceiling correctly. Yves
-
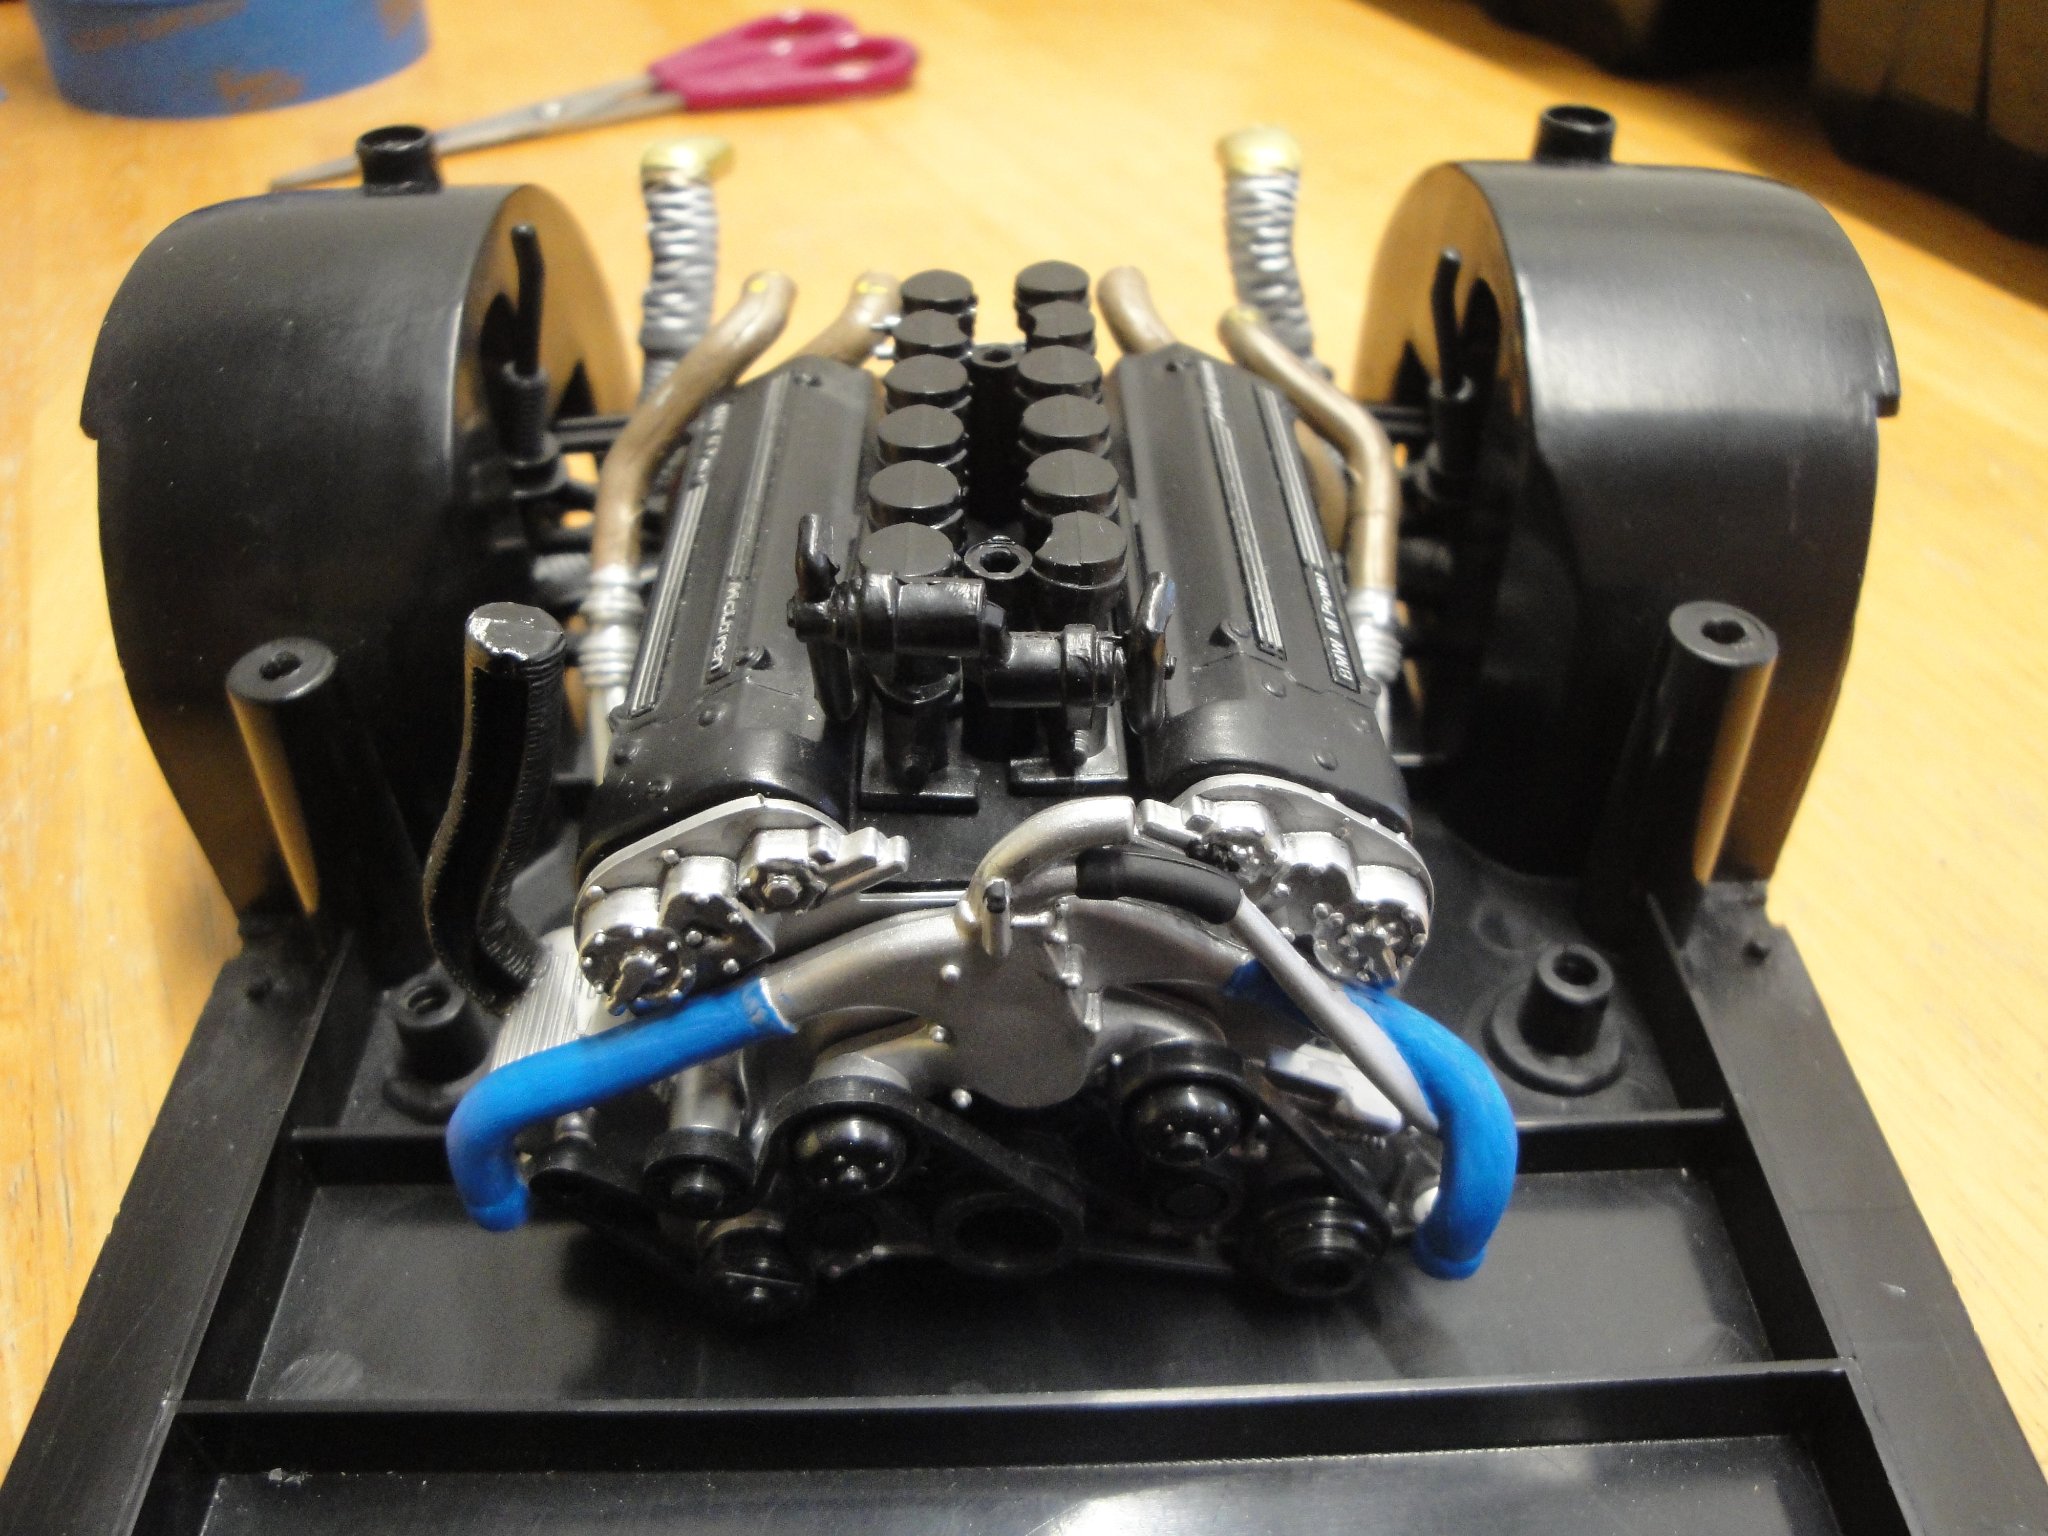
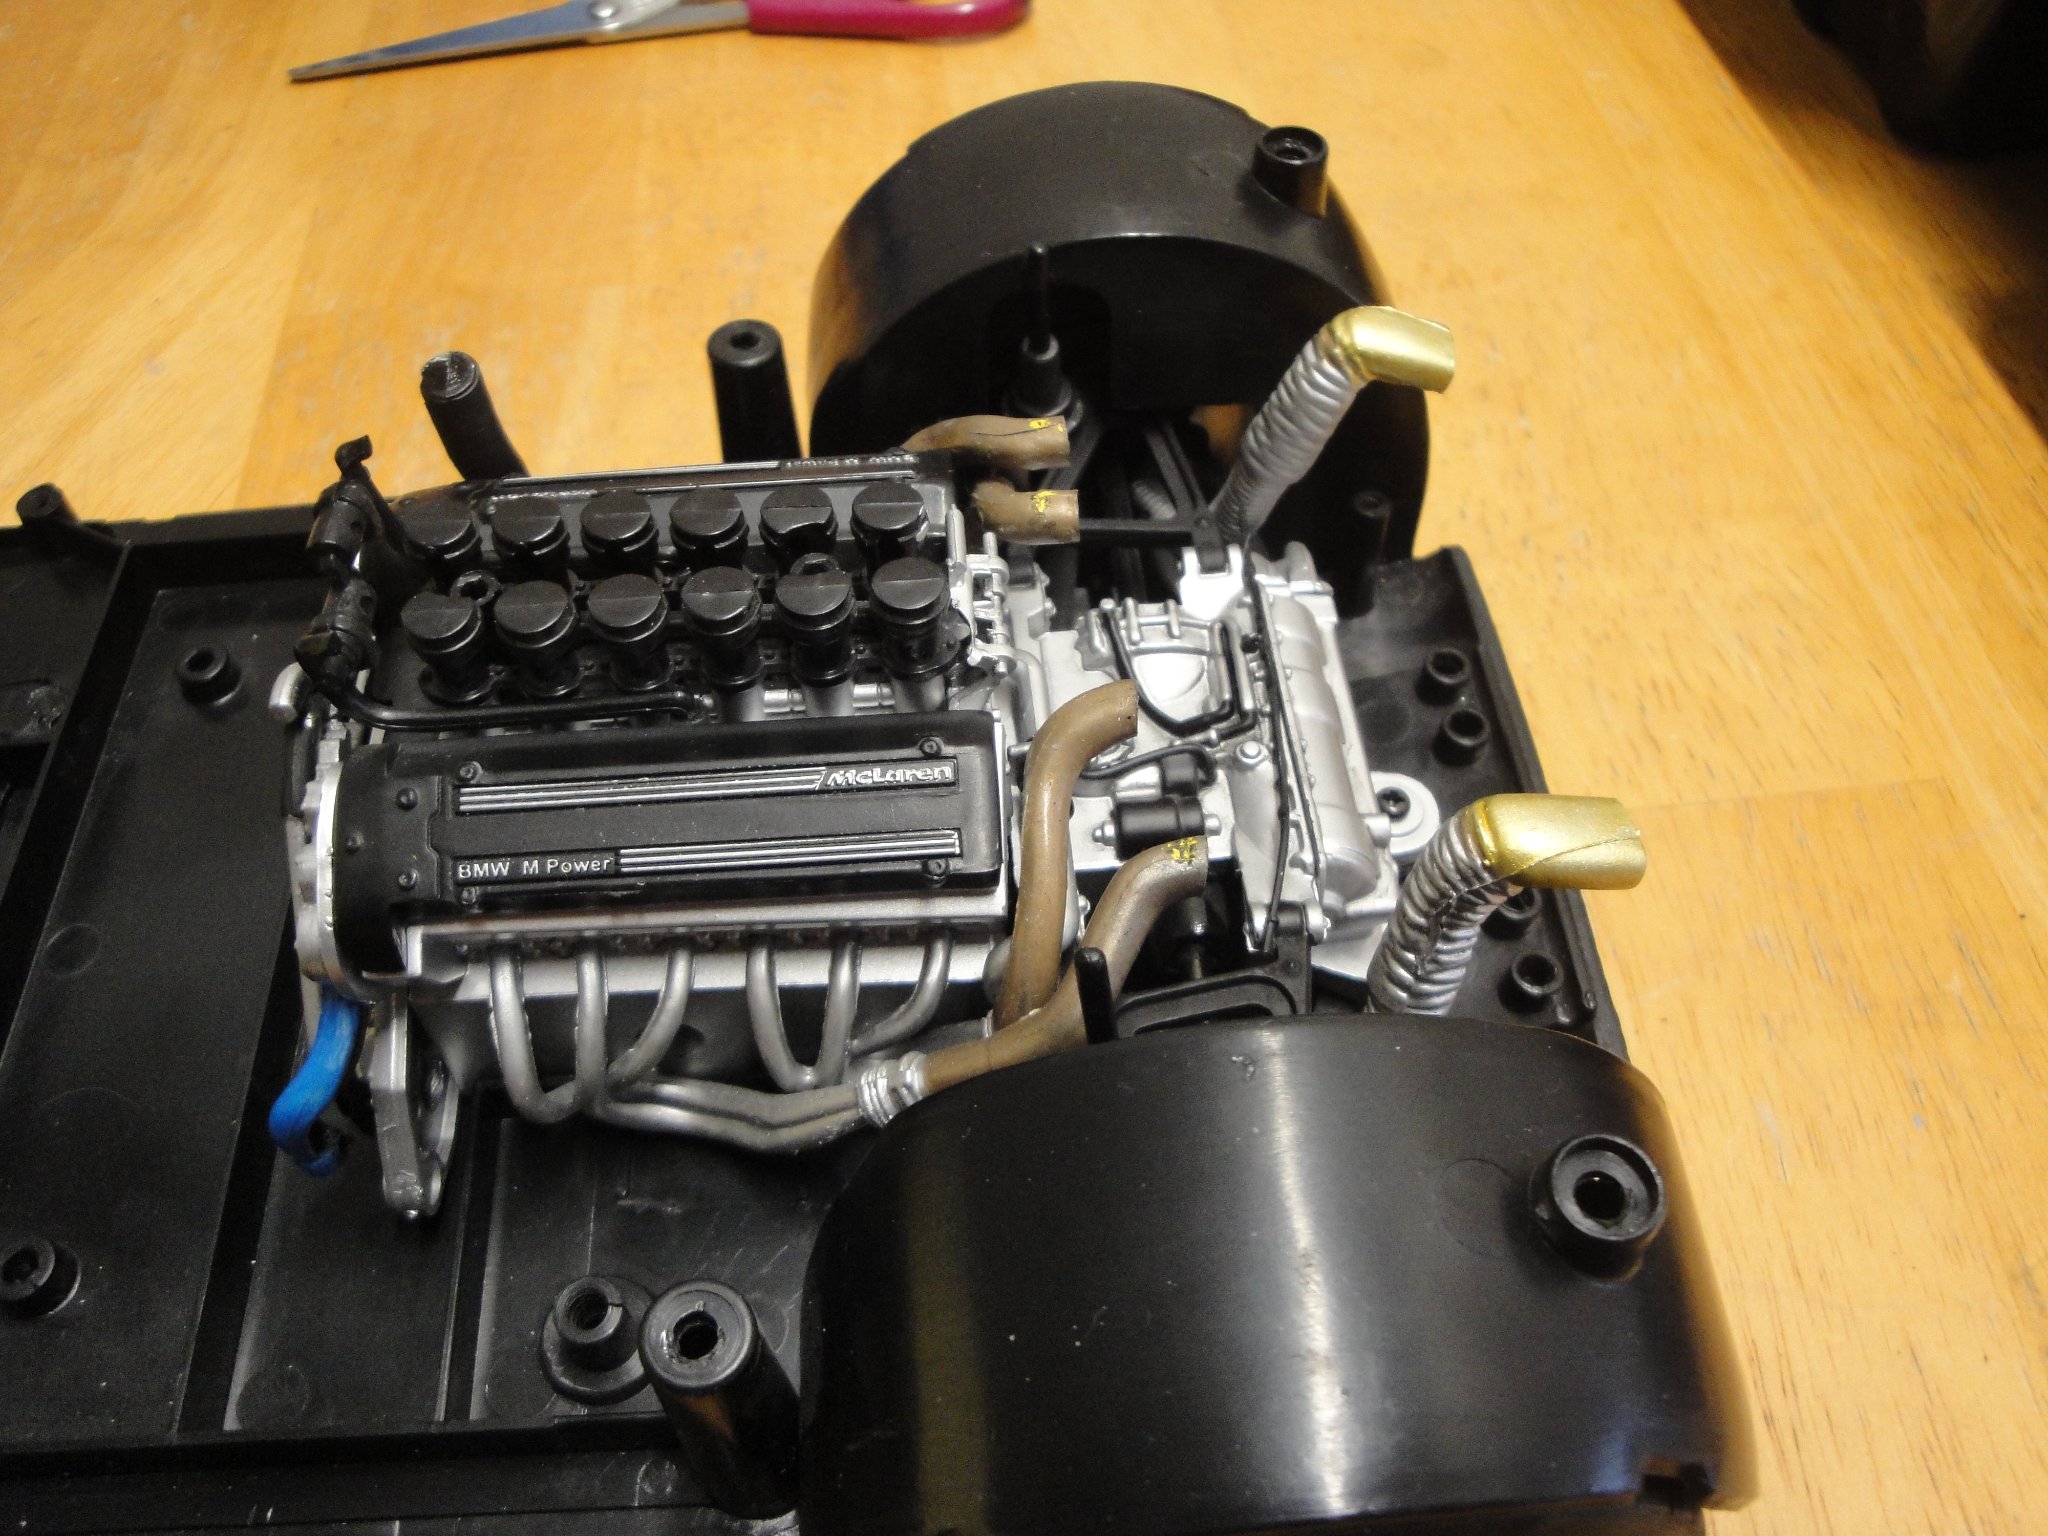
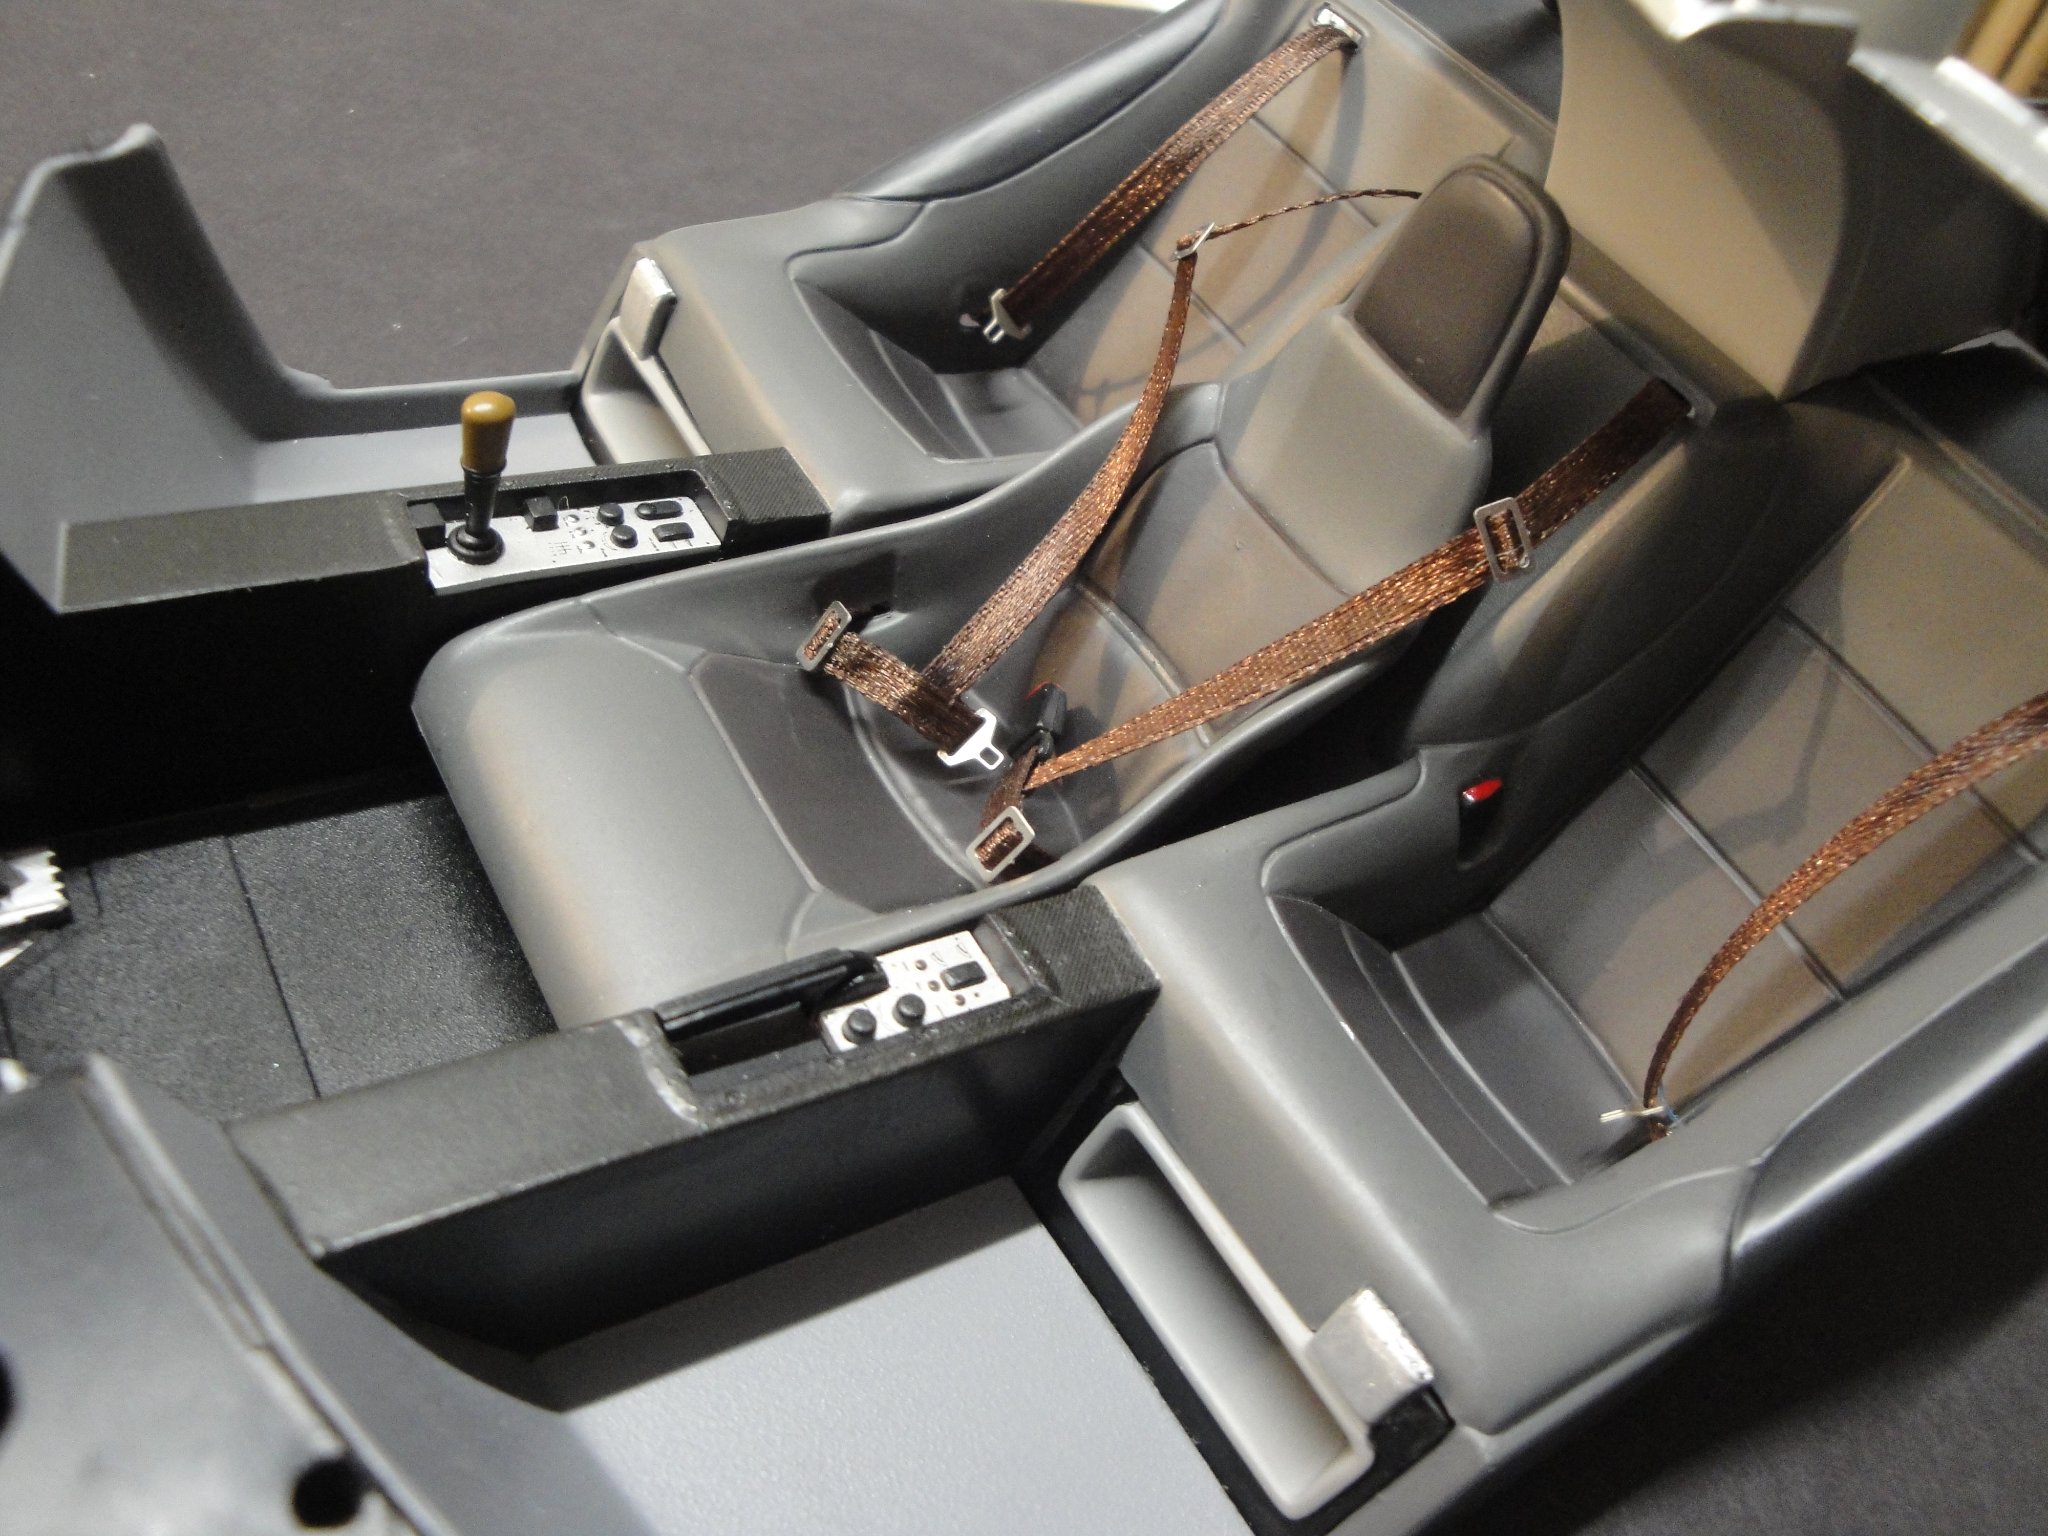
I am trying to clean up and add some details to the interior, which is already extremely nice from the factory: The left of the driver seat (central), are the AUDIO controls for the CD changer and amplifiers, hand brake lever, as well as the control of the left window. To the right of the driver, we have the ignition buttons, gear shift lever, right window buttons, climate control and mirrors controls. The massive stainless steel exhaust system. The kit is not too bad, but it is unfortunate that they did not represent the enormous muffler in full size. Only the top is shown and that is probably okay, since you cannot see anything else. That is where those desk top models stop short, when you compare them with a real plastic kit. I am adding some carbon fibers decals around the engine compartment. The racing pedals. An overall view of the full cockpit. Before putting all the interior together, I will describe the engine in the next post. Yves


- 30 replies
-
- 11
-
-
Fantastic model. Yves
-
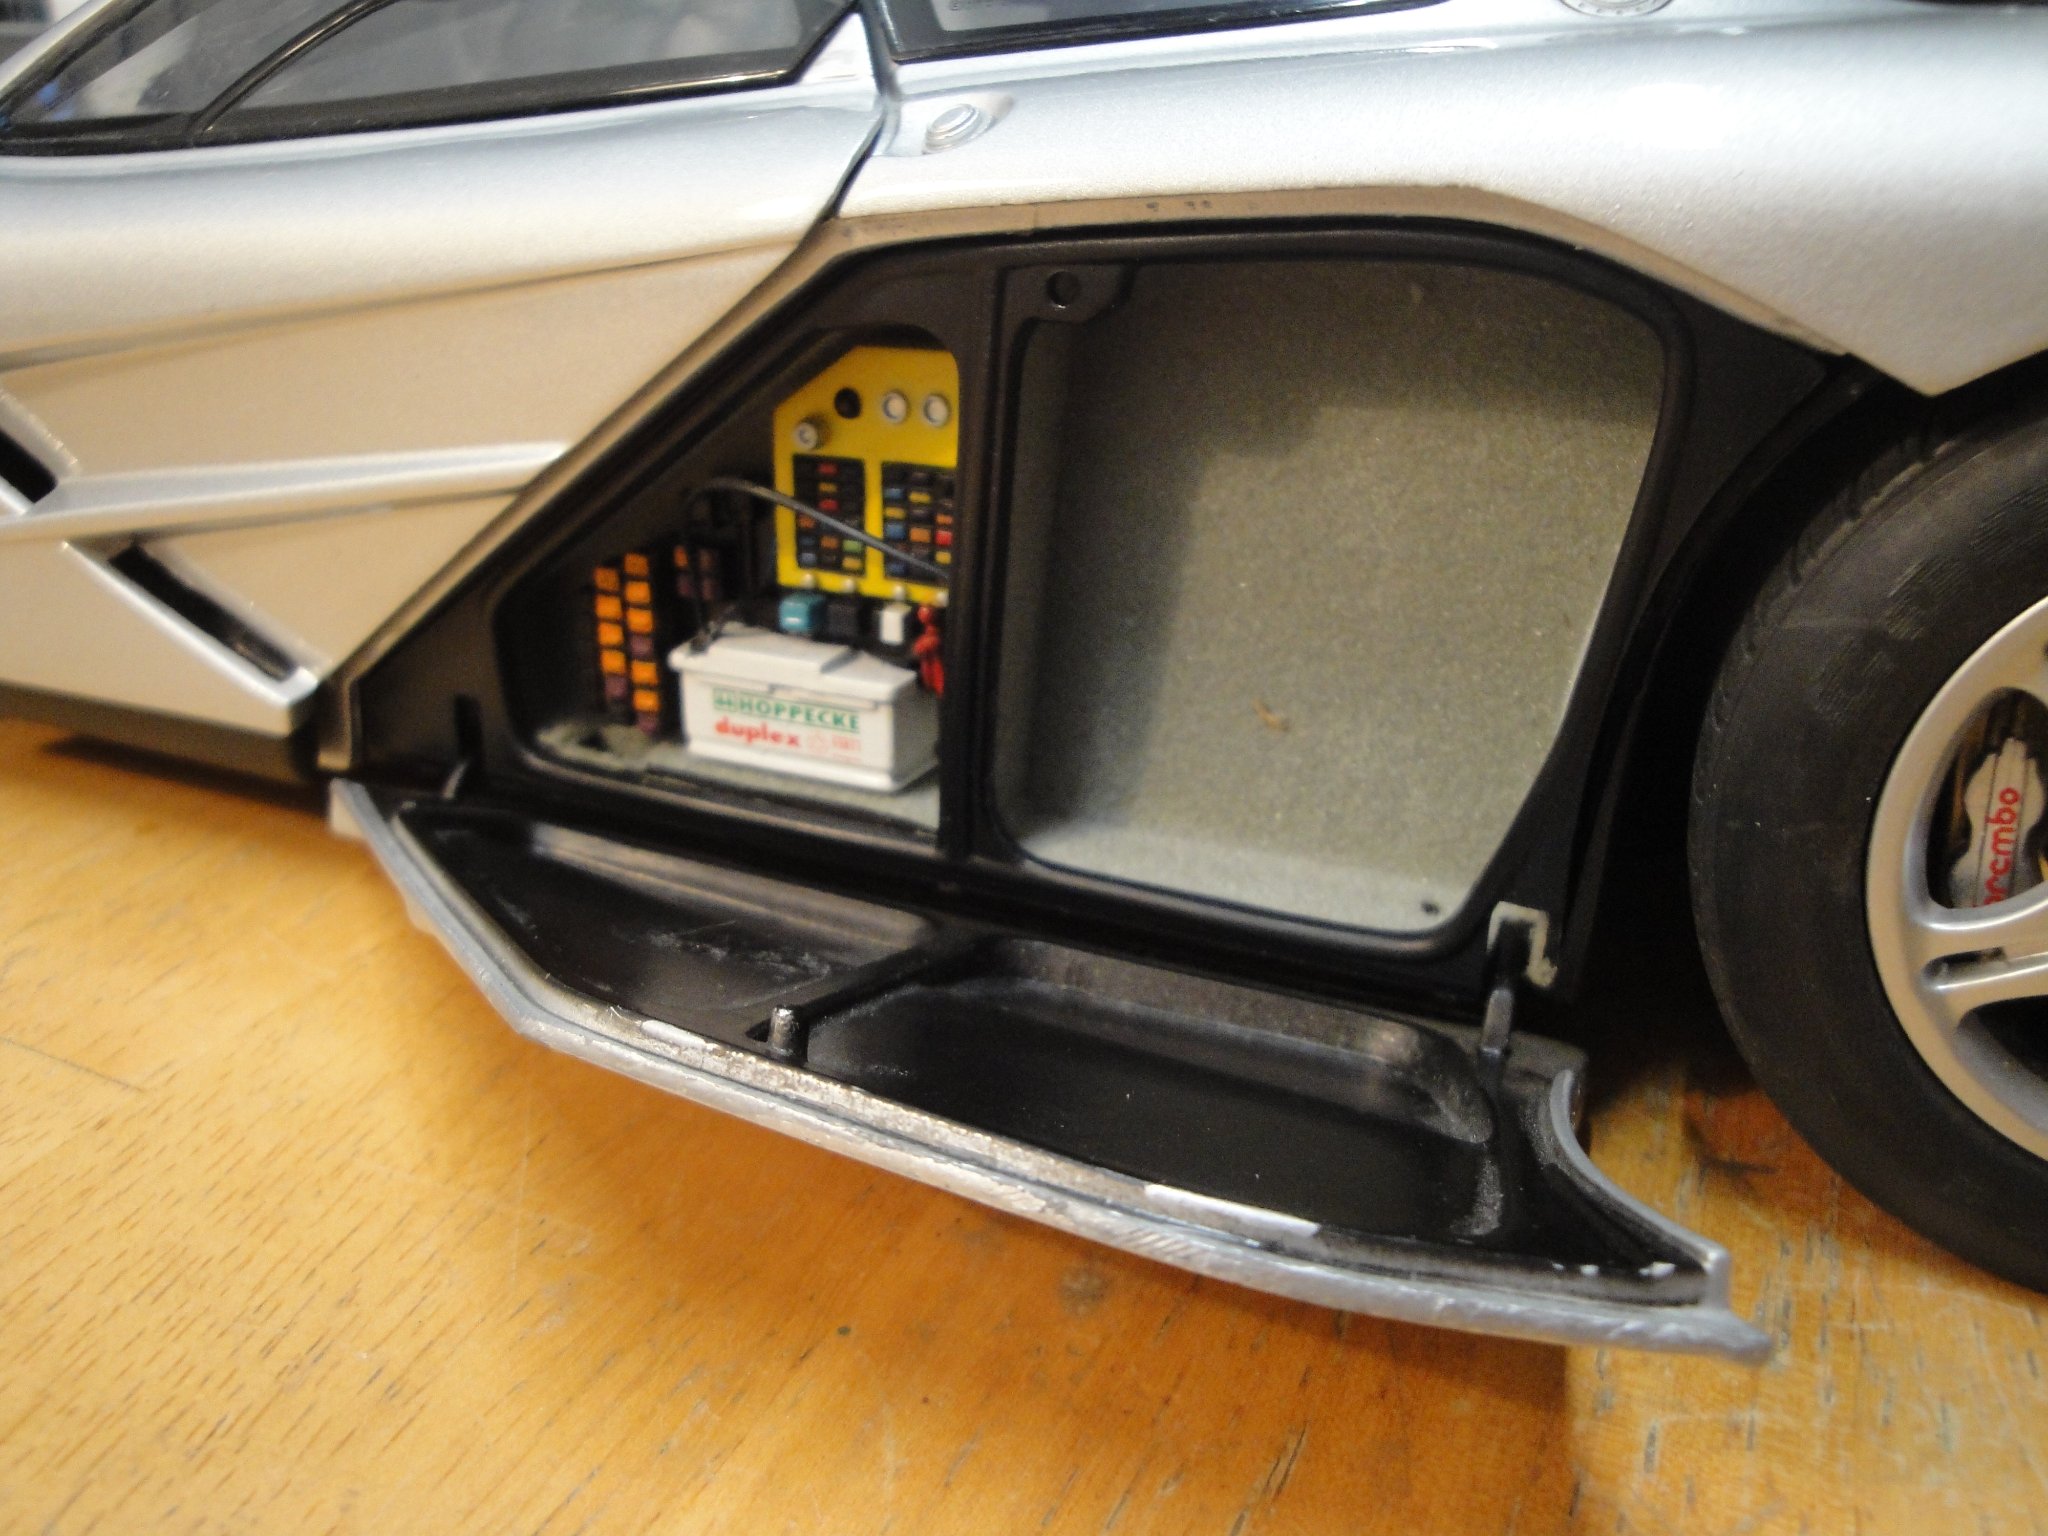
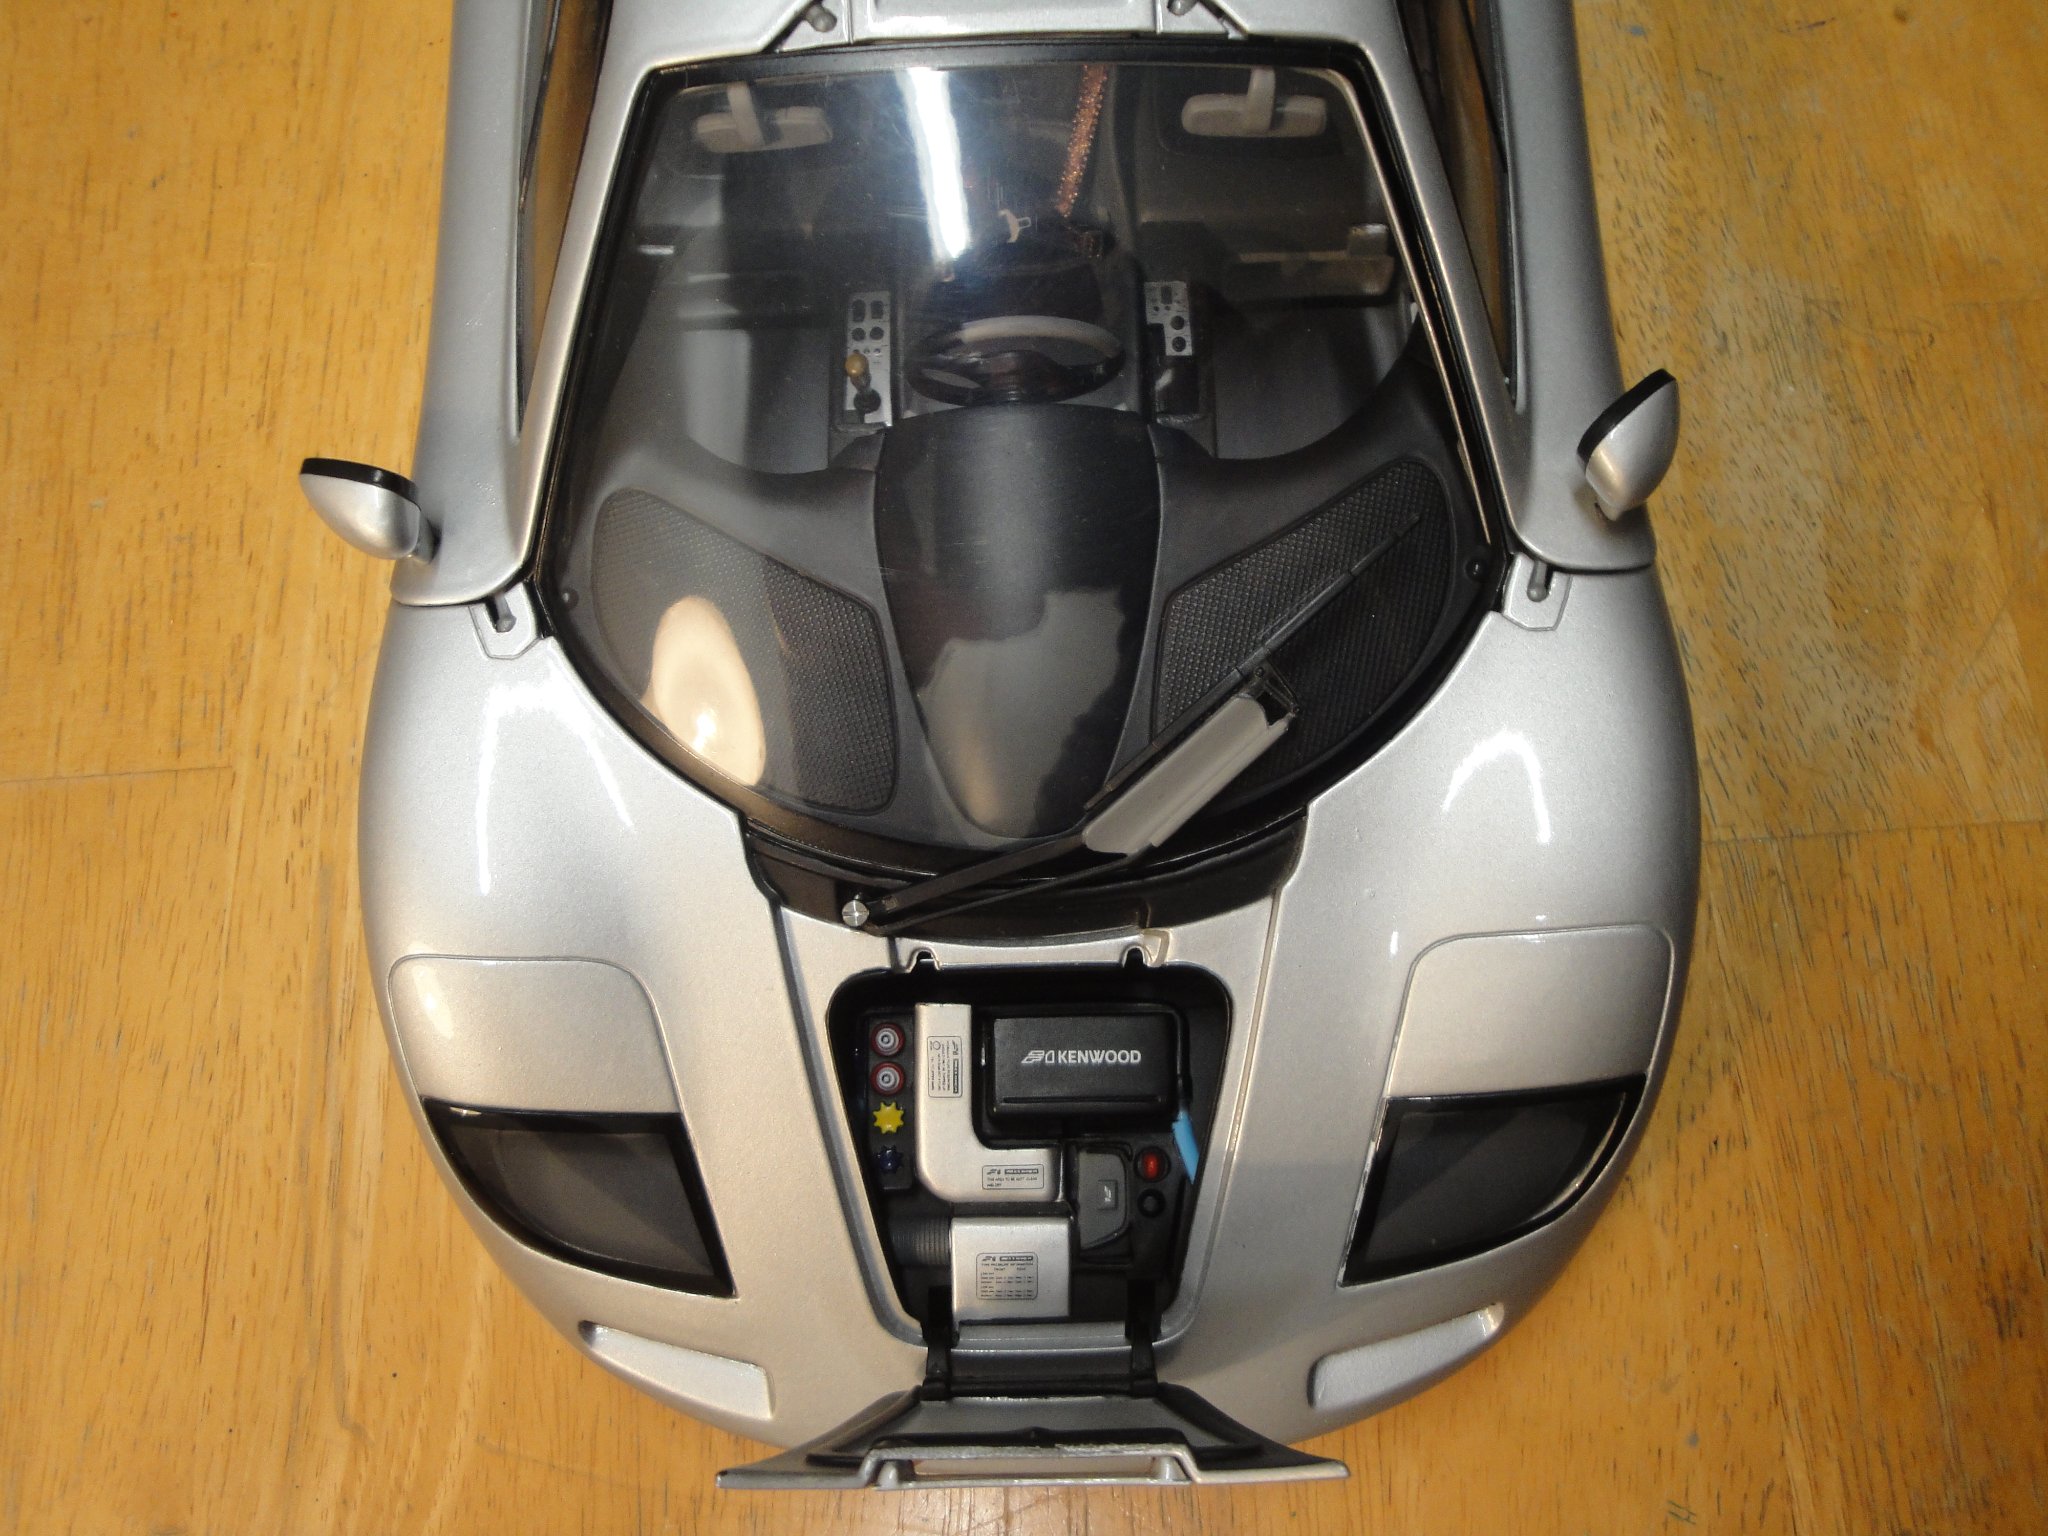
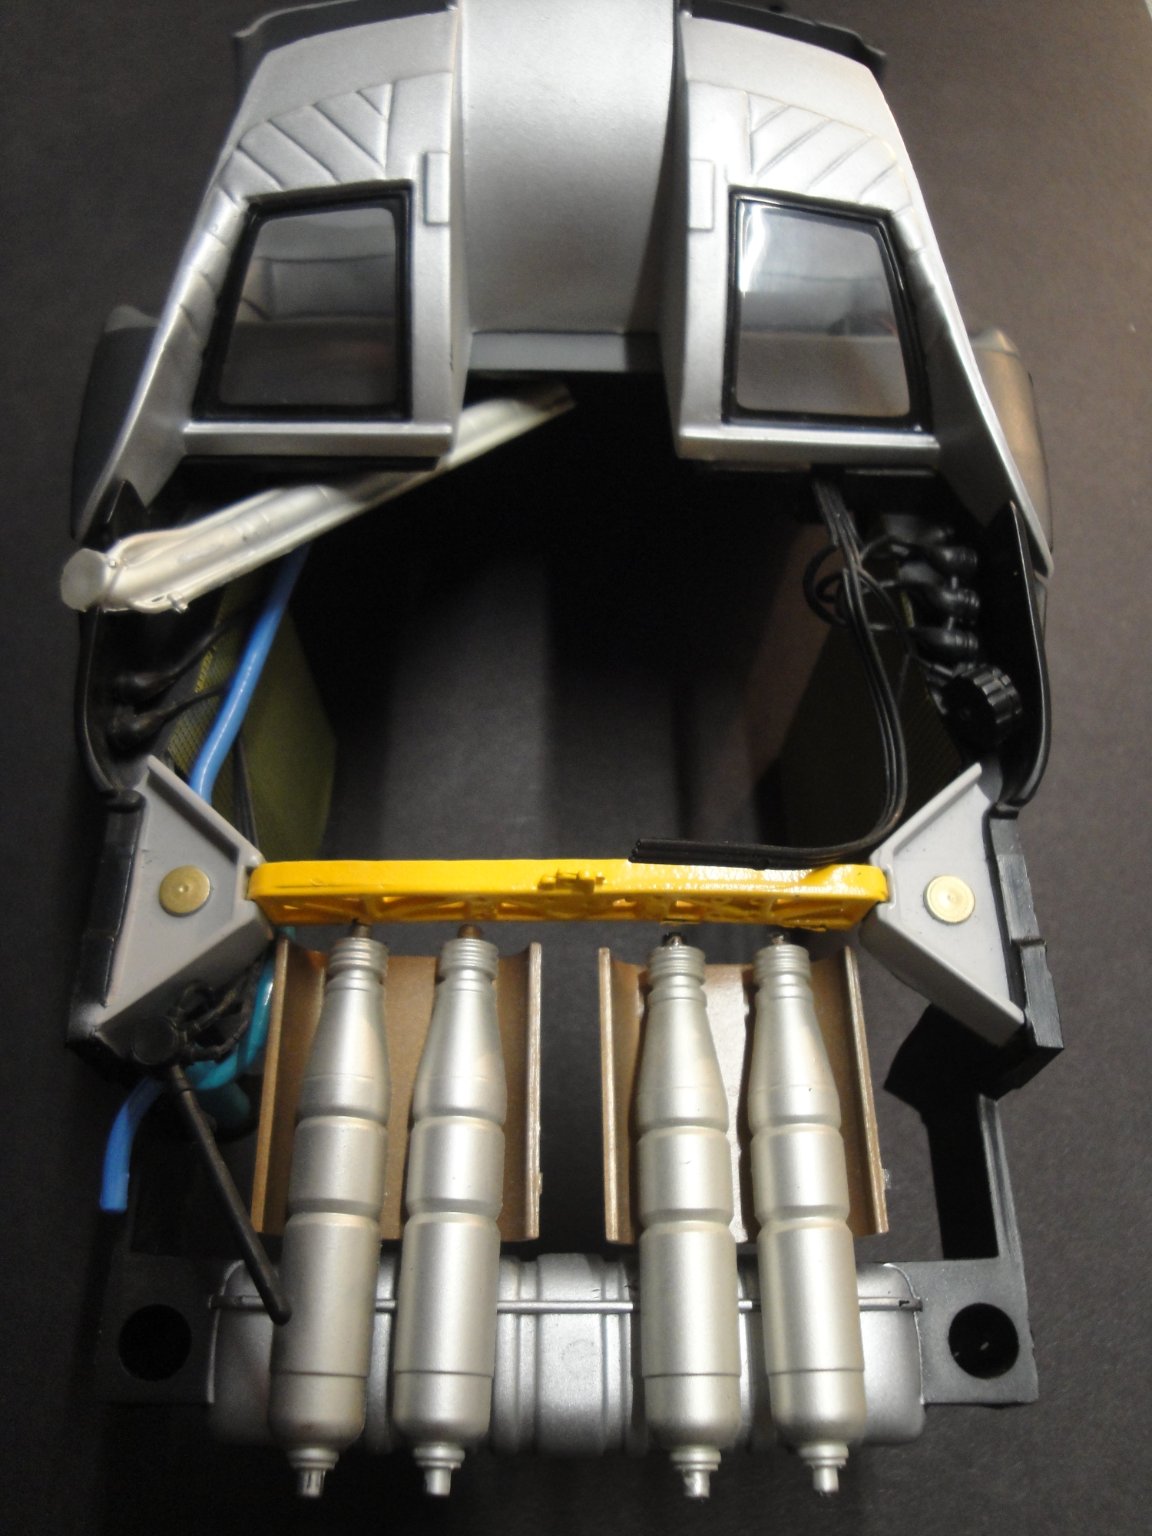
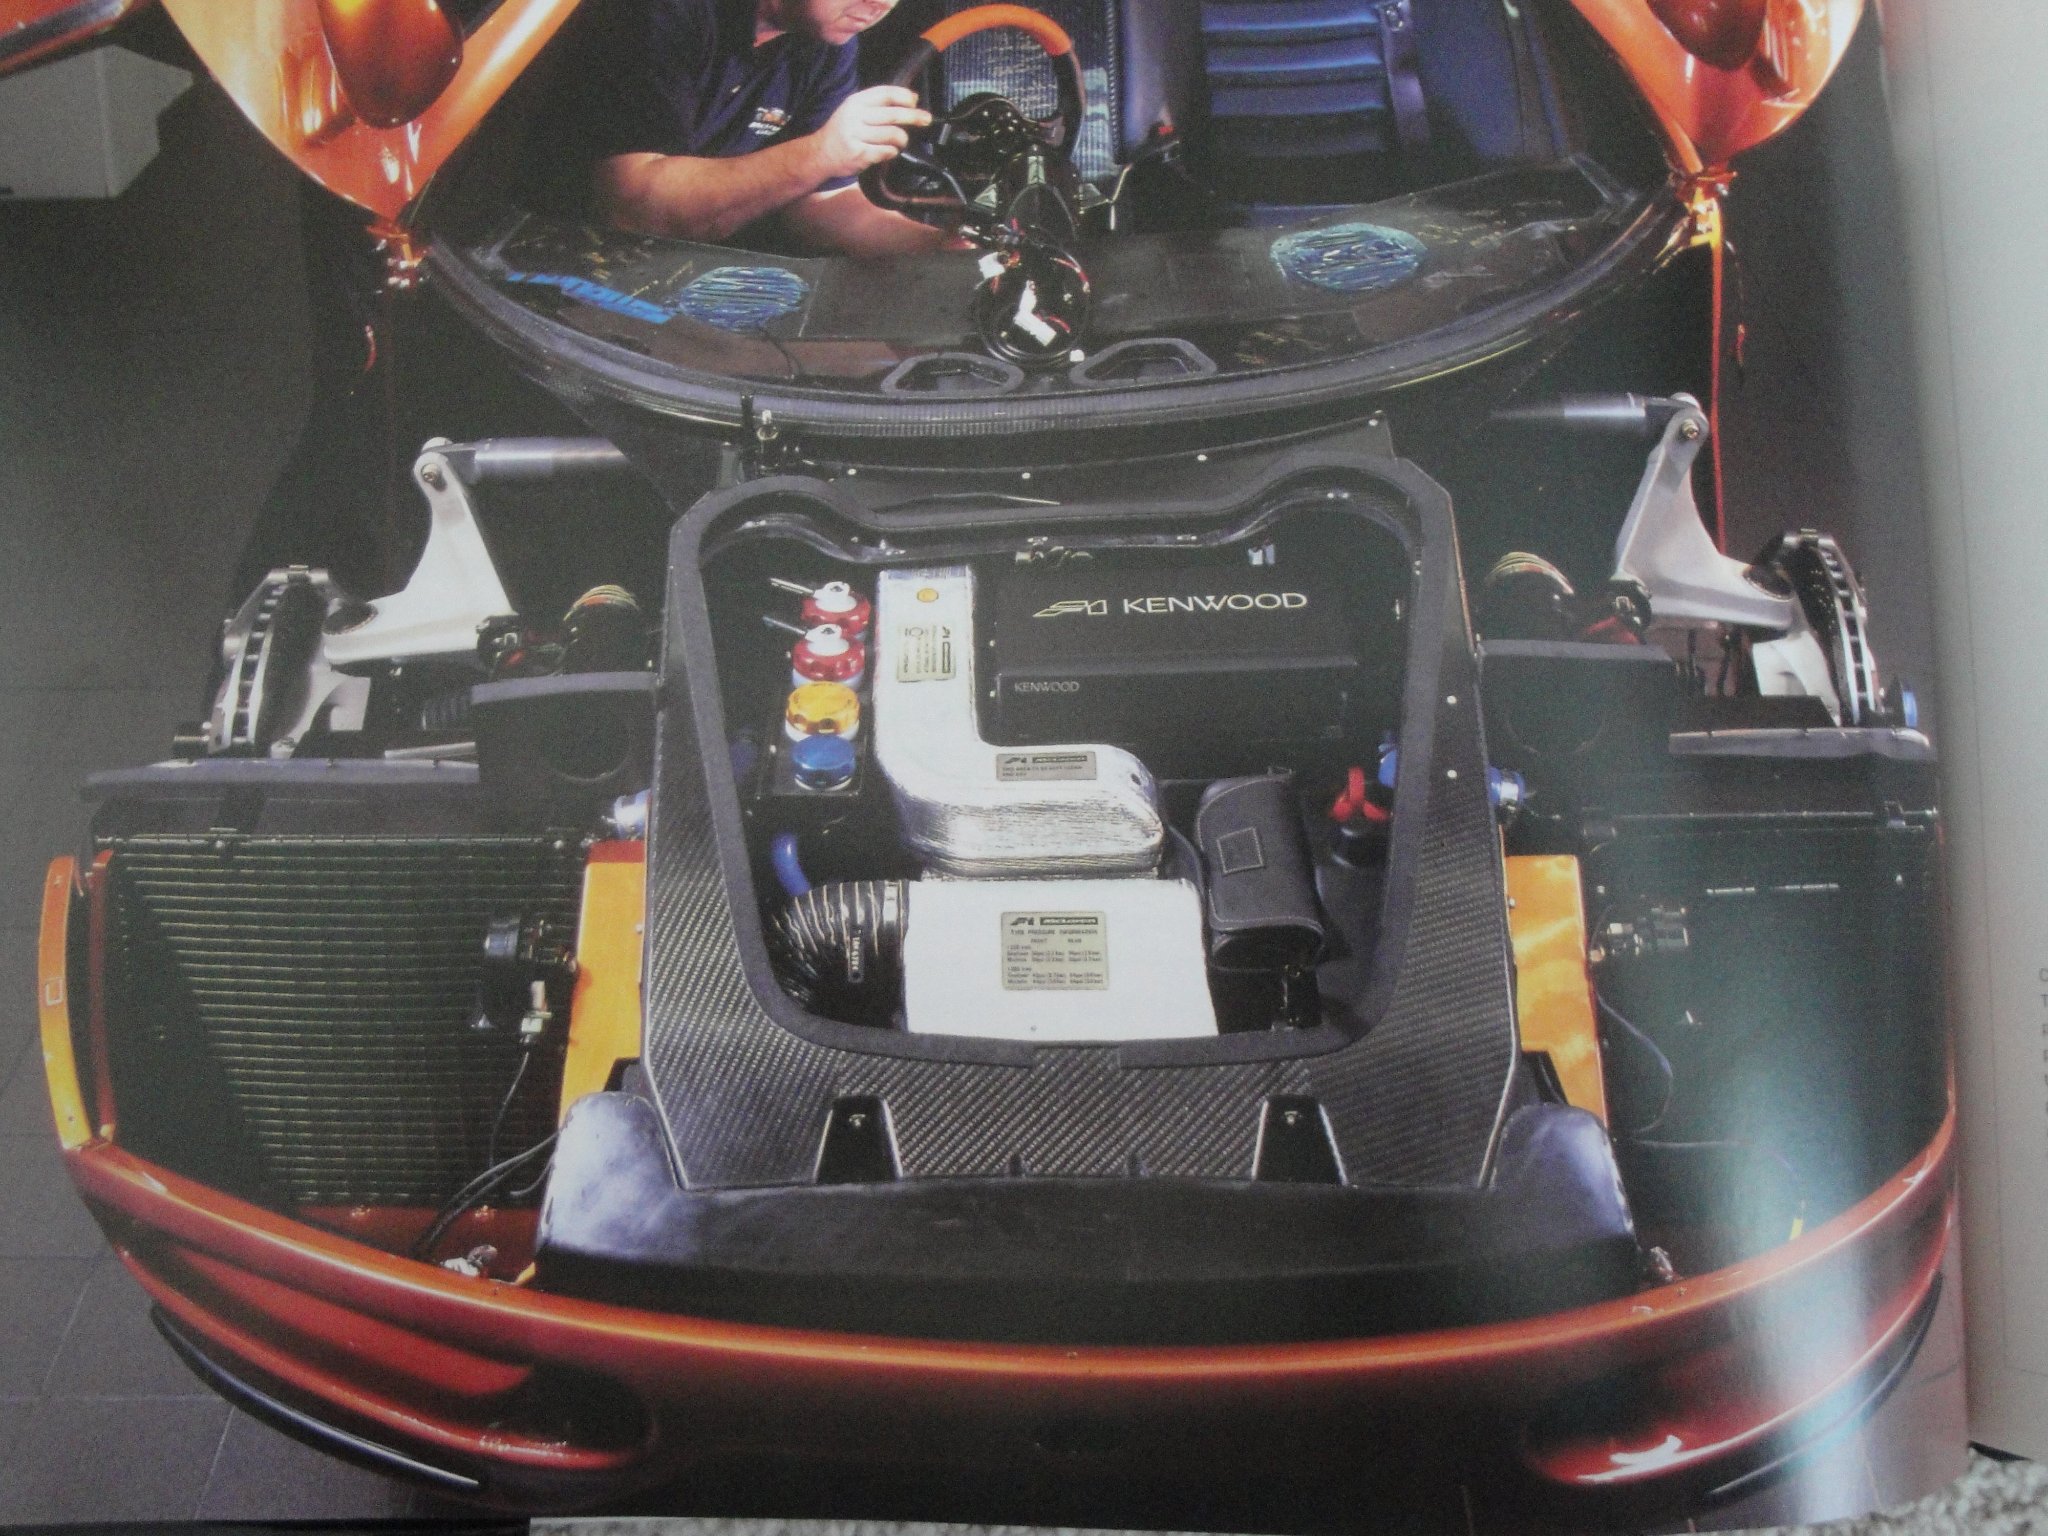
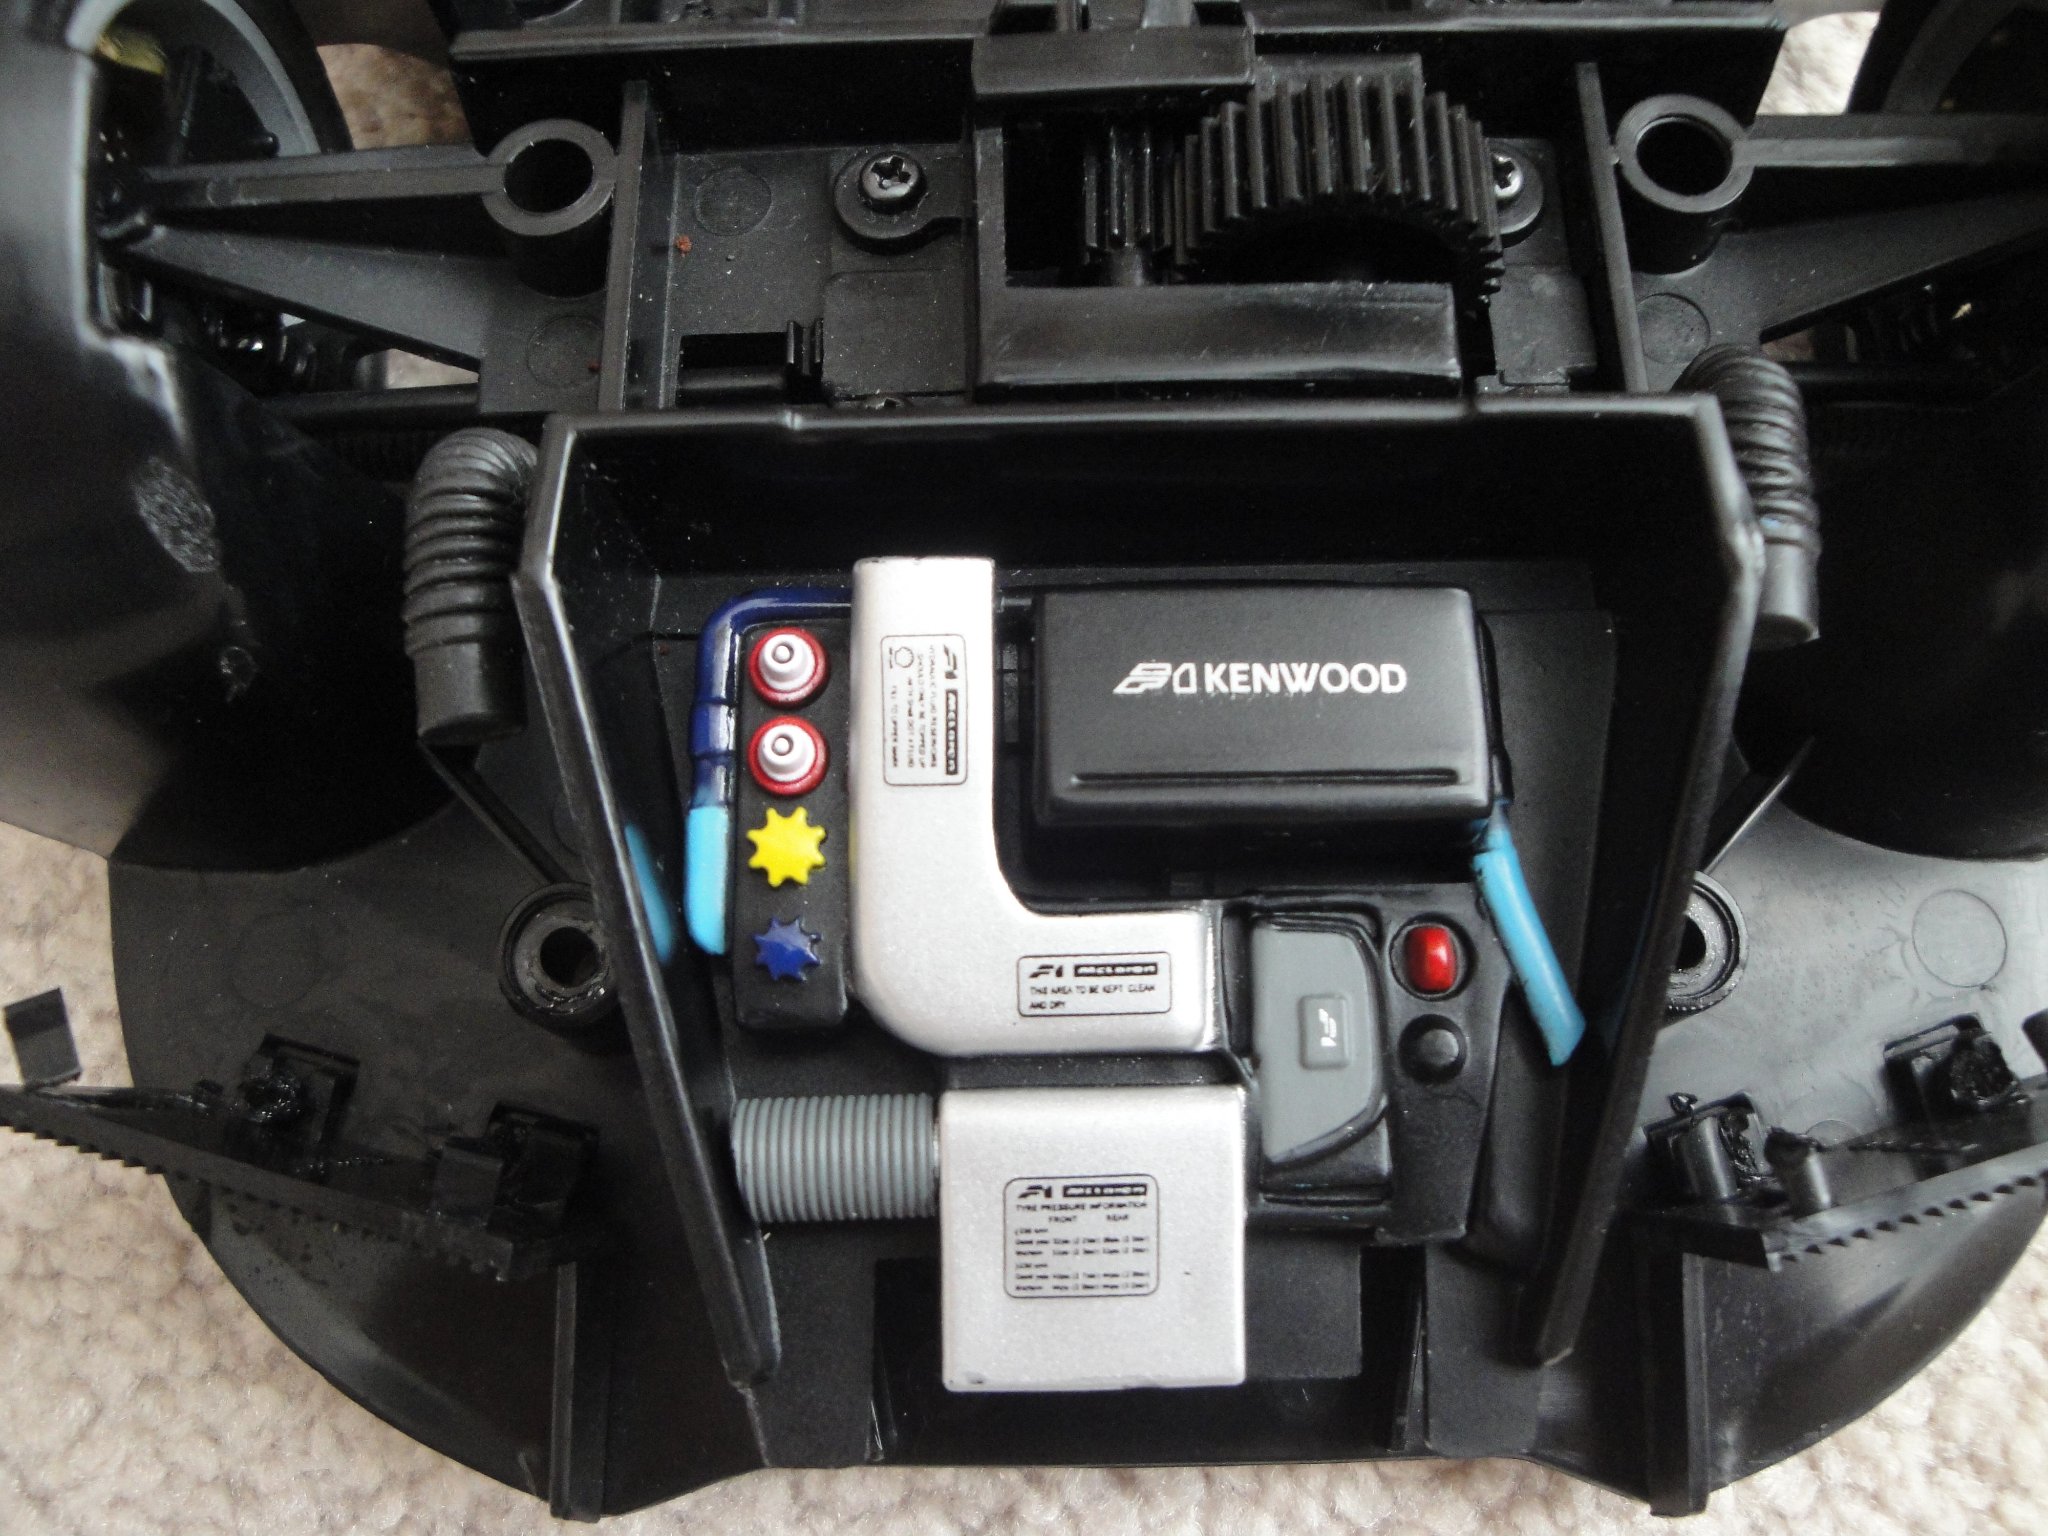
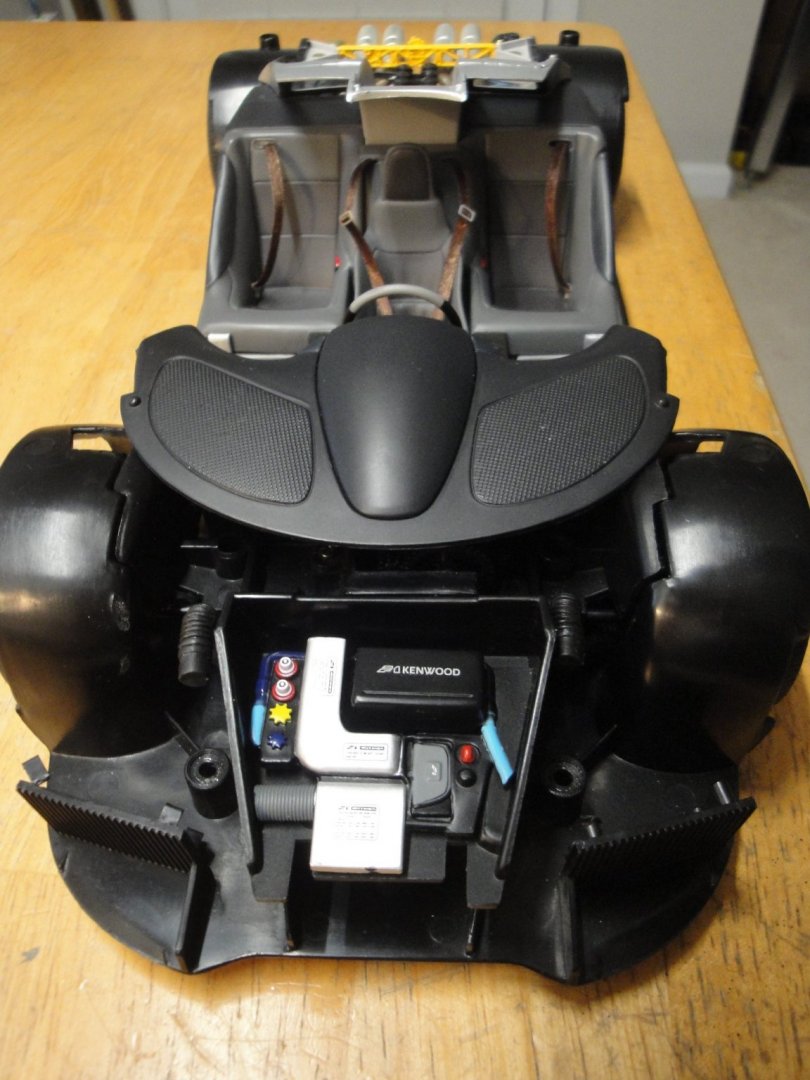
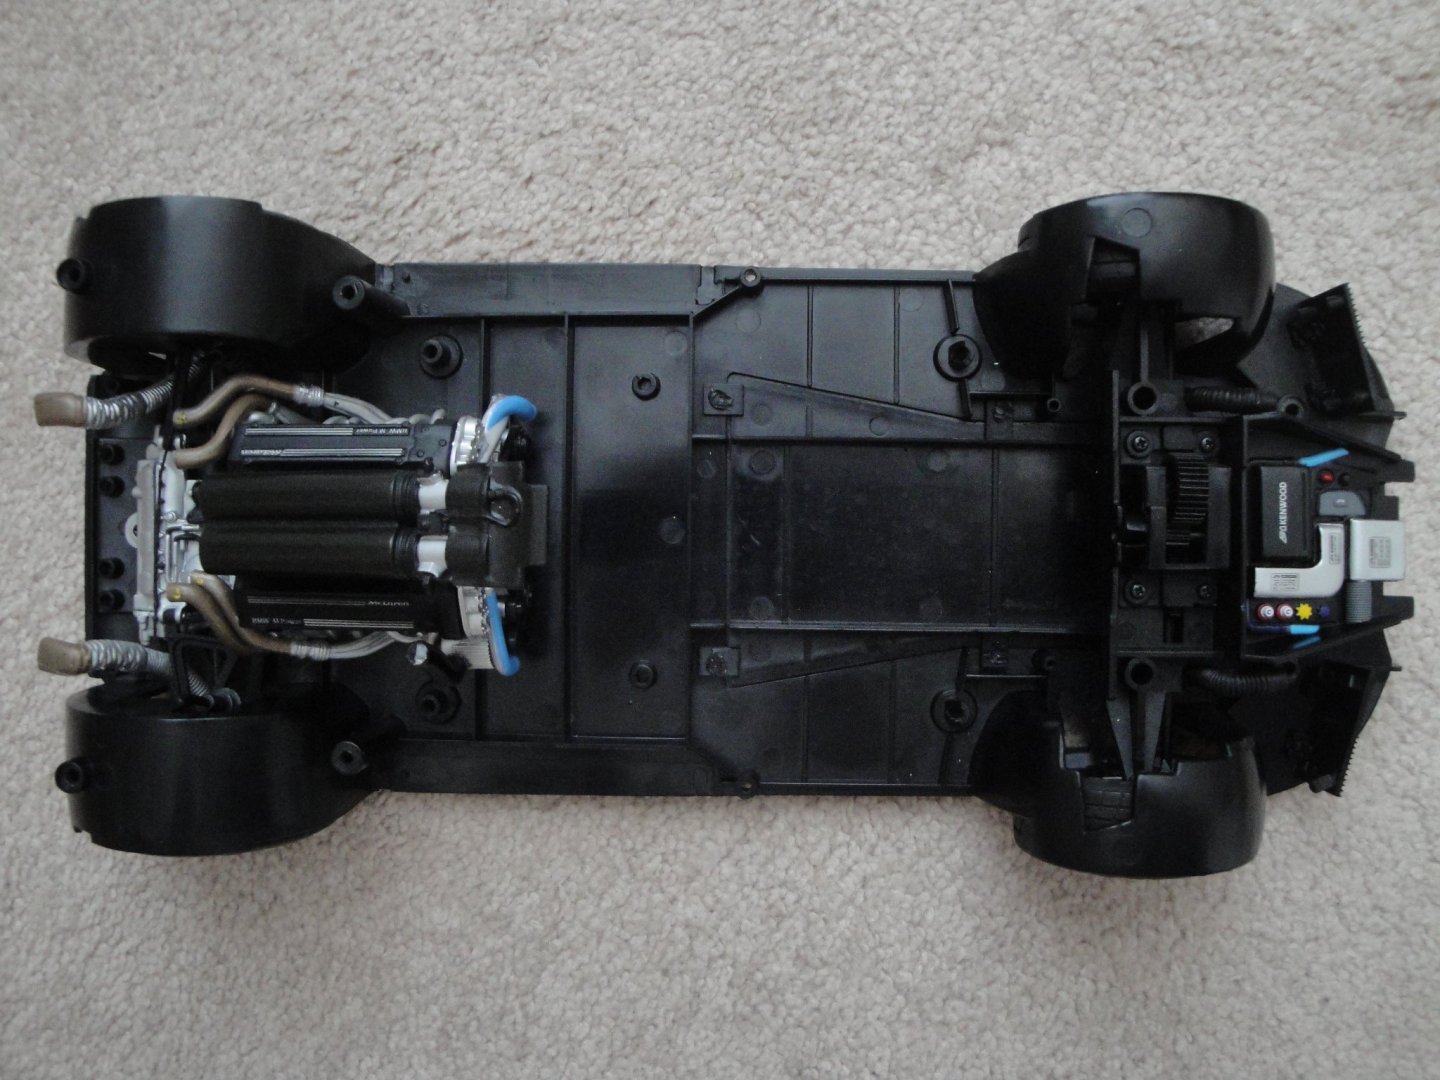
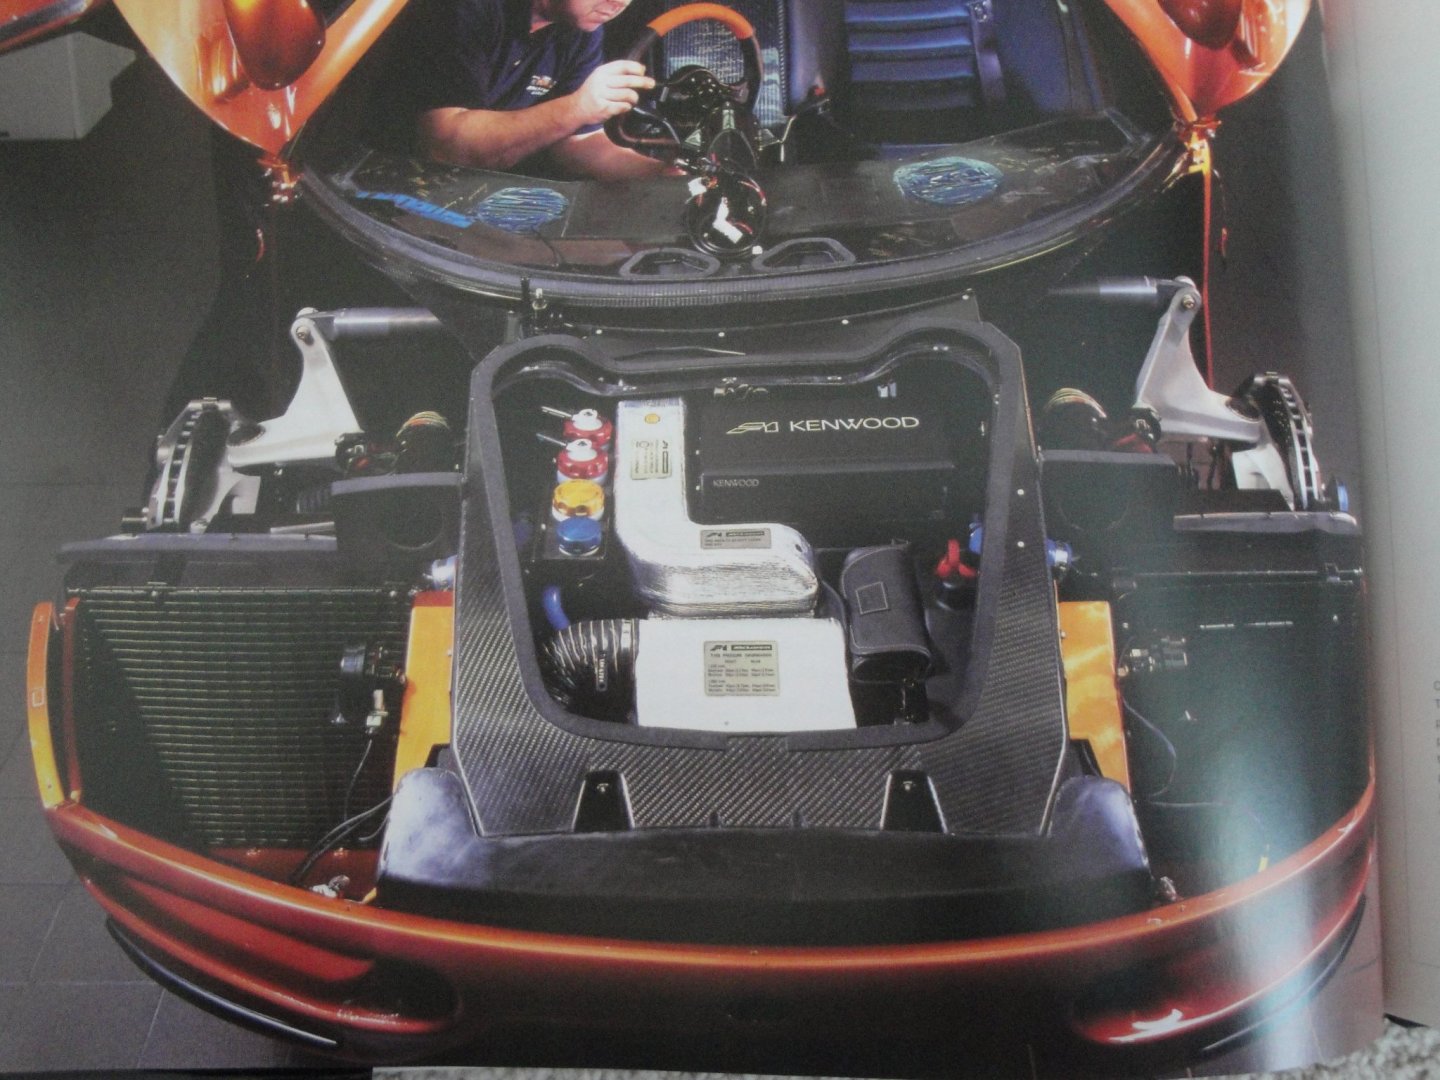
Moving on with the front compartment, where Audio and A/C systems are located: You can see in the frunk, the four bottles of brake fluids (Red) with its two independent circuits, Clutch Fluid (Yellow) independent of the brakes circuits, contrary to most modern cars and the windshield washer fluid (Blue). The KENWOOD system is capable of changing 10 CDs and was designed specifically for the F1 by Kenwood. There is no provision for Radio FM/AM in the F1, as Gordon Murray is an audiophile and refuses to listen to low quality radio stations. The entire audio system weights less than 8 Kgrs. The A/C system was developed in house by McLaren and weights less than 15 Kg, as compared to 30 Kgrs found in most vehicles. The model depicts very precisely and accurately that part of the car, down to the various stickers on each part: The tool pouch is also present. The original tool were designed by French tool manufacturer FACOM, and were cast in titanium for extra light weight and ultimate toughness. I am certain that none of the F1 owners, ever used these tools for any kind of maintenance. Yves

- 30 replies
-
- 11
-
-
Lovely. Yves
-
Heaven.... Yves
-
Your attention to details is just fantastic. What a beautiful work. I hope this model will get a chance to be in a public place so it can be admired by thousands of people. Yves
-
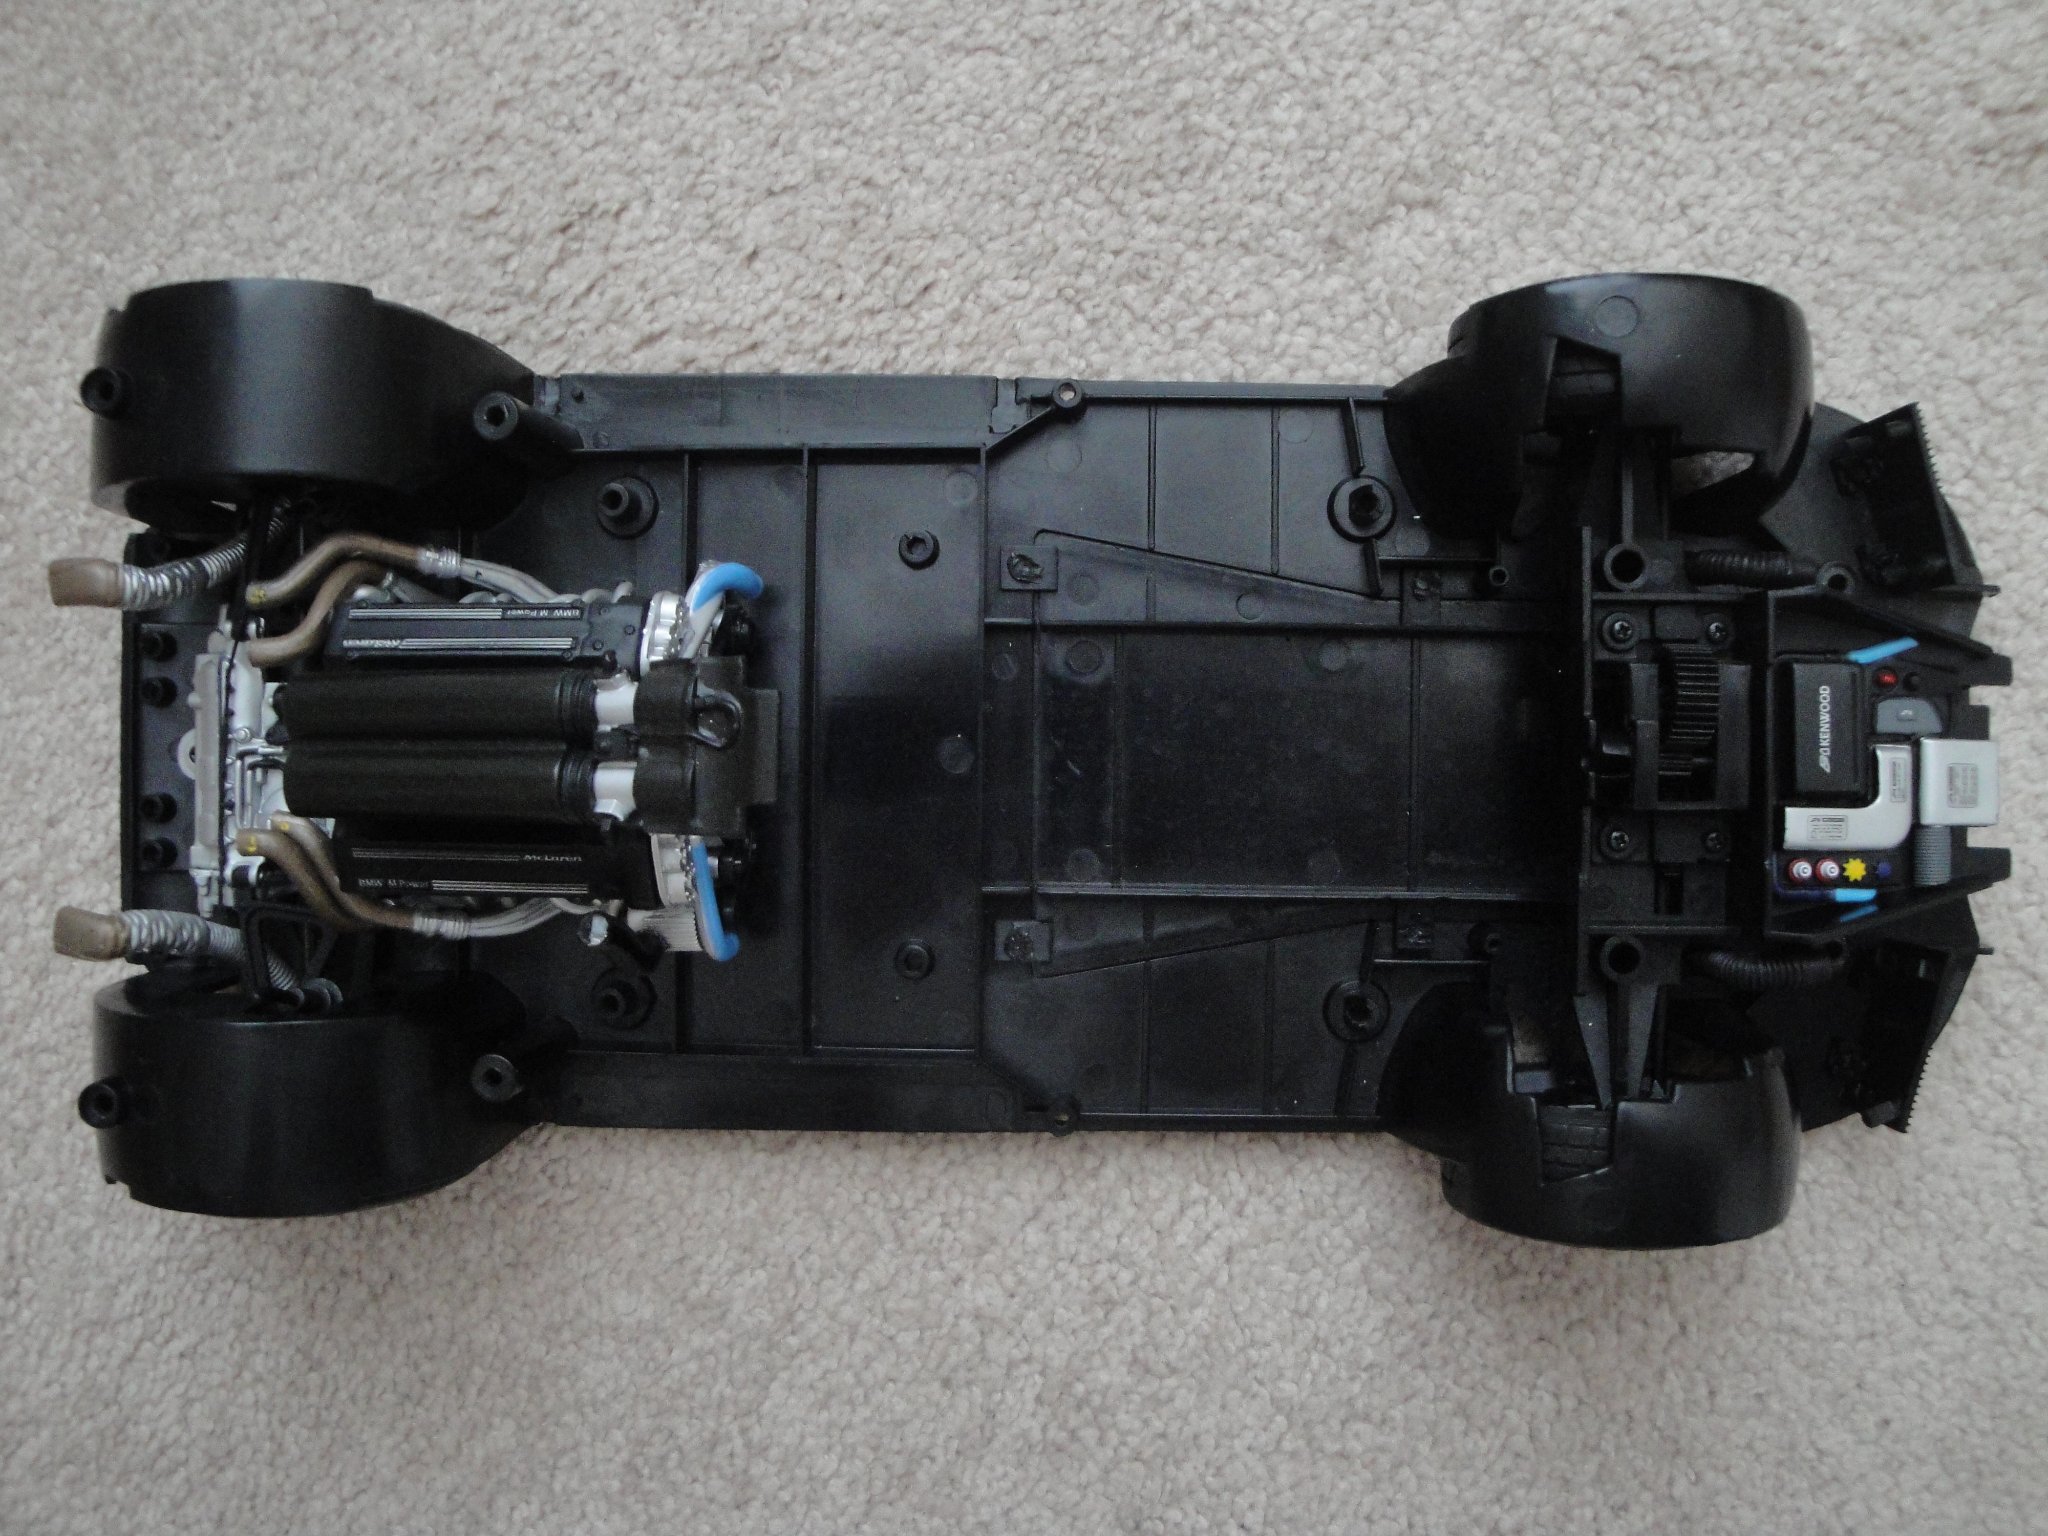
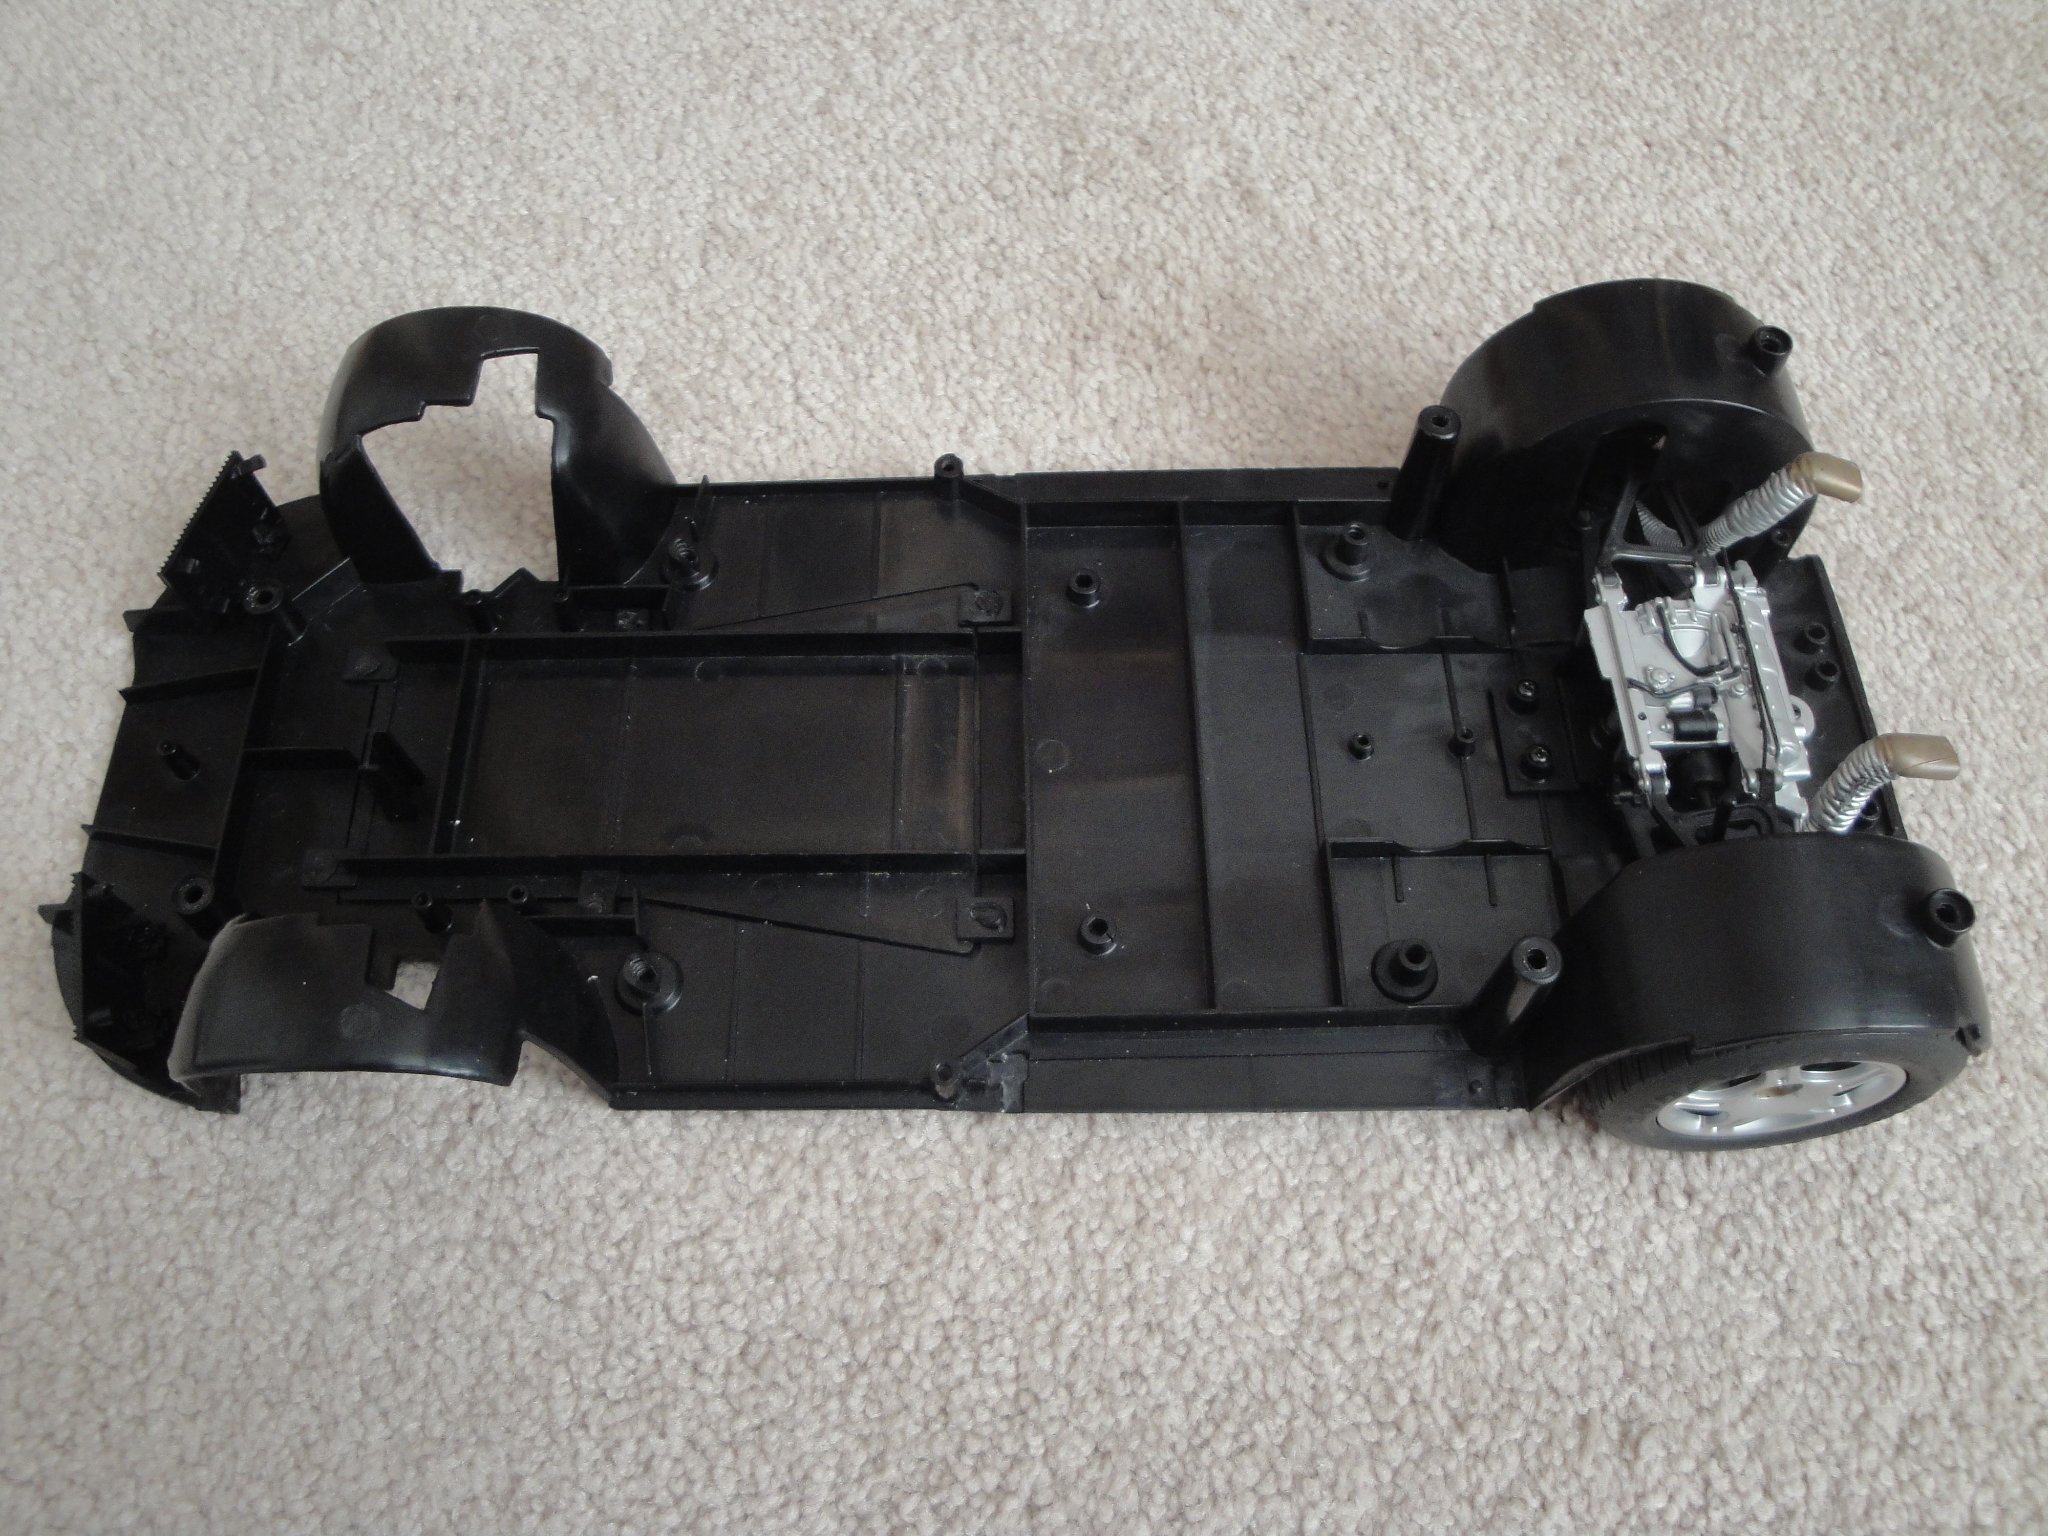
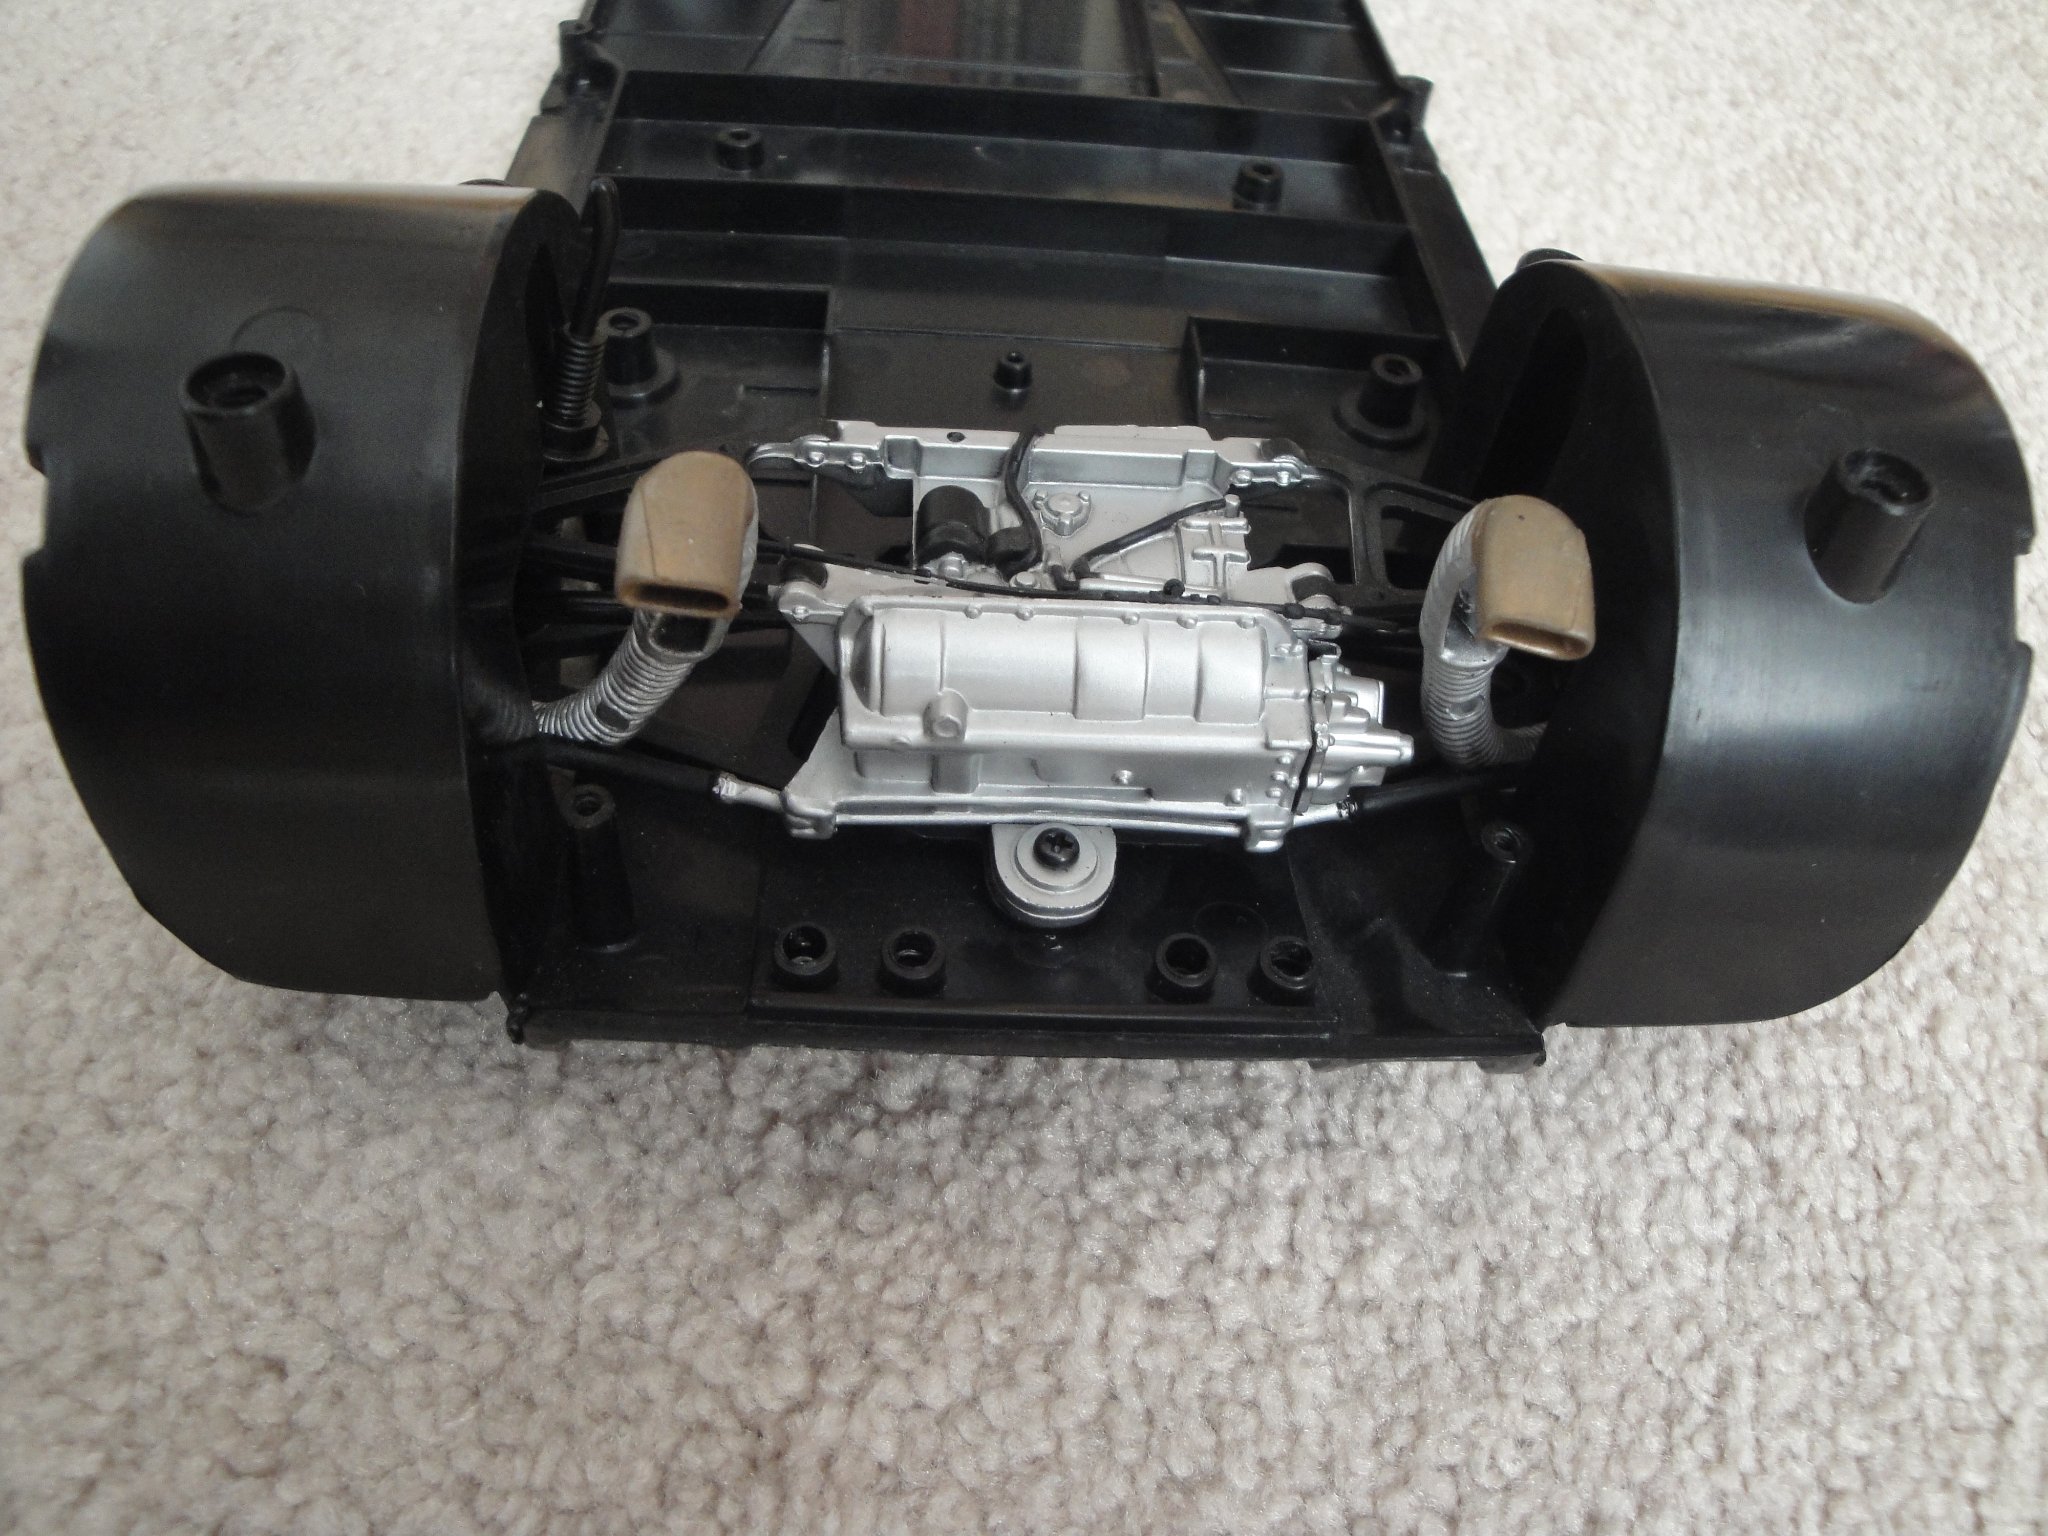
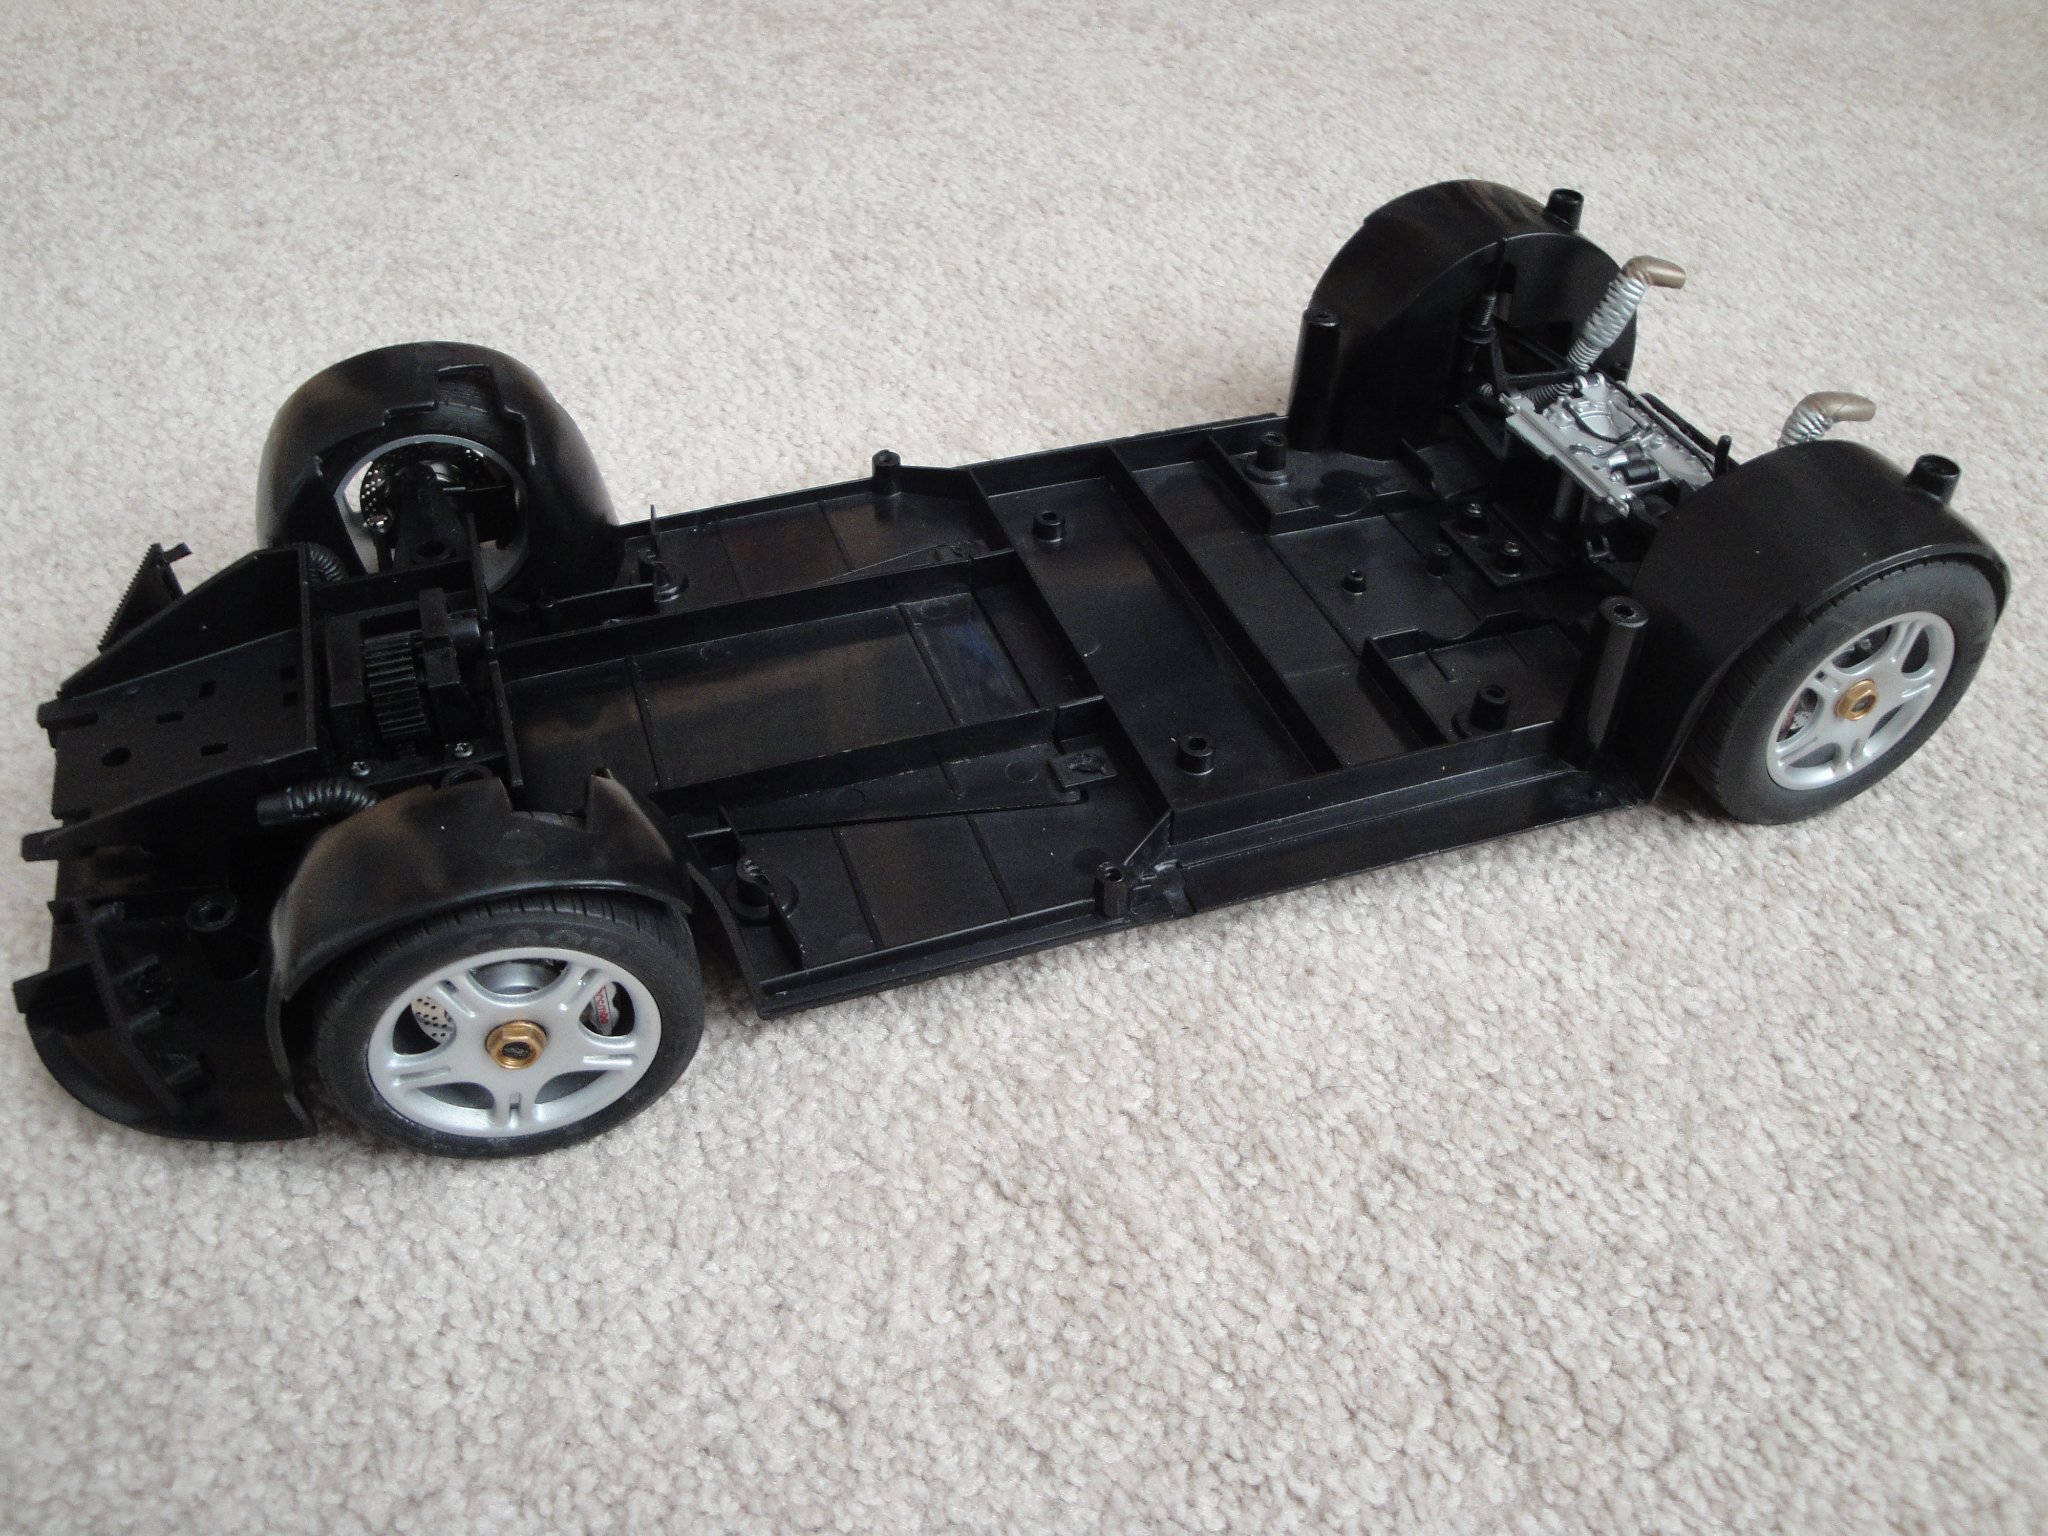
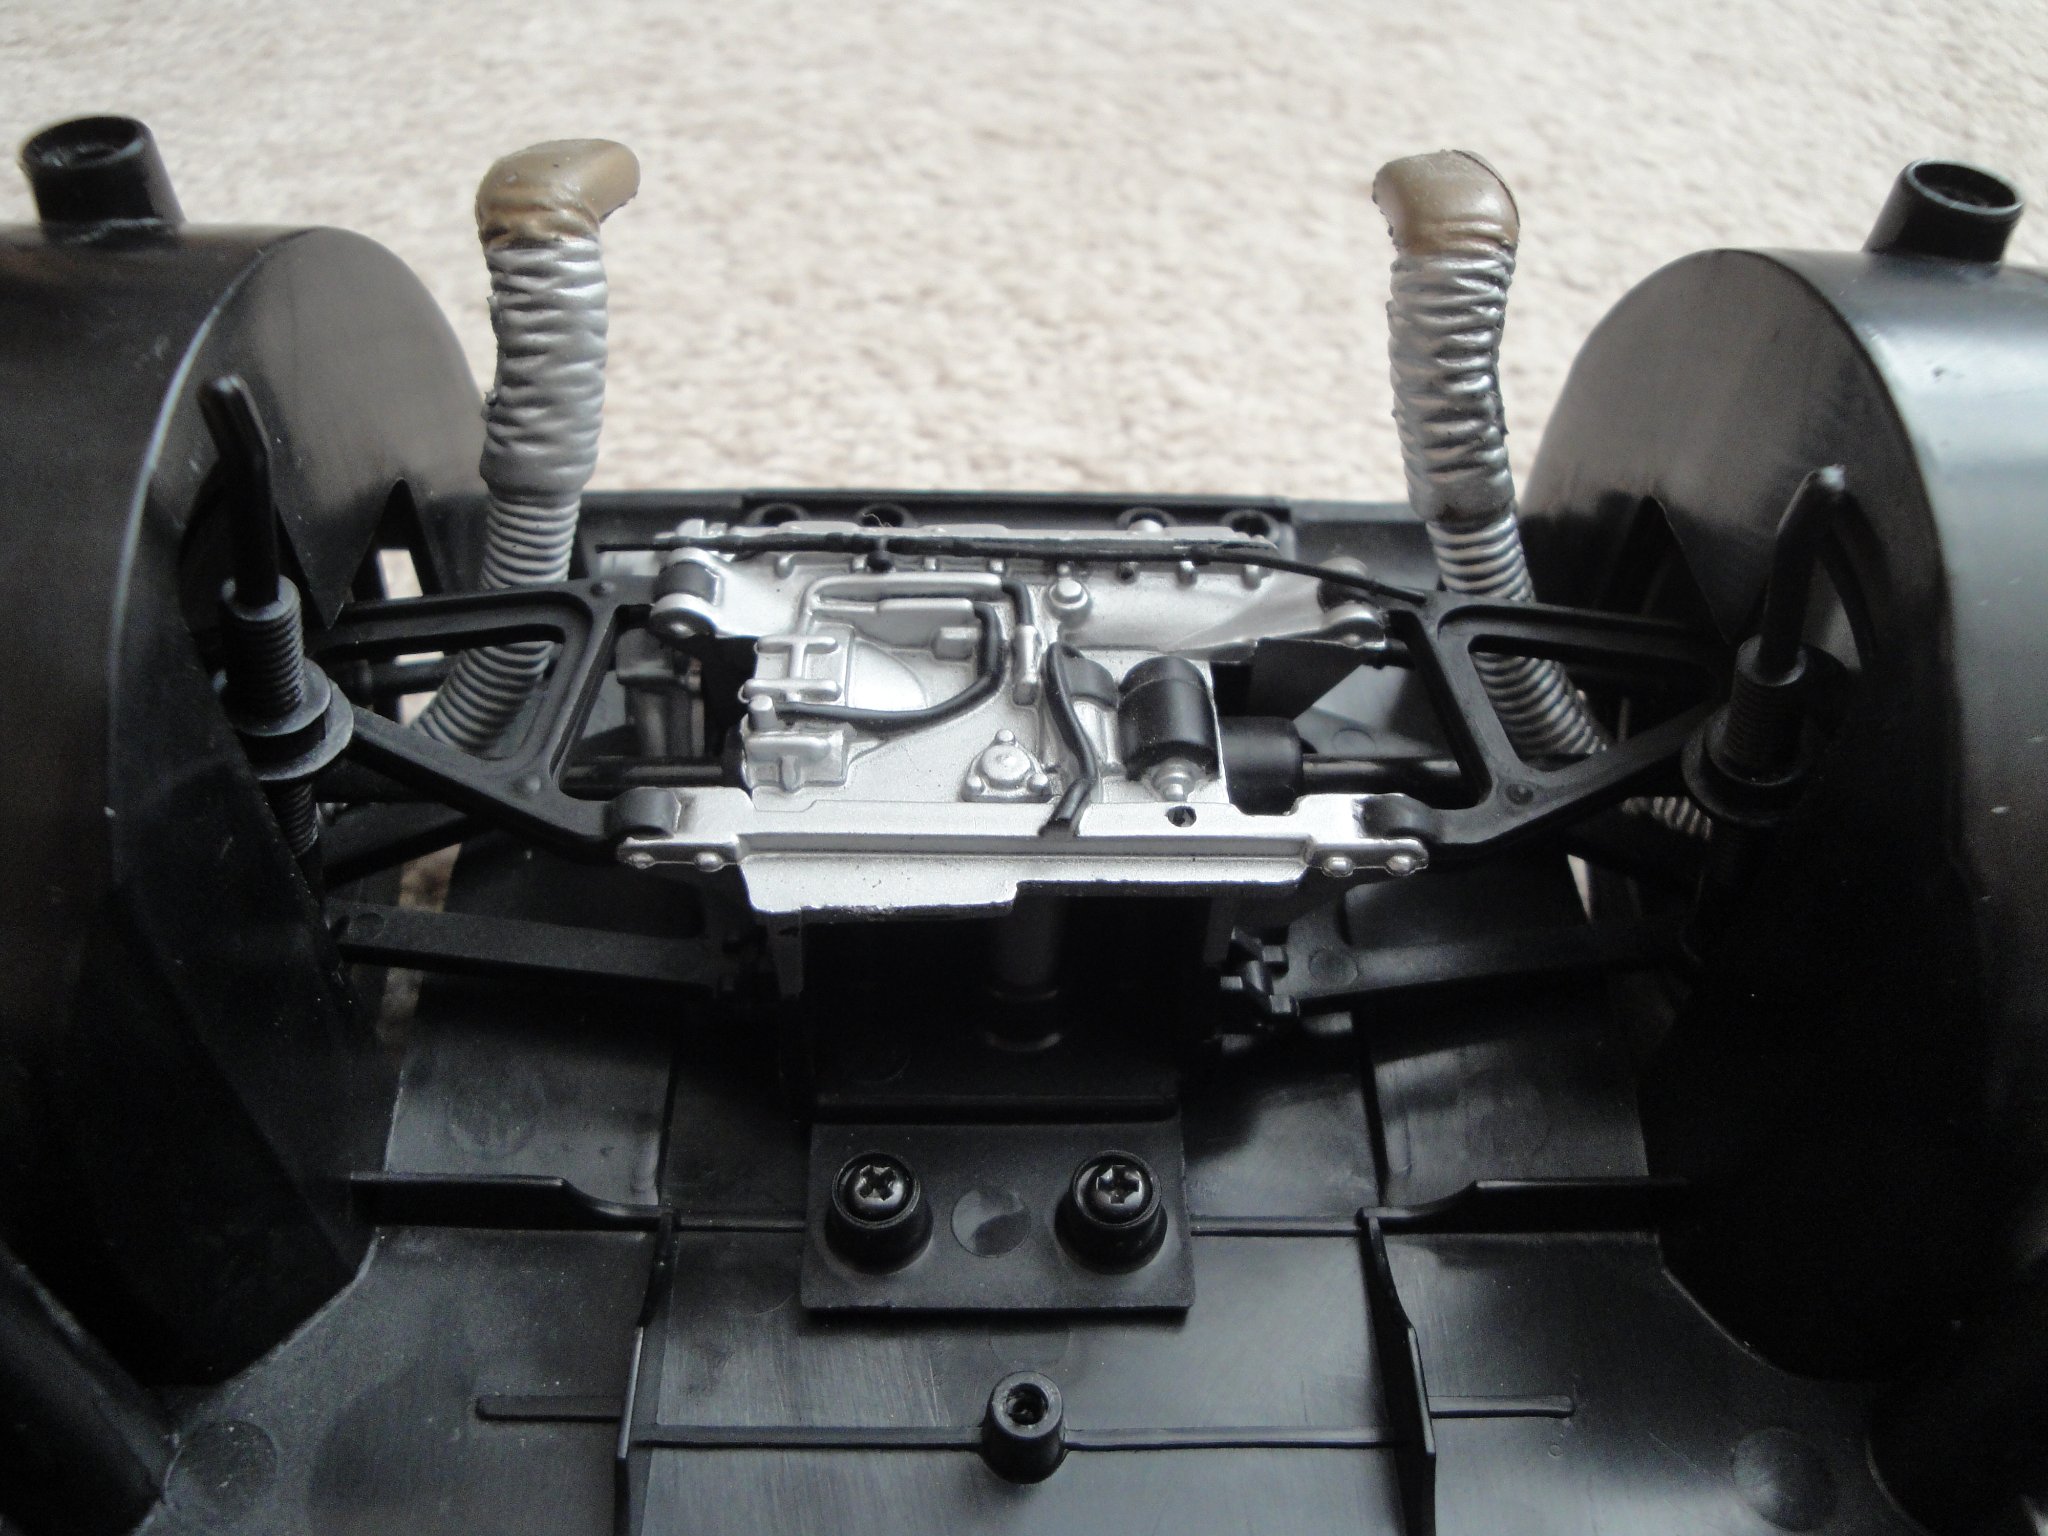
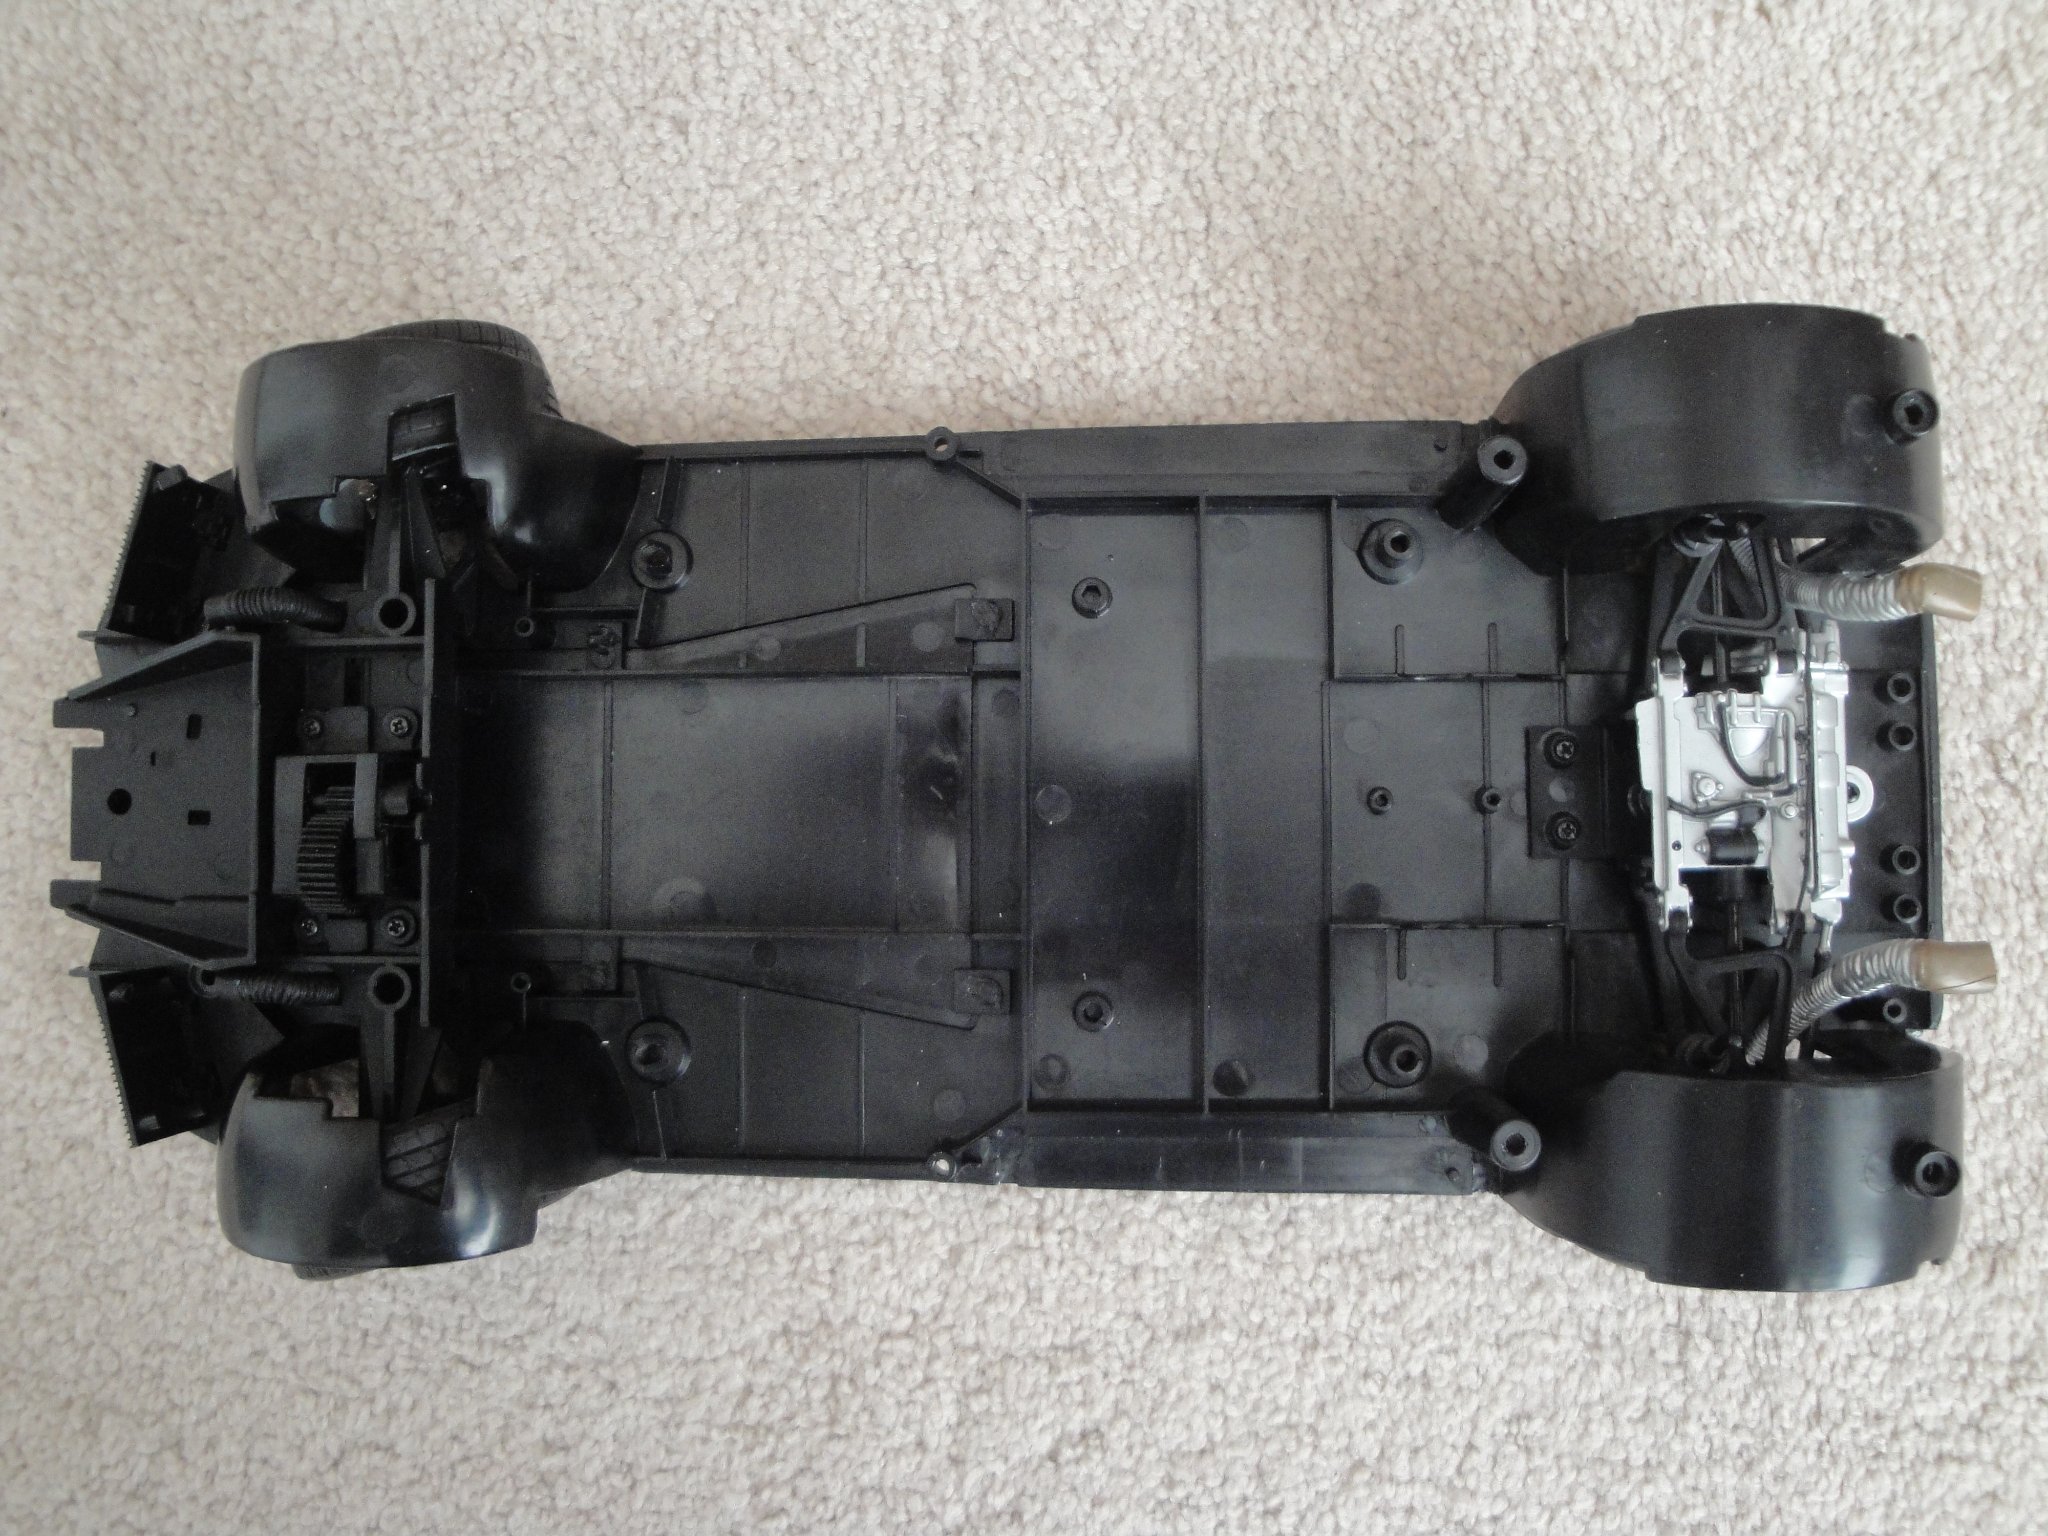
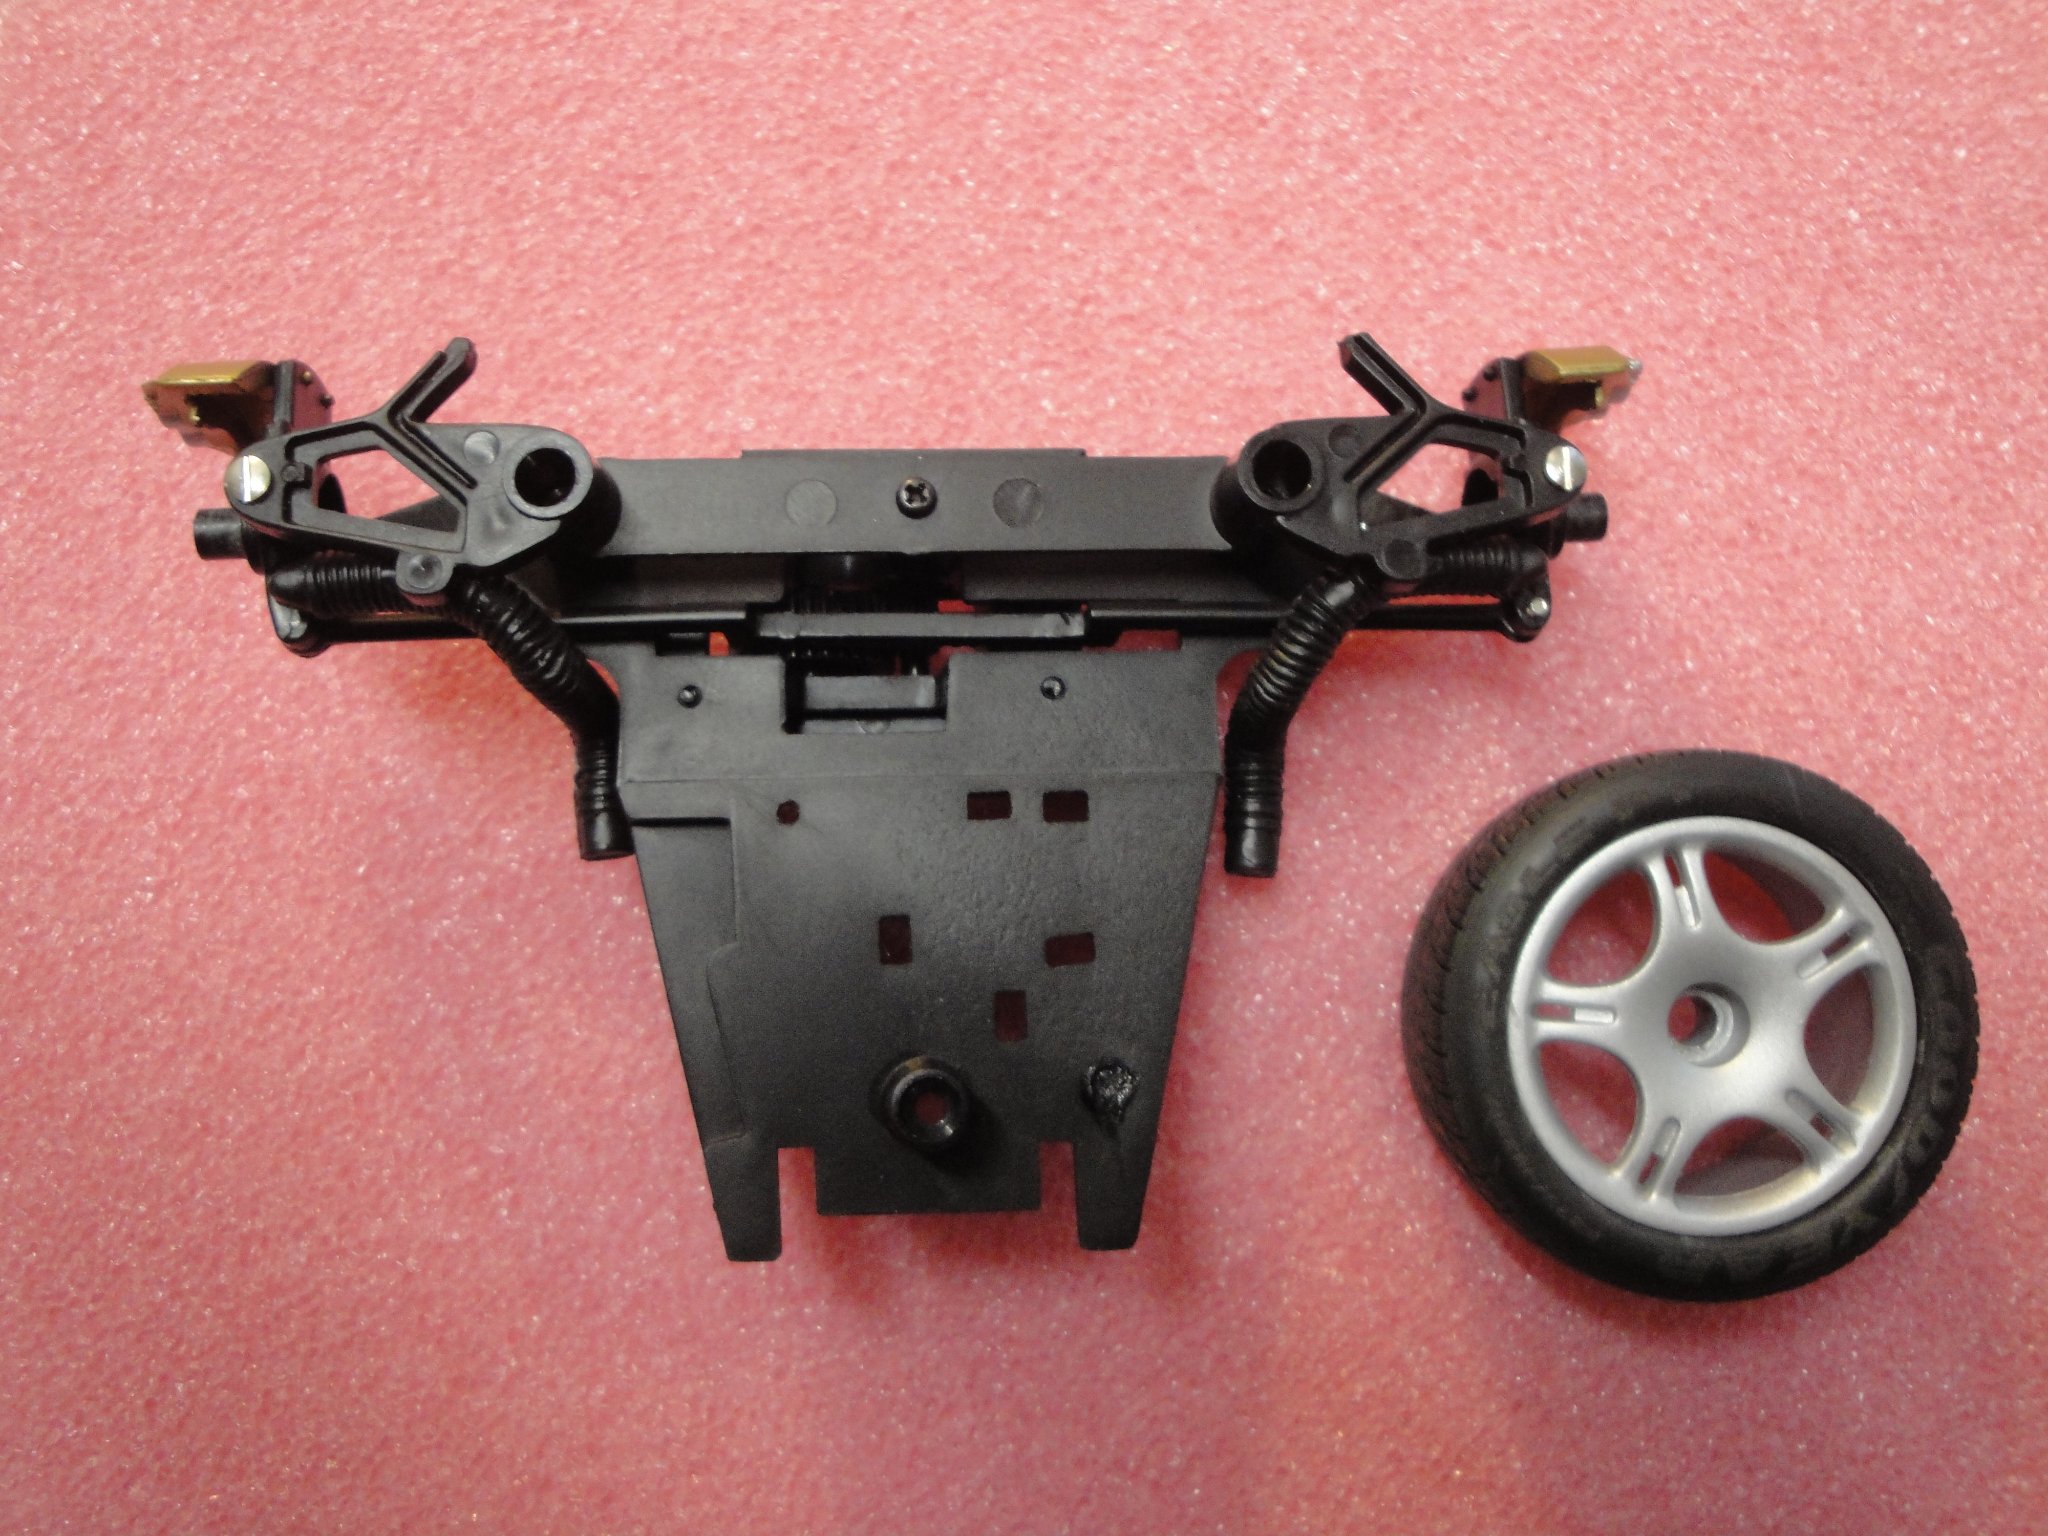
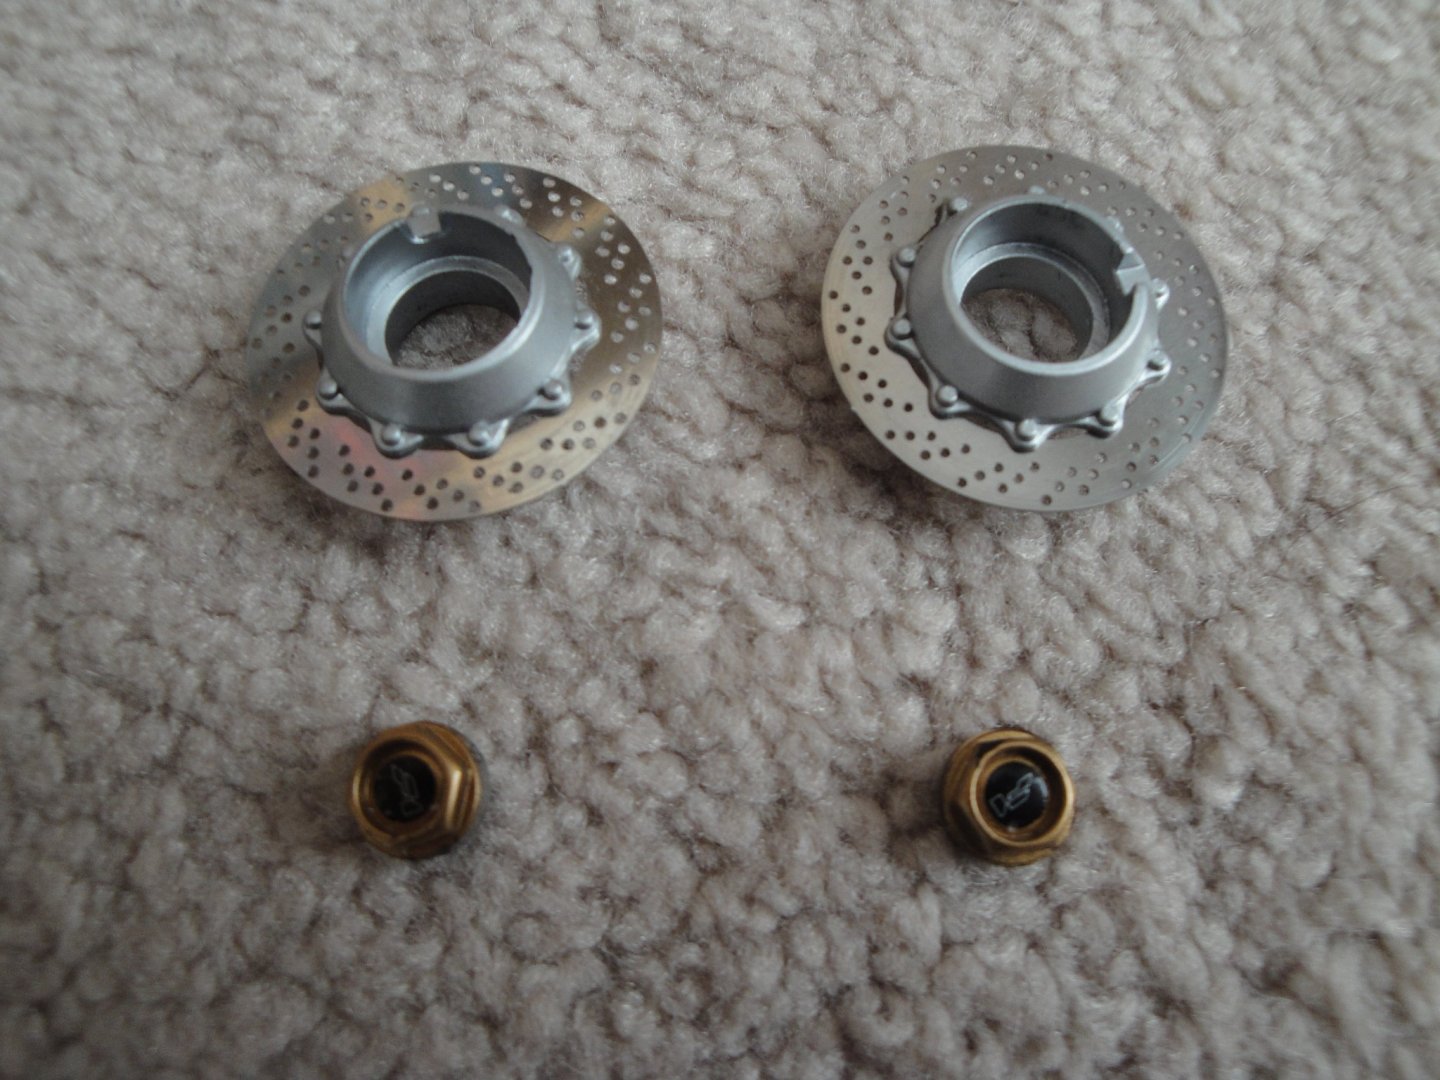
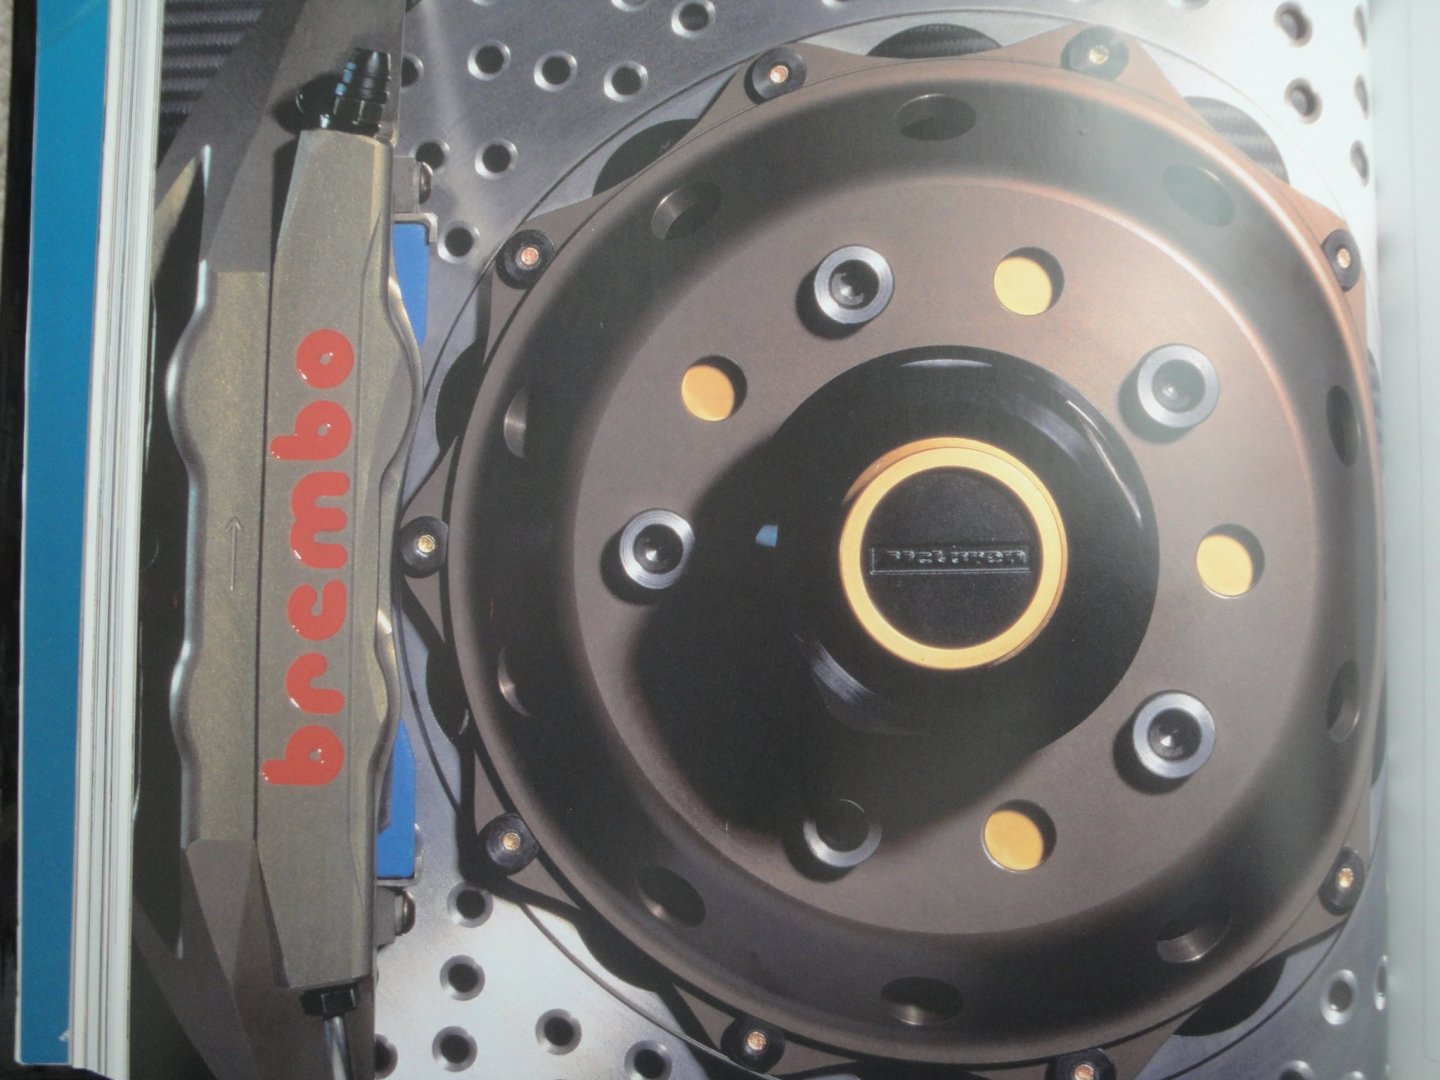
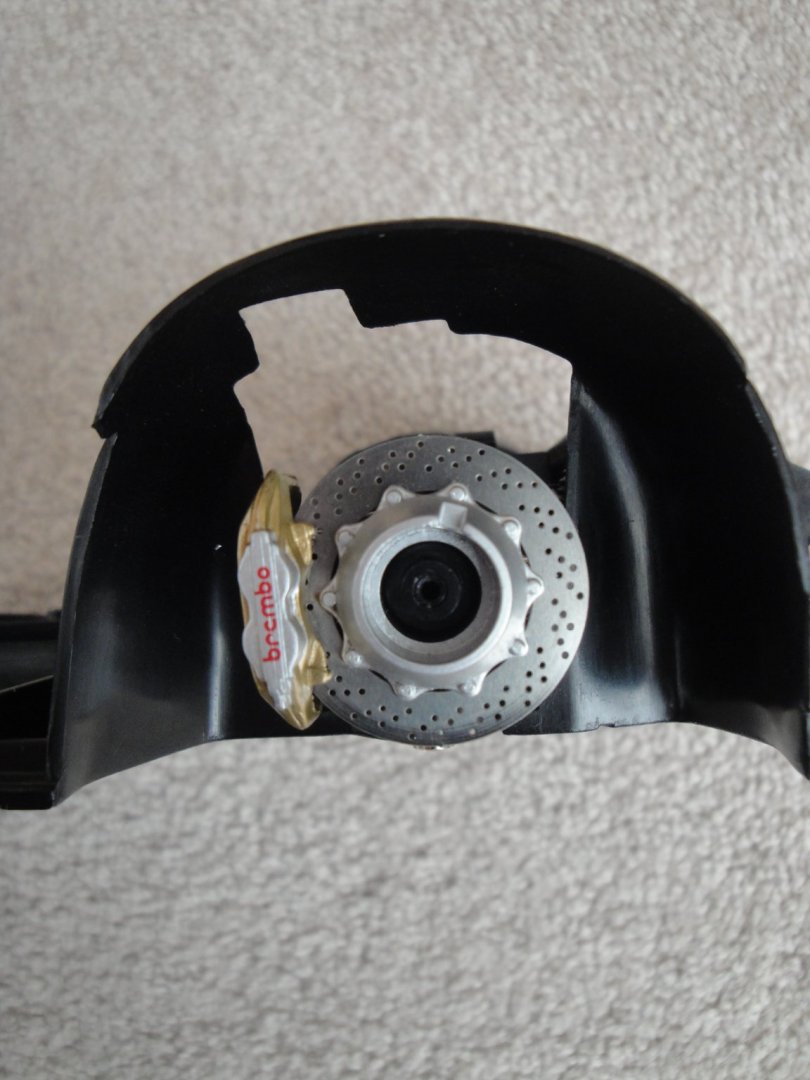
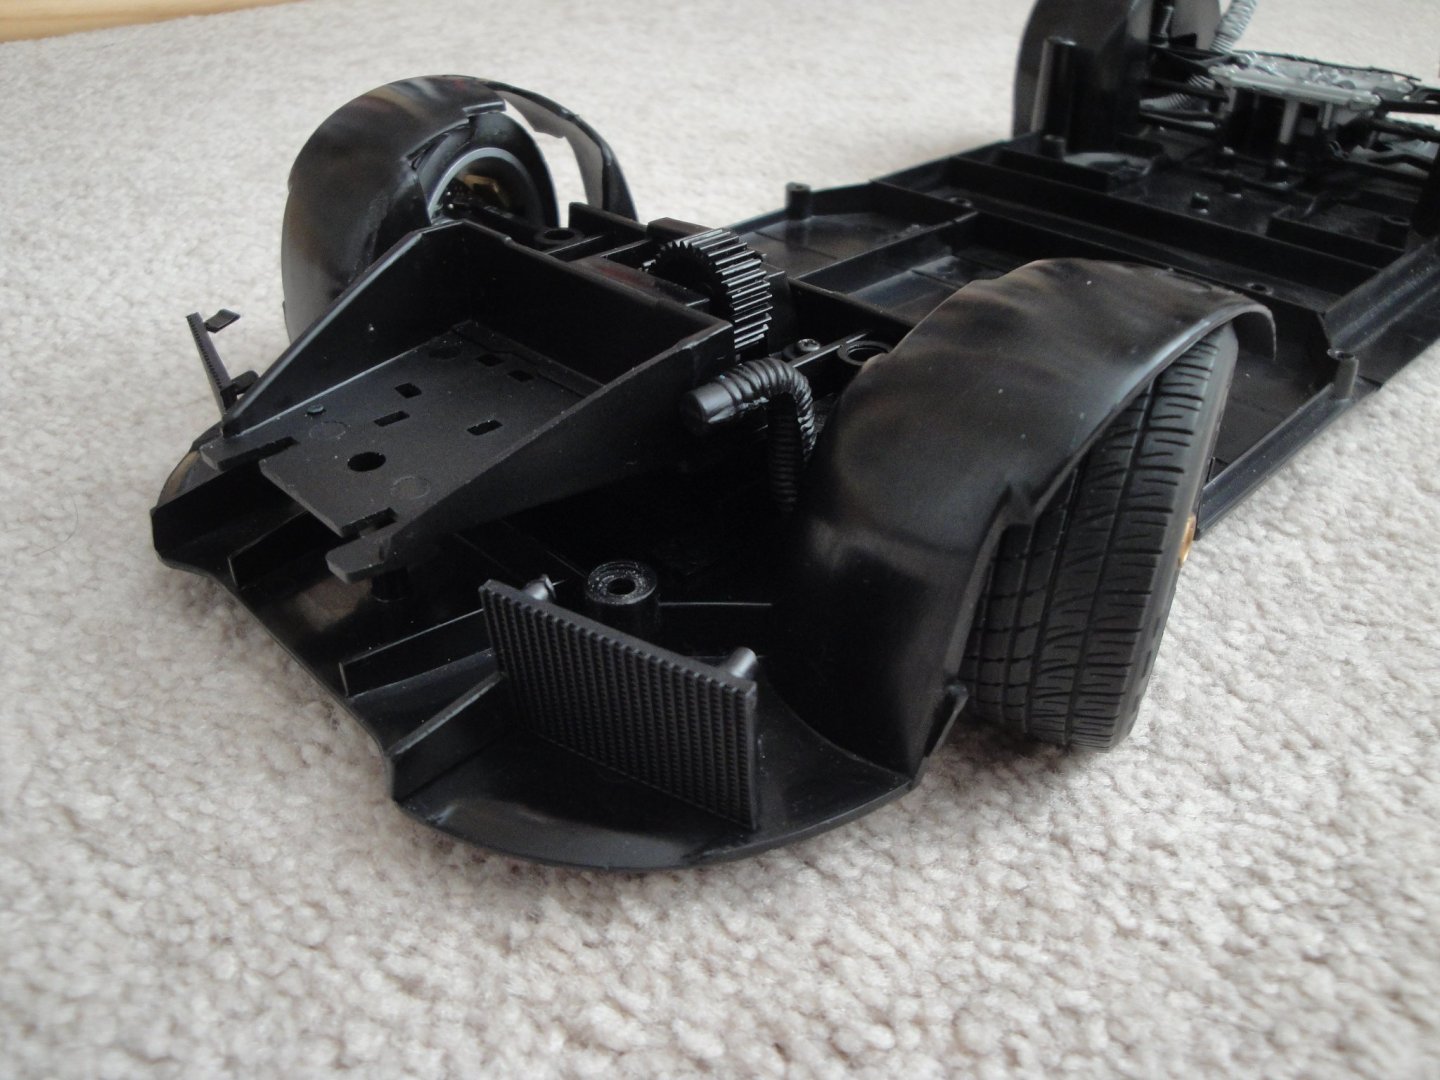
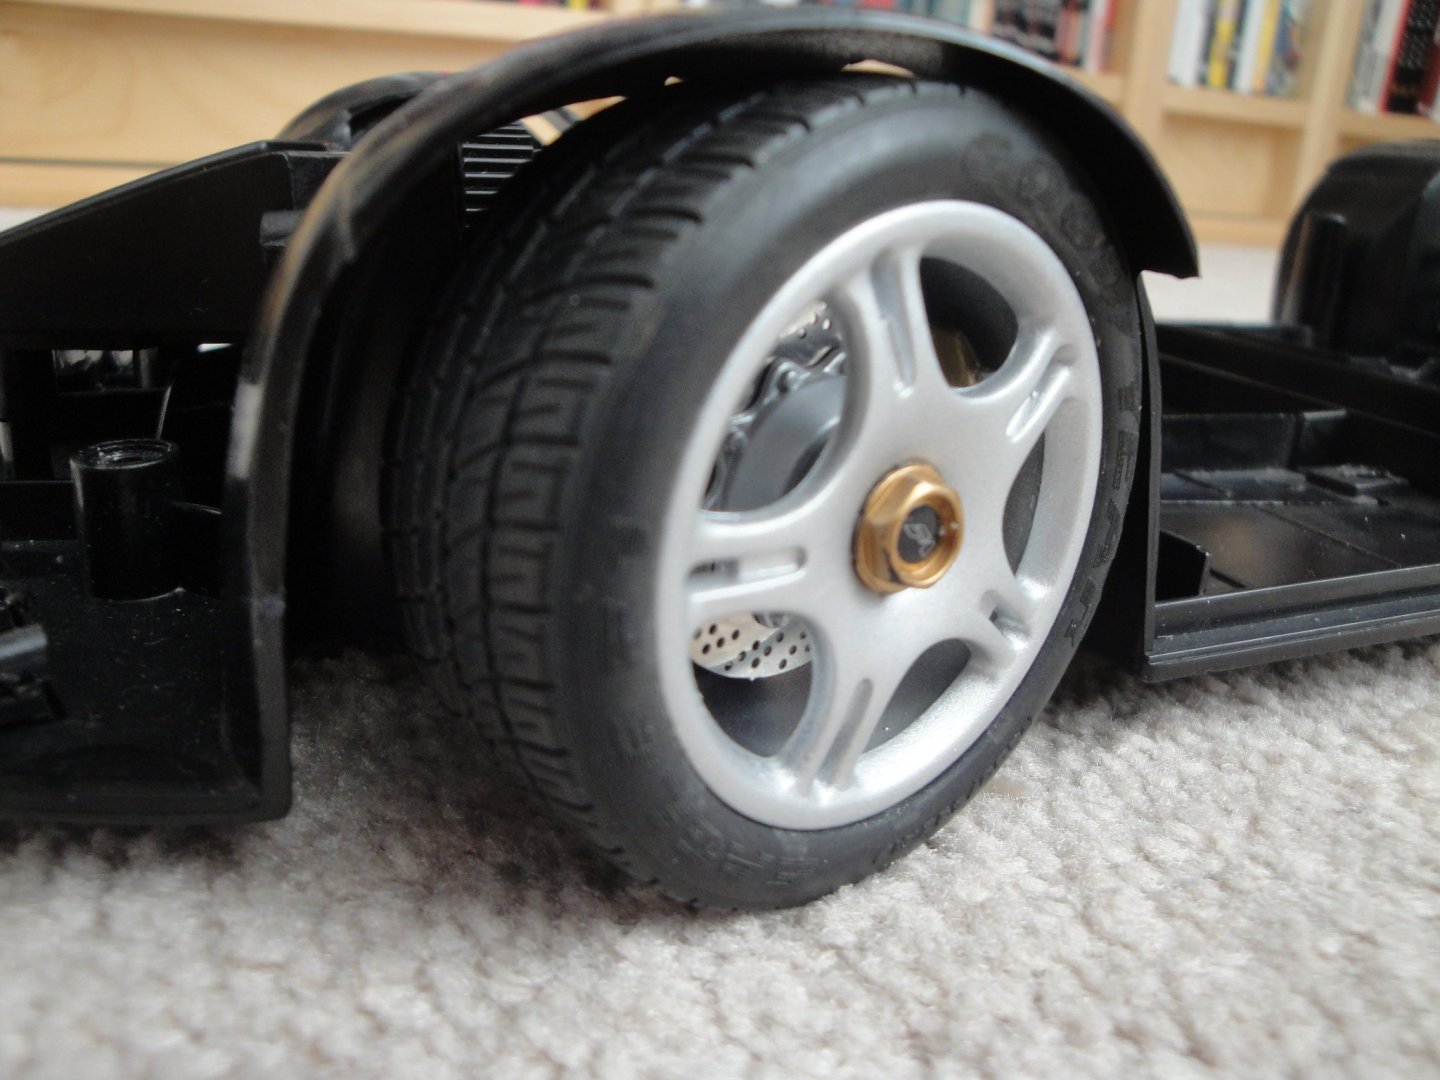
Next, I have to put together the chassis of the F1: As you can see, Paul's Model Art took a lot of liberty and went with a flat platform, which is quite different from the real car. I guess we cannot blame them for this shortcut, as it makes the model a lot easier to assemble and probably reduce the already expensive cost of the product. Below is a close-up on the famous transmission developed specifically for the McLaren F1. You can see the two strange "cobras" of aluminum hoses used to extract the heat from the rear brakes. McLaren has a patent on this feature. Close-up on the exquisite BREMBO brakes, with etched/Stamped (?) steel rotors and the central locking nuts for the wheels: Hub and brake assembled: For comparison, here is a picture of brakes on the F1: The brakes took a lot of efforts during their development. Gordon Murray was adamant about using Cast Iron brakes despite their heavier weight. It was the only way to stop a car running at 200 MPH, on a short distance. The pads were a lot more difficult to select and multiple combinations were tested. Finally, 4 pads made of Carbon Fiber were retained for the final car. The F1 being a driver car with a future for competition, was not equipped with Power brakes servo nor ABS. That decision was taken to save weight and allow a better feel of the brakes by the driver. Gordon Murray was inflexible on the 1000 KGrs weight of the final car and reluctantly accepted the 18 additional KGrs of the cast iron rotors, taking his precious creation to 1,018 KGrs. On a side note (and that is only my opinion), the lack of ABS may be the reason why our Mr. Bean wrecked his F1 on wet pavement. Switching from an ABS equipped car to a non-ABS/non-powered brakes car can be disconcerting at times, if you are not fully focused on the driving. Time to re-assemble the front axle and the wheel and here is the skate board: Yves


- 30 replies
-
- 11
-
-
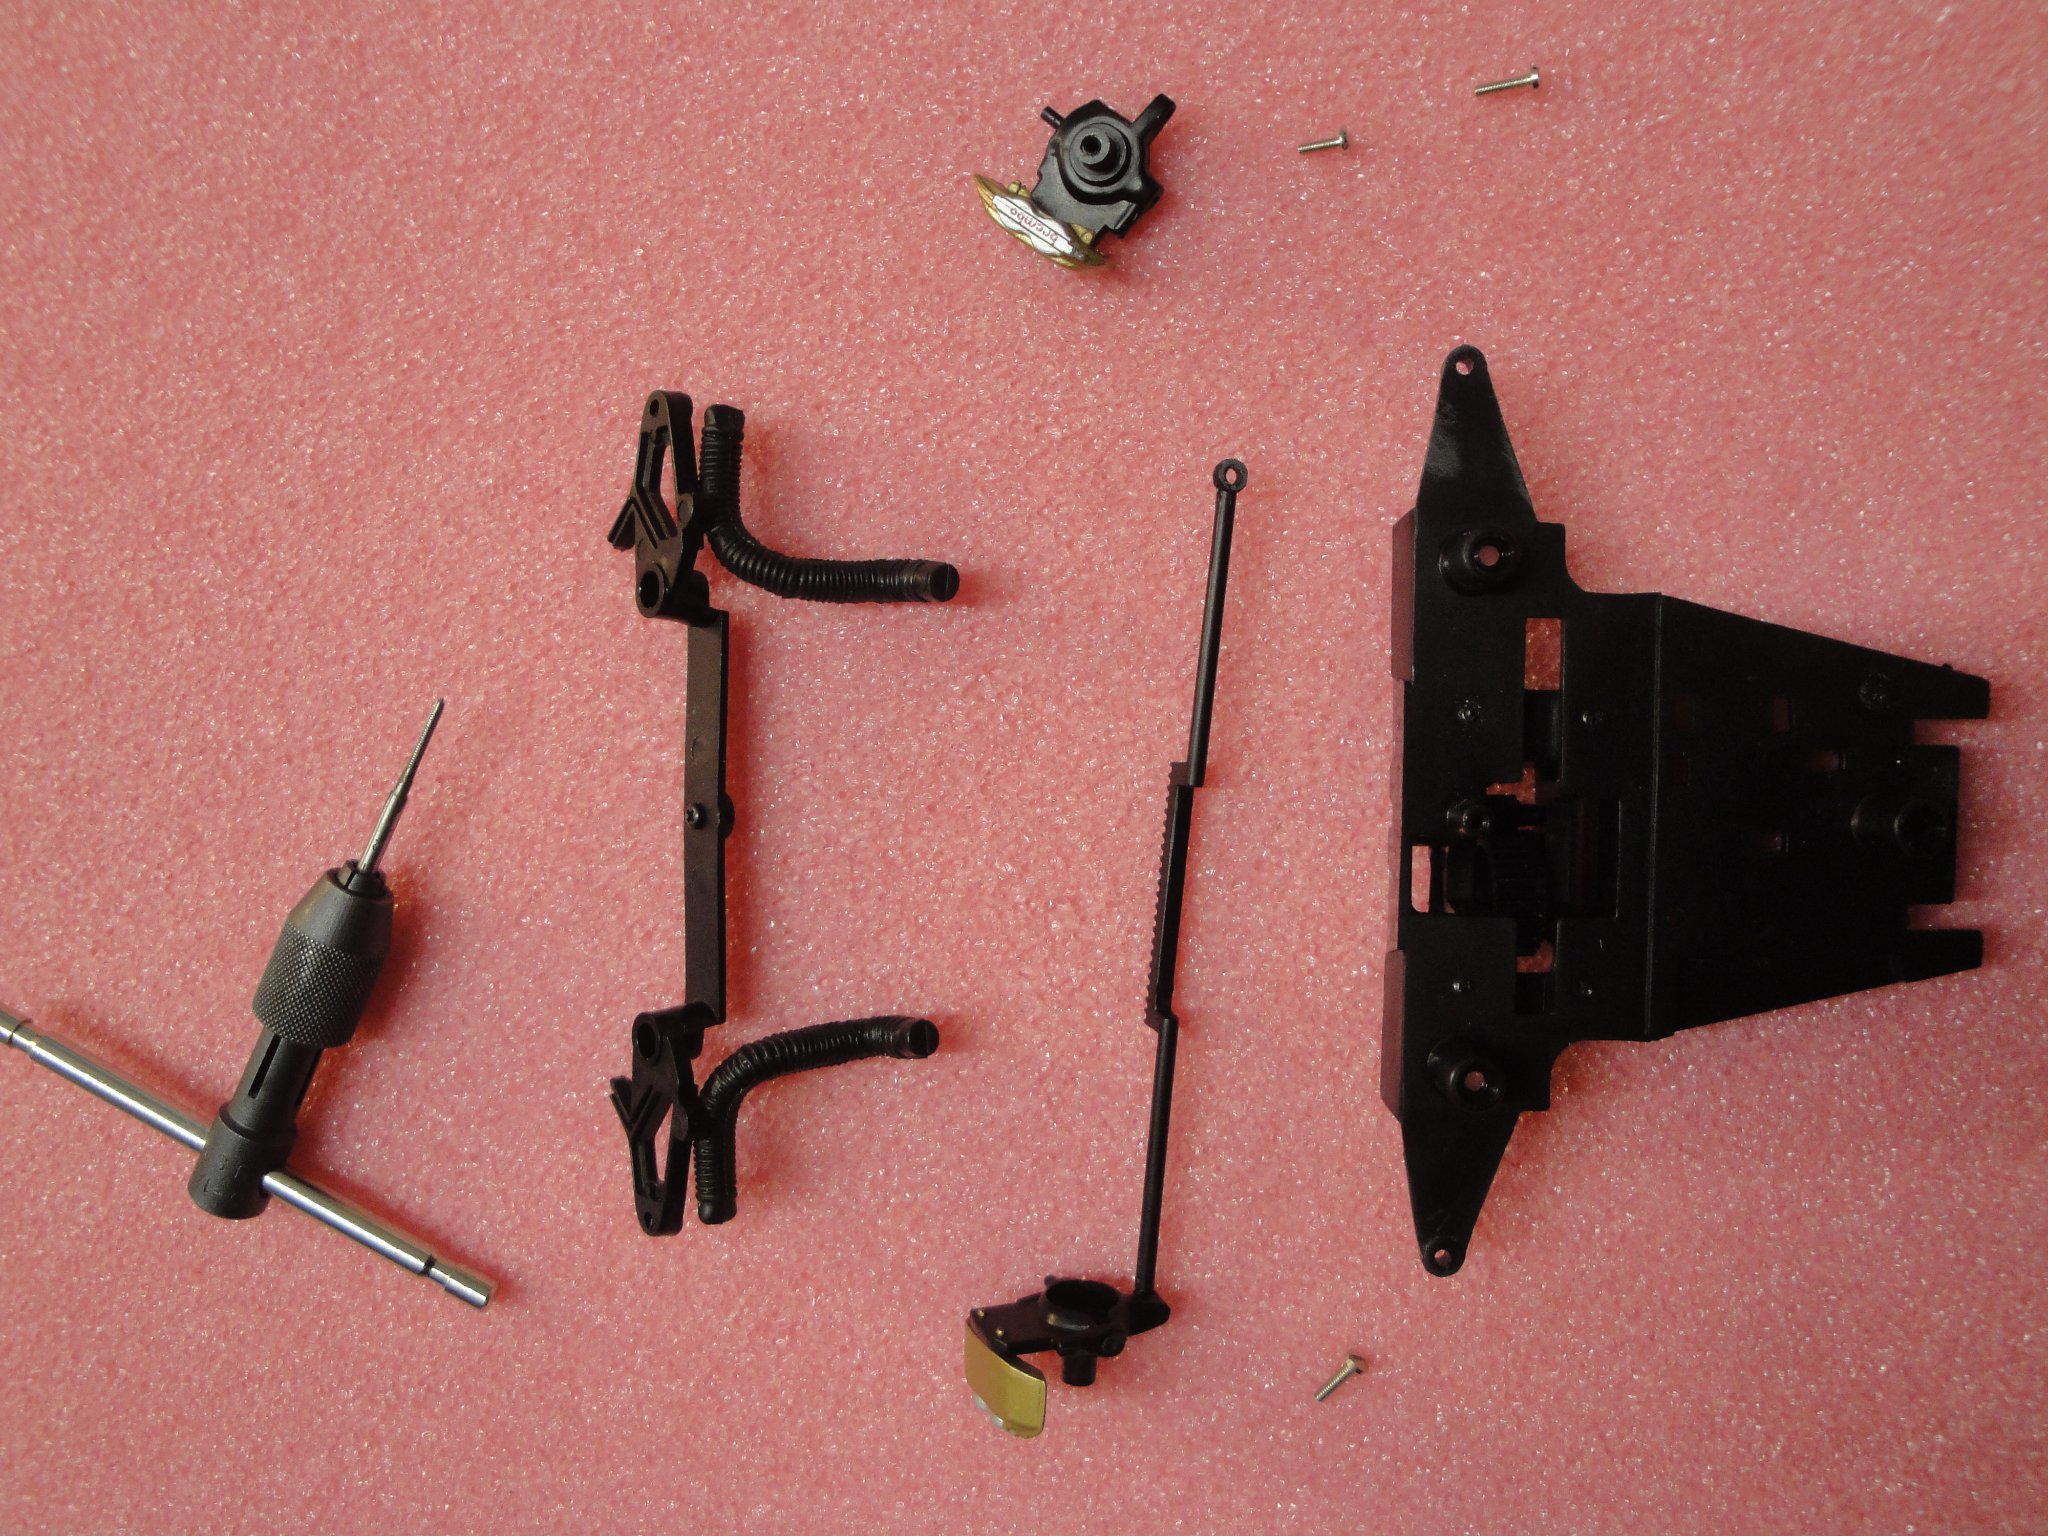
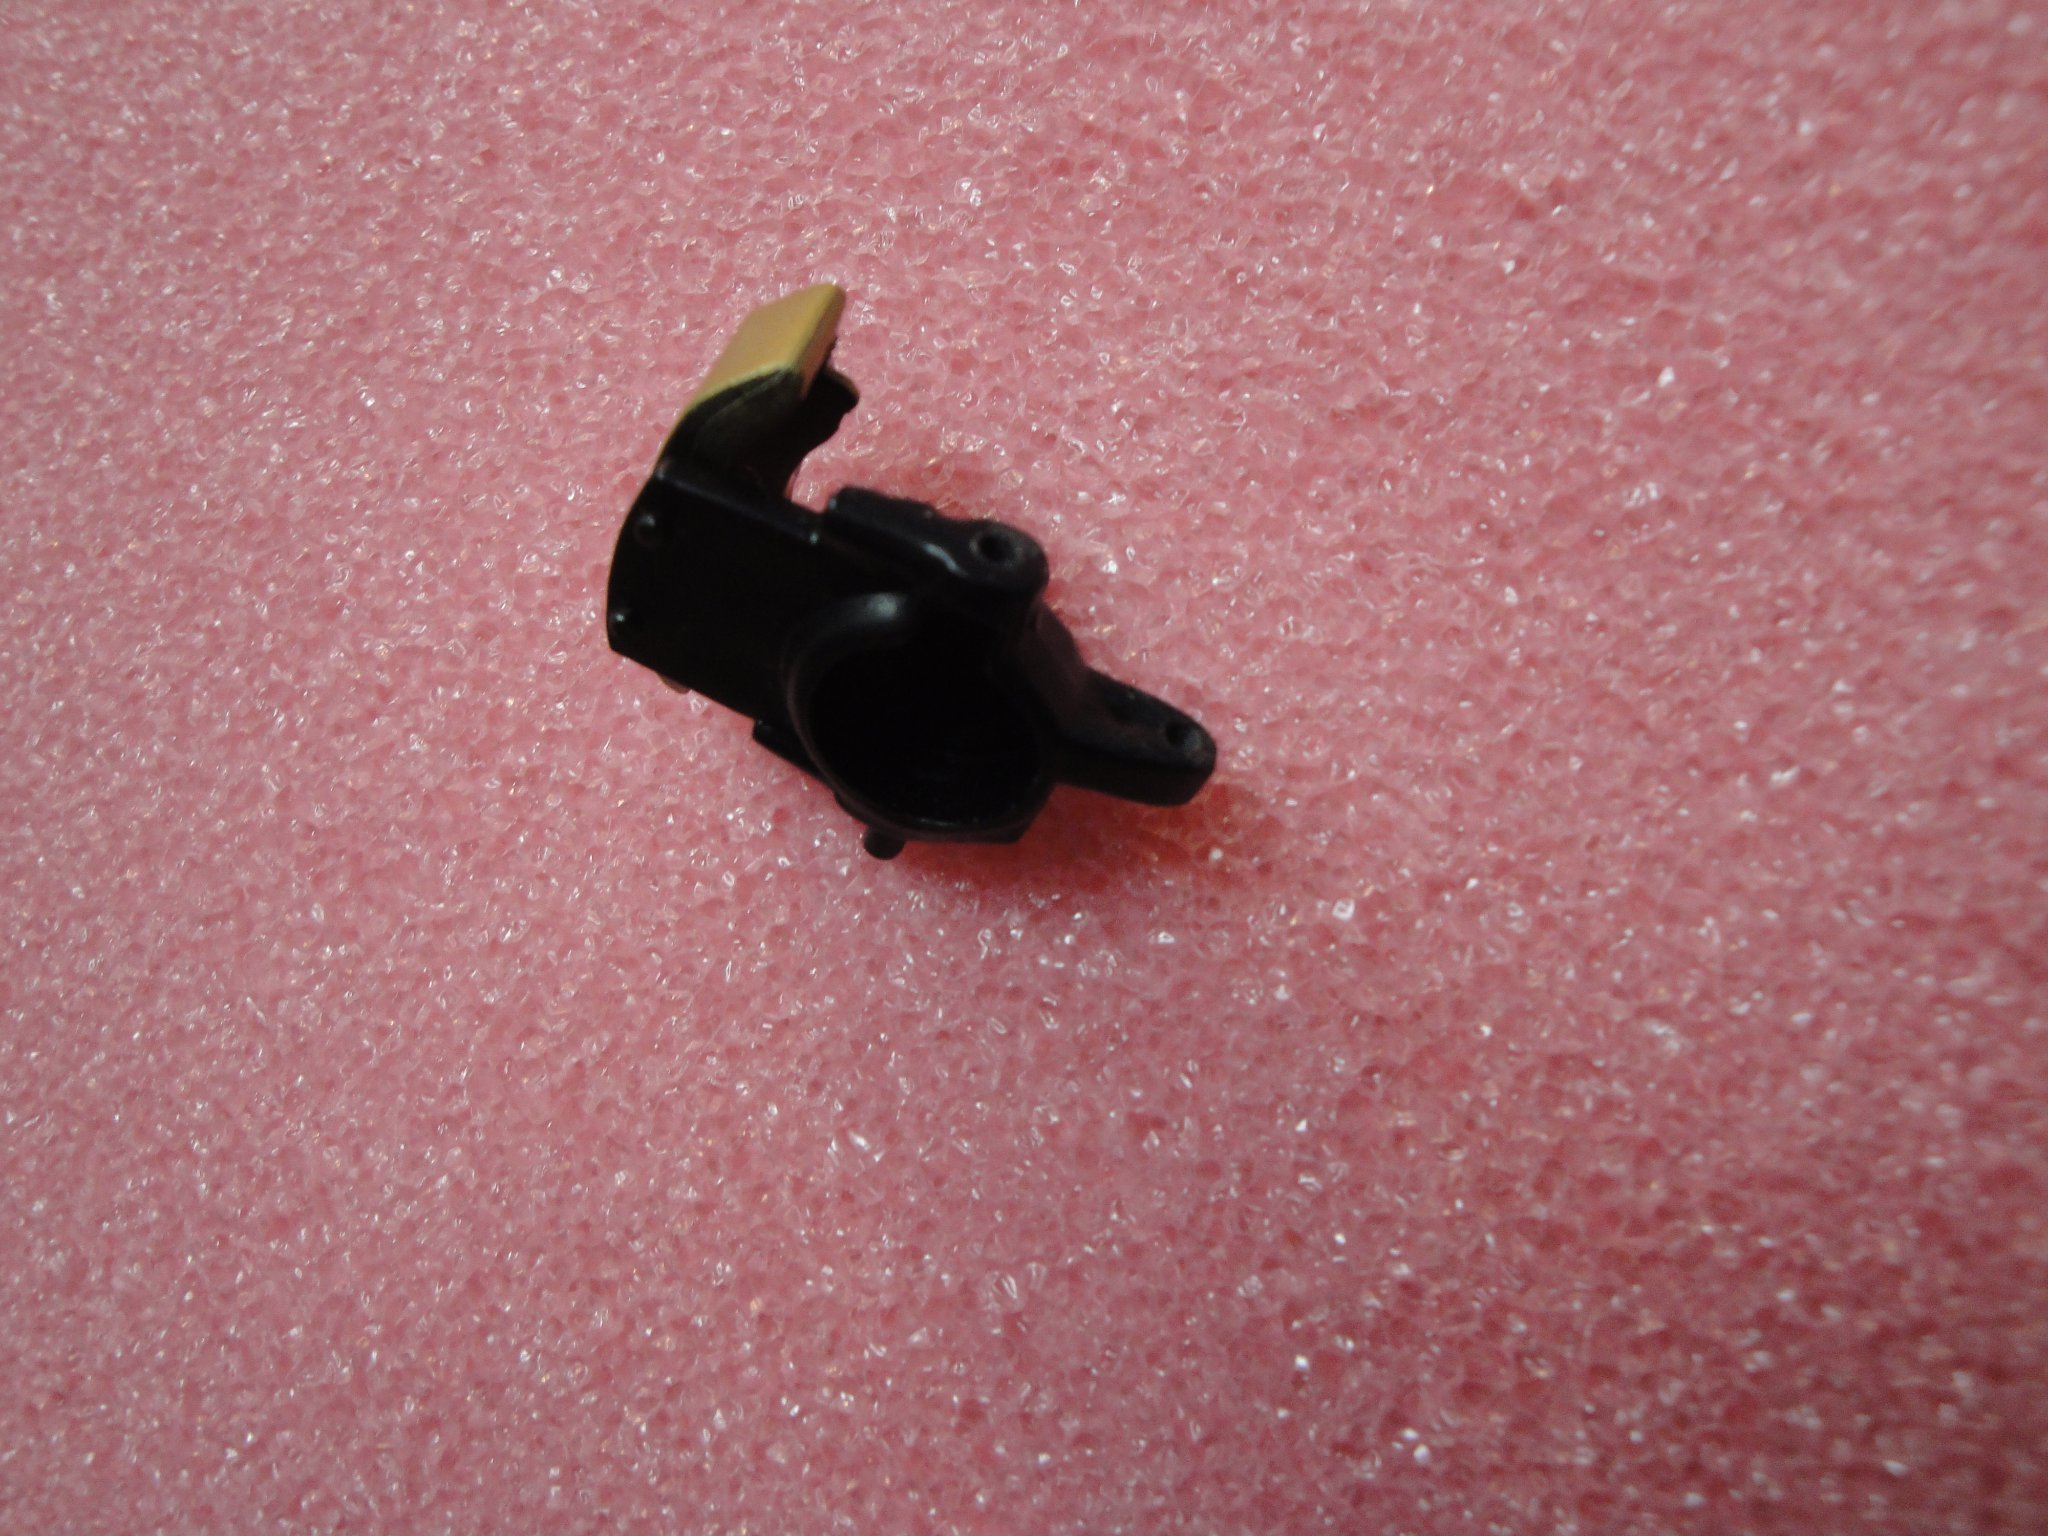
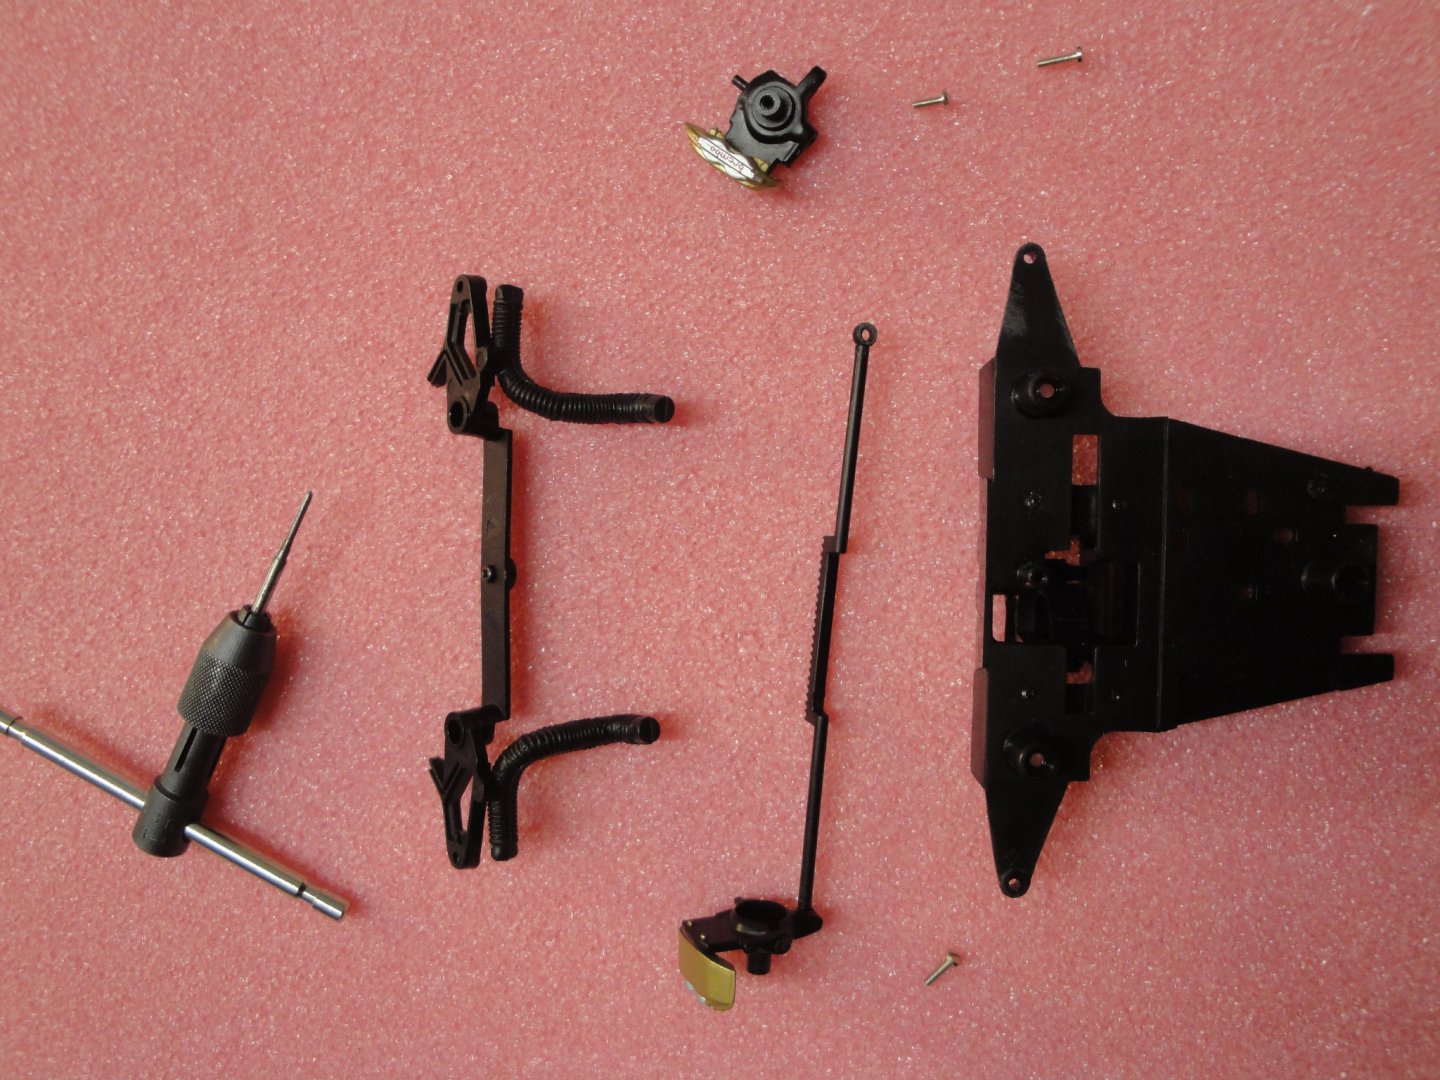
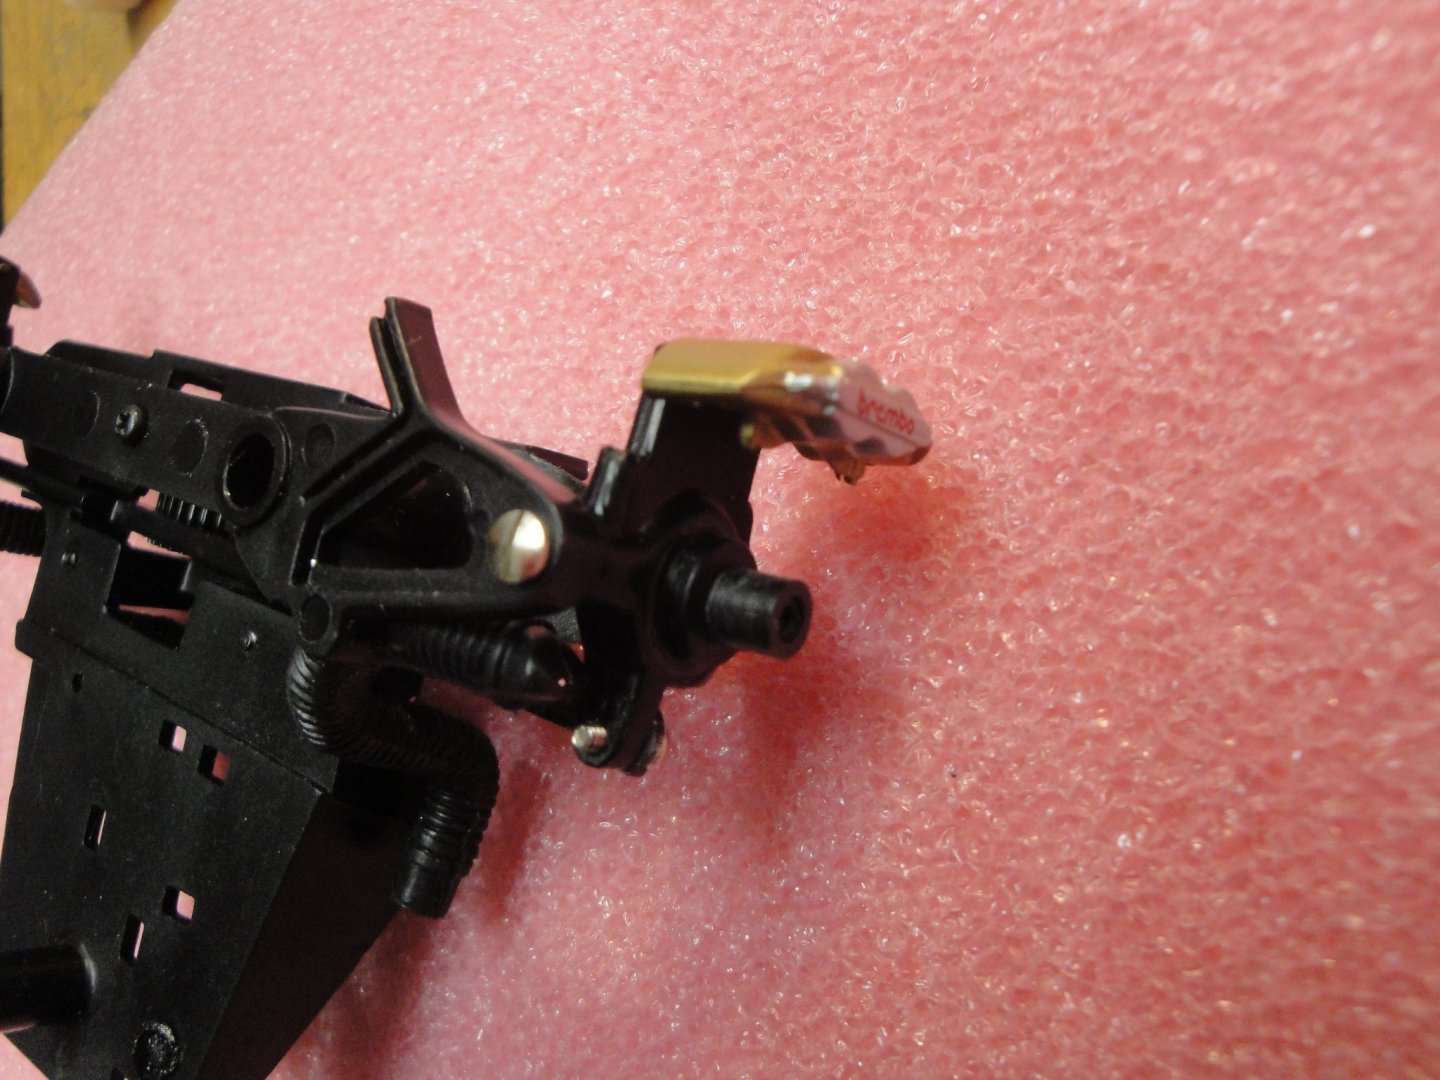
So, the next delicate phase was the repair of the front hub wheels. One of them was completely broken and had lost its lower connection to the suspension arm and the connection to the steering rod. Using a drill of 1.5 mm and a tapper bit of 2 mm, I carefully and delicately drilled and prepared two holes for the lower pivot and steering rod. The new anchoring system using 2 mm stainless steel bolts, is much sturdier than the plastic pins originally provided with the model: Strong of the success on the damaged hub, I decided to break the other hub and performed the same modifications. 2 mm x 10 mm for the lower arm pivot and 2 mm x 6 mm for the steering knuckle. Below is the hub, with the tapped holes: The front axle can then be re-assembled: Close view on the modified hub. That stuff is now solid and will allow the car to be rolled. Yves


- 30 replies
-
- 10
-
-
So beautiful and peaceful. I love that cloister.... This vision brings back memories of previous life times..... There will be some ripe tomatoes for the diner meal. Yves