HOLIDAY DONATION DRIVE - SUPPORT MSW - DO YOUR PART TO KEEP THIS GREAT FORUM GOING! (Only 36 donations so far out of 49,000 members - C'mon guys!)
×


yvesvidal
-
Posts
3,600 -
Joined
-
Last visited
Content Type
Profiles
Forums
Gallery
Events
Everything posted by yvesvidal
-
 Fantastic improvement Kevin !!! Yves
 -
You are correct, strengthening the hull. It is necessary and I remember doing the same on my R/C model. Yves
-
I feel your pain, Rob. The results are glorious. Yves
-
Maybe, you could display the car with the bonnet open, showing all the marvelous work you did on the engine. I agree with you that such bump is frustrating, especially after spending so much money and efforts to make it work. Your model remains a marvel and a master piece, no matter what your mood may be at this moment. Honestly, it looks just fantastic. Yves
-
Great introduction of these legendary ships. I am currently working the wooden version of that model, designed and created by CAF Models. It will be interesting to compare the two implementations, although I suspect that you will go a lot quicker than I. The last picture is from a model from the National Marine museum in Paris. I have been drooling on it, while painstakingly gluing the various pieces of wood, included in my kit. Yves
-
I can't wait for some paint to blend all these modifications into what will be the most precise and prototypical 1/200 Titanic hull on the market. Yves
-
That is a cockpit!!! I have a hard time imagining it is made of paper and cards. The realism is breath taking. Yves
- 112 replies
-
- 15
-

-
There is always a silver lining in every problem we face. Yves
-
It is just amazing. Rob, your model looks so much like the real thing. You are an artist. Yves
-
You did a great job with the color of the wood planking, on the deck. I sill remember that kit when I was a kid, it was tempting and my brother built it. Yves
-
That looks very promising. I like the inside framing and tubing.... Yves
-
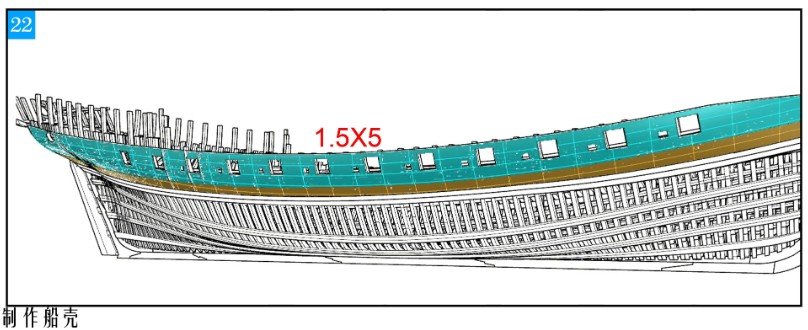
From my experience building a similar boat (Chebec Requin) from a different manufacturer (CAF Model), the only way to plank the deck is to do it one plank at a time. As you indicated, the deck is convex in one direction and concave in the other direction, and as such a flat piece of wood will never fit. It is one of the most difficult vessel to build, because nothing is flat or straight. In your instructions manual (Figure 06), it seems that you have to trace lines on the sub-deck and then cut along these lines and install the various panels, one at a time. Yves
-
Thank you Nil, for that beautiful picture and model. Excellent way of presenting this unusual ship, with oars and sails. Yves
-
BR-18 Locomotive by Greg Davis - OcCre - 1/32
yvesvidal replied to Greg Davis's topic in Non-ship/categorised builds
Great model. I have almost finished the Coasta Passenger car from Occre and can see a few similar parts between the two kits. I will be following your build, for sure. Yves -
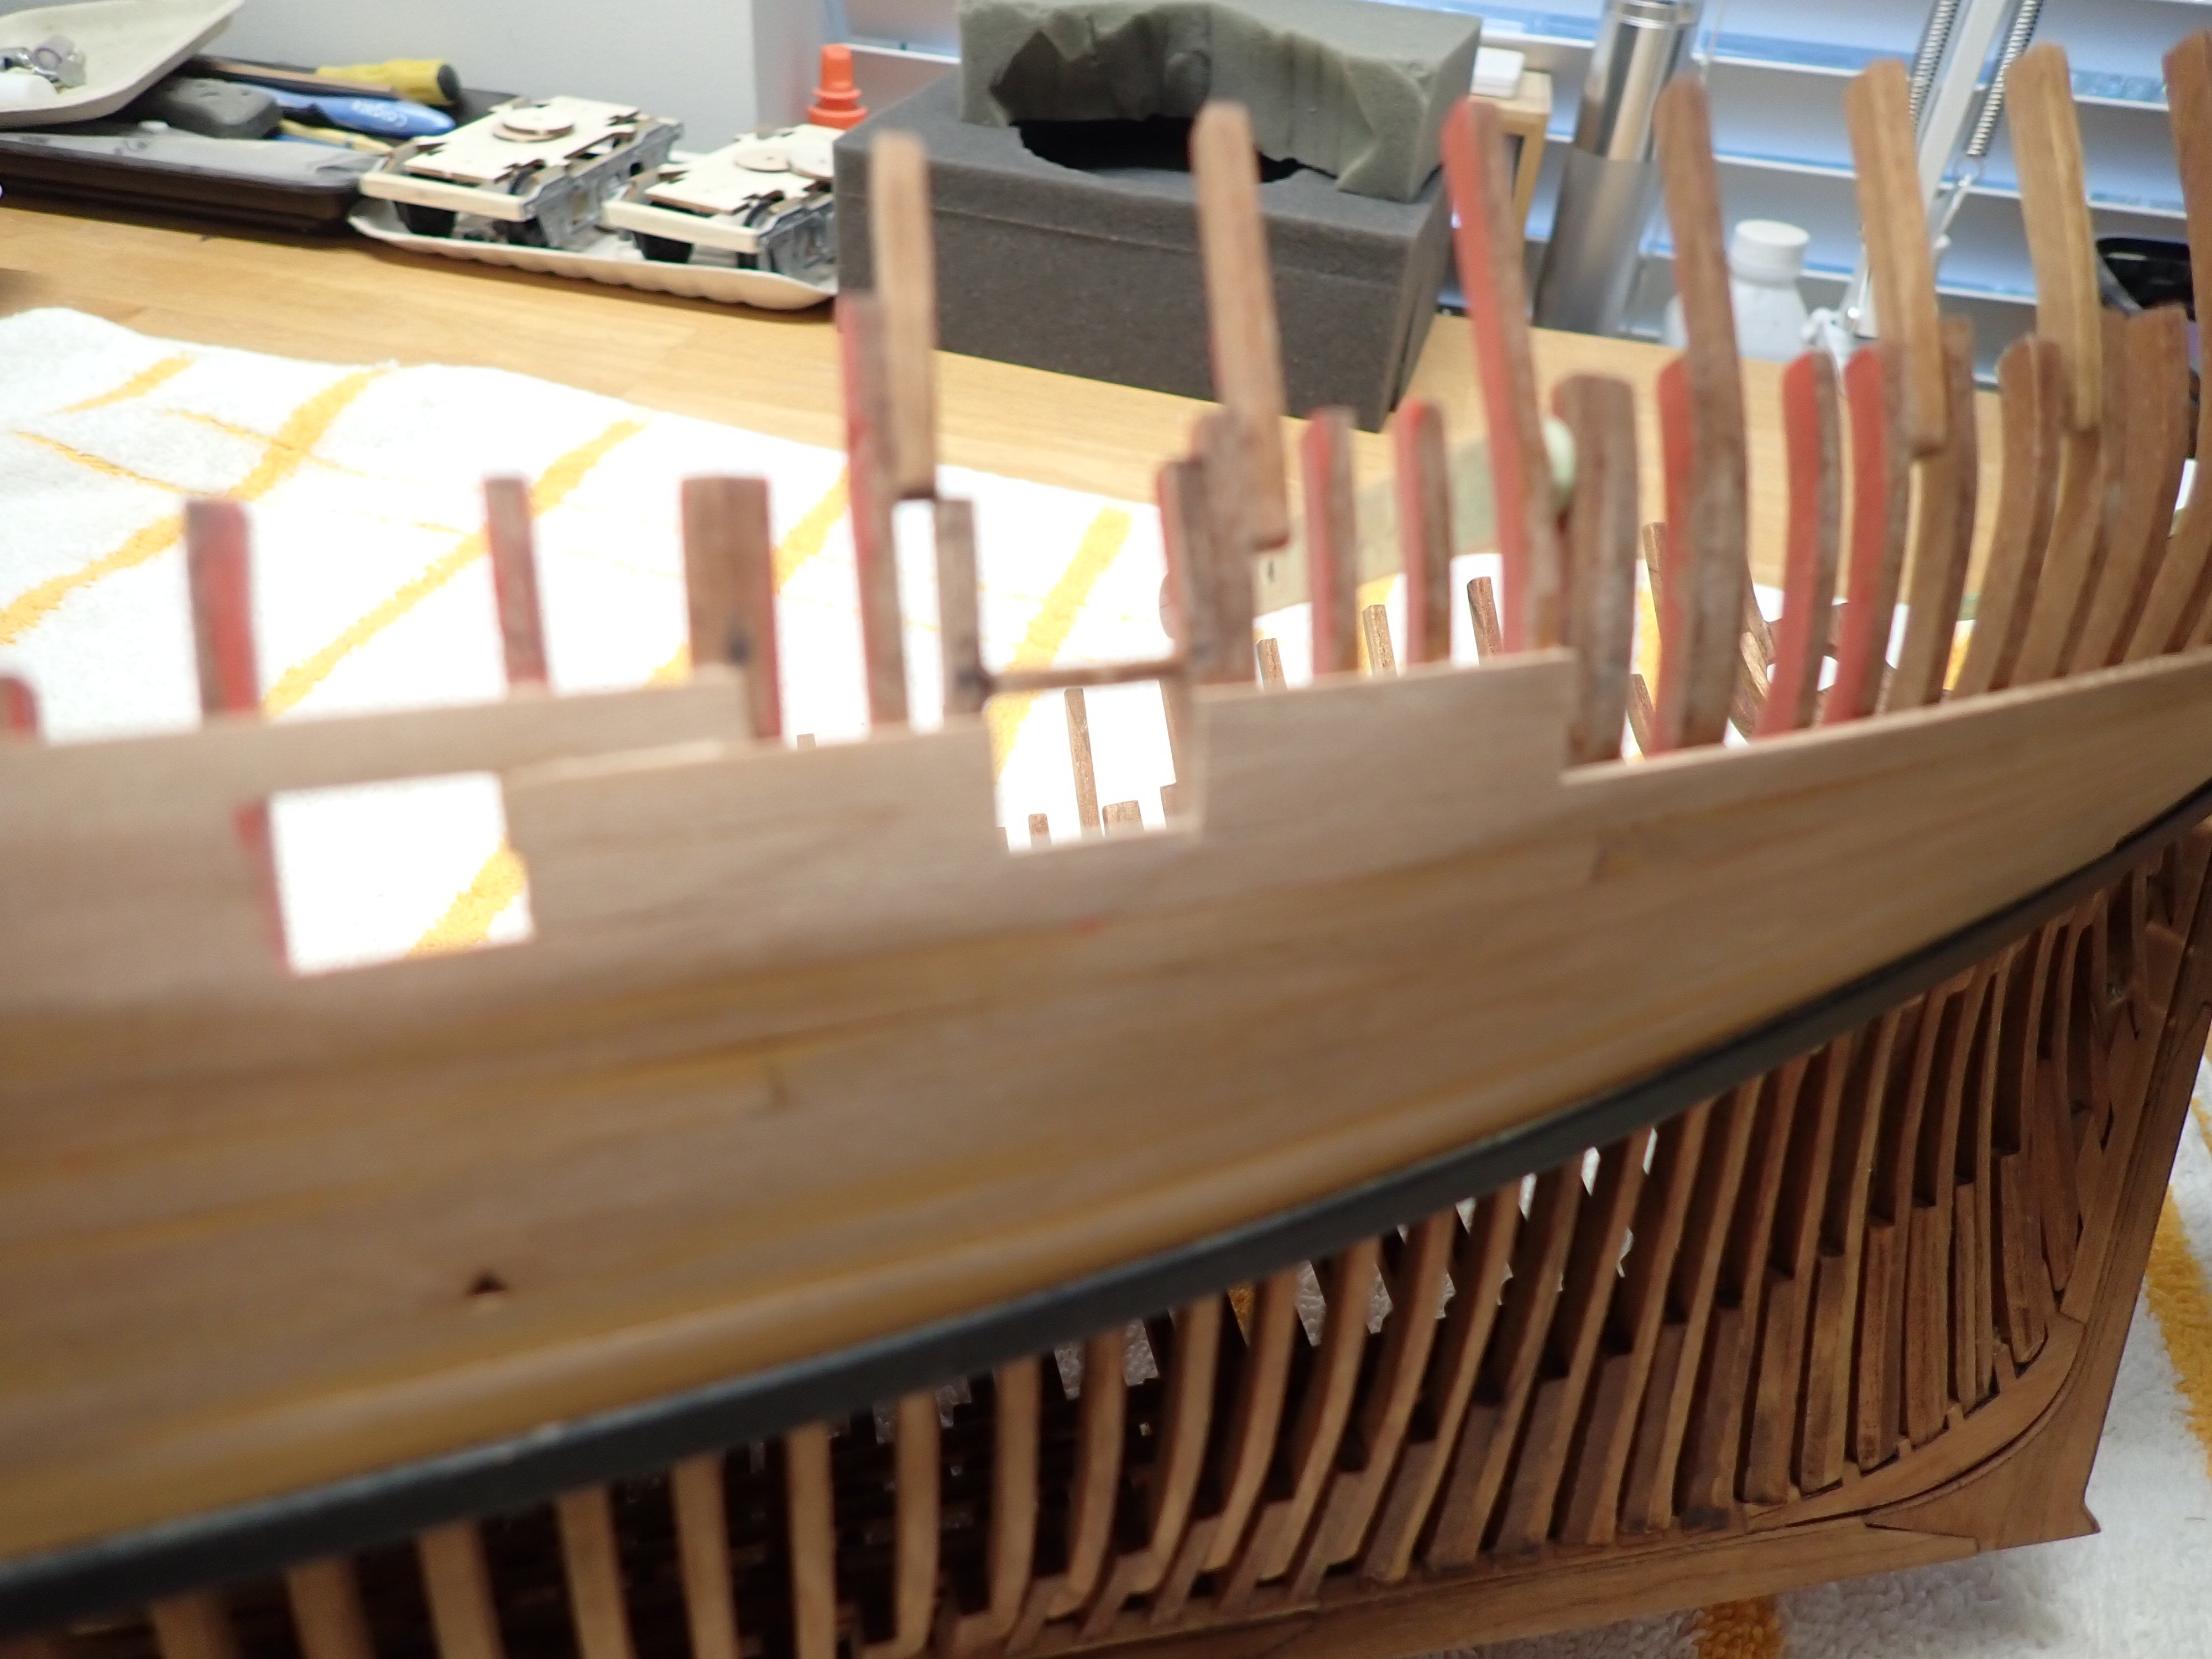
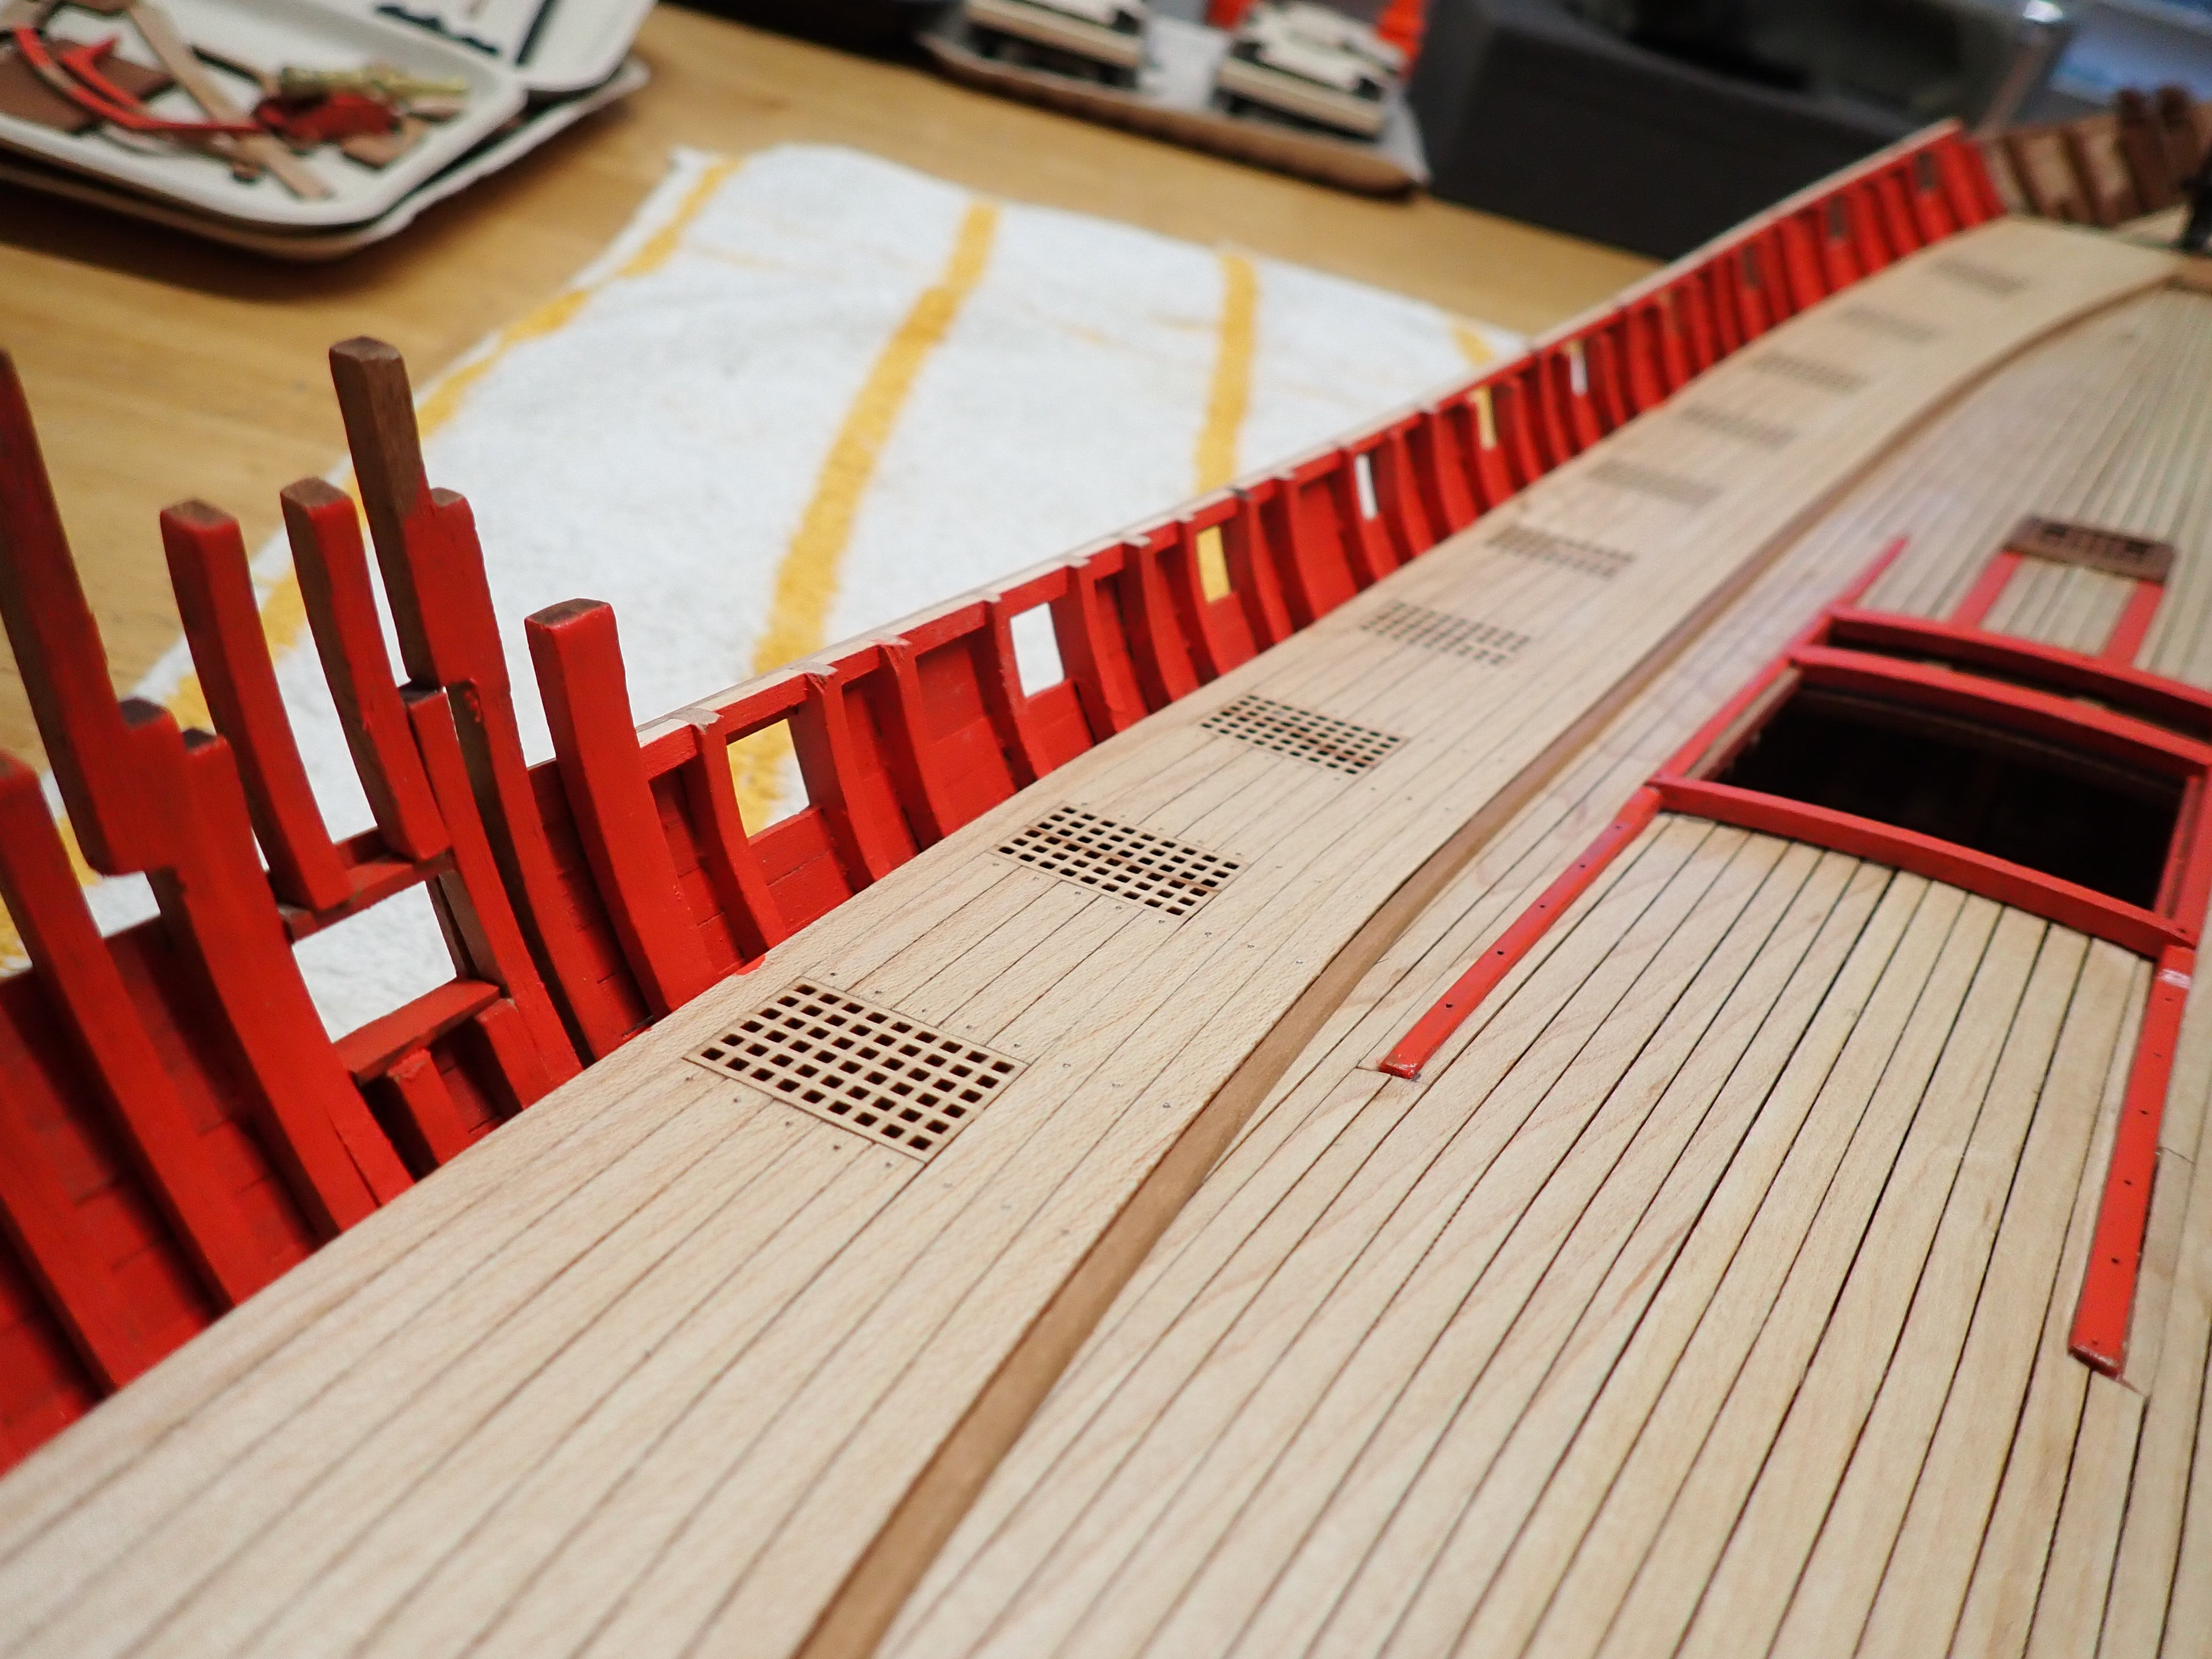
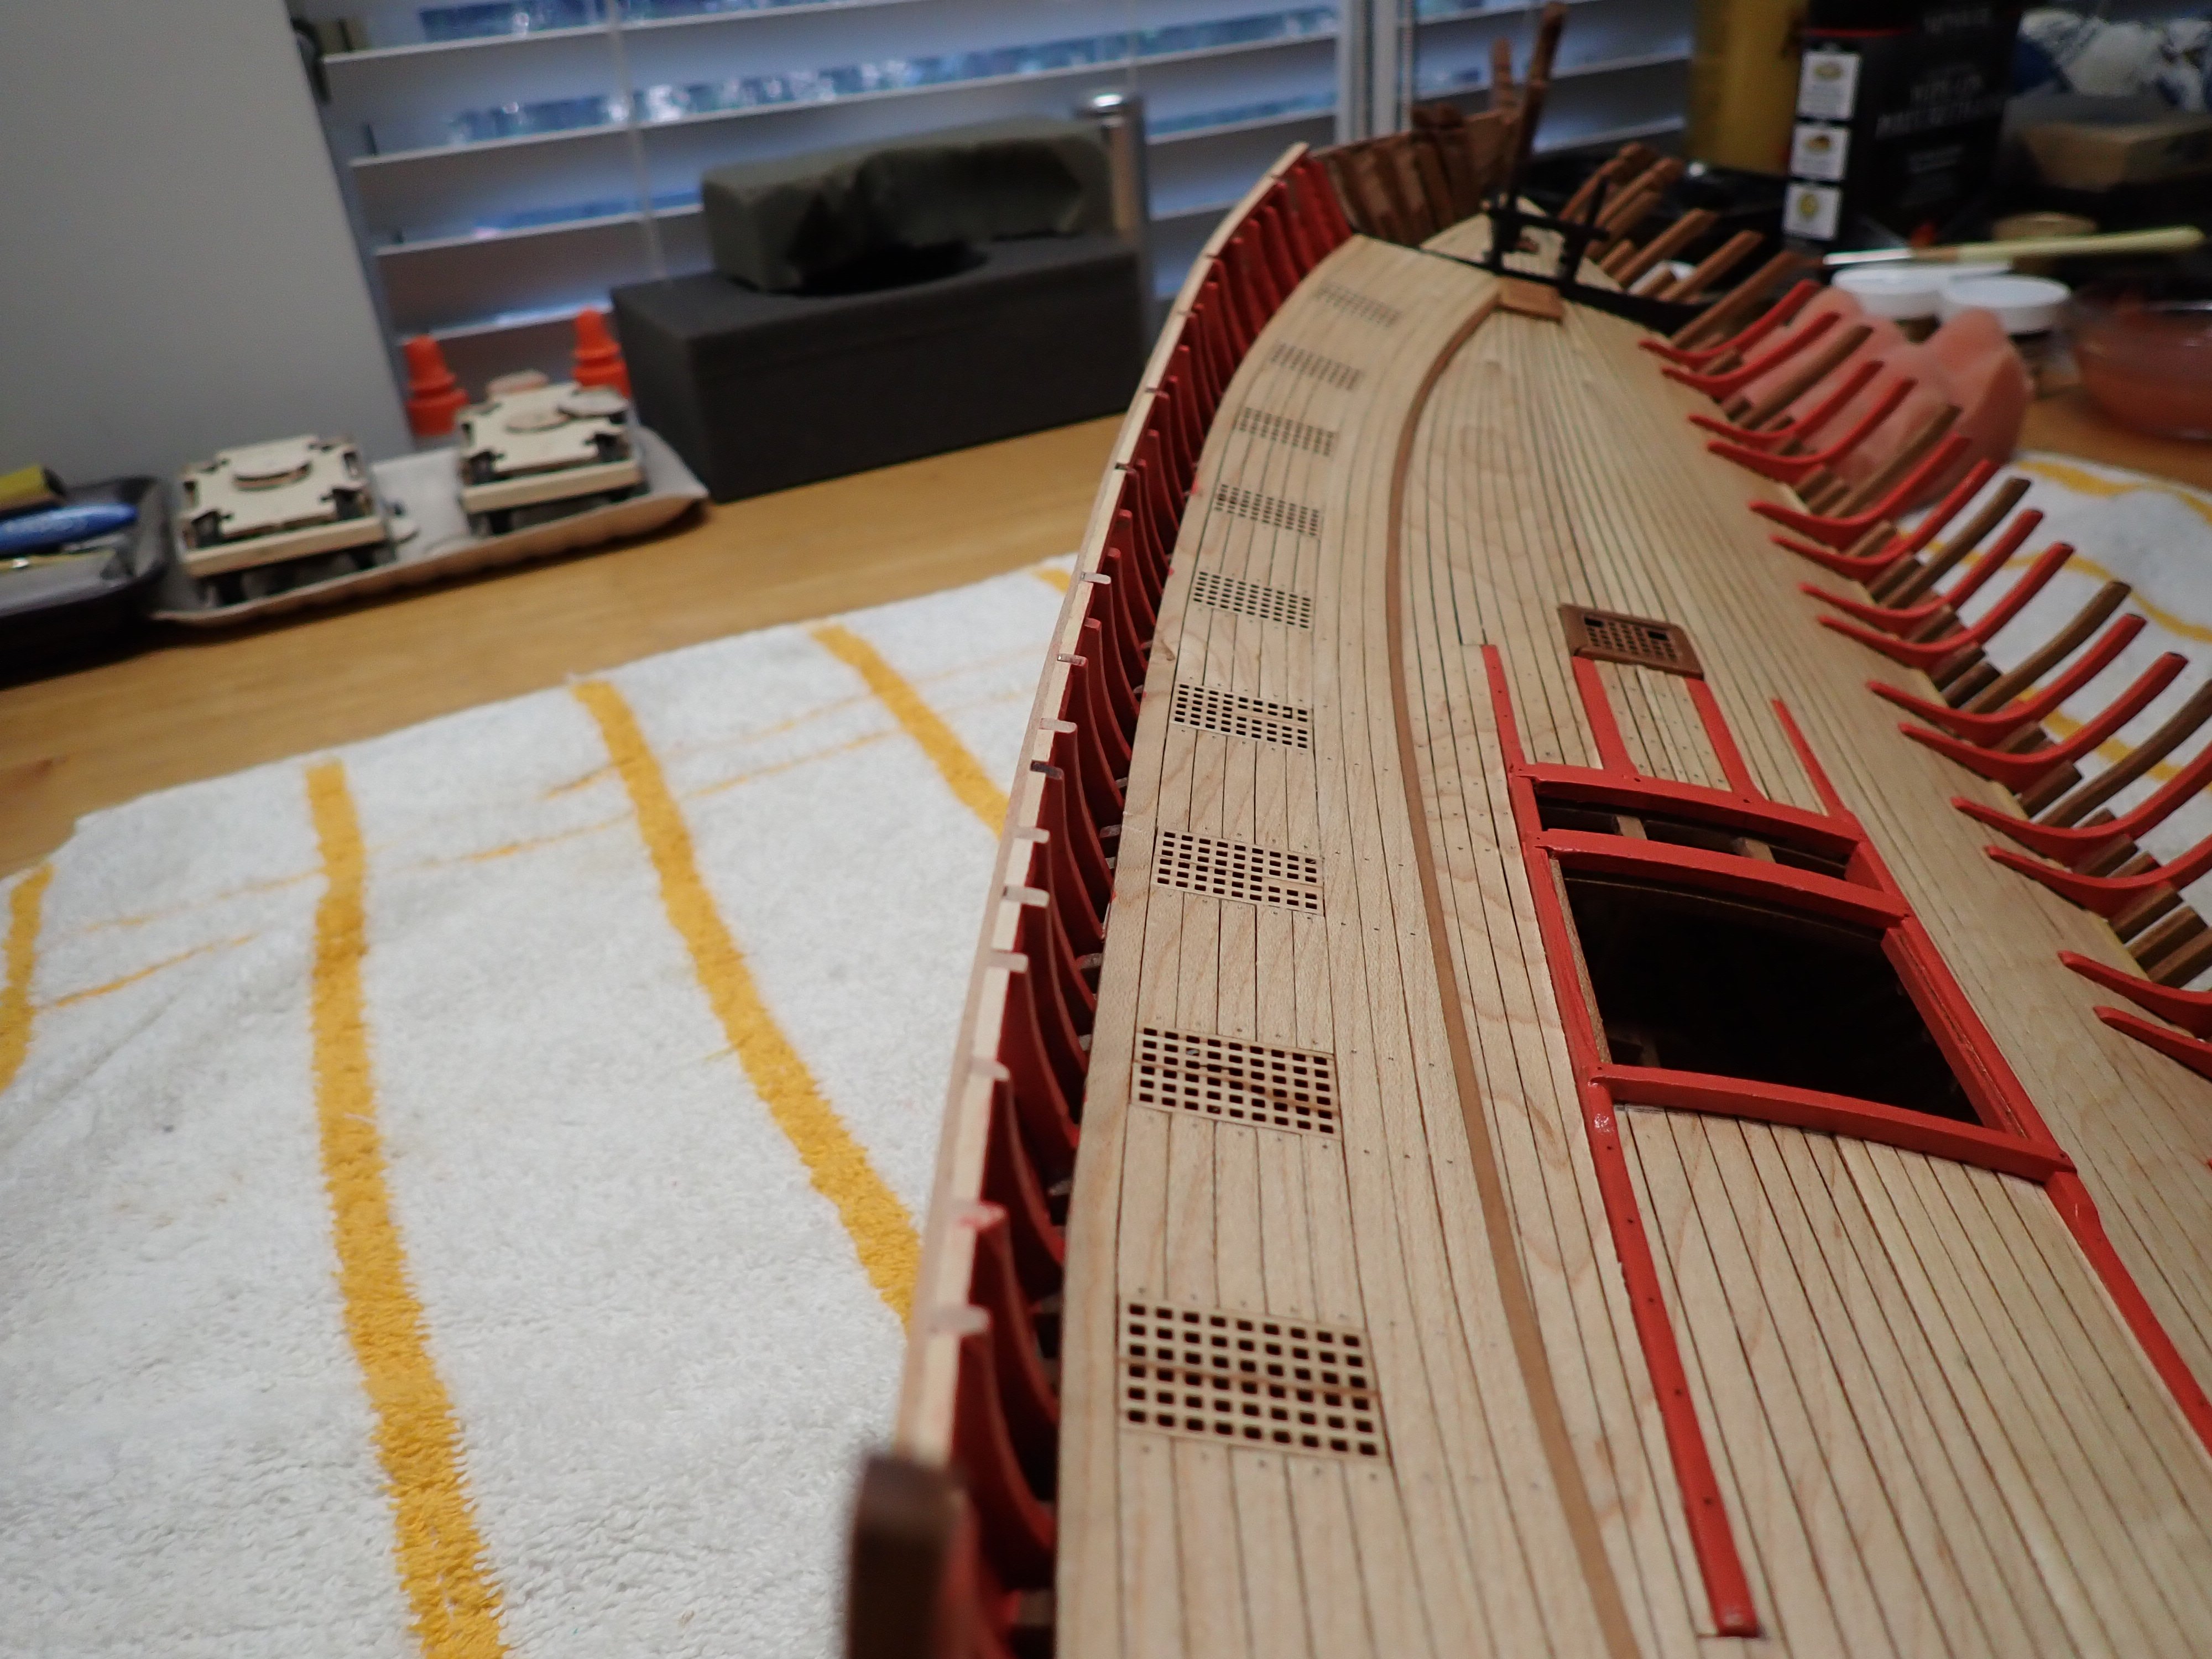
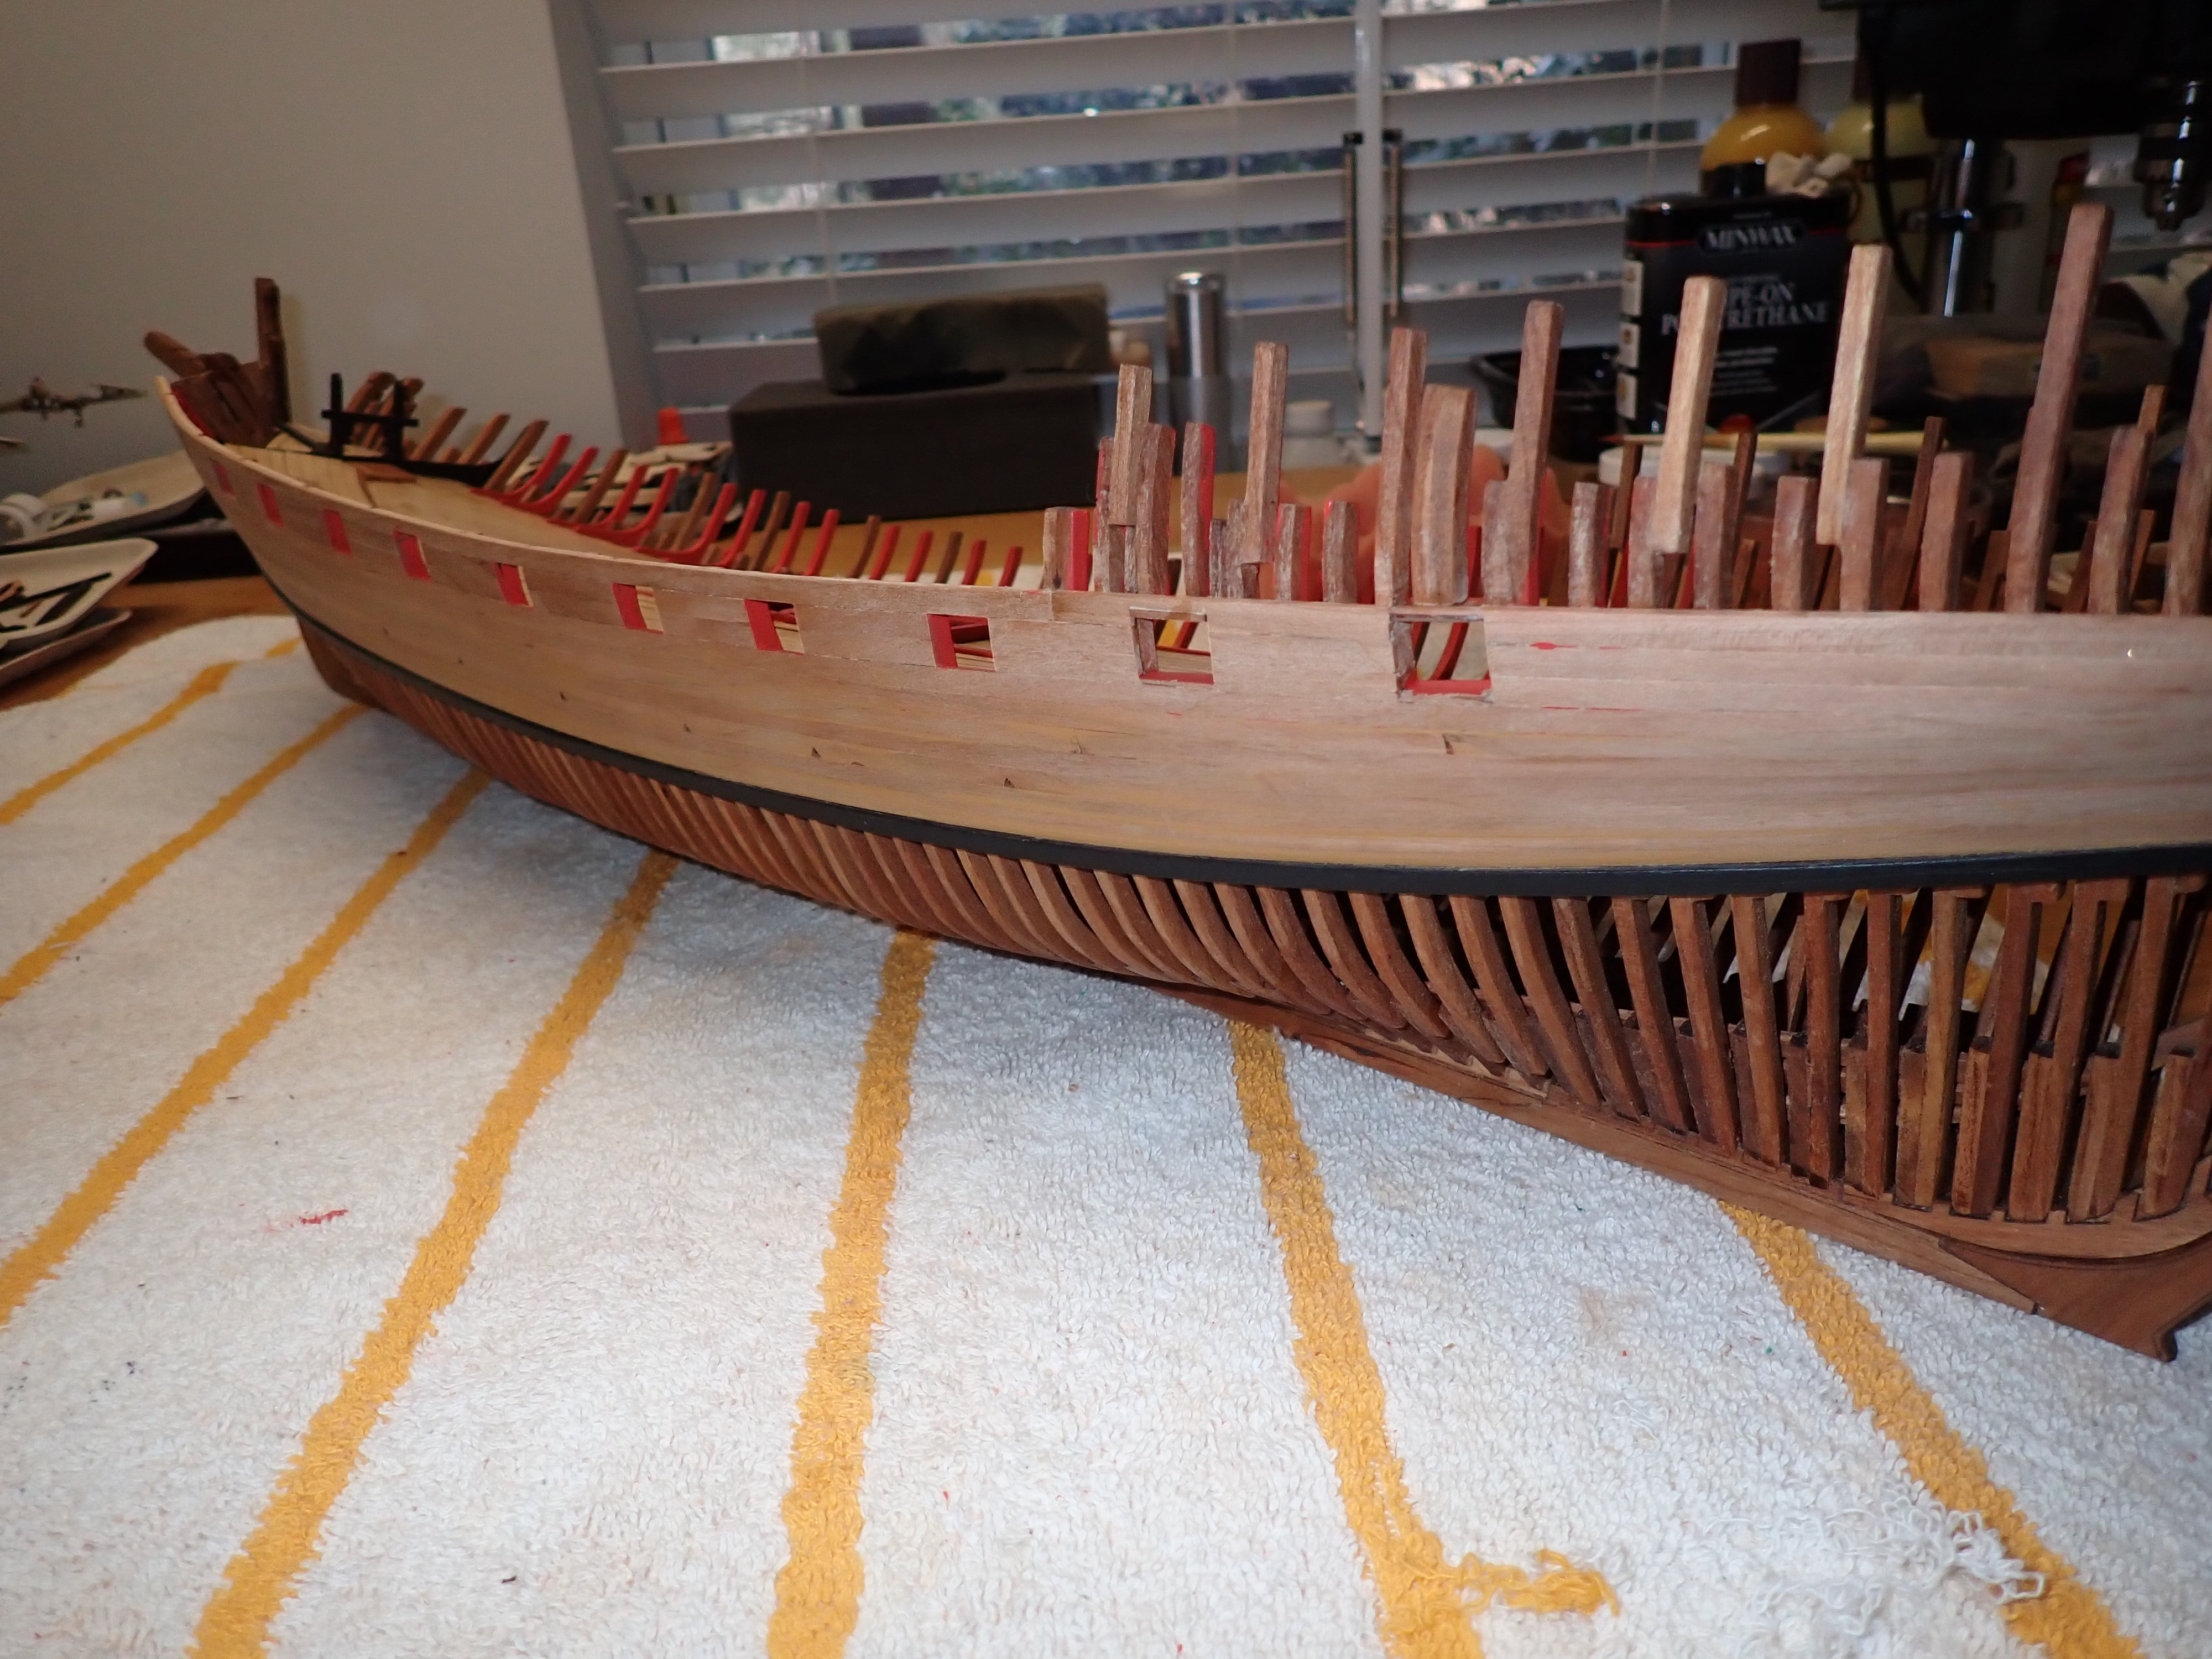
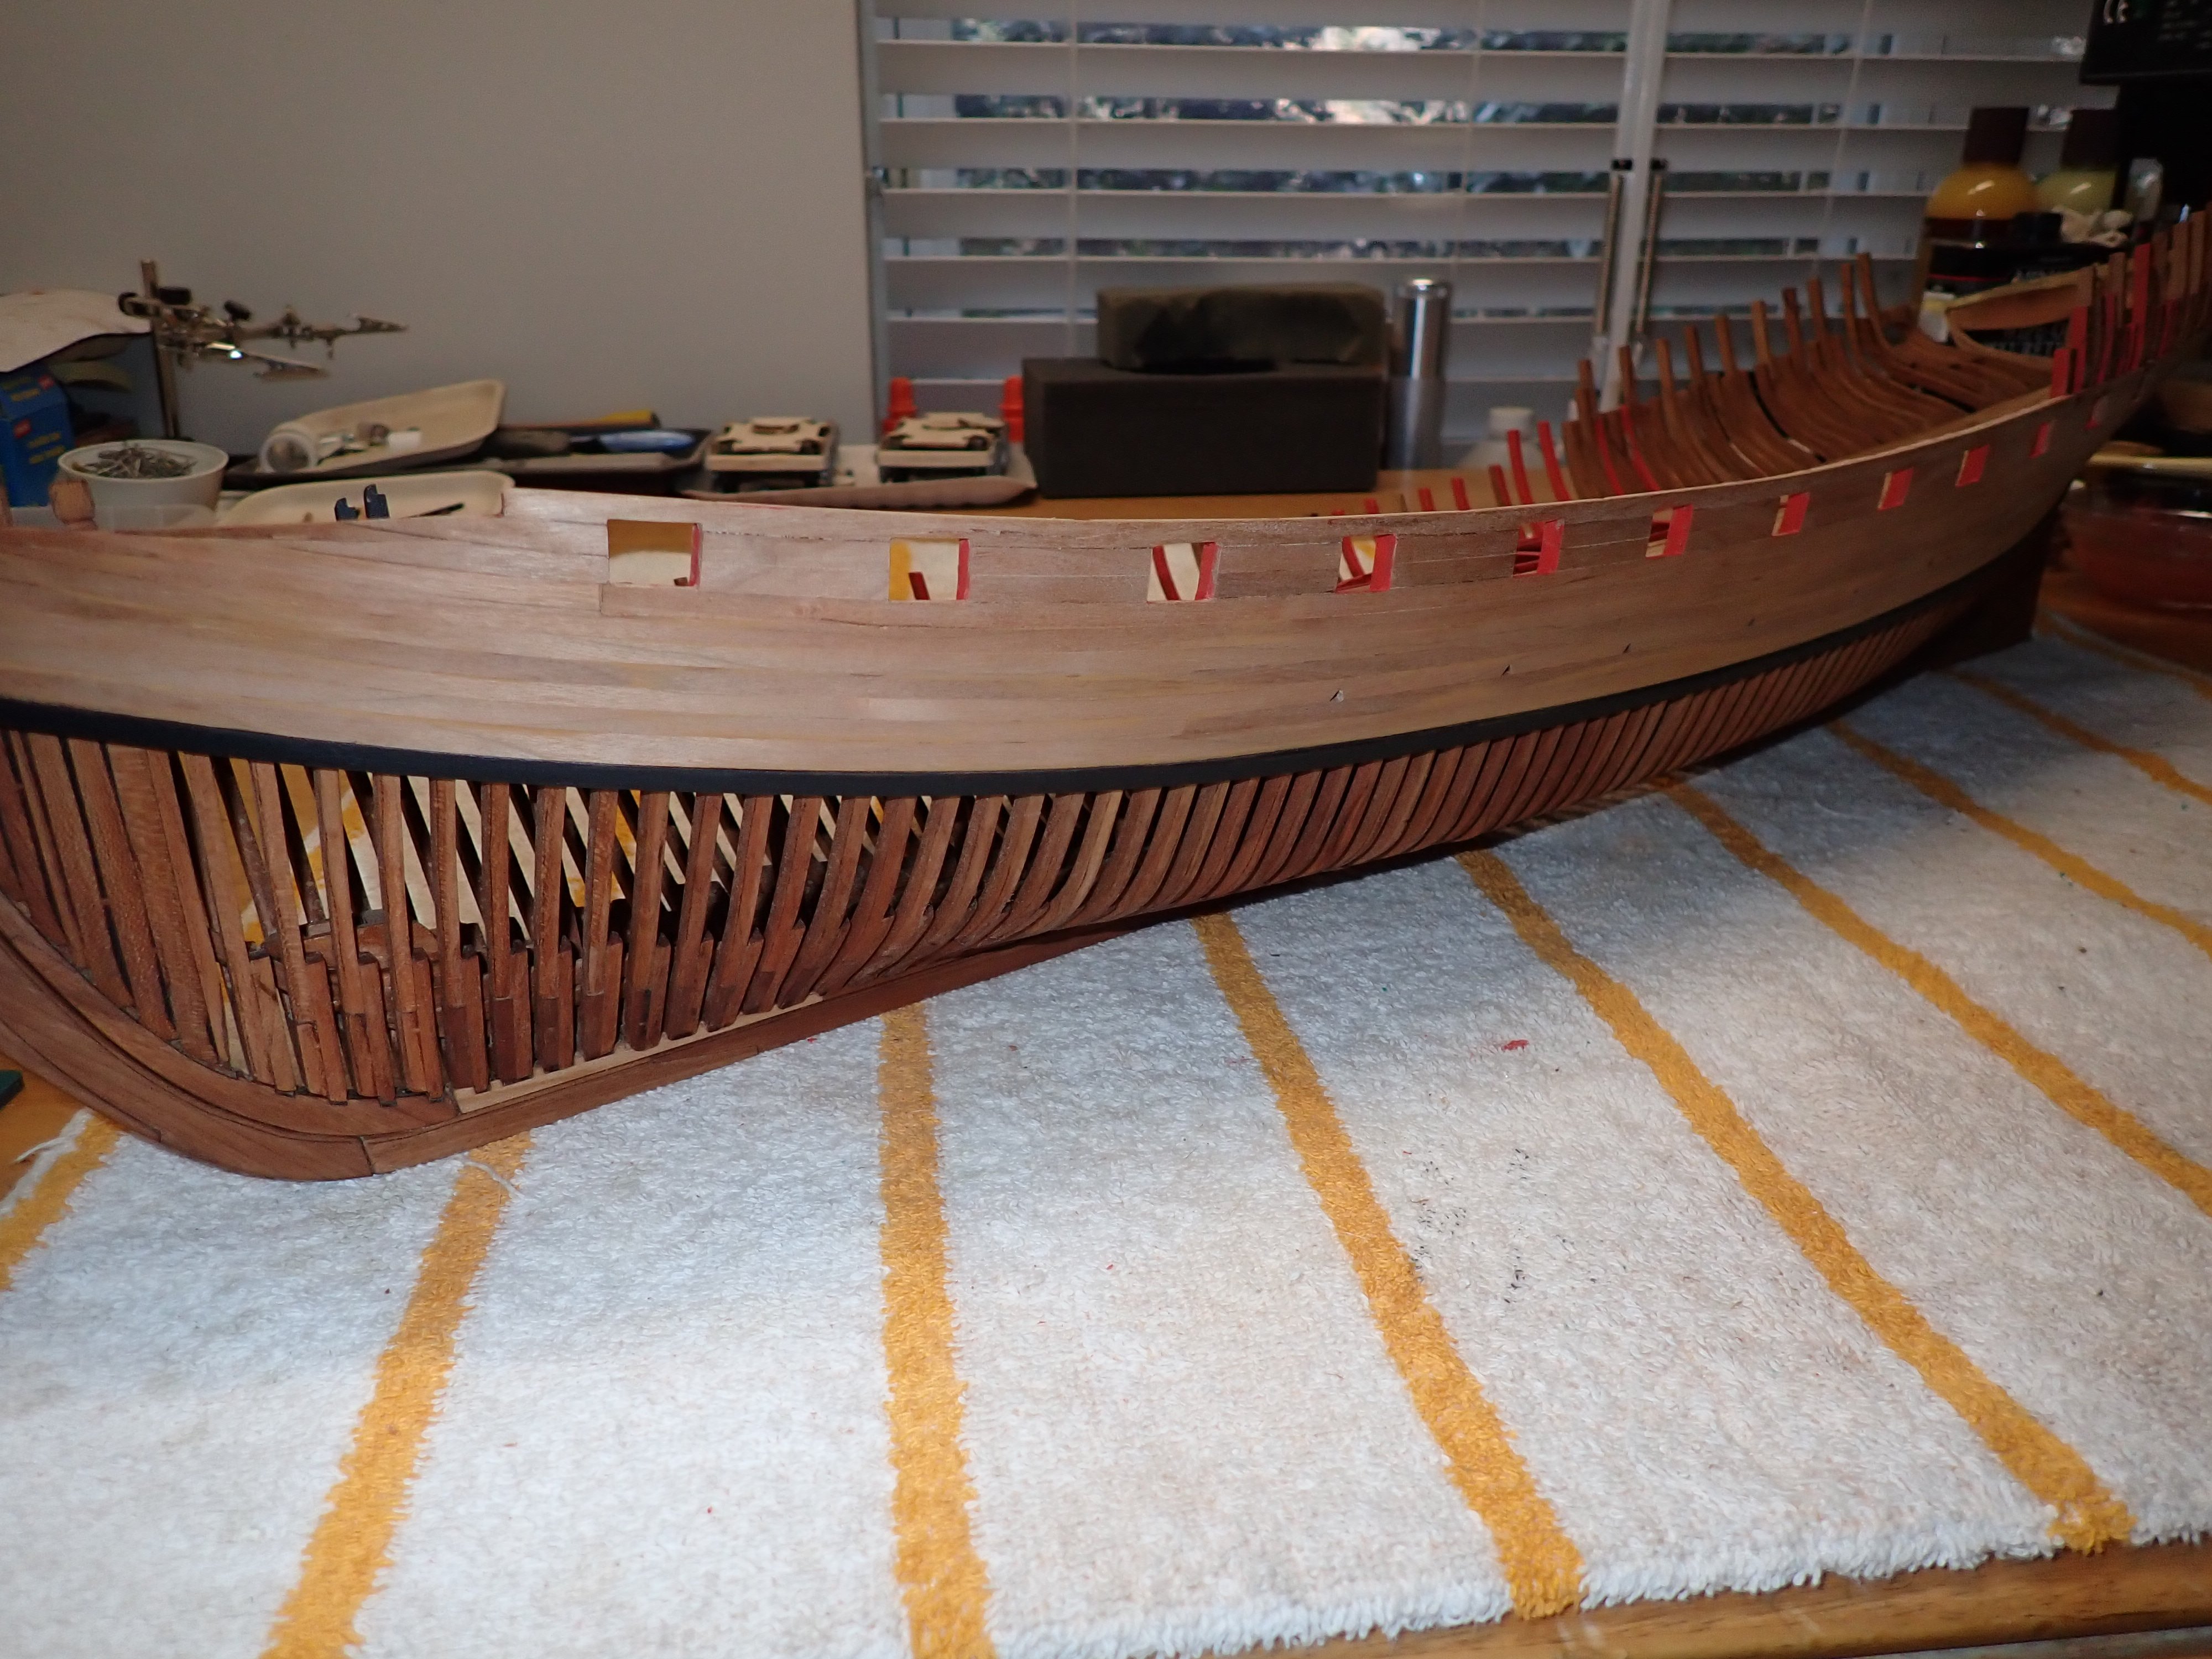
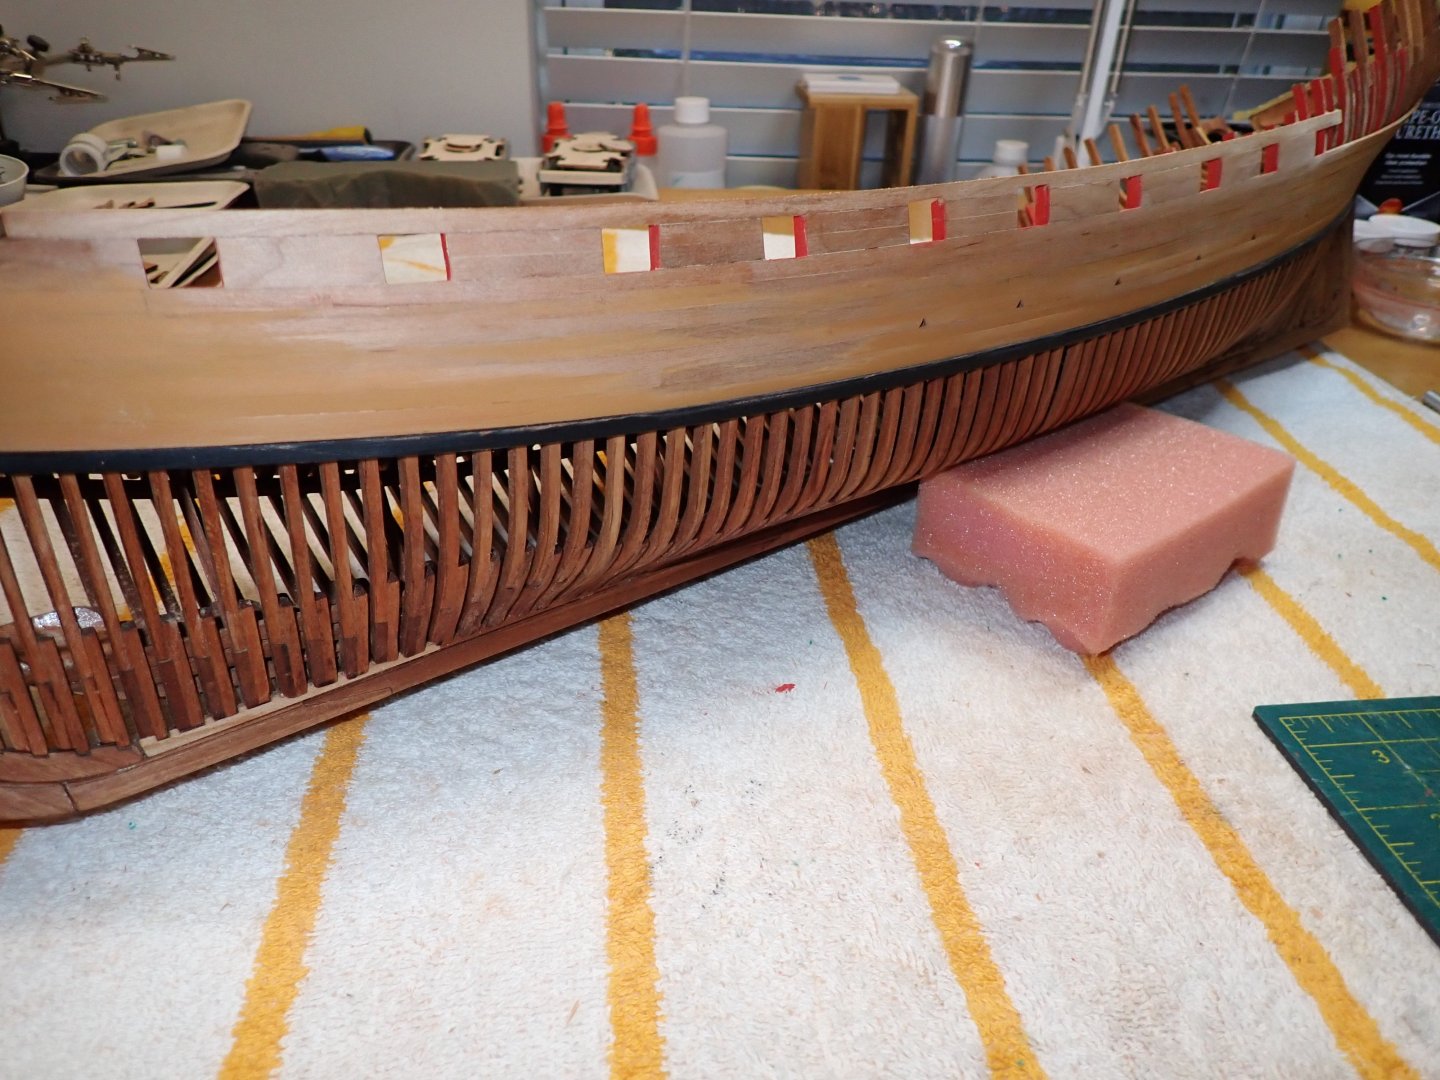
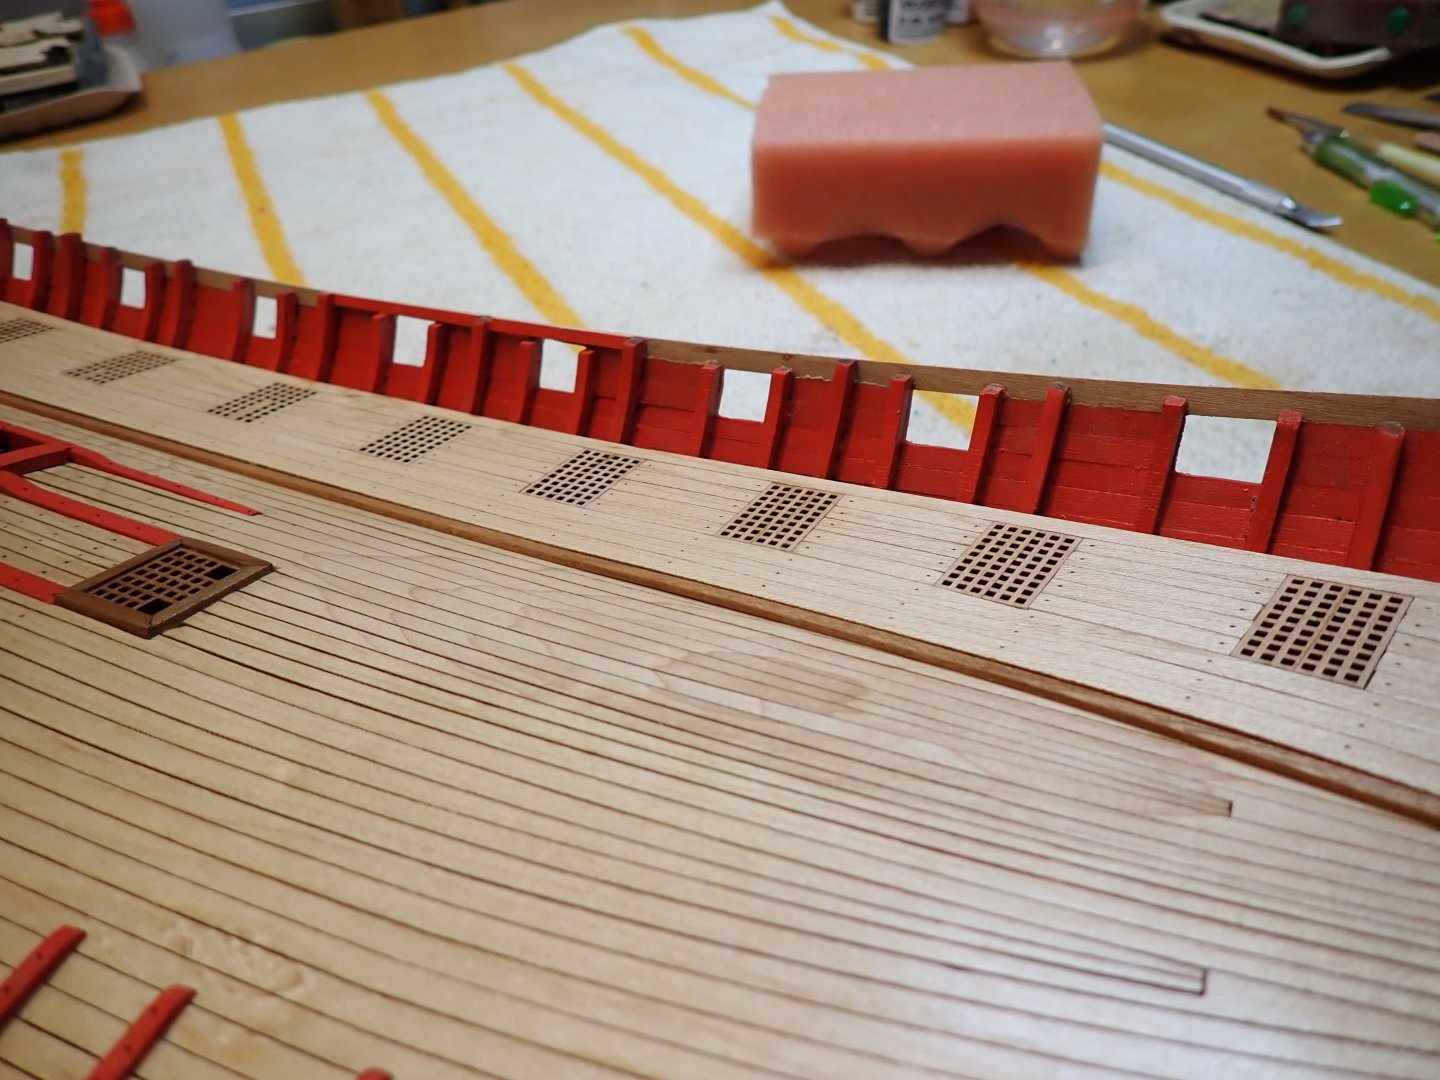
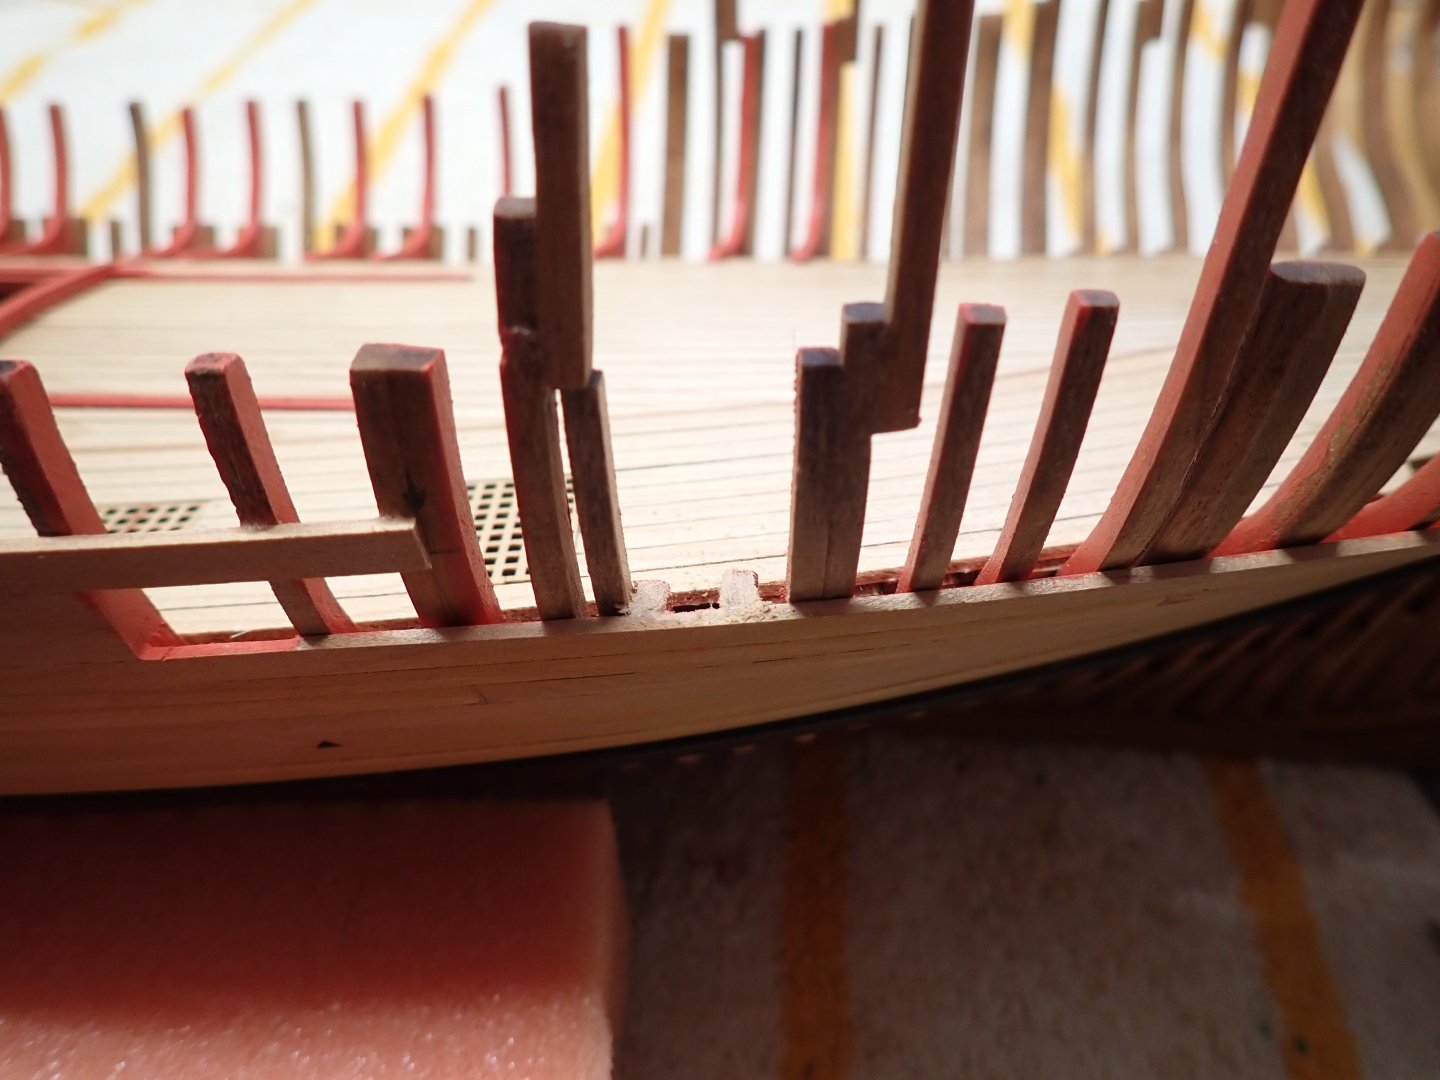
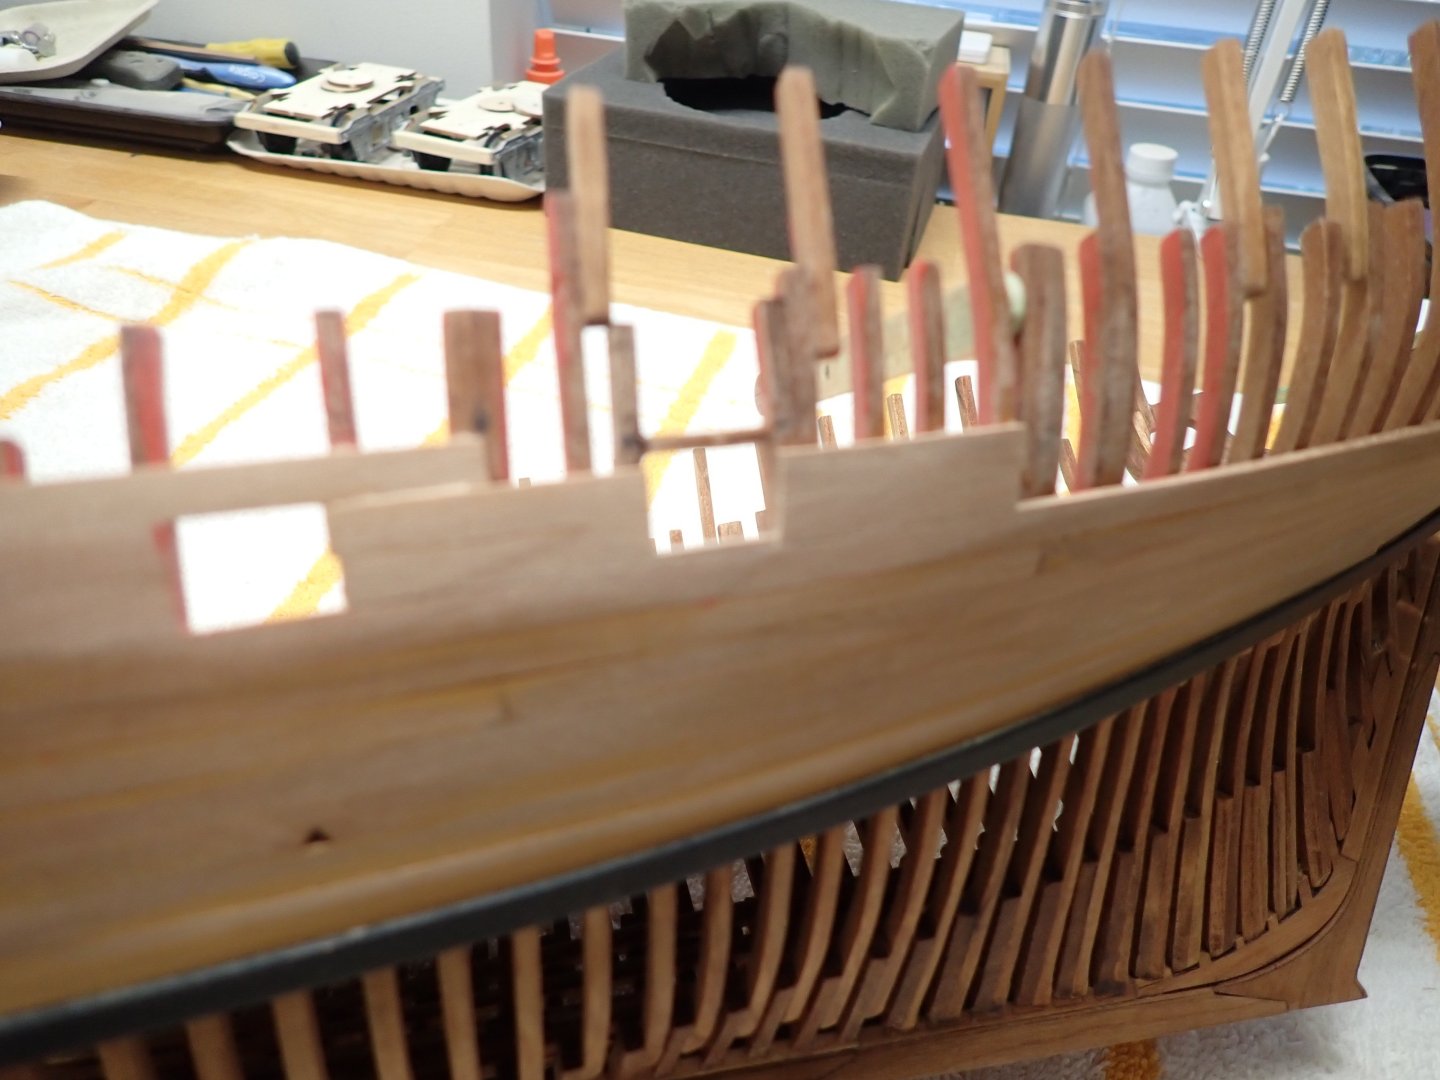
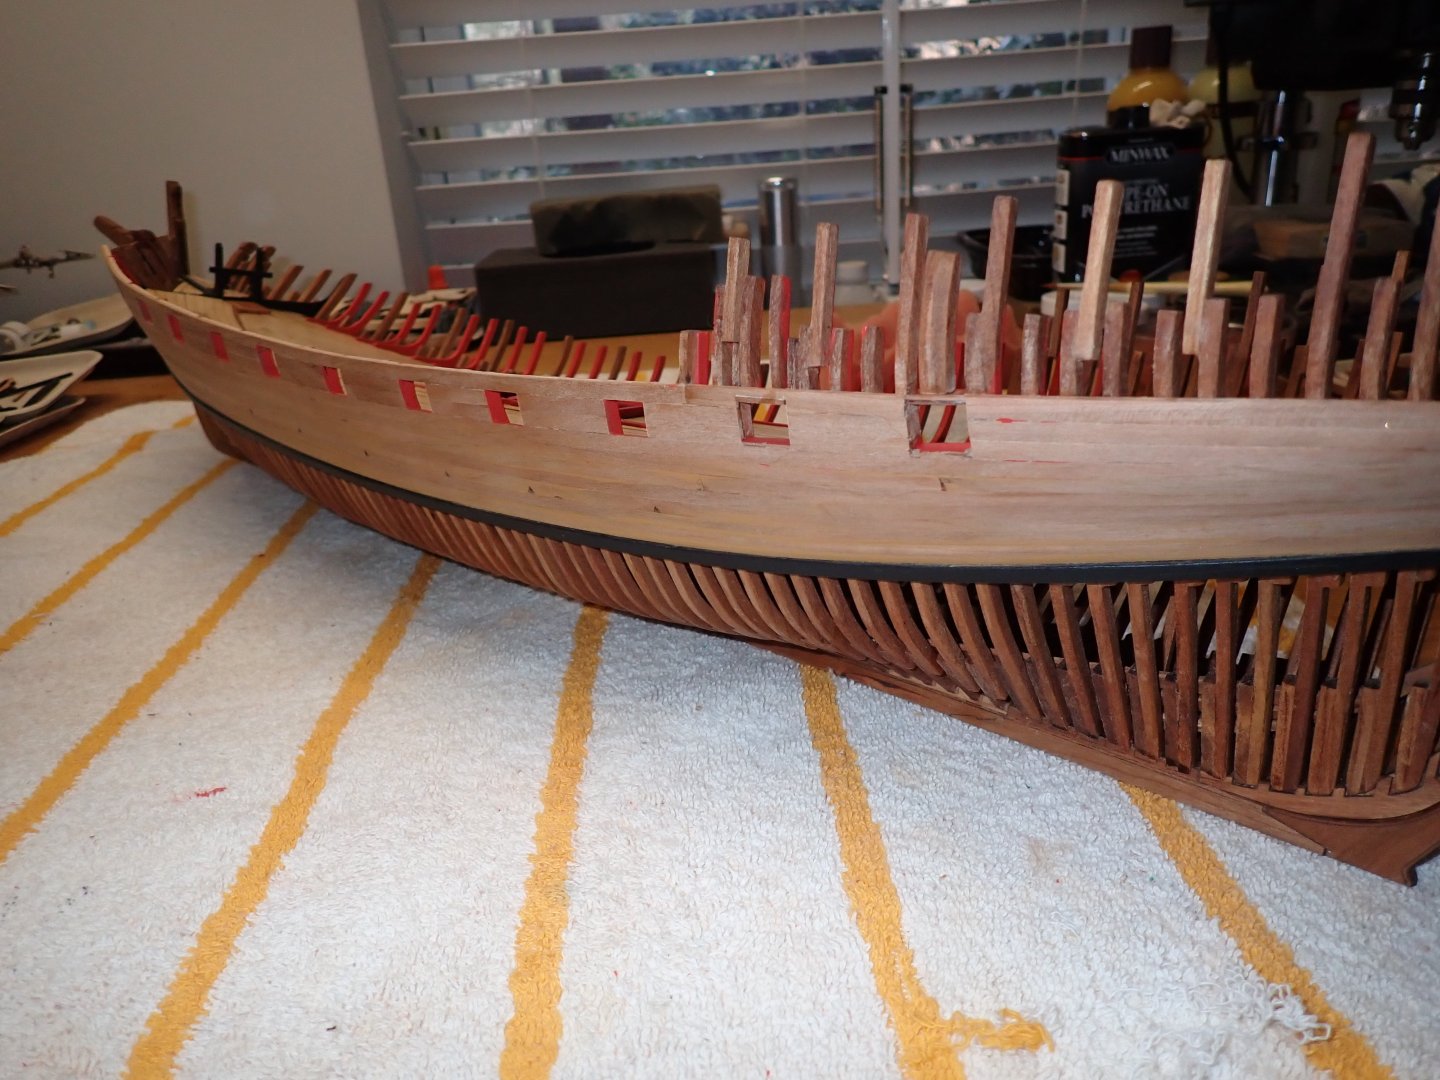
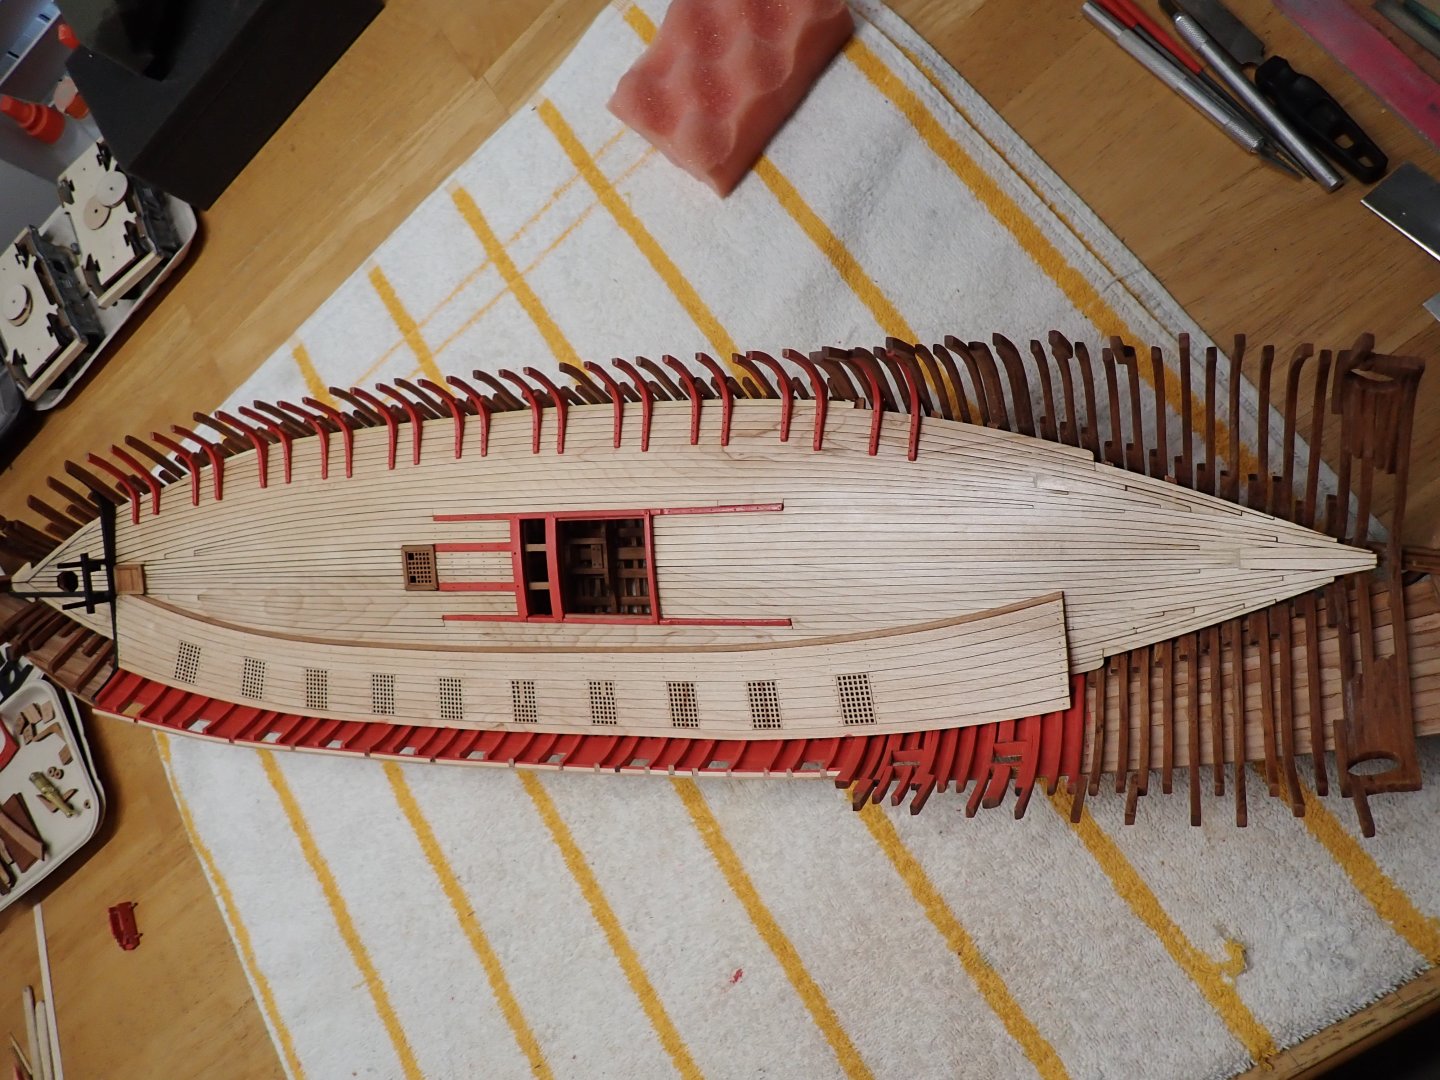
After building the gun deck (on one side...), I wanted to see how the planking is going to match and fit the gun ports and the overall allure of the hull. As you can see and in my usual way of building a model, I am not exactly following the instructions and the way CAF Models suggests to do it. I am using 1.5 x 5 mm planks as suggested by the kit. First, I tried to paint the planks in Ochre Yellow wood color to hide certain of my mistakes. But after seeing the beauty of the wood and its incredible smoothness when sanded, I have decided to leave the wood natural and will be removing all the paint from the hull. Above, most of the gun ports have been defined and built. I now need to move to the two gun ports located in the stern section, and these are much more difficult to build since they require cutting some of the frames: Planking is done little by little, to get an exact position of the ports. After some delicate surgery, I have come to a point where it is not too bad: I have also added a small strip of wood (not provided in the kit) at the top of the gun ports and planking, to offer a more stable platform to glue the railing. It also makes the bulwarks much more solid and realistic. Some fine sanding remains to be done but the hull is starting to look like a Chebec ship. Honestly, the shape and smoothness of this hull is almost sensual and I do not tire of holding that hull in my hands. What will it be when both sides will be planked....? Now, I have to do it all over again, on the other side.... or should I leave it un-planked...? Probably not. Yves


- 185 replies
-
- 15
-
-

-
Thanks Nil. I know you have built that model too (yours was scratchbuilt, I think) so you know about the lack of straight lines and flat surfaces on this vessel. I am making some slow progress, which I hope to present in a few days. As always, I am moving away from the official "Instructions" and going all over the place, as needed. Yves
-
Rob, are you available to polish my real size car? 🙂 I do have an orbital buffer to help your sore arms.... Your results are just amazing on that model. It looks better than the real car. Yves
-
Great progress Kevin. The wood decks make such a difference. There is no substitute for that. This stuff is so ominous and massive.... Yves
-
You may have to put another layer of clear coat..... Yves
-
Big sanding block is the way to go, in my opinion. Yves
-
Valeriy, since these models are static models, why do you line the hull with fiberglass and epoxy resin? Is it to make sure the wood does not warp or expand? Is it to increase the solidity and resilience of the hull to shocks? Have you considered just brushing epoxy resin on top of the wood and skipping the fiber glass? I would welcome your opinions and recipes. Yves
-
I can't wait to see some paint on that fantastic hull. Yves