yvesvidal
-
Posts
3,644 -
Joined
-
Last visited
Content Type
Profiles
Forums
Gallery
Events
Everything posted by yvesvidal
-
 You are a very brave man Jan. Floating this monster requires a certain dose of courage, especially after all the efforts you put into building it. The only Bismarck I "floated" was an old Lindberg Bismarck kit (1/350th) with a two ways radio control in it. It was a lot of fun. Yves
 -
That is truly impressive. What a beautiful model. I love the fact that you decided to do the early "Camouflage" painting, that you installed all the lights and to top it off, that you made the model floating and RC controlled. What a fantastic achievement. Yves
-
Citroen Traction Avant by kpnuts - FINISHED - Heller - 1/8
yvesvidal replied to kpnuts's topic in Non-ship/categorised builds
Personally, I'd like to see: - the Airfix Bentley 1/12 - the Monogram Corvette. Is it a C2 or a C3? I built the C3 when I was a teenager. Wish I had kept it.... - The London Bus would be interesting too. Yves -
Citroen Traction Avant by kpnuts - FINISHED - Heller - 1/8
yvesvidal replied to kpnuts's topic in Non-ship/categorised builds
Your traction is so realistic. It is superb. As you realize, the front bumper was an option as well as the extra headlight mounted on them. Here is the vehicle my brother rebuilt entirely: Yves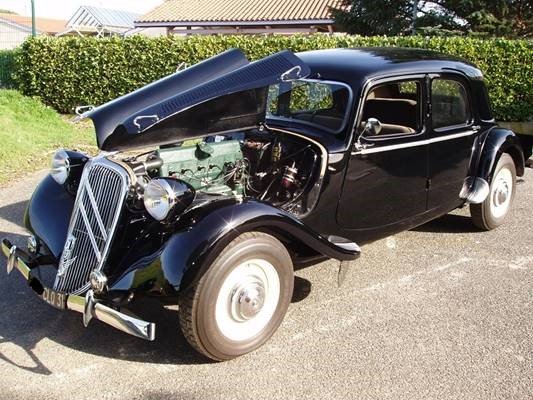
-
I wish I could. It is not possible....this stuff is buried in the Radio/Sonar module and totally unreachable. Not a big deal in the grand scheme of things.... Yves
-
Citroen Traction Avant by kpnuts - FINISHED - Heller - 1/8
yvesvidal replied to kpnuts's topic in Non-ship/categorised builds
Oh No! Yves -
Italari 1/12 Mephistopheles by kpnuts
yvesvidal replied to kpnuts's topic in Non-ship/categorised builds
Another great kit. I saw a finished Mephistopheles at a scale model show in Toulouse, in 2017. I was very impressed and this kit has been on my list since that time. I will be following your build with a lot of interest. Excellent choice. Yves -
ancre Coureur by cafmodel - 1/48
yvesvidal replied to cafmodel's topic in - Build logs for subjects built 1751 - 1800
Great ideas and tricks to bypass the Copyrights. Well done. Yves -
ancre Coureur by cafmodel - 1/48
yvesvidal replied to cafmodel's topic in - Build logs for subjects built 1751 - 1800
This looks like a very promising kit. Is this kit free from legal ties with that French company (Ancre)? Although it sports a French name, the plans and documentation seems to be in English. Hopefully, there will not be any Copyrights problems for this beautiful kit. Yves -
Superb craftsmanship. Will this model be used for teaching students about boats, or will it be displayed in a museum? Yves
-
What a great way to teach your students. Now, they have no excuse for not knowing the vocabulary and functions of the various parts of a boat. You truly are a dedicated and motivating teacher and your display will get a lot of usage, I am sure. Superb work and excellent presentation. Yves
-
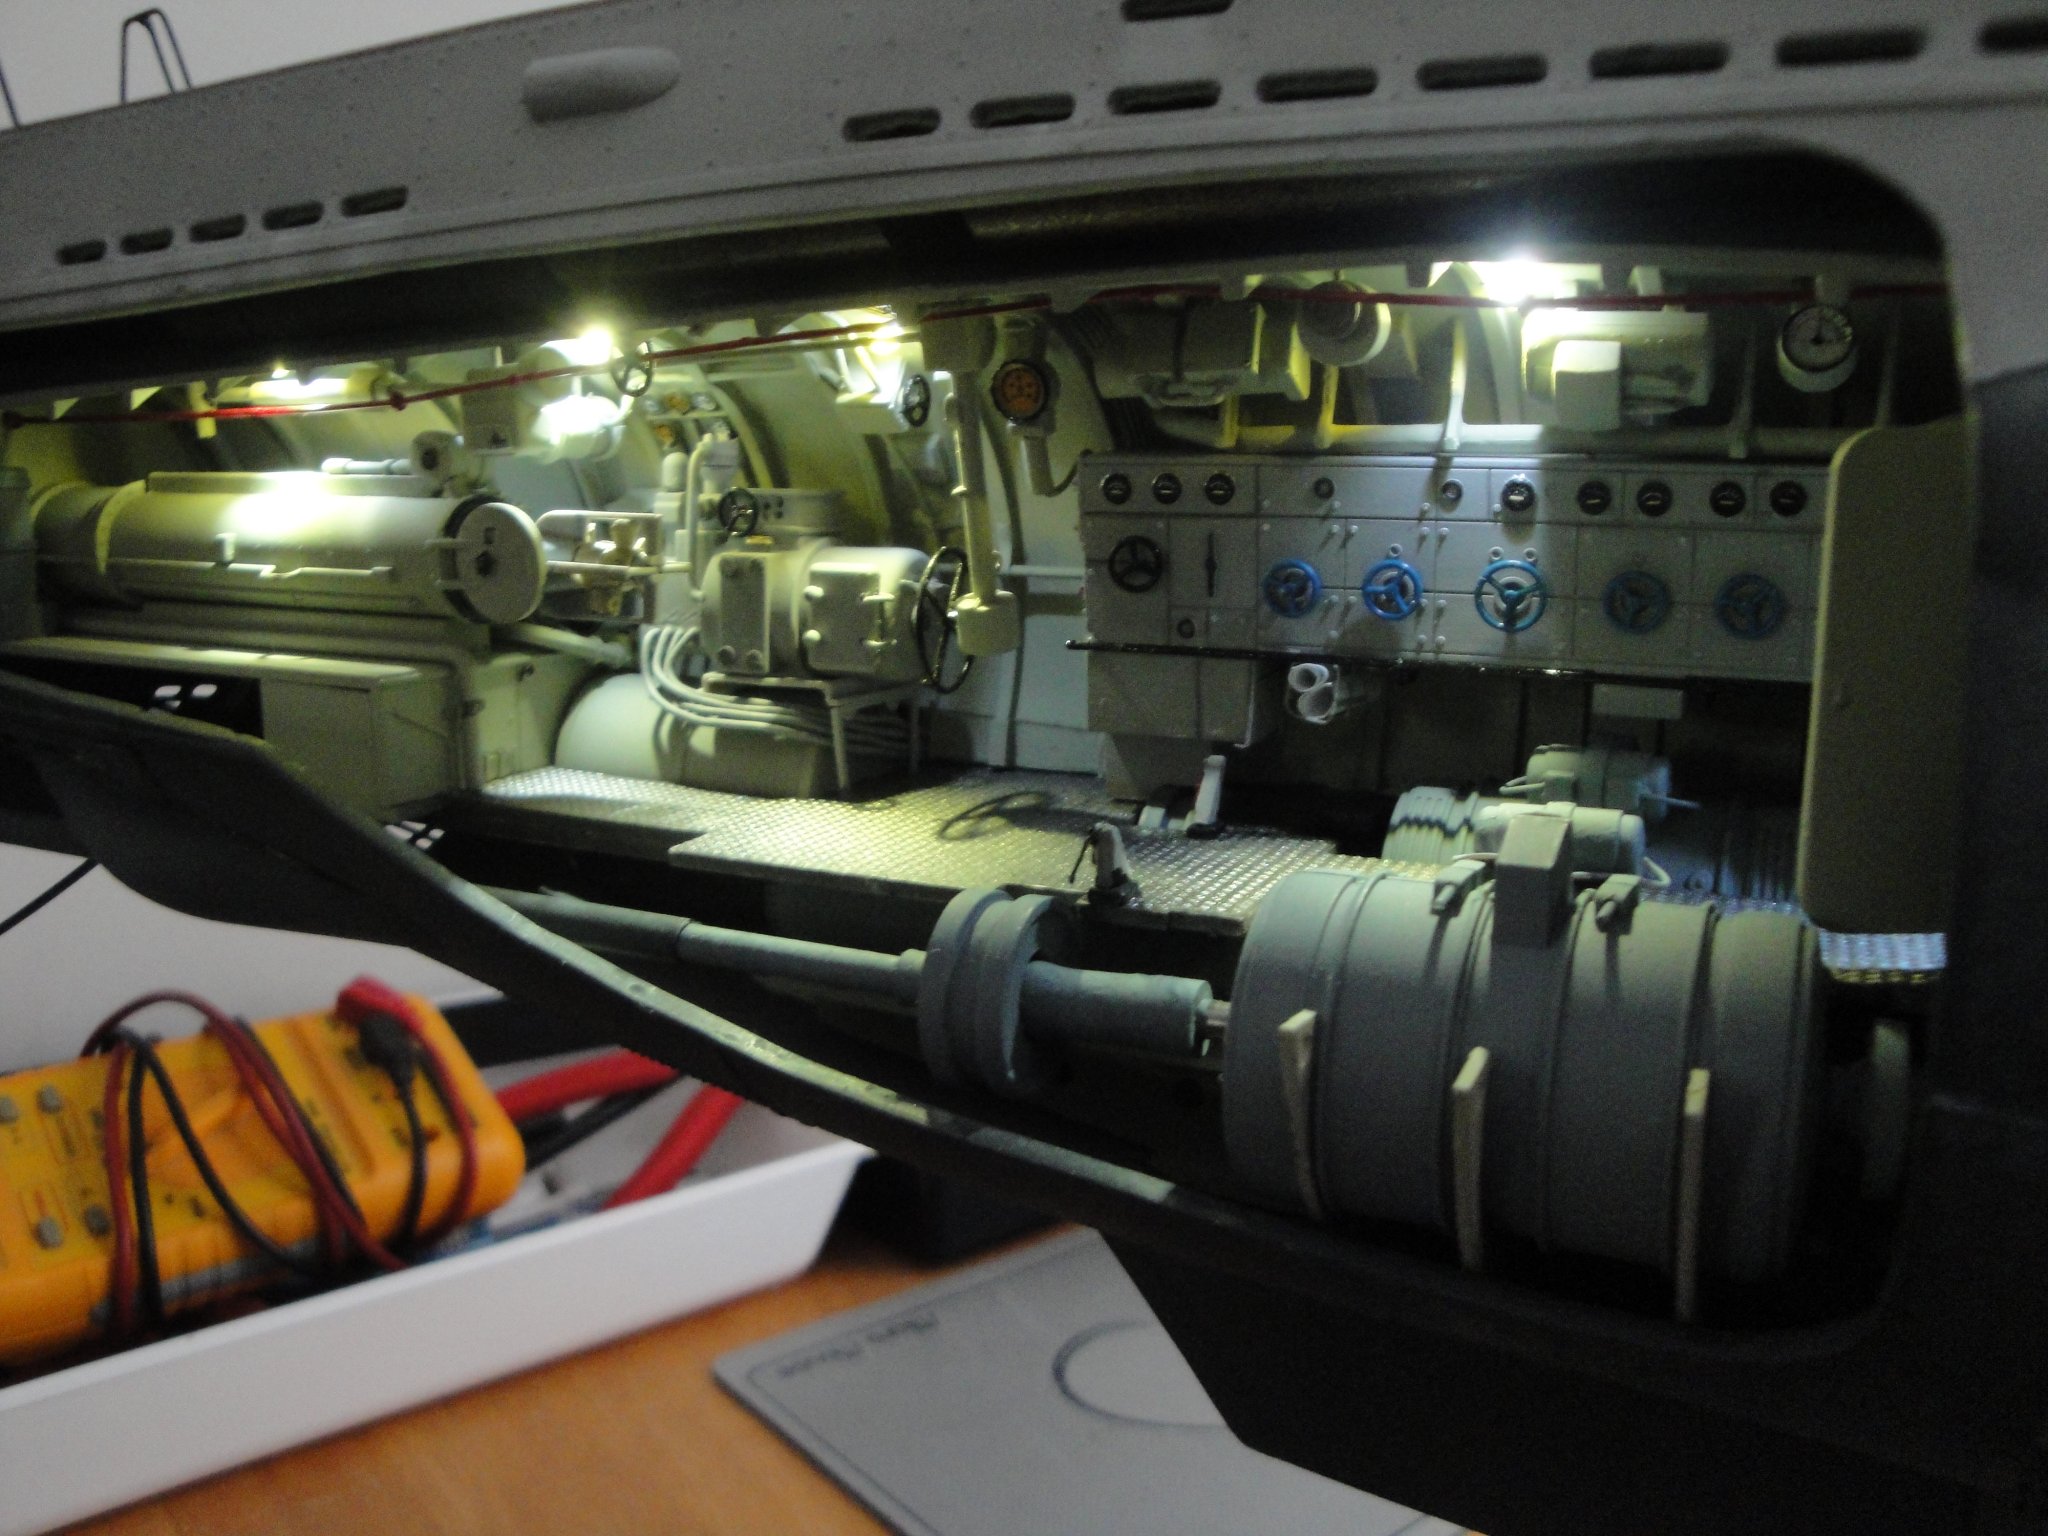
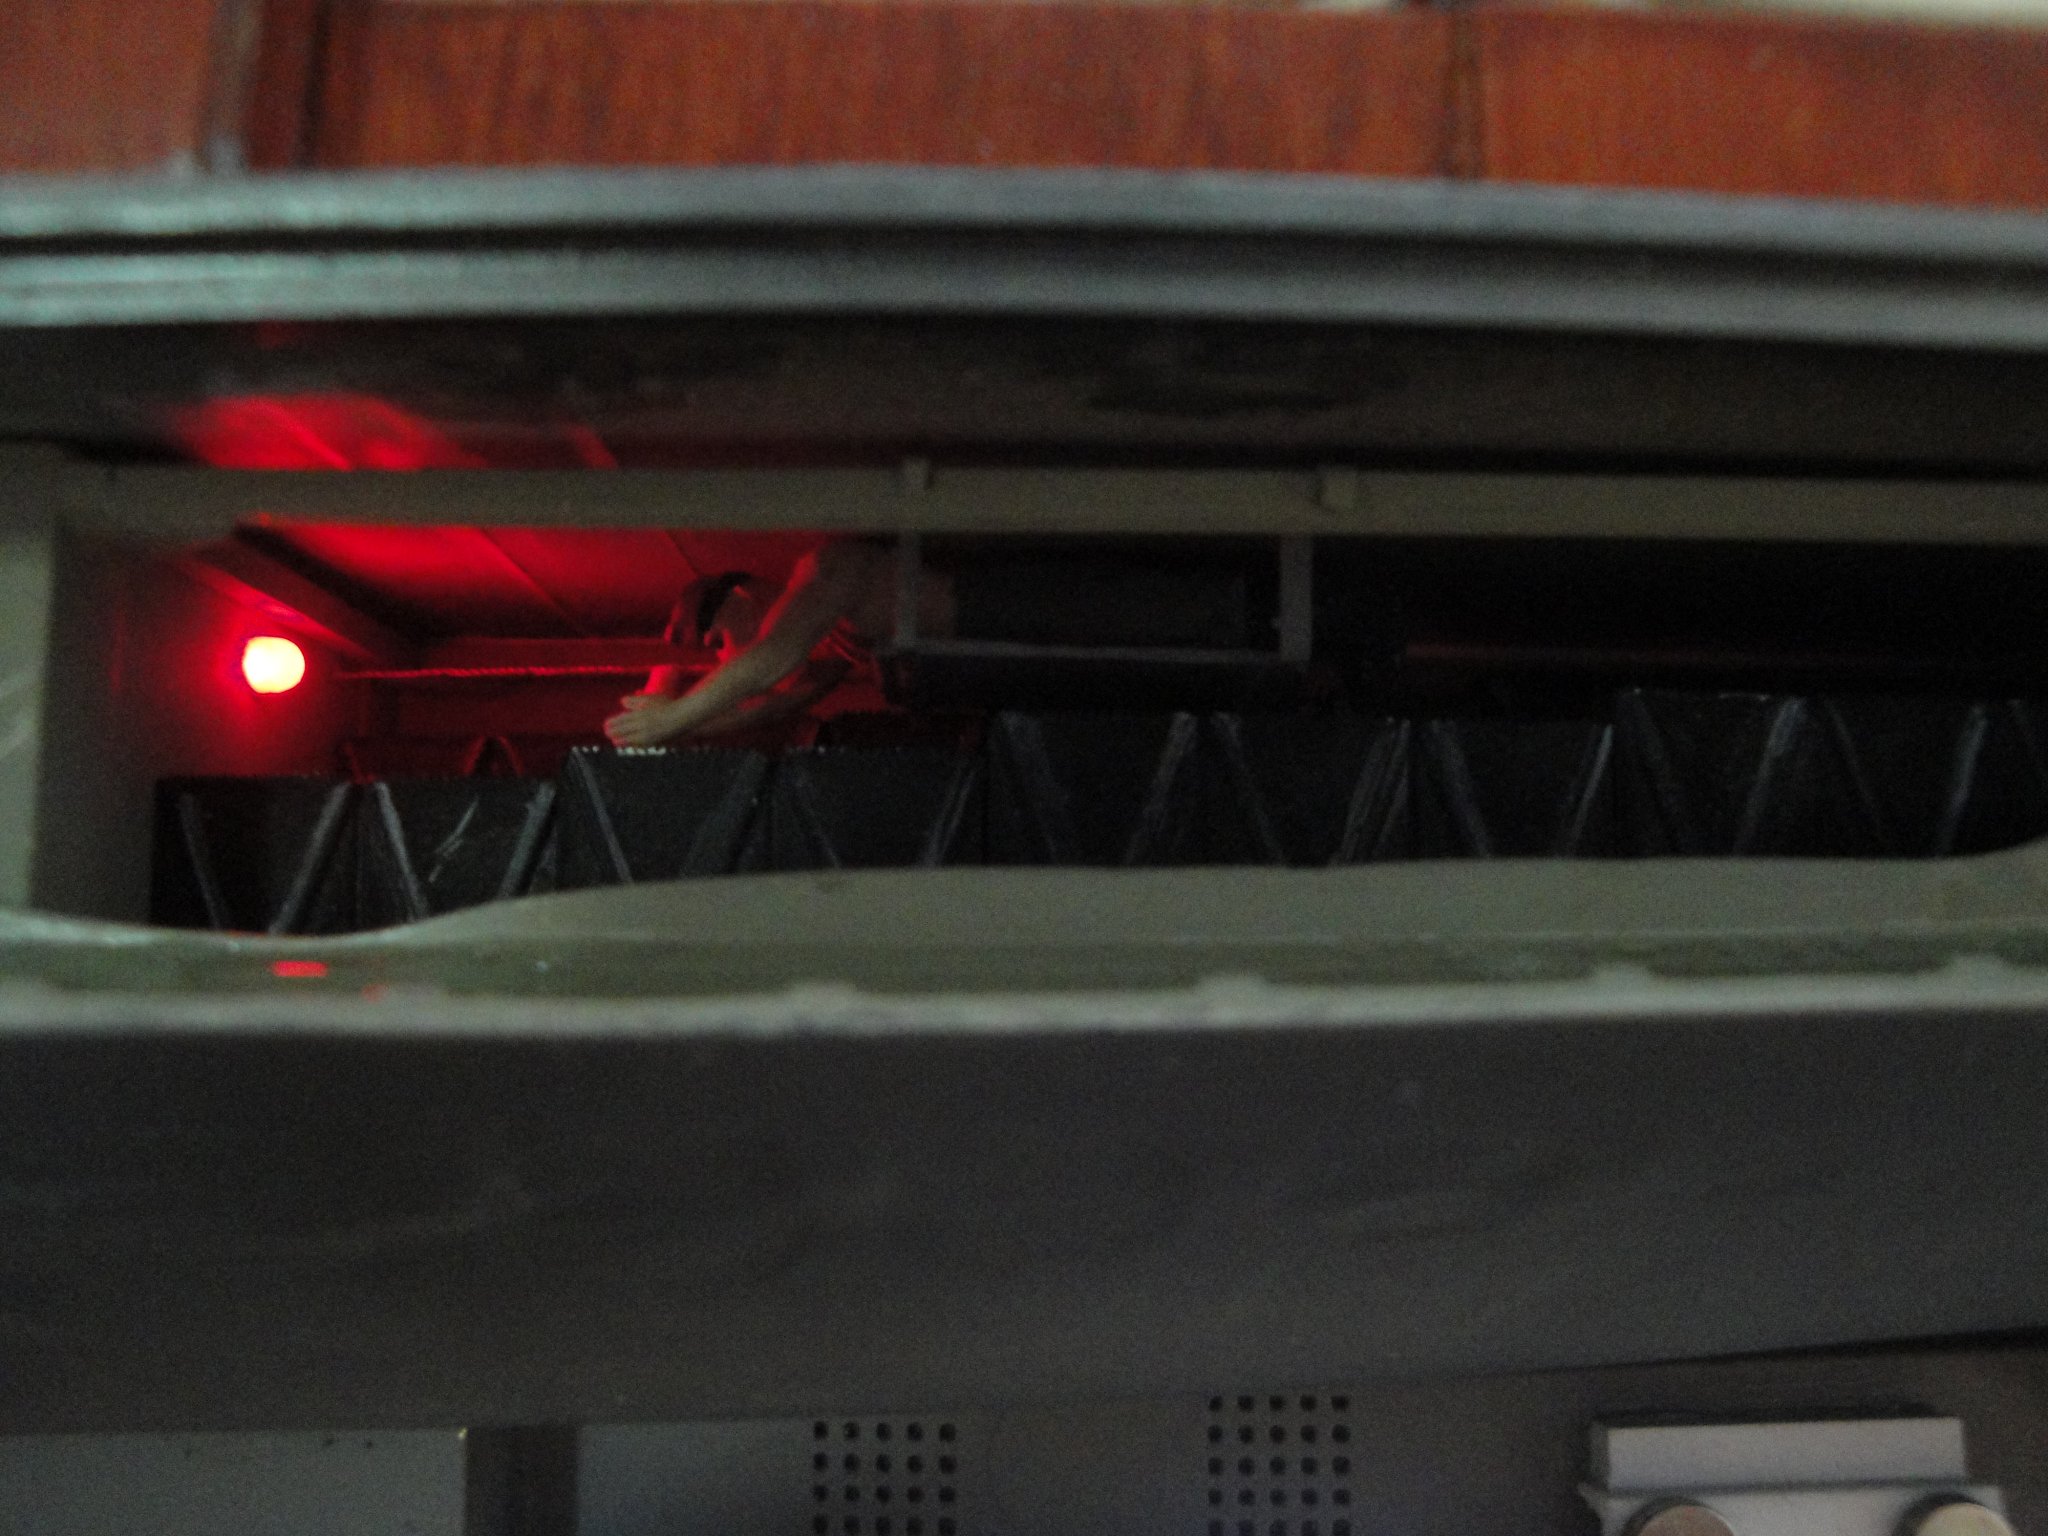
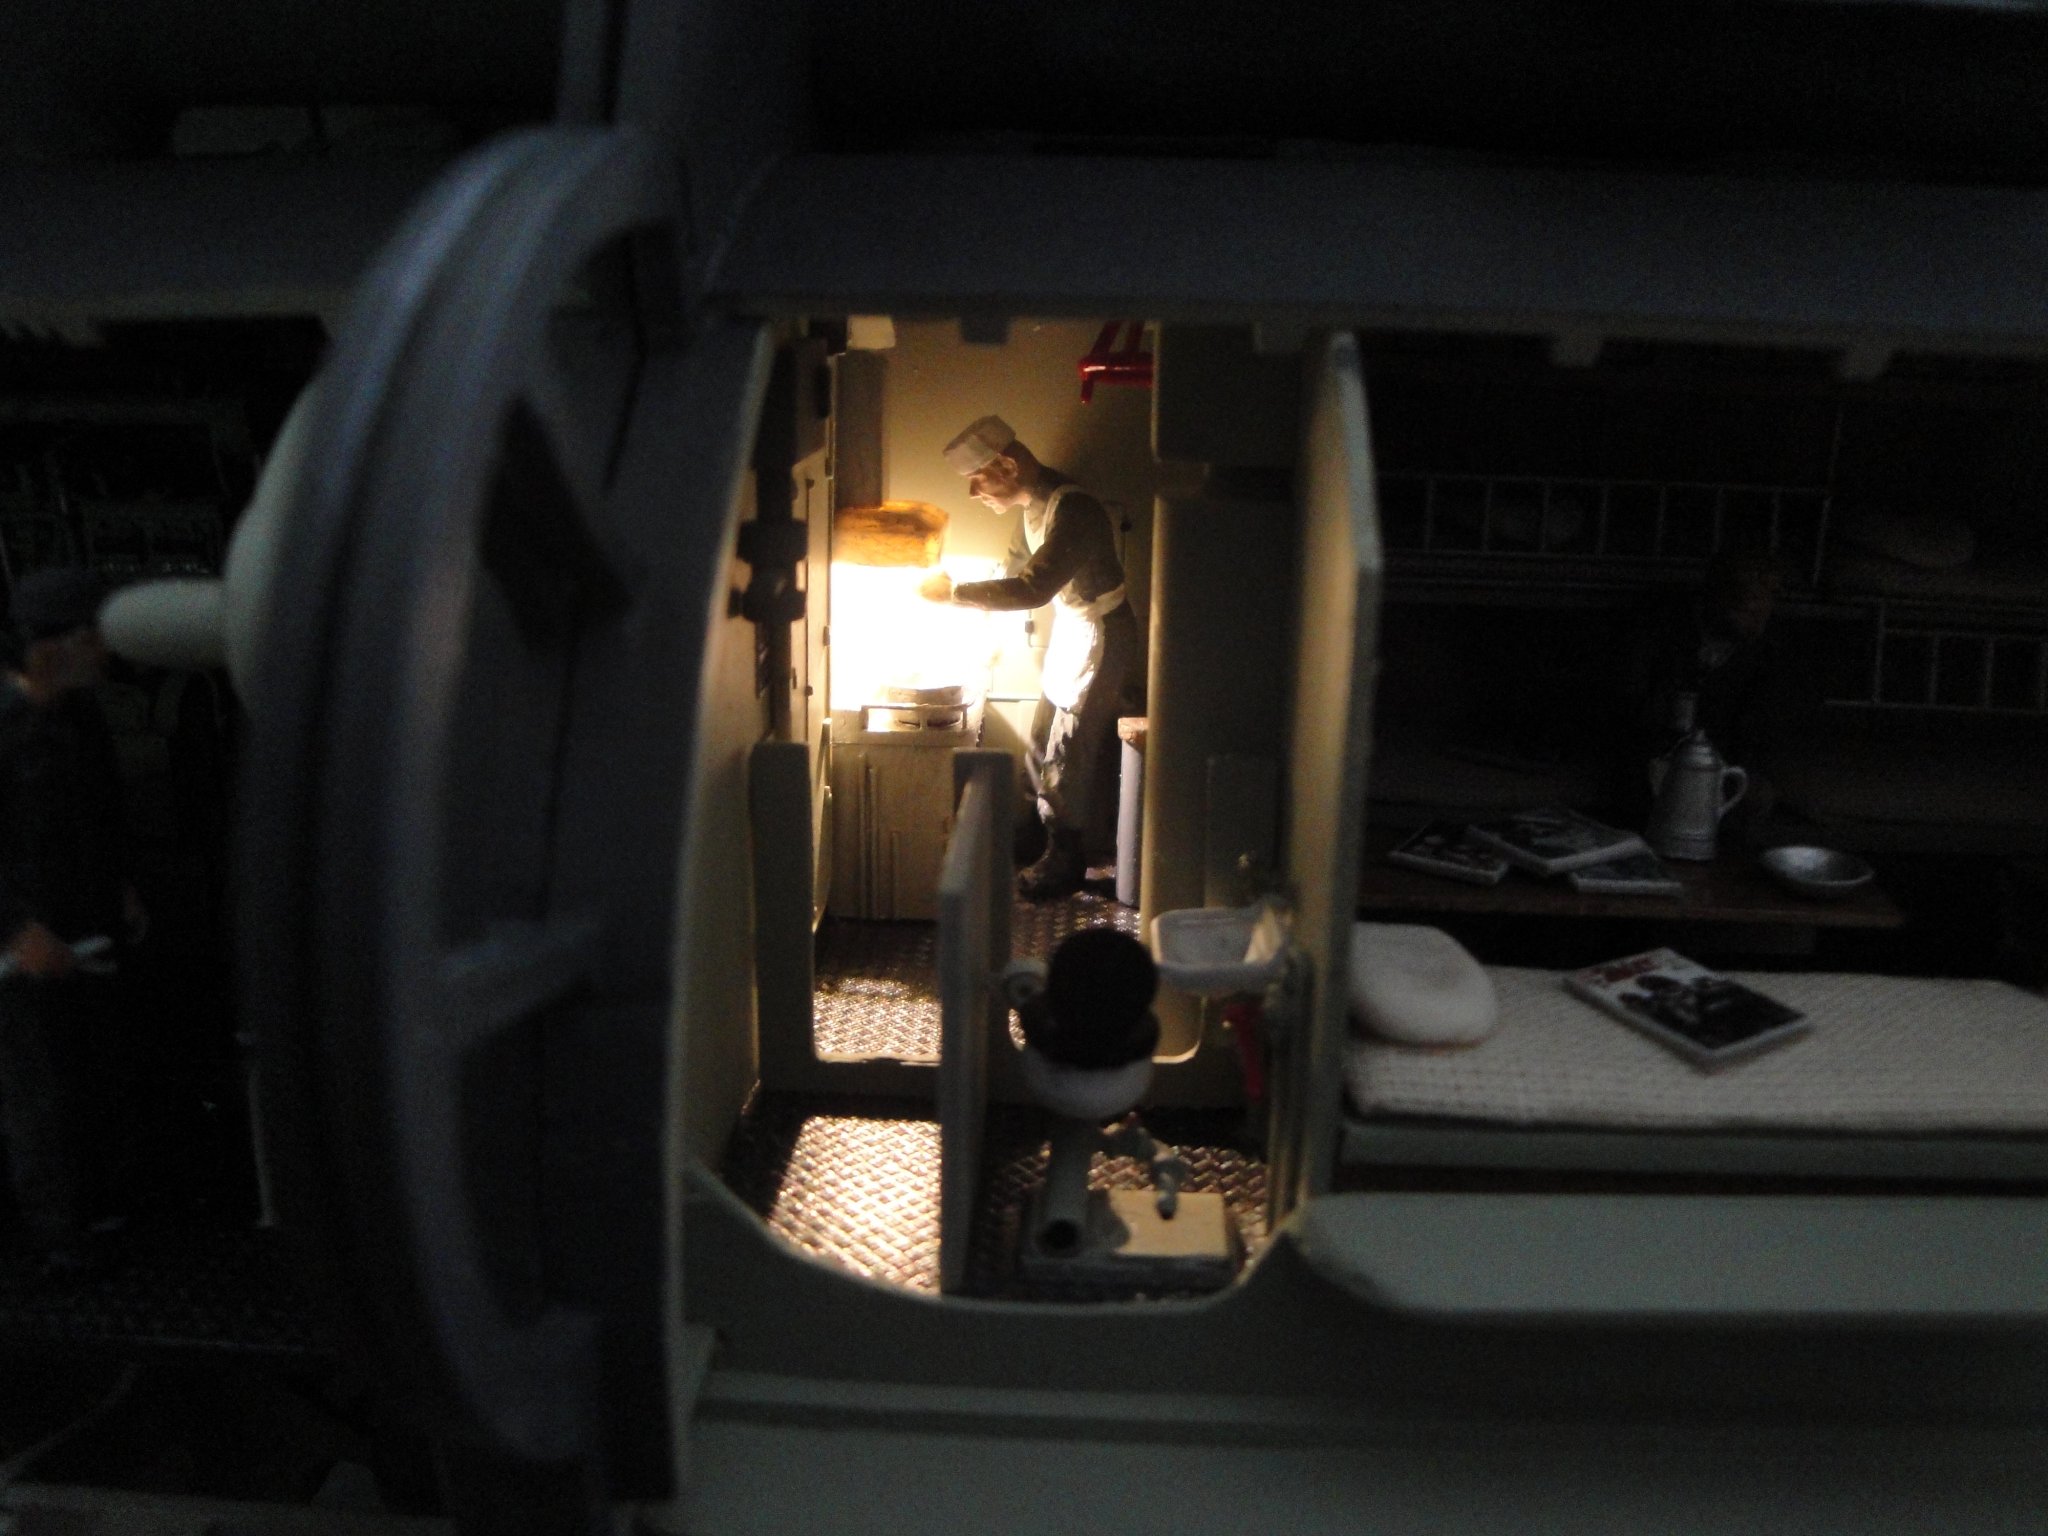
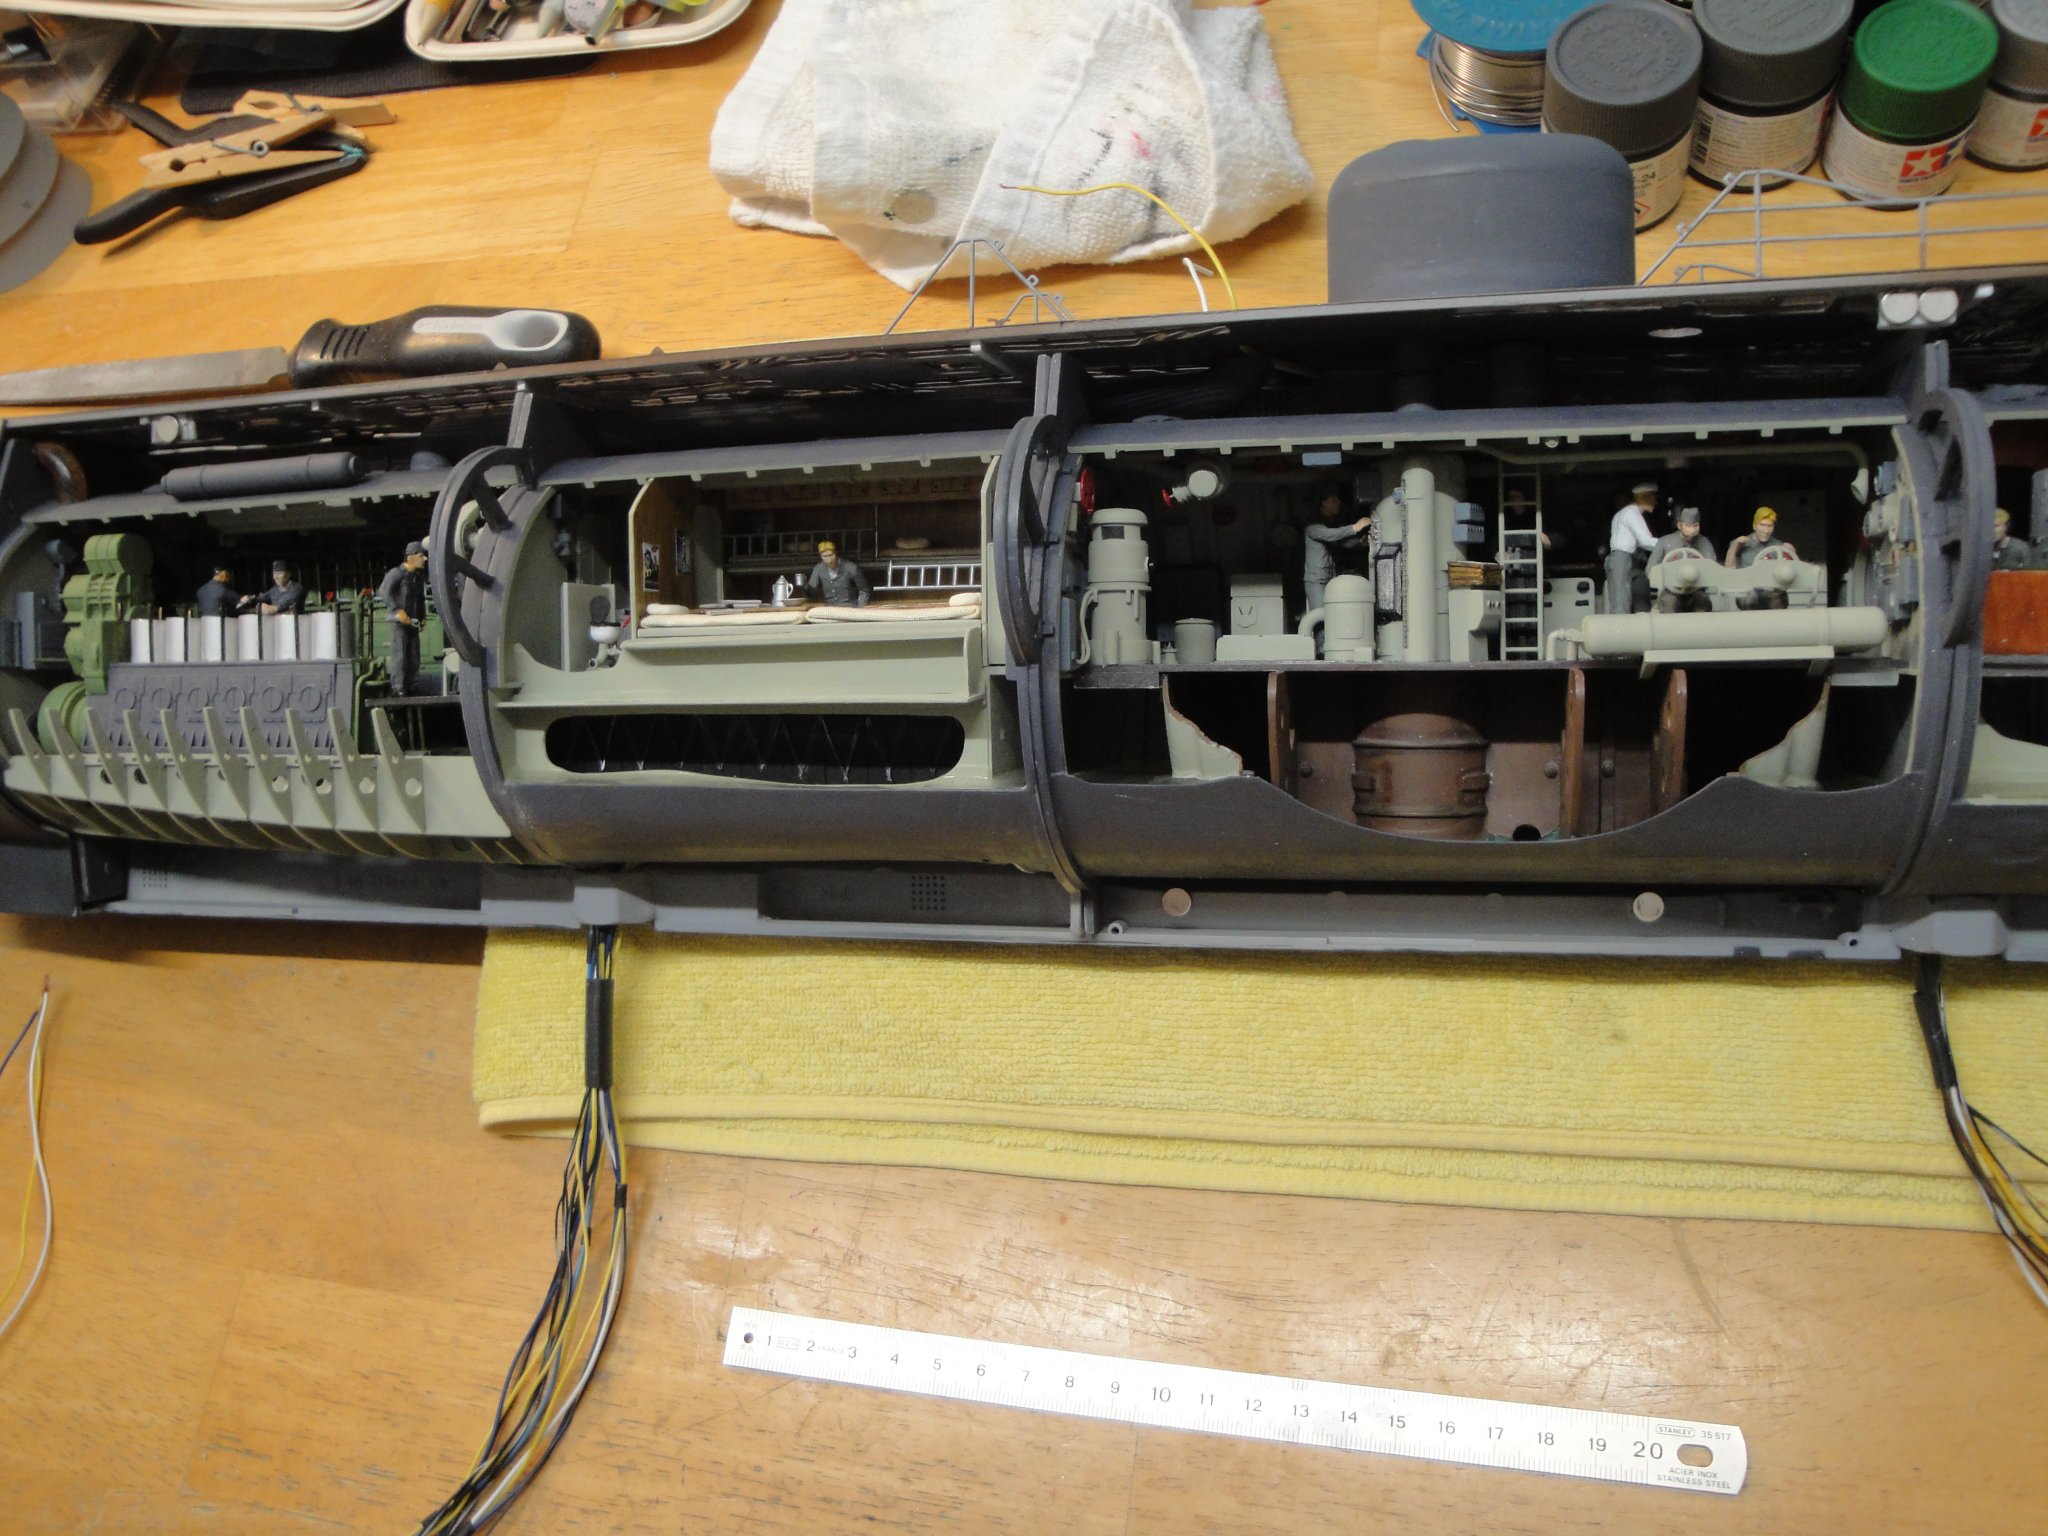
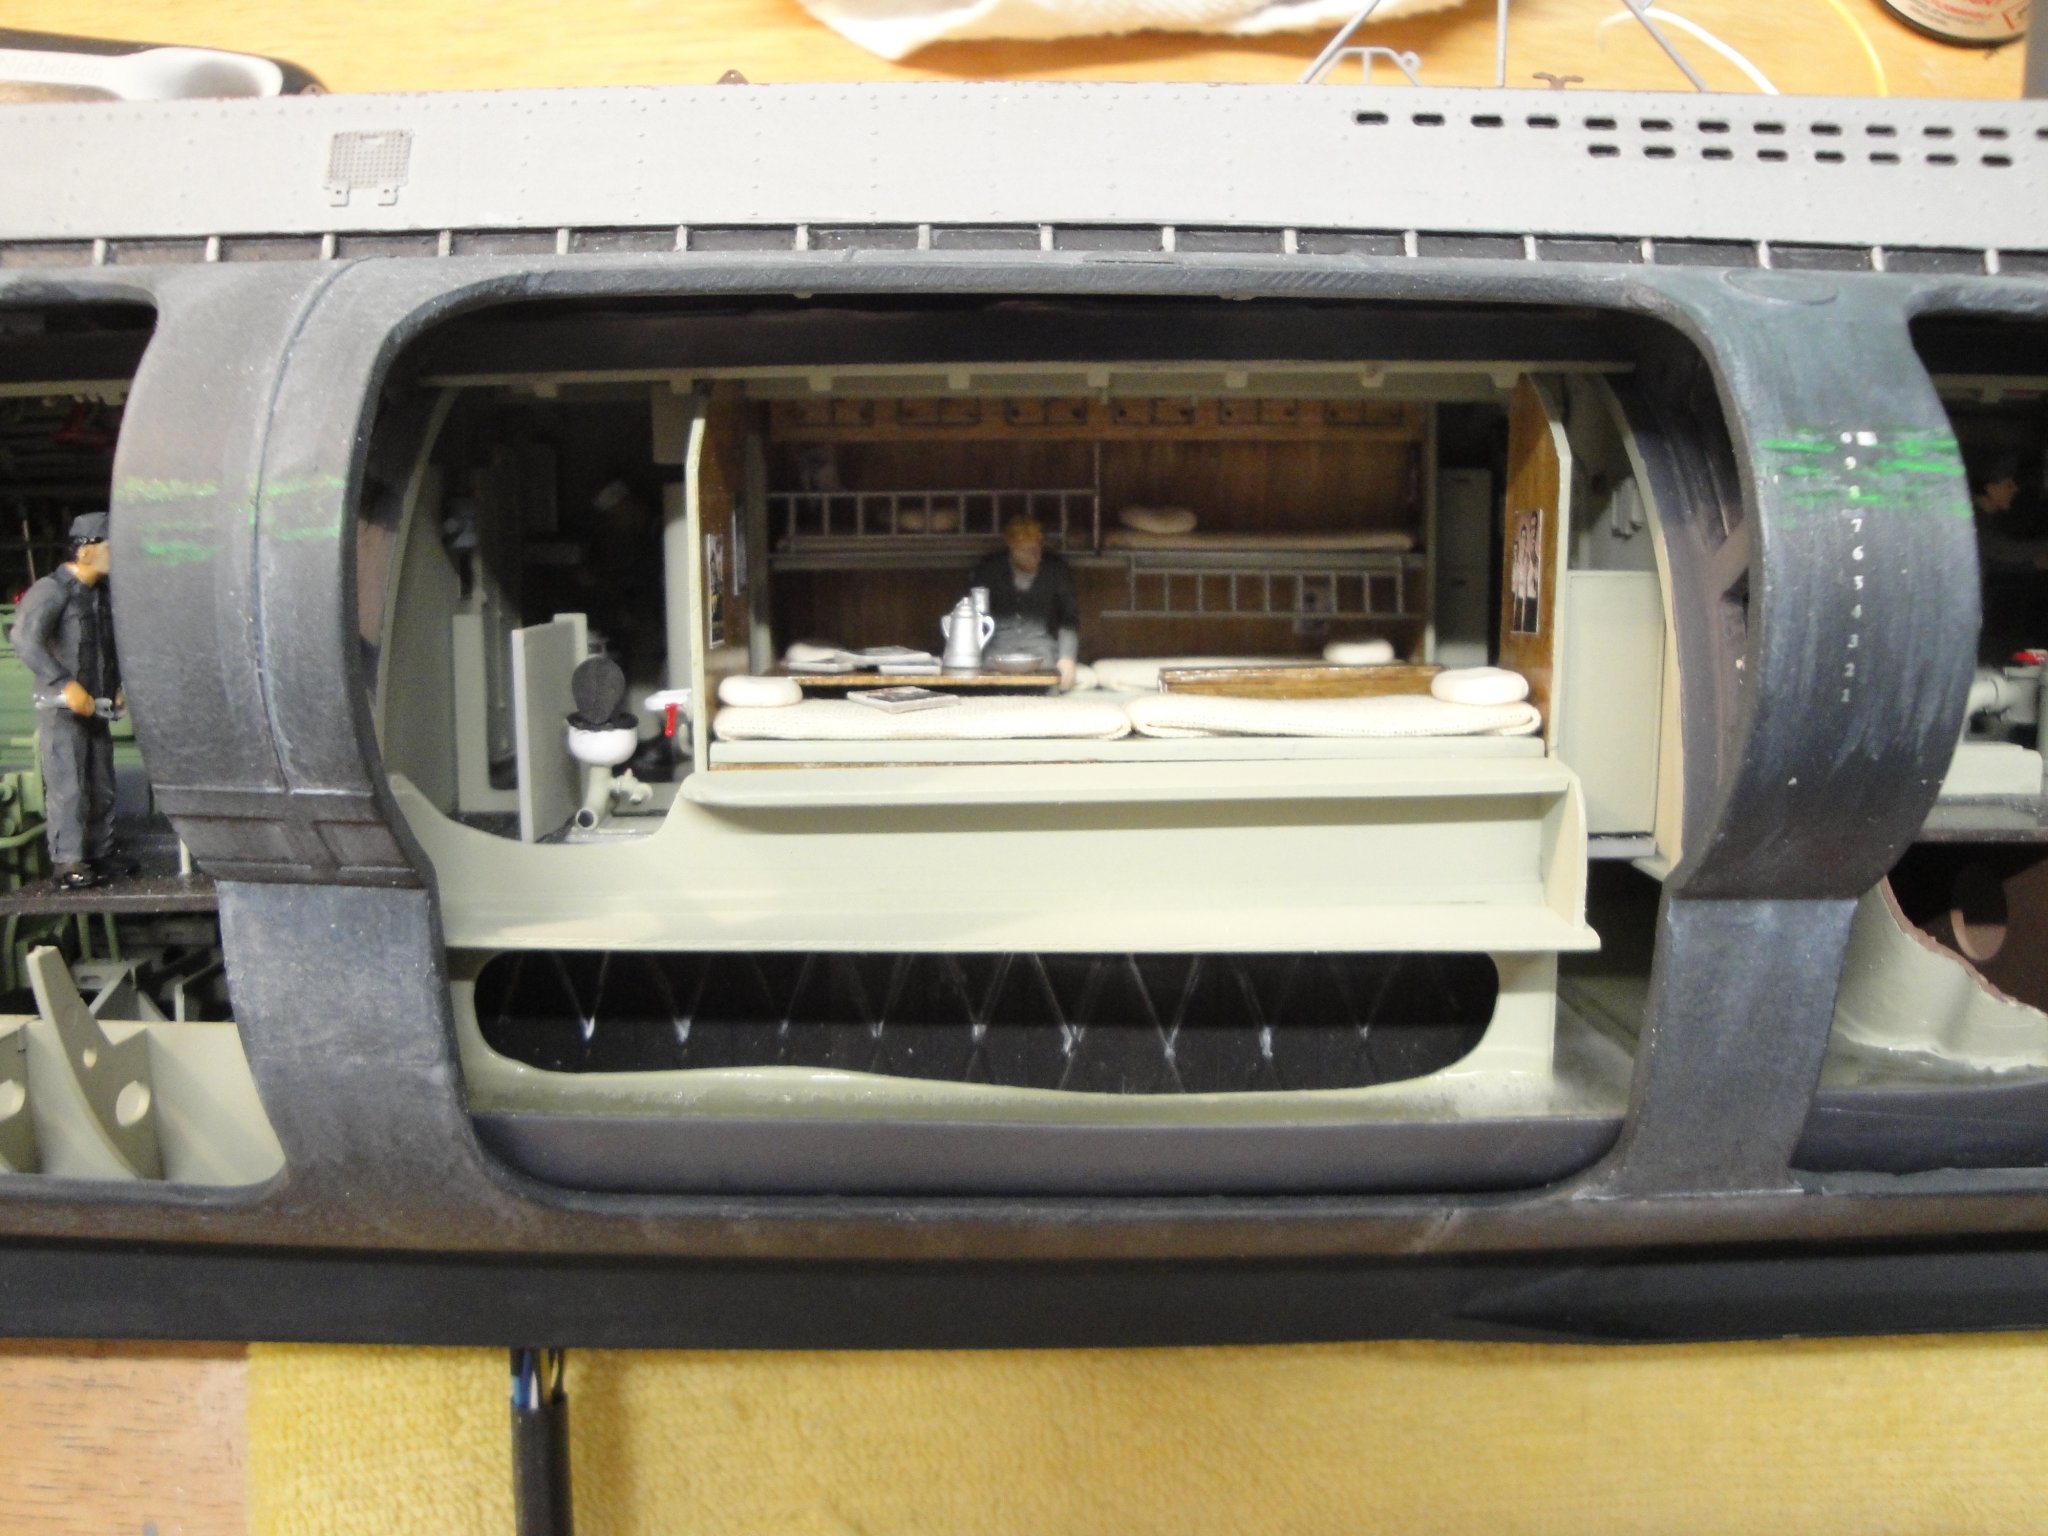
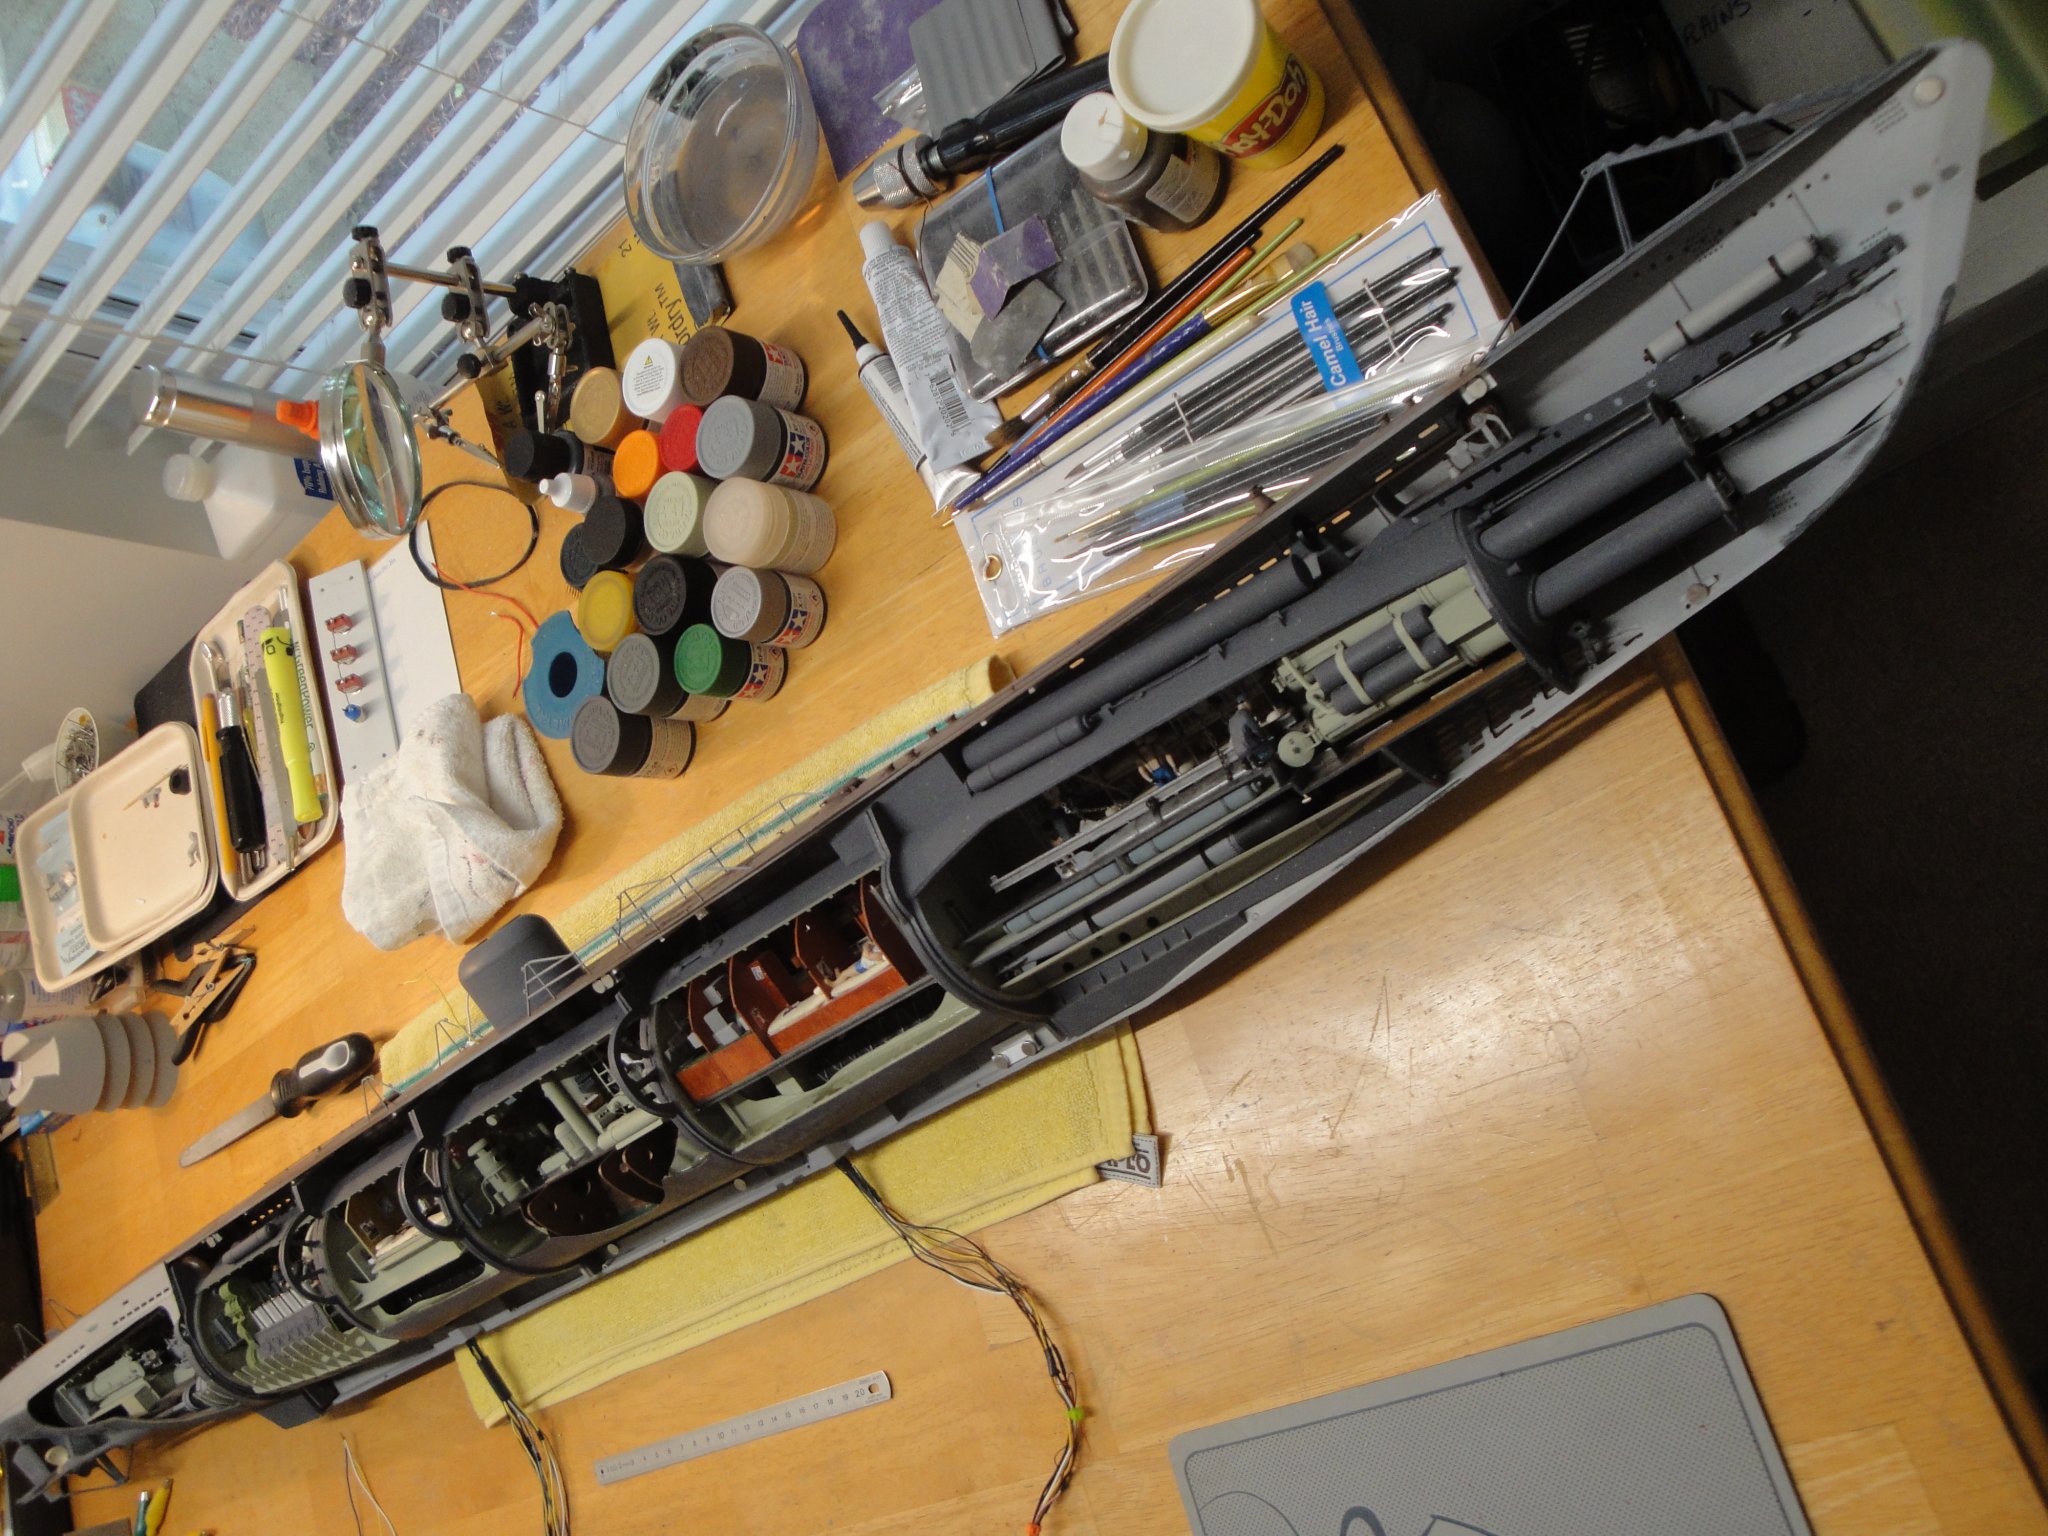
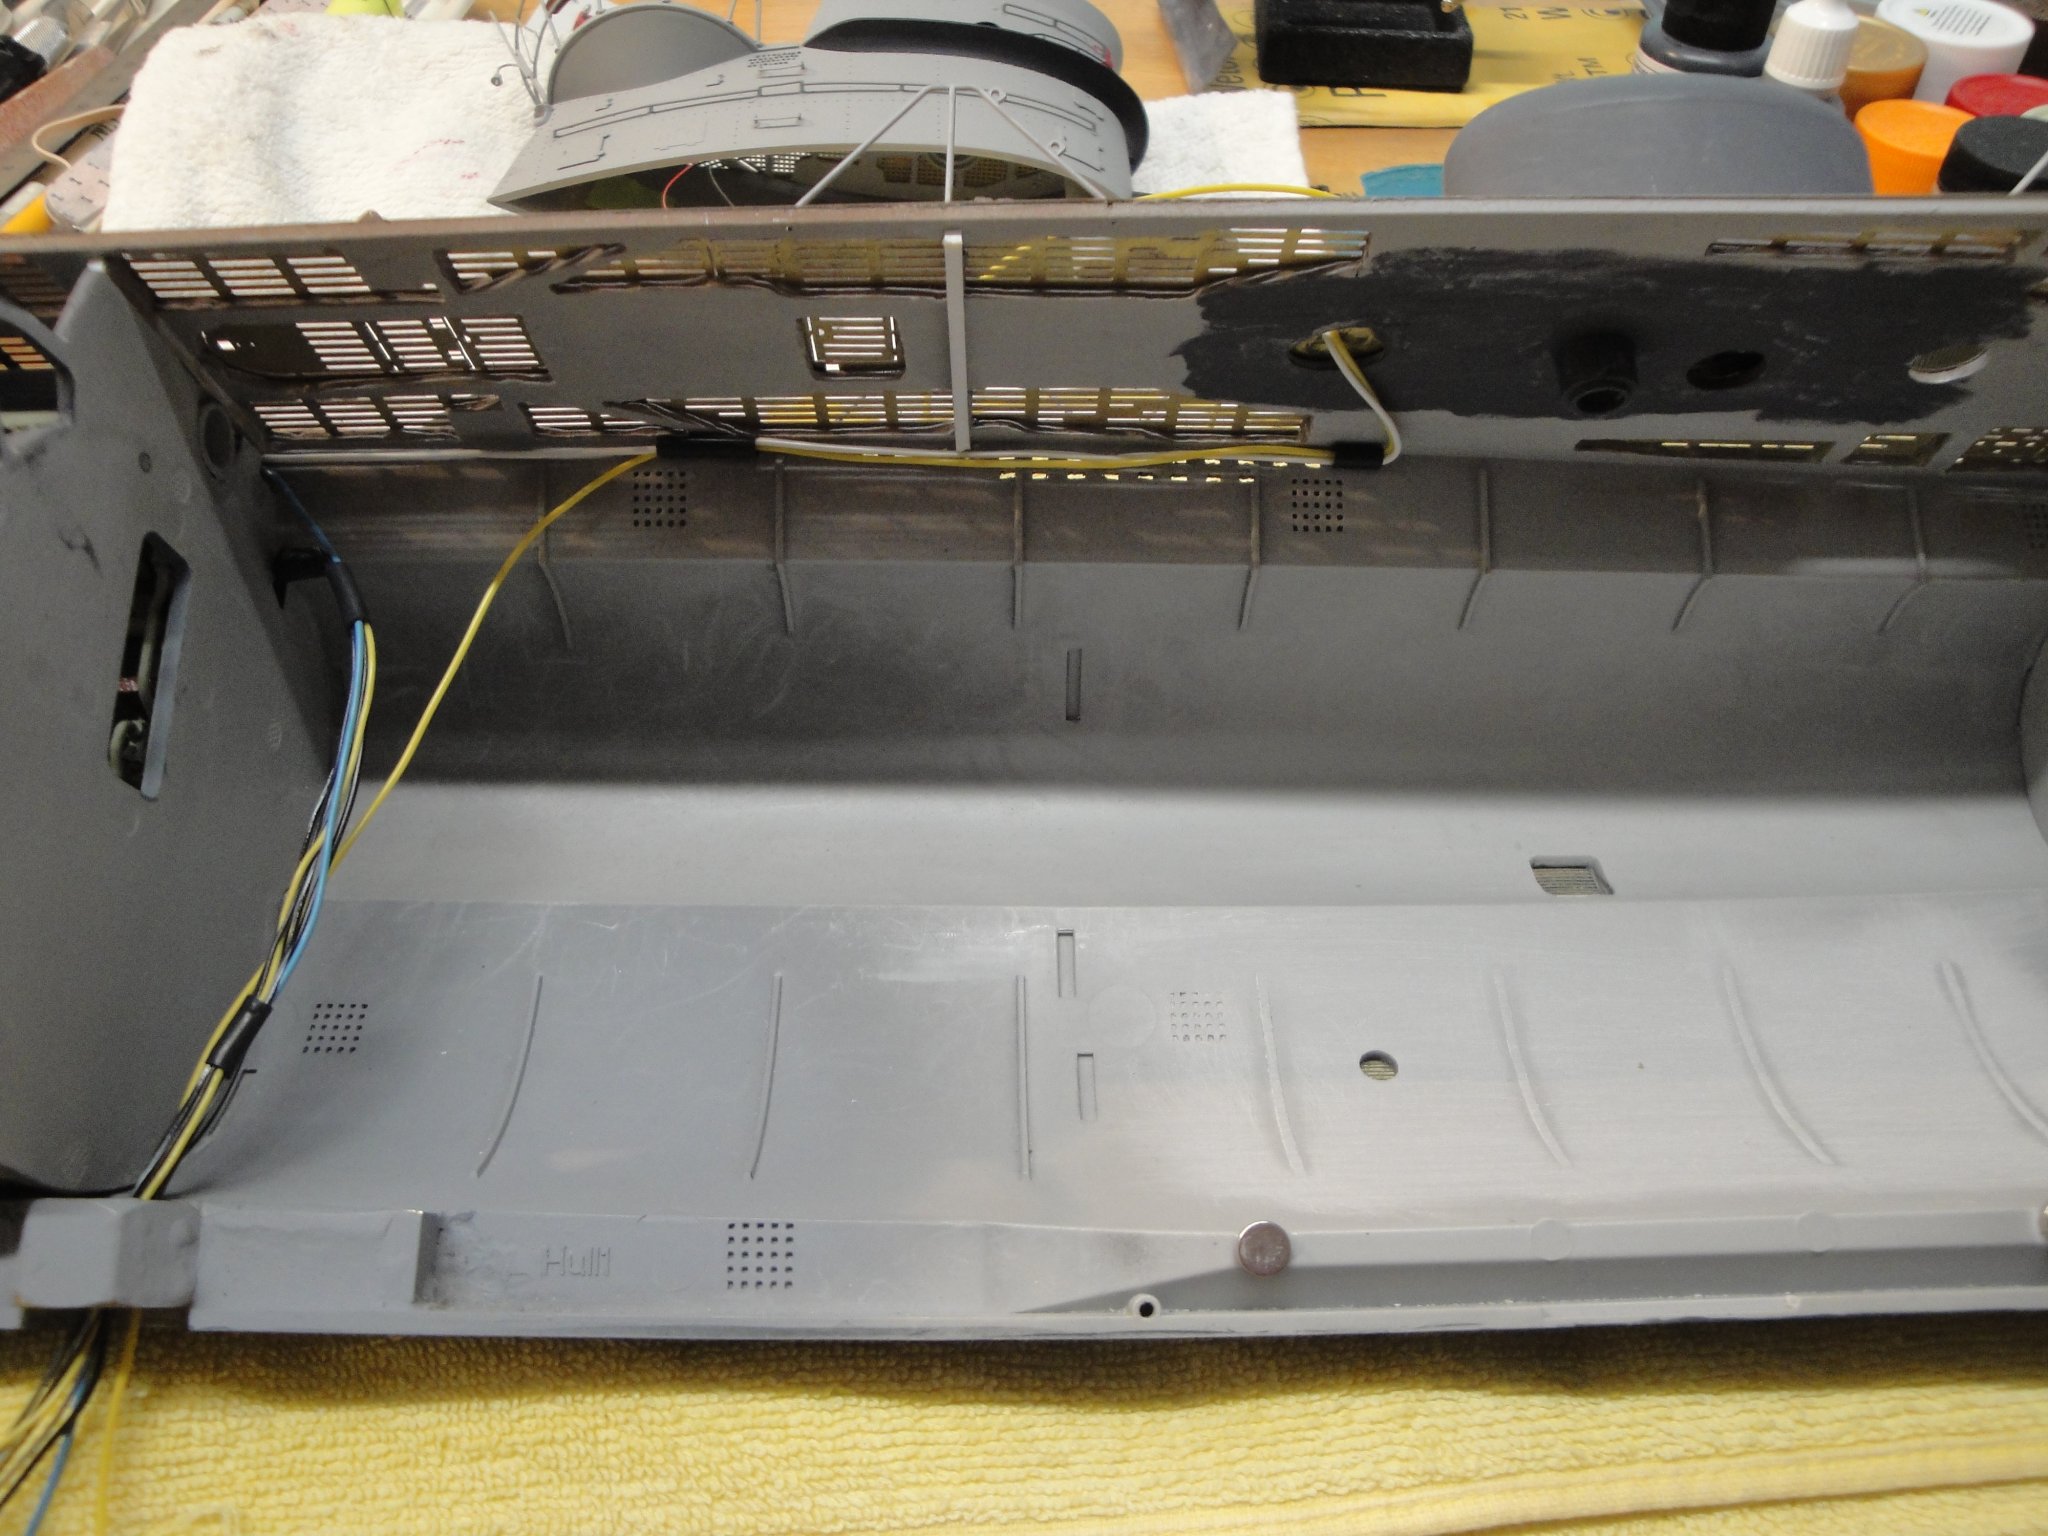
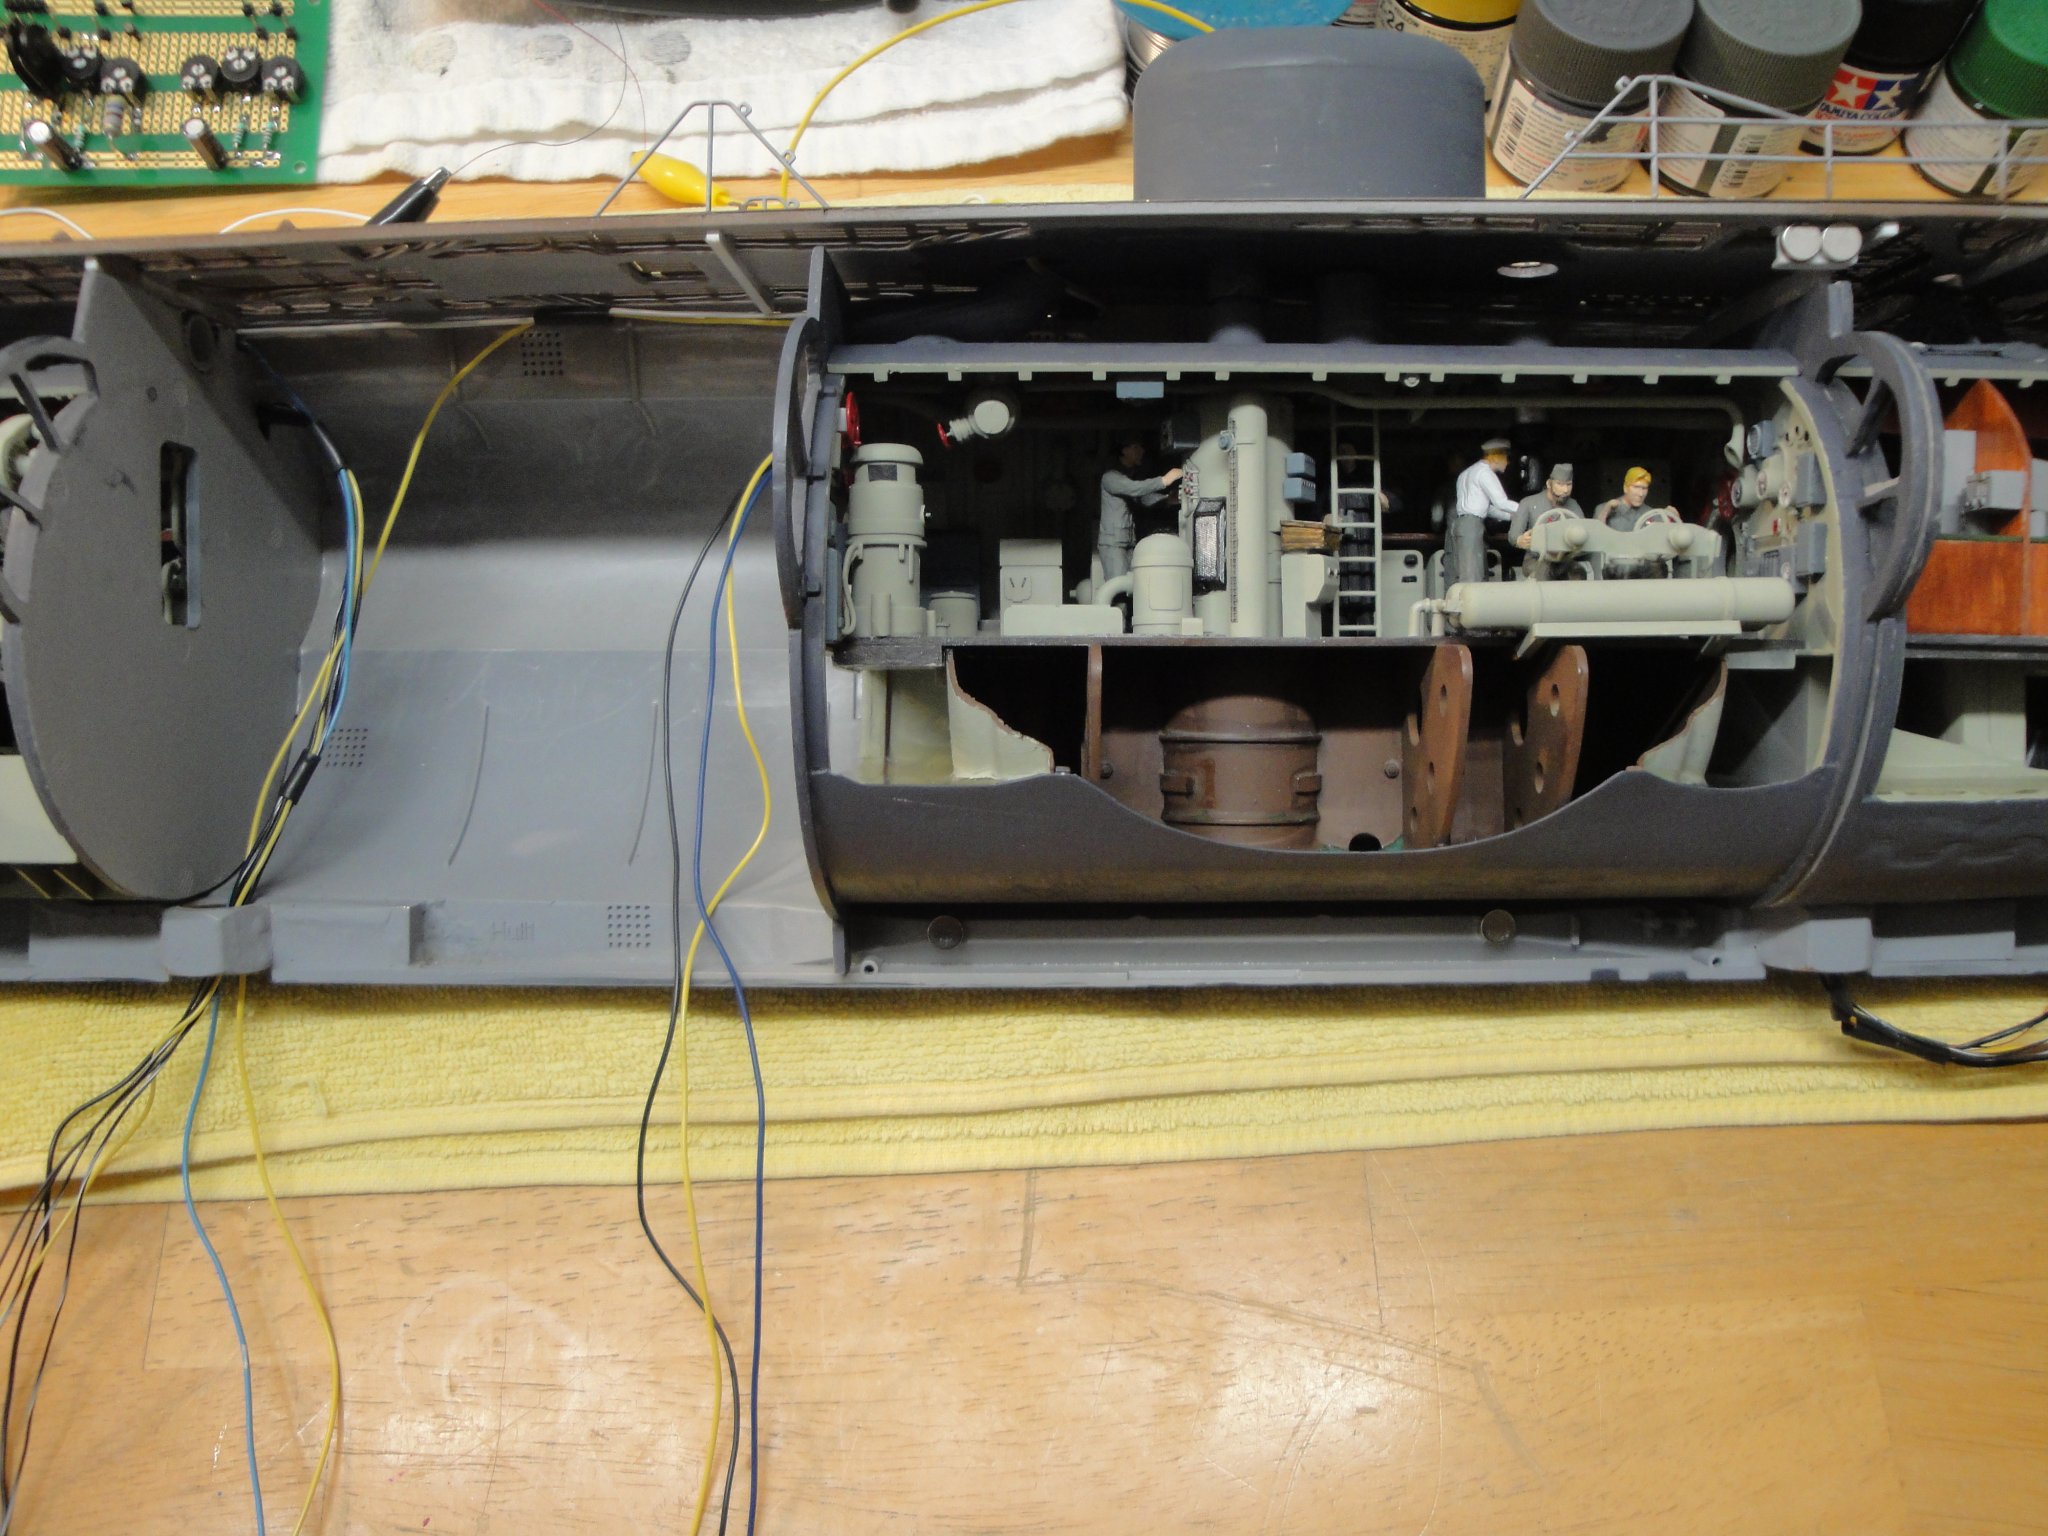
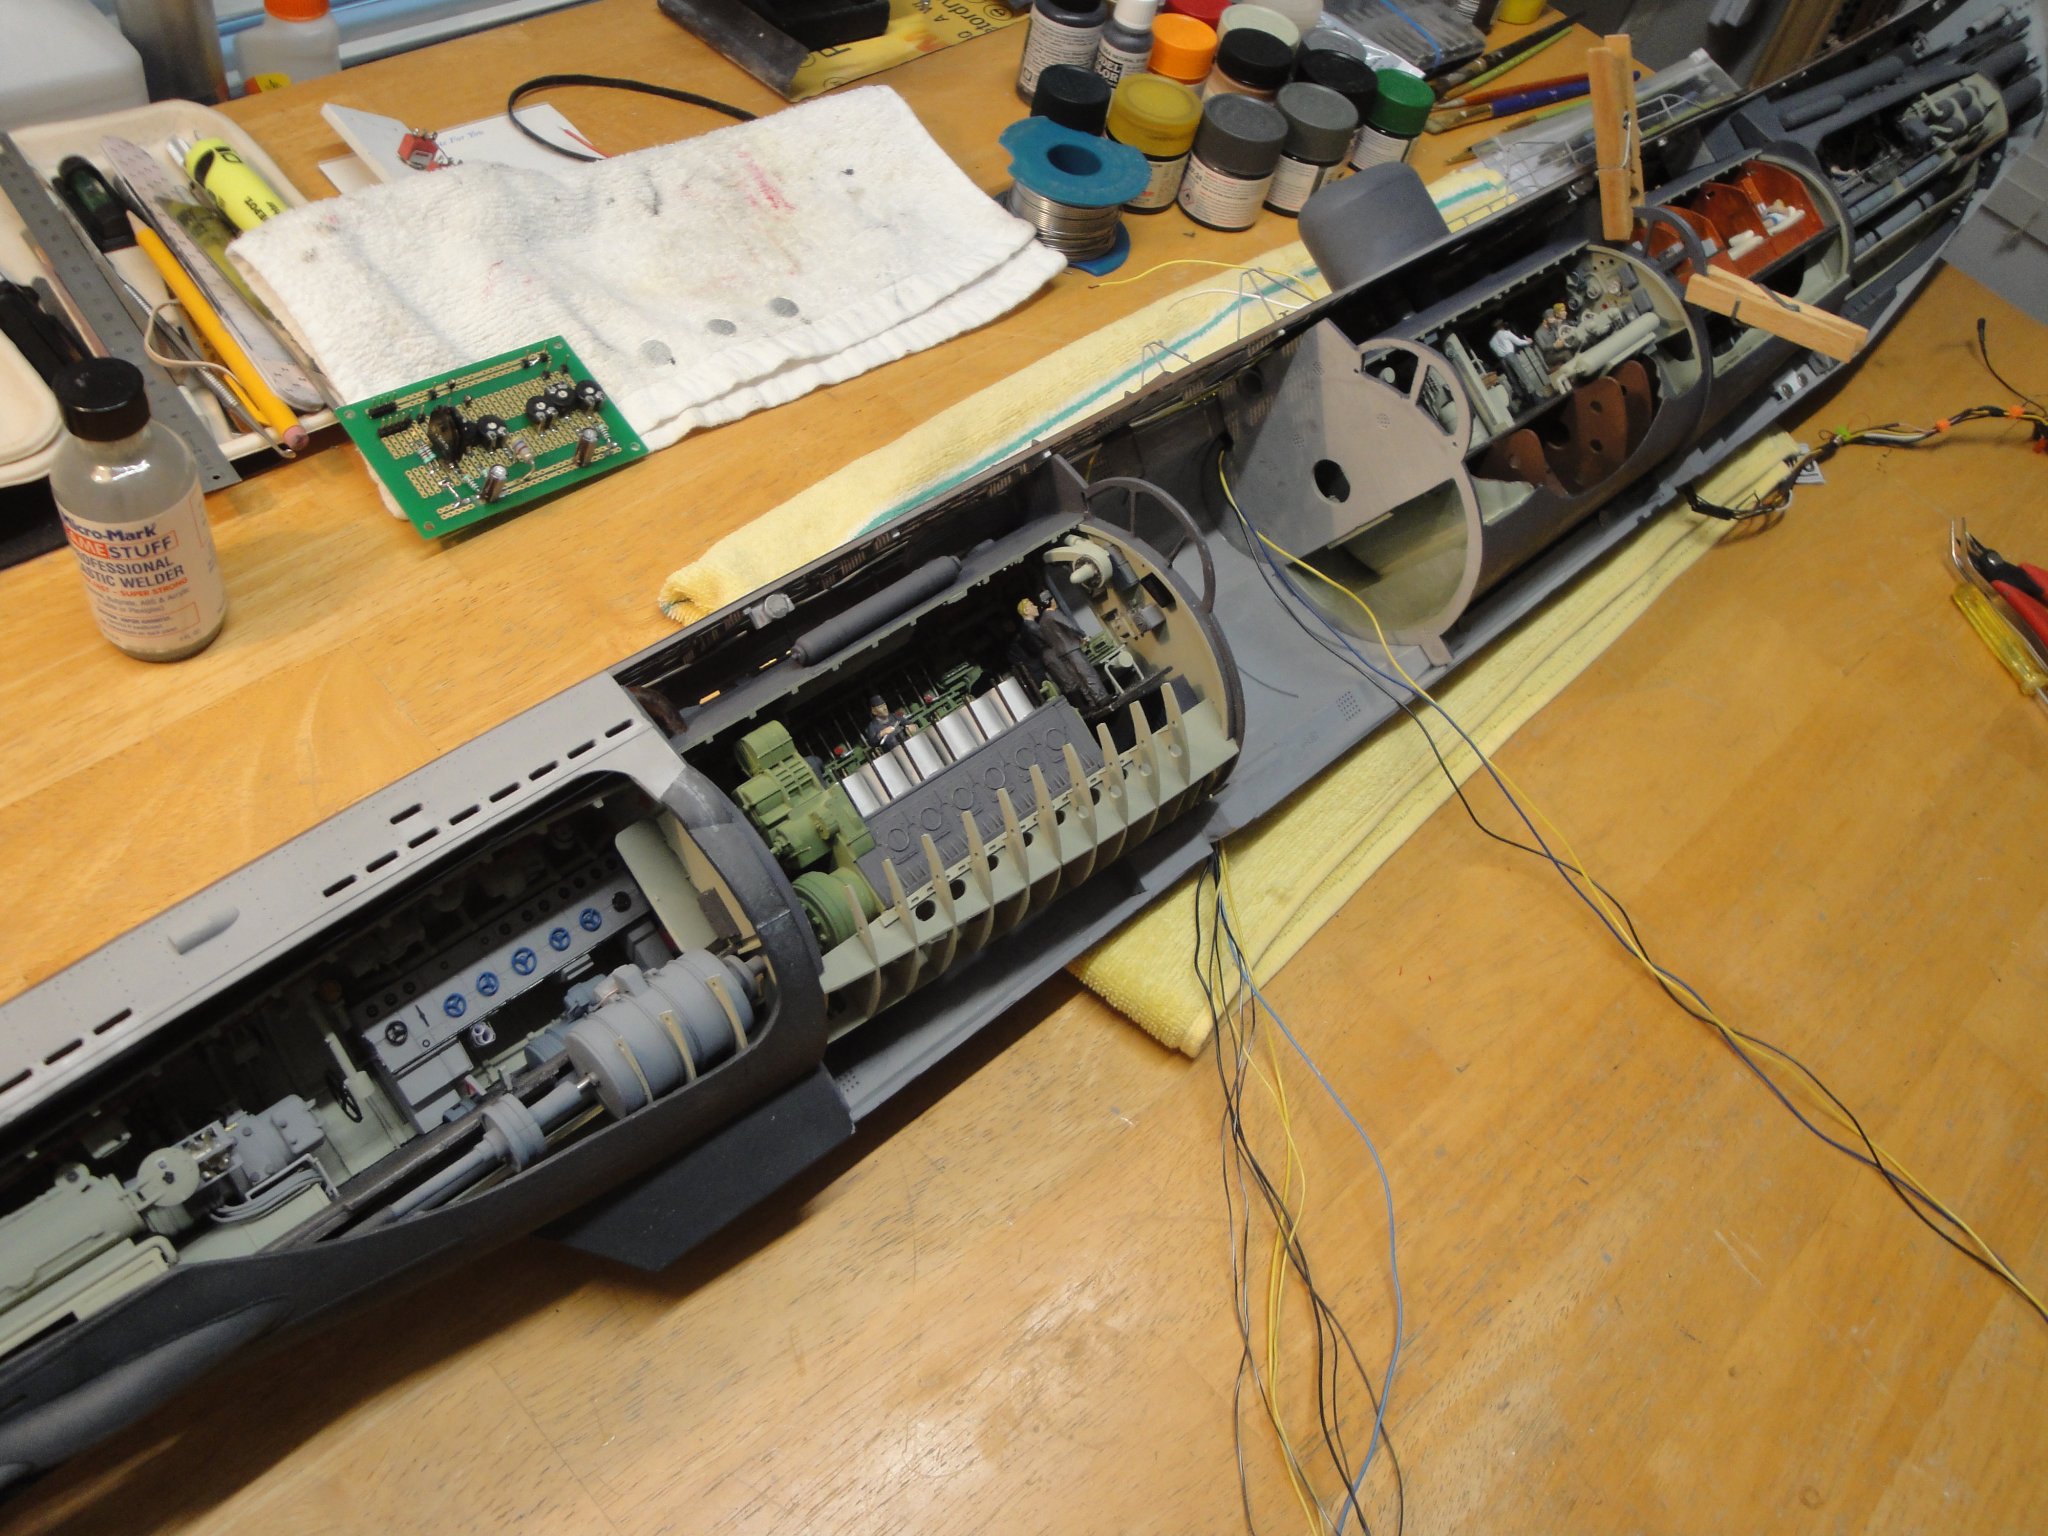
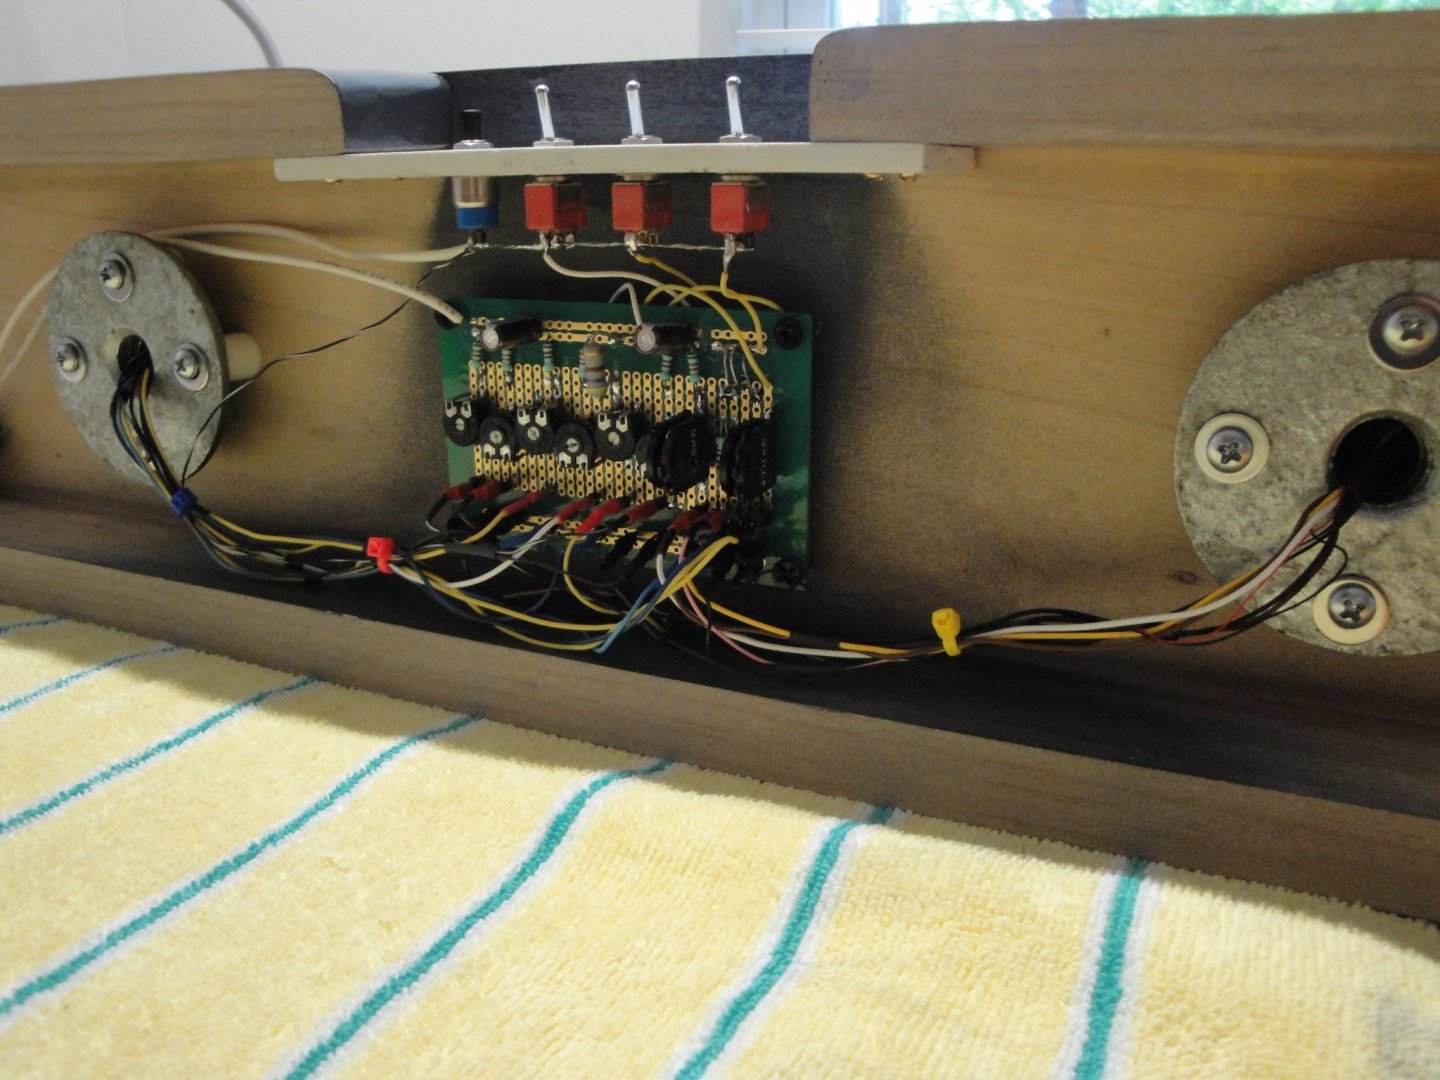
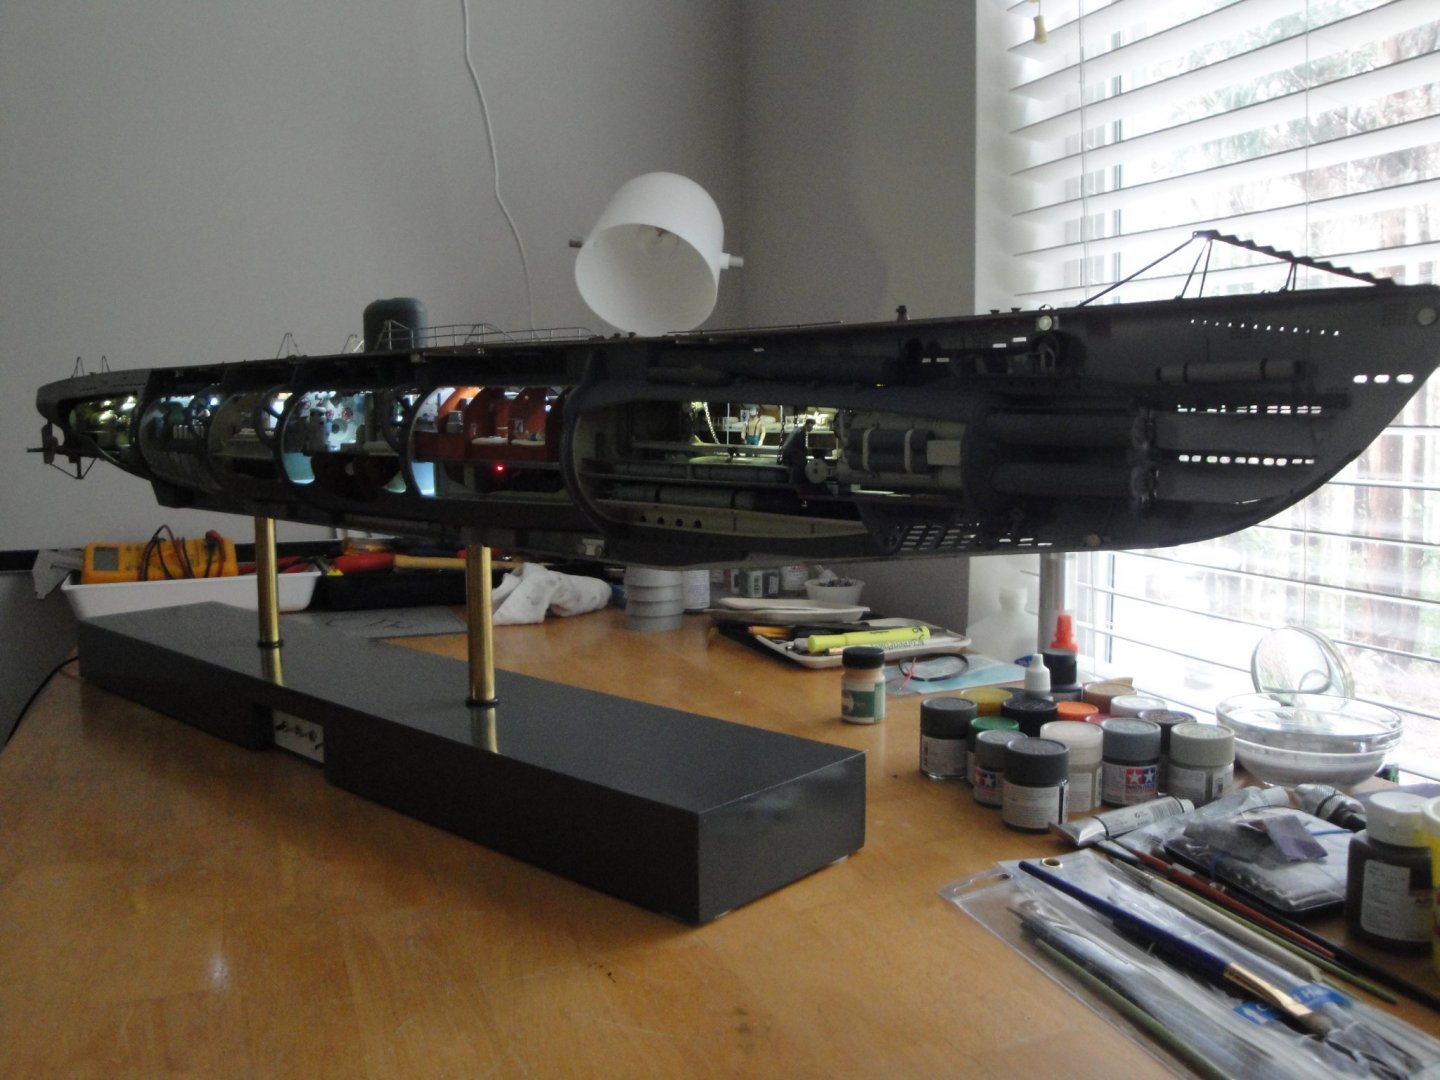
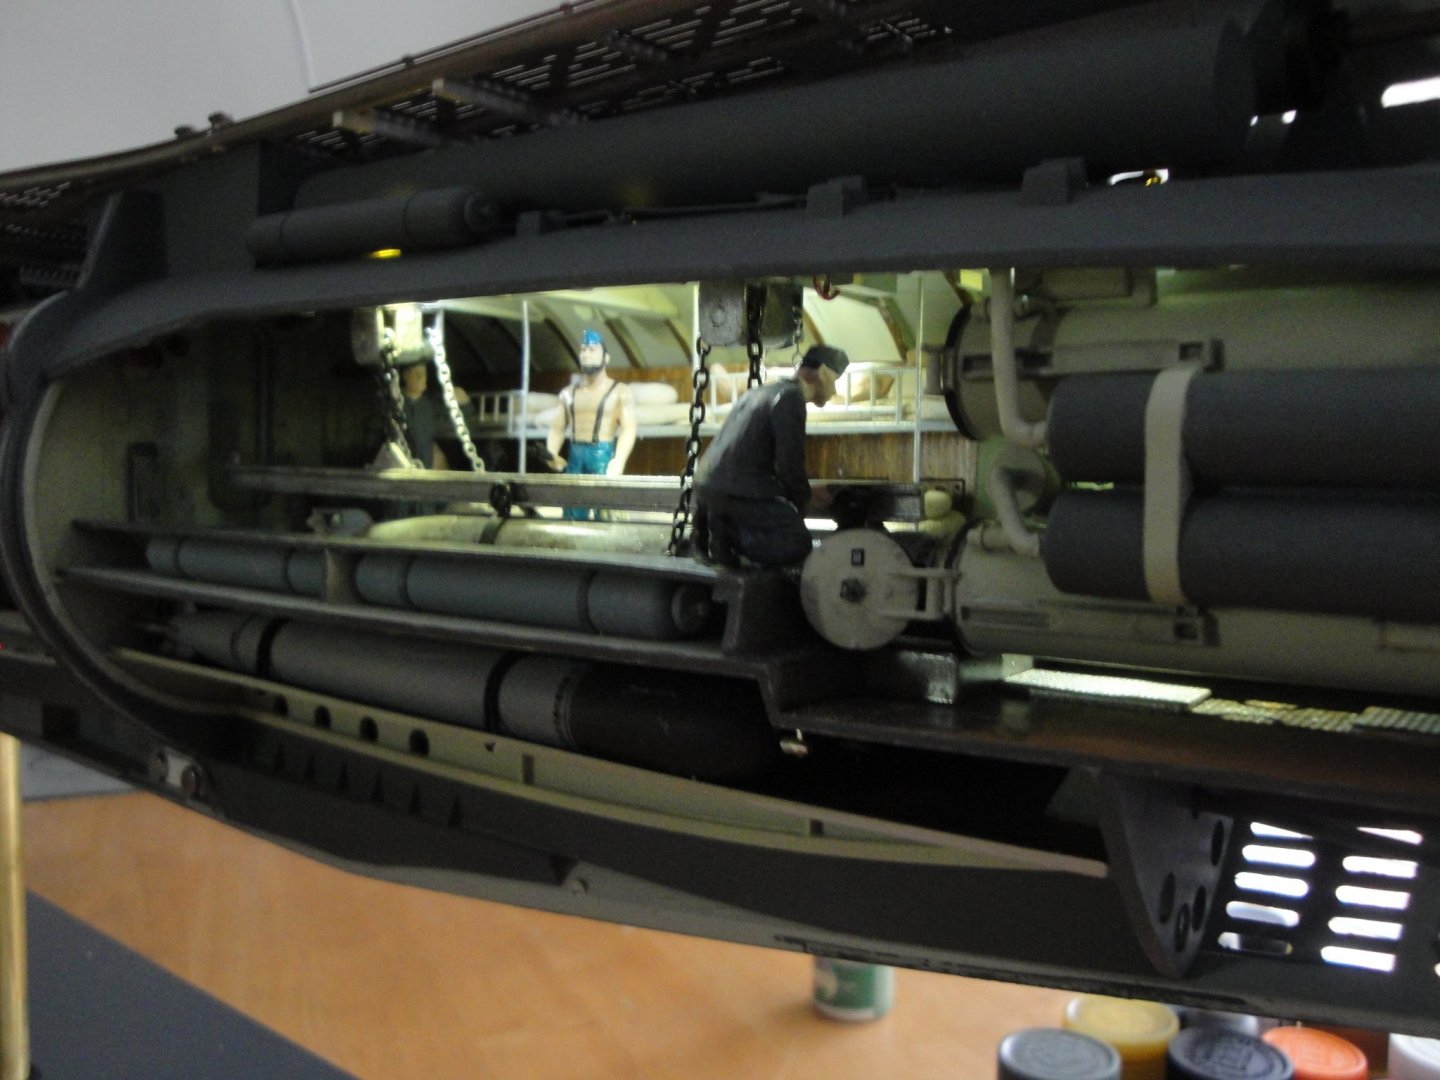
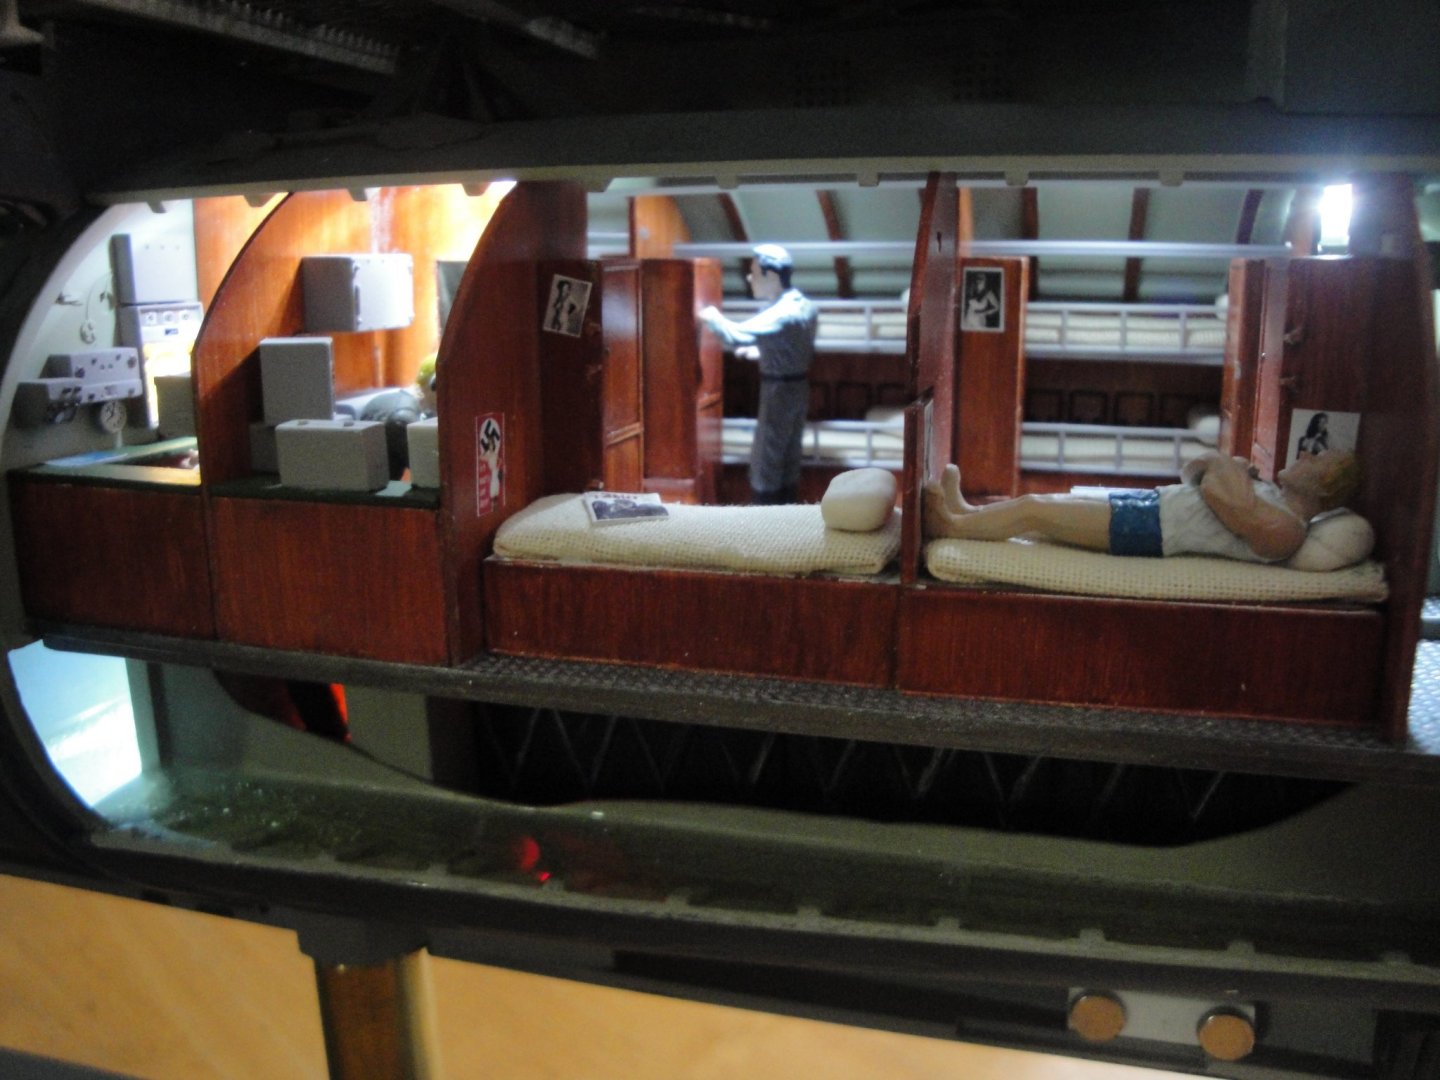
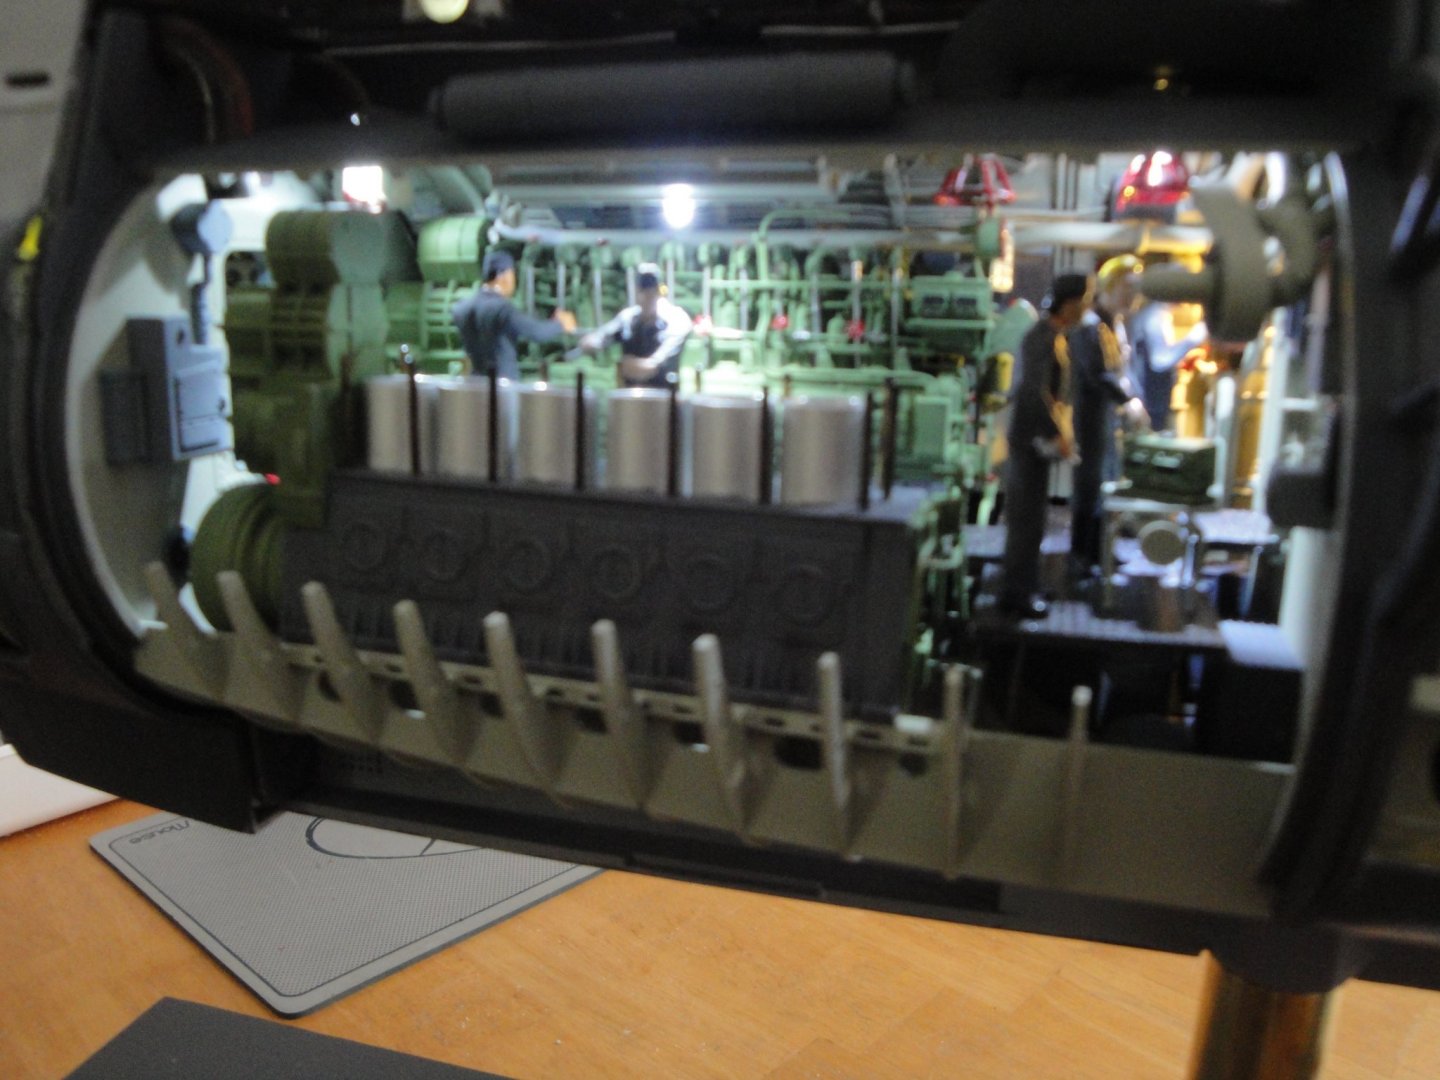
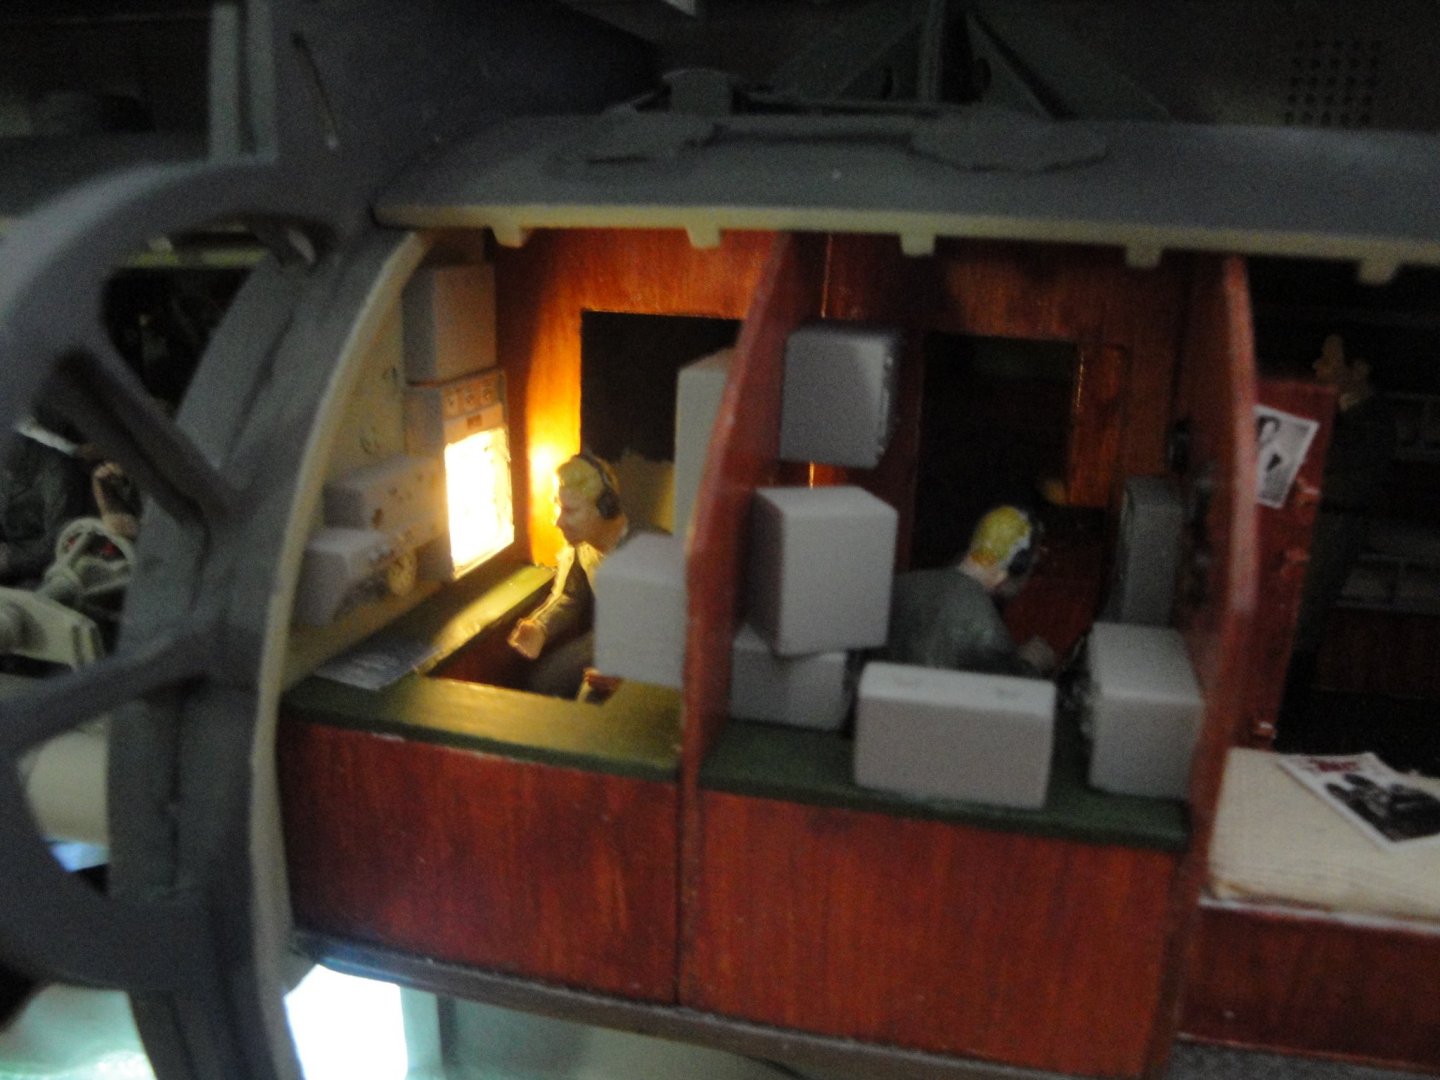
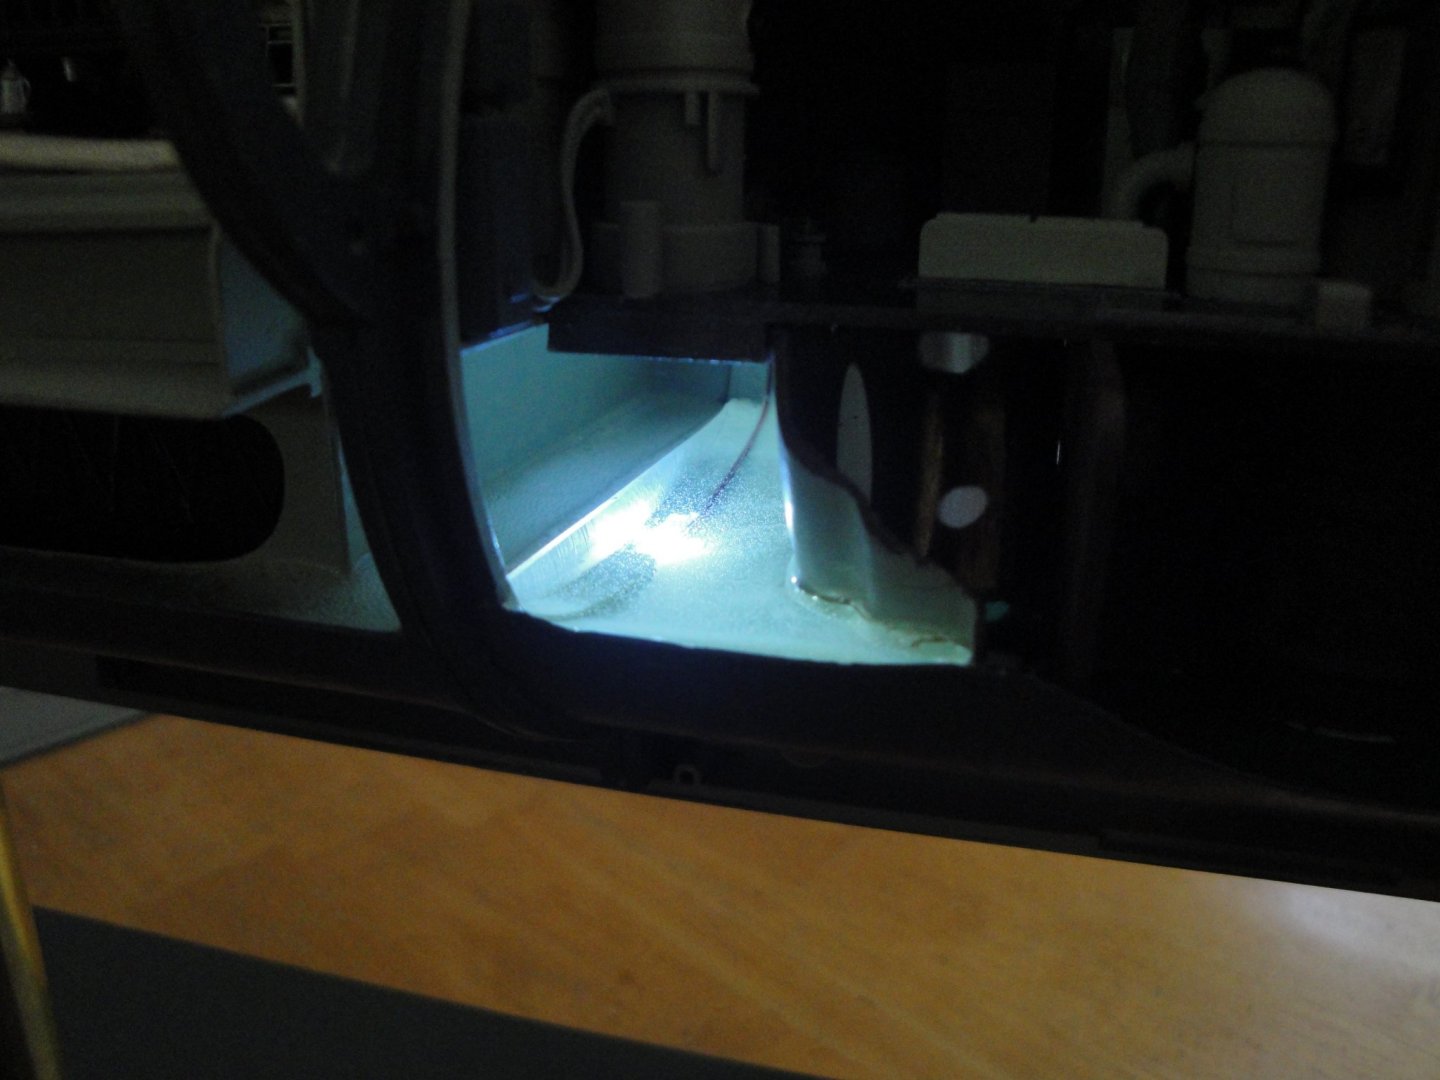
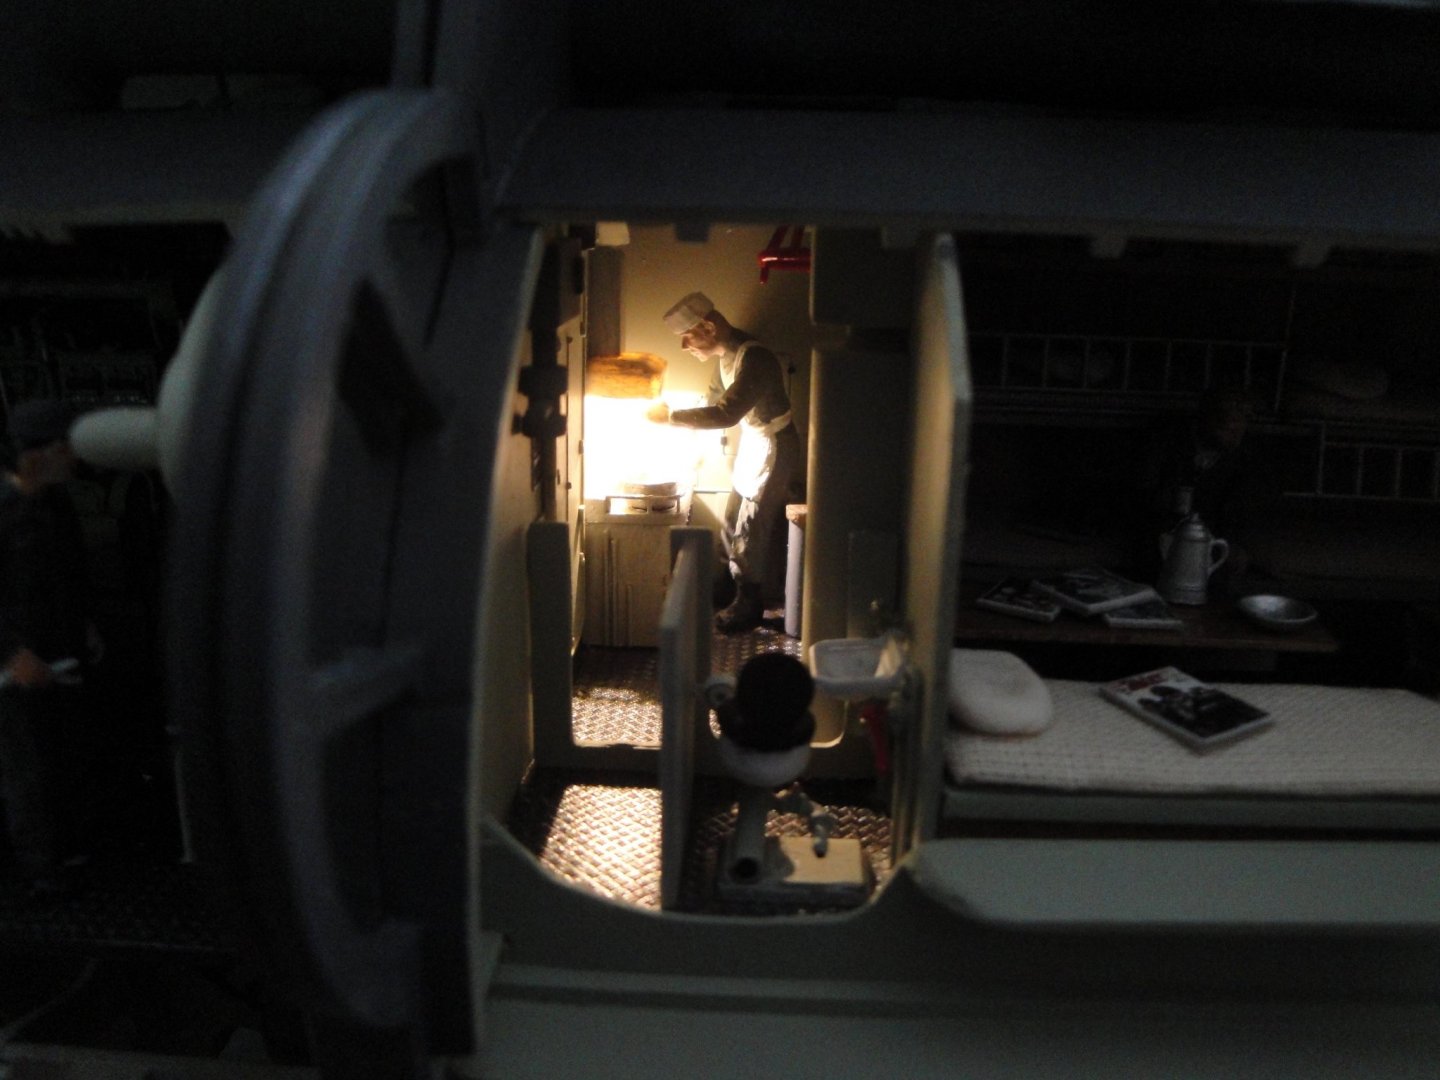
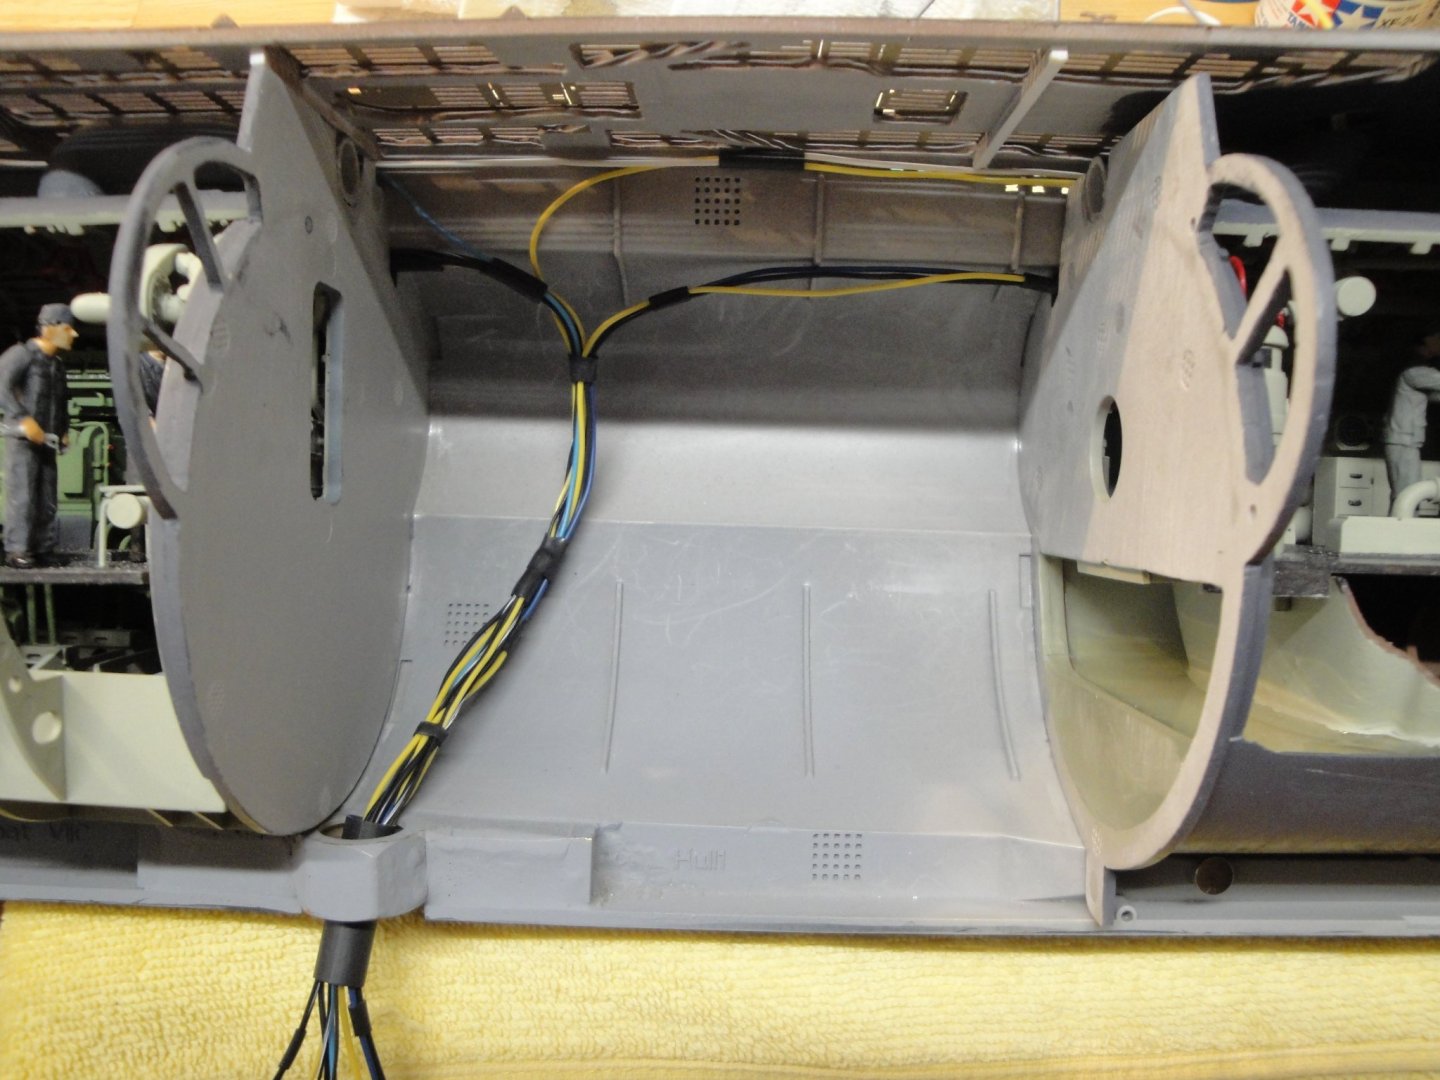
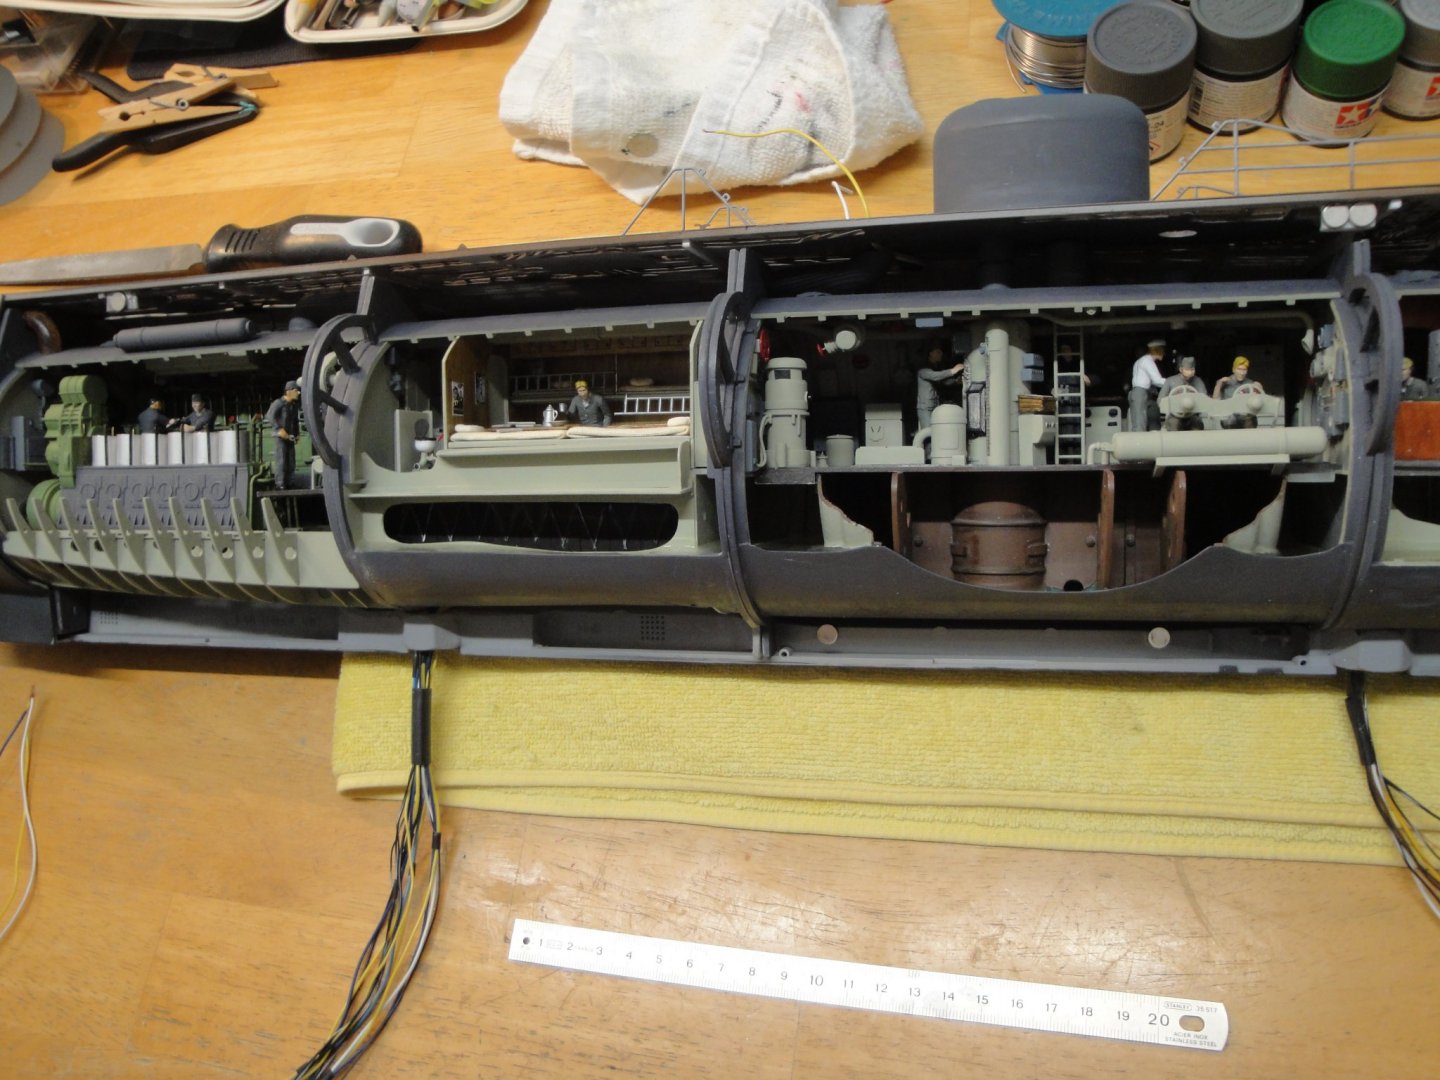
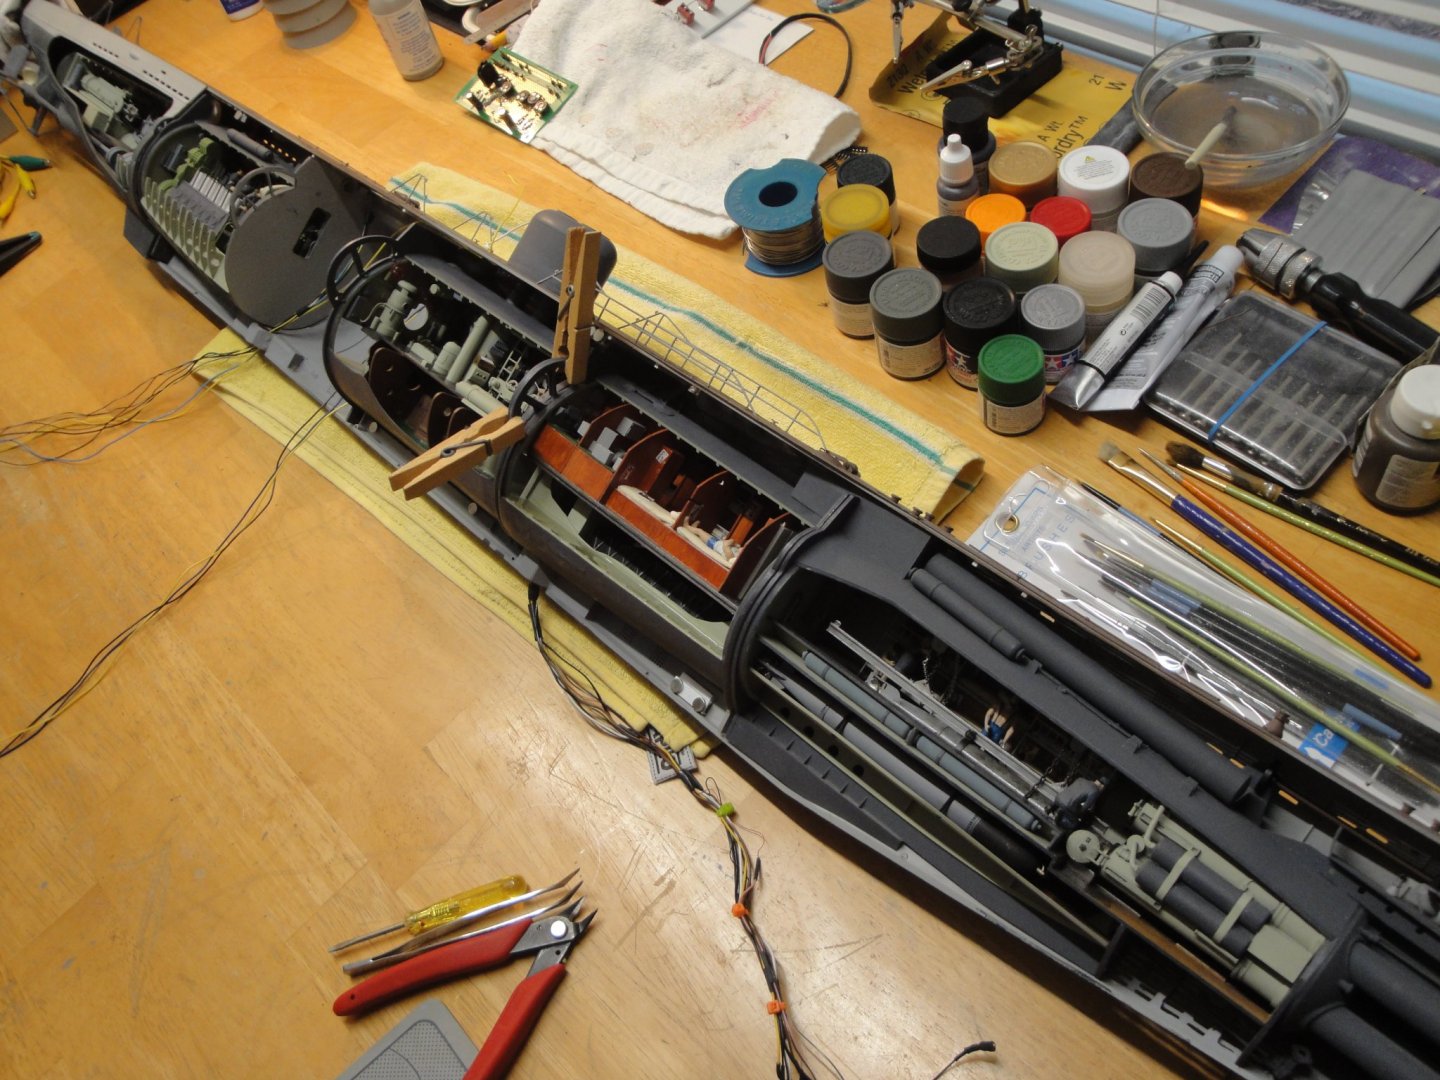
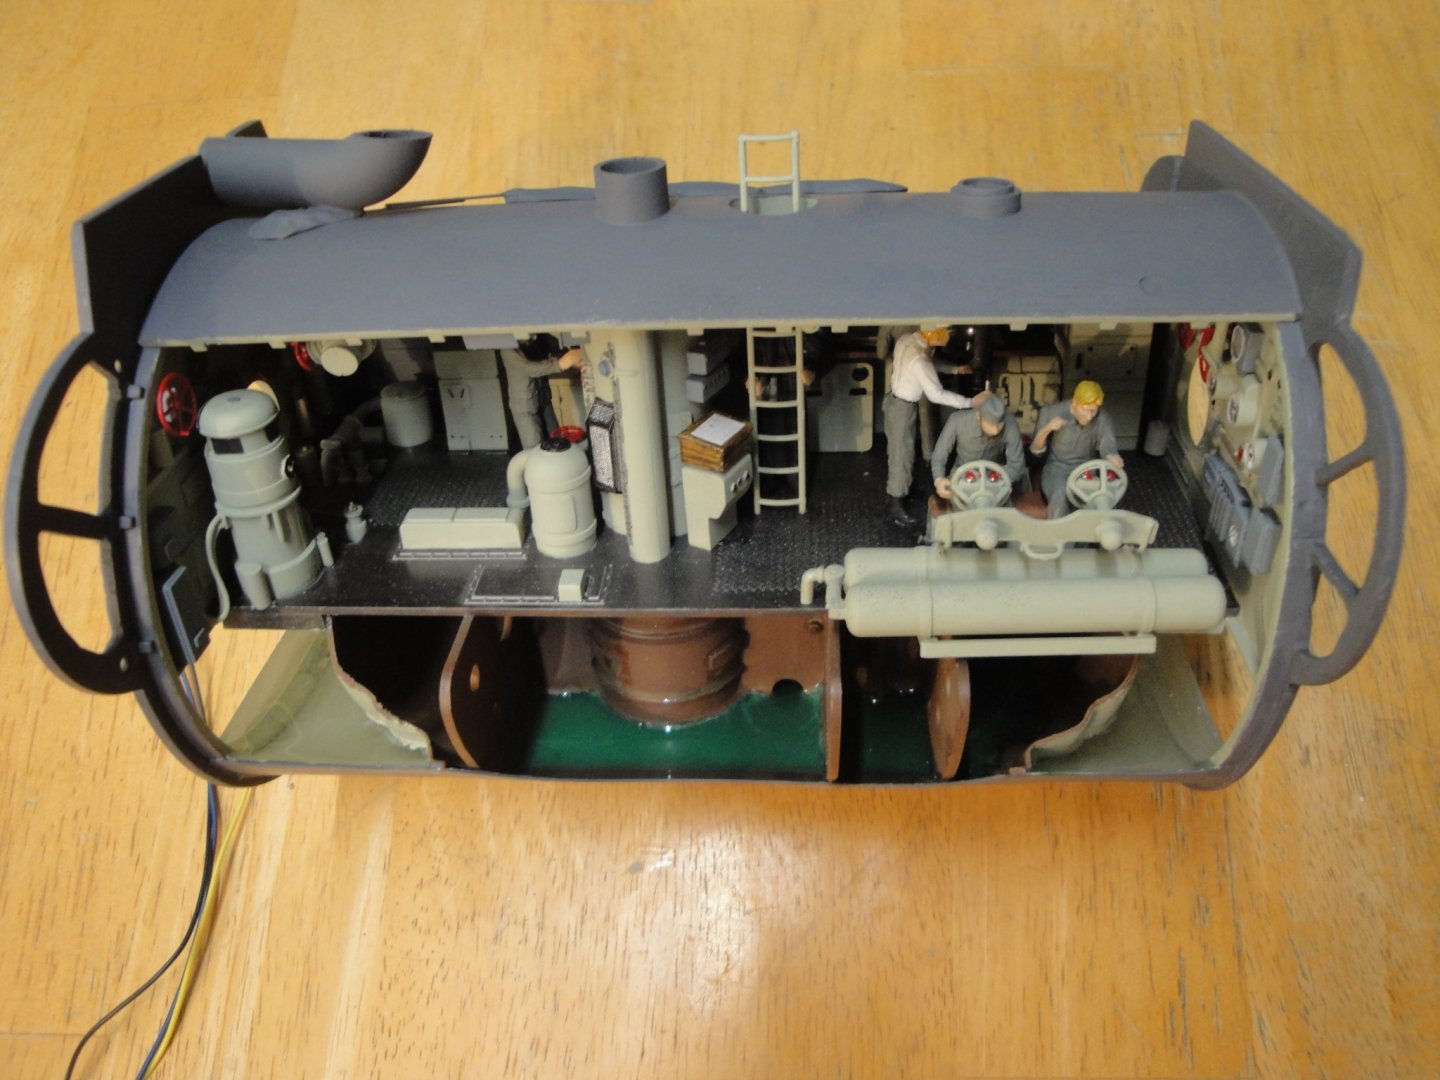
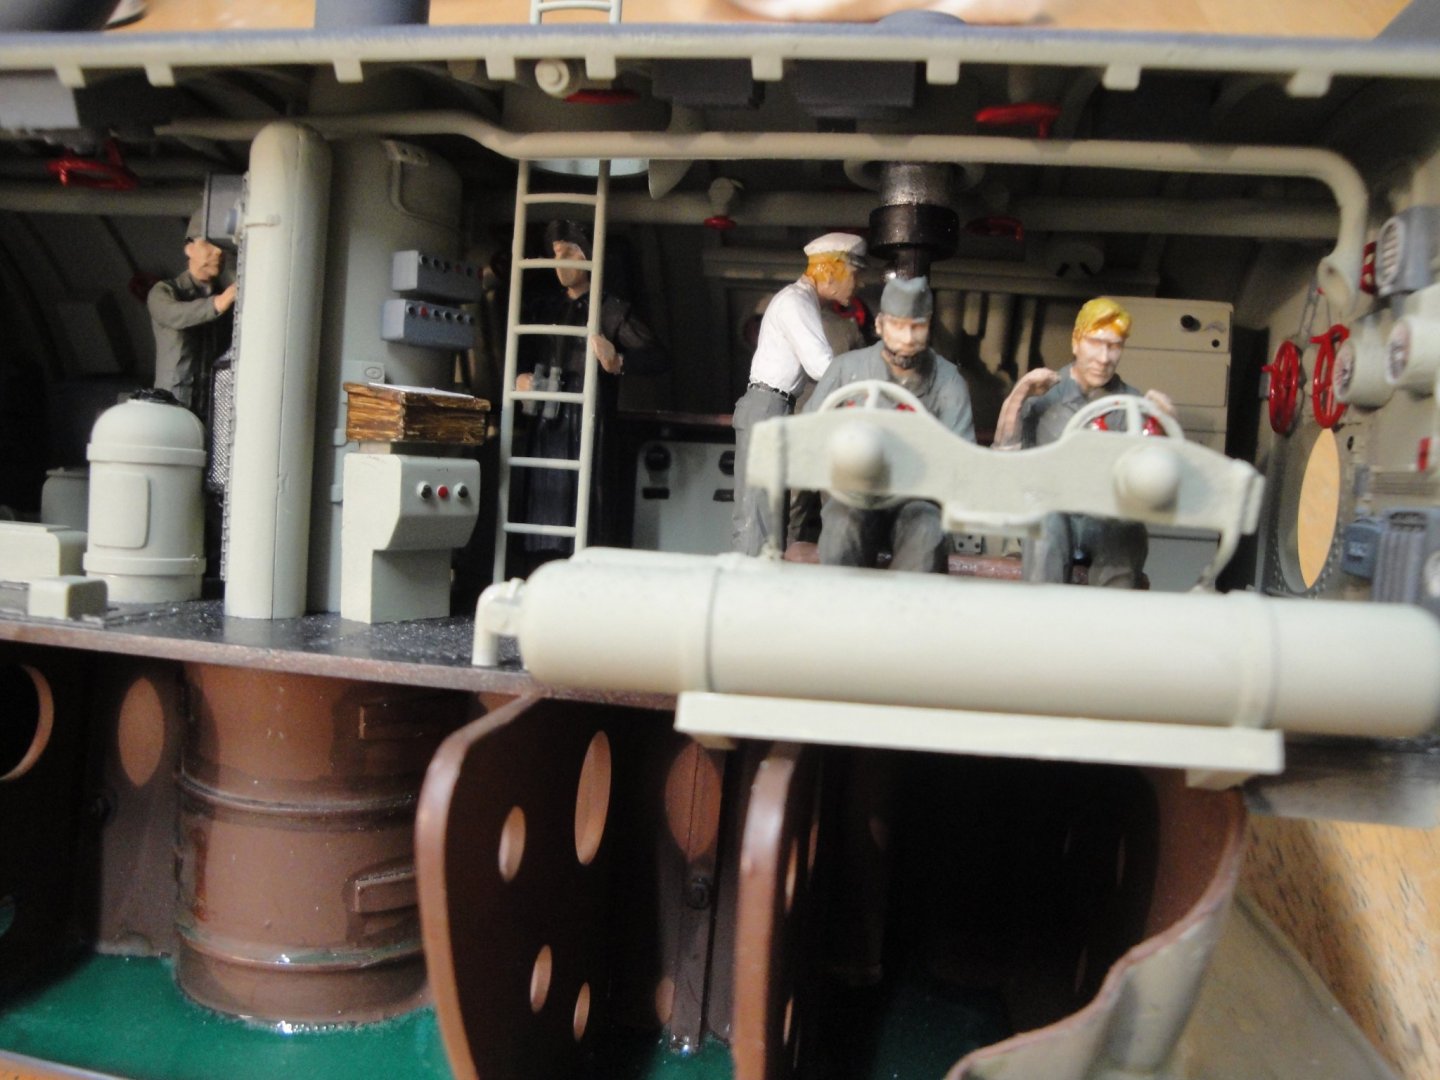
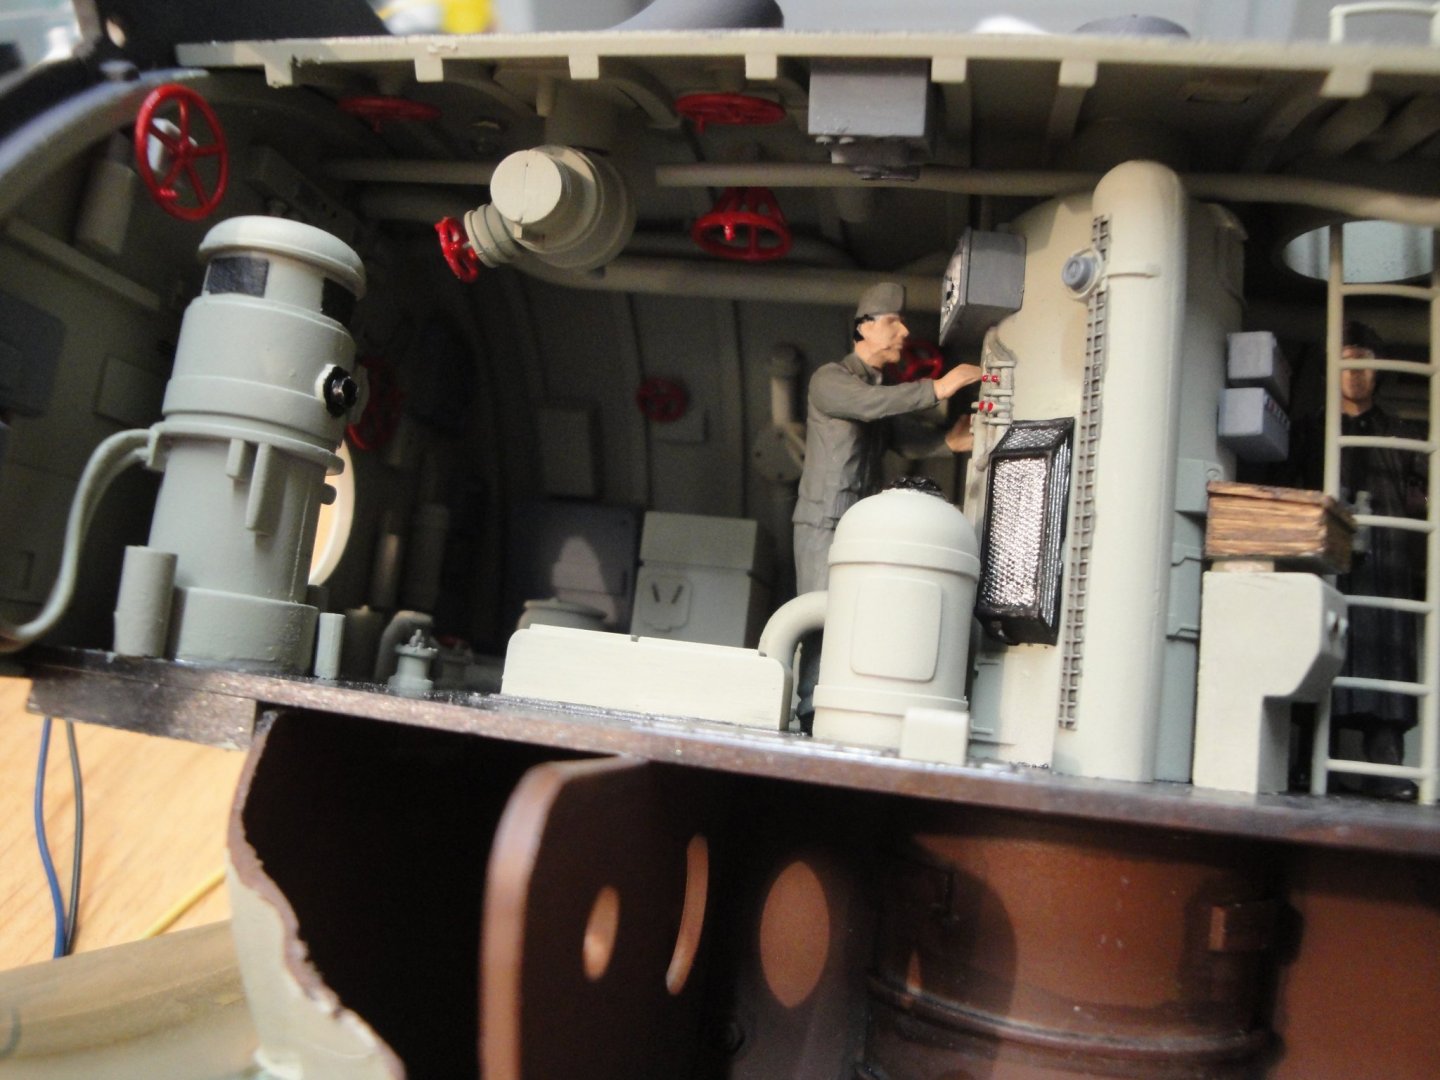
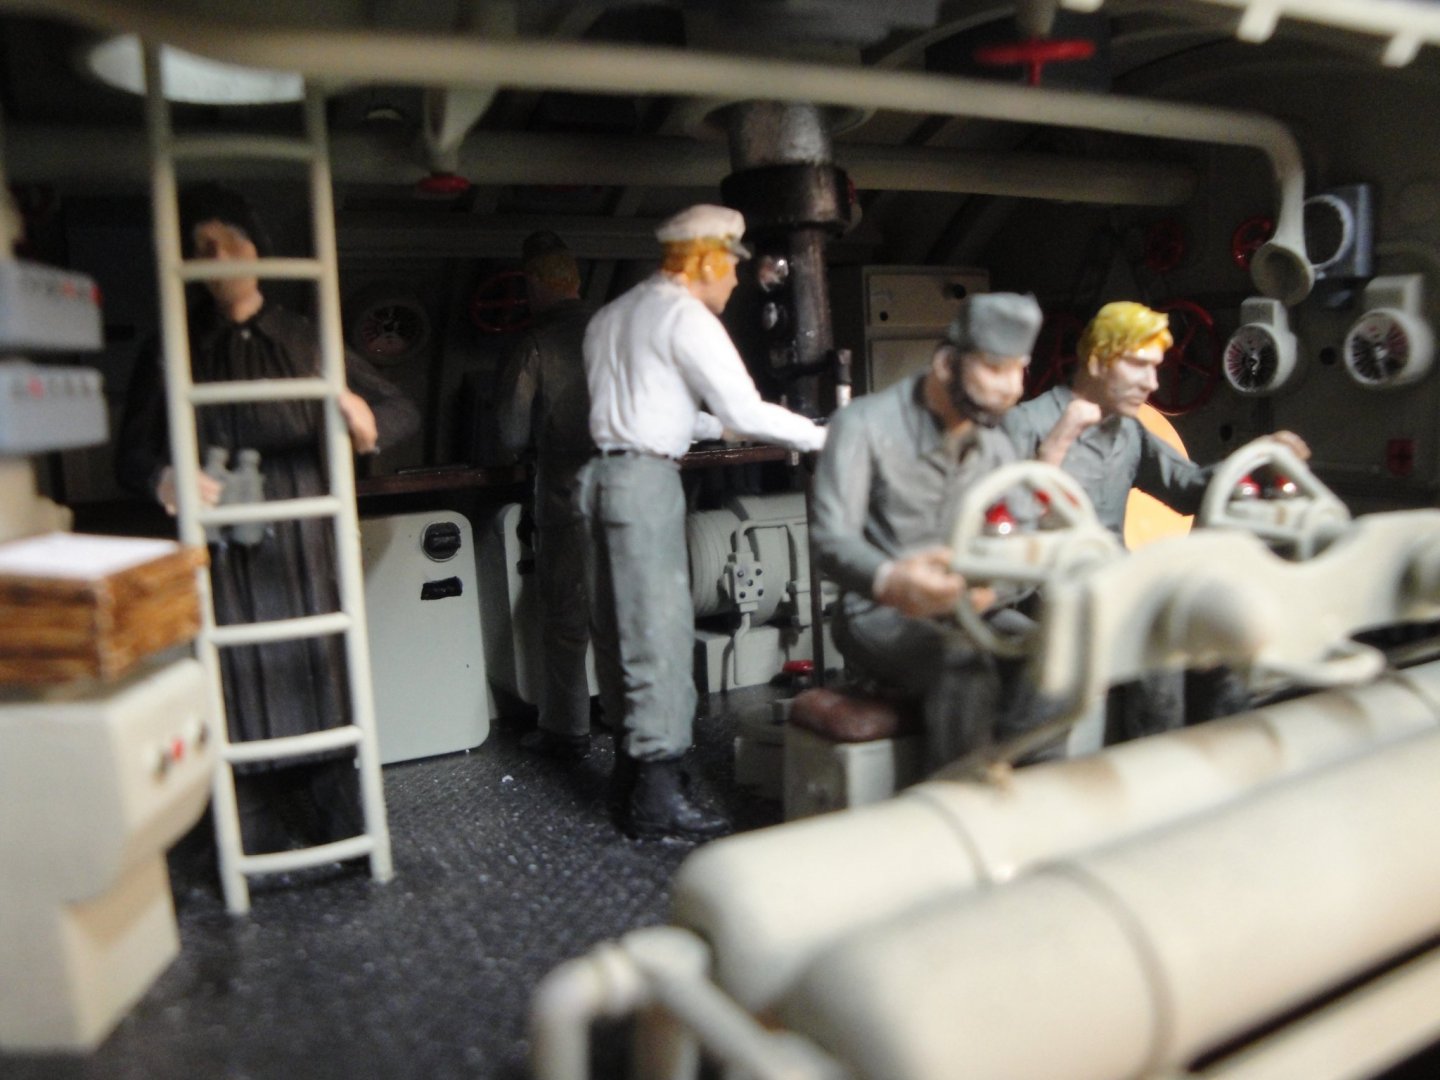
Thank you so much for all the encouragements, the "Thumbs Up" and the support. Today was a major milestone with the completion of the electrical circuit: As you can see, we do have a lot of wires, connectors and adjustable resistors. Everything works, which is refreshing: First, the lights circuit: Then some special features: Display in the Radio Room.... The Sonar screen died during the construction :-( The dangerous job of checking electrolyte levels in the Batteries room. Fuel tanks lighted under the Kontroll Room. The main ballast was supposed to have some light too, but the LED is obviously too weak to penetrate through the greenish water.... The rear batteries compartment. And the galley.... My camera does not cope very well with these light scenes and I will ask a professional to take some pictures, when the model is completed. It is a very large model..... There is still plenty of details to address and tons of work on the deck and conning tower. We are getting there....little by little. Yves


- 760 replies
-
- 30
-

-
Well, that is an enormous amount of work in addition to finishing up the outside of your model. Then, how will a visible see-thru hull will fit with your diorama? Yves
- 337 replies
-
- 4
-
-
- finished
- mountfleet models
- (and 1 more)
-
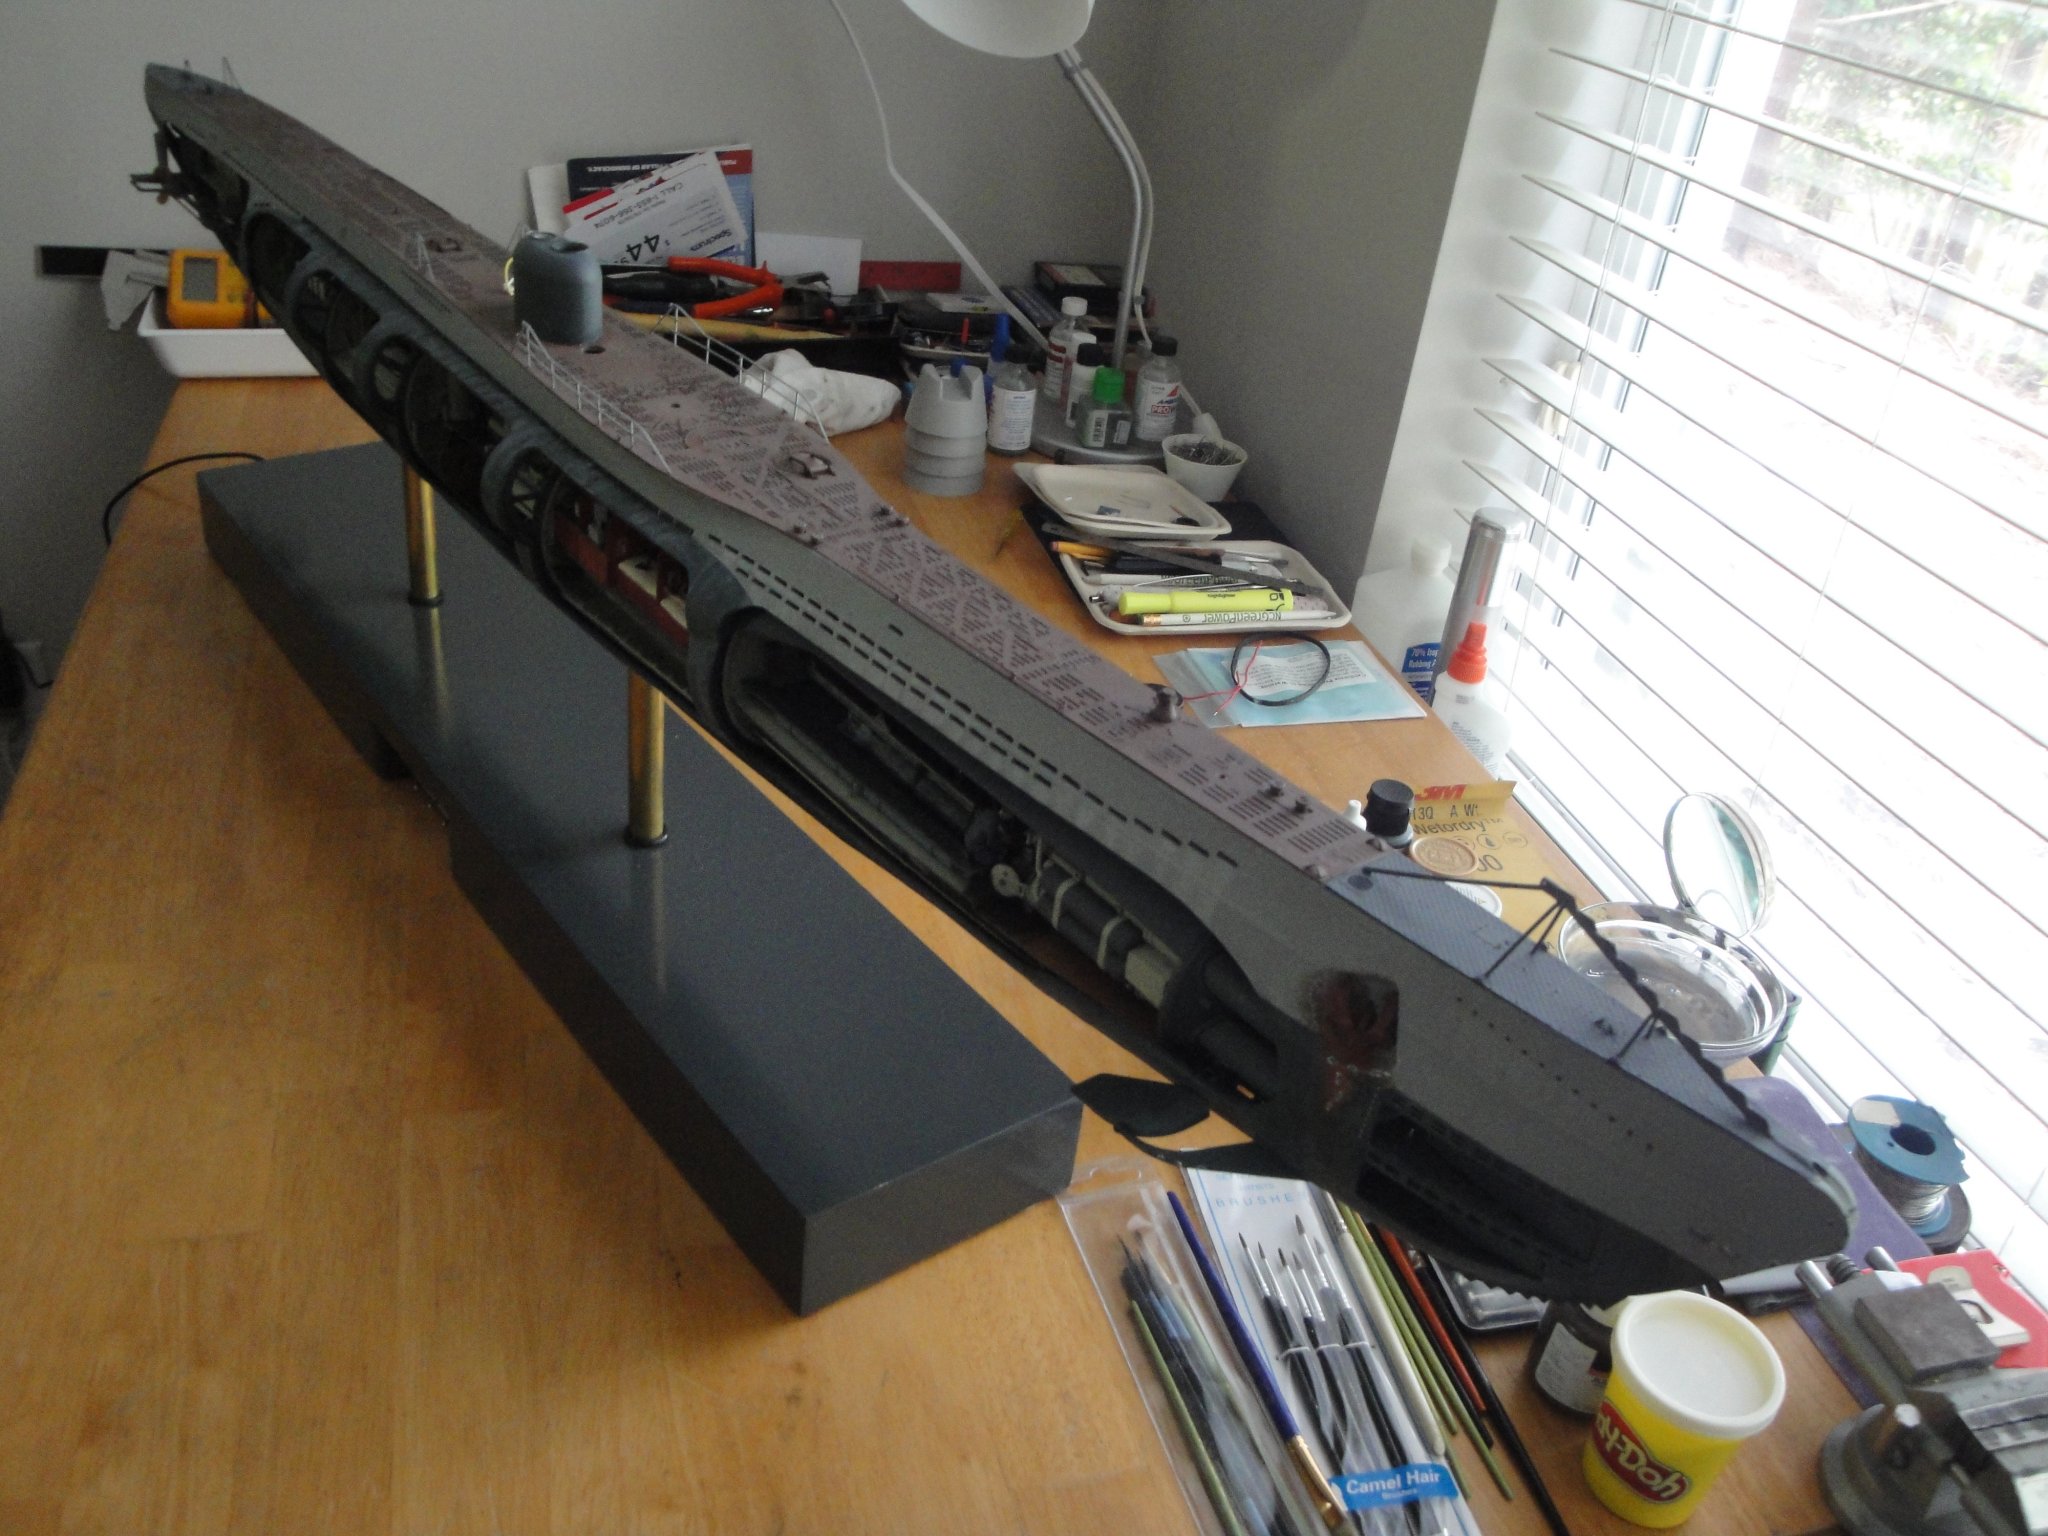
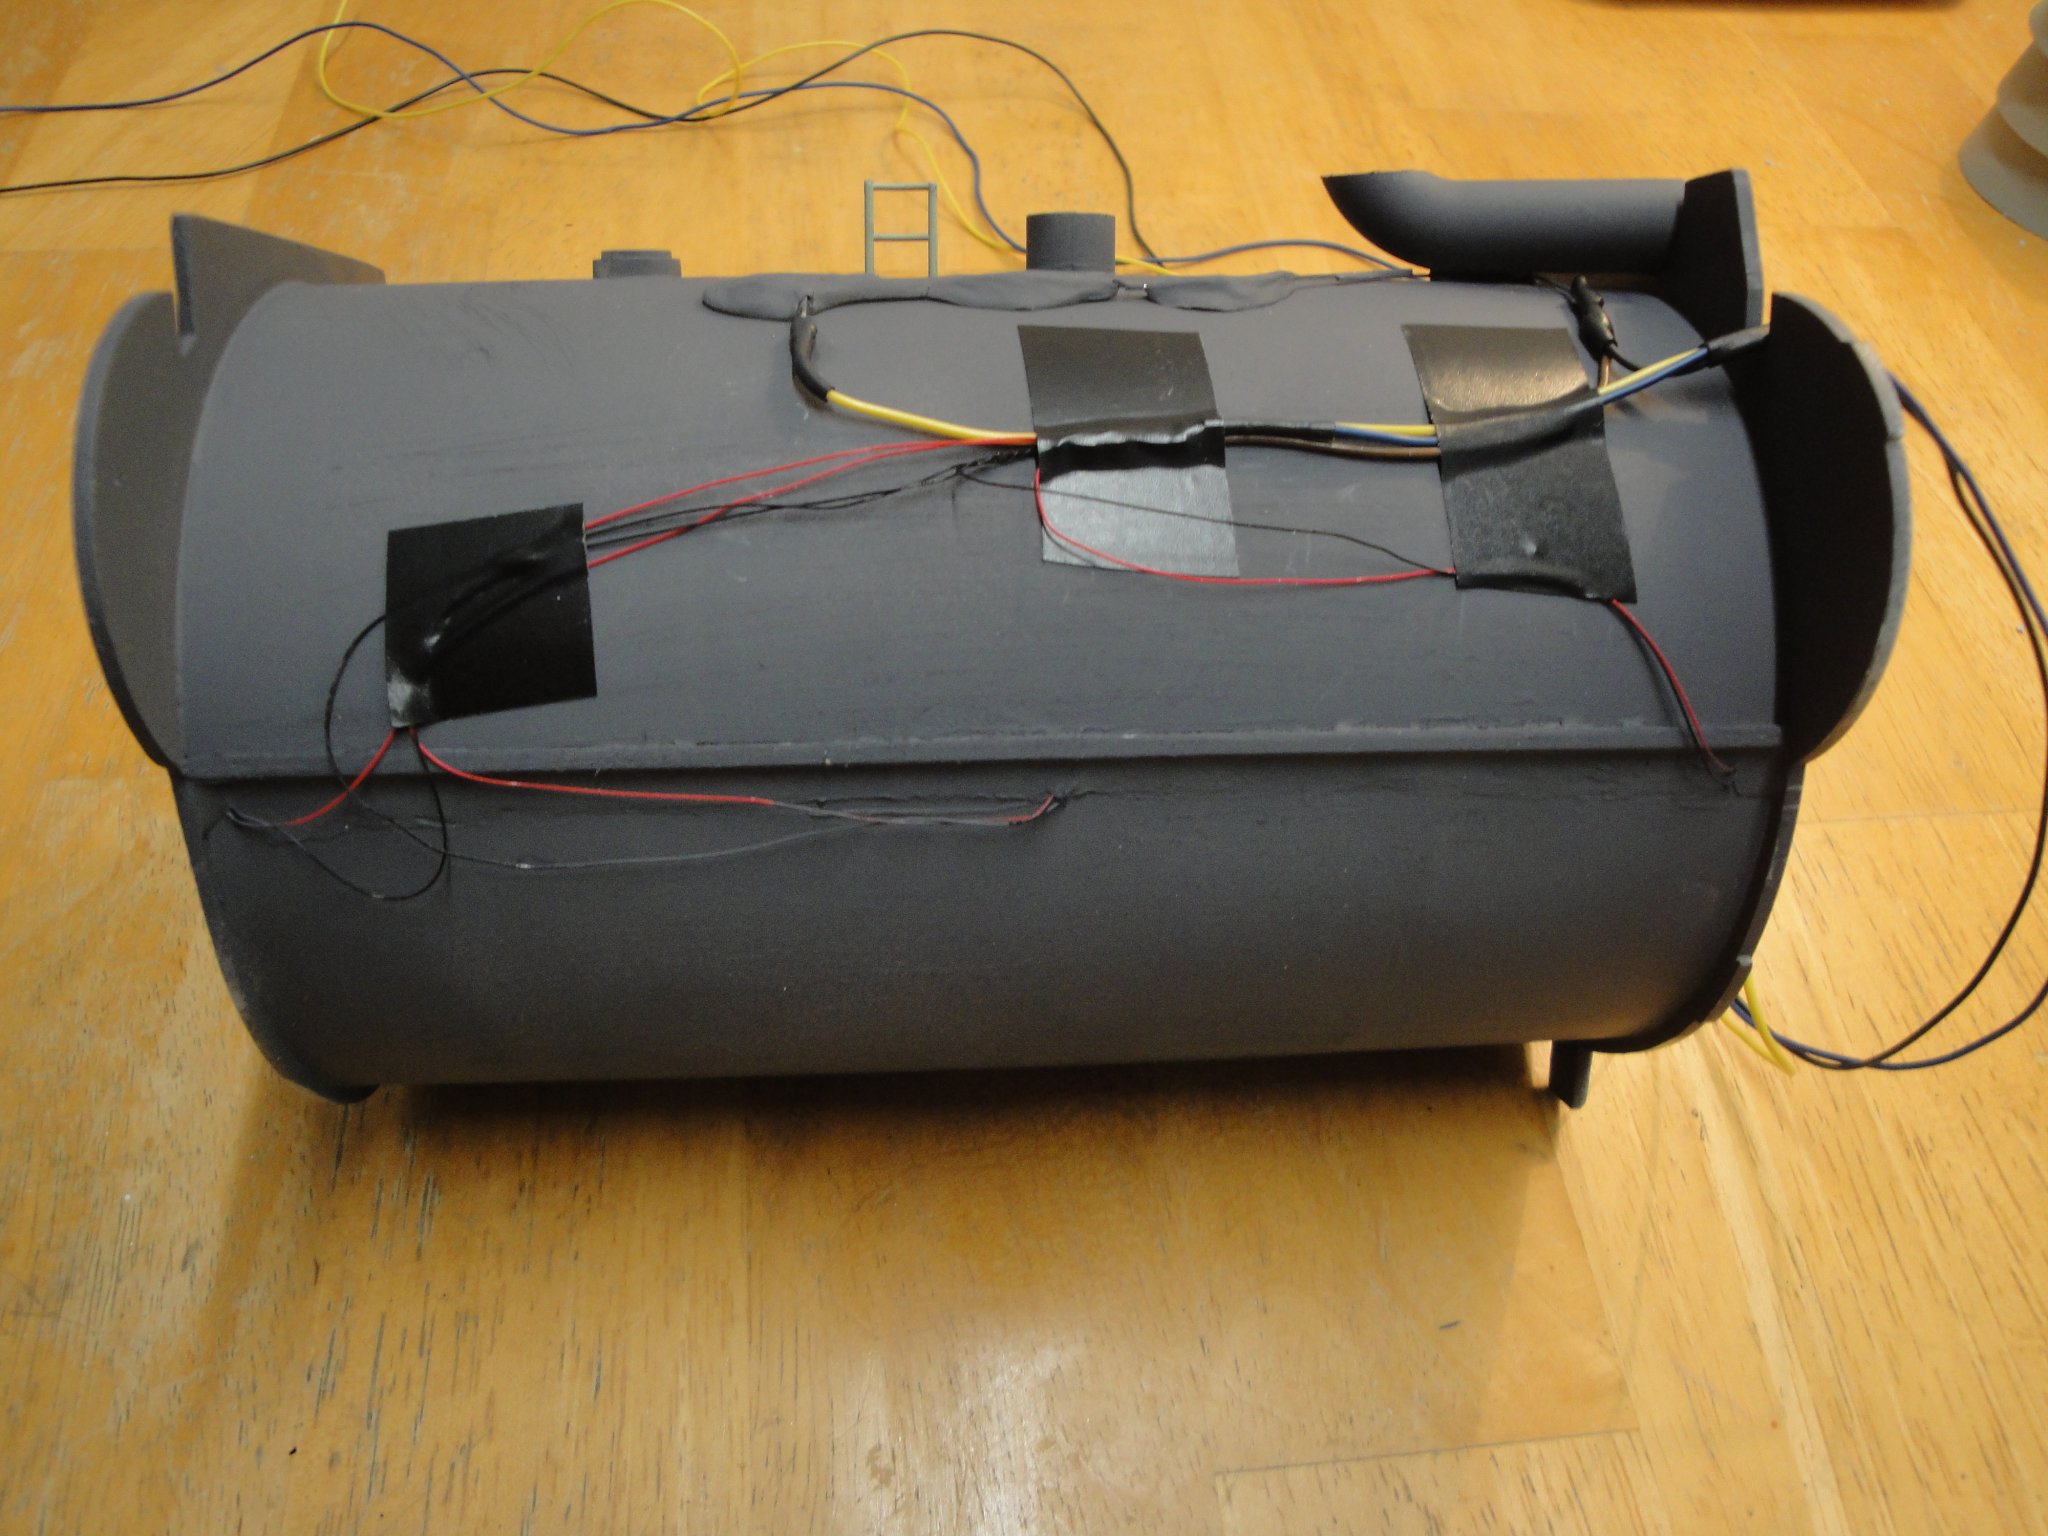
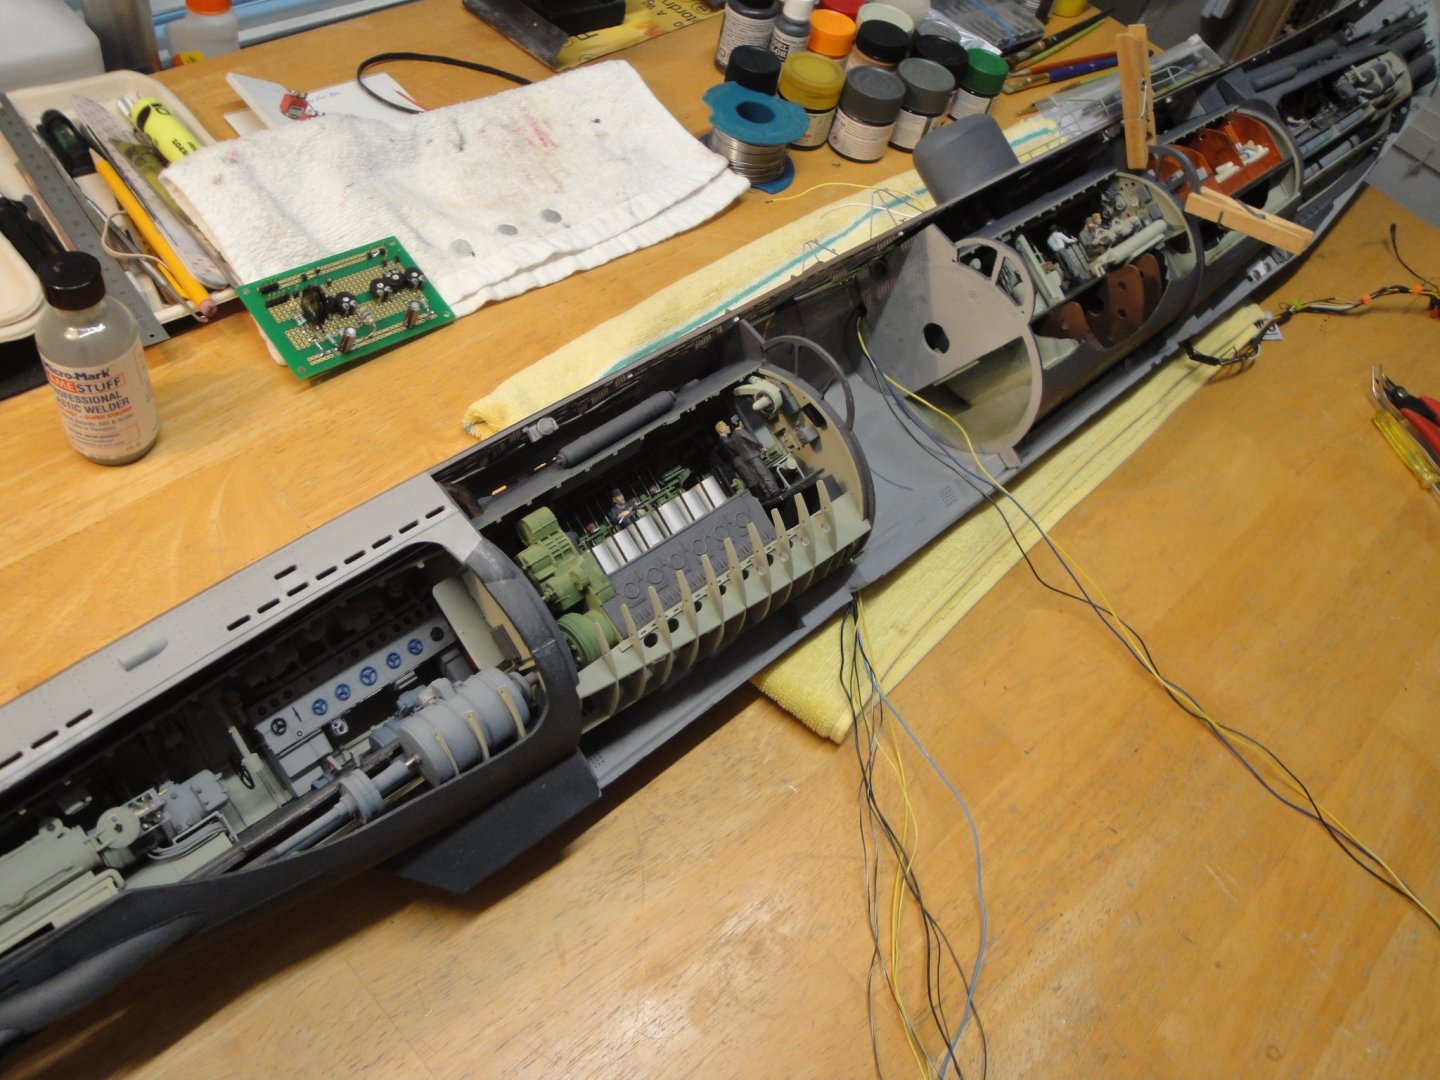
Almost there, yes. I am trying to finish a nice and reliable electrical circuit and to not get mixed up with all the wires: I am using a lot of heat-shrinking tubing to keep all the various circuits (modules) independent of each others. Finally, the rear batteries compartment module is inserted. I will not glue it, as it sits very tight and sandwiched between the others. It will allow me to access some of the wires if anything goes wrong one day. The enchilada is almost completed, at least for the inside of the hull. I still have to bring some modules to life by placing a few more crews, inside: Now, a lot of soldering remains to be done.... Yves

- 760 replies
-
- 23
-
-
Brian, Having a Build Log is wonderful for so many reasons: - It creates an interesting story for those that will never build the model but have a strong interest for it. - It is a wonderful repository of recipes and information if you ever attempt to build the same model. - It is a fantastic motivation tool to keep going and to bring the model to completion. I know it does it for me. Your pride and your tenacity are being judged and you just cannot give up.... - It creates links to other people and is great place to exchange tricks and methods. I love this forum. Lots of great people on it and an incredible reservoir of skills and gifts. Yves
- 133 replies
-
- 3
-
-
- chaperon
- model shipways
- (and 2 more)
-
Superb model and excellent conclusion of a very thorough Build Log. Yves
- 133 replies
-
- 3
-
-
- chaperon
- model shipways
- (and 2 more)
-
Citroen Traction Avant by kpnuts - FINISHED - Heller - 1/8
yvesvidal replied to kpnuts's topic in Non-ship/categorised builds
If I may suggest, there is a small round gasket all around the frame, where the two sides of the hood rest. This is to prevent the hood panels from rubbing against the body and damage the paint, while creating unpleasant noise. A wire of 1 mm or 1.5 mm would be perfect to recreate that fabric/rubber gasket. That model truly builds like the real car. Yves- 86 replies
-
- 10
-
-
This is adorable. What a great kit and a beautiful implementation. Yves
-
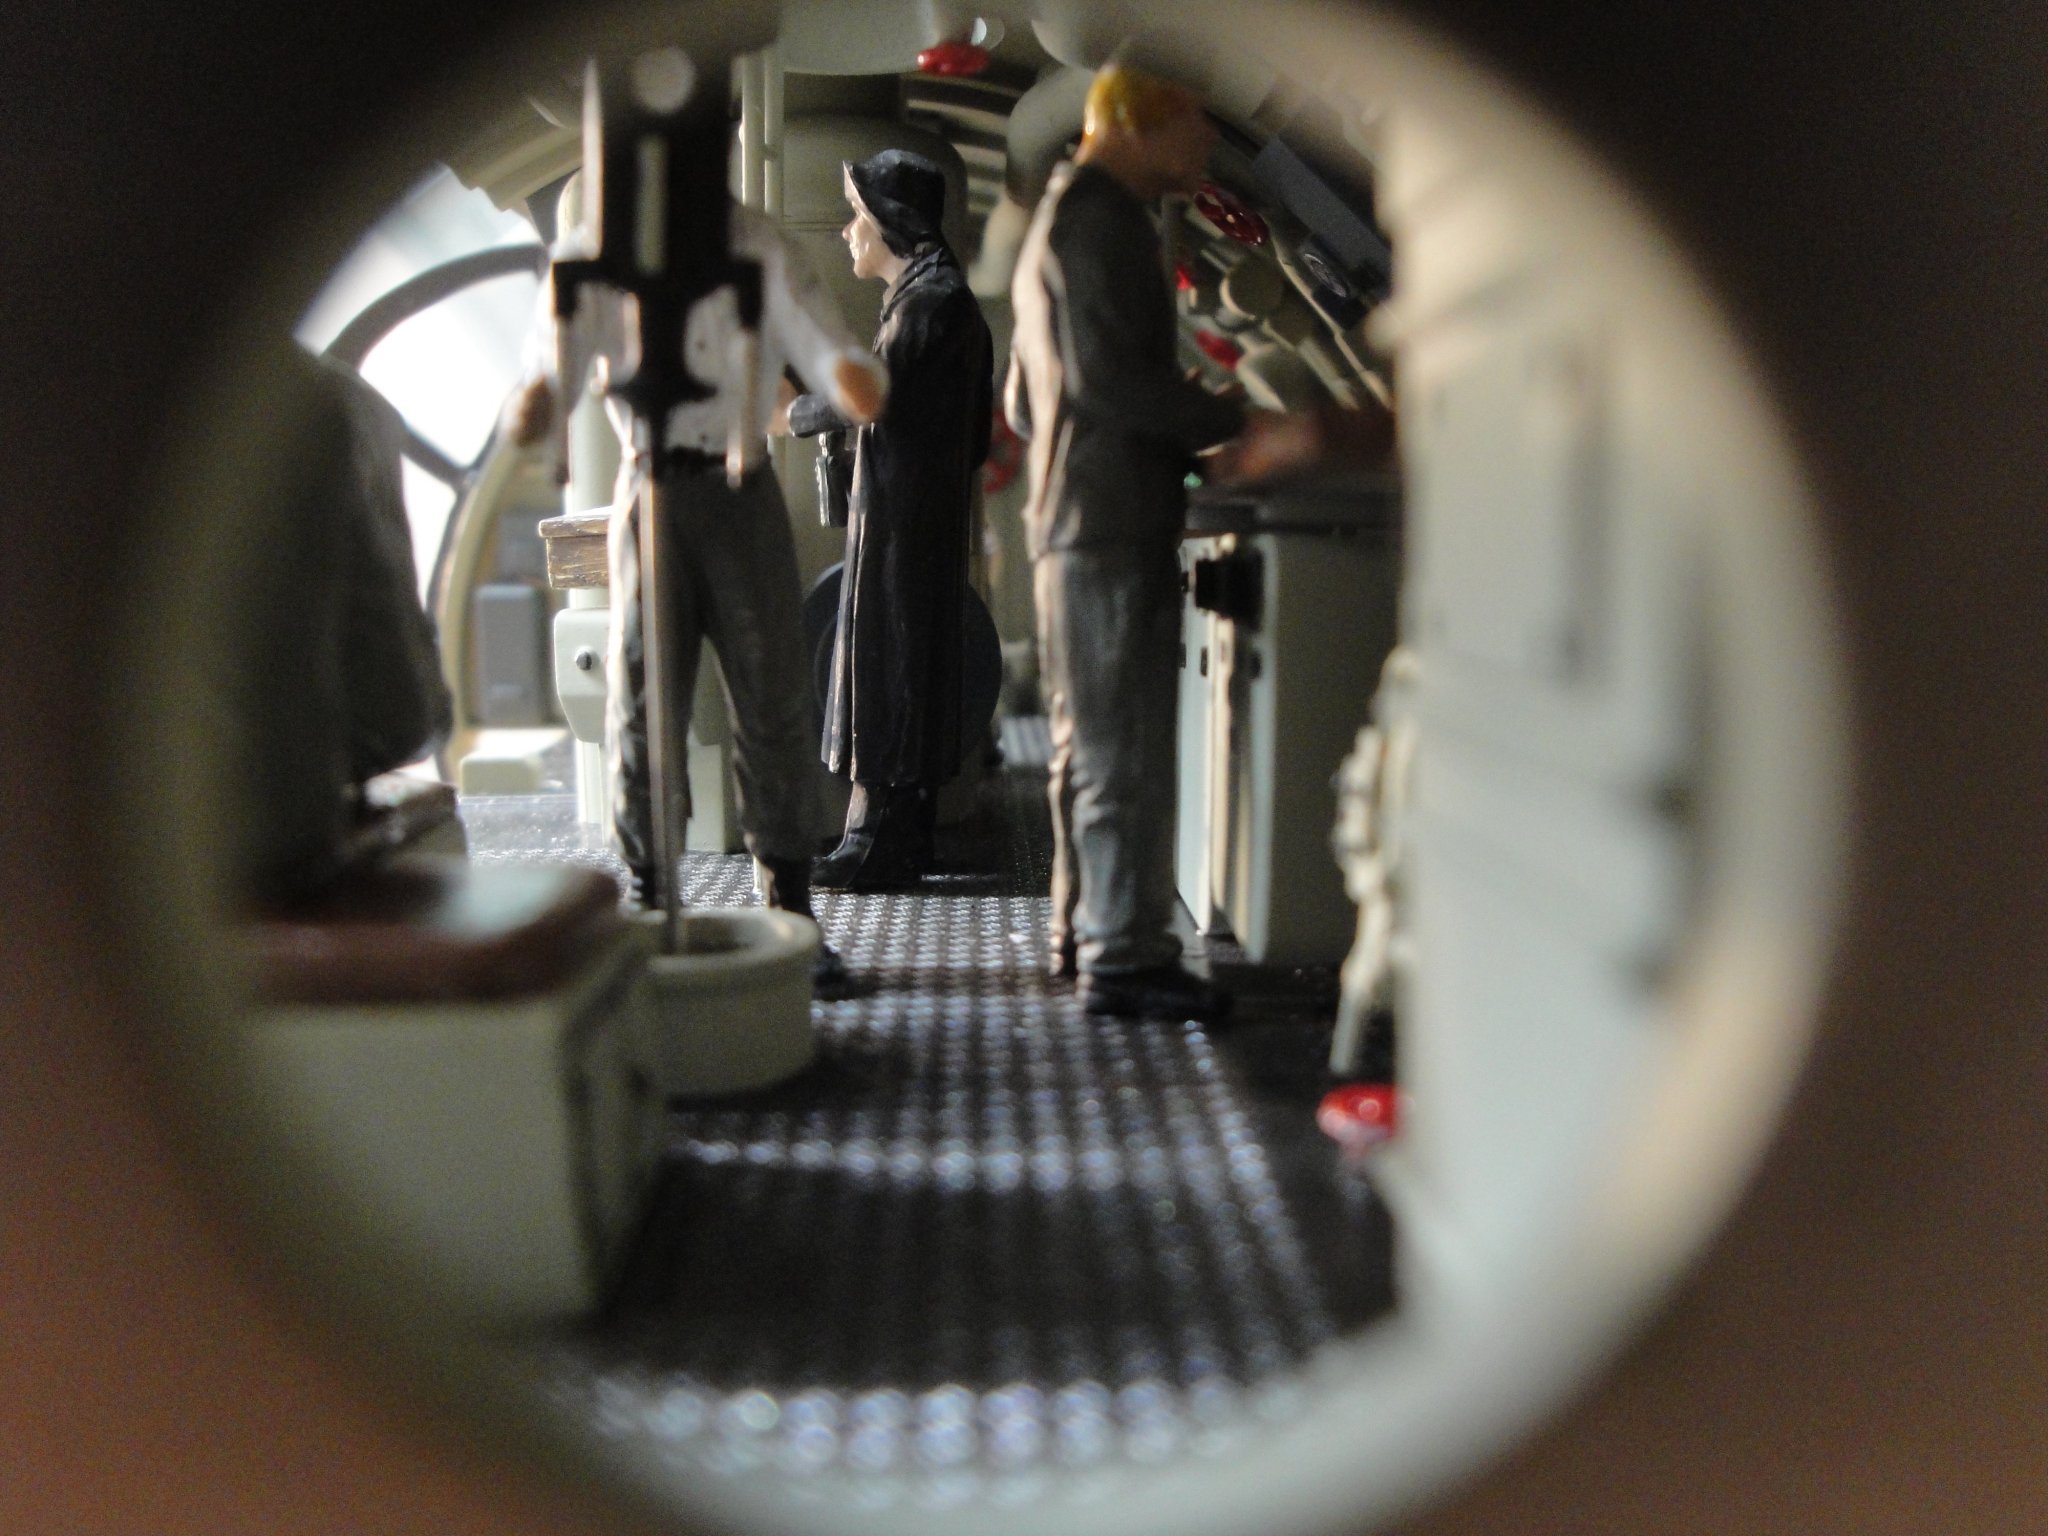
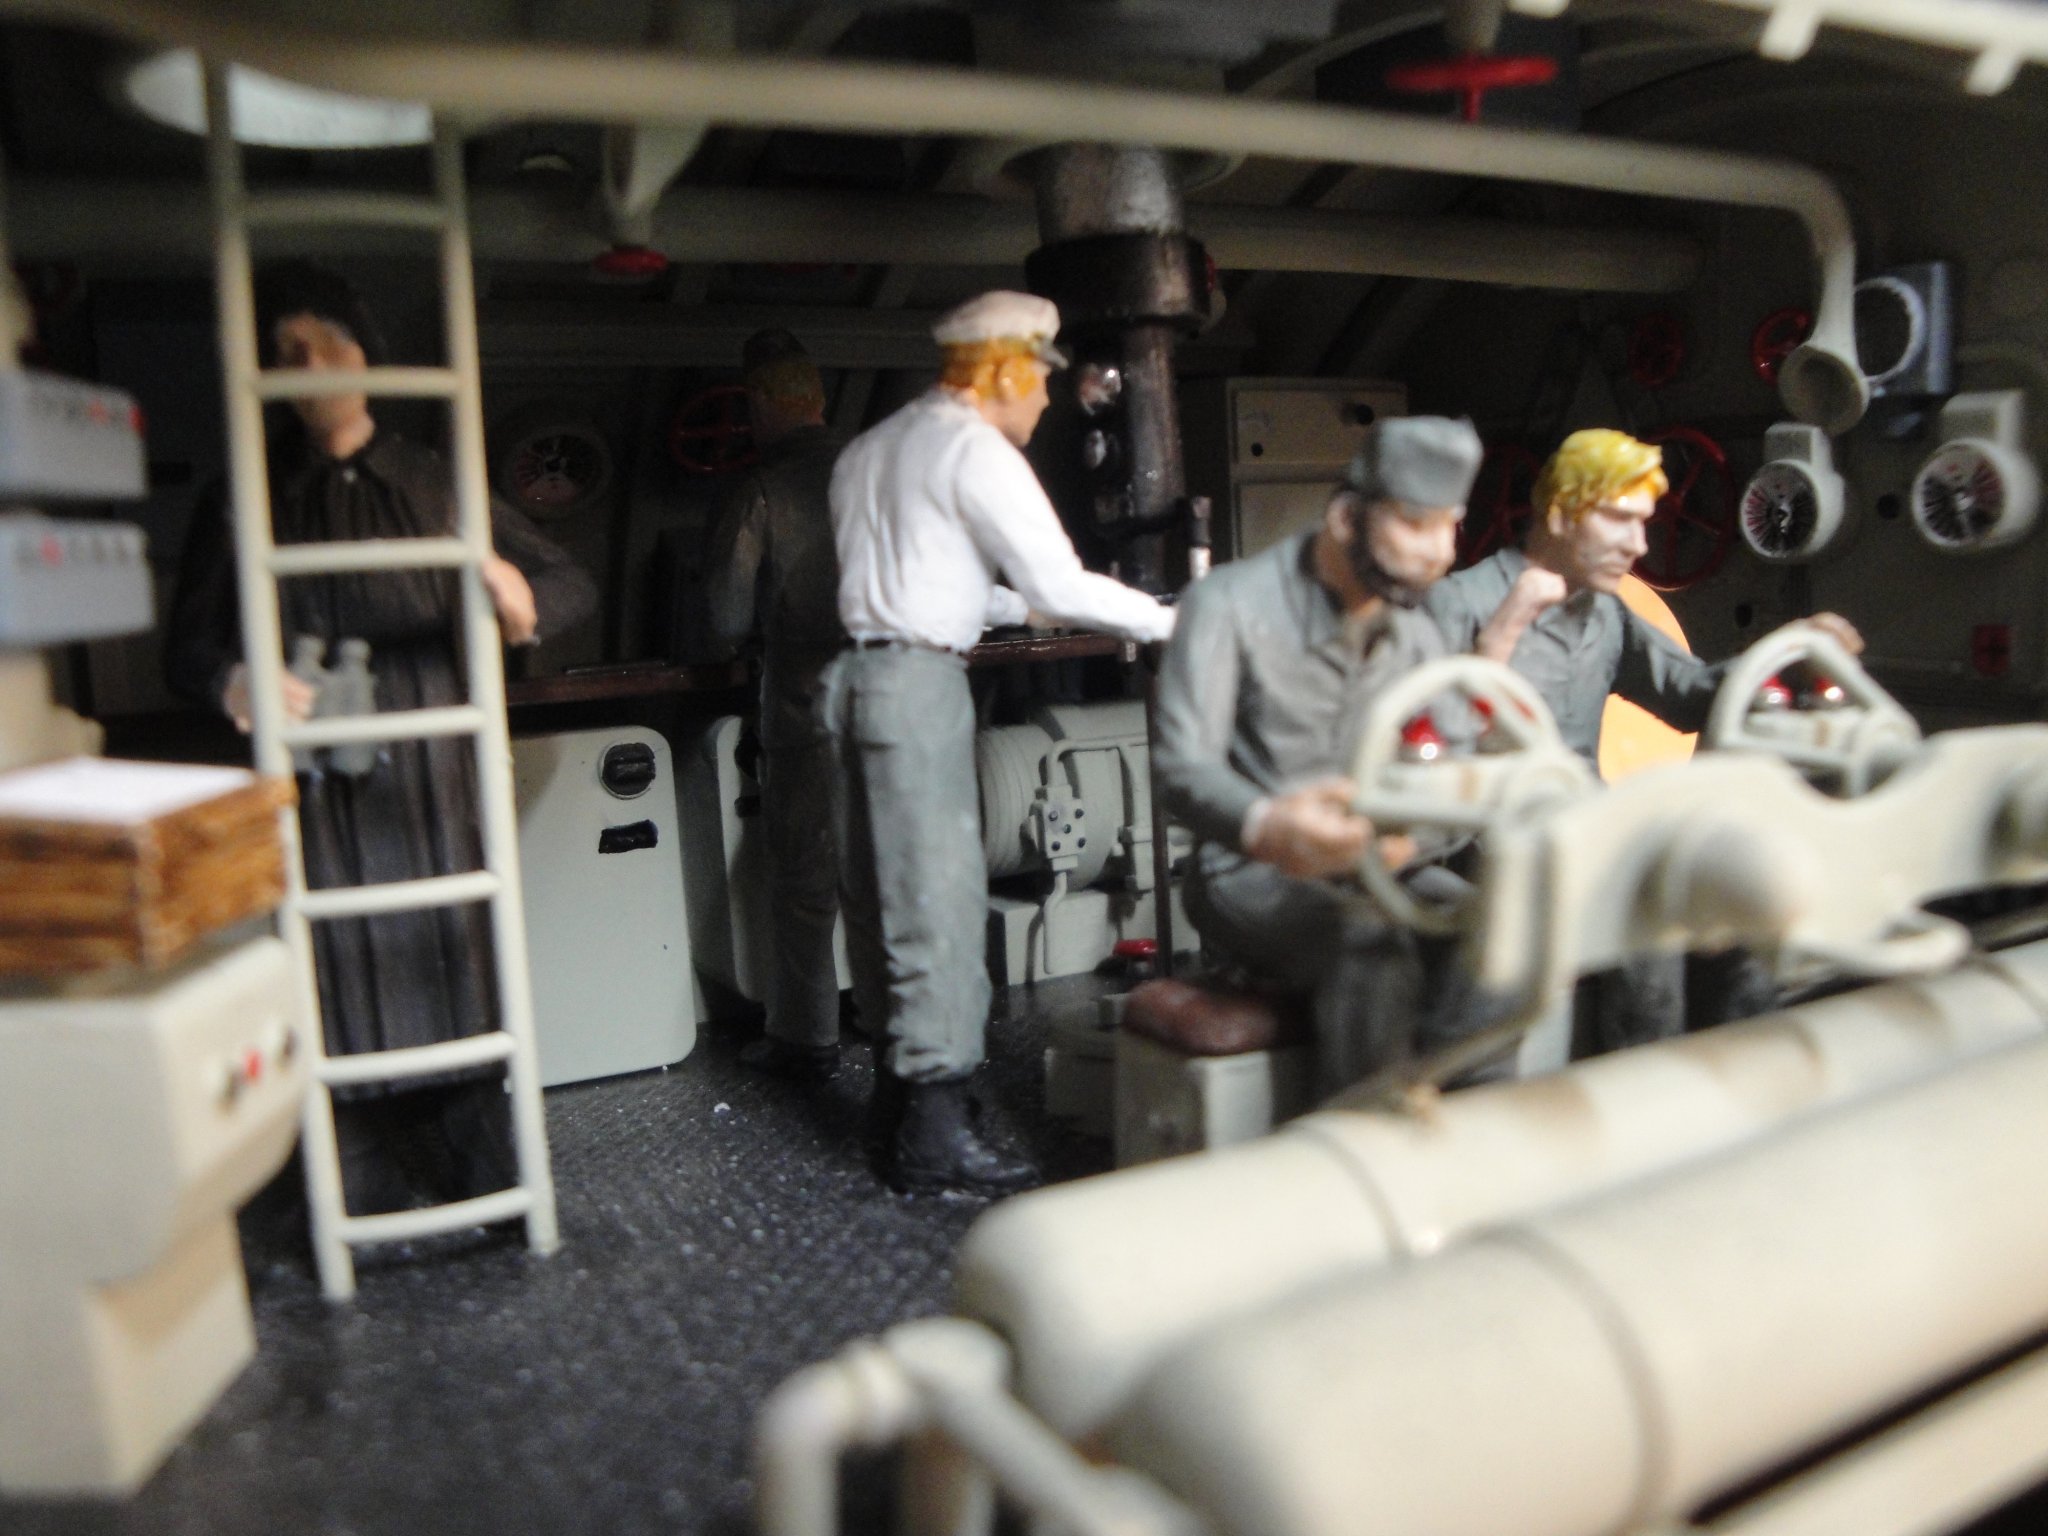
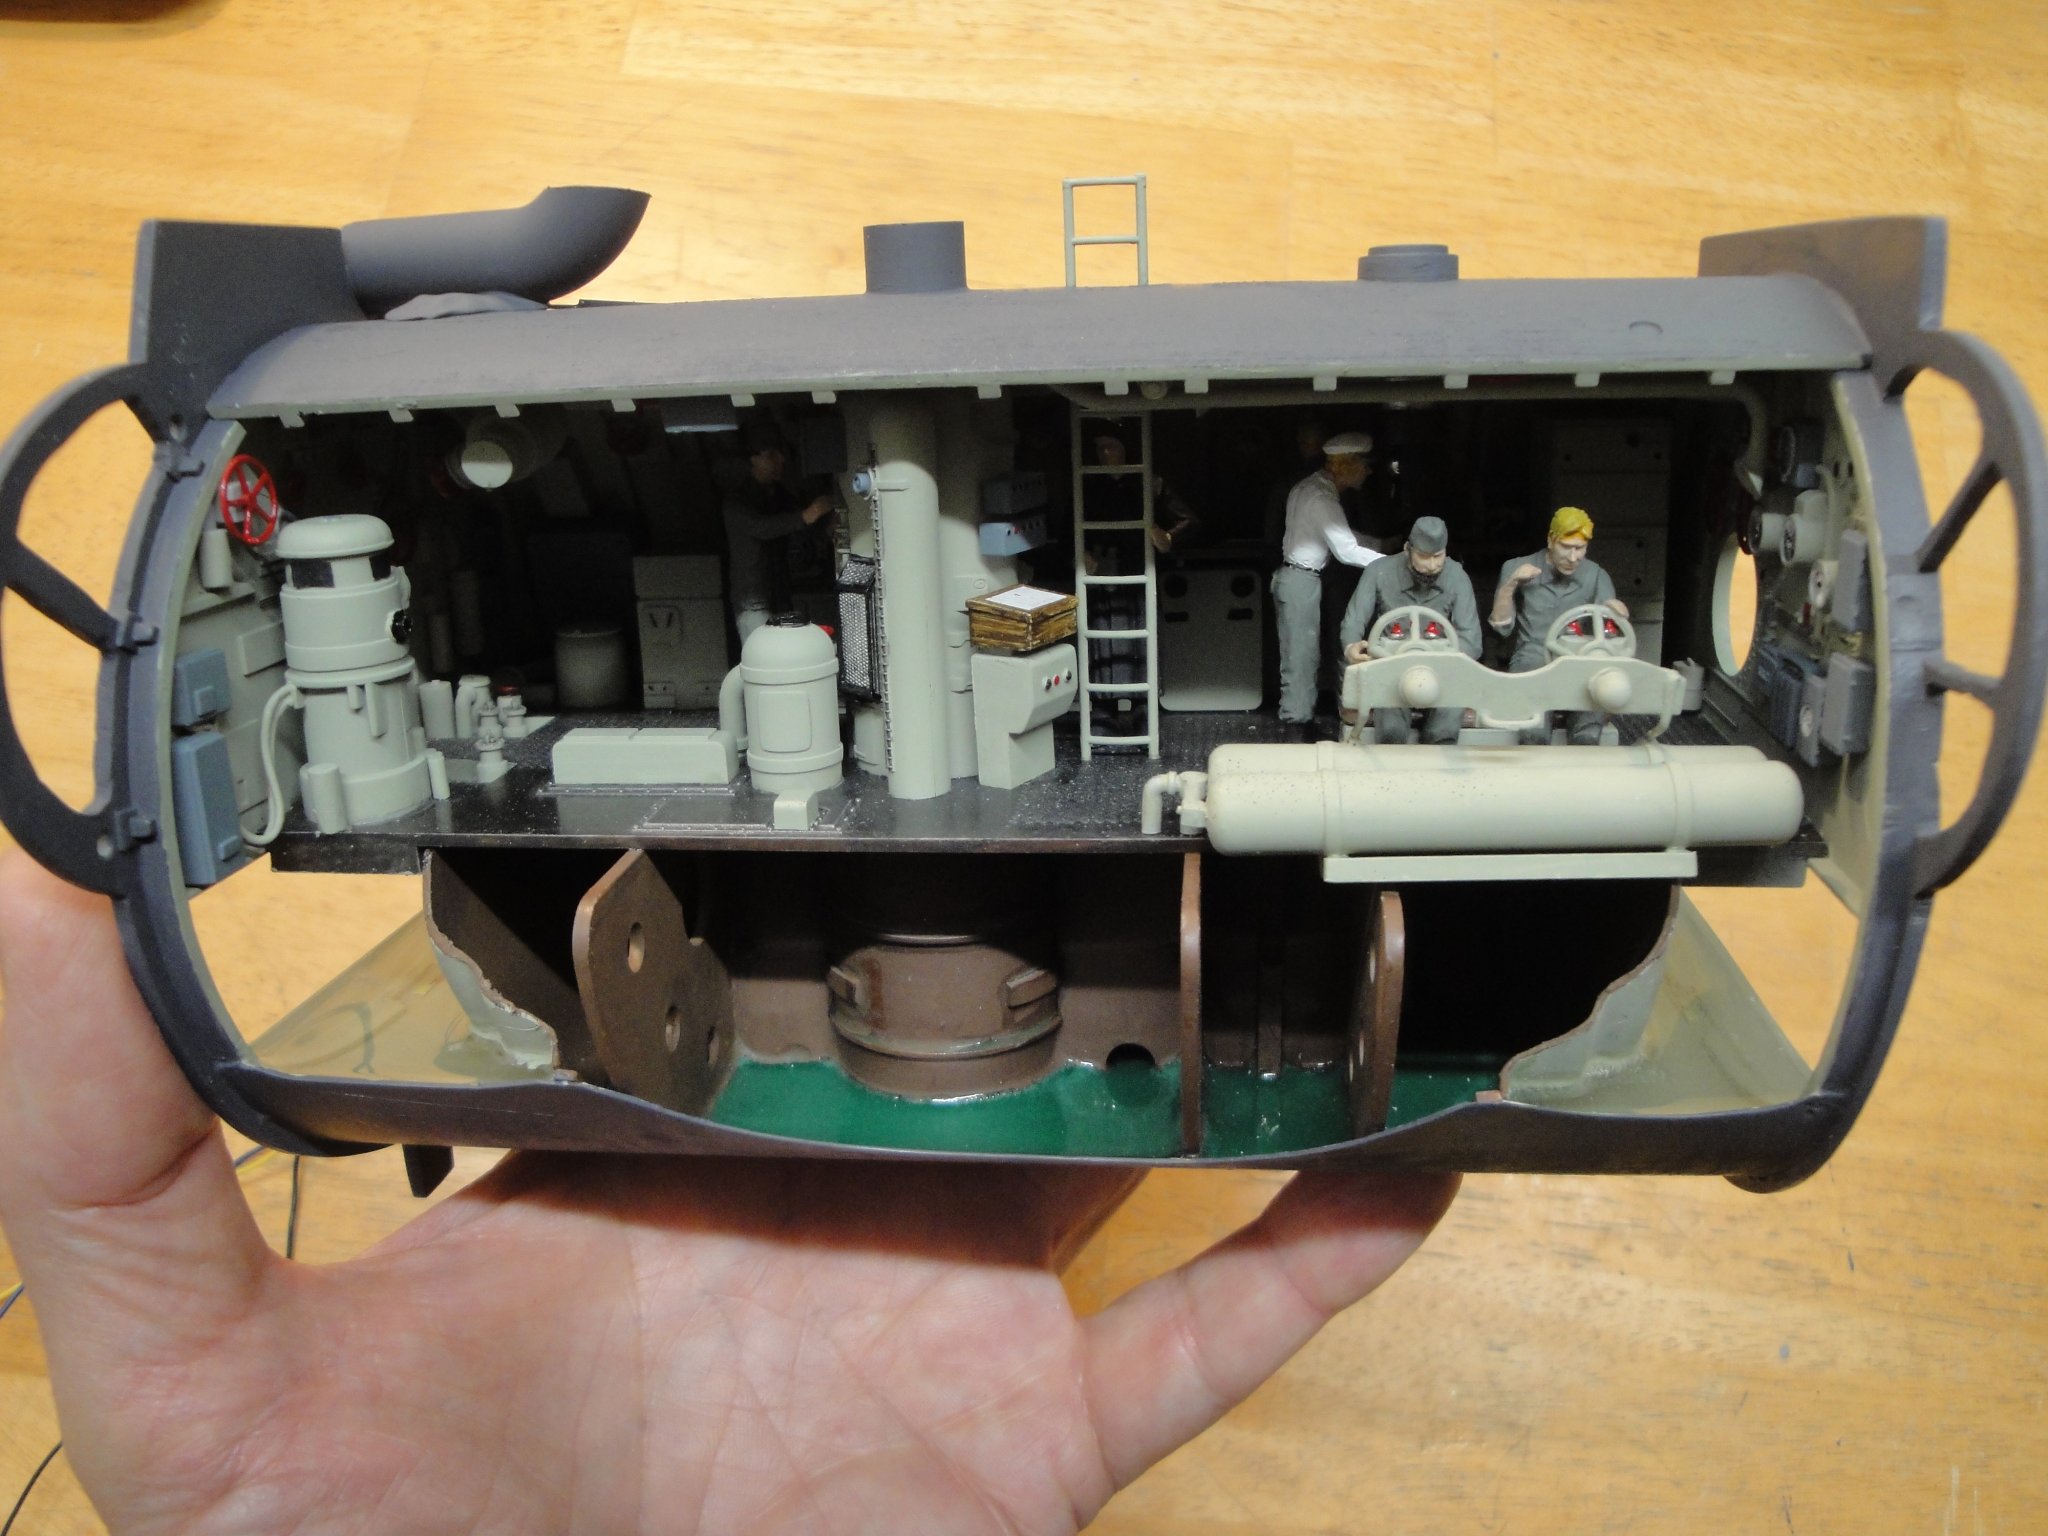
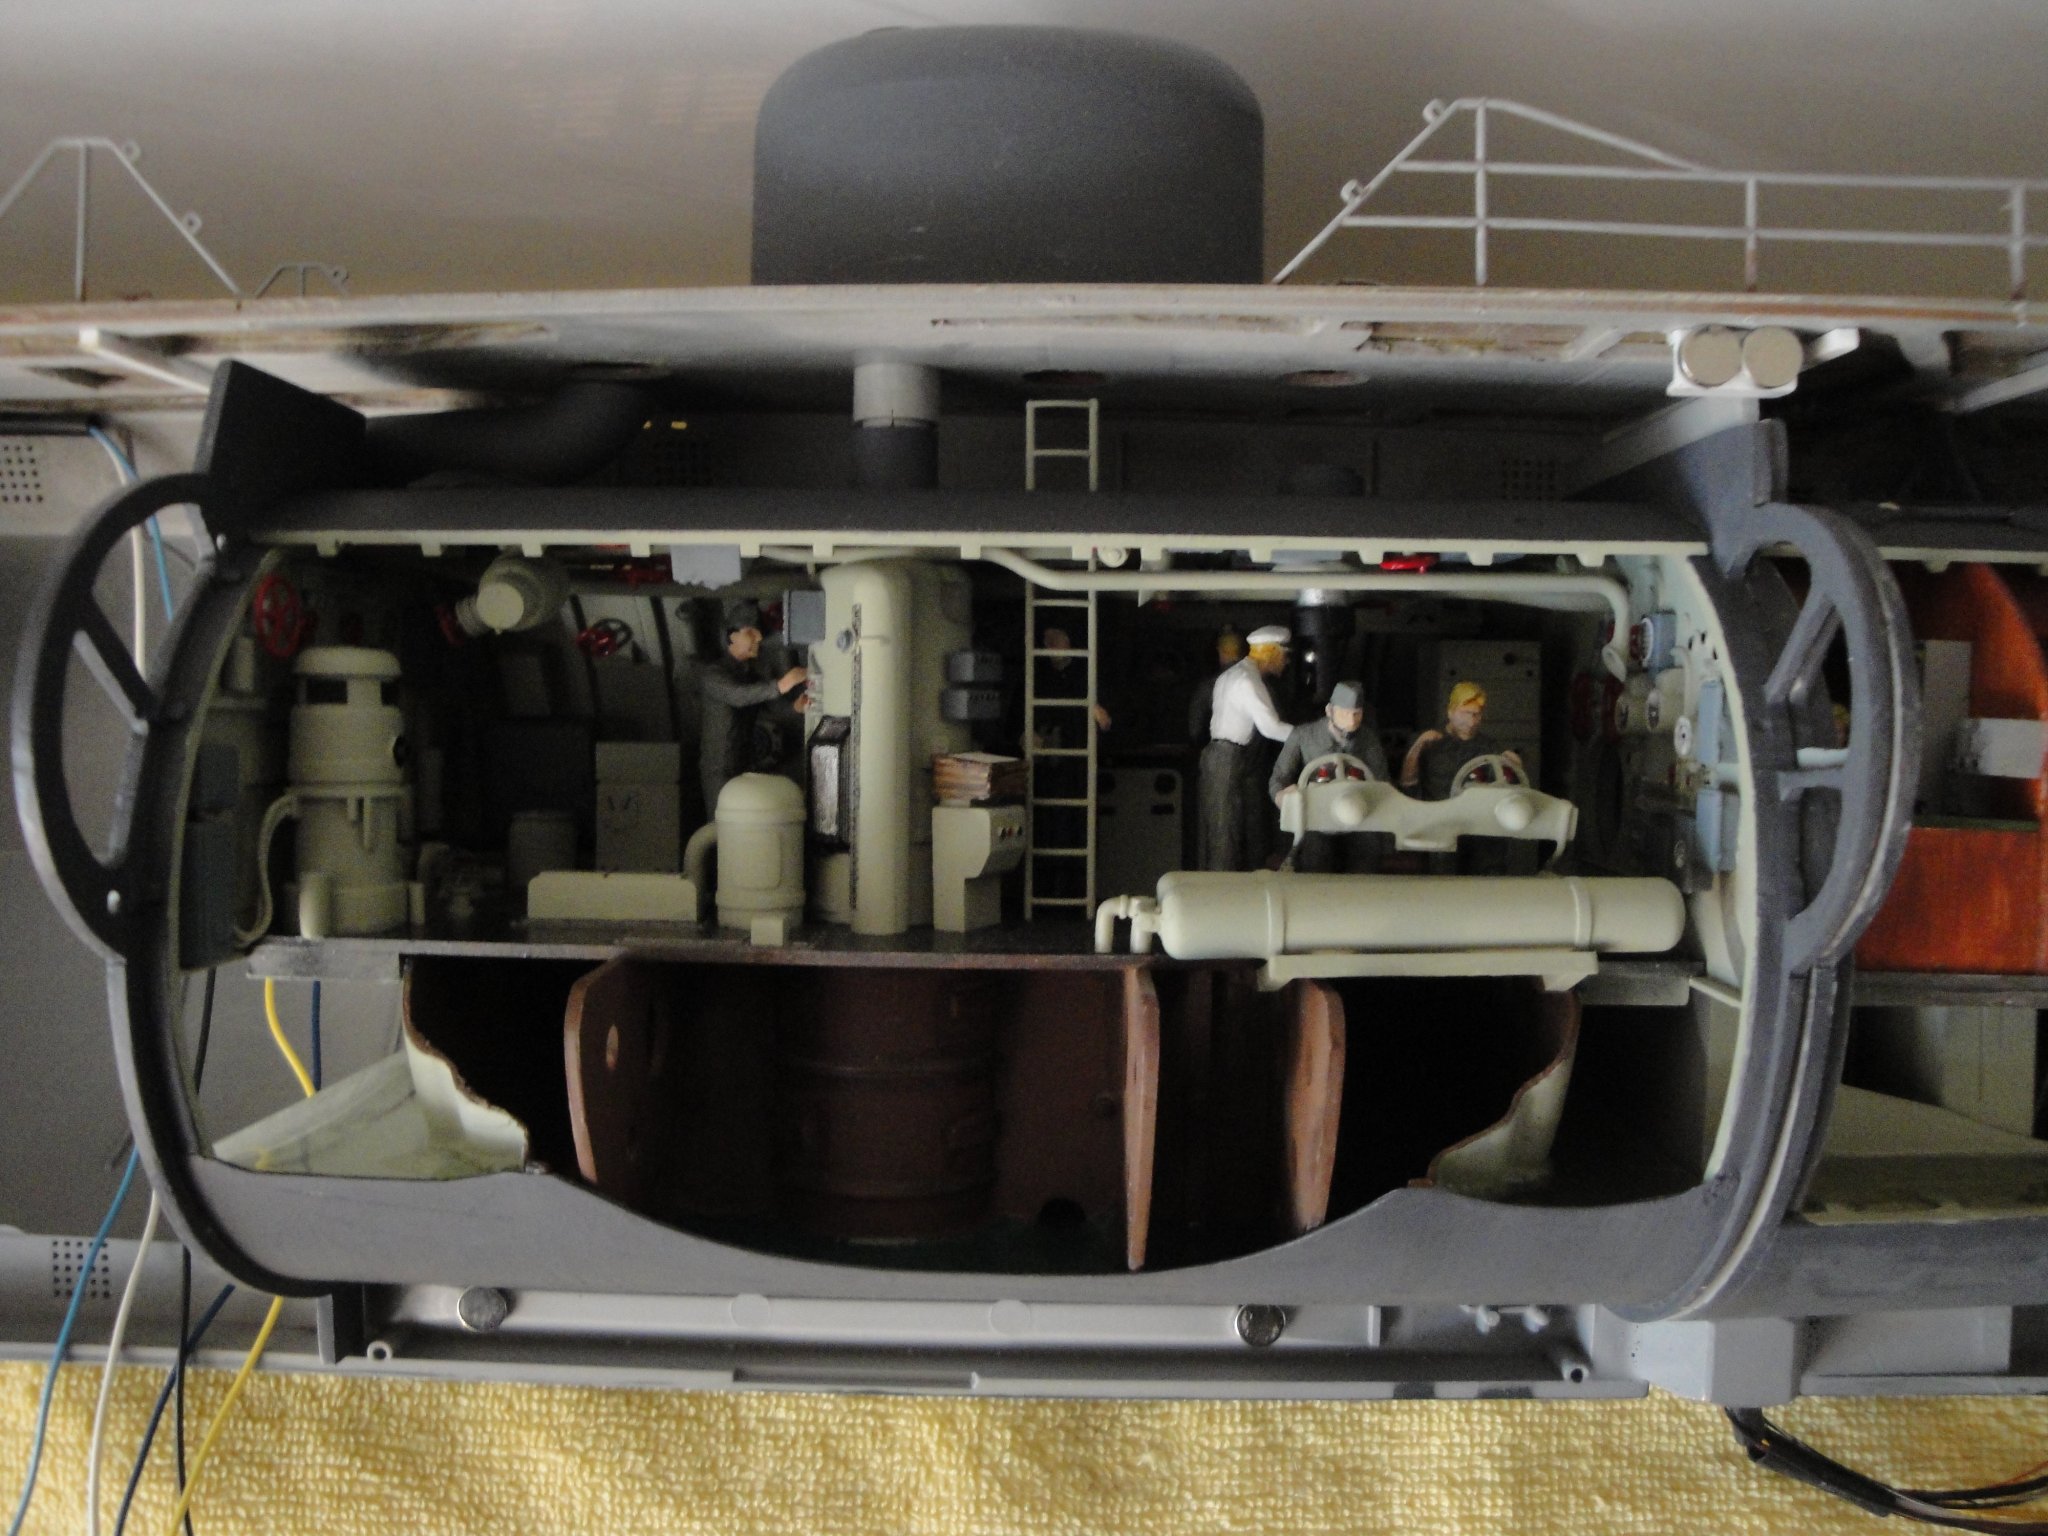
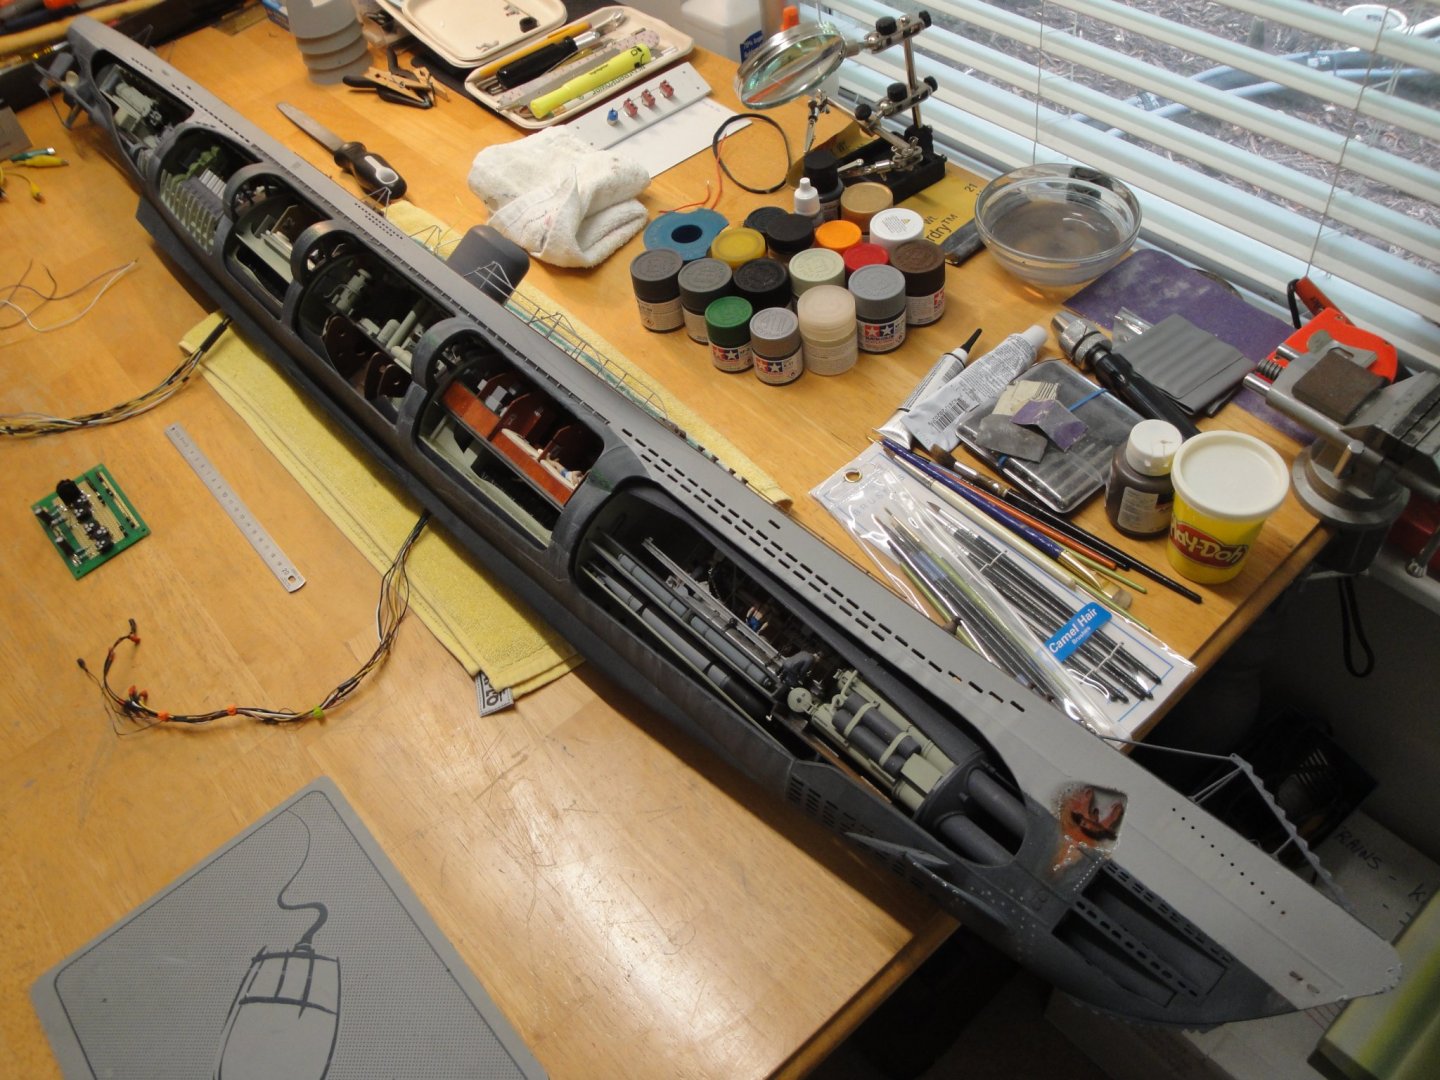
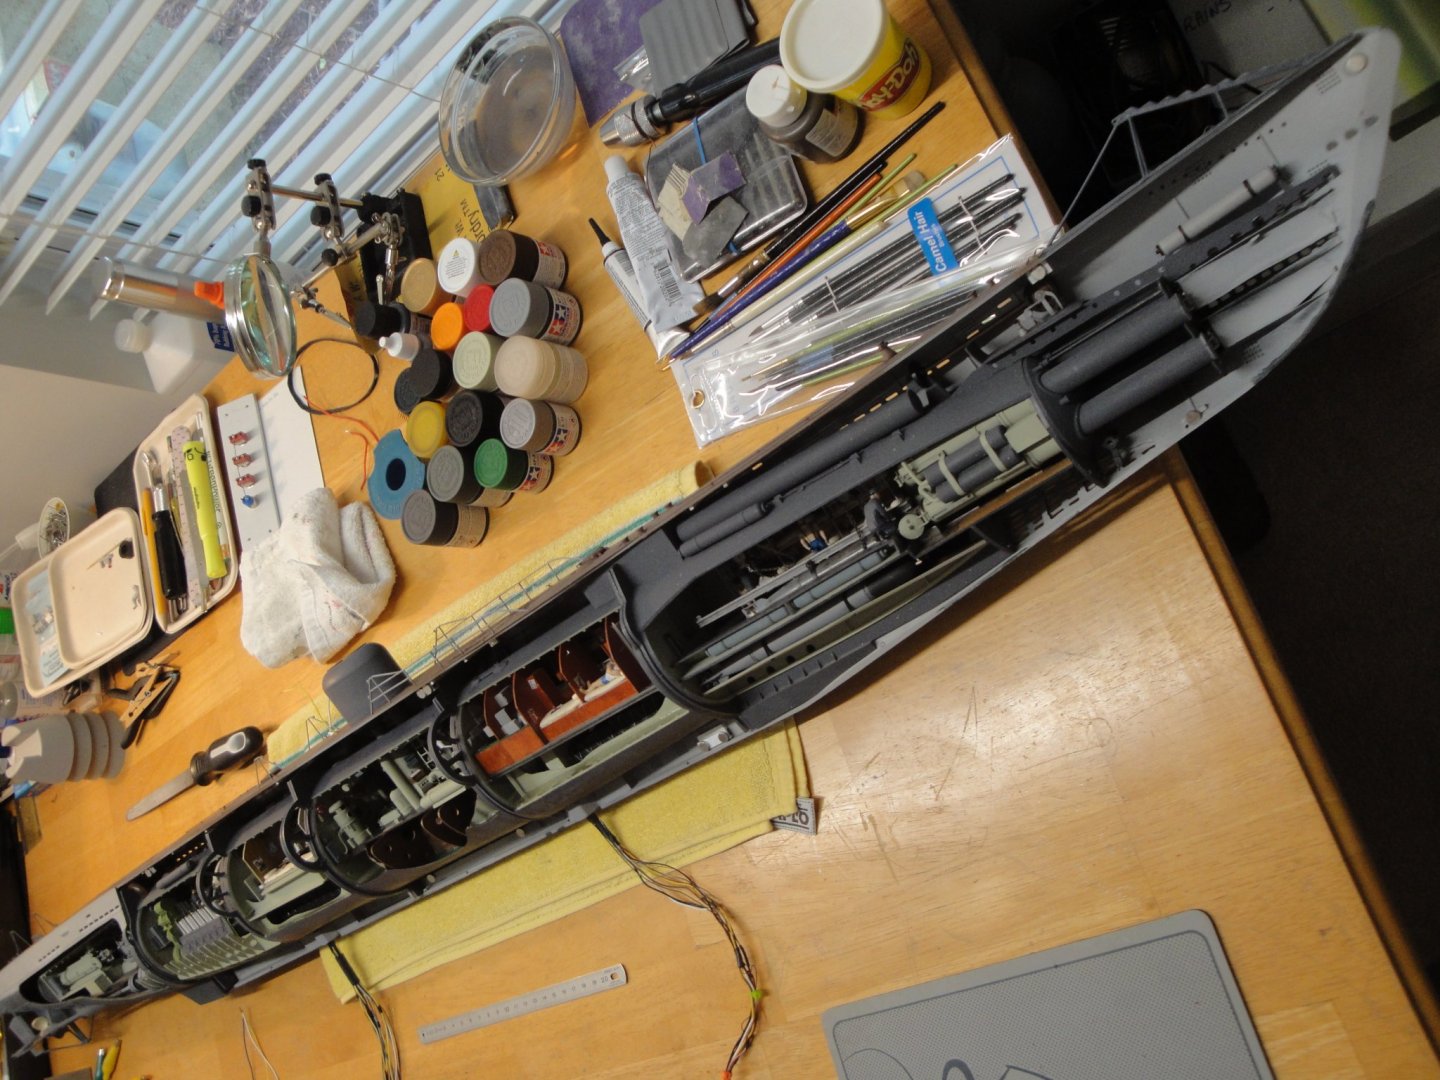
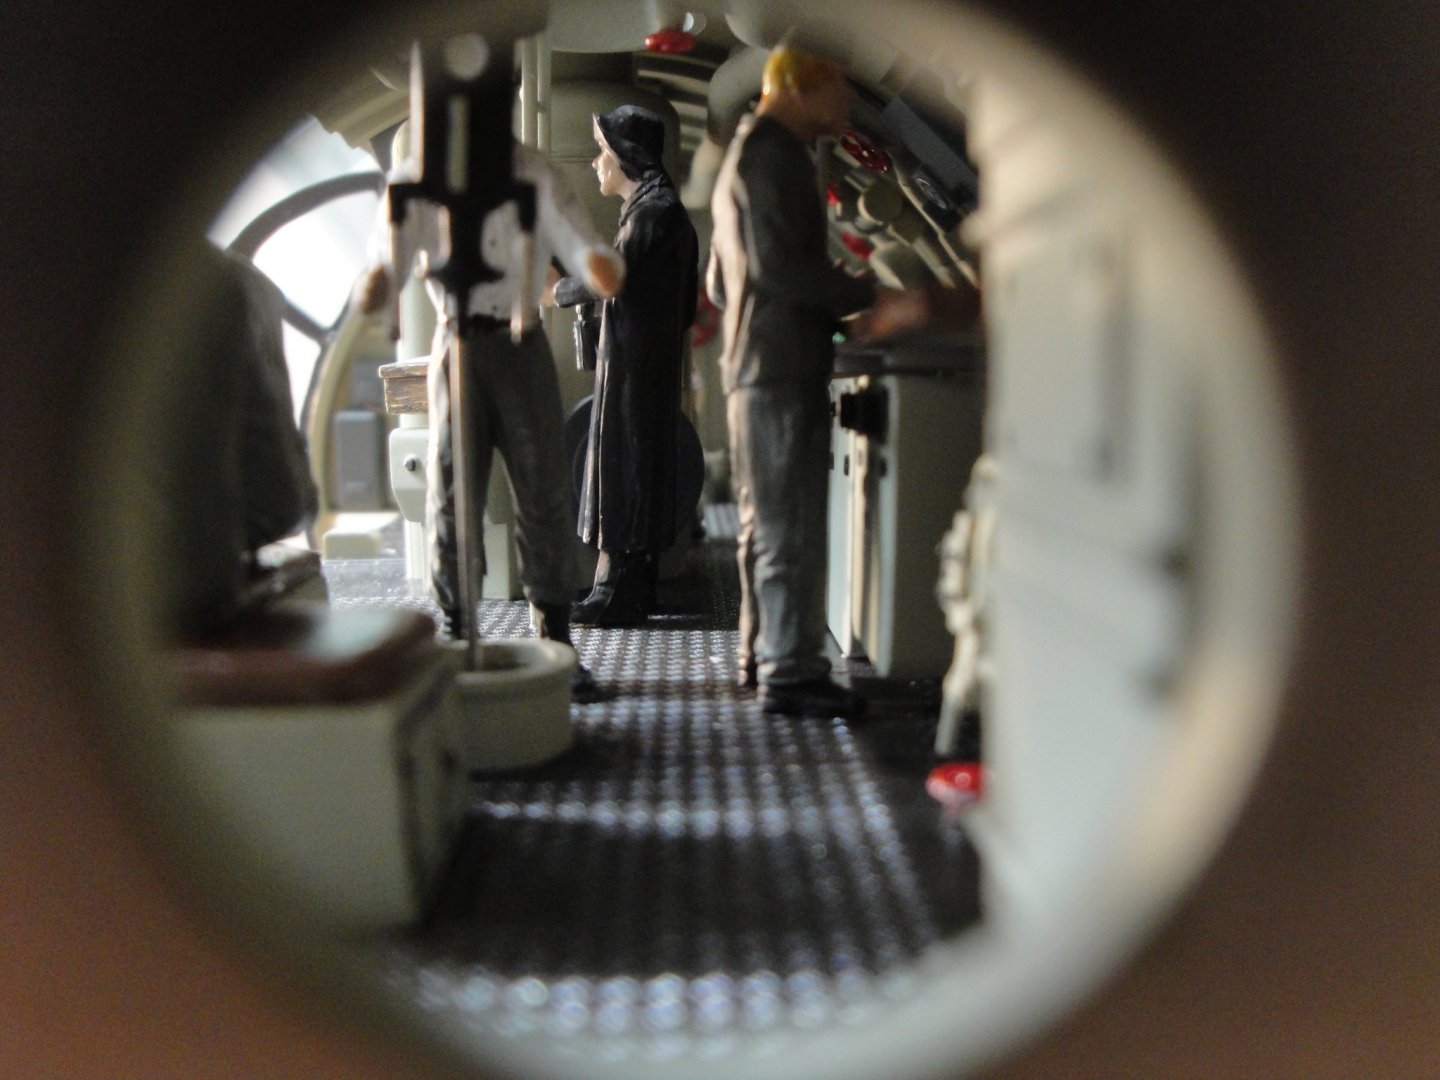
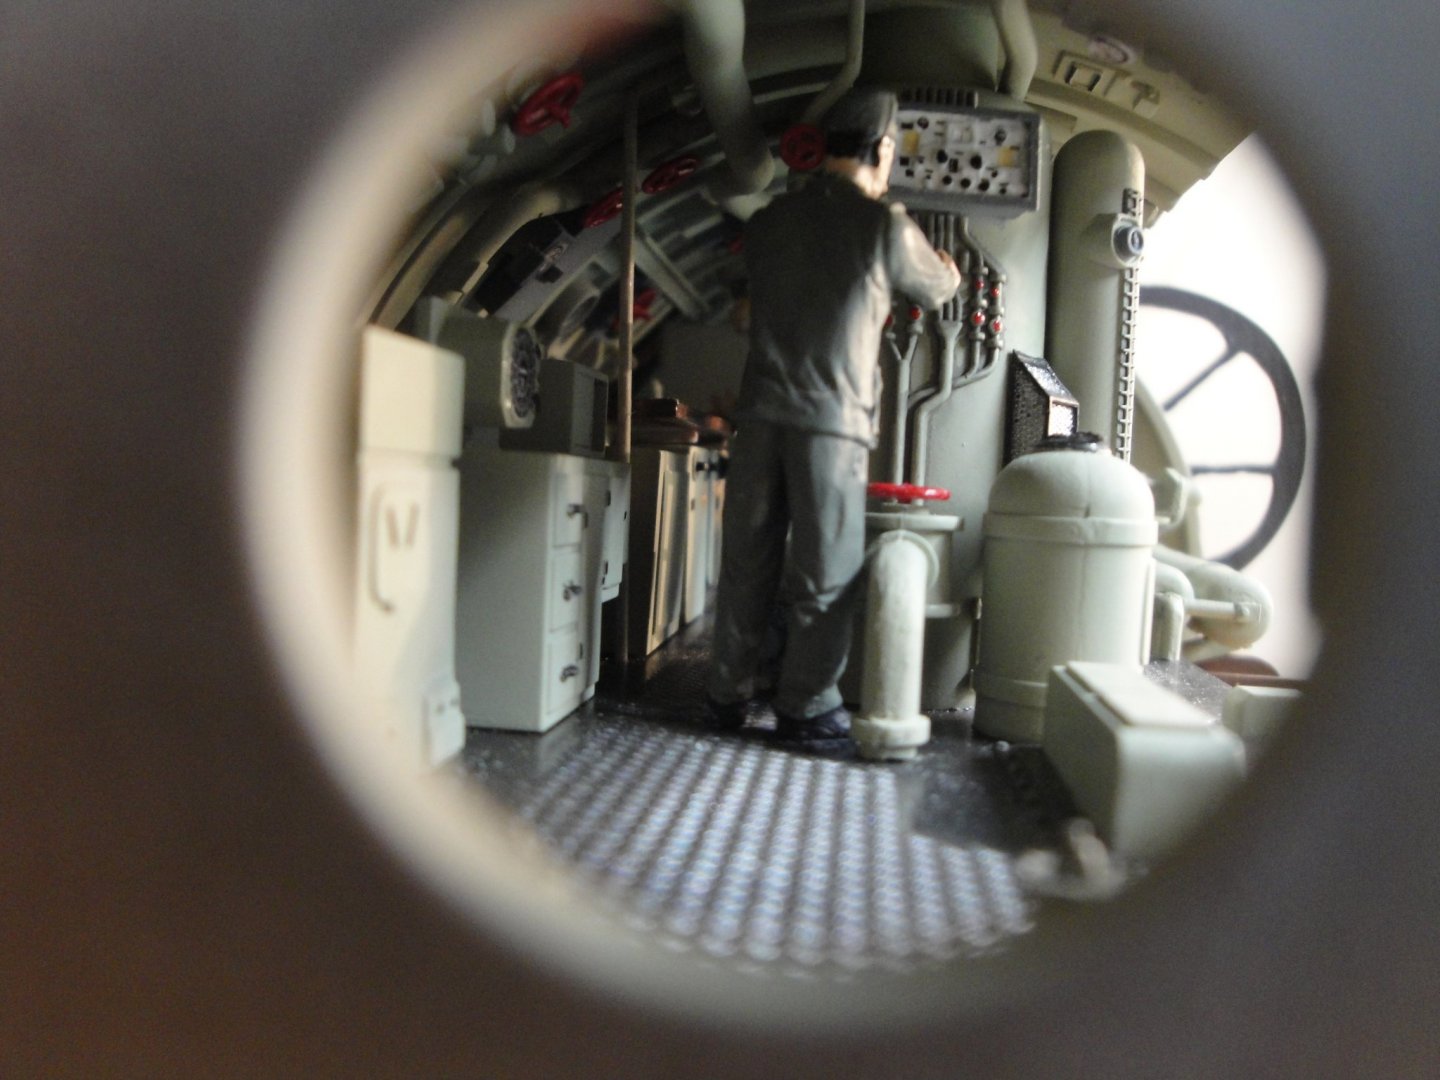
Jack, You need to go back a few pages and take a look at the starboard side of the hull: it has been opened in multiple places to give a very good view of each compartment. Yes, it would be foolish to build all these details and then to not be able to see them. Thank you for following. Yves
-
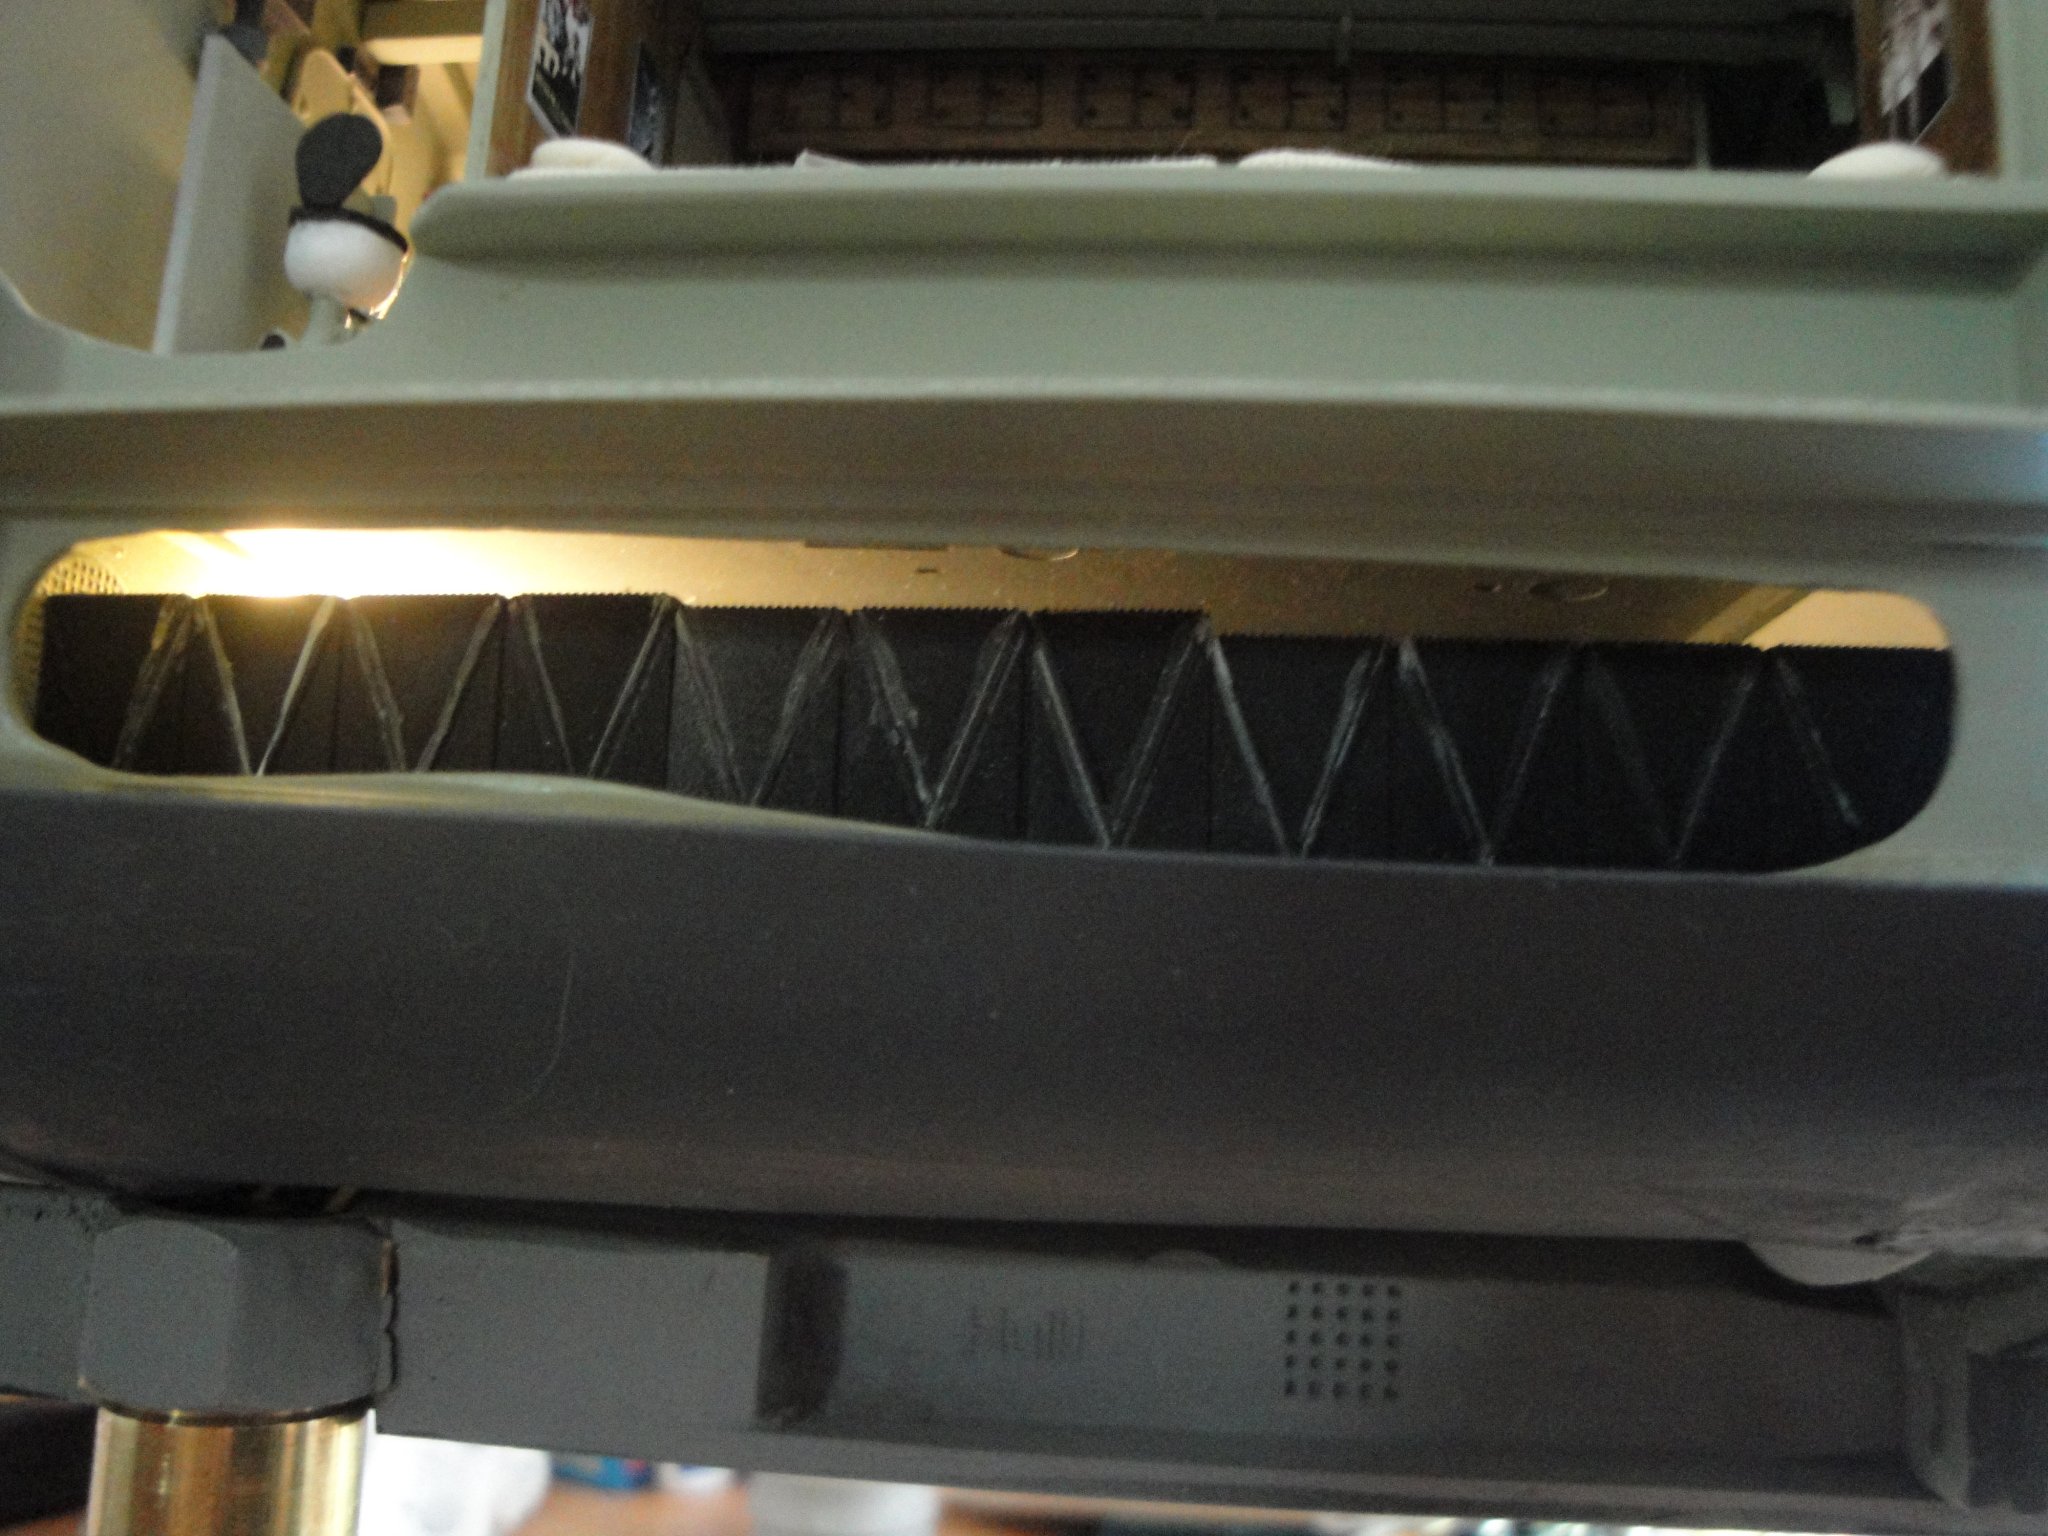
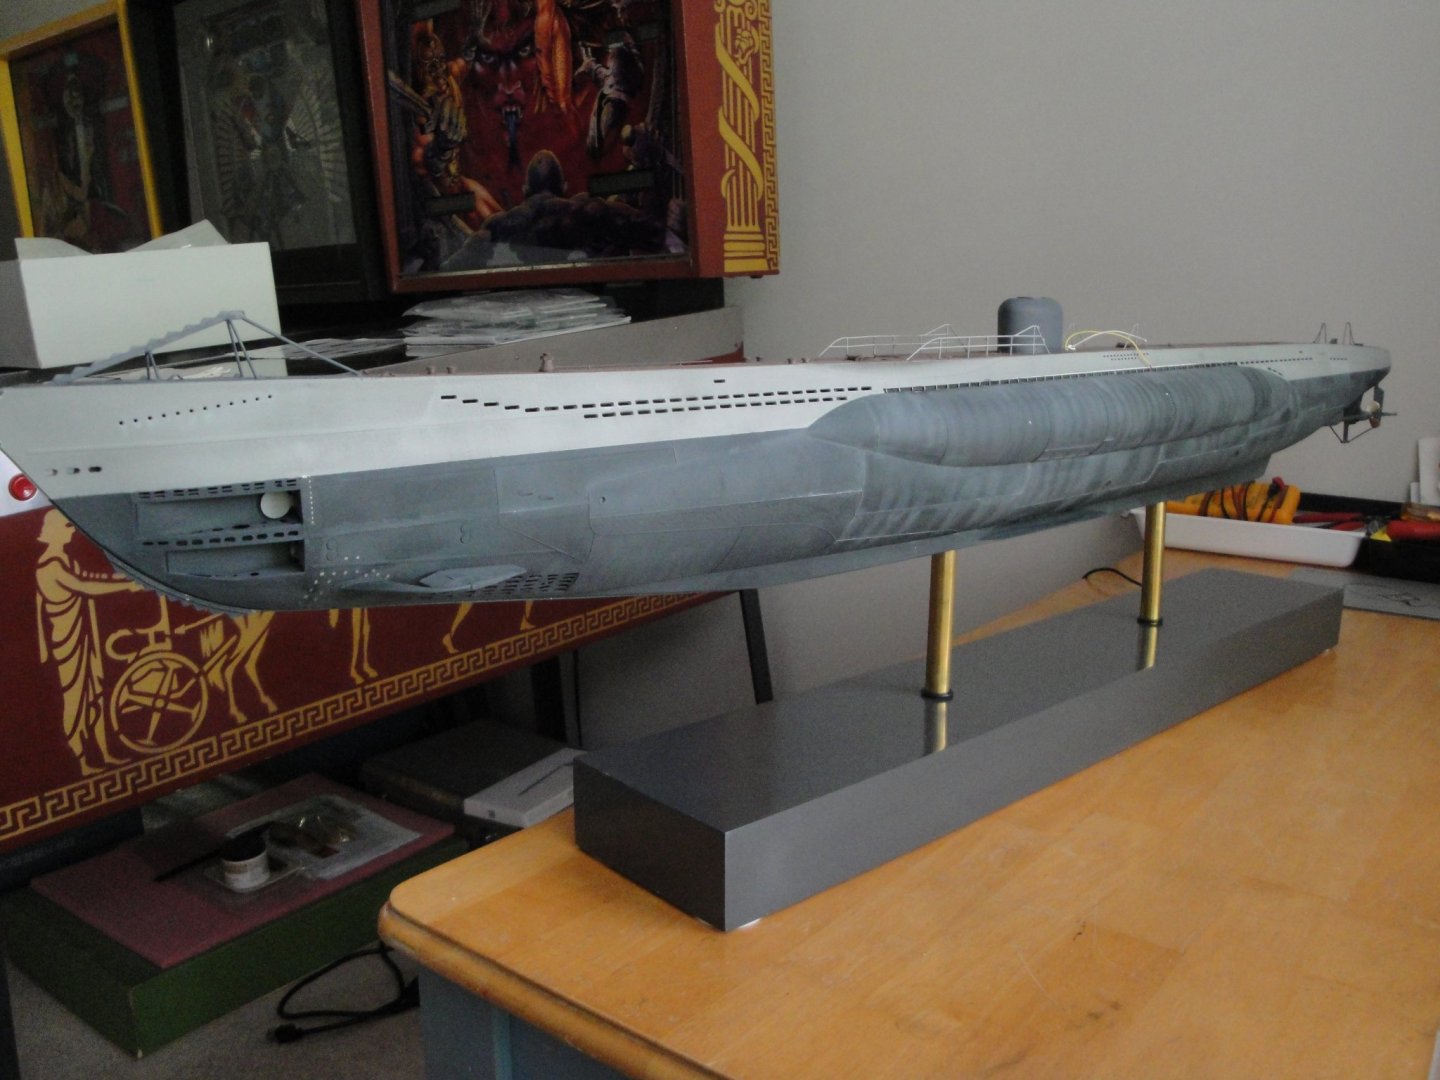
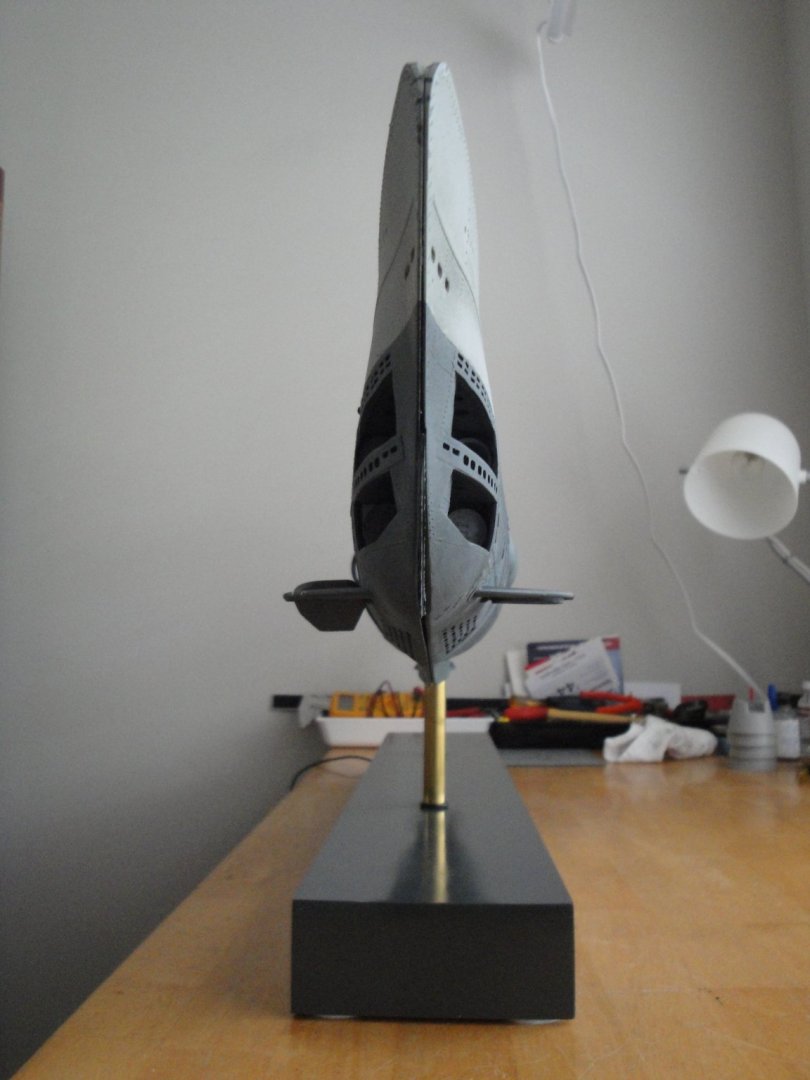
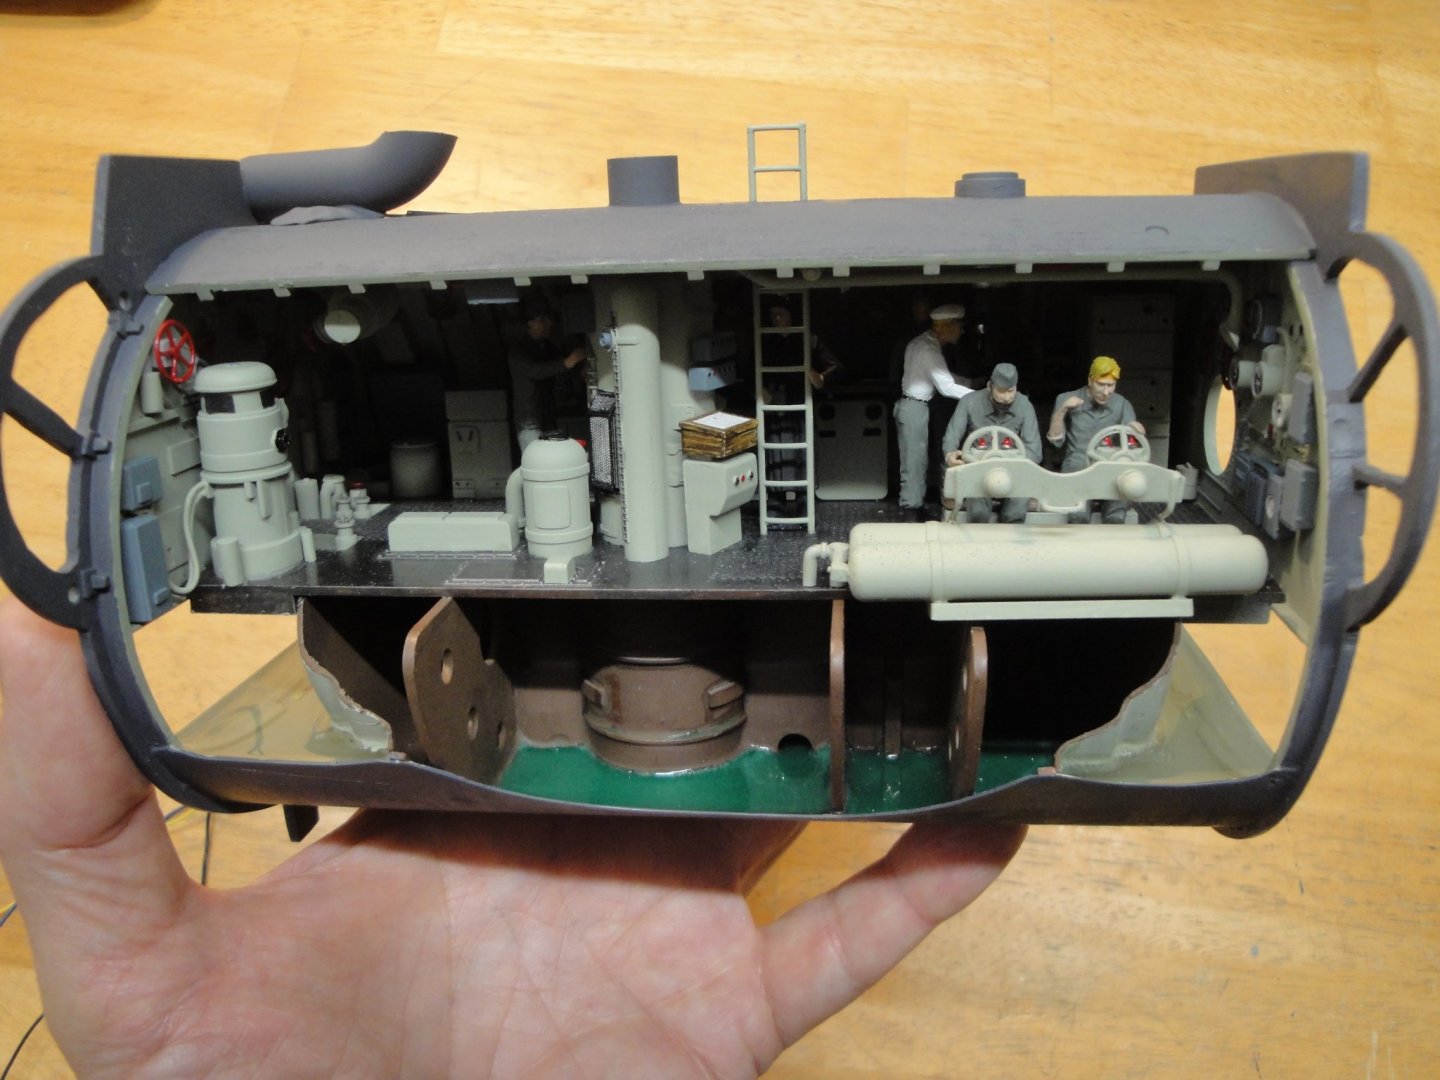
Major milestone achieved today: the Kontrollraum has been glued to the hull. After running the wires for the conning tower.... The Kontrollraum is permanently glued in its cradle: Not clearly visible here, but the top of the ladder hatch access has been plugged with an end piece of one spare torpedoes tanks, sitting outside of the pressure hull. Trumpeter provides quite a few of these, and two are only necessary on a Type VIIc submarine. The piece fits perfectly and extends the hatch to the conning tower. In addition, no light leak will be possible, under the deck. The last compartment will be glued when the entire wiring is completed and verified. This is now where we stand: Yves


- 760 replies
-
- 19
-
-
Citroen Traction Avant by kpnuts - FINISHED - Heller - 1/8
yvesvidal replied to kpnuts's topic in Non-ship/categorised builds
For having worked countless hours with my brother on the real thing, I have to say that your attention to details and incredible realism is stunning, Kpnuts. YVes -
Thank you Cog. Yes, the uniforms are not exactly uplifting and I may have used a color (German grey RLM) that is more appropriate for other things. I have to say that their fate is probably worse than the fate of convicts as more than 30,000 of them died in these steel cans, drowned or asphyxiated. Ideology can be such horror, sometimes. I think this is the last war machine I am building....although I have the Bismarck and a couple of other war pieces in store.... But my future kits if any, will be fun, historic, and dedicated to the well being of human kind. Yves
-
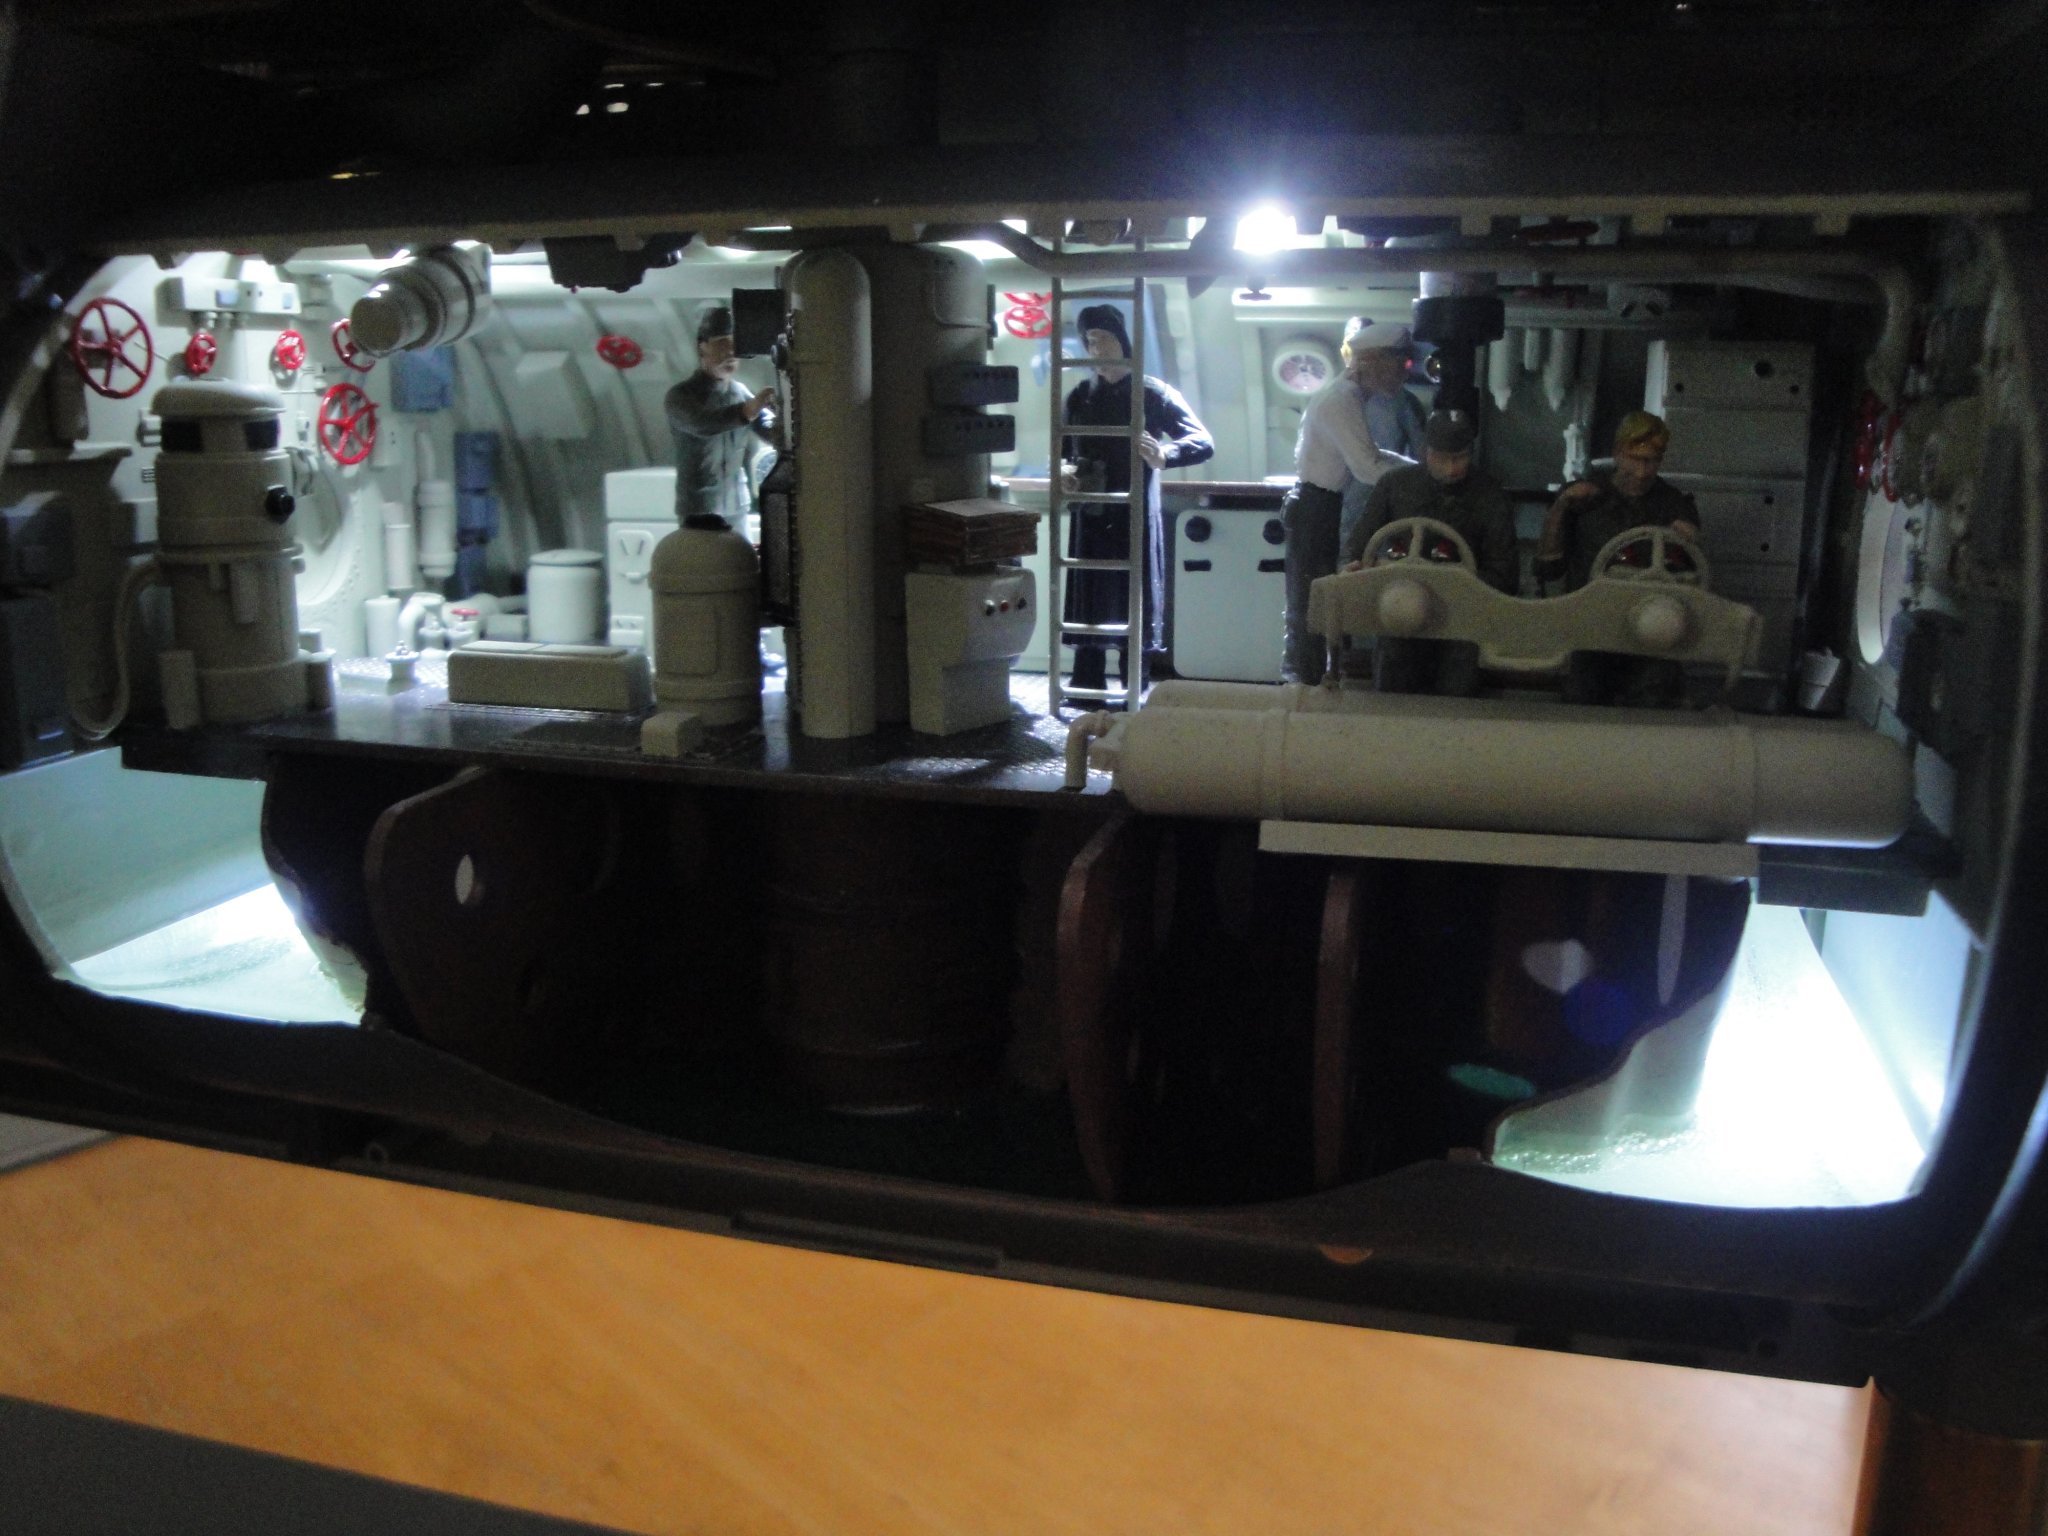
Kontrollraum module is completed. Ceiling has been glued, painted and electrical wiring is done: It is unfortunate that Trumpeter did not provide the extension of the sail to the pressure hull (where the ladder and periscope pass...). The back truly looks like a pressure hull, fully enclosed. I am making sure that there are no light leaks that may seep through the deck: A few details of the finished module: For the claustrophobia lovers... The Kaleunt is busy watching outside: Overall, it is one of the largest modules, and definitely the heaviest due to the amount of resin: Installed in the hull, it fits nicely, leaving unfortunately that gap between pressure hull and sail. Not much will be visible, but I may have to remedy that lack.... Yves


- 760 replies
-
- 22
-
-
Tamiya will help you with missing parts. I recently contacted them for a decals sheet and they will replace it as soon as the lockdown is over. Yves