HOLIDAY DONATION DRIVE - SUPPORT MSW - DO YOUR PART TO KEEP THIS GREAT FORUM GOING! (83 donations so far out of 49,000 members - C'mon guys!)
×


yvesvidal
-
Posts
3,607 -
Joined
-
Last visited
Content Type
Profiles
Forums
Gallery
Events
Everything posted by yvesvidal
-
 This is a massive model Kevin. With the Diorama, it is going to fill up a room ... 🙂 Yves
- 337 replies
-
- 6
-

-
- finished
- mountfleet models
- (and 1 more)
-
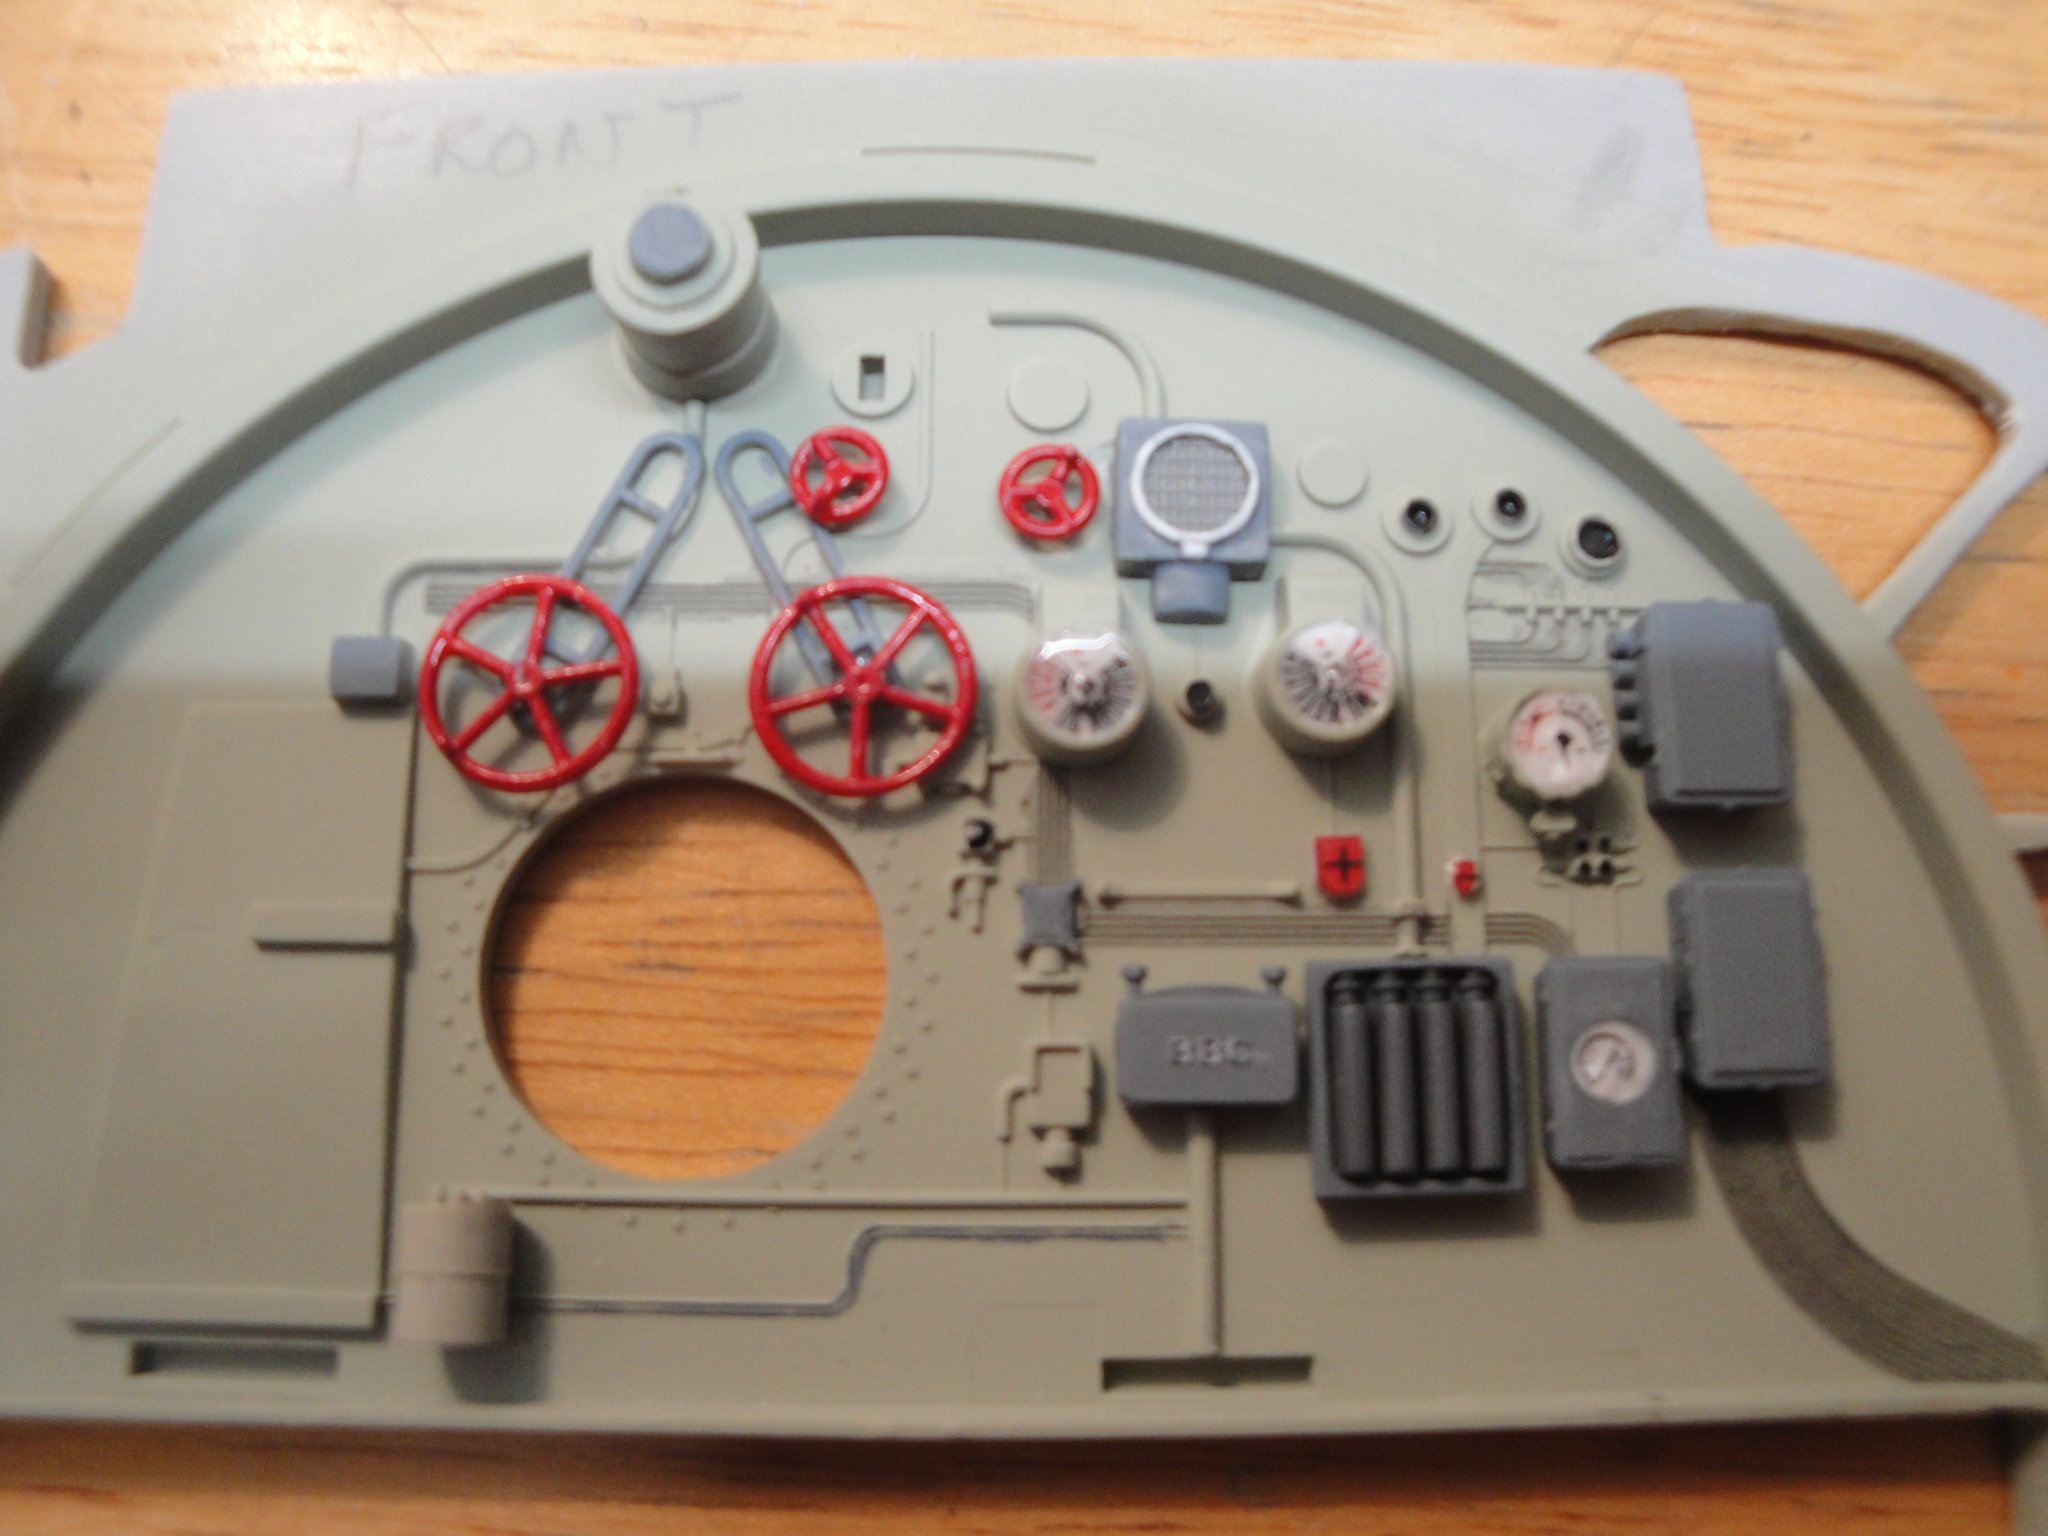
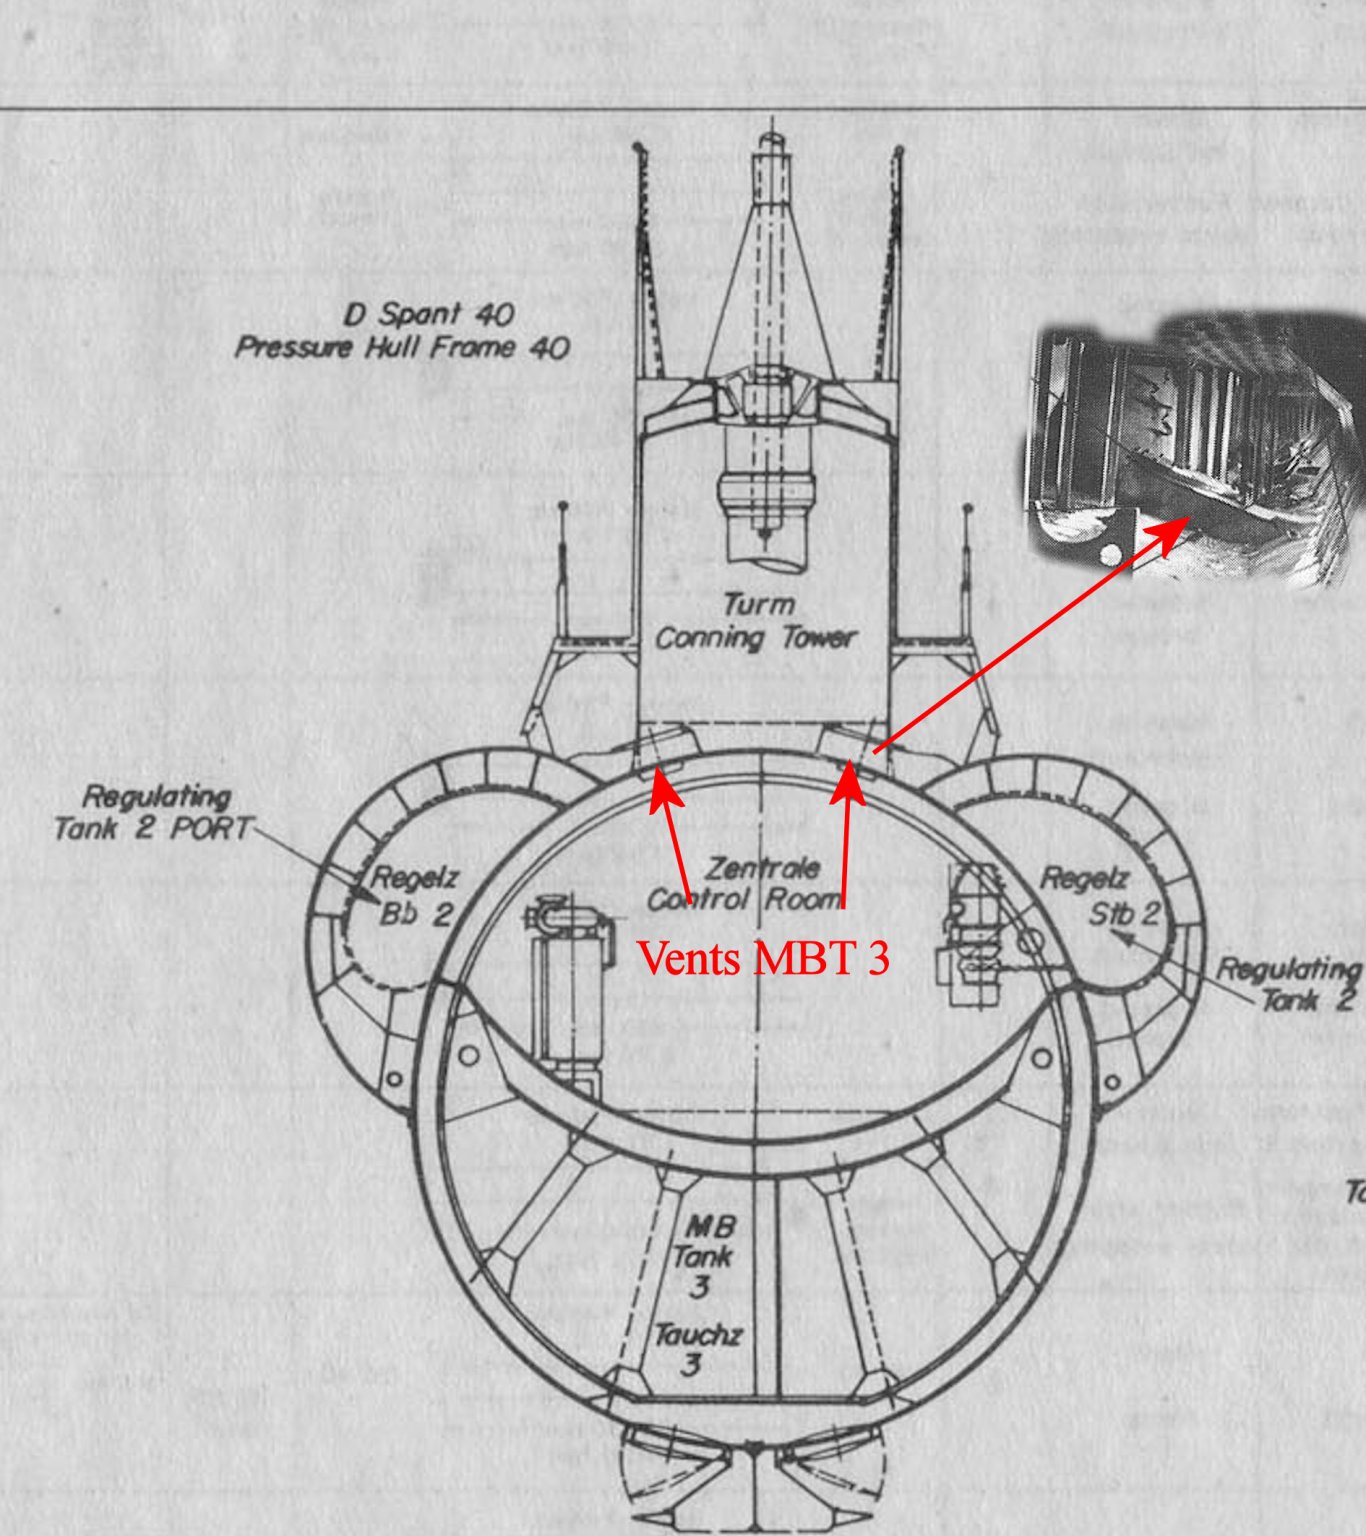
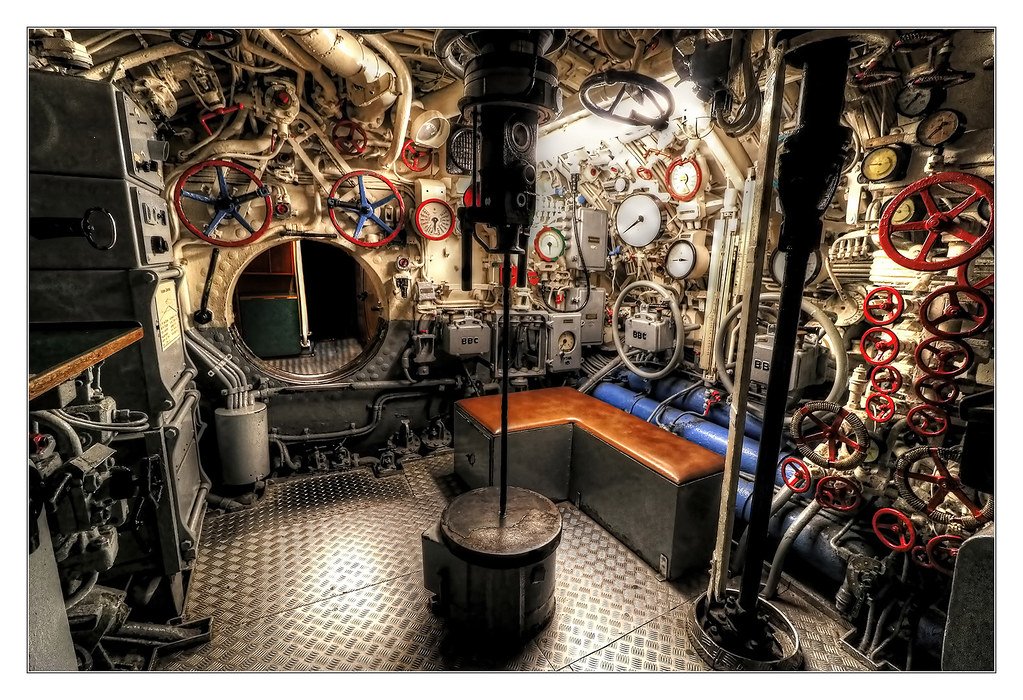
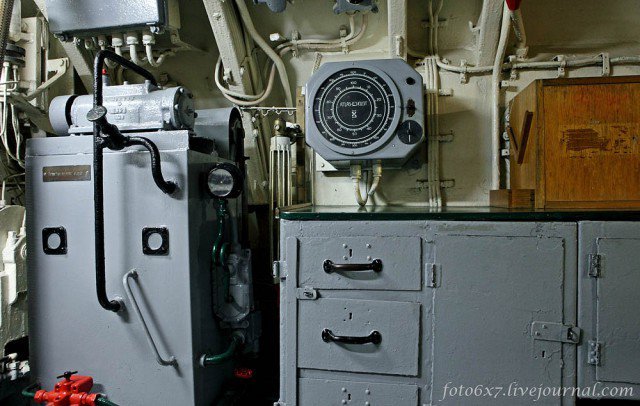
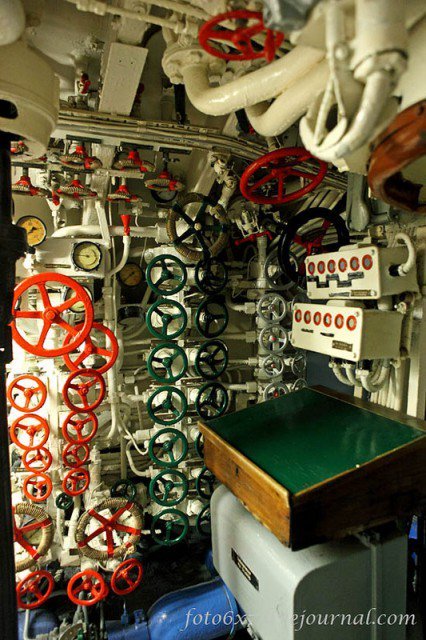
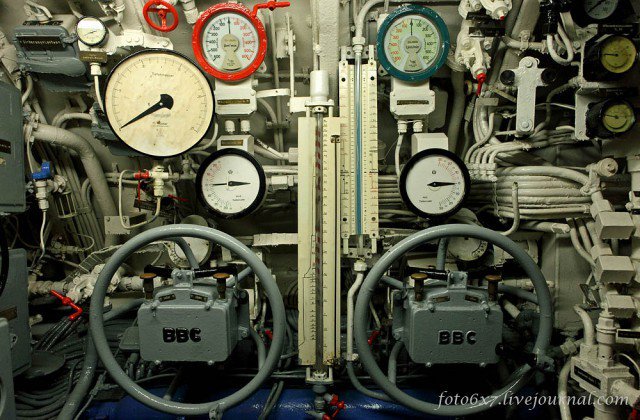
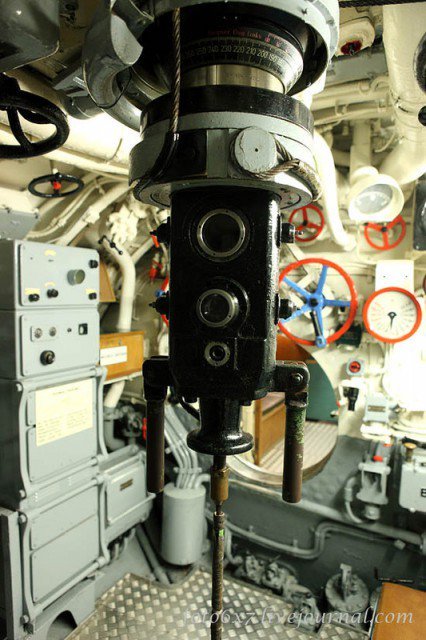
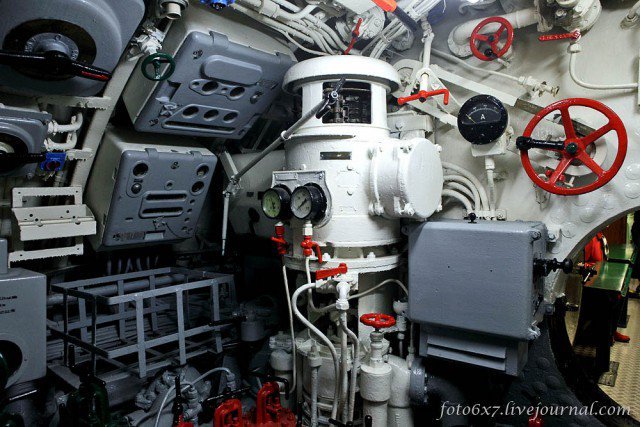
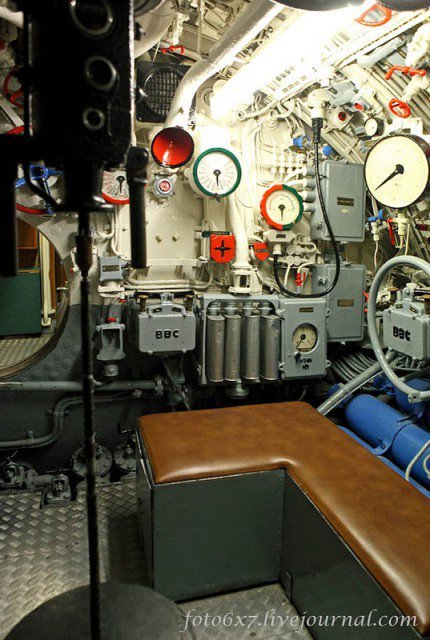
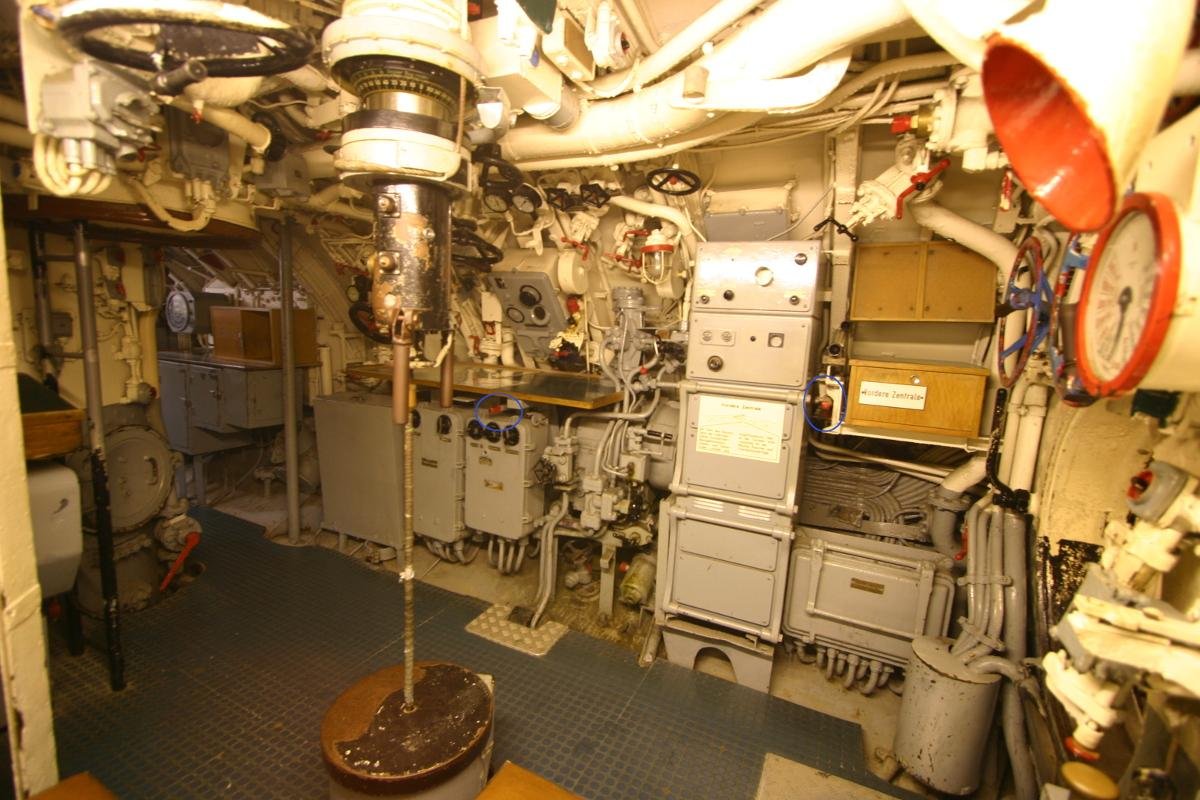
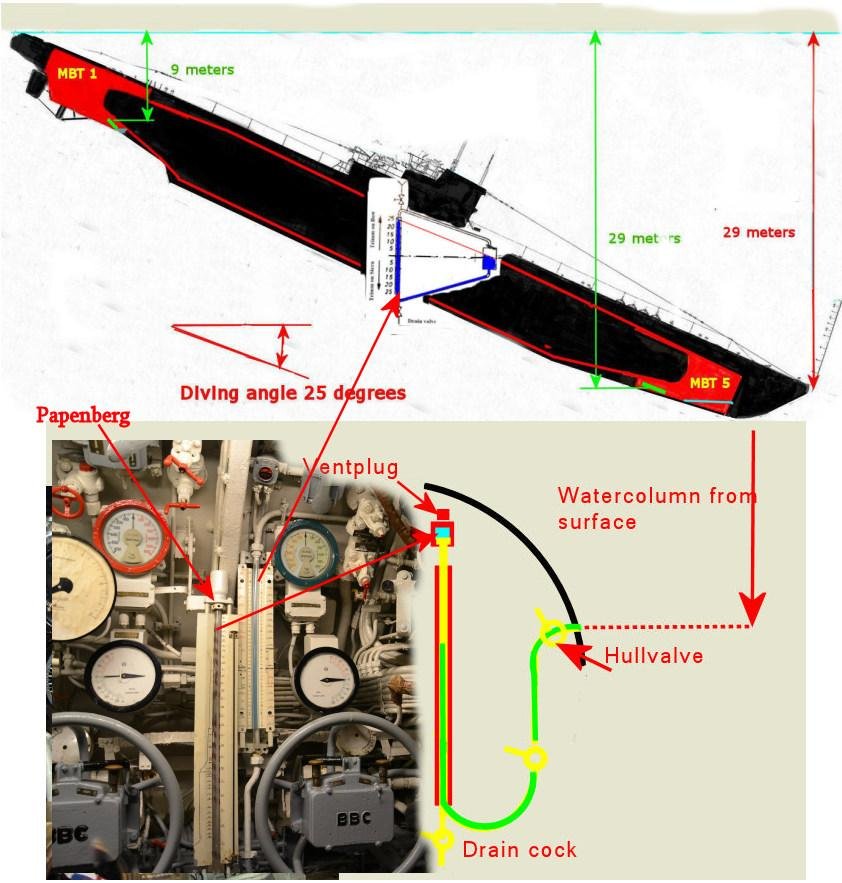
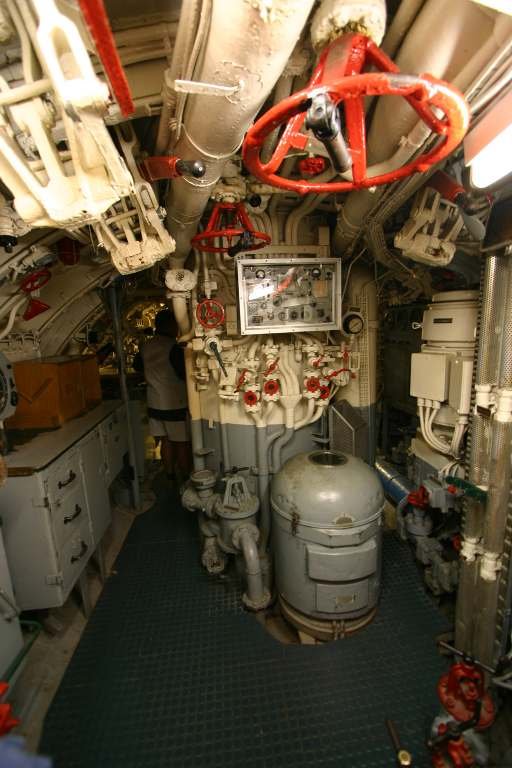
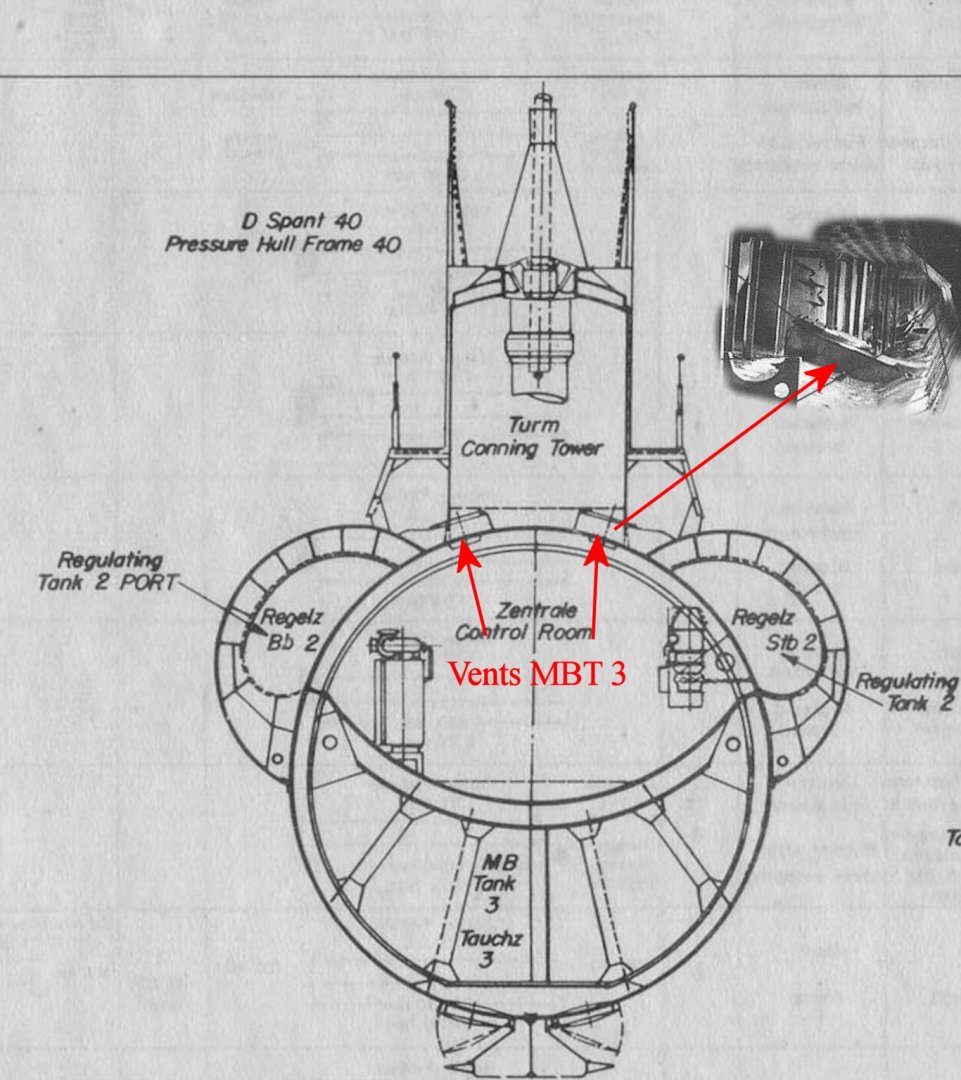
Since, we are on the subject of describing the Control room of the Type VIIc, I thought it would be appropriate to publish a few pictures glanced and collected on the Internet. May their authors be infinitely rewarded in this life or a future one, for their generosity and skills. The first "fish-eye" picture is particularly dramatic.... what a maze and intricacy of pipes, wheels, dials and valves. A true nightmare, when anyone of these hoses could have leaked, following an underwater explosion: The right part of what is visible on this picture is actually not represented by Trumpeter. The two steering wheels are the diving planes controls and are not part of the kit, since they stand where the opening to the module, is located. The L shaped bench is provided in the kit. Also, note the well on the attach periscope has been plugged to prevent the U-995 tourists from falling or throwing things into the main ballast. This problem, as designed by Trumpeter, will have to be corrected. The left picture represents the Port side and as such is correctly implemented in the kit. The right picture is of course, entirely missing, from the kit. The Christmas Tree of red and black valves is also missing from the Trumpeter Kit. The periscope enclosure on the right is correctly recreated by Trumpeter. Above is the Attack periscope, also nicely represented by Trumpeter. The various compressors on the floor (for the cold enclosure - fridge) are also well depicted by Trumpeter. Here also, Trumpeter did a good job with their bulkhead assembly. Above, the torpedo computer, used to calculate trajectories and program the eels. As we will see, the Port side is very well rendered in the kit. The last drawing explains how the depth measuring gauges are working and how the submarine was controlled when diving or surfacing. Soon, a few pictures of the model..... Yves
- 760 replies
-
- 14
-
-
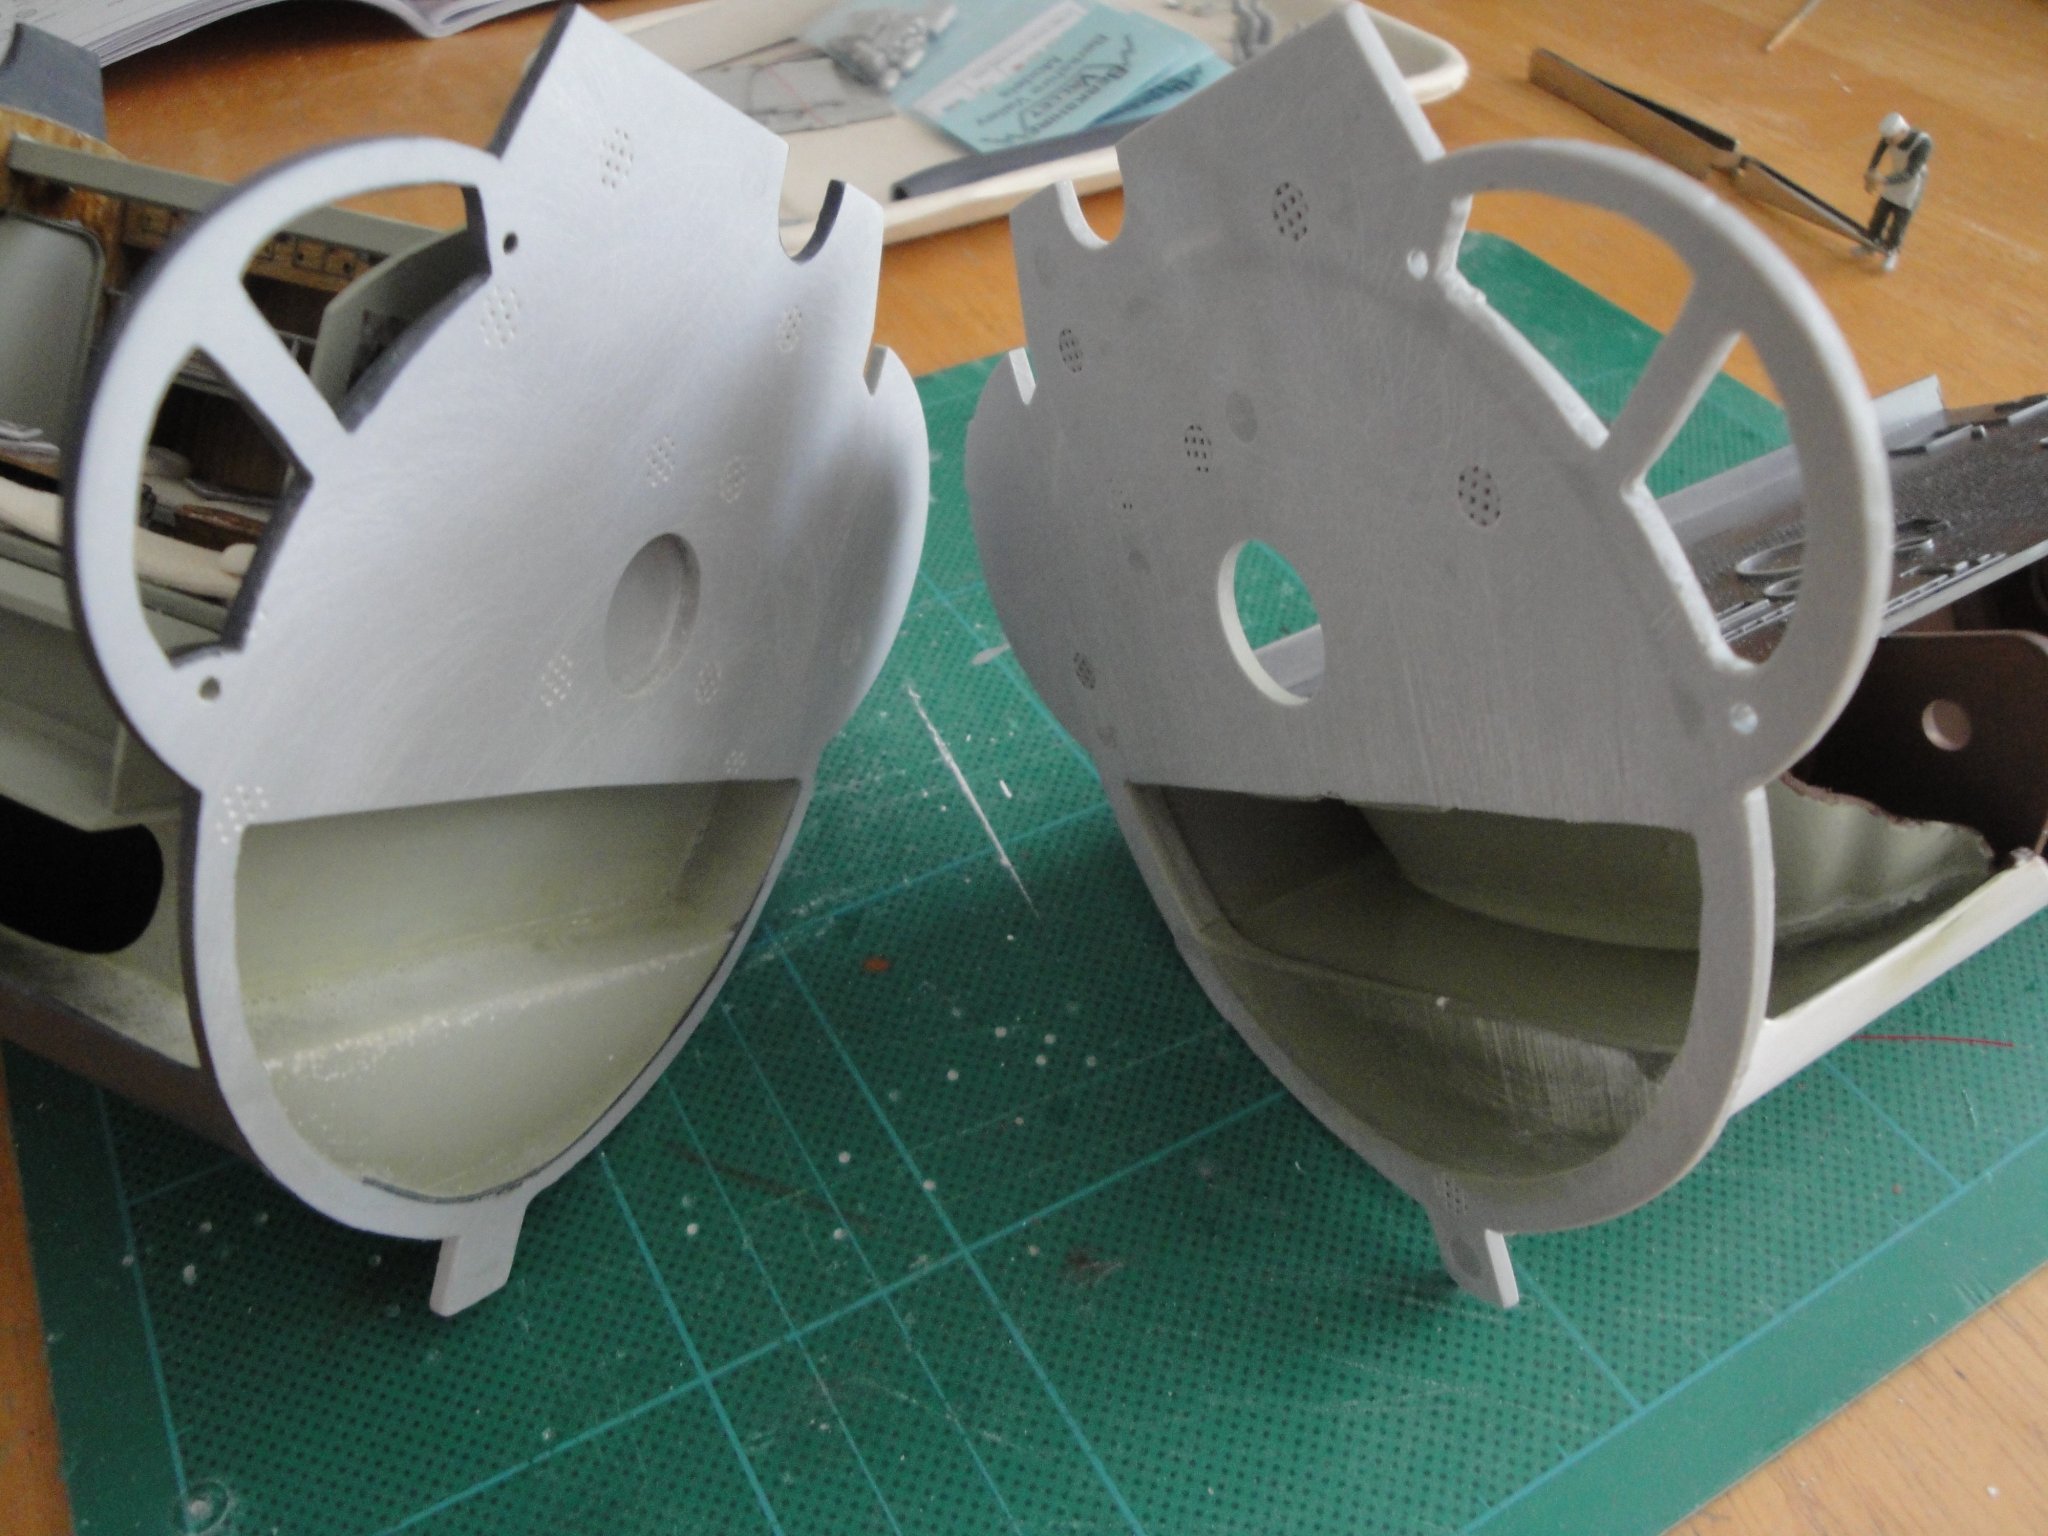
A few more progress, on the underneath of the Control room. All the resin has been poured and cured.... The floor of the Control room is now ready for the delicate assembly of all the parts, provided on two large sprues: The main ballast has been filled with a little bit of sea water: And here is the front fuel tank, with level matching the forward compartment's: Overall, even at this stage, this is quite a heavy module with all this resin. I have dry-fitted both modules in the hull, and everything fits nicely and tightly. The resin, sometimes can enlarge so slightly the compartment and make it impossible to fit. Trumpeter did an excellent job at fitting these various modules into the hull. Matching and alignment is very precise. Yves


- 760 replies
-
- 20
-
-
Beautiful little model. Again, I wish it was offered in 1/32nd scale. I love the shape and curves of the hull. So typical. Yves
- 100 replies
-
- 4
-
-
- zulu
- vanguard models
- (and 2 more)
-
Very, very nice model. You did a fantastic job as Artesania Latina models are not always easy to build, specifically in regard to the wood quality. Yves
-
This is probably to go with their recently released 1/200 scale Titanic. For those diorama lovers.... Yves
-
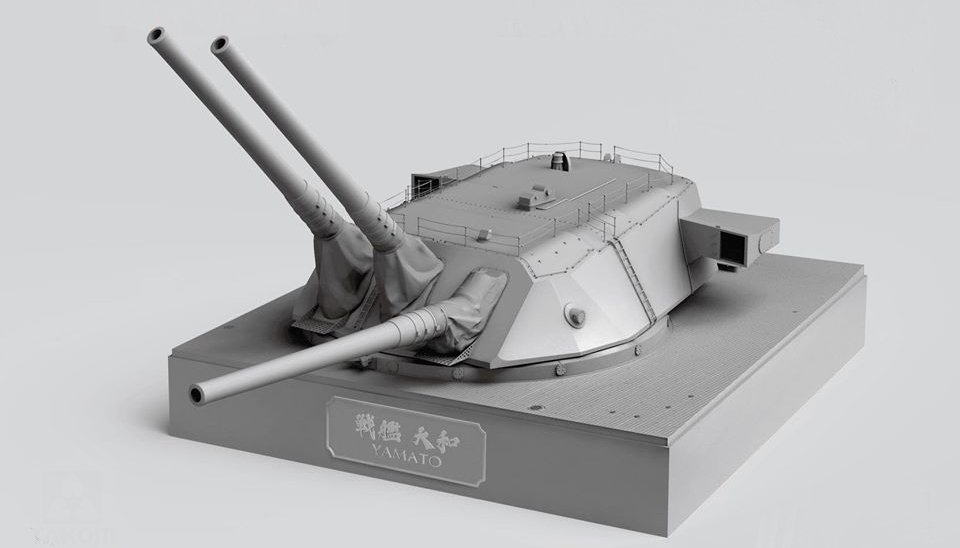
Apparently, TAKOM has decided to release the massive kit of the Yamato gun turret in 1/72nd scale. That could be a starting point for building a 1/72nd scale Yamato monster..... More details in the link below: https://www.themodellingnews.com/2020/04/it-is-officially-2nd-of-arpil-takoms.html#more Yves
- 1 reply
-
- 3
-
-
Beautiful. I wish Midwest would resurrect their line of small boats. Yves
-
April's Fool joke: it would be quite an experience, if they could start the Diesel engine as well.....
-
I like the hooks. Very nice addition to your model. Yves
-
Thank you 7Youngs. I did find some details and will present them soon. That is a very nice set that you got. Yves
-
Kevin, Very nice jetty that you are building. May I suggest you stagger the rails so as not to have their links at the same place. You could also use metal rails from Scale One (1/32) or even G scale (1/29). Brass rails can be purchased individually for these scales. Yves
-
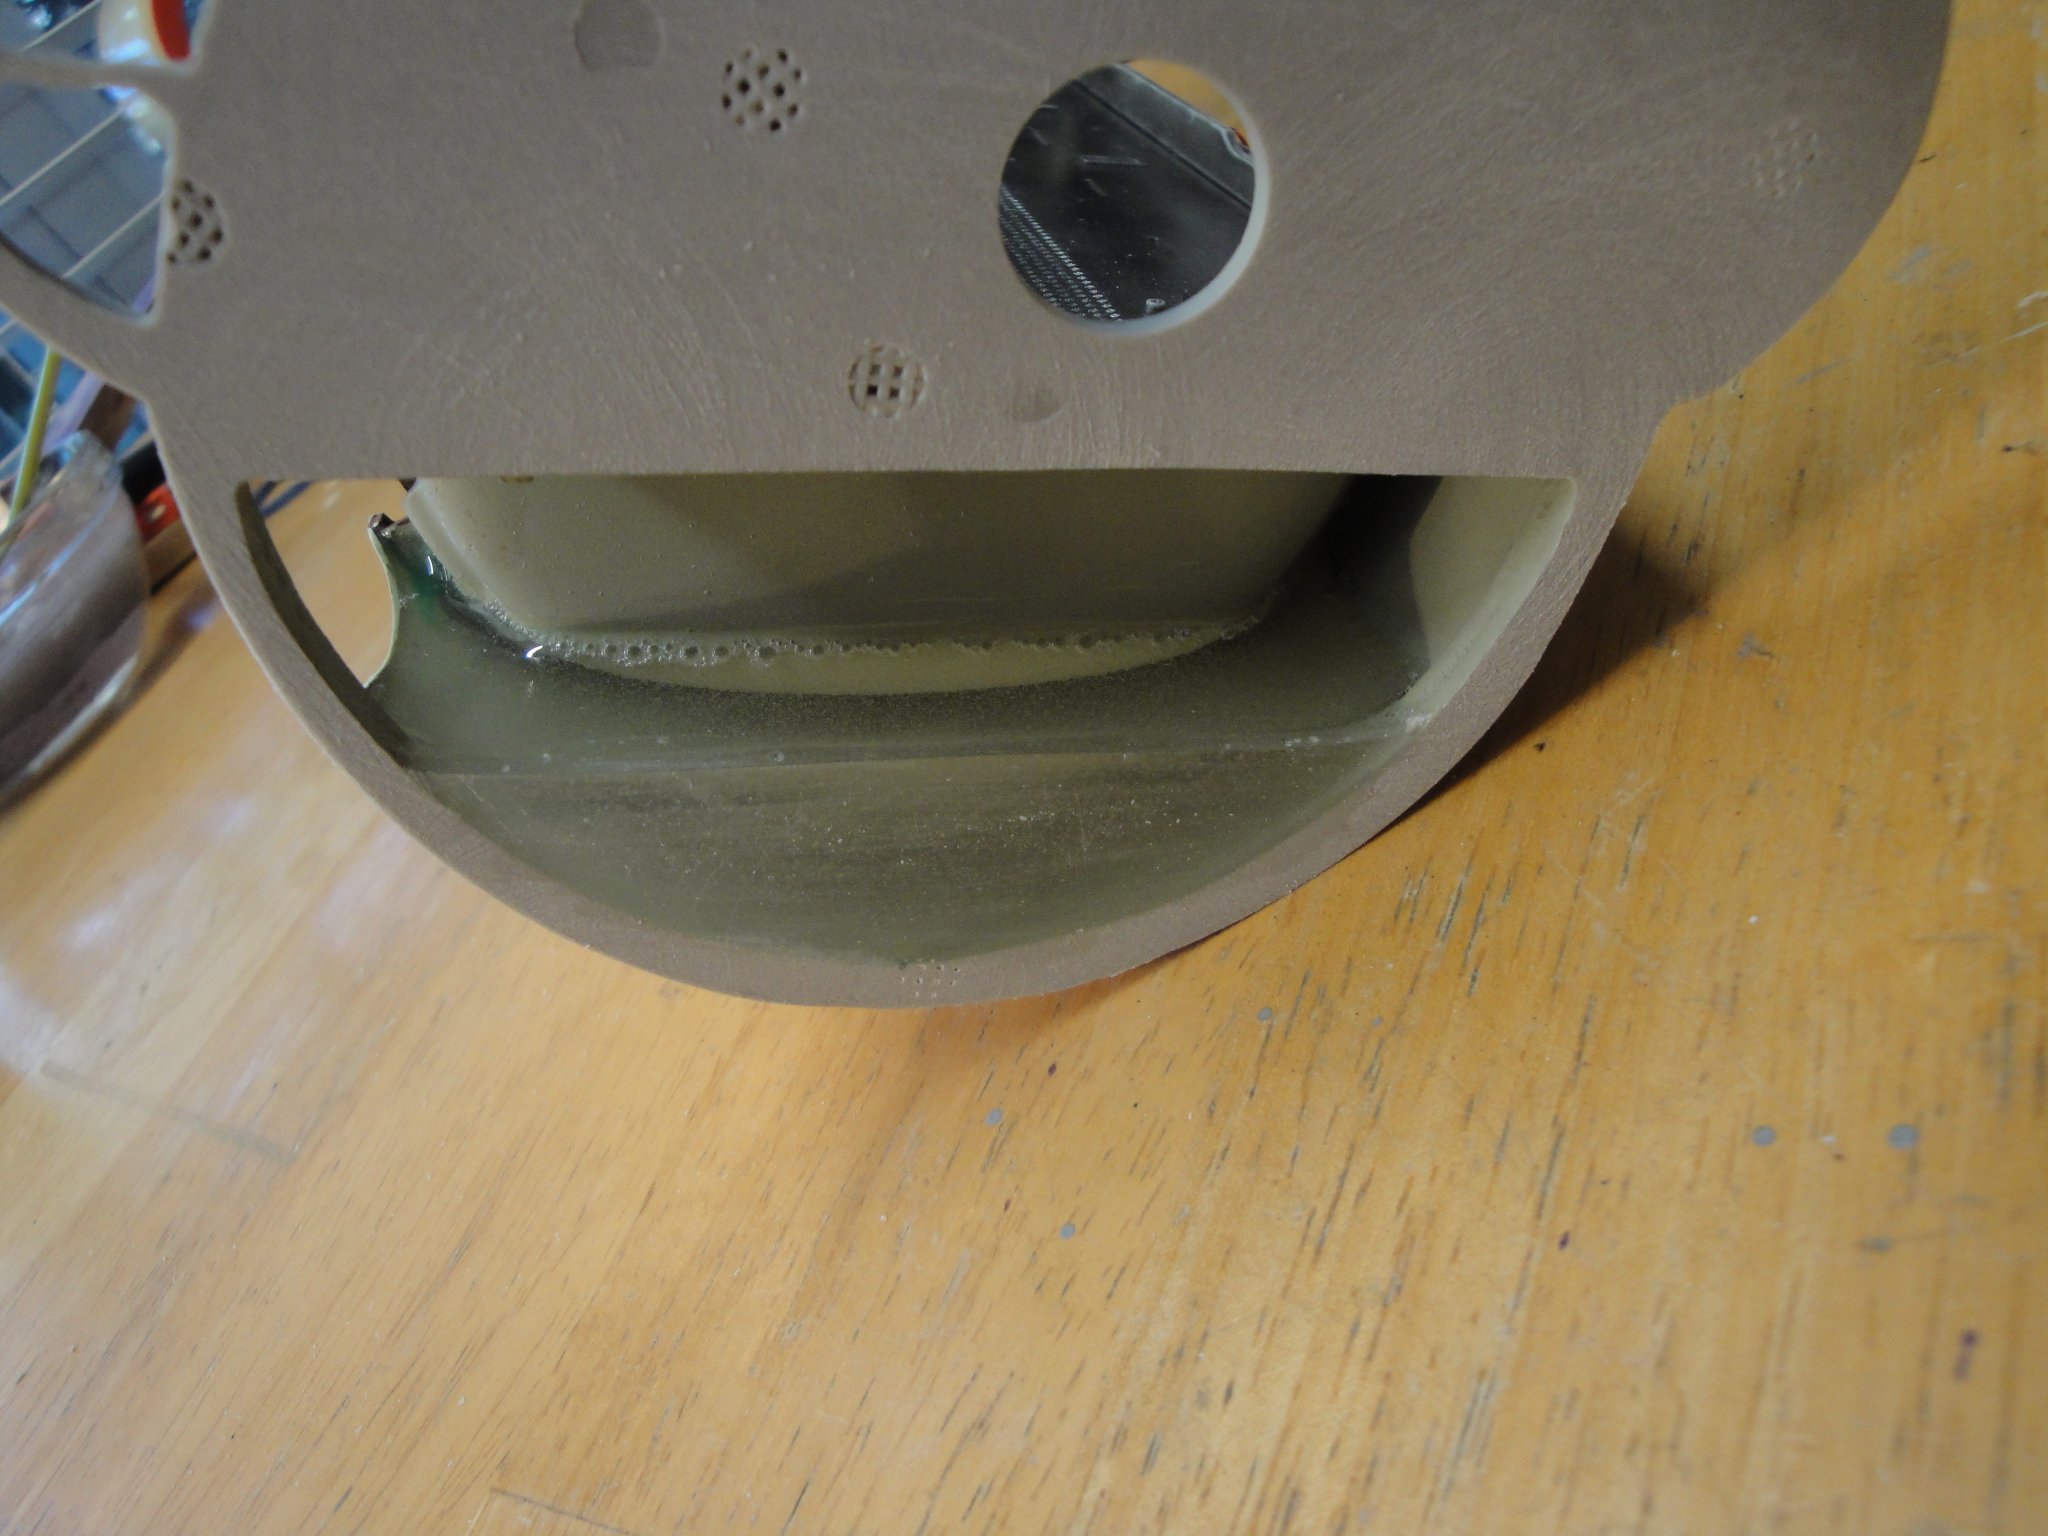
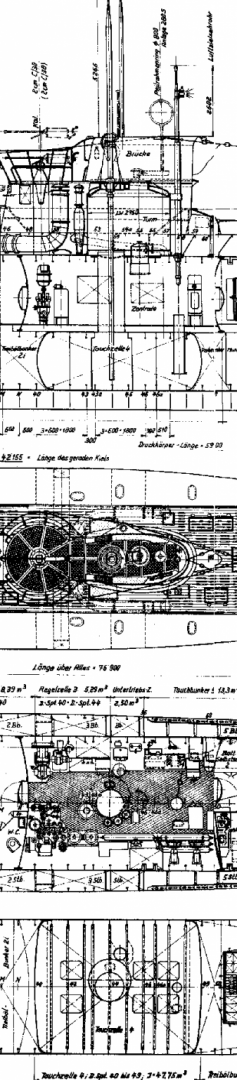
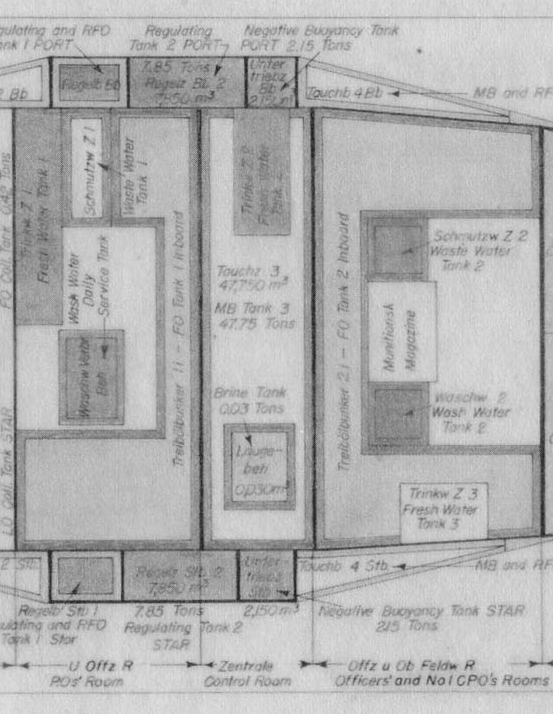
For the aficionados of Type VII-c, here are a few drawings representing the Control Room being worked on at this time: The Tank view clearly shows how the various fuel tanks are arranged inside the pressure hull. The Control room is basically sitting on top of the fuel tanks and the main ballast of a capacity of 47.75 cubic meters. On the top view, you can see the well for the attack periscope which is missing in the Trumpeter kit. The blue-print also shows the various curvatures of the control room and the fuel tanks. Trumpeter could have provided some convex bulkheads for that room, but they decide otherwise, to make the final assembly in the hull, easier. Too bad, it would have been an interesting feature. Another blatant mistake from Trumpeter is the curvature of the Control Room floor. I have already mentioned that limitation and this is how it should have looked like: Of course, the entire internal arrangement of the hull would have had to be modified, but it would have been so cool to have this feature represented, at least partially (from left to a partial right on the drawing, as to allow the viewers to peruse into the compartment. I thought about doing it, but the modifications are way too extreme and decided against it. Yves
- 760 replies
-
- 11
-
-
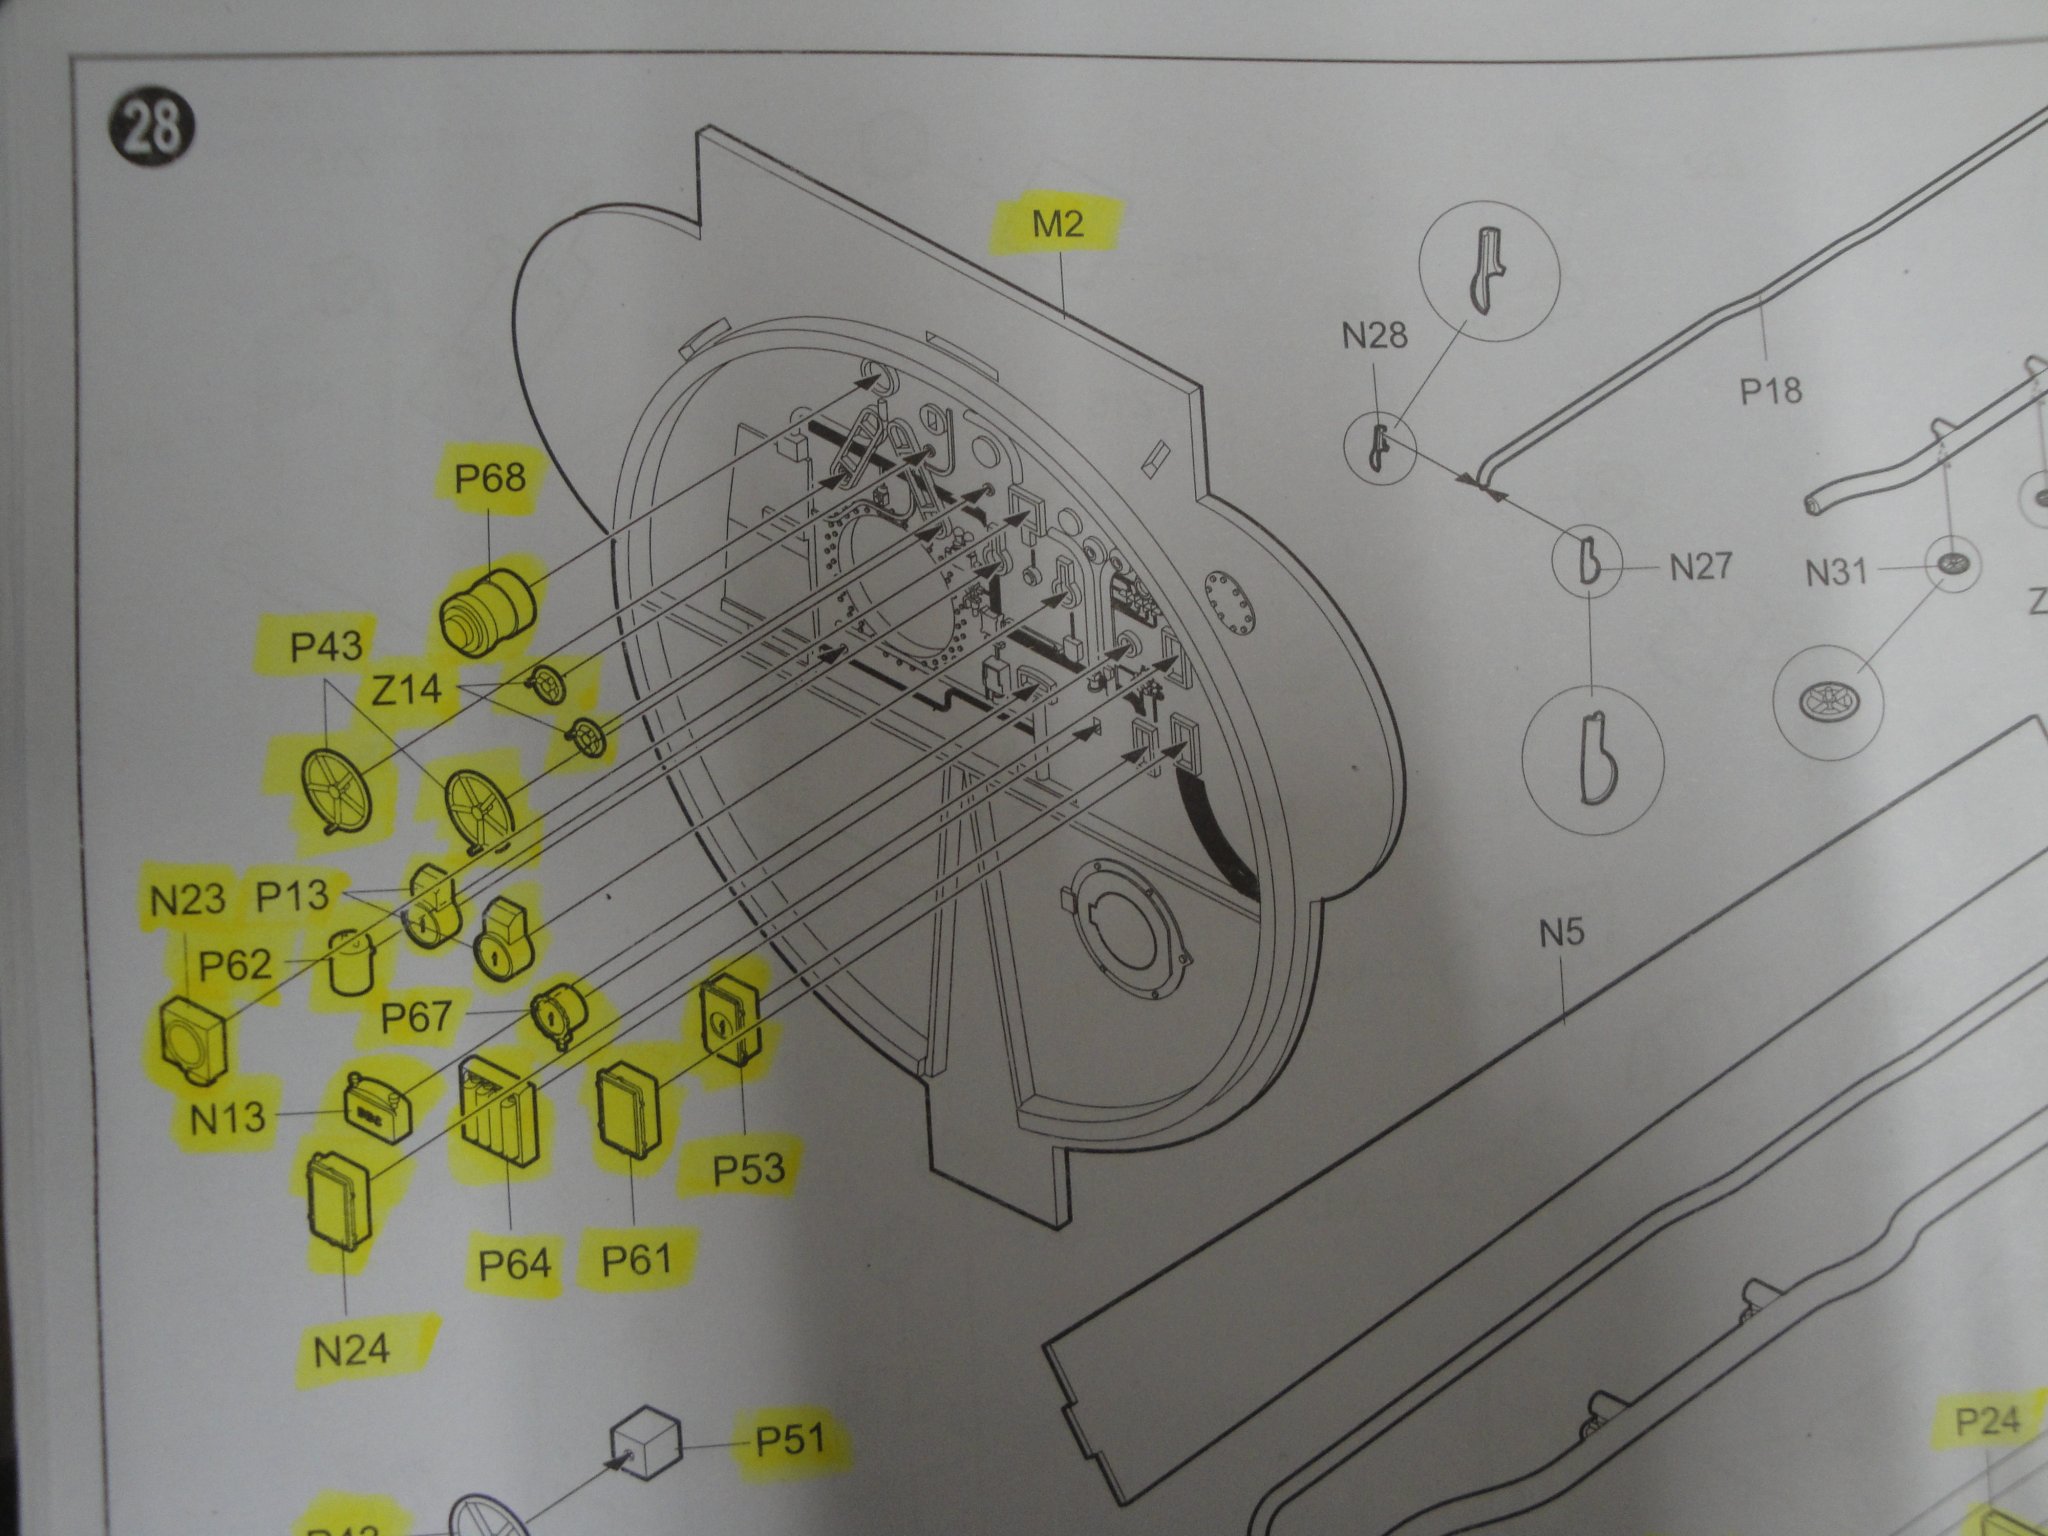
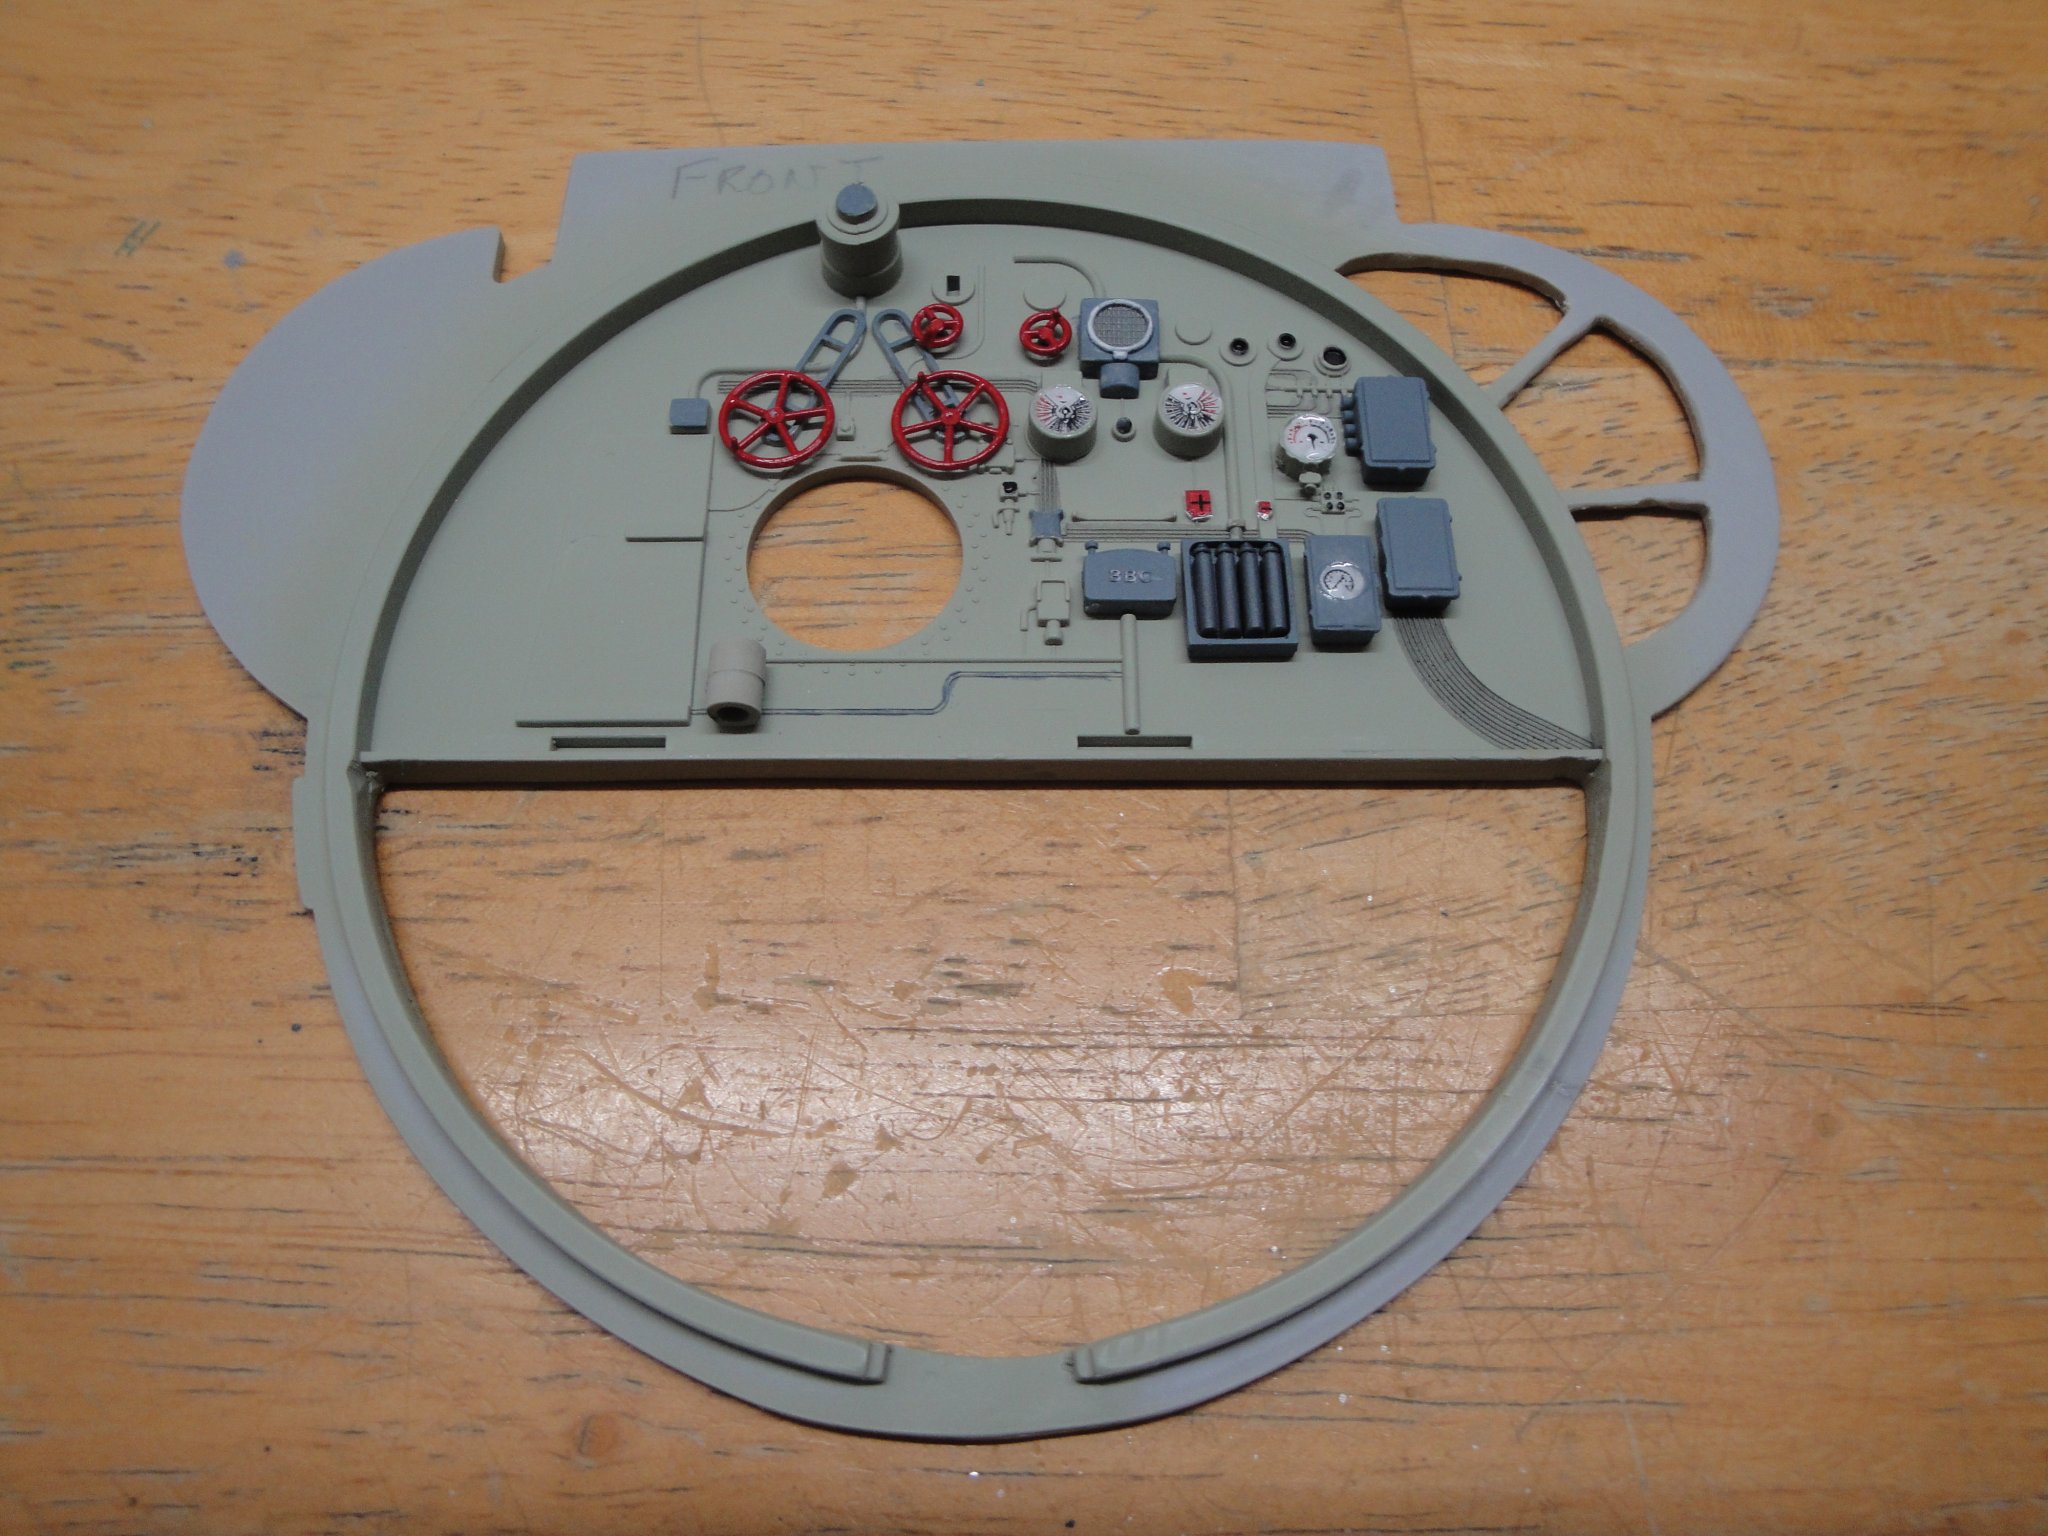
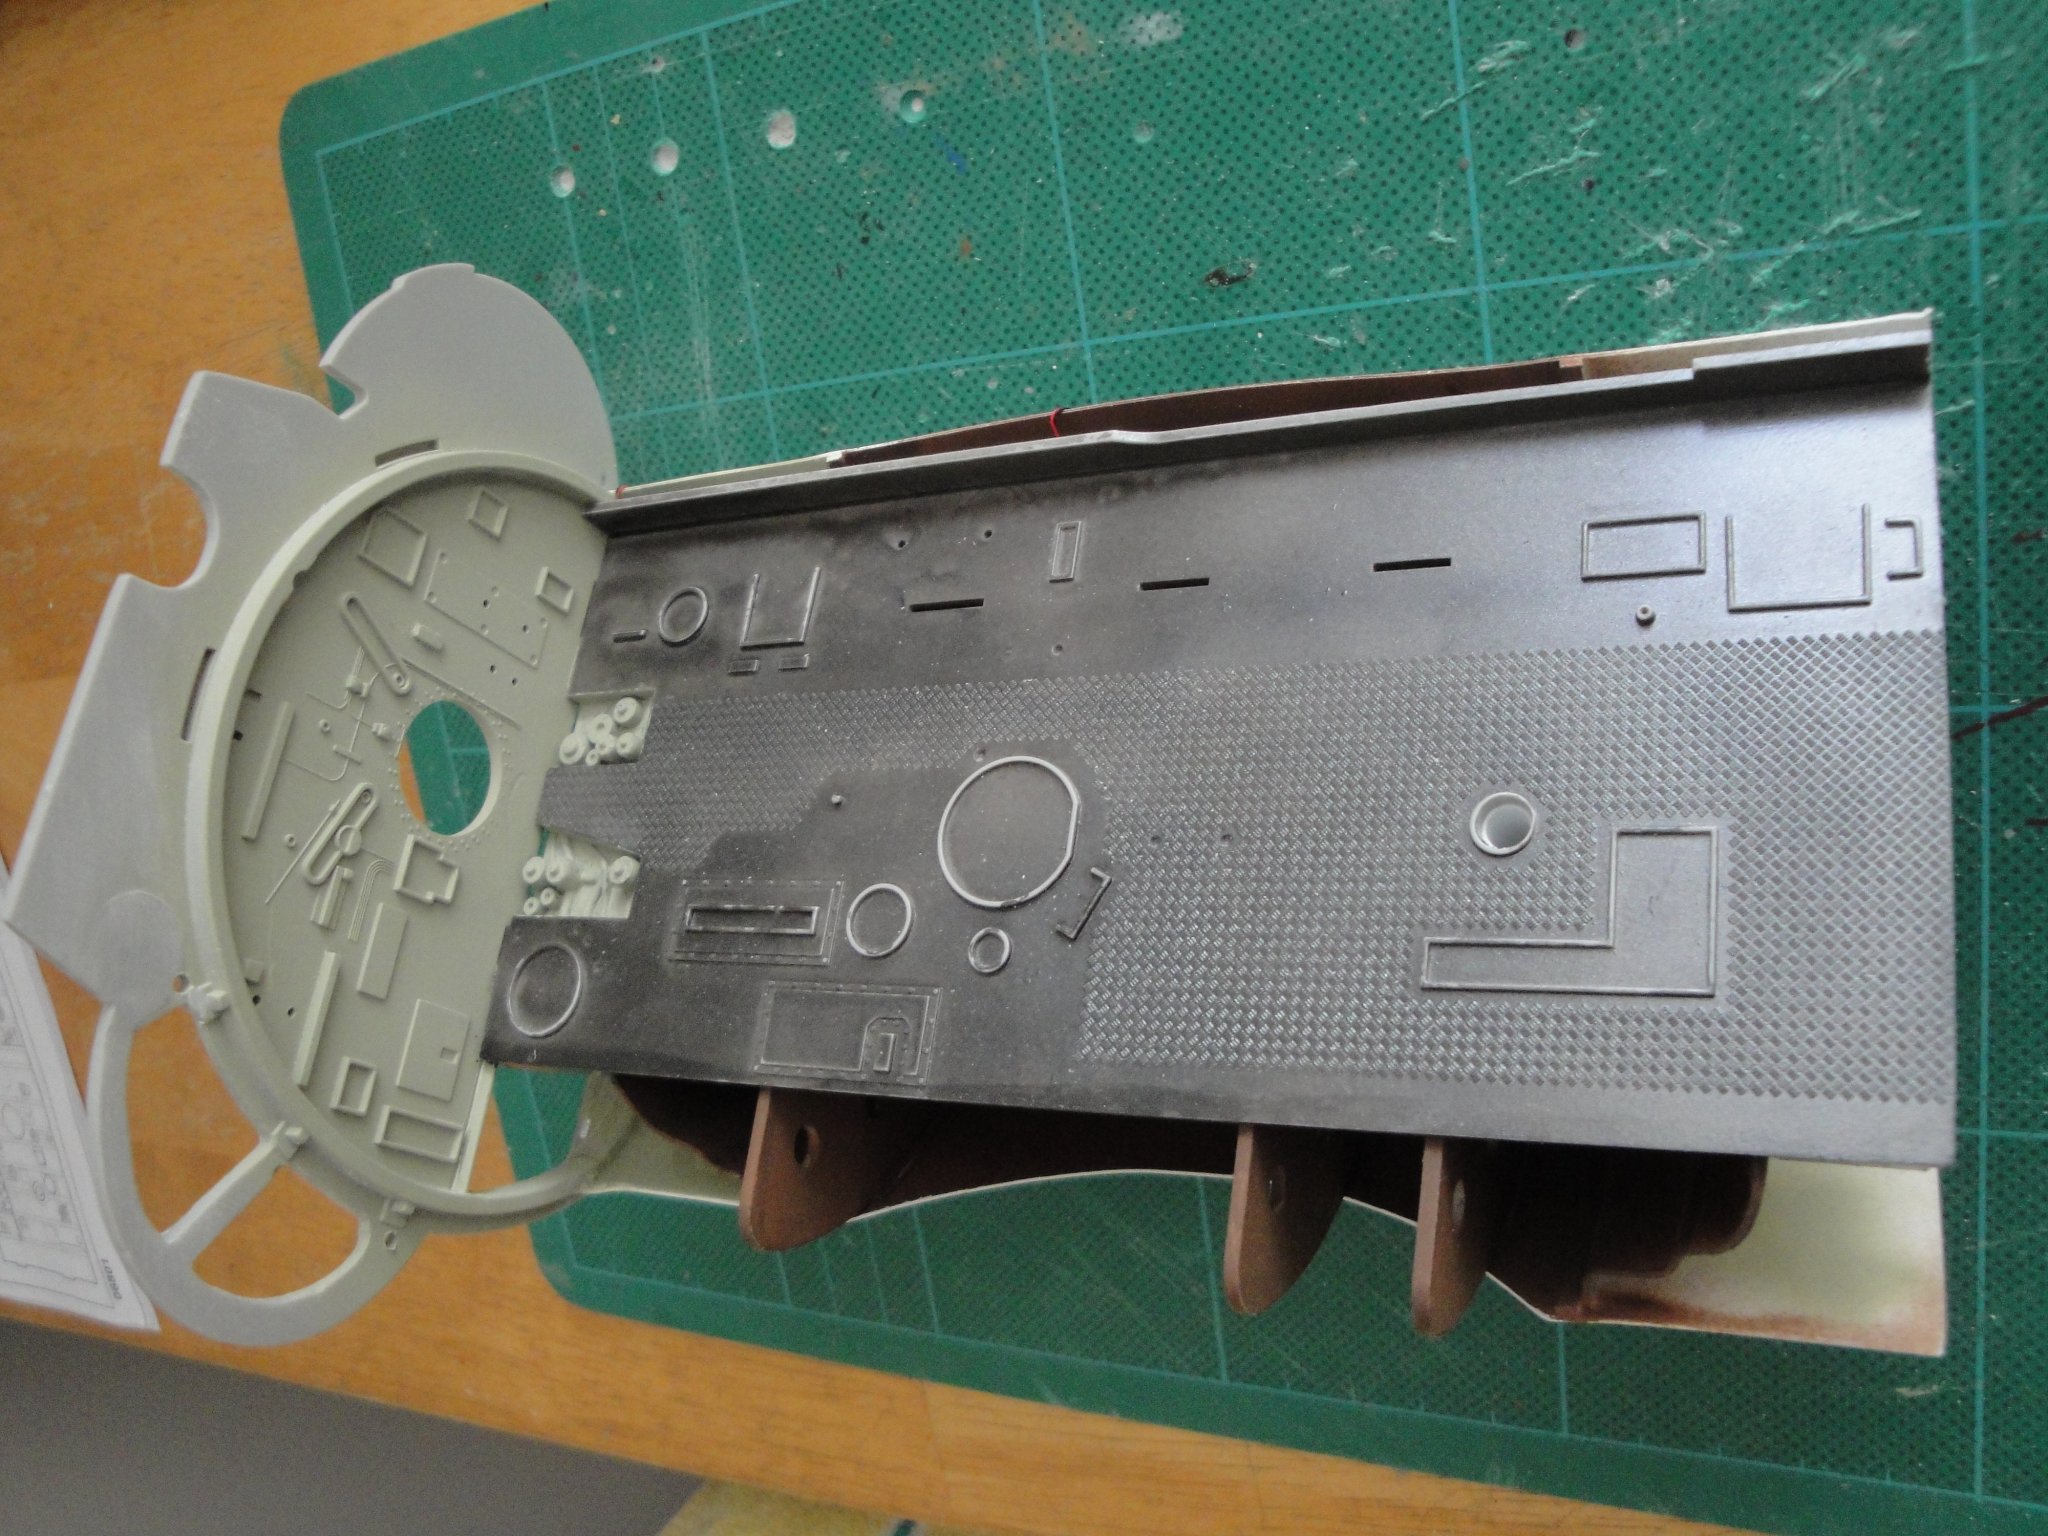
Just a quick update. I am working on the rear bulkhead and will not glue or install the front bulkhead, until I am done with both of them. It is in fact really difficult to paint and glue all the small parts if you do not have a direct access to the bulkheads. So, the rear one is pretty much completed: As indicated, this fuel tank (picture below) will be painted after gluing the front bulkhead. Then resin will be poured to match the level of the front fuel tank, in the forward compartment. Finally, more resin will be poured to simulate some sea water in the main ballast. All this "liquid" will do for a rather heavy module at the end. Yves


- 760 replies
-
- 13
-
-
Superb model and details Cathead. I like the painting/poster of the Arabia, that you have on your bench. Yves
- 599 replies
-
- 11
-
-
- sidewheeler
- arabia
- (and 4 more)
-
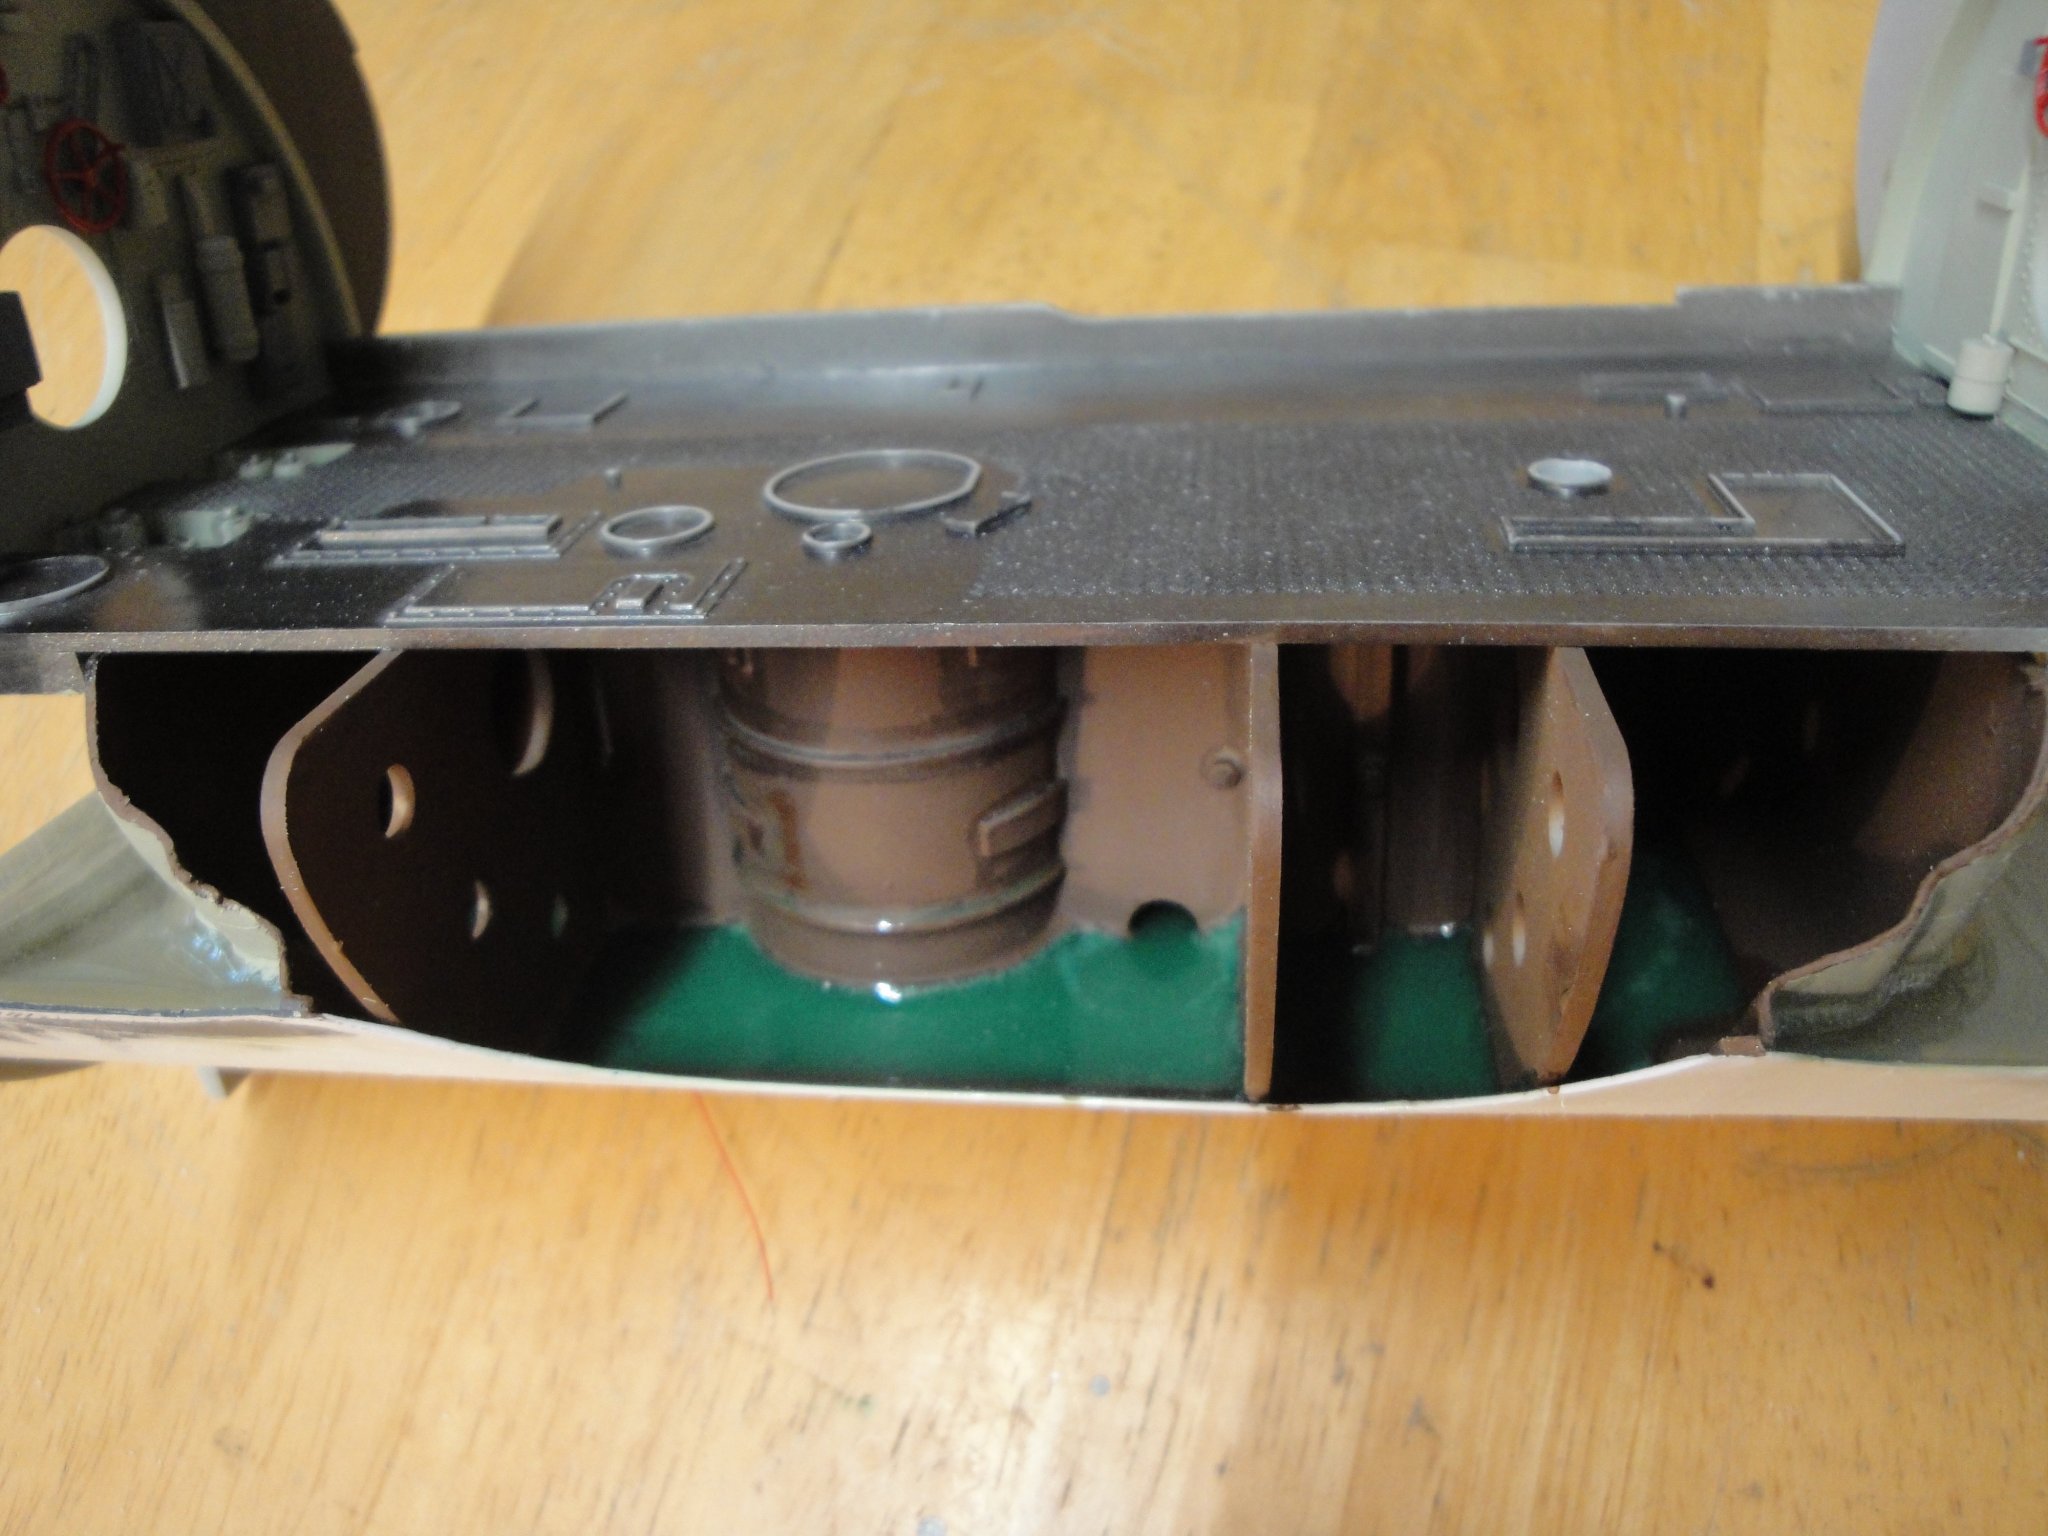
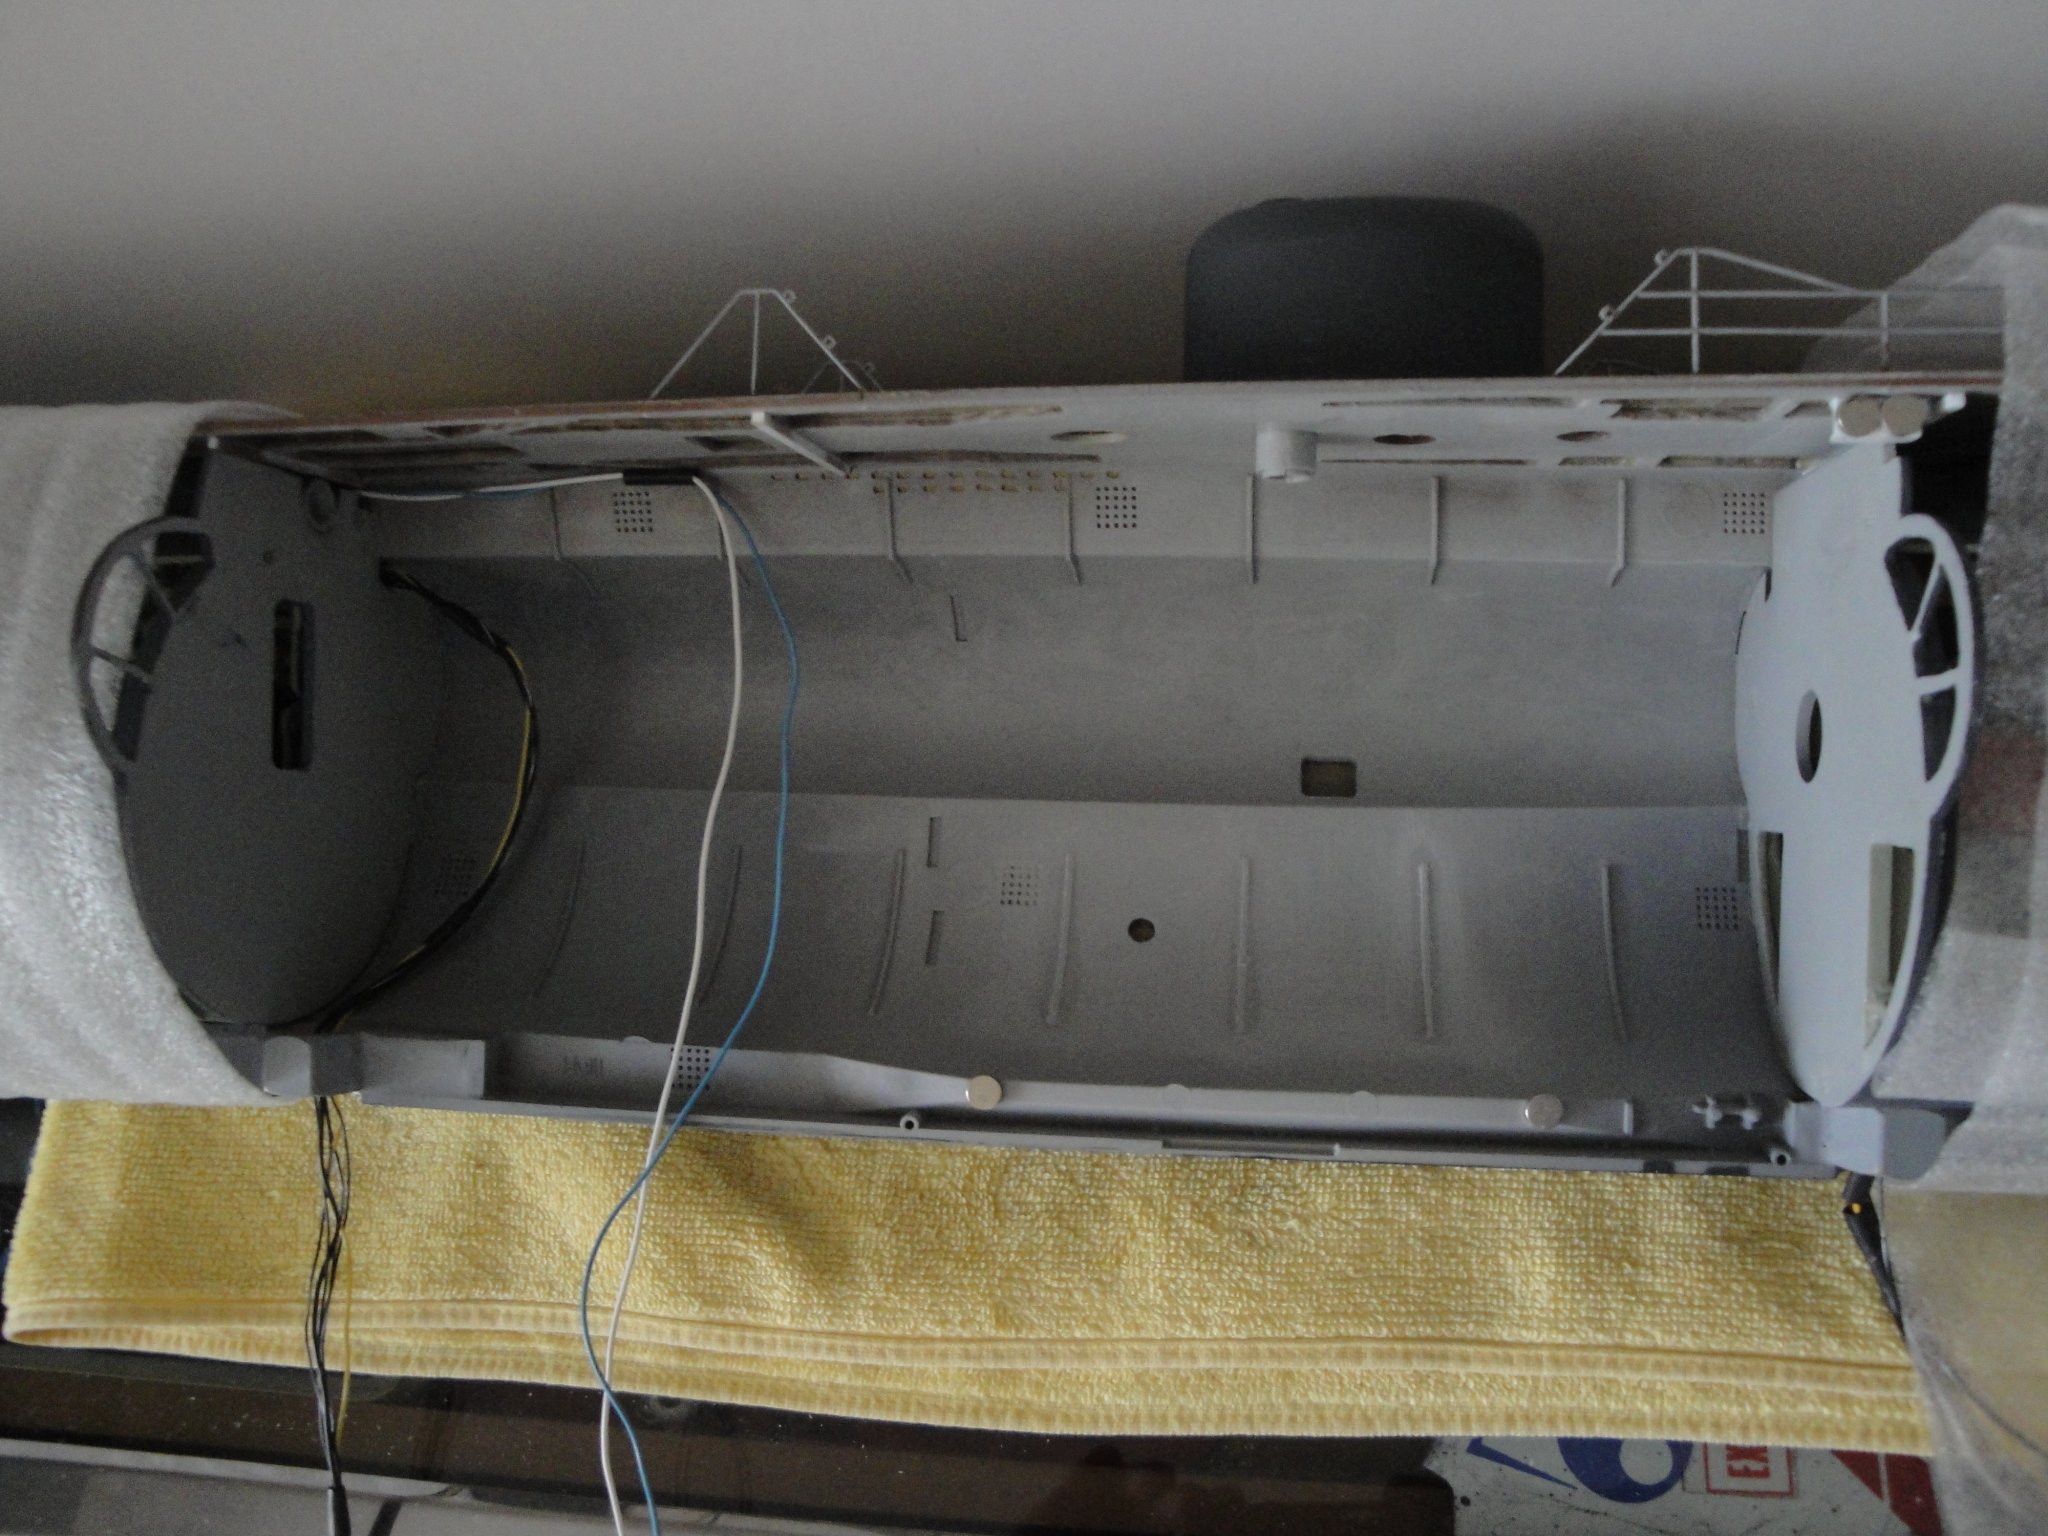
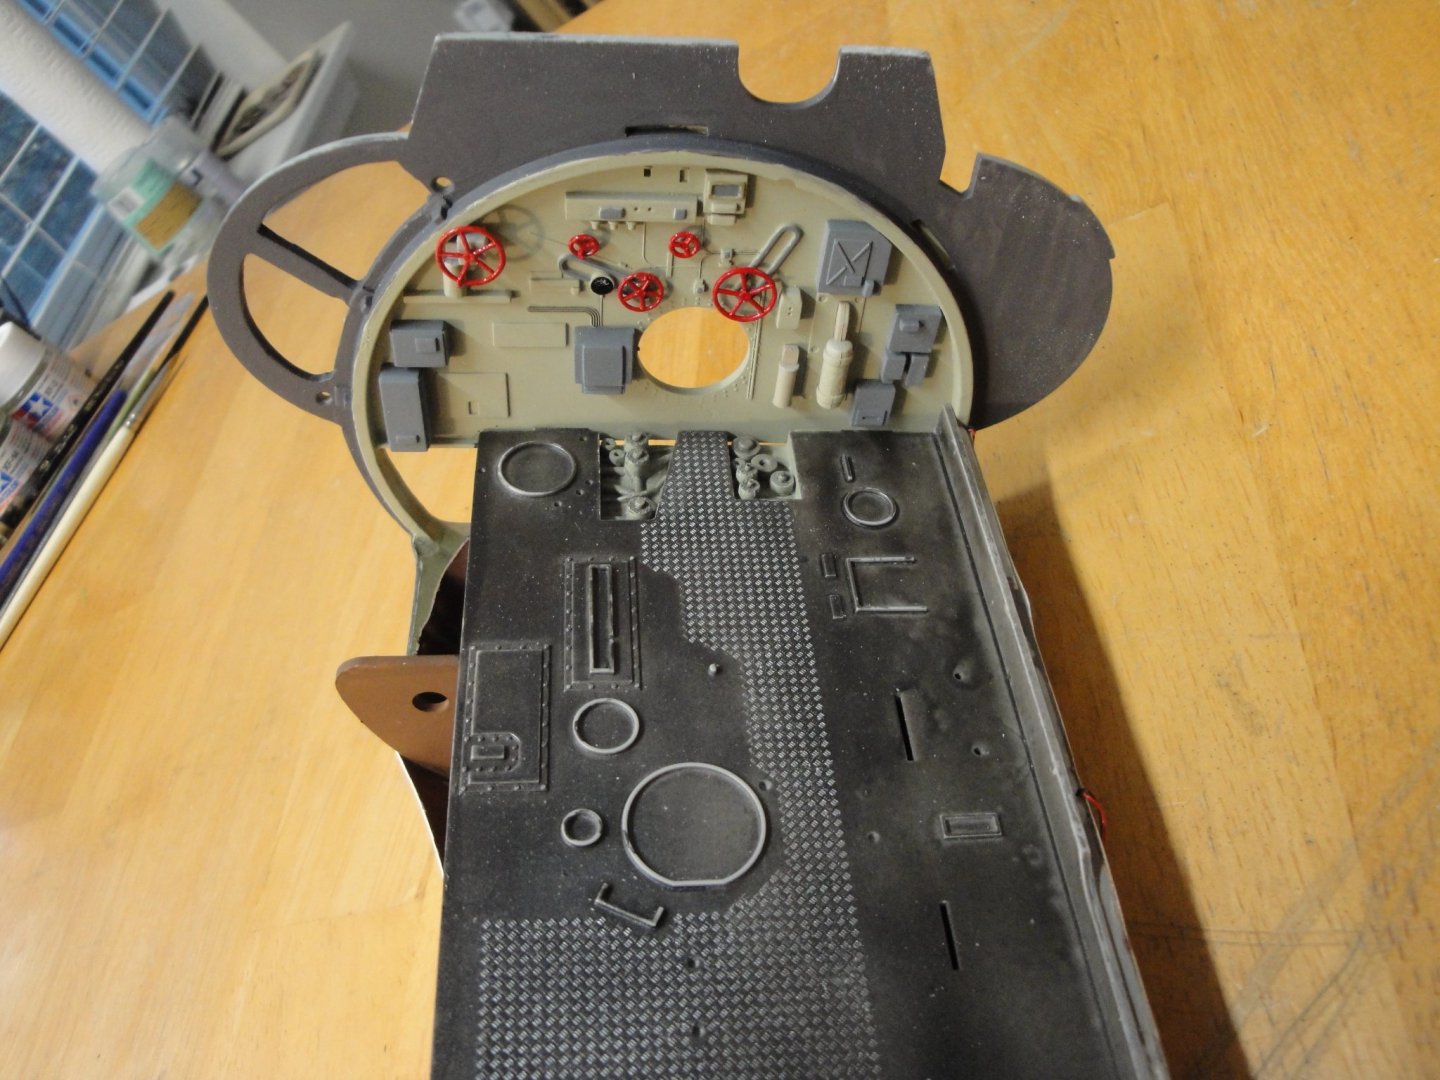
A couple more pictures to situate the action: This is the left over space in the hull that will accommodate the two compartments under construction. View of the Control Room floor. Notice the hole drilled and the tube allowing the attack periscope to slide down in the guts of the beast: View of the main ballast, before any sea water is poured into it (below): The tank located under the control room *below): And the two ends of the rear fuel tank: You can notice the different appearance of the resin mixed at (too) low temperature (left) and at correct temperature (right). Since these two sections are separated by the outside hull and not much of them is visible, it does not come as a blatant contrast. Still, I wish I had waited one more day before pouring that very sensitive resin. One day was in the 50's, the following in the low 80's. Yves


- 760 replies
-
- 14
-
-
Yes, very true. You described the mechanism very well. Here is a picture to illustrate the concept: Yves

-
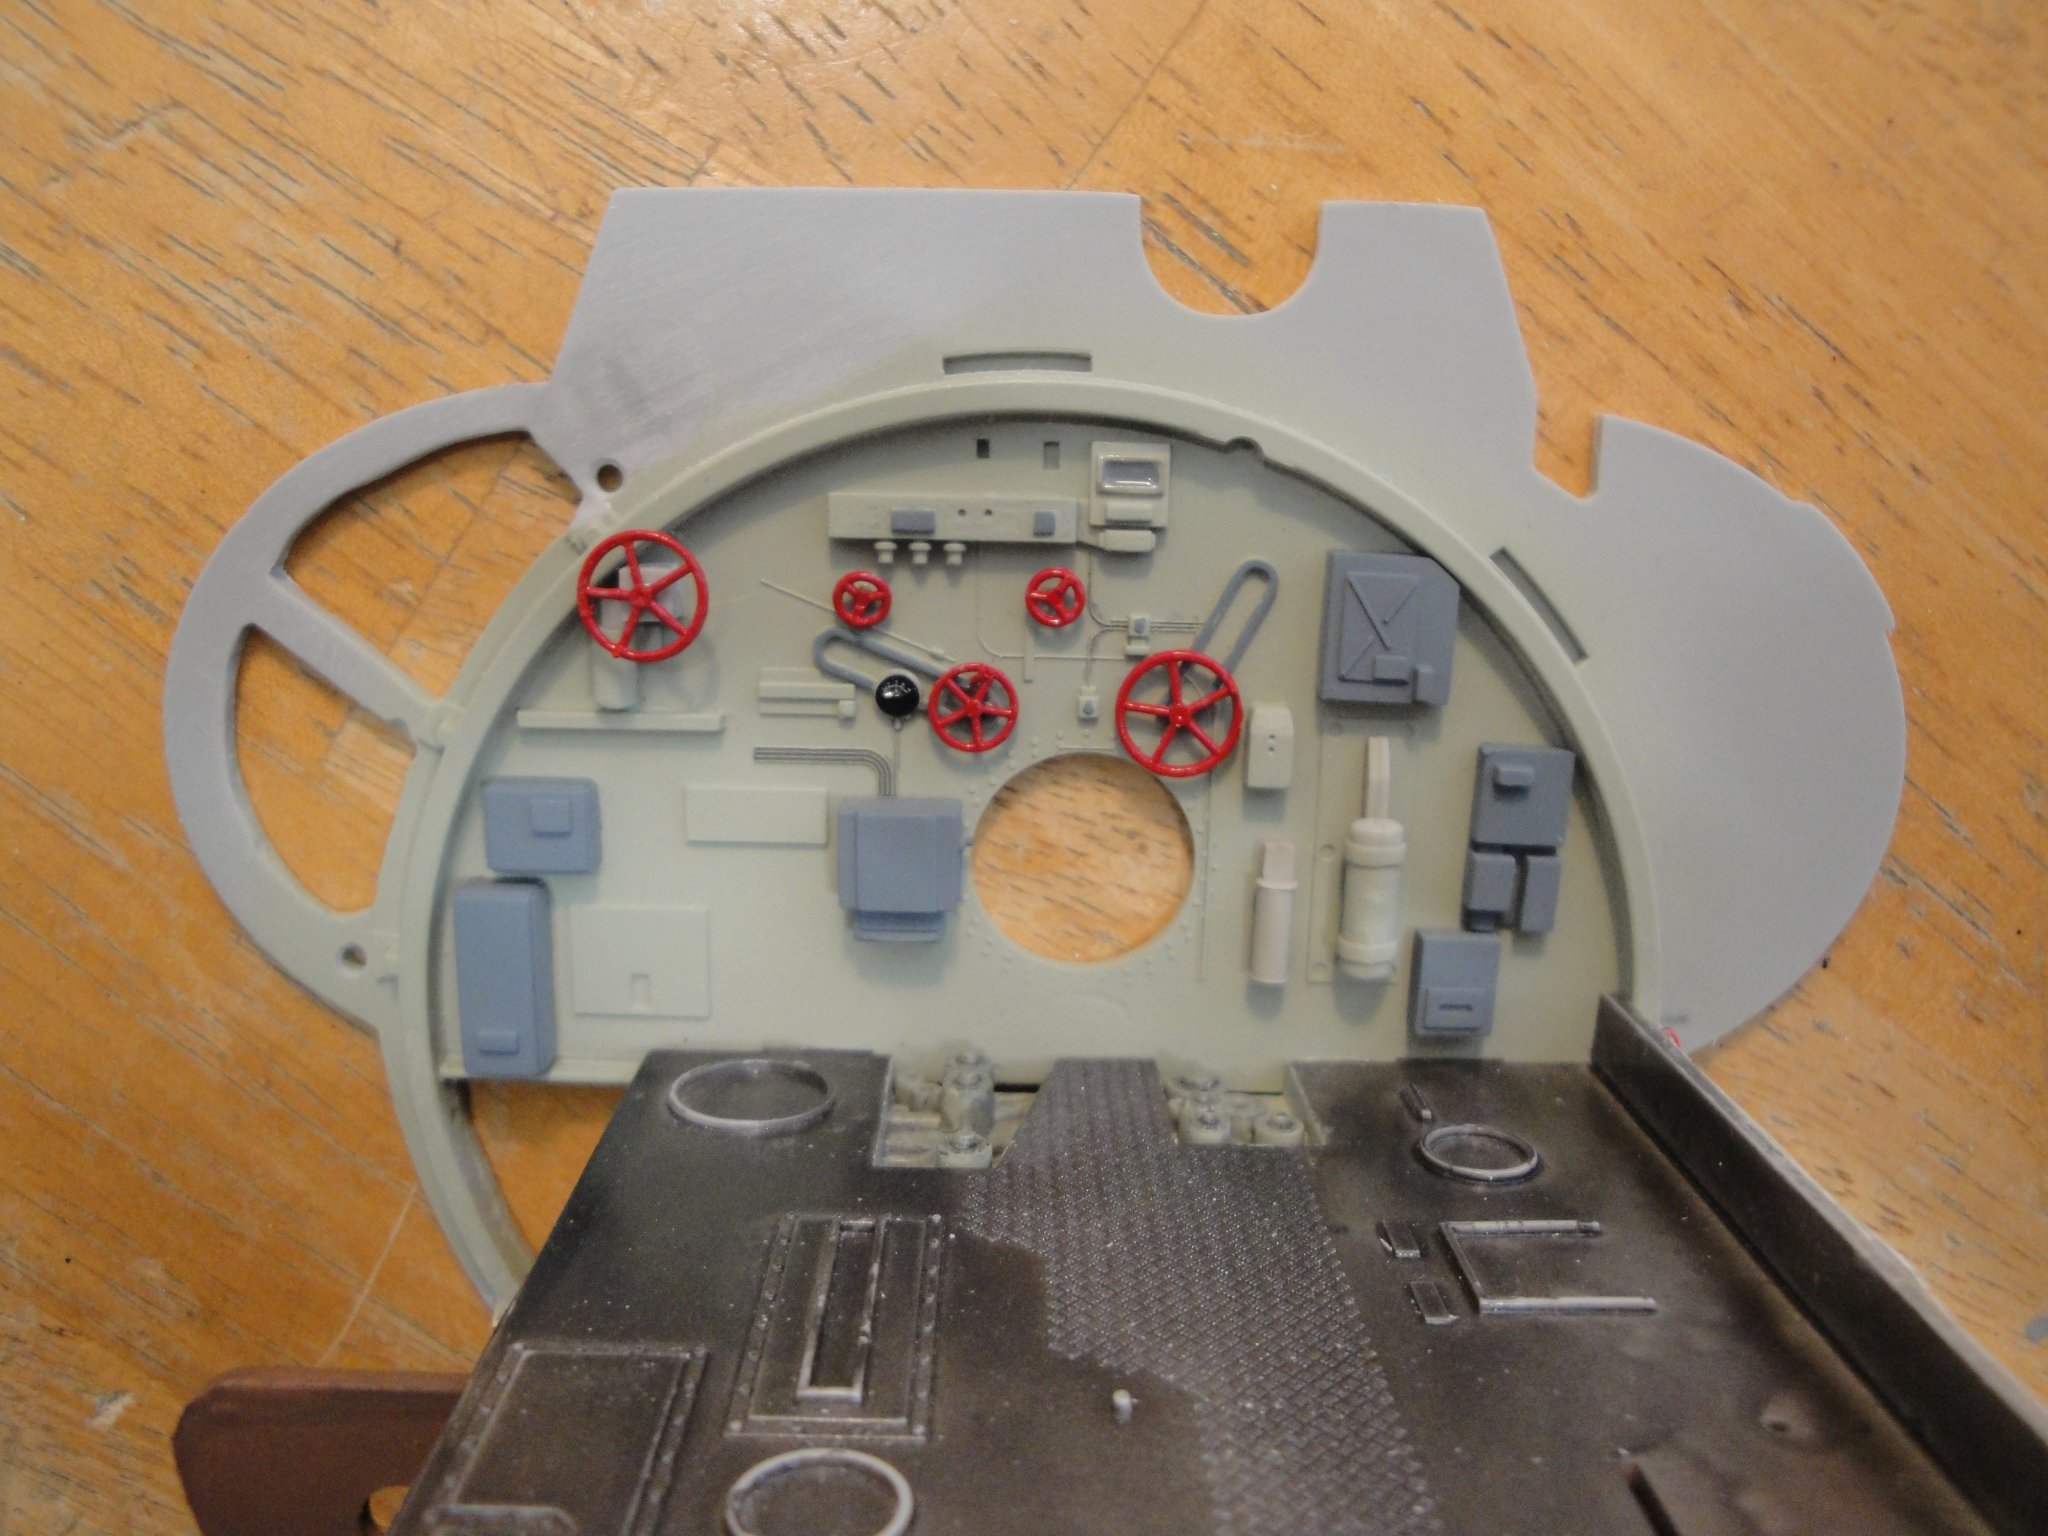
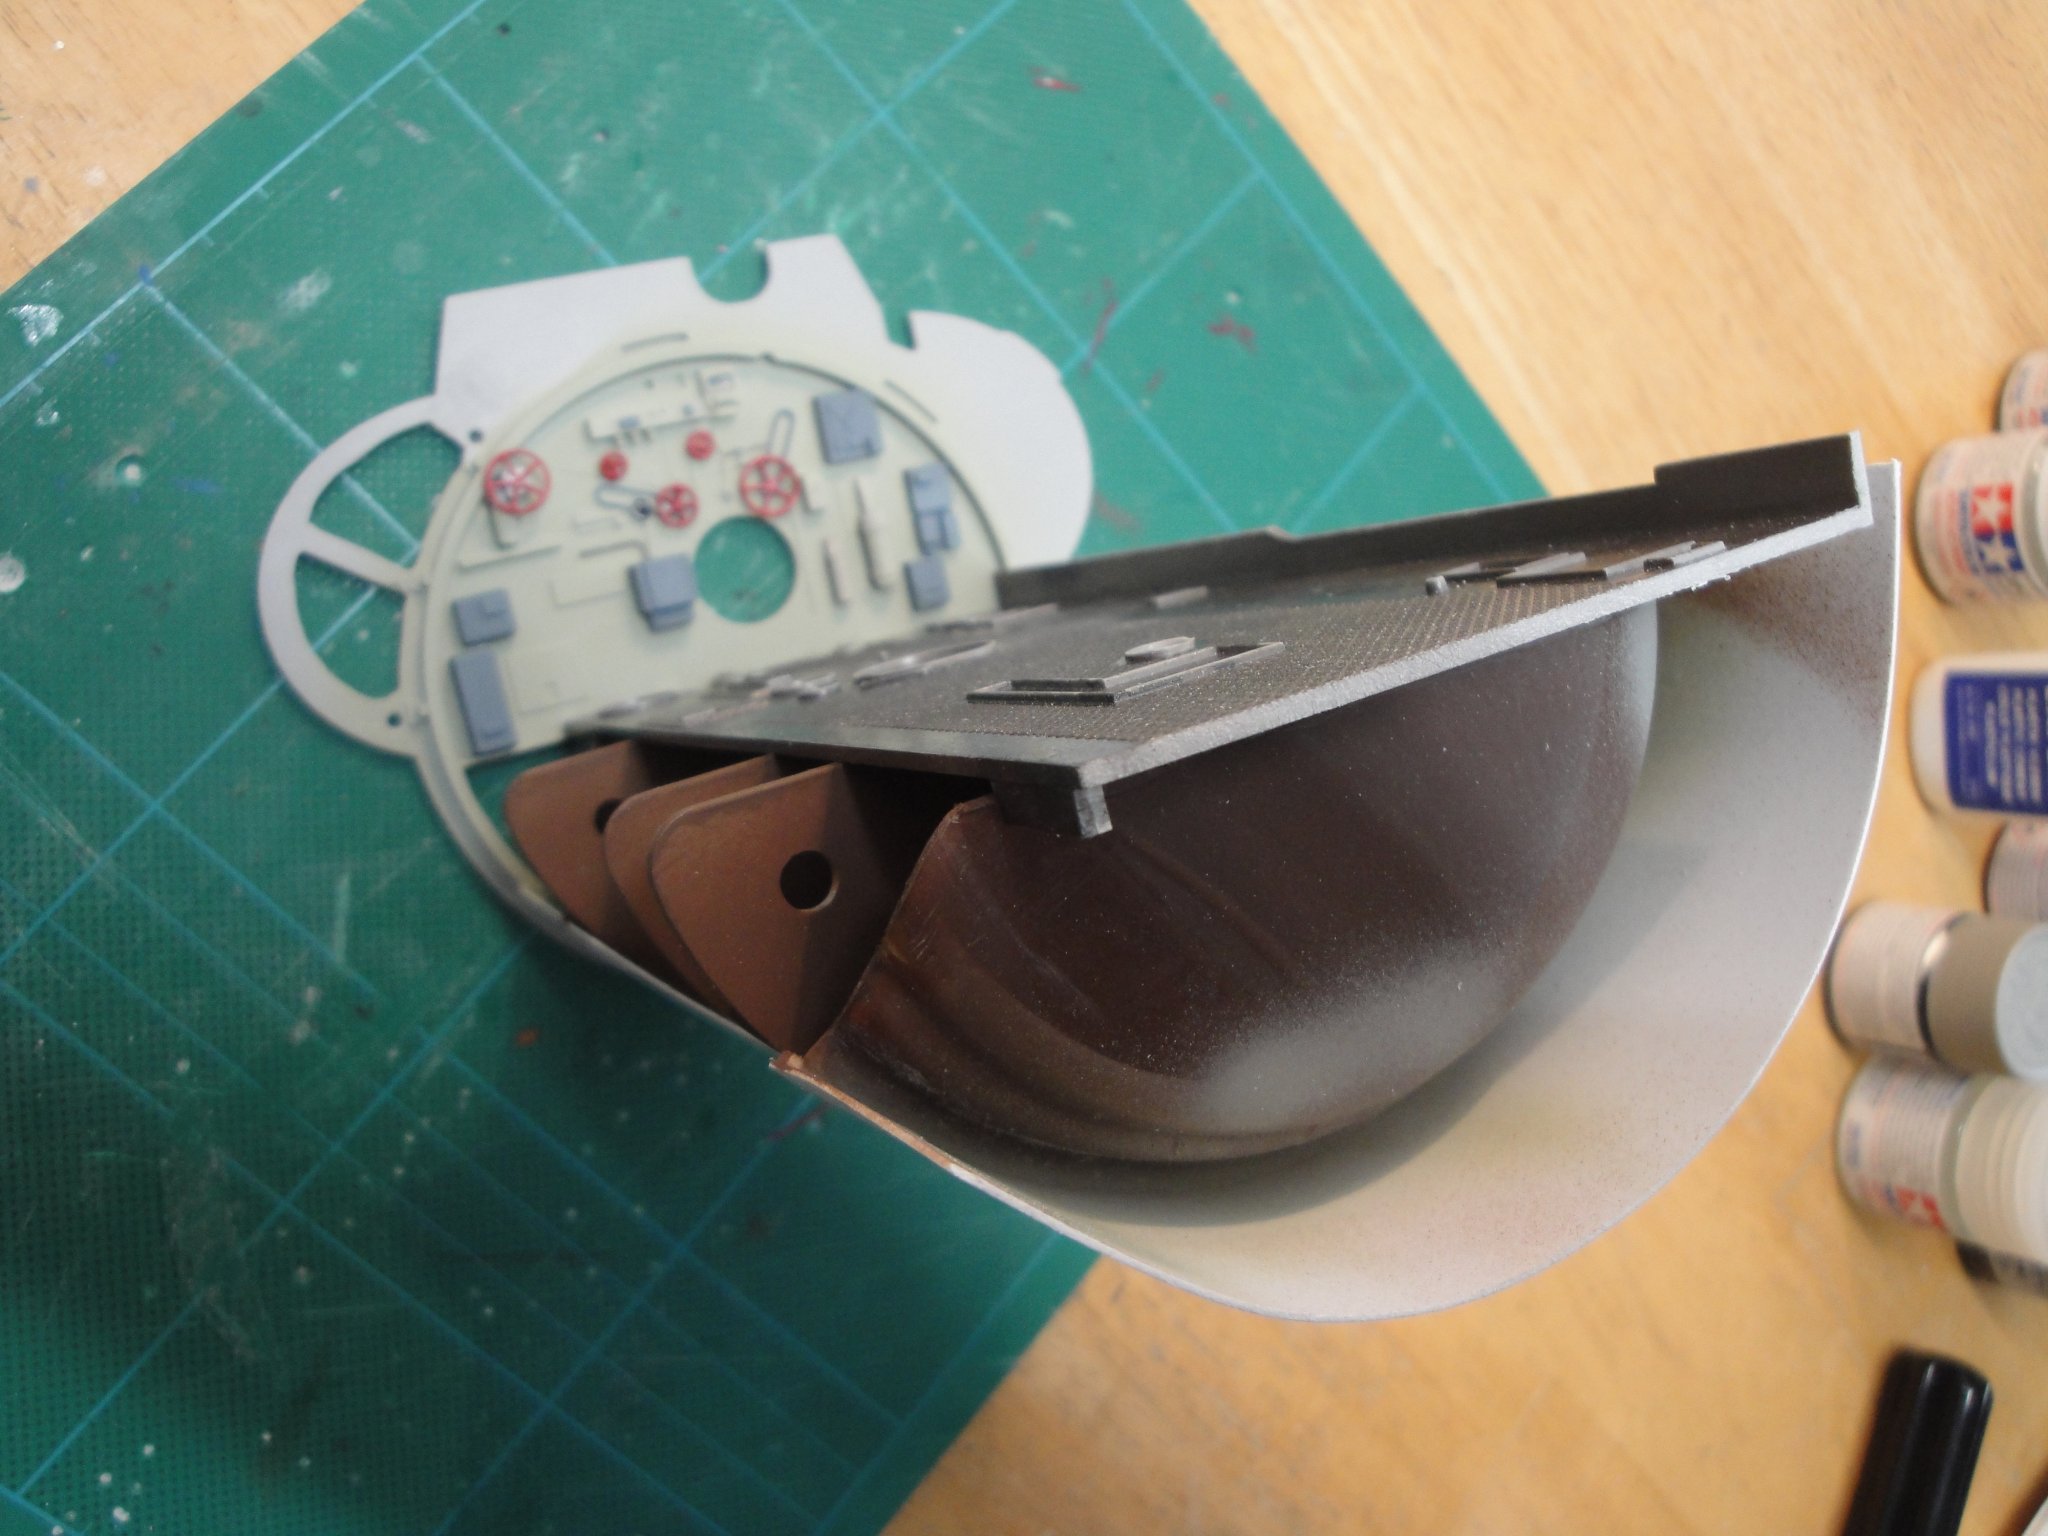
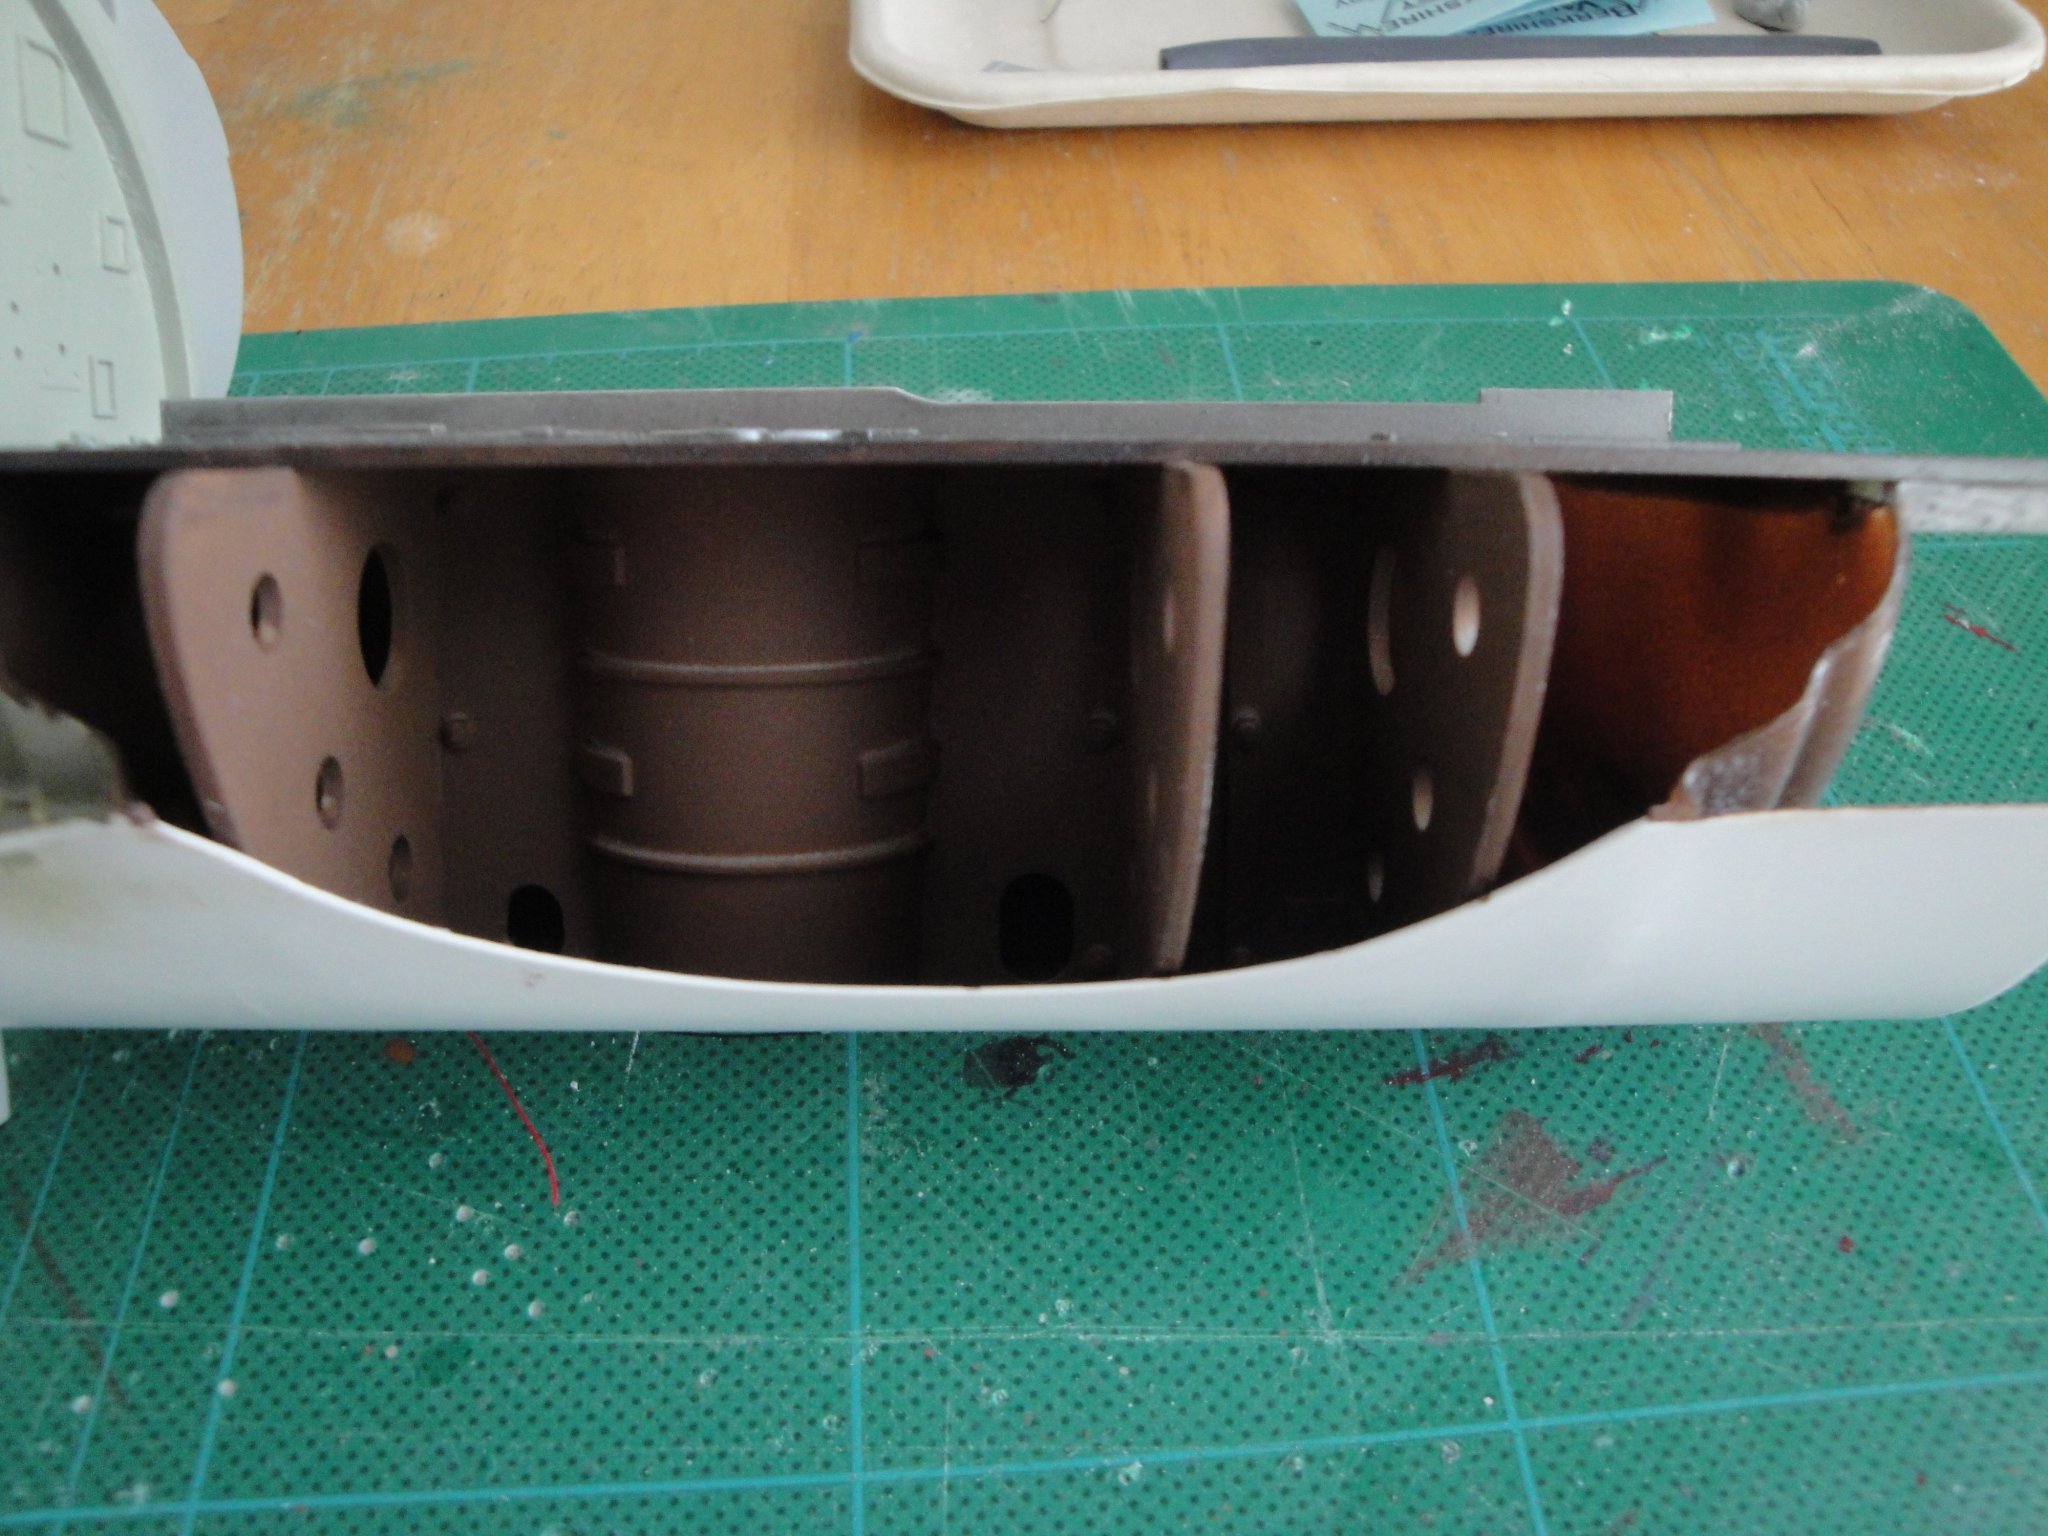
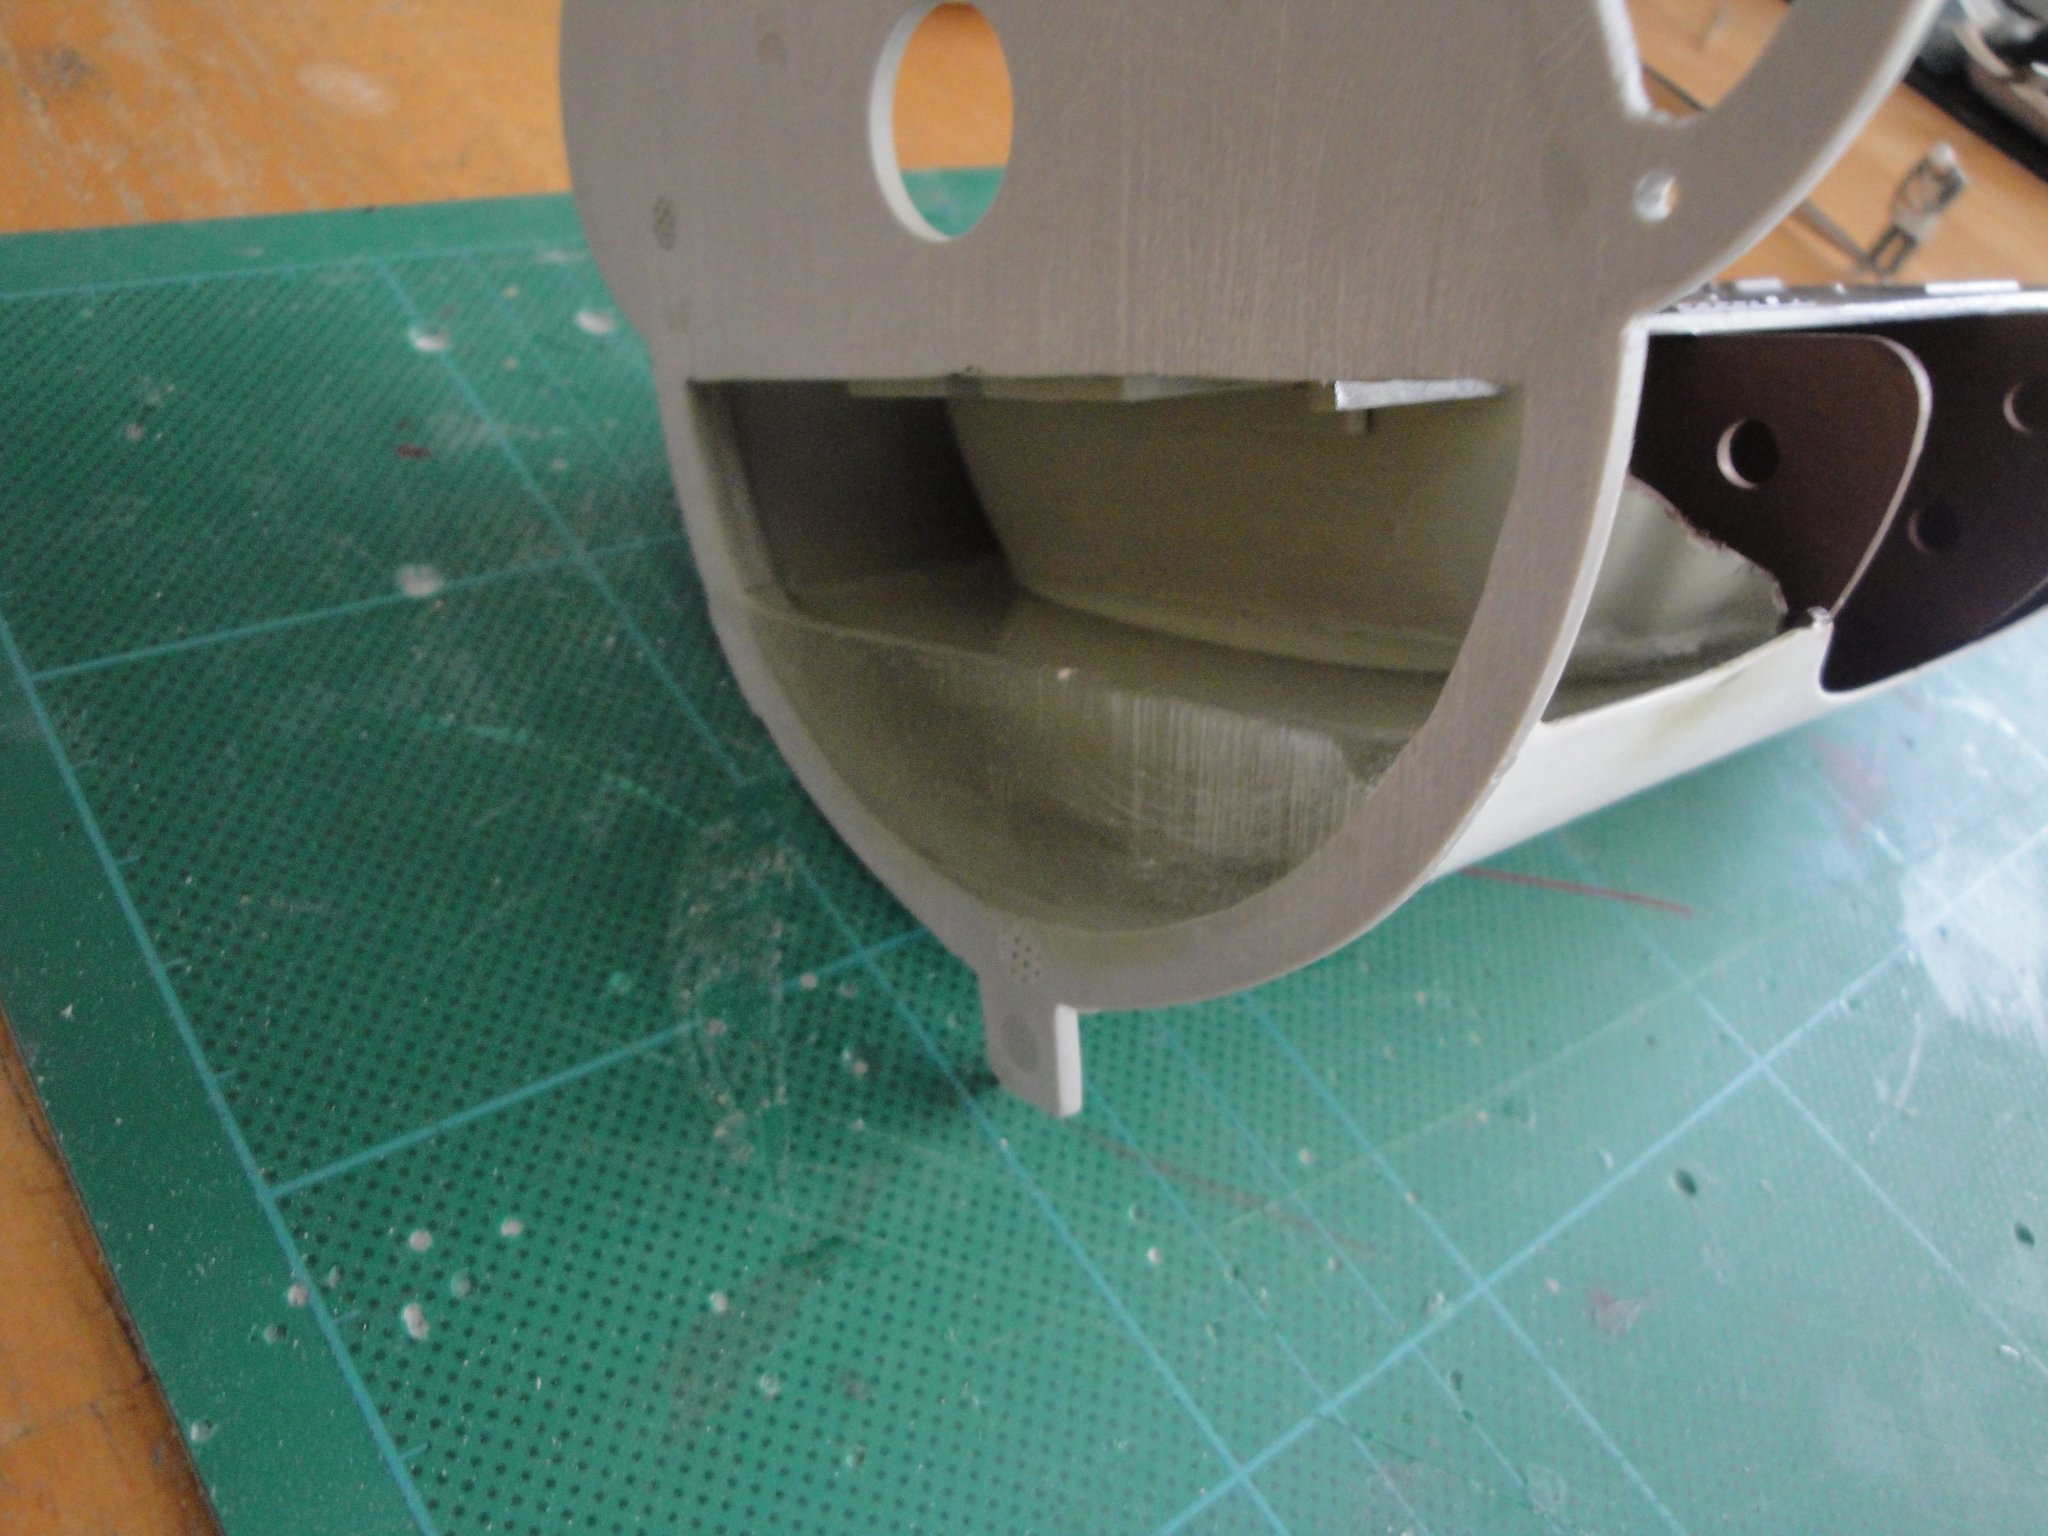
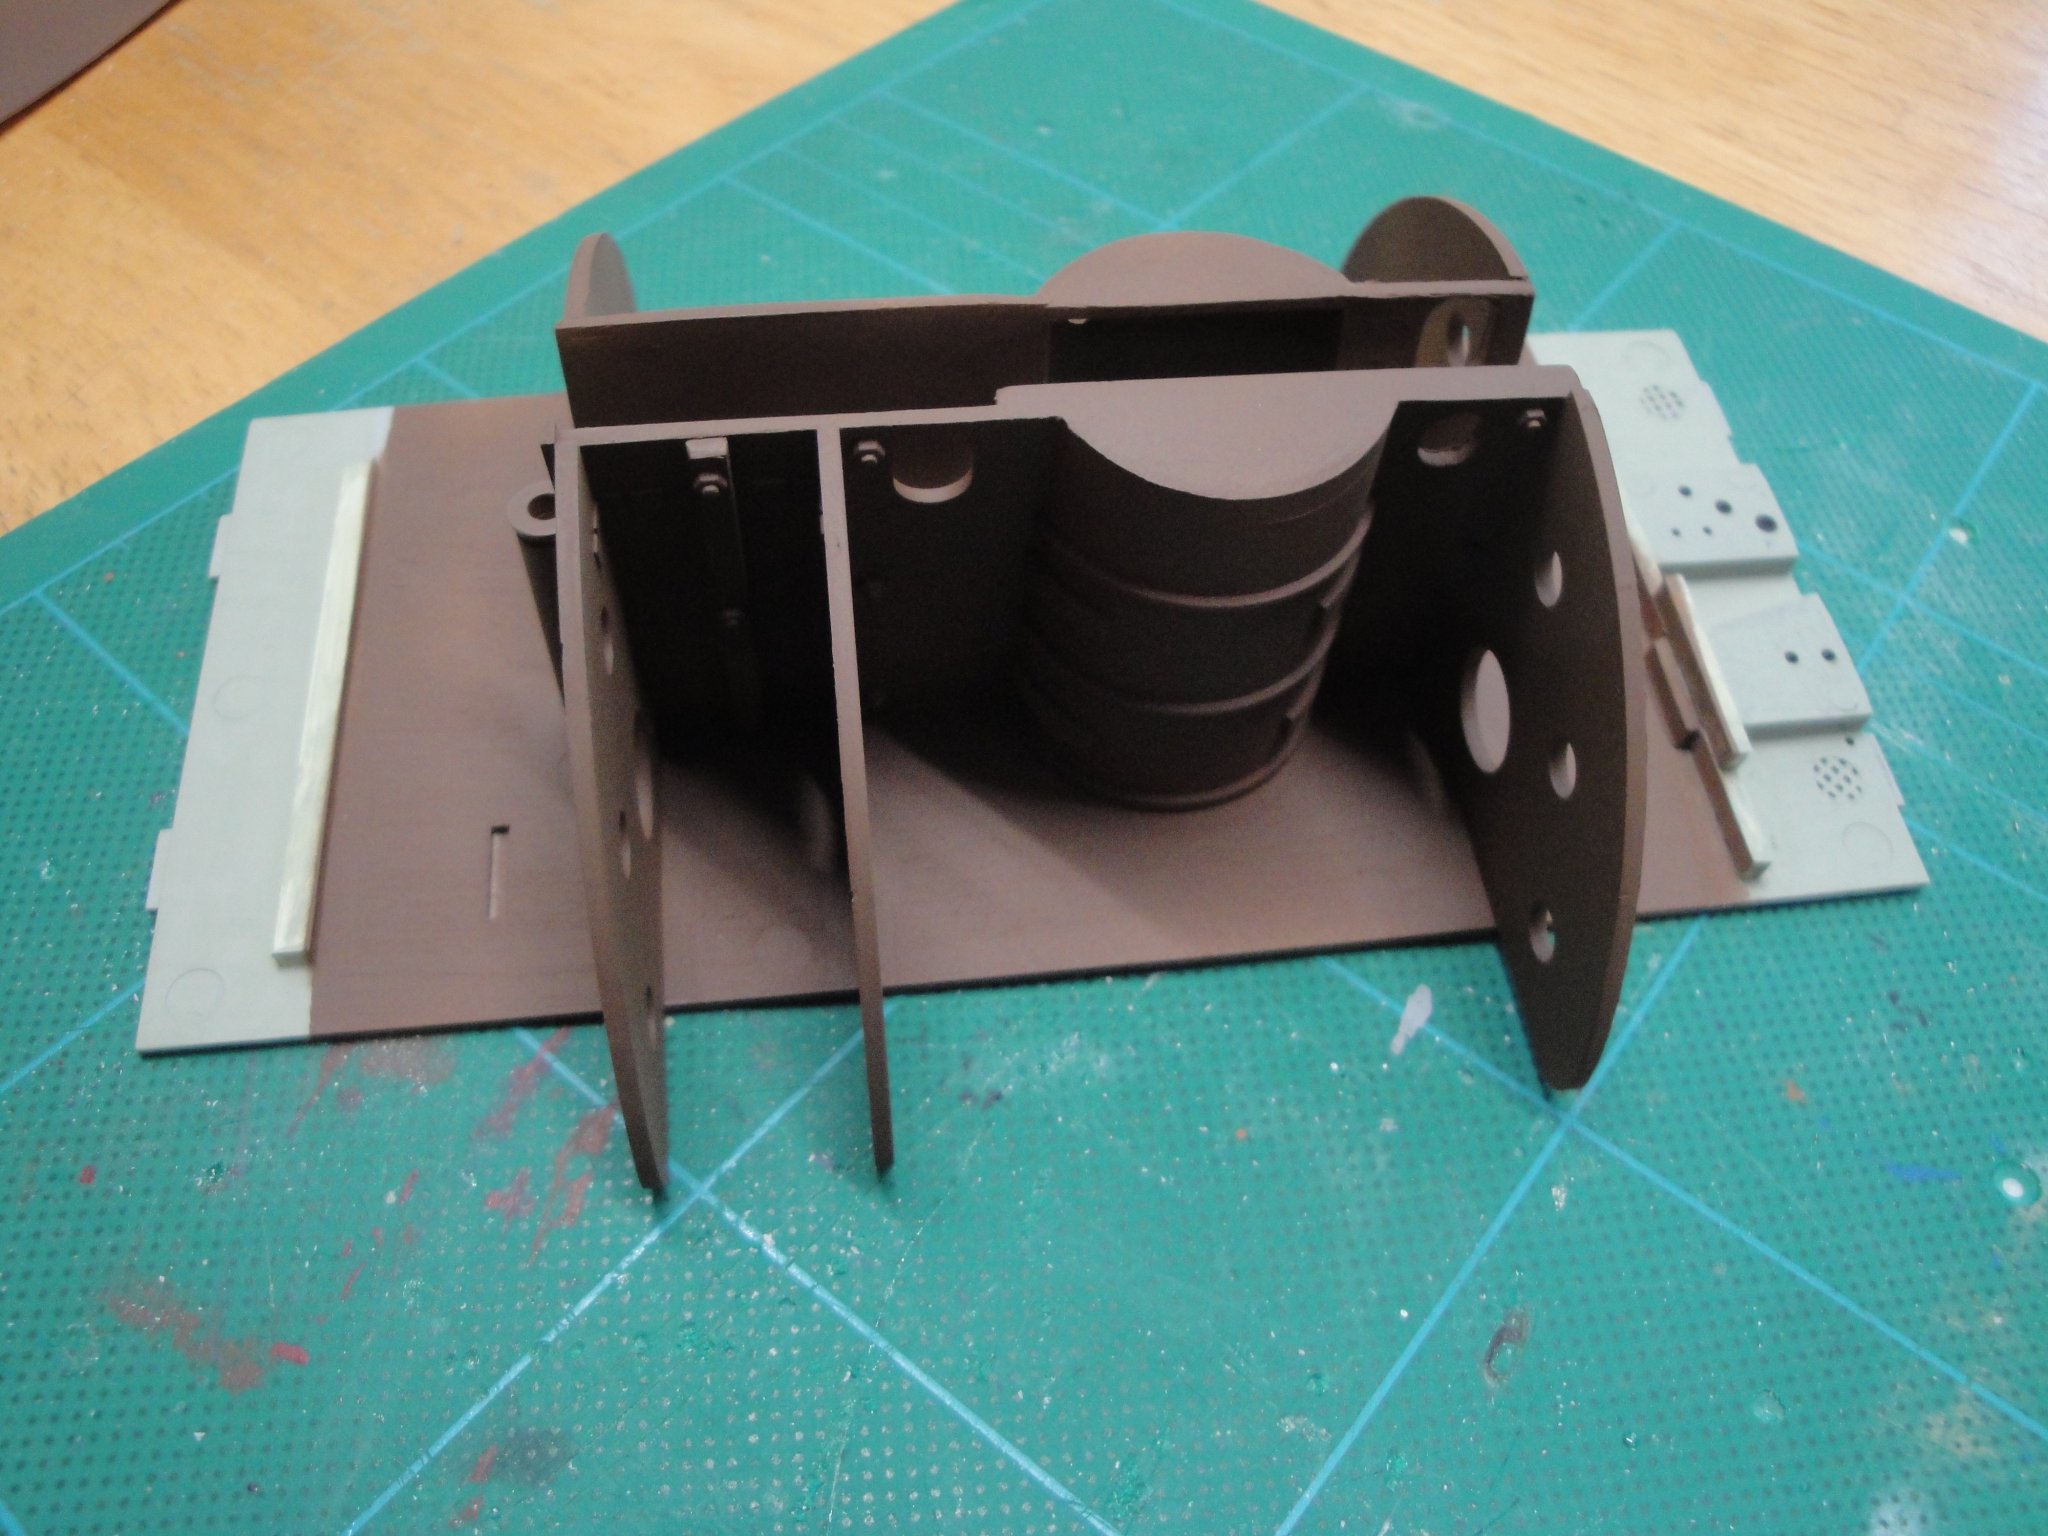
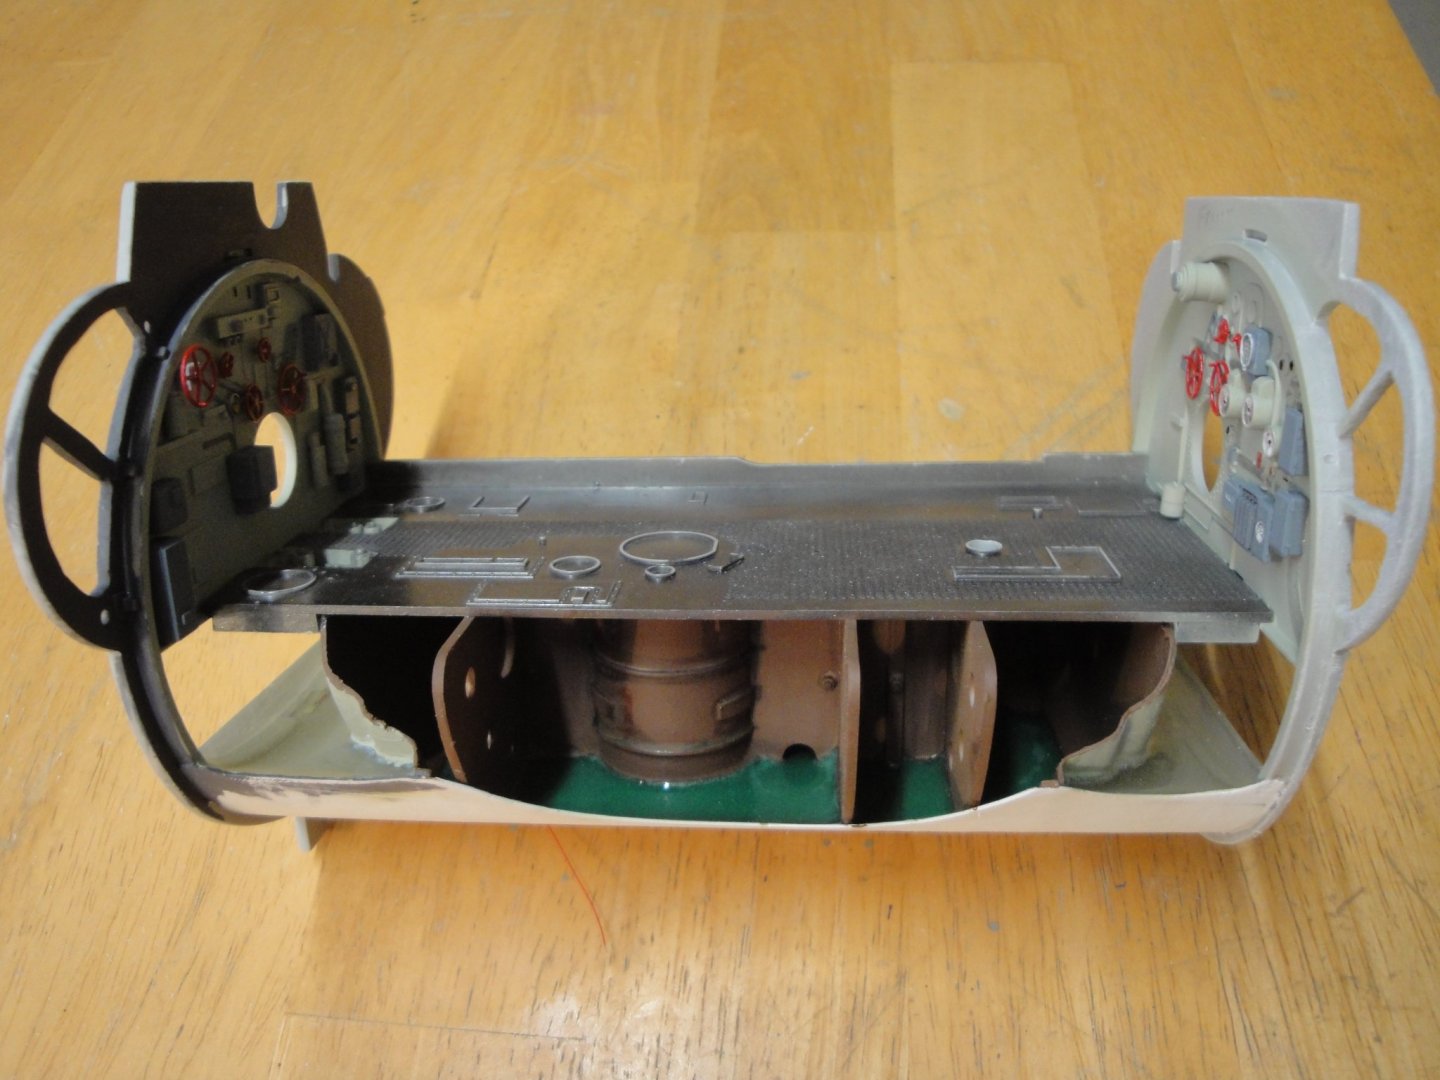
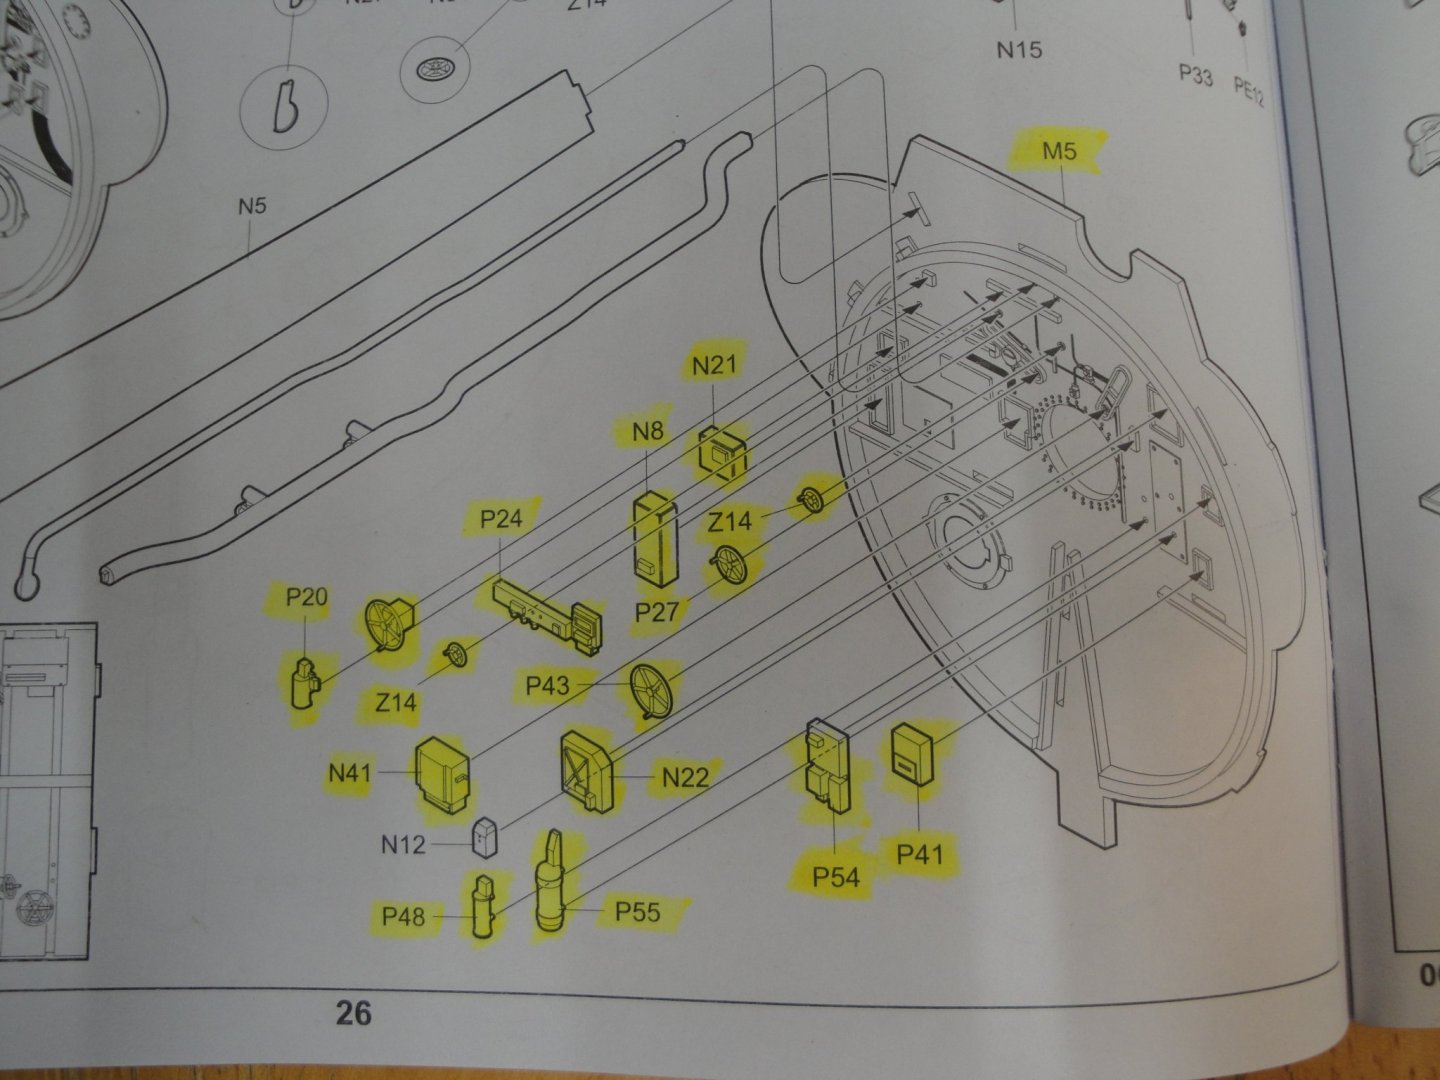
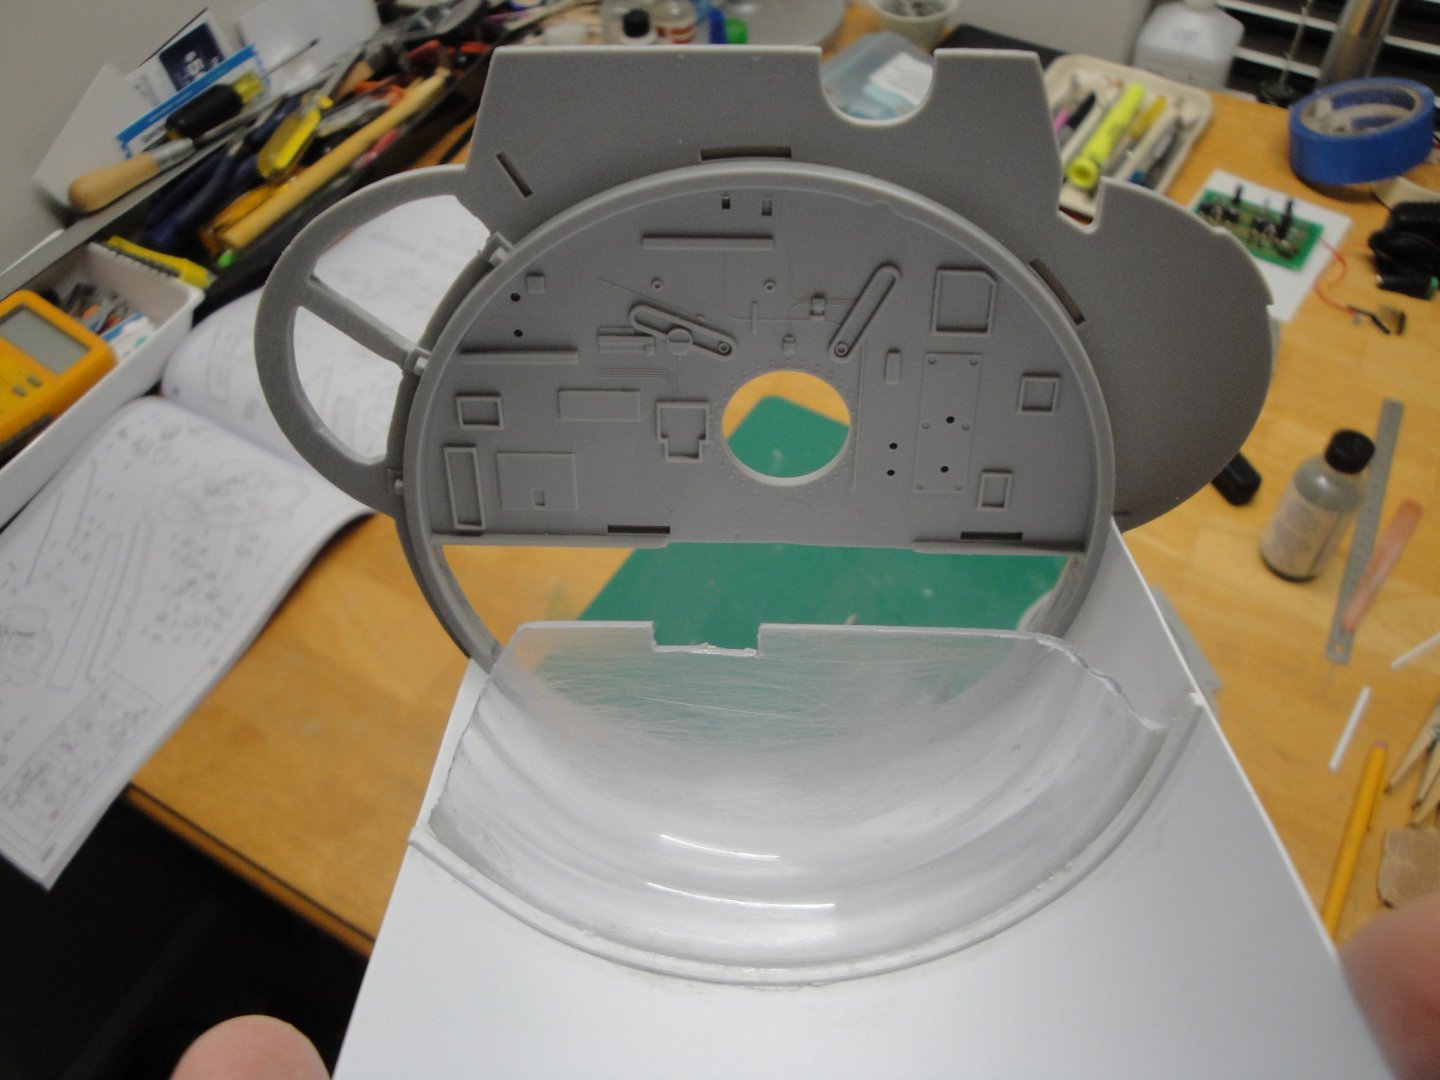
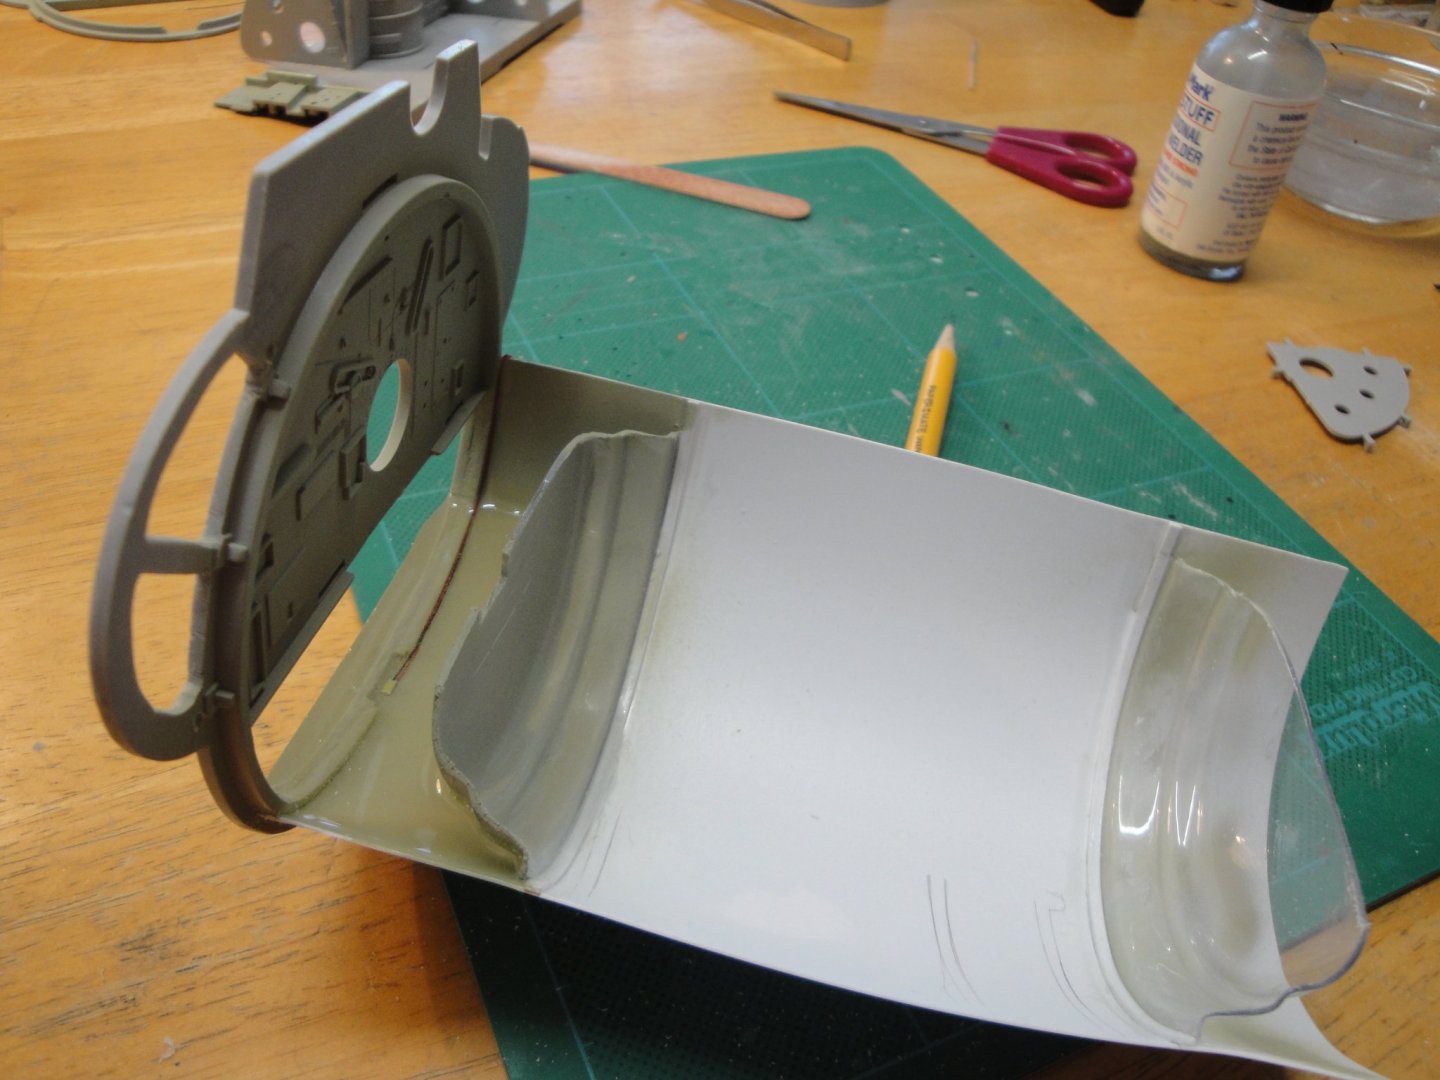
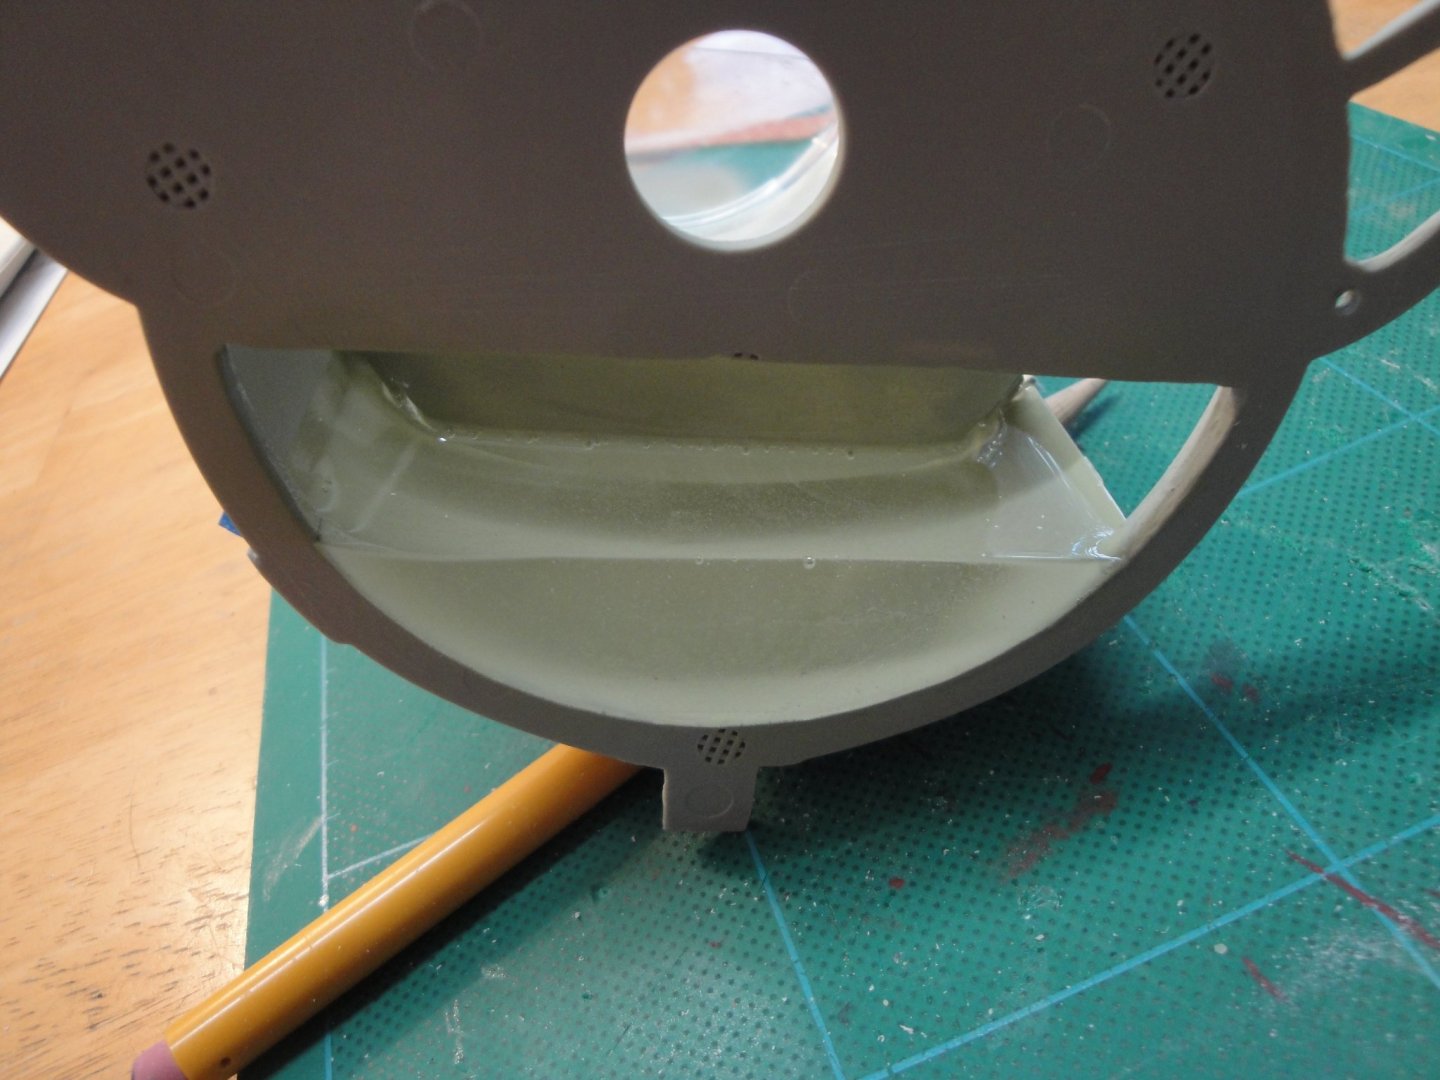
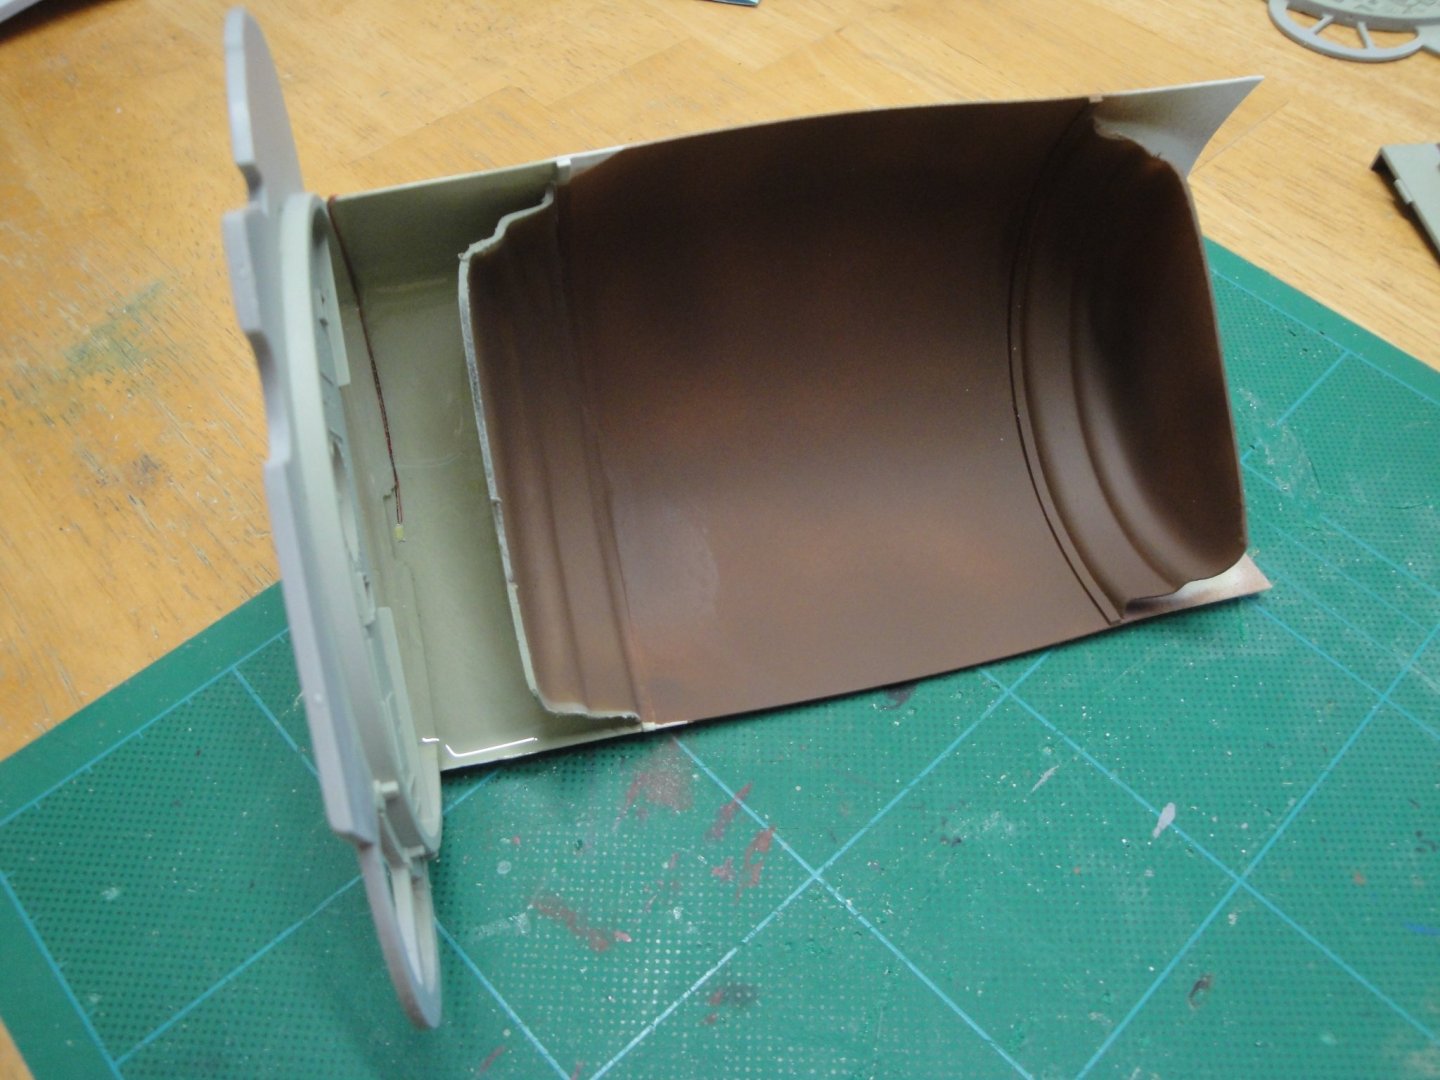
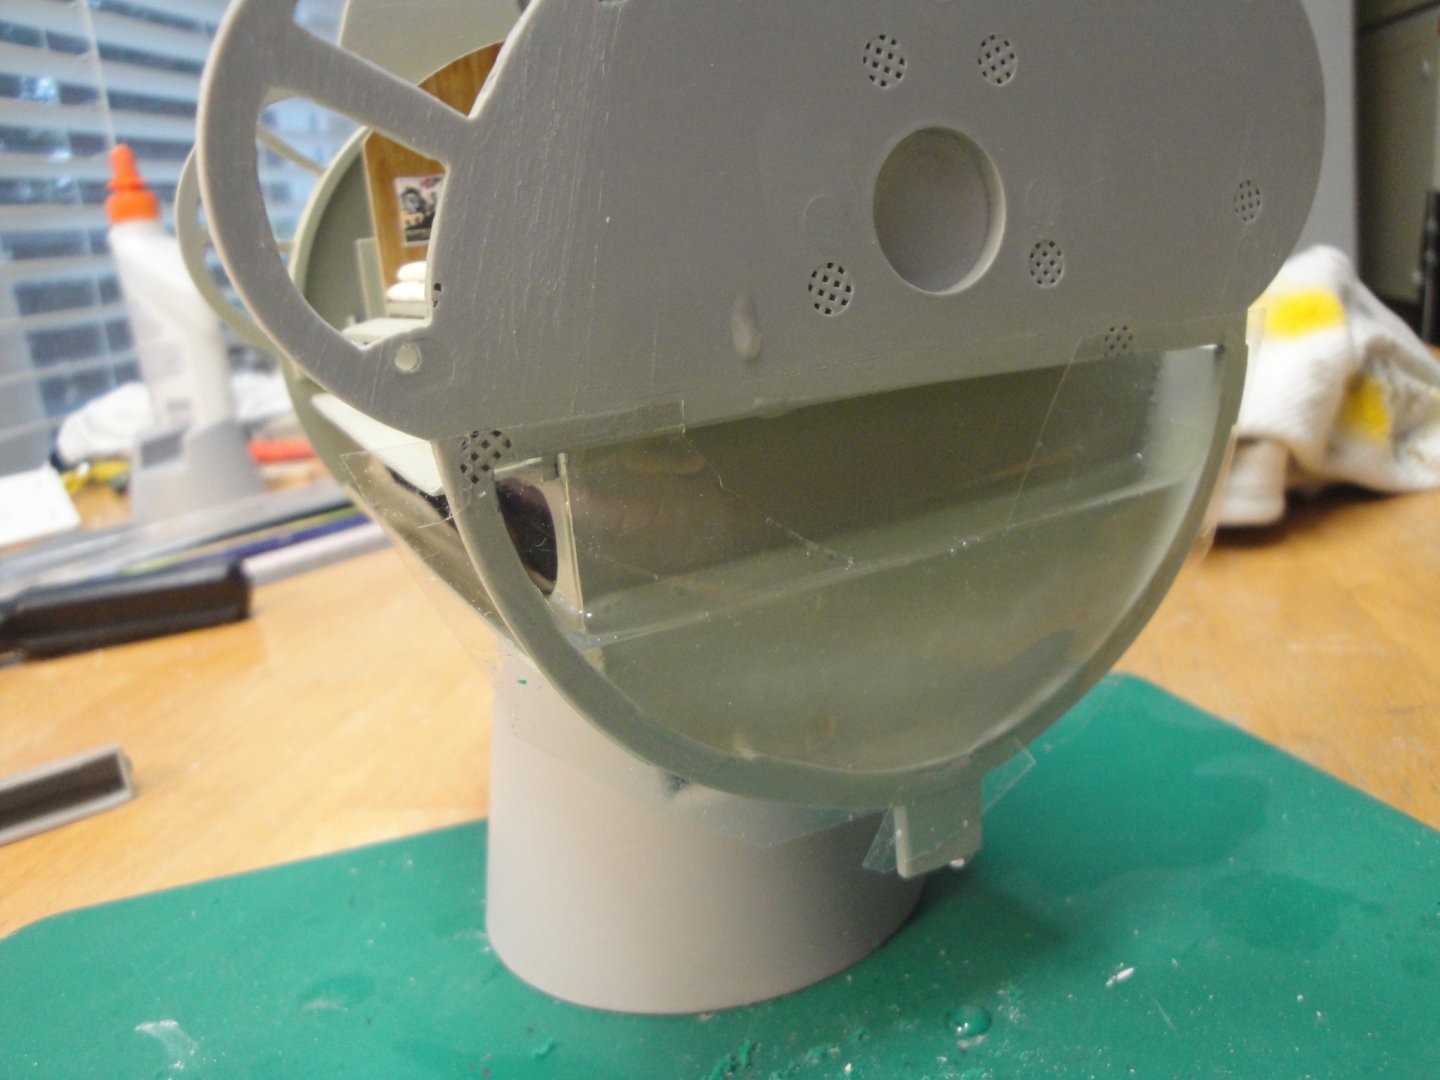
The next compartment is the Control room. All these compartments are linked to each other by the fuel tanks located underneath. It is therefore essential to build them almost at the same time for a perfect continuity. Thus, I started the Control room which is probably the most ambitious project as you will see. The lower level of the Control Room is composed of: Front Fuel tank....Main Ballast....Rear Fuel tank. Of course, Trumpeter did not see the need to represent any of these three sections and instead gave us a "semi" container for the periscope mechanism and well, and a few bulkheads. The result is a pale approximation of what this compartment is about. So, let's look at how we can improve on the kit: I decided to build a pressure hull and to install in it, the three tanks referenced earlier. I am using a lid from a NEST packaging (cut in half, to represent the convex bulkheads facing the fuel tanks. Tat lid is exactly of the right diameter and fits perfectly against the Trumpeter bulkheads. It does take a lot of fine tuning and adjustments to make it work, but I think I managed to create something that looks realistic. The pressure hull is made with a sheet of 0.5 mm thick, 16 cm long and about 11.5 cm wide. Above, you can see the front section of the rear fuel tank (extension of what is around the rear batteries compartment). From the other side, this is what we have: With both convex bulkheads installed and the resin poured in the rear fuel tank: Of course, the level of fuel matches the level we saw in the previous compartment: The main ballast structure requires a lot of work, cutting and sanding to bring it to something slightly more prototypical: Everything is glued under the control room floor. A tube (left on the picture) is added to represent the well of the attack periscope. That detail is missing from the Trumpeter kit (anybody surprised ?) The main ballast is painted with anti-fouling color: And the pressure hull is slightly opened to show the intricacies of the main ballast structure: Next step: glue the control room floor and start populating the rear bulkhead with all its details, before installing the front bulkhead and pouring resin in the front fuel tank. The main ballast will also have some water "poured" into it, for extra realism. Yves


- 760 replies
-
- 14
-
-
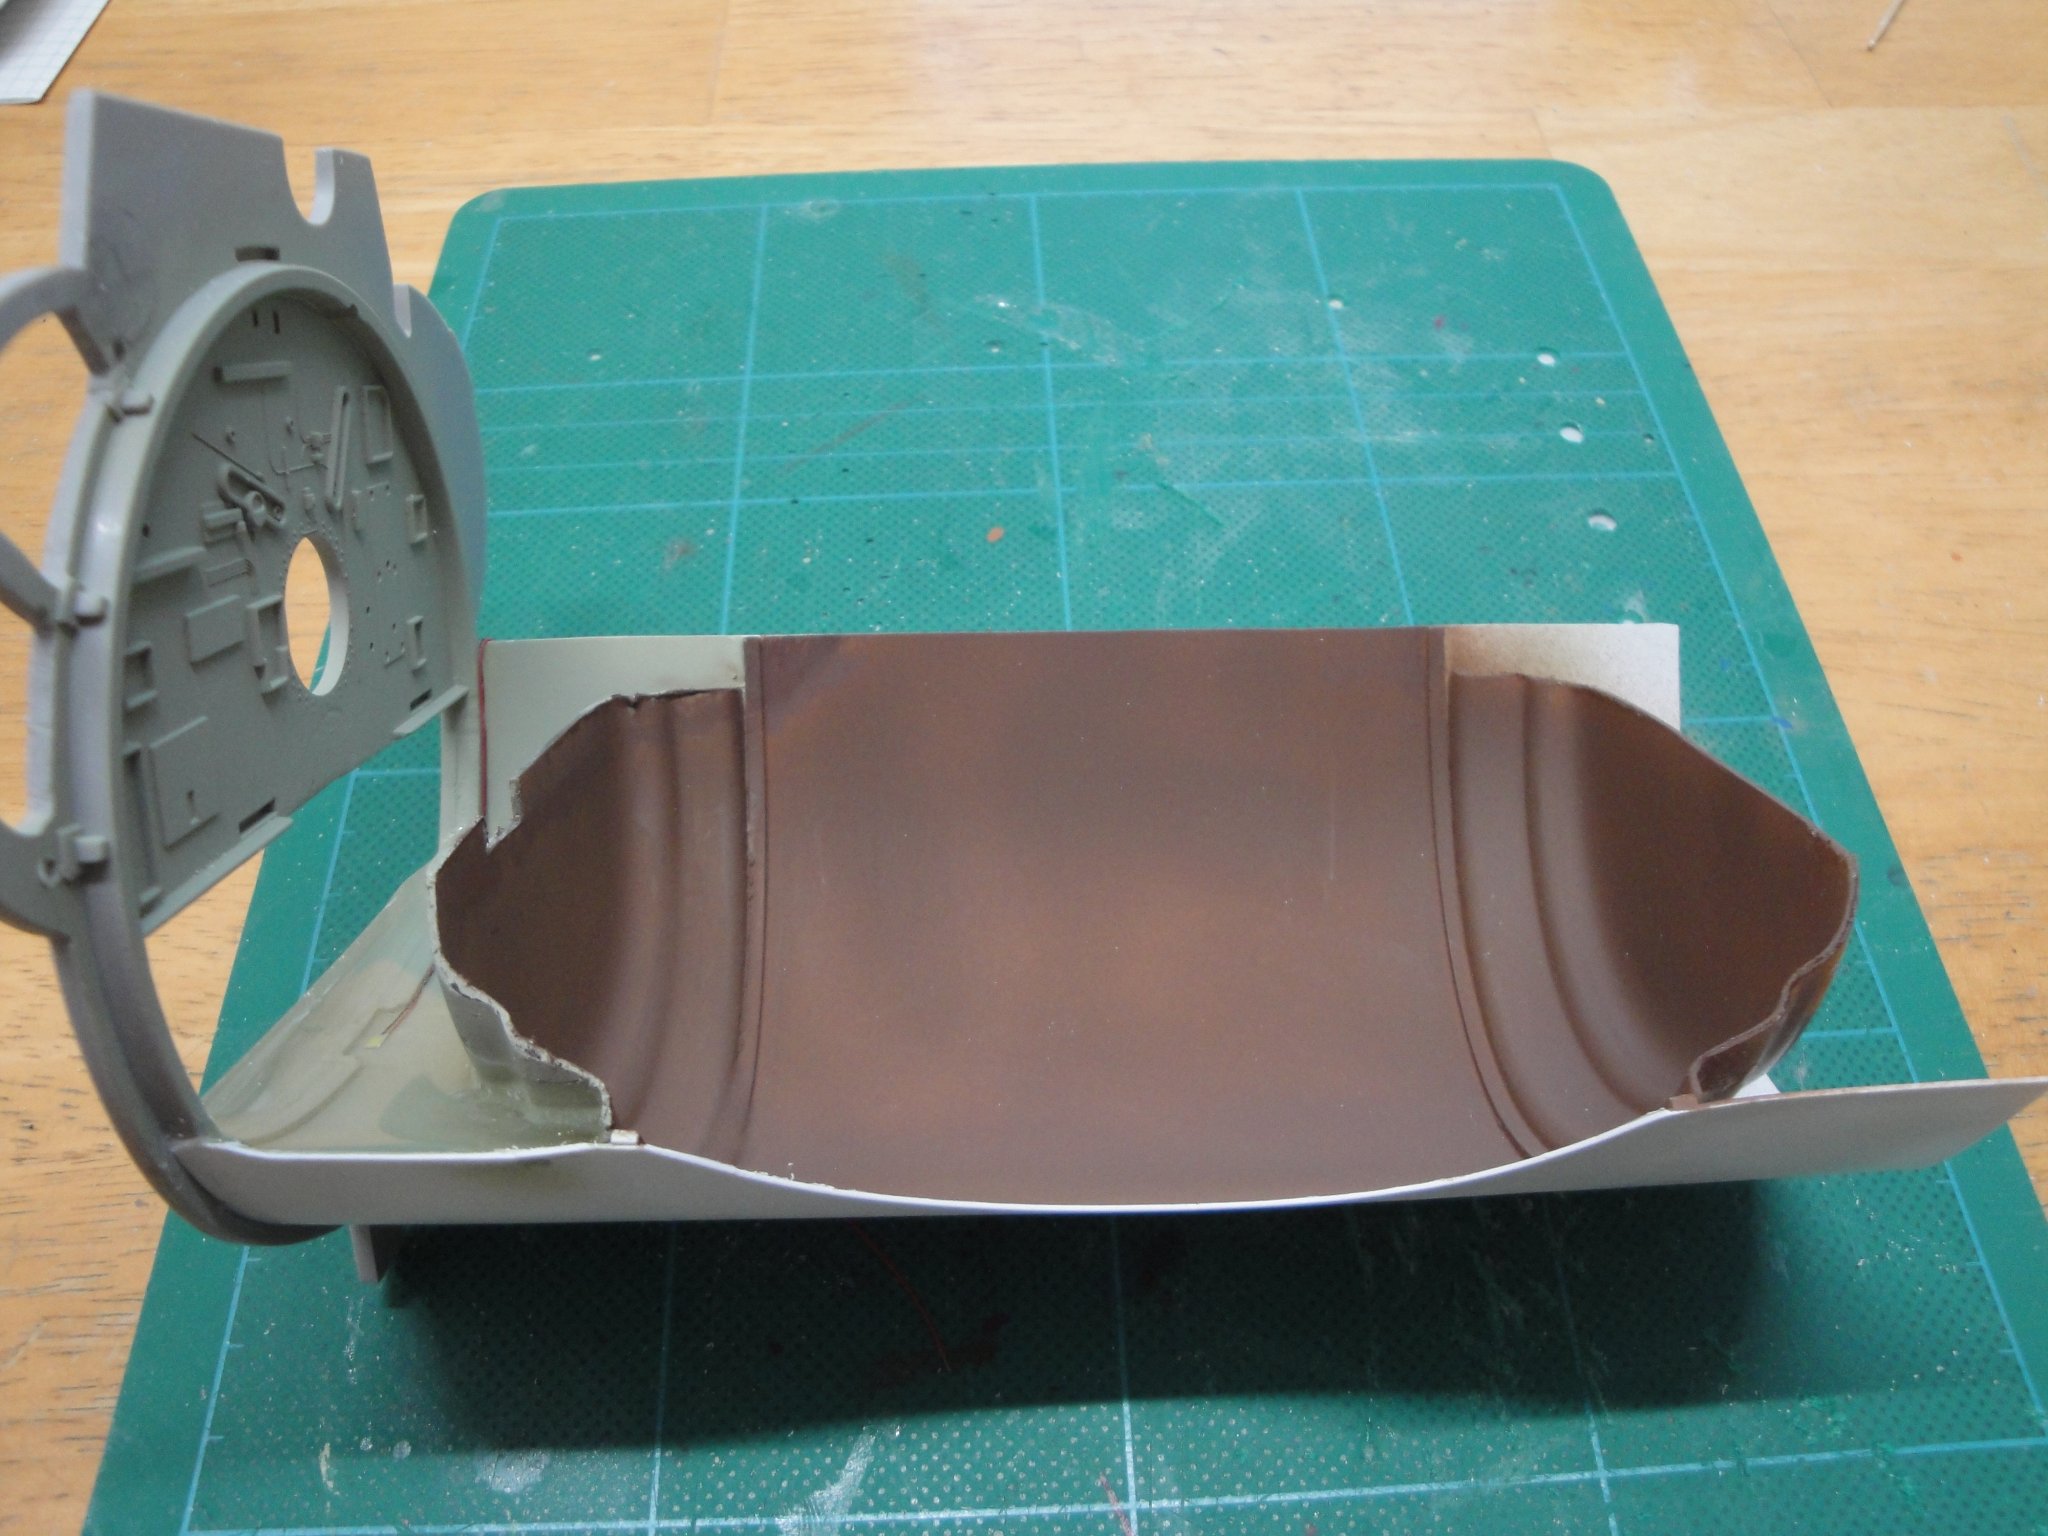
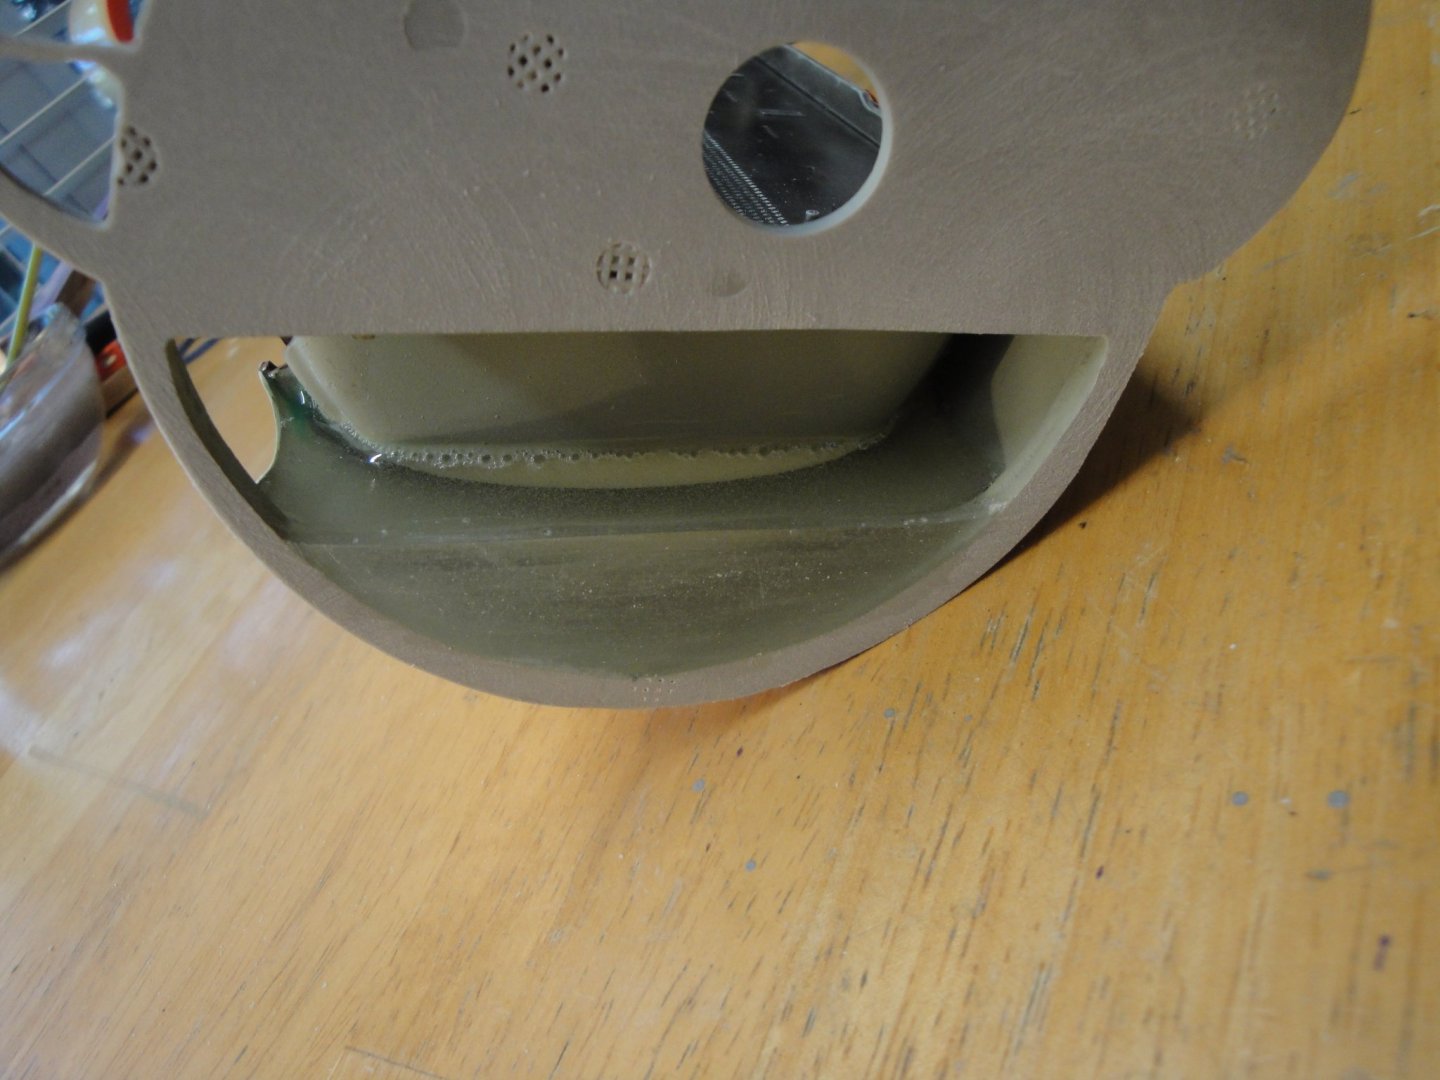
I have been doing some experiments with some acrylic resin. I am mildly happy with the results. As some of you who are following closely the development of that insanity know, I am trying to replicate the fuel tanks located on each side and under the control room and spanning into the living quarters modules, around the batteries compartments. Because we are using that resin on a delicate plastic model, the Polyester resin with its fast polymerization cannot be used: the heat generated during the hardening reaction is simply too much for the plastic parts surrounding the resin. Therefore, I decided to go with Acrylic resin which presents a certain number of good points when compared to the polyester resin: - Less toxic - Less stinky - Almost no heat during the reaction - More affordable - Crystal clear - Compatible with Acrylic paints - Long working time (40 minutes) - Easier to clean (alcohol or soap) - Very small shrinking once hardened. The only drawbacks I noticed are the following: - Extremely temperature sensitive - Need to mix perfect 1:1 ratio - Mixing time of at least 3-4 minutes (no less) - Very long to harden (24 hours to 48 hours at high temperature). What I am using is this product: My first attempt was not perfect but gave a very realistic results (even more realistic than when perfect): The top surface has a lot of small bubbles mimicking the motion of the fuel into the tank, while the submarine is under way. When I did the first attempt, the temperature during the mixing of the resin was a little bit too low (they recommend 72-78). Mixing the resin during 4 minutes created some tiny air bubbles that had a hard time getting to the surface and disappearing. As you can see, the mold is nothing more than two pieces of scotch tape to prevent the resin from running away. Once the resin is cured, the tape is removed and we have a perfect wall of fuel in the tank. Yves

- 760 replies
-
- 12
-
-
Kevin, I like you, love diorama. However, in this case, your model is so beautiful and full of details that I fear its intrinsic perfection is going to be drowned in the diorama. In addition, this model is big and to make the diorama realistic, it will have to be really large. Now, whatever decision you go with, I will follow with interest. Yves
-
Oh...I see a Calypso on the window sill. Is that the Billing Boat kit or the Revell Kit? If it was the Billing Boats, then your window would be really large.... You do have quite a collection of models. Yves