


schooner
-
Posts
641 -
Joined
-
Last visited
Content Type
Profiles
Forums
Gallery
Events
Posts posted by schooner
-
-
-
Hey Dan, glad to see a build log for this kit. Are you going to be making it Radio Controlled?
-
9 pounder guns
I’ve been busy on the model but not much to show for it, and with more aggravation than I deserve.
I’ve started to work on the 9 pounder guns for the gun deck. The kit provides nicely cast brittania barrels and carriages. Although there is minimal flash and seam marks on them their small size makes for some tedious filing and then I drilled out the barrel muzzles and holes in the carriages so they can be pinned to the deck per the instruction’s recommendations.
I then had to decide how much rigging to put on them given their size and the fact that even with some deck planking left off of the decks above them they will still be only indirectly viewable and in “shade” to boot.
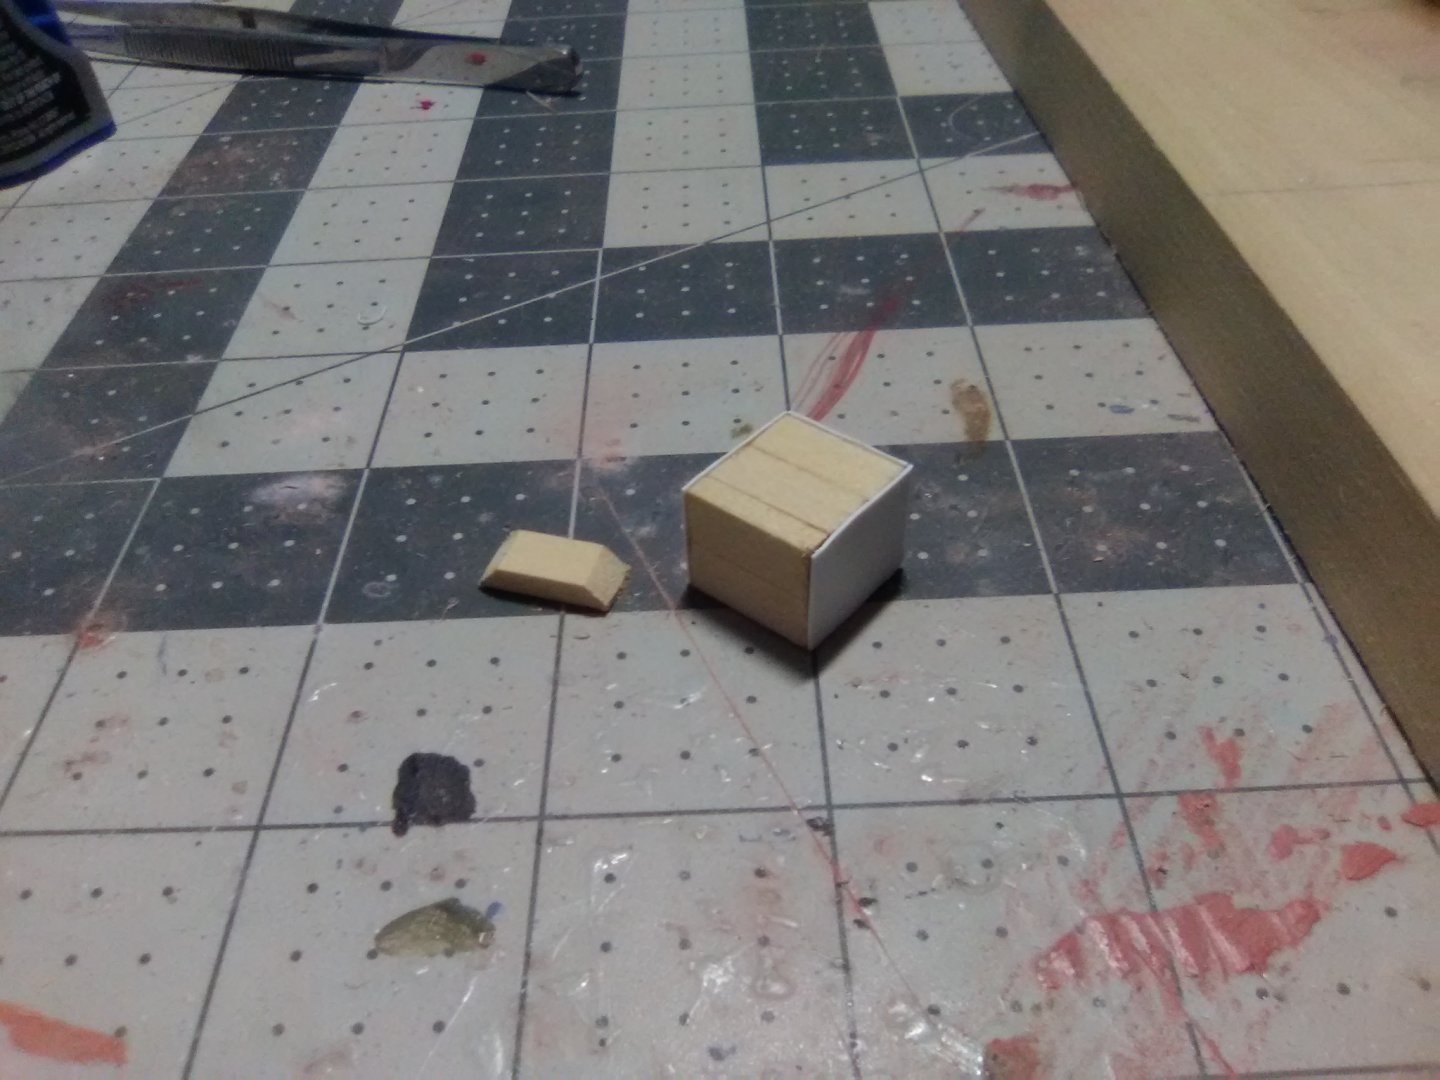
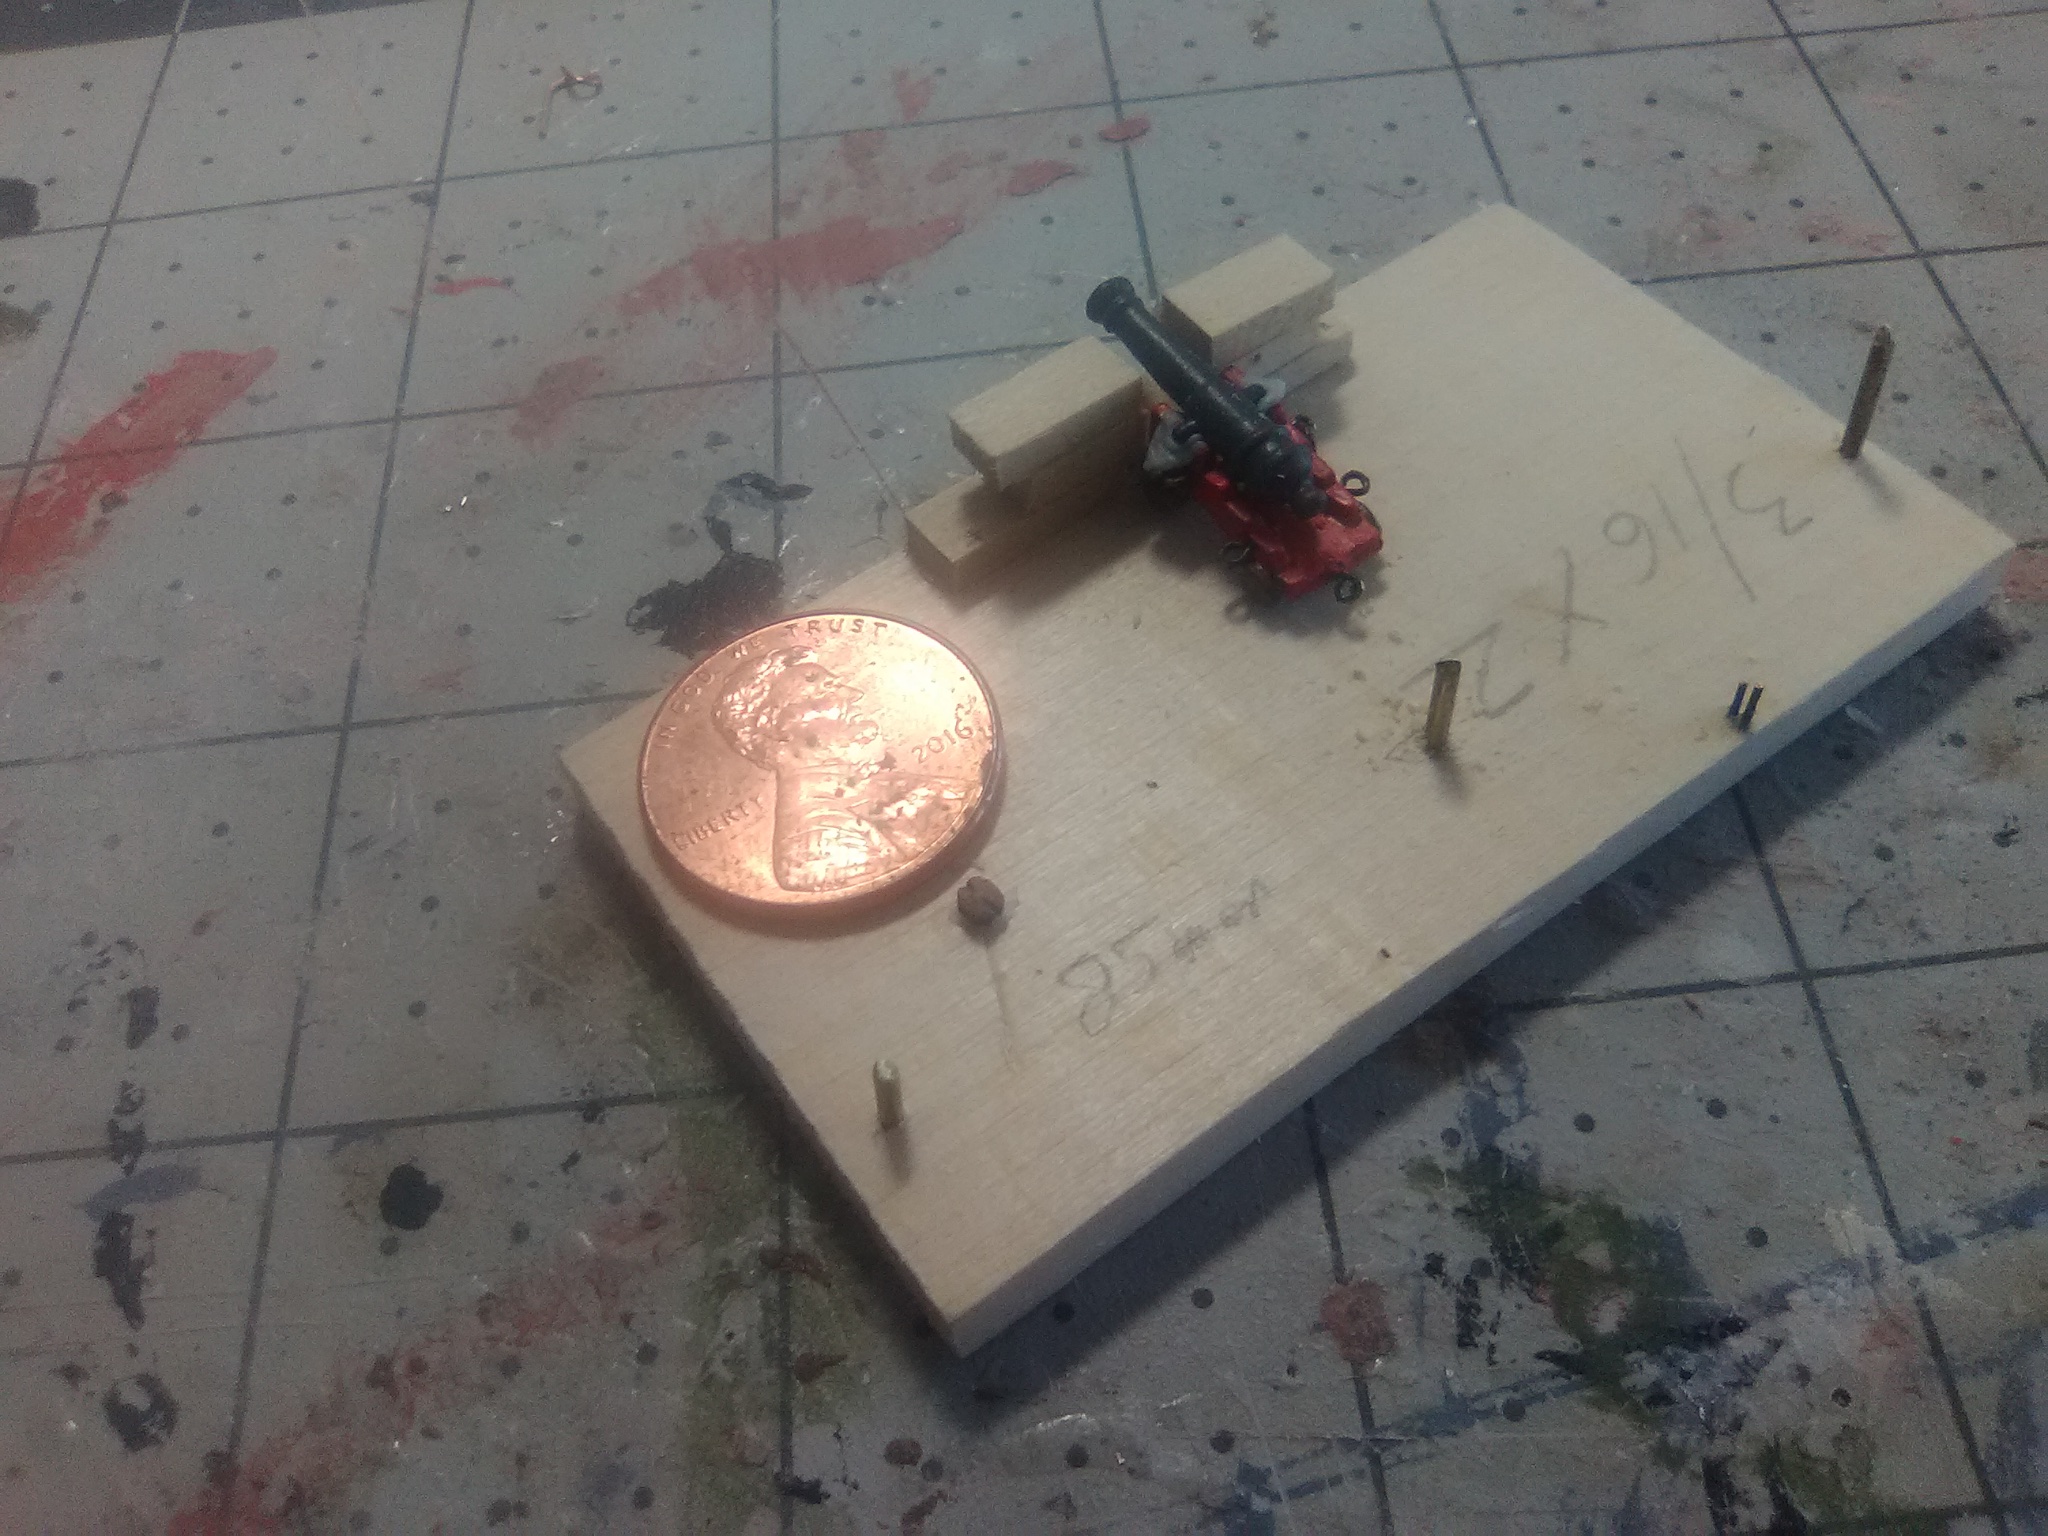
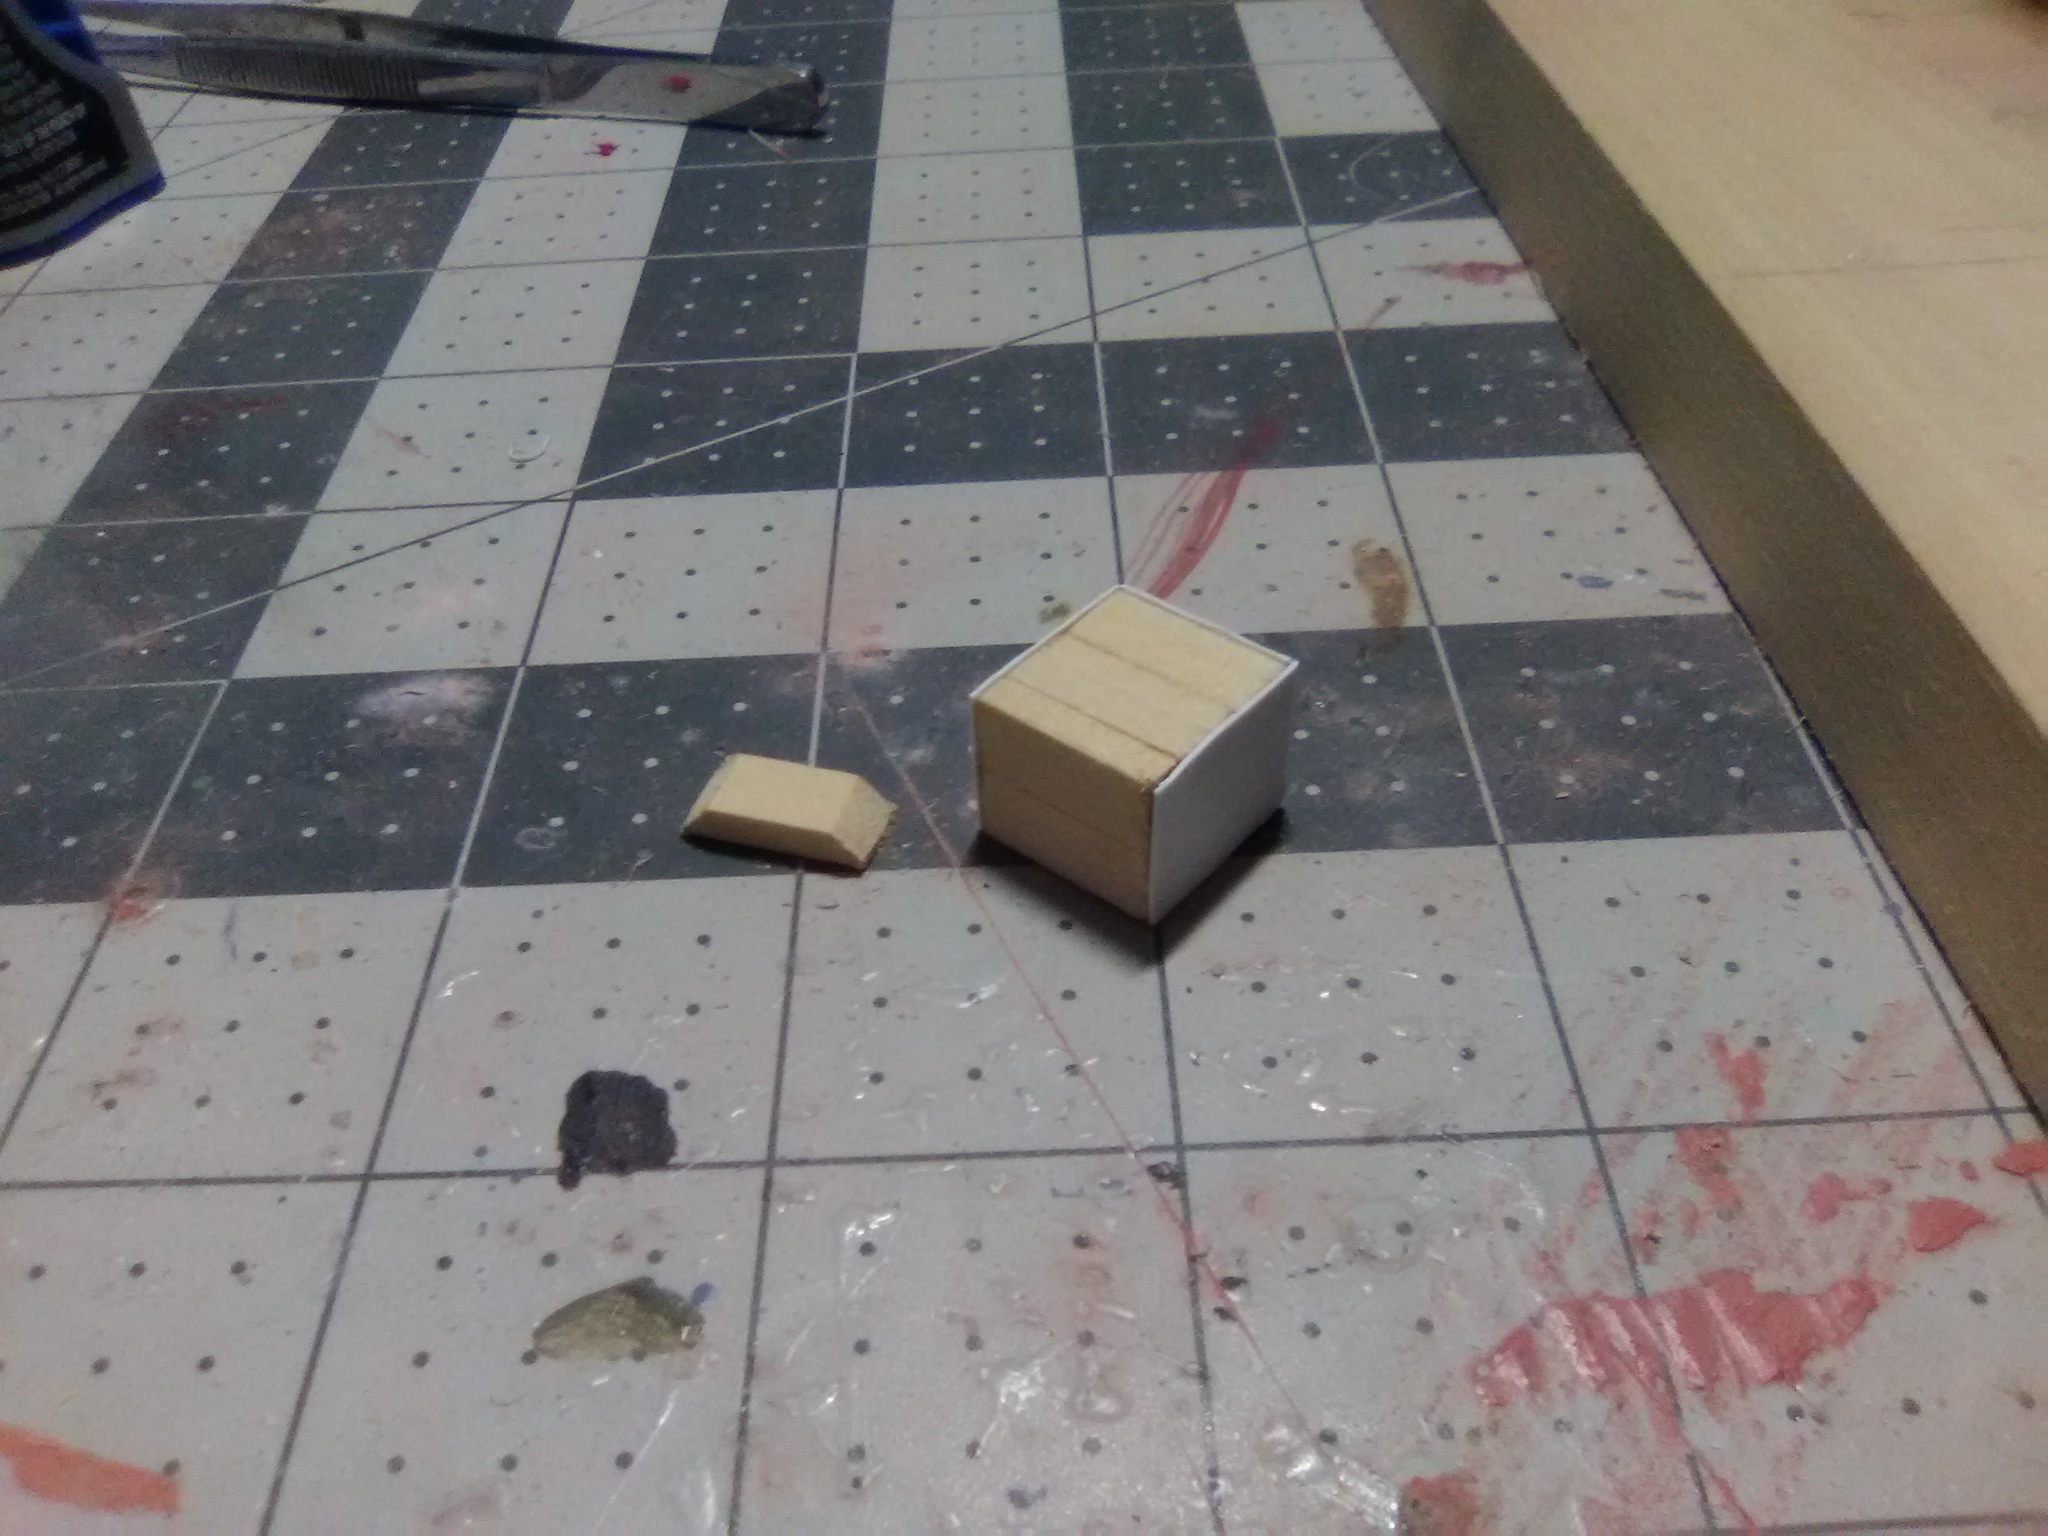
I built a little gunport mockup to see how much line I would need for the breeching lines. I ordered some 2mm wood blocks from Model Expo, the smallest on the market. After a frustrating hour I was able to get the line thru ONE block! Sure, I could get thread thru there but that looks way under scale. I also need smaller wire than I have on hand to strop them so that’s on order. The little brown dot next to the penny in the below photo is one of the blocks. They do have 2 holes in them and grooves for the stropping. I decided having to do 80 of these for the in-haul tackles for 20 guns would be more fun than I am willing to put up with, particularly since the breech lines will largely cover them up anyway. I’ll probably try to use them on the 6 3 -pounder guns on the quarterdeck but not down on the gun deck.

Leaving off the in-haul tackles still means each carriage has to have 3 holes drilled in them (2 for the breech line guides and 1 for the out-haul tackle). So all of that is done. I wanted to put together the 120 ringbolt/split combinations needed but when I ordered more 3/32” split rings from Model Expo they sent me ones that were smaller and thicker than I previously received from them - too small to work for this. I sent them and e-mail & photo and they are going to look into it but I’ll have to make about 80 split rings myself (sigh).
My final problem is with the Postal Service. The instructions call for some sizes of wood that are not provided by the kit (I’ll let Bluejacket know which when I’m done) so I ordered it from them. Unfortunately my shipment made it most of the way thru the postal system and then disappeared. I’ll give the Post Office a few more days and then reorder the wood.
Good thing I’m in no hurry with this build.
- Duanelaker, KurtH, Bill Morrison and 1 other
-
 4
4
-
Looking forward to watching this build! Thanks for the tutorial on sardine fishing - you could have fit what I knew about it into one of their cans.
- Nirvana, FriedClams and pwog
-
3
-
-
Just getting caught up with your build. Thanks for taking the time & effort to document how you rigged those small blocks, that will be a real help for me when I have to do 2mm ones on my ALFRED build.
Keep up the great work.
-
Thanks Nic! That's what I'll try to do.
-
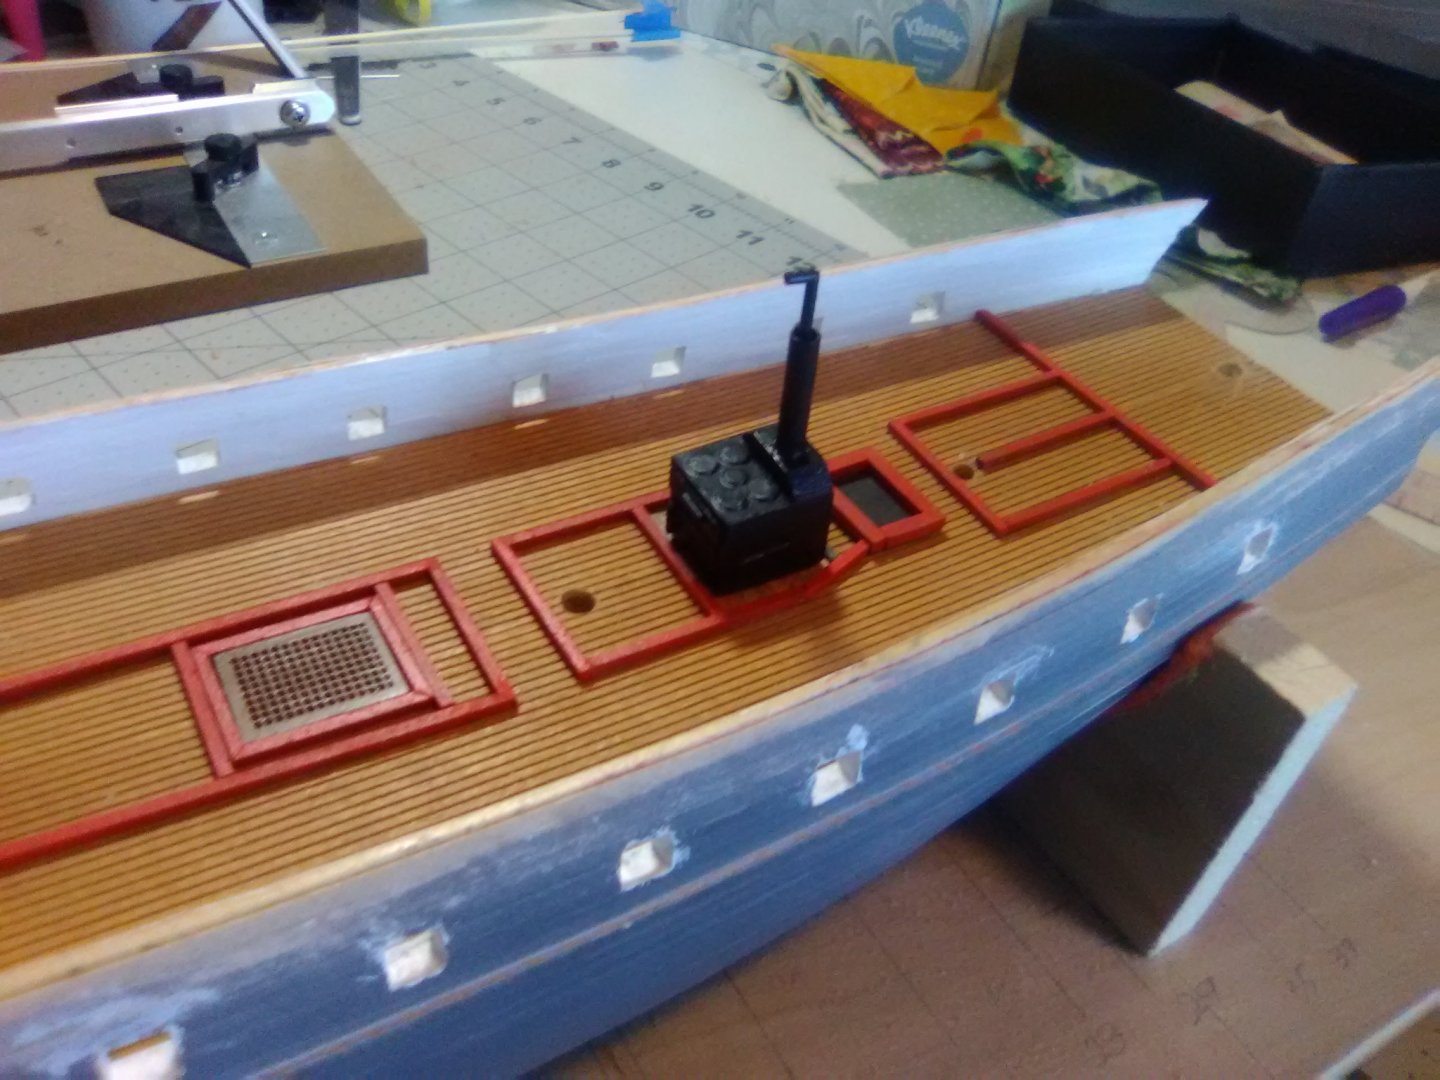
Fitting out the gun deck
The hatches and coamings (which serve as the footings for the bulkheads and screens that were removed when the ship was cleared for action) have been installed. Although I plan to leave some planking off on the upper decks I’m not sure how much of the stuff on the gun deck will be visible since it will likely be pretty dark down there. I’m also not sure if I will fabricate any of the bulkheads, maybe the one for the great cabin but that’s about it.
The galley oven is scratched out of material that stacks together for the right dimensions and then faced with sheet plastic(I’m lousy at trying to build a 6-sided box where everything is square).
The oven (or caboose) is just dry fitted since I may have to adjust its position a little to work around the deck beams.

- Bill Morrison, mort stoll, Bossman and 3 others
-
6
-
The Pauline looks like a great kit, I hope you do a build log since there hasn't been one for that kit yet. Good luck!
- pwog and popeye the sailor
-
2
-
Paul,
I guess open boat kits could be called POB or POF. They are usually built as POB (upside down over the tops of temporary bulkheads that are removed after the planking is finished - leaving the "frames" in place). You can look at build logs for Model Shipway's 18th century longboat to see what I mean.
From a strictly planking viewpoint there is no difference between POB and POF but POBs are usually easier to build because you don't have to build the frames too - which might require more shop tools than you have (certainly more than I have). I recommended a boat rather than a ship because the planks are bigger and fewer, and if it is"clinker" style like most of them the planking is a little easier too. Another plus is most boat kits are cheaper and smaller than ship kits, and don't need to be cased.
Spend some time looking around build logs here on the site and I'm sure you will find something. The catalogs from BlueJacket and ModelExpo are worth a look too.
- pwog and popeye the sailor
-
2
-
Great job!! Looks nothing like my 1st build! You have given me a serious case of lobster pot envy - your pots and floats are very realistic. It's amazing how details like those can really bring a model to life.
As far as you next build goes you might want to consider a planked boat, particularly one with an open interior like a rowboat, wherry, crabbing skiff, etc. Something not too expensive because it will be your 1st planking build and should be treated as a learning experience, albeit one that you can put on the shelf.
Once again, nice job!
- AON, popeye the sailor, FriedClams and 2 others
-
5
-
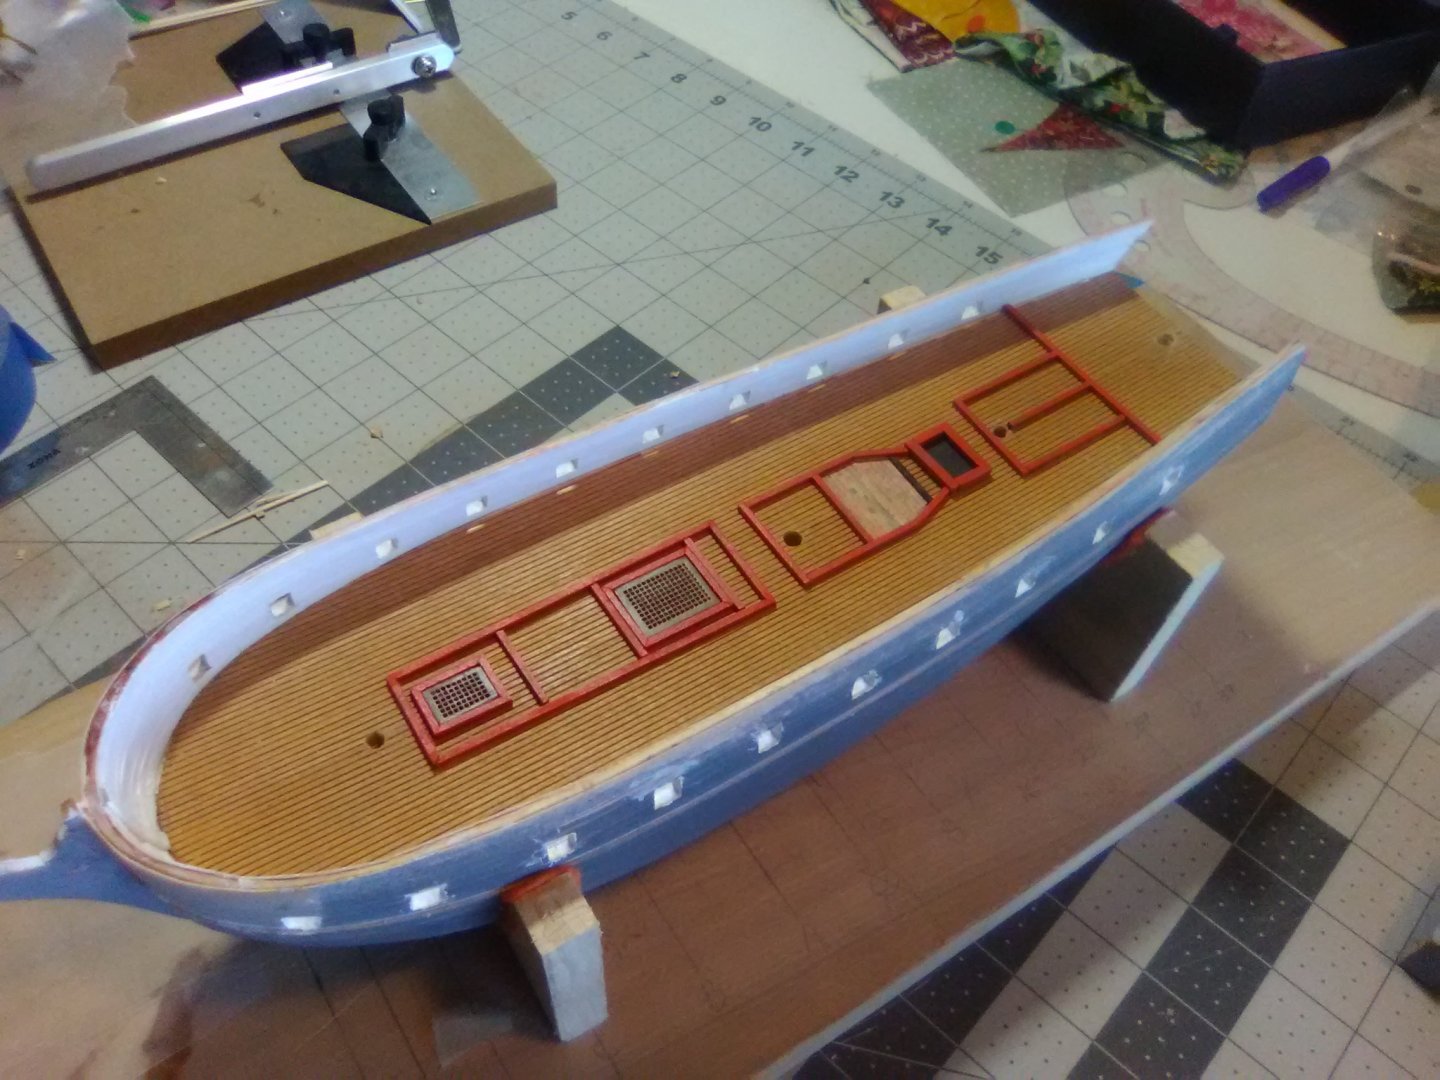
Gun Deck Planking
The ceiling planks are finished up and painted:
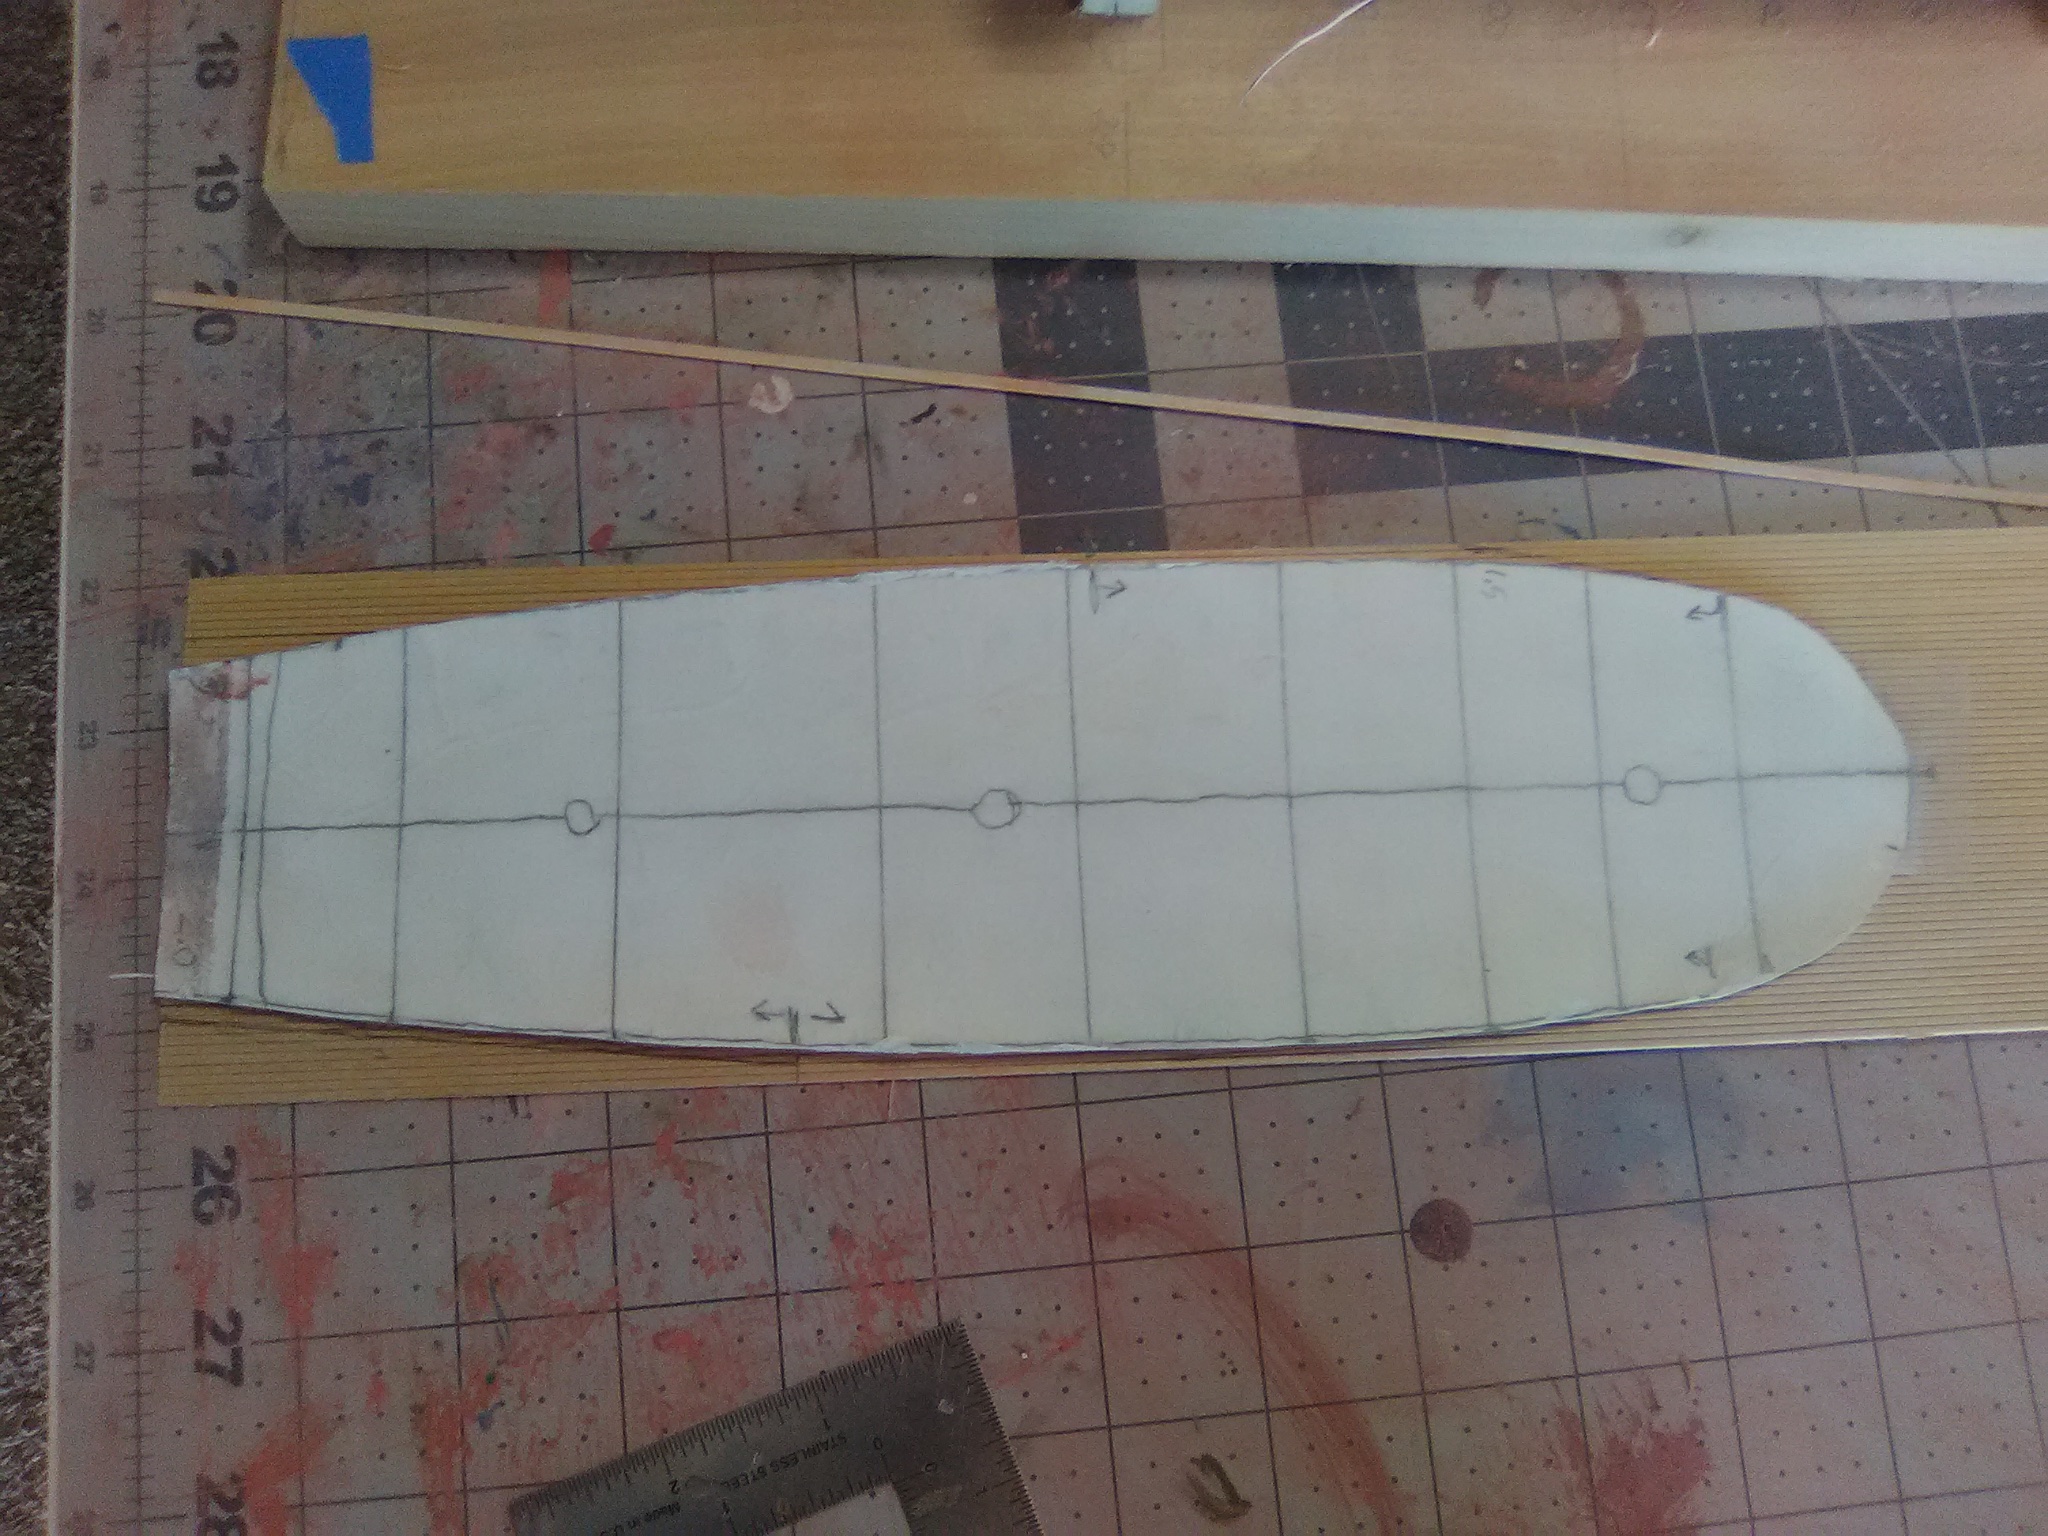
The instructions call for measuring the deck with dividers and using the measurements to lay out a template for cutting out the pre-scribed deck planking but I thought it would be easier to trace the gun deck from the plans, leave some extra around all sides and then test fit and trim as necessary:
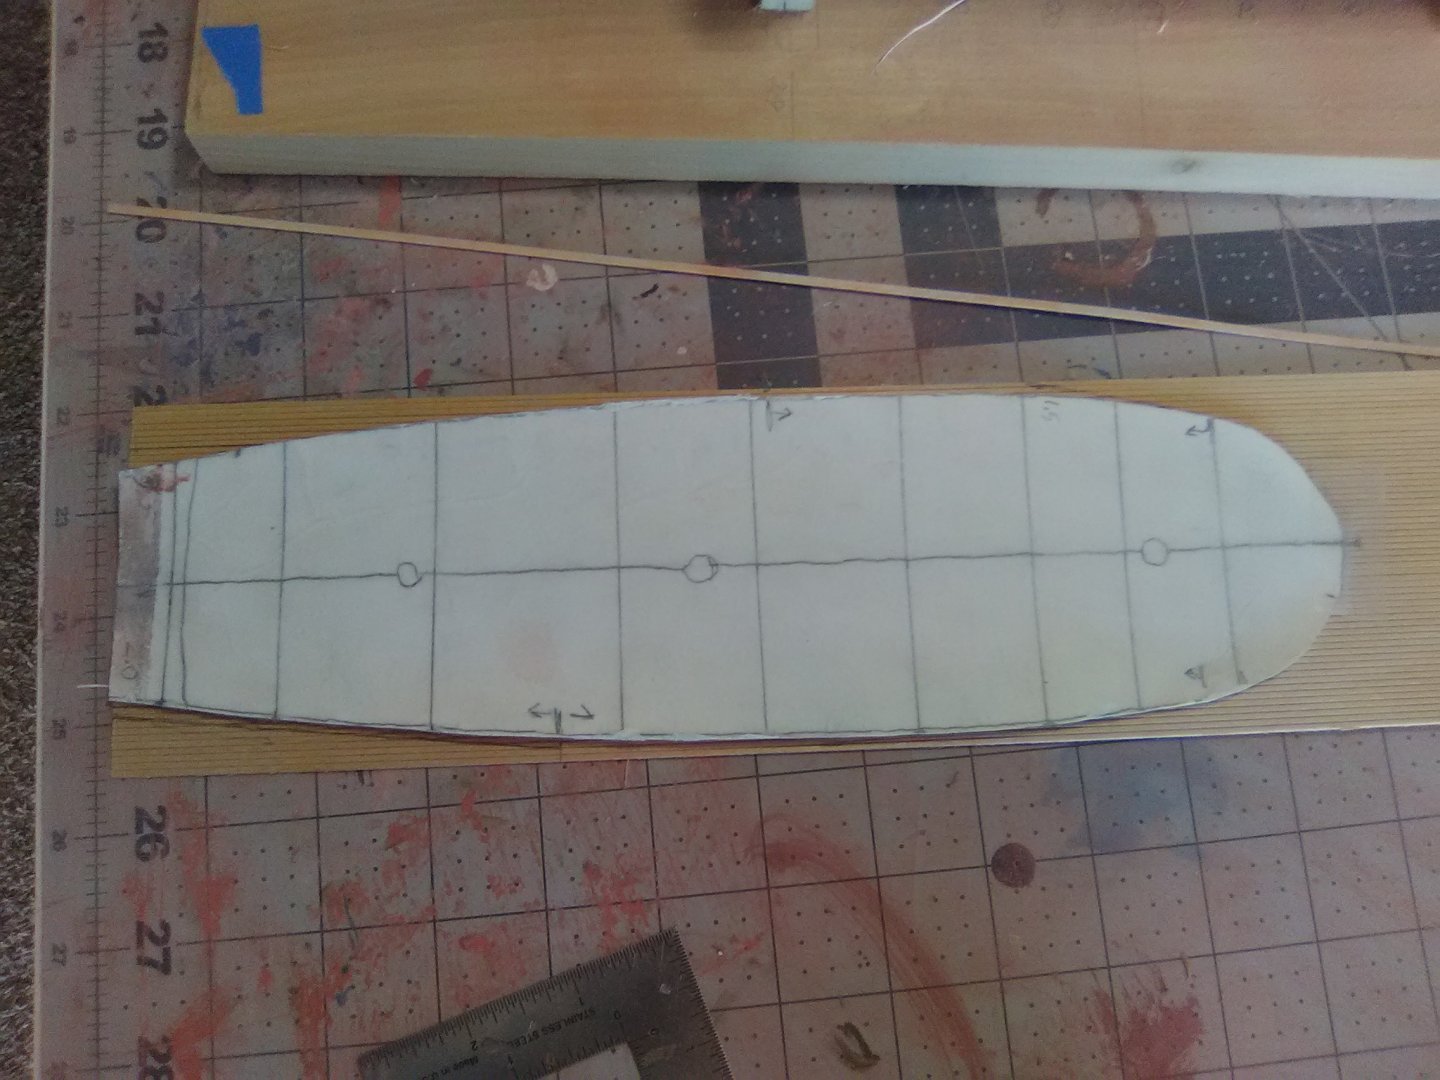
The template worked well but given the tumblehome on the bulwarks I could not drop the sheet onto the deck - I had to cut it in half down the centerline. After a lot of test fitting and trimming of each half I ended up with a good fit - any minor gaps along the side will be covered by the water ways. Before I installed the deck I stained it with Old Master Fruitwood Gel Stain which Chuck Passaro is using on his HMS Winchelsea group build here on the site. It’s great stuff! Although the planking is bass wood there was no blotching, it went on easily. It’s initial color was a light, almost yellowish tan but after a couple of hours it darkened to more of an oak color and the plank seams are readily visible so I did not have to try to darken them with a pencil, which I’m sure would not have gone all that well. I glued the plank sheets down with 2-part epoxy to give me enough time for final adjustments before it set and, most importantly, to avoid any swelling of the wood which can come from the water in wood glues.
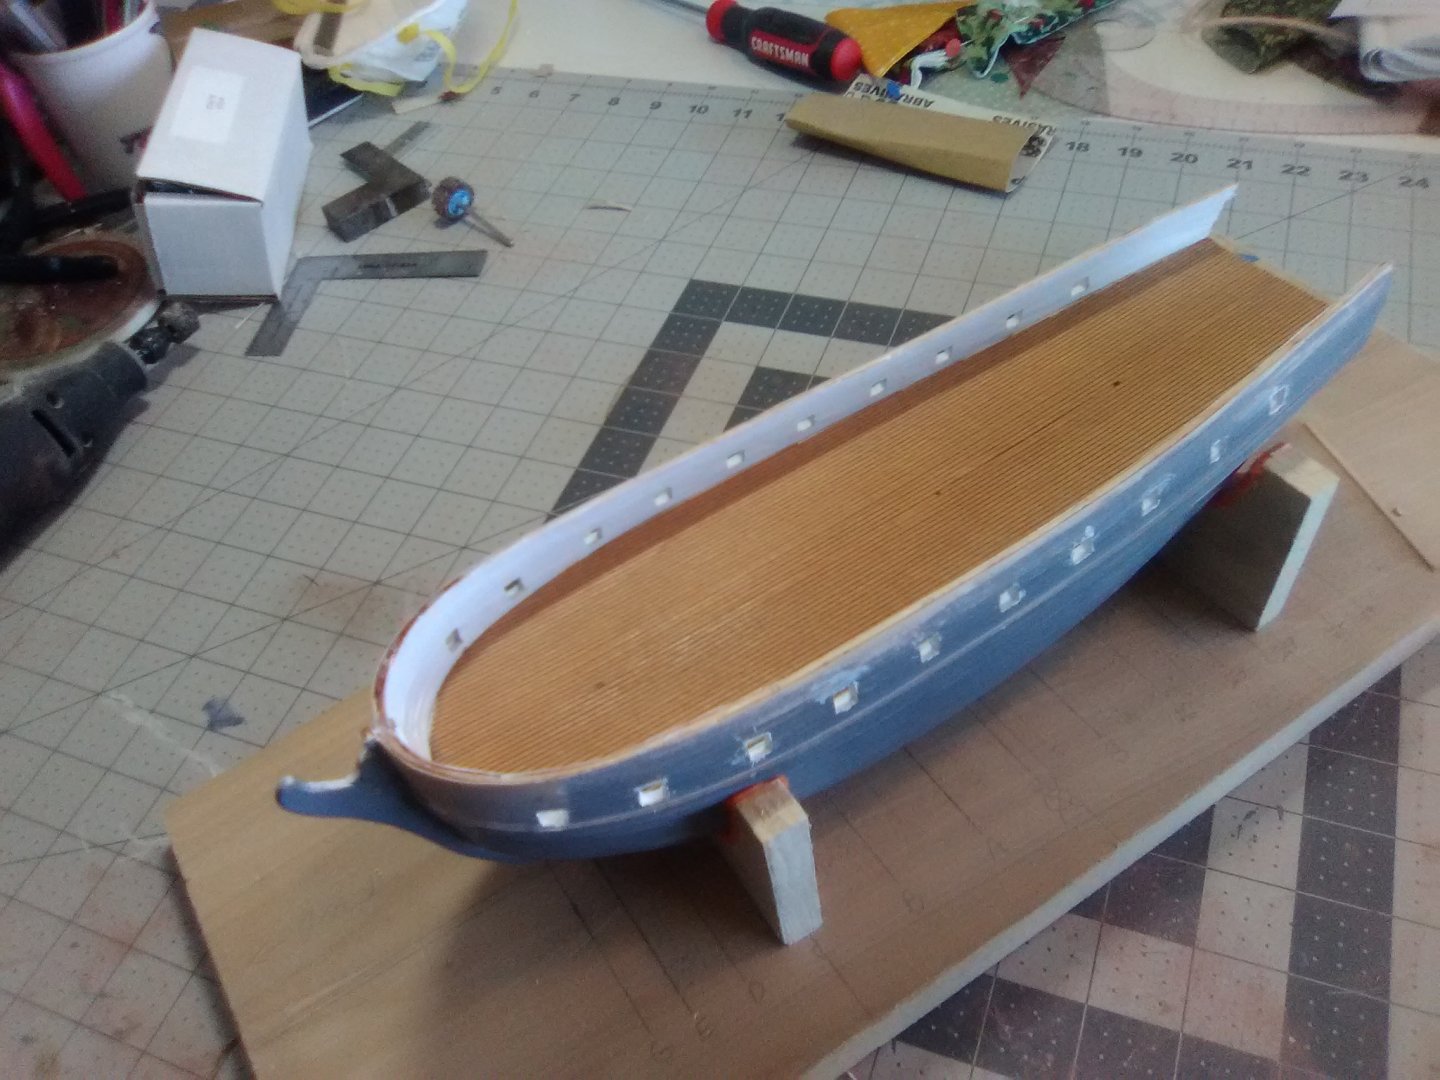

Next up will be adding details to the gun deck.
- KurtH, mort stoll, Bill Morrison and 1 other
-
4
-
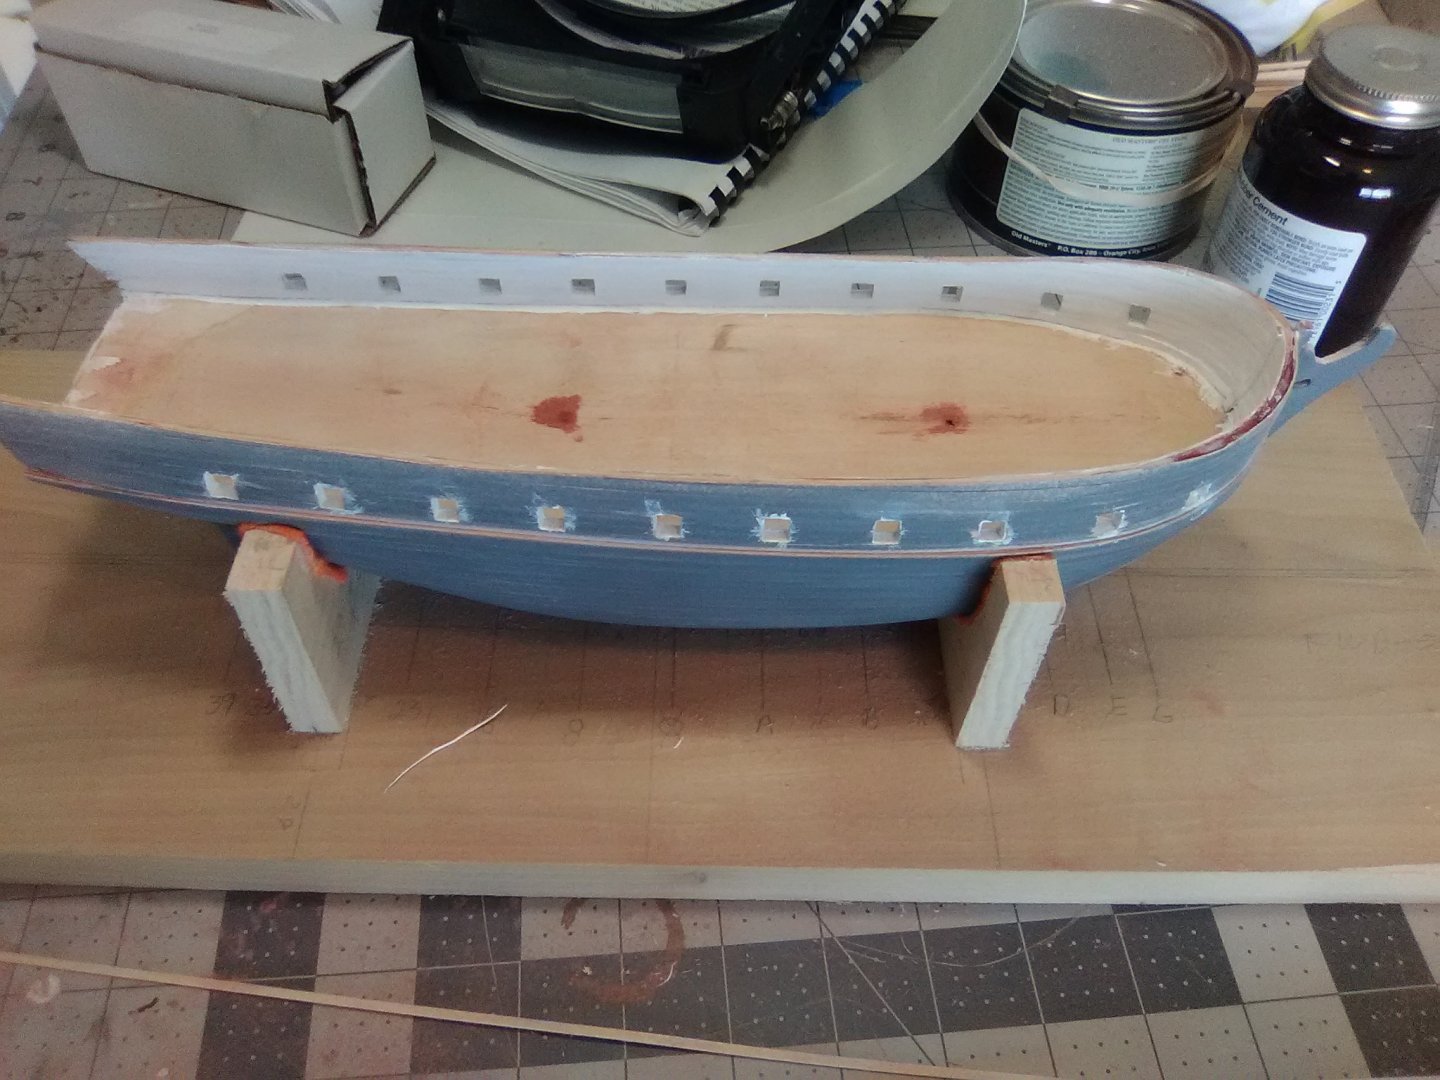
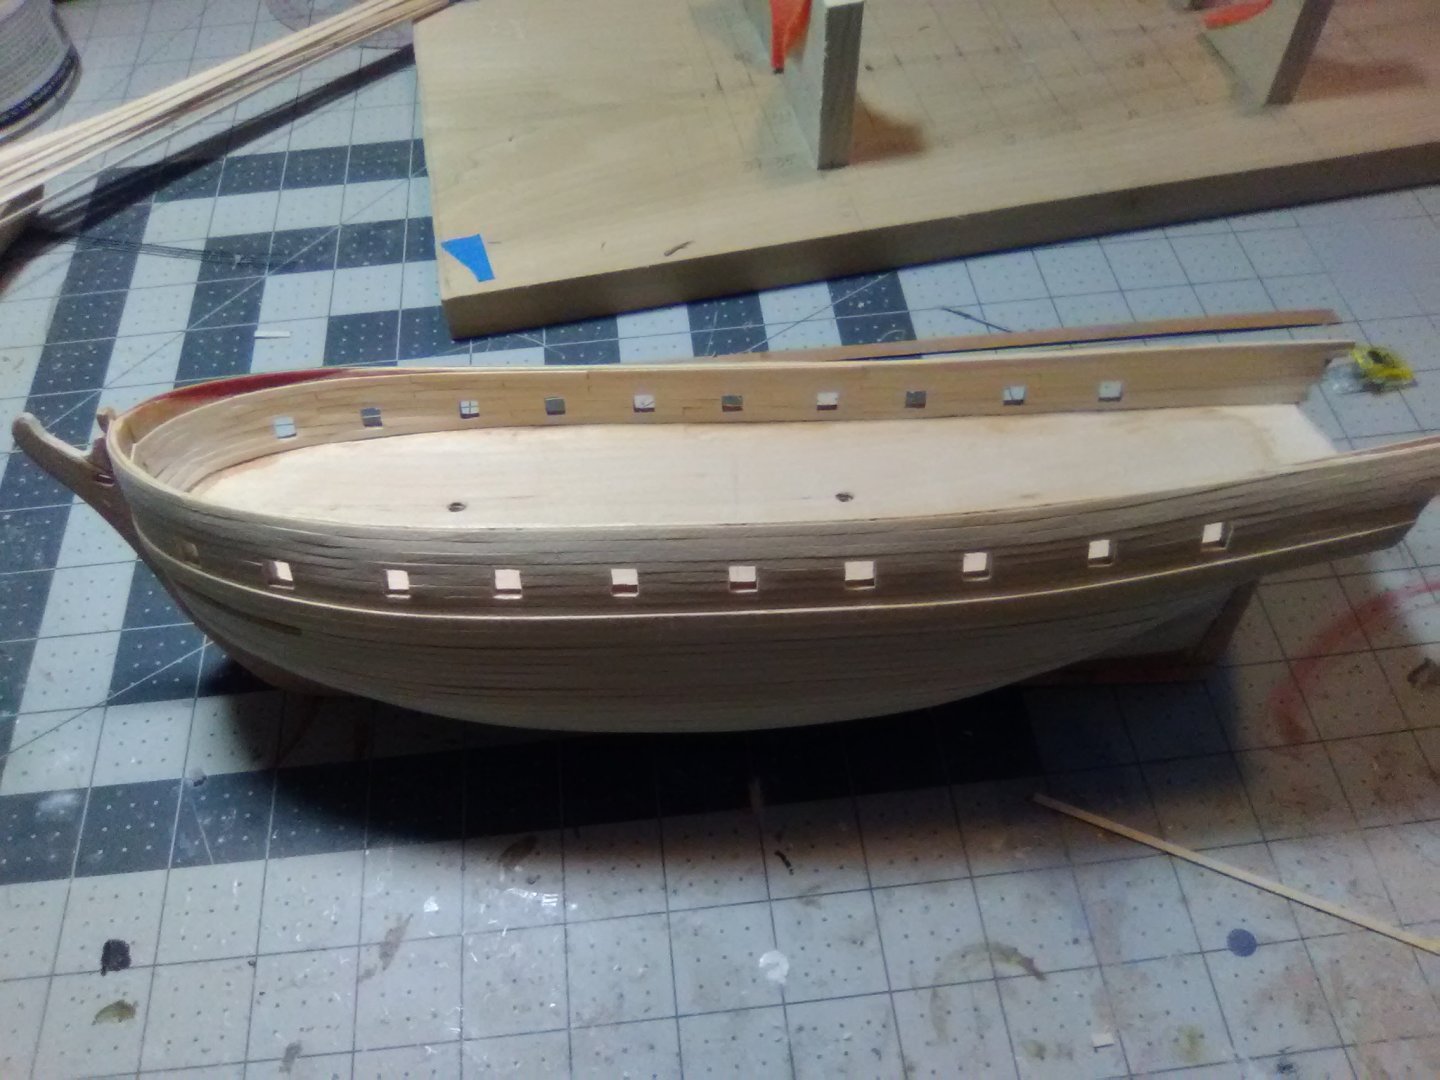
Ceiling Planks
After reopening the gunport the ceiling planks went in pretty easily along the inside of the bulwarks. I’ve got a few more to go up forward and then it will be time to break out the filling putty, sandpaper and primer.
- mort stoll, KurtH, Bill Morrison and 1 other
-
4
-
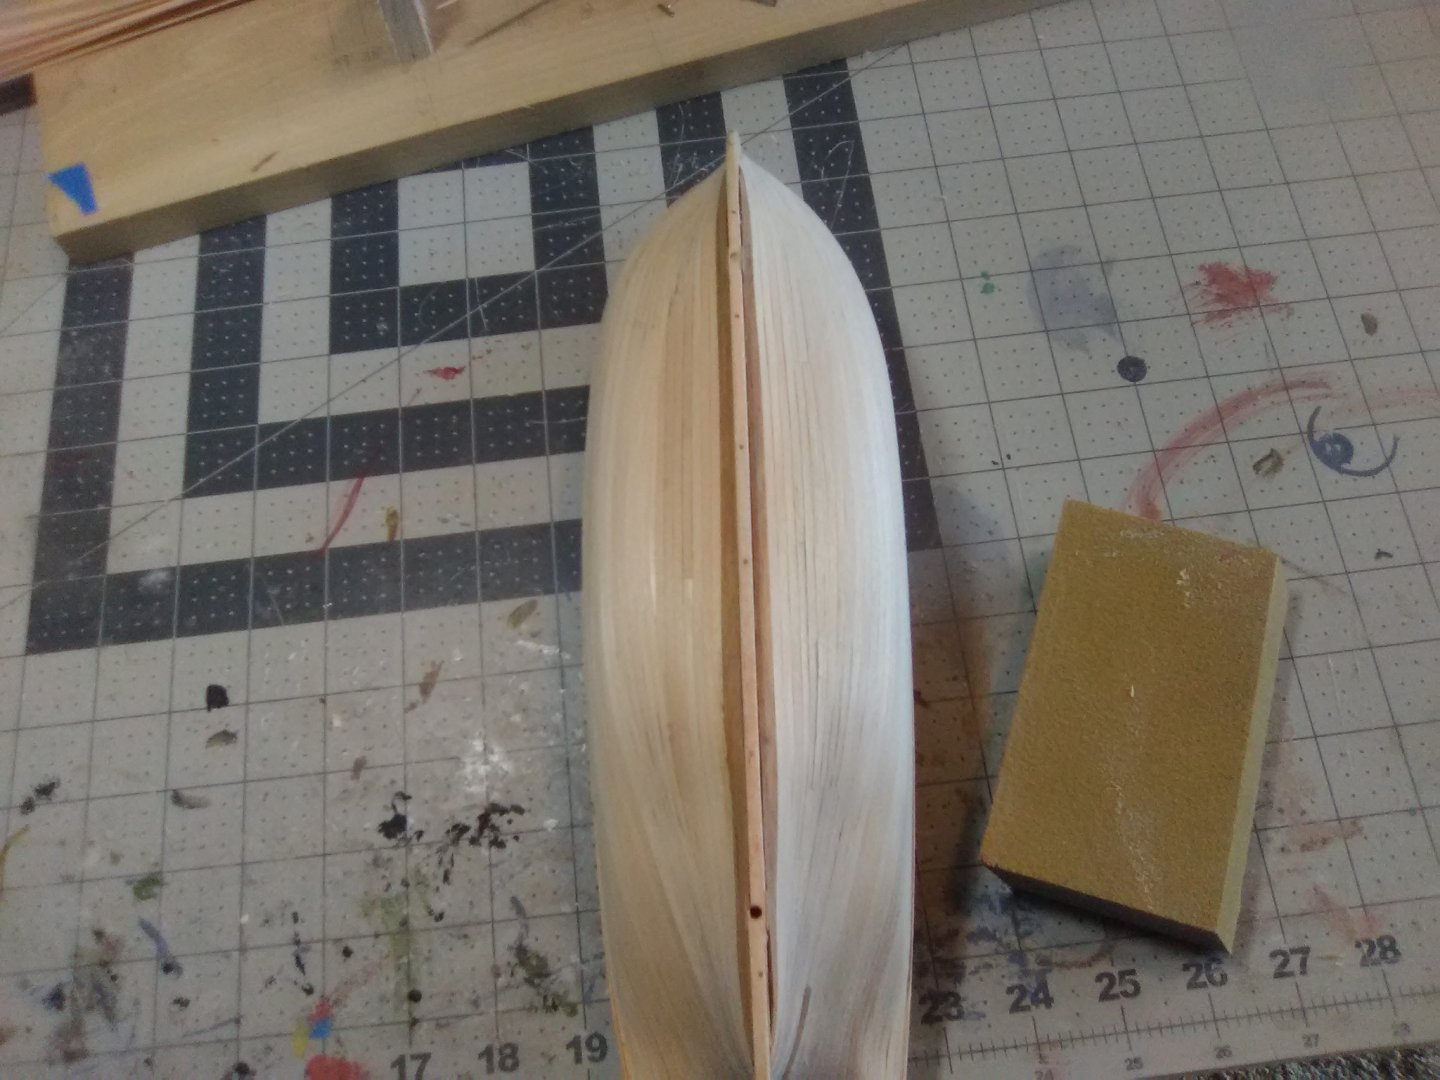
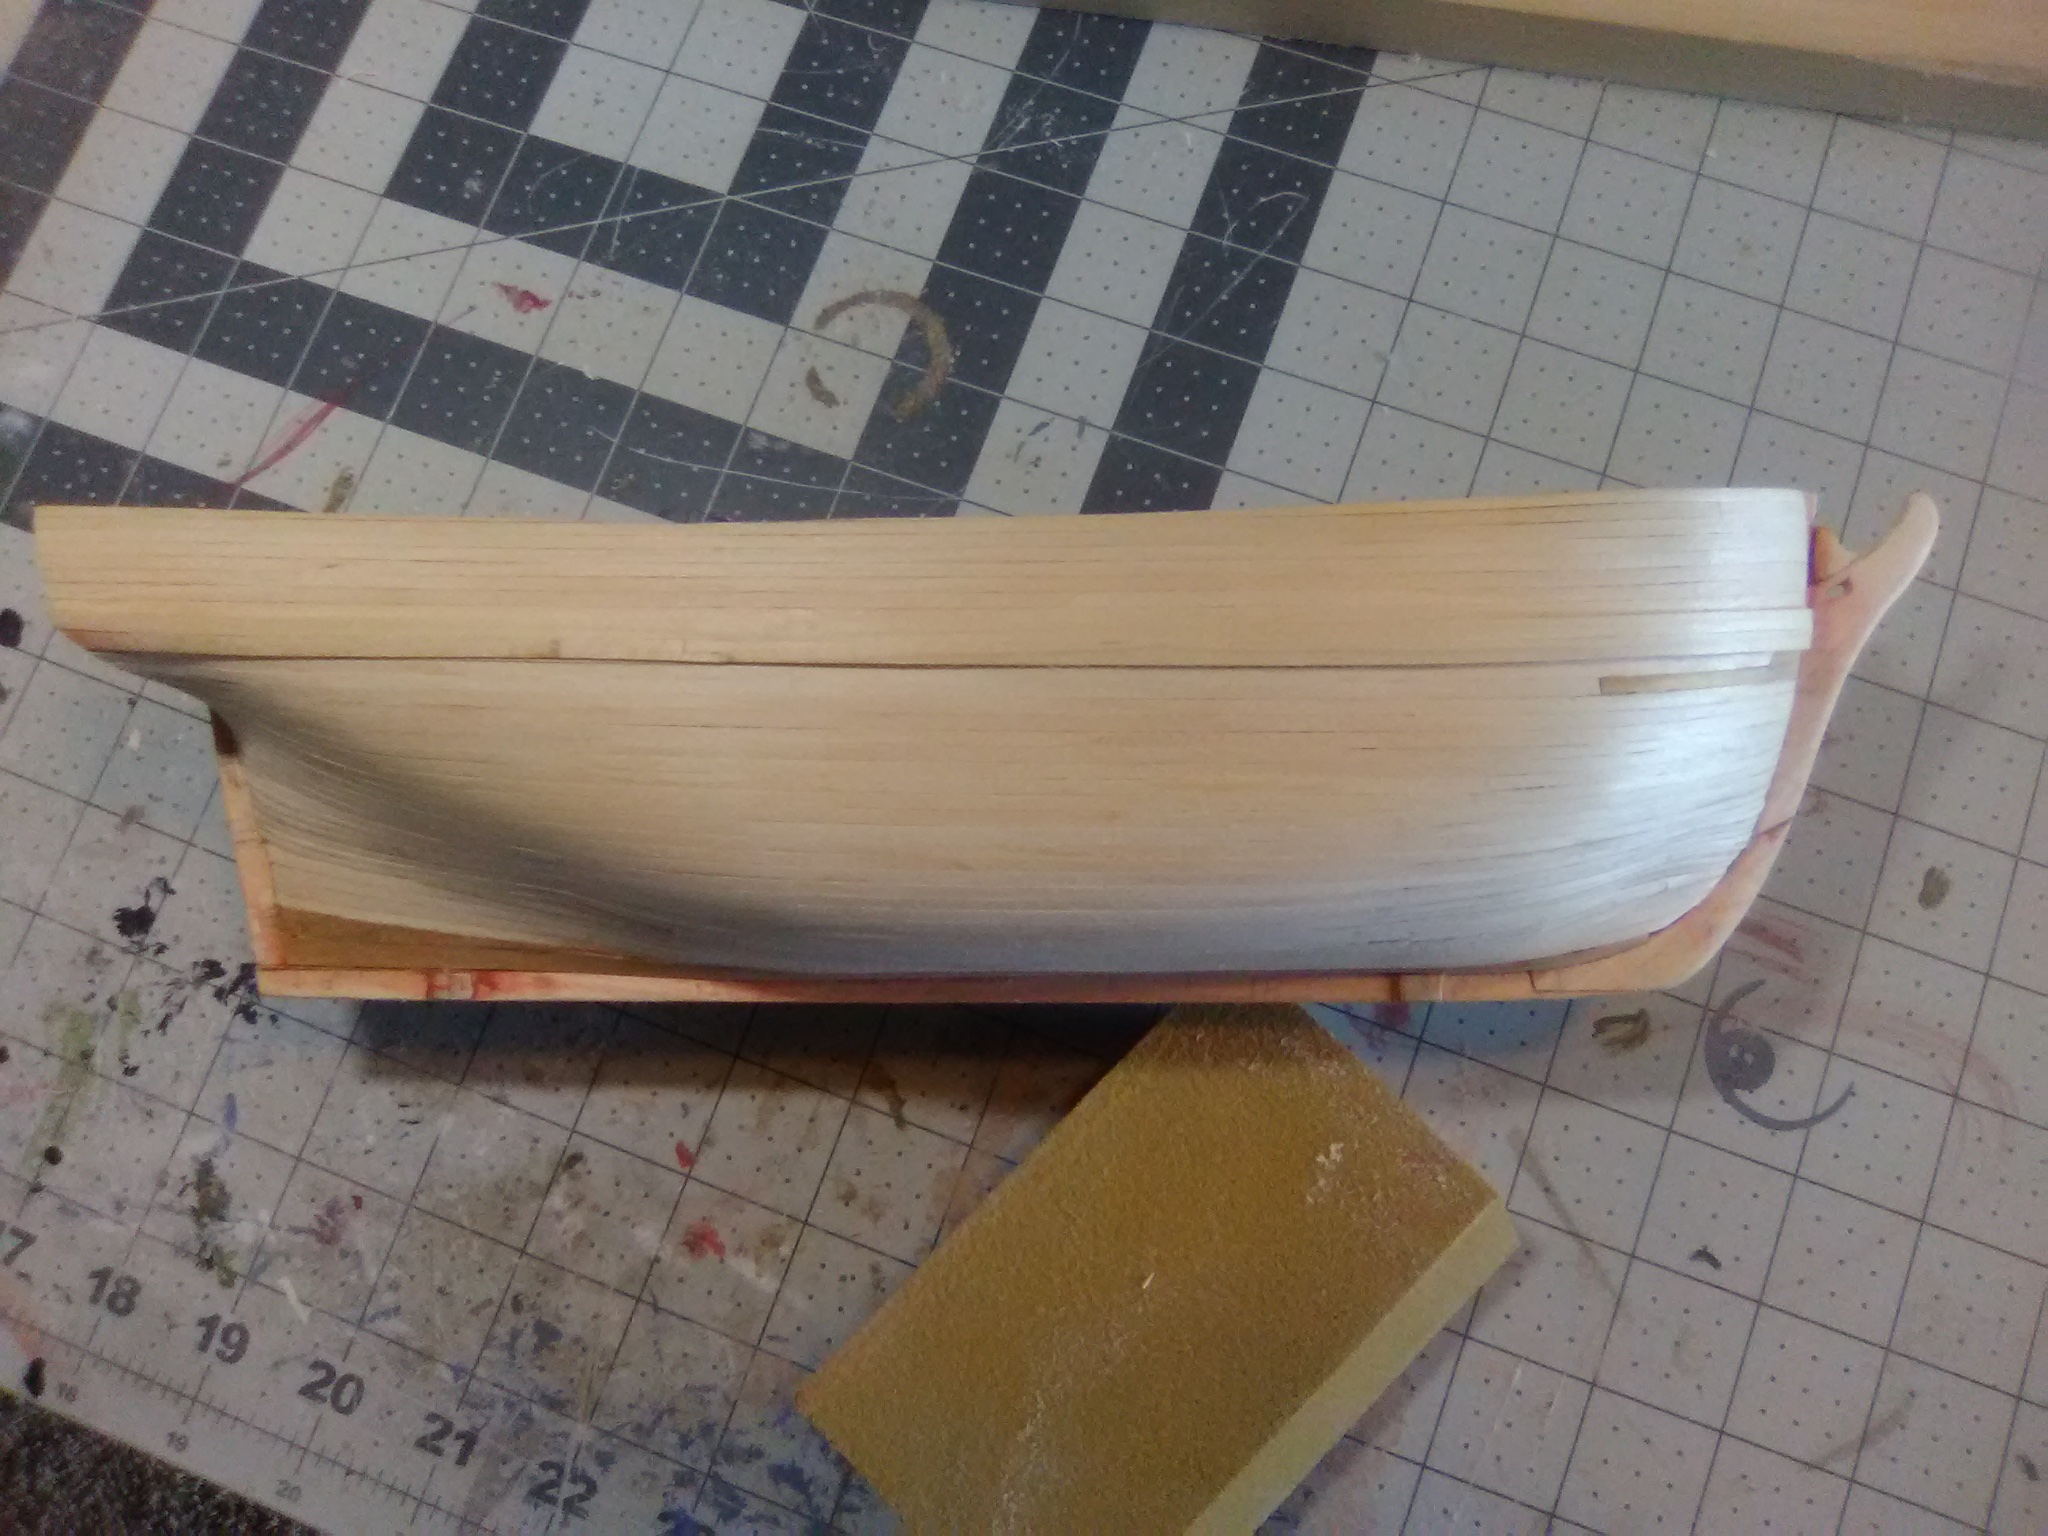
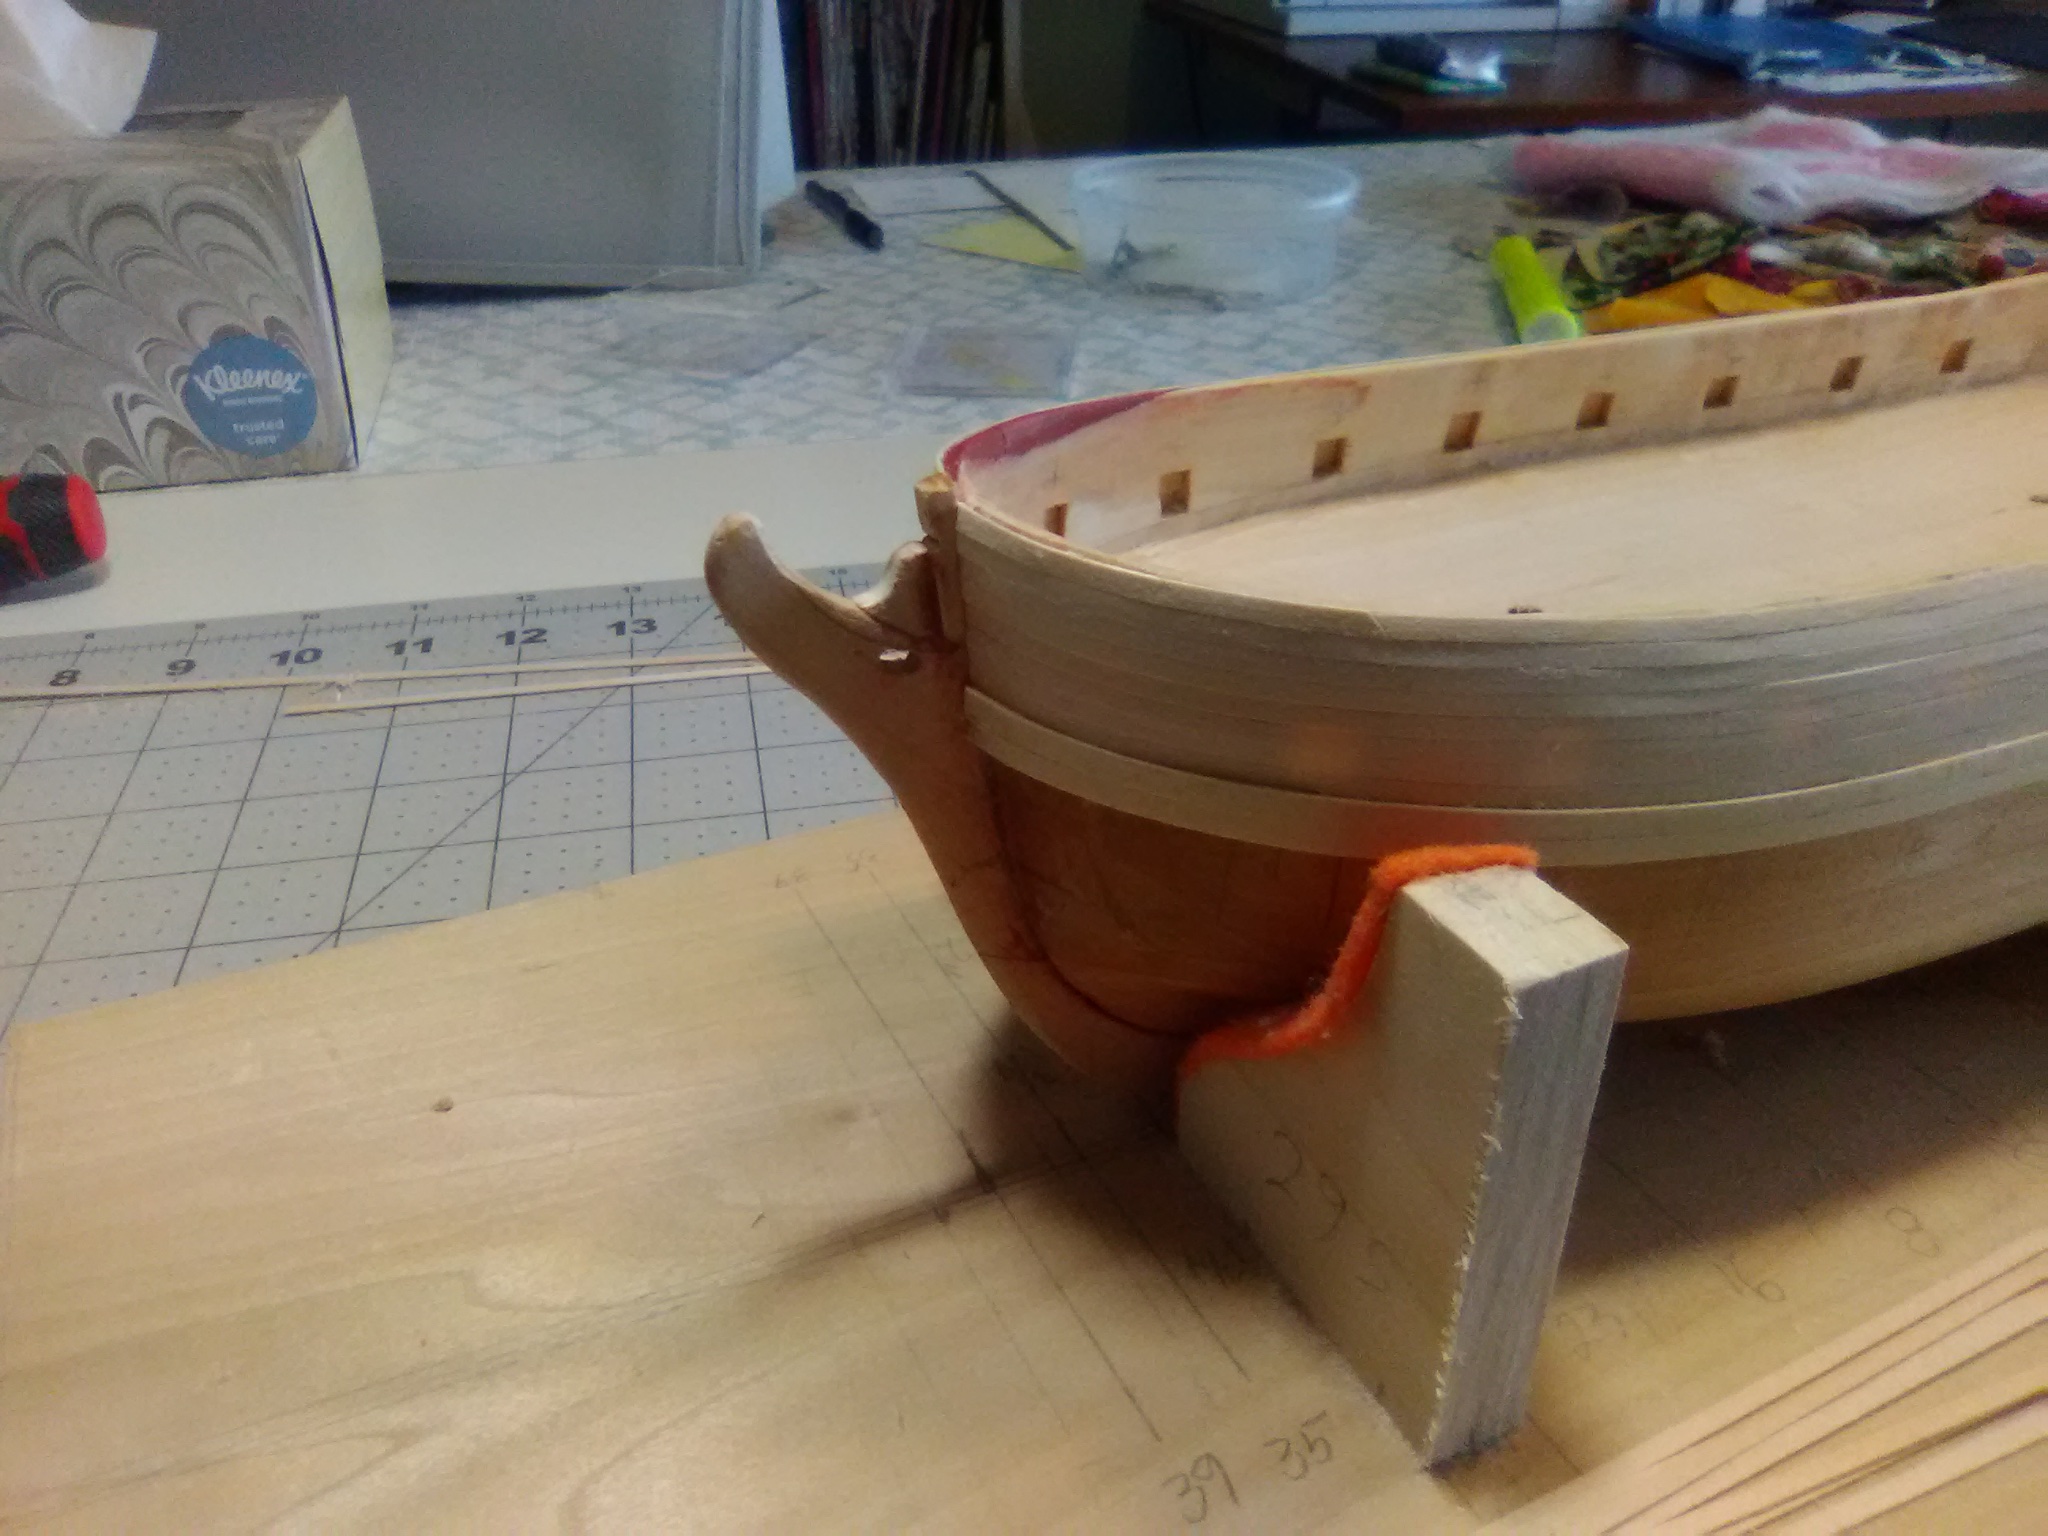
Exterior hull planking done
You can get away without planking this hull at all but I thought it would be good practice for me since I have the MS kit of the SYREN on the shelf and that kit calls for some good planking skills.
While this kit is not a good choice for someone’s first build I do think it would be a good choice for a first planking job for the following reasons:
- The hull will be completely painted so after priming and several coats of paint pretty much all of the plank seams and butts will be invisible - so will any learner’s mistakes - like mine
- Planking a solid hull is easier than a POB hull since you have plenty of glueing surface, don’t have to worry about fairing the bulkheads and you can terminate a plank anywhere you want
- The small size of the hull and the long lengths of supplied planking strips mean that you don’t have to cut most of the planks - they can run end to end
- The supplied planking is 2mm wide and .02” thick so it is very pliable, which allows you to get away with easy edge bending, no soaking or heating to bend it and no spilling to avoid twisting. One drawback to it is that it allows you to get away with things that thicker planks would not so the planking “experience” you get from this kit is not all that it could be. That said I was able to add some drop planks, stealers and practice tapering.
Next on my to do list is to reopen the gun ports and then plank the interior of the bulwarks (ceiling)
- J11, Bill Morrison, mort stoll and 1 other
-
4
-
Nice looking boat! I thought it might be a Grand Banks.
There is an interesting build log of Amati's Grand Banks kit, "Grand Banks by Mindi" https://modelshipworld.com/topic/24208-grand-banks-46-by-mindi-amati-models-120/
I've been thinking of doing an RC build but I don't want to mess around laying fiberglass on a wood hull. This kit has a fiberglass hull but some very nice looking wood detailing inside and out. You could probably bash it into a good facsimile of your boat.
-
James, I'm not sure what primer you are using but I've always had good luck using Krylon spray primer (grey or white) from the hardware store. It goes on pretty evenly, dries quick, sands well and forms a good base for the paint.
-
Your right, sorry.
BTW, is your "avatar" photo your boat?
-
James, I'm not sure what primer you are using but I've always had good luck using Krylon spray primer (grey or white) from the hardware store. It goes on pretty evenly, dries quick, sands well and forms a good base for the paint.
-
-
I don't think you will have a problem with it sticking to the bondo but there is a real "gotcha" to watch out for - something I learned the hard way with scribed decking. Wood glue like Tite-bond or white glue like Elmers has a lot of water in it and it can cause thin decking material to swell, buckle or warp. If you have enough decking material that you can spare some you might want to experiment a little - get a piece of wood (same type as the hull if possible), put some bondo on part of it (just to see if that will be a problem), sand it smooth and then pencil in an area on the top of it (not all the way out to the edges), cut a piece of decking the same size as the shape you drew , put on as much Tite-bond as you normally would (leaving a few spots bare to see if warping occurs, glue it on and see what you get when it is dry.
You could go with slow (i.e thick) CA but that has it's own problems - you get very little time (if any) to move the decking around if you don't place it just right the first time.
This may seem like overkill but on your Atlantic the deck will have a huge visual impact so you want to get it right.
-
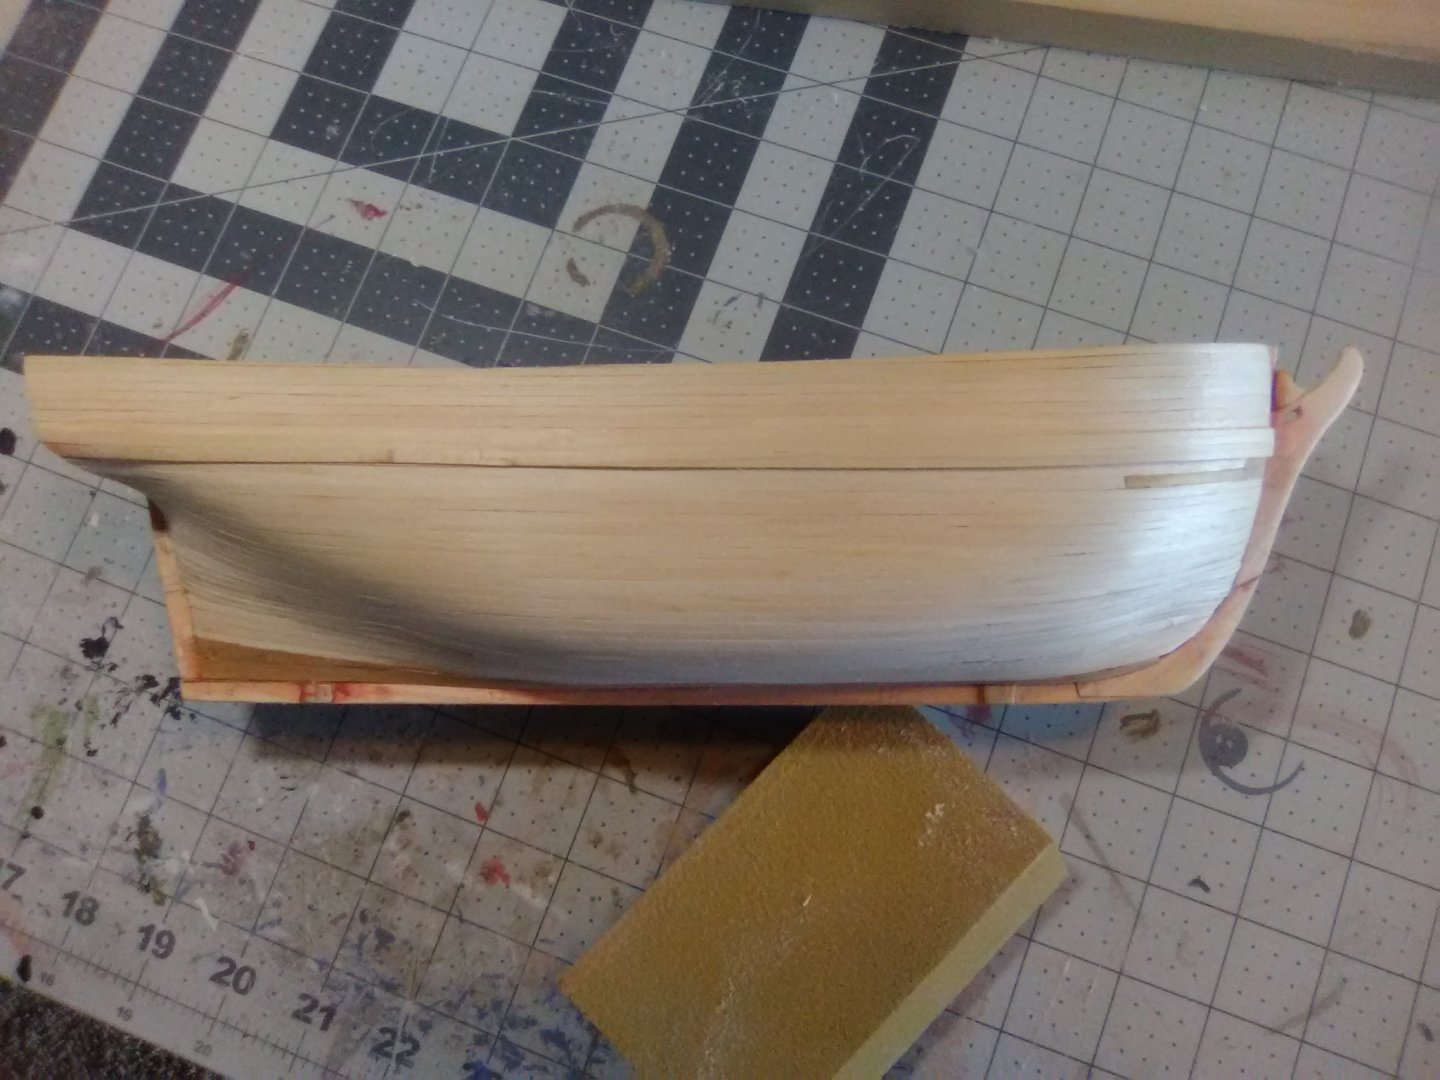
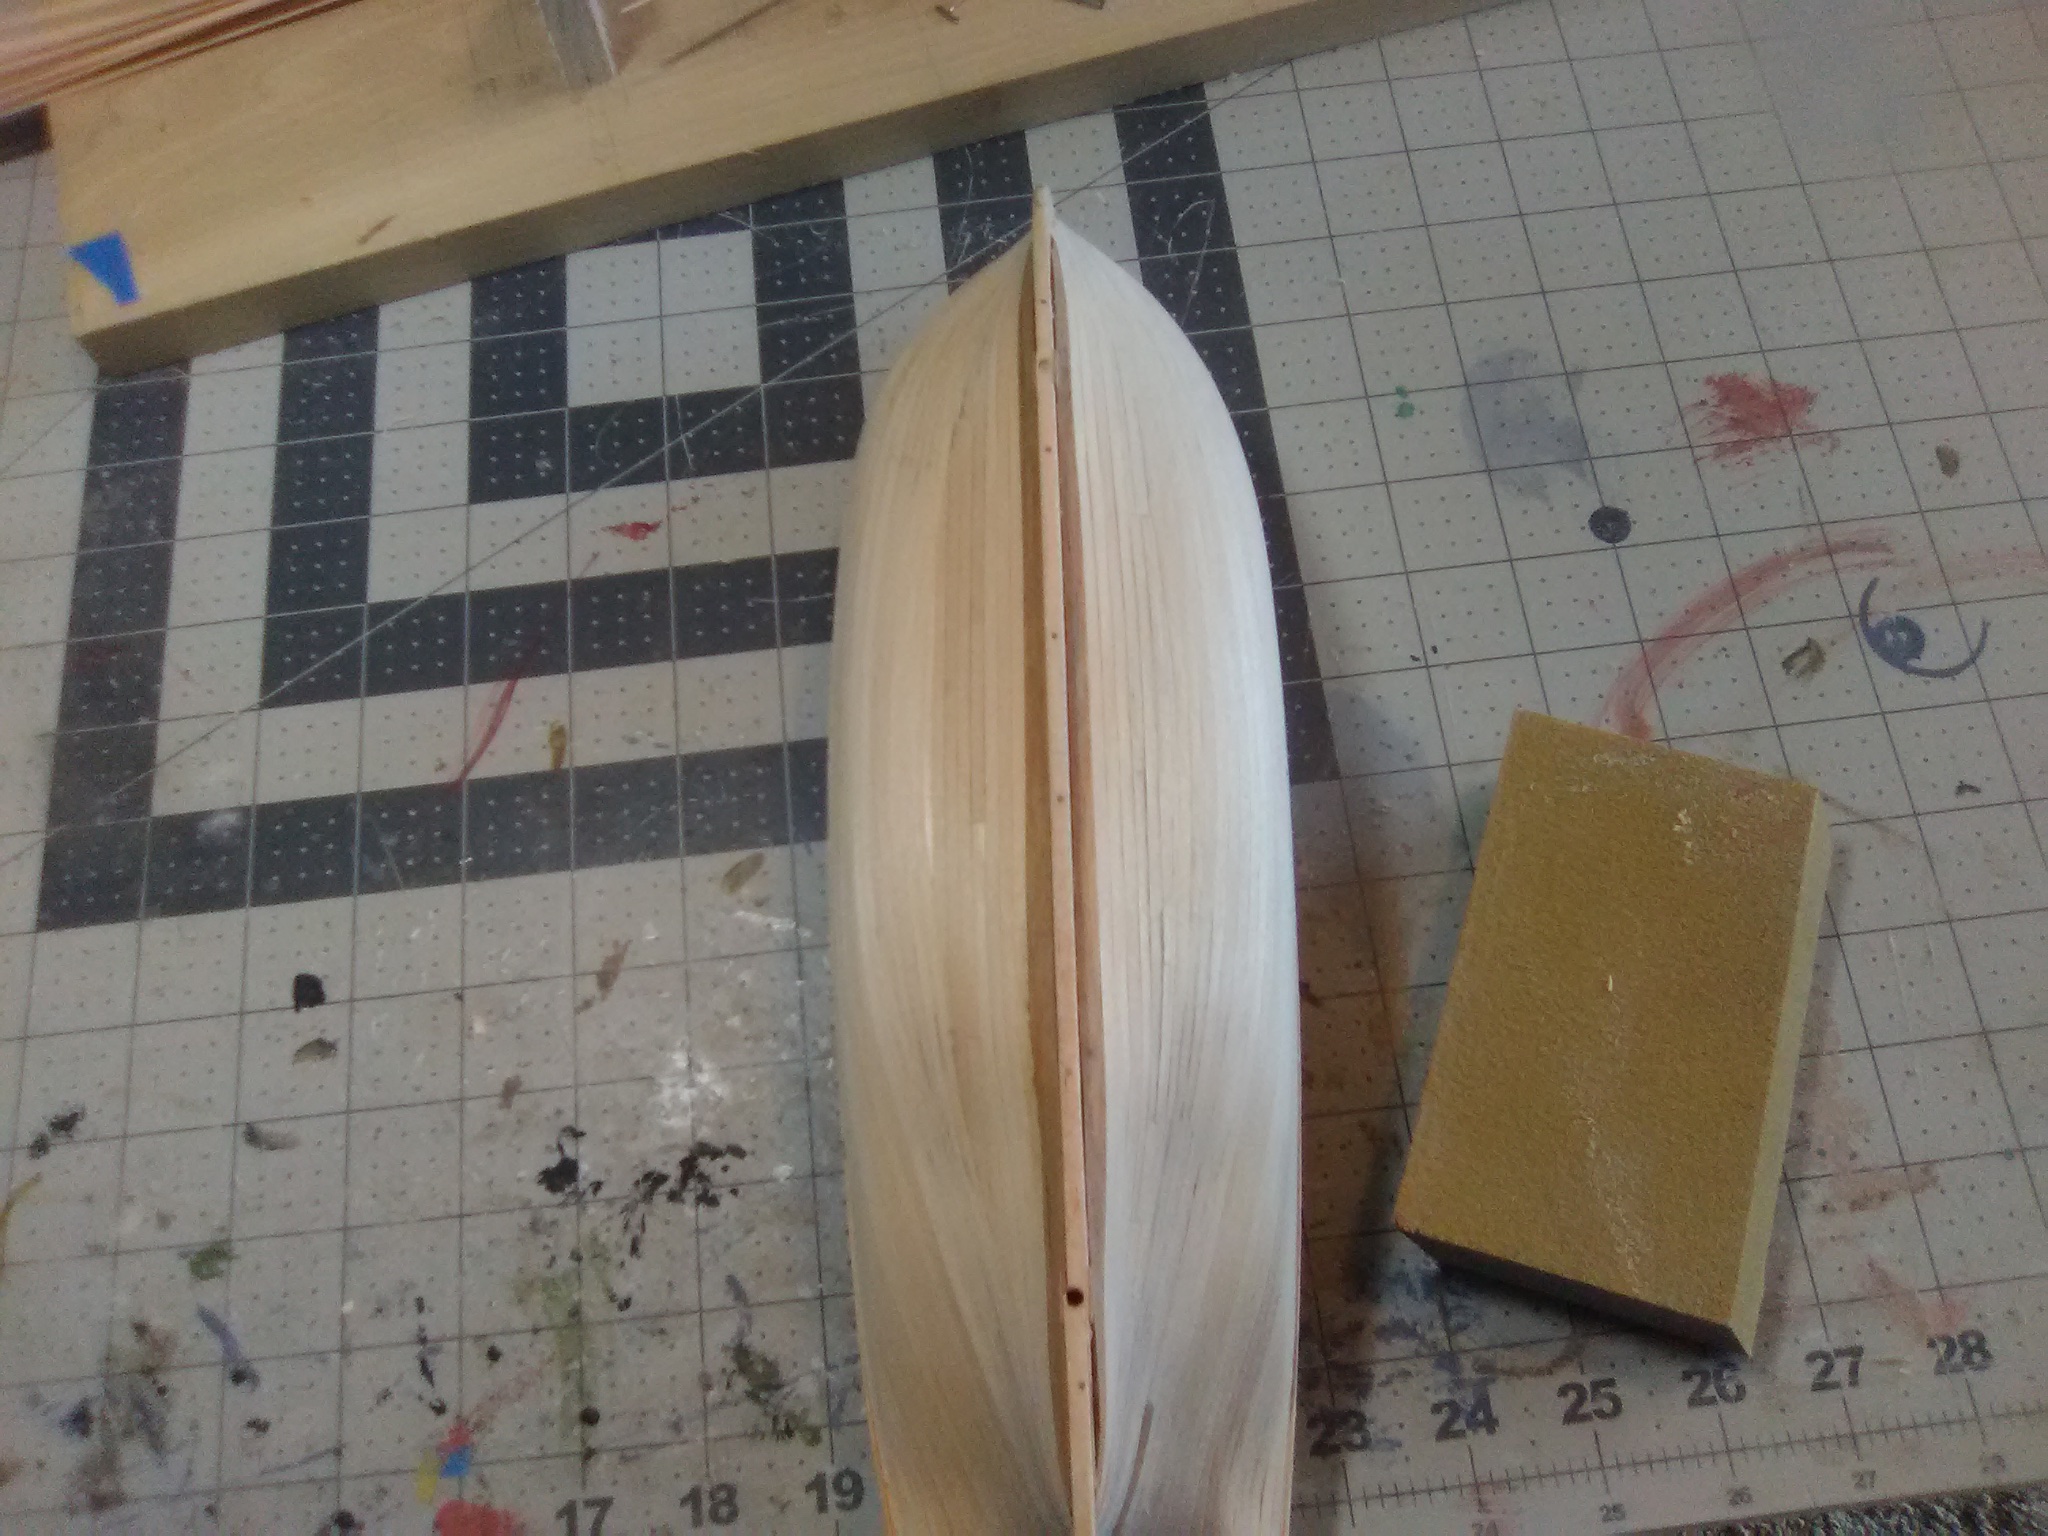
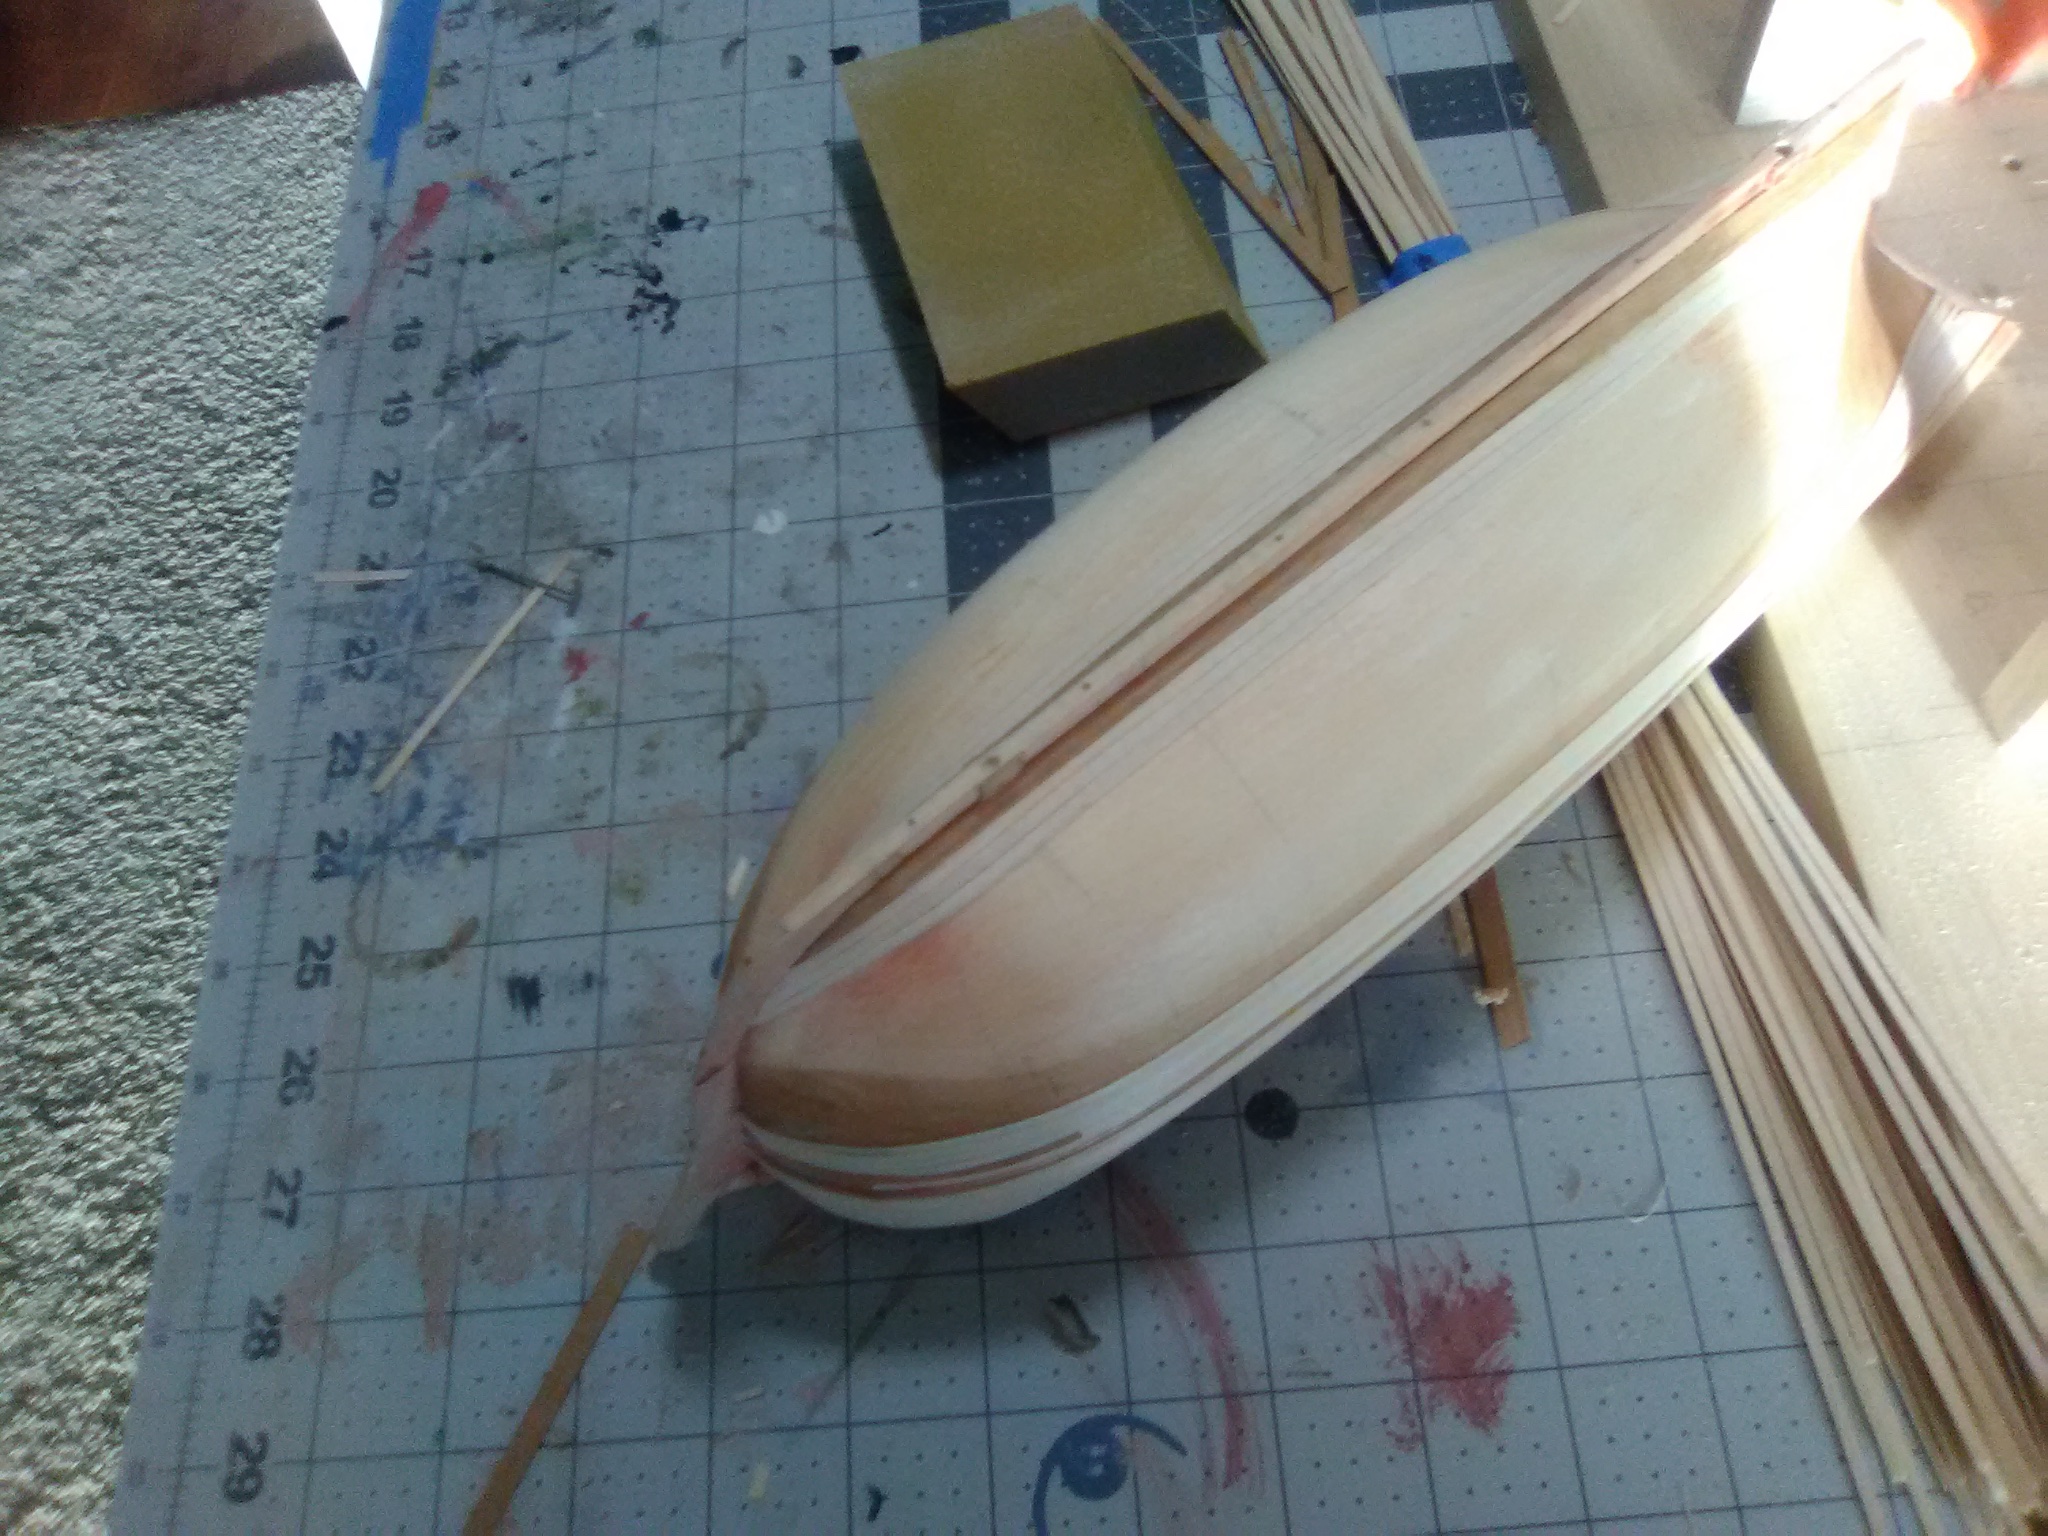
More Hull Planking
Planking is coming along better than I thought it would since this is only my 2nd planking job and the last one was about 15 years ago.
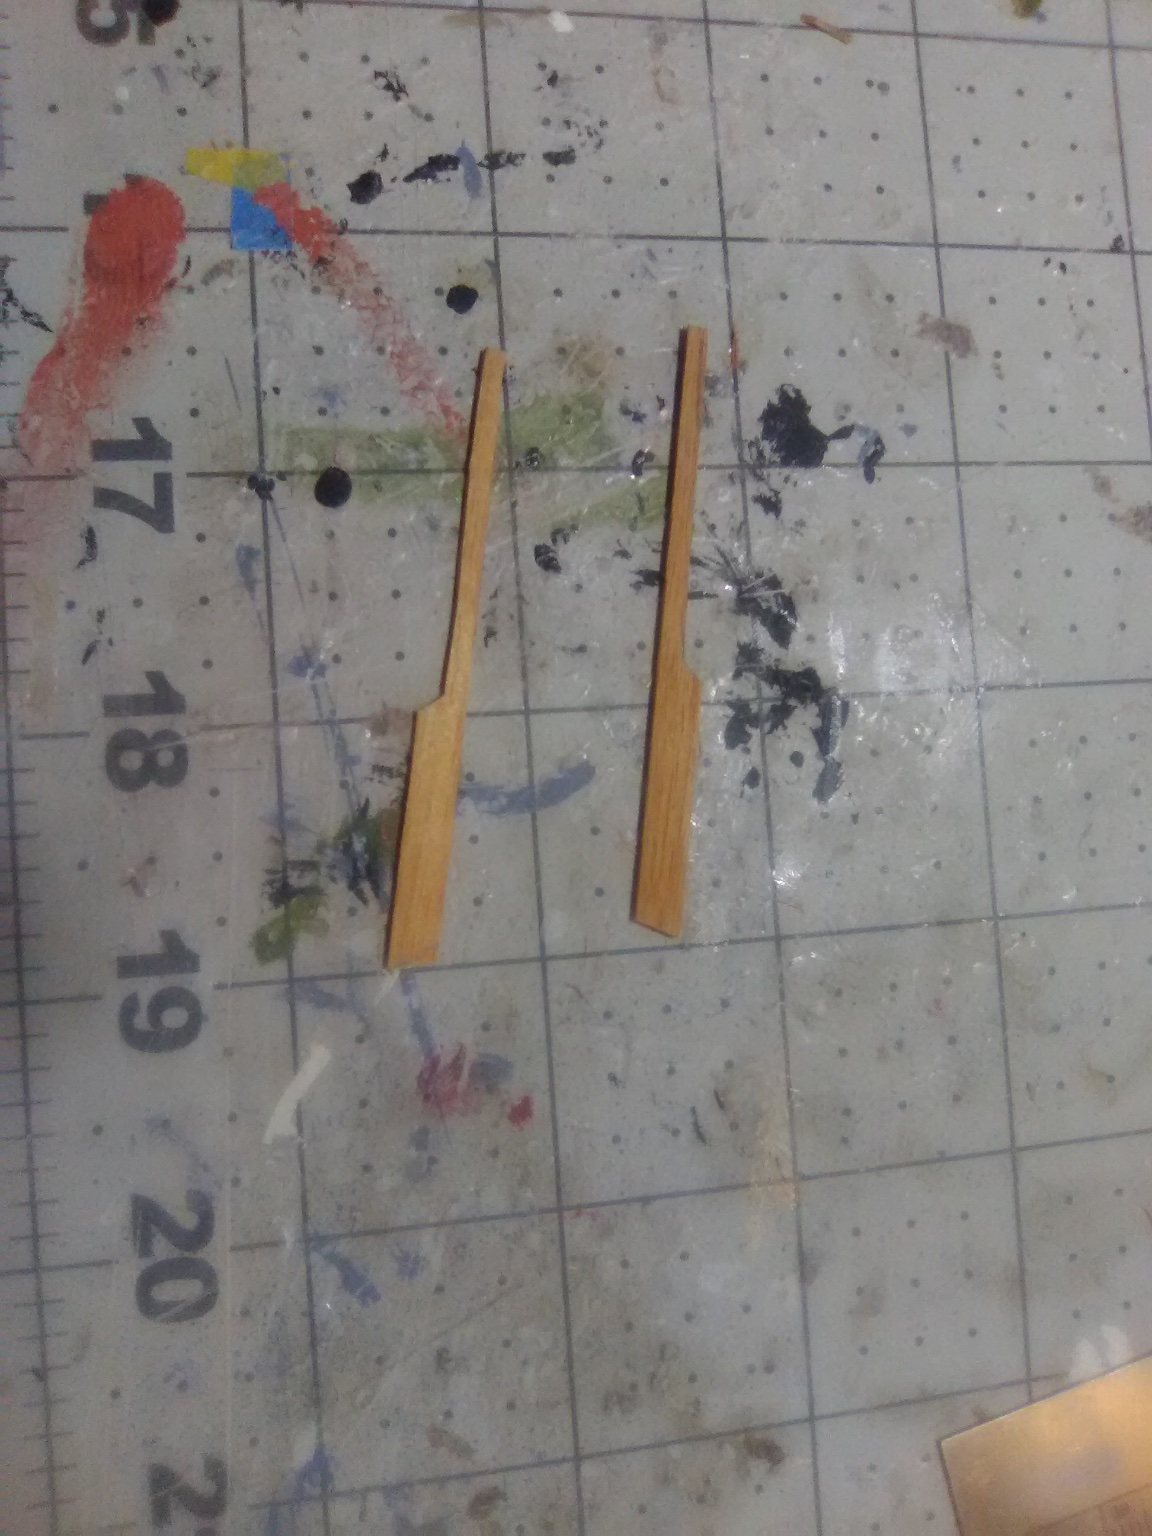
The instructions call for making the Garboard planks from a template but that implies having some thing to copy, which there is not. I found some mahogany strips in my stash that are wider than the kit planks and just a little thicker so they will be noticeable even though they will be painted. I read up on various build logs an shaped them as best as possible.
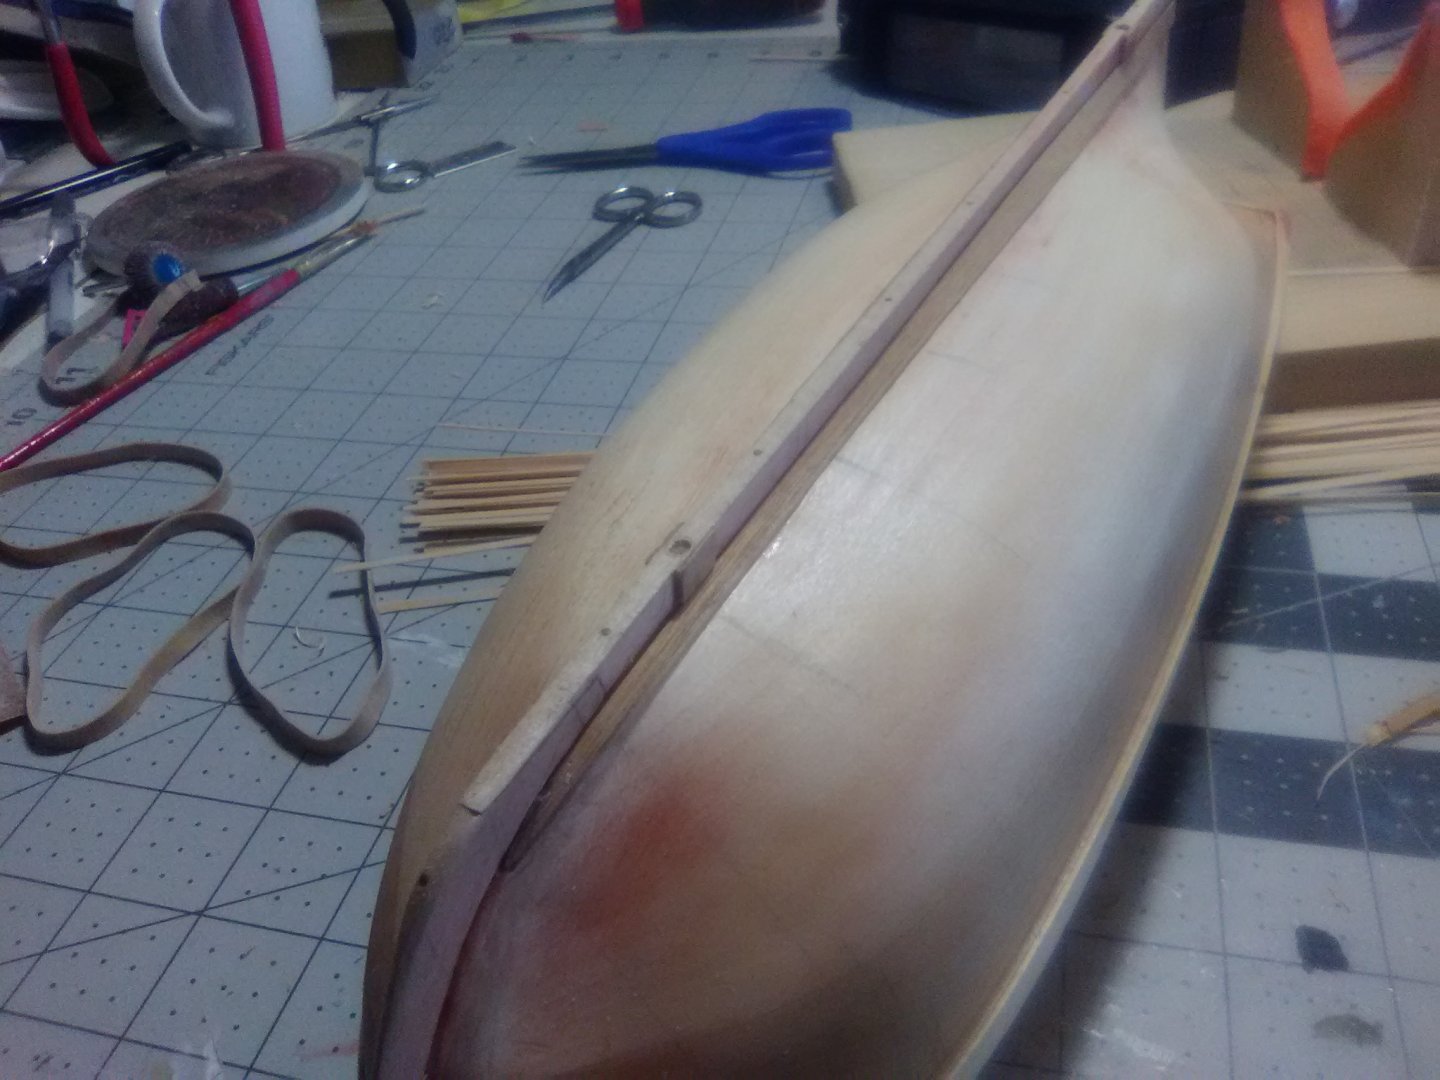
I noticed on Chuck Passaro’s group build for the Winchelsea that ships of this period frequently had a drop plank at the head of both strakes below the wales so I made a couple out of the same strip material as the garboards, fitted them and then sanded them down so they are the same thickness as the rest of the planking.

I expected to have to taper the planks near the bow and add stealers near the stern but this hull shape is a little surprising. I’m going to have to taper both the bow and stern areas - I guess it is because being built as a merchant ship the ALFRED has a much deeper and broader “belly” since cargo capacity was more important than speed like it would be for a frigate.

-
Your scratch catapult is amazing
- popeye the sailor, lmagna, RGL and 3 others
-
6
-
Gahm,
Wonderful work! I've got the Syren on the shelf and am noting those build logs worth emulating and yours is sure one of them!
Question about the carronades - are they kit-supplied or after market from BlueJacket or Caldercraft ? The ones in my kit are way too skinny.
Thanks and keep up the good work!
-
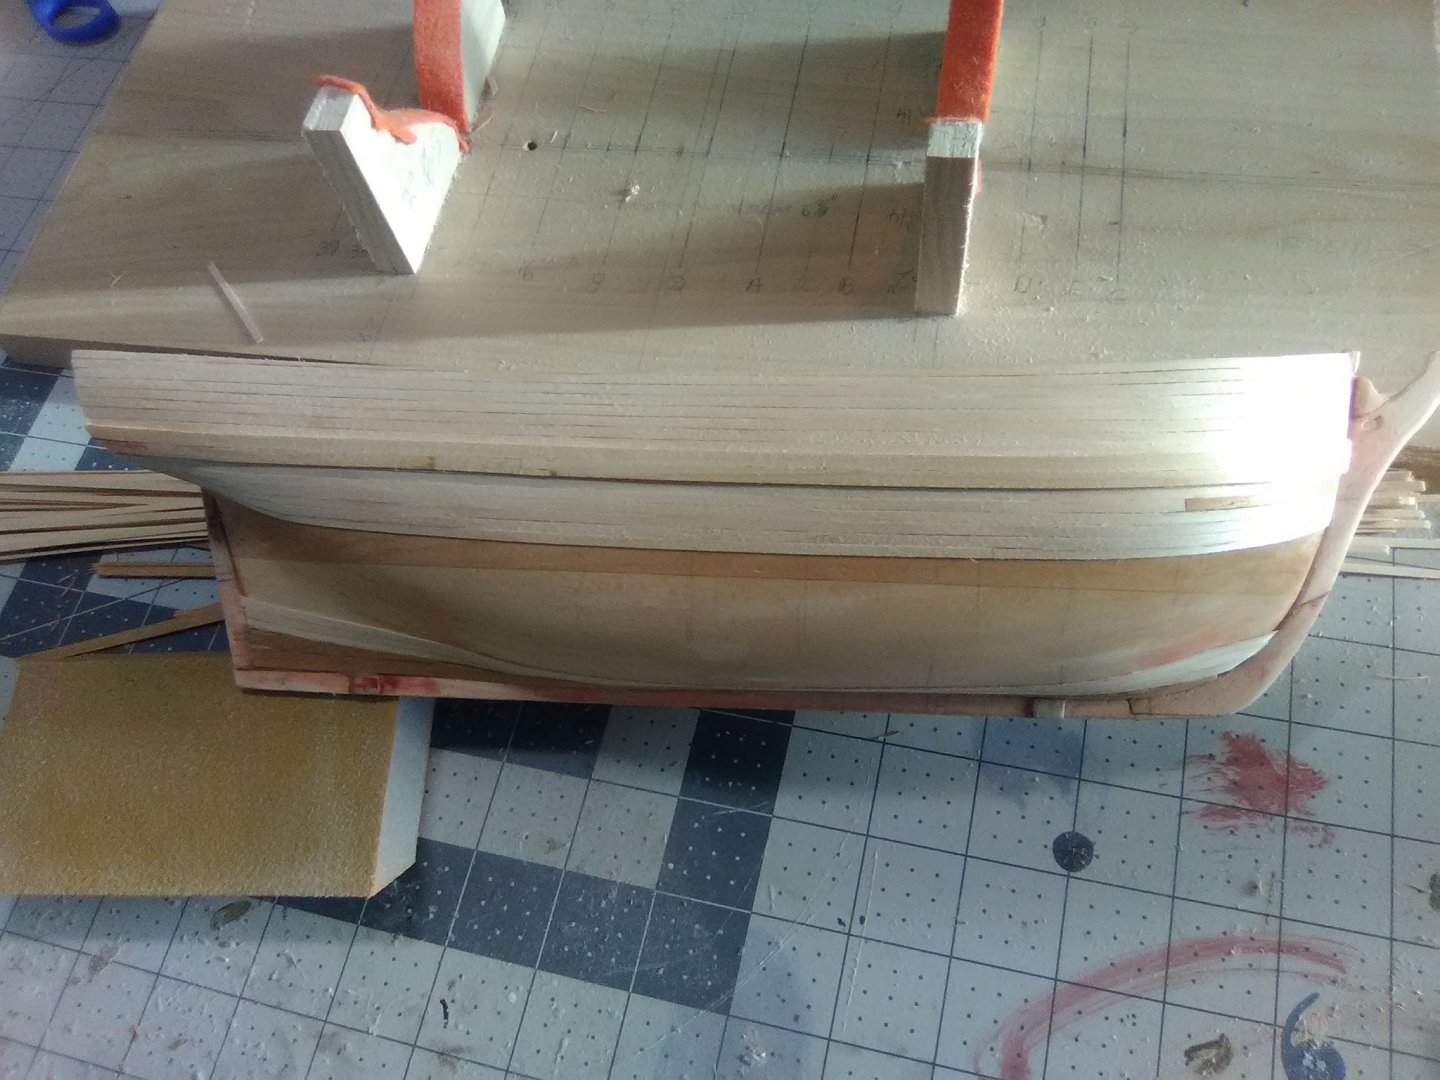
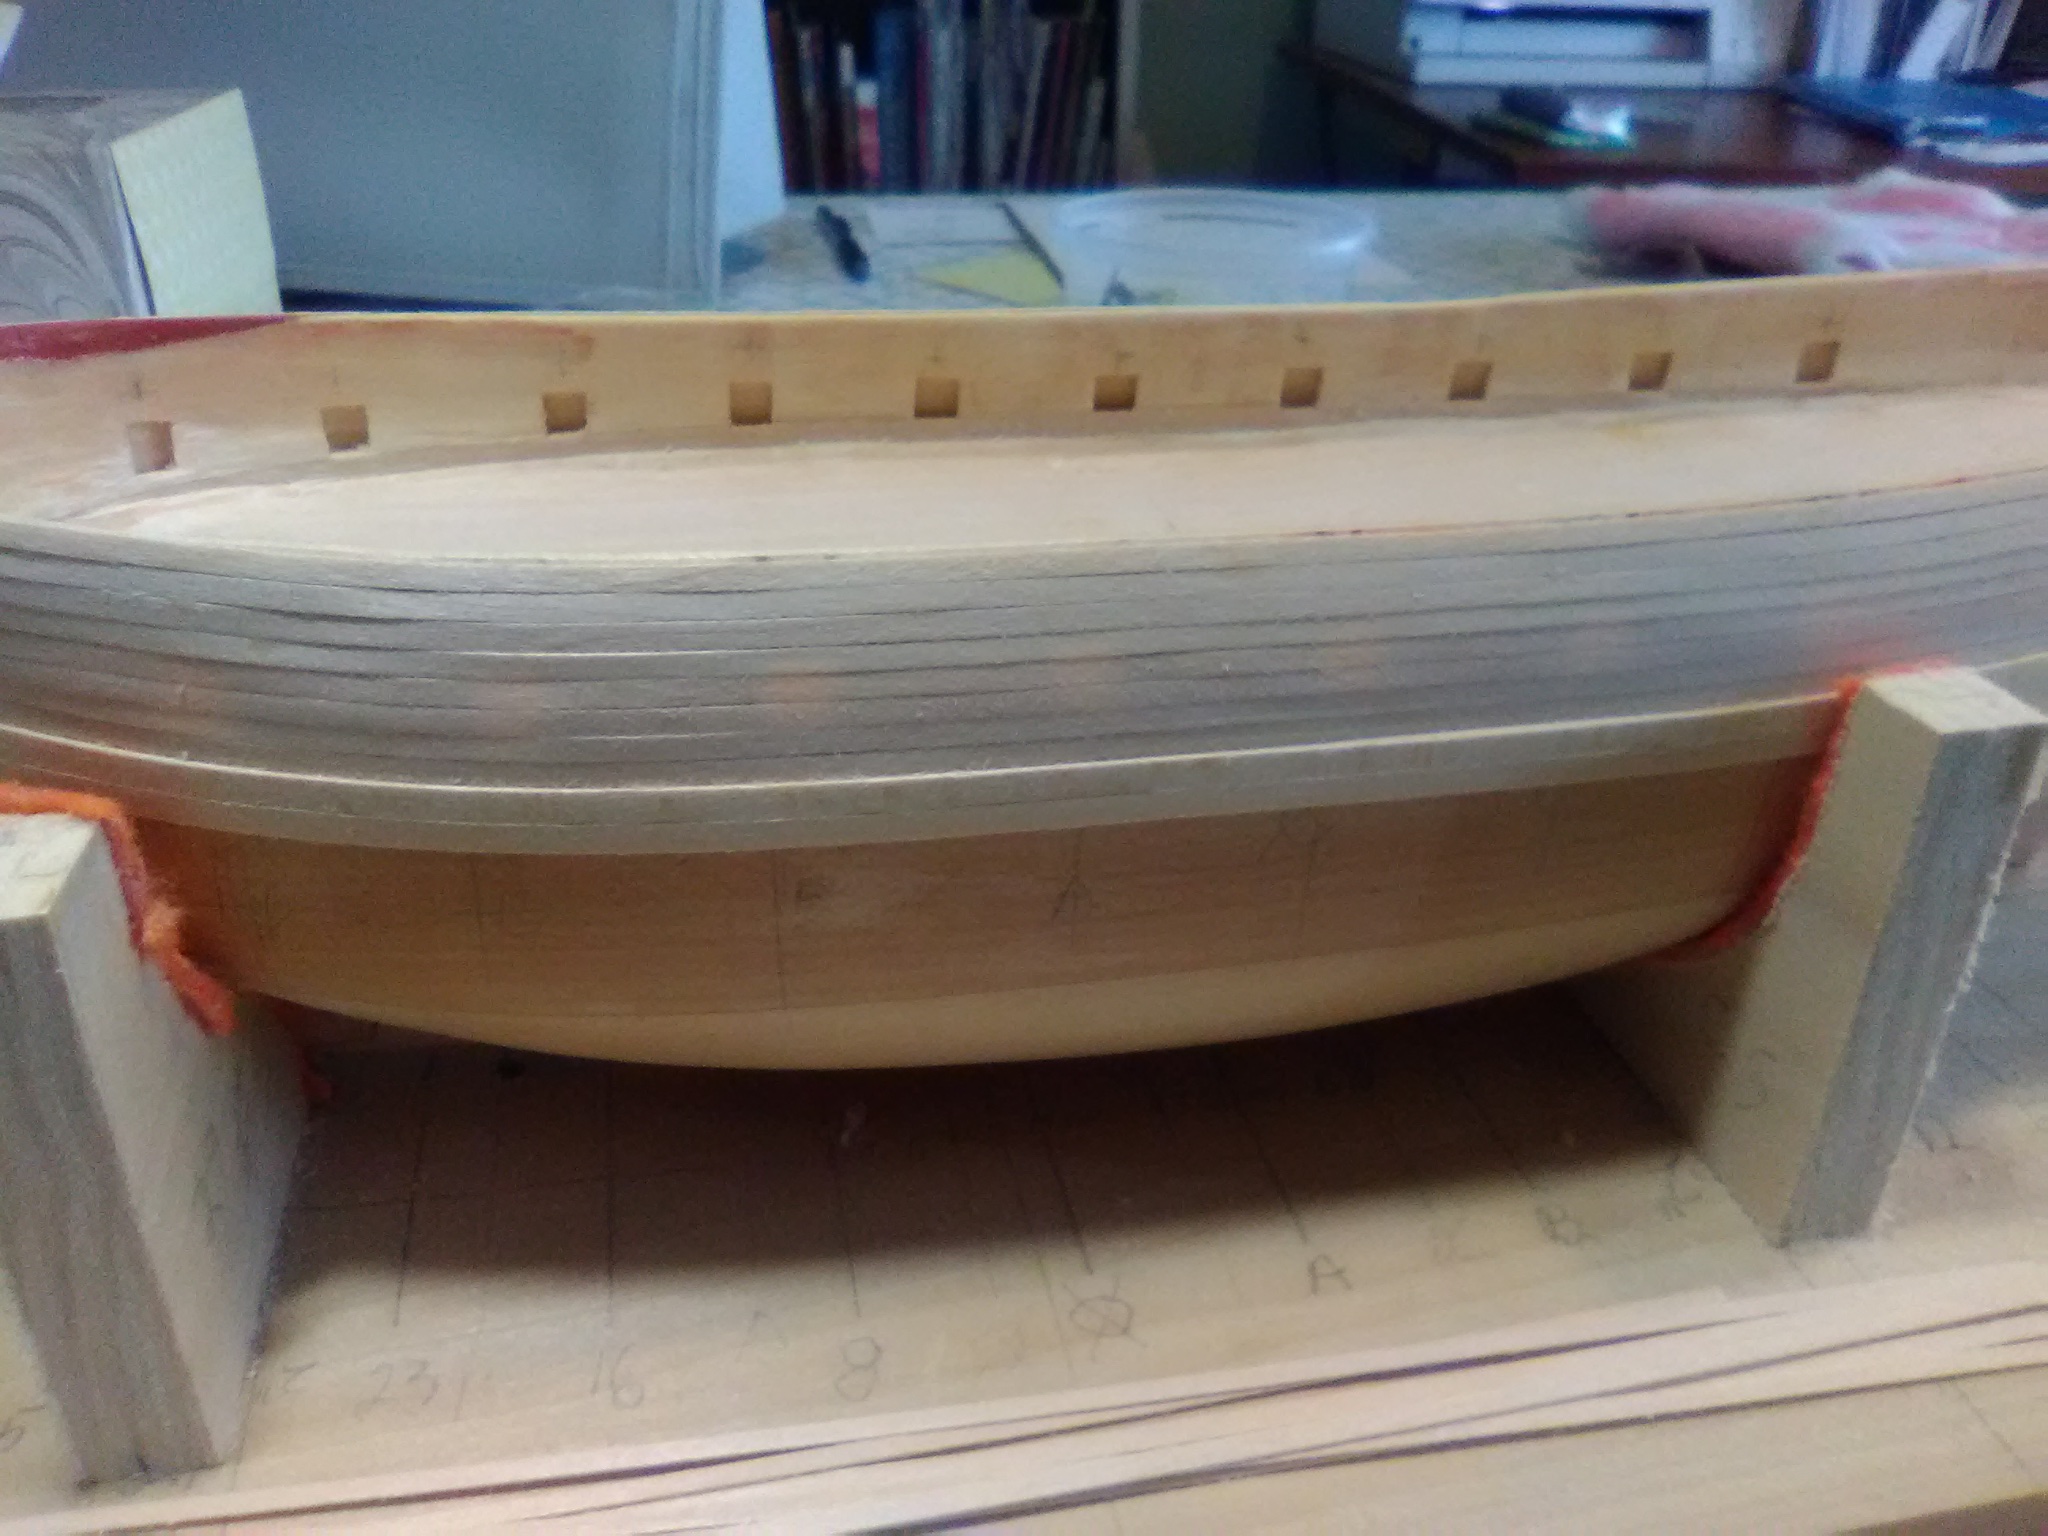
Bulwark planking
The planking from the wales up to the top of the bulwarks is completed. This section was very easy to plank and without the need to figure out butt locations each strake went on as a single plank.
Since I will be handling the hull a lot while planking the rest it I decided to hold off on reopening the gun ports - less chance of getting a plank end snagged on my clothes.


Next up I’m going to try to make a template for the garboard strake and then put those in place.


ALFRED by schooner - BlueJacket Shipcrafters - scale 1/8" (1:96) - Continental Navy Frigate
in - Kit build logs for subjects built from 1751 - 1800
Posted · Edited by schooner
Fitting out the Gun Deck
Thanks to a suggestion from Nic, the owner of BlueJacket, I may have a solution on how to rig the small guns without spending the next 10 years doing it. I’ll explain it when I get to that point which is still a ways down the road.
In anticipation of rigging the guns their carriages have been fitted with eyebolts for the in and out-hauls (the breeching ringbolts will be added when the breeching lines are), as have the bulkheads and the decks. The carriages have all been pinned to the deck per the instruction’s recommendation.
Note from much further down the road: I recommend that when pinning the carriages that you also pin the gun barrels at the same time, using the same piece of brass rod. Although the barrels don't stick out through the gunports very far, there will be plenty of opportunity to push them off the carriages while working on the hull and decks. If I had done that at this point in the build it would have saved me a lot of aggravation later on.
Next up will be raising the bulwarks, adding the cap rail and the fancy rails. It will be good to deal with wood again after all this metal and wire.