


schooner
-
Posts
723 -
Joined
-
Last visited
Content Type
Profiles
Forums
Gallery
Events
Posts posted by schooner
-
-
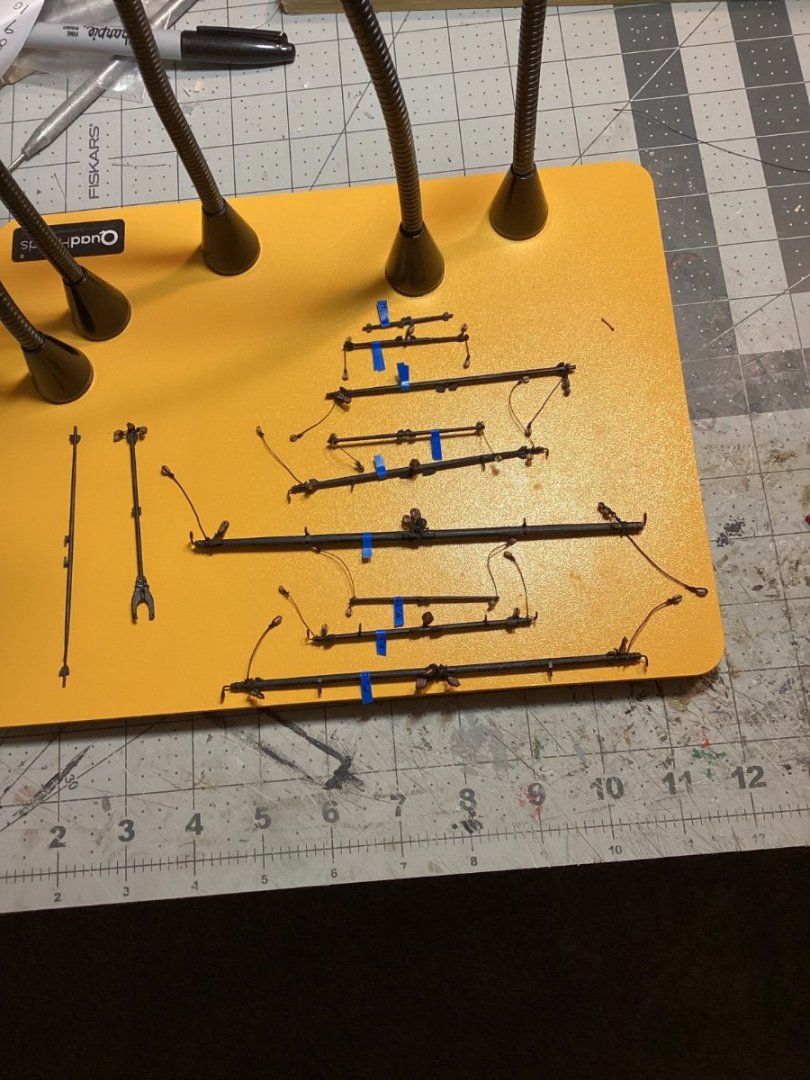
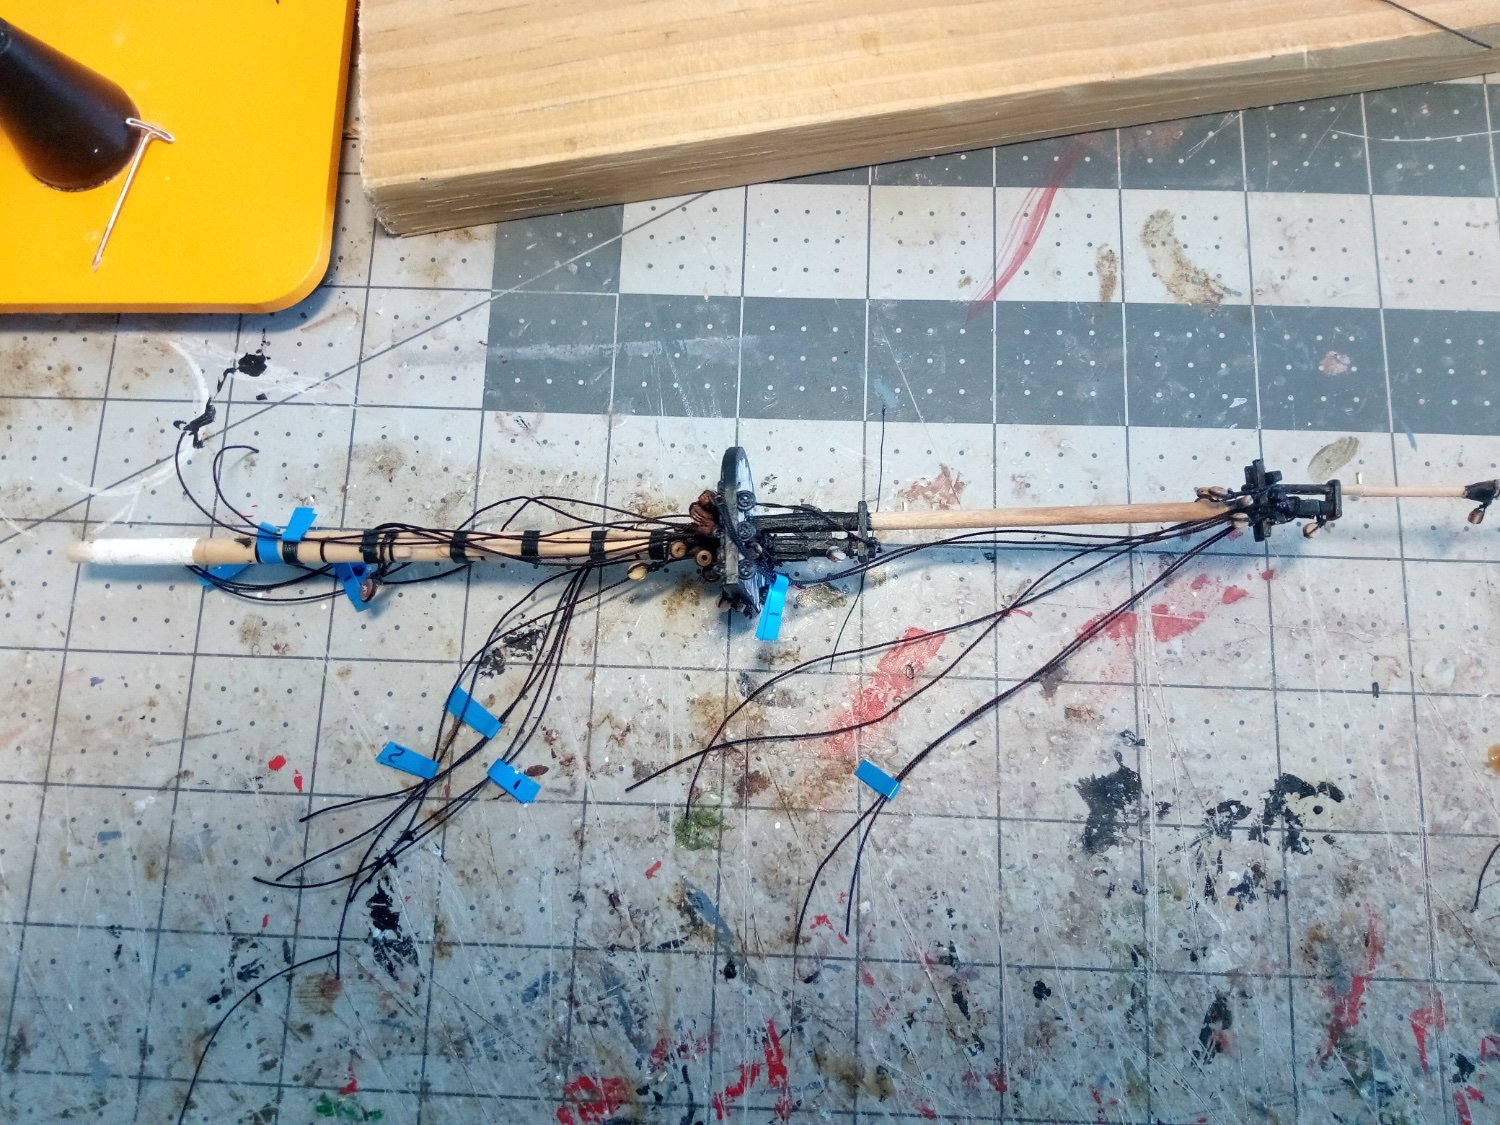
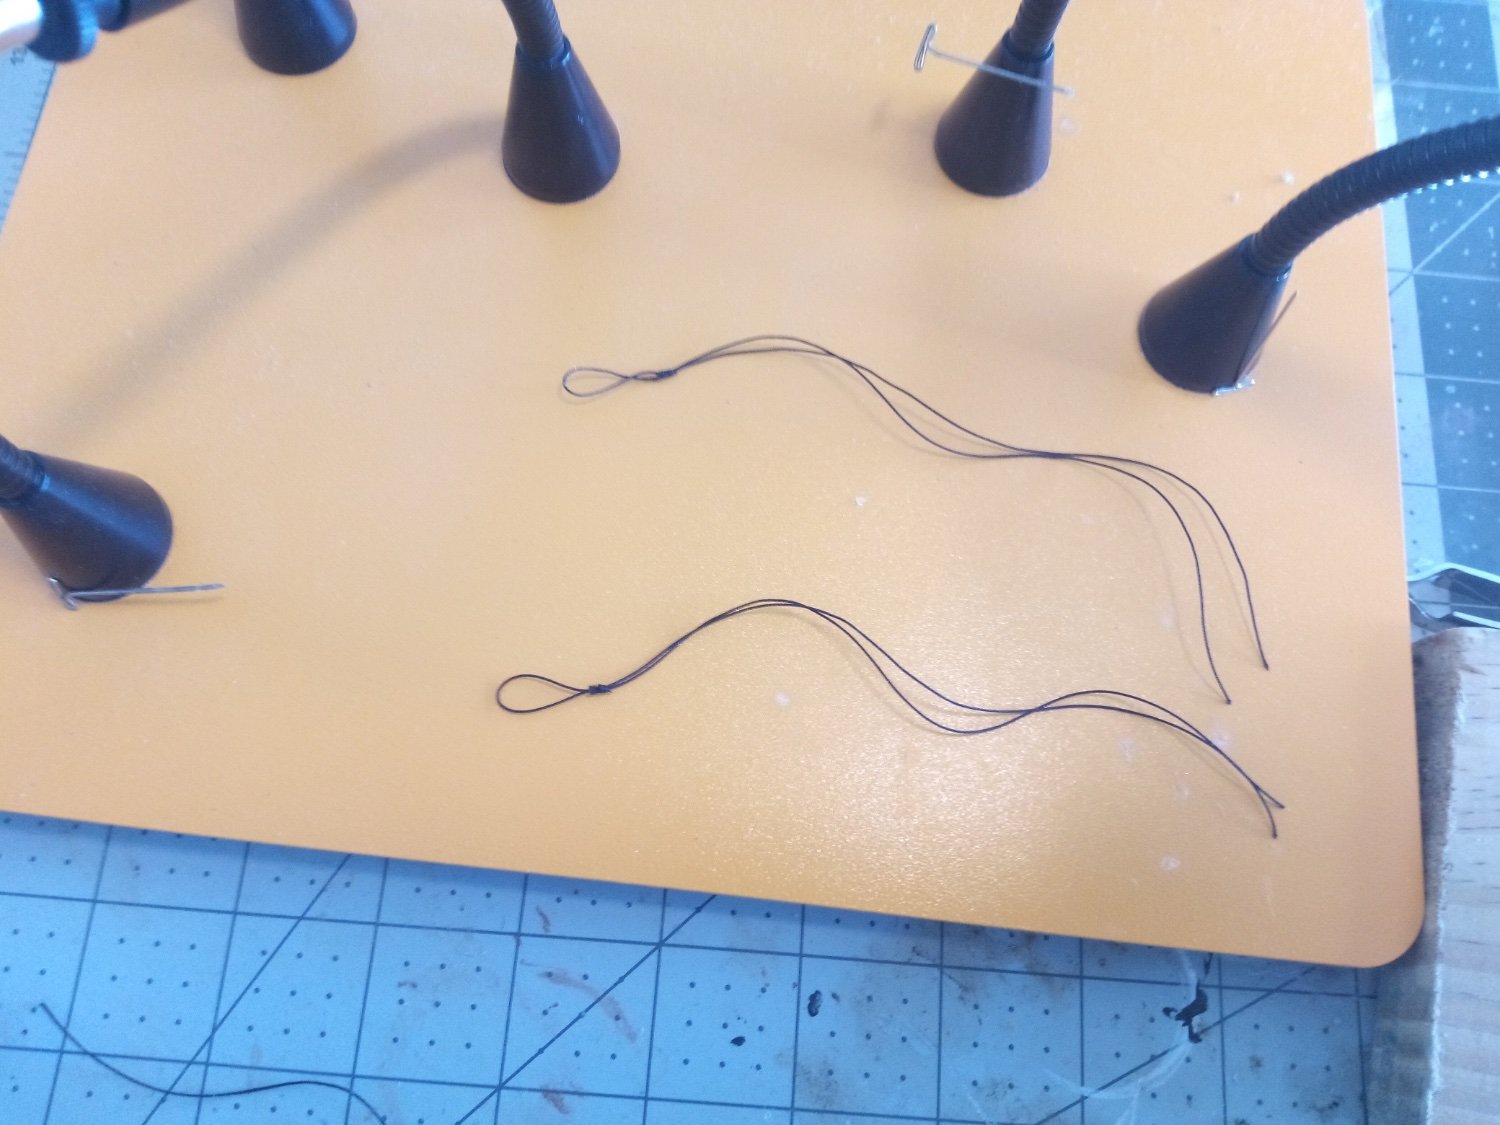
Topmast Shrouds
The shroud pairs and individual ones (odd number) were made up same as the lower ones:

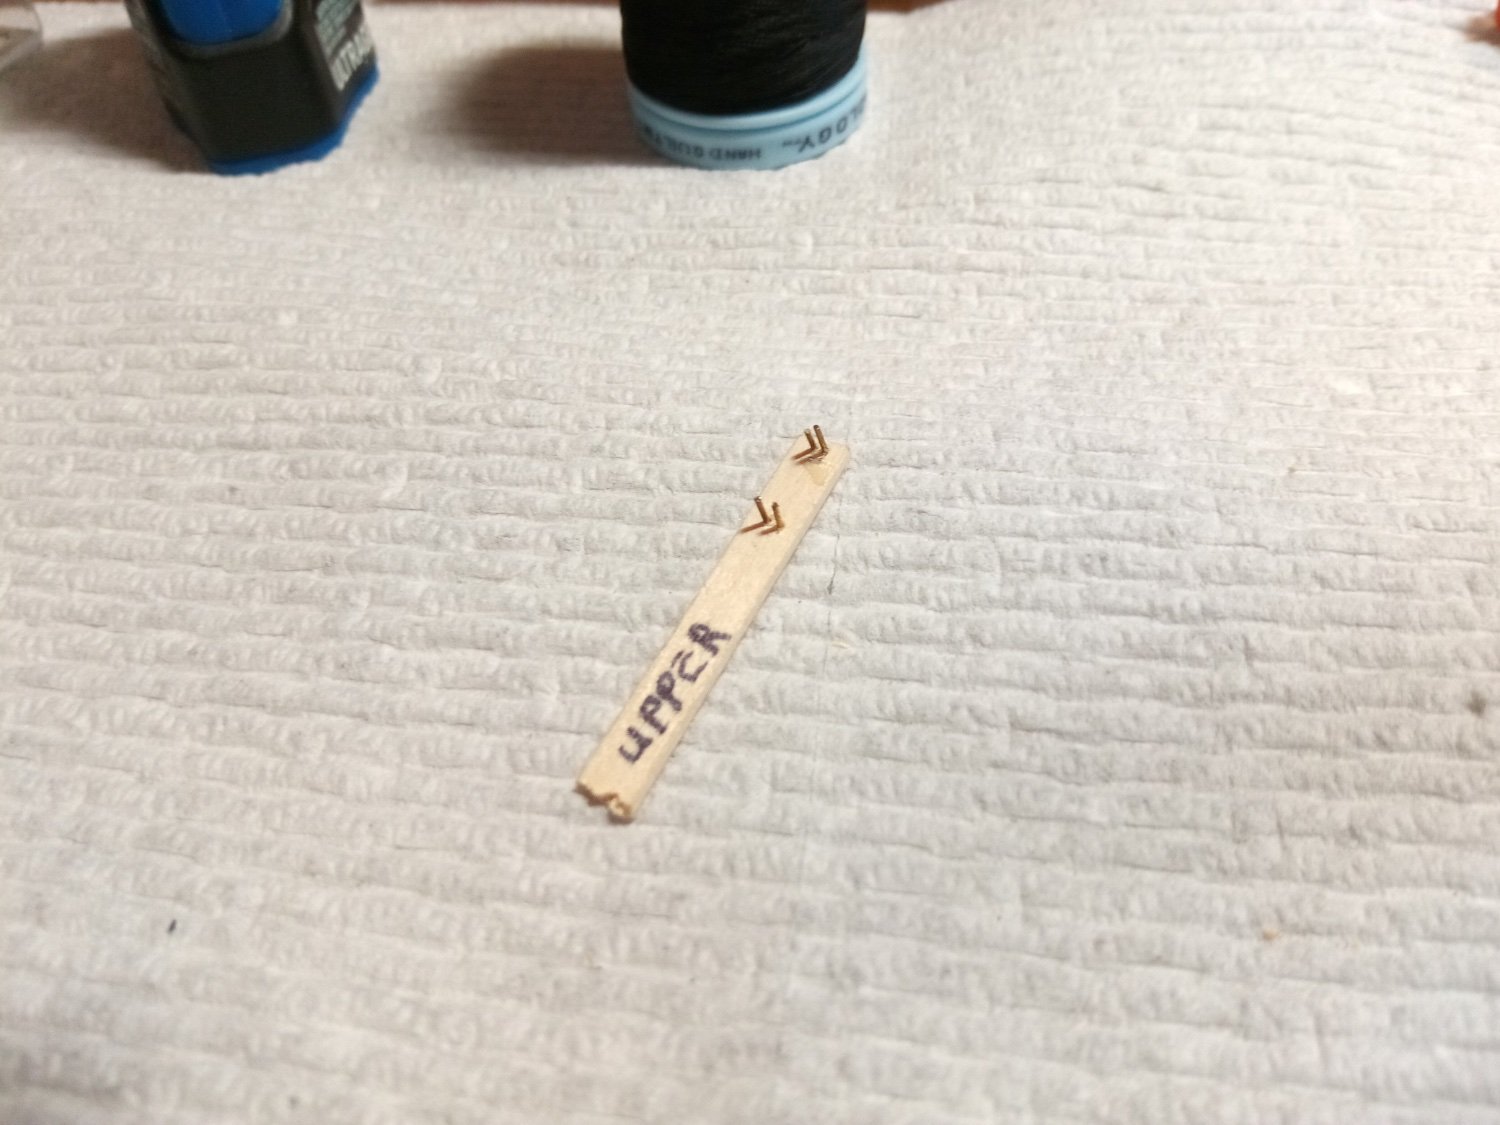
A simple jig like that found on countless other build logs was made up with 2 pieces of wire to fit into the upper and lower deadeyes to keep their spacing per the plans and the same to each of their neighbor’s:

Once the shrouds were in place it was just a matter of reeving the lanyards thru the deadeyes and securing them:


Next on the to -do list is rigging the Futtock Shrouds, the Catharpans (hopefully) and the ratlines.
- mort stoll, ccoyle, David Lester and 2 others
-
 5
5
-
-
Rigging intentions and starting the lower shrouds
As I get ready to start the rigging I thought it might be a good time to explain my plan for going about it, always subject to change since my plans/intentions/assumptions are blissfully free of relevant experience, this being my first real rigging job.
Resources
- The kit’s instructions contain a general discussion of how to go about the rigging but they assume a level of experience/knowledge that I don’t have. The rigging diagram is one sheet of plans that shows all the standing and some of the running rigging - it is a real spaghetti pile that I find hard to pick out individual lines from but it is useful for figuring out shroud lengths and deadeye spacing. The instructions do contain good info with regard to line sizes and the belaying diagram is fine.
- I will be using a mix of kit-supplied Brittania metal blocks and wood ones from SYREN Ship Model Co. For rigging line I will be using a lot from SYREN with the sizes being the closest match available to the kit’s.
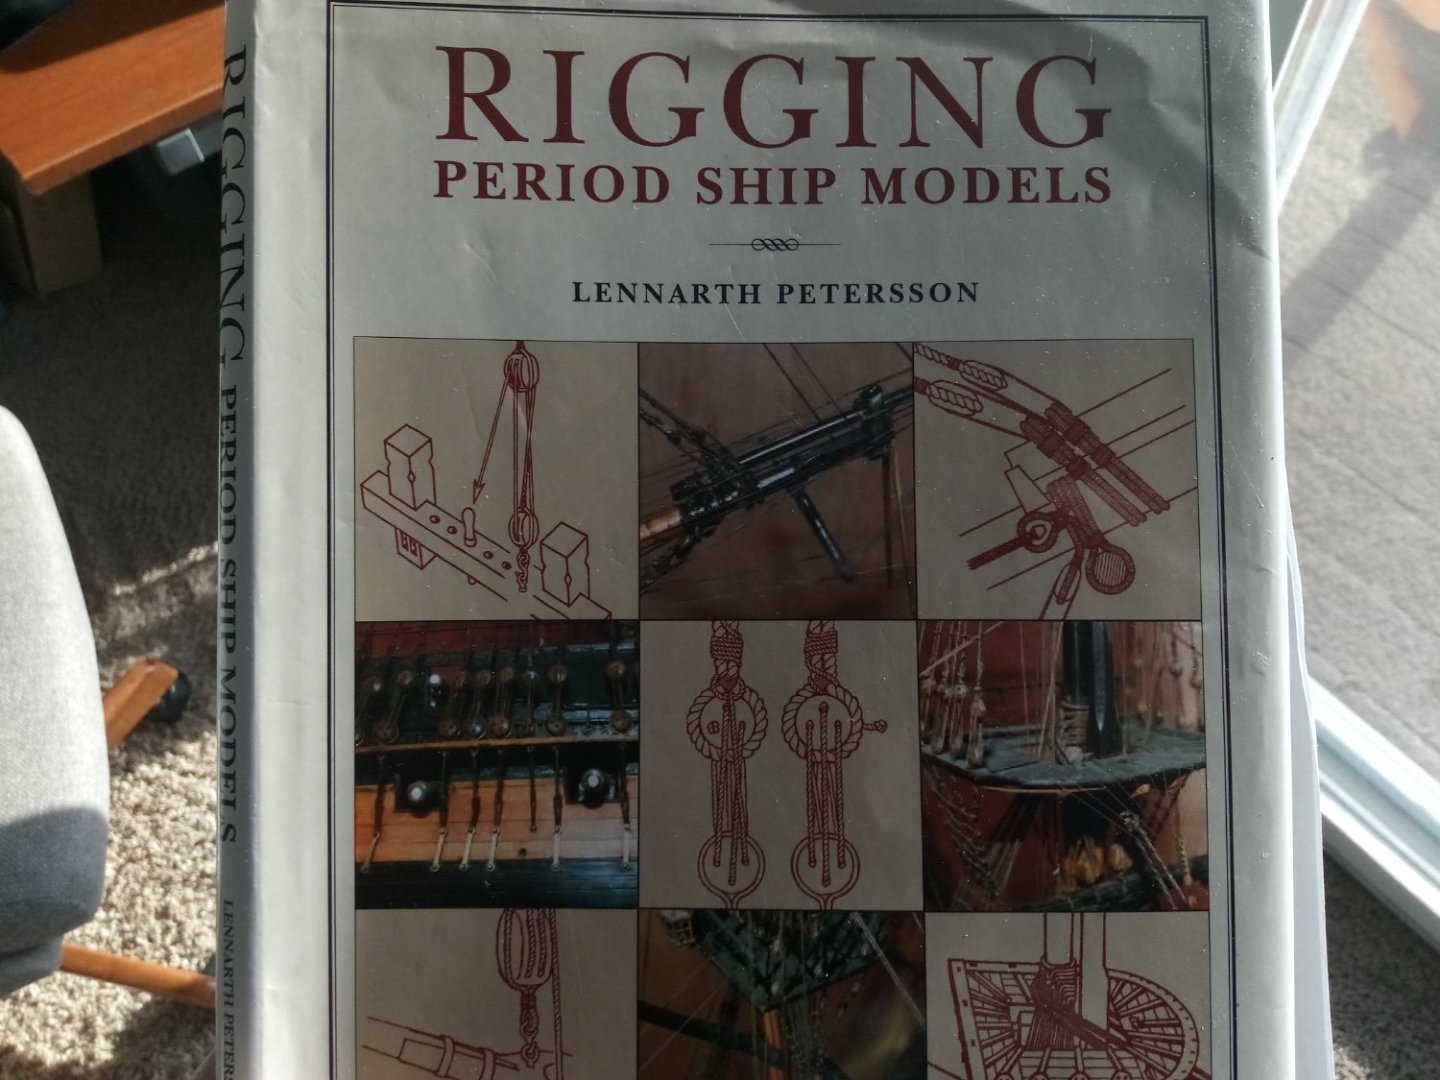
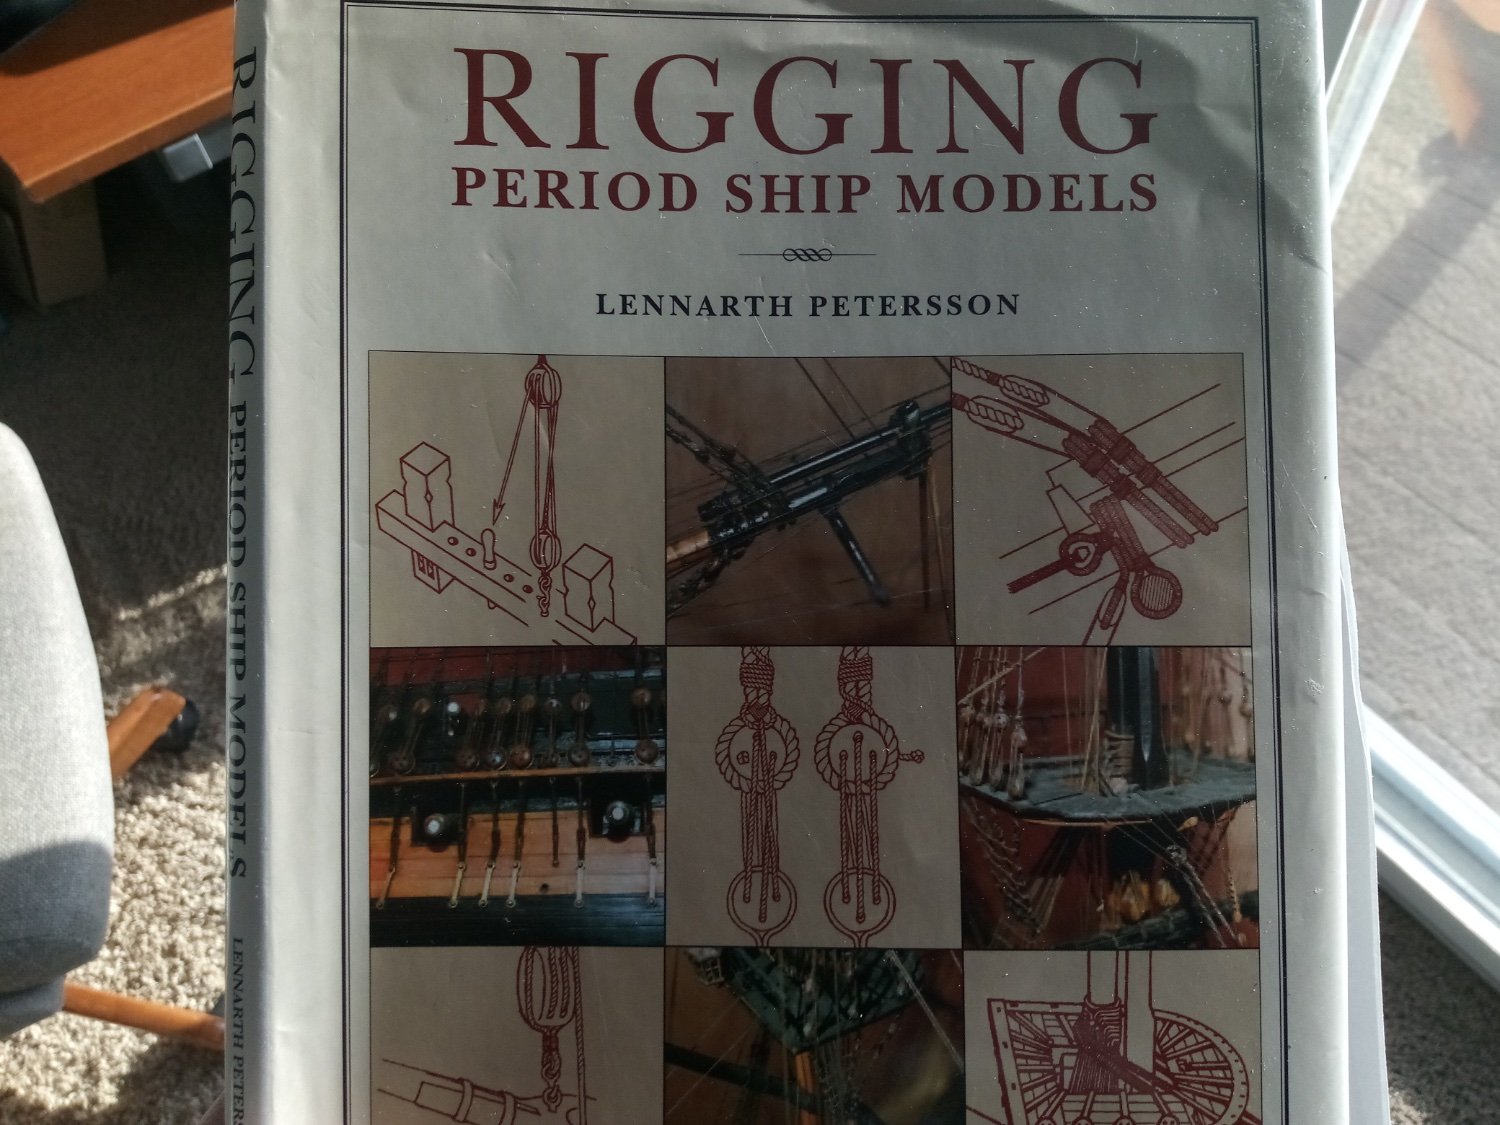
- I’ll be using Lennarth Peterson’s Rigging Period Ship Models as my primary reference for what to rig. The book is based on the late 18th century Royal Navy Frigate HMS Melampus. It has almost NO text but is made up of a clear diagram for each rigging line. It has the advantage that they are arranged in a sequence that makes sense for rigging a model with minimal interference between new and previously-rigged lines. The book does not contain any information about line or block sizes nor are the diagrams to any consistent scale so dimensions are not useful. It does have diagrams of all sails and their rigging for those who want to go that far and it does have belaying diagrams although I will be using the kit instructions since ALFRED had a lot fewer belaying pins than MELAMPUS. The differences between ALFRED and MELAMPUS are mainly ones of subtraction; ALFRED did not have a spanker boom, martingales, boomkins, flying jib, spirit sail topsail yard or royal yards.
General plan of attack
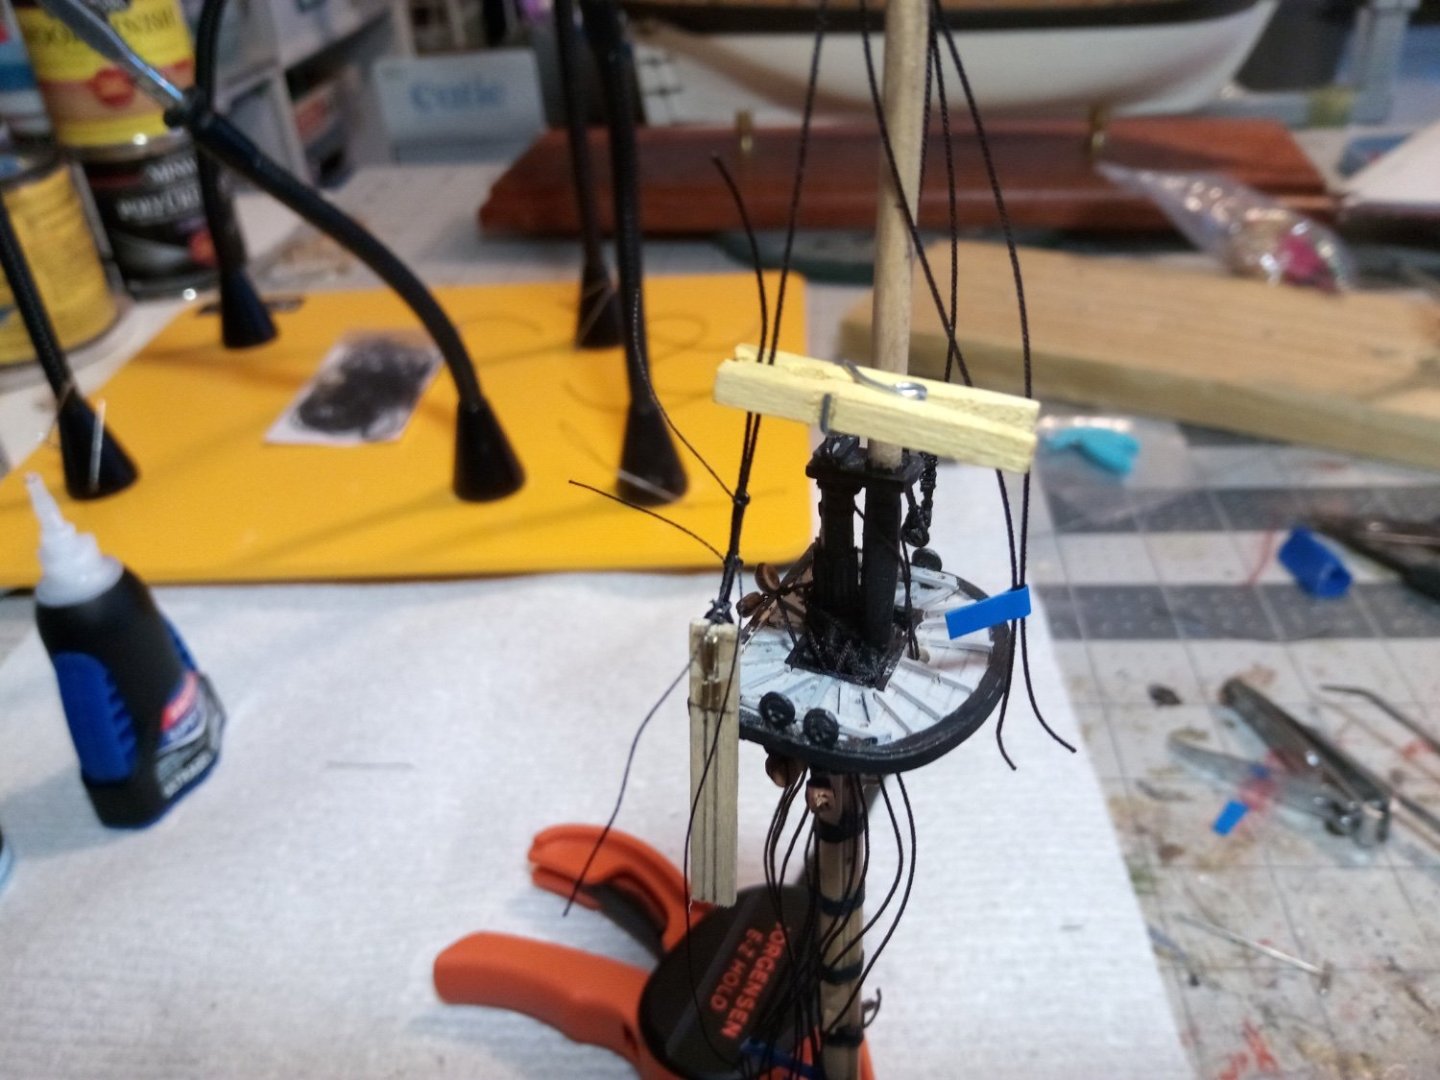
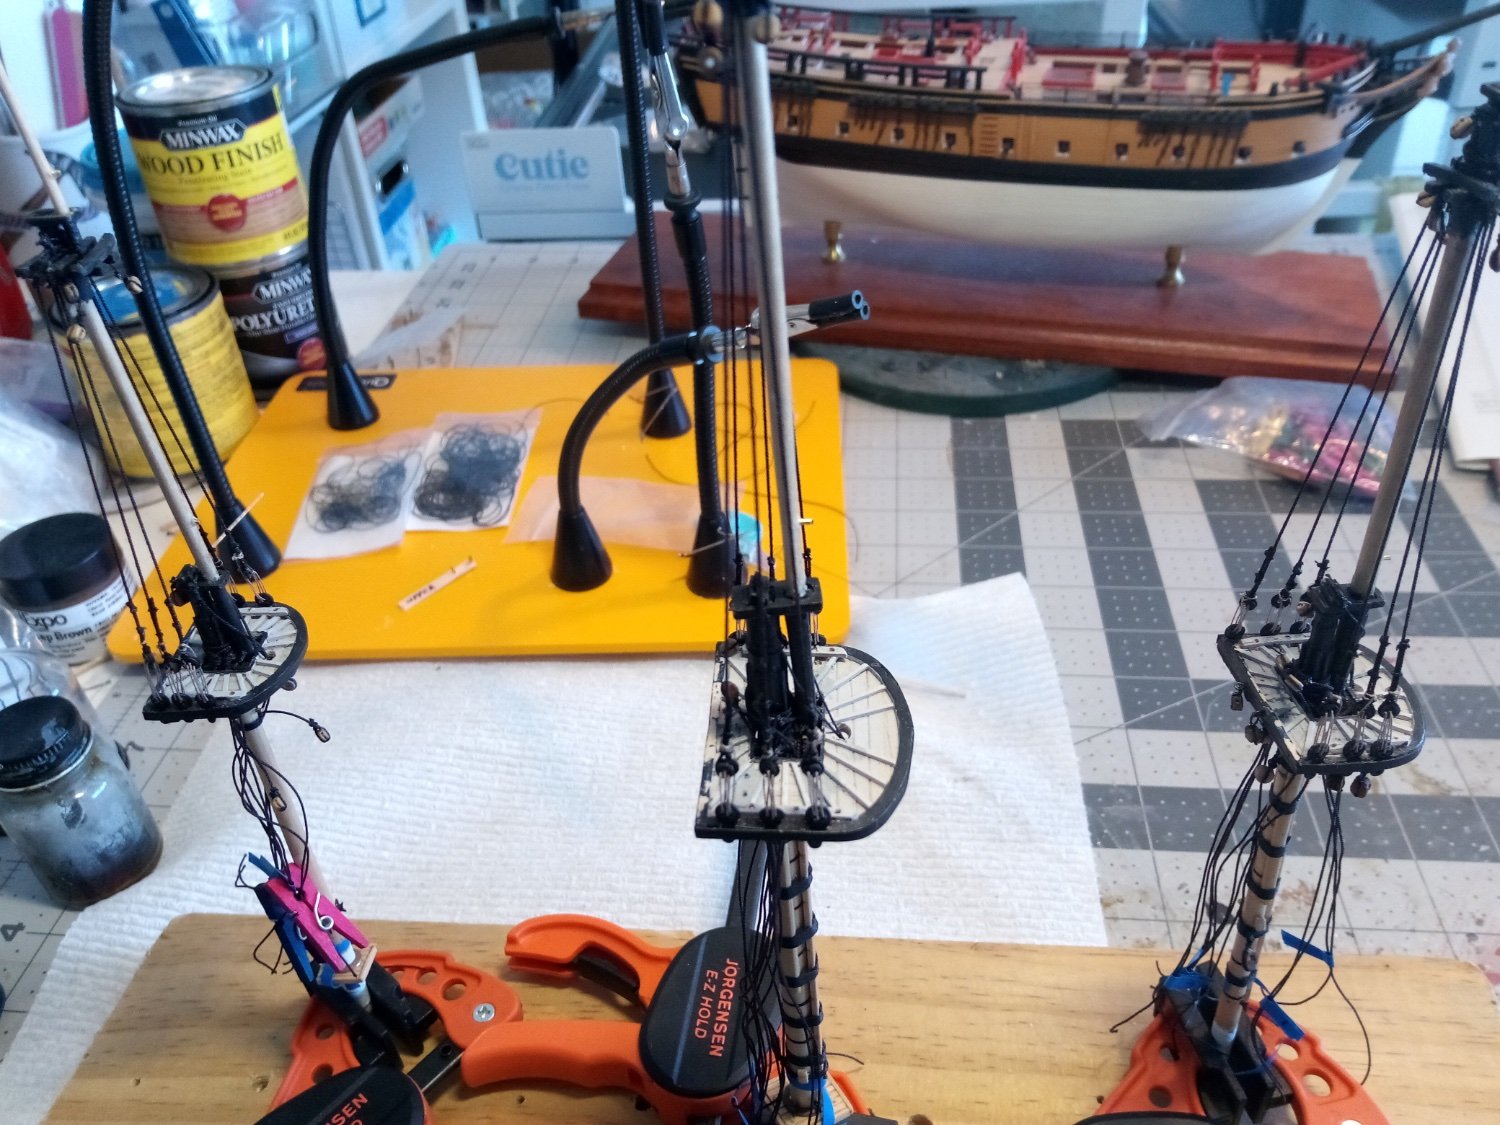
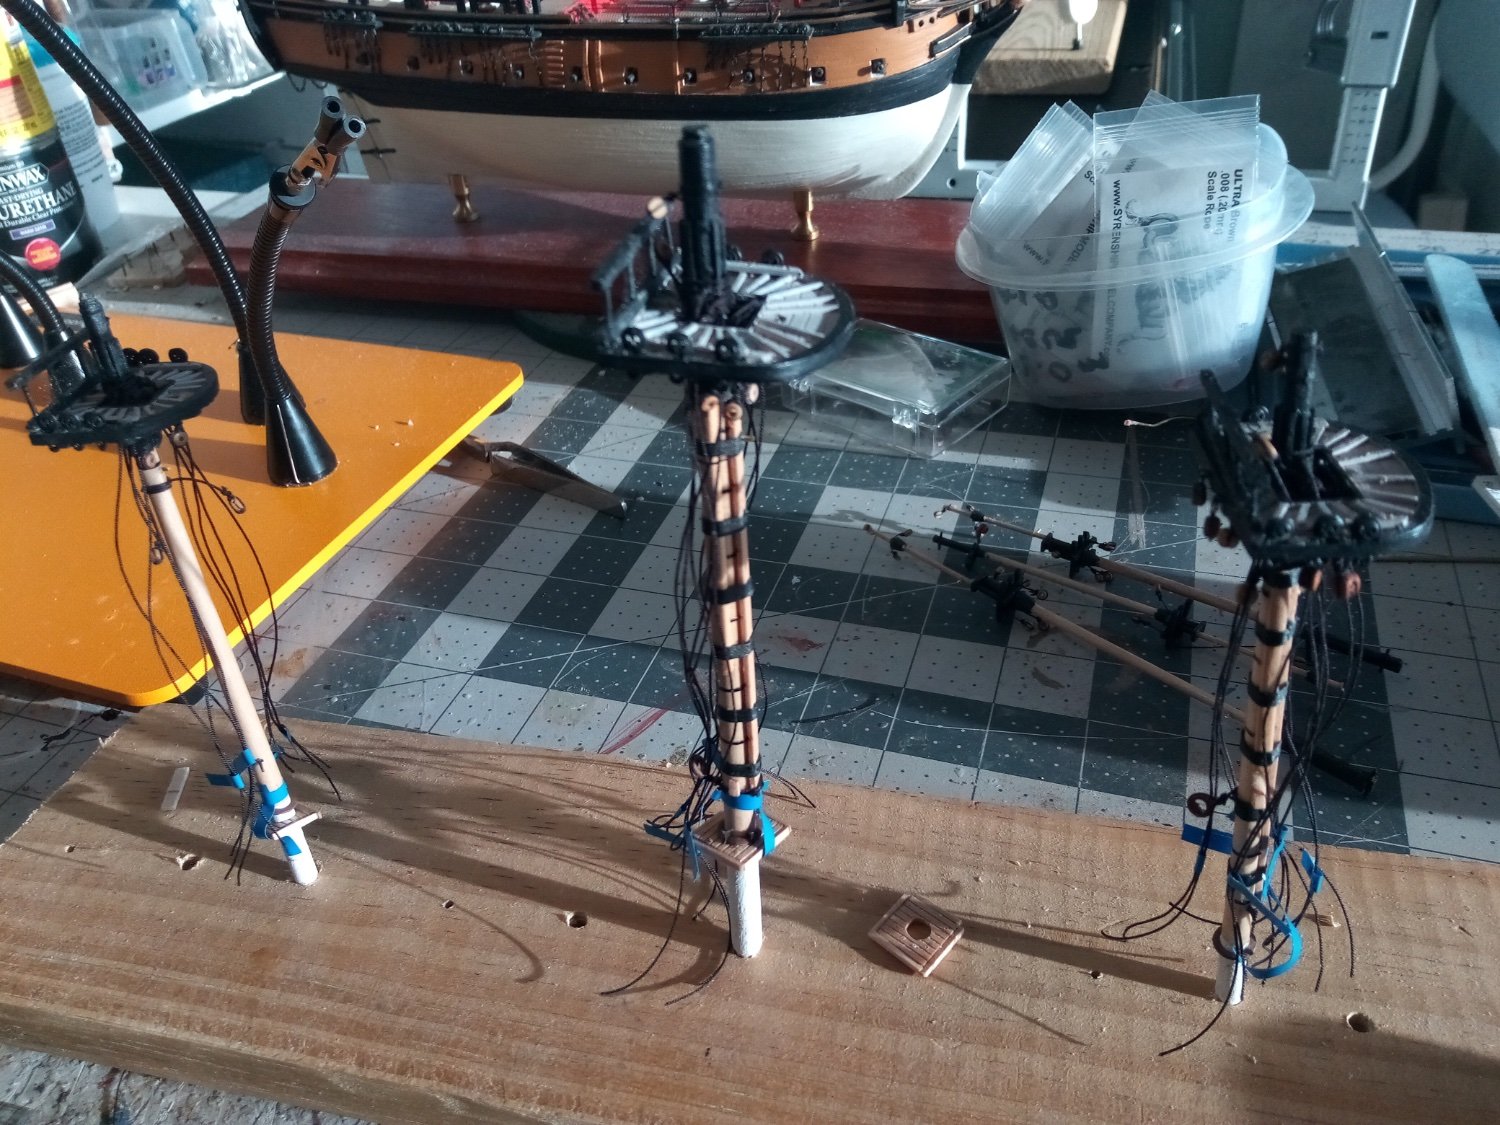
This is going to be a challenging rigging job because of space constraints. To start with ALFRED was a small ship and at 1:96 (1/8”) scale there is little room to work on belaying rigging, for example there is less than one inch separating the aftermost deadeye on the main chains from the forward most on the mizzen chains. Because of this I plan on including all of the standing rigging but only those running rigging lines that are associated with controlling and securing the yards (i.e halyards/slings/jeers, lifts, and braces). I will also attempt to rig each mast as much as possible, including the upper shrouds and the yards, before stepping them so that I can secure the running rigging lines that are tied off around the mast bases and many of the stays before securing the shrouds.
Starting the lower shrouds
After dry fitting each mast in place I used a piece of line to determine the shroud length for each mast, leaving what I hope is enough extra to allow for seizing around the deadeyes. I held off attaching the topmasts so that I could make up the shrouds off the mast and then slip them over the masthead before the mast caps are installed. The shroud loops are secured with an unglued seizing that can be cinched up to the mast head and then brushed with diluted white glue.


All 16 shrouds were easy to make up in this manner and were added to the masts, alternating each pair, starboard to port and forward to aft. They are all labeled with a small piece of tape holding the pairs together.
- KurtH, catopower, mort stoll and 1 other
-
4
-
-
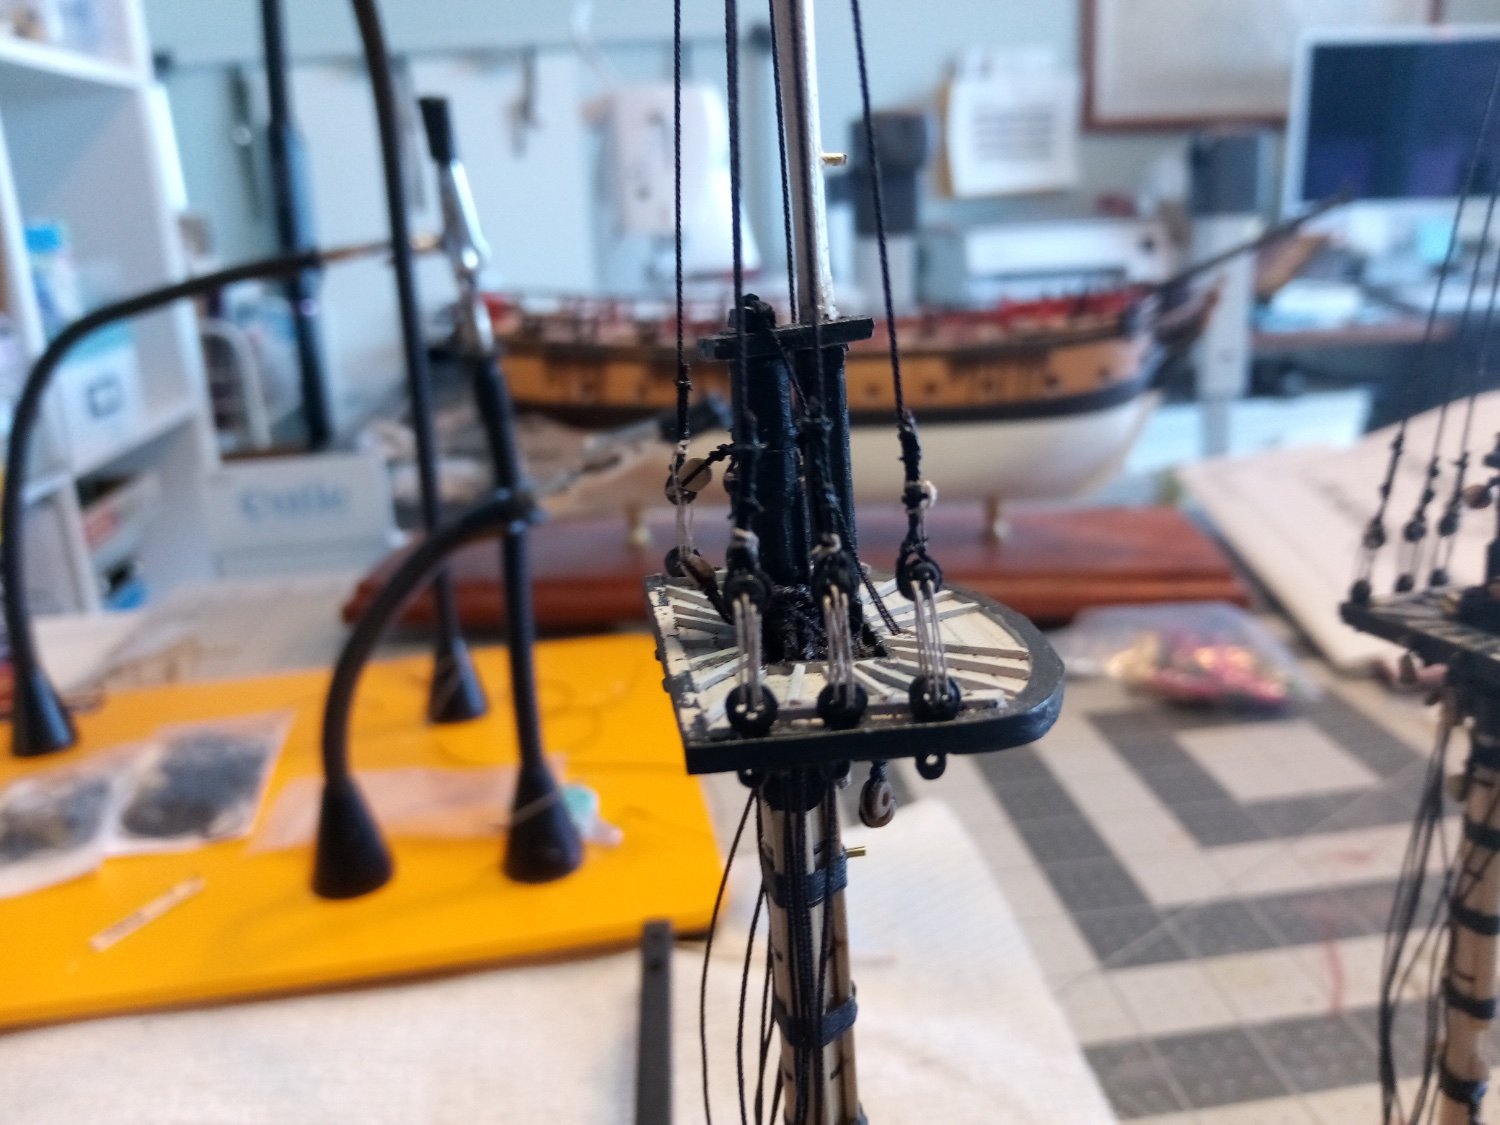
Foot ropes and Burton Pendants
I’d originally planned (hoped) to use some very small eyebolts I have on hand for the foot rope stirrups (the vertical lines that hold up the inner portions of the foot ropes). Unfortunately at this scale the upper yards are too thin to withstand drilling with even a #74 bit so I had to go with thread. After some trial and error I finally settled on making the stirrups by starting with an overhand knot tied around a needle to form an eye and spot glued to hold it. The stirrup was then led down the aft side of the yard and tied off to the eye would be 2-3 scale feet below the bottom of the yard. The foot rope was then tied off and one end, threaded thru the stirrups and secured at the other end. Once fabricated the stirrups were weighted with some small clothespins and everything was brushed with diluted white glue to stiffen them.
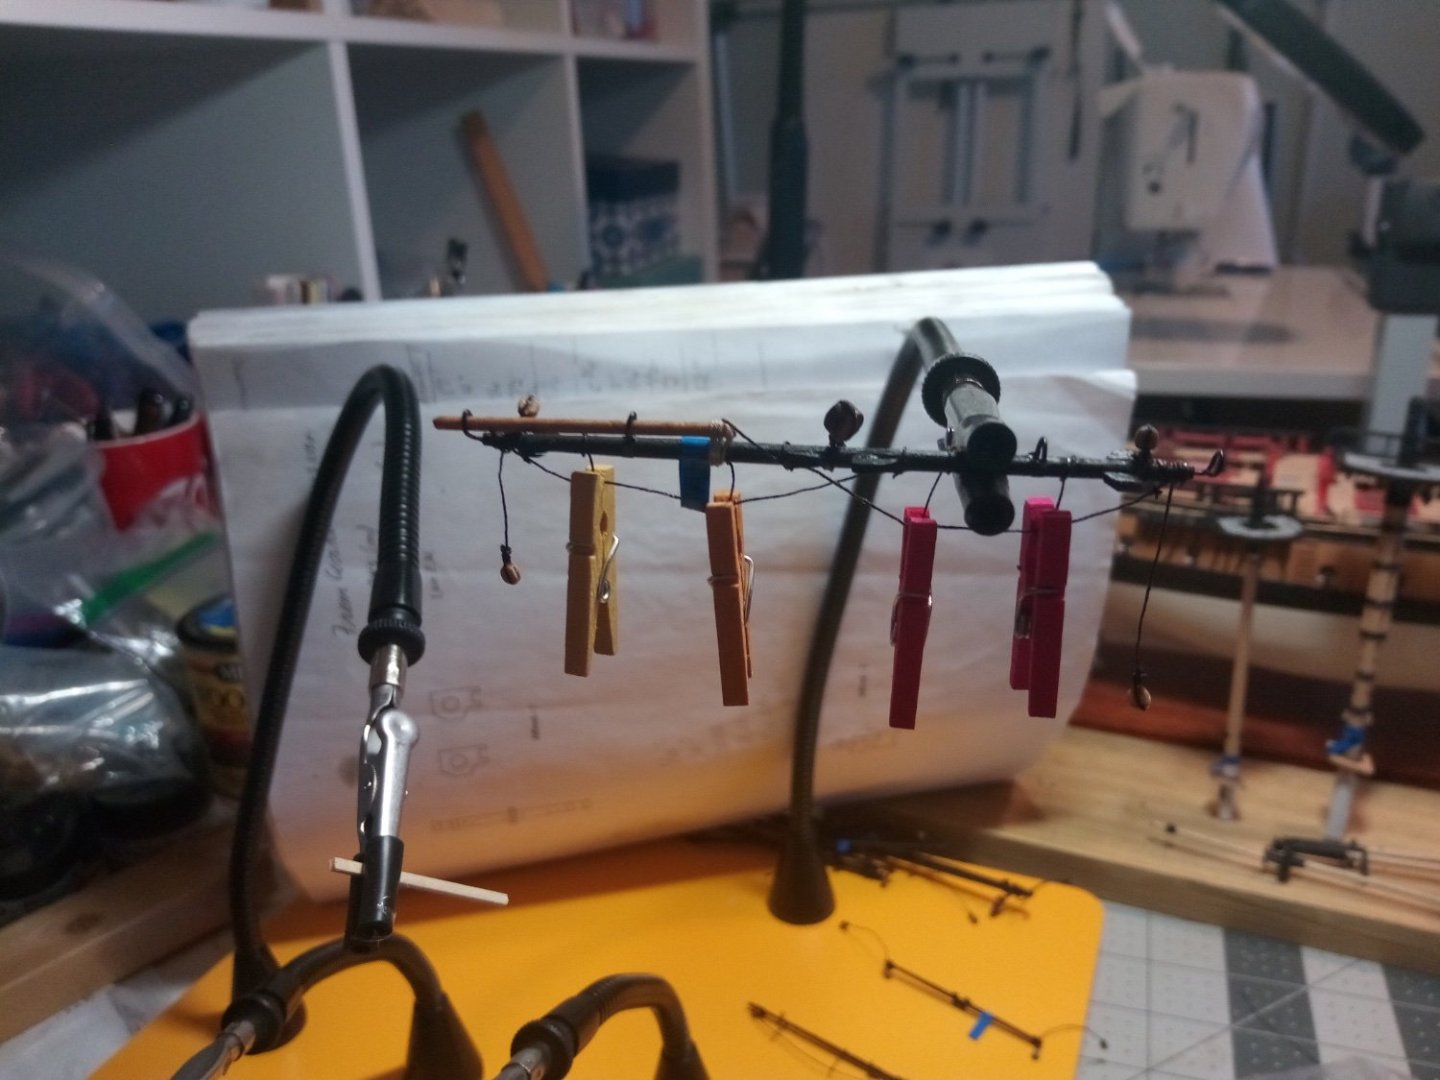
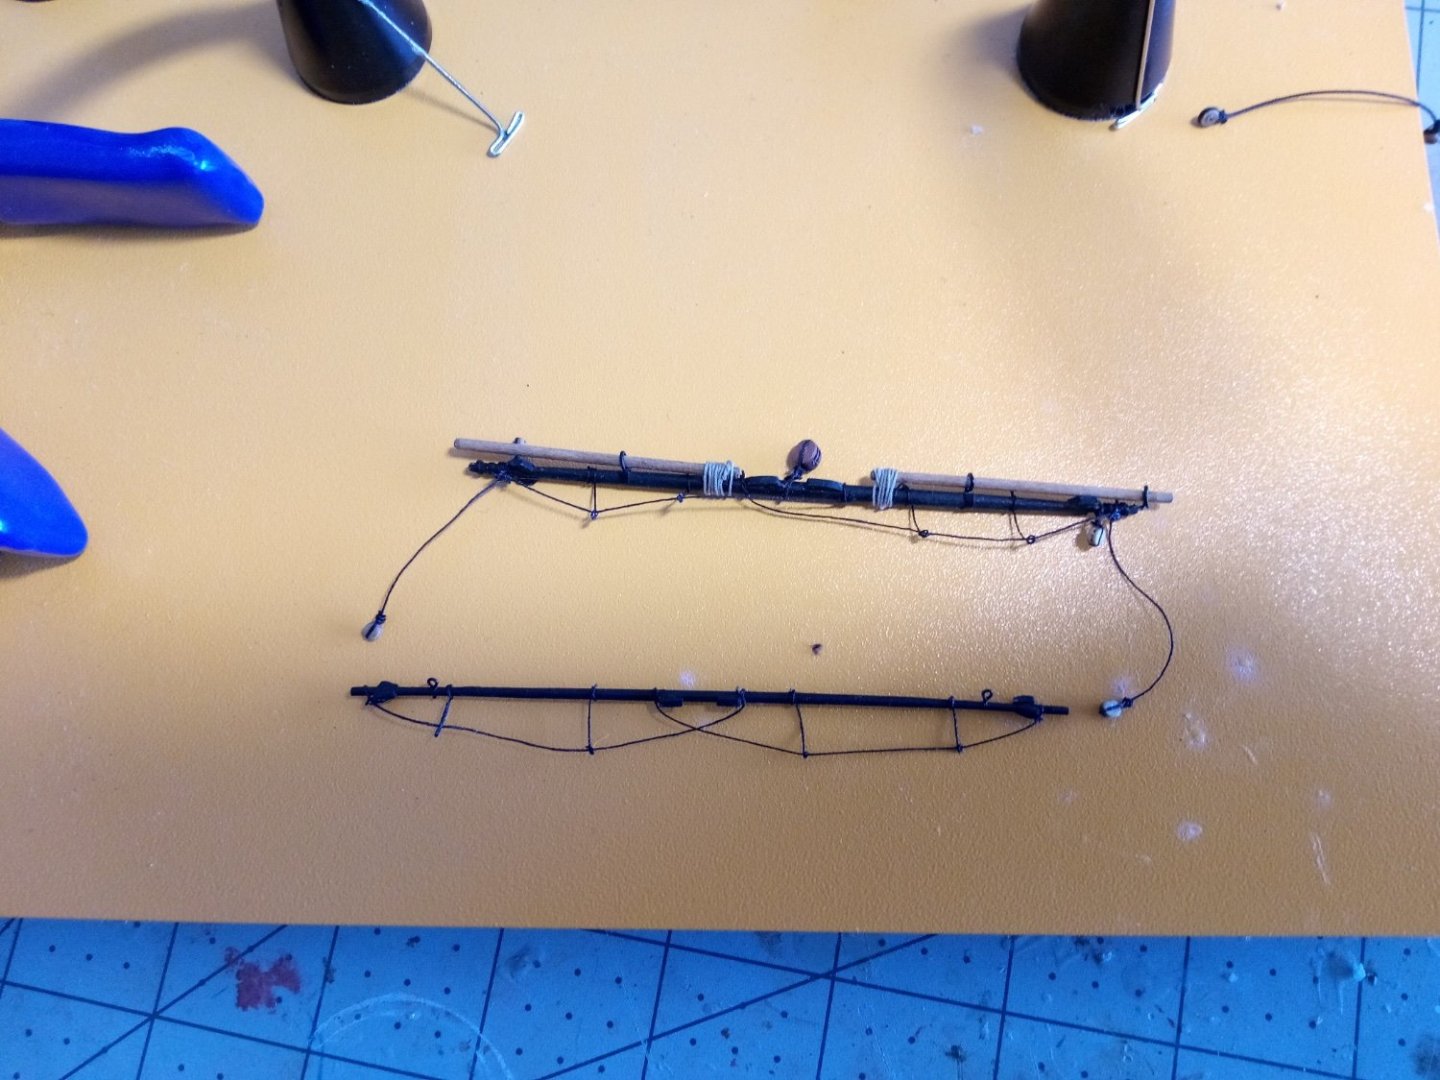
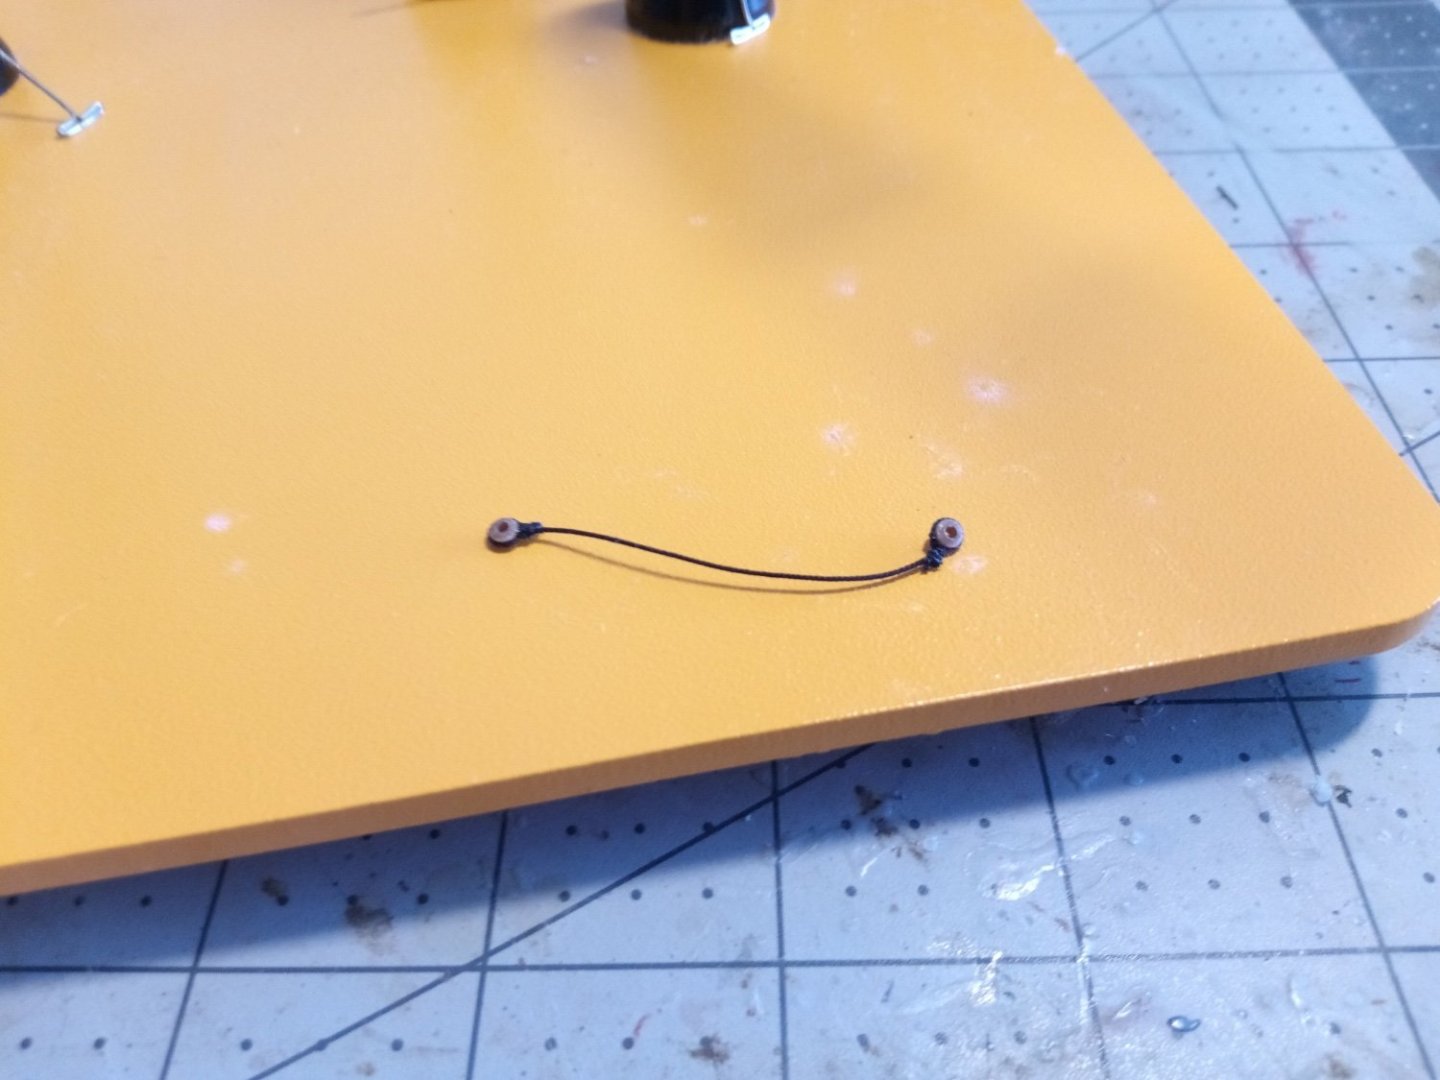
Next up was what has got to be the easiest part of the whole rigging process - the Burton Pendants which were anchoring points for blocks when handling heavy loads on deck. Two bullseyes were seized at opposite ends of a piece of line, they are then looped over the crosstrees of the tops and upper shrouds. The Fore and Main masts get 4 lower ones and 2 upper, the Mizzen just gets 2 lower ones. The pendants will all get the white glue treatment to keep them hanging vertical.
Next up will be adding the lower shrouds to the masts.
- mort stoll, SUBaron, chuckthedragon and 4 others
-
7
-
Agree with the 2 footers being the largest practical size for a model that does not become a piece of furniture when cased, at least for sailing ships.
As far as specific ships I think the cutter Bear or the west coast schooners Wawona or Thayer would be great. As far as USN subjects the armored cruisers of the Tennessee class (4 ships) were stunning in their as built white rig, plus each was first named for a state and later renamed after a city so that might increase their marketability/appeal.
- thibaultron, Canute, Keith Black and 3 others
-
6
-
Thanks for the kind words and the likes. I've been plugging away on the foot ropes and will then double check to make sure I have mounted all the blocks on the masts that I can at this point and then it will be time to actually start rigging (finally!).
-
-
-
Glad to be of help Ramsey, it is a great kit. Don't hesitate to PM me if you have questions.
-
Great painting and decal work!!
- Canute, patrickmil, Old Collingwood and 1 other
-
4
-
-
More yard work (the other kind)
The yards have been painted and the blocks and eyes for the slings, jeers, lifts and braces have been added. This has been slow work for me because it is pretty boring and repetitive.
Next up will be adding the foot ropes.
-
Geoff, although I have not got to the point of adding the futtocks and cartharpins I did find a good explanation of how to to them on Glenn-UK's build log for HMS Sphinx, starting at post # 281 for the lower ones and #367 for the upper ones.
You are doing a great job, keep up the good work.
-
-
Great choice Rod! That is one classy kit. I'll be following along.
- Knocklouder, markjay, Canute and 1 other
-
4
-
This is a great lesson on small boat kits whose ideas can be applied across many different kits and kit brands since they most of them follow the same basic construction sequence,
even lift-type hulls can still benefit from your ideas on detailing the interior.
Your techniques are very helpful since they do not require elaborate shop machines.
You have shown what planning, patience and attention to detail can accomplish - I just wish I had them.
I'll be saving this build log. Keep up the good work and thank you for taking the time to build it.
-
-
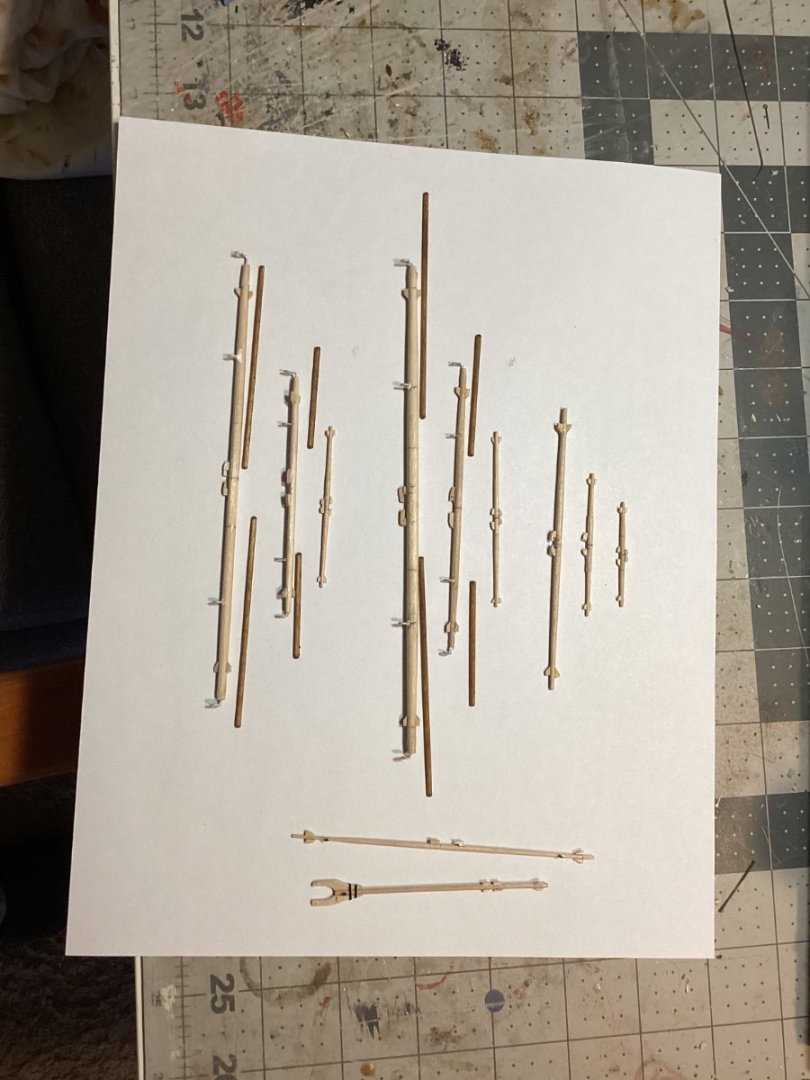
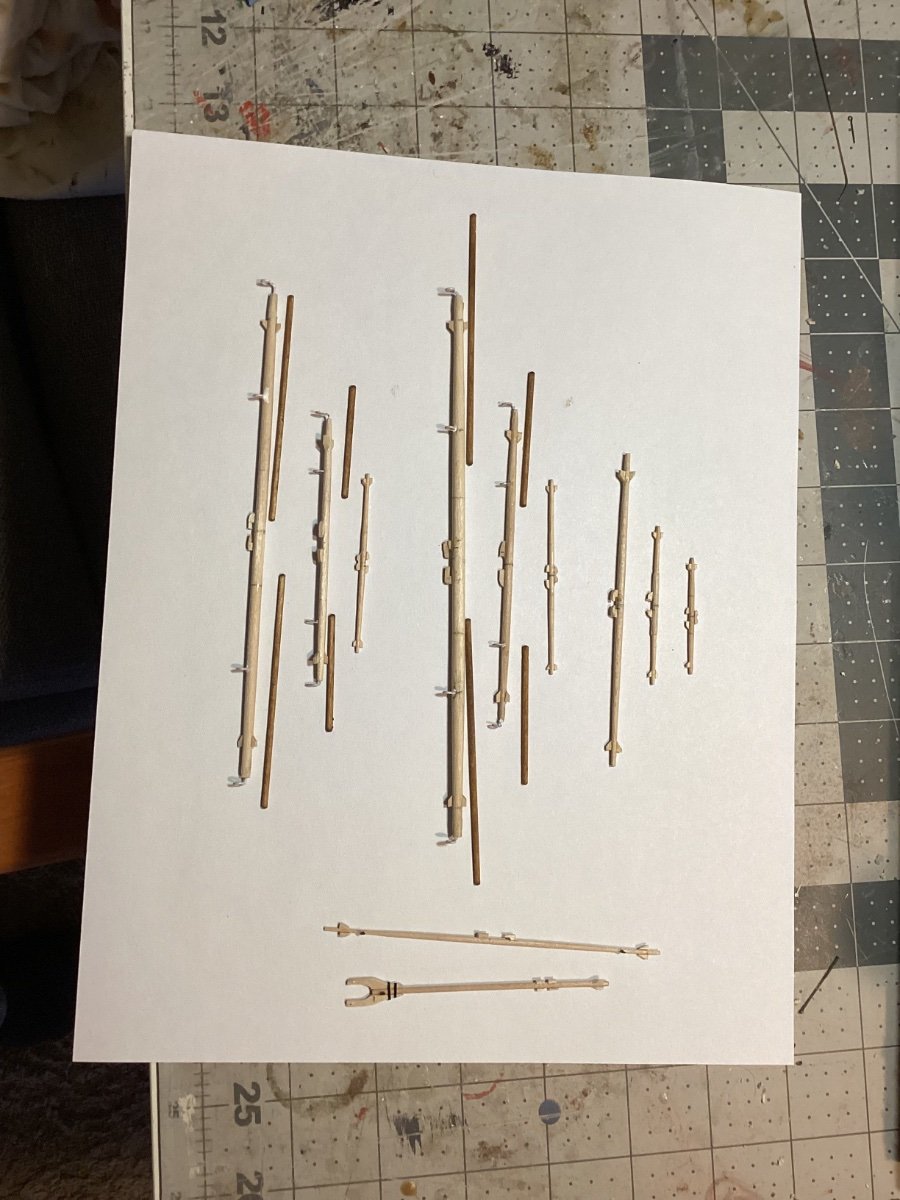
Yardarms
The yards have all been fabricated per the plans with cleats, chocks and studding sail irons attached. Now it’s time to paint them and add the foot ropes and blocks.
- KurtH, whitejamest, GrandpaPhil and 4 others
-
7
-
Your post on the makeup and purpose of all the blocks on a yard is great! It is a clear explanation of how to rig them but also a tutorial as to their purpose (many of which have always been less than clear to me).
Thanks for taking the time and effort to explain it all, it will be a great help as I am about to start setting up my yards.
-
First of all let me say that you are doing a GREAT job on this build, very clean and sharp!
I've had my eye on this kit for a while because I don't have the room for a rigged ship of that size. I've done a fair number of wood kits but I was wondering if you used anything other than hand tools in your build? The only power tool I have is a Dremel that I use for sanding (I might buy a small disc or belt sander to help with the frames).
Thanks and keep up the great work!
- Jorge Hedges, mtaylor and Mr Whippy
-
3
-
-
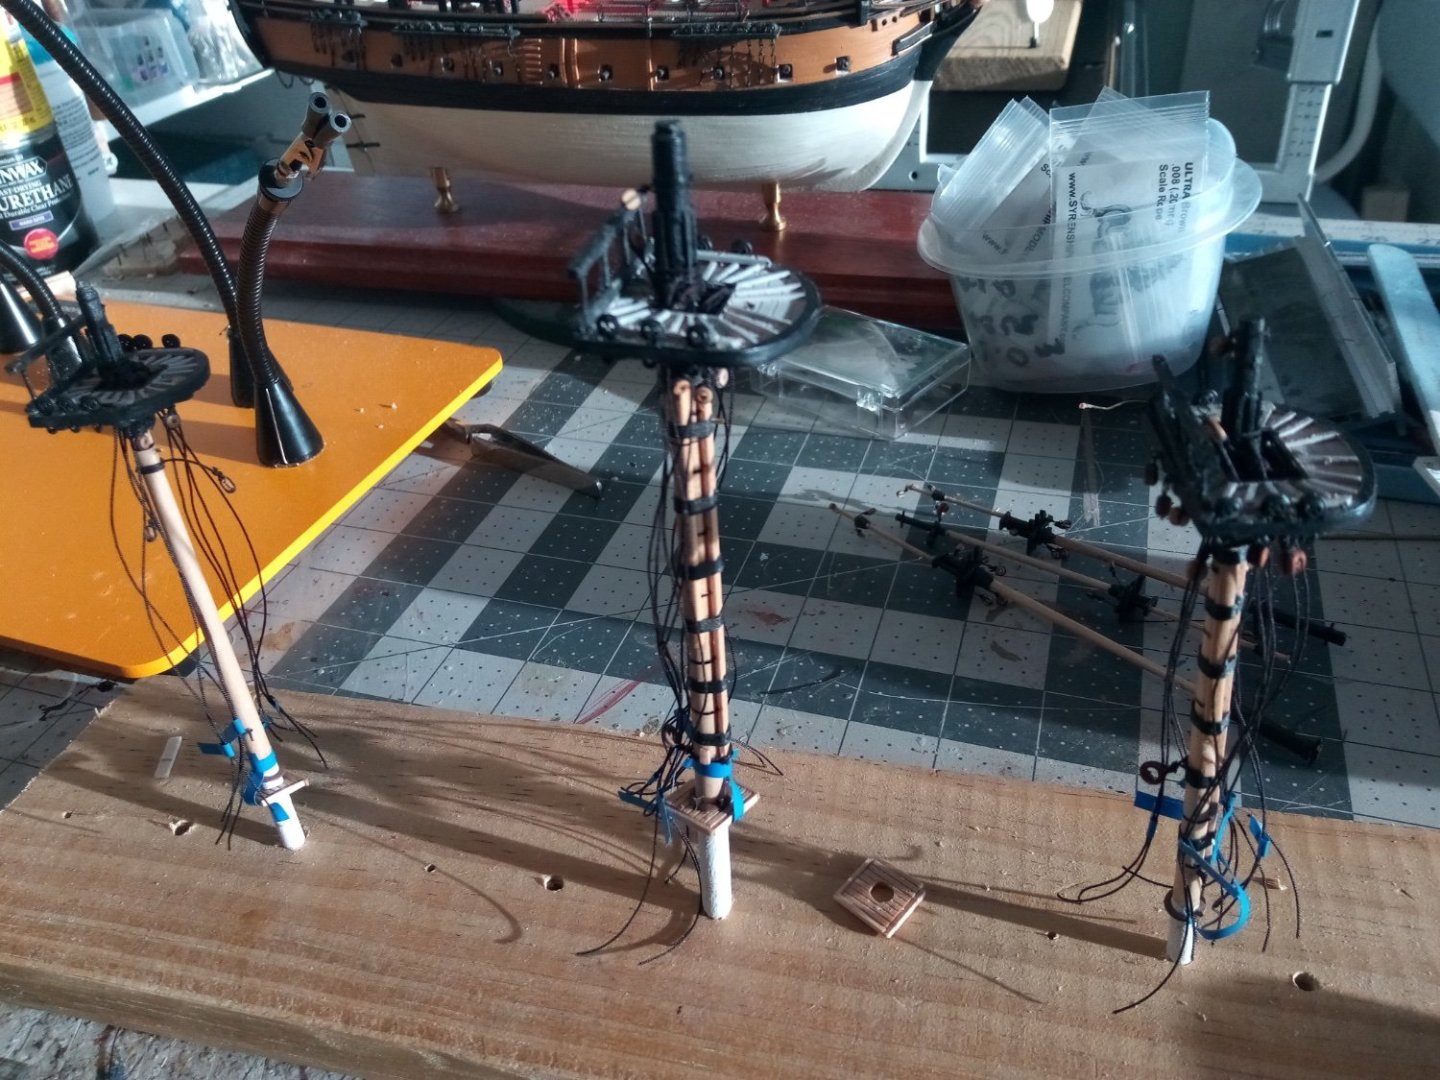
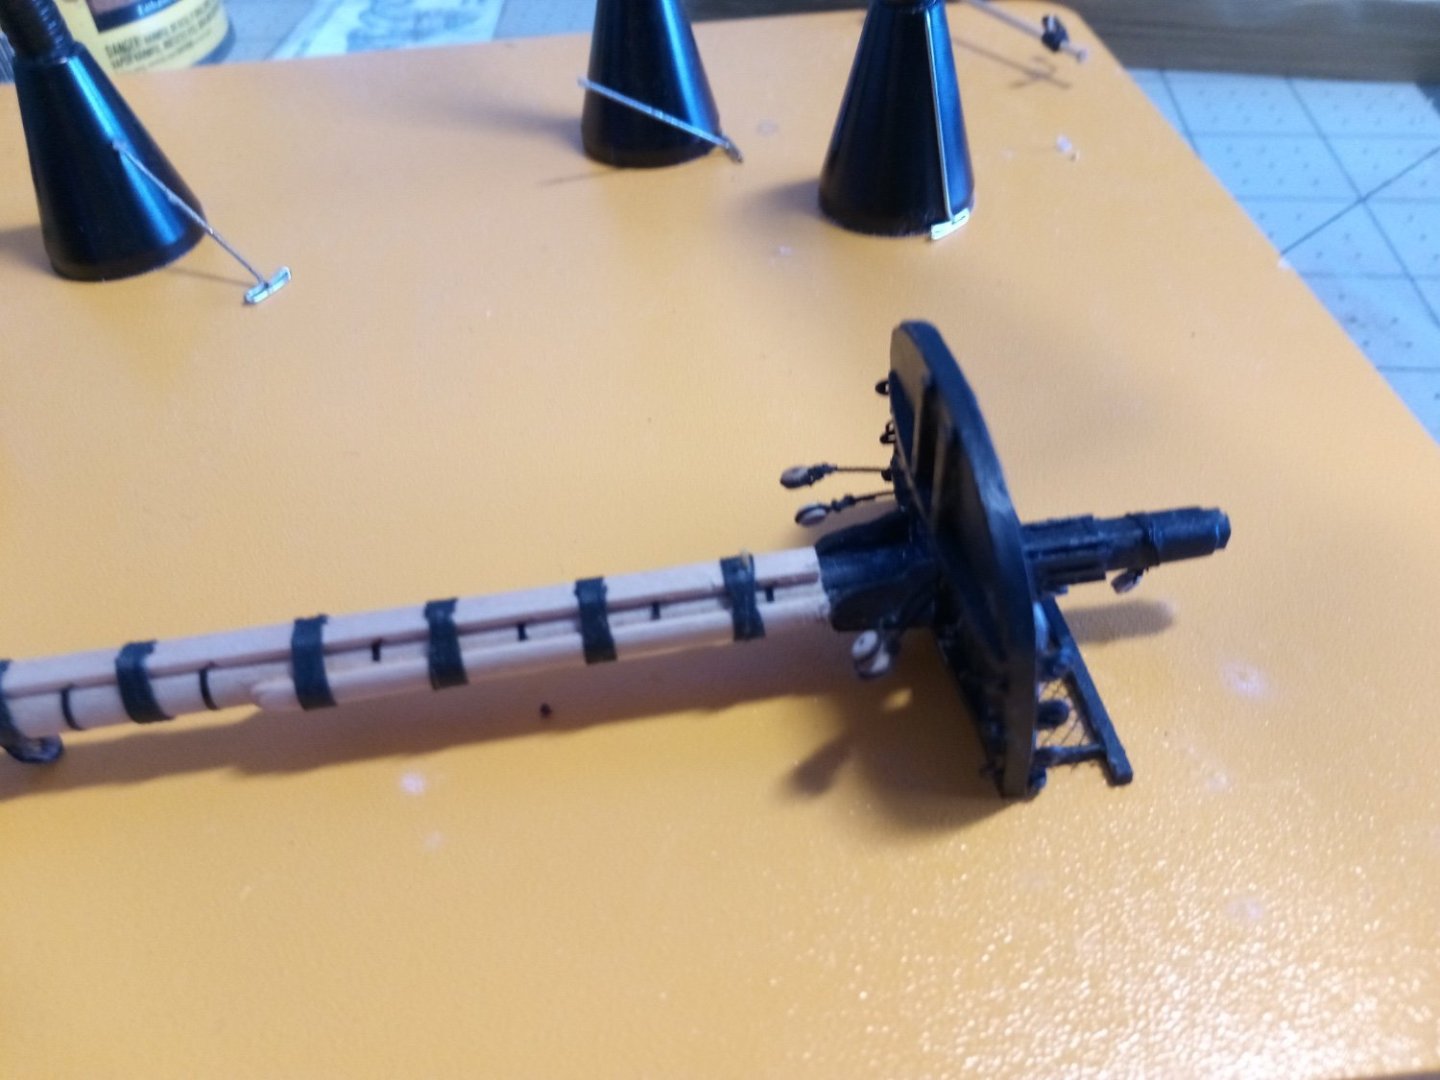
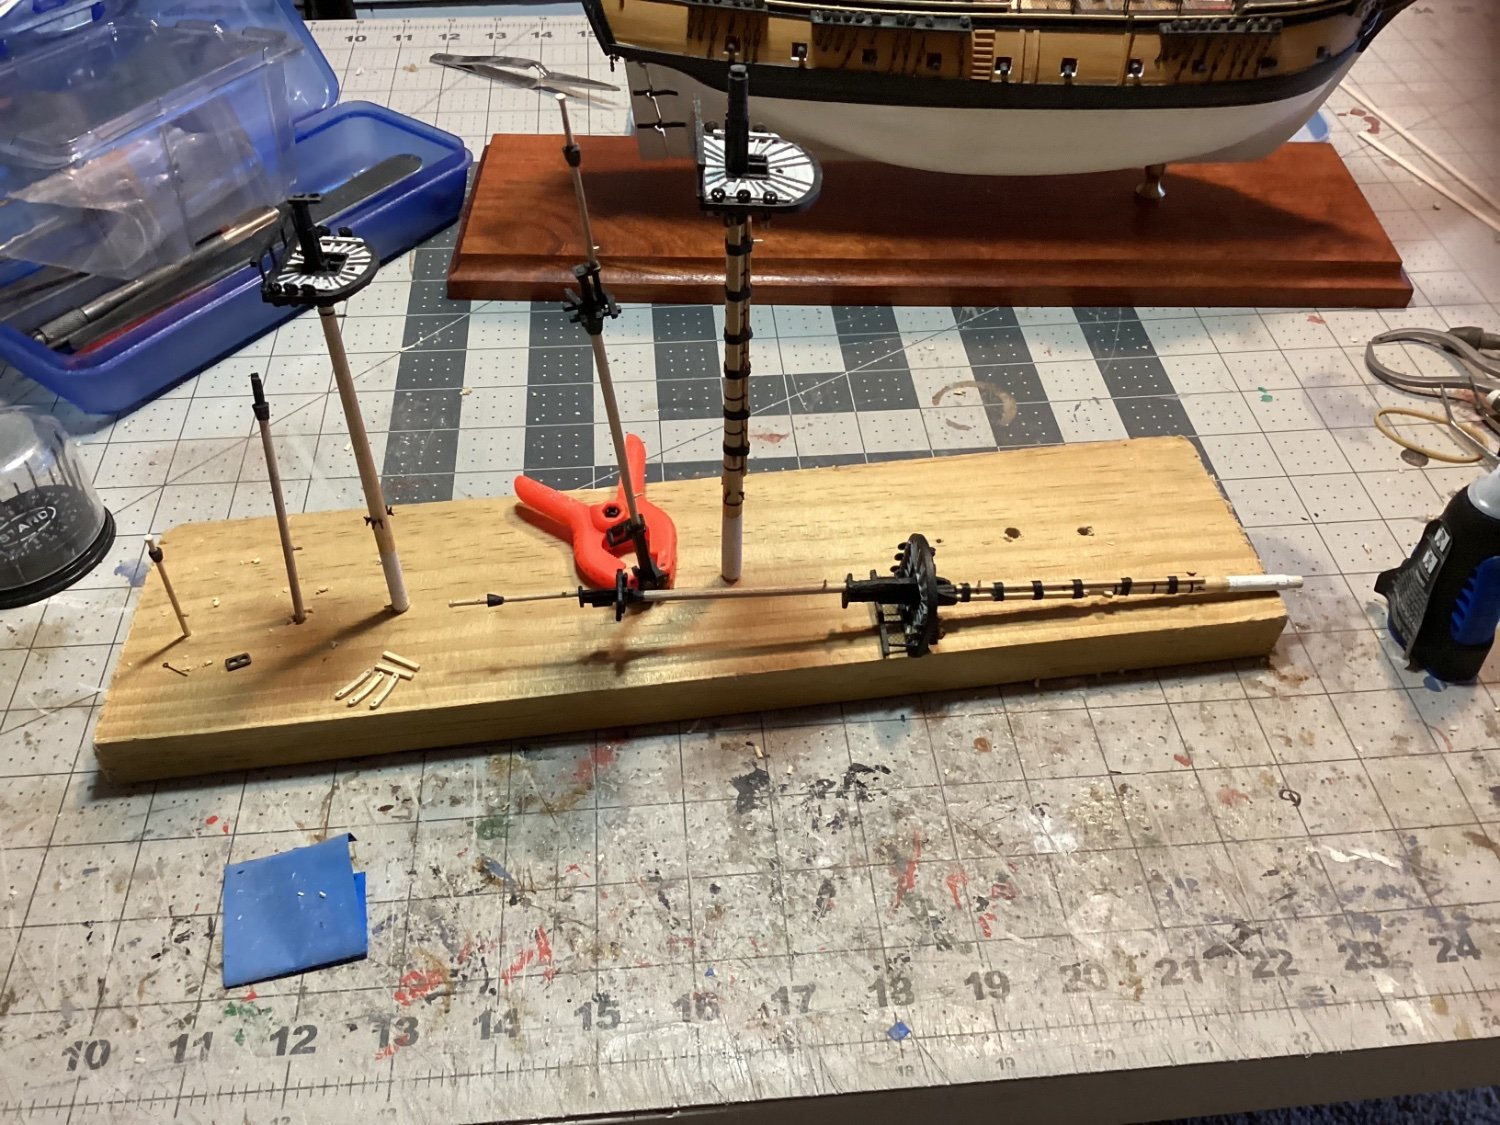
Topmasts and Top Gallant Masts
I’ve been fabricating the upper masts per the plans. The kit provides mast caps for the lower masts but not the upper ones so I ordered some small ones from BlueJacket.
I had some trouble getting the crosstrees right until I figured out that is was best to assemble them on the masts to ensure a proper fit around the different sections of the masts.
The Fore and main Top and Top Gallant masts are done (just dry fitted to the lower masts) and the Mizzen is ready for assembly. I’ve fitted brass pins in the masts where the yards will go:

Next up will be the yards.
- ccoyle, GrandpaPhil, Bill Morrison and 3 others
-
6
-
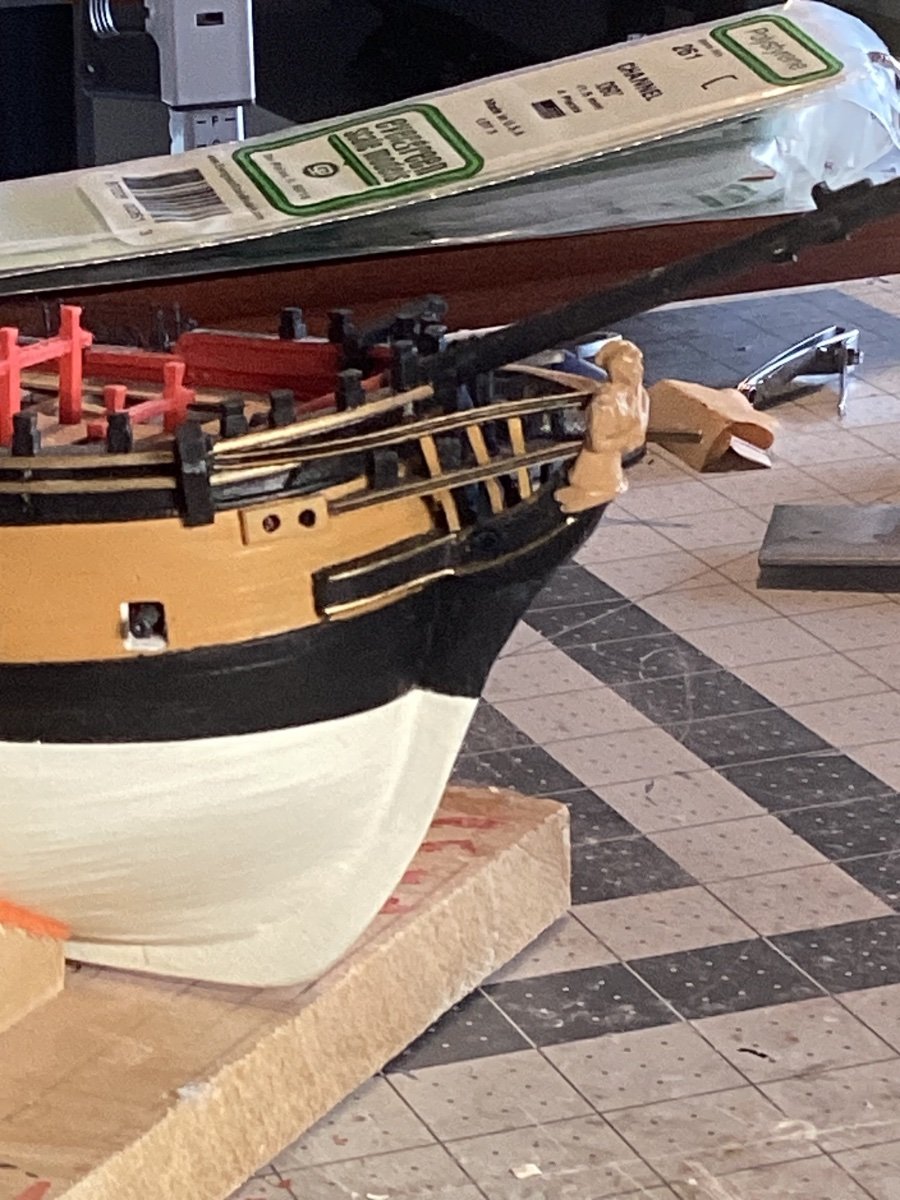
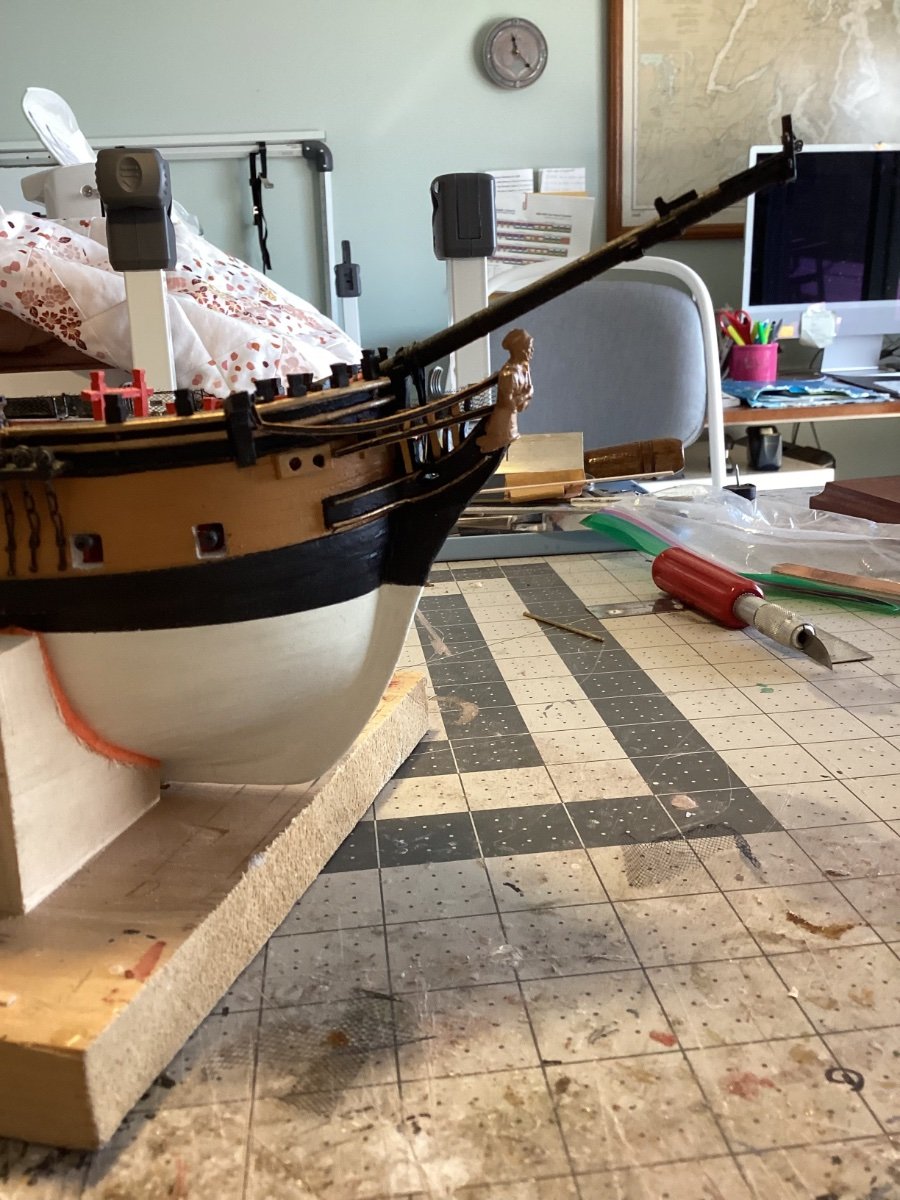
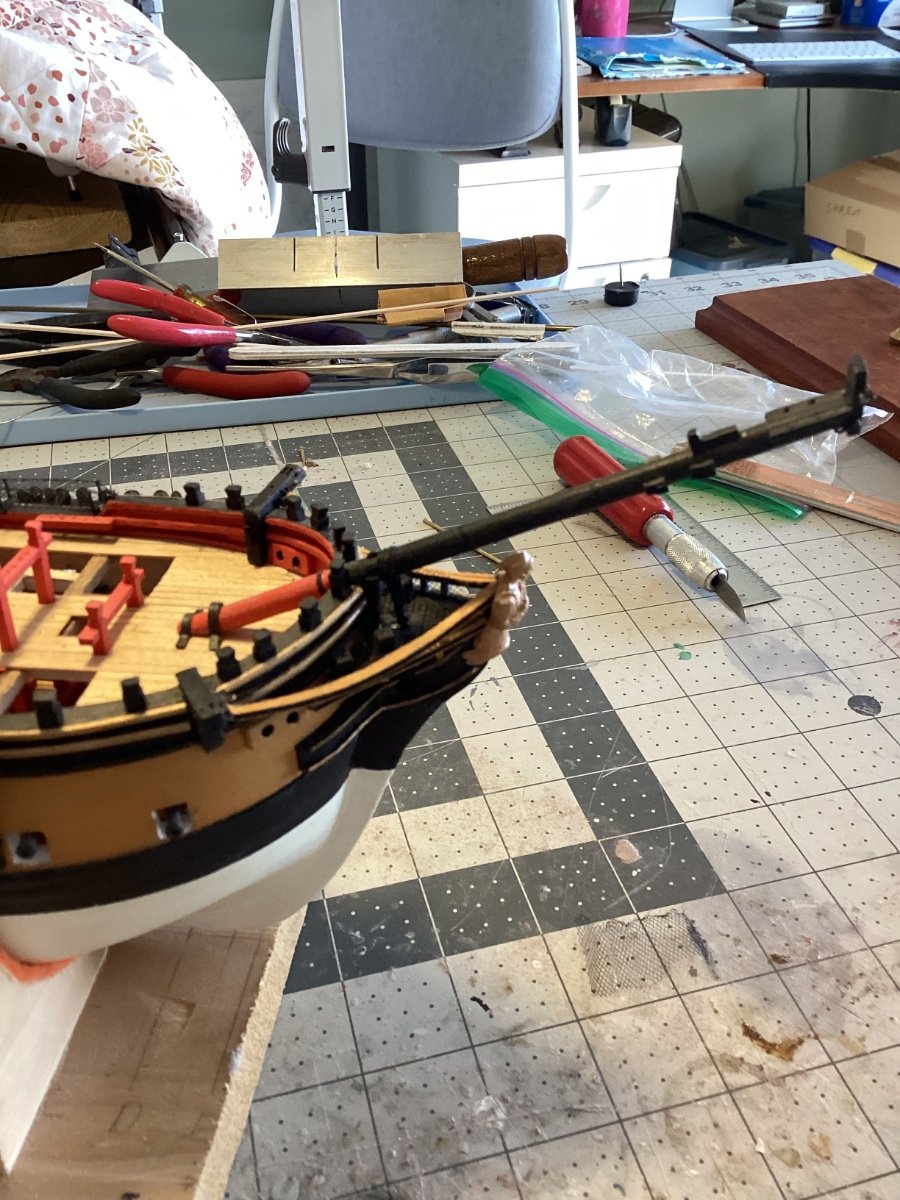
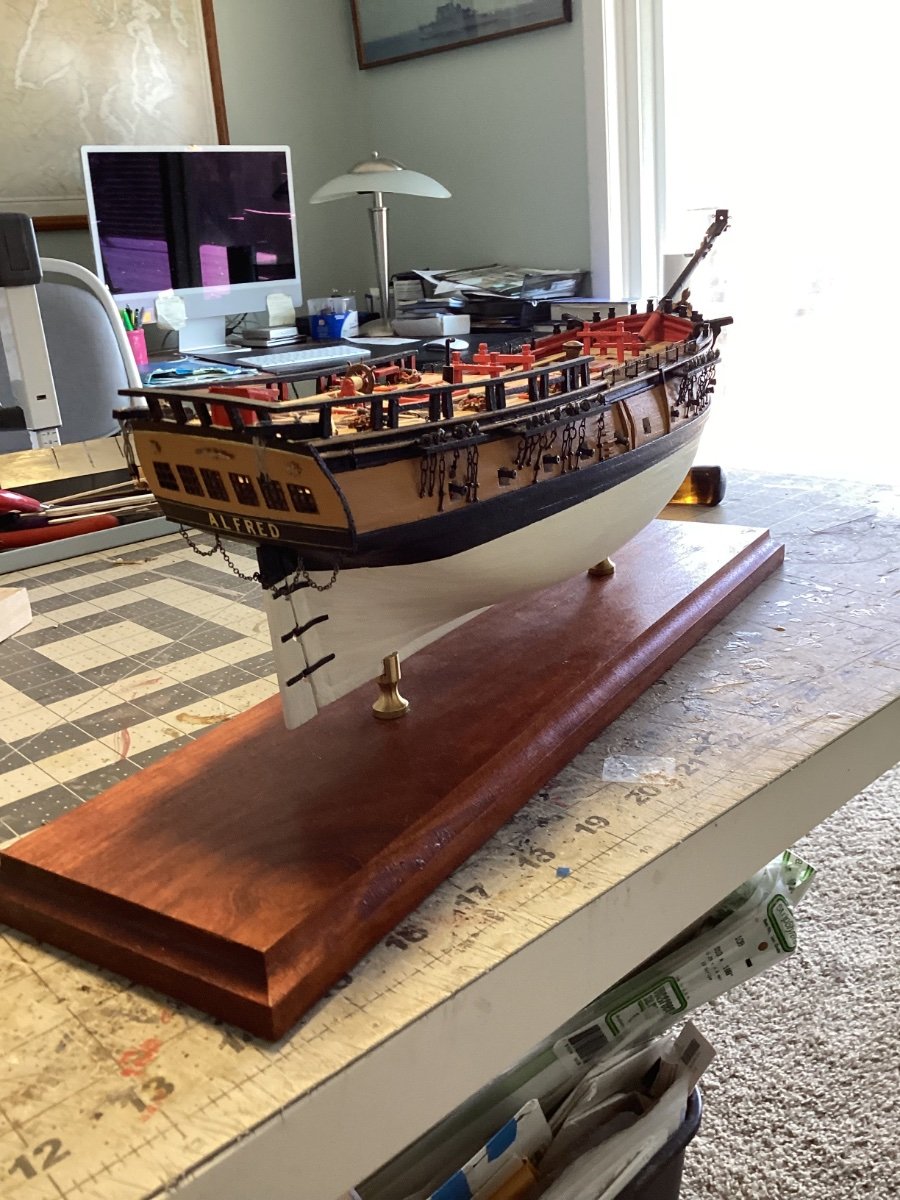
Back to the Shipyard
So, after a six month diversion into the world of radio control while building the SEGUIN, followed by an extended road trip out to the West Coast, it’s finally time to get going again with the ALFRED.
Before starting on the masting and rigging I wanted to do 2 things.
First up was fixing the upper head rails. My first attempt left them pretty straight without any of the “swoop” normally seen on the headrails of period ships (swoop being my term for vertical curvature):

So I removed them (the lower headrails had to be left alone since they conform to the outer edge of the PE grating) and replaced them with the same mix of Brittania metal from BlueJacket faced with plastic channel pieces from Stripstyrene; I’m much happier with the re-do:
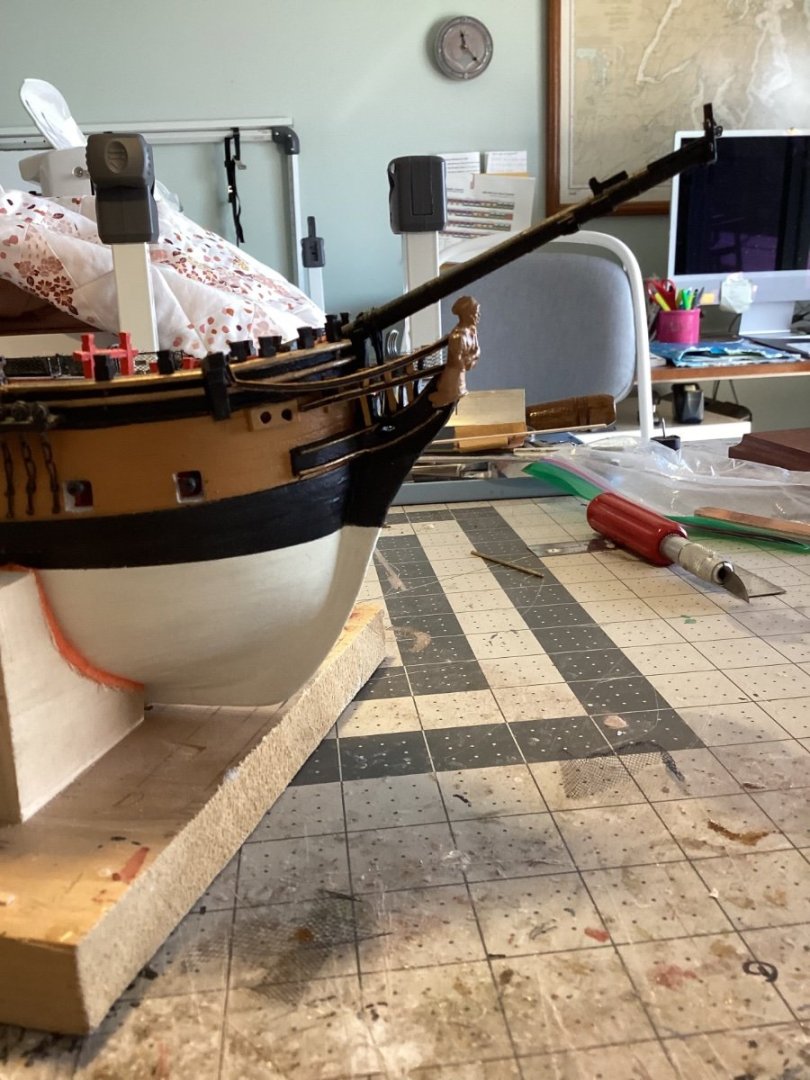

The other thing I wanted to do was to mount the model on its pedestals and display board because it would be a real nightmare trying to do it with all the masts and rigging in place. Since the masting and rigging should not require placing any serious pressure on the hull I think now is the time to do it:
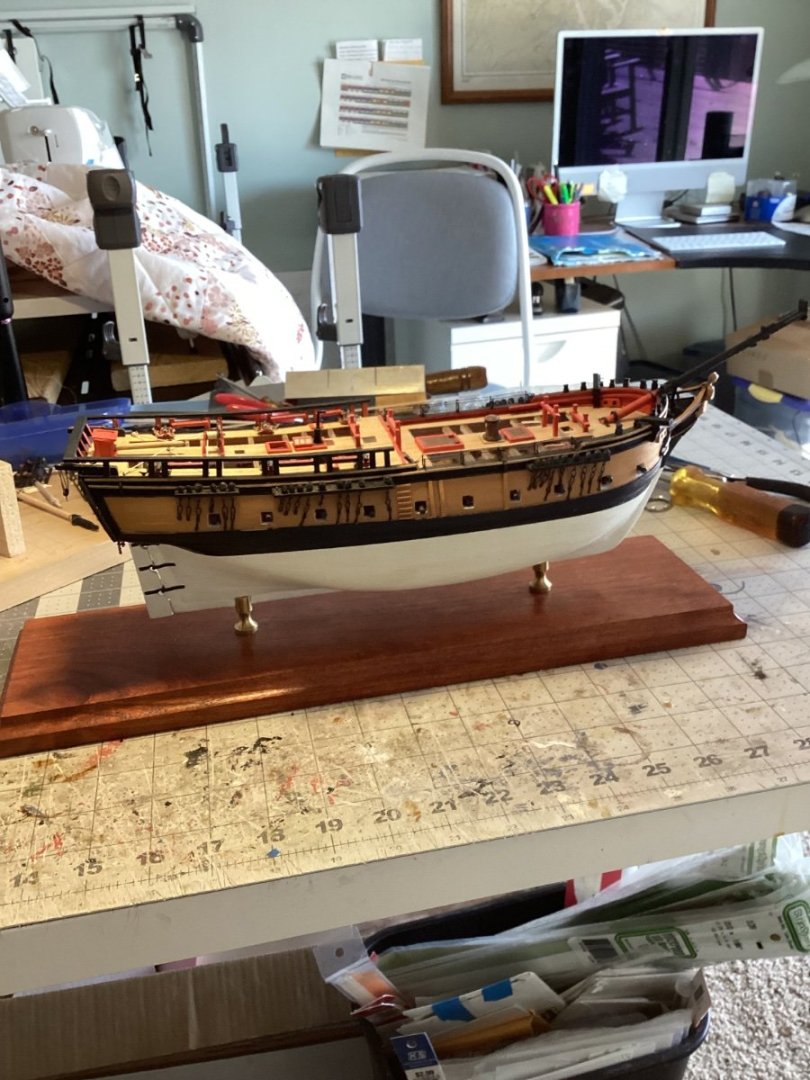
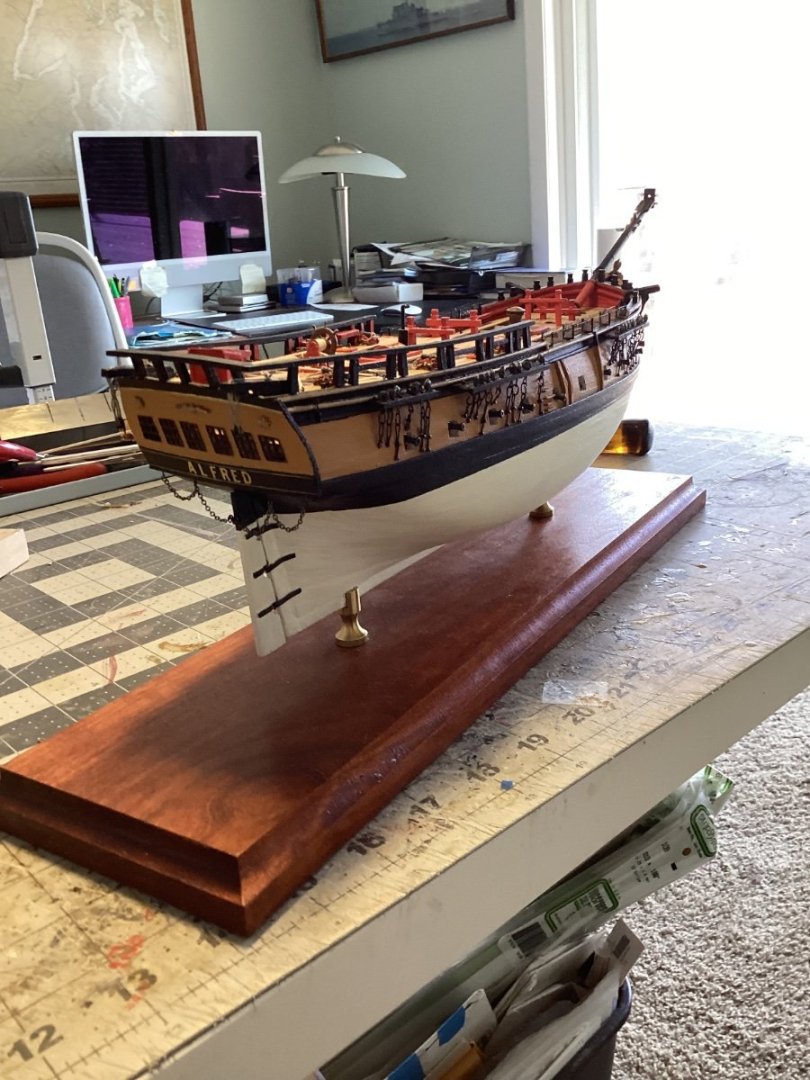
Now I can put the hull on the shelf and work on the upper masts.
- mort stoll, whitejamest, catopower and 9 others
-
12


HMS Sphinx 1775 by rvchima - FINISHED - Vanguard Models - 1:64 - 20 Gun Sixth Rate Frigate
in - Kit build logs for subjects built from 1751 - 1800
Posted
I've seen a lot of "greening" ideas here on MSW but this looks like the best yet, looks great!!