


flyer
-
Posts
1,011 -
Joined
-
Last visited
Content Type
Profiles
Forums
Gallery
Events
Posts posted by flyer
-
-
-
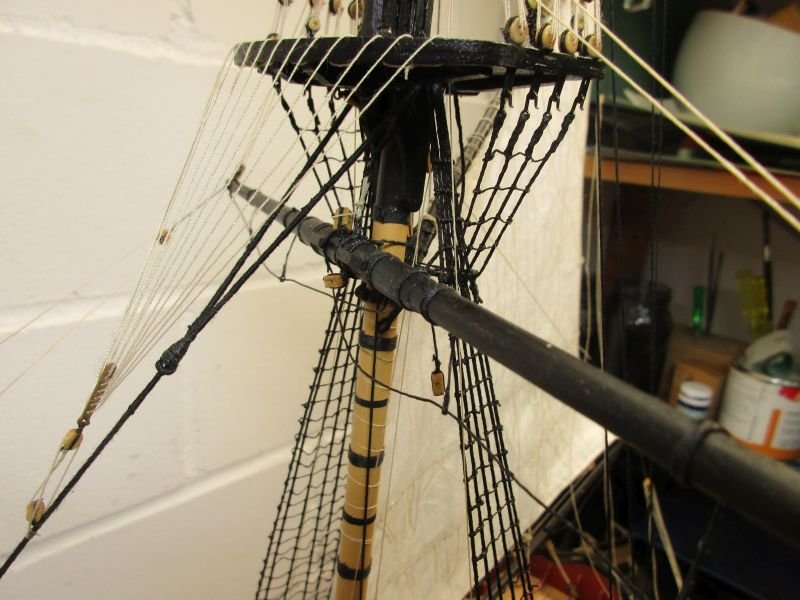
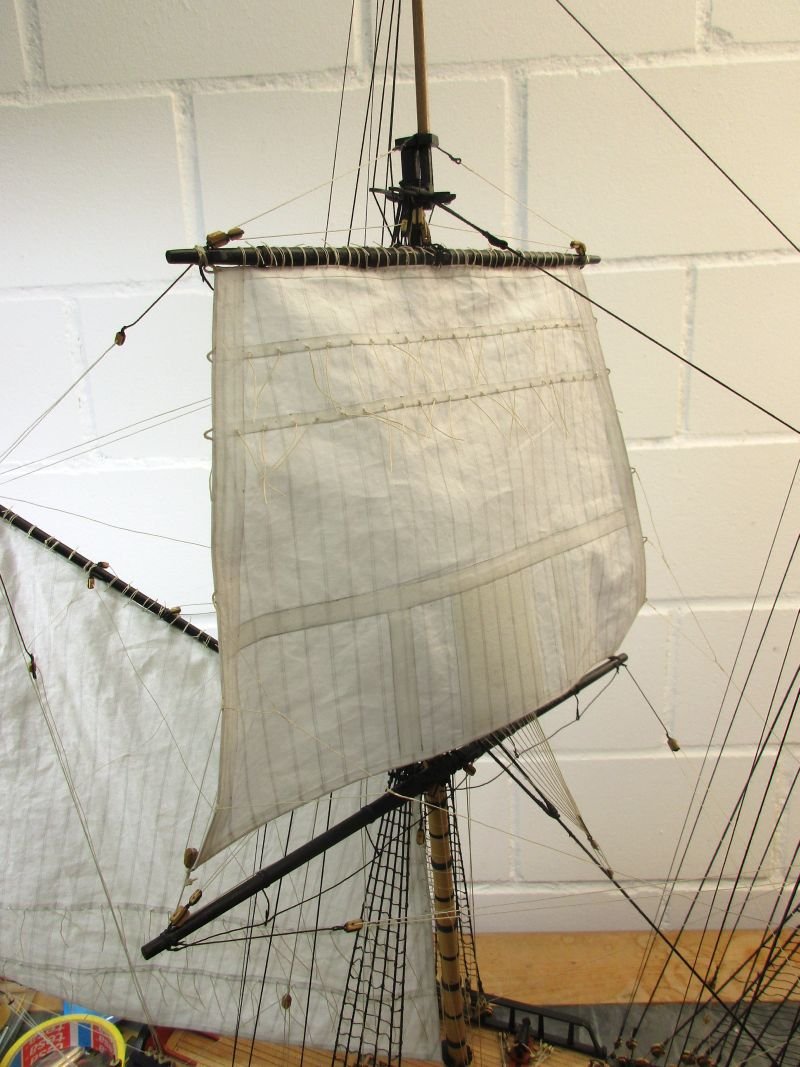
main yard and course
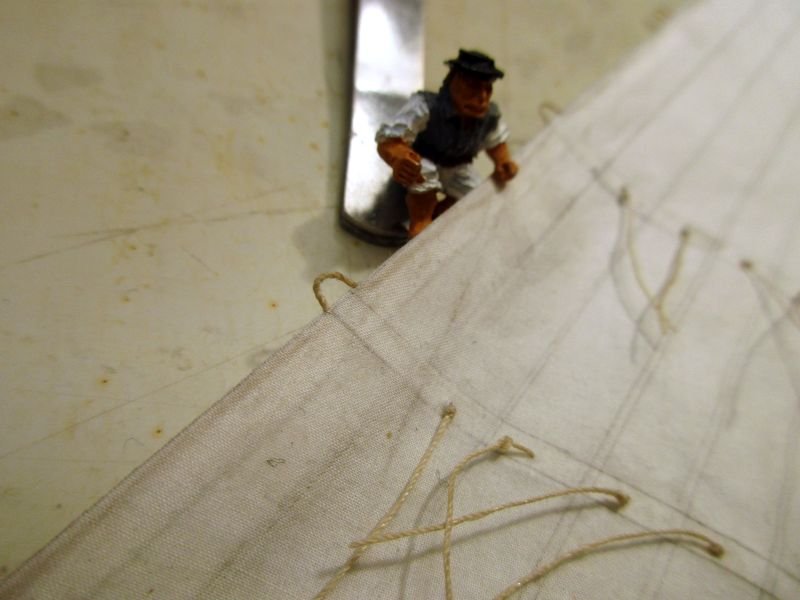
The main course's area was also reduced by about 30% and the simplified sail then bent to the yard. (Easily said - but I had to knot about 90 robands.) Buntlines, bowlines and clue lines were added and the sail then furled. It sits perhaps not high enough on the forward side of the yard, but I didn't want to cover the studding sail booms.
Setting up the yard was started with the sling. Then again followed a process of balancing lifts, braces, jeers and trusses to get a horizontal yard, braced by about 20° and with no slack in the sling. How to set up lifts caused a bit of head scratching: With yards squared it is obvious how to lead them in order not to conflict the standing rigging. But with the yard braced you will have to set them up the same way and they will not run free anymore but bend around the standing rigging. And of course the yard itself presses onto the foremost shroud on lee side. Letting loose the truss falls a bit helps here.
Then I had to lead all the lines through the correct blocks to the appropriate belaying points. Some I had to improvise, such as those for the yard tackles and its gear.
For the buntlines I changed the run under the main top. I had installed additional blocks and each runs now through two blocks in succession, similar to the plans for the fore course buntlines, and so clear the yard.
Now I only had to fix and coil a zillion rope ends and voila - another tiny step towards completion was done.
Sometime during that step, when I had enough of lace making, I finished the stern lanterns.
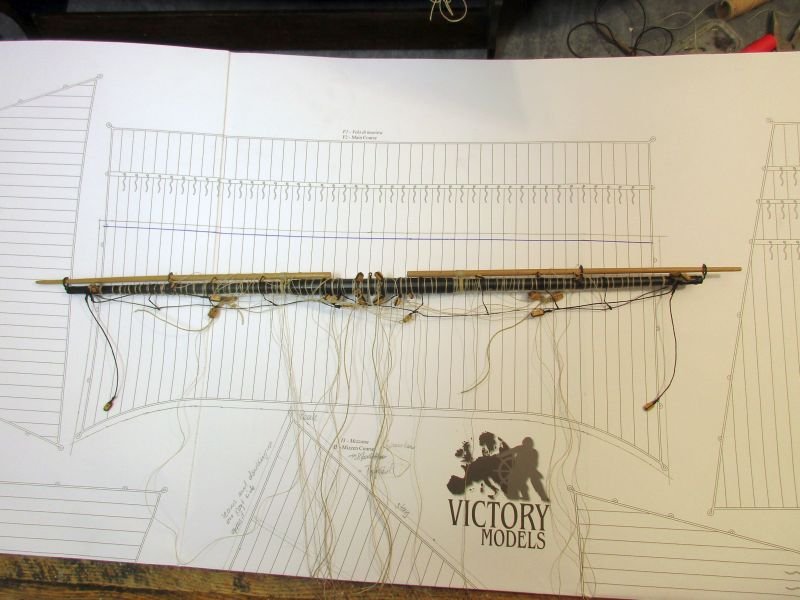
main yard from above - the reduced sail area is marked in the plan below it
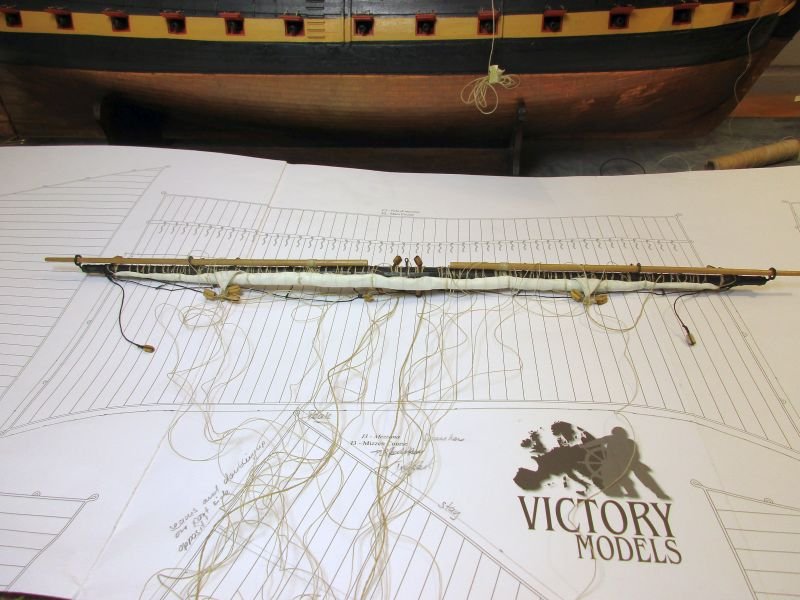
yard seen from below
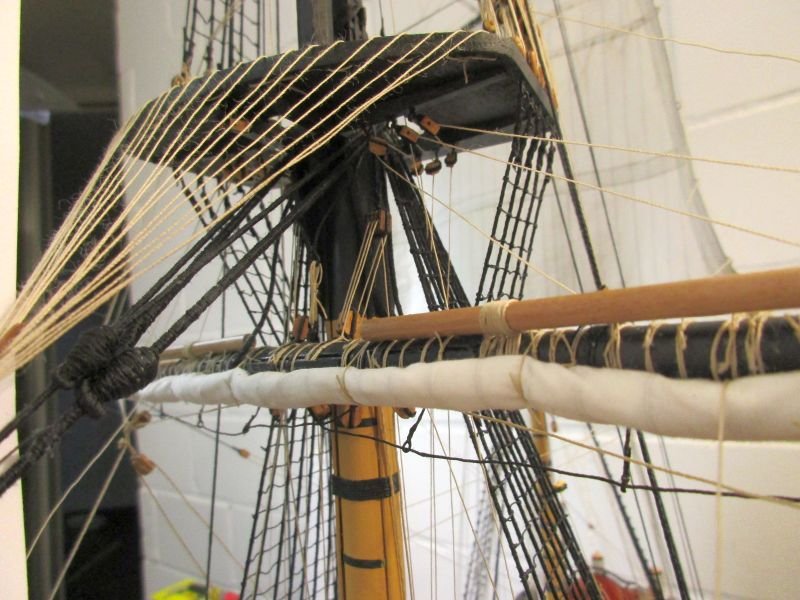
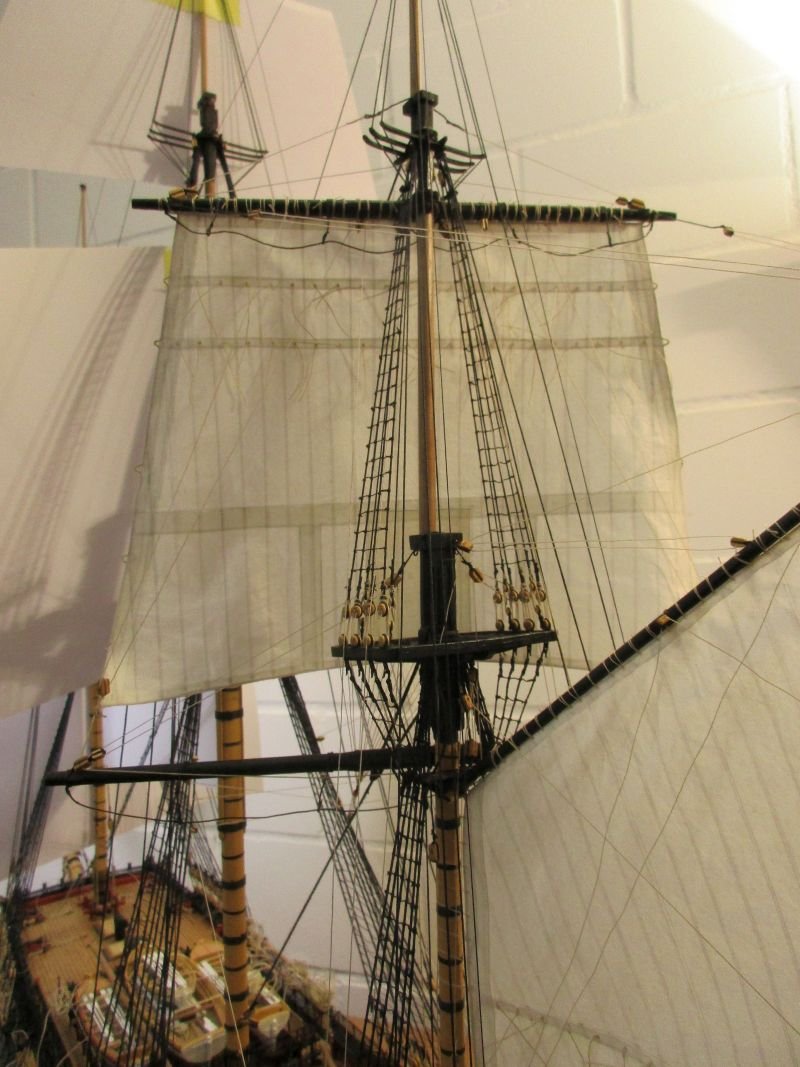
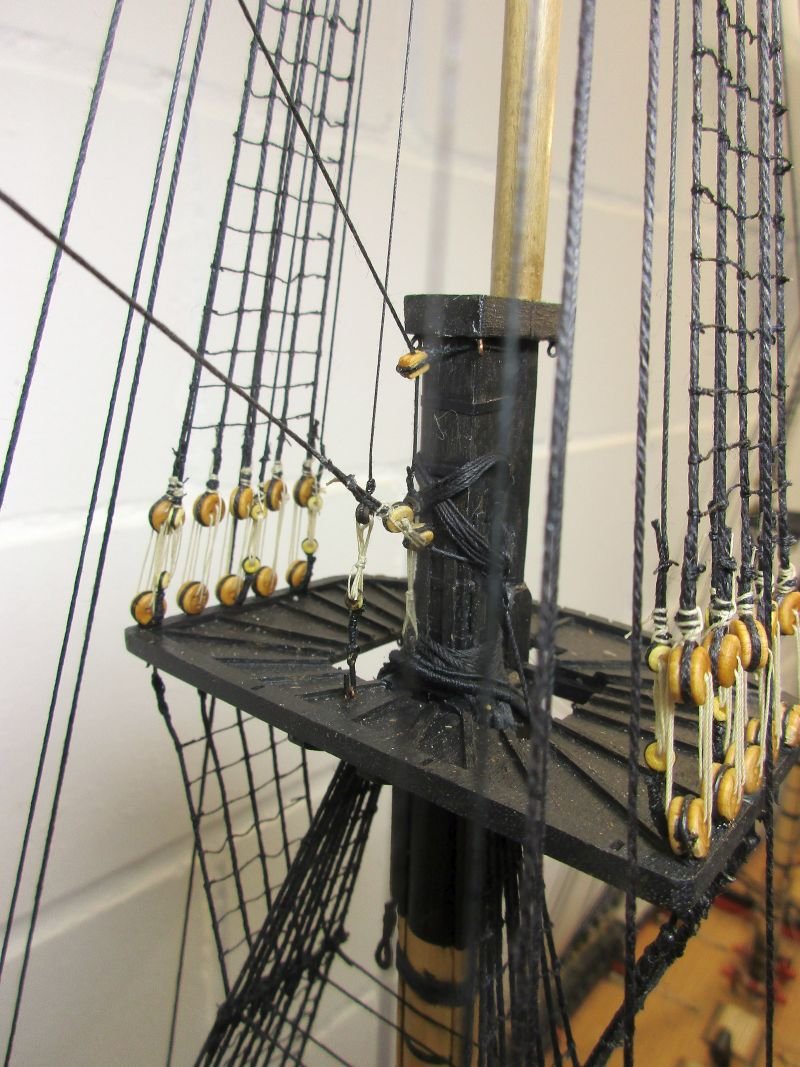
sling, jeers and lifts as well as buntlines visible below the maintop

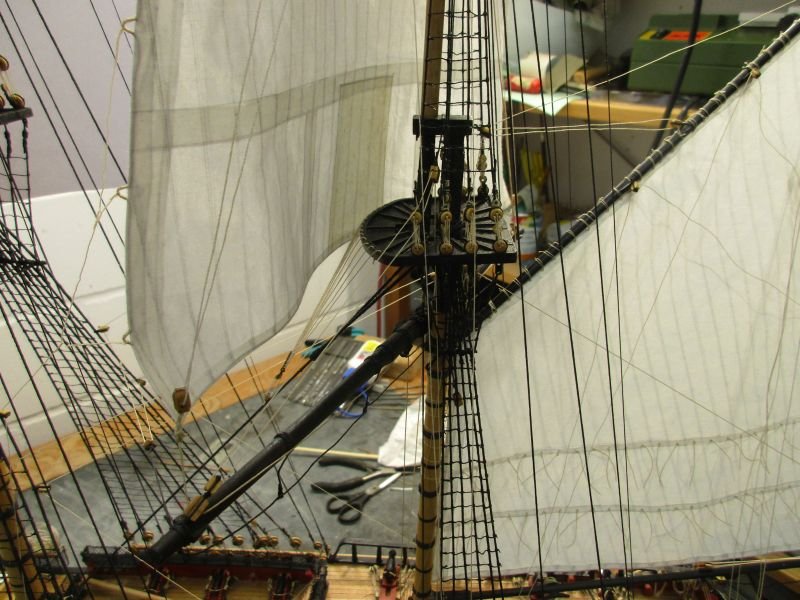
detail with truss
main yard from above - kink in lift due to the foremost shroud visible
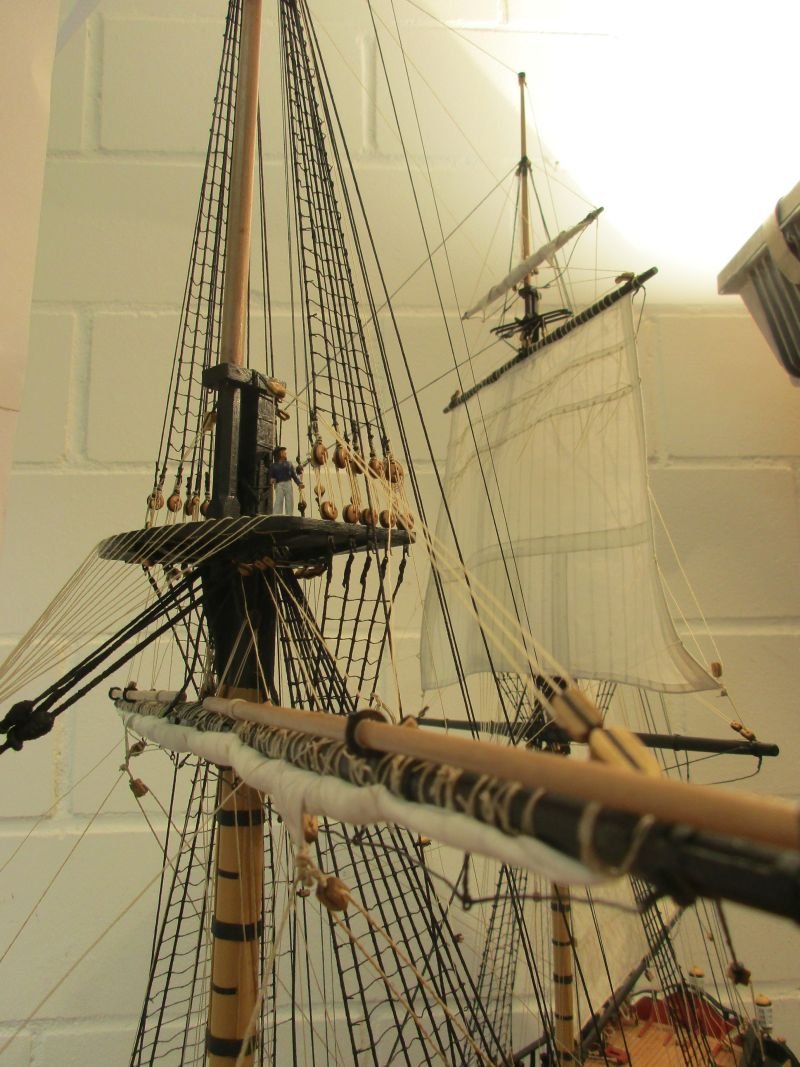
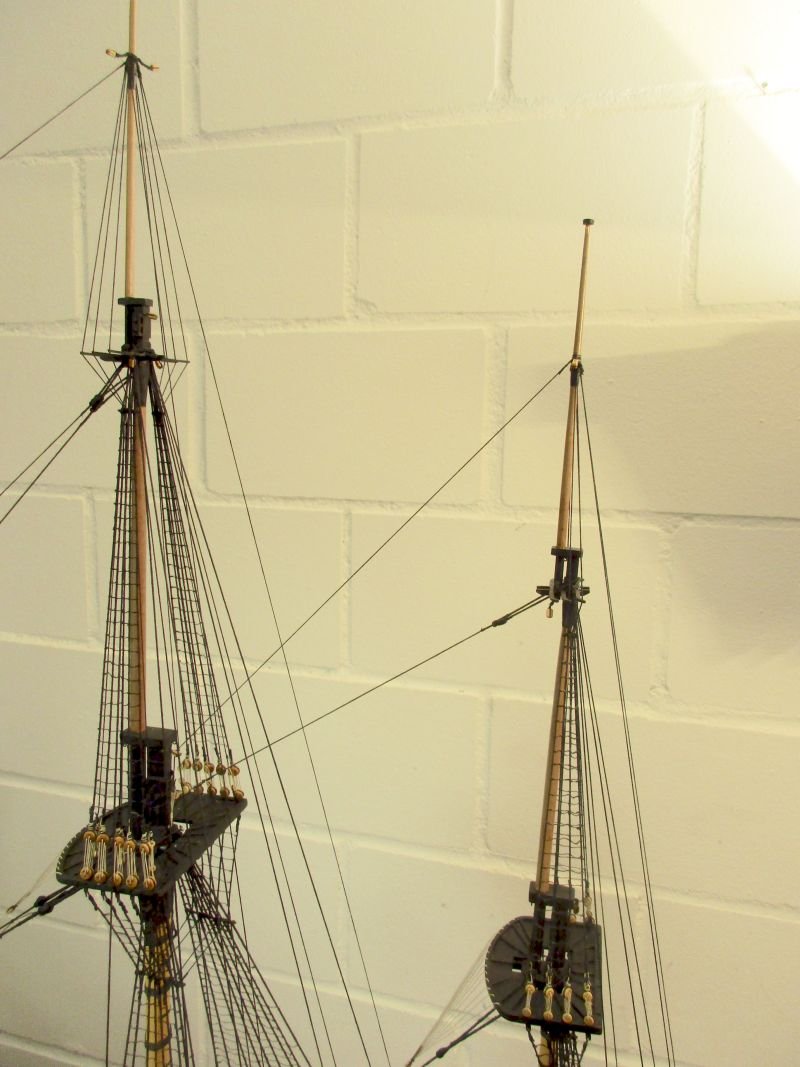
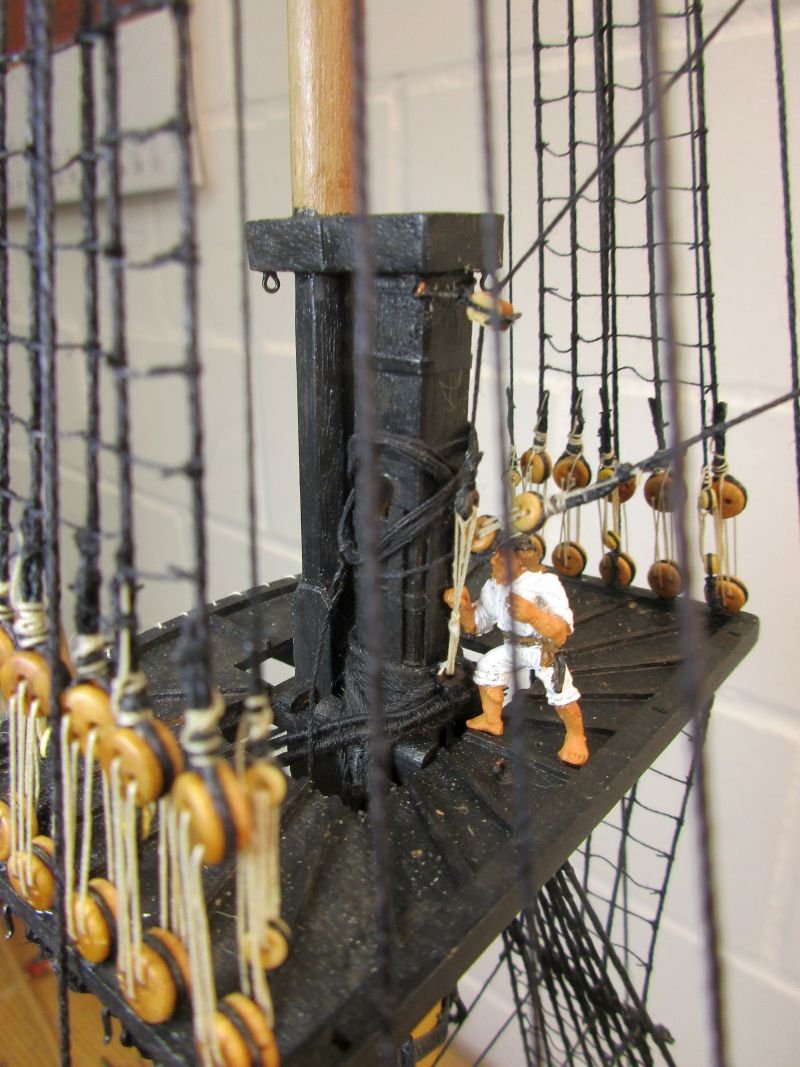
Do you see the sailor in the maintop? Those ships were huge!
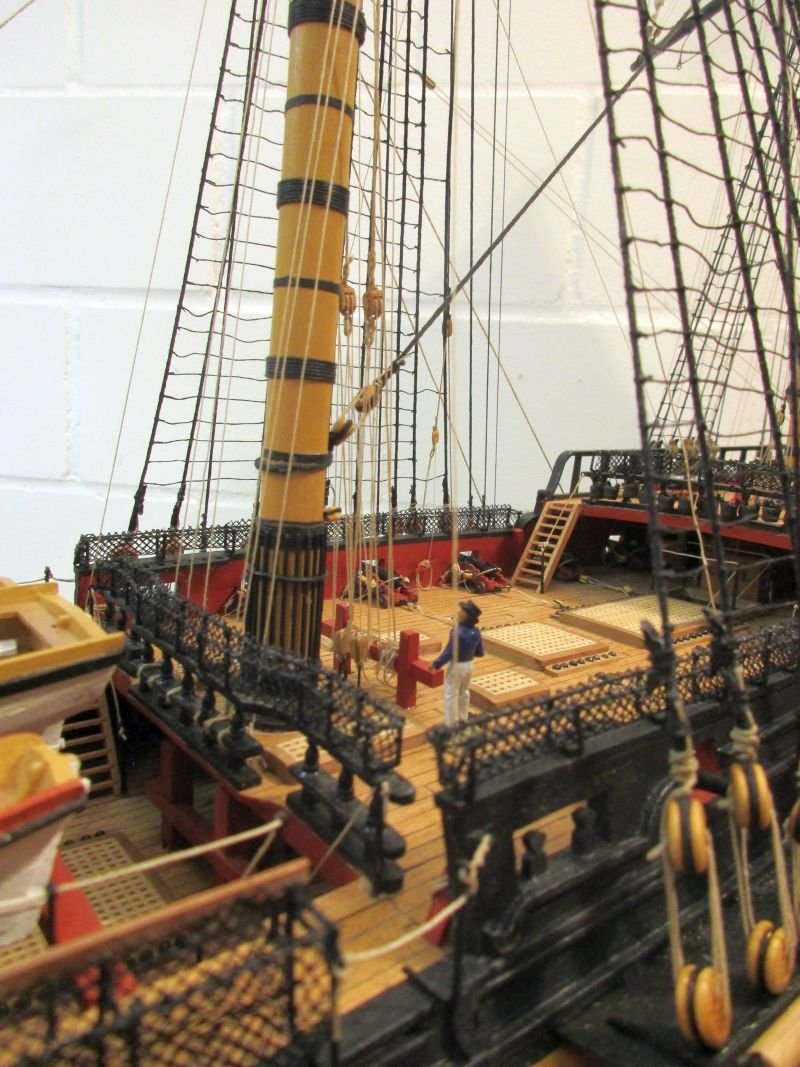
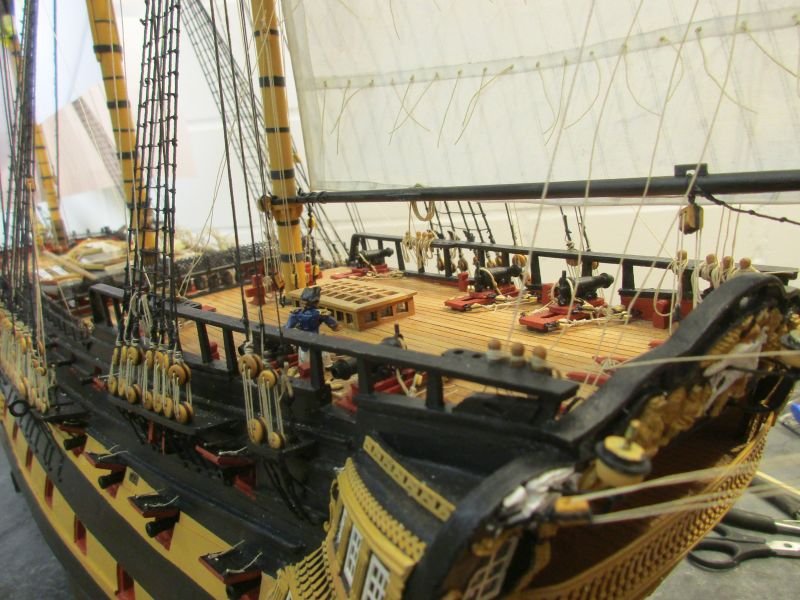
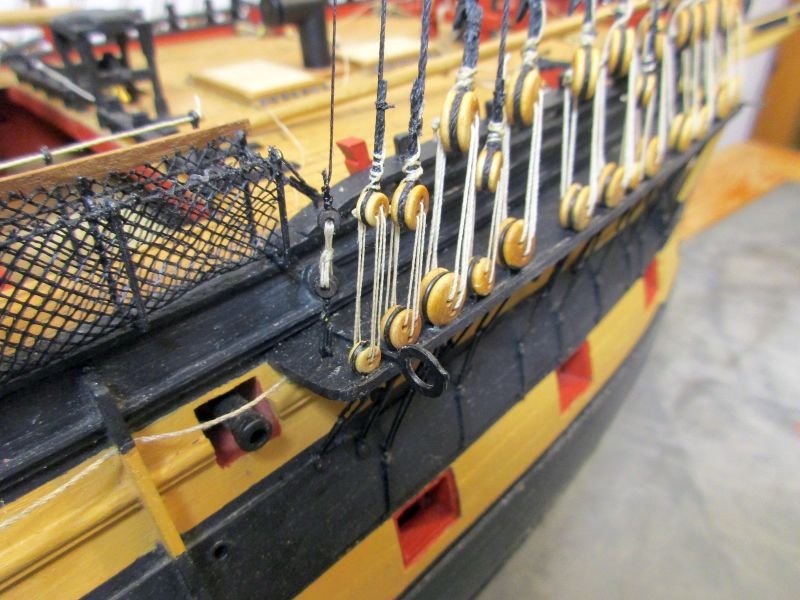
foot of the main mast with bitts quite full

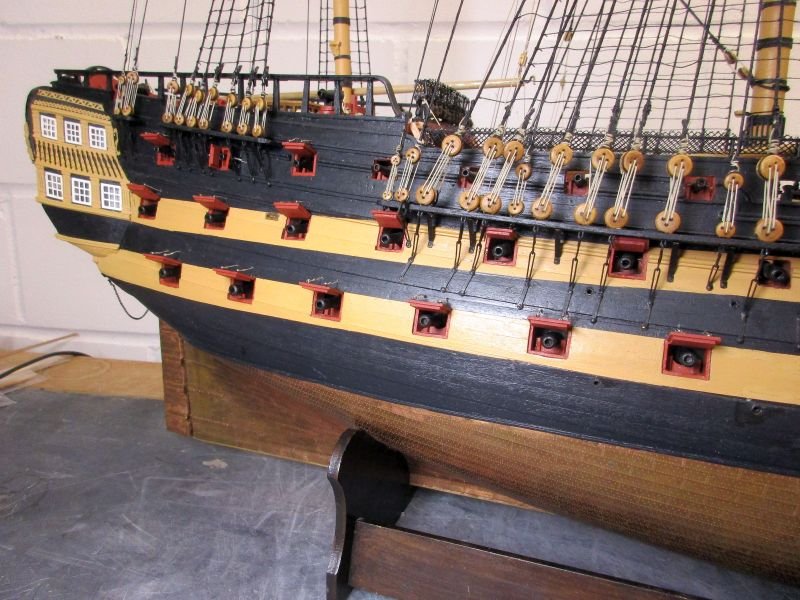
view along the deck
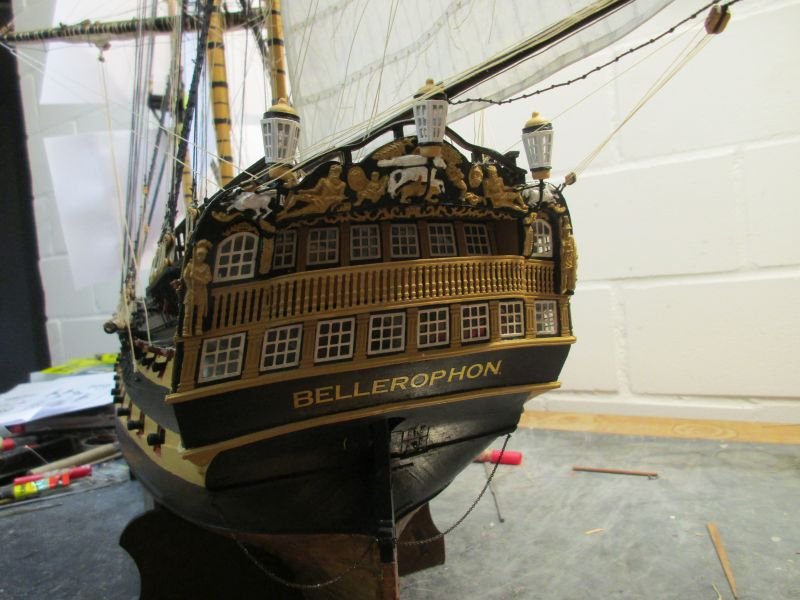
stern lanterns in place
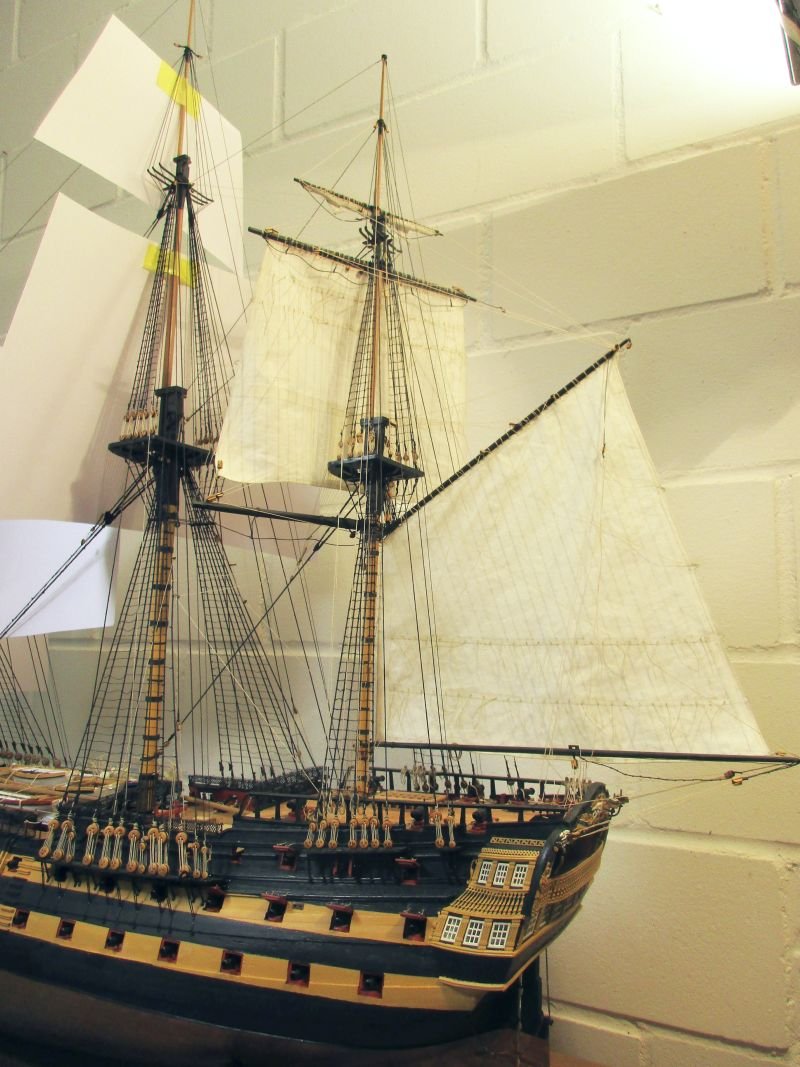
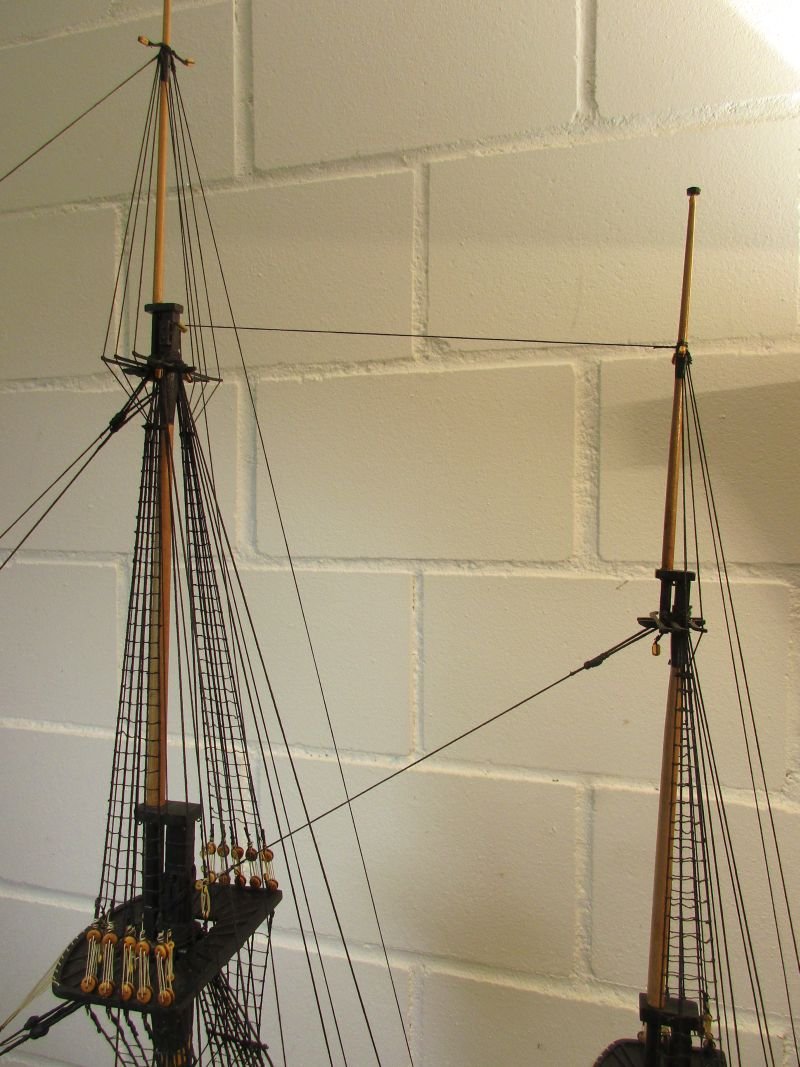
she's taking shape
- egkb, mort stoll, AON and 9 others
-
 12
12
-
-
Hi Nils
Just found your album of the pilot schooner. Again an outstanding build! (But who would expect less?) I really like that every one of your beautiful models clearly bears your trademark, setting them apart from the rest.
Cheers
Peter
-
Hi Alan
You are on a most interesting journey - thanks for taking us along. Watching you struggle with the correct form of those stern timbers lets me appreciate how complicated the work of those shipwrights really was. I guess they had to try, correct, try again and correct again their timbers as well. But in scale 1/1 that was some heavy load to shift each time. On the other hand they could make corrections with the timber in place - where you have not enough room to work.
It's a pleasure to watch your Bellerophon taking form.
Peter
-
A wonderful side project! I love the details.
And Chris Watton's figures really are bring a model to live.
Peter
- Blue Ensign, mtaylor and Jack12477
-
2
-
 1
1
-
Thank you, Alan.
To reduce the sail area this way was just a random idea which for once seems to work.
I'm afraid I'm unable to express the real amount of fun I had setting up all those lines - there might be readers of minor age. Frankly, it wasn't too bad but a bit tedious.
After seeing my photos I had to start - as it very often is the case - to rework the sail stowing. The starboard clew looked to loose and was tightened.
Thanks again for the positive feedback. It's always a big motivation.
Peter
- Ian B, Beef Wellington and AON
-
3
-
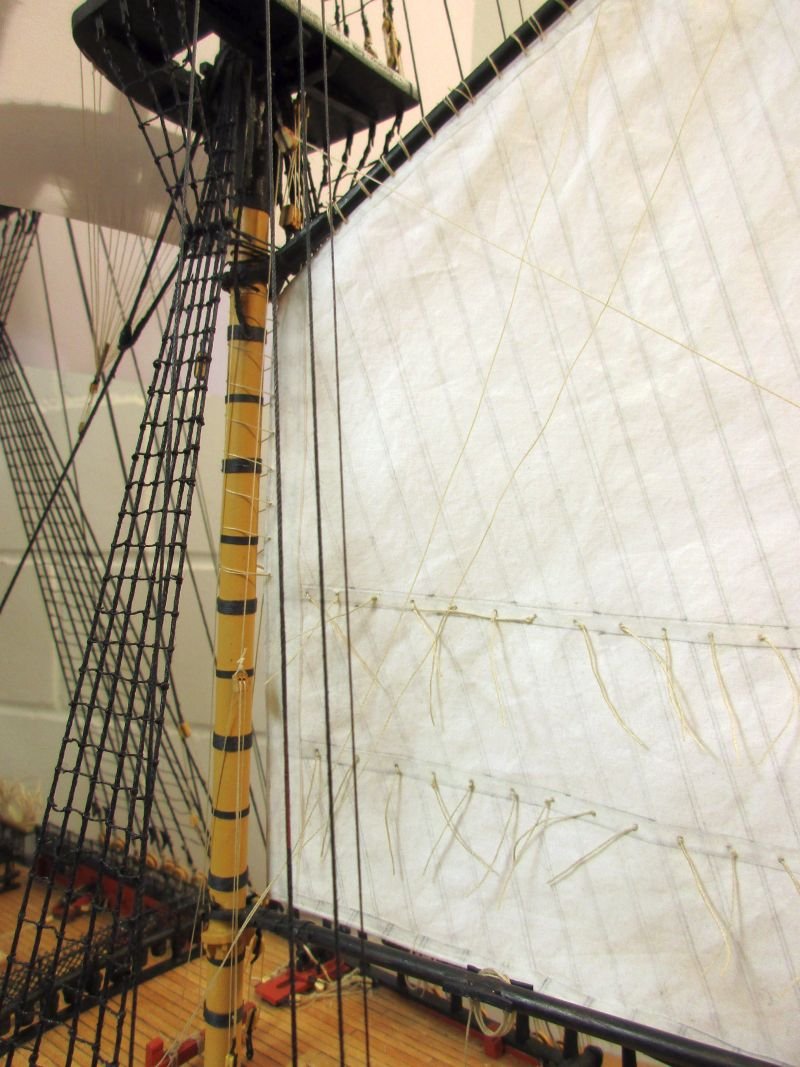
mizzen topgallant yard and sail
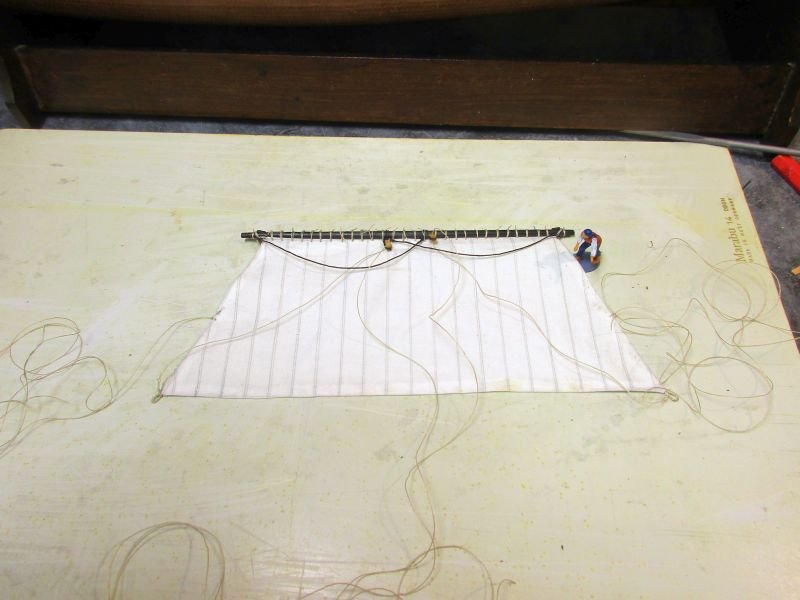
According to my sail plan the mizzen topgallant sail is furled. Zu Mondfeld recommends to reduce the area of furled sails by about one third - to get a smaller coil of sailcloth.
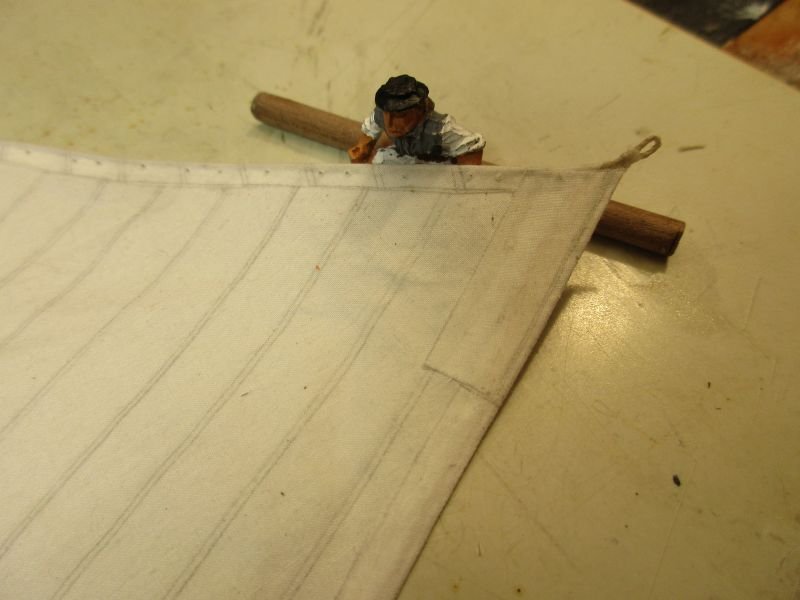
This I followed and made a smaller sail, however with the same width of head and foot. Seams were penciled on and the hem was glued as usual, but no reef bands ore linings were put on. Also the boltrope covers only the head and the clews to further reduce the bulk of the furled sail.
The sail was then bent to the yard and tie, clew lines and simplified bowlines added. Now the sail was furled as tight as possible - but no harbor stow fit for an admirals inspection - and bent to the yard. The clews are hanging down on the forward side as seen on various illustrations.
The yard was put up with its tie and fixed to the mast with a simple truss parrel according to Lees. A whole arrangement with parrel ropes, rips and trucks - as shown on the kits plans - seems to me too bulky for such a light spar and out of proportions.
Now lifts, braces and sheets were installed and balanced against each other to have the yard horizontal and braced parallel to the topsail yard and the crossjack. The clew lines were set up to fix the clews against the pull of the sheets.
Each pull on one line of course sets up the balance and requires adjusting of several other lines - a heartwarming procedure which gives a lot of joy and generates a peaceful mind. (...)
The bowlines were set rather taut and help to fix the position of the yard.
Not all belaying points were marked on the plan and I had to change a few and find some new ones. As far as possible I used Lees as a help but sometimes I differed and looked for a simple and yet logical solution.
Lines were only provisionally belayed until all lines and forces were balanced (or nearly so) and then fixed with diluted white glue and the ends coiled up.
Now the mizzen mast is fully rigged except for the flag line and the next step awaits me - the mighty main yard with its furled mainsail and as an extra the stowed yard tackles.
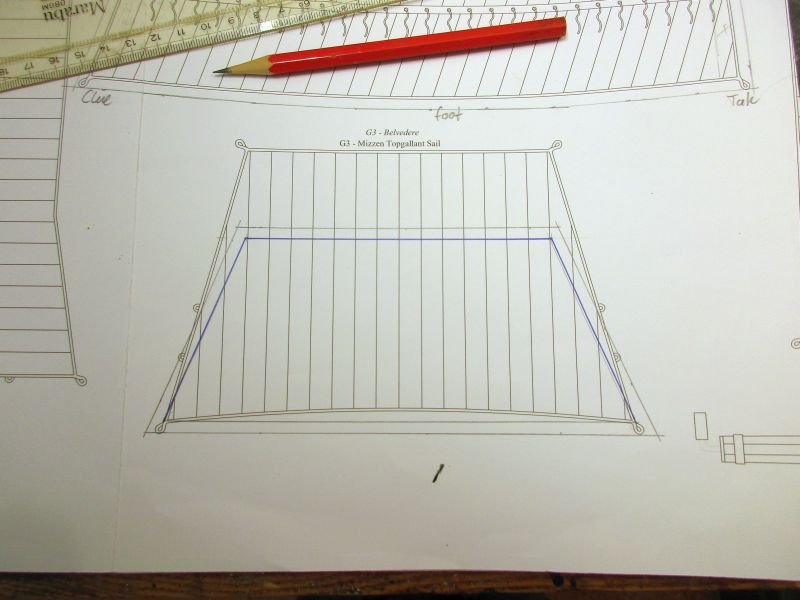
reduced sail marked in blue on the plan
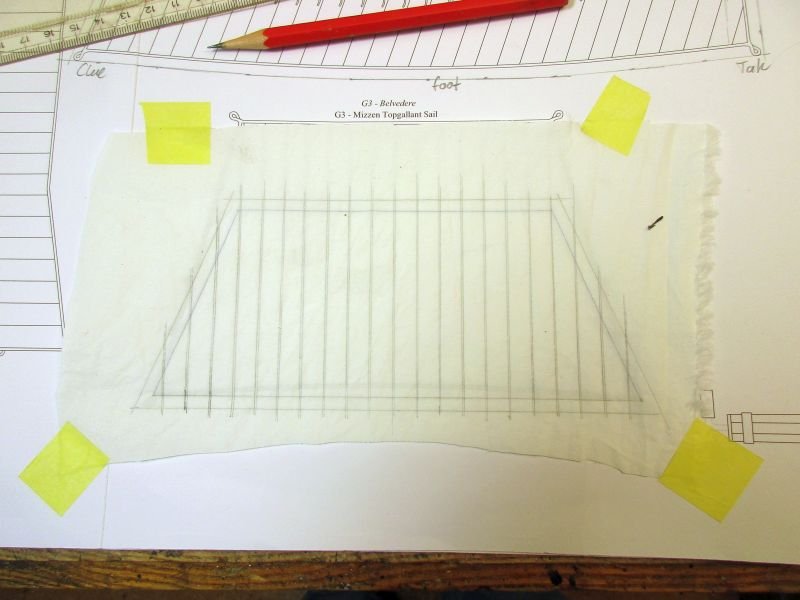
first side of sail marked on cloth
sail with lines attached - ready to furl
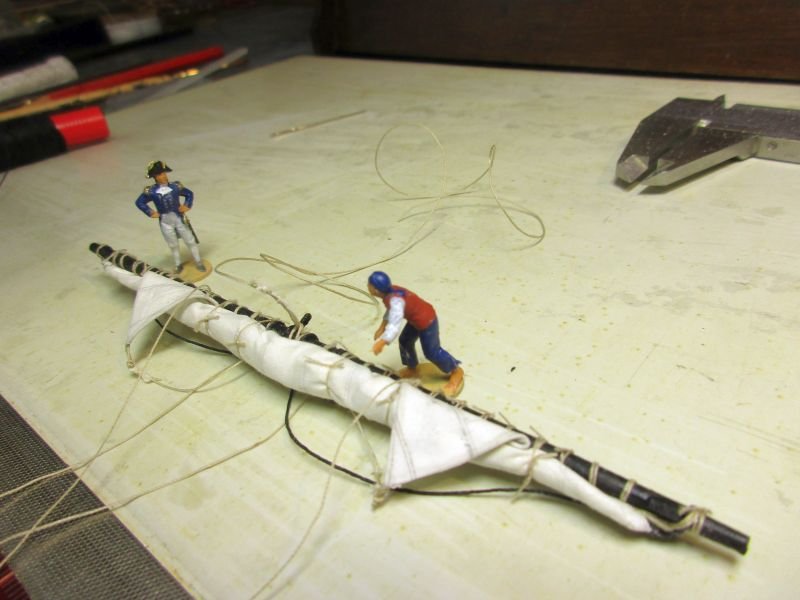
yard with furled sail, ready to hoist
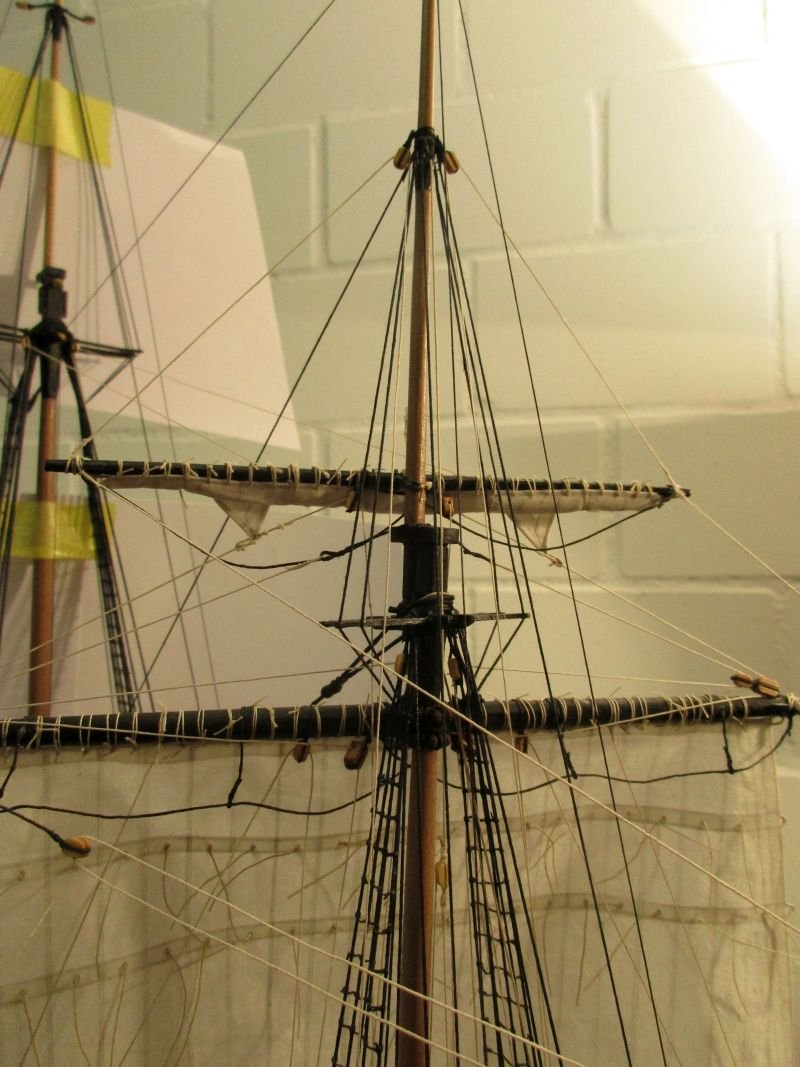
topgallant yard in position
mizzen mast with all spars on
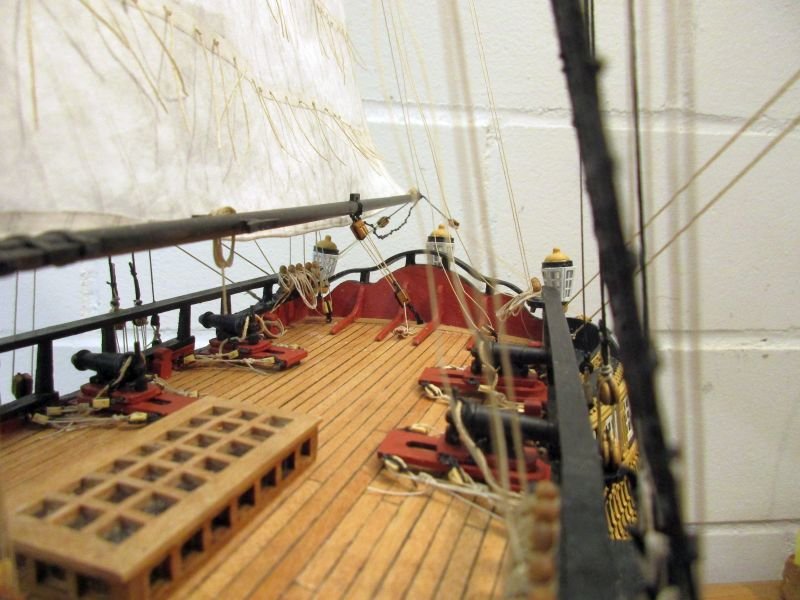
the poop deck gives now a properly busy impression
-
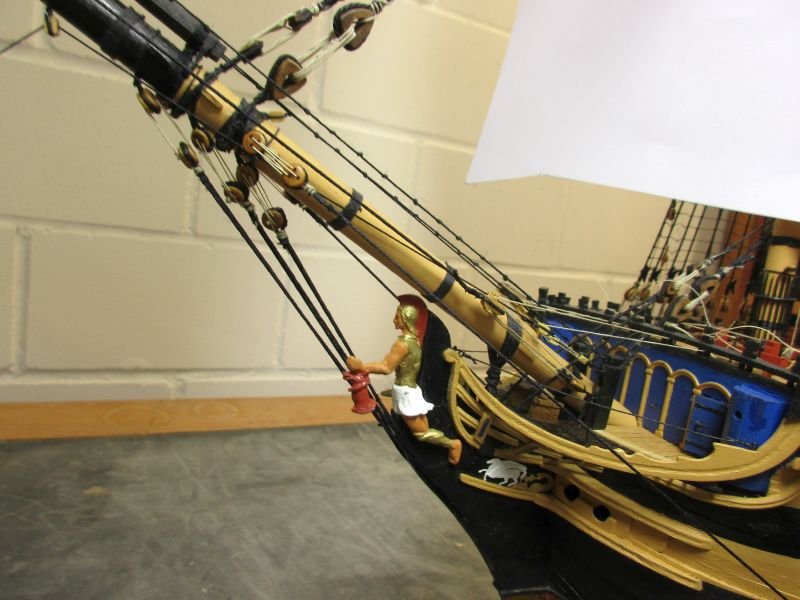
the new crew from Vanguard Models
After seeing Chris Wattons crew figures I had to try and hire a few of them. In my opinion, they surpass all expectations. The lively and individual stance of the figures makes them come alive. The details, such as faces with individual features, are just unbelievable - true works of art - and this in scale 1/72!
I read what Chris Watton wrote about having more figures sculptured and the cost of each individual masterpiece, but -
"Chris, if you ever have time to think about making more figures available, I humbly suggest to make a few more working seamen doing everyday work , such as a lookout or one climbing the rigging or scrubbing the deck. You should be able to sell more of them, than of costly individual figures of heroes - after all one skipper per ship is sufficient but you need hundreds of seamen. (However a captured Napoleon in 1/72 on the poop deck of my Bellerophon would just look great...)"
Back to Bellerophon: There seems to be a problem with carronade number 5 on the poop deck. A gunners mate is discussing it with the gun captain while two of his crew await orders. The skipper is watching the proceedings from some distance. A very quick and moderately able painter was fortunately there to catch the scene.
The figures are painted with standard admiralty paint. Initially I wanted to remove the bases but was afraid of some involuntary foot amputations. After painting the bases yellow ochre they are quite unobtrusive and blend in with the deck sufficiently to let them stay for the time being.

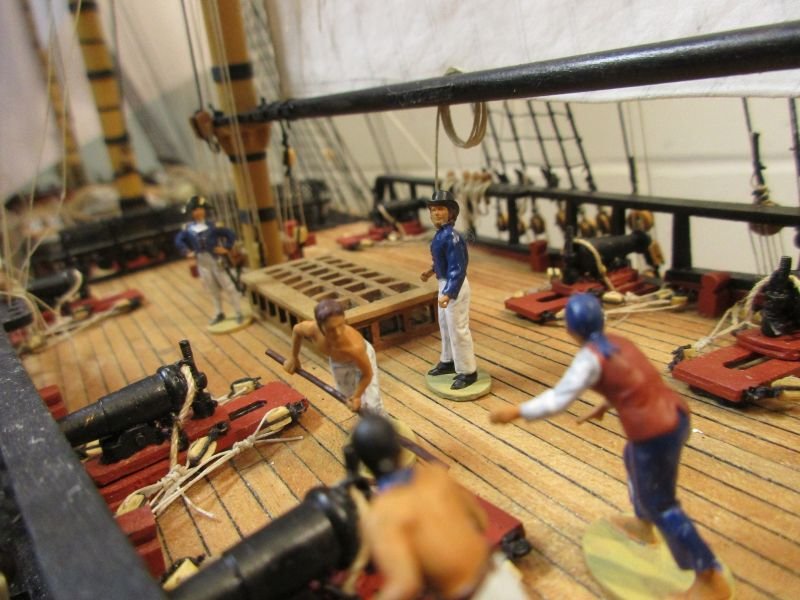
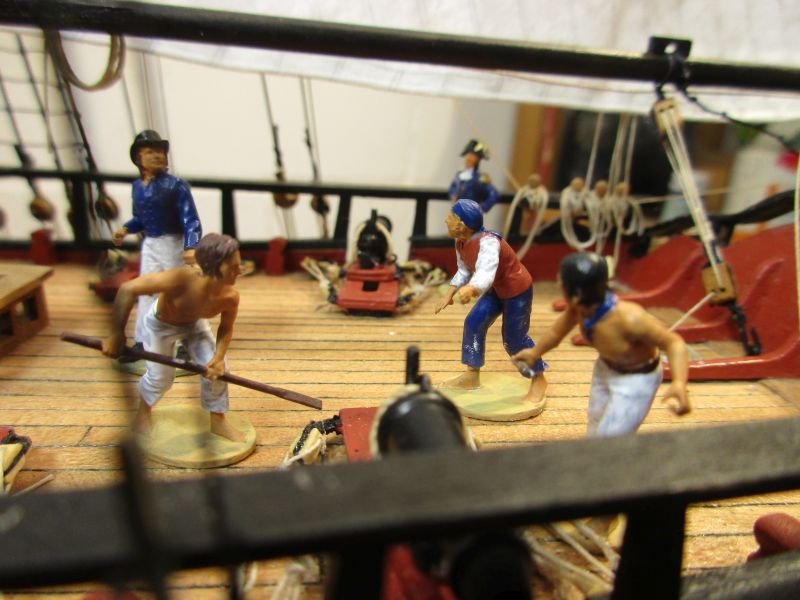
that seems a rather engaged discussion
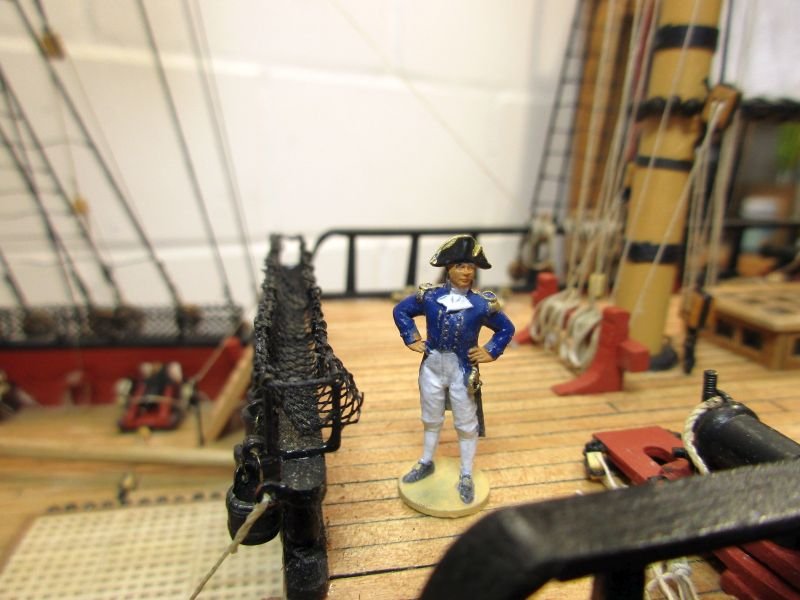
the skipper looks quite content with his new uniform
-
crossjack, mizzen topsail yard and sail
First thing was the making of the mizzen topsail. It is penciled and glued according to the kit's plan - a great help and a mark of the quality of the kit.
Setting up the crossjack was pretty straightforward. In order to create a more dynamic picture and to save space I braced the yard. Trying not to put too much pressure on shrouds and other standing rigging and to get a noticeable effect I settled for an angle of about 20°. Before fixing the running rigging accordingly, I put up the topsail yard as well to check the feasibility of the whole arrangement.
A few forgotten blocks on the yards were easily added. Another problem was the block for the topsail yard lift which suddenly appeared on the plan for rigging stage 5. It must be spliced between the first two shrouds of the mizzen topmast and should better be included, when setting up those shrouds.
As always I didn't use separately made rope coils but did make coils with the actual ends of the threads. It's a bit tedious and looks less uniform and tidy - in my eyes more naturally (Bellerophon isn't actually ready for an admirals inspection but just in an everyday state). Those coils are fixed with diluted glue. An additional benefit - which I was already glad to have several times - is the possibility to soften the coil with water and reset a rope with some additional length available.
.jpg.2d22e32879d041852c8dddfea1deaabc.jpg)
sail in the making
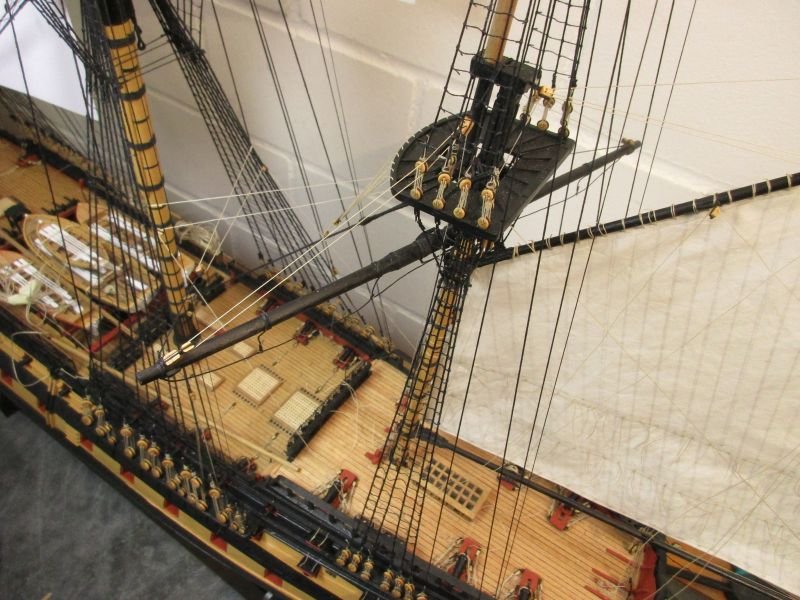
crossjack in place
block for topsail yard lift wedged between the shrouds
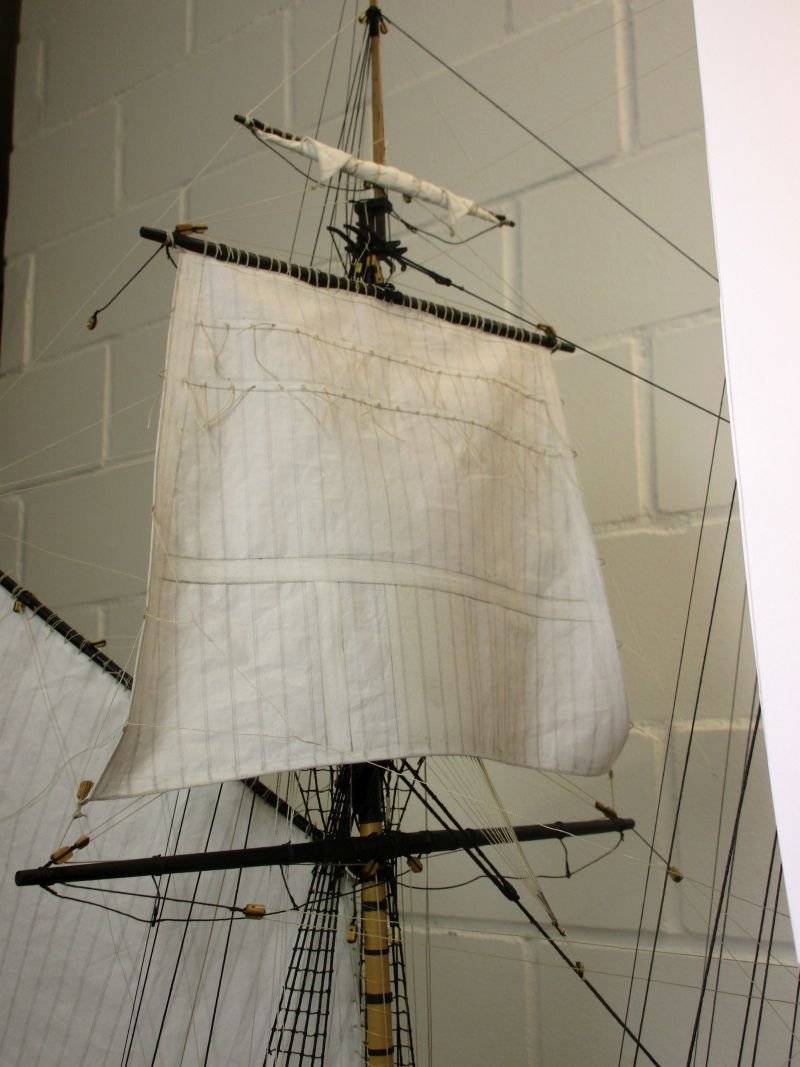
mizzen topsail set
the pin rails are filling up
the mizzen top - one of Stephen Maturins favorite places
the sails begin to draw
- Meriadoc Brandybuck, Techtonic, AON and 6 others
-
9
-
As far as I know you should clean the surfaces with solvent also before using a primer. The primer itself doesn't remove grease but just smoothens the surface and provides better bonding for the paint.
And you'll have to find out which of your pictures are actually inverted. Because I heard that generally everything is upside down in down under!!??
🙃
-
Hi Chestcutter
Your build is coming along nicely.
About how to build the stove: I did the same as you and painted after assembling. As I have no airbrush I used just brushes - I prefer anyhow the slightly imperfect finish I get that way as I like a 'handmade look' on the finished model. Just keep in mind to clean the brass parts with some solvent to get rid of any greasy residue before painting. Anyhow, it's a pity the stove is hardly visible on the finished model.
Cheerio
Peter
Oh, and by the way: I get slightly airsick looking at your upside-down pictures. 😉
-
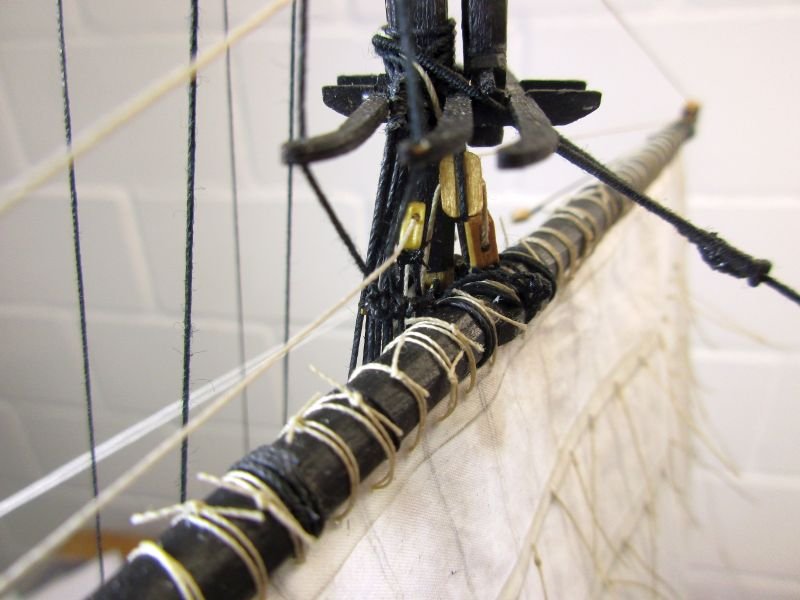
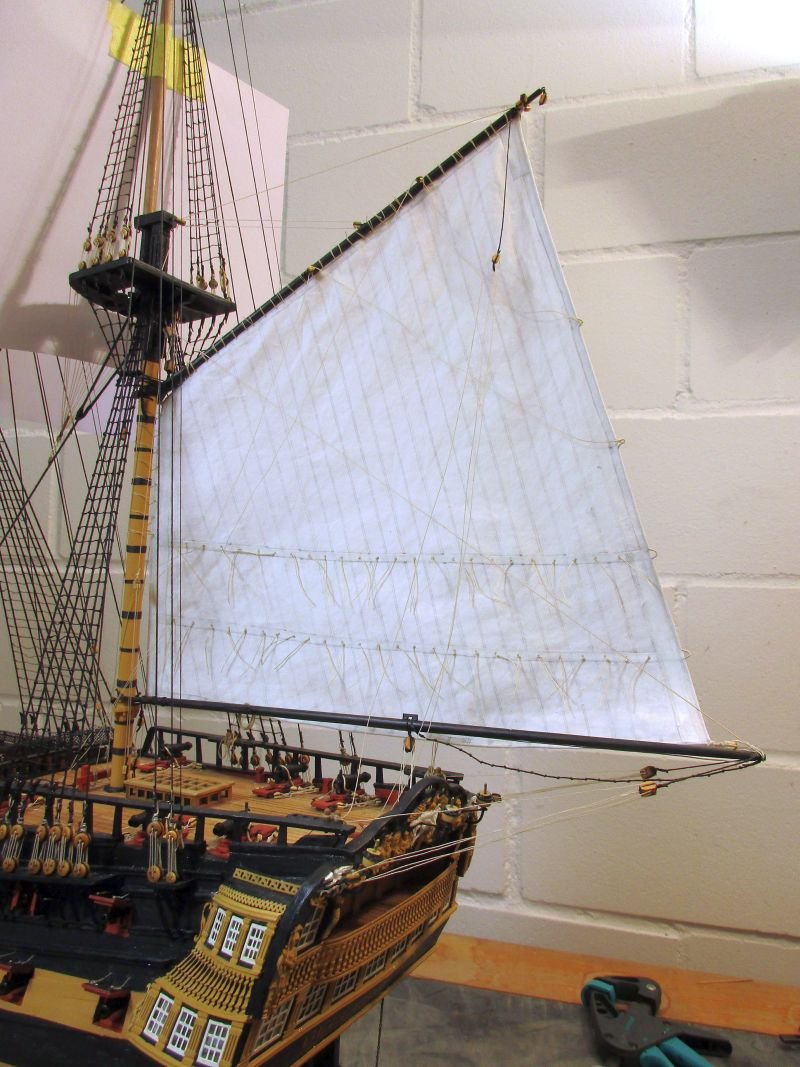
spanker
The spanker was laced to the gaff and the mast.
The finished model should depict a situation where light winds from the aft port quarter just ceased for a moment (I don't want to show the sails swelled up because I consider this rather difficult and additionally would mean Bellona couldn't be on an even keel). So gaff and boom are swung to starboard but the sail as well as parts of the rigging are hanging limp.
While belaying the various lines I found that although the belaying pins look a bit plump, the holes for them are still too large and the pins have a tendency to jump out and get lost. On former builds I could push them into the holes with a little force and they were just jammed tight. Diluted glue was necessary here to keep the pins in.
spanker set
sail laced to gaff and mast
spanker viewed from port and starboard
- bruce d, Beef Wellington, AON and 4 others
-
7
-
-
It's natural cotton found at a local fabric store. After explaining what I was looking for, the owner helped to search the finest, nearly unbleached natural cotton. After washing it was still a little whiter than the kits fabric. It is less transparent but much denser woven - a valuable find.
For this build I omitted the staining of the cotton with a mixture of black and sage teas. But pencil grit from marking the seams smudged the finished sail nicely.
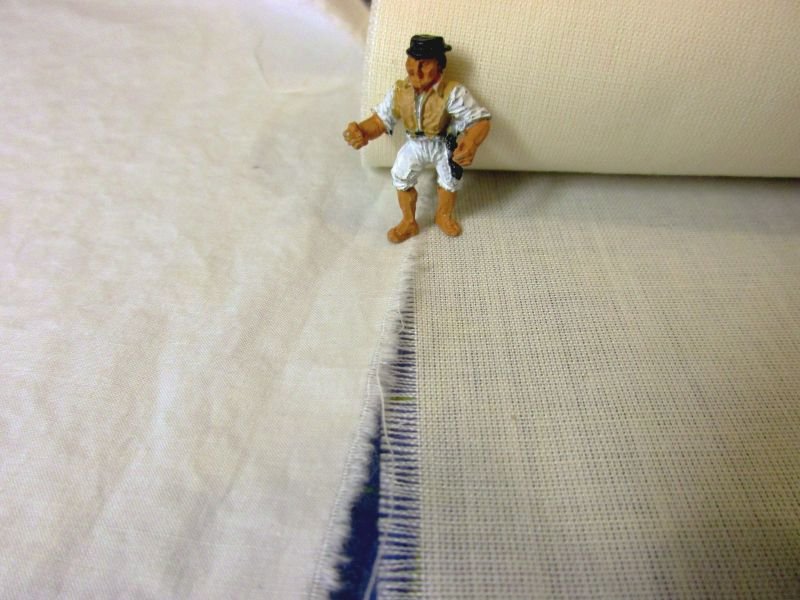
my cotton on the left and what was in the kit on the right
- mort stoll, allanyed and Techtonic
-
2
-
1
-
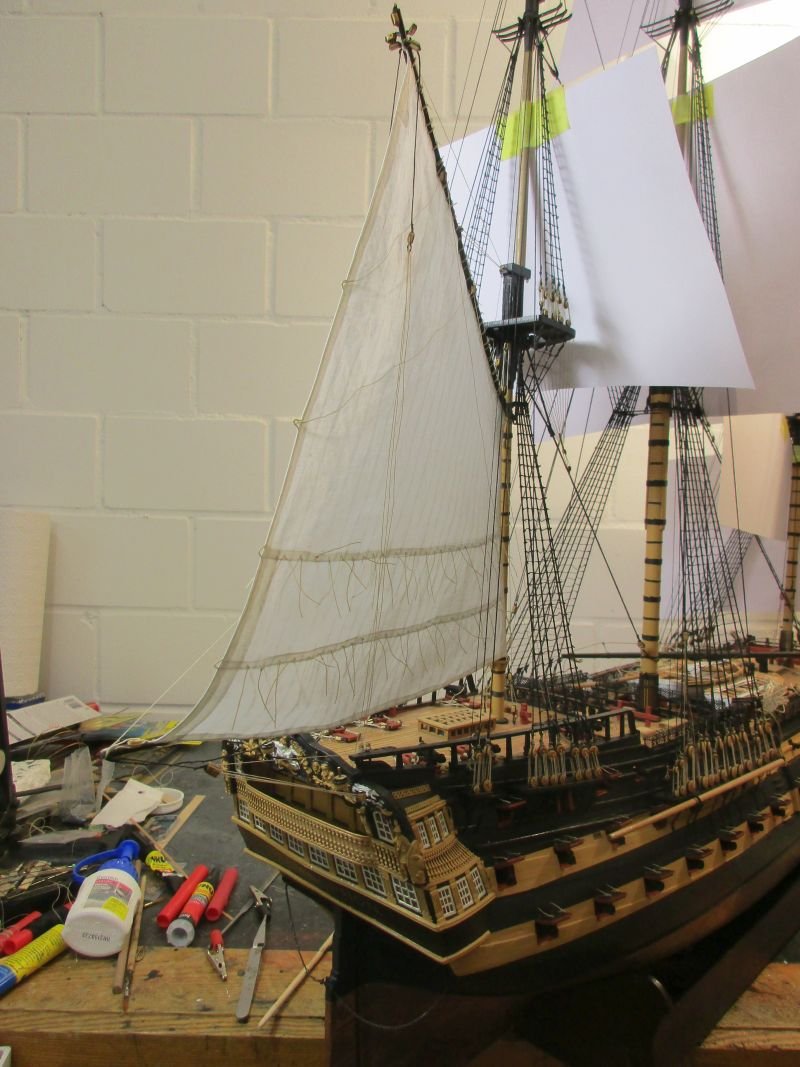
sails
The first sail I made was the spanker. I found really light and yet dense cotton which has a natural, light yellow color after washing. So I decided to make cotton sails the same way I did for the last builds.
The seams of the cloths are just penciled on with a medium soft pencil.
The bolt rope is laid into the hems with cringles formed by leading the boltrope in a short bow outside of them. Clews are small loops of the bolt rope at the corners. The hems are glued with a textile glue which is fixed with a heated flat iron.
Reef bands and linings are also glued onto the sail. Holes were prepared for reef points and lacing the sail to yards, gaff or mast. Finally reef points were put in.
While setting up gaff, boom and spanker I found it preferable to attach the stern lanterns - at least provisionally - to avoid them conflicting the boom or any rigging.
They were soft soldered. From some thin cellophane I cut 'glass' for the windows. However this is hardly worthwhile as the 'glass' is only barely risible.
sail maker at work
spanker hanging on main topmast stay - just to check its appearance
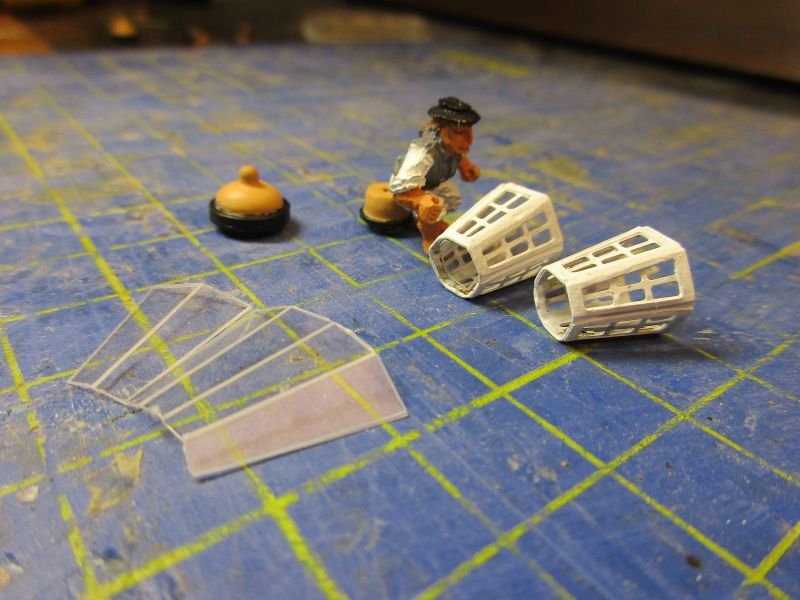
lantern parts
lantern substructure before soldering
ready to put up the lantern...
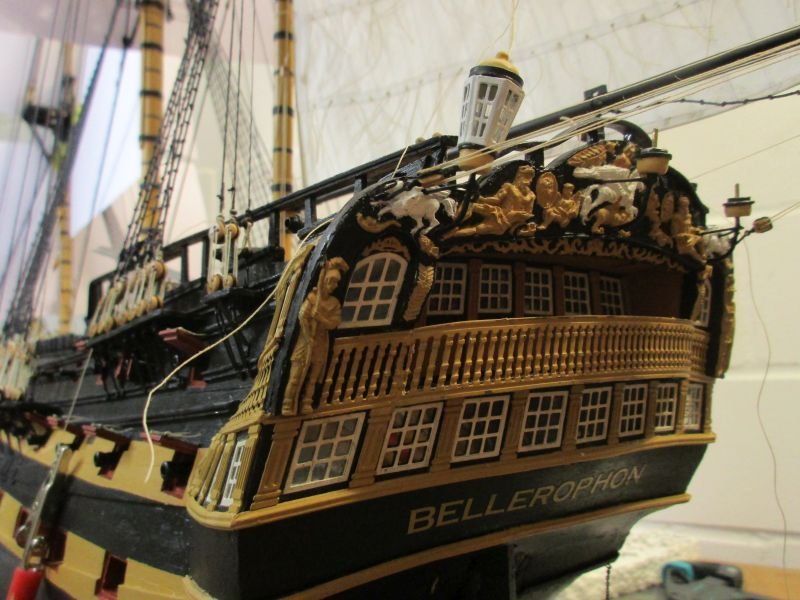
...and provisionally installed
-
Techtonic, your transom really will look good. Well done!
The ship is coming along nicely too - it's a pity I can't find your build log.
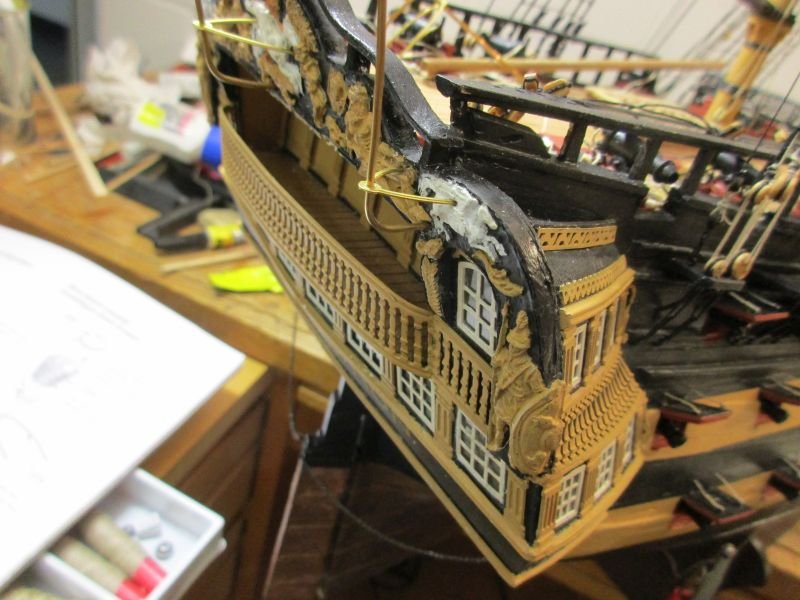
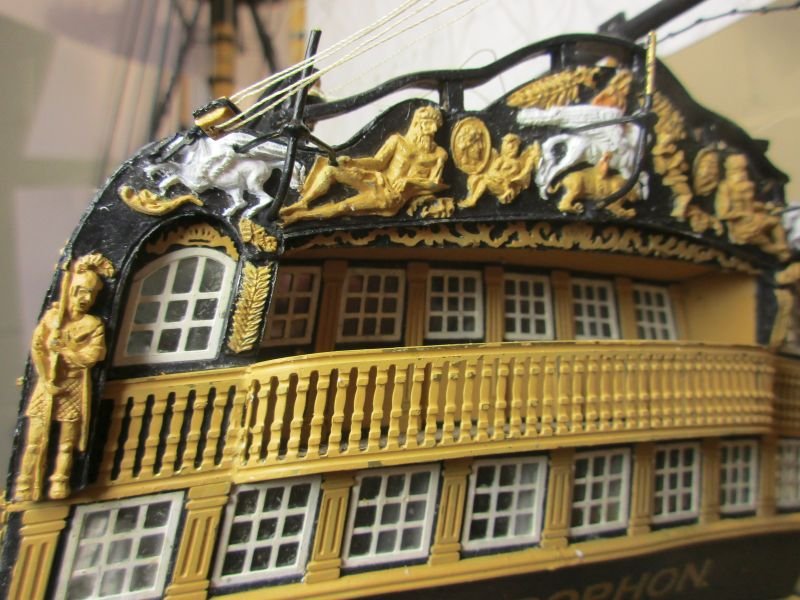
As some food for thought I have a picture showing our hero's left side. It doesn't look bad and with all the rigging also being prominent in view, I think you need not to base your decision about which variant to build on that view of the figurehead alone. And resting places may change...
-
Hi Techtonic
Thanks for that great video. There was quite a lot of information in it and hearing the correct pronunciation of many things was an additional bonus.
Did you already decide which variant you will build?
Hi Ian
Your sails look good!
Me, I'm currently setting up the spanker and should have some pictures in a few days.
Cheers
Peter
-
Hi Harlequin
Your Unicorn will join a nice squadron. I believe Bellona is in the background but what ship is in front of her?
And BTW I hope you did enjoy your Havana at the finish of the race. Here, the market for Cuban cigars is almost dry. Bad harvest and Chinese buying the rest at fantasy prices is the official reason. Prices for Cohibas and TTT increased threefold within the last few months. Fortunately Partagas prices increased only 10% - perhaps because the cigar band is only red and not that nice looking yellow and gold of the others...
Why don't they pirate Cuban cigars for their home market (dried Chinese cabbage and nice copied cigar bands) and leave the genuine article for those who really like it? Sorry!
Cheers
Peter
-
Thank you all for the great feedback and all the likes.
First of all I must apologize for the wrongly set spanker. I had it reversed and with the upper side (stay) against the mast. Put up correctly it is placed a bit lower and with the lower side more horizontal. But the distribution of the sails is about the same and thus the overall impression.
I appreciate the inputs with the printed tissue / alu-foil flag and did check how Chuck does it.
So far I used self painted flags, made from the same thin cotton I used for the sails, and I think I quite tolerably got the hang of hanging them. So I stay with that procedure but I could anyhow try to print them.
As for sail material - I checked MSW for silkspan sails and the making of them and admire how they look. But I still hesitate to try that rather complicated process. On the other hand I found some cotton fabric which is lighter than what I used for Pickle and America and has an even higher thread count. After the initial washing it is half transparent and has a colour of light eggshell or ivory which does away with the necessity of additional dying. I believe I even could attempt brailed up sails with that stuff.
A first try with the spanker will tell.
The sails and yards on that Gardner painting are arranged in a way which seems to indicate that they came in with a following wind with yards squared and spanker brailed in (it wouldn't draw with a wind from dead astern) and now they seem to stop the ship by taking in more sails and then probably backing some.
However I want to brace the yards to reduce the space used by the model and to create a dynamic impression. But then you would be on a course with a more quartering wind and the spanker would draw and should be used - probably also to balance the jib. The one topgallant sail I would like to set fully because it would emphasize the enormous height of the whole sailing machine. Hence the proposed changes to Gardener's painting.
Again thanks
Peter
-
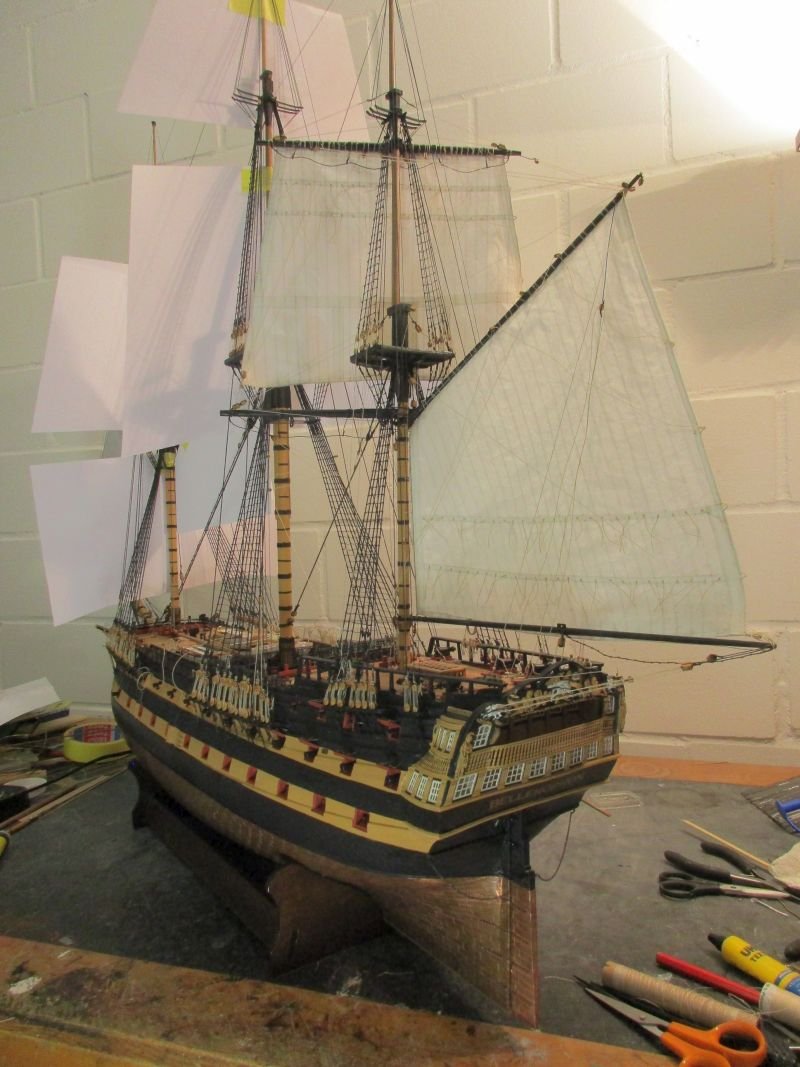
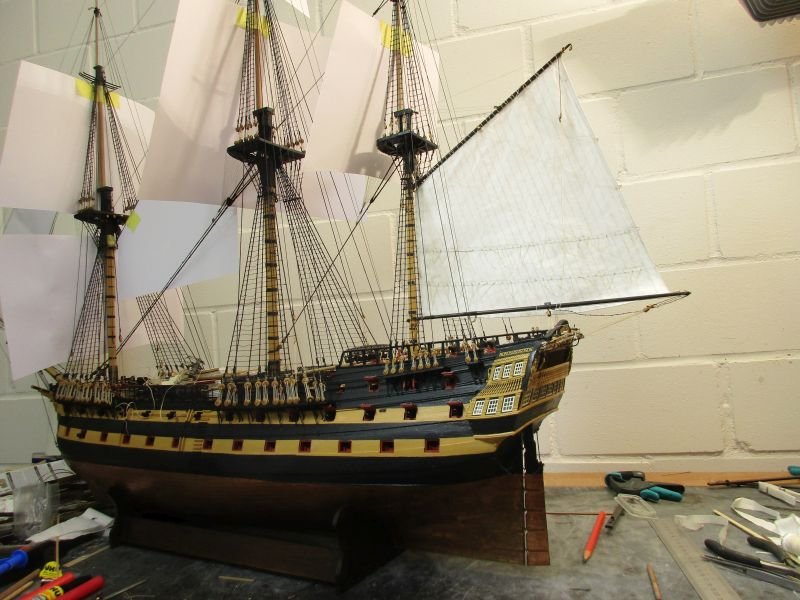
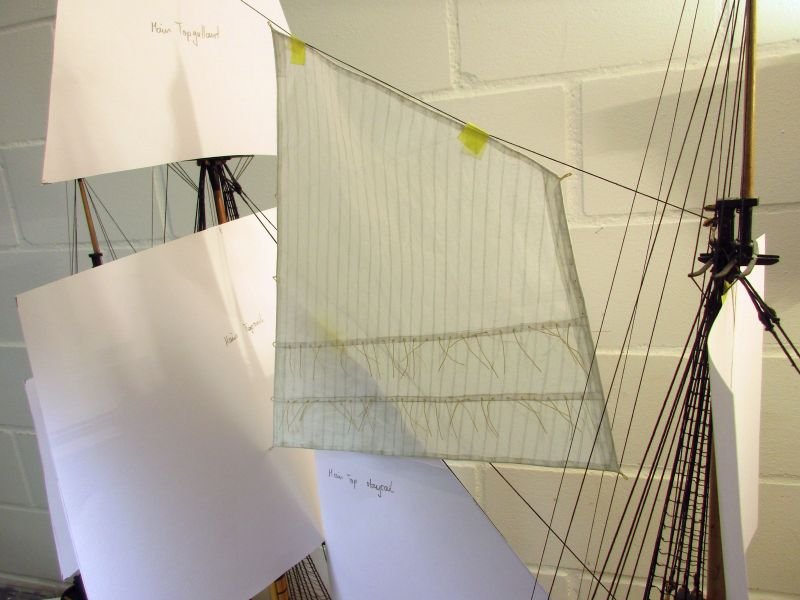
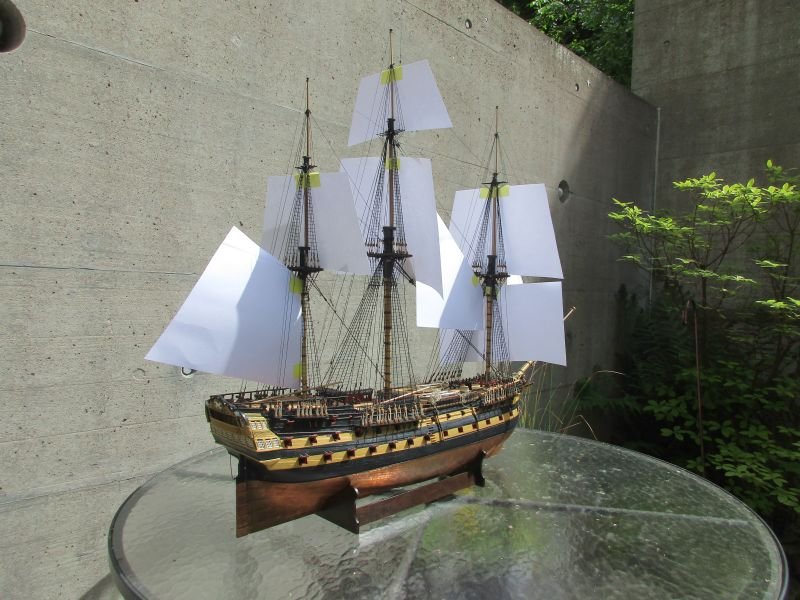
sail plan
Browsing through my books and the net I was looking for inspirations in form of paintings of a three masted ship with not too much sails set.
One painting which did catch my eye - for obvious reasons - was Derek Gardner's 'Bellerophon at Plymouth'. I noted that Gardner did several paintings of different ships with a similar perspective and sail arrangement. As he did serve in the royal navy - albeit more than 100 years too late - he should have his sails right.
I guess Gardner's Bellerophon could have sailed in with a wind from her aft port quarter. Perhaps a short while before she still had her main topgallant and fore course fully set and also did use her mizzen course.
Taking this as a possible scenario, I could set course and topsail on the mizzen, topsail and topgallant on the main, fore course and topsail and jib sail. On that painting she also carries her main top staysail. To decide if this would suit, I will check with dummy paper sails. Main course as well as mizzen and fore topgallants would be furled on the yards while spritsail and sprit topsail yard would be bare. This means 5 square sails, spanker, jib and 1 staysail - a total of 8 sails set and 3 square sails furled. The fore topmast staysail should most probably also be furled on the bowsprit.
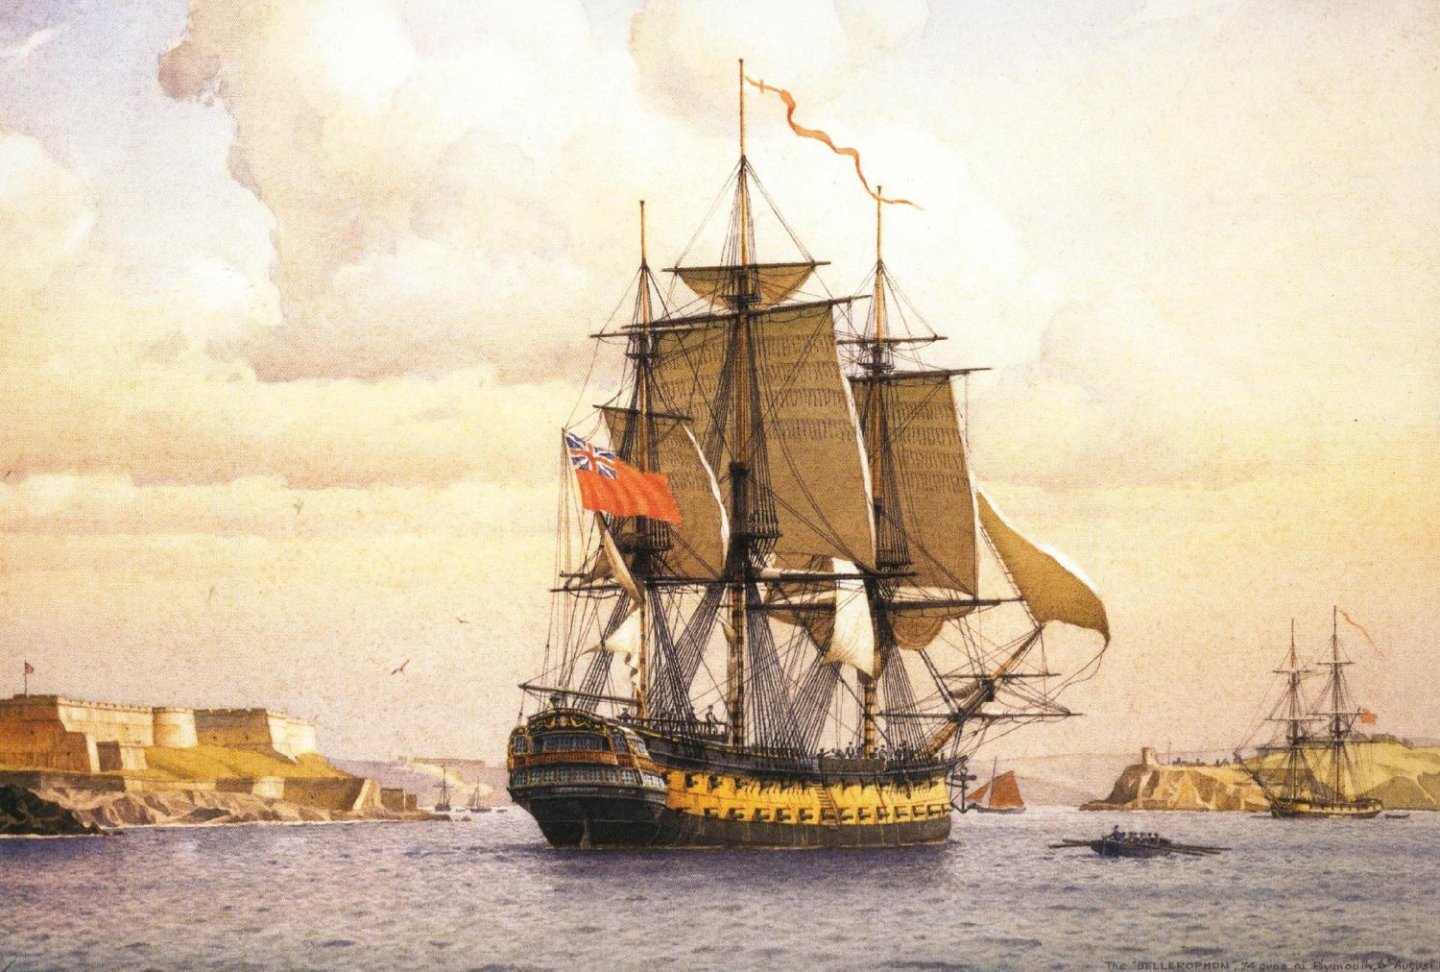
Bellerophon at Plymouth by Derek G. M. Gardner
To check the look of the arrangement I did then cut paper sails. After attaching them to masts and stays I came to the following conclusions:
- Checking a sail plan with simple paper sails is definitely worth the effort.
- All the kit's sail plans must be rechecked with actual masts and yards.
- The main top staysail looks good and helps to create a balanced look.
- The chosen sail plan looks quite business-like and still leaves an unobstructed view onto the decks.
- It guess it will look fine with those sails set and the others furled. I will omit to attempt clewed up sails.
- Whether the jib or the fore topmast staysail will be set is still undecided - that's for later.
- The jib has an odd size. Although it matches that in the book 'Bellona' in the AOTS series it is completely different from one constructed according to information from Lees. If I set the jib it will have the corrected form.
- It would be nice if the making of the definite sails would be as fast and easy as the paper sails were.
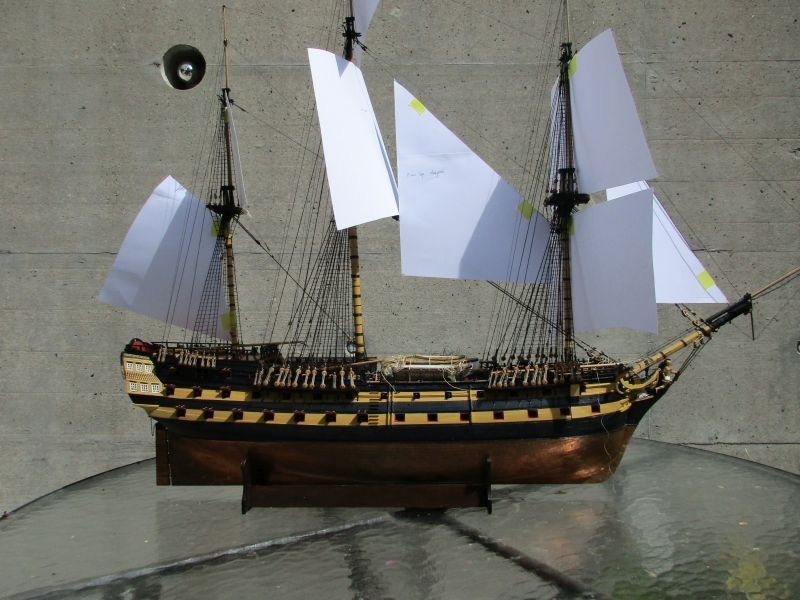
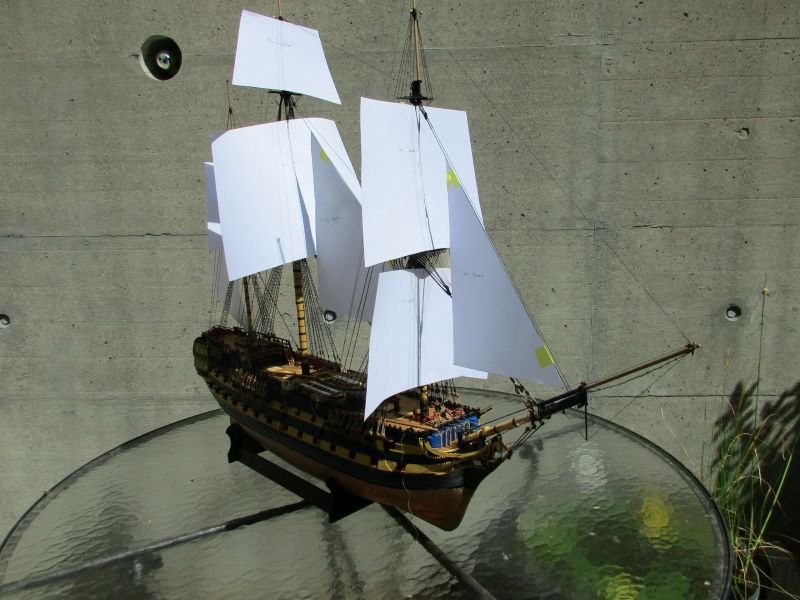
with fore topmast staysail
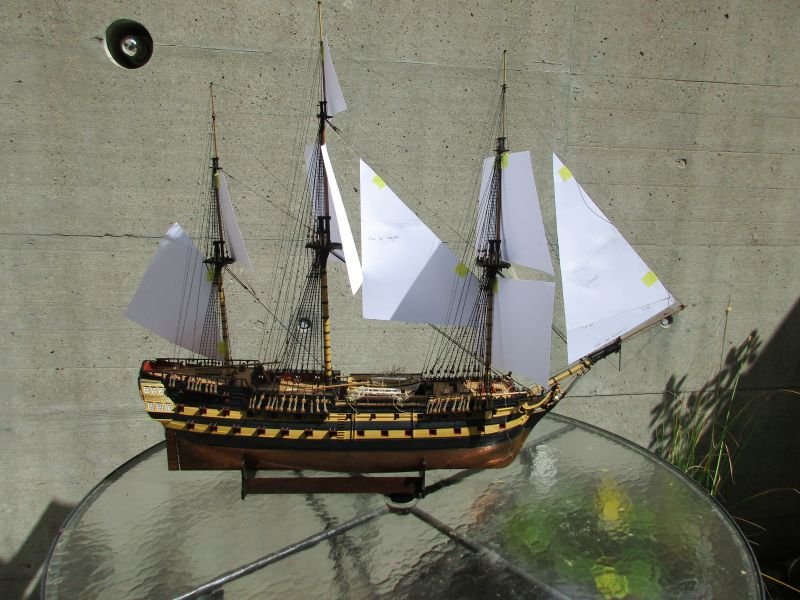
jib according to kit's plans - a clear no go
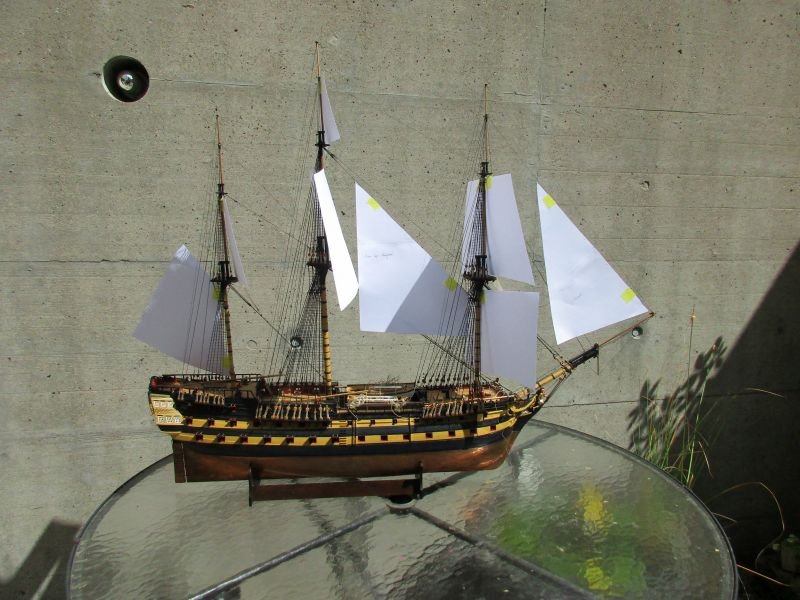
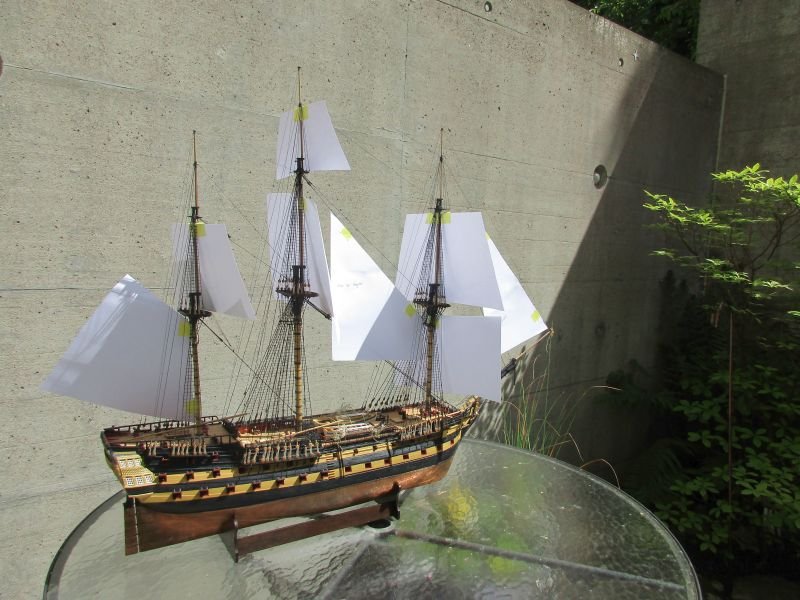
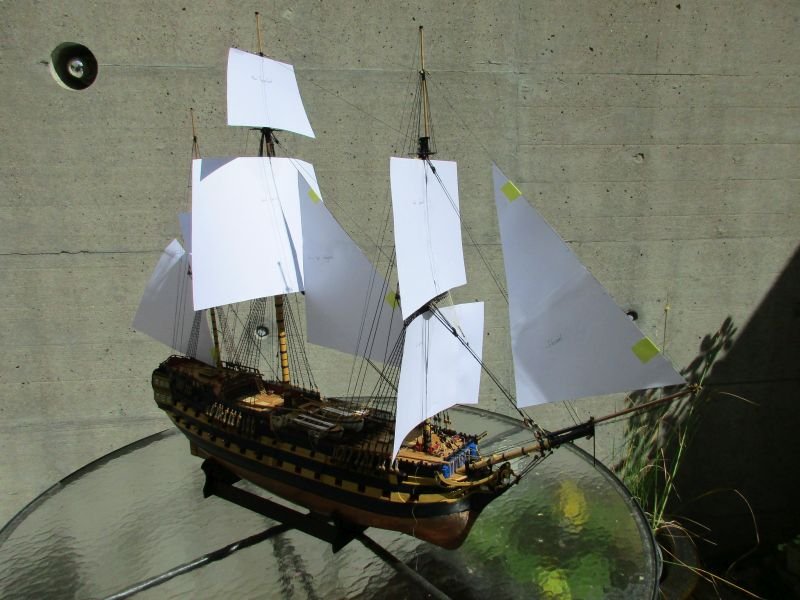
with jib according to Lees
- BenD, mort stoll, AON and 2 others
-
5
-
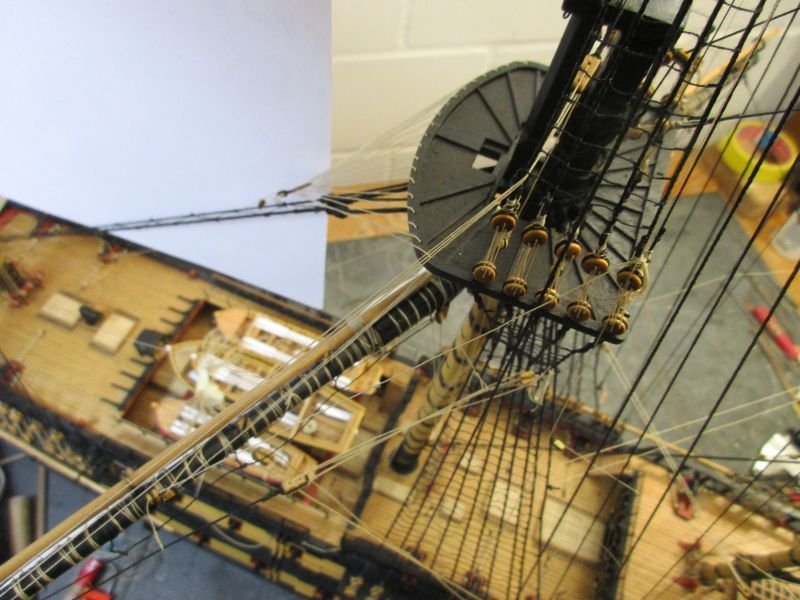
royal stays
After finishing the topgallant stays, I started to rig royal stays on all 3 masts. To find out how, I mainly used information of Lees. The diameter of all stays is 0,25mm, half of that of the topgallant stays.
The backstays are spliced around the mast tops and their lower ends are set up to eyebolts close to the lower deadeyes of the respective topgallant backstays, fixed with thimbles and a lanyard and hooked to the eyebolt.
The fore royal stay is spliced around the masthead and the bowsprit while main and mizzen lower ends are fixed at the aft most fore topmast crosstree respective in the main top.
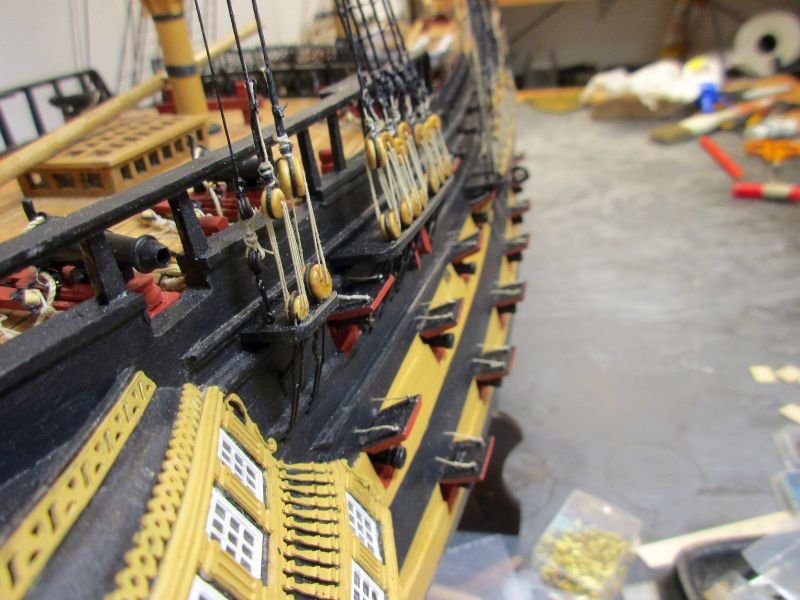
Meanwhile I also started to arm the lower deck with the dummy gun barrels and glued the port lids in place.
The standing rigging is now finished and it's about time to decide what sails she should carry and in which way.
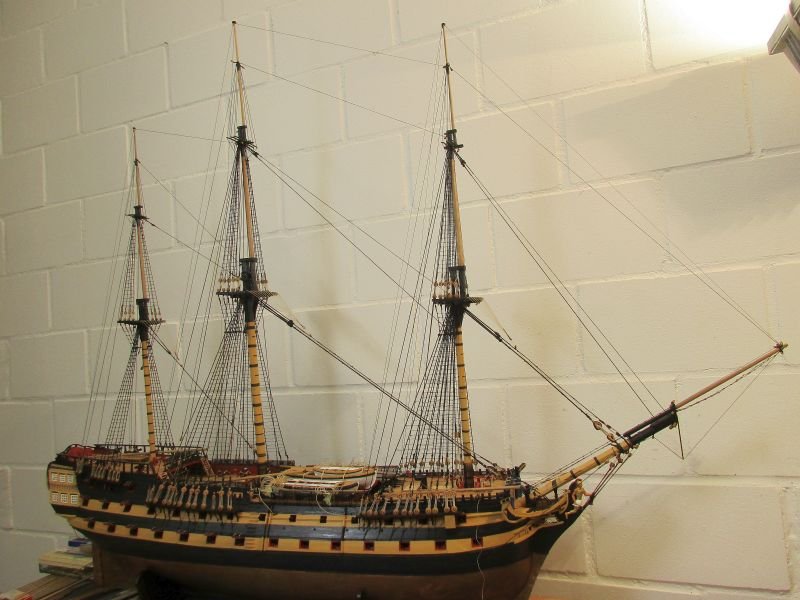
finished standing rigging with royal stays
mizzen royal backstay inside of the topgallant backstay
fore royal backstay
main top with mizzen topgallant stay fixed with thimbles and lanyard to the collar of the main stay and mizzen royal stay, to the left of it, fixed with thimbles and lanyard and hooked to an eyebolt

fore topmast head with main royal stay made fast to the crosstree with thimbles and lanyard
the first guns appeared on the lower deck
- ccoyle, Meriadoc Brandybuck, AON and 5 others
-
8
-
mizzen topgallant stay 2.0
After deciding to set up royal stays, I tried to figure how.
First I glued two small cleats on the sides of each royal mast, just below the caps. This is according to an information in Darcy Lever's Young Sea Officers Sheet Anchor. I recently acquired a copy and found that book full of useful information.
Then I turned to Lees to see how the lower ends of the stays would be set up. While checking the run of the mizzen royal stay I noticed that it's topgallant stay changed several times the way it was run. The kit's plans showed a topgallant stay before royal stays were put onto the mizzen - before ca. 1810.
So I reset it and led it from the mast top through a block below the cap of the main mast and fixed its end to the collar of the main stay with thimbles and a lanyard.
topgallant mizzen stay 1.0
...2.0
lower end in the main top
-
What has become of our generation!
Today it's covid, drugs and no rock'n roll.
Get well soon!
Peter
- thibaultron, BranPie, chris watton and 10 others
-
2
-
 11
11


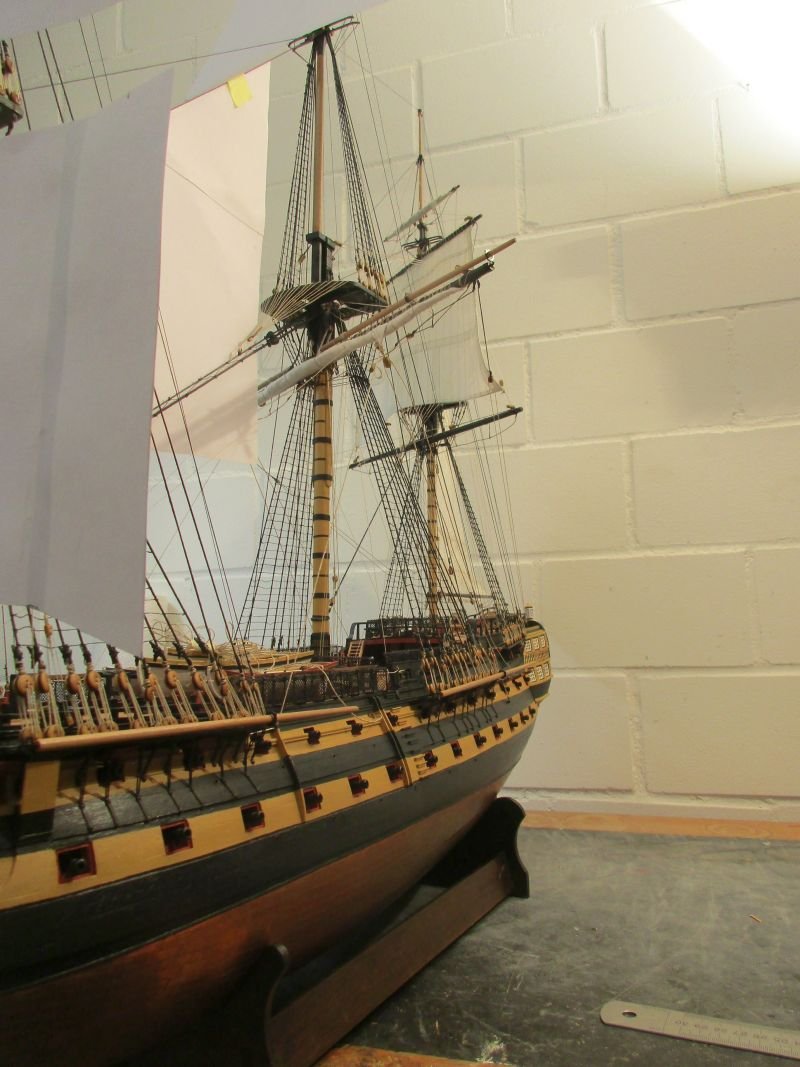
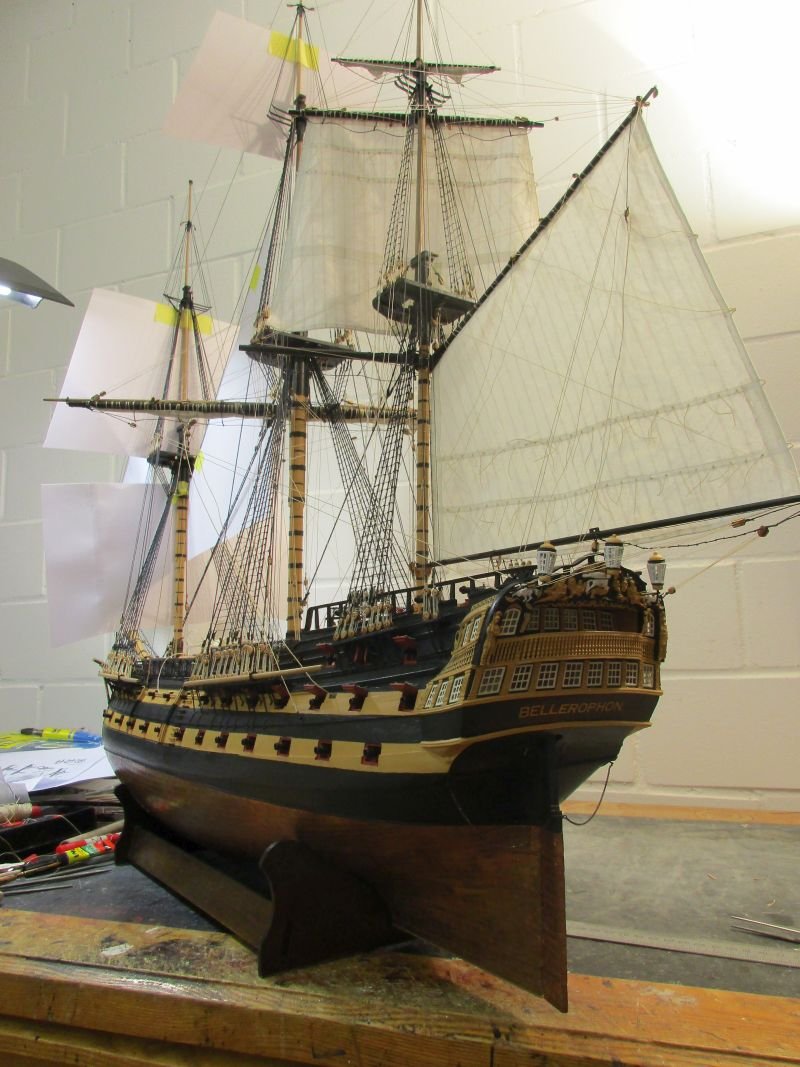
HMS Bellerophon by flyer - FINISHED - Amati/Victory Models - scale 1:72
in - Kit build logs for subjects built from 1751 - 1800
Posted
Meriadoc and Alan,
Yes, landlubber me was confusing some nautical terms - once again I feel a certain kinship with Stephen Maturin.
Meriadoc, what I meant was sling. The log is now corrected.
Alan, you are right, of course, about the tie. On Bellerophon however I think I installed jeers. As I understand James Lees they complemented and finally replaced the ties in the 17th century.
Thank you very much and Happy Holidays!
Peter