


Mike Y
-
Posts
1,437 -
Joined
-
Last visited
Content Type
Profiles
Forums
Gallery
Events
Posts posted by Mike Y
-
-
Sanding would never leave a perfectly flat surface, no matter how straight your hand is. Milling is the best, but if using handtools only or if mating curved pieces - then shave off the curved center area with a blade or a knife. If one really want to make the joint disappear - you can scrape the middle with a curved tool, creating a tiny ”shallow zone” 😊
Good luck with these!
- druxey, dvm27, moreplovac and 1 other
-
 4
4
-
Very neat! Thanks for showing your milling setups, that is extremely useful and I am curiously examining every photo 😊
- mtaylor, cotrecerf and Keith Black
-
3
-
Your build looks beautiful and with clear quality standard!
Used a disk sander to shape frames, so it was never an issue since the disk always pushes the part down.
The concave parts are sanded on the edge of the disk, slow and careful.
When you got close to a line - then I guess you can smoothen it on a spindle sander. You don’t need to get too close, better leave some ”meat” for the fairing once the frames are in place.
- CiscoH, mtaylor and moreplovac
-
3
-
Would recommend to look into decent household vaccuums with some "silent" keywords in the name. I have a Bosch ProSilence (this one or similar https://www.bosch-home.com/ne/en/mkt-product/vacuum-cleaners/canister-vacuum-cleaners-bagged/BGLS42230), very quiet on lower speeds (that are more than sufficient), has a HEPA filter and does not take too much space. It even handles power planing well enough, so unless you do a full scale woodworking - it is more than adequate for the hobby needs. I have it for many years and it shows no sign of issues with wood dust.
It is so quiet that I run it at night when modelling in a living room while the family is sleeping in adjacent rooms. Just placing the hose close to the object that I'm sanding - a steady flow of air easily gets all the fine airborne particles, while the heavy ones just drop on the table, posing no risk to your lungs. No visible wood dust floats in the air, which makes it reassuring that the finer dust is sucked into the vac.
No sound boxes required. And they are not terribly expensive either (around 200 USD I guess). Not sure why everyone assumes you need a shop vac for our hobby, we are not grinding concrete and not sanding wood panels for hours every day. Despite a small-ish size, it takes a very long time to fill the vaccuum bag when woodworking, and the bags are cheap. Zero issues with clogging, leaking or anything. More than enough power when connecting to our tools.
- mtaylor, cotrecerf, Ryland Craze and 2 others
-
5
-
Not only it has incredible details, but it definitely has a charm and very well designed! Can easily imagine it as a movie set
") A pleasure to look at!
A pleasure to look at!
-
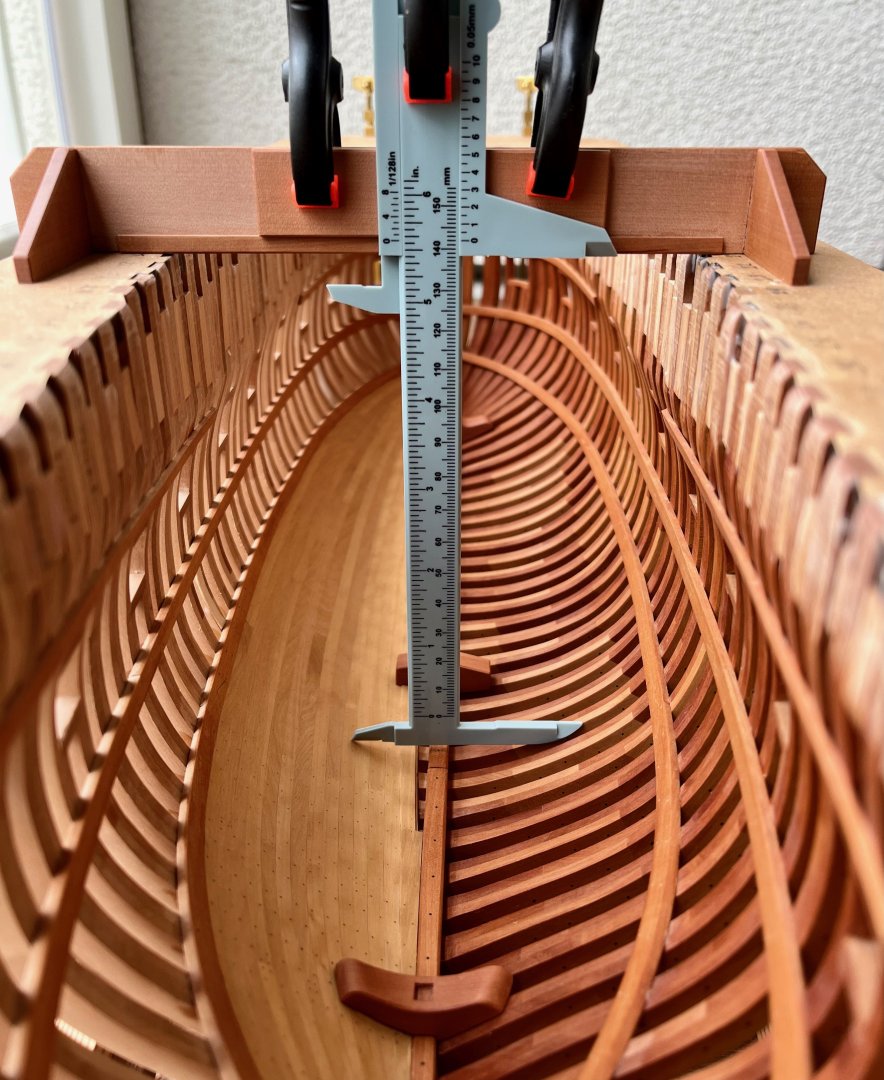
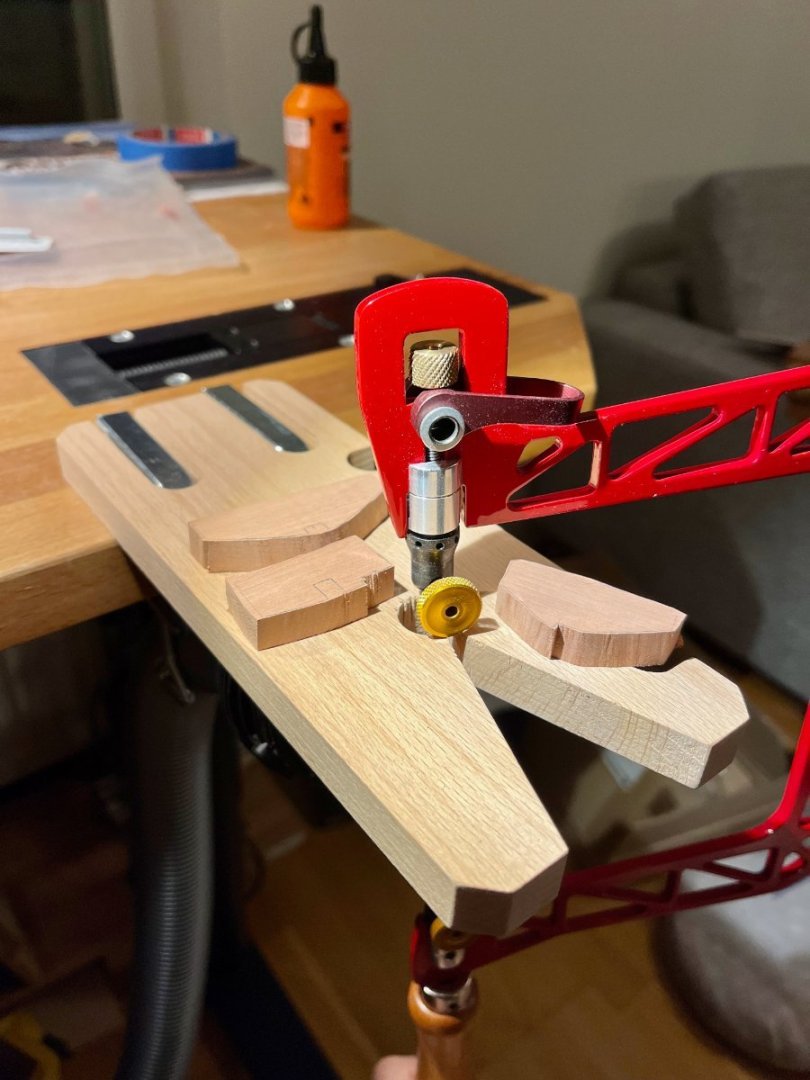
Now it's time to build magazines and all sorts of decks and beams. For that phase an accurate depth gauge is essential, so I've let my brain overthink yet another tool
The requirements are:
1) Soft plastic or wood to avoid scratching the model
2) Nice looking and pleasure to use, that tool would be in active service for at least a decade.
3) Ideally it should have a thumbwheel or a knob for fine adjustment.
I have a cheap plastic vernier calliper that satisfies the first requirement, but it does not have an knob / thumbwheel.
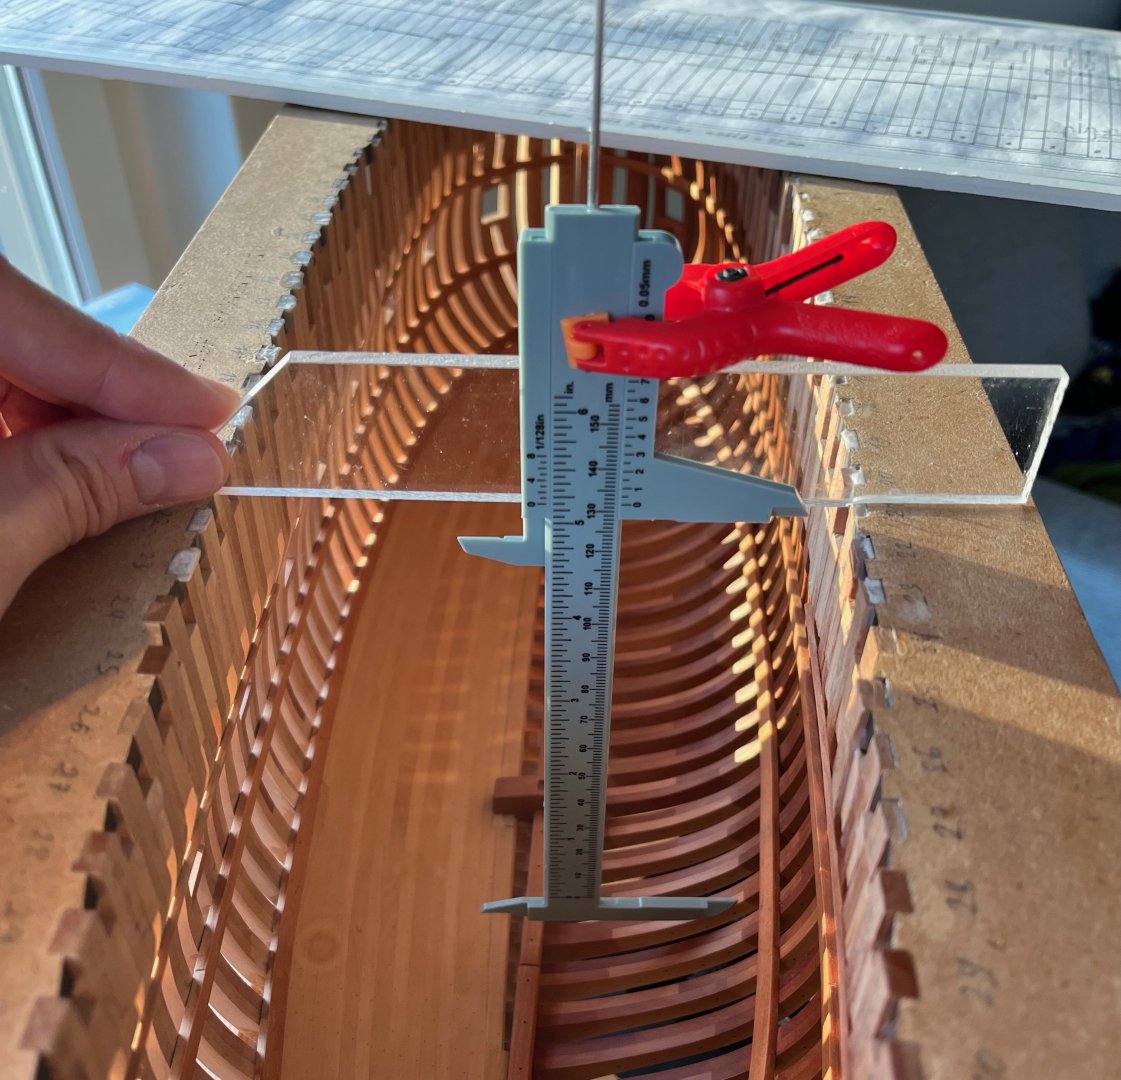
Could not find any plastic callipers with a knob, unfortunately. The plastic ones are already rare enough, let alone with a wheel adjuster.
Then I spotted a Lego set with a container loader ("reach stacker", to be more precise) that has a worm gear and tried to make an abomination out of it. It is surprisingly challenging to build a compact functional tool out of random lego parts, a whole puzzle of its own. Respect to people who do it on a regular basis!
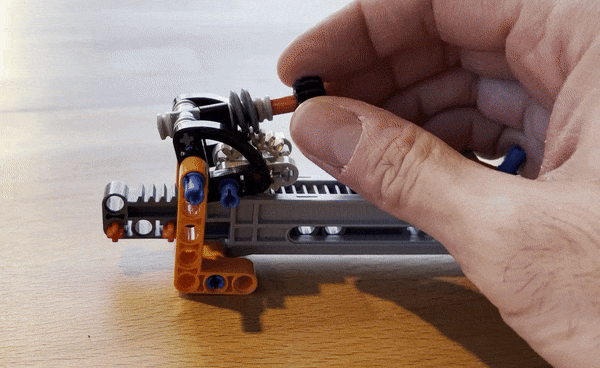
It kind of works, but the play and precision is not good enough for my needs.
So I gave up on the wheel adjuster requirement and went back to the simple "calliper on a gantry" setup.
It was a nice warmup to recover some skills that I've lost over years of inactivity.
This time I even got help from my little helper! She enjoyed cranking the mill
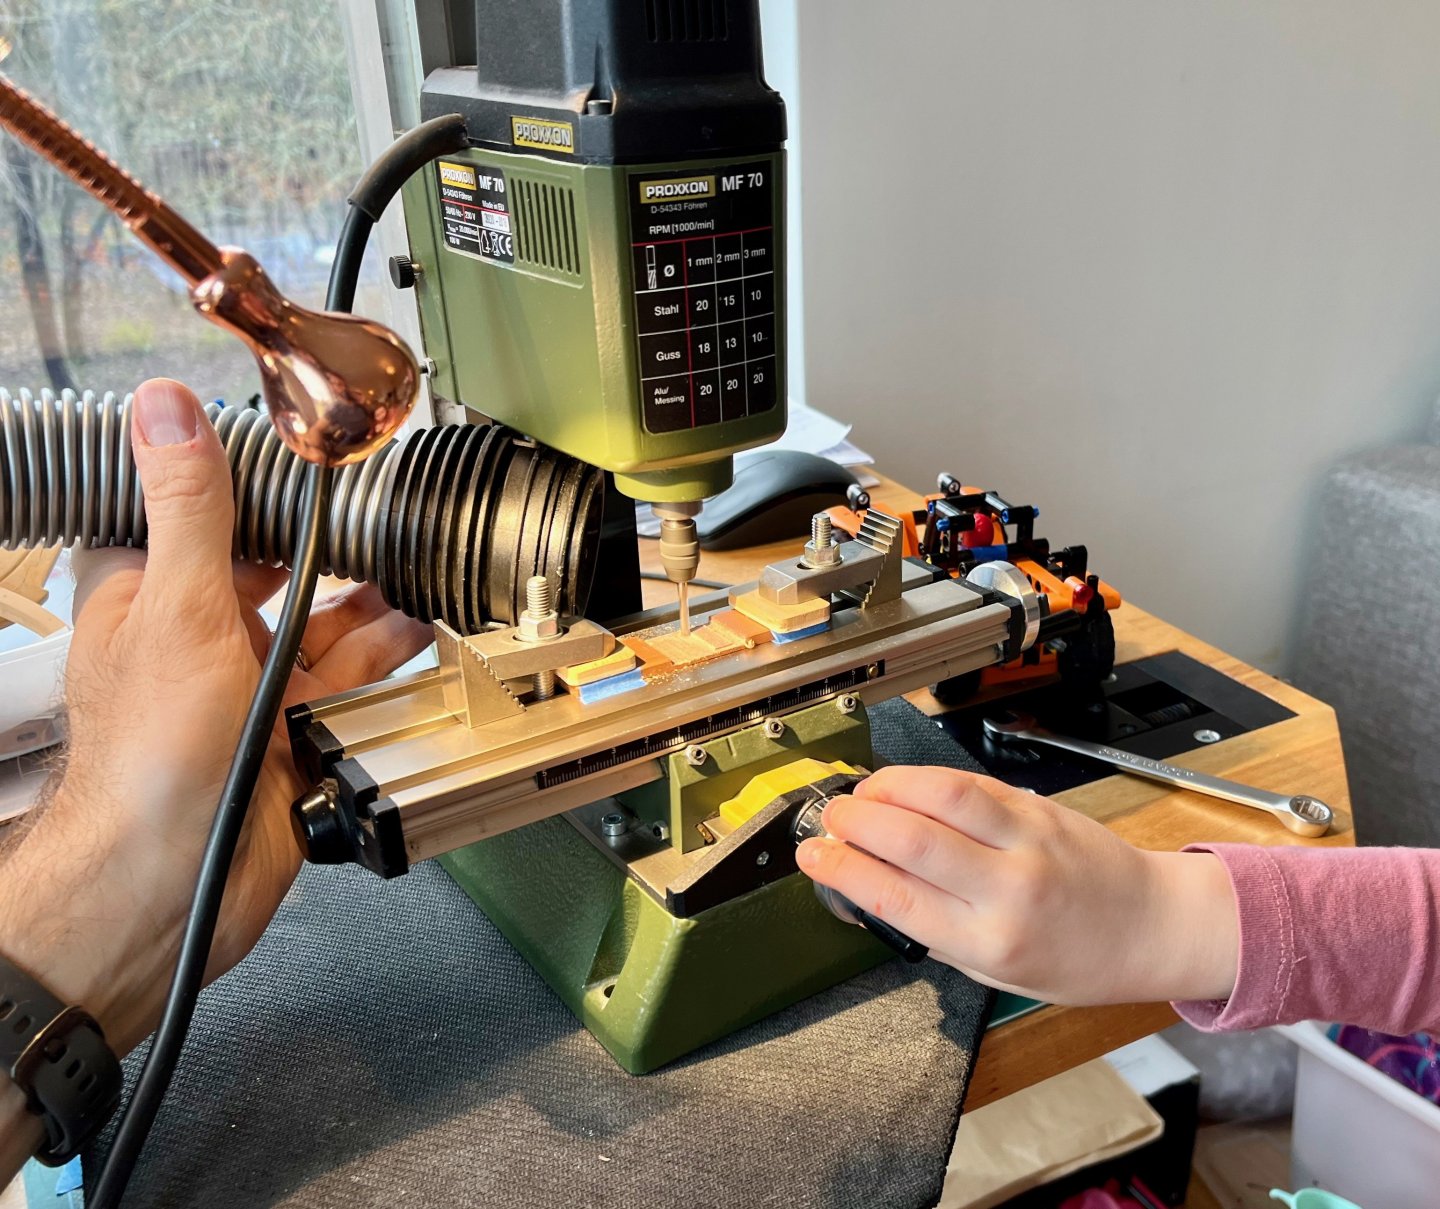
The resulting design has two parts - sliding gantry (no t-tracks, it is stable enough on its own) and a "calliper holder" that slides sideways on the gantry to allow the gantry keep contact with both sides of the baseboard.
The bottom edge of the caliper is trimmed to a flatter profile to avoid hitting the keelson. Both ends of the calliper can be used for a markup to allow for a comfortable pencil positioning.
The setup relies on three clamps to fix everything in position. These plastic clamps are a bit of an eyesore, maybe I will sidetrack again to build a nicer ones


-
New build from Tiziano! You don’t see that every day 😊 Quite excited!
- mtaylor, Keith Black, druxey and 1 other
-
4
-
Hi Michel,
No, your model is quite awesome! You should really start the log and post more. There is always some other log that looks better, that is not an excuse
And we all are masters of finding flaws in our models, so it's never perfect...
Have you built yours out of the Lumberyard "timbering package" or entirely from scratch (plans only)? Haven't seen any Lumberyard based build logs, frankly... Would be very interesting to see!
The scrolls under your quarter gallery look laser cut, so that's why I thought about a package
- VonHoldinghausen, mtaylor, Gregory and 1 other
-
4
-
Curieux, so nice to see another Beaver's Prize build! Hope you can start a build log and share your progress (even retroactively, it is interesting to follow the old build steps even if it you are much further into the build by now).
I see you are building the pre-modification version?
Yes, Hahn frame is a styling choice and does not follow the real practice, so both of our cant frames are incorrect
We can refer to the same period Swan class that is greatly documented in the TFFM book series to see the proper practice.
Would like to see more photos, hopefully not only the finished model. Really like your unpainted railings, but hard to see anything else from this angle.
-
Välkommen! 😊
- Keith Black, Nirvana, mtaylor and 2 others
-
5
-
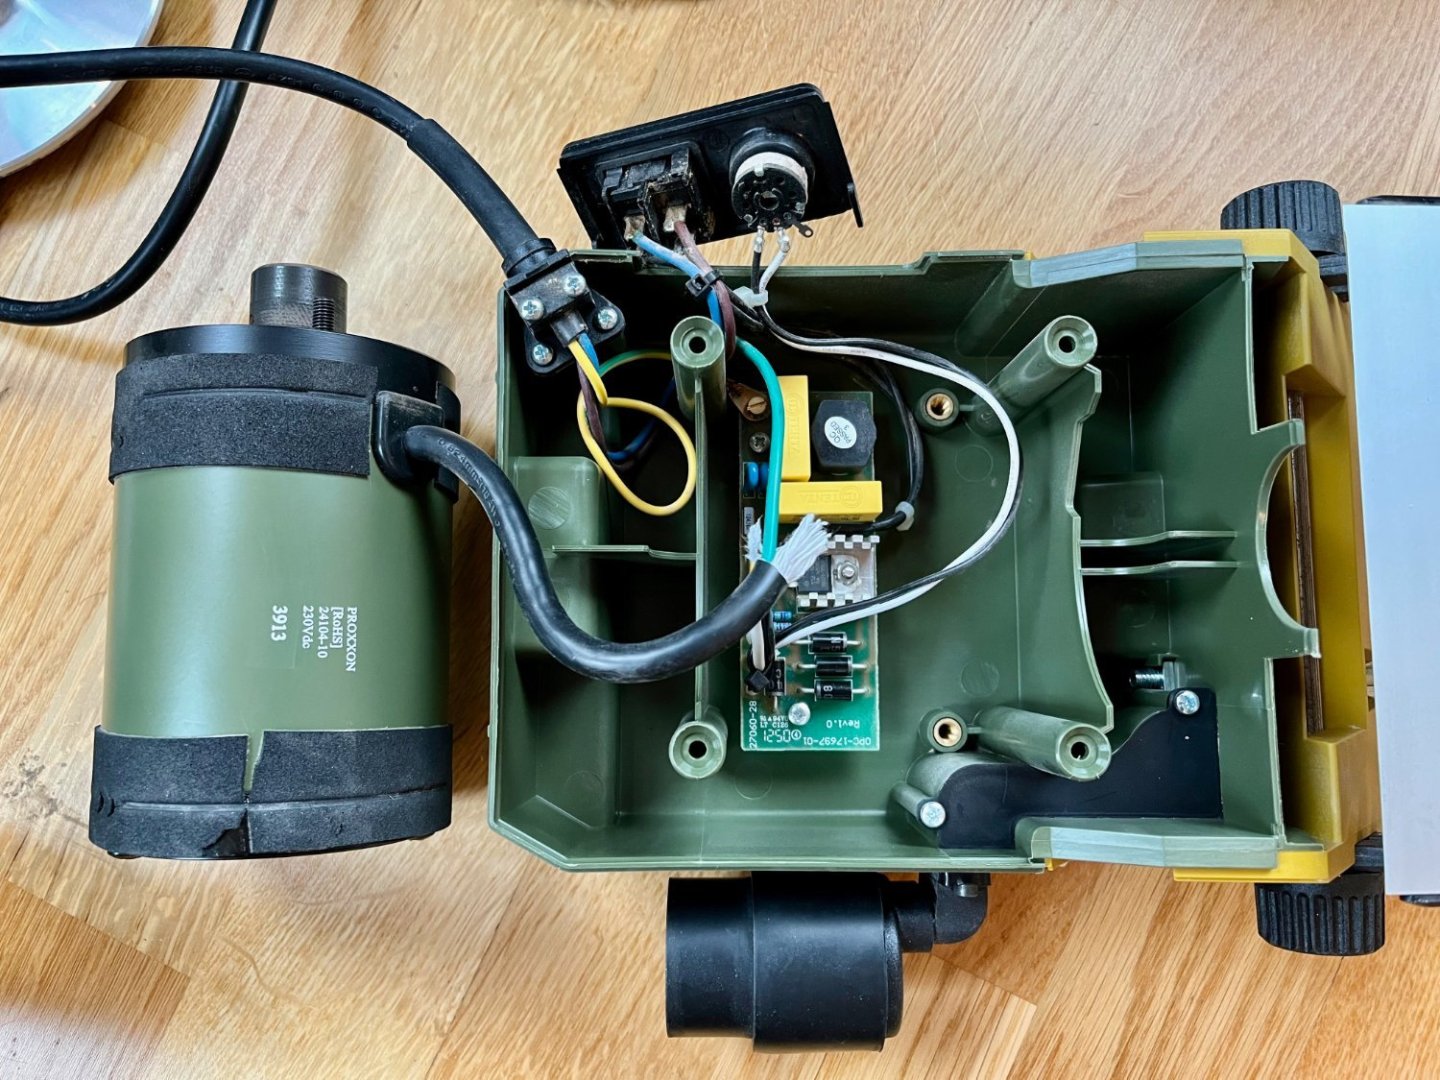
Very interesting mod!
Have you considered decoupling the screen from the rest of the measurement device? Since you have pretty much disassembled it anyway, and I assume the screen is just attached with some connector and can be soldered with a longer wires, creating a convenient "DRO panel" on the front of the mill.
Though it might be just integrated to the rest of the circuit entirely...
Is it actually possible to crank the Y axis wheel with the caliper being that close, or is it designed for a left handed user? From the pictures it looks to be right in the way. Pardon if I am just overthinking it
-
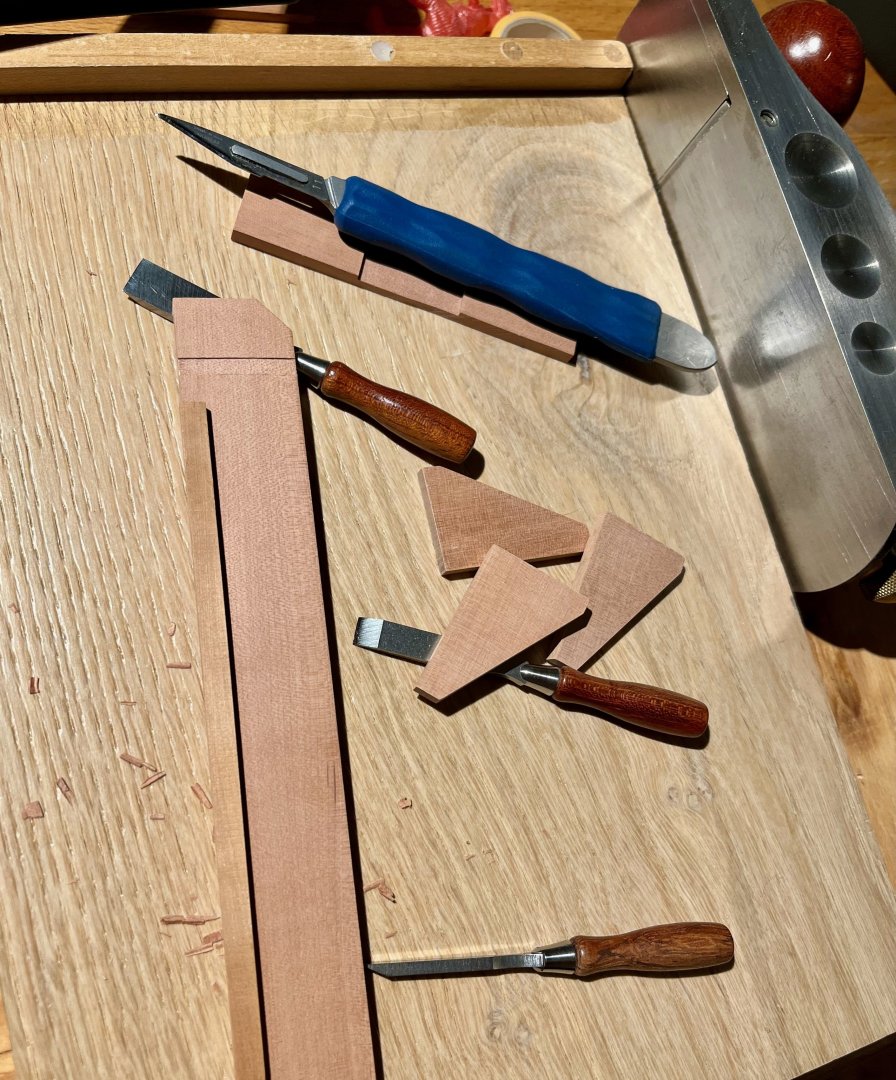
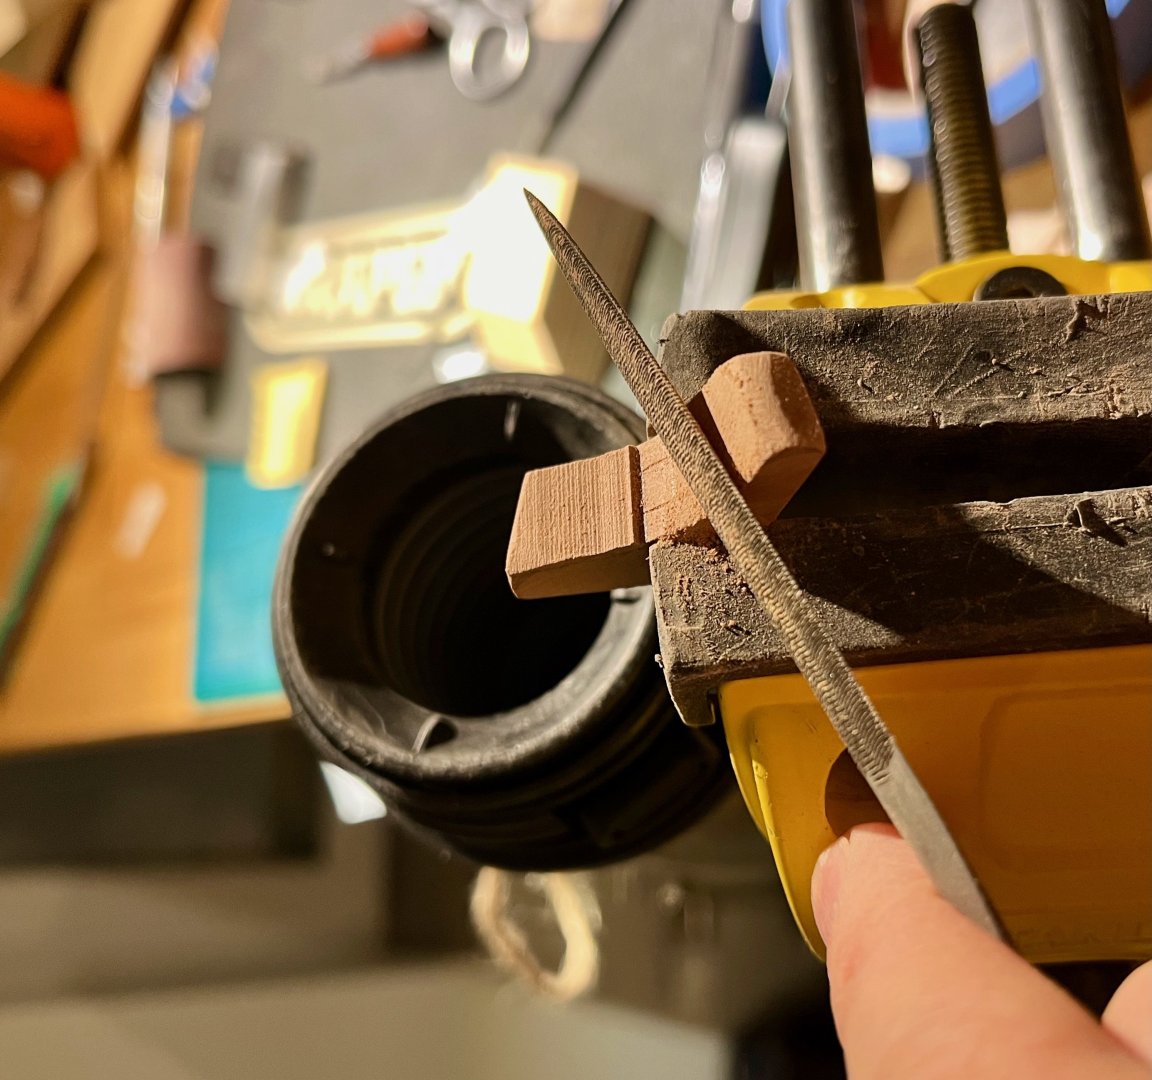
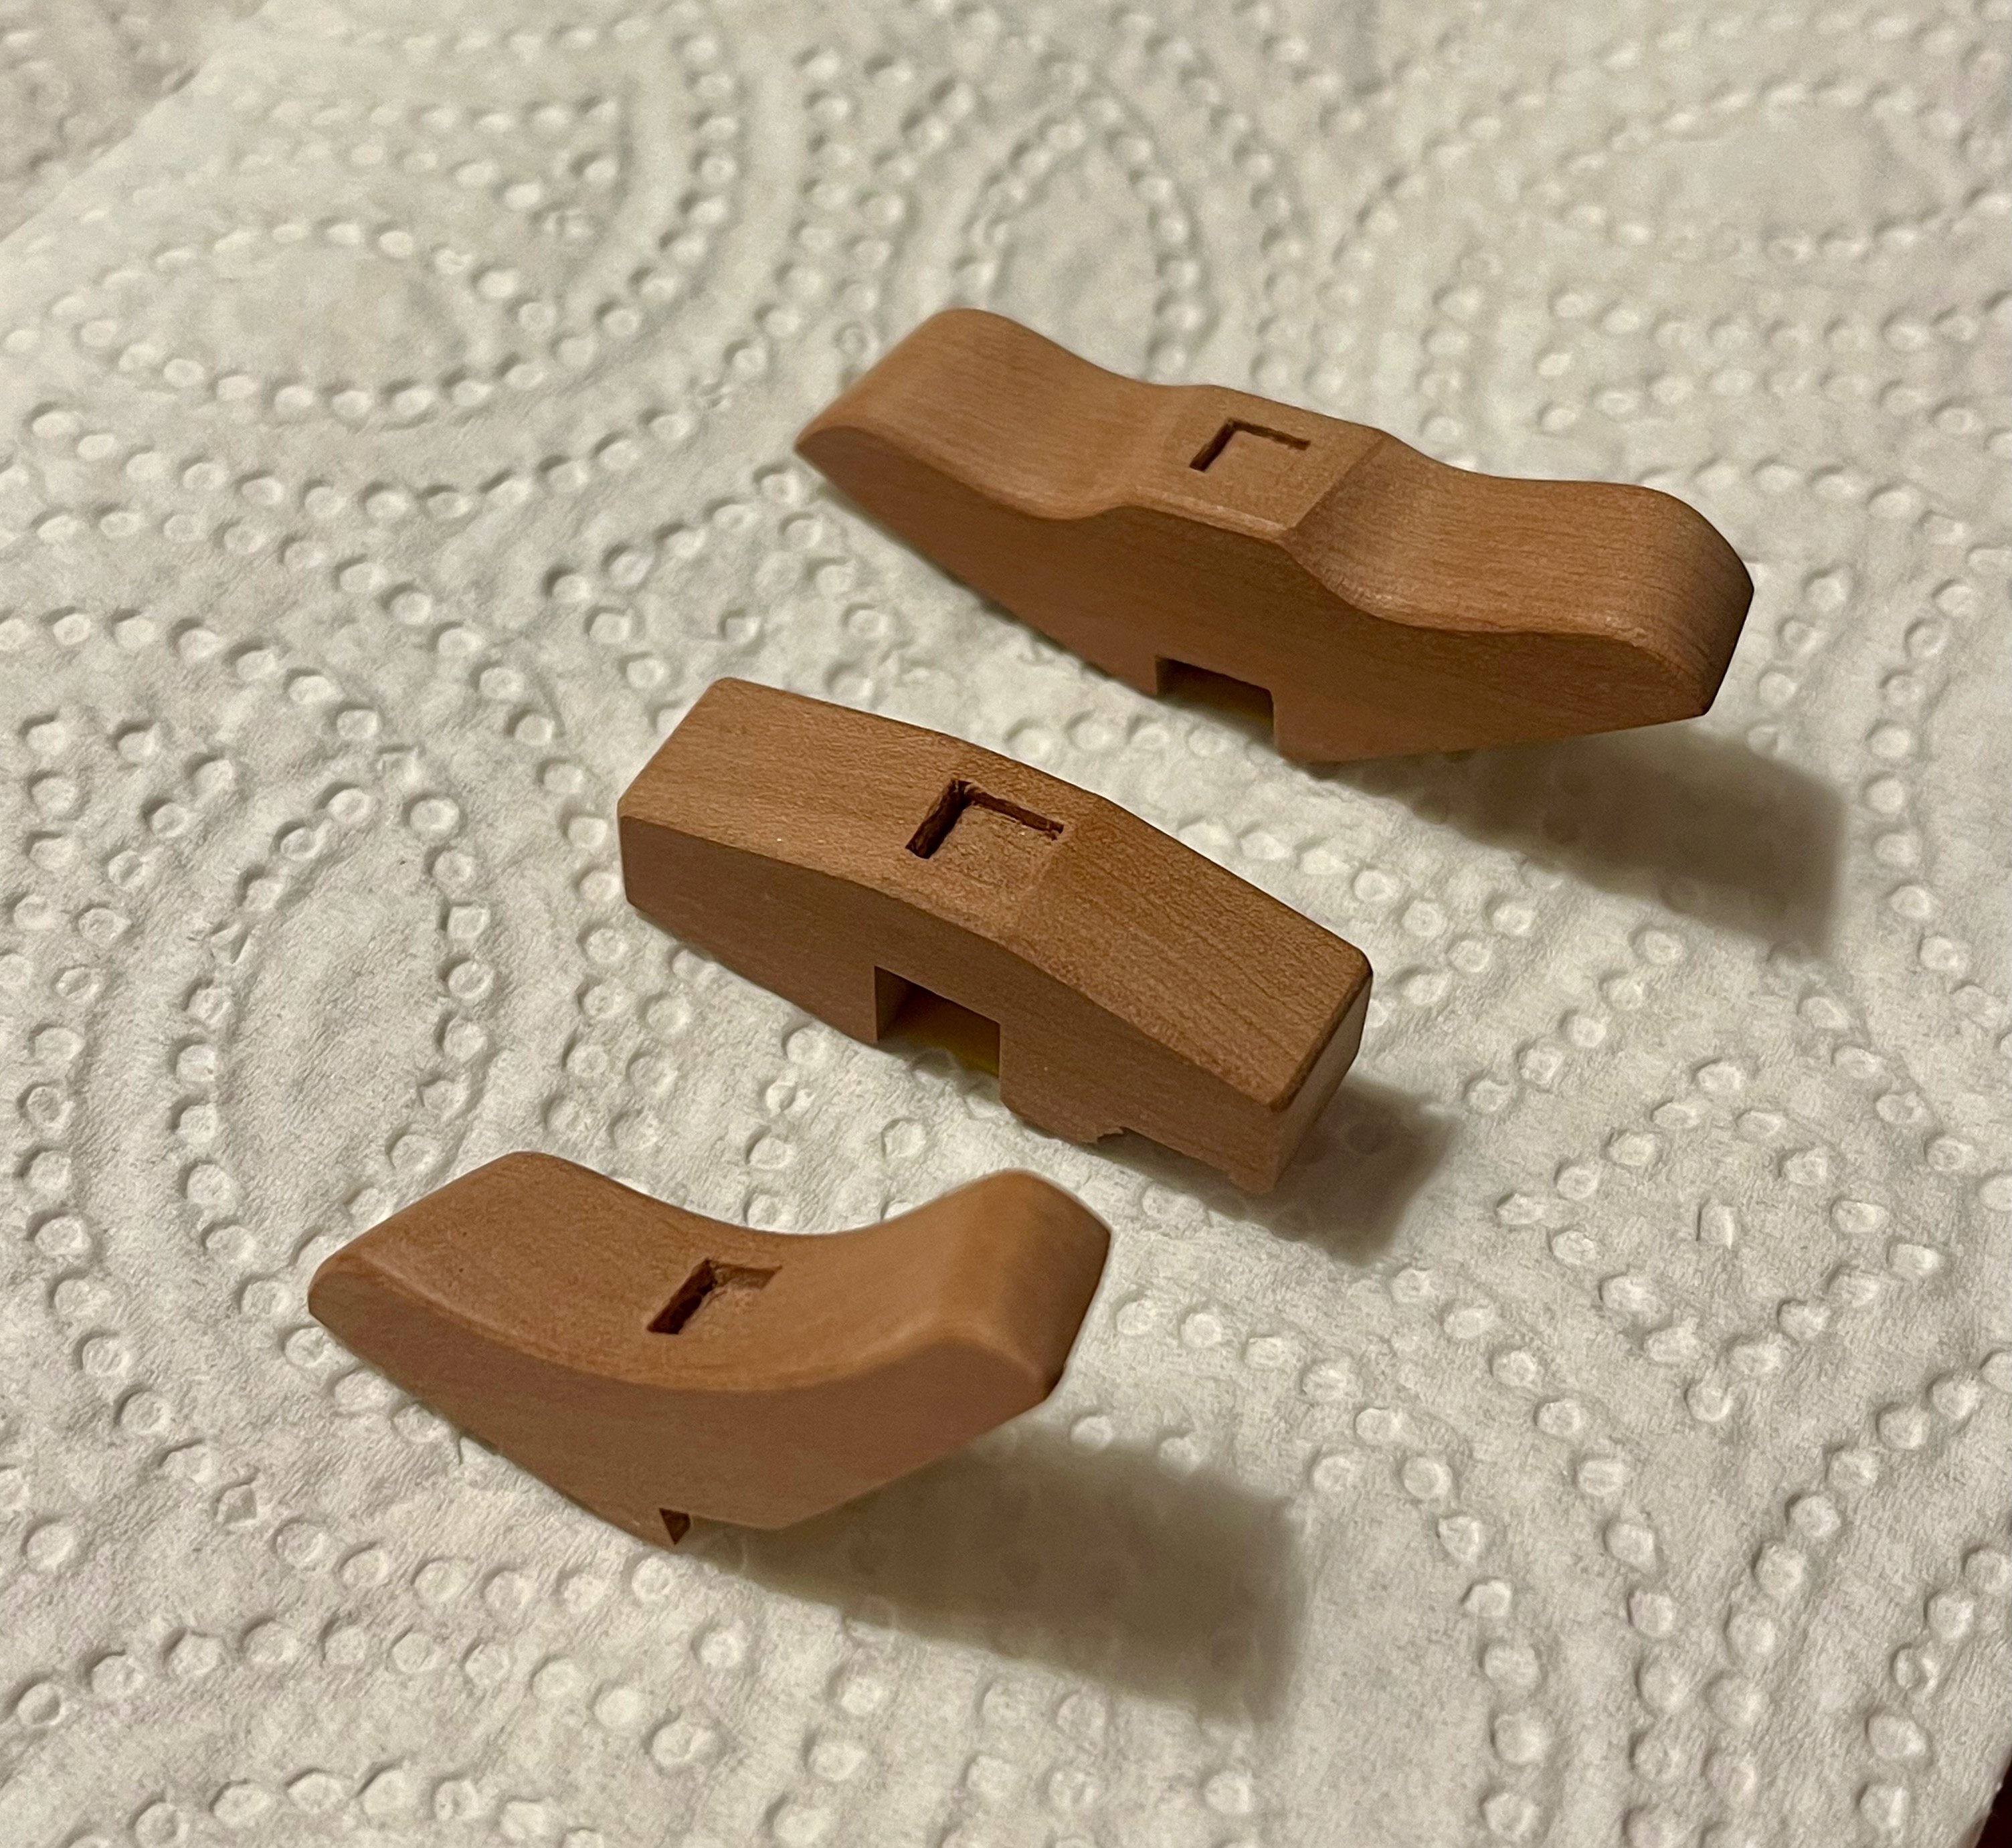
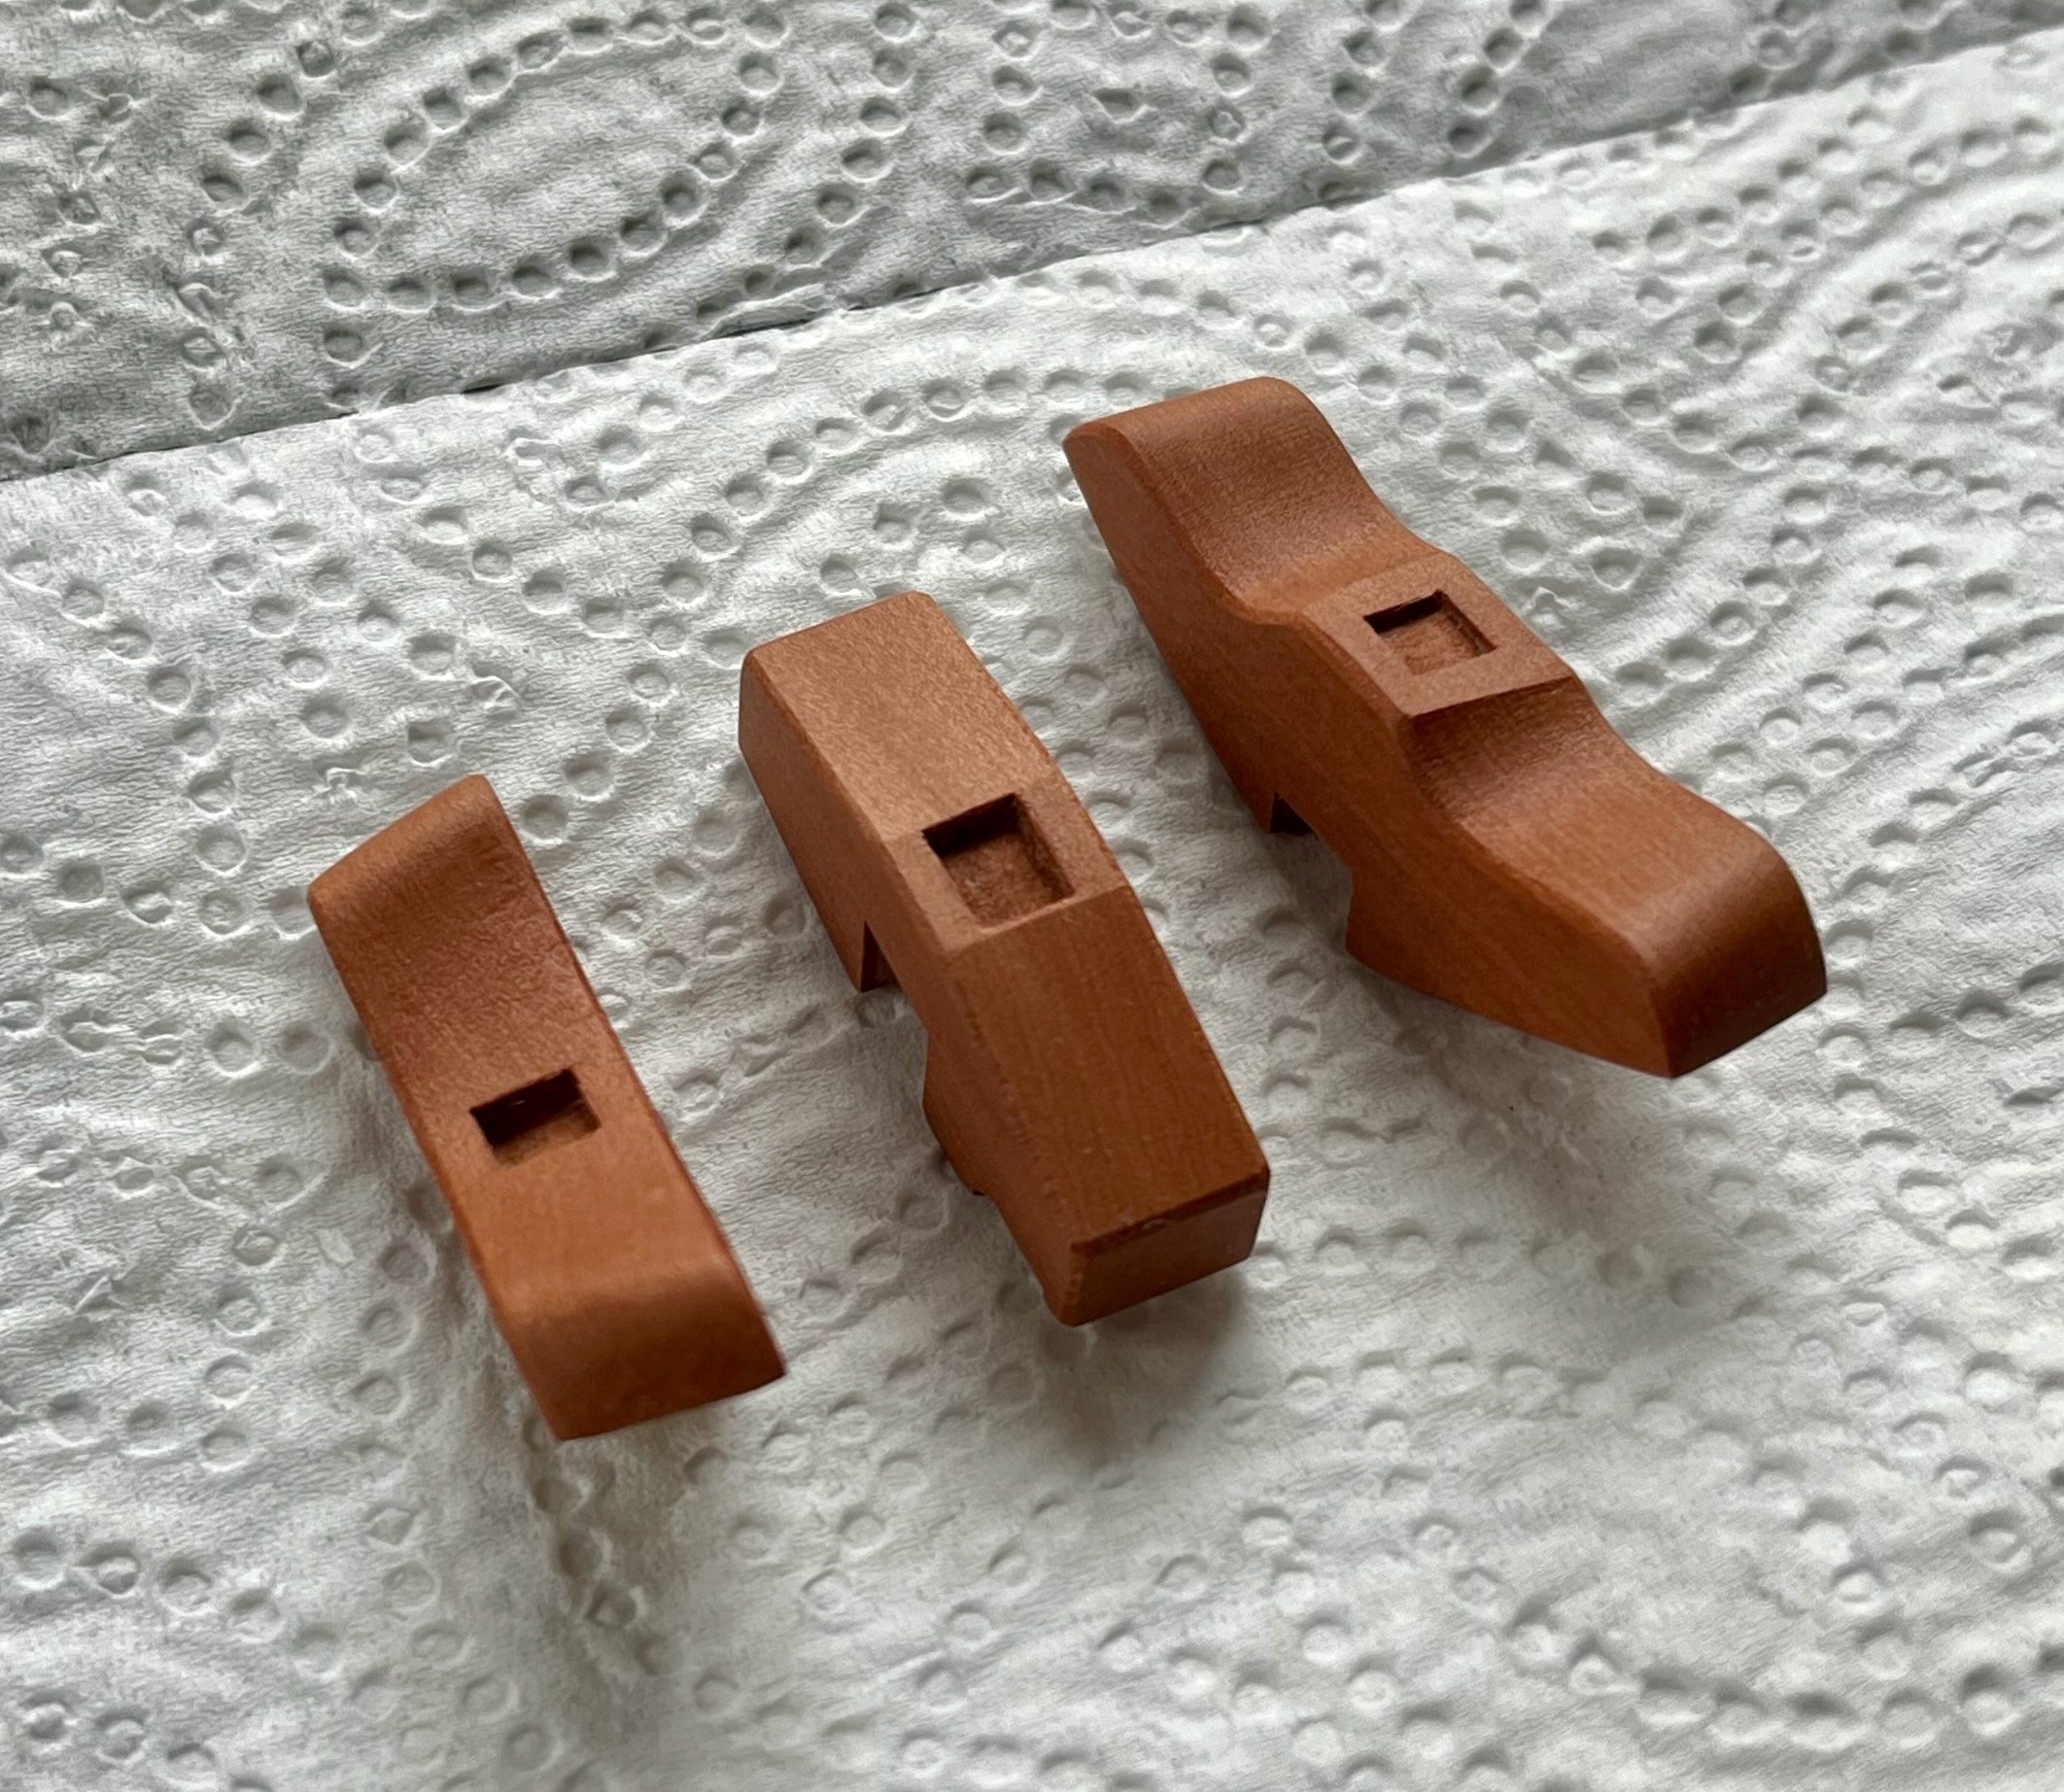
Found my rhythm and finally produced first parts!
Admittedly got carried away with the shape of these mast posts, they are supposed to be much more boxy-looking and utilitarian. I was inspired by a few other models with very elegant posts For the same aesthetic reasons iron bolts are omitted and edges are aligned with the run of the planking.
I really love the look of curvy pear parts, big fat black dots would spoil it a bit. And after all these parts would be hidden deep in the hold.It is more labor intense without a disk sander, so shaping and beveling involved a lot of chiseling. Though it is a pleasure with a nice and honed chisel.
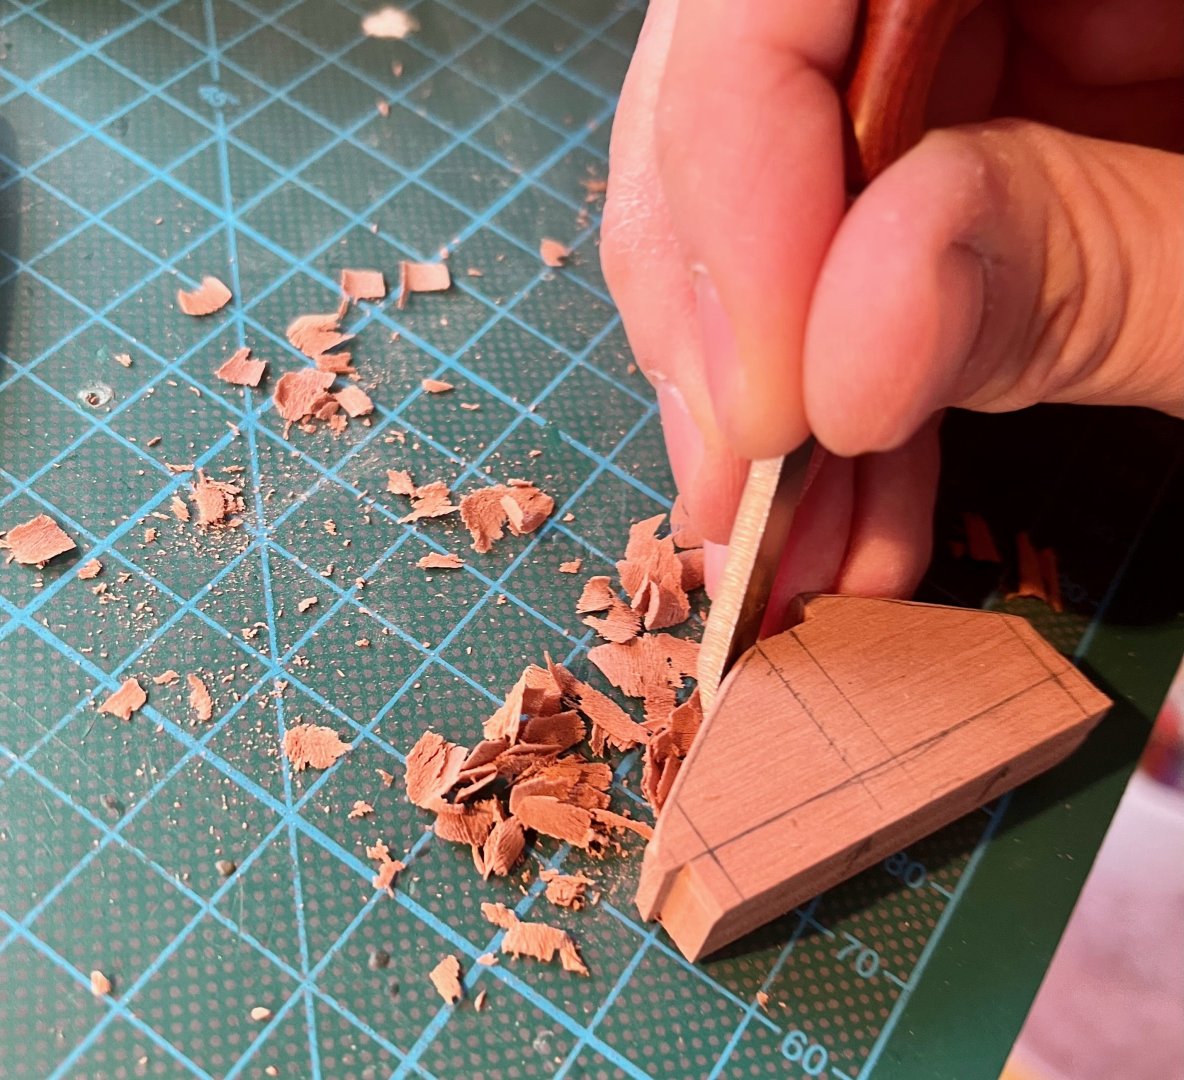
The most pleasuring moment was chamfering these edges with some relaxing background music
Super happy, the joy is back!
Finished with my new go-to finish Osmo Polyx 3062. Contemplating leaving smaller parts unfinished later during the build, but these are right next to the dark shiny pear frames, would be too much of a contrast.
Before and after the finishing, side by side:


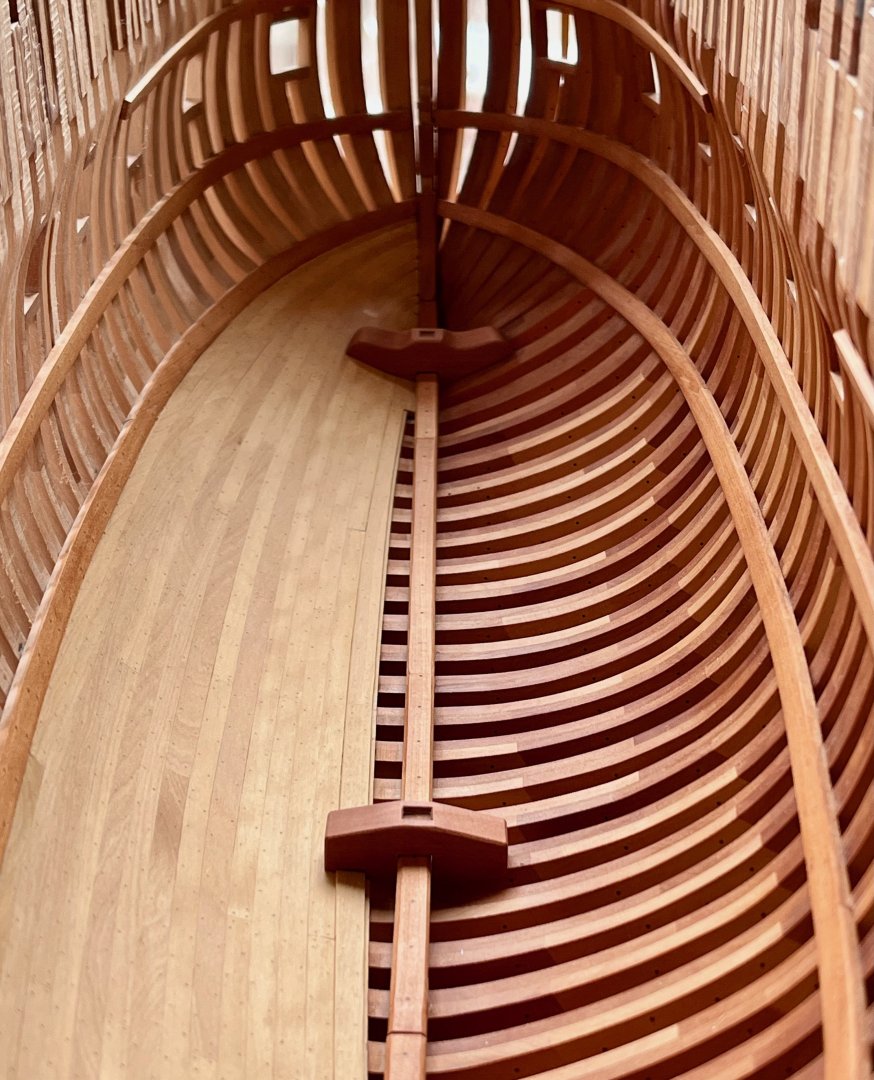
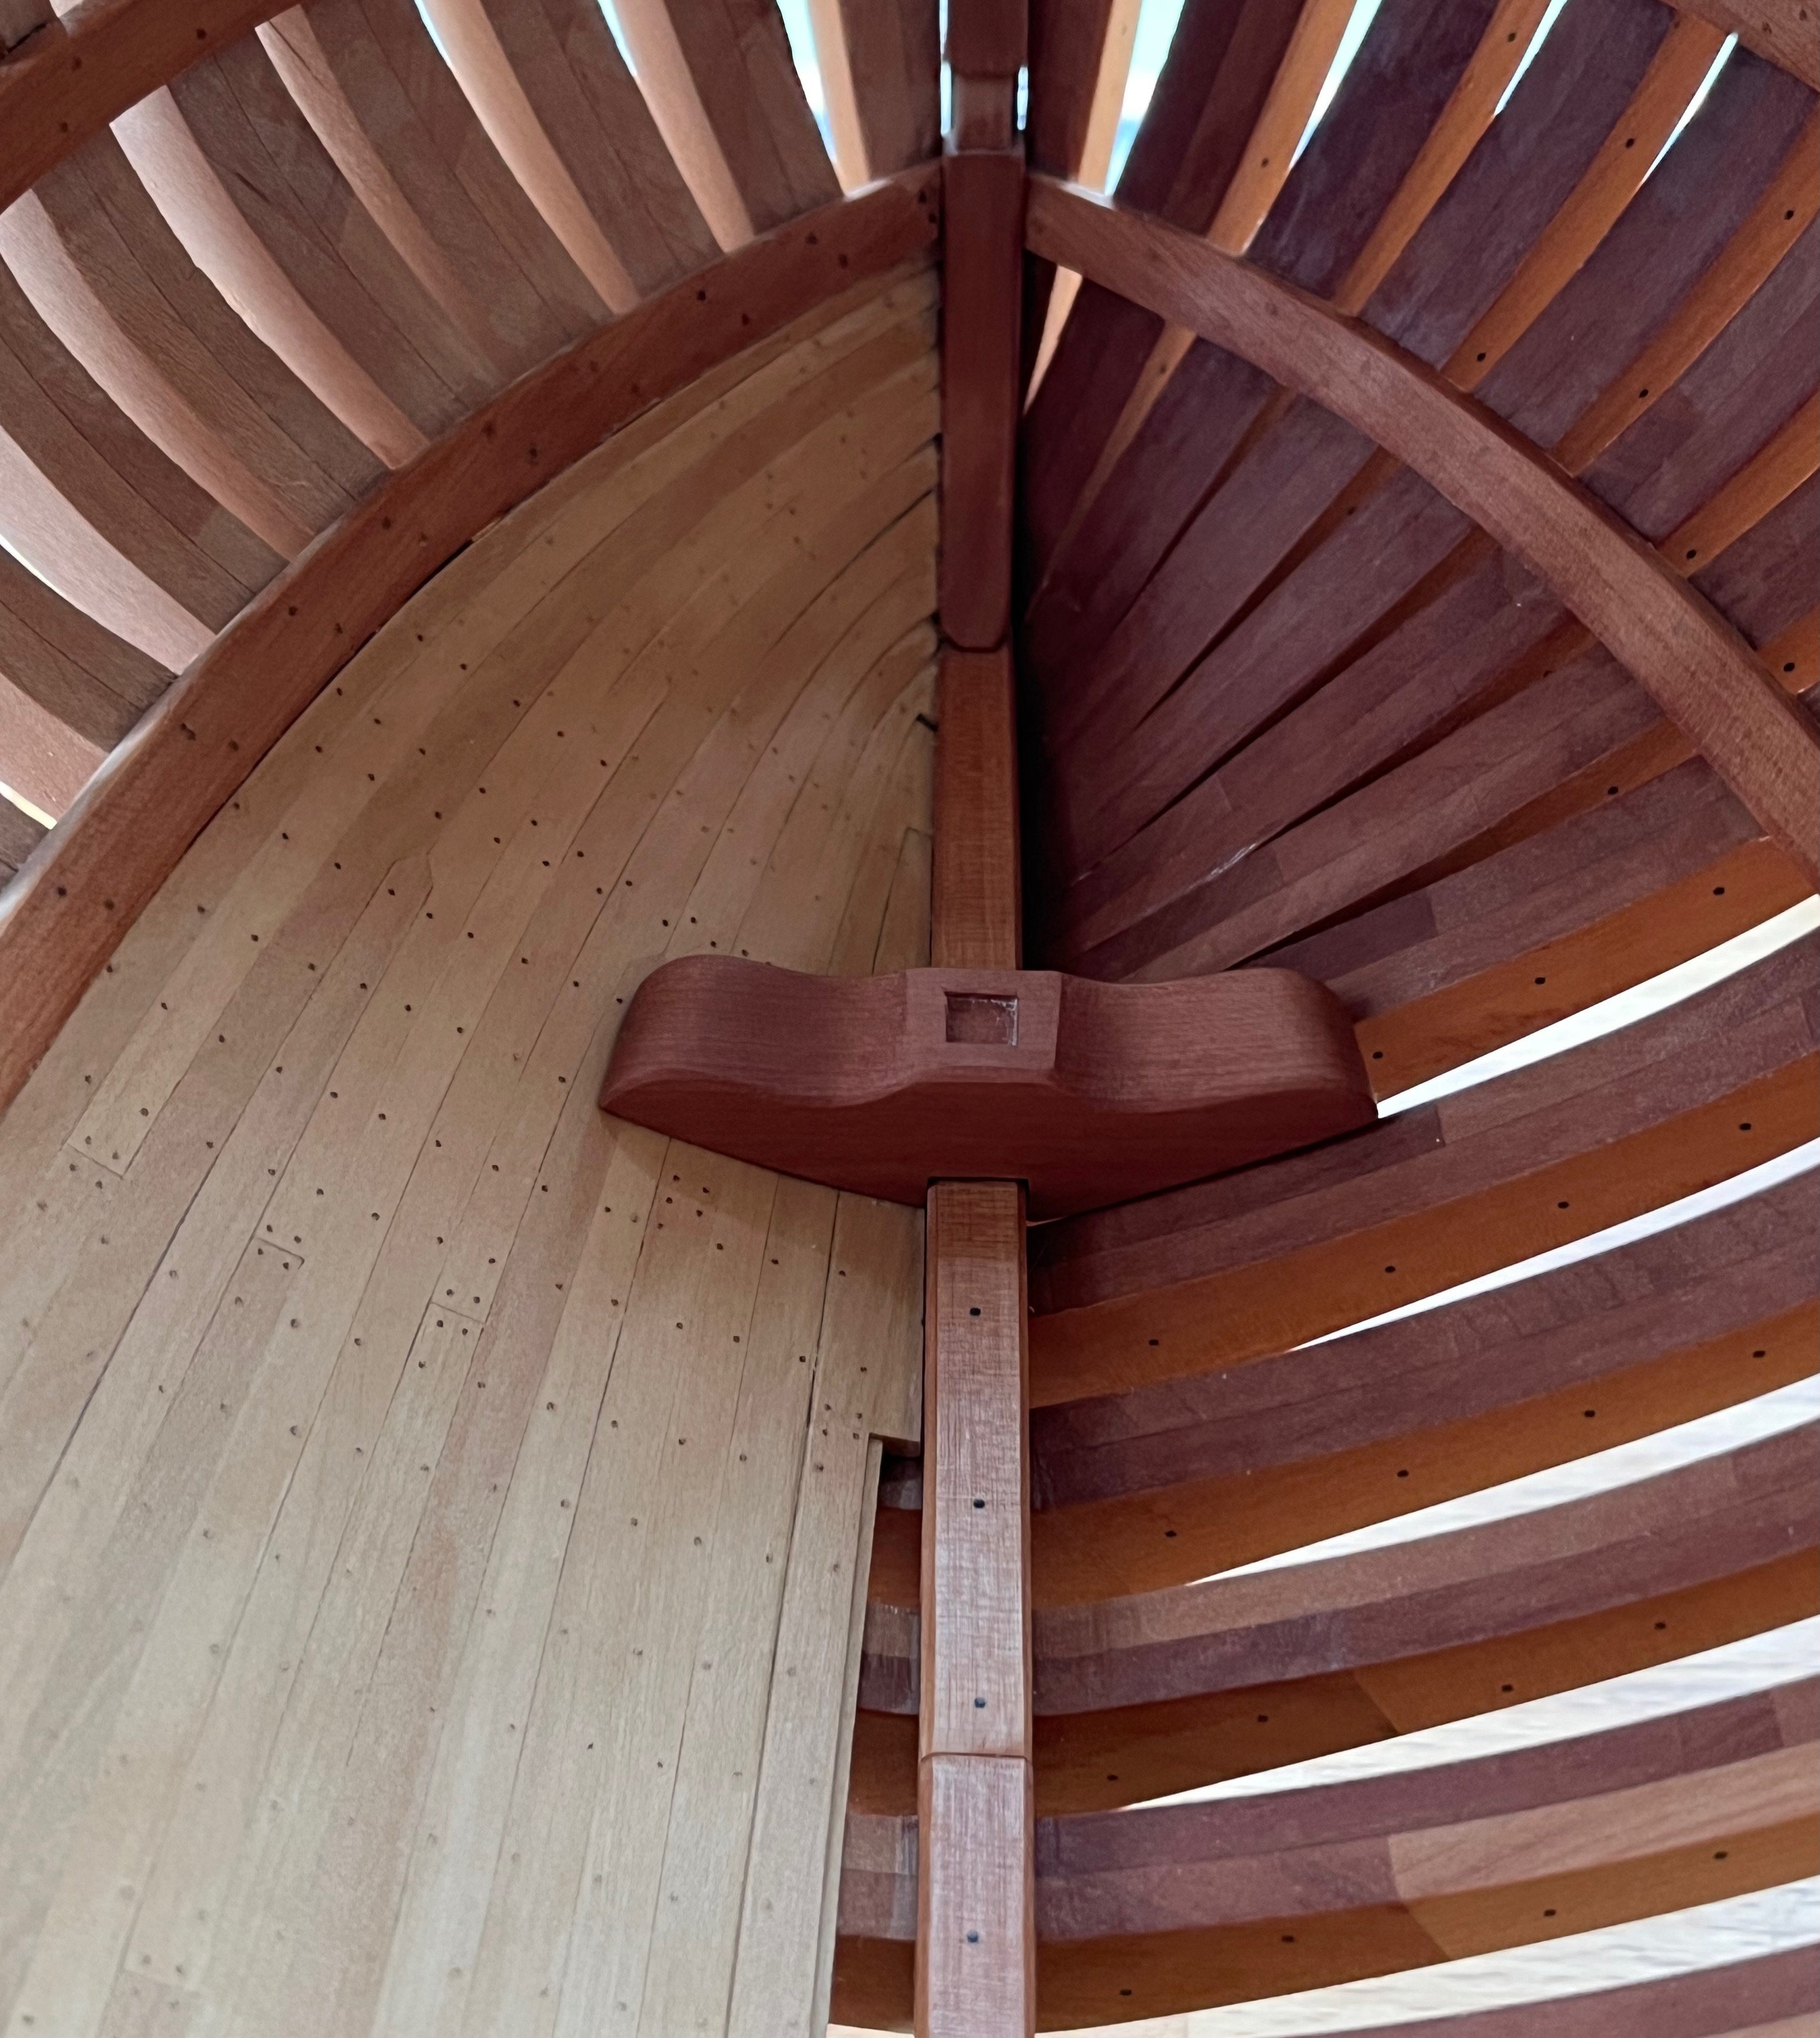
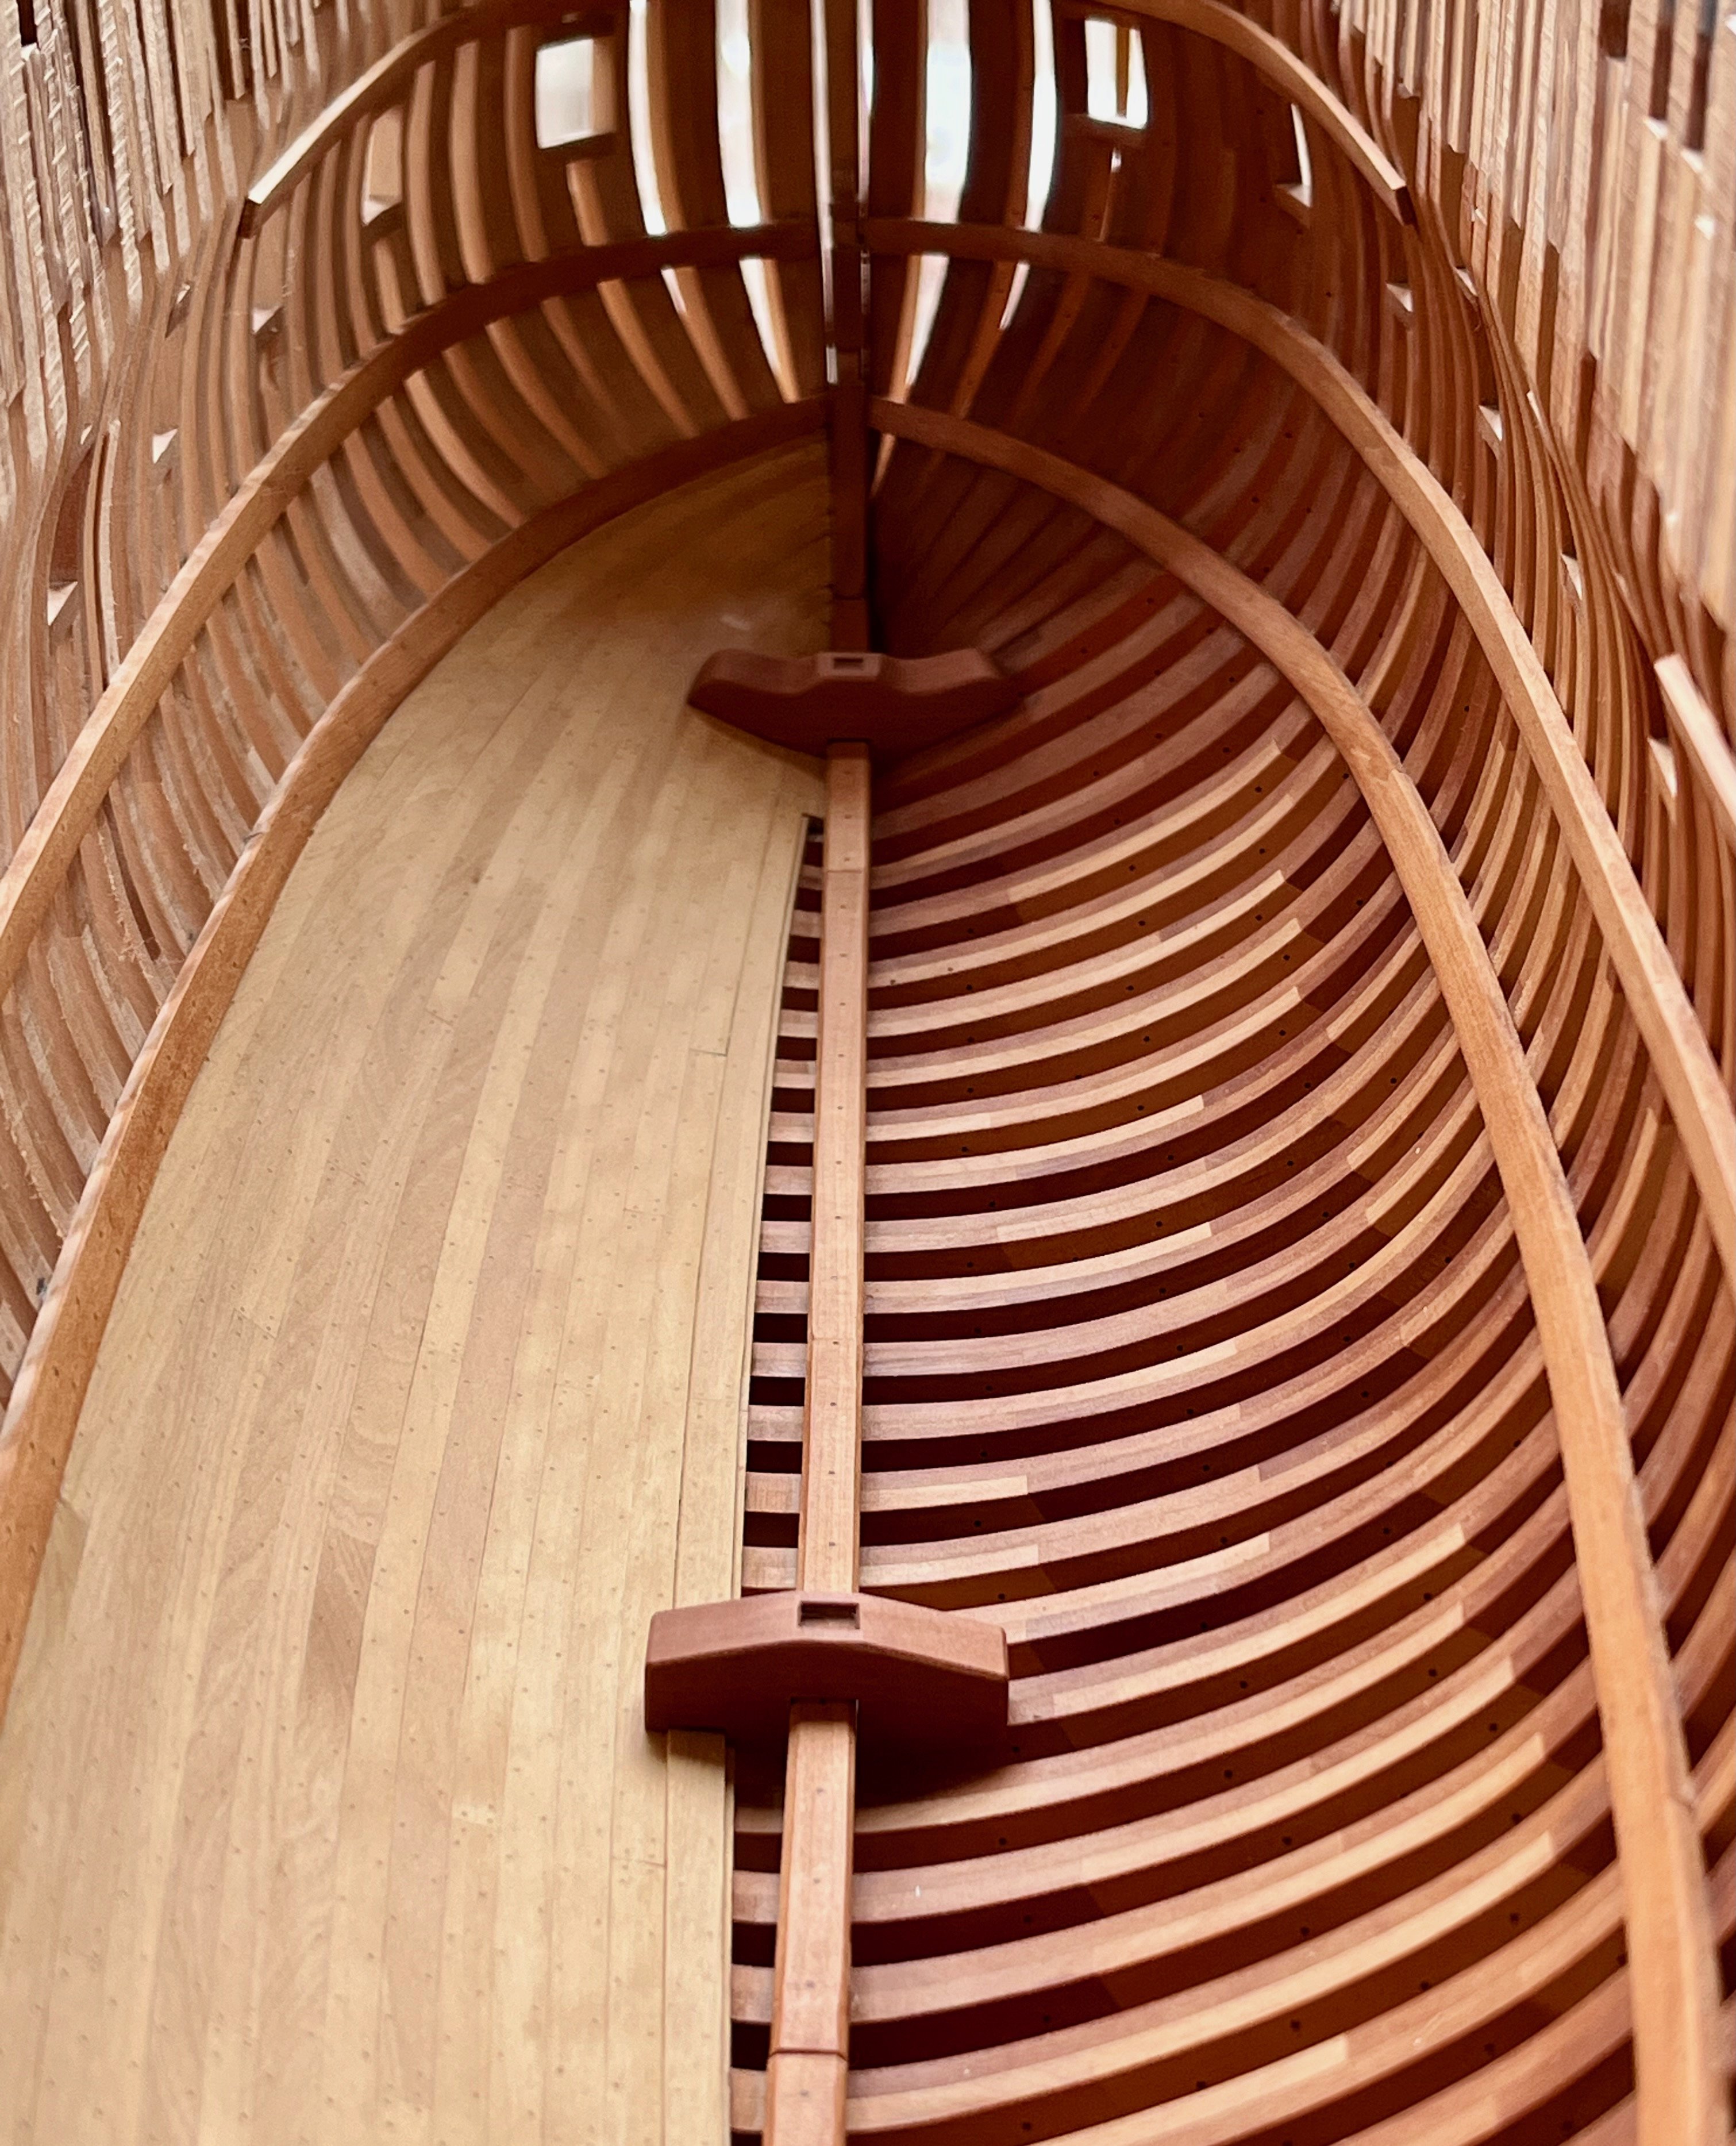
In the hull (dry fitted). Quite ashamed with the quality of planking at the bow, who left all these giant gaps? 🫣 Did not look that bad on photos from 2021...
No big deal, it only means I should be more careful next time. Also spotted an obvious misplacement of the top breast hook notch, it was the same guys fault. I was too young back then

-
-
Erik, thank you! Your build is one of my inspirations too
Greg, thanks, that is a clean shot! Though so far it was actually easy to sneak on a good fit, since with wide Hahn spacing and no chocks it is easy to put a part to the edge of the next frame and mark a clear line. But time will tell
-
-
-
Thanks everyone for your support! Ron, can definitely recognise that
20 hours ago, tlevine said:Welcome back! For templates I will use a combination of taping small pieces of paper together for one side and inserting the paper between the frames for the unplanked side. Still requires some tweaking, but it compensates for the thickness of the planking and any asymetry between port and starboard.
Toni, thanks, will try that approach too. Inserting a pattern between the frames is a nice benefit of keeping one side unplanked, but haven't tried taping smaller pieces together.
- tlevine, VonHoldinghausen and mtaylor
-
3
-
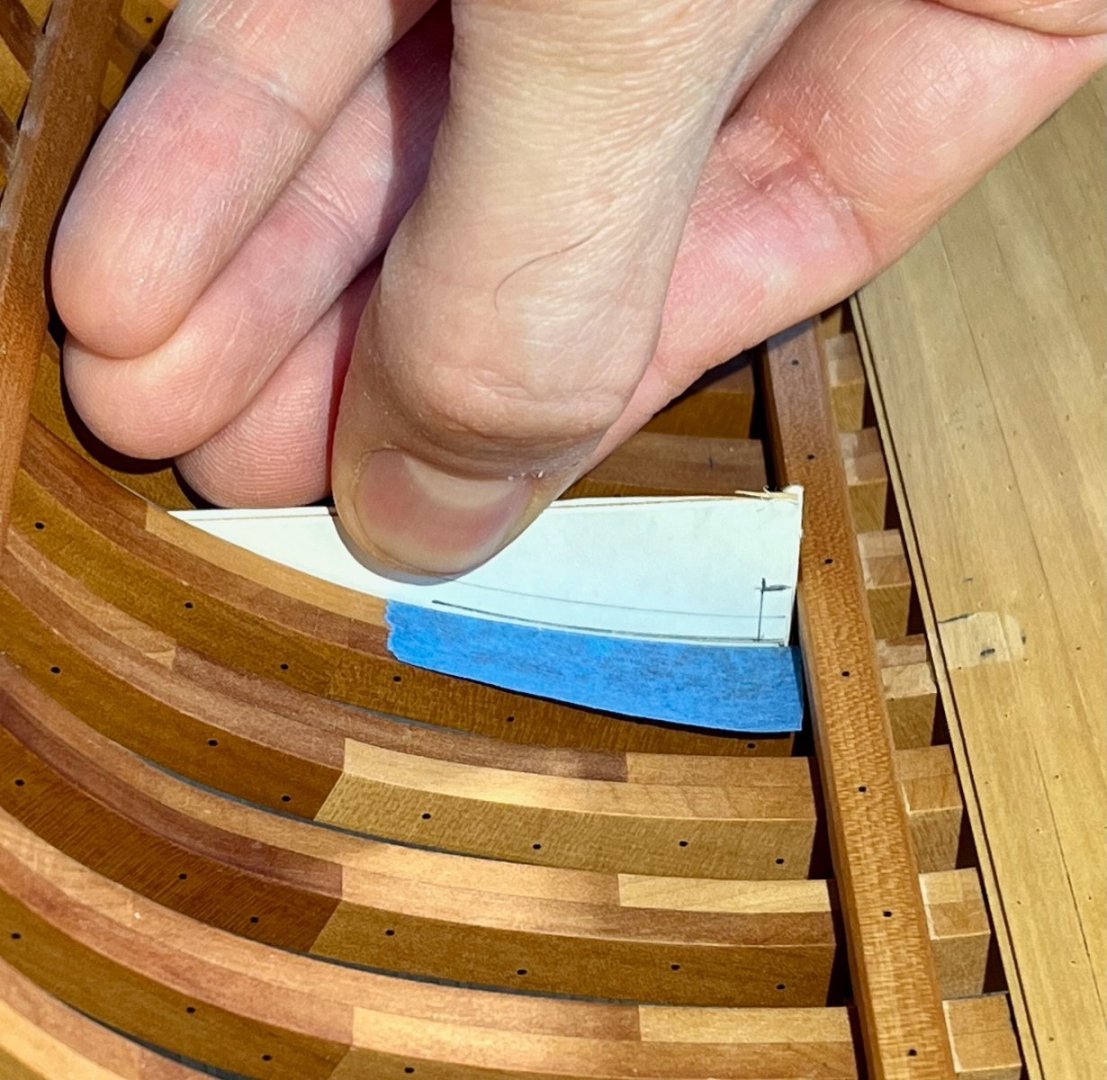
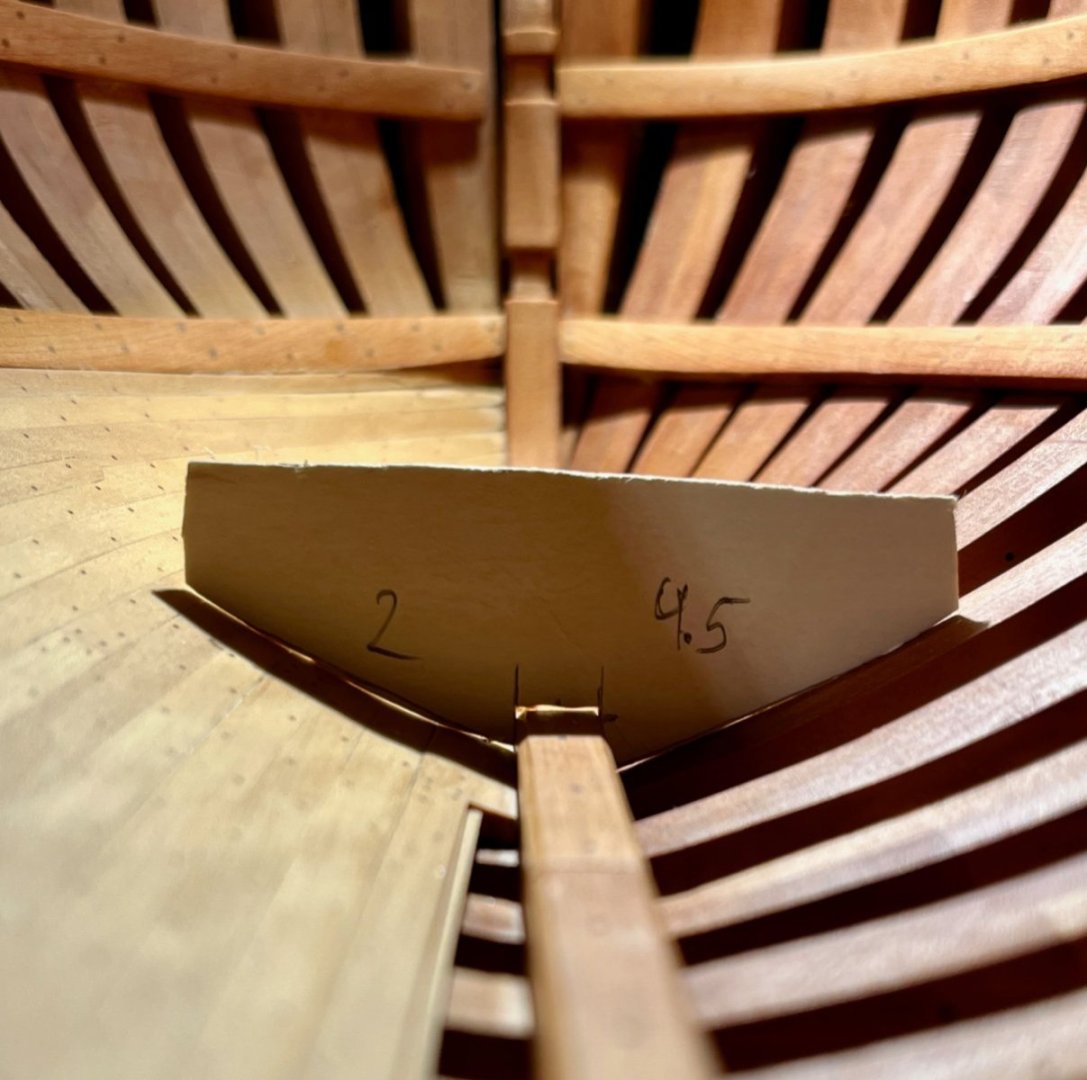
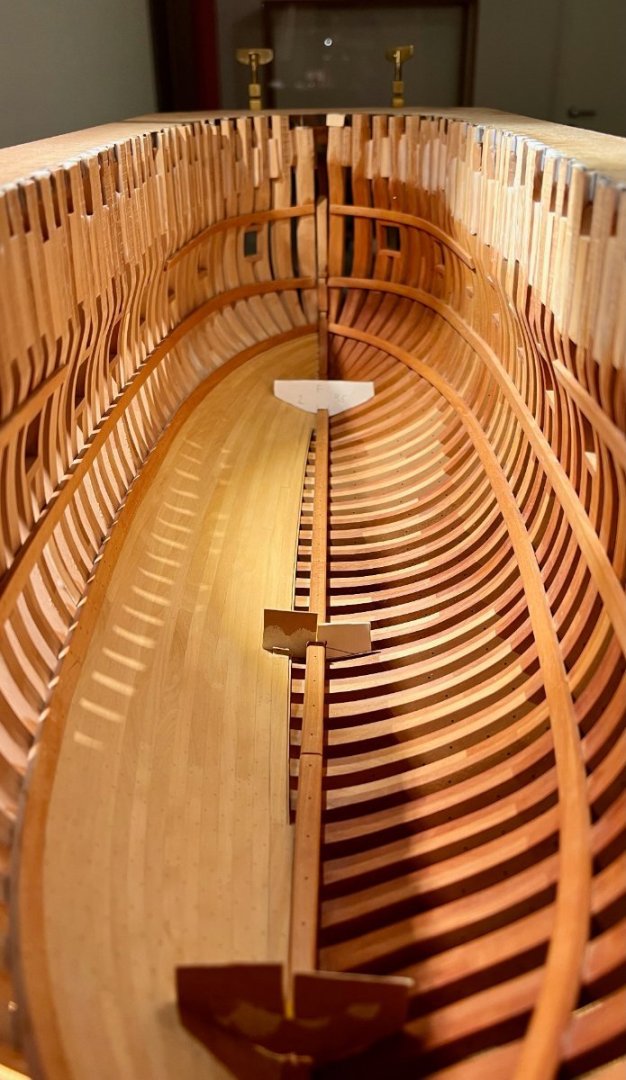
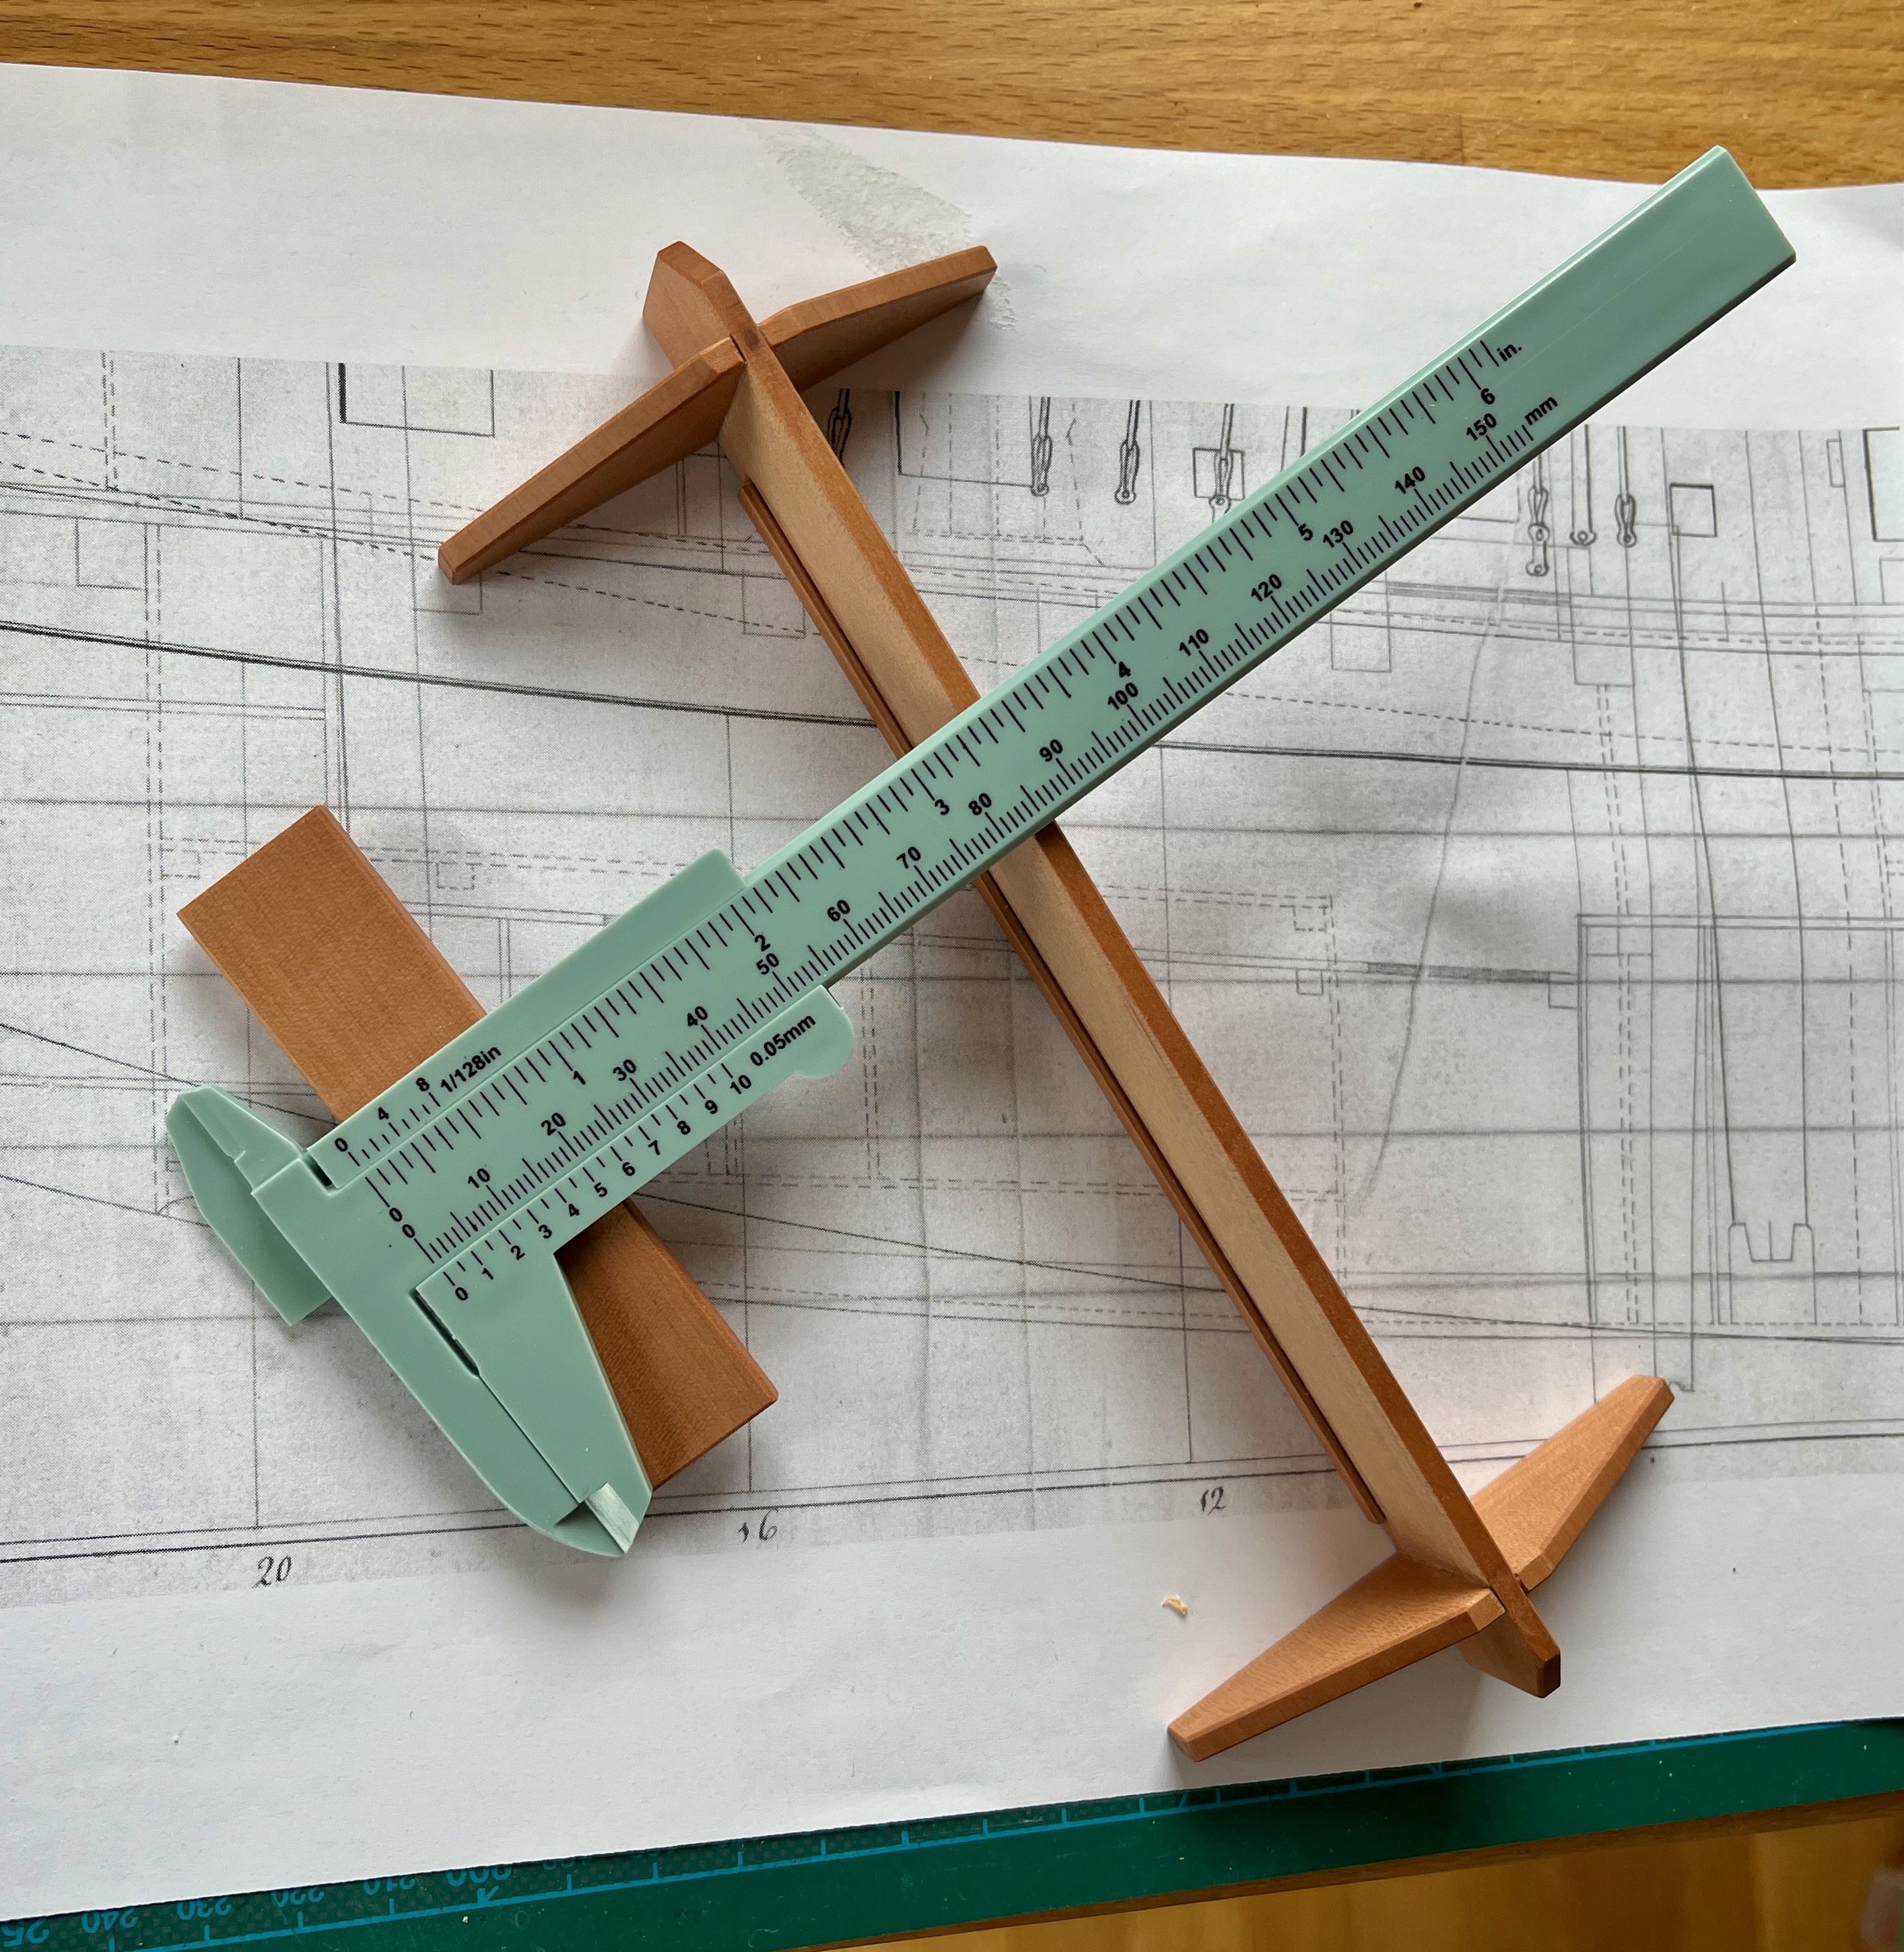
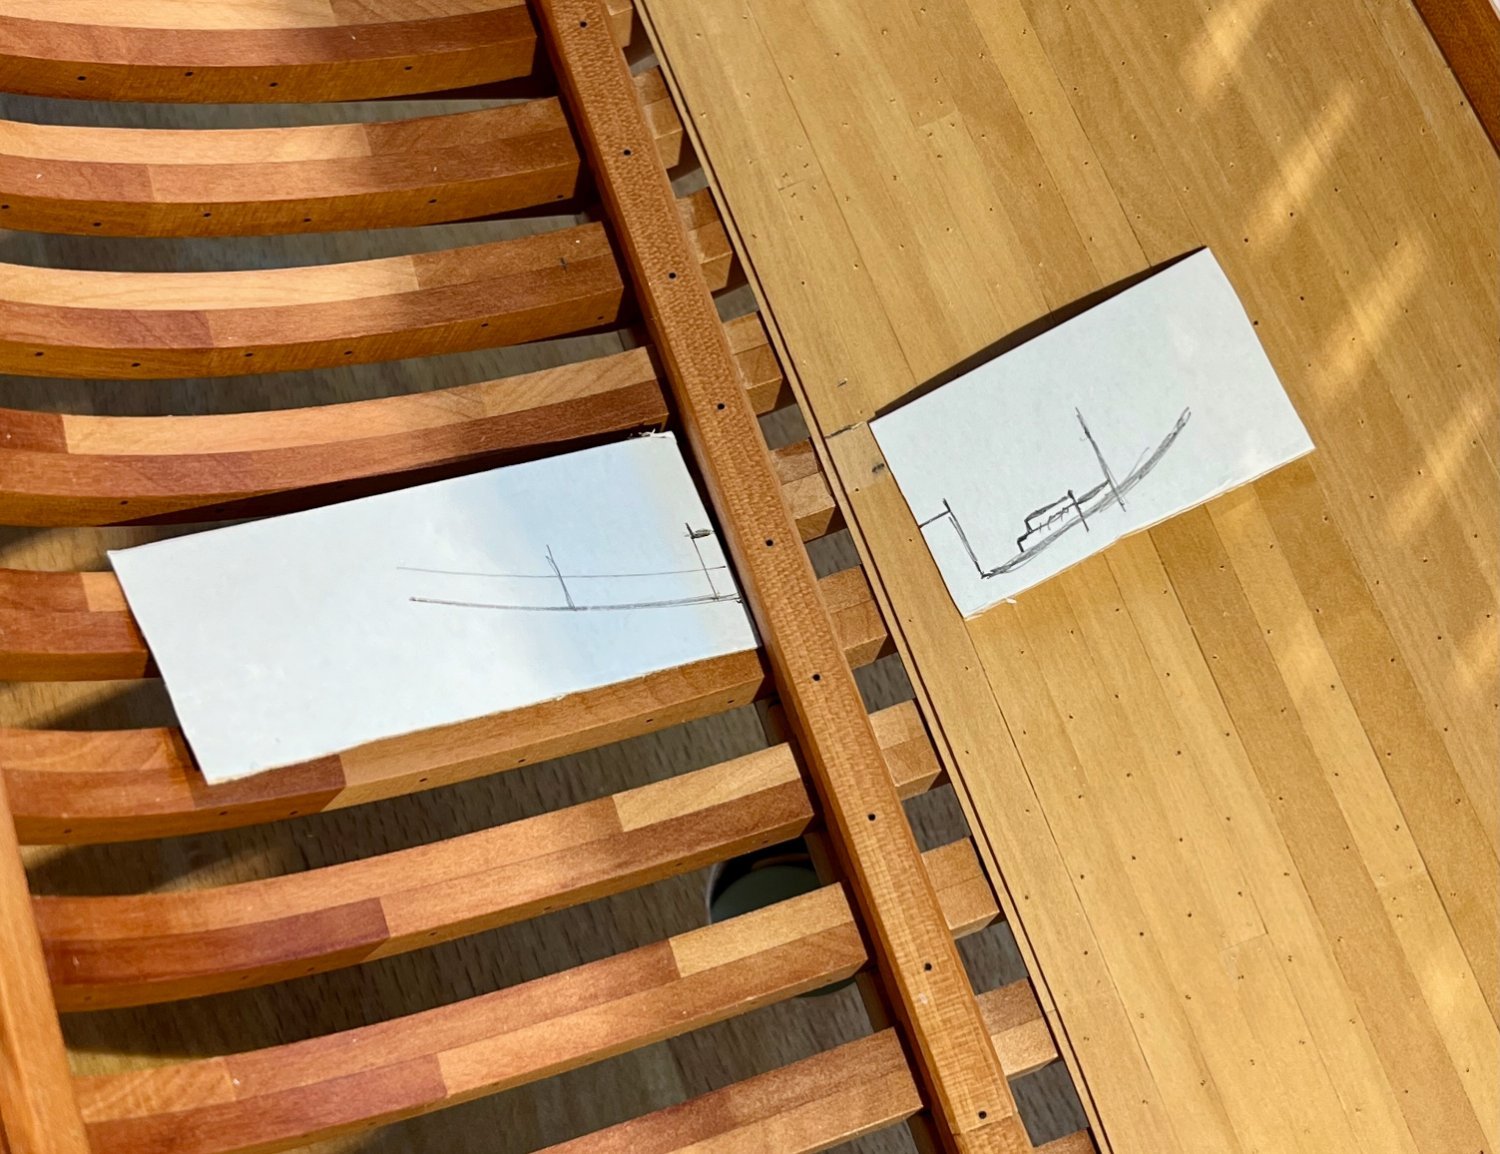
Mast steps are not complicated, but struggling with pattern transfer.
Feeling like I miss some obvious tricks? Even thought about making a miniature duplicator tool with toothpicks instead of metal pins
Would appreciate your advice!First I tried to make patterns like on a full scale - by gluing small rectangles on a piece of card. That way works great for real boats, but is very awkward and potentially messy on a small scale.
But I like that tiny plastic vernier gauge! Got a few of those to measure spacing inside the hull without scratching it.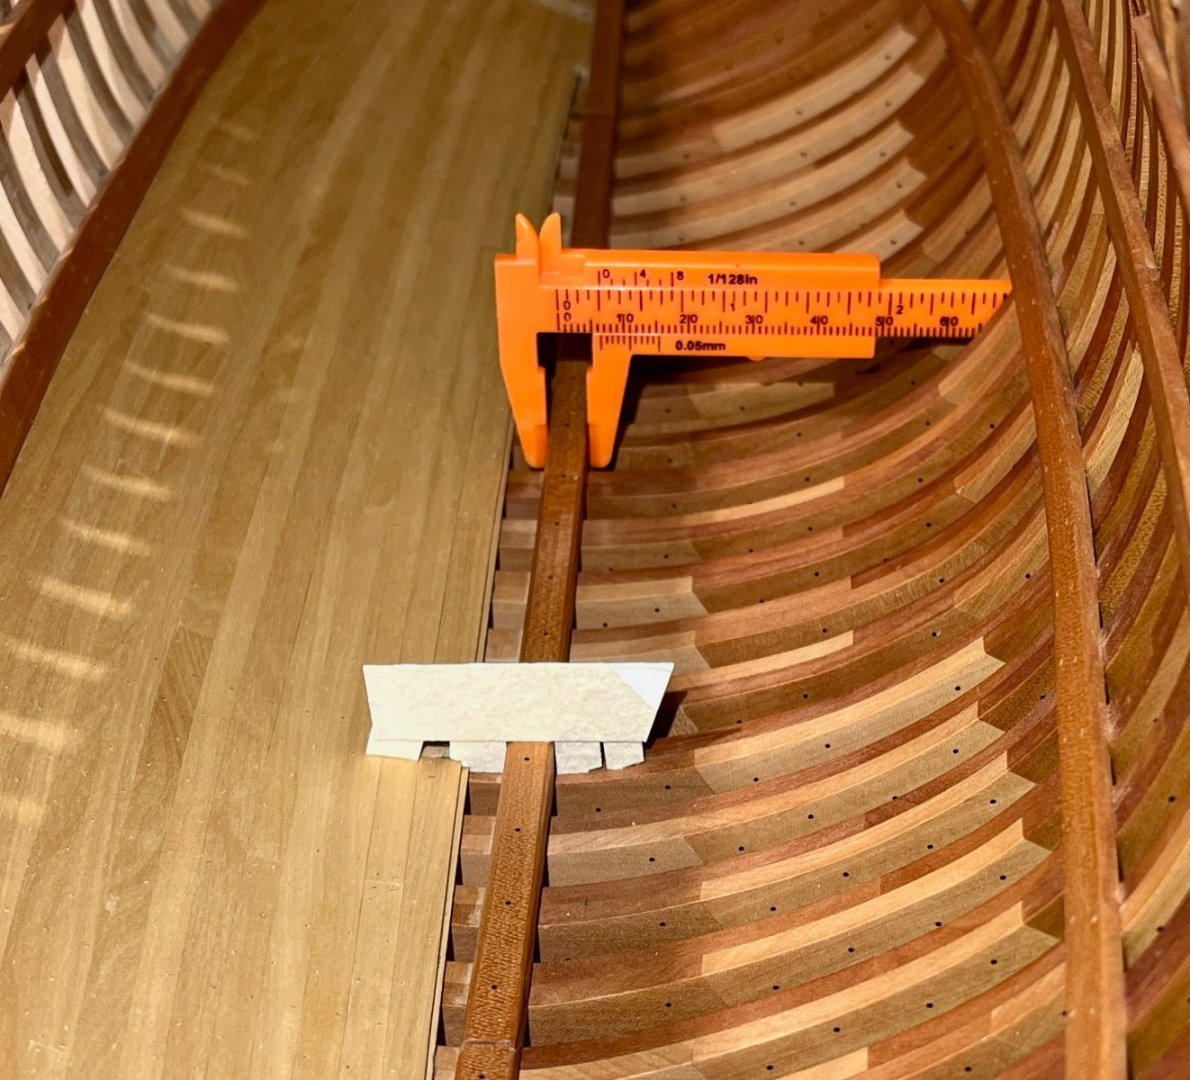
Then I just traced a frame pattern on a piece of card and eyeballed the other side. That is less complicated than I thought, but takes a lot of fine tuning (counter light helps too). But feels like an art rather than a reliable and repeatable method.
Though should admit - trimming and cutting card is quite satisfying!
Is that how everyone is doing it or is there is an easy way?

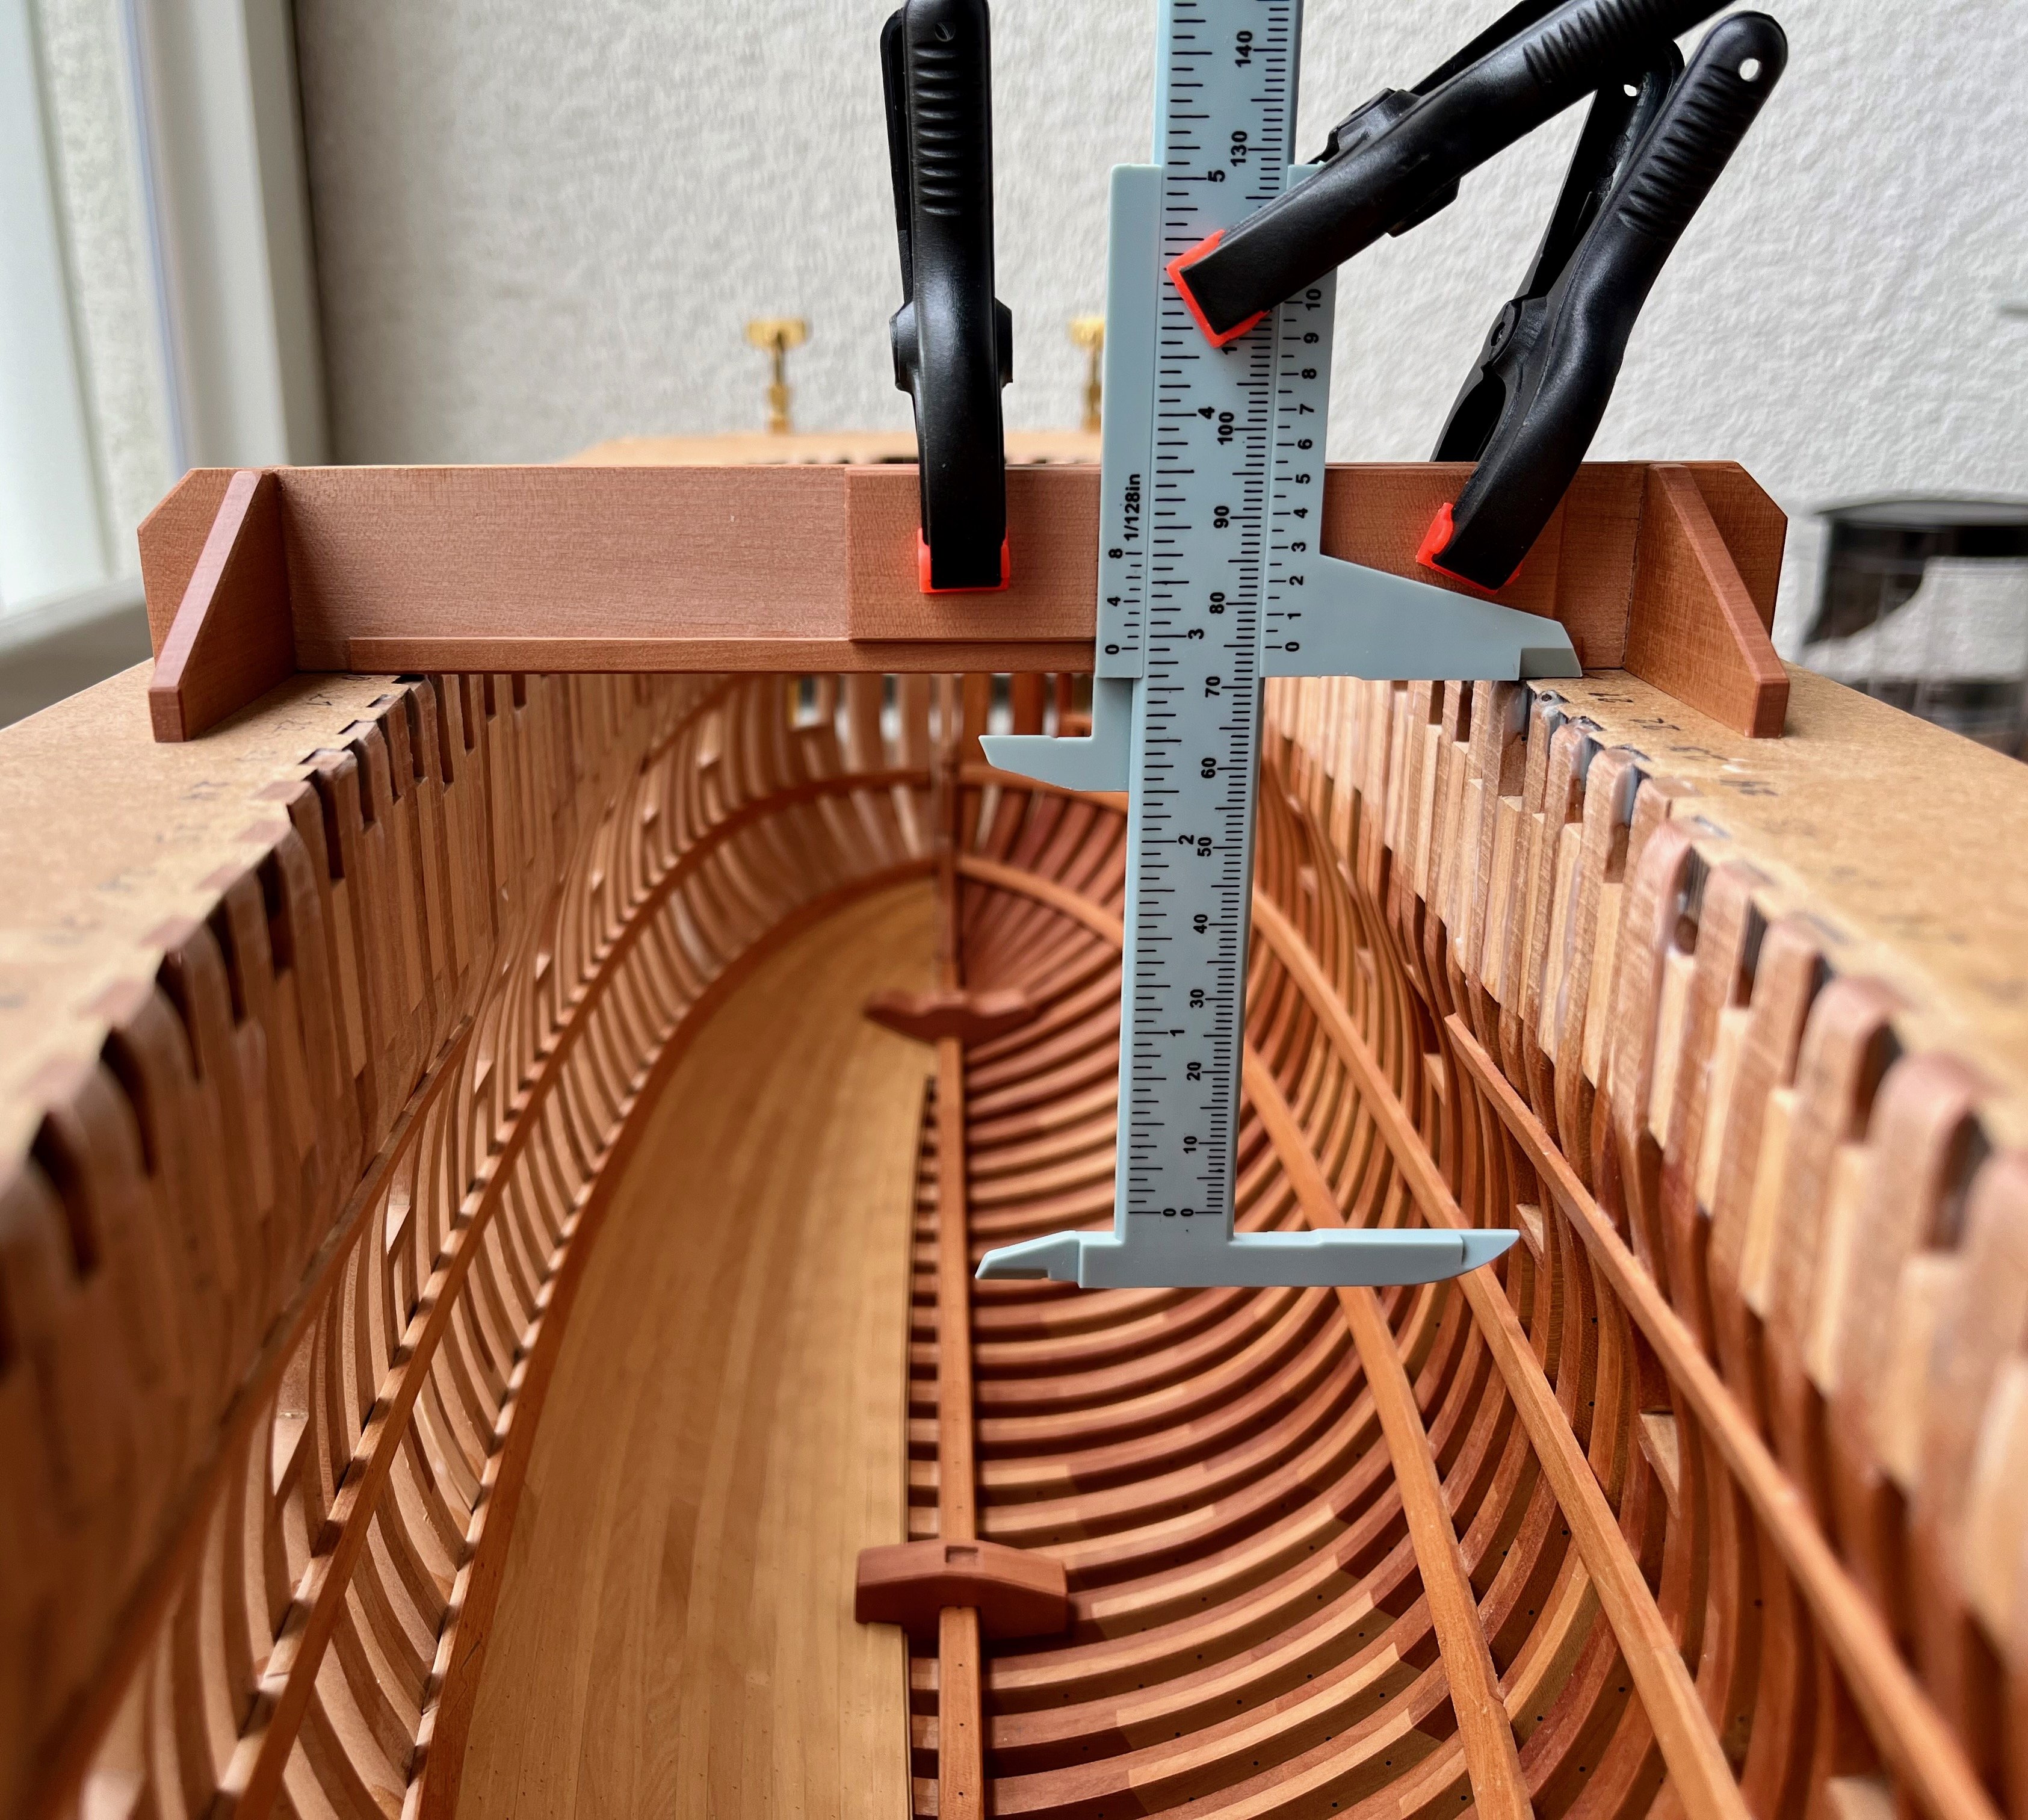
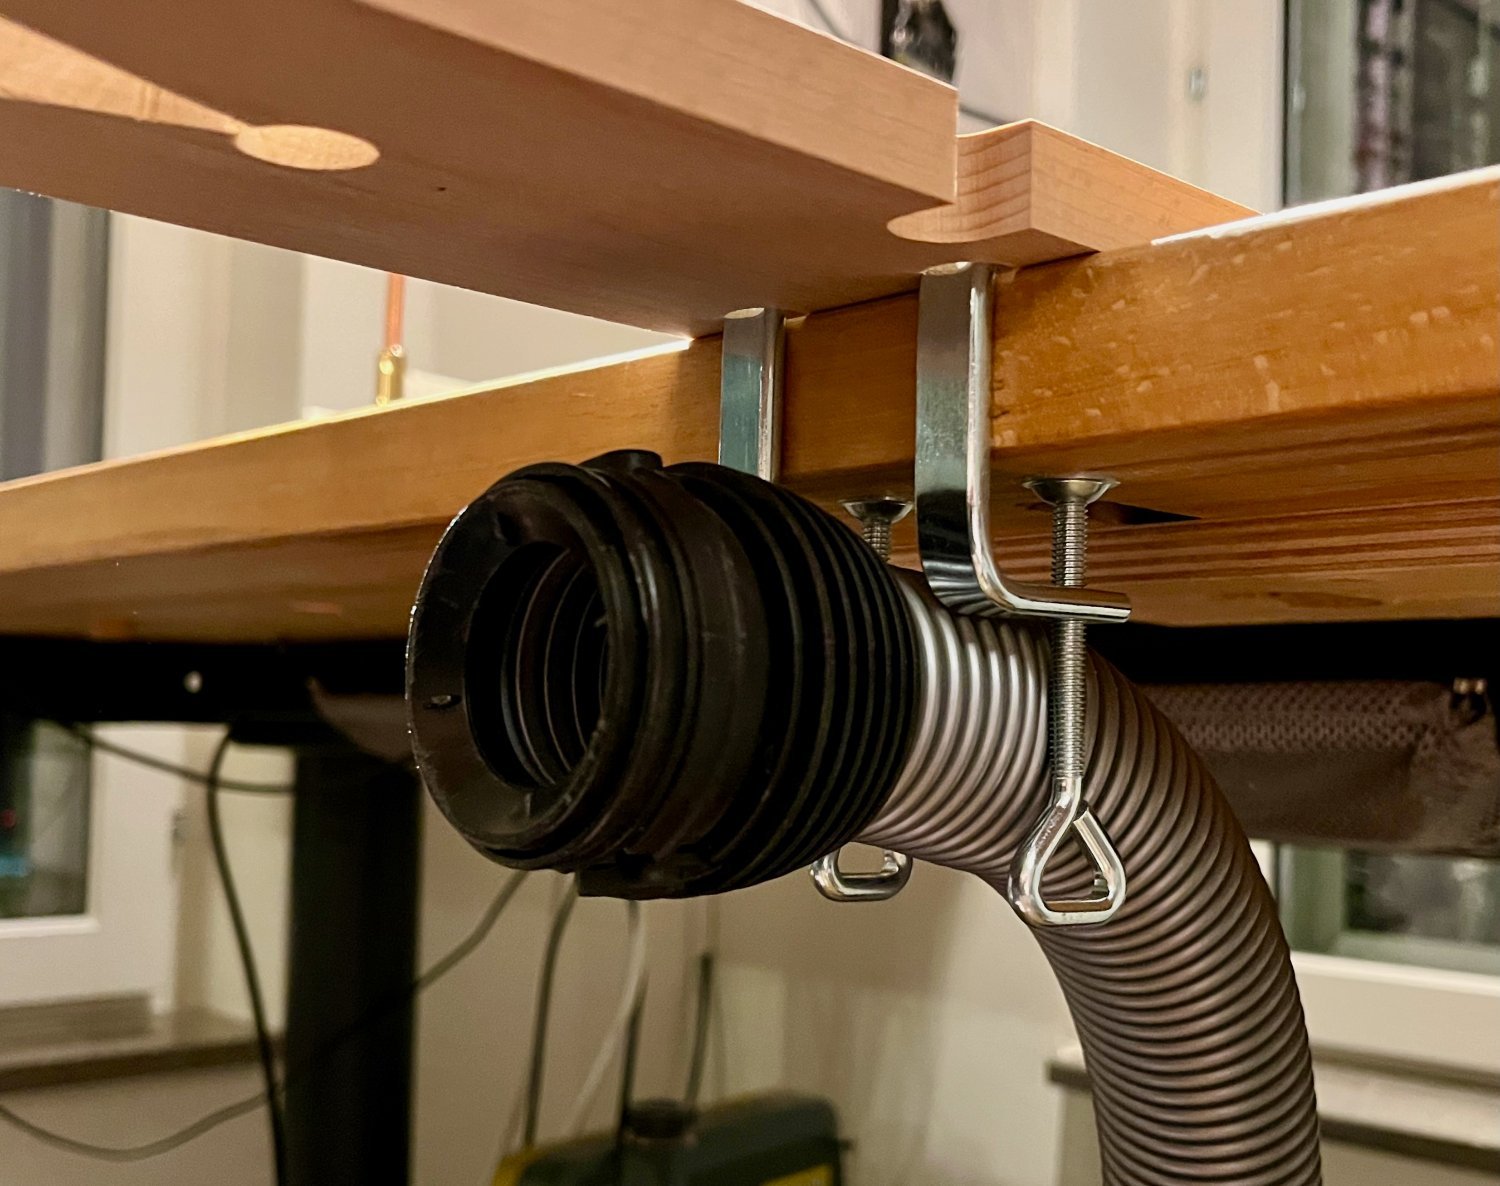
Practicing the quiet modelling (in preparation for the evening sessions) - tried a coping saw instead of a bandsaw. The dust extraction problem solved itself, vacuum hose fits perfectly between the clamps:

Finally - the rough pear blanks are cut and I hope to shape them into beautiful parts in the upcoming days!
I really aint much, but a little symbolic step towards the healthy hobby routine
-
Hmm, where was I? What is this thing?
With an active family life and outdoor activities I barely had energy in the evening to plan the next step of the build. And while kids even nudged me to make some sawdust - the main problem was the planning. Planking does not take much brainpower once the markup is done, but now I need to make mast steps, breast hooks and so on - need to analyse plans, mark out locations, get the necessary dimensions, etc. These details are omitted in the Hahn plans, and I wanted to build the model after the British modifications (including the fore mast that was moved ahead two feet).
Just imagine - once everyone is asleep you open up books and plans, mark and measure and scratch your head, and in no time the brain just says "nah, lets watch some movie and go to sleep" 😇Next day you are really worried about mistakes the tired brain might have done, and so you get a mental block and put it on hold.
But now I am trying to break that barrier and spend some quality hobby time while family is away for Easter. Feeling very rusty, forgot a lot of things (including the location of some tools) and everything is slower than it was before. Also discovered that my Proxxon disk sander broke entirely (motor is humming, but not moving).
It was slow to start before and was a bit unstable (I think I bumped it during an apartment move), but after a couple of years of downtime it failed entirely. Could not find any obvious failure once opened it up, so really hope Byrnes shop would eventually reopen and I can upgrade to the sander I was dreaming about.
Shaping thick parts without it would be quite a challenge...
- Erik W, Haliburton, GrandpaPhil and 4 others
-
7
-
Volume 2 is released now and is available in the museum shop!
You can also find it on Amazon: https://www.amazon.com/Vasa-II-Rigging-material-archaeological/dp/9188909115
However volume 1 is sold out everywhere
 is available in a second hand market for ridiculous collectible prices (3-5k USD, sky is the limit)
- thibaultron and mtaylor
-
2
-
-
-
-


HMS PEGASUS by giampieroricci - Scale 1:36 - Swan-Class Sloop from plans by David Antscherl & Greg Herbert
in - Build logs for subjects built 1751 - 1800
Posted
Really like you wood colour pallette, contrasting ladders and ebony pieces on the deck (ebony hatches look especially awesome!).
Will "borrow" a few ideas")