


Mike Y
-
Posts
1,437 -
Joined
-
Last visited
Content Type
Profiles
Forums
Gallery
Events
Posts posted by Mike Y
-
-
Thanks everybody, it's so nice to be back
")
GuntherMT, the motor is geared down significantly, so it's pretty slow, but provides enough torque for the purpose (tiny holes that are not very deep).
So you only need a moderate pressure. Though it's not fast, each hole takes around 5 seconds. Dremel would do that in a second, but the cost of mistake is higher.
I chose a weak motor simply for the size, anything more powerful is also bigger. And the design goal was to have a tiny little thing.
Unfortunately collet is as long as the motor itself, but I do not have good enough tools and skills to machine my own collet on this scale...
Foot switch would be nice, but I did not have one, and making it would be a bit more complicated. Can be retrofitted pretty easily if needed.
I usually do not have space for both hands when working on a model, at least not for internal planking.
The power supply is a simple "adjustable power adapter" from any electrical / hobby shop, with a range from 3 to 12v. I run this motor on 5-7.5v usually, but trying to be careful and take breaks. I am worried about frying this little motor, wooden drill body would not dissipate the heat, and I would not feel the motor getting hot. Machining it from brass and attaching with some thermal paste would probably be smarter, but it's another can of worms (surrounding a bare motor with conductive material is probably not great).
-
Once I've lined up the treenail holes - I realised that I do not have a way to drill them. Dremel is too long, manual drill is too long as well, so I need to make a tiny micro drill that is as short as possible.
But then the spring came, I got into mountain biking hobby, youngest daughter started to grow up and need attention, then we had a fantastic boat trip in the archipelago, one thing lead to another - and I found myself in the middle of Christmas holidays, realising I haven't touched the model for a year, such a shame! When you have a break that is soo long - it feels pathetic. You don't remember when some tools and parts are, there is a thick layer of dust built up on some tools, and so on.
So back to making tools
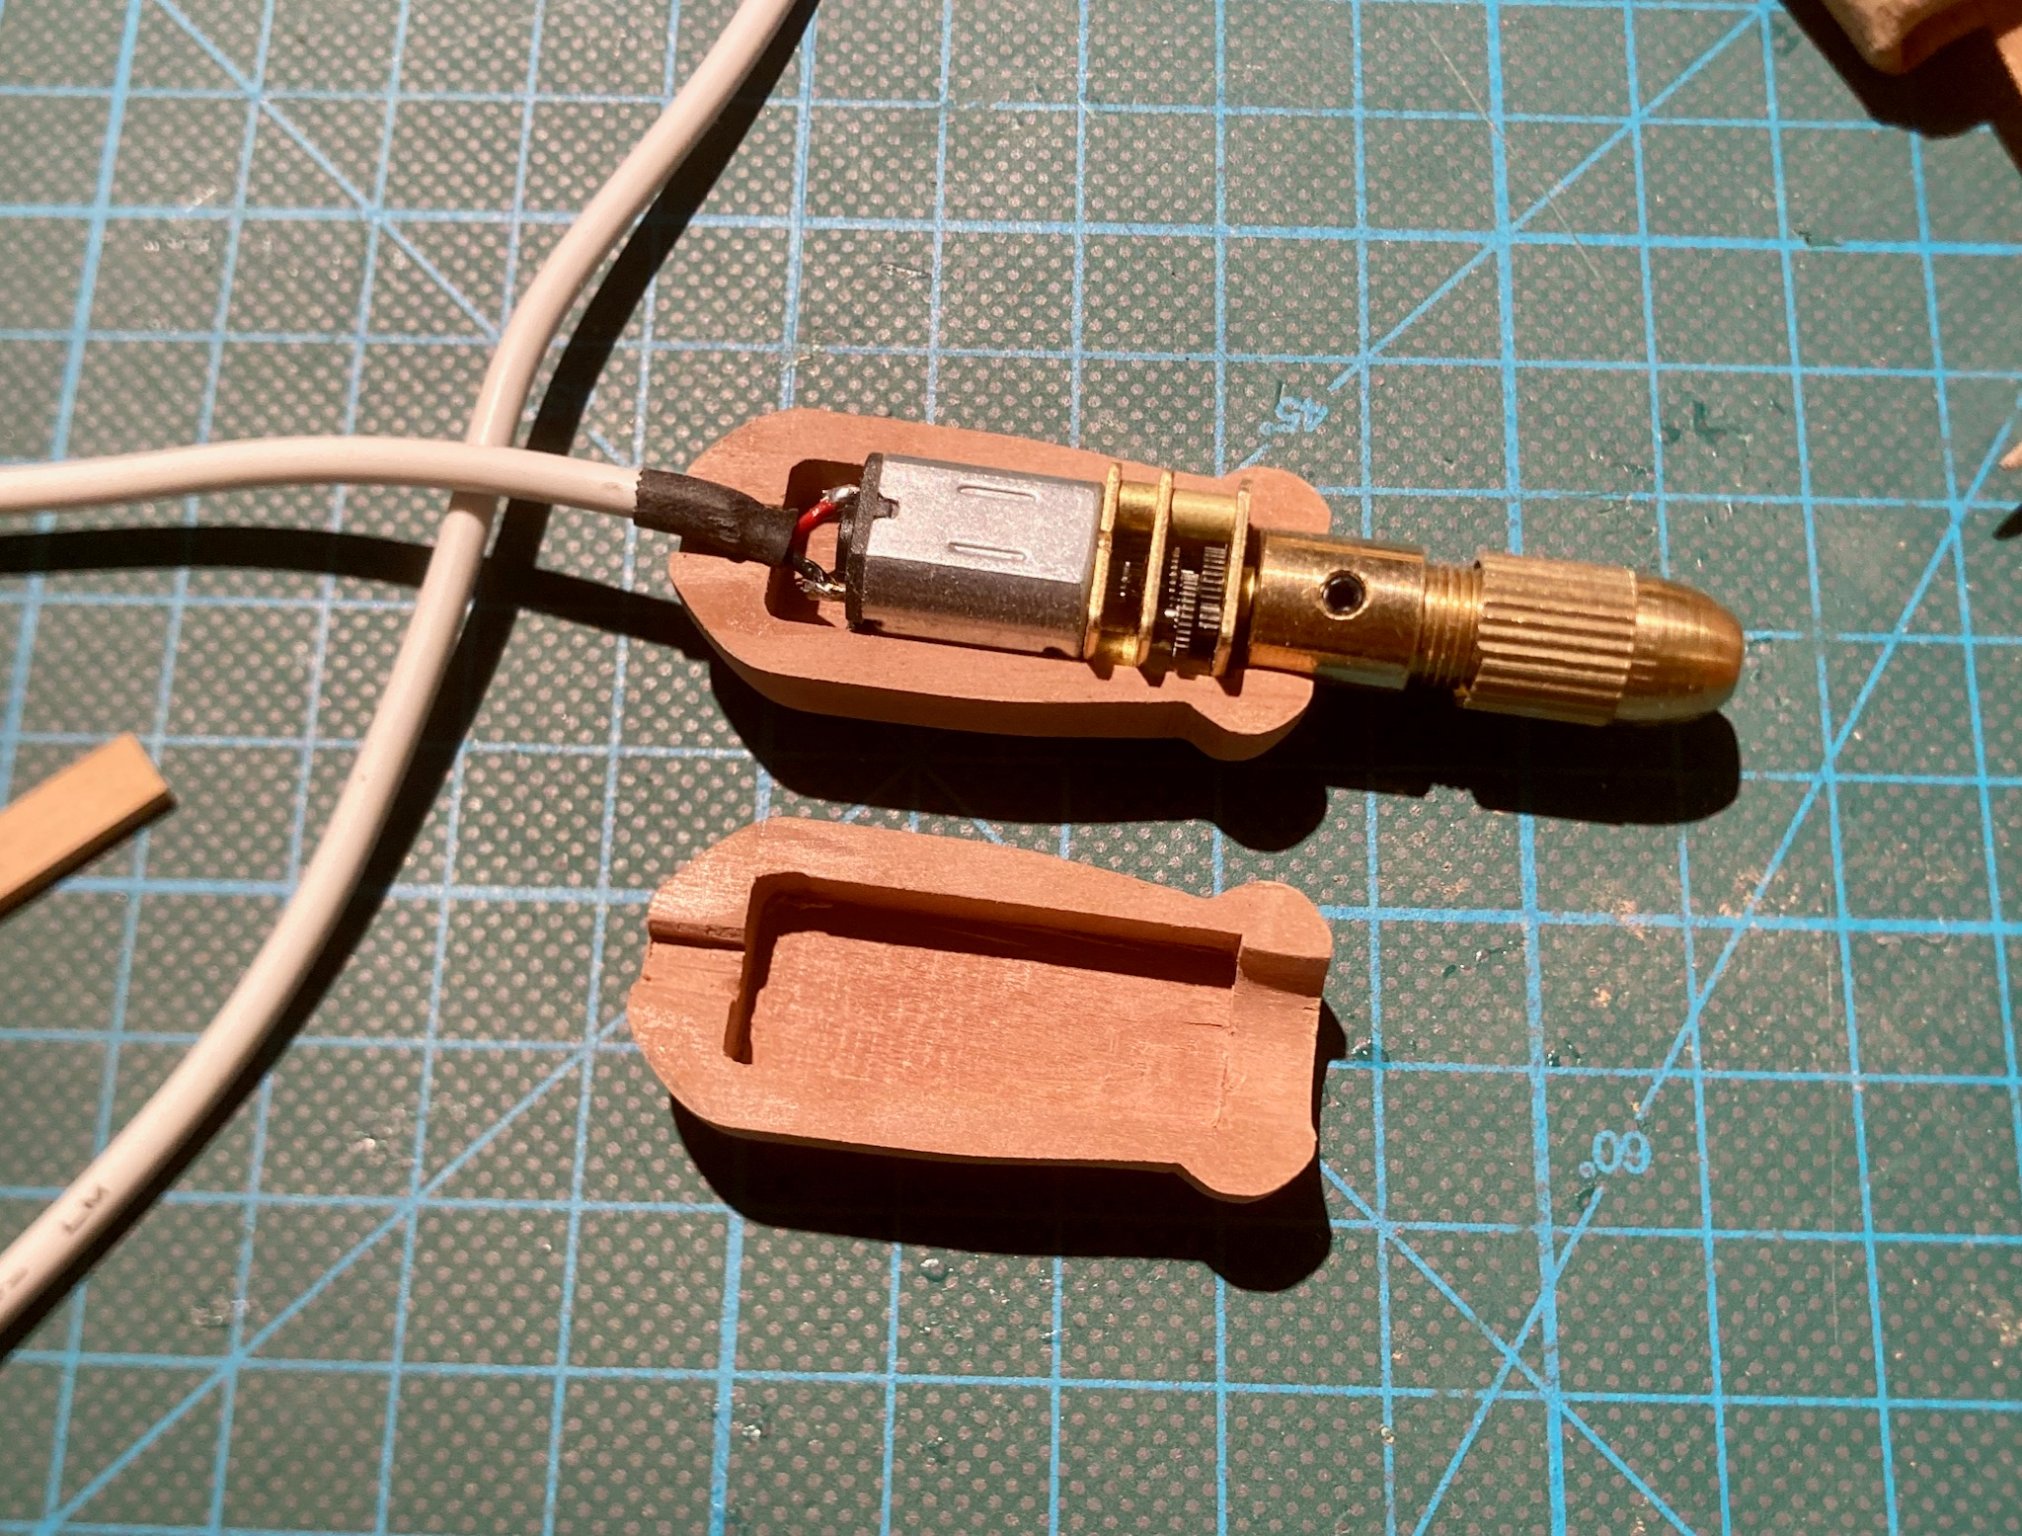
The idea is simple - use a tiny geared down motor as a drill, control it with a button that is held with another hand (to reduce the chance of whoopsies when drill bit wanders off when it touches the pilot hole).
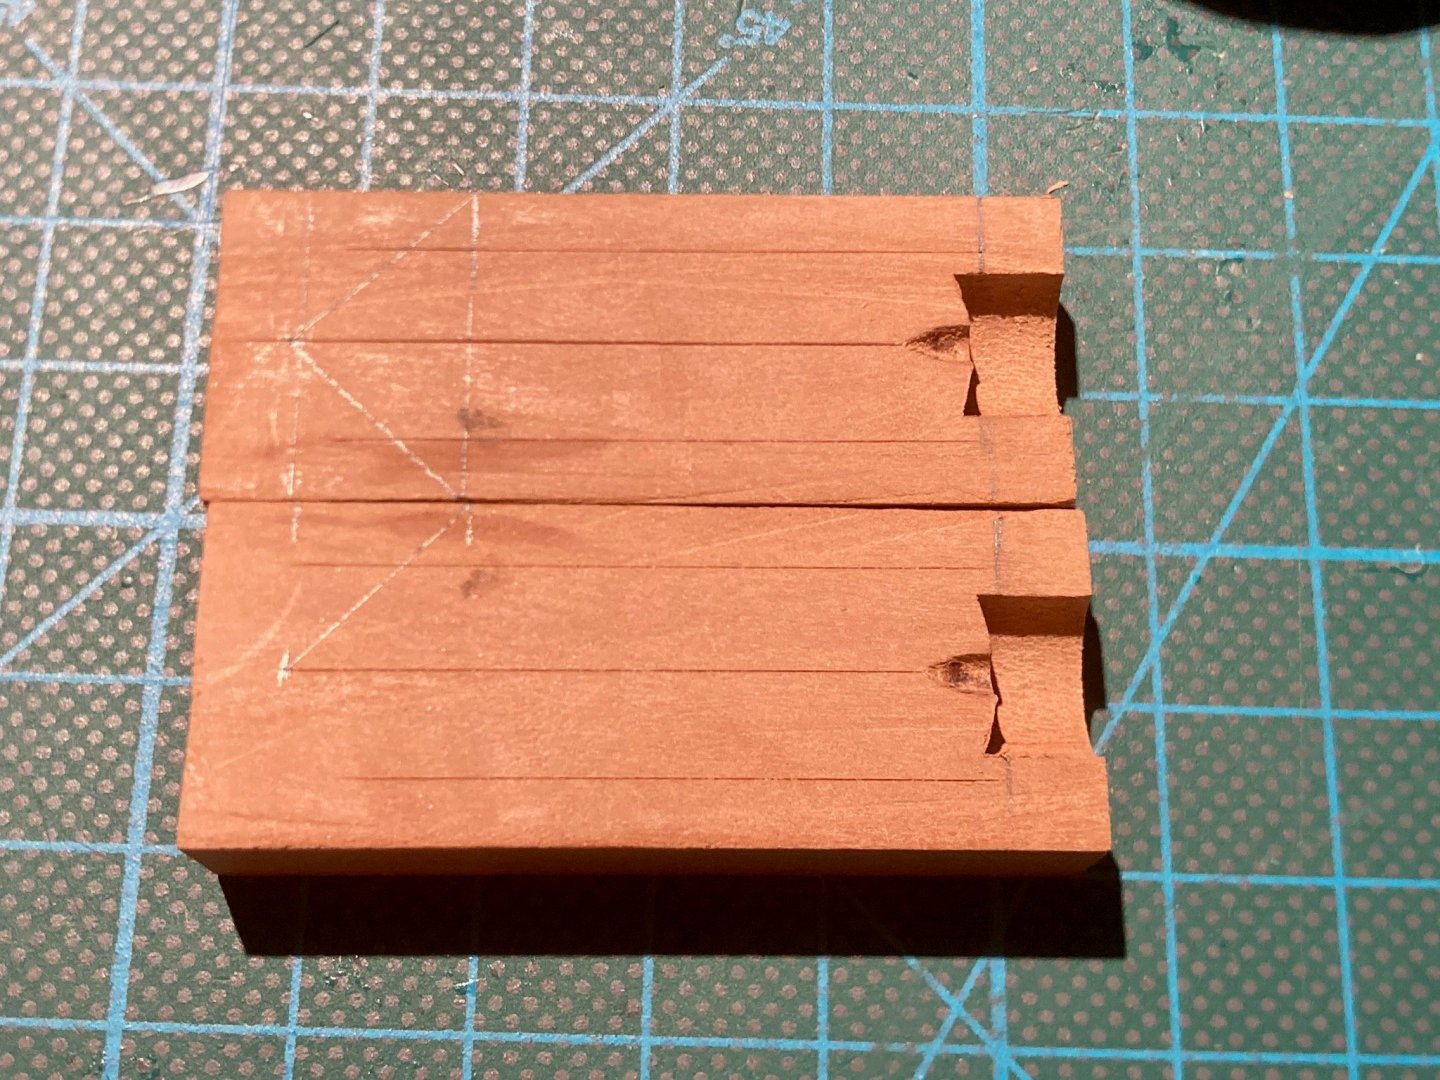
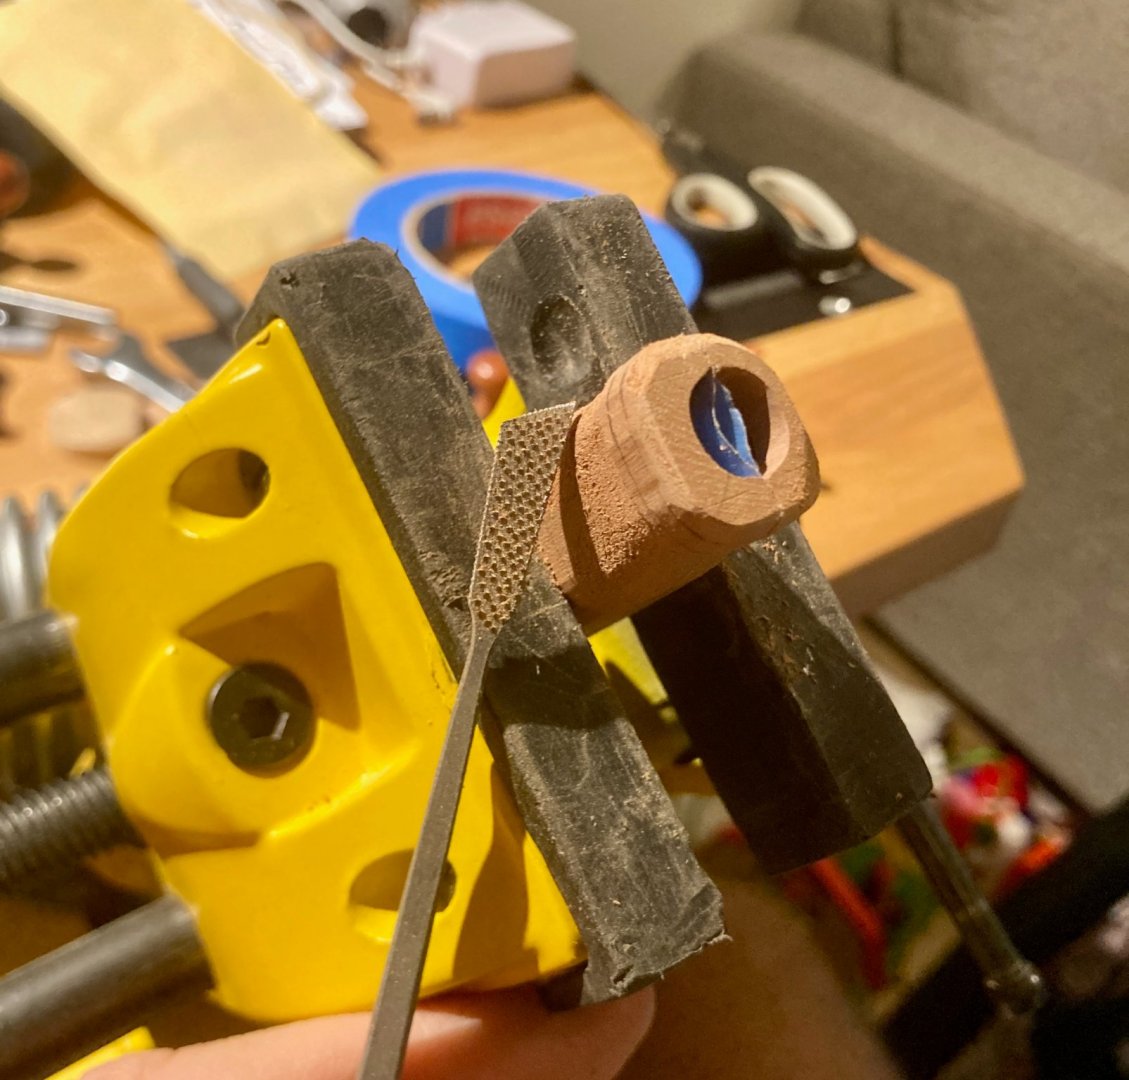
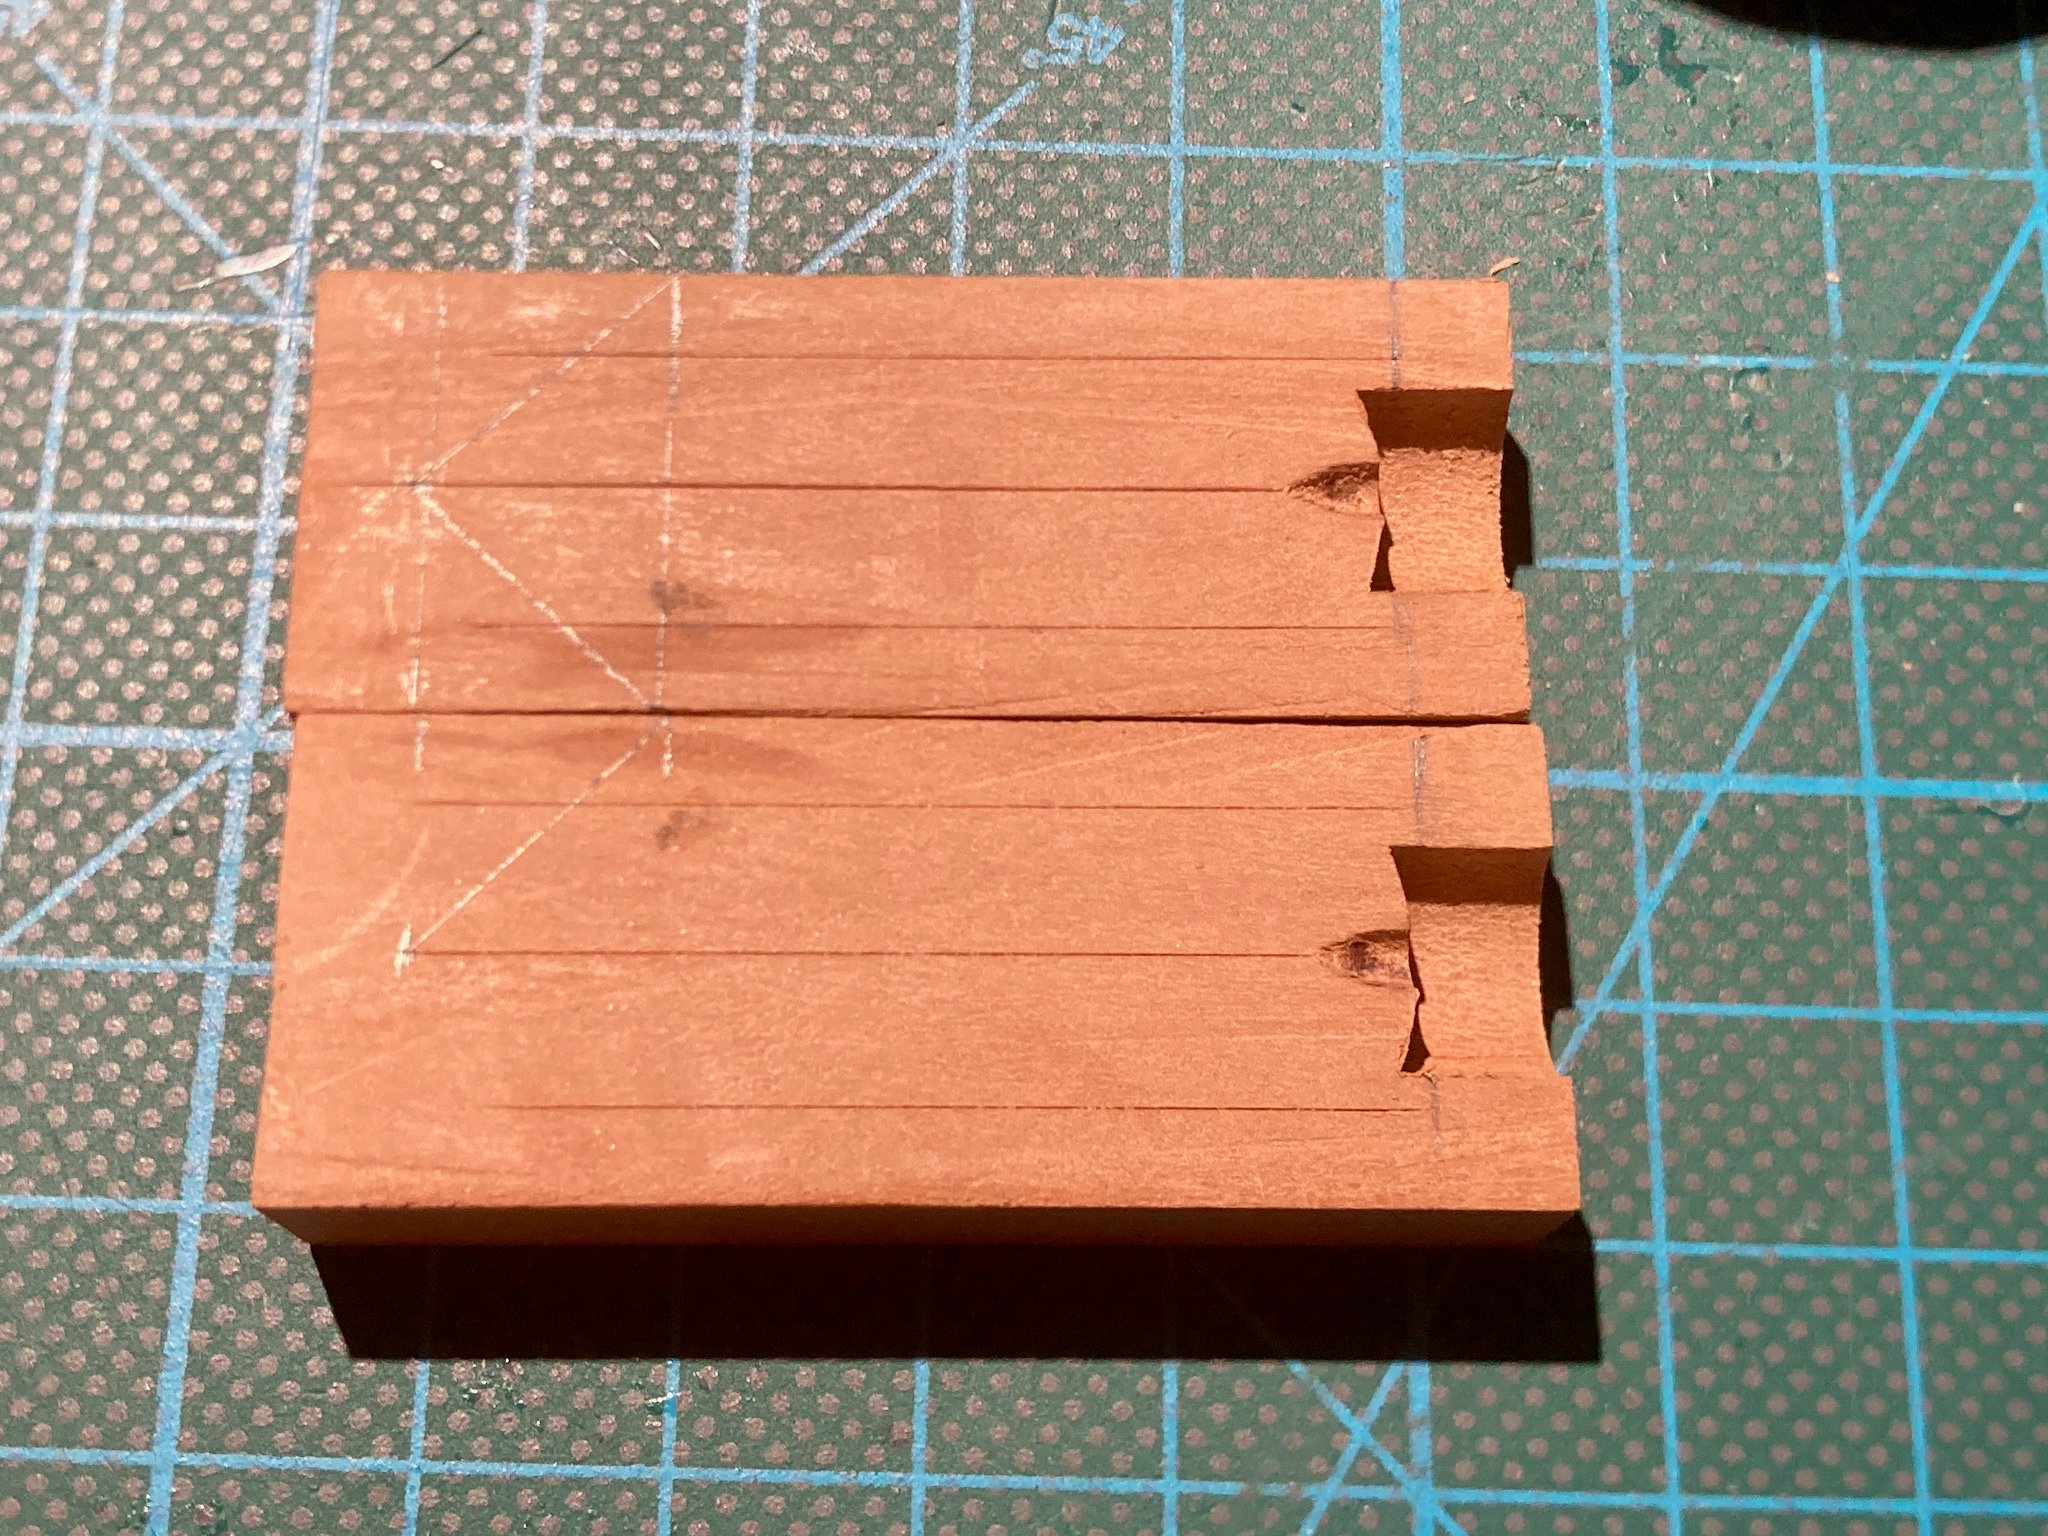
Milled the recess for the button, using a blue tape + CA trick as a workholding method.
That would be a perfect job for a CNC mill, if only I had one...
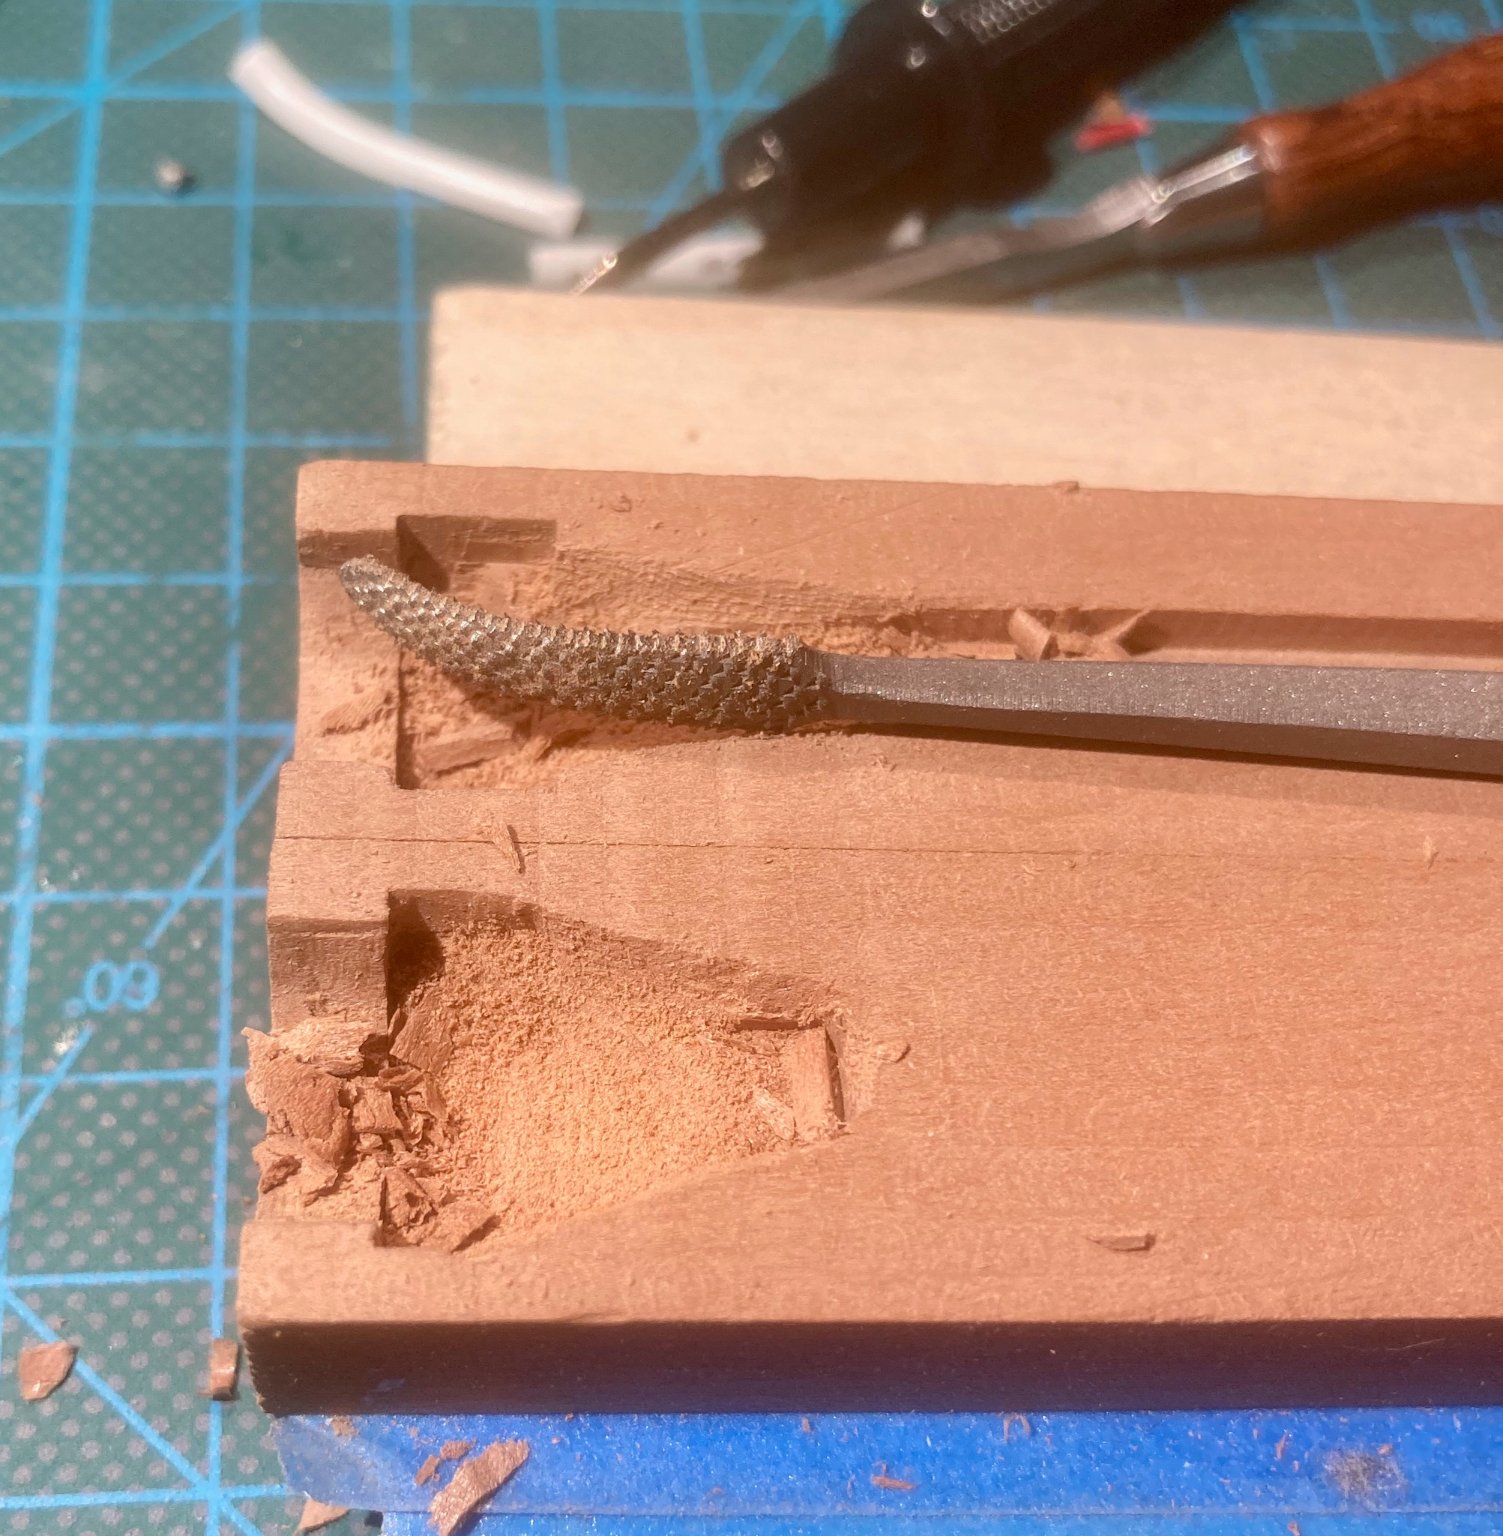
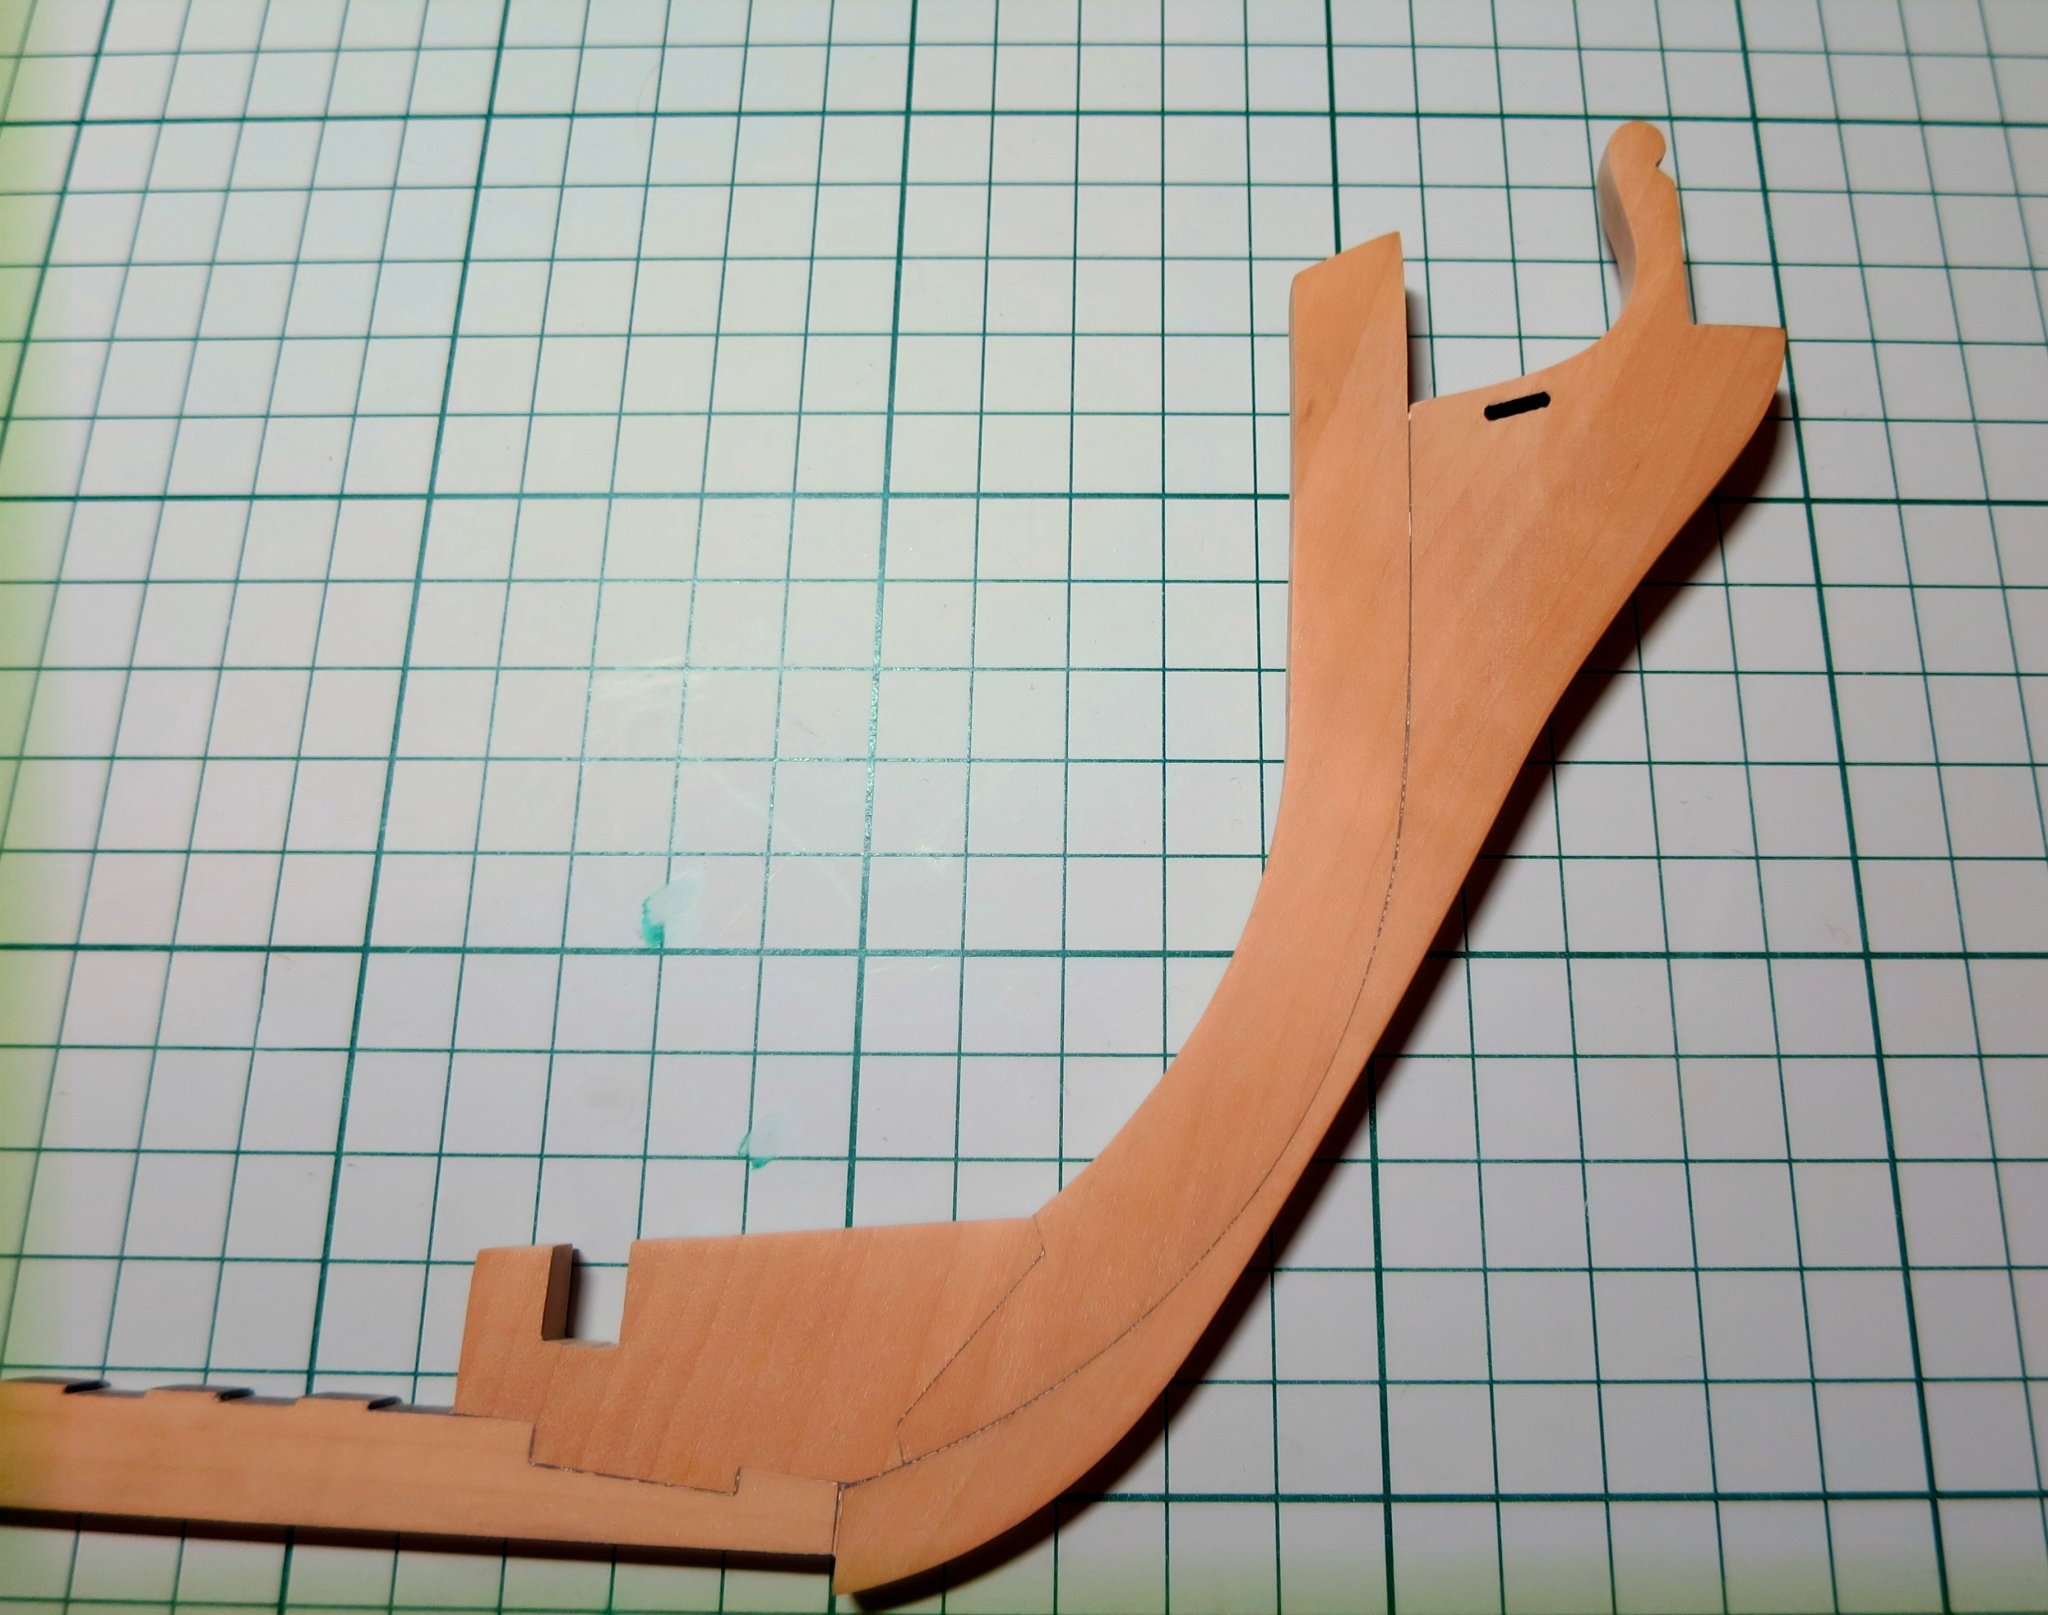
Shaped it with my new toys - miniature rasps. They are fantastic for that, cutting pear pretty easy:

That's how the assembly looks before the glue-up.

Next was the drill part.
Due to noise limitations imposed by a younger kid - I am trying to avoid using power tools if possible.
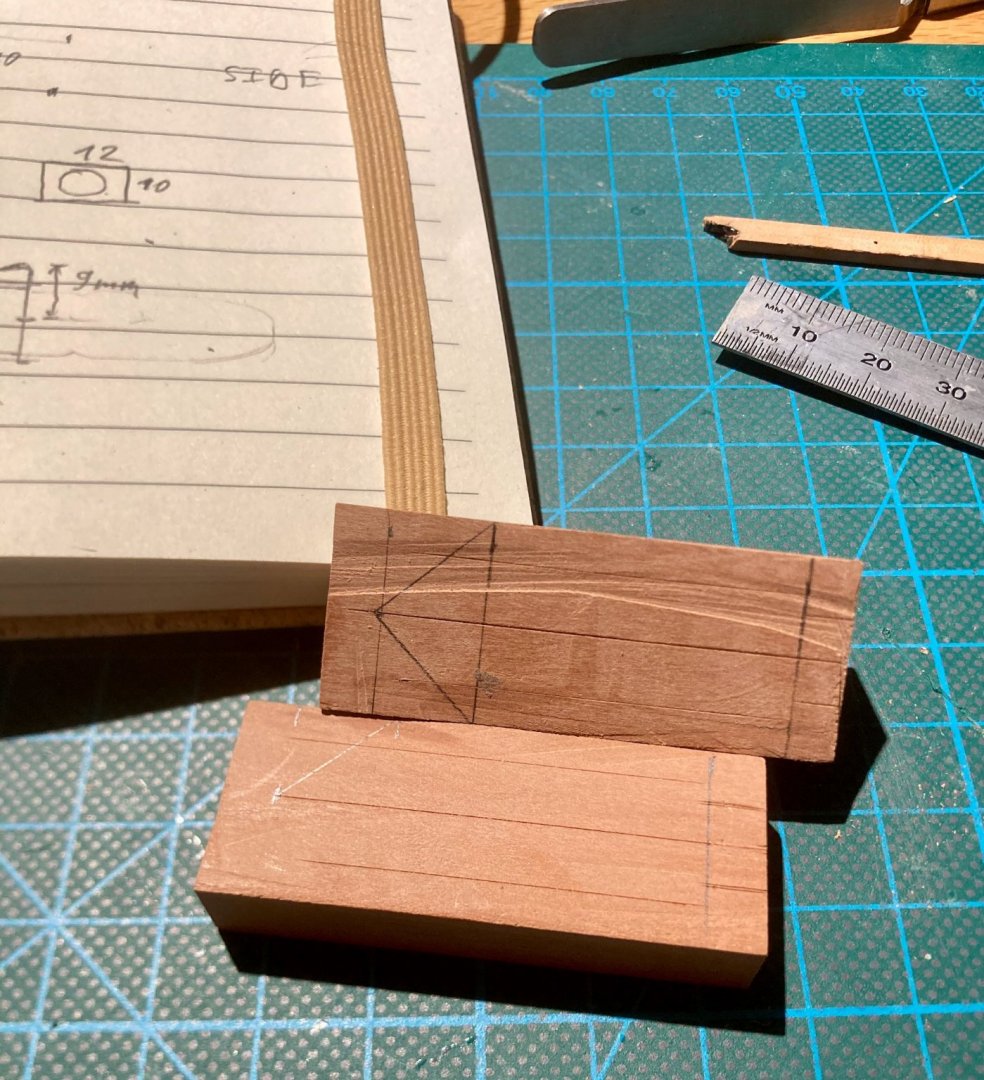
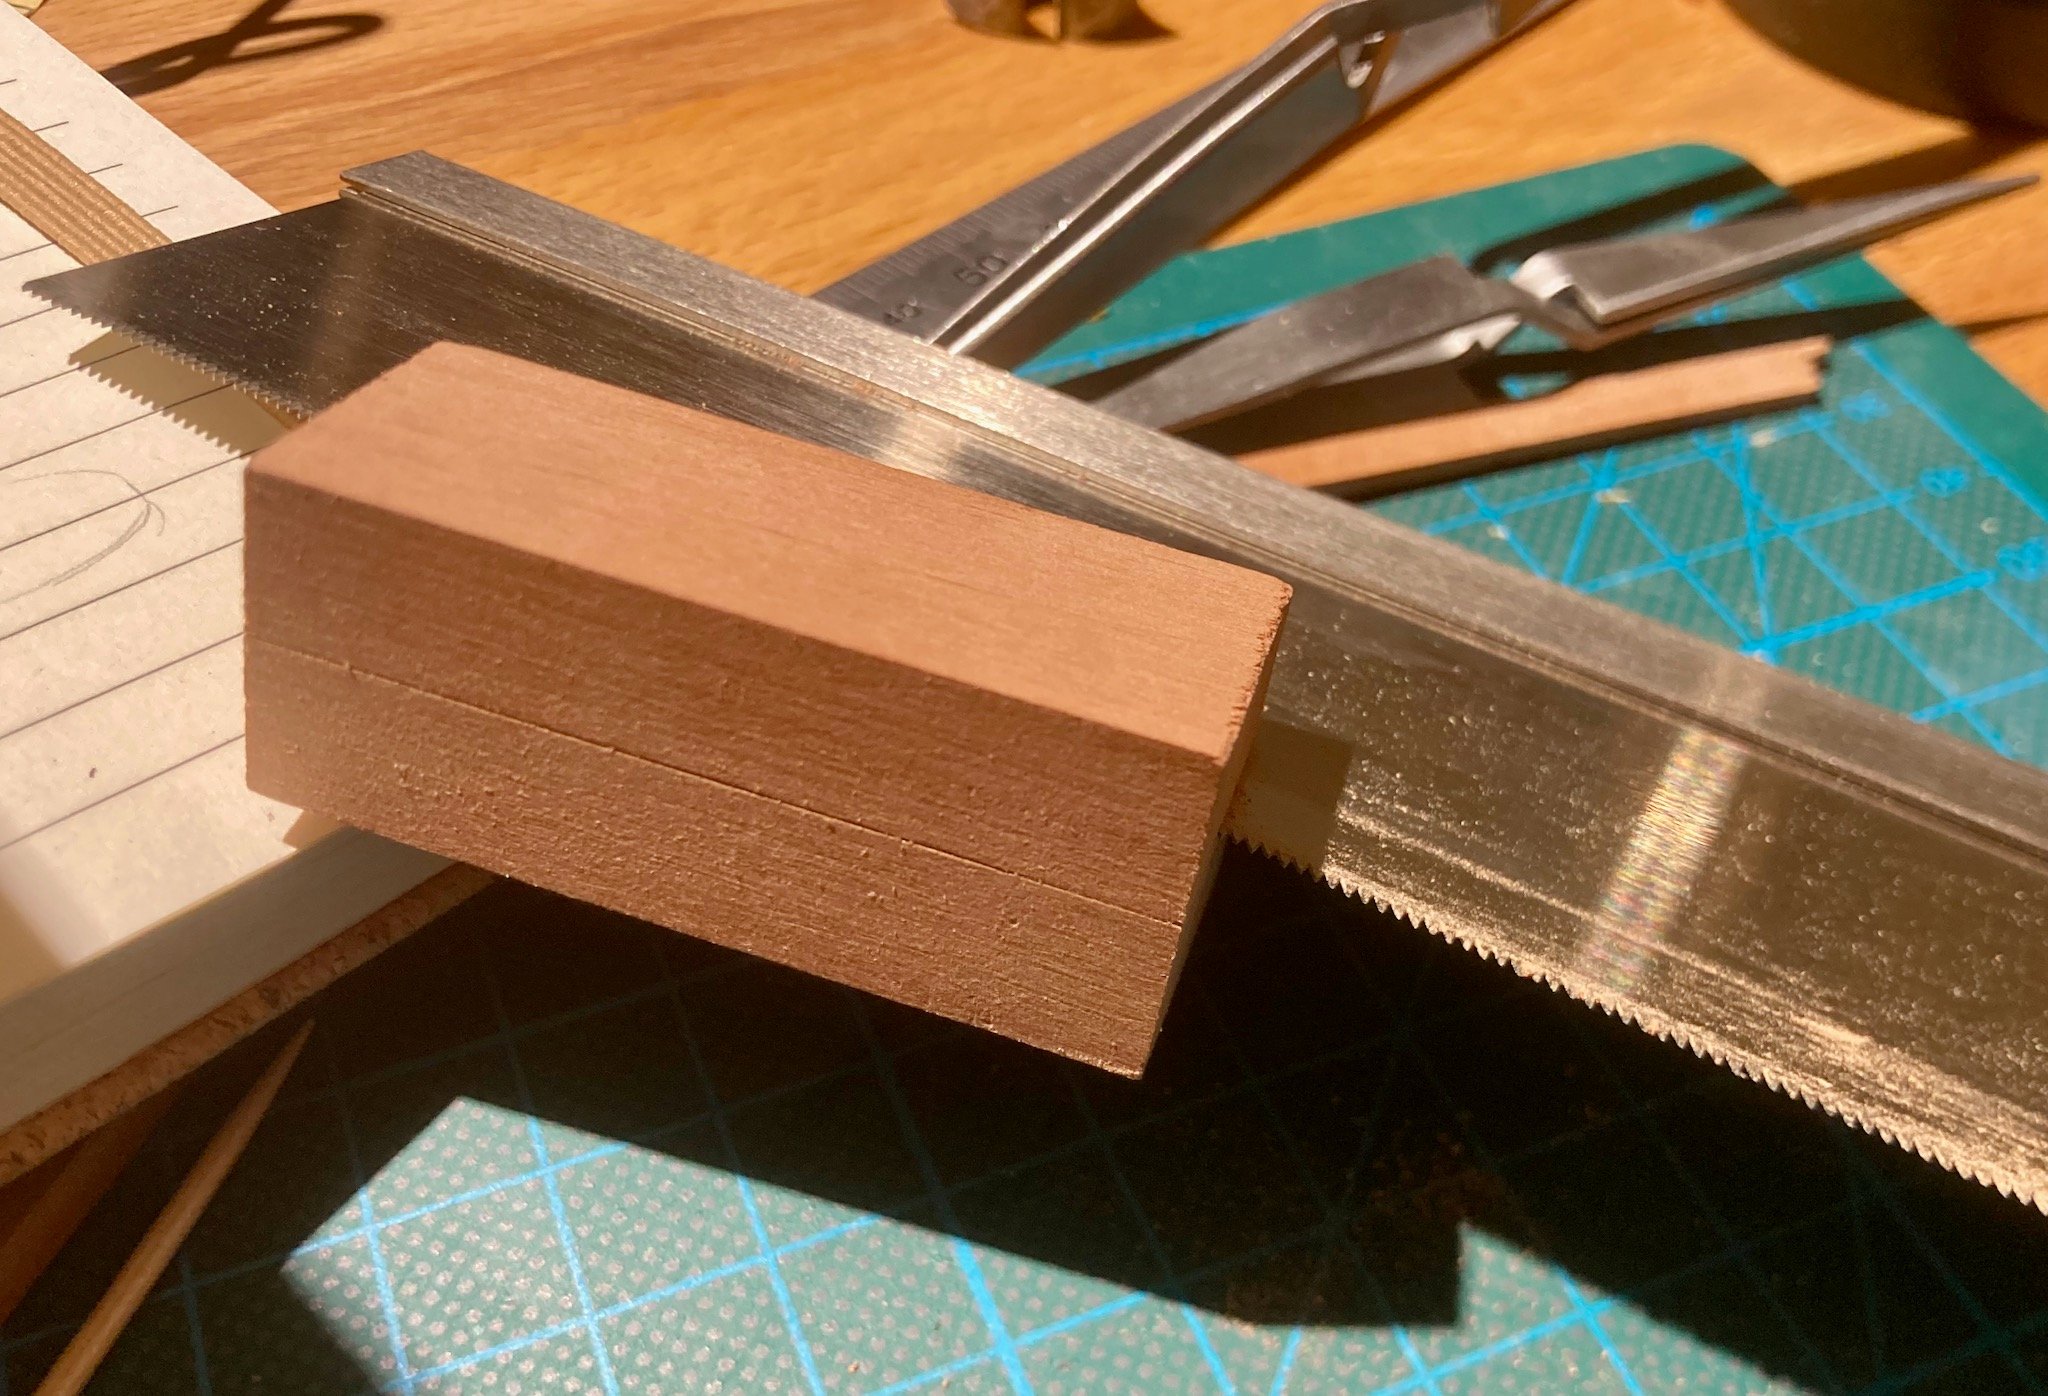
While table saw is gathering dust - tried ripping a block of pear with a handsaw, following the scribed lines. The result was surprisingly ok, nearly straight, and took just a few minutes.

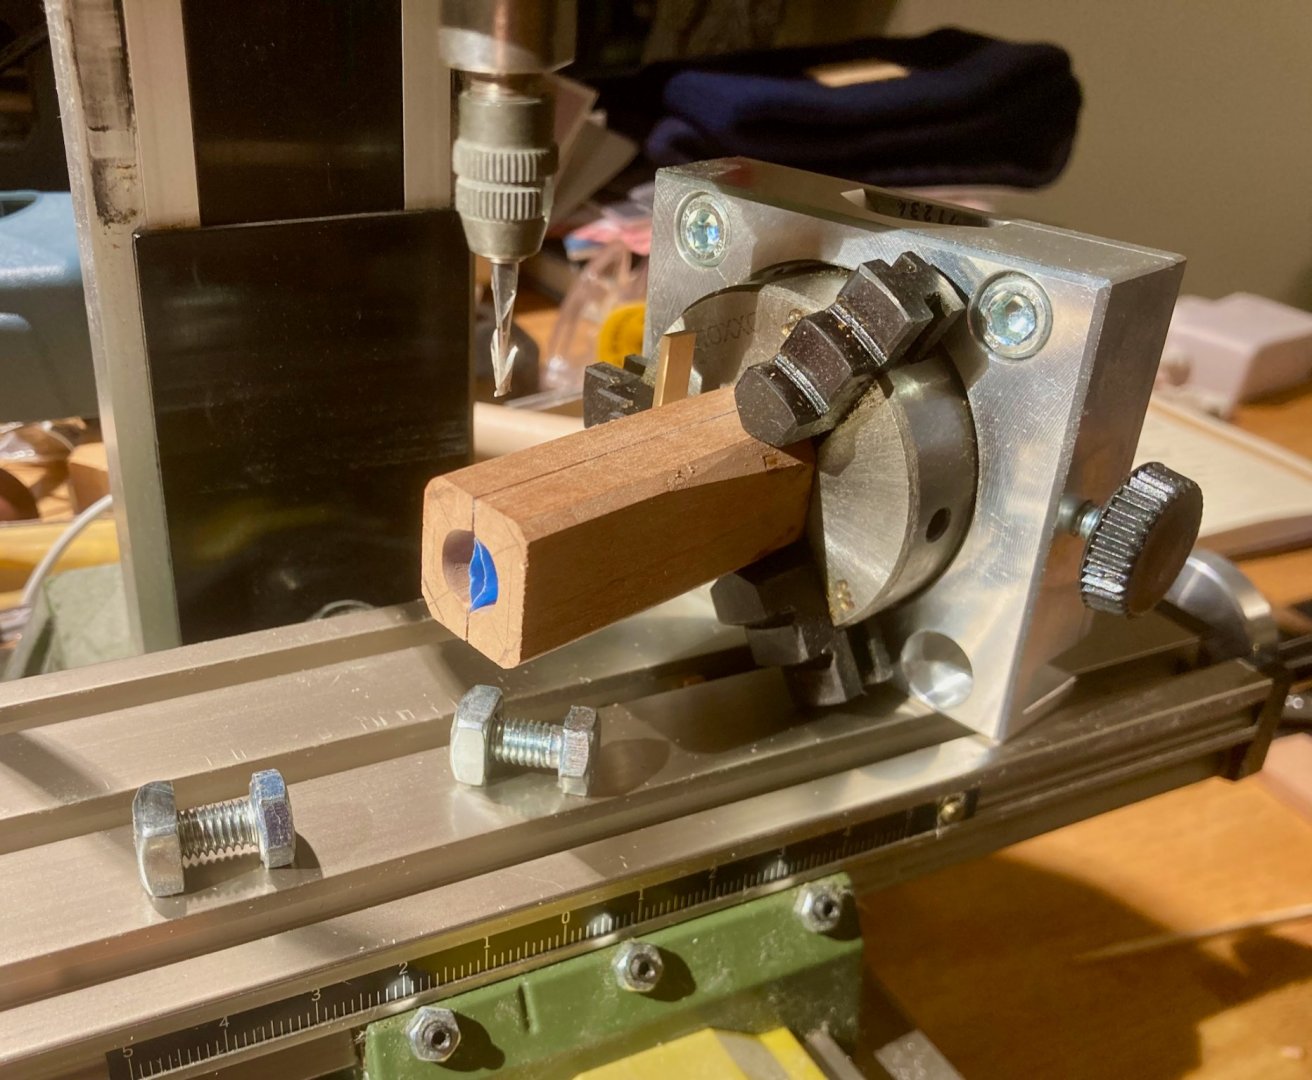
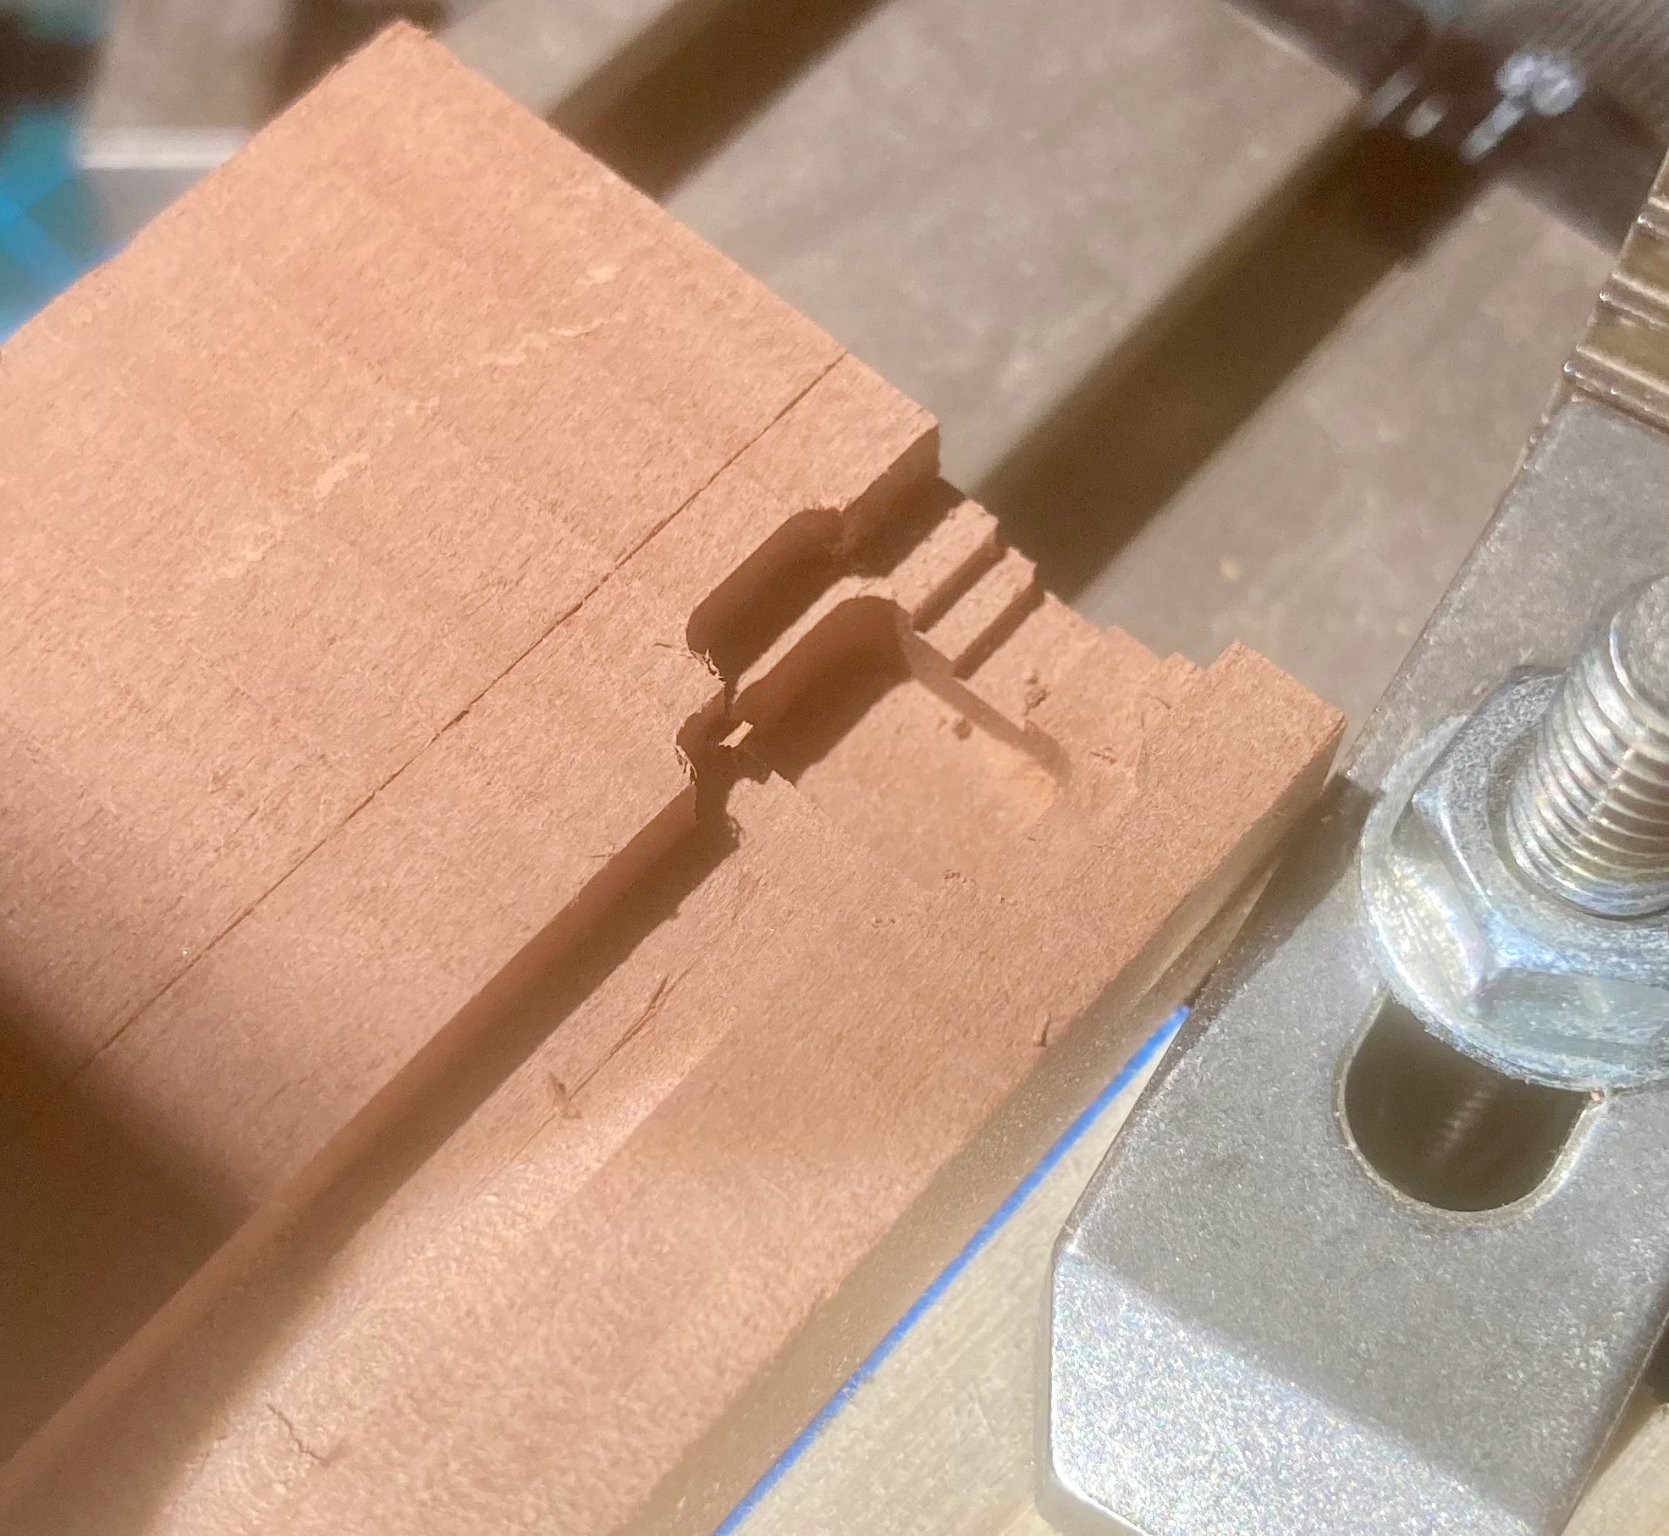
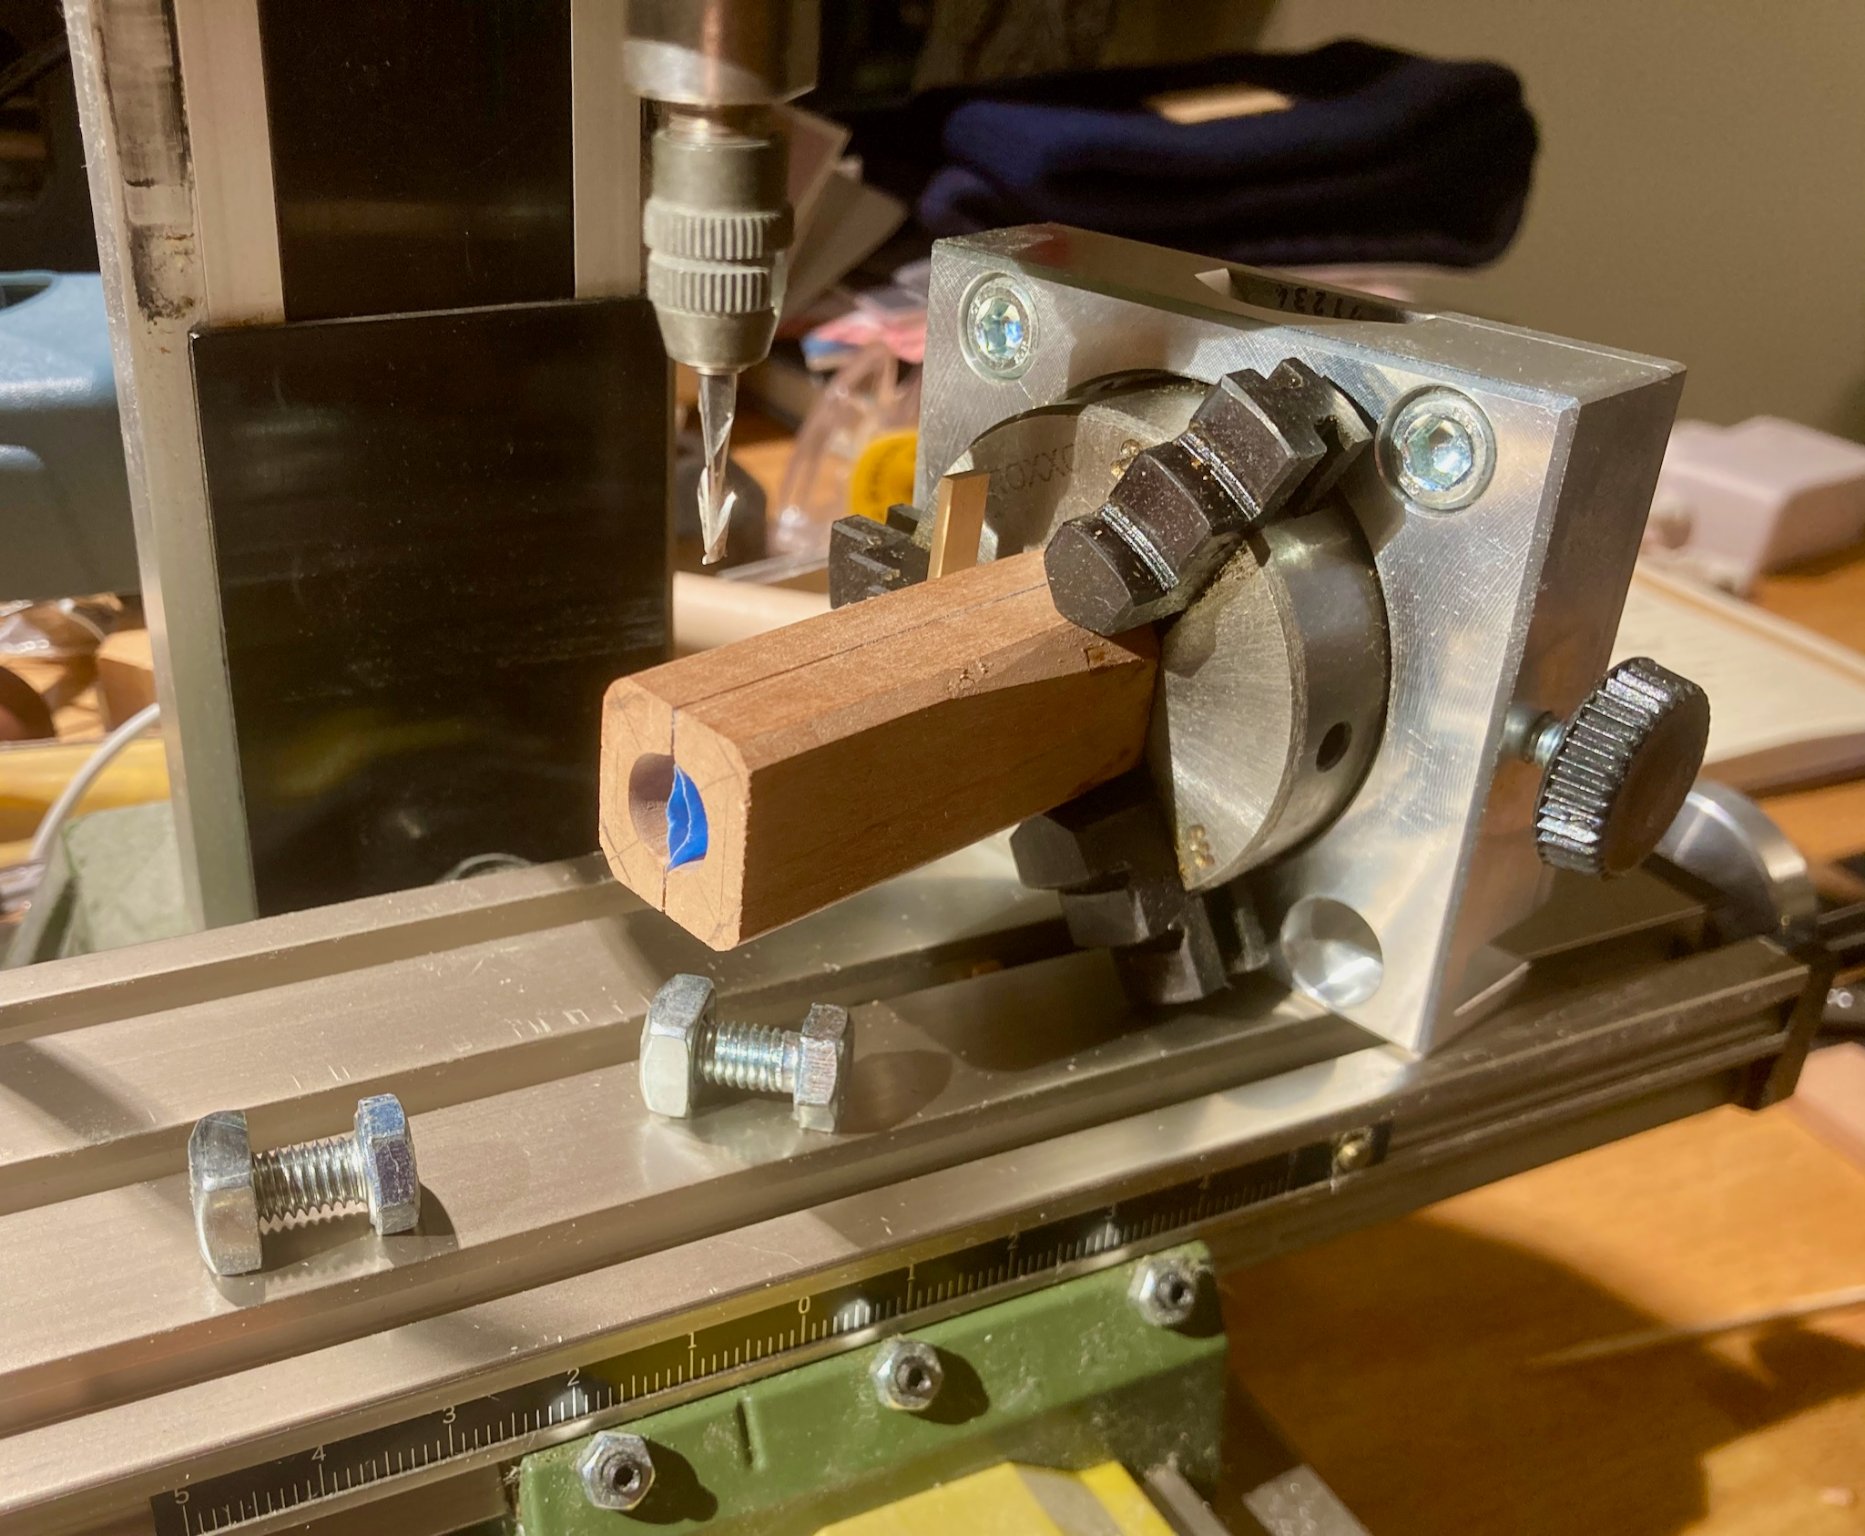
Interesting shot - here is the blank after drilling the hole for the chuck
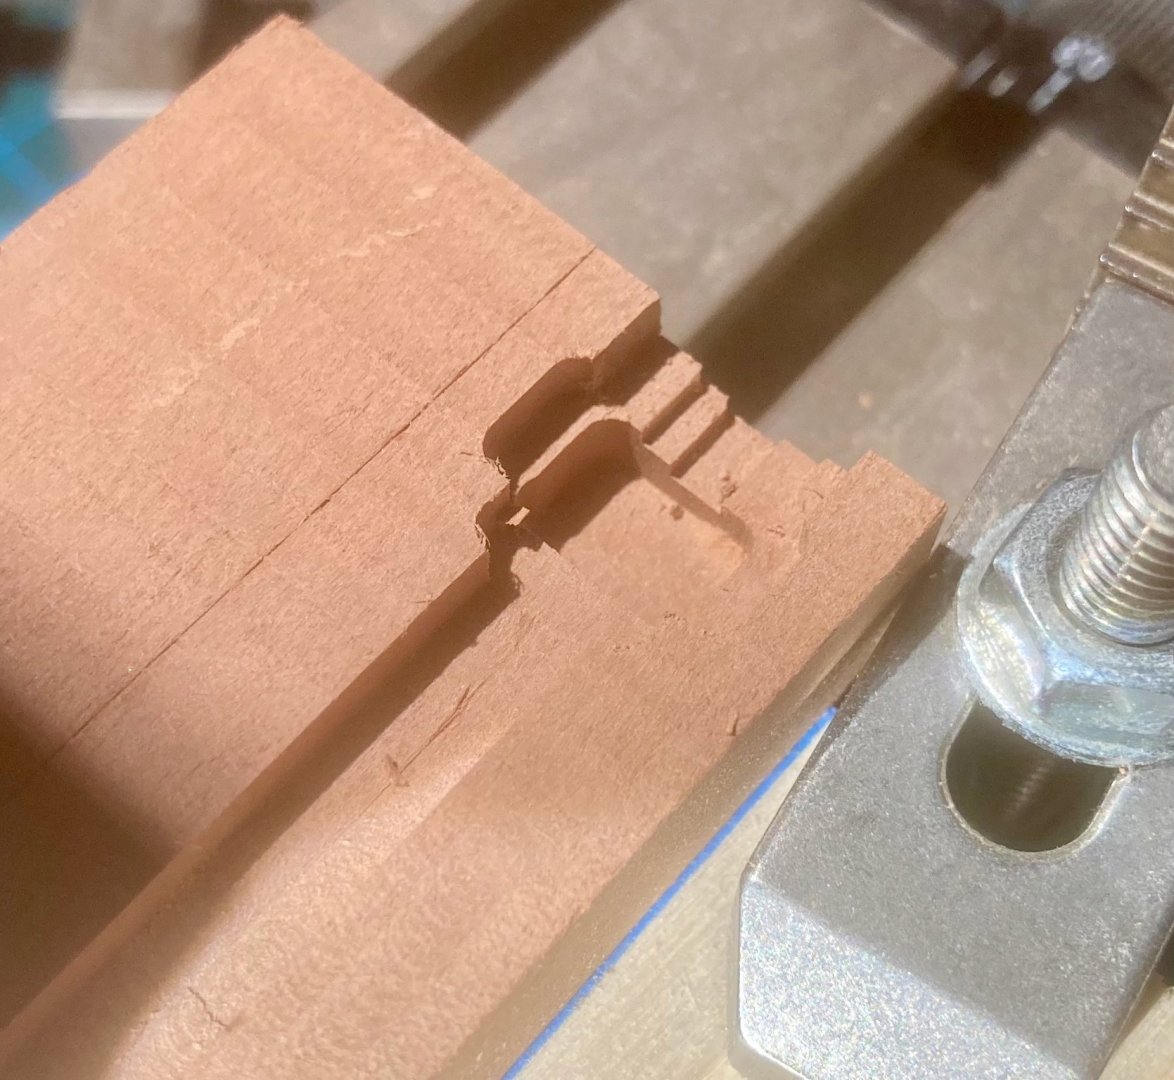
After milling the internal recesses or the motor I tried to mill the outside shape using a vertically mounted rotary table, but faced a very stupid problem: jaws of the chuck hit the milling table. Adding a spacer underneath the rotary table would have solved that problem - but requires a longer mounting bolt, which I did not have

No mill then, back to shaping by hand with a rasp. That was pretty satisfactory, though the result is clearly hand sculpted and not as precise.
Everything is ready for the glue-up, and I managed not to cut off too much wood to expose the inner recess. Got pretty close though.
The glue-up was delicate, I forgot to seal the gear block, so used very little glue in that area to avoid it getting into the gears.

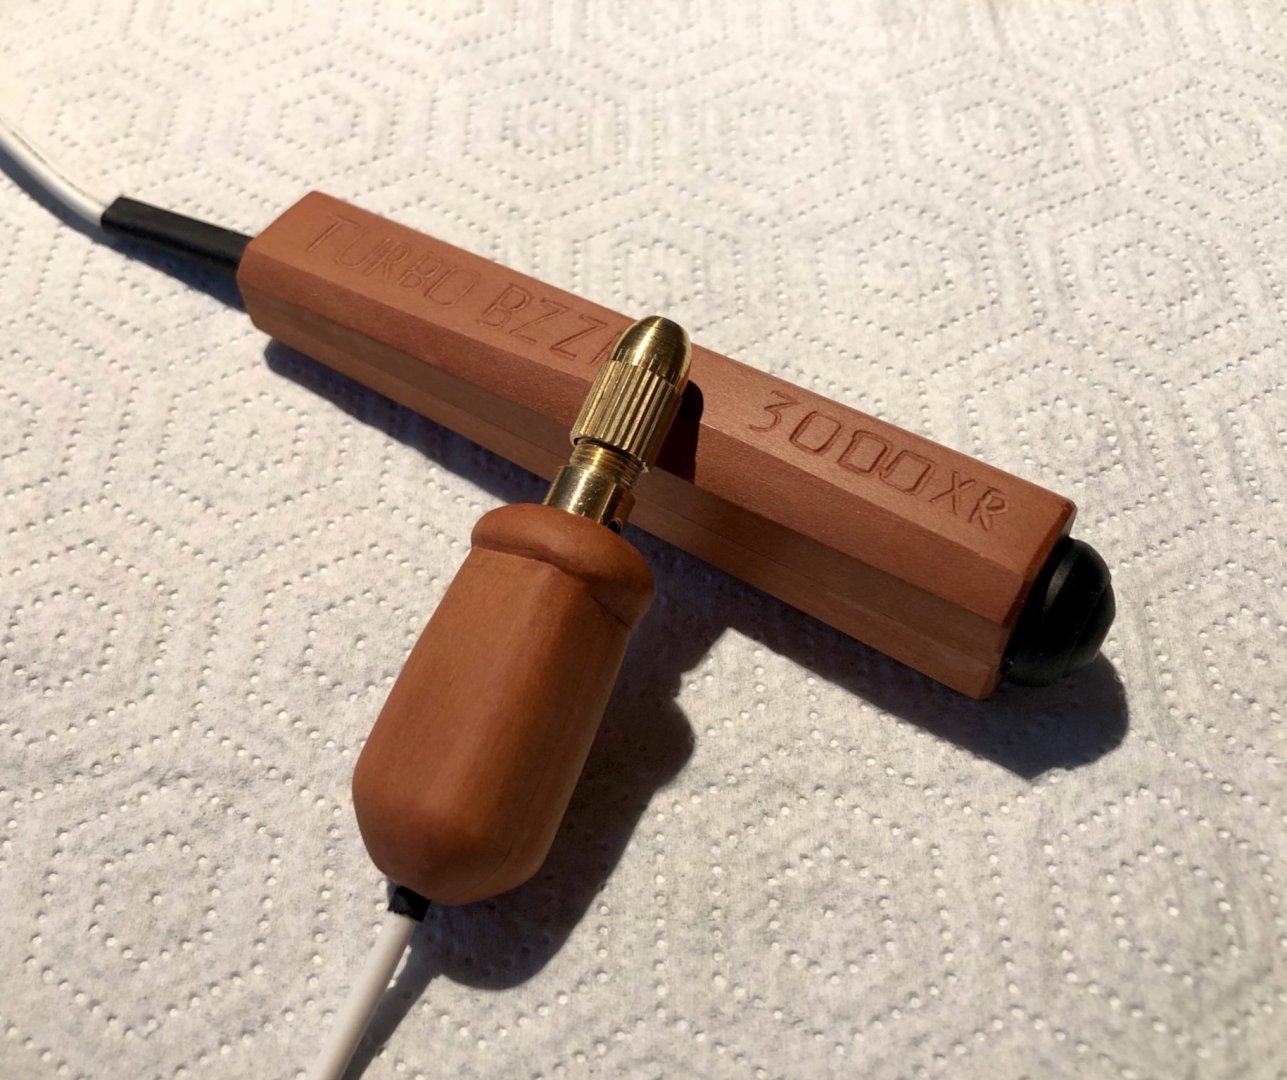
And the final result - the mighty Turbo Buzzr 3000 🤣 It works and make a buzz, the drill bit rotates, you can actually drill with it!
Now I have a few hundred holes to make
Feels very strange to hold a wooden drill, so used to the feeling of rubbery plastic when drilling, wood feels entirely unnatural in that situation.
Glad to be back! A lot of build logs to catch up on MSW... Which is a good problem to have.
Stay safe and Merry Christmas to all! 🎄🎄🎄
- tlevine, BANYAN, GrandpaPhil and 18 others
-
 21
21
-
Glad that you have returned back to the model! It hits close to home, that sudden losses of enthusiasm.
I would never dare to actually paint the letters, would try some sort of paper / plastic / photoetch trickery
By the way, I really like your wooden master anchors, they look great! -
Monumental work on a clinker hull where you can't just smoothen everything with a gentle swipe of a sandpaper..
Amazing!
- michael mott, bruce d, tlevine and 2 others
-
5
-
Remco, thanks for sharing your situation, and truly hope it would be back on track soon! The journey of the Kingfisher would continue one day, I believe!
Someday when it's done I hope to see it again, regardless of the location (it's worth a roadtrip!)
Merry Christmas, and let's hope that this curveball is a beginning of something new, something great! 💪
-
It's so nice to realise that we inspired some to start building with their kids
Hopefully there would be more!
Will try to share all my observations, maybe it would be useful. Of course, everything is different, and I only have one child to compare.
The modelling sessions were around 20-30 min at the age of 6. There was no expectation of a quick result, but more of "I want to do the same thing my dad is doing", plus a natural interest in doing something crafty. Each finished phase was treated as a semi-finished thing you can play with. I remember same when I was a kid - finished model was as exciting as an unfinished one, so do not stress too much about it. It is unlikely to be finished unless you can do it many times per week.
Expect some deviations from the plan, this is normal and increases the interest. For example, my daughter likes to build things from small scrap pieces left over from my build, by gluing them together and to a piece of paper.
The starting skills are non-existing, every technique needs to be explained with some practice and help. How to hold a file? Sanding? Gluing? Cutting? Every single operation is new, account for that when planning a build. Prepare every session, so you have parts at hand, tools ready, etc.
Each method and skill is introduced the following way: show it first, explain how it works. Let the kid practice on some scrap, first holding hand, then letting go and allow to make some mistakes. Do not start with safety precautions, introduce them gently where necessary. Dremel is quite kid friendly, by the way (if you do not use cutoff wheels and such).
One of the hardest skills is keeping a consistent angle / plane when using a tool, as well as consistent pressure. Steady hand when using a file, for example. Still struggle with that a little bit, so do not have a very high demands on filing quality.
Sanding is tedious, plus a pressure level is different. Split the time evenly, so kid feels that the contributions is fair. But just because of skill and pressure, your sanding would do 70% of the job. The other person holds a vacuum hose, which also counts as help.
Let the child help, find some "busywork" in a delicate situations. For example, some of the planks in our kit are a very thin and delicate veneer, which breaks easily. I was doing any edge shaping, but she was helping to fit, hold the light, etc etc.
Safety-wise - perfect time to introduce dust protection and safety glasses, no problem with that if you both use it. Dust protection is mostly decorative, all the masks and respirators are way too big for a child face, but it's still a good habit. I used a vacuum to really catch small particles when sanding.
Plastic or wood? Plastic models involve CA glue or cement, both are harder and more risky to use by a child. Also parts are smaller. Wood - larger parts, safer tools (file, sandpaper, PVA glue). Some machine tools are also fine - with some help and introduction, she learned how to use Dremel (nylon brush to clean the glue squeeze-out, sanding drump, drill), disk sander (low power, so it would stop even if you stick finger into it) and even a bandsaw (of course, all supervised). At the same time, I would not dare introducing table saw or a mill, that one is too risky.
Planking is actually doable by a kid if planks are pre-shaped (laser cut). Assembling the hull (bulkheads and so on) - doable as well. The rest is up to you, probably a lot of details needs to be skipped.
But even if you will end up with just a planked hull - it is already something that is nearly finished. Add a mast and few sails - imagination runs wild!
Do not forget that it's all for the process - positive reinforcement, highfives and a good mood is the most important technique in the whole exercise. It helps to be a big goofy, make stupid mistakes and let a child correct you and help you - it makes them very very proud
Hope you will have many enjoyable sessions with your granddaughter, that she will remember for a long time afterwards. Does not matter if she will end up with a finished model.
-
-
-
Hoorray, another Hahn build, this time from giampieroricci!
I like the transformation of a rough hull to a smooth one after fairing, very satisfying!
More progress pictures, please!
- giampieroricci and mtaylor
-
2
-
You need quite some rigidity when sanding, to achieve it and prevent misalignment when humidity changes - you need temporary spacers between frames anyway. Hard to imagine how that can be done with a non-temporary joints. Replacing a frame or two is doable by just dissolving PVA as described above, but getting them all in and out?
-
-
-
Great start!
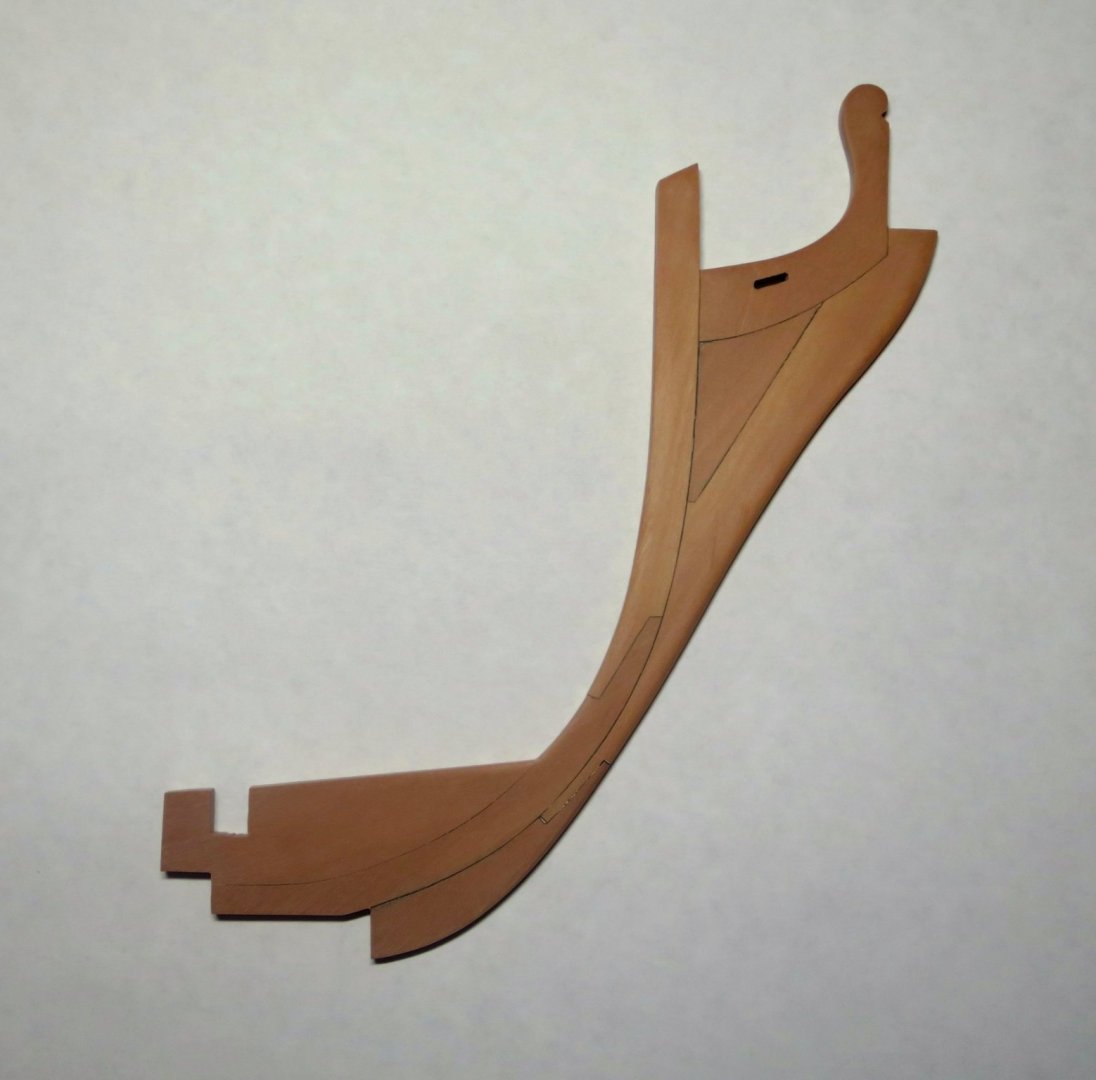
Hahn simplifies a lot of details in his drawings, you will find plenty of "giant pieces" that were built out of multiple pieces in reality. Just use more detailed sources if you want to build it in a more realistic way. For example, the stem is likely made out of more pieces, etc etc. They are quite visible on a model, and actually look way nicer in a detailed form, to my taste...
On my model, Hahn version looks like this:

Looks too crude, so I scrapped it and re-made in a bit more detailed way, based on other drawings and books. Note that this is not a full level of details, for example that triangle in the middle should have been broken down as well, etc etc. But still looks a bit better.
- bruce d, KenW, GrandpaPhil and 13 others
-
16
-
-
This is something else, but there is more than one "correct one". Try it, shake it, make sure it is not too flimsy, check the max height if you are tall
- garyshipwright, Canute, No Idea and 2 others
-
5
-
You have one of the most unusual workshops!
Nice build!
- TOM G, Jolley Roger and mtaylor
-
3
-
Välkommen!
-
Hi Andre,
They are fairly common in modern offices, and allow to work while standing. Height is adjusted smoothly and continuously with two buttons under the table, no tools required and it takes a few seconds. It is not a fixed set of positions, you can move it like you move your car window. I move it up and down all the time, depending on the work being done. They used to be expensive, but then IKEA released a very decent version for half the price (model name BEKANT).
You can buy the ready-made office table, or just a frame separately. Screw any tabletop on it and you have your custom made electrical table. It is nice to have a solid wood instead of an office fiber board, so you can add a vice and clamp things without damaging the top. They exist in different sizes, colors and even corner versions are available: https://www.ikea.com/us/en/search/products/?q=bekant frame stand
The only downside - it is a table for light work, not a replacement for workbench, since legs have motors and screw rods embedded into them. So I would not recommend chiseling a tenon an mortise joints for your furniture projects on such table... Otherwise it is great
There are a few topics on this forum where this was discussed in details, with photos, etc.
- Castos, Canute, thibaultron and 2 others
-
5
-
-
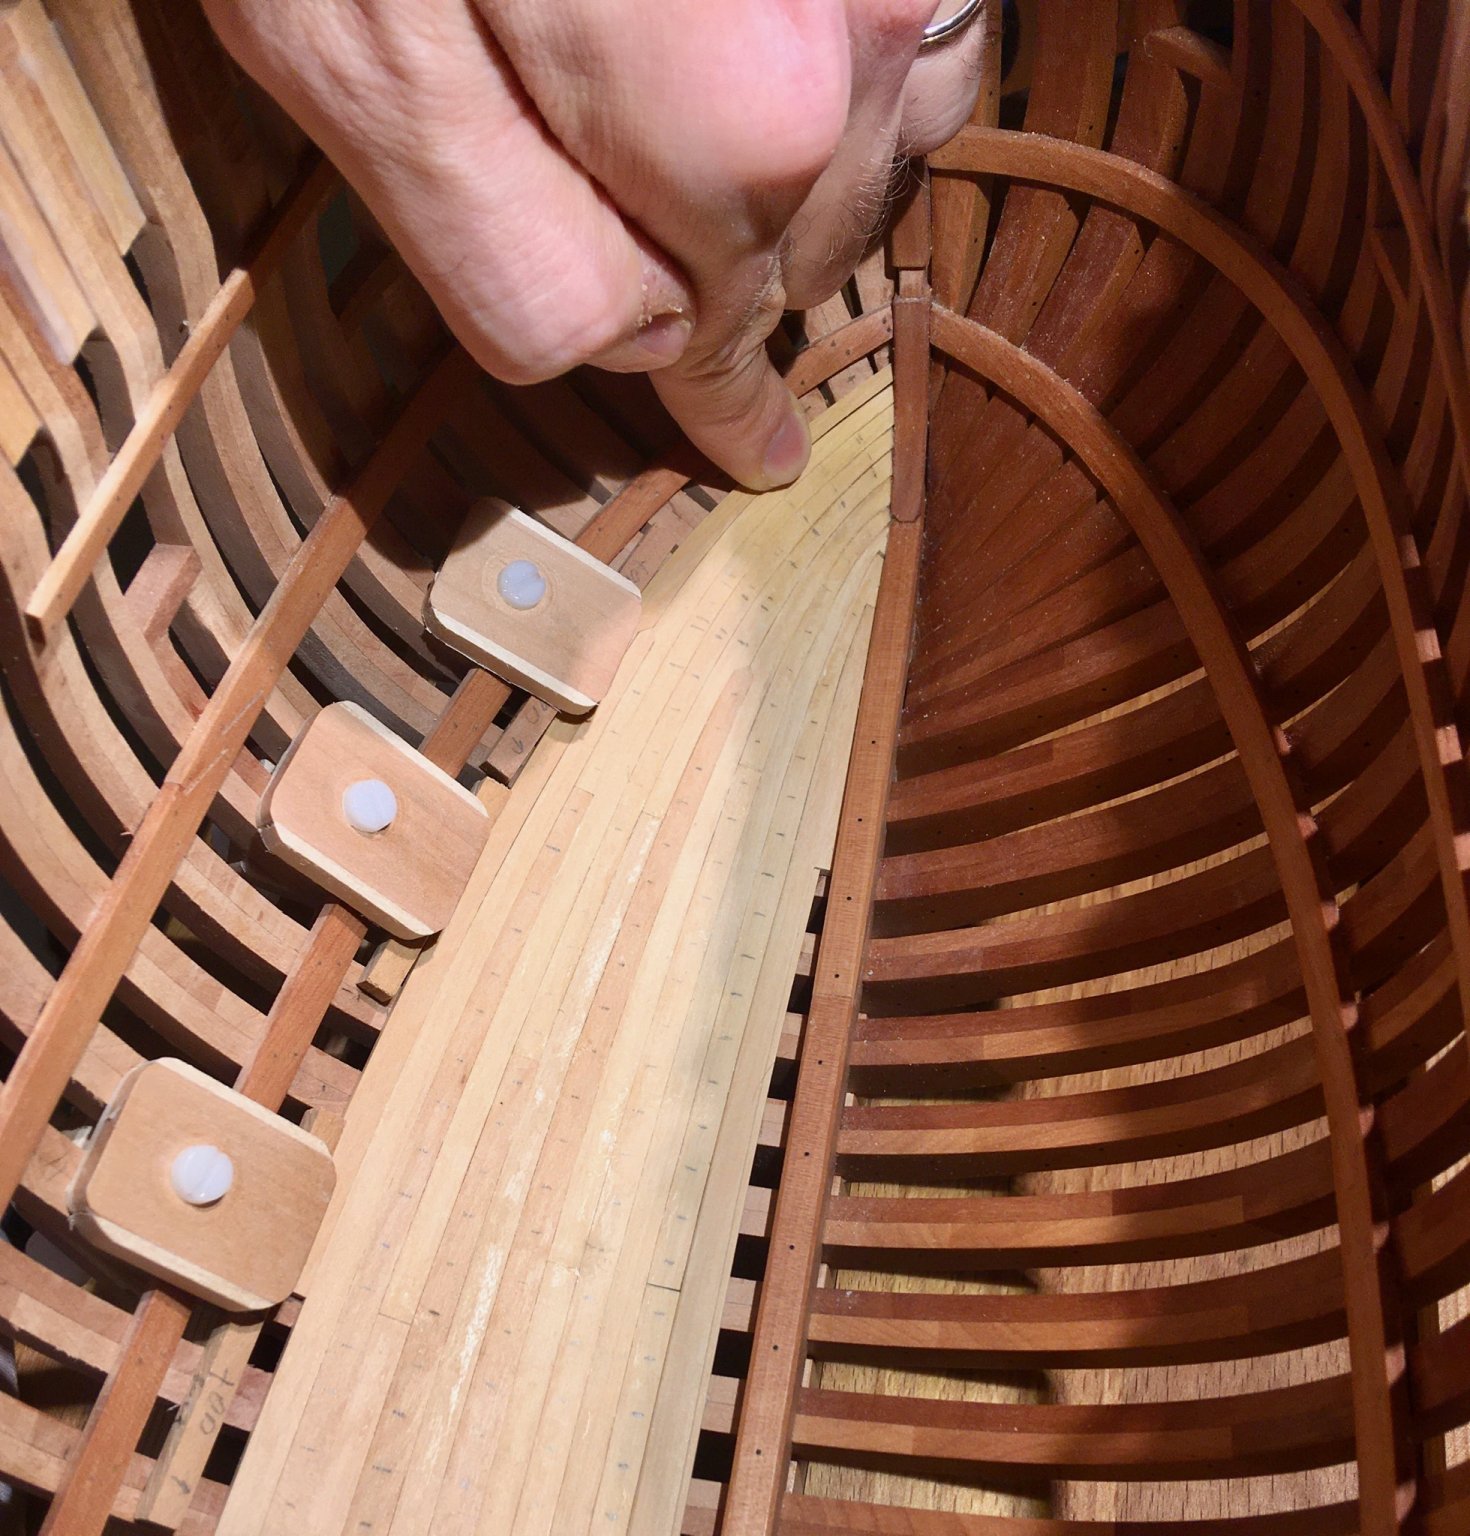
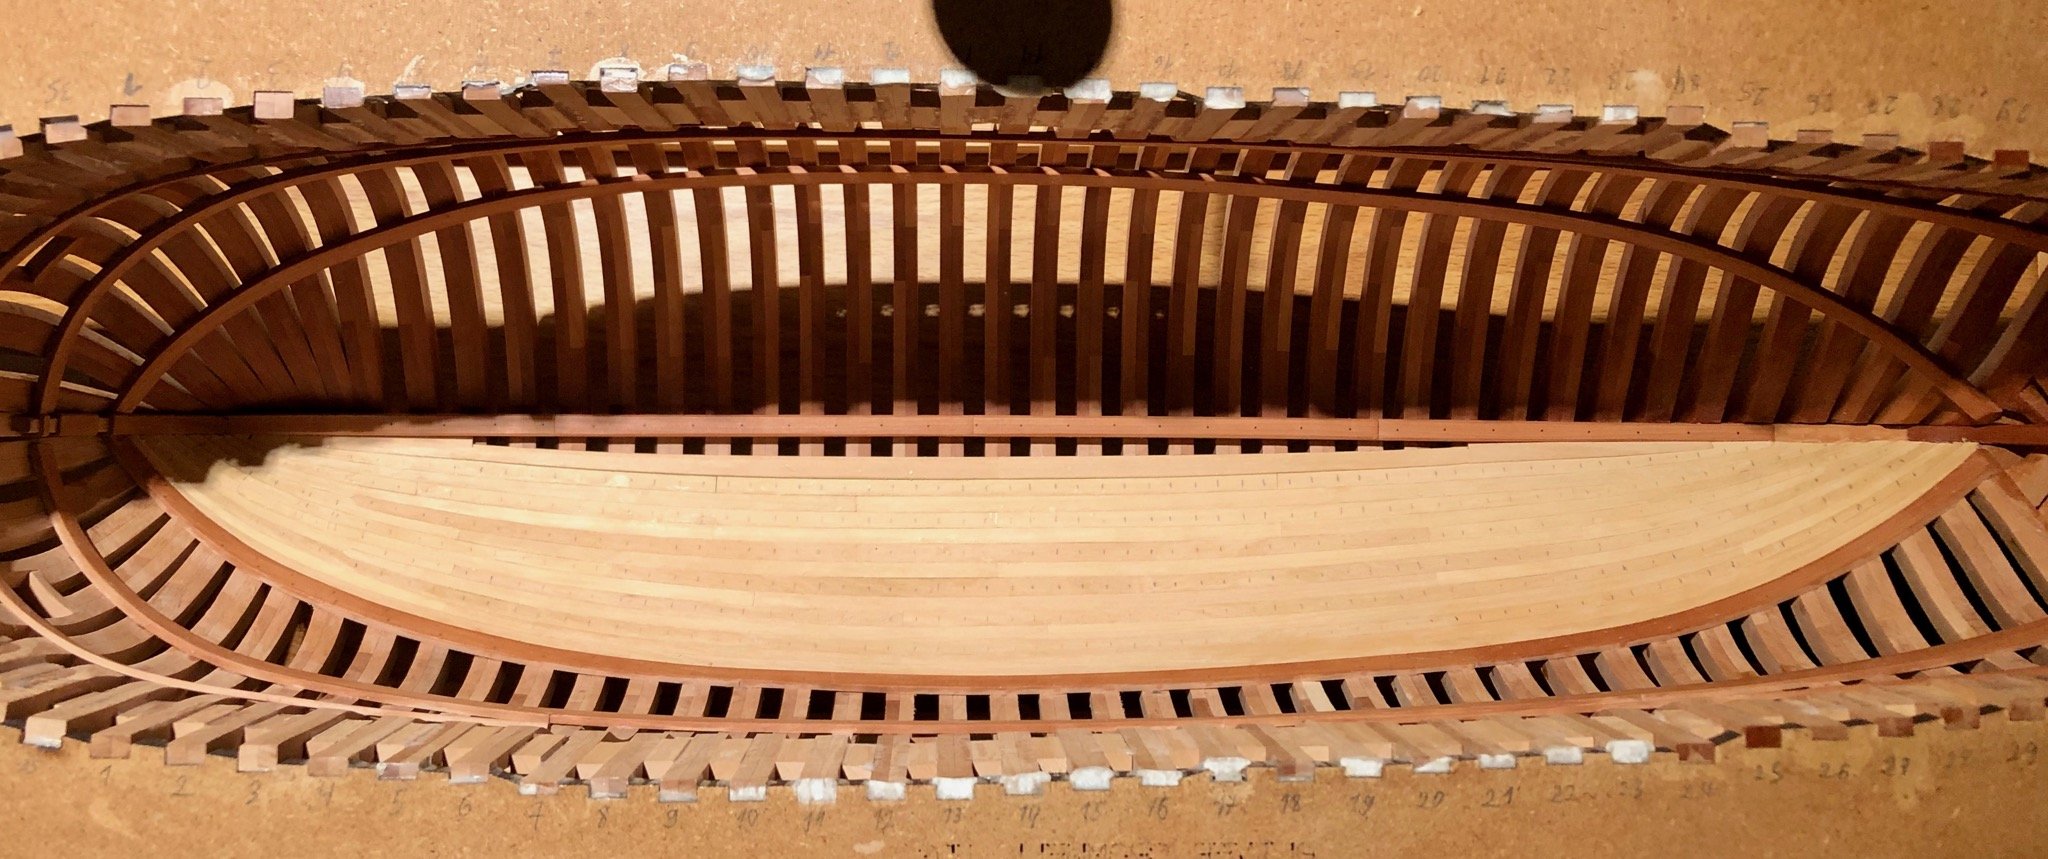
This was an interesting part of the build, though pretty repetitive. I am glad that I took internal planking first, it would be barely visible, and a good practice before doing an external planking.
One more time thanks to Chuck for showing how to edge bend. Got the hang of it, no more broken planks, and I get quite close to desired shape from first or sometimes second attempt:

Got more Pfeil chisels, this time to simplify in-situ fairing. Works like a charm!
Closer to deck clamps it became harder to clamp, so some awkward arrangements were used:

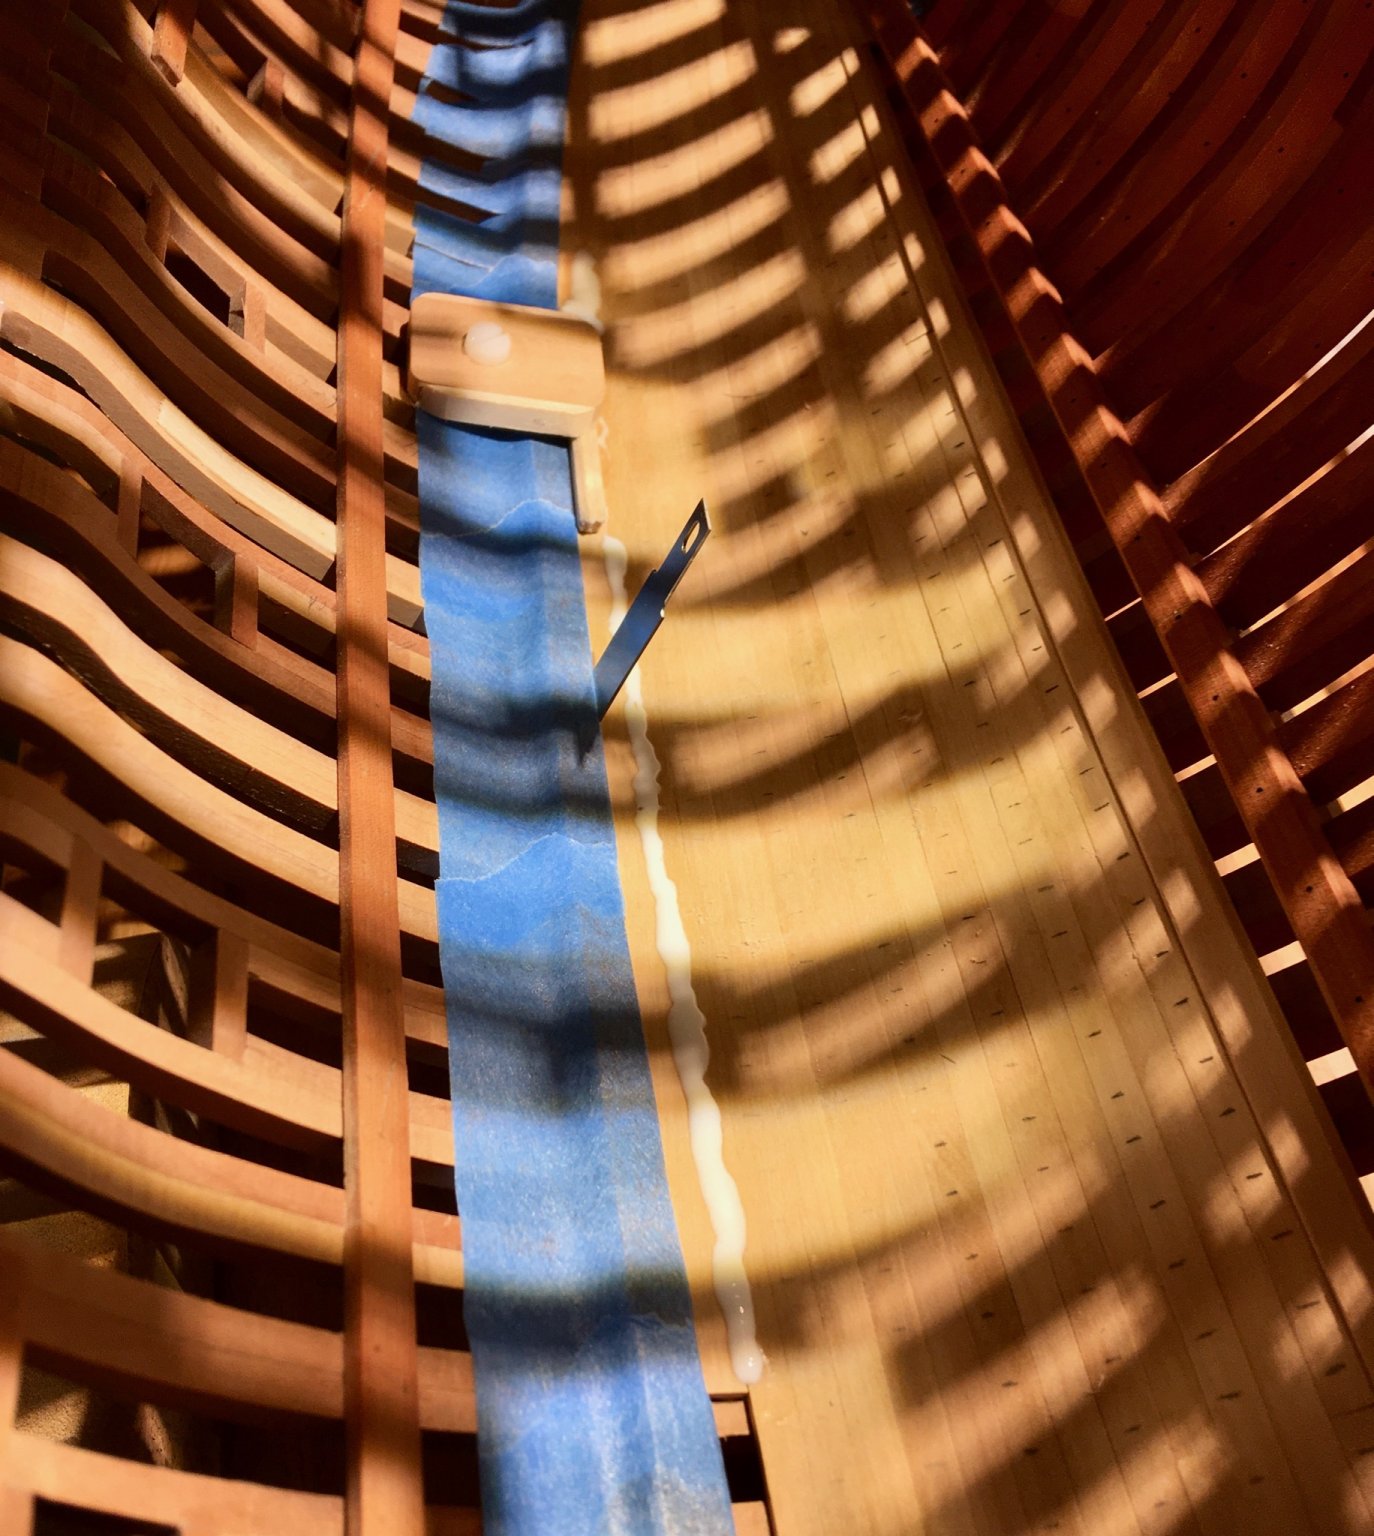
The last streak was difficult. Even though I used tick marks, the last forward plank ended up a bit too narrow. Will be careful next time, does not worth re-doing this time.
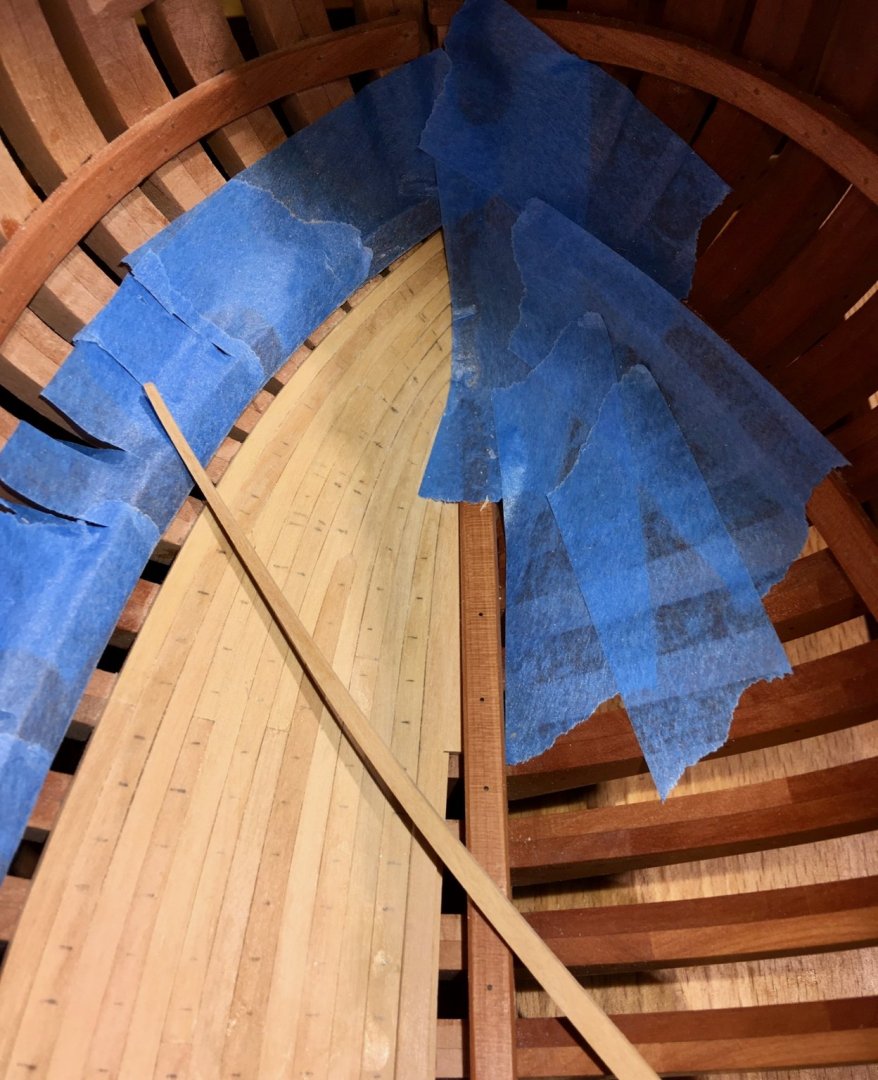
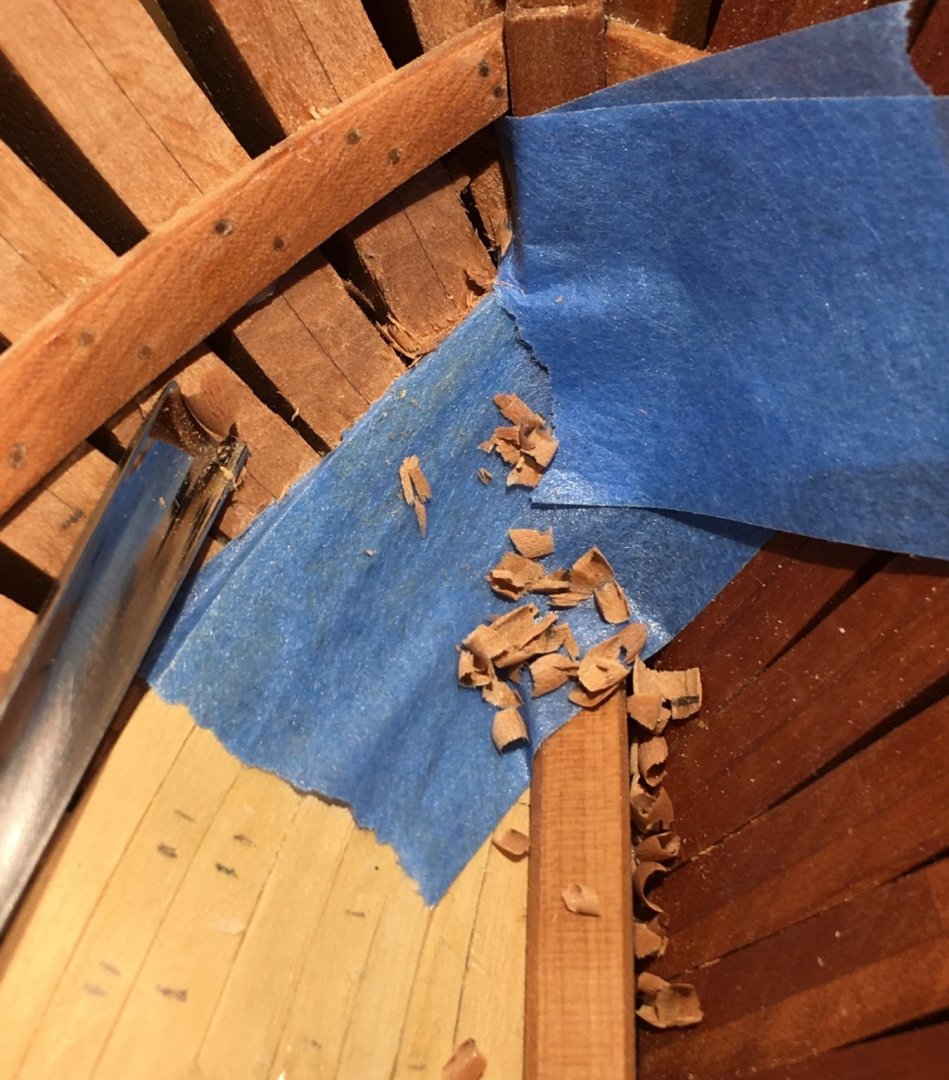
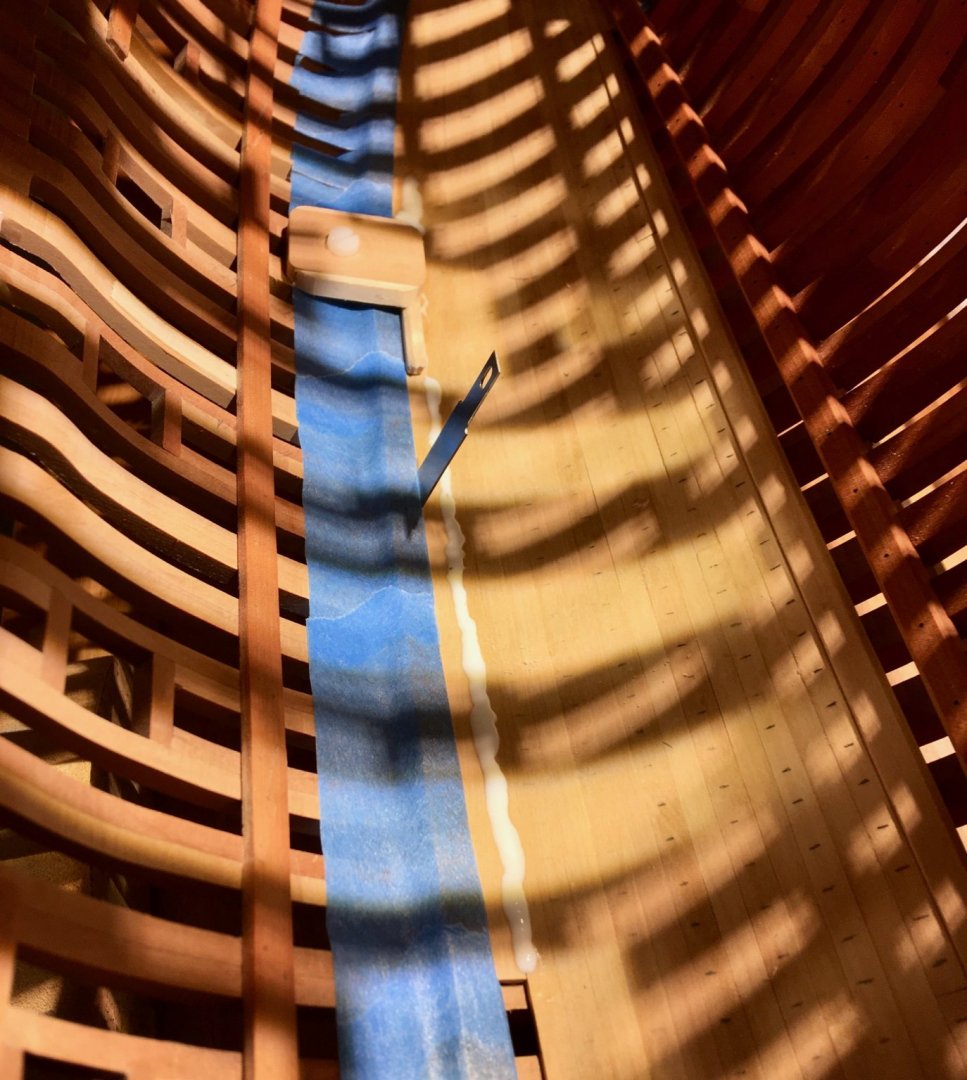
A blade is used as a wedge to press planks into each other in the areas of some gaps. More glue to soak into the gap. It is cheating, I know
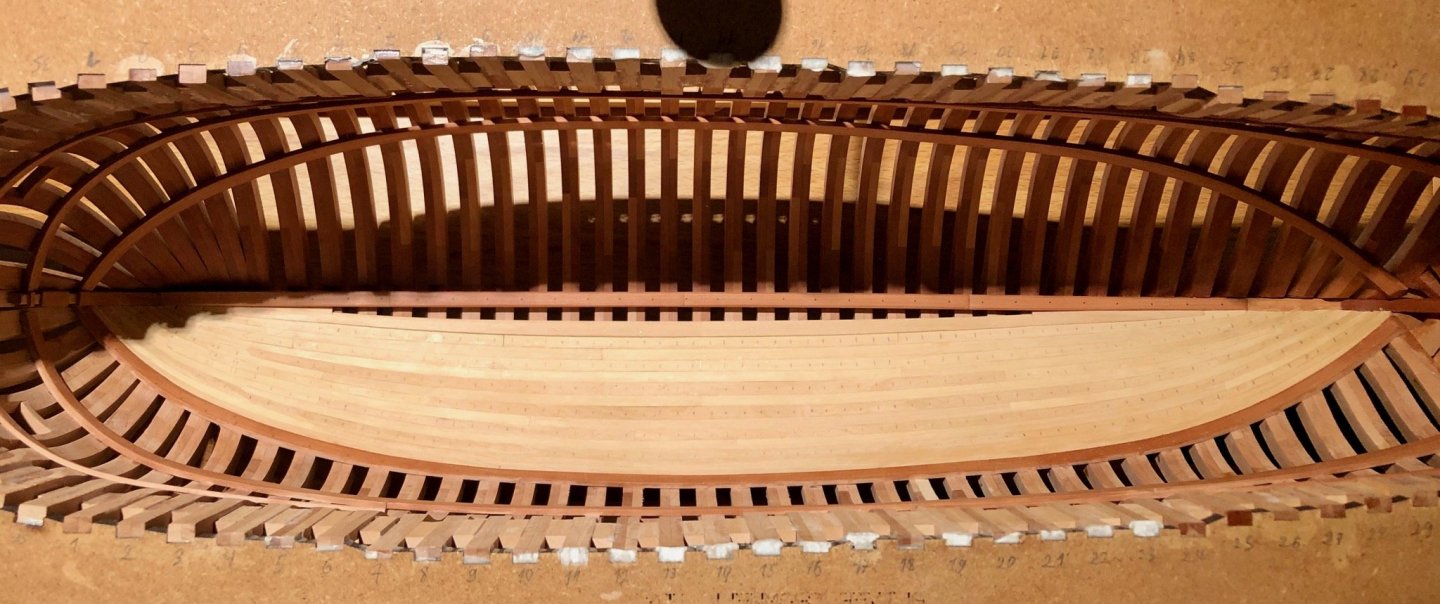
During the last few months I was sneaking to my modelling corner regularly (which is a challenge with a newborn), and managed to install all planks before the end of the year! Yay! I did not expect it to take this long though - with an average of 4-5 hours per streak and 14 streaks it sums up to 60-ish hours.
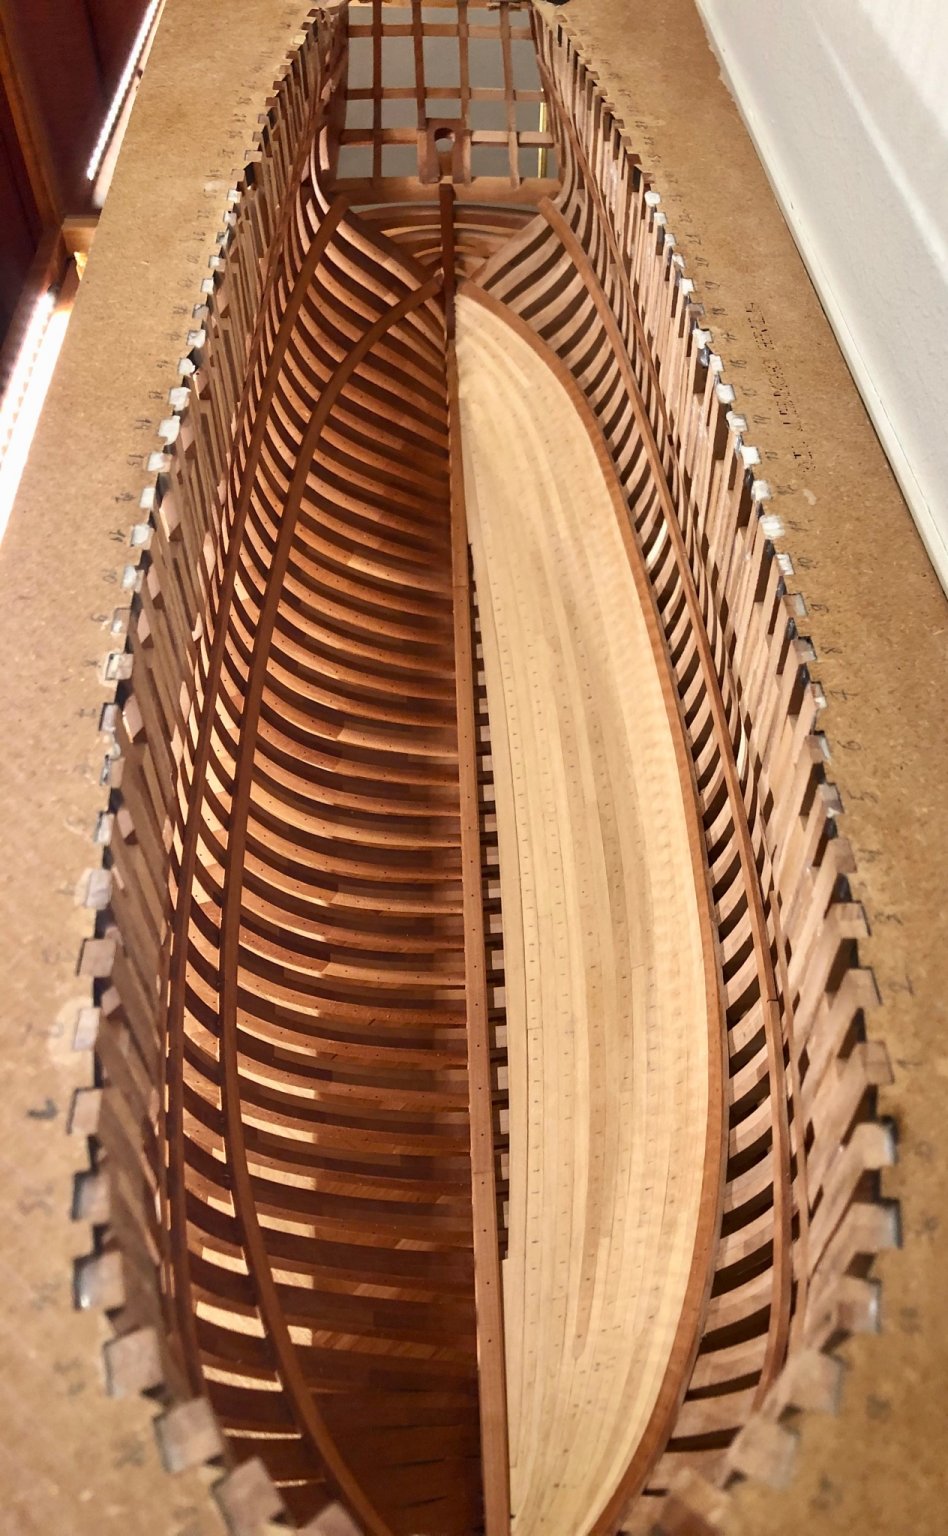
So here is how it looks today, before treenailing / fairing / smoothing / trimming.
When in display case, light coming from the bottom of the case goes through frames and makes an interesting pattern on the planks:

There is plenty of dust over the model, that I will need to carefully remove after sanding.
Hope to finish it in a near future and get to less repetitive parts (breast hooks, mast steps, deck structures, etc etc). But before that I need to decide on a finish to use (or maybe no finish at all), will make some test pieces and try all the sanding sealers that I bought last year.
Also I got a surprising color deviation in planks, even though they are all cut from a few sheets of castello box, and sheets had no obvious discoloration.
Maybe it is a side effect of heat bending, may go away after final sanding. Anyway it is not so bad, shows individual planks. A bit of deviation is good!
- Dubz, Wintergreen, Jorge Diaz O and 24 others
-
27
-
-
On 12/16/2019 at 4:38 AM, mtaylor said:
There it is, in a nutshell. I have a MicroMark saw which tilts the blade. I think I've used that feature once in maybe 10 years.
Not for modelling purposes, but as soon as you start making small woodworking projects, or even a display case for the model...
")
-
Great layout! Hope it would work great for you.
I would recommend to put a disk sander closer to your working area. It is by far the most used power tool when you make small things, once you are used to it.. Like who needs a table saw for cutting planks into proper lengths, where you can just cut rough dimensions using some wire cutters or any other simple tool, and then fine fit using a disk sander?
Combined with some small household vaccuum to catch airborne dust - it is handy to have it close by.
P.S.: consider an electric lifting table, it is actually the most used "tool" in my shop overall
- thibaultron, bruce d, MEDDO and 3 others
-
6
-


Beavers Prize 1777 by Mike Y - 1:48 - POF - Hahn style
in - Build logs for subjects built 1751 - 1800
Posted
Mark, I am also worried about overheating, the problem is you can't know how hot it is inside. If the outside gets hot too - then it's probably already too late") So I'll just make sure to take tea breaks, no drilling marathons.
So I'll just make sure to take tea breaks, no drilling marathons.
Alan, I did not know you can attach 90deg attachment to a flexible shaft, interesting idea! But then control is still an issue, when your fingers are 90deg to a hole.