


Mike Y
-
Posts
1,513 -
Joined
-
Last visited
Content Type
Profiles
Forums
Gallery
Events
Posts posted by Mike Y
-
-
-
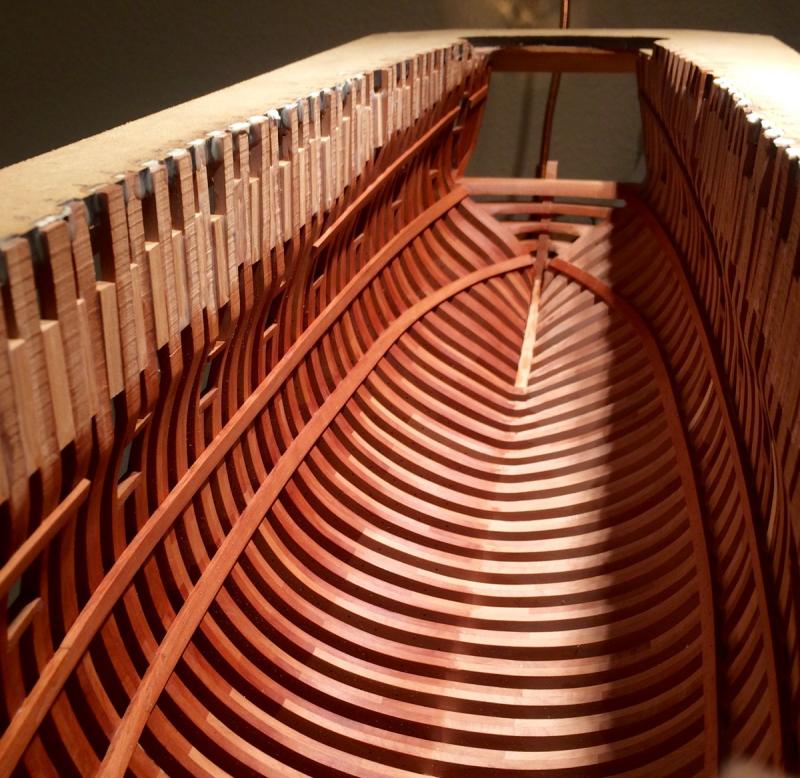
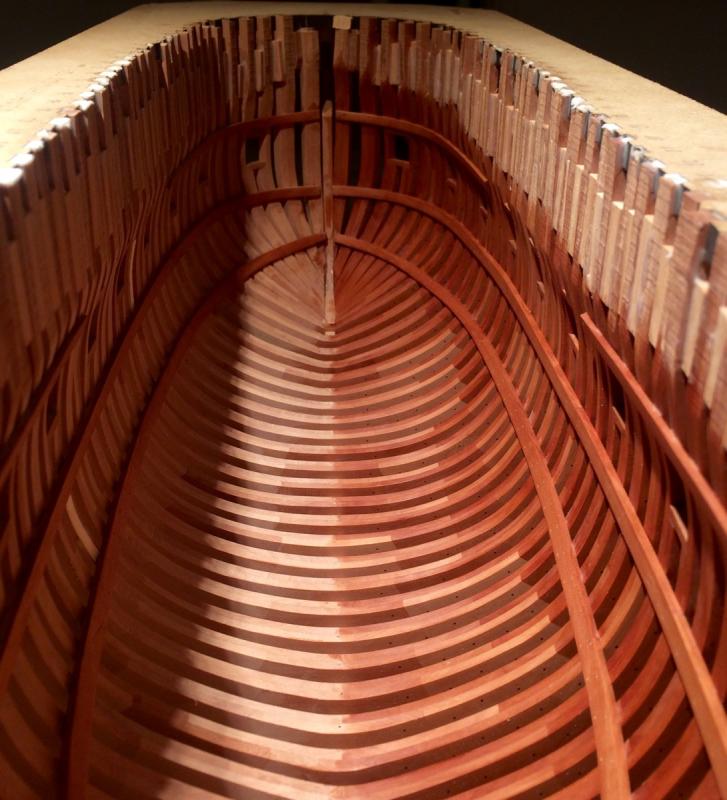
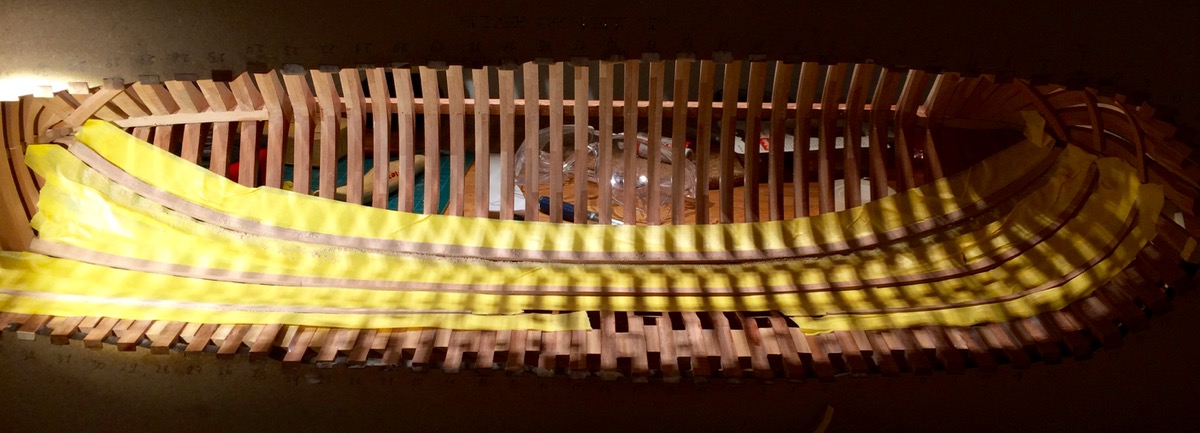
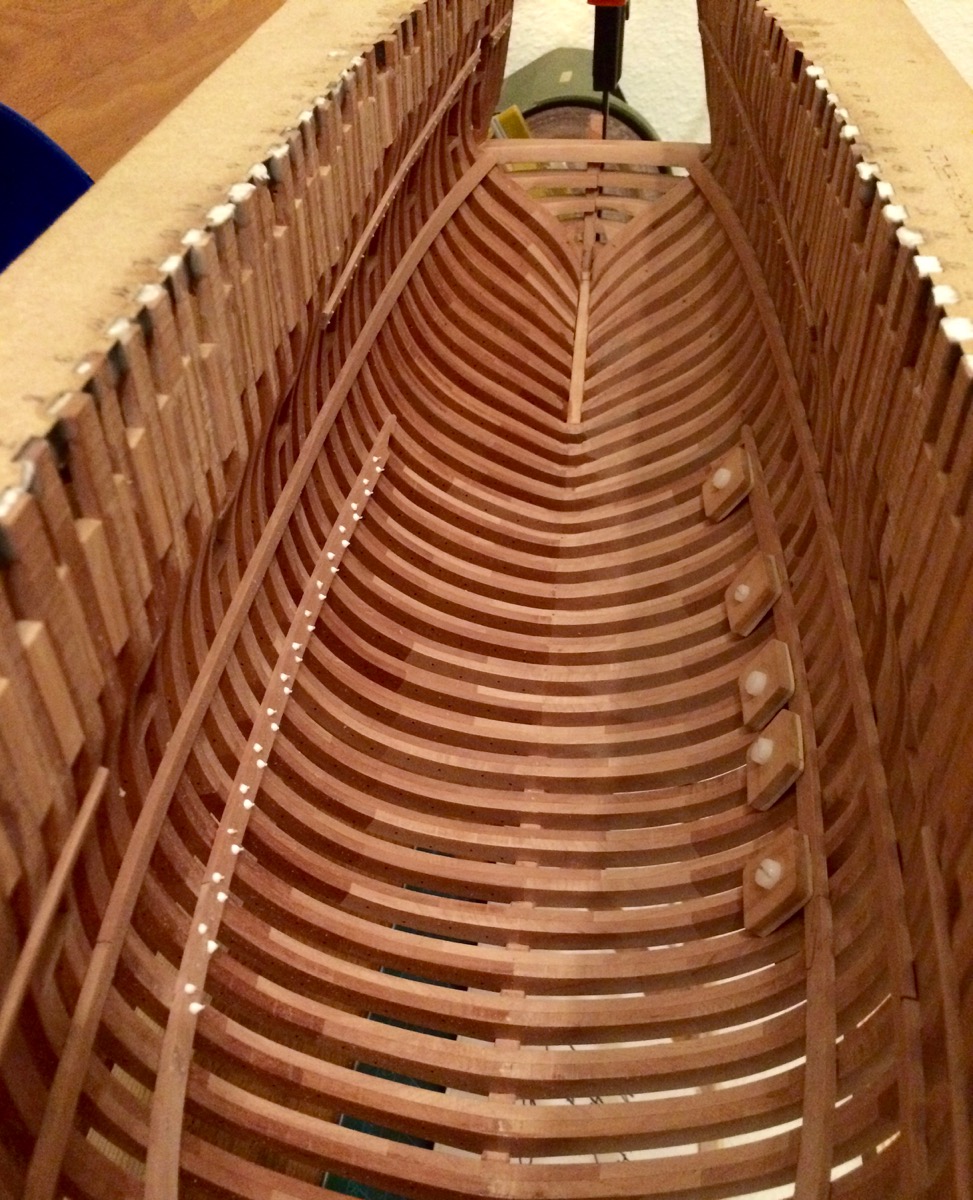
Magnificent! Love that "light through the frames" shots

- billocrates, WackoWolf, Canute and 2 others
-
 5
5
-
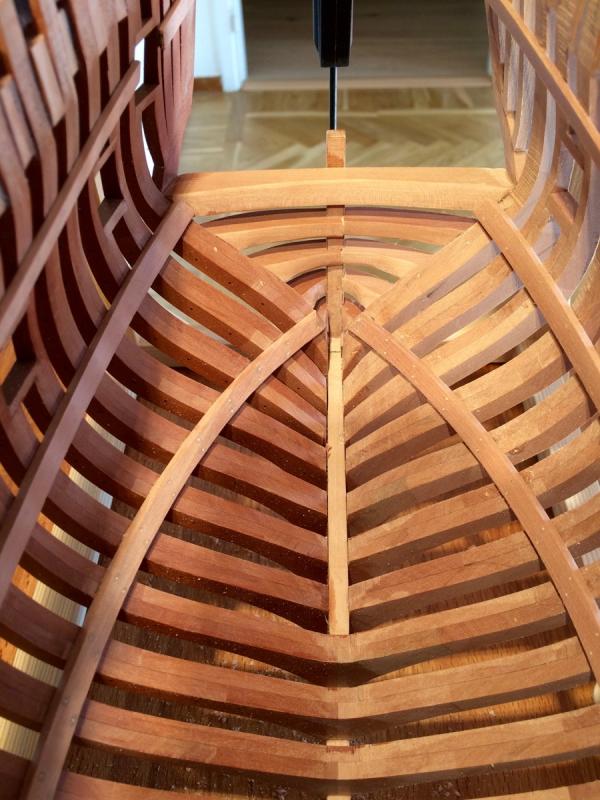
They are not perfectly symmetrical where the bending is significant (+/- 1mm, not more), but this would not be visible if I manage to make nice and even deck framing, perfectly aligned in all projections (because the deck beams are higher than deck clamps, recessed by roughly 1 inch). How hard could it be, right?
-
Hm! Amazing bending, will try that as well. Maybe ebony wales are not as messy as I thought?
Two cents about pink ivory: Stiles and Bates does not ship wood outside UK.
I bought it here instead: http://www.exotichardwoodsukltd.com
Not sure about US, but shipping to Sweden was not a problem.
Got two big fat billets, they are amazing!
-
Thanks John!
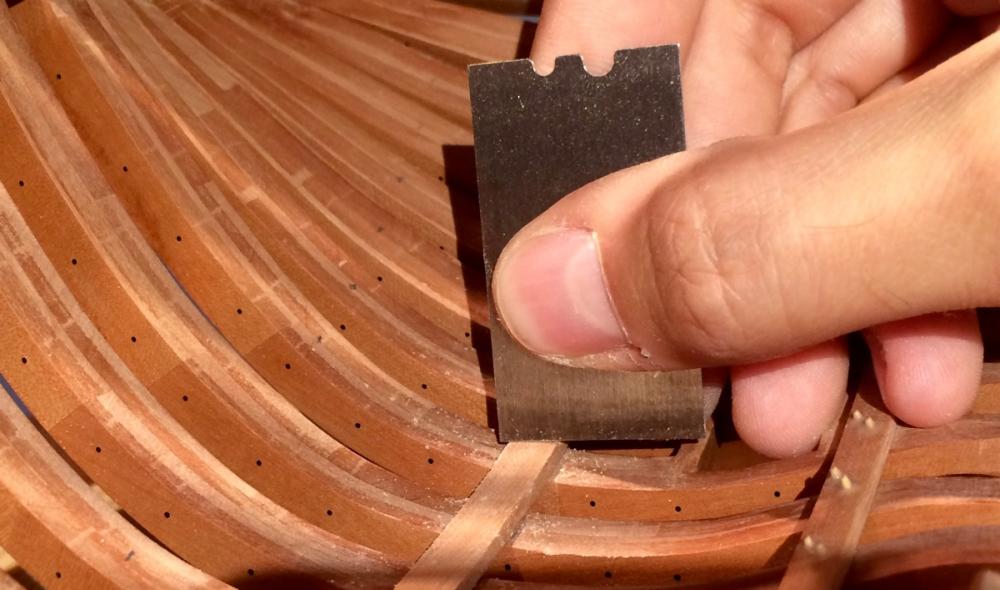
Finishing the planks with some sandpaper, mini scrapers and xacto blades. The mini scrapers were surprisingly useful!
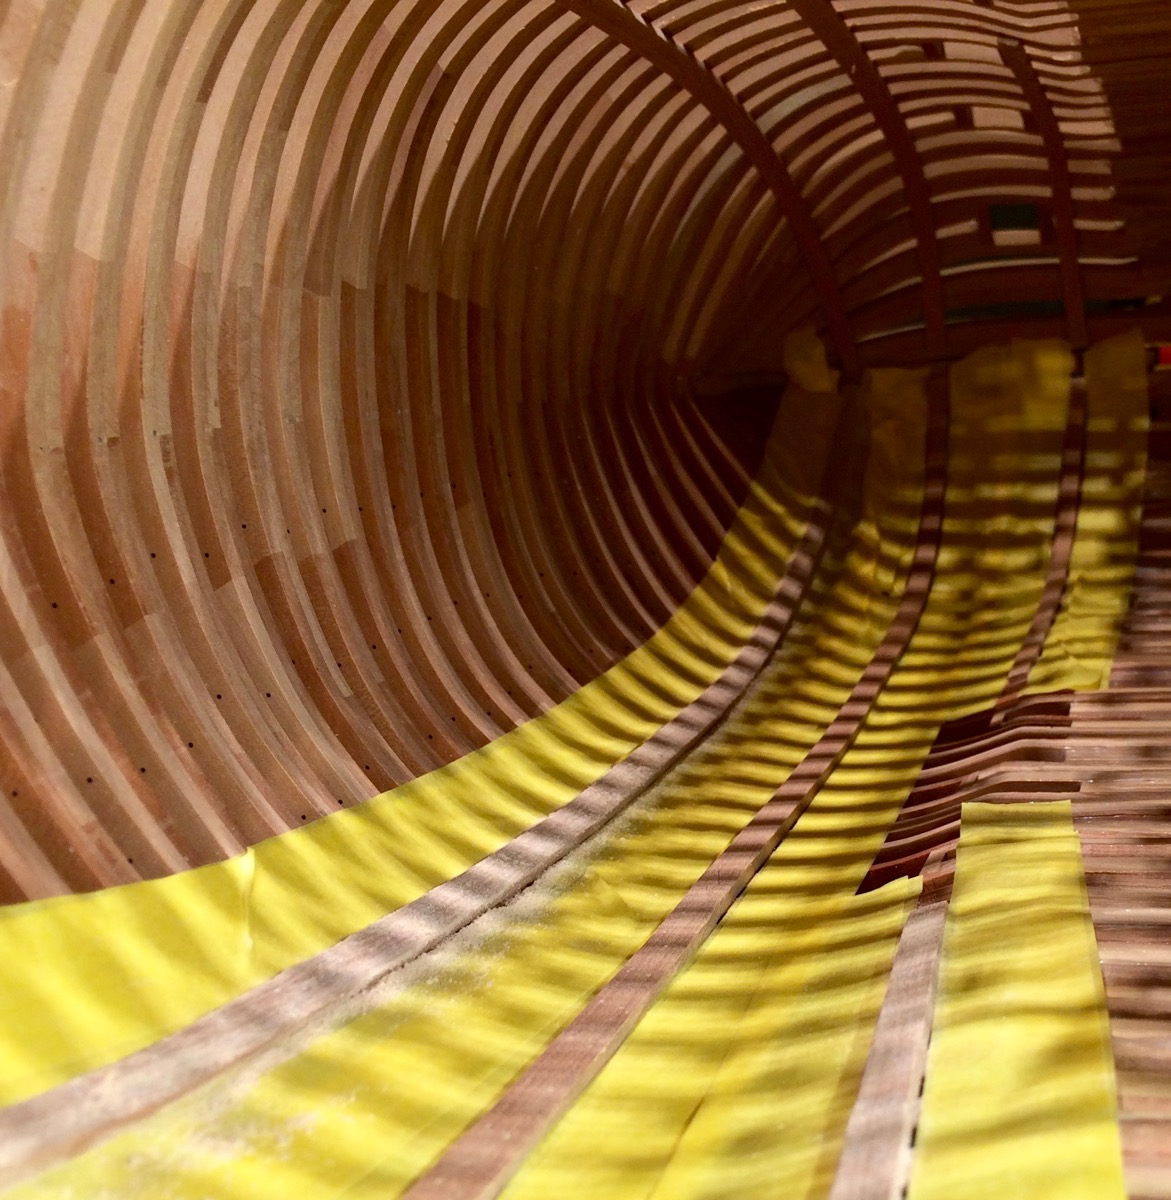
Covered the frames with the masking tape to avoid scratching them accidentally:


Final result, with tung oil applied.
The exposed side of the hull would be left as is (with deck framing, of course), things like breasthook, fore and mizen mast steps, etc - would be cut in half with one side omitted. That is to avoid obstructing the view through the hull.
If something will need to be glued to the finished side - will use treenails and/or monofilament. Or epoxy.
But hope it will not happen
-
-
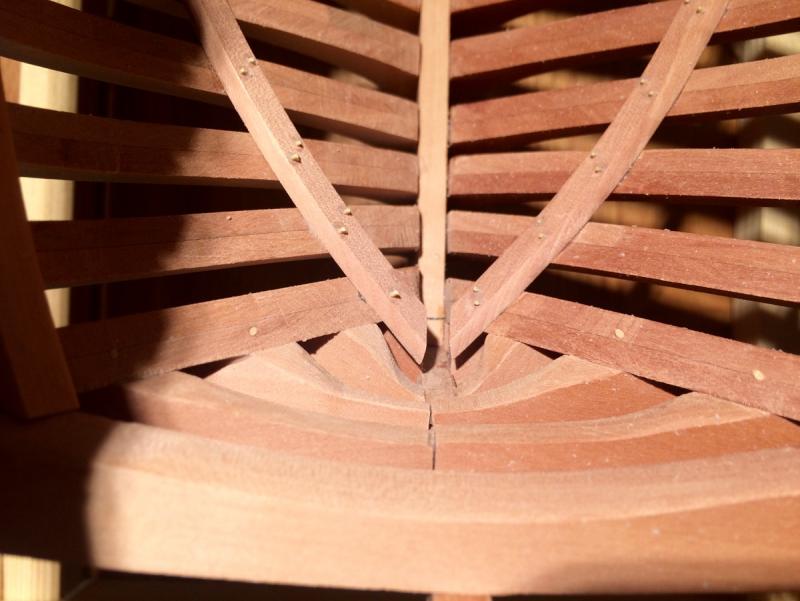
Shaping the clamp ends in situ was a bit tricky..

Transom wings were shaped with sandpaper and scrapers and finished with xacto blade:
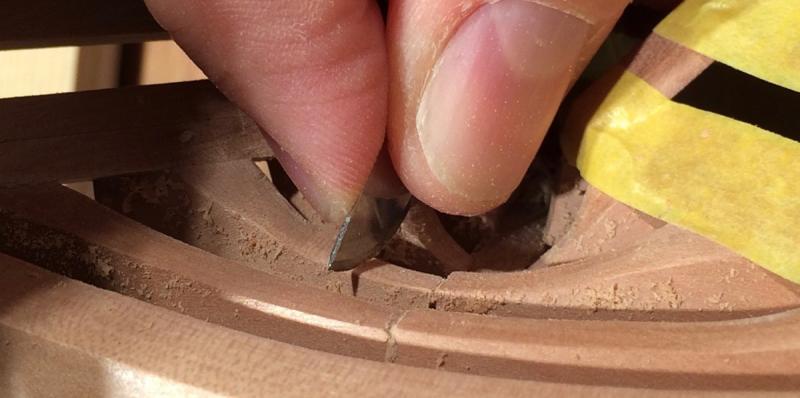
Result:
It is still clear that transom wings are made out of two pieces, and the gap between the pieces is still visible, but it is kind of better than it was. Sigh... Will do better transom on the next model!
Luckily it looks good from the outside, and the inner part of the transom would be barely visible under three layers of deck framing

-
-
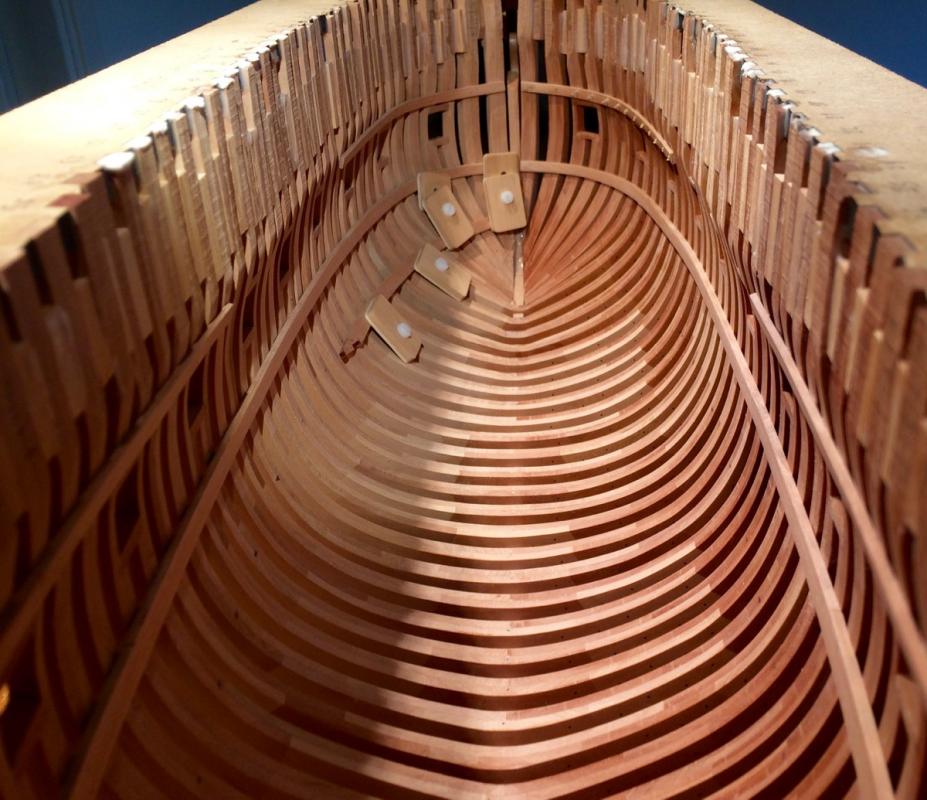
Just realised that I screwed up the transom a bit.
For some reason I thought that inner planking and deck clamps in that area fully cover the transom wings. Also, I was expecting some sort of stemson, but at the stern. I thought that inner planking will terminate there.
Well, I was wrong. TFFM and other build logs indicate that transom wings are just left open, and inner planking terminates on the rear-most cant frame.
Like here, on Remco's Kingfisher:
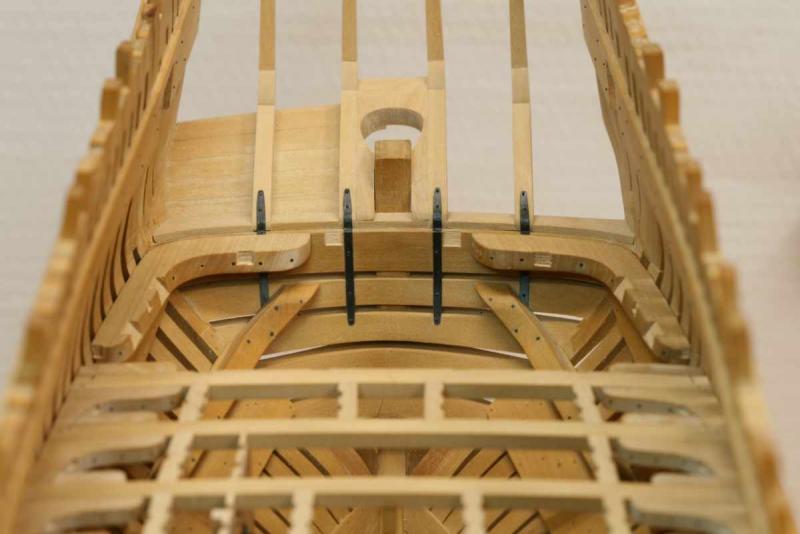
Or on Albert's Naiad:
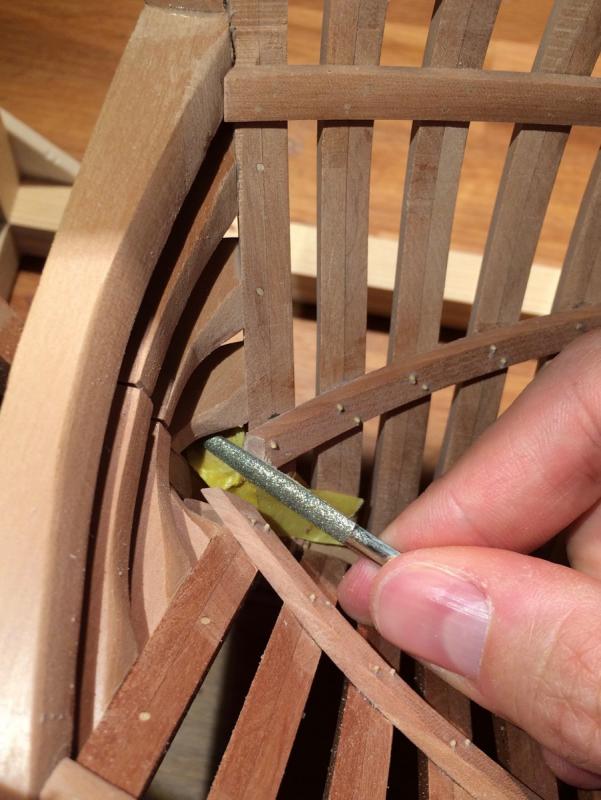
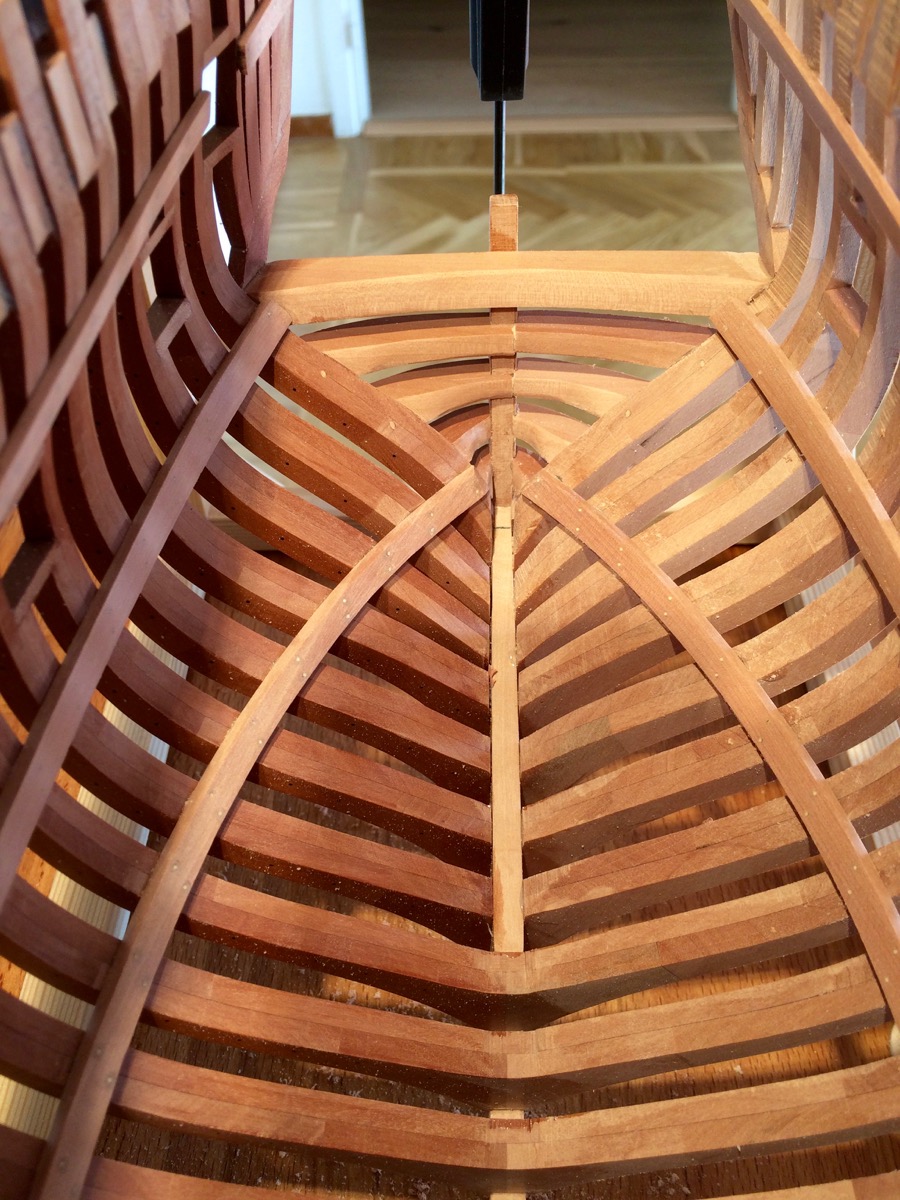
And here is what I have. Nevermind the glue spots on the clamps, they are not sanded or scraped yet, but you can see that they expect to terminate on some big timber in the middle of the transom (which, apparenly, does not exist), and the wings are ugly on the right side, because I was going to hide them under planking. Whoops!
Will try to reduce the impact of the screw-up by shaping the transom wings carefully, so they will look nicer. Shaping them in such confined space is a challenge, but seems like I have no choice.
Luckily, that area would be barely visible under multiple layers of deck framing, but it is not an excuse to leave it in such a bad shape!
- tadheus, giampieroricci, davec and 13 others
-
16
-
Found a nice color scheme in this beautiful cross section, made by Maurys.
Darker wood above wales (looks like pear), lighter below. With a subtle colour variation where lighter pear goes lower, and darker pear is higher. Or it is just a lighting? Anyway:

Link to his build log with the rest of the photos:
http://modelshipworld.com/index.php?/topic/513-echo-cross-section-by-maury/
Another one is Naiad by Albert. Careful mix of lighter and darker pear in the deck framing:
The full log: http://modelshipworld.com/index.php/topic/3443-hms-naiad-1797-by-albert-148
-
-
-
She looks great!
Interesting implementation of the "floating" type of display.
I was thinking about hanging the model on a thin and transparent fishing line, mounted to the top part of the display case. Have you tried something similar?
-
-
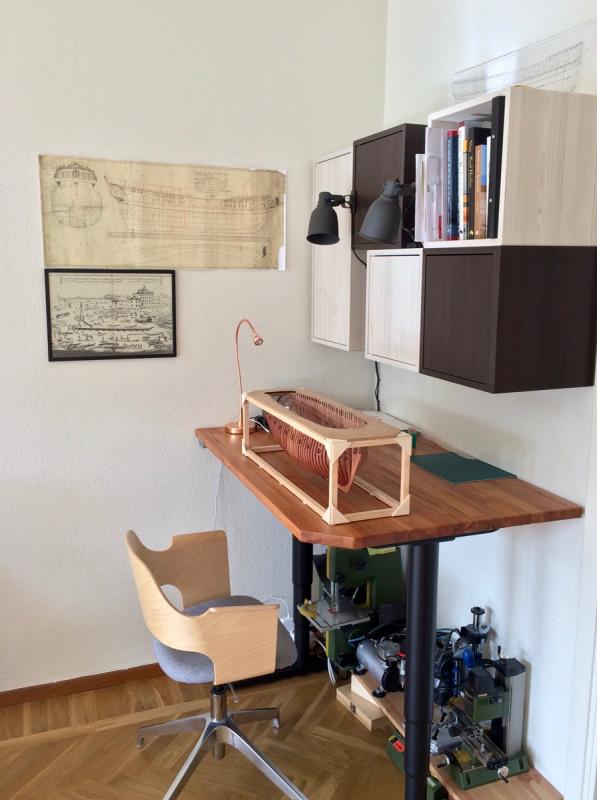
Carl, yes, even this "drill" is better than manual drilling. It is just a pity that there is nothing in the market for a proper quality micro drills. All drills I found while googling were similar hand-made "cheap motor + chuck + few wires" construction. I love working with good tools, this one is not pleasure to work with, but it gets the job done.
Many thanks to Gaetan, now my livingroom corner looks even more like a shipyard, with the Arsenal de Toulon drawing on a wall
- Wishmaster, cog, KORTES and 16 others
-
19
-
Really admire your courage to do the reconstruction instead of saying "meh, will make it right on a next model"!
Now it would be definitely right.
- billocrates, mtaylor and Canute
-
3
-
-
Thanks for the nice words and likes! That really helps to find more modelling time
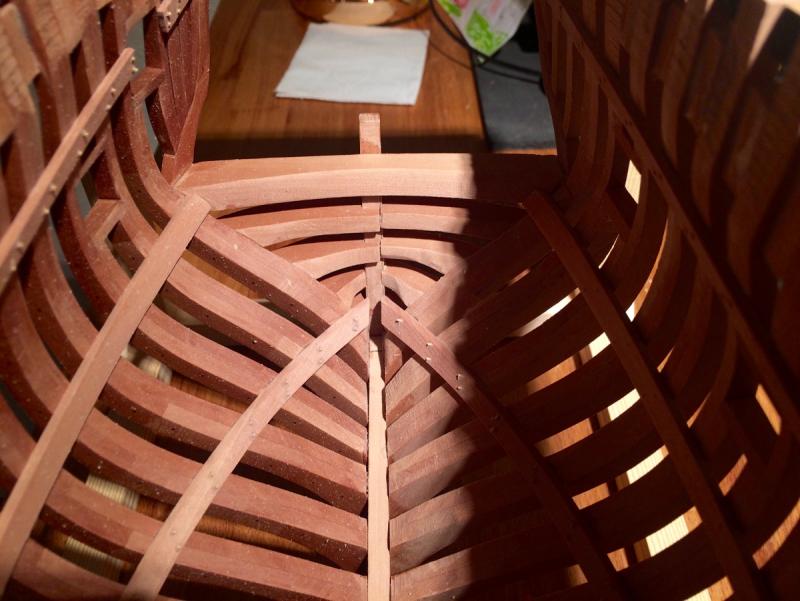
Finally got the micro-drill working, so now the clamp installation goes faster.
After marking the treenail locations with the pencil, they are accentuated with the scriber (I know, bad use for the scriber):
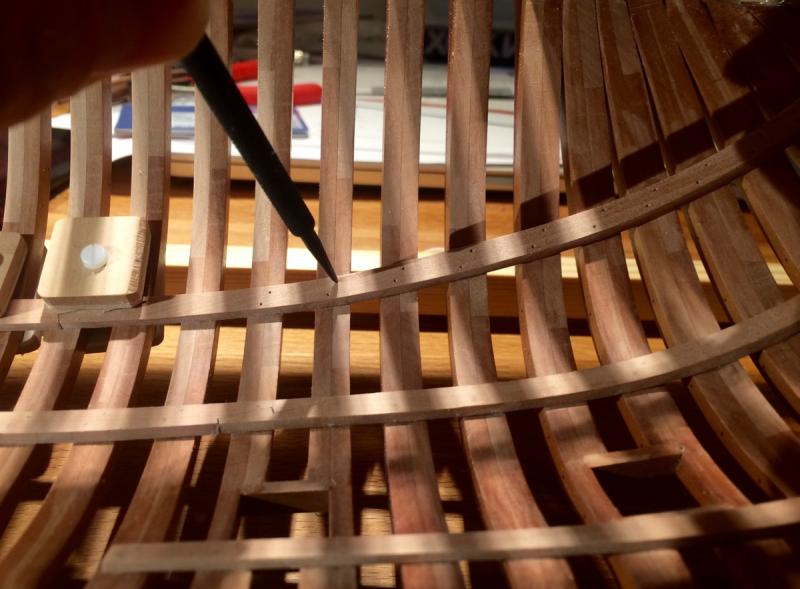
That is required to avoid the drill wobble, it is not very balanced (chinese crap):
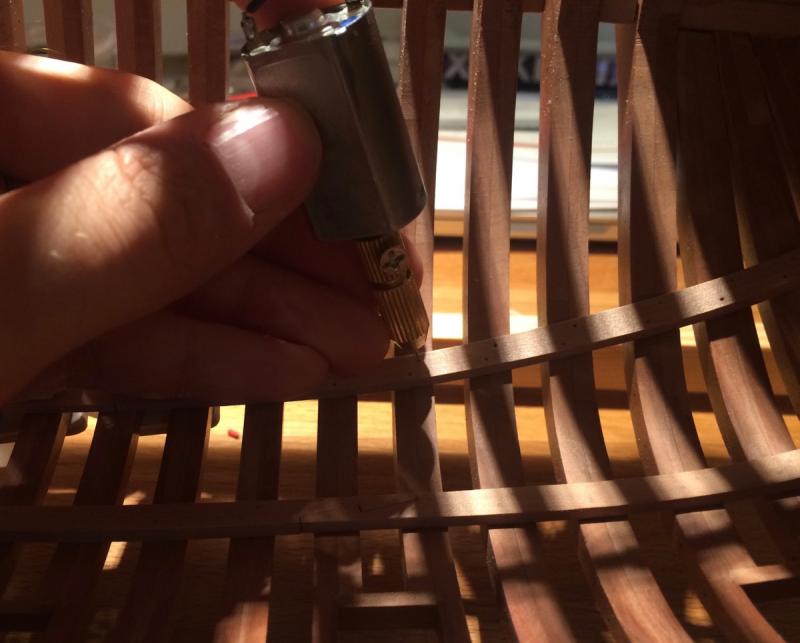
And then install the boxwood treenails - these ones are not just for looks, they are injected at least few millimiters into the frames and glued, hope that will make a strong bond between frames and deck clamps, to avoid the hull cracking and twisting during the dry winter months.

-
Forward and aft frames could be bolted safer by drilling shallow holes from each side independently, after initial pre-beveling. That is easier to do comparing with a full-depth single hole. Nobody wll find out that you have two short bolts instead of a single long one
Did it on my model, worked like a charm, even on a really bevelled frames.
-
Hoorray! This is a major milestone indeed!
One thing about the finish - if you use oil, be ready that it might sip through the frame and end up on the inner side as well. Testing on a few scrap frames would be useful
It sounds impossible, especially with grain running along the futtock, but happened for me. If that will be the case for your finish as well - probably better to apply it after gluing in the deck clamps and inner planking, if you plan any?
- Canute, mtaylor and billocrates
-
3
-
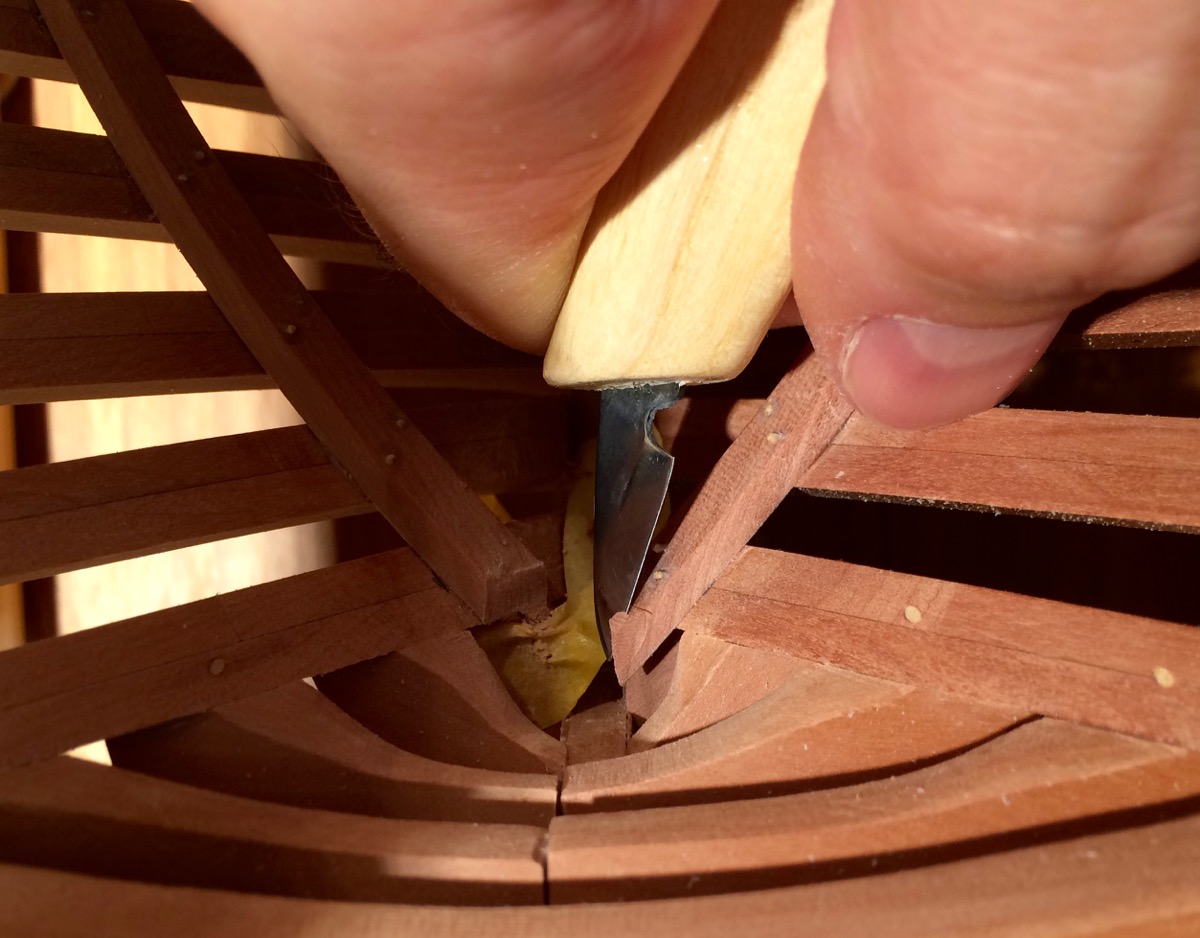
Thinking about it was the scariest part. There were a few little slips that nicked adjacent frames, but overall it went well.
I was wrapping both adjacent frames with multiple layers of the masking tape to protect it when cutting (gunports, in my case). It took a lot of time, but was working efficiently enough, because the blade slipped a few times.
-
-
-
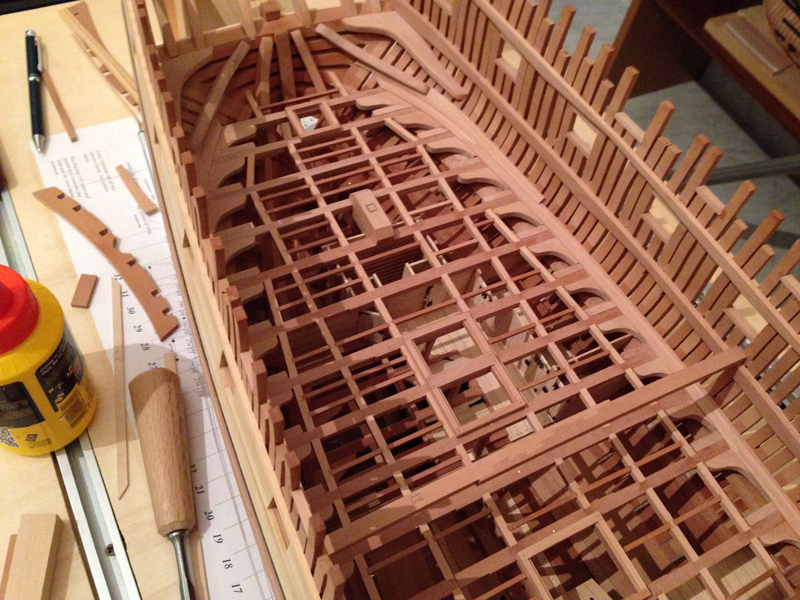
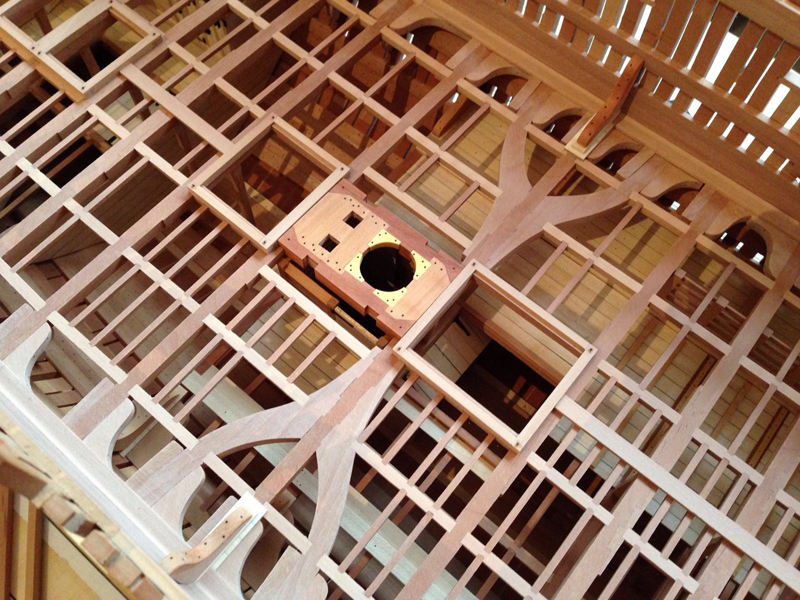
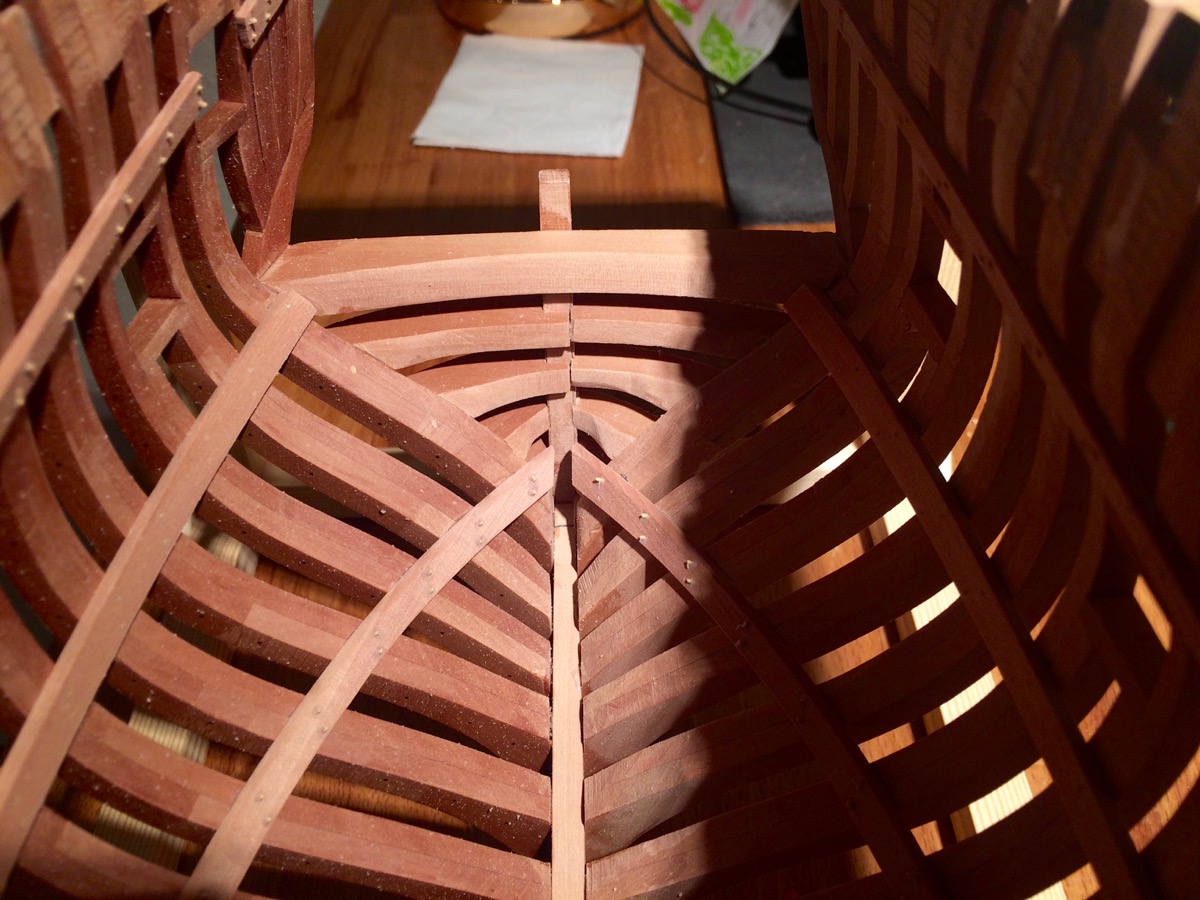
My modelling progress is quite slow, barely find few hours per week to work on it.
Still installing various deck clamps:
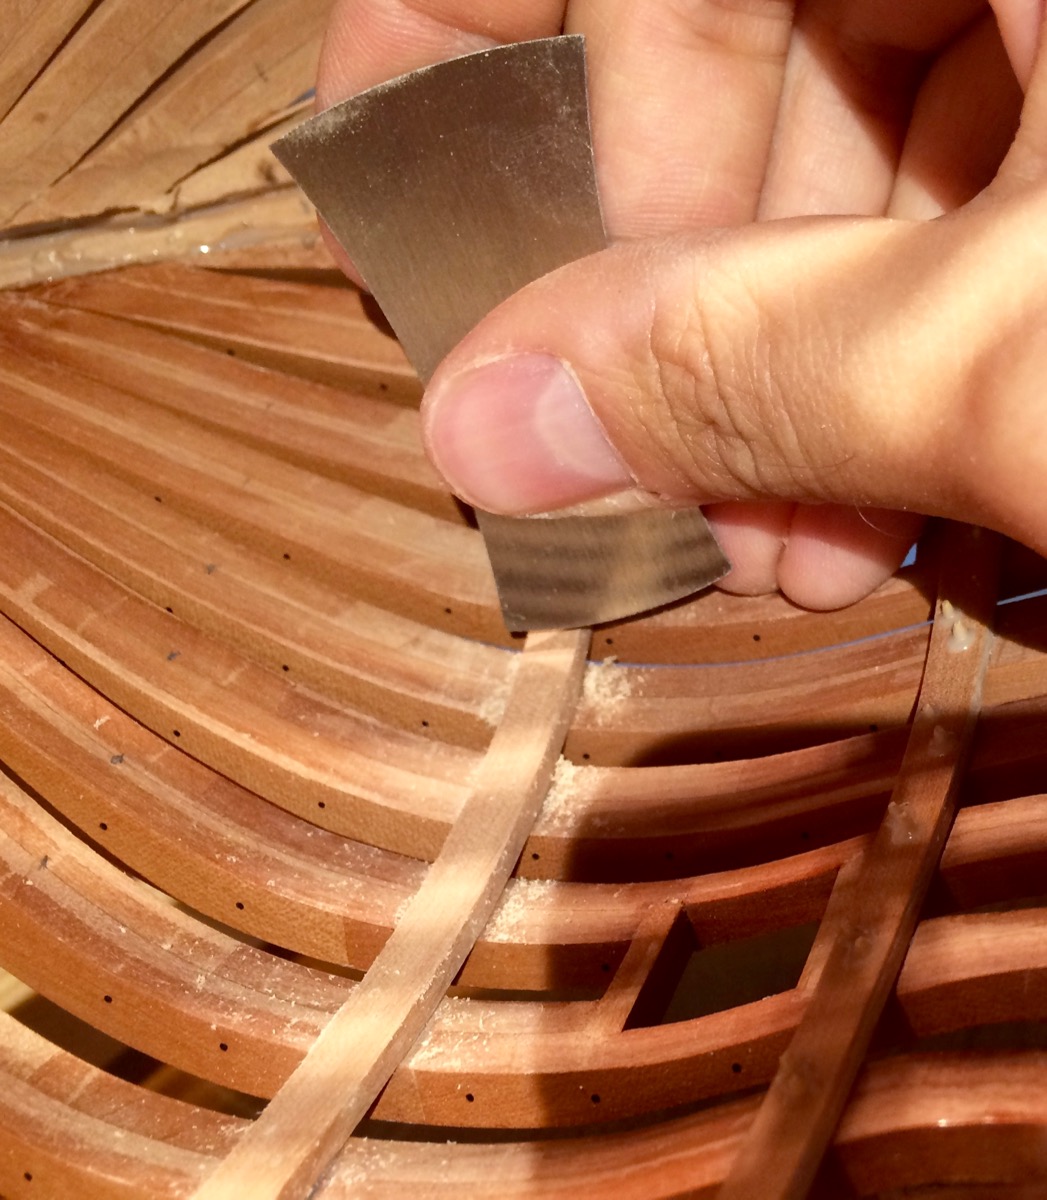
Using scrapers to make the final shaping of the clamps when they are already installed. Straight or curved, depending on a section:

And a final polish with a straight xacto blade, it barely removes any material, but leaves a nice finish, better than sandpaper for such tight locations:


Beavers Prize 1777 by Mike Y - 1:48 - POF - Hahn style
in - Build logs for subjects built 1751 - 1800
Posted
Hi John,
Thanks!
The scrapers are amazing, I am using them very often now. They are removing much more material than xacto blades, and they can get into any small places because of the small size. The edge do not have any dents.
Bought them here: http://www.axminster.co.uk/lynx-mini-cabinet-scraper-set-504698
I also discovered them on MSW in somebody's build log, but forgot who that was...
Quick googling shows that you can buy them in US, for example, here:
http://www.woodcraft.com/product/158977/lynx-mini-scraper-set-4pc.aspx
http://www.grizzly.com/products/Lynx-Mini-Scraper-Set/T26658?utm_campaign=zPage
http://www.japanwoodworker.com/Product/158977/Lynx-Mini-Scraper-Set-4pc.aspx
etc etc