


Mike Y
-
Posts
1,513 -
Joined
-
Last visited
Content Type
Profiles
Forums
Gallery
Events
Posts posted by Mike Y
-
-
-
Finally the sawdust has been made! Your model gave me a lot of the inspiration, very happy to see it taking shape again! Might deserve to be renamed to "Phoenix"?
 Should be in line with the Swan naming convention!
The building board is great! What do you use to fix the model when working upside down?
- Canute, mtaylor, AnobiumPunctatum and 2 others
-
 5
5
-
Yes, I draw a boxwood nails. Requires a nice straight grained piece to cut the strips from, but works fine after some practice. Also works as a reliable mood measurement tool. One must be totally calm when using it - otherwise the piece will snap somewhere in the small hole

- ChadB, mtaylor, thibaultron and 3 others
-
6
-
Mike Y is working up the "Cromwell" with Lumberyard wood: http://modelshipworld.com/index.php/topic/7297-oliver-cromwell-by-mike-y-148-1777-pof-hahn-style/?hl=%2Bdlumberyard+%2Bkits#entry215467
Appreciate the note, but I use Lumberyard jig and plans, however replacing all wood with the one from Arkowood. See my whining in the first few pages of the log (page 2 and 3), there are clear photos, the conclusion is up to you.
Lumberyard has a good inventory, but when ordering - please be super pedantic about what you need. Things like
1) Allowed amount and severity of defects in the wood you get
2) Finishing sanding grit. That was a bummer for me - I ordered a milled wood and got something so rough that needed thickness planer / sander or a lot of time wasted on tedious sanding. With a totally different thickness in the end
3) Wood type. I wanted "swiss pear and boxwood" - got a non-swiss (not kiln dried) pear for the frames, which has a different colour. Not saying this is better or worse, but it is definitely not something that I expected
So, I guess, with all that precautions they could be used. However, there are many new suppliers - the famous one is Crown Timberyard that provides a dramatically different quality and no need for sanding / re-milling. Stuff is just perfect out of the box and looks exactly like you expect.
Lumberyard have a much better selection of woods though, so if you have a tools to mill your own wood (or, at least, to thickness it) - they could be used for less popular woods bought in some rough form (sheets, billets).
Sorry for getting that dirty laundry out, but with the lack of a proper "rating" system and such a limited amount of wood suppliers, guess it is better to share.
- Captain Poison, Chuck, Jack12477 and 6 others
-
9
-
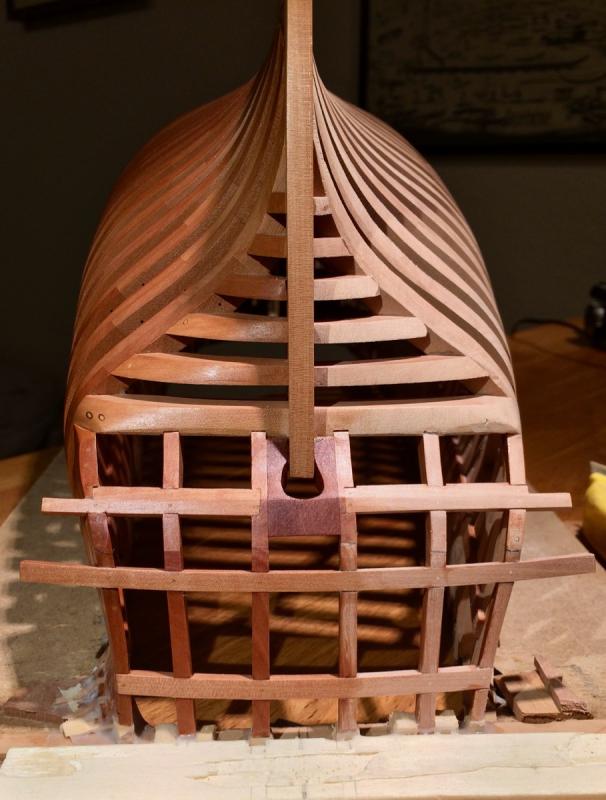
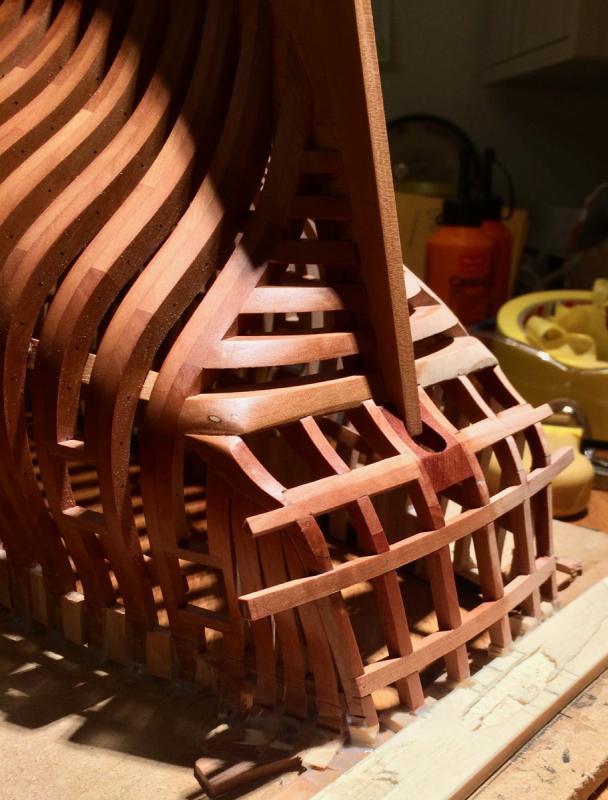
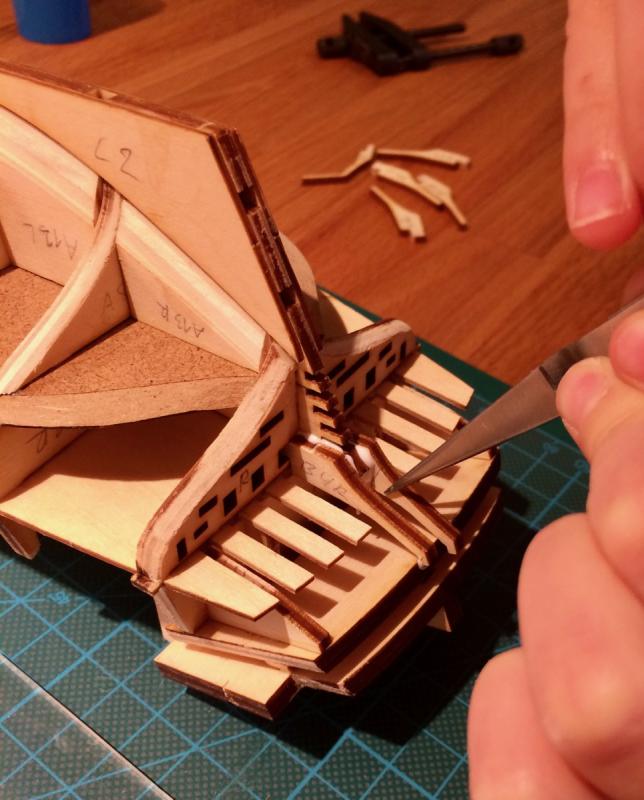
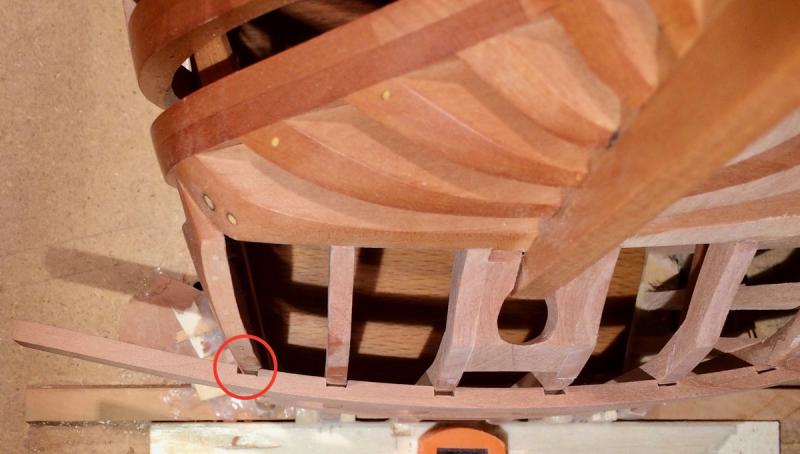
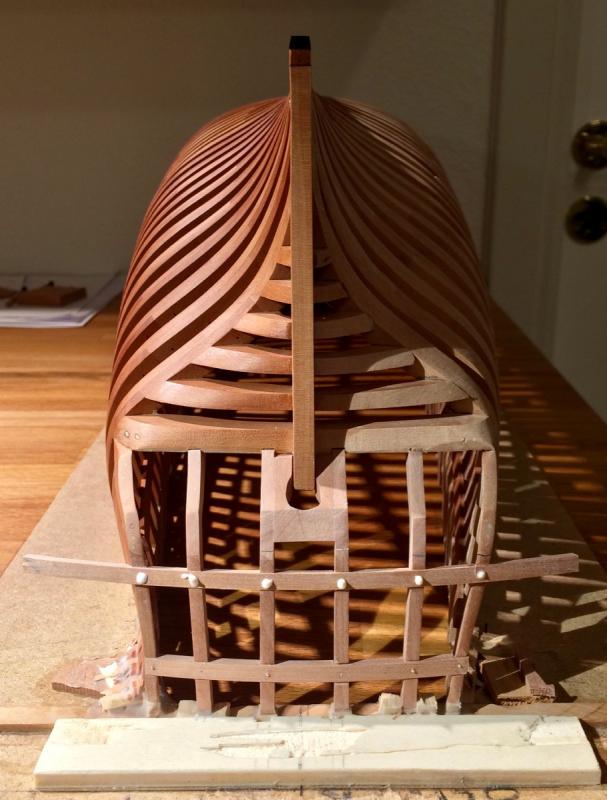
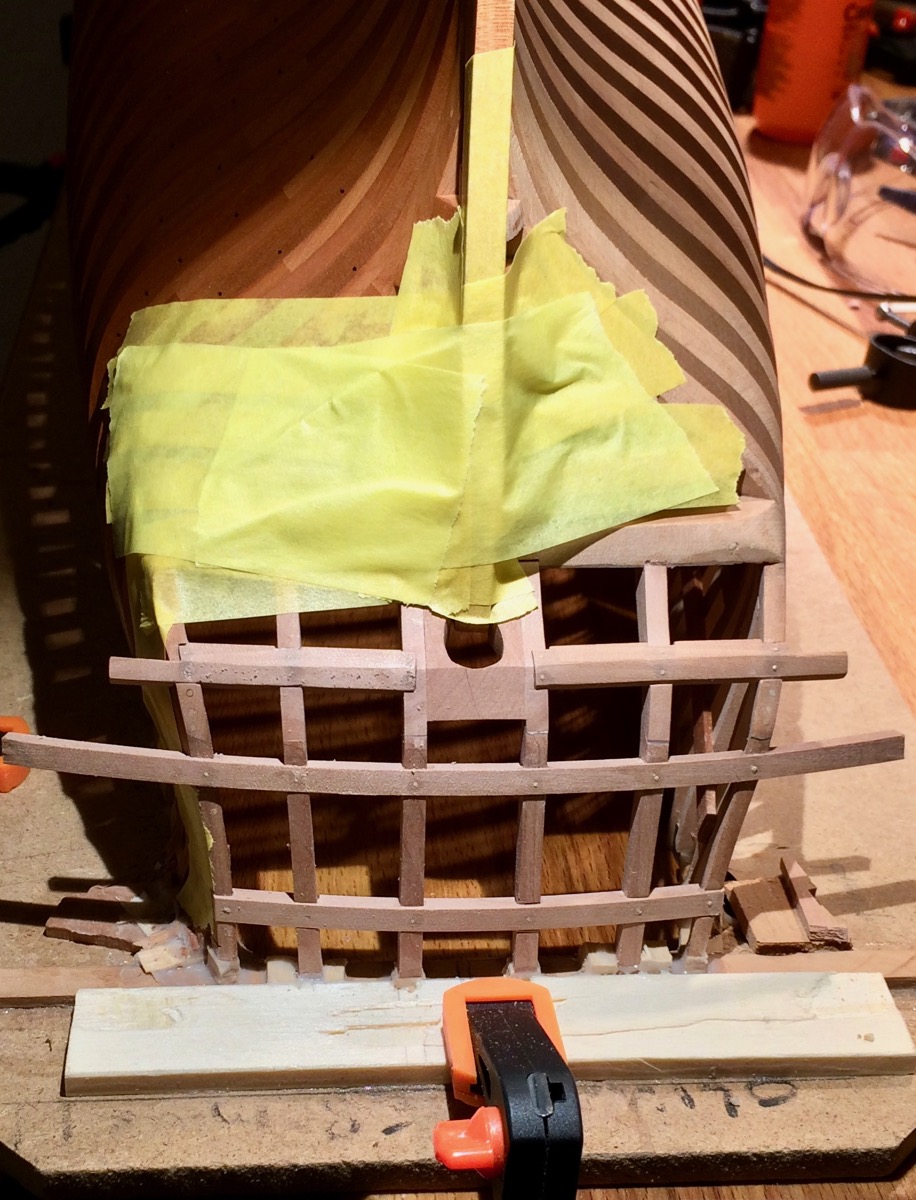
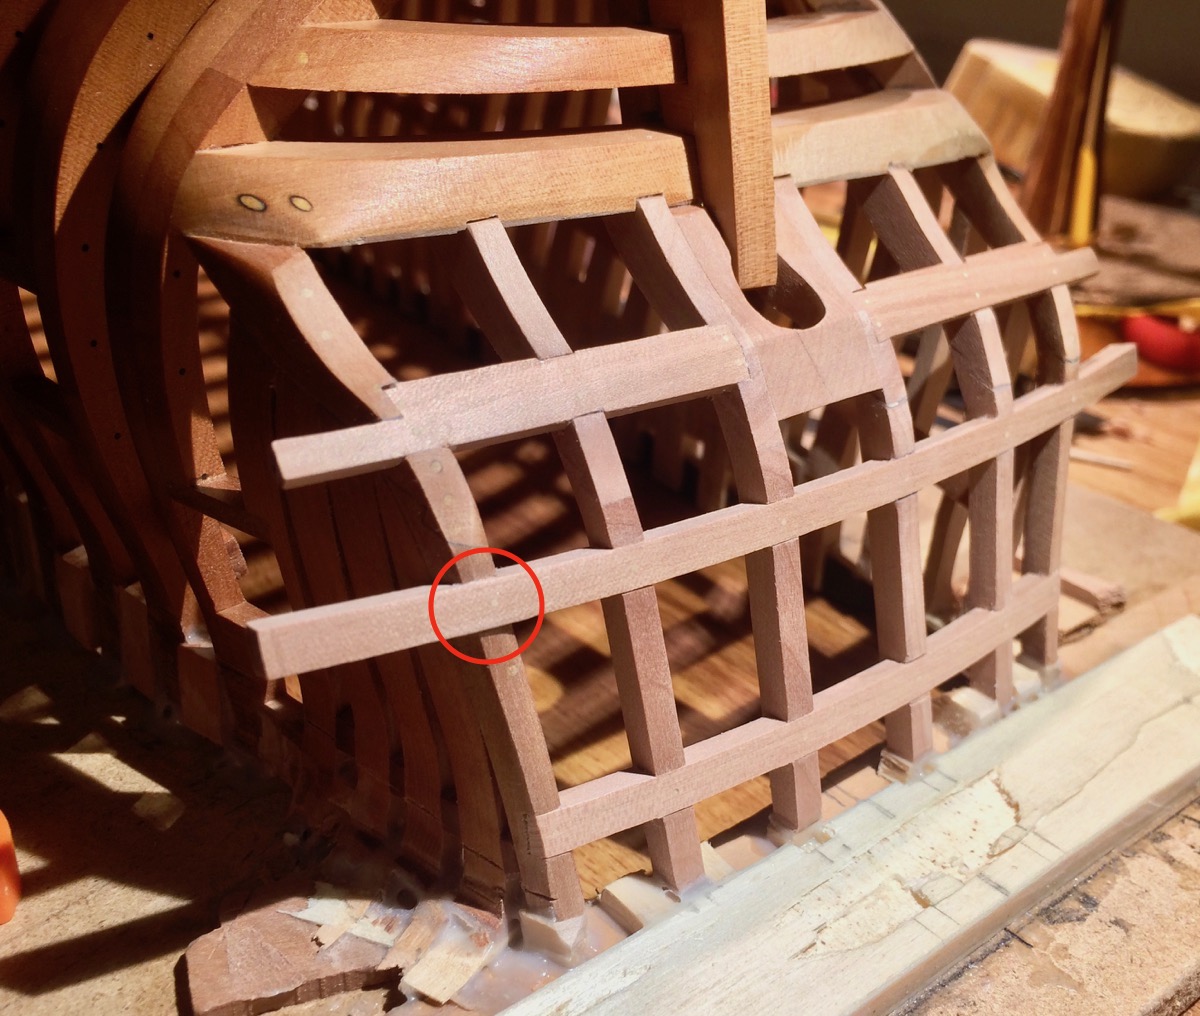
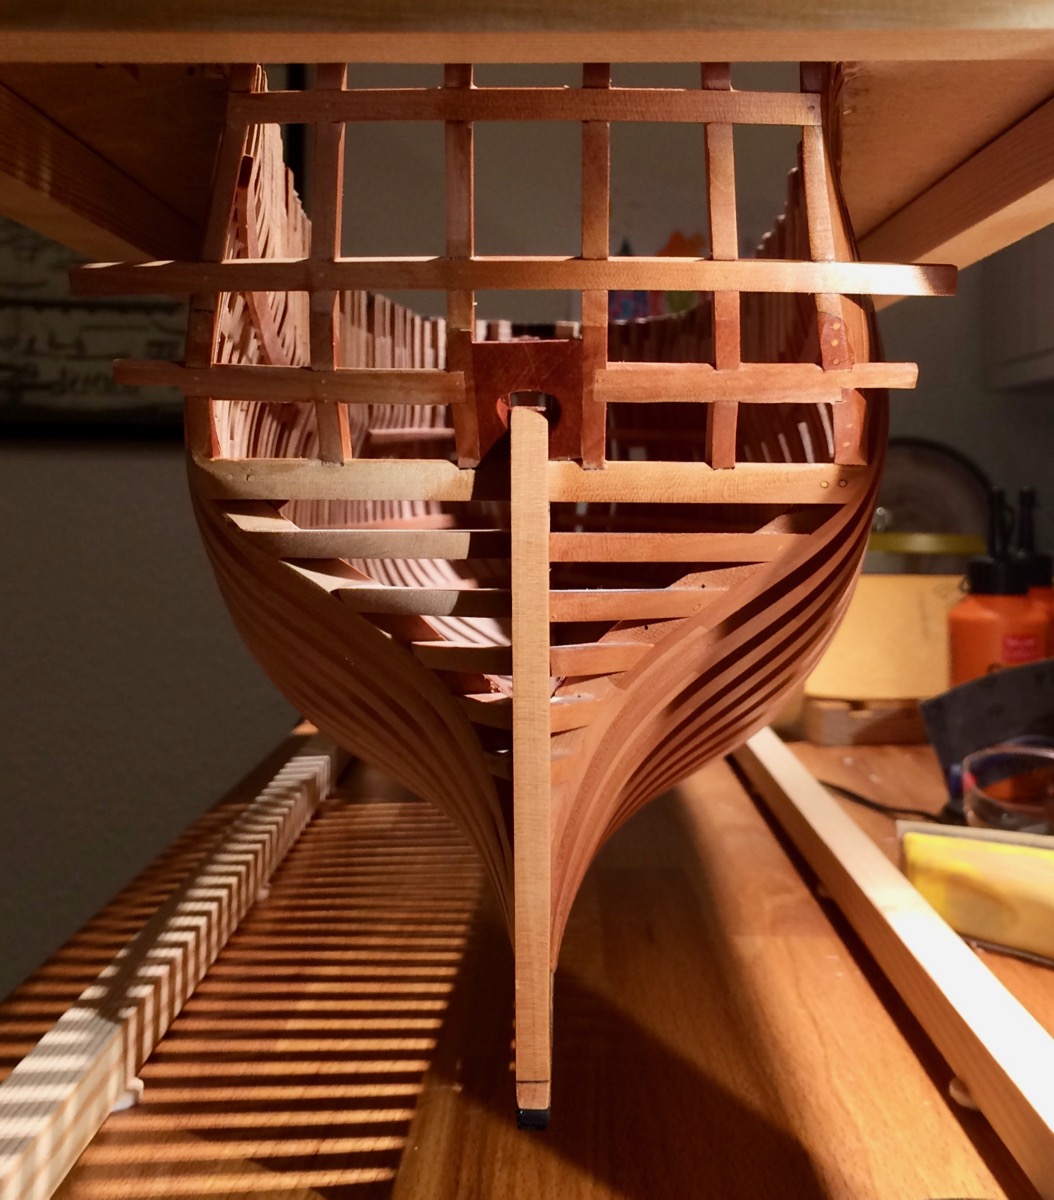
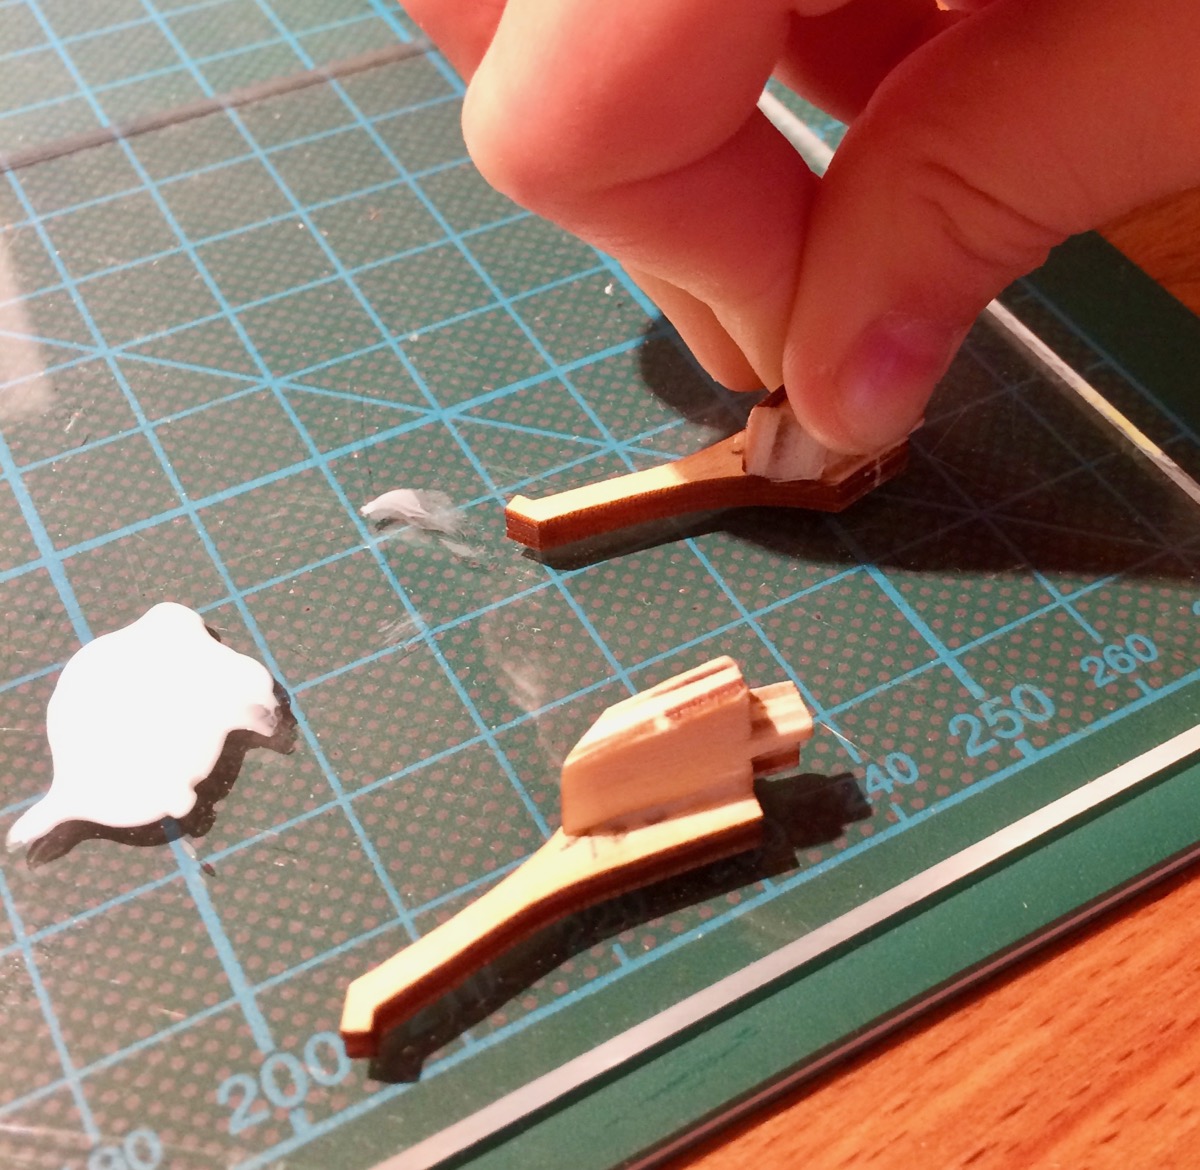
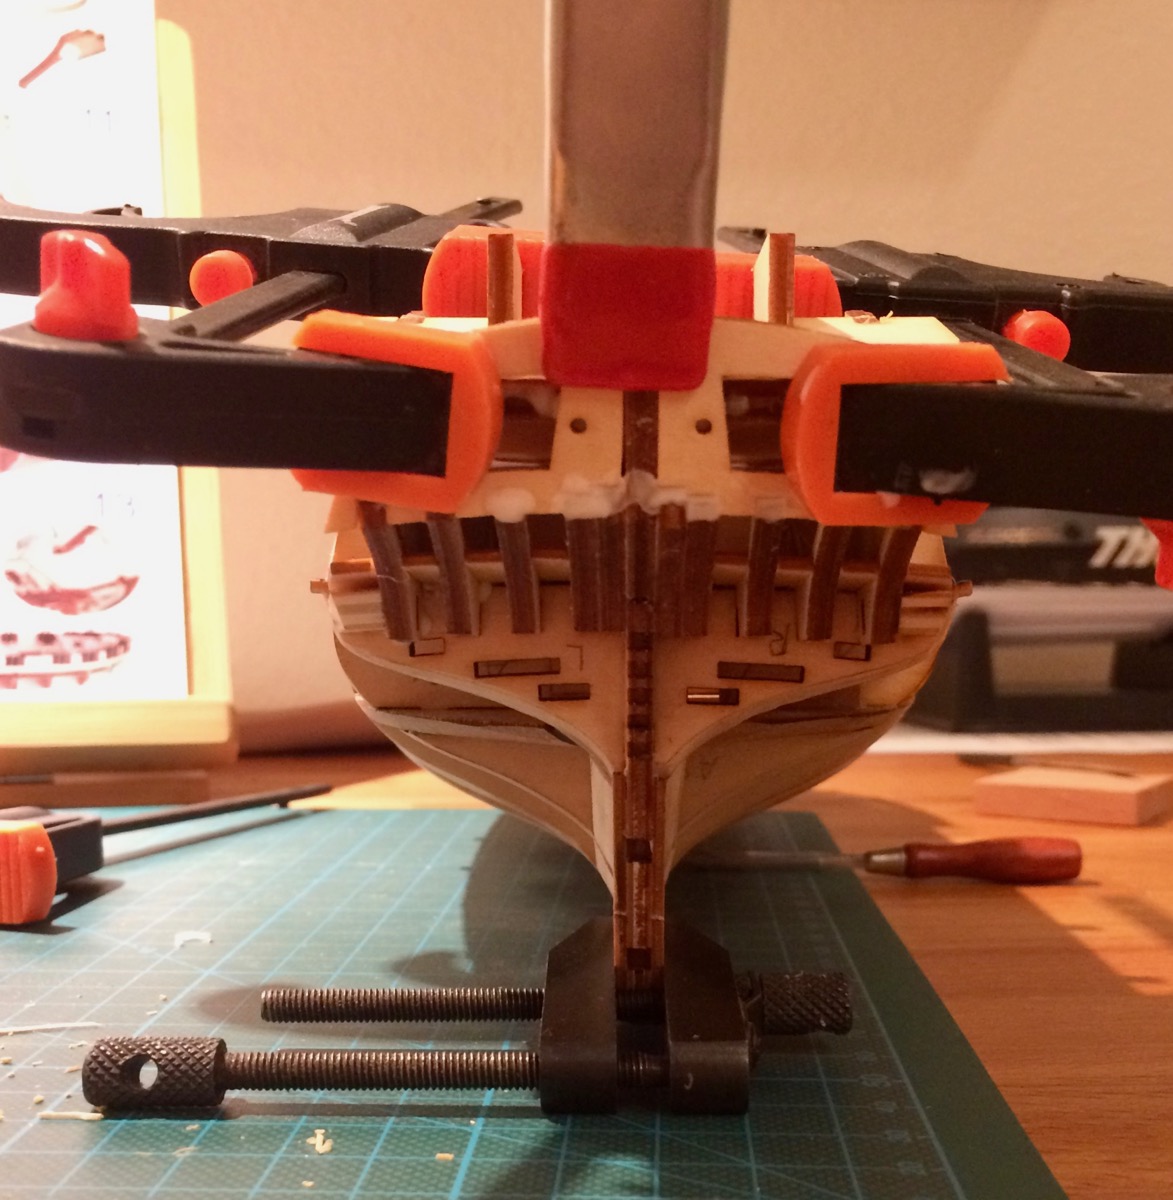
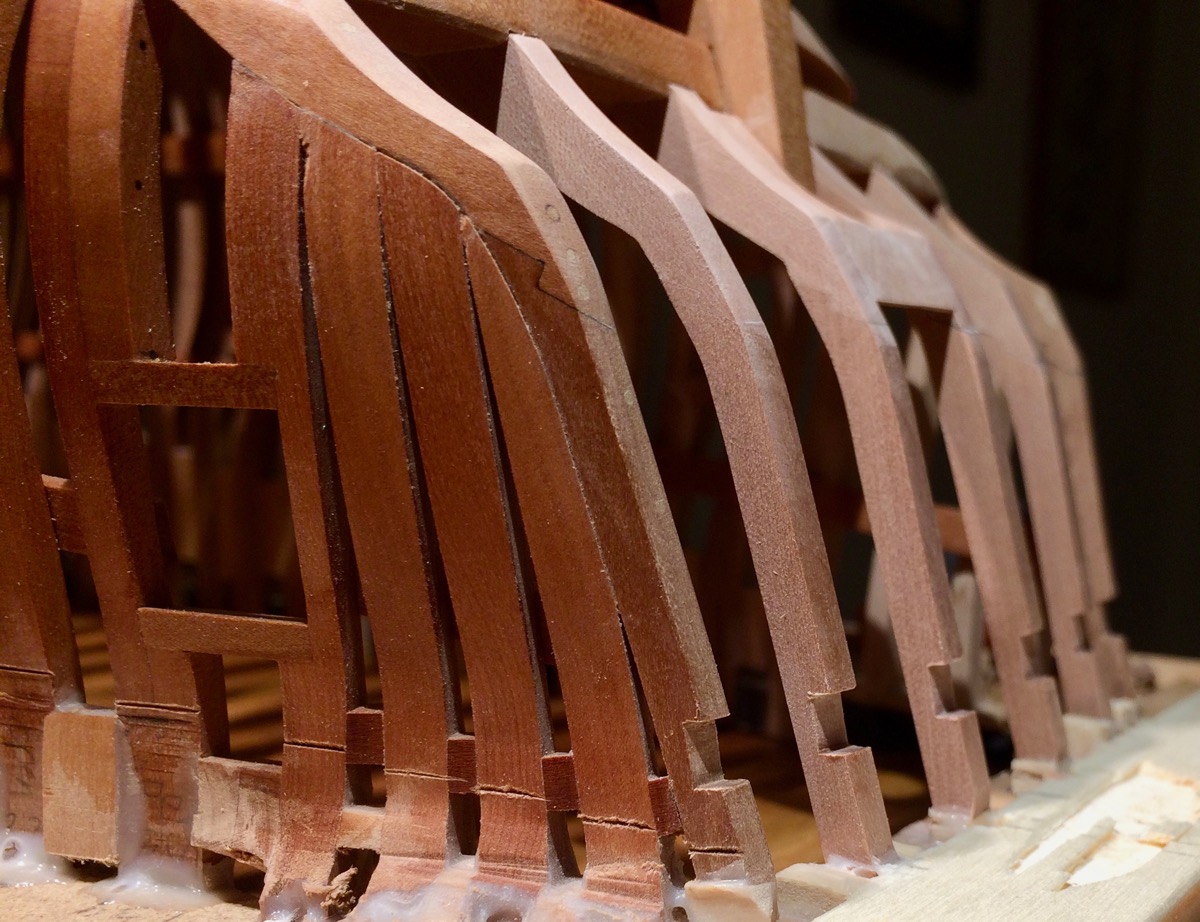
Finally finished the transom.
Last set of notches (aka "macro is brutal")
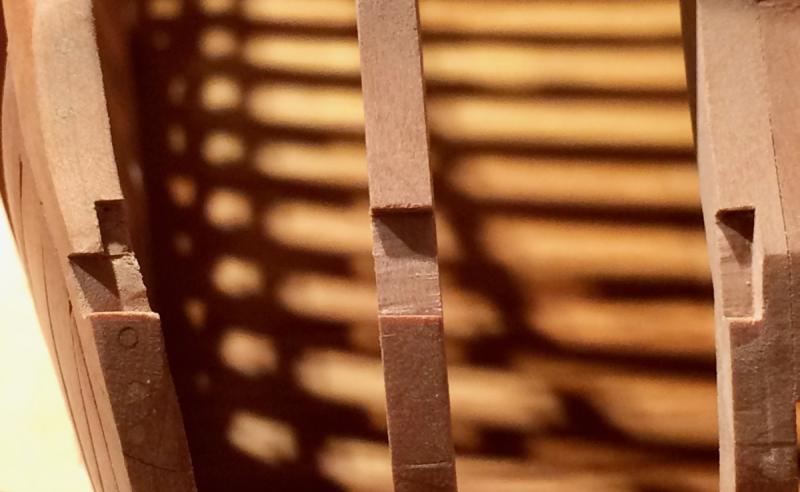
Horizontal piece also got some of them, on a weird angles:

Glued in, treenailed and masked for fairing:

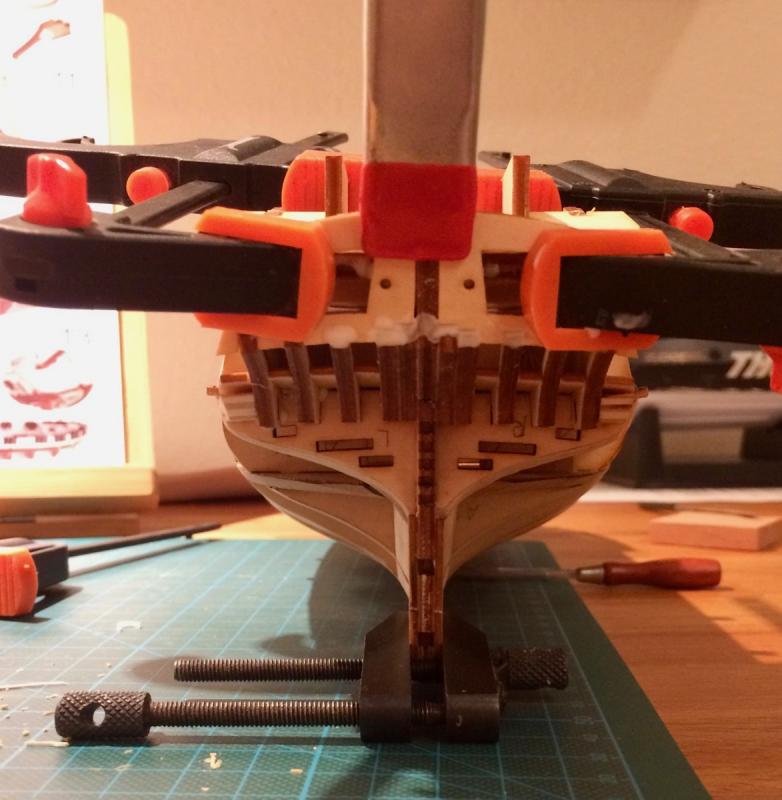
Fairing was easy, because the smooth curve of the transom allowed to use the plane:
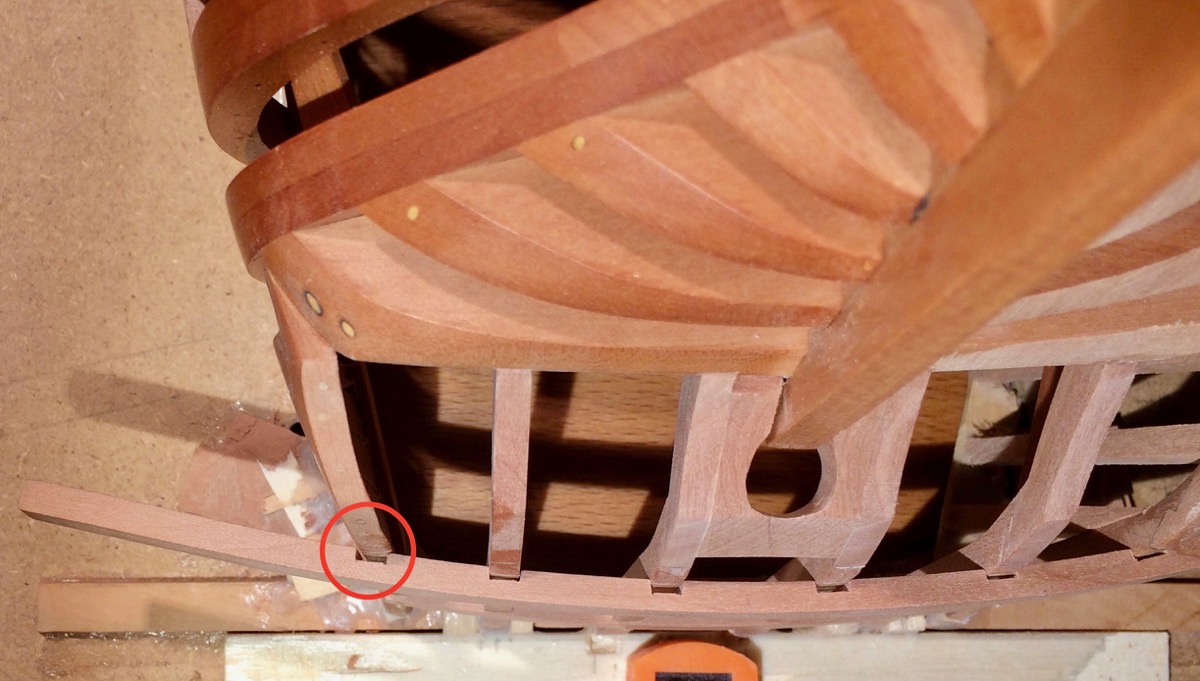
Faired. I made one mistake, one joint is too shallow, so can't fair this junction properly - the wood is too thin and will fall off

Too late and painful to fix, decided to leave it as is. Eventually this will become a part of the quarter gallery, so it will be less visible:

Put the oil on it (that was fun, so many surfaces to carefully oil and so many are crossing each other). Can't wait for it to dry, sorry for reflexes due to wet oil!
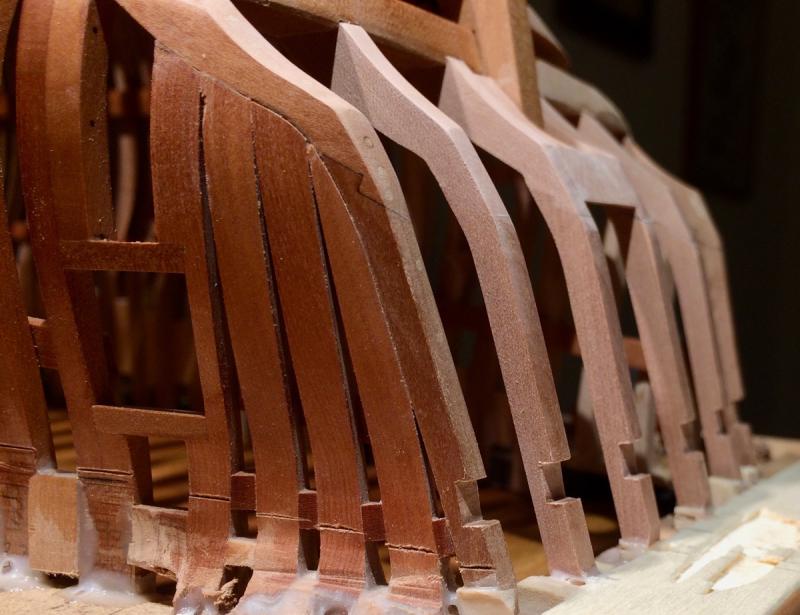
Note that due to a different grain orientation, oil resulted in different colours for different groups of timbers. Light "along the grain", medium dark "diagonal grain" and very dark "cross grain". It is all made literally made of the same piece of wood, I promise! Wood is magic
Not everything aligned as it should, but I started with a not very symmetrical transom, at least haven't made it worse. Will pay much more attention to the proper alignment in the next build!

Now I am taking a short break - will shift attention to the jewellery box I promised to admiral, and then will come back to this log with a display case for the model. The model is far from being complete, but it does not stop from displaying it properly, and will definitely help to keep the dust off.
- Trussben, Ryland Craze, Canute and 36 others
-
39
-
Small note on treenails: I use the same method as you, and after some practice it works fairly ok. But it is more efficient to use a long strip of wood instead of a short ones - you spend roughly the same time per strip, but get much longer treenail material in the end
Great log, thanks for posting!
-
The progress photos are very interesting! Thanks for taking your time to start the log, it is very educating.
- mtaylor and aviaamator
-
2
-
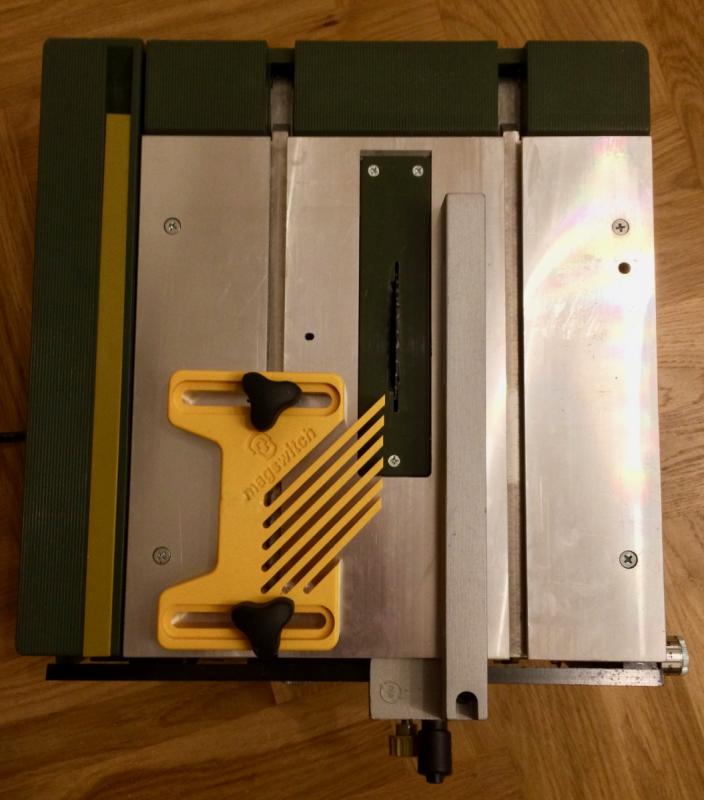
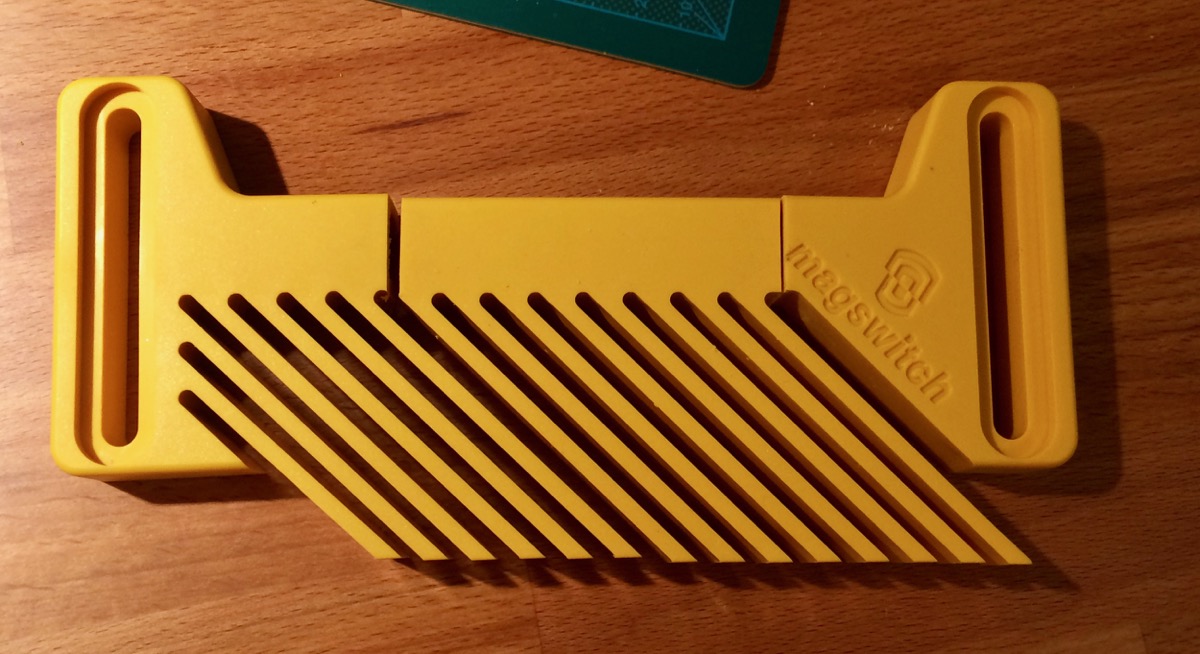
Wanted a featherboard for the table saw. Magswitch looked really good: https://www.amazon.com/Magswitch-Table-Feather-Universal-Model/dp/B001DSZ7EC
But I forgot that my table top is aluminum, not iron. So magnets are not working on it
So I bought this attachment, because I really liked the material (and it also includes all the hardware, bolts and knobs)
https://www.amazon.com/Magswitch-Vertical-Featherboard-Attachment/dp/B006SJH0SW
It was, obviously, too large for my saw, so I shortened it a bit, cutting off a long middle section and gluing the remaining parts with epoxy, reinforced with a wooden block inside the featherboard:
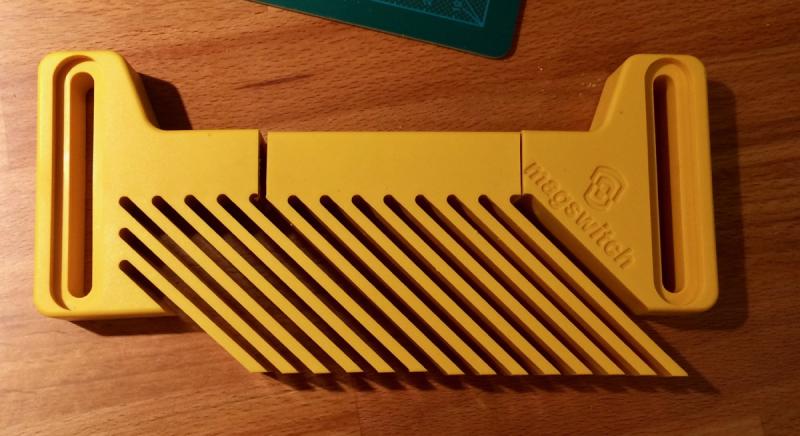
After squaring and shortening the bolts, it was a perfect fit and it works like a charm:
-
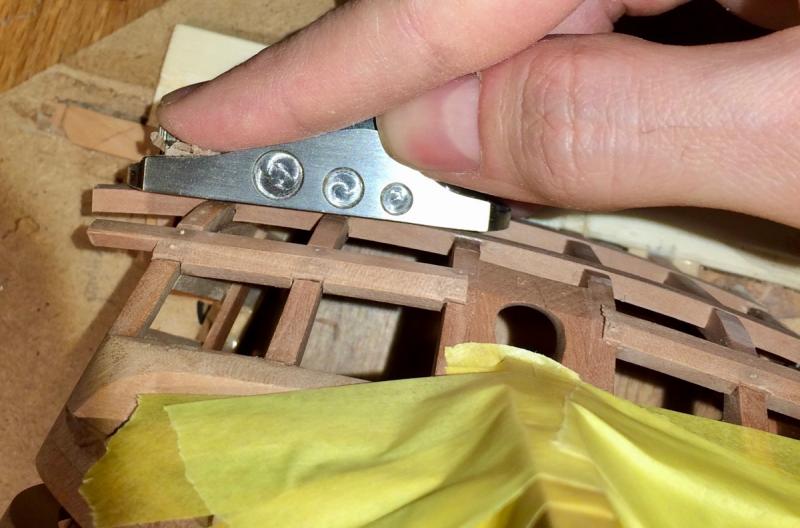
How do you use the spokeshaves in this hobby, if not a secret? They are designed to make some round and curved shapes, right? But I can hardly find parts in the model where a spokeshave can be used.. Or I totally miss the idea?
- mtaylor, dvm27, Seventynet and 3 others
-
6
-
So precise for such a small size! You definitely have a sharp eye and a steady hand!
- giampieroricci, PeteB, mtaylor and 1 other
-
4
-
Roger, these chisels are used a bit differently - shaving and cutting the wood with a finger pressure, not with the mallet. Due to their size, they are much easier to work with comparing to the full size chisels - which are just too long. I have both fullsize and miniature chisels, and haven't used the fullsize ones on the model for a while.
Might be subjective though.
- donfarr, Seventynet, cog and 8 others
-
11
-
Semi-offtopic: got a bit distracted from the build with an idea of doing some small-scale woodworking (jewerly boxes, that kind of stuff). Part of the plan is to also build a nice display case for the Cromwell. The model looks quite nice even when not finished, plus in the case it would be better protected from dust. Plus it is better to build a case while you have an itch to do it
Ordered few boards of some basic hardwoods - walnut, cherry, maple. While the wood dealer is milling them to desired dimensions, took some small piece of scrap to practice with milling my own wood. This was a walnut from the edge of a trunk, with a bit of sapwood.
Everything is sooo out of scale
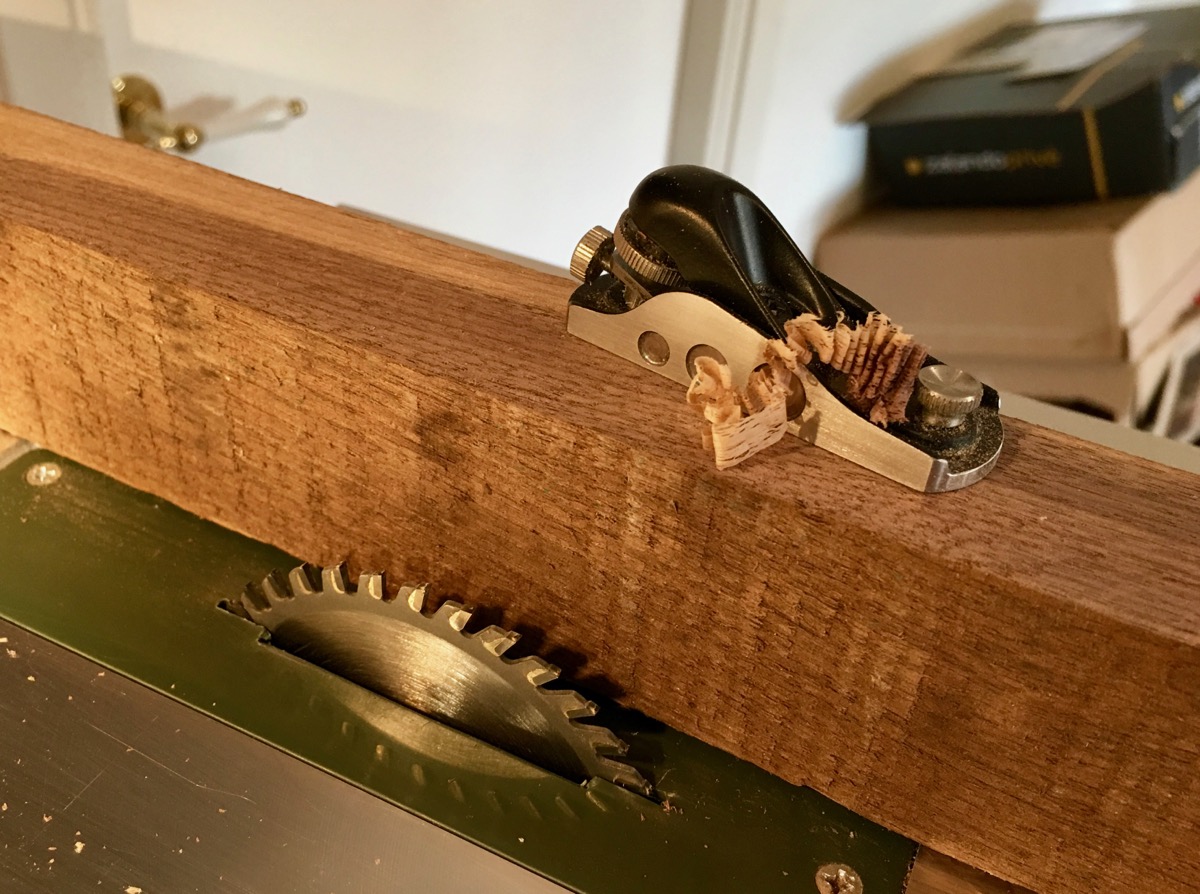
My tools are tiny. So I can only build tiny boxes. The piece I got was not square and not symmetrical. Obviously, I do not have a jointer, so squared it on a table saw.
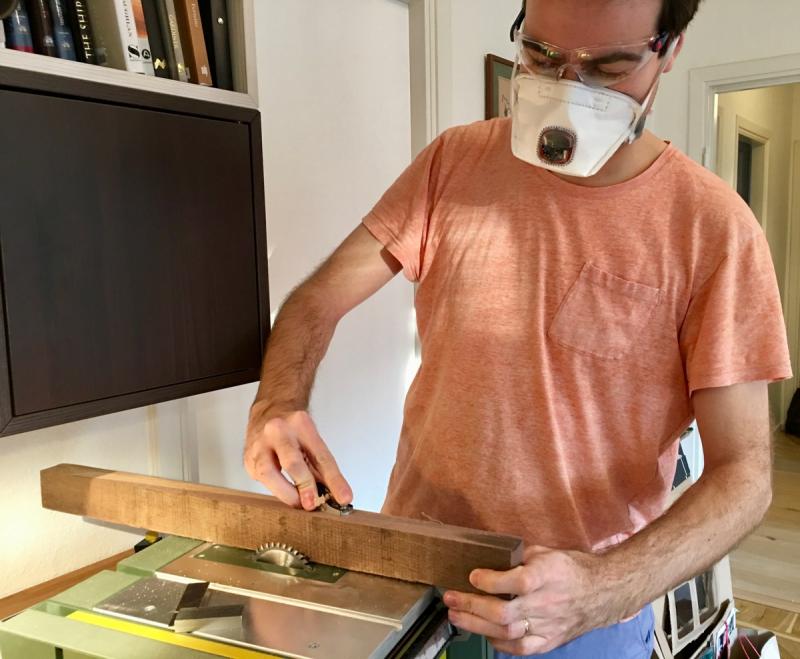
Of course, the saw is too small, so finished squaring with a plane. Which was also super small. That felt, hm, awkward for sure!


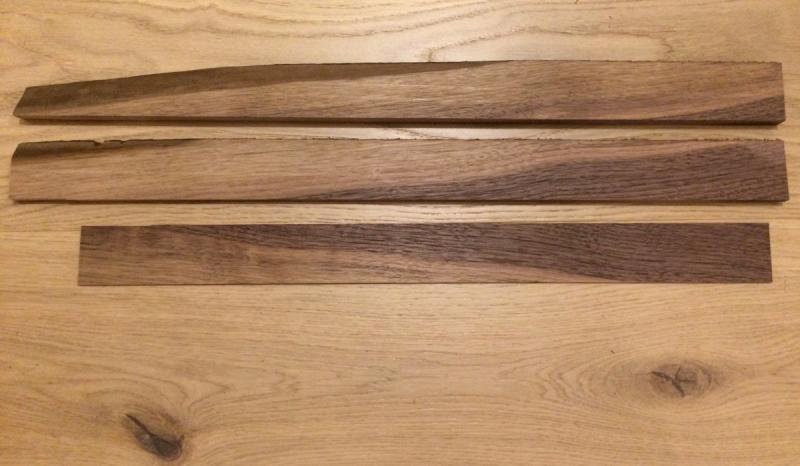
Resawing this piece into planks on Proxxon bandsaw was just pathetic. Super slow even on a max speed and the sound was disgusting. The bandsaw was definitely not up to the task.
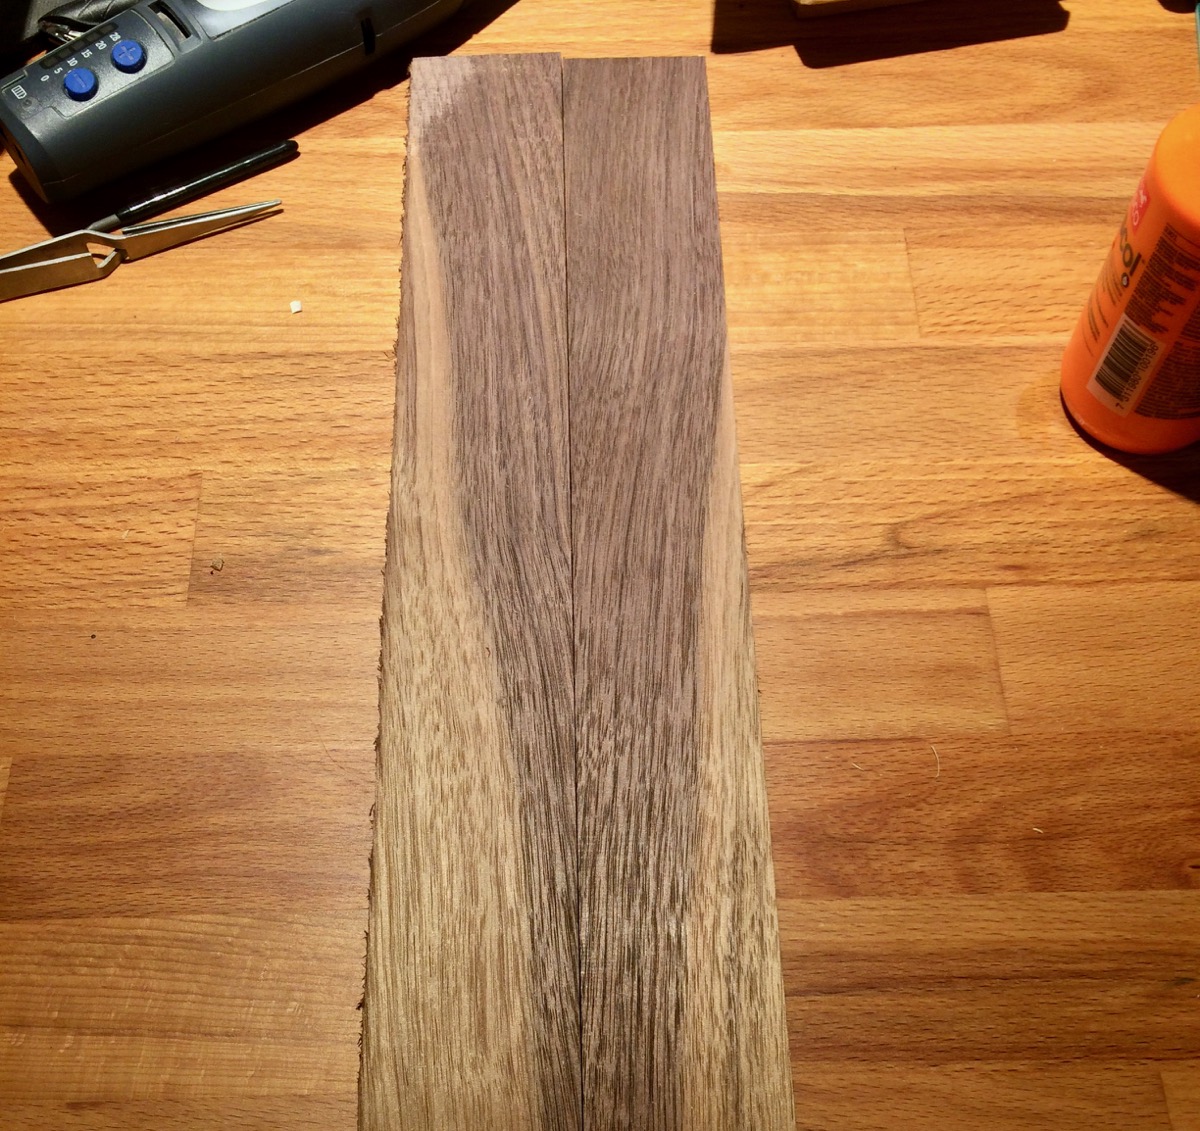
But after passing it through planer the wood turned out to be beautiful. Very deep walnut pores and grain, but guess that is a feature?
That contrast of sapwood and heartwood is striking, something I can use on some box to create a nice effect if matching the boards correctly.

Walnut on stained white oak.. I turning into a wood junkie...
- tadheus, mtaylor, MarisStella.hr and 11 others
-
14
-
From both: thank you for the comments, it is really nice!
This weekend Daria asked me to find a time to build together, I was really happy she asked for it. Also, this time I tried to maintain a slower pace - the build sessions are supposed to be a moments of calm enjoyment, no rush. But it is harder with kid, since her attention span is quite short and she is typically rushing things. So trying to slow down
Fiddly bits in the transom. It is funny that this kit build reached the same milestone (hull is ready, building transom) after 4-5 hours, while it took 2 years to get there with my main fully framed build
Daria loves to think these are a pieces of the puzzle that can fit together. She might enjoy the Things Perfectly Fitting Into Other Things tumblr eventually
Gluing the side timbers with some sort of filling blocks. Everything is carefully notched and well thought trough, this kit is great! Daria got the concept of "parallel alignment" and played a lot with parallel machinist clamp.

Installation is tricky, but was fairly successful in the end:
Transom is ready. There are some gaps, but I in this build it is better to make mistake instead of chasing perfect quality:
(nevermind the glue, will clean it up when dry)
Clamping was very tricky because transom is not square and not parallel, so I did it myself.
So far, that kit is quite kid-friendly. Except the fact that every single part fits too tight and notches should be extended with a file. Bleh!
I take all the nasty parts (filing, filing, filing, filing), and she gets all the fun parts (assembly, measurements, clamping). Not fair!
- GrantGoodale, Cathead, archjofo and 13 others
-
16
-
Mike Y,That's my test project and there are some specifics need to be improved.The blog Maybe released after the project is completed.The project of Zeehaen is some preparation or test for HMS Cumberland 1774 -i want to make my drawings by 2d/3d technology and CNC engraving machine to process parts.
hjx, it is much more fun to share the progress - please start the log while the project is not yet completed!
I am sure lots of people would be interested in a CNC build. Even a tiny photos you attached look excellent!P.S: Chris, sorry for skewing your discussion!
-
Hm, for me it works without any extra jigs - I bend pear even with 3-4mm thickness by simply:
1) Boil a full kettle of water
2) When it is done - open the lid and dip the piece into the boiling water while it is still boiling. Of course, it is super hot inside the kettle, so use tweezers to hold the wood piece
3) Wait 15-20 sec
4) Done! Take the piece out, bend and clamp to shape
5) Wash the kettle and pretend you never did it in a first place
Super simple and no problems. Of course, it will be hard to do with long pieces, but super long pieces are typically out of scale anyway, right?
I found that for best results it is important to dip when water is still boiling. Maybe it is all that air bubbles and vibration that helps to relax the wood fibers? Just a guess..
At least experimentally - it works better than just dipping in hot water when bubbles are gone, and much faster then using steam.
-
-
-
-
-
It actually looks very nice with that grain! Feels like that "flower growing through asphalt" pictures. Rough wood - and a gentle flower emerging through it
With a proper backstory, this piece could be more interesting than something carved on a "proper" wood where grain is barely visible.
And the pimple is a nice touch, not a thing to get rid of!
- Canute, Modeler12, aviaamator and 3 others
-
6
-
-
The log is not abandoned, just a very slow building due to an upcoming Christmas and everything related to it.
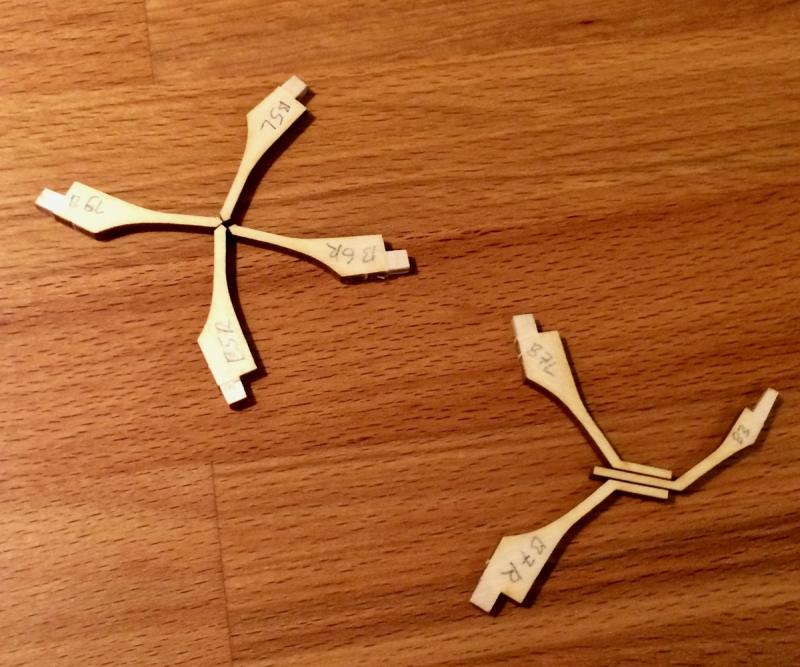
Notches lined up:
Whoopsie, forgot that wings are at an angle. Argh, redoing this piece again from scratch.
Two curved things are in place, one to go and then I can fair it nice and flush:
- gjdale, Canute, FriedClams and 24 others
-
27
-
Eeeh, what? Already done? So quick?

Your productivity is incredible, especially combined with the highest quality and careful planning and research. Bravo!
Looking forward for the next project
- FriedClams, Mahuna, cog and 3 others
-
6
-
1) Yes, lots of them, just look on the shaft diameter - anything between 1 and 3.2mm will fit
2) No problems, it can even handle aluminum. Just a matter to the cut depth. I am usually using it with hardwoods (pear and castello), they should be harder than plywood
3) The table surface dimensions is 7x21cm, do not have any experience with trying to fit larger pieces onto it.


A Lorch Micro-Mill that never was ...
in Modeling tools and Workshop Equipment
Posted
A-ha! Now it fits together
Any action shots planned?