HOLIDAY DONATION DRIVE - SUPPORT MSW - DO YOUR PART TO KEEP THIS GREAT FORUM GOING! (Only 13 donations so far - C'mon guys!)
×


popeye the sailor
-
Posts
16,007 -
Joined
-
Last visited
Content Type
Profiles
Forums
Gallery
Events
Everything posted by popeye the sailor
-
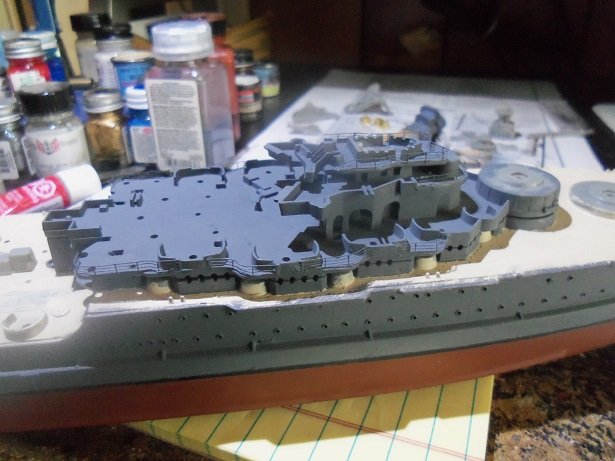
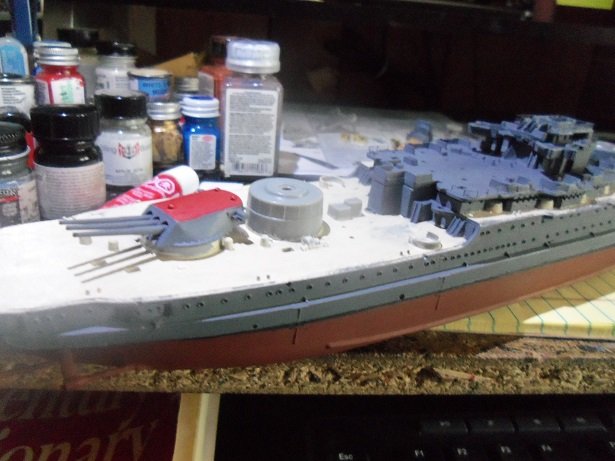
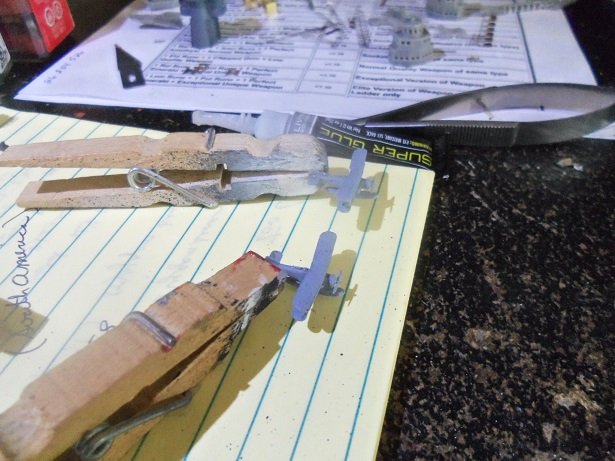
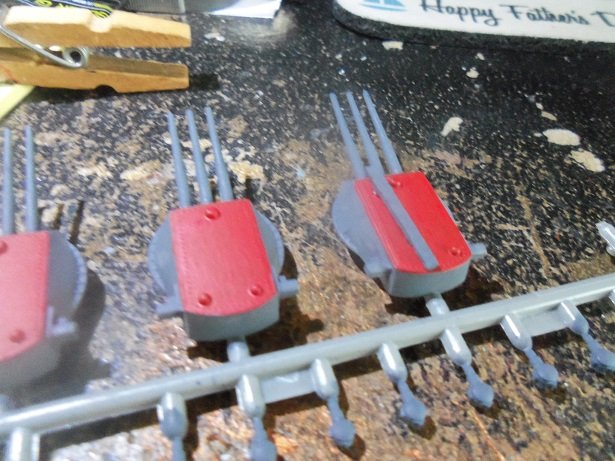
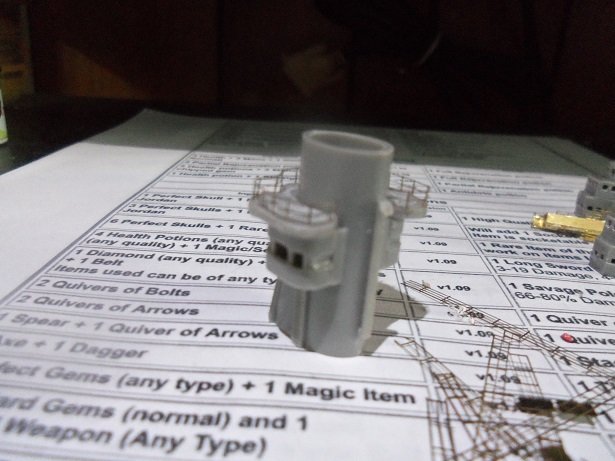
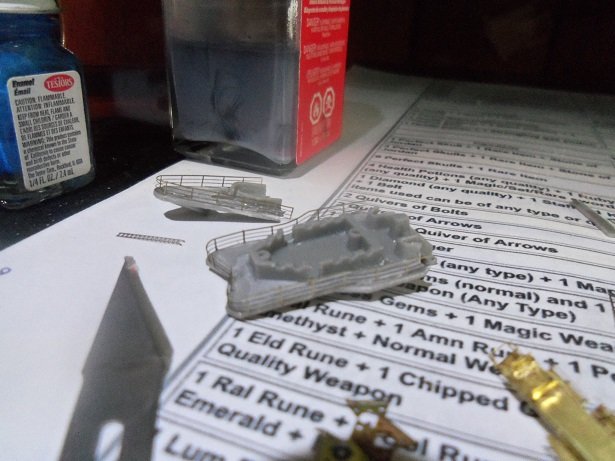
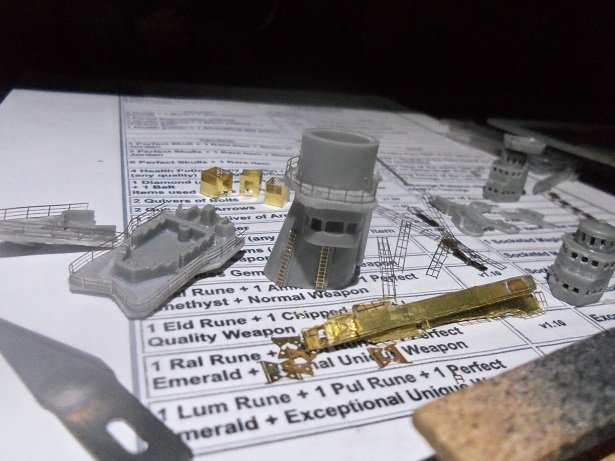
 hi there Carl no, the part was for the deck catapult......I think I subbed in another part, but if I still need it, at least now I have it! I haven't given up on the Vendetta.......she still resides on the table. I'm using the Arizona to give me a little more practice with PE, before I continue on her. I went a little further.......after painting the funnel, I filled the windows in with the window maker. there's still more to go before the funnel is finished. the third level was added to the structure. I touched up the red on the turret tops.......here's a cheeky picture of one on deck. the part for the turret catapult and the catapult itself were painted. gotta get this in place........handling it, I already had to repair it once. the planes were painted with light ghost gray. the catapult bar was cemented on the turret...........the catapult will be next. I've been painting other parts as well........gotta get back to the deck though. I need to do the railings, so I can see if I have enough to continue with the structure. painted the top wings on the planes.......needs another coat they got the second coat.......they look much better
- 259 replies
-
- 12
-

-
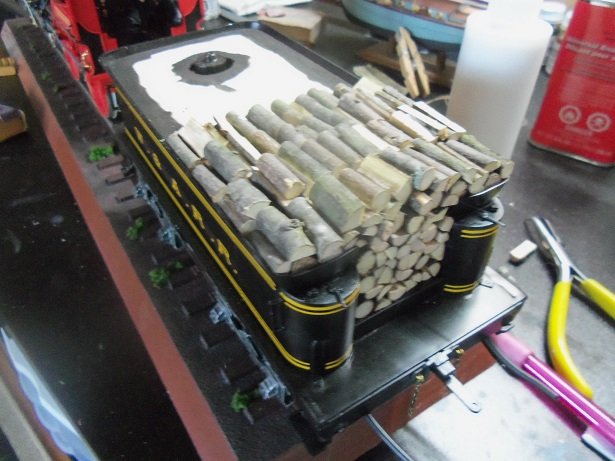
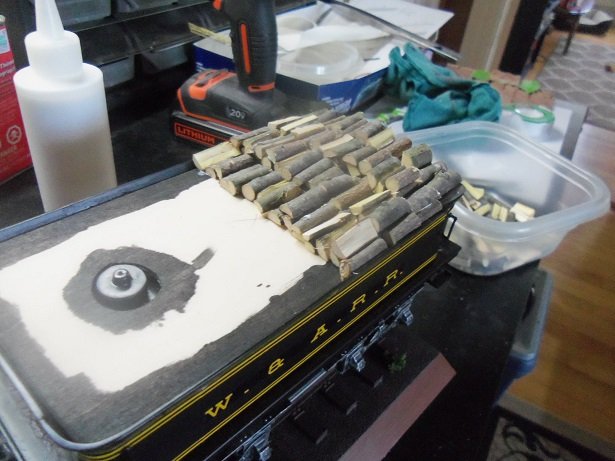
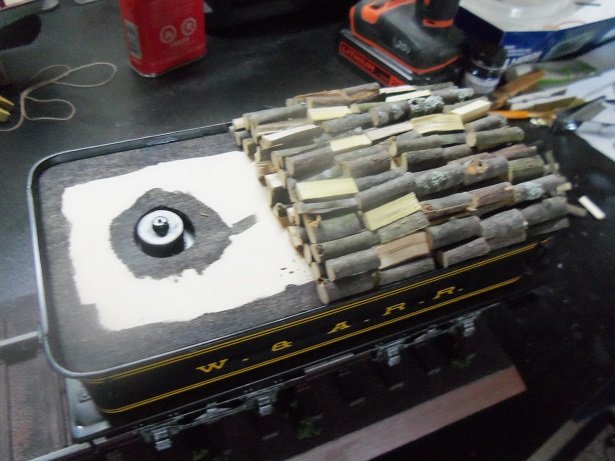
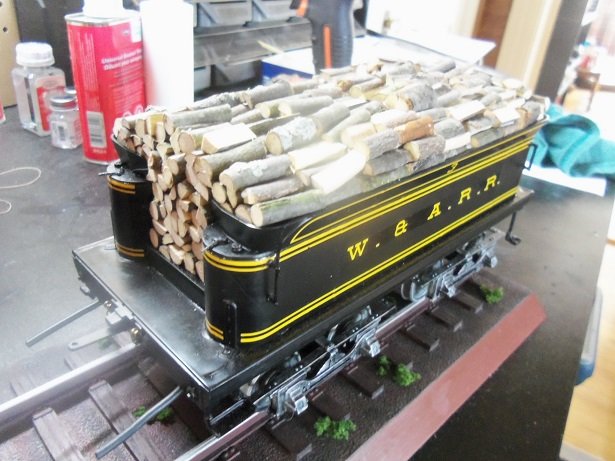
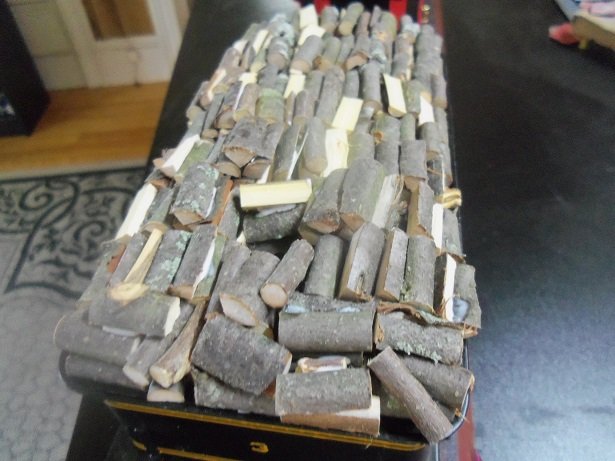
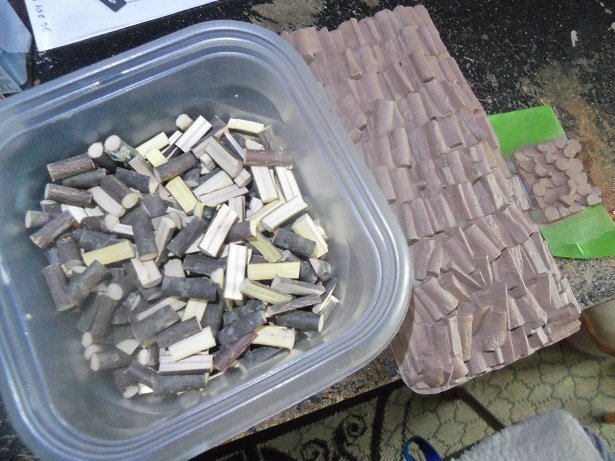
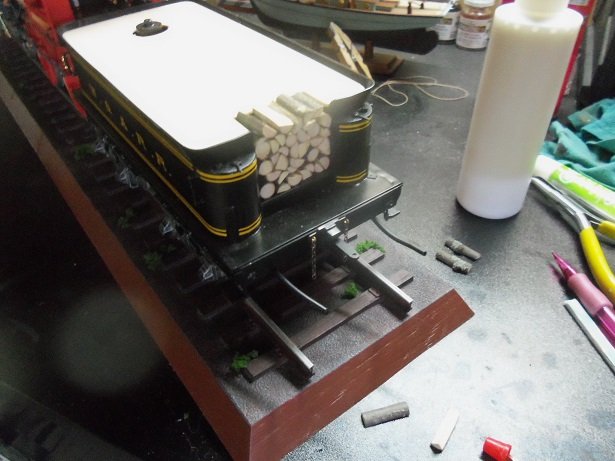
thanks Lou.....I am too the plastic parts were tossed in the trash.....after filling in the front area, I knew there was no going back thanks Mark......yea, I only painted around the water fill and the edges. I had that thought too, but as I filled it in, I worried about it less and less. I made sure that the first layer covered everything thanks to everyone for the likes.......I am so glad I went this route .....and to think, I was going to use that pseudo plastic thing. it took about eight rows to fill it in.......I even had to cut more wood. I did get a couple small cut from the first batch.........the second batch, I could have done some damage, but I only took a sliver of skin off the side of the knuckle of my index finger. the blood sacrifice to the modeling god four rows into it........as the wood is stacked, it totally hides the platform. another two rows will bring me to the row that will begin to encircle the water fill.. add another row......it can be seen that I didn't quite catch all the firewood pieces that were longer than the others. I just blended them in as I went along. once reaching the water fill, there was a row that met the sides........one more beyond that, and I couldn't make another row. I just fitted them as best I could at the back of the tender. so what the results are I am very pleased to show you deserve a hug Ken! .....brotherly though, 'an not that lovey dovey stuff I was hoping to get the tender hooked up to the loco........next and possibly final update perhaps.

- 245 replies
-
- 15
-
-
look'in really good...never tried the carpet thing
-
thanks Ken was going to start painting the plastic parts...but I just couldn't do it......I had to see how this would work out.
-
your right about that..........I never had a stash, until I picked the hobby back up in my later years. you have a nice work space..........I have three tables, counting my desk as for my unfinished kits.......let's just say your not alone
-
thanks Rob I'm getting better.........it's practice. the more one does...thanks for the good word
-
thanks Kevin........I'm only doing some of the railings. I've seen models that have different degrees of modification. I want to make sure I have enough for the hull, so I'm being selective.
-
simple fix........just cut out the square you'd be going a light gray anyway.......if it sticks to the frame, it will aide you when you sew it to the frame. the support posts can be white. coming along nicely!
- 446 replies
-
- 3
-
-
- zebulon b vance
- deans marine
- (and 3 more)
-
like everything else......it takes practice I'll be 63 come August.......not too late to teach an older dog new tricks it's not the easiest....but I like the outcome. I prefer painted though, although the unpainted models look great too. the effort really shows in the finished model
-
thanks John swear?!?!.....me..............nawwwwwwww! there are no bibles around now.......if you were referring to cuss or curse.........well then.........I guess I'm gonna burn for it
-
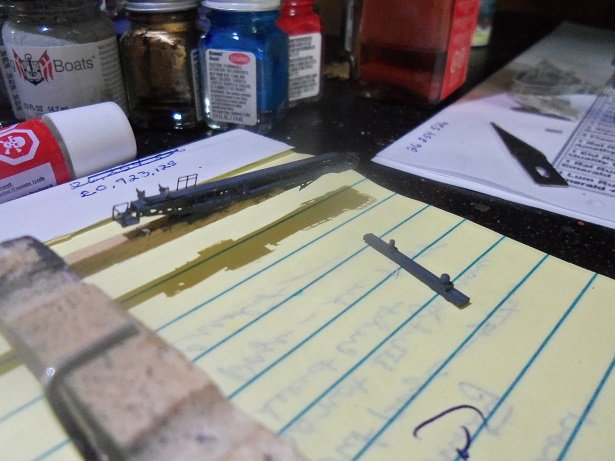
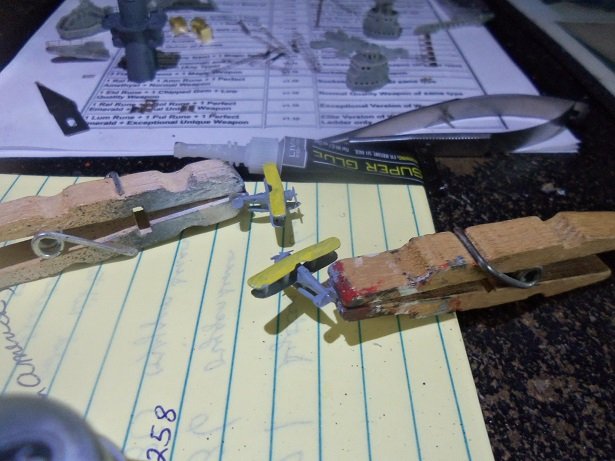
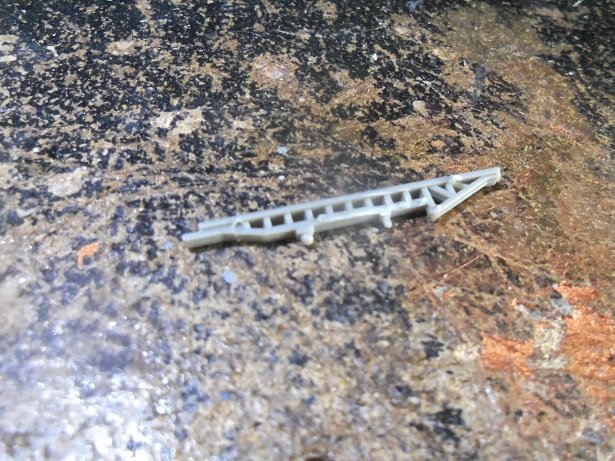
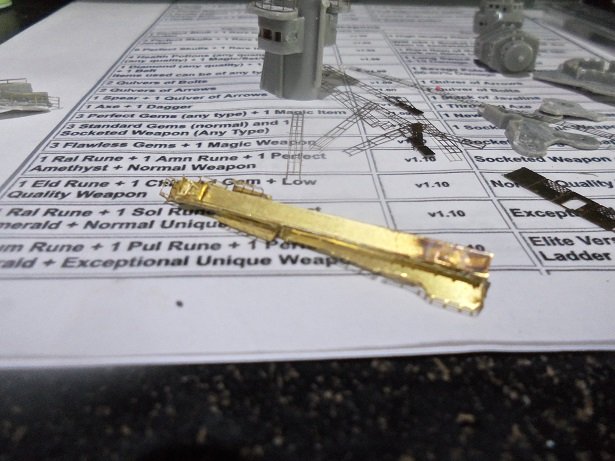
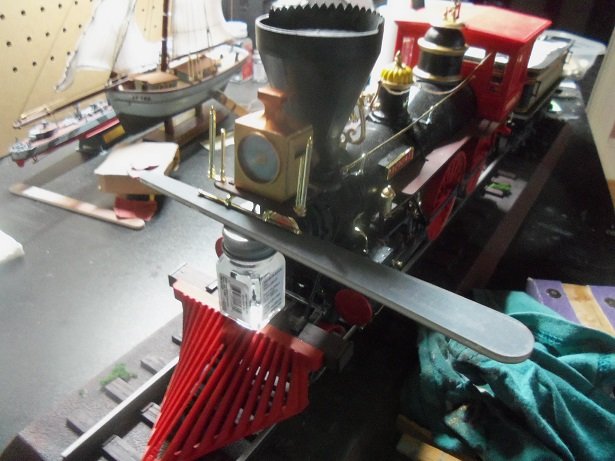
made some more progress on her to report. I'm still play'in with the PE........a bit of a funny. I dropped one of the pieces and got down with the flashlight to look for it. lo and behold, I found the part that I had lost earlier. I'll put it on the deck catapult later on. railings were added to one of the mast platforms. then I did the platform that sits on the funnel. there is more to go on the funnel, but the part is in place. I'll be filling the windows in with window maker. I also worked on the two mast structures, trying to square up all the windows on them........that's a lost cause. I did notice some PE on the Hood sheets.......perhaps I can dress them up if I have enough. the idea with the turret catapult.........I dug out the catapult and cut the bottom part out of it........I started to cut it out here. it is a little bit narrower than the PE catapult.......at least I can use it as a guide. I did manage to move the sled for the plane......thanks to Lou for mentioning that to me. the instructions are wrong. the next level for the main structure was railed off at this time. I also added ladders to the funnel. I didn't bother to file them out........they make them stand out better. in the background there......I played around with some of the other PE from the Hood set. whatever I can use off the set........I'm hoping it's a lot thanks for the likes and look'in in!
-
I recall some older kits that supplied springs........that was short lived. great idea for the extra detail file
-
thanks for the compliment OC..........the initial Pho-par is what got the Murphy ball rolling with this one. as I've come to know.....there's always one project that's not gonna go the way it was planned. Ideas may look good on paper, but in application, they fall flat. small bites.......chew......and then swallow
-
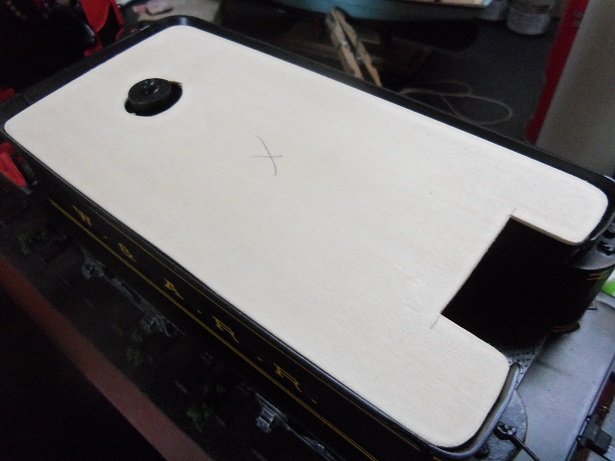
well....tell Sven thanks for me........and thanks to you as well if it wasn't from the subtle 'push' from Ken, I wouldn't have tried to do it. I hope I can pull it off........so far.........so good! big thanks to you Ken 👍 not to disappoint you.....here is a small but productive update. I had trimmed the larger pieces of wood and split it all........guess I'll have no use for the pseudo wood load. looking at the platform I made, I felt that it should fit lower in the tender. I trimmed a little off the three sides, and was satisfied with how it fit. it is now cemented in place. filling it out starts in the front.......I have to build up the load front face first, then pile over it in somewhat of a heap. I'll do fairly neat rows until I get back to the water fill, which I want to leave accessible to some degree. I only used the testor's green tube glue along the bottom.......the rest is done with white glue. while this was drying, I installed the headlamp. there are no braces or brackets for it, other than the two that connect it to the loco. I will leave it braced up until tomorrow. things got rather busy 'round here, so I didn't get much further with the wood load. I did manage though, to paint the edging around the platform with flat black, so it wouldn't be seen through the piled wood. I hope to get back to it later. thanks to everyone who hit the like button........and thanks for look'in in more to come soon!

- 245 replies
-
- 16
-
-
so many odd shaped parts..........masterful work! love that gun........so freak'in neat!
-
thanks, but the body doesn't look smooth.......I'm still not happy with it. but I will finish it........one never knows. it could come out look'in halfway decent I actually started to write this reply a few hours ago.........been real busy 'round here. thanks for the vote of confidence
-
glad I'm not getting chastised for cutting my own wood. believe it or not.......I'm sitting here at my desk, and that's all I can smell. hopefully I won't need much more, but all that I cut has been split and ready for stacking. as luck wood have it, I happen to have some testor's in the green tube for the wood to plastic adhesion........I can use white glue for the rest. I should have more on this later on.....stay tuned thanks for the kind word and to those who hit the like button
-
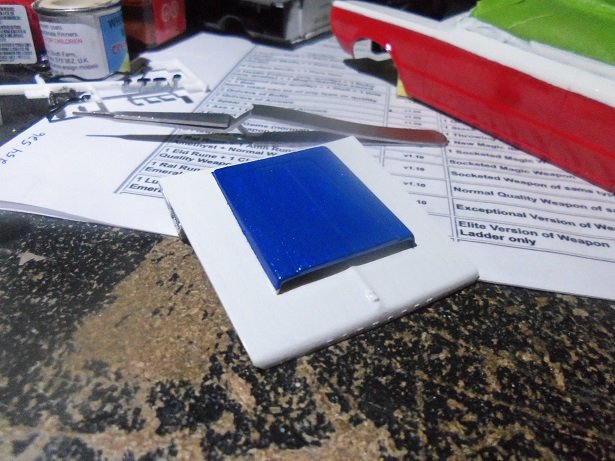
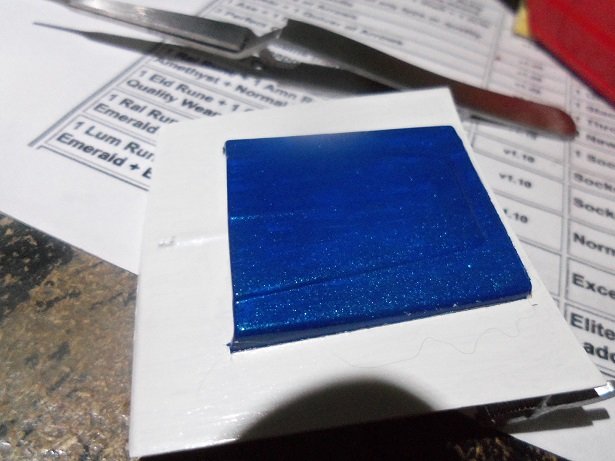
plastic is too hot going into the molds.......the quick cool is what creates the sink holes. I used to work in injection molding......made Chrysler window transmission grommets, Caterpillar hydraulic wiper rings, and various neoprene seals. very nice work none the less the body looks really good...I do believe I see a hint of blue
-
Airplanes and Tanks in plastic by Jörgen
popeye the sailor replied to Jörgen's topic in Non-ship/categorised builds
I don't see them........what I do see seems to blend into the camo. I'll look forward to your logs -
I use three pairs of glasses........my normal 1.25 reading glasses.........1.50 and a pair of 2.00. works well for me I'm beginning to dabble in PE myself Mike.....not the most friendly stuff, but when you get done, it looks good you'll have fun
-
awesome..........has to be your most life like yet
- 345 replies
-
- 5
-
-
- graf zeppelin
- trumpeter
- (and 2 more)
-
I though the same thing when I saw how thin the bulwark posts were. how well did the parts come out of the parts panels?......noticed on the stern, one of the post lost a layer of plywood {last picture, port side}. I'm sure it's nothing you haven't dealt with pleased to follow along
-
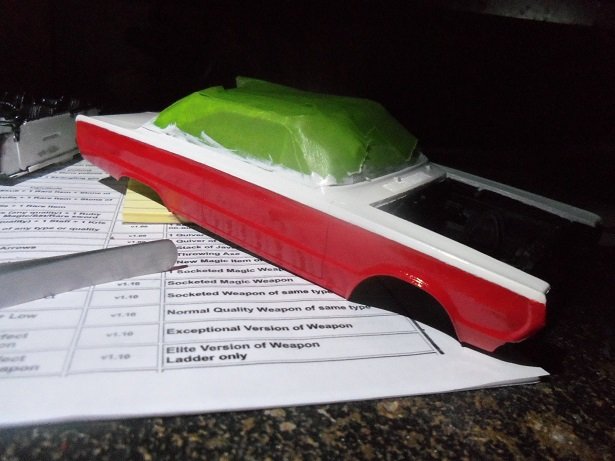
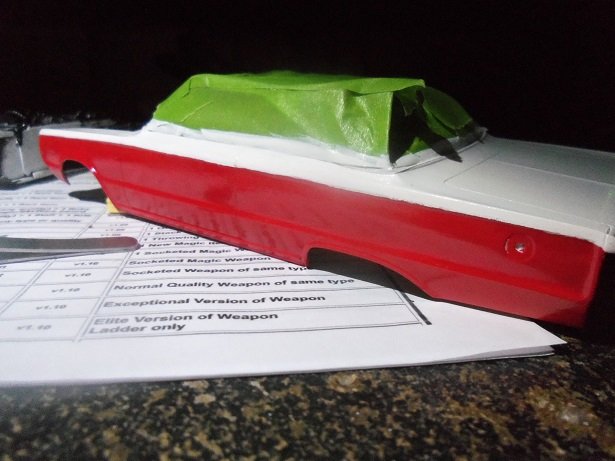
a little forward roll on this project. as mentioned, the body still looks a bit rough. my painting didn't help matters much either. I did get it to look halfway decent though........once the decals are on, it should look OK. noticed some minor touch ups on the trunk. I painted the blue this morning.......I'm going to treat it with that paint, I used on the hood scoop. it says to use flat black.......but as I proved here....if I had used flat black, I would have had a shiny black hood scoop. I painted the hood scoop blue....if you look close, you can see the glitter in the paint