
HOLIDAY DONATION DRIVE - SUPPORT MSW - DO YOUR PART TO KEEP THIS GREAT FORUM GOING! (Only 13 donations so far - C'mon guys!)
×


popeye the sailor
-
Posts
16,007 -
Joined
-
Last visited
Content Type
Profiles
Forums
Gallery
Events
Everything posted by popeye the sailor
-
 ...or perhaps a narrow piece between the PE parts......drill the holes. what you need, needs to be thin
 -
not a staunch sponsor?.........glad that I wouldn't feel like I was taunting you
-
ooooohhhhohhohhhhh......that my other poison!
-
that's the Calvin I was referring to.......I never knew what they called it either I have one image for Ford, one for Chevy, and one that has them both. I also got a couple of others.........the Duster emblem with the mini tornado, and the Plymouth logo. I may go with one of the latter two....the image is rather small........is it Calvin tinkling on a Plymouth emblem? 🏁
-
too big for the back window great paint work! no doubt you could do it.........right down to the lighter blue borders
-
does popcorn leave less crumbs?
-
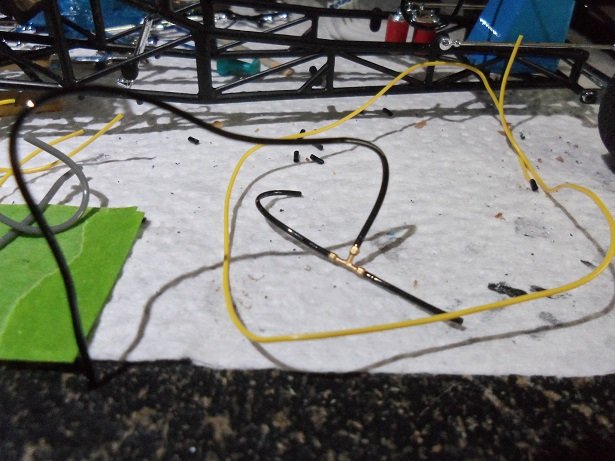
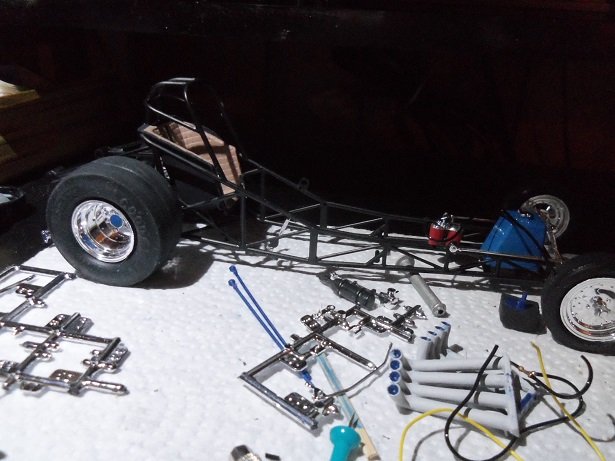
the ignition wires are just that J........very thin electrical wire...the kind of wire you would find in toys and such. I actually could have substituted red wire.....I have some in my electrical box. I have other types of wire that would be suitable. the problem here was that being very flexible and needing to have a boot added to them, it would have been very hard to put the wires on the distributor exactly Ken........I'm sure you've used this type of thin tubing. it's very tiny. the pins on the engine parts vary in size....just enough to make life miserable. I have found that heat can be a friend in this dilemma.......I use my pick to spread out the ends. the thing here is that the tubing tend to go back to it's original size rather quickly. also from being balled up in the kit for so long, it has taken the shape of a balled up bundle of hoses I've already broken one pin off........to fix it, I did the same as I did with the left rear caliper, drilled out the broken pin and fitted a new pin made of brass rod. then I got a brainstorm......made me feel like a dunce..........why don't I drill the hole.......insert the pin in the hose while it's off the model.......and THEN insert the pin in the hole.....duhhhhhh I took the black tubing and ran it under hot water........most of the kinking came out, but some are coming back. I wonder if a repeated hot water spritzer would be helpful {I just did it to the black and the gray tubing......it seemed to do more to straighten it}. perhaps using a heat source, besides my fingers, will help in spreading the end to keep the shape longer. if you have some insight for this Ken.......by all means, add it. I'm sure this won't be the last model anyone will attempt........and I do enjoy these large scale cars. I'm positive that the information will be very helpful. there are some aspects in the model railroad medium that work quite well in the other mediums. I got a little done yesterday.......ooofff.......darn! some of my keeys arsticking! man......I gotta lay off the jelly sandwiches and coffee rolls, eating over my keyboard........I think the added sugar is making my keys fat........as well as my fingers! perhaps saran wrap over my keyboard will help..........>or a bib< the slicks are cemented on finally...........before I did that though, the brake lines were plumbed in. I'll get the cookie crumbs off the tires later
-
second version?.....how can you improve your first masterpiece? love the name plate........puts the finishing touch to a lovely model.
- 131 replies
-
- 3
-

-
- bottle
- the old man and the sea
- (and 1 more)
-
Cutty Sark by NenadM
popeye the sailor replied to NenadM's topic in - Build logs for subjects built 1851 - 1900
I can see a string ties around it to make for a decorative pull cord knob for an overhead light or ceiling fan- 4,152 replies
-
- 5
-
-
- cutty sark
- tehnodidakta
- (and 1 more)
-
she's look'in great rob.........sorry to hear your experiment wasn't very fruitful. you never know though, it will likely happen, when your attempting to do something else sometime the results of achievement is attained by another result of failure, that when you don't feel so bad but hey, your really putting some nice touches to a sweet look'in model.......you've already succeeded!
- 1,208 replies
-
- 2
-
-
- great republic
- clipper
- (and 1 more)
-
she looks beautiful Jens sorry to hear that she isn't sail worthy, but with a finish like that, I'd be horrified to put her in water. she'll make a great display on your mantel though. can you find plans, so to build one to sail? you did a superb job restoring her!
- 39 replies
-
- 2
-
-
- kdy 15 juniorbad
- yacht
- (and 2 more)
-
the deck is filling out nicely............the detailing of your fittings is superb nicely done !
- 1,000 replies
-
- 2
-
-
- gun dispatch vessel
- victoria
- (and 2 more)
-
not quite......now I have to deal with the black and gray hoses.......and they're a bit stiffer. hot water does do wonders with getting the kinks out of them. it does tend to come back though after a while, so I have to work fast!
-
never tried it on laser either. went look'in for an image to put in the rear window.......saw Calvin tinkling on a ford emblem 🏁
-
sweet look'in tank Danny........really great job!~
-
been peek'in in, but being quiet. your doing a very nice job so far
-
consider that site book marked.........I was in there looking at some of the gassers........WOW! awww.......cool paint jobs are always a crowd pleaser is that their version of decal bonder.........that's what I use. I use their decal maker. luckily, you found out with decals you can imitate with paint. I love the 3 in 1 kits.........used to have boxes of spare parts under my bed as a lad. guess I dated myself too
-
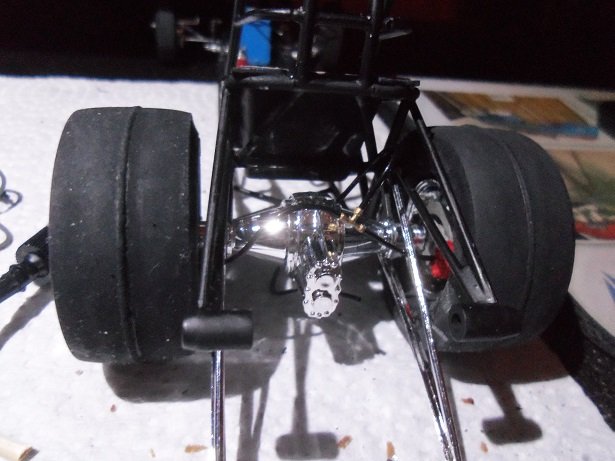
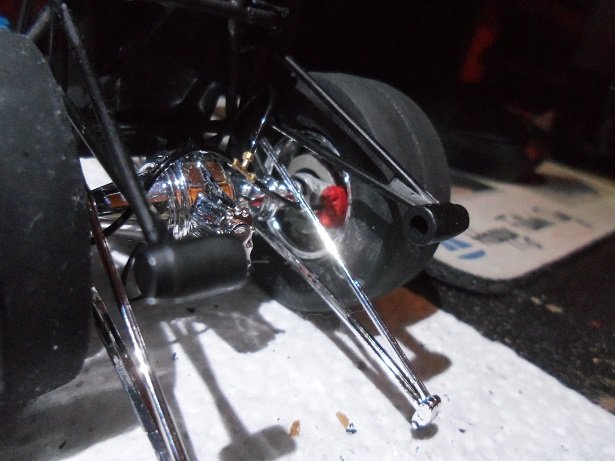
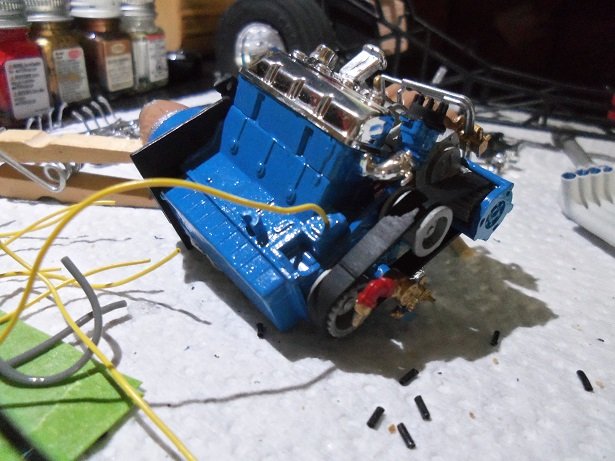
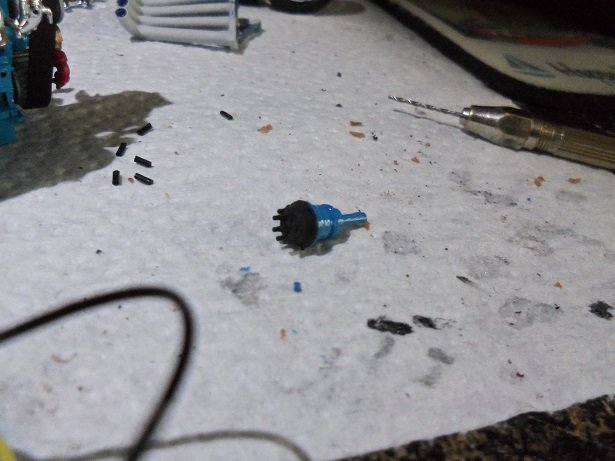
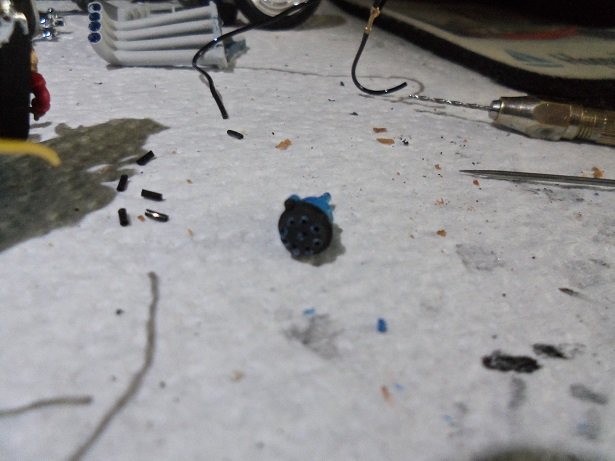
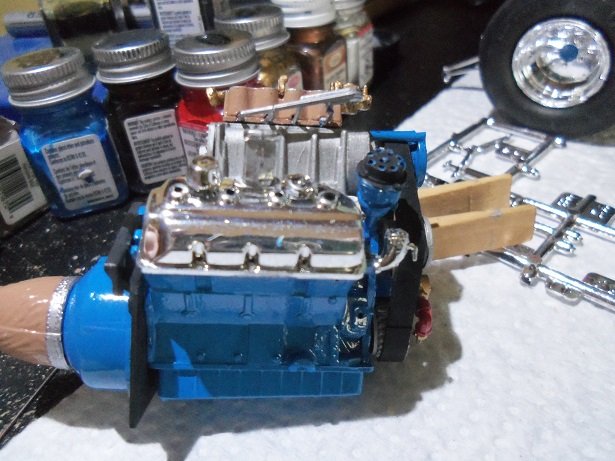
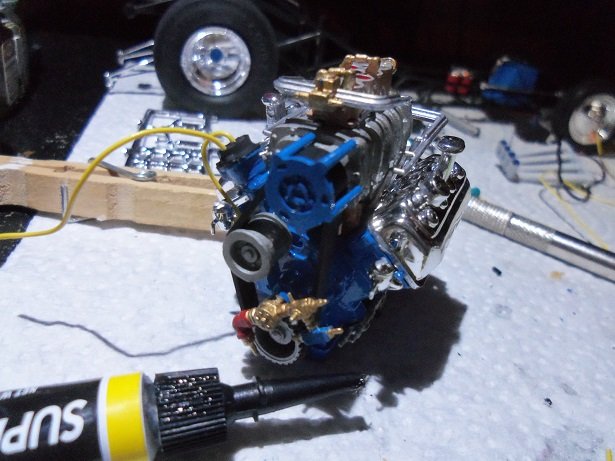
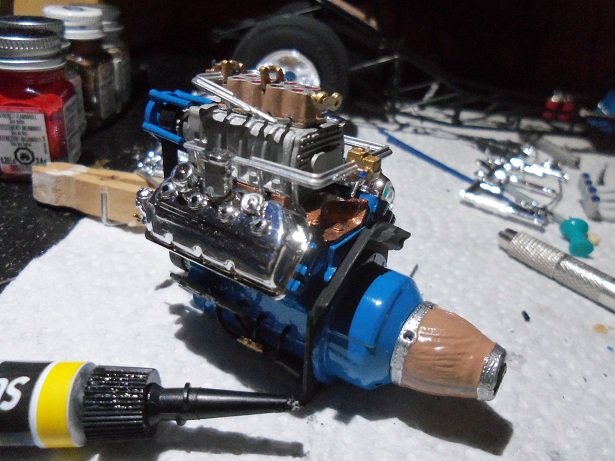
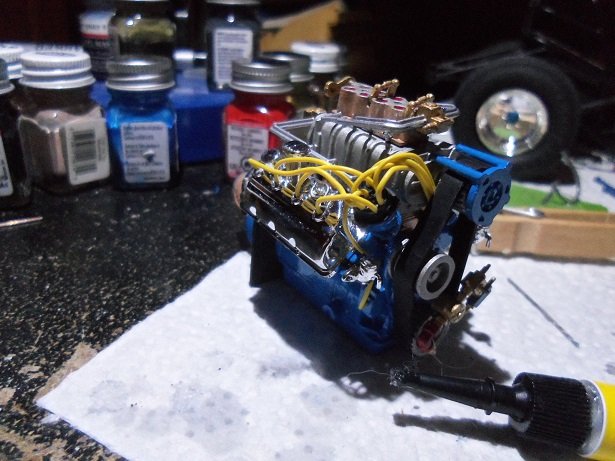
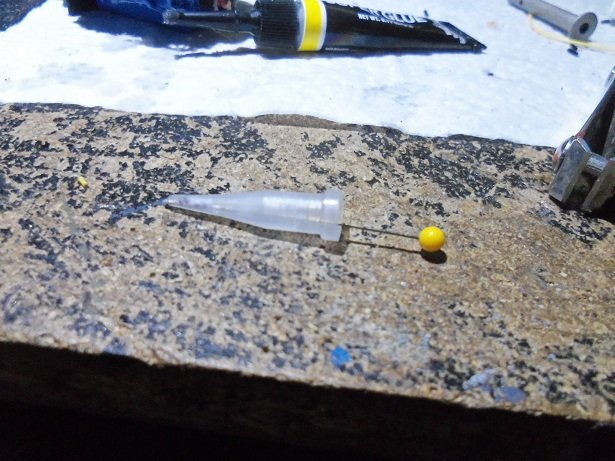
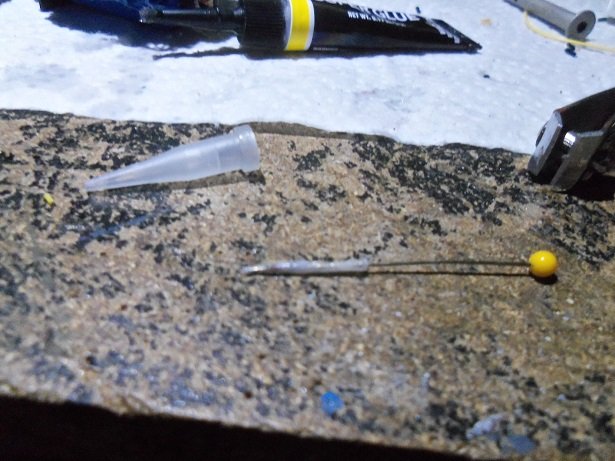
well........I'm still fumbl'in with the hoses and stuff.......trying to get this stuff to stretch over some of these pins is near impossible. I find I need to work fast because it will go back to it's normal size, if it takes me too long to attach them. not all the pins are the same though.........the brake line tee seems to be alright. now to get them on the calipers....that's the next feat in the meantime, I devised a plan for the wires. after a few failures with those black boots I was supposed to use, I thought to cut the pins off and drill a hole for them. the magneto was my test......seemed to do the trick. the distributor will be the bigger task.........I removed it from the engine with no problem. after cutting all the pins off, the same drill was used to make these holes. being so close to the edge of the cap, I started on an angle, straightening the drill out as it dug in. took time......being very careful.........got 'em all drilled out. the distributor was cemented back on the engine...had to wait until the distributor was dry enough to run the wires. for unseen reasons, the freshly cut wires wouldn't fit in the holes..........too tight a fit went up a drill size and started to drill them out again, but the distributor came loose and had to be removed again to finish the job. once back in place....and more time was wasted, it's back to square one. it was touched up with flat black. once starting to run the wires.......which was working much better, I got to thinking about the main fuel rail.....I really should get that in place first. there was trouble getting it to fit, as you might recall....and then the breakage. fitting it at this time, there was success, and it was cemented in place using the needle tip nozzles that can be bought separate, comes in a two tube pack, or in some model paint sets. I use them also to extrude filler, in tight areas and gaps for my wood projects. just for fun, I dry fitted the rear slicks on the chassis. what a messy garage........ before long though.......all the wires were installed.......the electrical part of the model is done now to get to the plumbing parts. once done using the needle nozzle, here is how I clear out the remaining glue........I just stick a long pin in it. give it time to dry...twist......and pull it out. it's ready to use again hope to get more done today!

-
more like spatter CDW...........the caps are likely no good anymore. i'll likely sand it down in that area and shoot it again. I've been mess'in with the hoses.......being all balled up for as long as they have, kinked it terribly. still working with it........gonna try some hot water......it might help get the kinks out. I need to fit it on the pins J........this hose stuff just doesn't want to stretch over them.
-
wow!........looks really good
-
on the site that I frequent, some of them even require insurance, if you buy them......collector's items. I forget what the Revell kit I'm working on went for.......but it was produced in 1988.......really not that old. there are some that are a lot older. I really like what you've done with the chassis......you did a super job on it! your mod work looks good too.......so sorry to see what happened to the decals. yep.......that's what I call micro cracking....thousands of tiny shards. can't wait to see what you do pro stock and pro modified divisions have aero-ed the bodies too
-
I'm bumping heads with the hose and wire dilemma..........I've done a couple thing at the moment that did perplex me. but, if things work out right, I'll solve the silly black boot thing and I can move on. this plagued me when I built the English Leather........I managed to do it, but there were some headaches along the way. update soon.........let cha know what I decided on
-
very nice cockpit.........well done! were the belts supplied in the kit?
-
glad to see you're posting the revival you raised a very interesting point.........I never really thought about the height of the body off the ground. I've just built them.........but the thoughts of aerodynamics didn't come into play until later in the sport. before the flip body cars, gassers ruled the strip......but in looking at them, the rear of the car was never higher than the front..........they were always level to the ground. the idea of the 'straight shot frame led to the rail dragster........they thought that length would better get a handle on stability .......wrong! {whole 'nother soapbox} this is probably why they got away from the street version body styles and started using the bodies you see today, although you can still see the resemblance in pro stock and pro modified cars. they corrected the angle in which the frame relates to the ground, but the bodies are made to decrease the amount of air that can get under the car. still love what you did for the hoses......making me want to rethink what is supplied in this kit.