
HOLIDAY DONATION DRIVE - SUPPORT MSW - DO YOUR PART TO KEEP THIS GREAT FORUM GOING! (Only 13 donations so far - C'mon guys!)
×


popeye the sailor
-
Posts
16,007 -
Joined
-
Last visited
Content Type
Profiles
Forums
Gallery
Events
Everything posted by popeye the sailor
-
 the resin might not fill in the dips and valleys. I've used filler on the one I did a resin job to, and it worked out fine. it might not be a bad idea to do the same with this one
 -
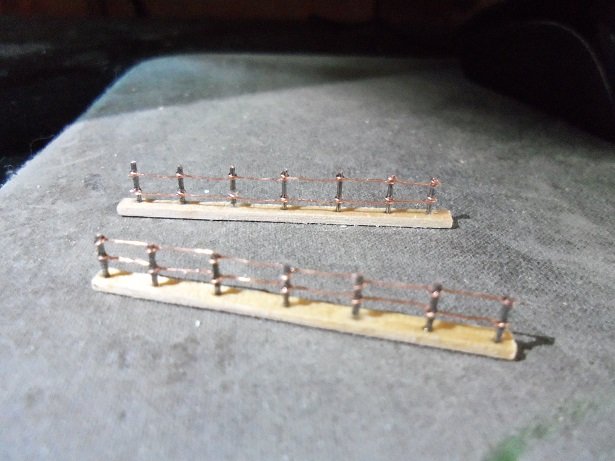
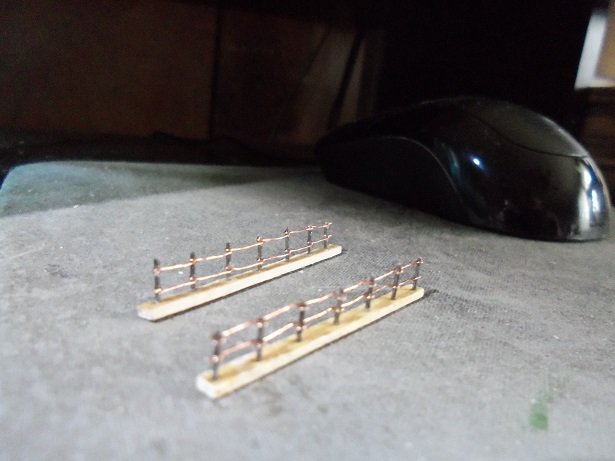
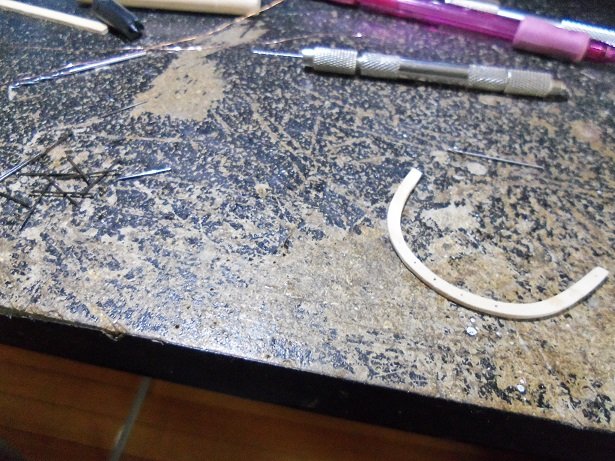
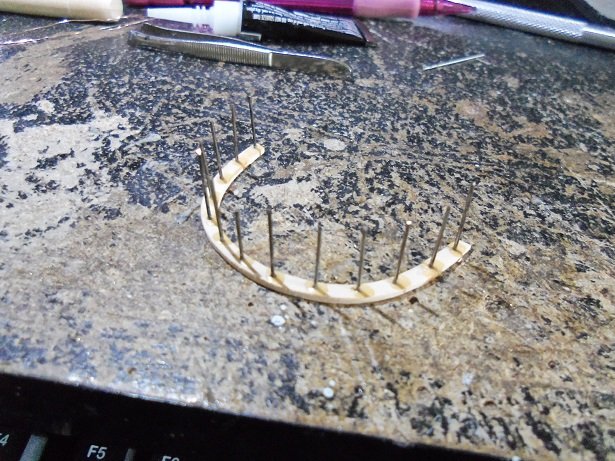
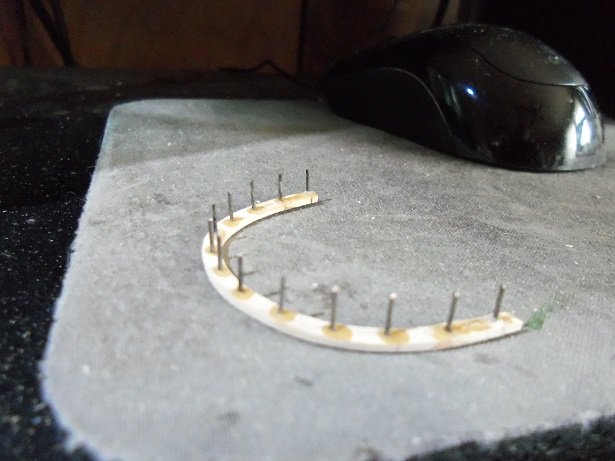
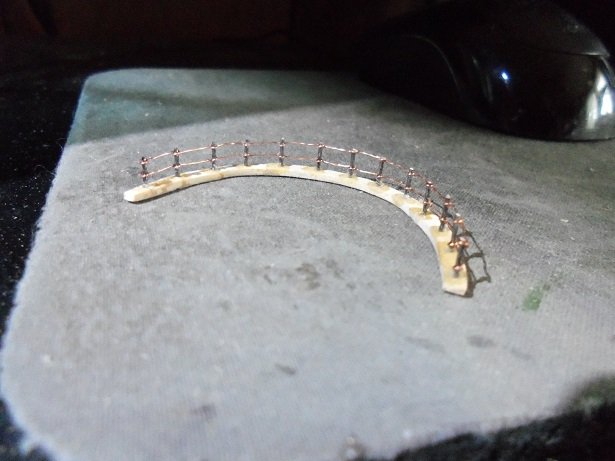
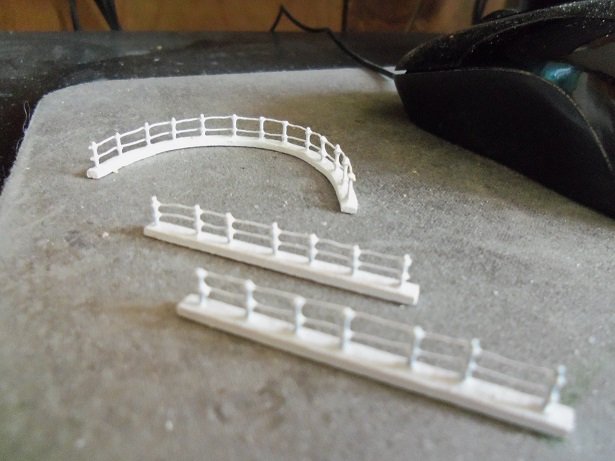
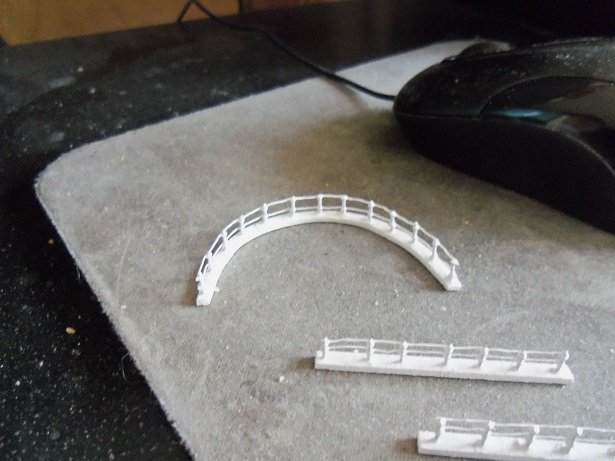
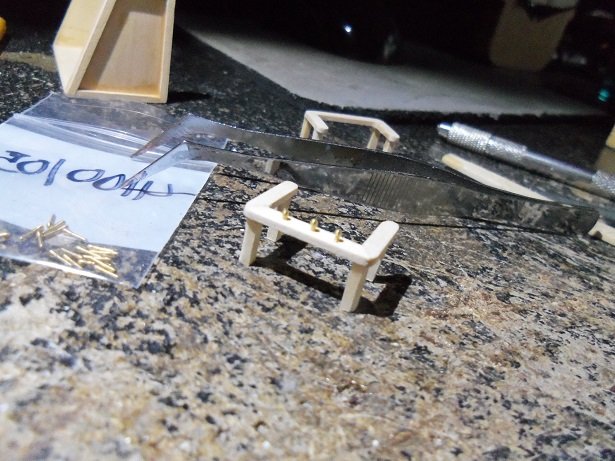
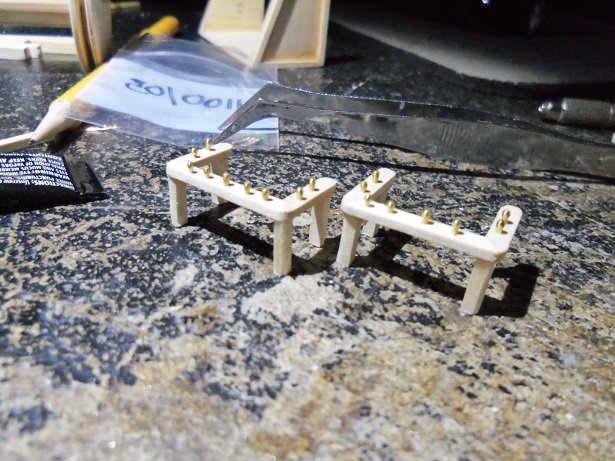
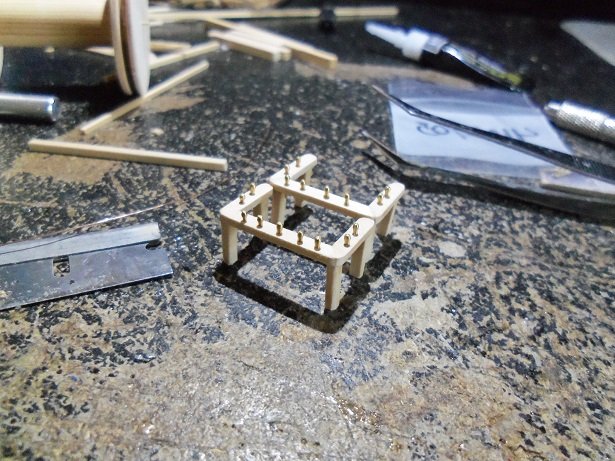
I think I've gone stark railing mad!!!!!! I think I've practiced enough......time to make the ones I really need. the fife rails and overhead racks have been painted.......now they dry. these railings came out the best I've done yet....... too bad they are the wrong length........can't cut 'em down either. I made another pair. I'l making them the same way I did the others........sandwich them to create a ladder, and then cut it in half, making two identical railings. I'm sure I can use them somewhere. as you may recall......I had cut out two of the transom cap rails........the one I didn't use ended up in the box. I will use it to make the railings. sanding it down in width, the holes were drilled in it........trying hard to keep it from breaking, and the stanchion spacing even. more wires were cut.......I had used my reserve up. they were then cemented around the base.......I didn't make a pair like the others. using the jig I made, they were all trimmed to length. the thin wire was strung onto the stanchions........those tweezers work great! they straighten the wire really good. once the Ca dried, all three railings were painted. now I need to make a pair of ladders........these are going to be small

- 453 replies
-
- 18
-

-
- thermopylae
- sergal
- (and 1 more)
-
hello there! my first build was the Nordkap, so I feel your pain. it wasn't laser cut either. I can agree with Carl about those hull panels.......I'd plank it too I think you should remove all the punch outs on the deck though......before they get cemented in place, or before they fall inside. nothing like ending up with a floatable maraca. they are nice kits though.......one of these days, I may get this one. I'm watching with great interest
-
plastic kits are usually date stamped ......one can figure out the production and mold. as the molds are improved and updated, they change the date. wooden kits are hard to discern, we can only go by the box, whether it is laser cut, or if there is a date stamp on the instructions or QC production card.
- 192 replies
-
- 2
-
-
- sovereign of the seas
- sergal
- (and 1 more)
-
hello Hennie........a very nice kit indeed. should be an interesting build
- 192 replies
-
- 3
-
-
- sovereign of the seas
- sergal
- (and 1 more)
-
the ship sounds familiar.........went to the link and reviewed what they would let me, of the book. very interesting
-
thank you very much.....I'm glad your liking the log. it'll get even more interesting when I get into the masting......the instructions have strange ways of attaching the yards. with a small scale like this, it might be tough, but I'll try to add as much as I can. I think this thin wire I'm using for the railings might serve well for the foot ropes......just a thought
- 453 replies
-
- 5
-
-
- thermopylae
- sergal
- (and 1 more)
-
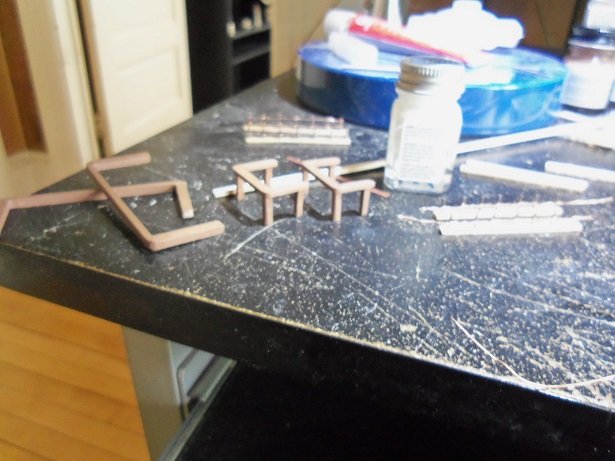
thanks Piet........ain't they the bomb! I gotta order some more....I don't think I'll have enough. I check on replacing the anchors........best I've found is 20 mm. the supplied anchors are a tad over 30 mm. I started to compile the list of replacement parts.......I'll post it when I feel it's complete. the fife rails are painted now, along with the aft pair of overhead racks. there is a triple set of overhead racks toward the bow.......I'll do them in a bit. I gearing up for the stern railing......making a few for practice. my cutters put quite a point on the wires.......poked myself in the finger a little while ago. I just dabbed it with CA and kept going....the admiral told me I was nutz. I will neither confirm or deny it's late my friends.......guess I'd better go rest what brain cells I have left. the admiral already has her Briggs and Straton going..........and she says I sound like a Mac truck!
- 453 replies
-
- 7
-
-
- thermopylae
- sergal
- (and 1 more)
-
you've made some great progress since I last looked in. the fuselage looks great! love the rigging! I kinda laughed with your plane disaster.....I could tell you a few stories with my balsa planes. my best flyer was a Guillow's Fokker D VIII - rubber power. even after the band was spent, it would glide for quite a ways {story 'bout that one} I had two worst one, but the one with the shrotest story was a curtis P-40 warhawk, that flew straight into the trunk of a tree........ouch! great job! keep up the good work!
-
Such great progress since I last looked in your boats are coming out very good......future boat needs will be a lot easier now. super trip you and the admiral went on.....thanks for sharing
- 2,625 replies
-
- 4
-
-
- kaiser wilhelm der grosse
- passenger steamer
- (and 1 more)
-
very good progress Doris.......the hull is coming along great!
- 1,035 replies
-
- 5
-
-
- royal katherine
- ship of the line
- (and 1 more)
-
good job Frank!
-
it all sounds good bill........glad to see things are looking up for you. primer is different than paint.......don't do it if your using paint. it's confusing......primer is a paint per say......but it lacks the suspensions that paint possesses. the resin can penetrate a primer because of this. I'm not too sure about flat paint though......this paint lacks the suspensions as well.....that's the reason for the flat finish, but I believe it still has some of the properties. be sure to use a primer if you still need to resin. using this I'm sure is OK Billing's is well know for having vague instructions.......other companies are about the same. it goes with the territory.......keeps the cost down.
-
neat video Steve.......never saw a Bounty that large!
- 291 replies
-
- 3
-
-
- bounty
- billing boats
- (and 1 more)
-
I gotta say.......she's look'in a whole lot better! very well done! of course I have a finished model......I made it scratch / modified from a cloned hull, of another model I have. I used both sets of Billing's instructions to get all the particulars. I printed out the instructions for the # 526 kit {ABS hull}......you have the #608 kit. I have those in a folder in one of my memory stix. there isn't any measurements, as far as I can see, but if you make them anywhere from 3/4 to 1 inch, you'll be alright. you can also gauge it from the rise to the fore deck. the aft bulwarks are the same height all the way around.......there is no cut out in the transom bulwark......it just wraps around. the cut-away in the stern, is as it is....you don't even cut out the deck..... the fore deck has a fender that doesn't go all the way back........it tapers off before the mounts for the birds. you may also have a part to make the fore deck go over the main deck. if you want to view the instructions for the # 526 kit for any reason, go here........ https://drive.google.com/drive/folders/0Bw40frlcNqbjOTNlYTE5Y2YtMGUyNC00NGE0LWE0ZTktNTRmZjFhNmM0MjM4?hl=en if this don't work, go to BillingUSA. com and you'll be able to access it from there. I haven't been in there for a while.......they have a lot more kit instructions listed. are you using a clear resin? I see where the green stuff was.......just curious to know if the gaps are filled. just a head's up.......all ship hulls look terrible, until they get further in the build, or paint is applied. keep it up Bill your doing alright. if you don't want to see her like that anymore.....just give'er a light coat of primer. you can still resin over it
-
thanks for the kind comments........jeeze........an' I don't even drink red bull I have my days, like every one else......but when I can sit and play...I take full advantage the admiral surprised me yesterday.......we were talking about kits. I had said something about the larger kit and how expensive they were.........her reply was if I had the second {part time} job, we coulda started a 'ship fund'. the surprising part came when she said she hoped that I could make other hulls {ships} from this kit. in the back of my mind, I have ideas to clone a few other ships from this kit.....the parts panels are of really good shape, so it should hold up rather well. I think she likes the size......and how the model is coming out. it's not museum quality, but it is looking fairly nice, and I am getting into building at this scale. I got to try the belaying pins last night.........I think they are perfect. the one in the front is slight longer {jest a tiny bit}......that's for the main mast. I'm keeping the receipts for all the parts I'm ordering for this project. should I start another, I'll jest order more parts. now these two rails shocked me a little......it's taken almost 1 package of pins to do them. I want to make sure that there are enough pins to go around........I don't want to be drill'in holes when the rigging stage is in full swing. some of the fittings in this kit is good, but there are other parts that need to be scaled down. with the finished models I've seen......I still wonder how these folks did it.......some of the processes with this kit are very clumsy to work with. the kit is not impossible......for those who have this kit, go into it with a scratch builder's mind, and you'l do just fine. I'm also working on another idea for the poop railing......I'm continuing with the railing concept i've been using, but I'll give it a small twist. I'm not finished with it yet. we'll see how it looks when I get it done. I'll try to put together a list of parts....numbers.....and places I got them from. it should help future projects. hello Vivian........glad to see your look'in in. I hope you enjoy the log

- 453 replies
-
- 15
-
-
- thermopylae
- sergal
- (and 1 more)
-
looking good Sam.......you can do a decent clove hitch........ .........I jes' do knots gotta learn too........I know.
-
awesome deck Sjors.........nice color.
-
the stern came out well....the changes you made, made a big difference agree with your statement....I haven't bought a kit yet, where I haven't made changes.
- 682 replies
-
- 3
-
-
- halifax
- lumberyard
- (and 1 more)
-
I've resized them {those eye bolts} sometimes....... squeeze them around the appropriate size drill bit, and trim off the extra wire. I don't think they carry any other size. there are other bead fittings that work well with the hobby. I find stuff every time I go in there nicely done masts on a beautiful ship........they go together real nice
- 652 replies
-
- 1
-
-
- royal william
- euromodel
- (and 1 more)