


popeye the sailor
-
Posts
16,007 -
Joined
-
Last visited
Content Type
Profiles
Forums
Gallery
Events
Everything posted by popeye the sailor
-
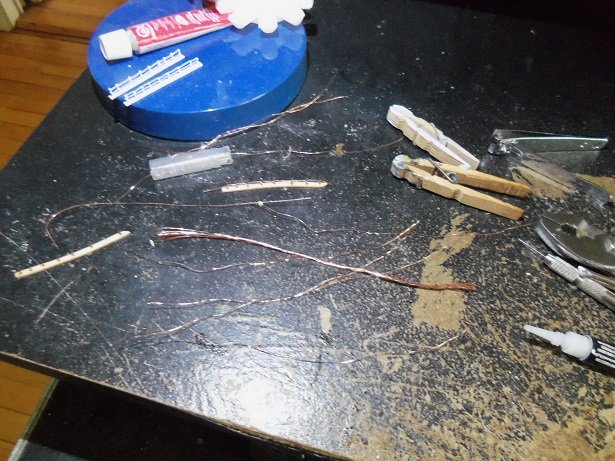
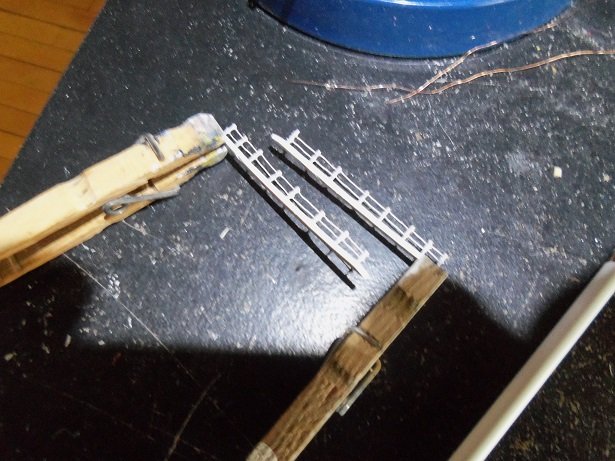
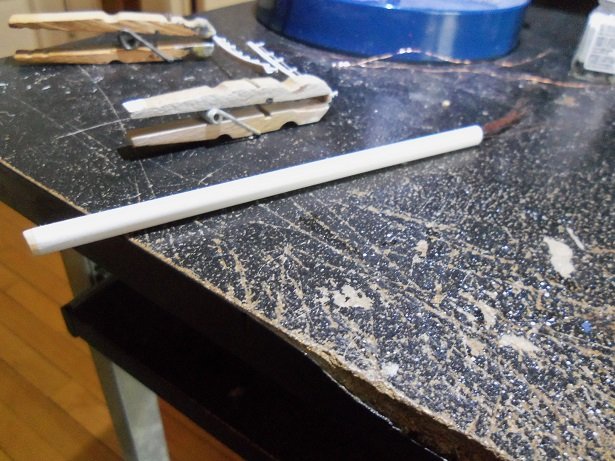
 thanks Bob OK........so my cross trees don't make me look fat........GOOD! my first attempt at making them {it wasn't on this build}......I'm not too happy with. if I ever get back to said build, I might change them. the day did not go as planned.......... I had left the bow railings on the desk, in the event during the week end, I felt up to some play time. I didn't. so, the day began with getting then done and out of the way. one of the railings.....I forget which one, had a pin that was out of place. in trying to fix it, the pin broke.....so a new one was cemented in it's place......that is, after filing down the stub of the old one. the first strand was strung on, when I realized I would not have enough to do the aft railings. getting a short length of light cord from the garage, a fresh bunch of wire strands was extracted. both railings were strung and cemented.......I found a pair of tweezers that do the trick with straightening out the rungs.......these actually came out looking better. I may be getting used to this lilliputian modeling after a bit more tweaking, they were given a coat of paint. I made a special sleeve to keep the wire in.......I kept out two for the aft railing. capping off one end of a plastic tube, it works perfectly. the bollards need to be prepped and painted. in assembling them, the pins to insert them in the base, are too long and stick out the bottom. they need to be filed down first. once filed, they were stuck on a piece of tape, that I had laid out. the lonely one on the right broke, so the base needed to be replaced.......good thing I have the extra parts panel, that I ordered from Cornwall.....I have the part to fix it. you can see how flimsy the bases are.......made of that thin stiff plywood. why that particular material was chosen, is anyone's guess. the panel I'm talking about can be seen at the beginning of this log.......if you recall, the parts for the structure in the background, is on the same panel. I started to make the fife rails........and the bow fife rail....but I got distracted.........I began thinking......... I wanted to do something on the trawler.........but that wasn't it I was befuddled something that will make a lot of sawdust ....... looking at my desk.......I don't know where I had left off I know I had the bow rail somewhere..........
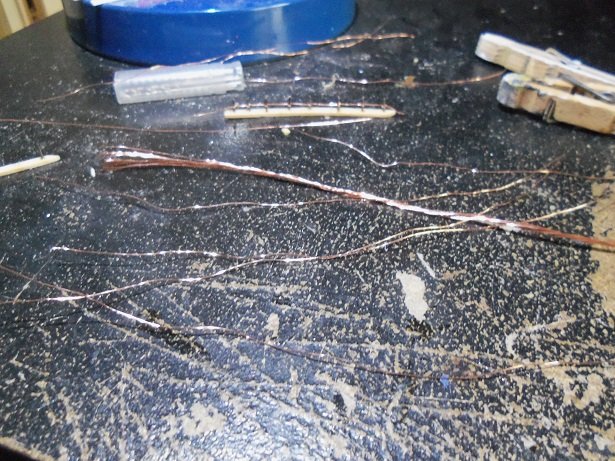
- 453 replies
-
- 15
-

-
- thermopylae
- sergal
- (and 1 more)
-
good to see you've been back to the table! great progress, but sorry to hear you've hit a snag. hope it isn't serious welcome back!
- 525 replies
-
- 2
-
-
- cutty sark
- mantua
- (and 2 more)
-
hope you enjoyed your trip talking to you, I realized that I never used these parts.......thought I'd show you that there are alternatives.
- 291 replies
-
- 3
-
-
- bounty
- billing boats
- (and 1 more)
-
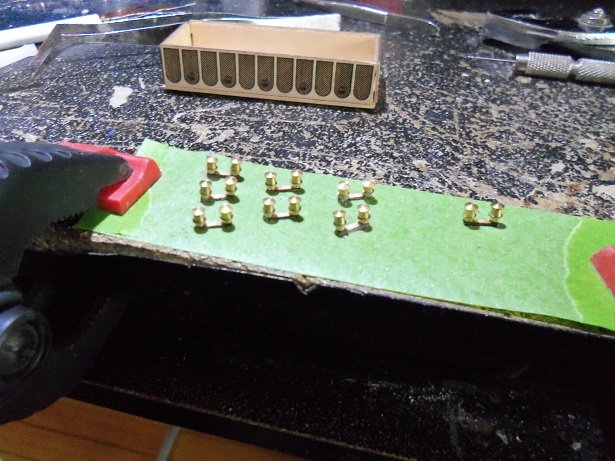
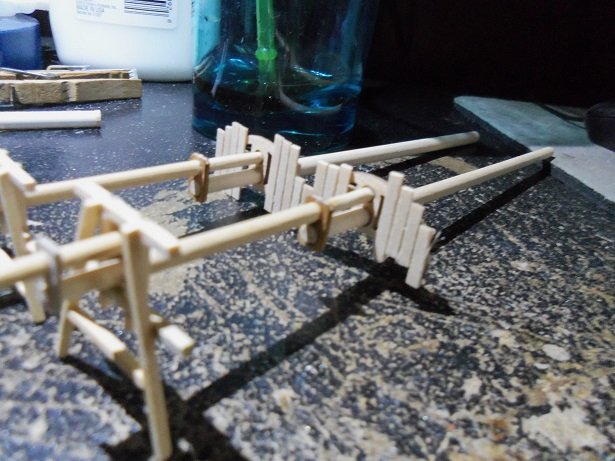
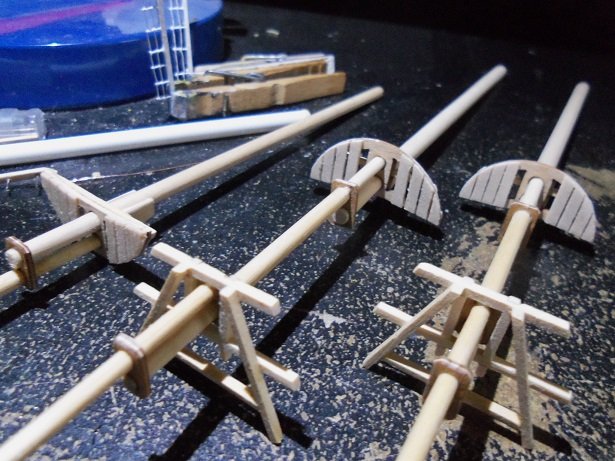
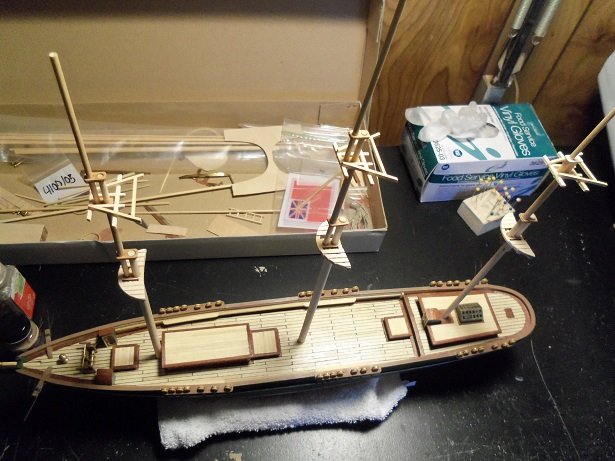
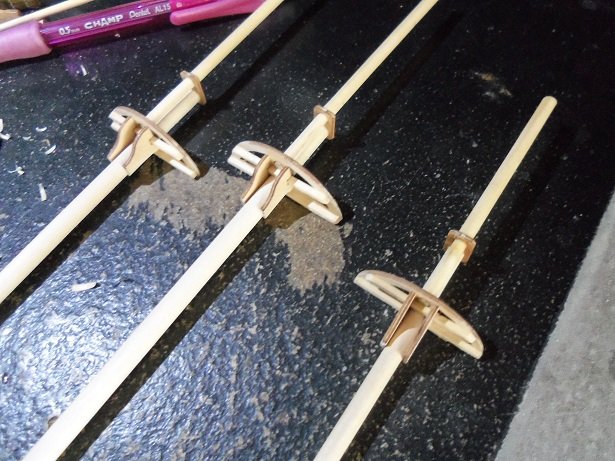
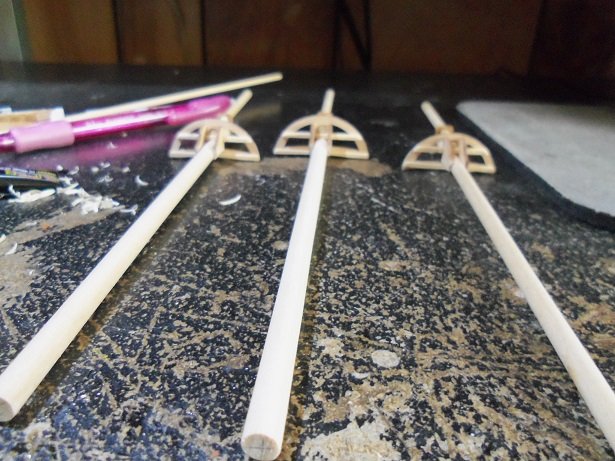
well then Greg.......I guess I'd better fix the exhaust on that thing! thanks for the good word, my friend.......and thanks for the likes. this is just the bare bones of the masts.......there's more to be added to them. as you can see........it was late. I barely finished trimming the tops. they needed to have planking added to them. they said to use the 0.5 x 3 strips........I used the .75 strips {they might even be 1 mm thick}. leaving a slot for the shrouds to run through, they were planked to the ends, leaving a gap between them. once dry, they were trimmed using the toe nail clippers. this wood is really brittle.......the mizzen gave me some grief, but I fixed it. are they called cross trees or crojacks.........always knew them as the cross trees {Revell's fault}. Well.....anyway, I hope they aren't too big.......based their size according to the caps. the mizzen is fixed and sanded.......they're all fitted on the ship. still gotta finish the rub rail stripe.......and make the rest of the deck furnishings. I think this is the direction of the day.
- 453 replies
-
- 17
-
-
- thermopylae
- sergal
- (and 1 more)
-
there are models out there, where proper research has depicted the layout of this ship. but then again, as more details are known, there are none that are exact. the model manufacturers won't put that kind of time into a kit.......time and cost effectiveness rules the roost there. however much time we choose to put into our models, will dictate how much detail we add to them. looking at other build is a good way to see the differences in the deck layouts........in the end, put them all together and add what you see.
- 714 replies
-
- 2
-
-
- lady nelson
- victory models
- (and 1 more)
-
seriously nice work Tom. I see the vacation charged you back up in fine shape
- 1,350 replies
-
- 1
-
-
- constitution
- model shipways
- (and 1 more)
-
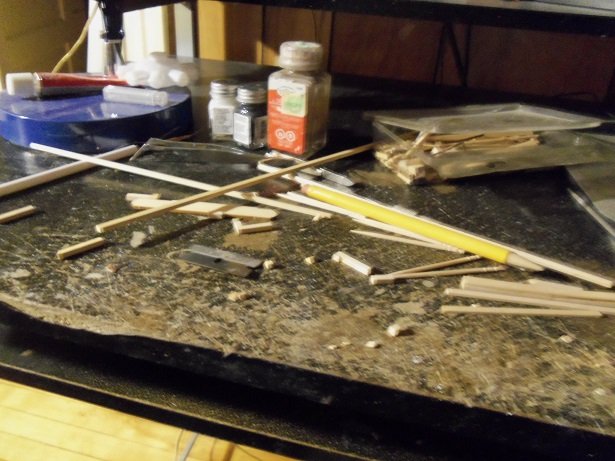
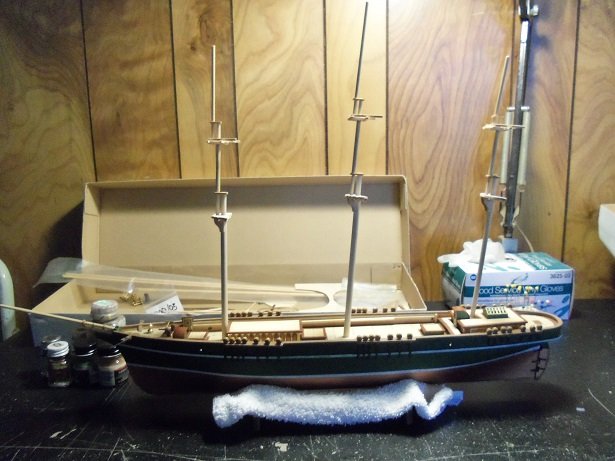
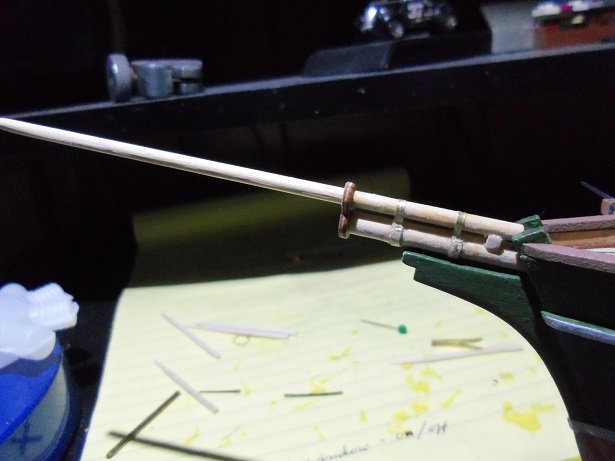
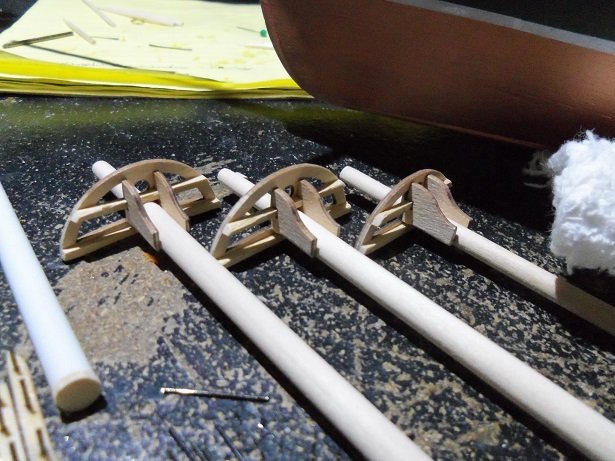
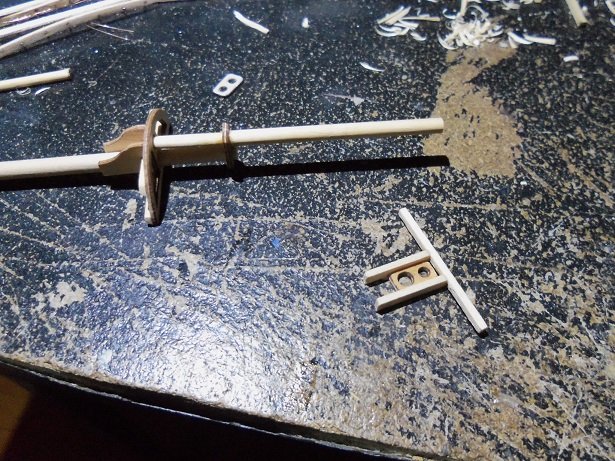
I finally put together the pictures from Friday.......figured I'd add them in with today's. bad thing is......I wasn't very diligent with the camera. I had cemented the boom on the bow spirit. after it had dried, I cut some thin strips of brass, and added collars to the assembly. at this point, I began to work on the masts, since I was playing with them. double checking the height......guess it's OK.......I matched them to the diagram of the sail plan. after a bit of whittling to the upper end the tops and the trestle trees were cemented in place. I thought I had a picture of them in place on the model.......but I guess I didn't. I had done a few other things before I knocked off for the evening.......making up part of the bow railings, and adding the second step to the fore and main mast. I need to finish them, of course. the work on the masts continued by adding the second step to the mizzen mast. to add the third step to the masts, I had to make the cross trees. no measurements, no numbers....I'm pretty much feeling this out.......just going by the diagrams in the instructions {and there are only two to follow. for the third step, I found that I was one cap short........must have used a wrong one somewhere, 'cuz there's one in the parts box. I have some of that thin stiff plywood, that the kits supply {a parts panel}, and I made one. it can be seen in the picture. the cross tree to the left has not been trimmed yet.......I left the fore and aft bars long...no sanding either. the fore and main mast were assembled at this time......the mizzen cross tree still needs to be made. the mizzen was assembled and plank slats were added to the tops........these need to be trimmed. by the time I finish this update, I should be able to trim them......if it isn't too late, I'll post a picture of the masts.......ready for paint and brass.
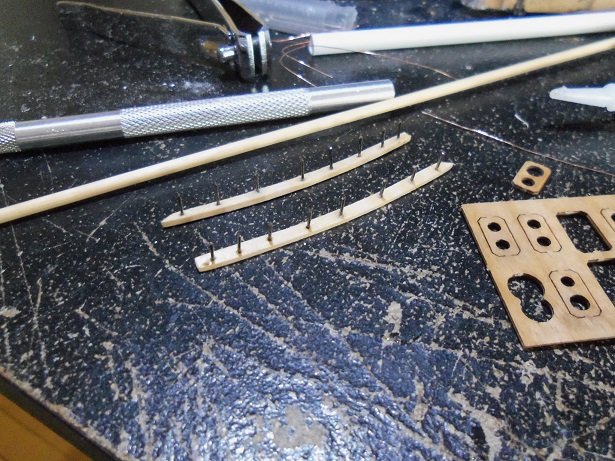
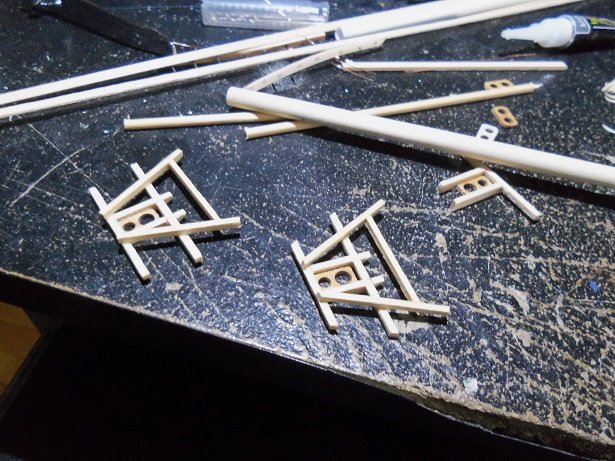
- 453 replies
-
- 15
-
-
- thermopylae
- sergal
- (and 1 more)
-
the frame looks great Bob. the curve looks like it carried over from the sides........shimming it will take care of it. you'll fix that ...no sweat!
- 682 replies
-
- 3
-
-
- halifax
- lumberyard
- (and 1 more)
-
you could let a few trucks drive over it.......that might do it yea......that's pretty serious.......and you already done it once. hope the parts get to you quickly good time to trace and cut all the parts from plywood.......then you'd have two hulls! double the fun! can't help it........insanity has it's virtues, Vincent
-
hello Gerty....glad to have you aboard still a lot more to go...not even at the half way point yet. thanks for the good word.....and thanks to all for the likes! should have an update soon
- 453 replies
-
- 4
-
-
- thermopylae
- sergal
- (and 1 more)
-
I have quite a bit of that material.......I'll have to give it a try. my printer can handle it.........after all......it can handle sail cloth! since I like to make my own decals and such, I'm always on the look out for techniques like this........thank you!
- 1,051 replies
-
- 5
-
-
- cheerful
- Syren Ship Model Company
- (and 1 more)
-
held in your fingers Nils, one gets a sense of how small the structure is.......some really great progress! the added figures look super positioned in their rolls on board...kudos to such a fine gift
- 2,625 replies
-
- 7
-
-
- kaiser wilhelm der grosse
- passenger steamer
- (and 1 more)
-
Cutty Sark by NenadM
popeye the sailor replied to NenadM's topic in - Build logs for subjects built 1851 - 1900
wow Nenad.......so many things coming your way. I see a busy world for you in the future as I've always told the admiral {she's the one with the apron strings} the boys are older now....they need to create a life for themselves. they're still close.....but they're branching out. the same will happen with your two......but your going to have longer branches you won't lose them....and when you do find them, the reunion will be so much sweeter. as said in game of thrones, your world is going to get much larger nothing wrong with a relationship.....I'll bet your son and daughter are glad to hear.....you won't be alone. Rhea will like it too.....she won't be alone either.......and you can get back to her majesty without feeling guilty. good to hear that you also have have a schedule for your eyes.- 4,152 replies
-
- 9
-
-
- cutty sark
- tehnodidakta
- (and 1 more)
-
will it bleed through to give you the two sided effect?
- 1,051 replies
-
- 4
-
-
- cheerful
- Syren Ship Model Company
- (and 1 more)
-
good to see your back in the workshop very nice work on the compass......your metal working skills are amazing.
-
great start Ben........the paper mock up looks super. if you know of any pawn shops in your area....check there. your liable to find a good deal on a scroll saw........and who knows what else that's where mine came from.......an old Craftsman. luckily, I can still get the blades for it.......but I have to go to Sears.....found the manual online.
-
likely, the lack of deck beam framing accounts for a lot of the sagging. would make for an interesting restoration project. at least you have all the parts a log on her would be splendid!
- 10 replies
-
- 3
-
-
- africa
- passenger liner
- (and 1 more)
-
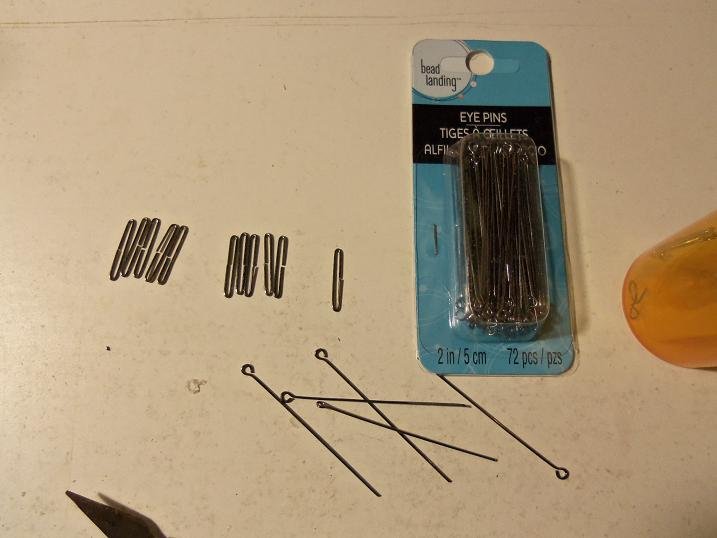
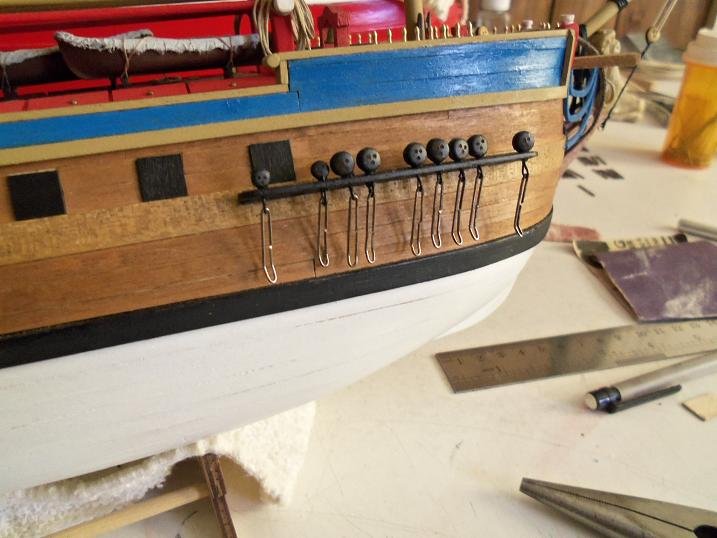
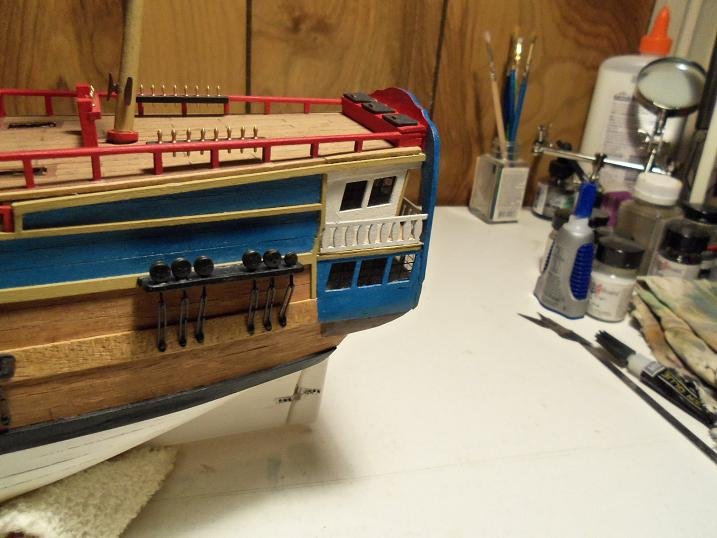
hello Steve......all I gotta say is WOW! Bounty looks good. you've learned a few valuable lessons with this build...scratch building is one of them. you made some good choices with the blocks and dead eyes........so true that kits supply fittings that are too large. you did well with the dead eye chain plates......I would have suggested getting the Amati ones. now that I bought some, I don't think I could use anything else. as for the chains down under......I've never used the parts Billing supplied in their kits. I made them from thin metal rod. I cut the eye bolts off and wrap them around a piece of scrap wood, cut to the length needed to fasten them to the hull. here they are all ready for paint and to be fastened on my Gothenborg. here is what they look like after paint and being touched up. I think this arrangement will look better on the bounty, rather than the way Billing's shows them. again....you've done a super job on her. keep up the great work!
- 291 replies
-
- 7
-
-
- bounty
- billing boats
- (and 1 more)
-
I will do that Steve........yea, it's sad that Billings supplies the plastic dead eyes and blocks. I don't mind the blocks so much though.....they do look alright on my fishing vessels. hello Dave..welcome to the log. I'm rather surprised how this little model sucked me in.......almost hard to put it down. enjoy...... I did a little bit more on her Friday night.......once I get the pictures together, I'll post them.
- 453 replies
-
- 6
-
-
- thermopylae
- sergal
- (and 1 more)
-
you weren't kidding about the warp! hope your idea works.........if not, scratch'in out a keel may be the better solution. it beats send'in away for replacement parts, 'cuz you'll have something to do while your waiting {insane humor.........ha.....ha}