


popeye the sailor
-
Posts
16,007 -
Joined
-
Last visited
Content Type
Profiles
Forums
Gallery
Events
Everything posted by popeye the sailor
-
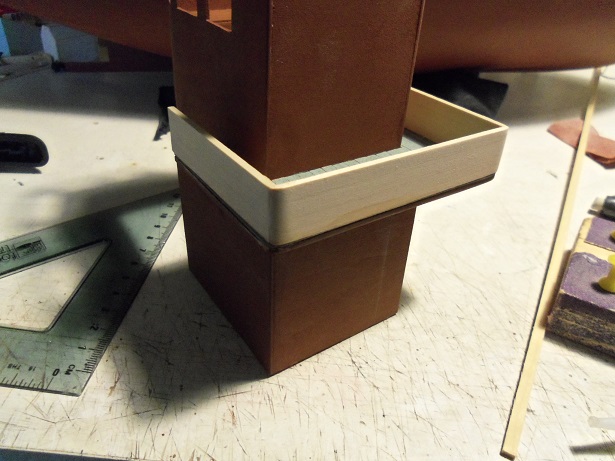
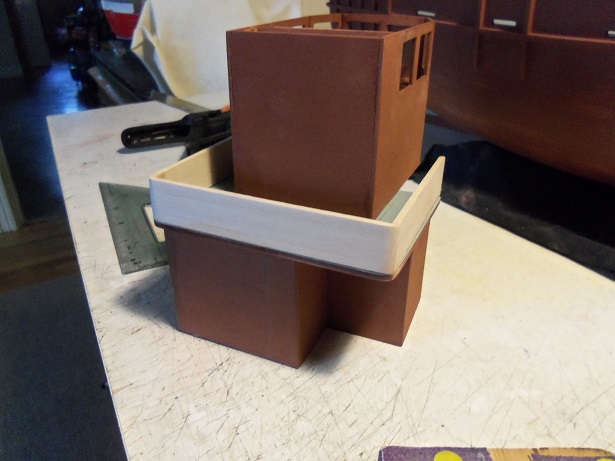
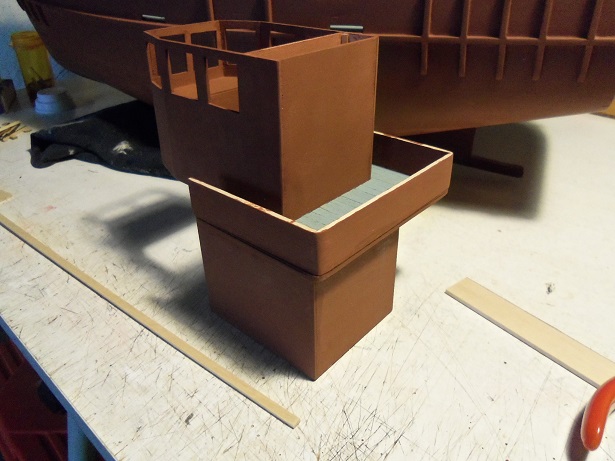
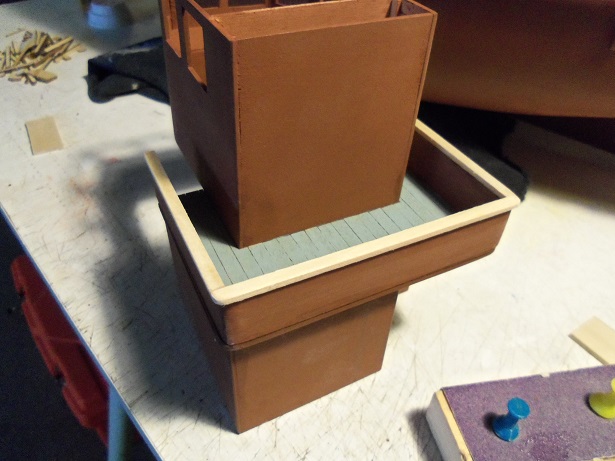
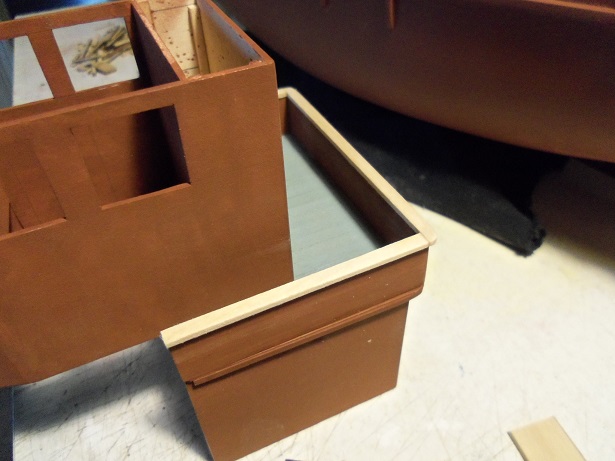
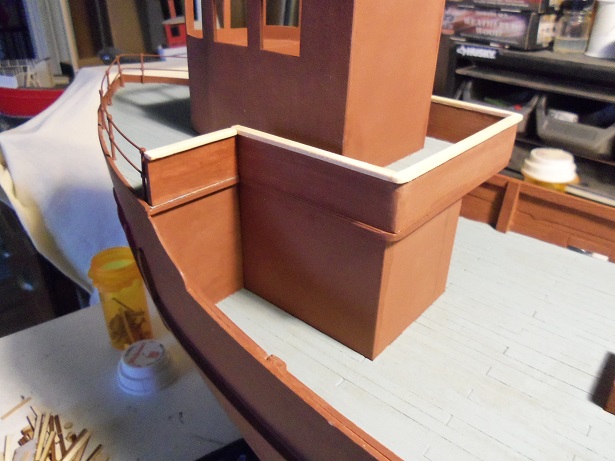
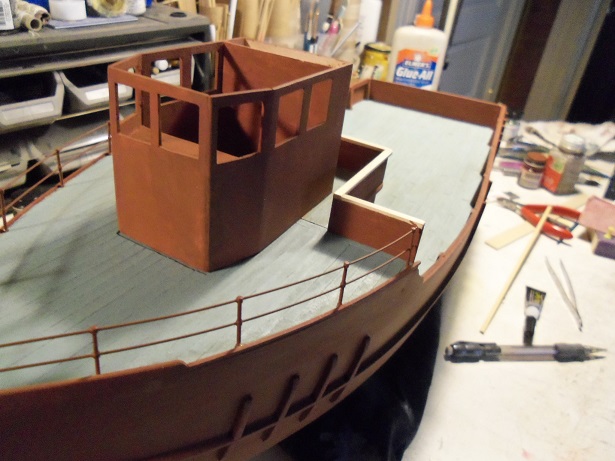
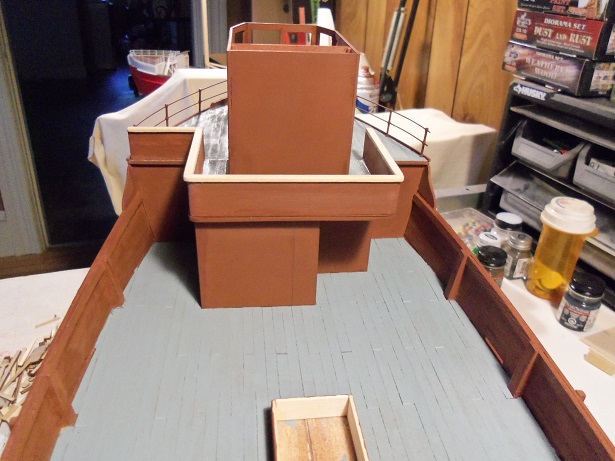
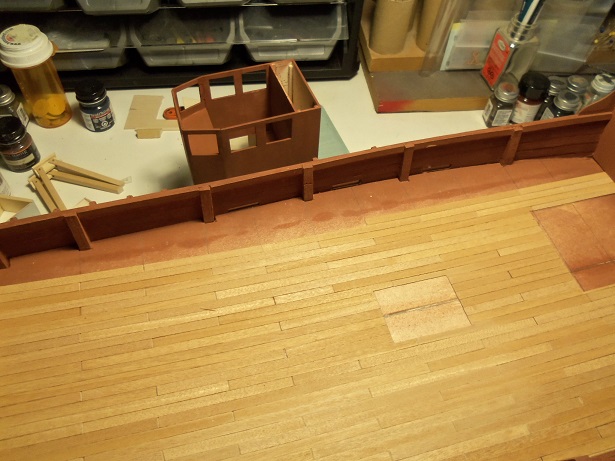
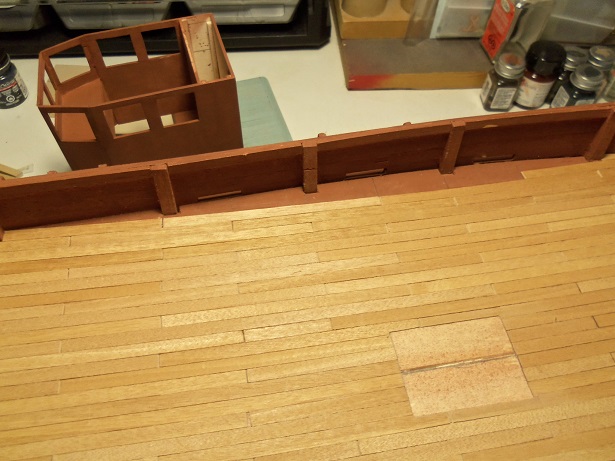
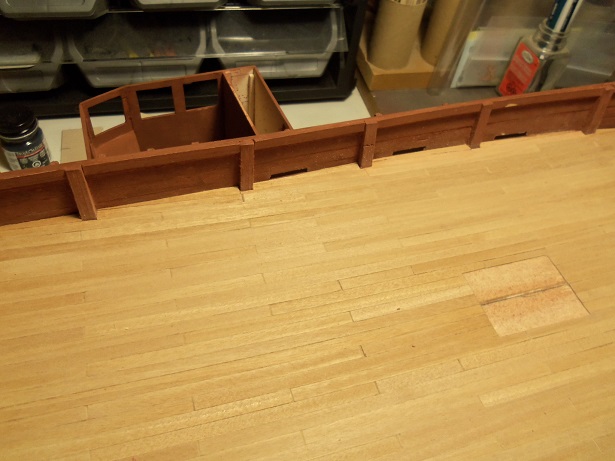
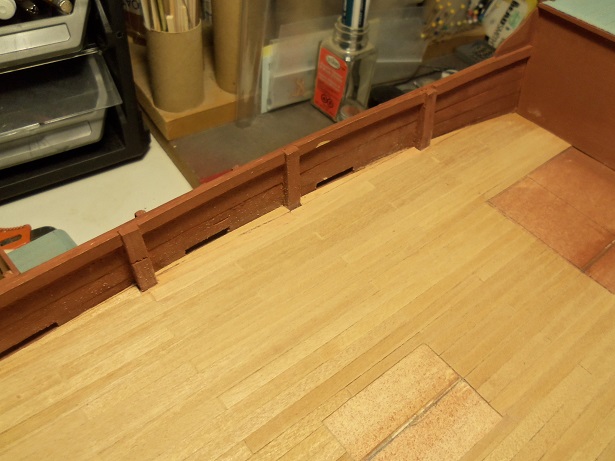
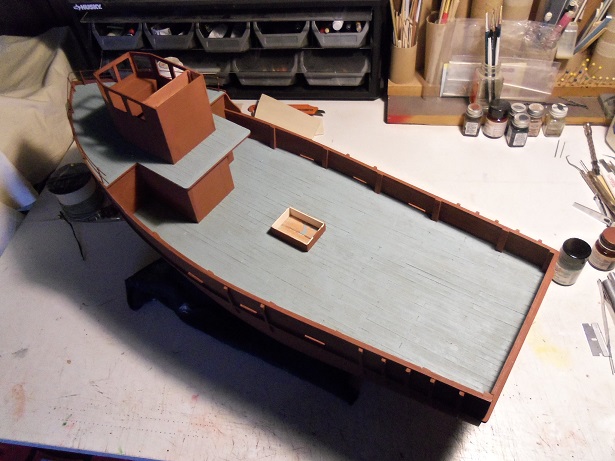
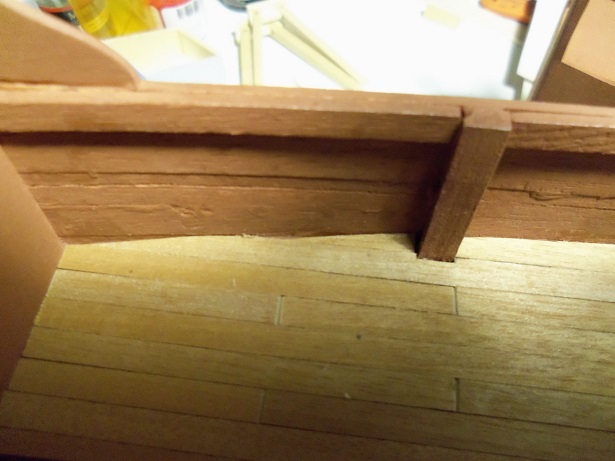
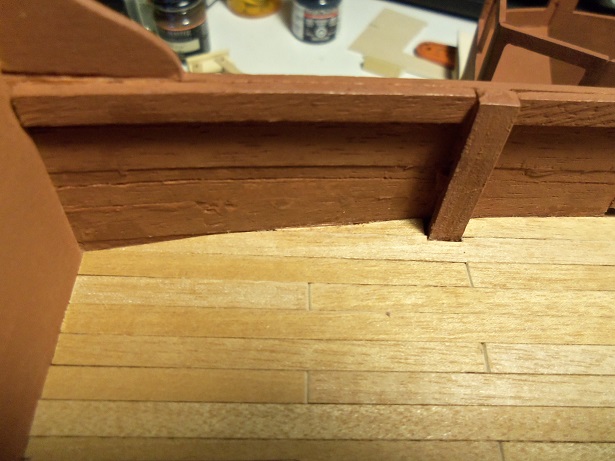
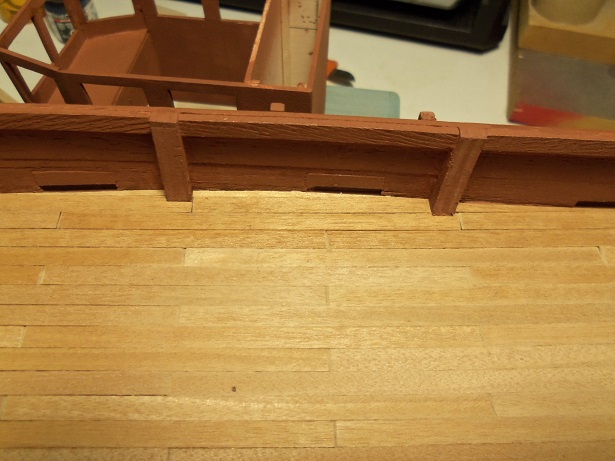
 thanks Patrick........it feels good to be done with the deck. as luck would have it, I got my order from billing's today....another 50 strips of 0.7 x 5 mm Annegre. oh.......I don't thing that the chips were the culprit.....besides, I love the little buggers as mentioned, I did a little bit yesterday. this pertains to the decking around the helm room. I want to do a sort of railing, but perhaps a bit differently than what I used to. I have a few sheets of 1/8 flat stock, that I want to use up......I don't use it too often. I cut a strip of it a bit lower than the bow deck railing. three pieces created this... rounding the corners off and cementing it in place, the structure deck now looks like this. I really should have painted it before cementing it in place........but when I was done.......... taking some 1.8 x 4 mm strip stock, I was able to cap it off. the corners were rounded off as well. with the structure in place on the boat.......it give a unique perspective. a section was assembled to fill in the port side. this will either be cemented to the fore deck, or I'll wait till the structure is cemented in place permanently, before it is put on. I left a bit of rail sticking out of the last stanchion, so it would mate up with the solid railing. the attention now, will turn to the starboard side, where I have something a little different in mind.


-
thanks Piet..........I feel much better thanks for think'in of me.
-
very unique Bob..........and it makes a fine looking part like that?!?!?! way too cool!
- 348 replies
-
- 3
-

-
- pequot
- cable ship
- (and 1 more)
-
I had to laugh........I corrected it.......onion and garlic ships?!?!?!? who would have thought! I do thank you gents for your kind comments and think'in of me......yes, I'm fine now thanks for the likes as well. I don't know what to tell you Kevin....all I can tell ya is your one heck of a modeler. the subjects you choose are very complex and labor intensive, but you make them beautiful there is a very funny story about that night......I had bought a pair of fancy black dingo boots. I had to go home.........my feet had swelled and I couldn't get 'em off! I took four showers after I got 'em off ! after I felt better, I put on a ratty pair of sneakers and went back......came home near dawn thanks John it's wet and cool around here too......hoping for a warm up soon. hope I don't feel like that again too soon I'm usually a healthy guy, the only thing I ever went to the hospital for was my knee surgery. thanks Mark.....yea......I'm think'in the same thing......allergic to something in the paint. but I've used this stuff before and never got a reaction like that. oh well........that I can change very easily.........I'm not about to go look'in for it either. if it happens again, I just have to get it checked out.....that's all. can't be the chips, I know that........they are my favorites. I did a little at the table today. but I gotta work at the airport tomorrow.......I'll do a bit more tomorrow when I get home. thanks again everyone........I'm still in the saddle!
-
that's one wood I haven't tried yet, other than plywood. do you use it for hull planking too? be interesting to see how it looks sanded and smooth. windows look great!
-
love that picture with all three decks spread out.........very well done. chairs are no slouch either such an awesome job !
-
could you make openings in the fender and railing?
- 2,625 replies
-
- 5
-
-
- kaiser wilhelm der grosse
- passenger steamer
- (and 1 more)
-
yep! I have to agree....the deck layout and fittings are the best part looking great Nils!
- 2,625 replies
-
- 6
-
-
- kaiser wilhelm der grosse
- passenger steamer
- (and 1 more)
-
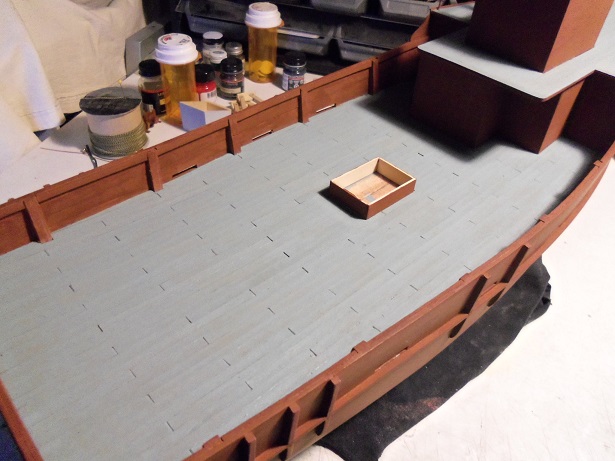
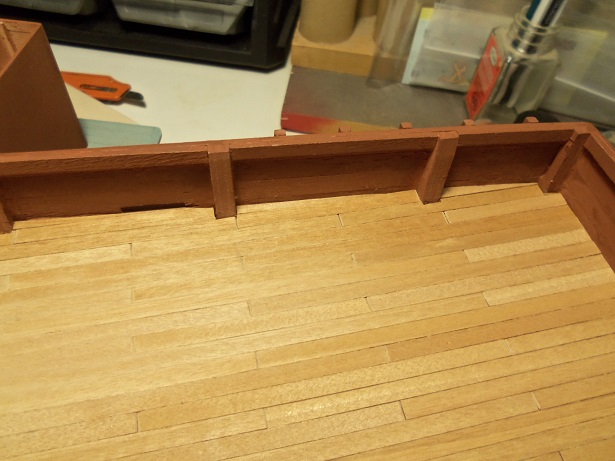
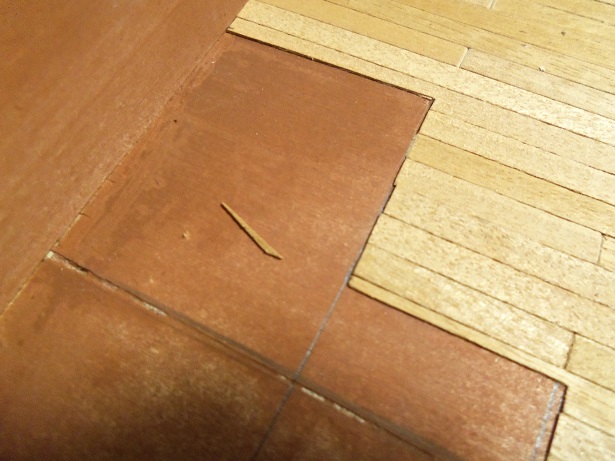
thanks Piet and Carl.......depending if a margin or waterway is added, it can make life easier. in this case though, I think I would drive myself crazy, bordering the deck out......too bad all I have is some 0.7 x 25 mm dark mahogany. not that it would have mattered....I painted it, but the hue might have come through since I am allowing ghosting. anyway, I thank you for the kind word and all the folks who hit the like button now for a story on a very interesting day............ I finally got the two e-mails I have been waiting for.......my order from Billing USA.......has been shipped and is in transit. After I posted on the starboard side planking, I went to work on the port side. yea........there's quite a bit here to do. I gave it a go, keeping in mind of the utilization of wood. I did a fair job of this, all through the process.....each strip was reduced to a 1/2 inch stub, along with various small clippings. these, as you can see, do come in handy at time.....I don't throw anything away, till the task is over. I had 50 strips......it probably took 5 or 6 strips to do the fore deck and structure addition. I was sure that I had more than enough to do the main deck.....but considering the size of the strips being used....this was a big deck. I got the open field down to four segments...... one at the bulkhead was filled in....... ...and one at the stern was as well. I did another search for 0.7 x 5 mm strips........through all my tubes, and all of the kit part boxes in the closet.......no more were found. I had only a few choice pieces left..........looking at the part box for the trawler, there lay a bag with assorted strips in it. some were dark walnut, for wales and rub rails, some were lighter shades of walnut......but there were three strips of 0.7 x 5 mm Annegre that I had painted red on one side for the Gothenborg build {they've been around that long,,,,I save everything}. the unpainted side had some red blotching on it........I wondered if it could be sanded away? taking the first strip and sanding it with an aggressive paper......it appeared to be working........that is, until the paper grabbed the strip, snapping it into a bunch of jagged pieces. lighter pressure proved to be better, and I was able to use what I had sanded to fill in most of the open area. I used the rest of the unpainted stuff to do around the scuppers...I didn't want the red to show through the openings. ....and so, the deck is finished........now it needs to be sanded. there were a couple areas that needed some tidying up before painting........now that it is indeed painted, I still need to tidy up one or two small imperfections. if they prove to be a pain, I can always figure out some way to hide them. After finishing, I don't quite remember if I had a couple of sandwiches then........but I do remember eating them. I may have browsed the site for a short, but Gibbs and I retired to the living room, so I could watch the second episode of game of thrones again {I couldn't watch it Monday night}. I saw it Sunday night, but I like to review it, in case I missed anything. while there I had eaten some onion and garlic chips and a soda. I came back to the computer to browse the site {I wanted the paint to fully dry before posting the results}, when I began to feel itchy, dizzy, nauseous and began to sweat. I got up as it intensified and went into the dining room. it got to the point where I was using a chair as a crutch...not getting any better, I called to the admiral. I went to lie down....she got me a cold compress for my forehead. it got worse and short of breath / hard to breathe. after a while, it began to lessen.......I could sit up and drink some water......totally alien to me........coffee, pepsi, and beer.........my staple usually. we had ordered out for supper......Kevin had gotten it in the meantime.......I ate mine a bit later watching TV again.......I did nothing more after that. Gibbs was by me the whole time........and of course got to share supper with me. I'm OK.....for the rest of the evening, I was fine. I can only come to the conclusion that it was an allergic reaction to something, with a panic attack thrown in for good measure. the last time I can remember this happening to me, was in a bar in Florida, back in the 70's.......I was drinking draft beer!


-
it'a like sandpaper to wood Piet............sooner or later, we'll wear you down :D I'll tell ya one of mine?!?!?!?
-
awesome looking frames.........very nice I use a flameless soldering iron too.......looks like the combustion level got too high on the last frame though. looks good none the less
-
I was looking at the photo of the spreader........you can even add eye bolts as guides for the rigging lines. looks good up there that's what I did for the Andrea Gail......set up the decals, changed the background color to green, and printed them on white decal paper. the hard part is the color spectrum. some shops only show the normal color range......but there are others that will give you the hues in between. I'm on the lookout for a chart with the color formulas......I think this would help tremendously. the other cool thing is your also able to import images....look into scanning images of stencils......I've found them to be a great source of scroll designs, as well as block lettering and roman numerals. doing a frieze is a breeze glad to see your build back in action........she's a sweet looking boat
-
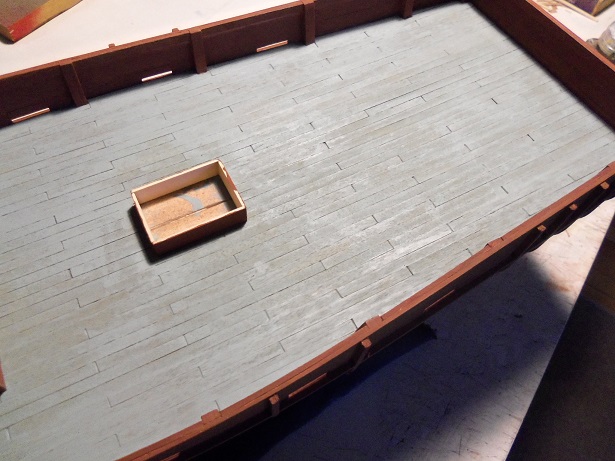
this is agonizing.........I SOOOOO want to be able to paint this deck! I ordered another five packs of strips.......I probably won't get them till the end of the week. this morning, I filled in the starboard side........filled in two more segments from the stern, this in turn, filled in the first couple segments from the bulkhead. I wasn't too crazy with that imperfection in the first segment. looking in the scrap pile on the table, I found this piece. not as long, as I would like.........but it looks like the only piece that will come close. dry fitting it in, it looked pretty good, so the area went from this.... ....to this...... all that remained was the one in the middle, and that was filled with a small strip and some scrap. from the eight strips I found, I only have 3 1/2 left.........doubtful that it will finish the port side and complete the task. we shall see.


-
very nice job thus far.........I have this kit as well. I have some very maniacal thoughts about it...trying to think of different configurations. look forward in seeing more
- 34 replies
-
- 2
-
-
- chesapeake bay flattie
- Midwest Products
- (and 1 more)
-
I tried to get a hold of George Clooney during my Andrea Gail build..........that was one big bust! awesome job!
-
I agree with Bob......a log would be super! ship's boat can be a trial to make I've never seen pictures of 'Cicilie'.......got pictures of my second cousin........but she's not as pretty to look at {just kidding} love to see progress on this as well
- 745 replies
-
- 2
-
-
- francis pritt
- mission ship
- (and 1 more)
-
I have to agree Russ....nice job on the decals.......neat how you blended the two color fonts. you must have used paint shop? I have a decal program for mine.....works very good, but it does have a transparency problem. I have to be creative making them for a darker background. using a printer is a trip..... since printers don't do white........thankfully, white decal paper solves that problem in most cases. nice work on the spreader.........try a test though with thin strip 0.7 x 1 mm {or 2 mm} looking at the picture, 1/16 square stock might come off as being too thick, unless you plan to sand it down to the desired thickness.
-
nice fore deck shots! nice find with the railings too
- 2,625 replies
-
- 5
-
-
- kaiser wilhelm der grosse
- passenger steamer
- (and 1 more)
-
looking very nice Tom
-
awesome Idea...........love the use of different size strips can't wait to see it completely assembled
- 601 replies
-
- 2
-
-
- constitution
- revell
- (and 1 more)
-
sweet first planking bob. I'd be will to try a spot of stain to see how it looked I've done kits that directed a second planking.......but I've only done it to one so far. it does work out cool though..........it allows you to integrate the wales and rub rails during the process. it melds them into the hull and don't jut out as far......it looks more natural too. either way.......you have a good basis to start from..........whatever you do, it's gonna look spot on
-
Awesome progress Charlene! I'm seeing the use of quite a few double blocks........more than any kit I've ever gotten gives you. did you or Jerry order any extra? the rigging looks great give my best to Jerry and I hope that he's faring better with his problem.