popeye the sailor
-
Posts
16,007 -
Joined
-
Last visited
Content Type
Profiles
Forums
Gallery
Events
Everything posted by popeye the sailor
-
 you've certainly excelled in your studies...your progress and enhancements look awesome! the cannons came out looking very nice........and the refinished deck looks great too nice to see you've made some progress
- 2,191 replies
-
- 7
-

-
- confederacy
- Model Shipways
- (and 1 more)
-
I did this little experiment with my decal maker and ink jet printer. there is a thread here, but here is my blog on it......I still need to do more on it though: https://wenzelswharftips.wordpress.com/2014/04/29/embossing-sails-part-1/ you can do the same in photo shop. take an image of the decal sheet...sized to what you need, and run a piece of sail cloth through you printer. I used decal bonder to stiffen the cloth .......but I tried it with cloth that required no stiffening at all...and it worked just as well. hope this helps
-
thanks Ed.......appreciate the good word and the offer I ordered another five bundles of 10........I wanted to order the photo etch for the Sergal Thermopylae, but the admiral suggested I get the wood first, and order the etch in a couple of weeks. I'm not starting that kit right now, so it was fine with me I guess that's one of the drawbacks, wit ha site like this.........you can have such great friends...but there are so many miles in between. thanks John.........this should take care of the problems with detailing a deck for a fishing boat. once both decks are done...and especially when the hull paint is done, it should look even better thanks for the good word. proof is in the pudding though that you can make a ship look just as good without paint.........you've proven that already!
-
mast really looks good rigged ........love the way you have it set up! your desk is too neat.........I need two tables to strew my stuff over
- 2,625 replies
-
- 5
-
-
- kaiser wilhelm der grosse
- passenger steamer
- (and 1 more)
-
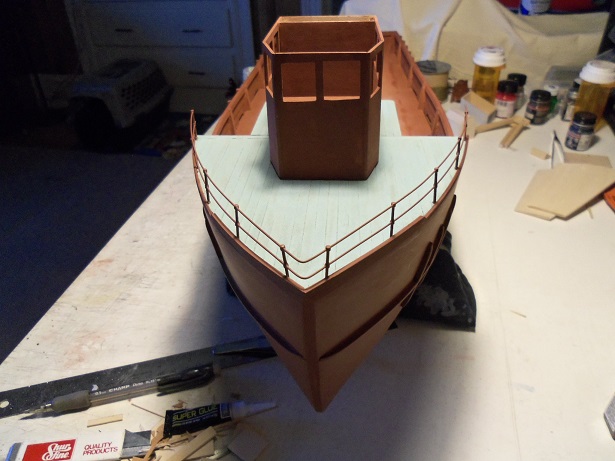
now you see the beauty..........the refinements are beginning to show the upper decks are gorgeous.......you did well in giving her a visually elegant 'top'. if this is the indication of the finished photos....the Mary Jean should be a piece of cake! awesome job my friend!
-
thanks Patrick....and everyone who hit the like button. didn't do anything today.....It's my work week appreciate the good word!
-
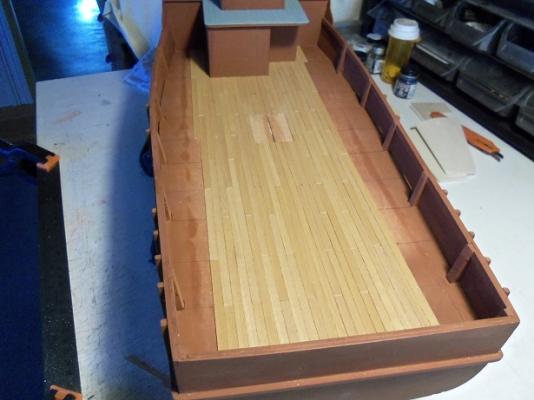
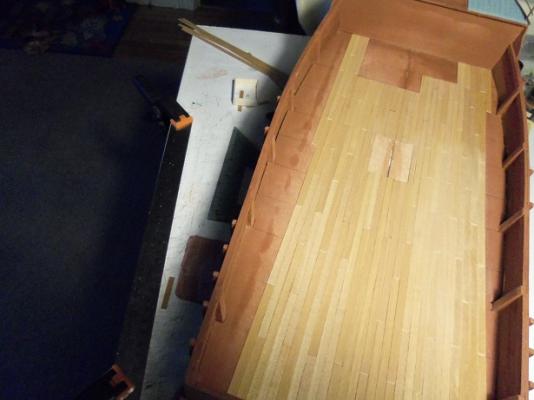
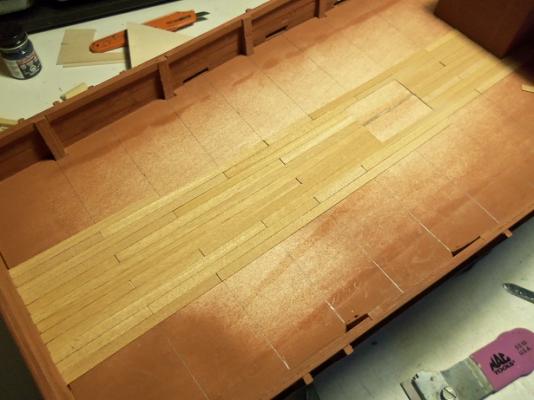
thanks for the likes gents this has to be the largest deck I've done so far, besides what I did with the United States decks. I got much further today.......but I'm not out of the woods yet. I think I had 50 strips in that bundle.....after going a bit further today, I looked at the bundle, and the bag was empty! all that was left, was on the table. oh, crap! I made it around the starboard side of the structure......this side is now totally closed in. I had better get the port side boxed in before I run out. I did that.......and a bit more, as I got down to the last few bits. I haven't removed the structures yet.......I'm hoping I still can. the lower structure slides under the lip edge...so it might be tough. it is a trial, but it can be done....I could trim the lip a little, to make it a bit easier. I dunno.......I might. I guess I had better order some more.......huh I'm gonna need it. I went through my tubes of wood stock, and I found another sleeve with eight or so strips in it! great.....I can go a bit further! I did more with the starboard side...and am now at the point of closing in on the bulwark. I've already closed in the first segment at the stern. it's also beginning at the bulkhead as well. there will undoubtedly be a lot of trimming to do. then I can get 'round to the port side. I'm going to order some more........I got the OK from the budget director

-
fantastic looking ship......there is so much to this ship.......where to begin! really like the rigging........easy to see why model manufacturers only give instruction for simplified rigging. fantastic workmanship!
- 228 replies
-
- 1
-
-
- spanish galleon
- lee
- (and 1 more)
-
hmmmmmm, I wonder if I can use those eyelets..........I got a big box of 'em {big in consideration of the size that they are}. cloth looks good Michael....has the look of canvas. I was looking at the current state of the Bristol project........you most definitely have a beauty there! really sweet!
-
looking super John.........the fiddldy bits are the fun part what's the other project?
- 745 replies
-
- 2
-
-
- francis pritt
- mission ship
- (and 1 more)
-
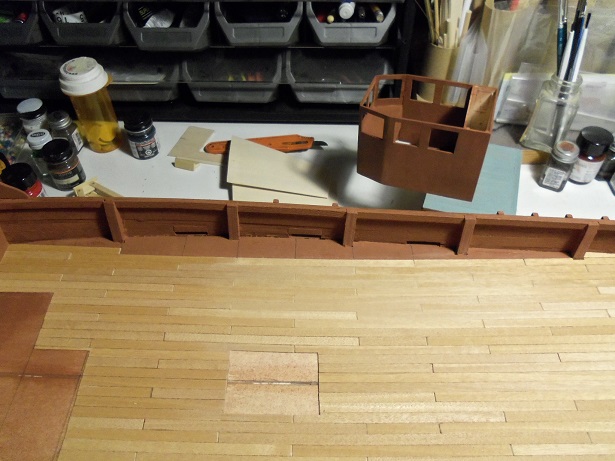
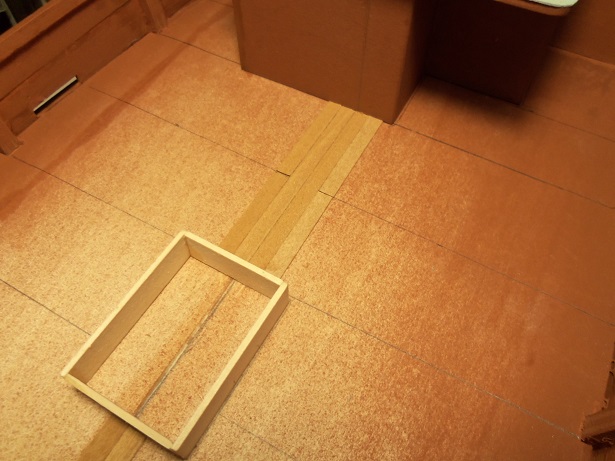
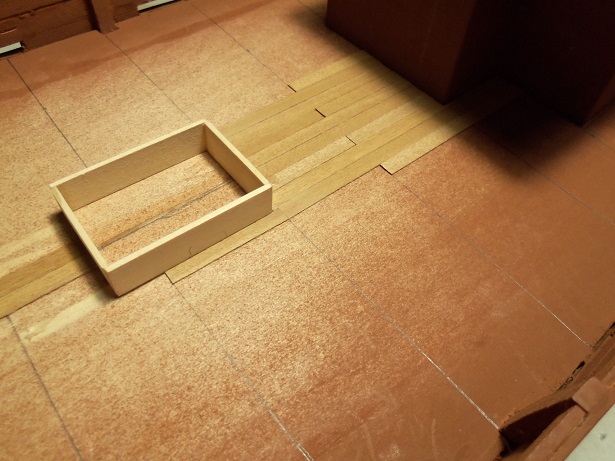
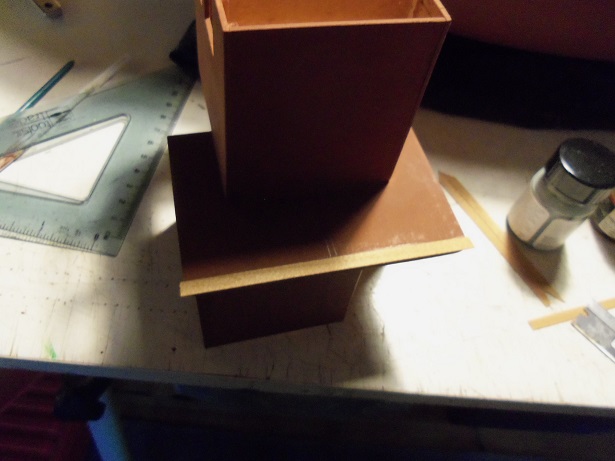
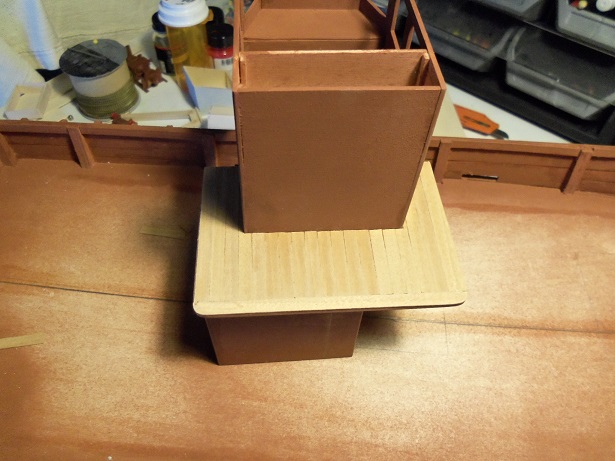
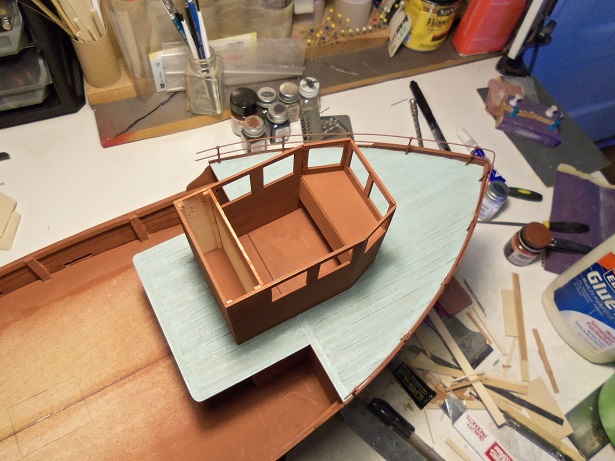
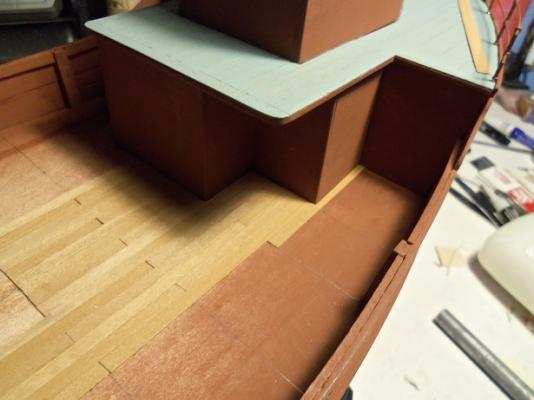
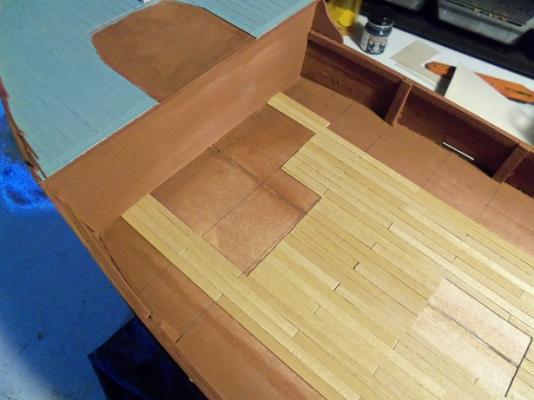
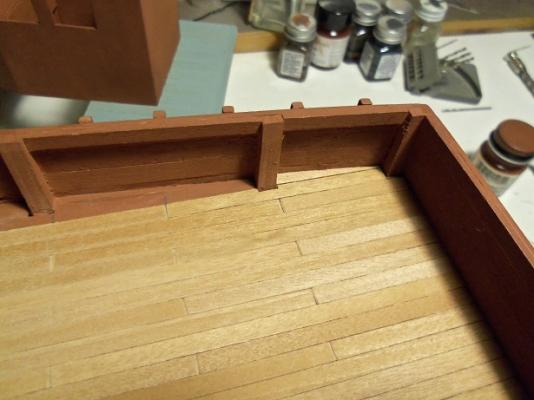
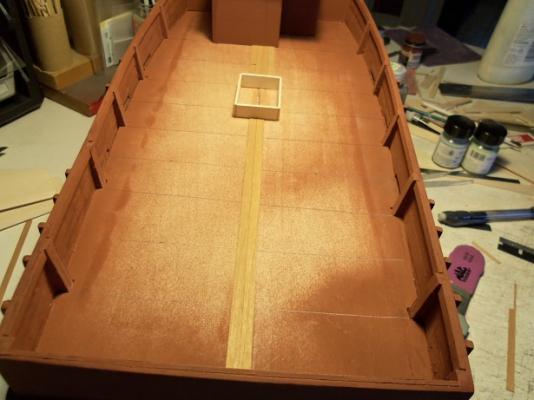
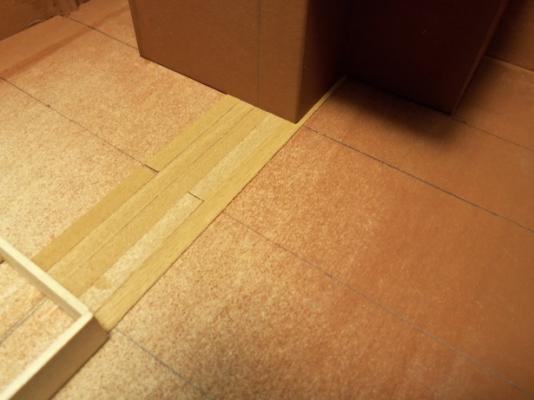
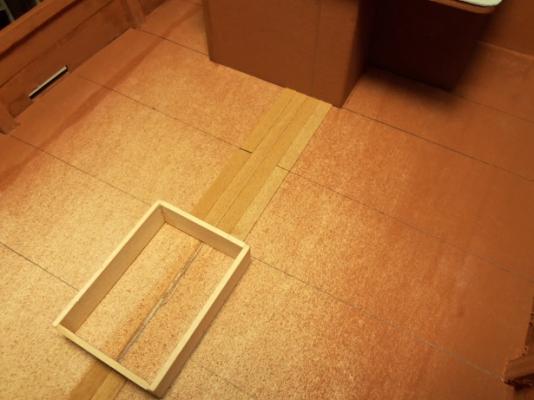
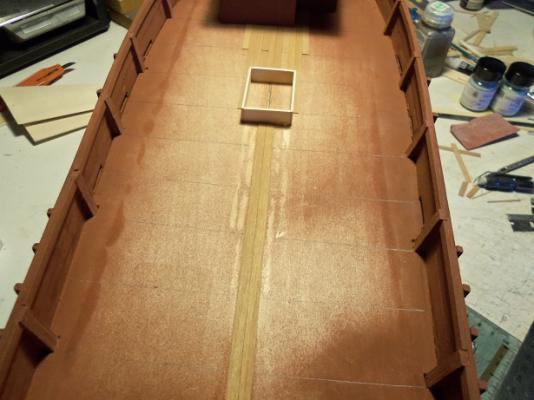
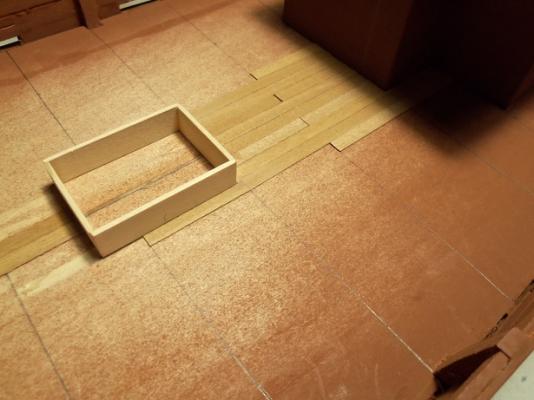
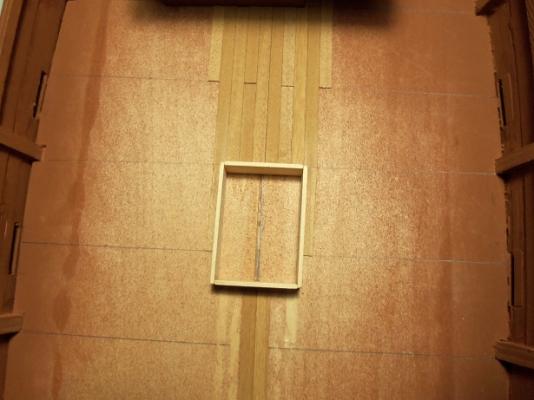
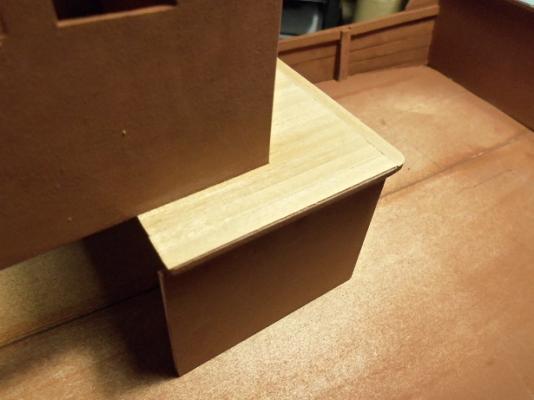
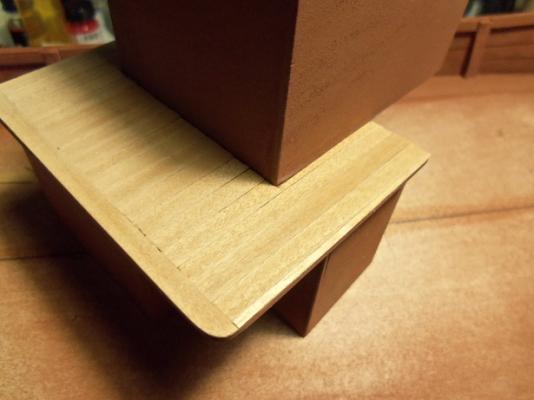
thanks Piet for the good word....yep! that's me........still here, experimenting and seeing what I can get away with I think i'm skirt'in too close to the 'triangle' though I got some of the main deck done yesterday.......and then I got pulled away. figured it was going to happen sooner or later. the deck was mapped out.almost looks like a football field...all I need is some green turf now I always cut the stripping freehand, squaring up the ends with sand paper afterwards. this time I came up with a process....a jig of sorts. it works out pretty good, so I'll use this in my future work. it starts with two planks rows in the center being full length. I try to run forward -> back.......get the structures out of the way first. planking around the structures, it helps to eliminate the separation lines that can occur between the structures and the deck. to make the butt joints stand out a little, I'm sanding them at a slight angle, so they will be more visible. my first trimmed plank around a corner of the lower structure....... when planking around structures like holds and such....one has to think if a butt joint is going to fall within that space.....I goofed. so I had to rip up a couple of rows. even though the glue was fresh.......I still managed to gouge the deck in a small area. nothing major going along the sides of the hold, meant I had to trim these planks as well. this is done evenly on both sides so....I ended up at this point on the deck planking.......I'll try and finish it today.

-
I was wrong........it's in my trawler Syborn log http://www.ebay.com/itm/Deluxe-Materials-AD55-Glue-N-Glaze-Glue-/231851041327?hash=item35fb66222f:g:p7kAAOSwjVVVkwHO thanks Cobra!
-
I use the Testor's window maker / cement..........it is water soluble. there is a link in the Holiday Harbor log....go back to where I was making the windows. someone suggested that product to me
-
nice looking lights Nils...........I can relate with the saving stuff for later. I've done it myself the mast is shaping up.......looks super!
- 2,625 replies
-
- 6
-
-
- kaiser wilhelm der grosse
- passenger steamer
- (and 1 more)
-
I have this kit in my stash...got it this past Christmas. it's the old kit, molded in the late 60's. I haven't seen this build.....looks very nice ans well done I'm commenting so it will appear in my watch list.........a lot easier to find that way it will make for a good reference later on when I assemble it nice job.........are the sails cloth?
- 10 replies
-
- 2
-
-
- santa maria
- Finished
- (and 1 more)
-
it looks pretty good so far.........once you fare the hull frame, it will look better. I'd have a little trouble with that beveling your doing ahead of time. I did something like that on the bulkheads of one of my builds.....figured I'd get a head start. boy, was I off on some of them......there was no 'full bulkhead' contact on a couple of them. from the looks of the ones you have done already........it's working out well Keep going my friend!
-
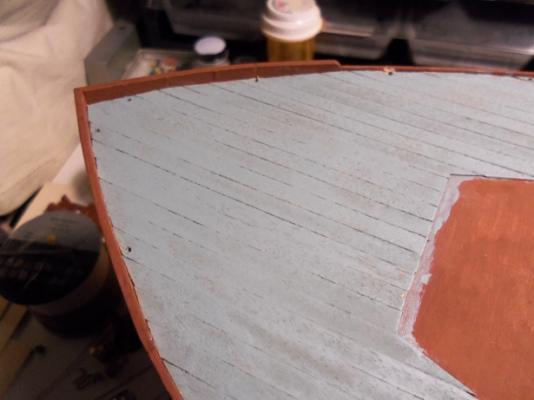
gee....glad to see that many likes.........as mentioned, it is a little out of the ordinary. it's a neat way to add more detail to a painted deck. where I like to use an archive pen to do the simulated calking.....I envisioned the paint activating and lifting the ink, sending black streaks all over the place {my main reason for not doing it.....should have mentioned it earlier}. it dried a bit more blue than I would have wanted.......I guess looking through the bottle was a poor barometer for gauging color. if I had looked a bit harder, I would have found the pale gray.......I have two bottles {1/2 oz} thanks Mark.........this hobby is full of surprises. the best thing any modeler can do, is just let it happen thanks for the good word, friend! {right back at ya} thanks Patrick I mentioned somewhere that I used to enjoy writing short stories and poems. I still do every time I have time to think...those came to mind as I was painting the deck......I just had to write them down. I like a couple of different styles........nice to know I won't scare little kids thanks for look'in in and the good word. well, I have the deck lined off.........today must have been too much excitement for me, cuz I didn't get much further than that. tomorrow for sure thanks for all the likes
-
nice.........looks ready for hinges I prefer the flat enamels as well. Testor's, Model Master, and I have a fair amount of Billing's paint
-
hey there Mobbsie..........kinda planned, but was unsure of the outcome. it will look better when both decks are done thanks for look'in in and the good word. hi Frank........you might get a kick out of this appreciate ya look'in in and the good word thanks for all the likes!
-
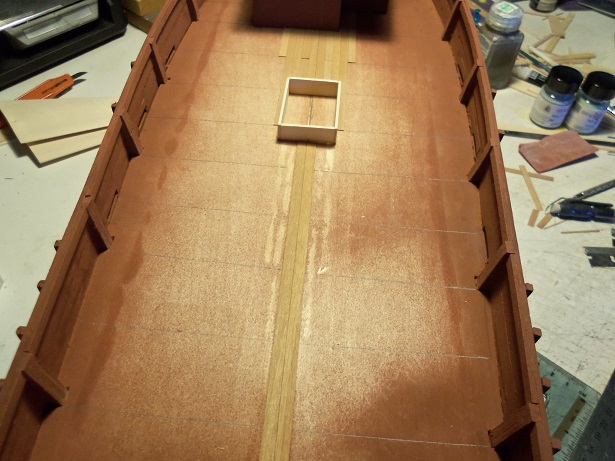
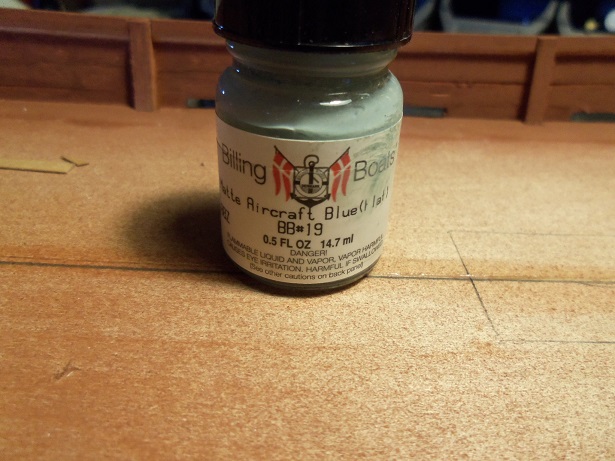
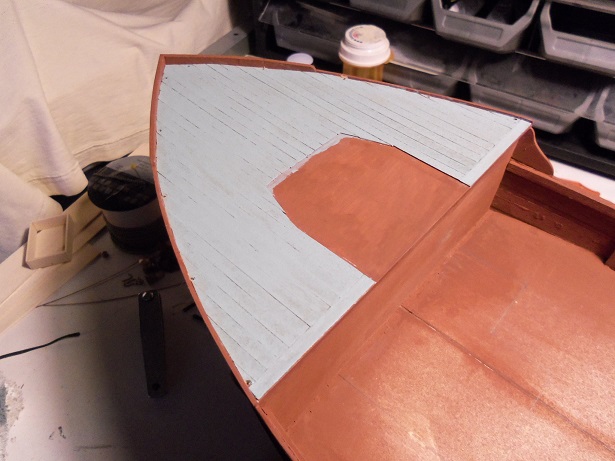
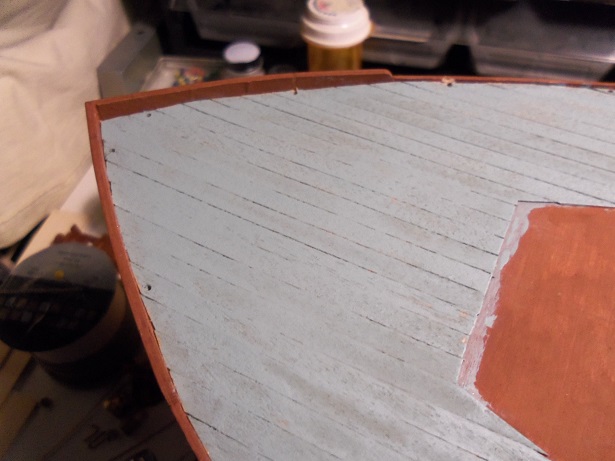
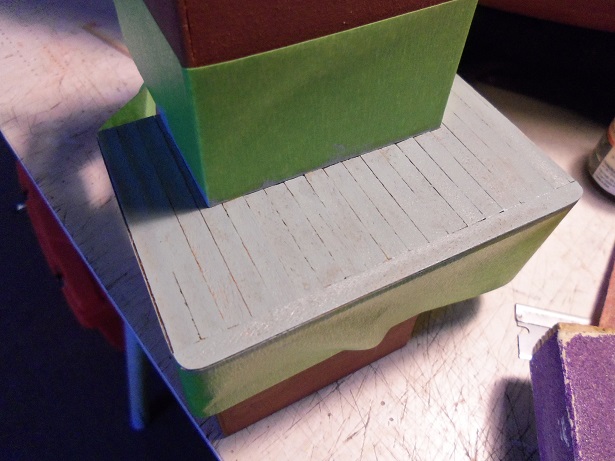
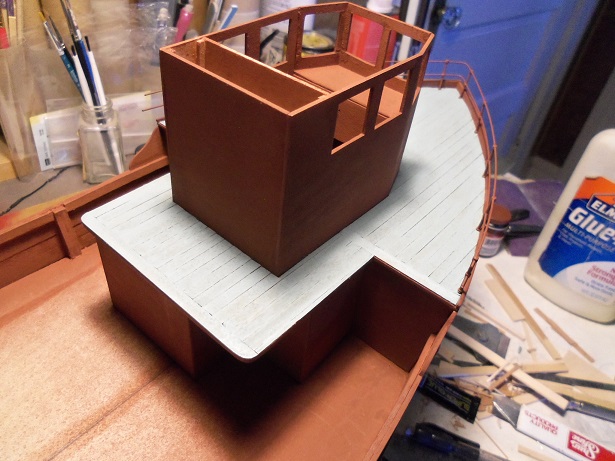
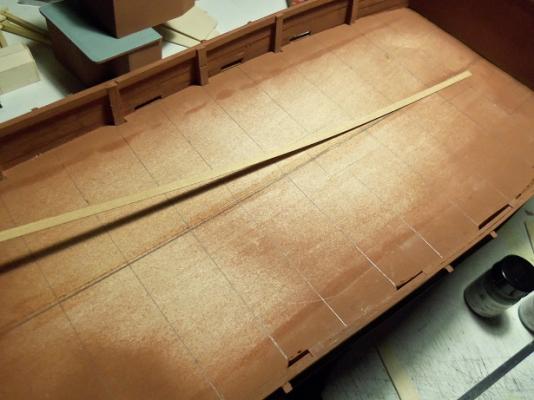
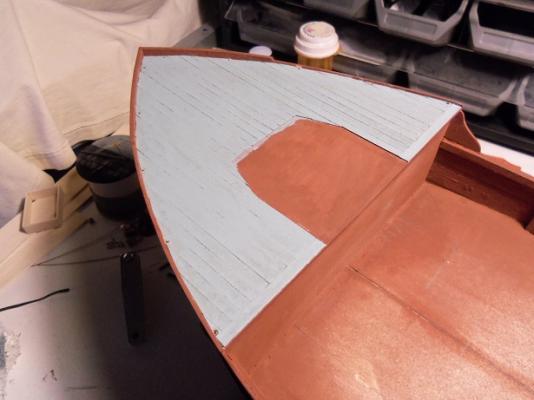
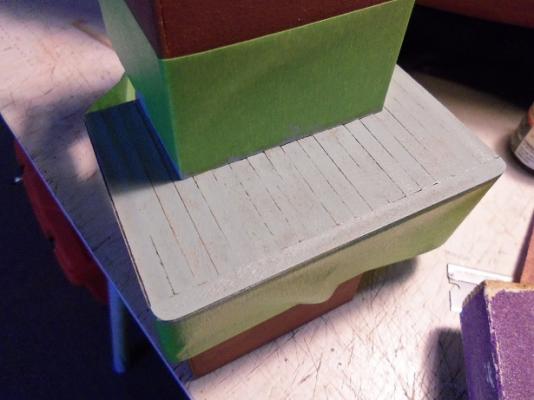
......just sentiments of the way I felt as I did it.......it just didn't feel natural. is it a common practice? I recalled back when I did the Maine Lobster Boat.........I thought planking the deck was the cat's meow. it did........it gave the boat a touch of class..........but as it was pointed out to me, work boats don't usually look that good. so, I quickly assembled another hull, and turned it into a two boat project.......no skin off my nose I might have thought about it at the time, or I was too fearfull of the outcome.......I'm not sure.......but there was an easier alternative. as mentioned, the deck was planked without doing the simulated calking.....it would have been a waste of time. I didn't do any butt staggers either......I recall learning that poop decks and fore decks should be done in whole length planking........I kinda stuck with it. paint I initially was going to simply spray it over with the red primer, but I didn't want the decks and the bulwarks to be the same color. I didn't want white......gray would be the logical choice. I didn't want a spray either...too uniform and most likely wouldn't give me the look I wanted. looking in my paint inventory......I found this: flat aircraft blue........seems odd, but there's a logic to it........I'm hoping the gray and blue attributes even out the paint scheme. the primer red..........and I want the outer hull to be either duck egg blue, or sea blue. I added a little extra thinner to the aircraft blue to bring it down to somewhat of a wash. I worked small areas at a time. spreading the paint out as far as it would go, I allowed ghosting.......taking into account that the wood is going to be thirsty........it sucked the paint up like a sponge. in the beginning, it looked real blotchy.......but as the paint cured, it slowly went away and became a flat finish. the same went for the structure roof / deck....it was planked as well. I was a little off on my center......the port side planking went to the edge with just a tiny bit of a deficit. the starboard side however had more..........I filled it in with some 2 mm wide strip. it was then masked and painted the same way. clear to see why I won't use a green the structures were placed back in place......the gap between the two is pretty much gone at this point. now I guess I'll get started on the main deck.......here I will do butt staggers. I need to map it out first though


-
oh......thanks for the good word and those for the likes. I gotta go now and find a sharp chisel oh why didn't I listen to my own inhibition I'm usually quite attentive you see as I crept to the table and read the label it clearly says....."not to be used with......"
-
oh Patrick.....I feel so sad folks shaking their heads....Popeye's been bad to ruin and destroy that precious planking they gonna give me ....one heck of a spanking the grain is gone......there is no hue and nothing about it, I can do I swished and swashed with one fail swoop and turned it into.....one.......BIG........oops!
-
I have to agree with Keith........it's logical that as the scale gets smaller, some detail gets lost. you seem to ignore that rule. I don't see any mistakes, I only see 'adjustments to be made'
-
glad to see you've returned Nils...........and what a great way to start! the mast looks awesome.......and since I last posted {but forgot to hit the post button}, you've added more very nice work Nils!
- 2,625 replies
-
- 5
-
-
- kaiser wilhelm der grosse
- passenger steamer
- (and 1 more)
-
how do you expect us to learn anything, if you keep raising the bar..........they are sooooooooo awesome!
- 434 replies
-
- 4
-
-
- pelikaan
- beamtrawler
- (and 2 more)