


popeye the sailor
-
Posts
15,981 -
Joined
-
Last visited
Content Type
Profiles
Forums
Gallery
Events
Posts posted by popeye the sailor
-
-
which catalog is that? that is the general shape of the rudders from Shapeways. as Lou pointed out, these are R/C parts I'm working with. as with any parts found in kits, some require shaping and trimming. I may shape them.
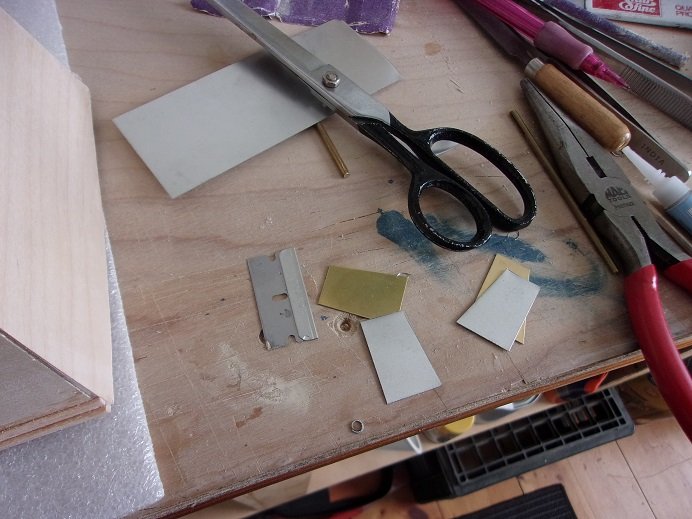
I have been able to pick at the PT boat. the rudders don't match, so I'll have to make a match to either one. I have some sheet brass stock. I have a copper sheet, but it isn't thick enough, nor ridged enough. what I did find was some tin sheet........that was thick enough.
the hull was sanded around the tubes....just a little more and it will be good.
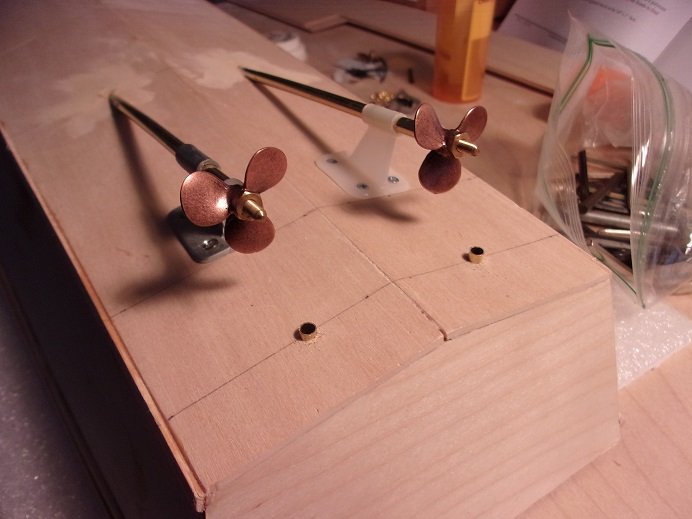
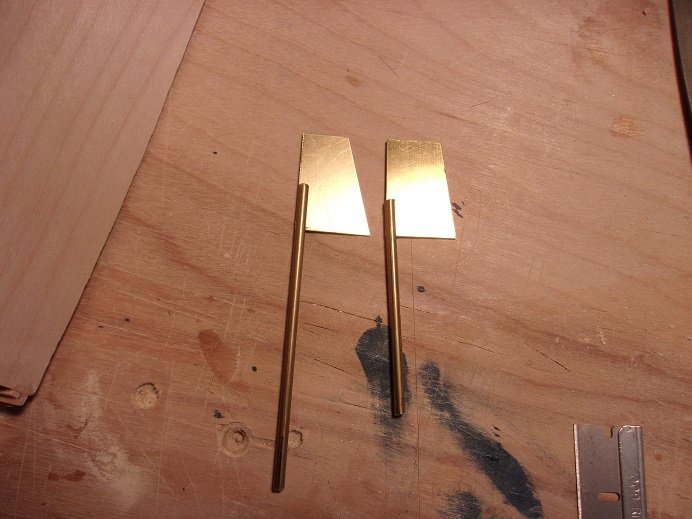
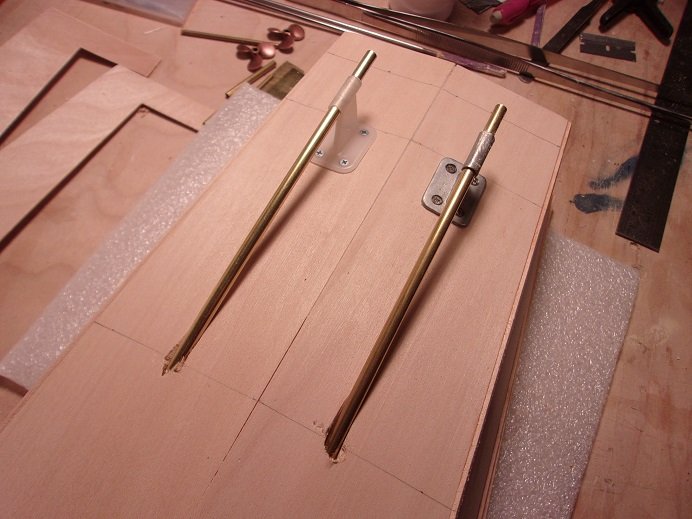
I still need to go over the rest of the hull, before I do the resin coat......the weather is getting better and better....I'd rather do it in the garage. the next step with the rudders, was to solder them on the shafts. another defect I had to deal with, was that the slots for the rudder weren't cut equally. the solution was to measure how much of the rudder would fit into the shafts, and notch the one for that particular shaft. I think it was like a 3/16x3/16
square cut out of the corner. soldered together, they now look even.
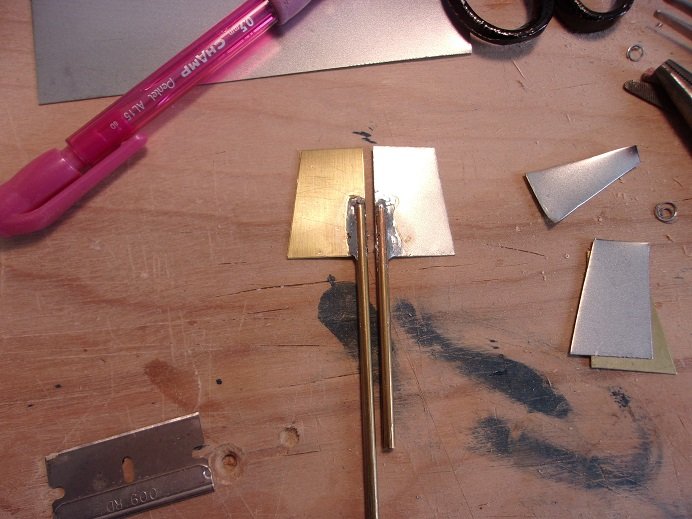
luckily, there is enough shaft to go the entire length of the tubes......I can do what I want to do. fitted in place, the spacing looks good.
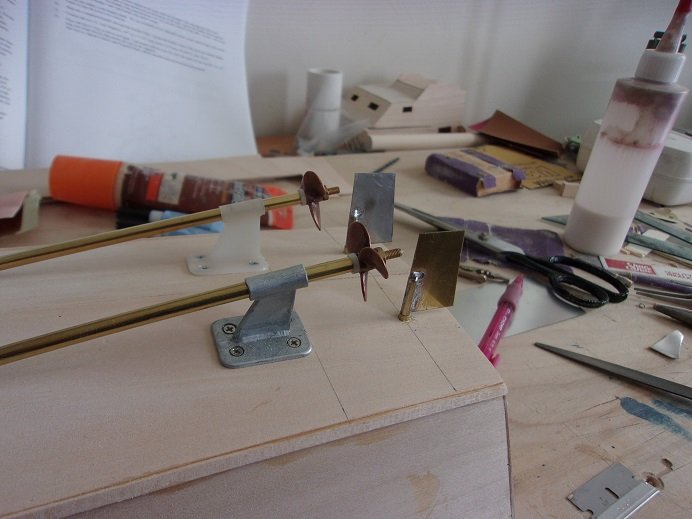
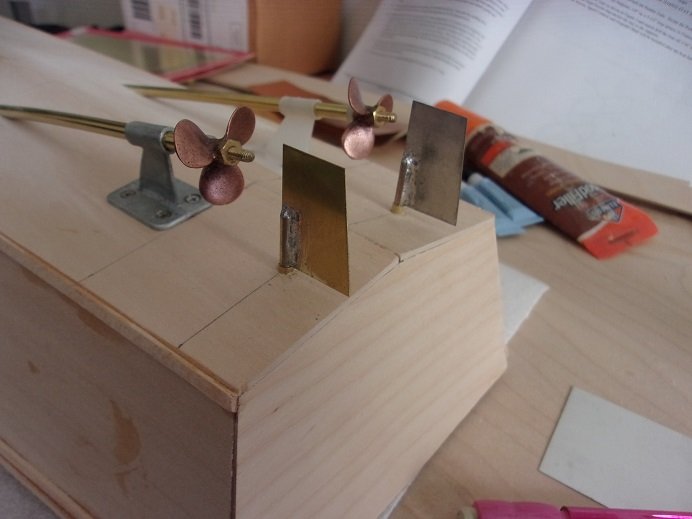
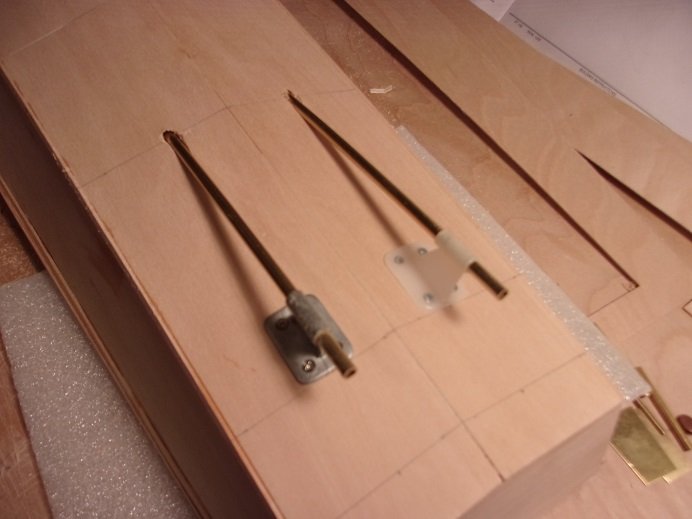
the last picture had me concerned.........the starboard side rudder was a bit out of line with the prop. there was a difference of about an 1/8th of an inch. removing the tube, I remeasured and marked where it was supposed to be. this can be easily corrected.
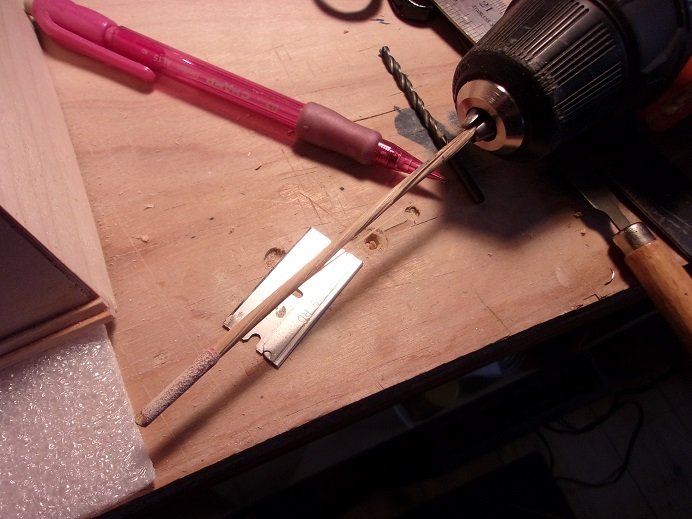
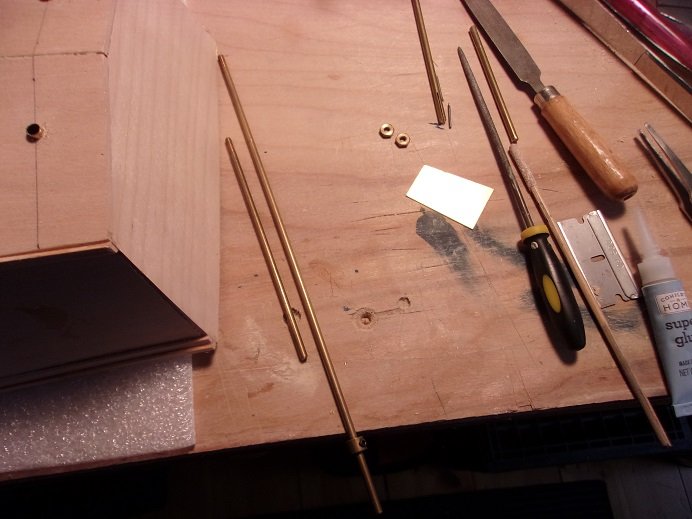
the hole was redrilled........to fit the tubes, I used sandpaper to ream out the holes. this was done by wrapping sandpaper around a bamboo dowel, secured in place with CA. it was fitted in the drill and then passed through the hole....in and out........over and over, until the tube fit, tight enough to be firmly inserted. it worked well for the first holes...........I guess I got too aggressive with the reaming, and I found out how strong bamboo is, before it began to twist. I still got the job done though
")
one beauty of a round hole, is how easily it can be plugged.
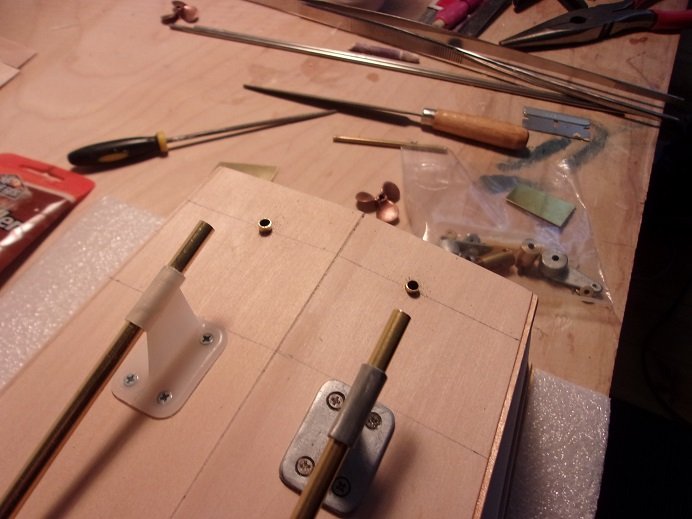
so the tube will be refitted and properly sealed. as for the prop shafts, there were no holes for a shear pin. for a static model, this isn't important, but I was able to drill them anyway.
I located them so there won't be too many threads jutting out from shafts. inside the hull, the linkage levers for the rudders were sync together, and a connection rood was fashioned for them. so far, I haven't found an allen wrench that fits the jam screws....I know I have some that are THAT small...I just have to find them {I'm sure they are in a bag somewhere in the garage}.
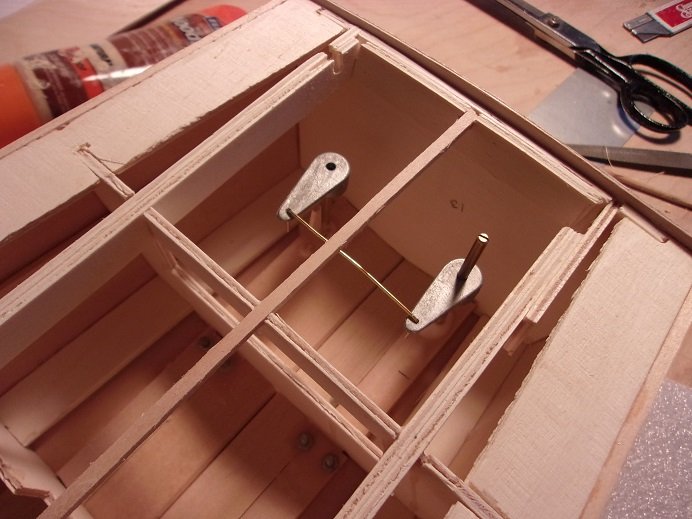
more to come
")
- marktiedens, Edwardkenway, lmagna and 8 others
-
 11
11
-
-
I just placed the next order for this vessel at Shapeways.......I saw that they also list the struts, associated parts and props as a set. if I knew that back when........ I ordered the 50 cals......and I ordered the deck gun as well.......I liked the way Mike's came out
yea......I know Lou. what I should do is round off the rudders so they would look more like the real ones {the ones I saw at Shapeways are}. hopefully, I can set up the rudders so they can move.....I will connect them so they move together. I could have gone with the three prop/rudder set up, but I was concerned with the apex of the keel for the center shaft. I read in the instructions that when locating the 'single' shaft, the keel was flattened, to accept the strut.........I wasn't keen on drilling through the keel either. so I settled on having just two props/rudders........close enough for me I'm going to use the props too.......they are close enough. I've done some work on the rudders.......I'll have something to show later
- lmagna, Edwardkenway, Egilman and 3 others
-
6
-
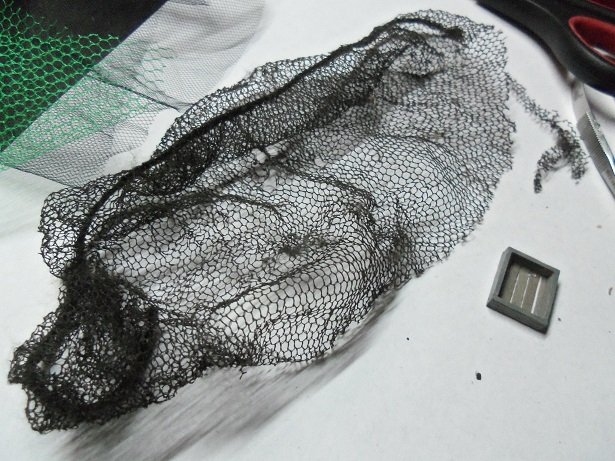
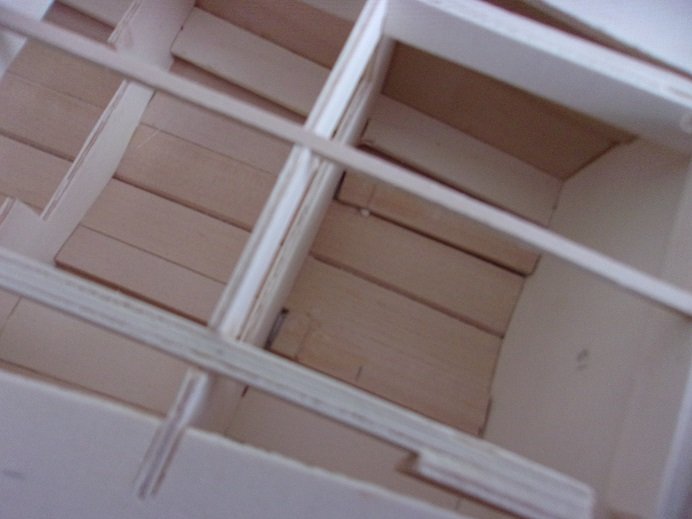
yes...those bulwark panels can be a problem. usually, I don't use them...I simply plank the bulwarks. it comes out just as good. I've built a couple of these split hull designs, and to me, felt that it might be extra work joining the two halves once planked. I joined the halves together before planking, so I could properly clamp the halves together. I also though of the seams at the stern and the bow. most modelers will approach these steps in a different way.....there are no real wrong ways to build wooden ships. it all comes down to what is easier for you. the neat bit of research I think you will enjoy, is the net winch
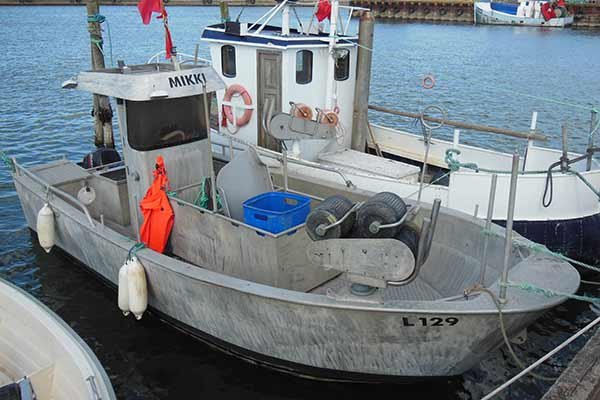
I did a lot of looking to find out how it worked........even more to find the right mesh for netting. I work for Walmart on the trailers and trucks, and one day I was working in a trailer, I happened on a hairnet that crumpled in a corner. it had been left behind from a shipment to a store, and repeatedly run over and beaten........it looked perfect! I didn't even clean it up.......cut it to size and used it
be sure to fare the frames well, so the planking will sit on the bulkheads flat.......it will insure smooth contour to the hull
- G.L., Blackreed, Keith Black and 1 other
-
4
-
I'm back.........almost late for the vaccine appointment
 the admiral looked up and saw the time! we were given a time, but it didn't matter.......when we got there, we got in line with several other people. the end result of all this, is we got our second shots.......Hurray!
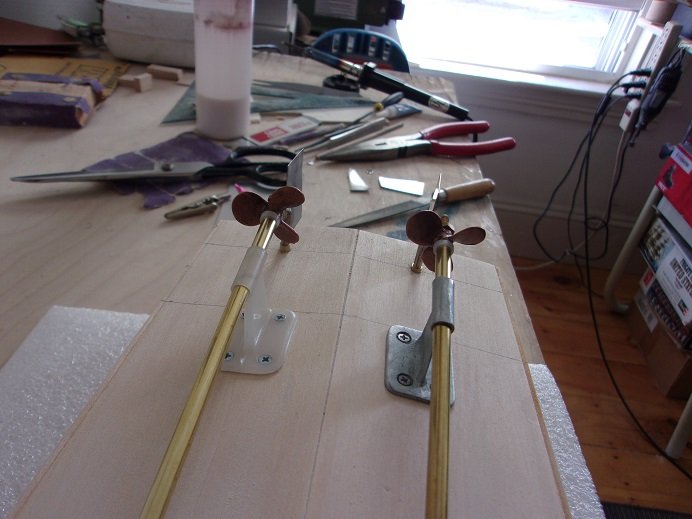
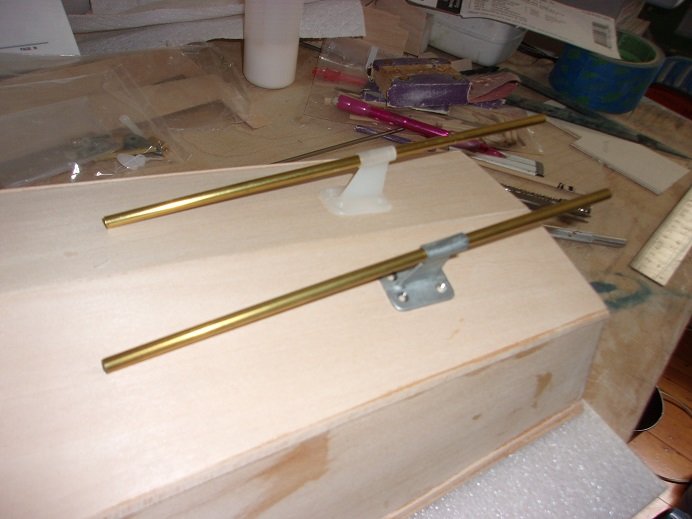
where wuz I????? the screw shafts.....yea! swapped the props over to the other shafts and put 'em in place.
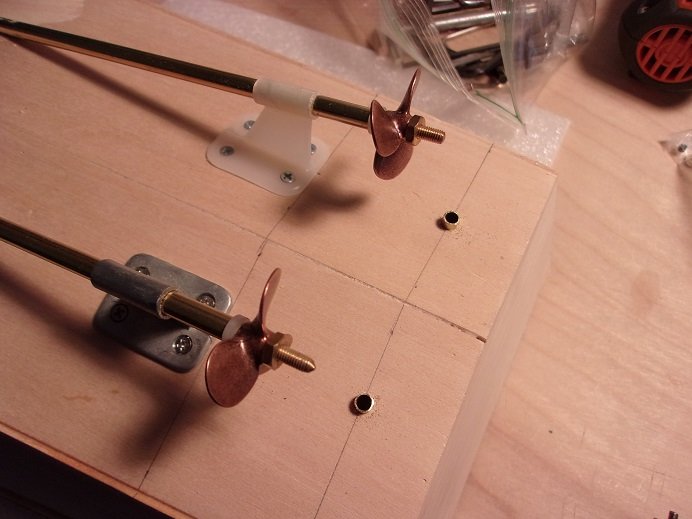
I put the plastic spacers on this time around. I wasn't out of the woods yet........the rudders are problem No #3. the shape of the rudder is off, the shafts are different lengths, and the slot to insert the rudder in the shaft, is longer on one than the other. the long one is slotted on both ends...for what reason, I have no idea.
'''''''''''''''''''''''''''''''''''''''''''''''''''''''''''''here we go again

-
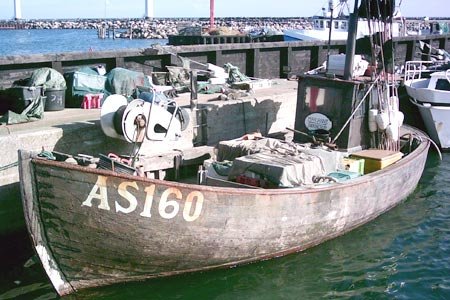
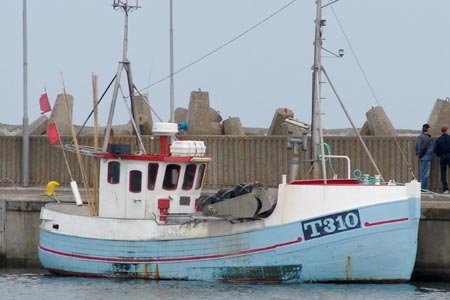
when I bought the kit, it was simply called the Norden. with this model, the name is located on the front of the pilot house. in the case of the Cux 87, it was located on the stern. basically, most fishing companies number their boats, and usually they are on both sides of the bow. there are some companies {North Atlantic trawlers and deep sea fishing vessels} that will put the name of the ship on the bow.
I do hope I'm reading the discussion correctly, because I didn't know there was a proper way to display a ship. I always display my models on the side that came out the best
- Veszett Roka, grsjax, Blackreed and 3 others
-
6
-
likely........they recently opened up another branch that deals with kits that they bought from the general public. folks who wanted to thin out their stashes must have taken advantage of this..........the email I got showed pictures of the shelves......amazed with what I saw!
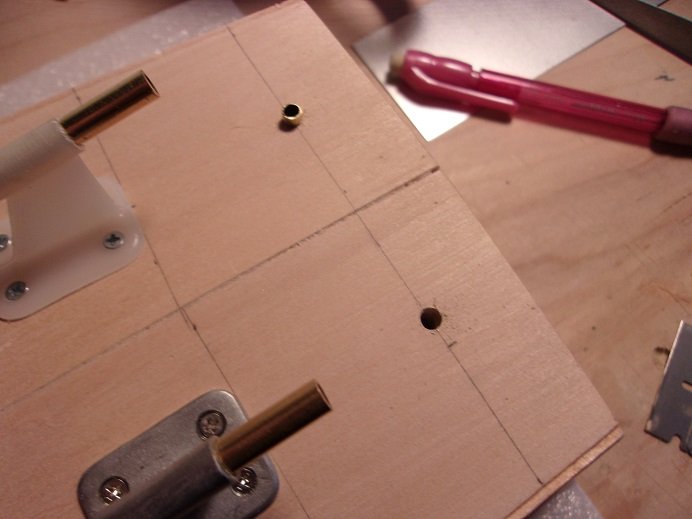
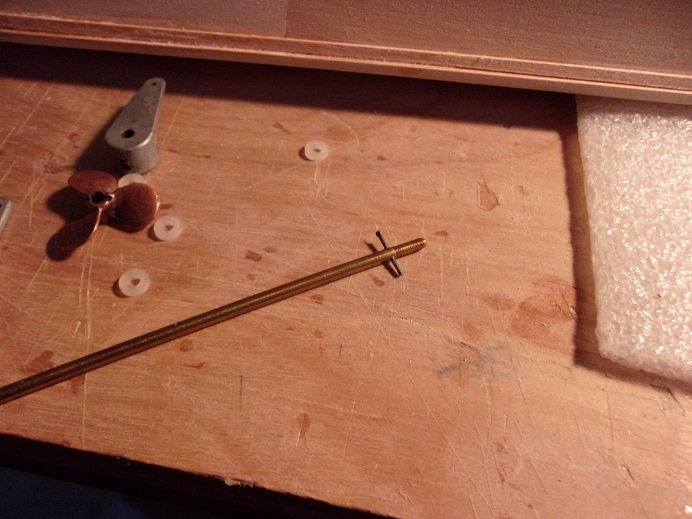
I'm even more amazed with the differences between these two hardware kits. my only deduction is that what I bought from Model Expo, was old stock, and the one I got from Ages of sail was newer stock. the struts aren't the only issue.......there is one with the prop shafts too. the props from Amati are good......they have the slot in the back for the shear pin {locking pin to arrest the prop and key it to the shaft}......I only had to enlarge the center hole slightly so they would fit onto the shafts. the difference here are the nuts that secure the props to the shaft.......one is small and looks good, while the other one is so big, its an eyesore! before I found this problem, I filled in around the shaft tubes using a razor blade as a trough.
I'll sand it and apply more if needed. the next thing was to drill the holes for the rudder tubes......I left them around 3/16 " out of the hull, just in case {but I can still adjust them}.
I would have gone onto the rudders, but then it hit me about the props........and the second problem presented itself......

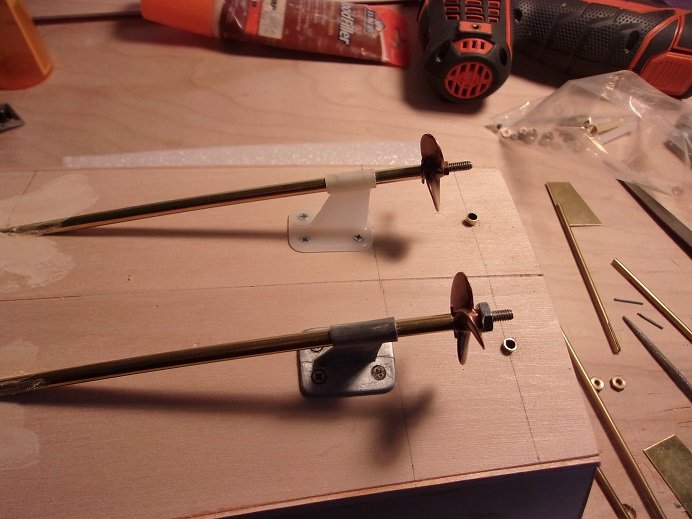
if I wanted to make spinners for them.......it would be impossible. I will see if I have a nut that small in one of my junk cans in the garage.......but wait! I happen to have a Billing's prop shaft......perhaps it will still have the nut on it?!?!? checking around......I found not only one....but two! one of them I had cut down for some reason or another........the other one had the nut and the collar still on it!
of course, the nut was a different thread pitch.....rats! but...........then again, this is to be a static model.......so it really doesn't need to be a full shaft. I found the nut for the other shaft in the jar with the props and anchors { my inventory}. these two nuts are the same, and so I set it up again using the Billing shafts.......there are no holes for a sheer pin, but I can drill one.....got to go!
-
hey there Mark.......glad to hear it! Lou was telling me they did fine as well. well........good......that means I won't lose a day of my vacation because of this crappy virus
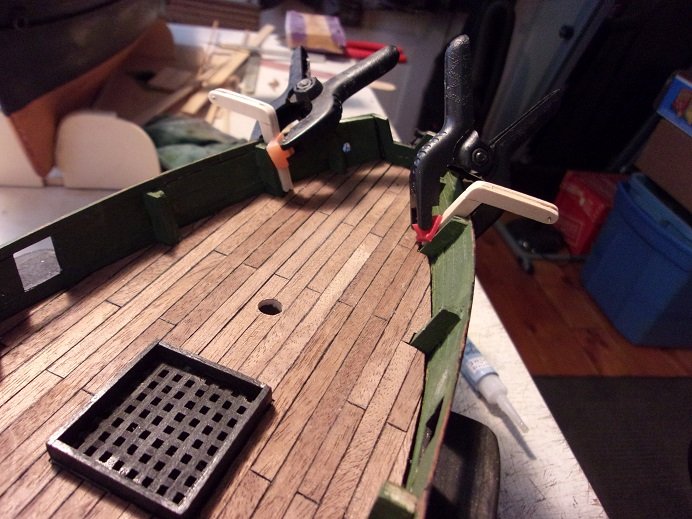
I did a little tinkering with this one today. I started to add the eye bolts to the pin rails...a little more and I can paint them.

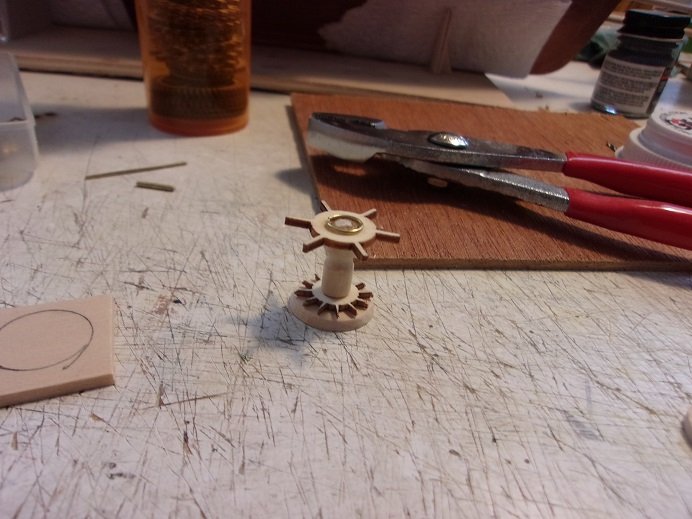
then I made a capstan, using those wooden gear pieces I bought a while ago.
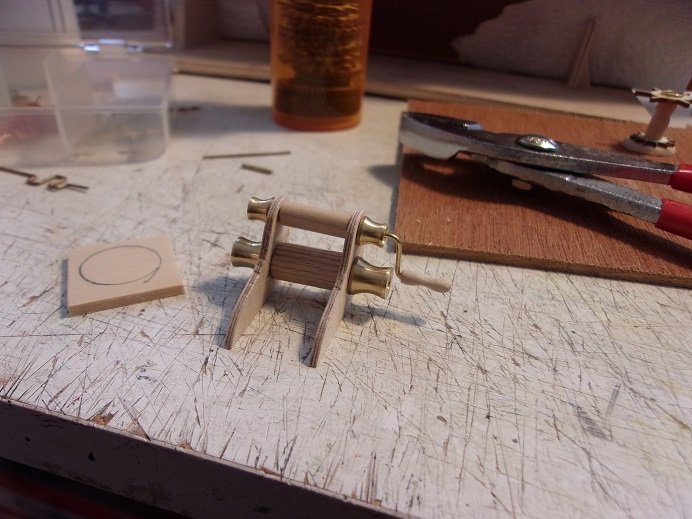
along with the order for the PT boat, I included a windlass. it didn't include the sides.....but included a smaller pair of drums. I kinda adlibbed it a bit and came up with this.

- Edwardkenway, marktiedens, J11 and 3 others
-
6
-
neither.......it's a static model. sad.........but true. I haven't built an R/c either......but I have one in the stash
future build.........
-
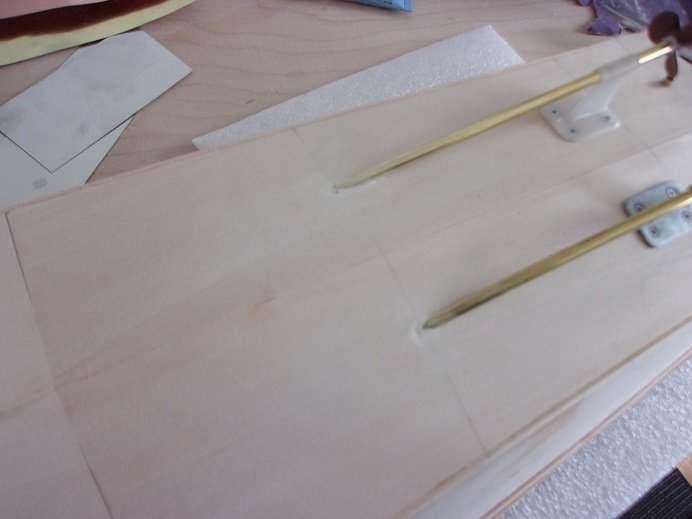
I played with the Agillis for a little while.......now its time for the nail biter. the holes were enlarged for the screws and the struts were fastened in place...it wasn't too tough to do
once tightened down, I gave them a coat of white glue to keep them from backing off. .......little chance of it, but one can't be too careful
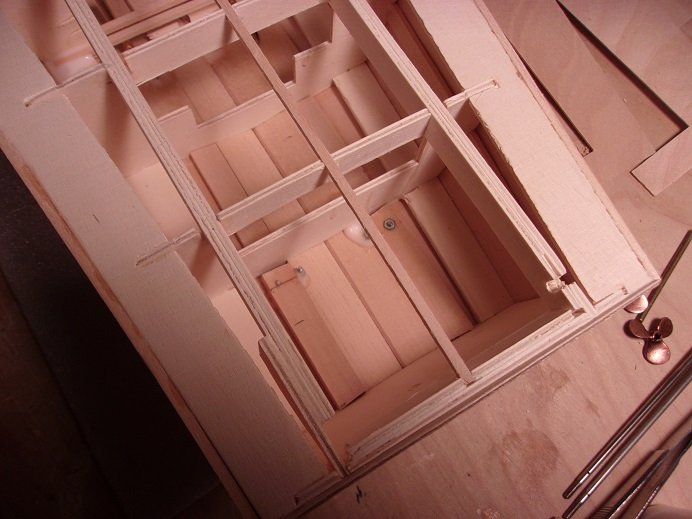
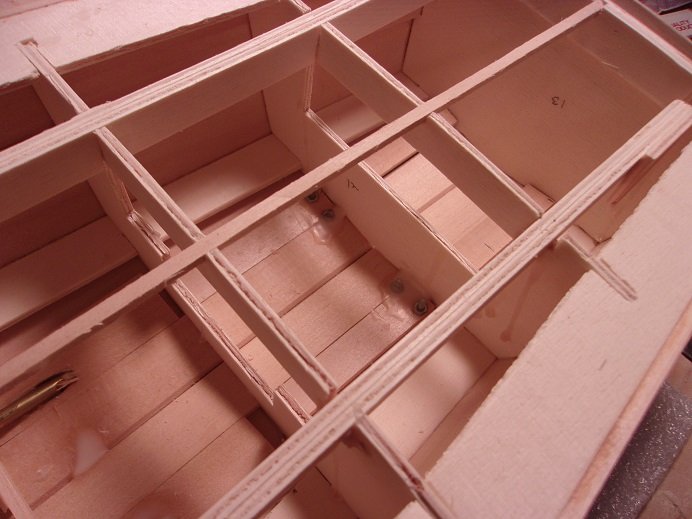
getting the angle of the shaft tube right was somewhat of a problem.......I inserted the tubes and marked out where the entrance holes were to be. the angle was the real dilemma........had to make a few adjustments. the two struts weren't at the same angle either.......this brought the holes starting before bulkhead #10. this one needed to have a section cut out anyway......but I had forgotten about it. that's OK though.......resorting to a hammer to drive in the tubes in the rest of the way, cleared the obstacles in fine order!  this didn't upset the applecart too badly......I removed the broken piece of bulkhead, and after the tubes were set in place, two lengths of 1/8X1/8 basswood was cemented in to fill in the gap. this didn't pose a strength issue, since the chine struts carry most of the hull strength.......but again, I may as well do it.
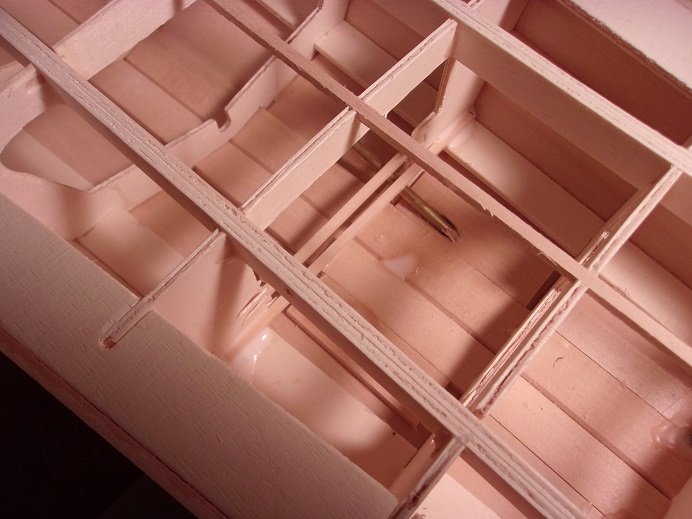
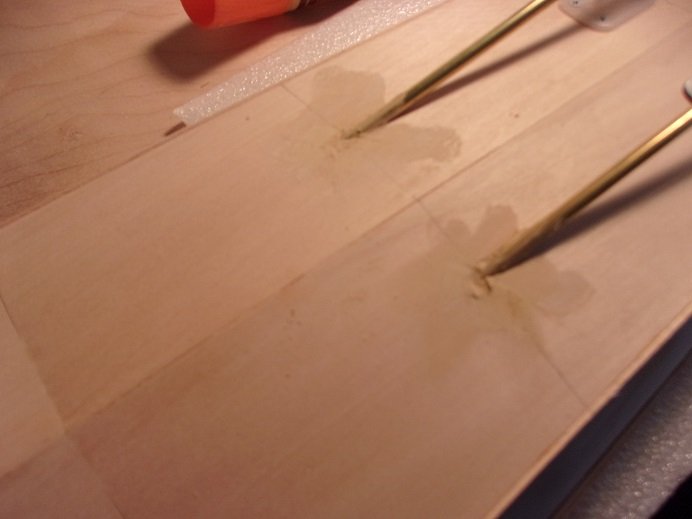
the tubes were sealed with white glue
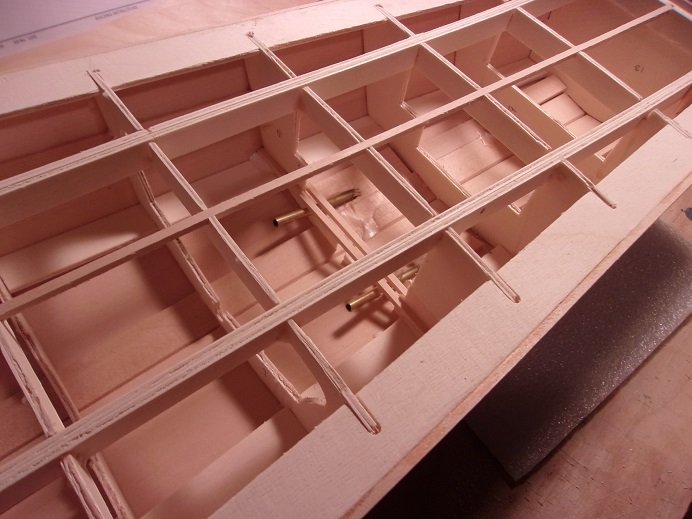
there's a bit of buggering that need to be filled in, where they enter the hull. I'll do that in the next session, along with the rudders.
I was hoping to set them up and remove them for the resin coating. but with all this........I think I'll just work around them
more to come soon
- marktiedens, TOM G, GrandpaPhil and 8 others
-
11
-
the ground shook.....some movement on the PT camp! I had ordered the running hardware, but not through Model Expo, where I got the first running hardware set. so far, I've only ordered the running hardware......I've got to come up with a total for the other stuff...budget director's orders. I got it on Tuesday........so opportune, since I start my vacation...and the second round of shots on Friday. I am a bit dumbfounded though......the first set has a metal tube strut.......this one has a plastic one. ....ewww.....and it's that horrible plastic to boot! .......really a pain to clean off the flash {kind of the type of plastic that milk jugs are made from}.
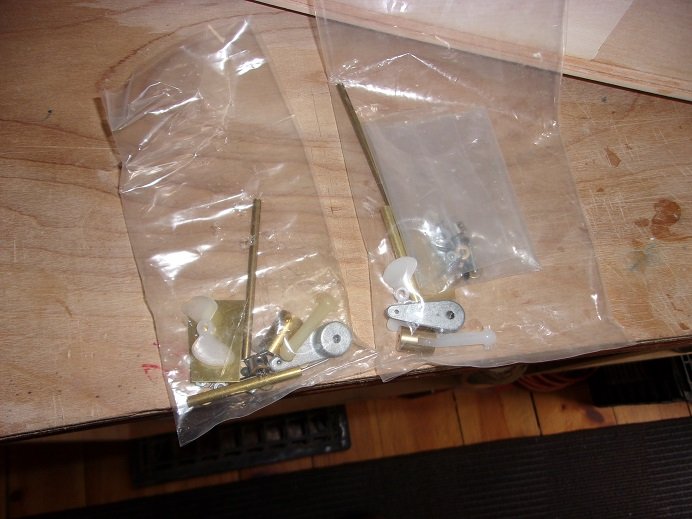
the rest of the parts are the same, I'm relieved to say...I only hope the angle of the shaft tubes is the same. I also got a pair of 30 mm three blade props, which I selected from Amati....I went to ages of sail for this order. Model Expo was out of the running hardware kit.
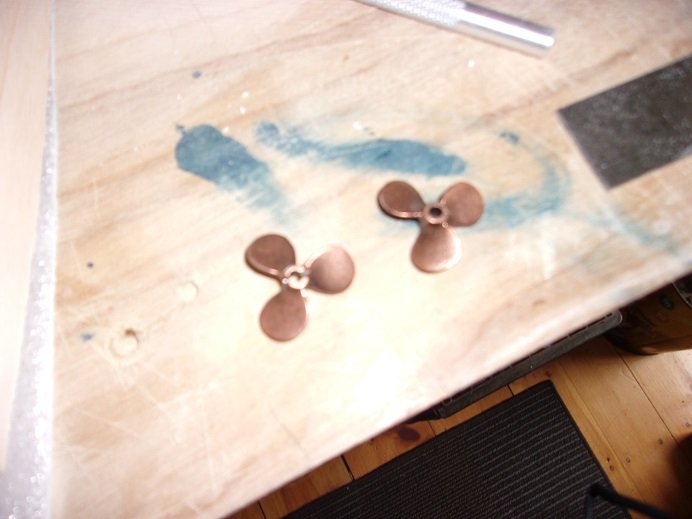
looking at these......I could easily have gone to 33 mm props....think they would translate to 1 3/4. these I think are 1 3/8.....I'll see if they are big enough.
if not, I just get another pair {I'm sure I have a model or two that needs a prop
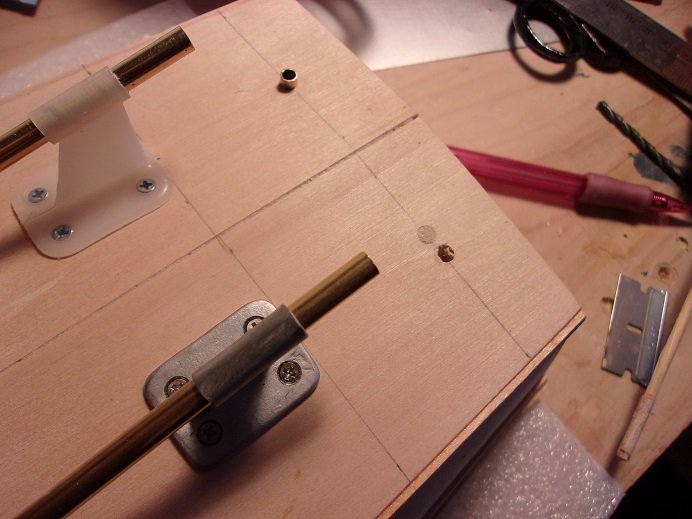
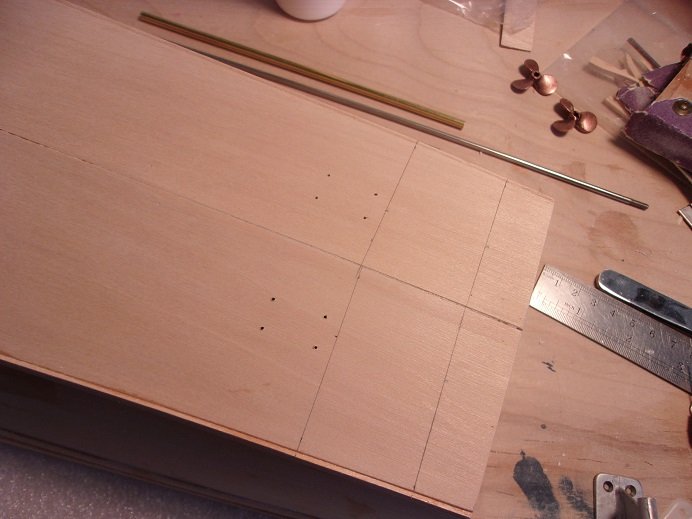
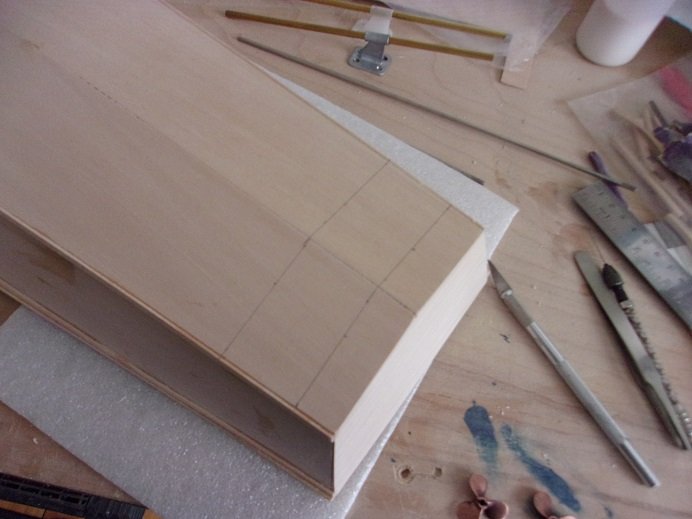
so......the first order of business is to mark off the location for the struts and rudder shafts...
the nuts for the screws are small......and would be a frustrating affair, considering where I need to put them. but with the aide of my mega tweezers, it should make it a lot easier.
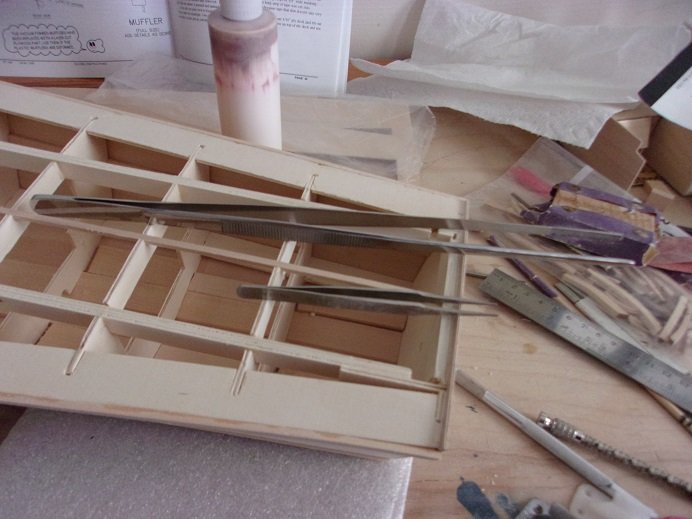
it's 12 inches long, and will easily reach into the hull. centering the struts, the holes were marked out and drilled. one of the screw holes missed where I had added the reinforcements.....so I added an additional piece. got to wait till it dries now.
- TOM G, Edwardkenway, GrandpaPhil and 6 others
-
9
-
very nice progress Kevin....she's look'in super
- Kevin and Old Collingwood
-
2
-
-
nice!
I built one as well........a really fun kit to build!
- Keith Black and Halvor
-
2
-
I see the aft mast was removed by this time
- cog, mtaylor, Old Collingwood and 3 others
-
6
-
-
that's a quarter of an inch.......when the hull is fully assembled, you would likely never notice
it would just get sucked into the model. in the years I've spent modeling, there is a + and - to scale, that you can get away with. .......just don't stray too far away from it. one thing it will do though, is translate to all the other involved parts. luckily, parts are a bit oversized and need to be fitted.....you can use this to an advantage.
the pedal looks really neat
remind me of when I attempted to make foot stirrups for skis for the Phylly C. you have to know the story about the Lobsie twins...it was a fun project.....and I came away with two models for the price of one I did such a terrible job trying to make them, that I turned the skis backwards so you couldn't see that I gave up on making the stirrups
-
-
I've dealt with a number of Billings kits......the one glaring issue with the plans are the termination points. does the plans include a deck view of the belaying pins? I've always wanted to build this vessel
-
thanks Lou.......can't wait to get it over with. wish this crap would just go away
hey Mark......I didn't know you started another build!!! I wrote it down........definitely got to take a TOTAL look at your log! looks beautiful!!!!
-
so now you are past me Tom.......I'll get back to mine one of these days
I get the second shot March 26........I took the following week off from work in case there are any side effects { a third hand would be nice }. this has also been the first year that me and the admiral got a flu shot.
I don't recall what I did for the ship's boat........I thought the same, and I didn't get the vac piece, as some of the parts were missing. she's coming along really nice.........superb progress!
-
I was tempted to get the coastboat bent, by Billings, but was a bit daunted with the clinker design. with the way I plank.......you couldn't doubt it by me
Billings had a few different kits of these era ships in the past.......I fancy collecting old catalogs { I have a few}. I'm a big fan of their kits......my first kit was the Nordkap
wow! you do some beautiful work!

-
I had not seen this kit.......thought it might be an older offering. I was surprised that it is fairly recent........gee, for a while there, they'd take one out of production and put another back into production. nice to see they are turning out new models
never done a clinker before.......yours came out excellent! if like your village, she's gonna look sweet!
-
hey.......guess what?!?!?! there's an update going on!
I wish I had a larger one, but I've been splitting time with a 'what if' that's been rattl'in 'round in my head for some time now...... time to put it to the test to see what comes of it it's been occupying brain cells since 2018. I'll have some time on my hands coming up as well.......March 26th is coming! this is when the admiral and I gets the second vaccine shots.........I'm taking that week off {yes, a vacation....first one in probably three years}, so I'll be able to gets some decent modeling time in. work is allowing us to use more of our sick time, so I'm taking advantage of it they say that the second shot may make you feel icky { mild side effects}, so I'm not taking any chances.
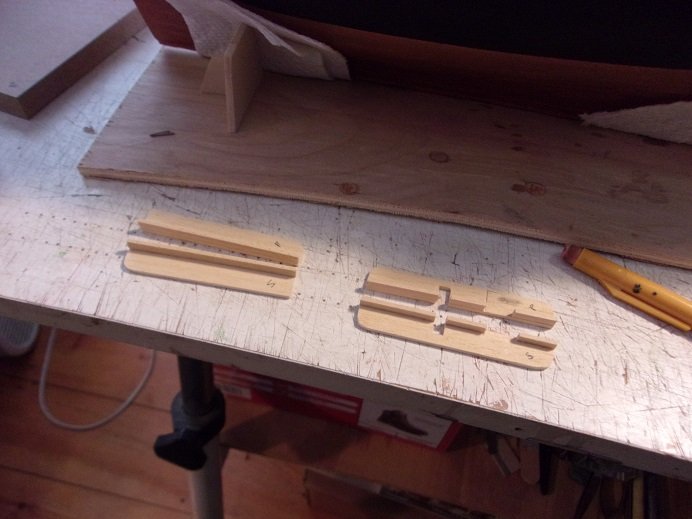
finally.......I got around to the catheads. with the Clotilda, it's not too bad, but with the Agilis, the cannons and the pin rails need to be in place before the cap rails can go on. I decided to go a different route than I normally do.......I'm actually going to fit a reel {rollie thing} in the end, rather than drill simple holes. there aren't too many pictures of the assembly process, but you'll get the idea. it's all in sandwiching pieces of strip together.....the head part is slotted for the reel and a filler piece.
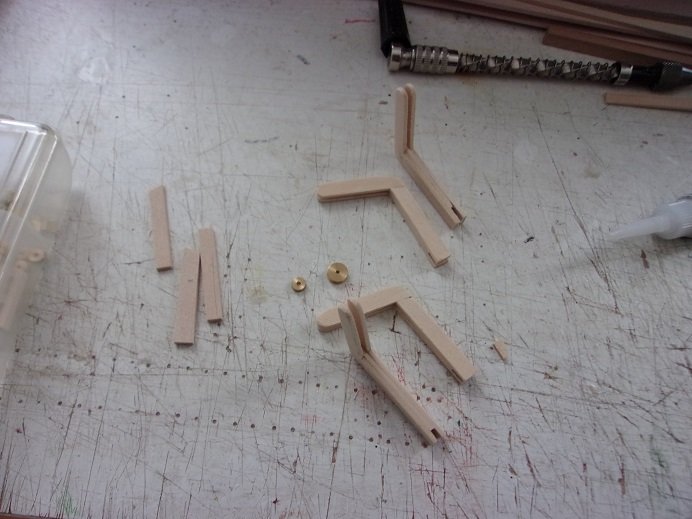
since the Clotilda is similar, I'm making two pairs. the base will be trimmed at an angle to sit flush on the deck. I ordered a windlass for this one too...........I still have more parts to order, but mostly for the PT boat
deciding to go with the smaller one, the holes were drilled and fitted, and the filler pieces were added.
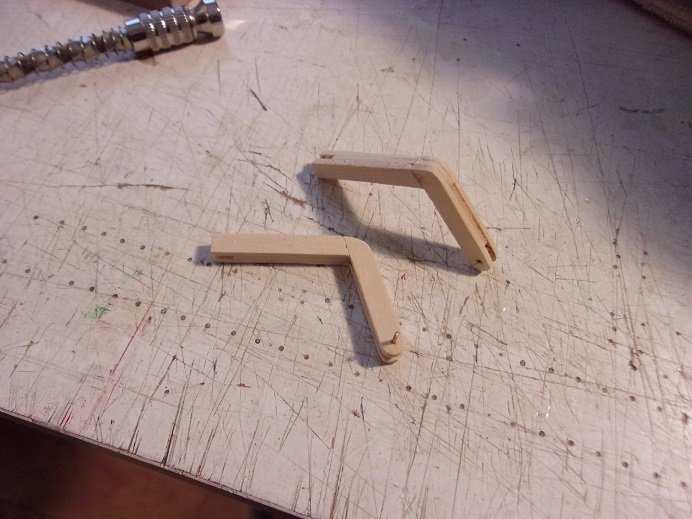
can't see it too good, but the reels are in there. the pair for the Agilis were trimmed at the base and dry fitted in place.
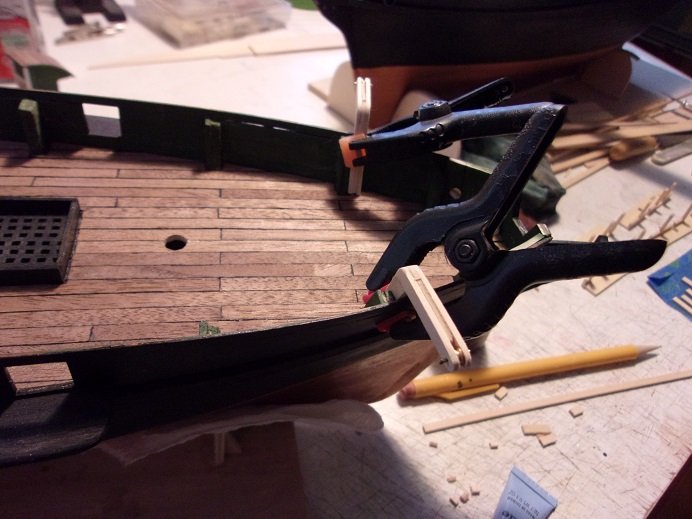
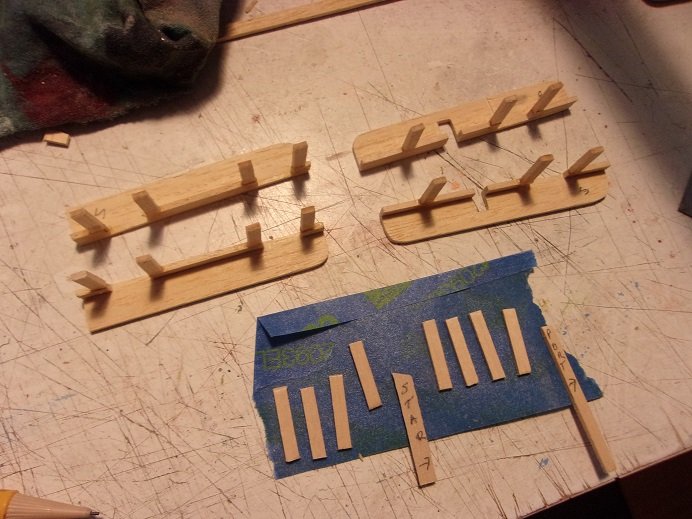
I'll fit the Clotilda a bit later, when I get the pin rails done. they won't be as labor intensive as the Agilis.......these will have the eye bolts for the cannon rigging. two sets of the forward and aft rails were cut, for each of the ships. there will be reinforcement posts on both side of each of the gun ports, and those that involve the rails will be built in to them. I still need to drill all the holes for the belaying pins and such.....but they are fleshed out and ready for paint.
here, starting with the forward rails, they are cut out, to accept the posts and gun ports. the aft pair still need to have the gun ports cut out. strip wood was cut for these posts.......some are really short, but will reach the deck.
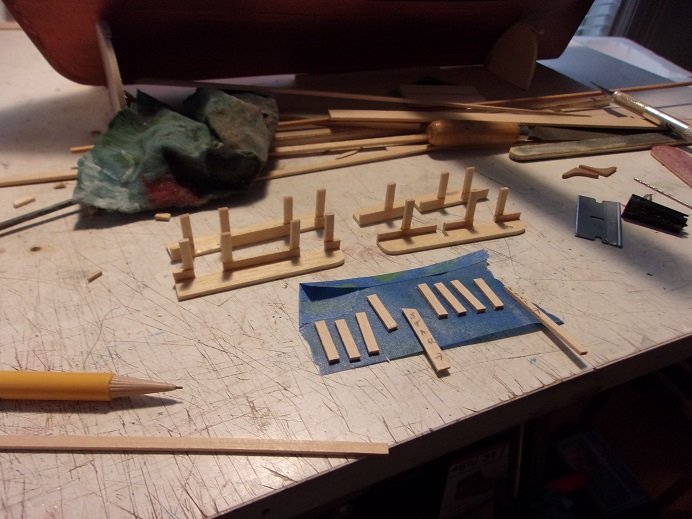
here, all the posts are added, and the one not involved with a rail, are whole length and ready for paint... they are labeled as such. there are other parts that need painting too......when I get them all together, I'll do it all at once.
I will endeavor to come up with more soon..........
- J11, Edwardkenway, Blackreed and 2 others
-
5


USS Gwin (DD-433) by Egilman - DML/Dragon - 1/350th scale - PLASTIC
in - Kit build logs for subjects built from 1901 - Present Day
Posted
here to echo what all has said.......I've had burn out issues too, as well as projects that get my goat") sorry to hear your admiral has issues as well......I wish you well in that regard. take care of things man........look'in forward to seeing you continue
sorry to hear your admiral has issues as well......I wish you well in that regard. take care of things man........look'in forward to seeing you continue ")