


popeye the sailor
-
Posts
16,007 -
Joined
-
Last visited
Content Type
Profiles
Forums
Gallery
Events
Everything posted by popeye the sailor
-
 I tried to visit Monday evening..........after a day at work......I failed. too dog tired to thank you fine folks for your kind comments and likes. I didn't do much on Tuesday........restoked my fire..you could say I'm on vacation now.......I do have a few things to do, but I don't think it's going to impede my table time too much. I took some measurements of how warped the aft section of the hull is. all I need to do now is mark it off and then I can install a couple extra braces in there to pull it into shape. yes, the hand rails are to be painted a teak color {or as close as I can get}. I used the paint I mixed for the bottom color for the stairway railings......I need to do something with it though, it almost has the consistency of a wash. I'll beef up the pigments and then I can do the handrails. of course, I'll need to unrig the #4 funnel. got to get my hairs cut today...........I'll work towards coming up with an update thanks to all of you
 -
thanks for the good word and the likes only one more day.......then I'm on vacation again then I can get back to her the TRMA, as well as photos I've seen George suggest this. besides, I don't believe that the single size thread that the kit supplied, is the only size cabling for the entire build. like the masts........the thicker thread is for the main stays, the thinner thread is for the lower lesser support cables. I think the mix of thread sizes will enhance the looks. tell Urmila thank you for me, Ed.........another one of those extra special hugs is in order it would look better Nils if they were all rigged......soon my friend. it would even have been better, if I had seen the lower cables, and added them in. they would have given more contrast........use the thinner thread for them. those braces in the hull are supplied in the kit S.coleman....I added in the cables for the cranes. nearly broke them drilling the holes. it was worth it though there is some warpage at the stern........I have the bow section cemented in place already. I'll have to make something to pull the hull together, when I do the stern section. don't think you have much to worry about Patrick.........your past builds show that you have a great command of the paint brush modeling in such a small scale is no easy feat . thanks again for your kind comments........I hope to have an update soon
-
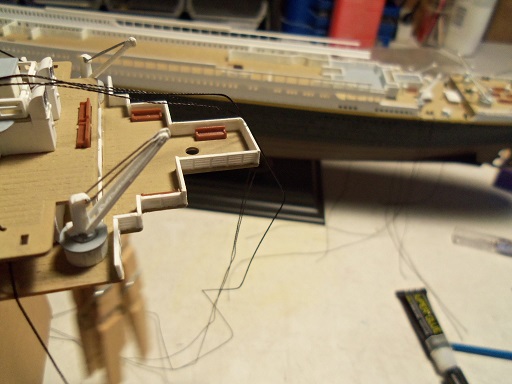
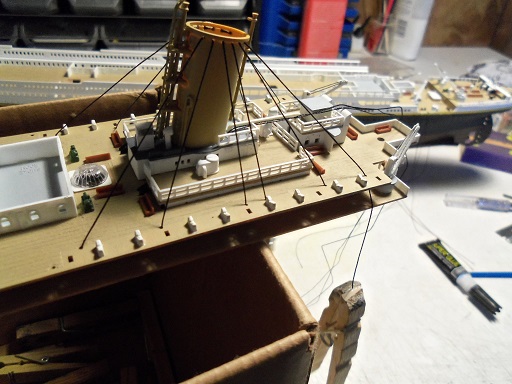
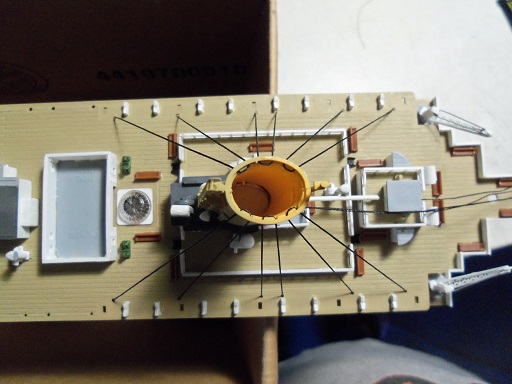
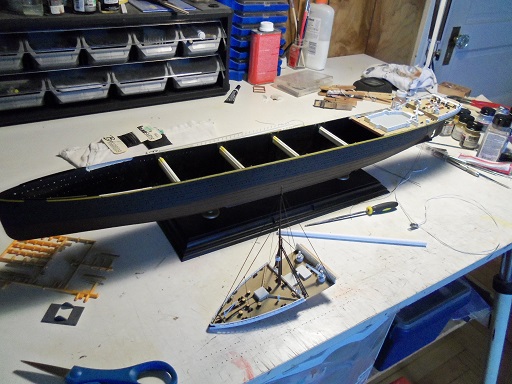
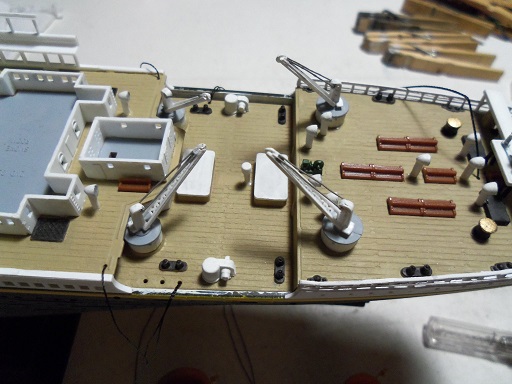
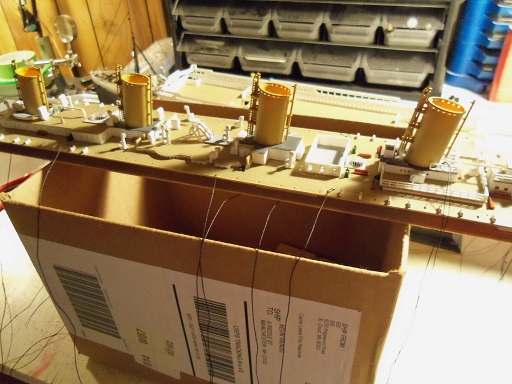
I did something I couldn't resist........first though, I finished touching up the A deck railings and added the last pair of cranes. #4 funnel is ready......so I went and rigged the cables. it was a good call to use a thicker thread than what was supplied in the kit.....they are much more visible. the aft view of the deck assemblies then I started to think that I should get the hull buttoned up and ready for the next phase.
- 573 replies
-
- 19
-

-
thanks everyone for your kind comments and likes. yea, I haven't written any poetic stuff for a while......I used to quite a bit. I never know when it kicks in.....a lot of what I see usually does it Nils........I think you'll like this next little update I'll have to see if you have a build log on that Dreadnought Kieth........I've done a few battle ships and such in my younger days. Again......more touching up on the glue marks. I need to get more railing work done. two more days.....I'll be back on vacation
-
saw the bottle off to the side........is that you mini bar? I thought I saw your build up in light as I came in.........CONGRATZ< my friend! you did a super job on this build! you went through enough crap with it......even threatened to scrap it {nasty words}! but you pulled the rabbit out of the hat, as they say:) ..........great job....very pleased to have watched
- 119 replies
-
- 1
-
-
- la reale de france
- heller
- (and 1 more)
-
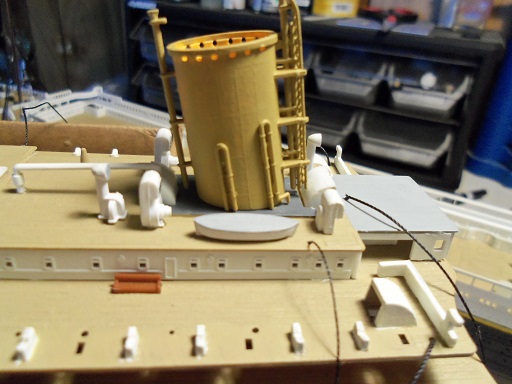
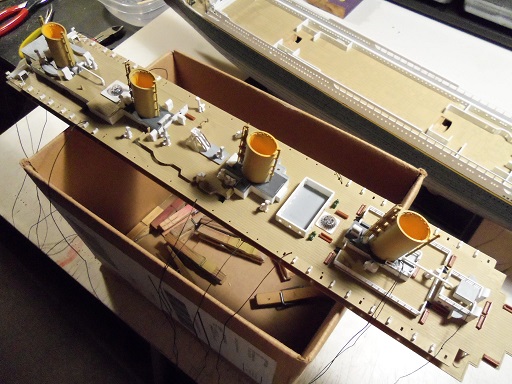
got a bit more done yesterday....the railings took most of it though. I also began to add the pipe work to the funnels, which will also put some emphasis on funnel #3. I didn't get that far though. the port side of the four funnels....... the starboard side of funnel #1 got a couple of pipes added. this is the better one........picture #3 was blurry. I still need to touch up the railings, but the A deck railing is complete I'll see what I can get done today thanks all for looking in.

- 573 replies
-
- 22
-
-
I think summer took a vacation.........kinda cool the last couple of mornings. spent a lot of time on that aft railing........one part broke and I had to fix it. these are very delicate parts the thought is still there Patrick, although there are some things I'm not pleased about. not all of the areas will be lit.....this is the biggie. the hull in my opinion, is a bit too thick........with the lighting test I did, not all of the holes were visible like I wanted them to be. as for not blocking the light filtration through the walls.......well, I think the outer bulwark shell would hide some of that. the main thing is that the three sections are not cemented to the hull yet, so there is still the chance......the door is not totally closed to the idea to Frank: ah.....the life of a modeler been this way, since we were toddlers we started with blocks the parents in shock it got worse when we started to walk! I did more Frank, but it started getting stupid, so I gave up. I know your sentiment....I thank you for that I was glad to see YOUR last update, good to see your still visiting the table........there is never any rush! we are modelers.......that's what we do I'm not sure if it's a defective gene in our DNA, that makes us do what we do........some folks look at us and shake their heads. all I can say, is that if a lot more folks practiced the medium, there would be a lot less trouble in the world. here are some things that would be different, if modeling took over the world.......... 1) TV would die out.......that is, unless there were a lot of modeling shows on. 2) commercials would cease to exist.....if the tele died, no one would see them anyway. but, it would be a boon for model Expo and places like that, if programming took a flip 3) travel demographics would see an upswing.........more folks would be taking trips to view the subjects they're modeling 4) here's a biggie! there would be MORE hobby shops! 5) and perhaps the biggest one would be.......the admirals would always know where we are
- 573 replies
-
- 12
-
-
nice touch of detail KP.......adds to the overall looks I forgot to mention a couple of posts ago.......nice looking Monkee-mobile in the background. that kit is somewhat rare here in the states. I remember it well.......loved the show
- 119 replies
-
- 1
-
-
- la reale de france
- heller
- (and 1 more)
-
thanks for the kind comments and the likes today, I think I dropped more parts, than I have during the whole build combined. I didn't lose any though! the railings are a pain.......some of the segments are really tiny. I want to rig the funnels, but I can't do it unless the railings are all done.......so I gotta wait till then. I have more done.....but I'll wait till later to see if I can go further. I'm glad everyone is enjoying the build....... Thanks for the good word Daniel
-
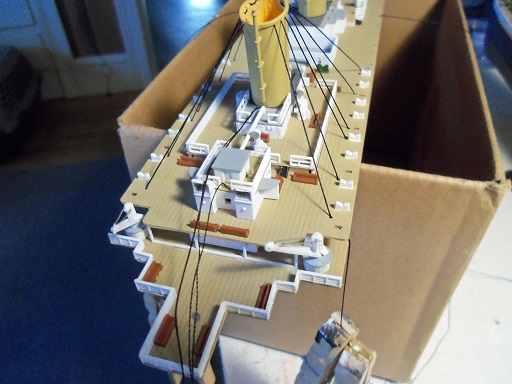
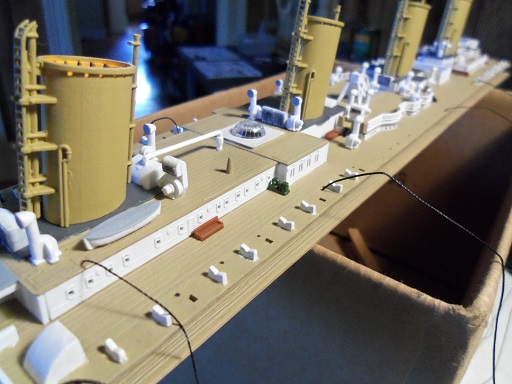
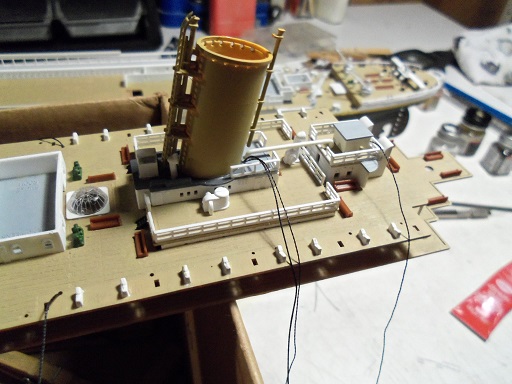
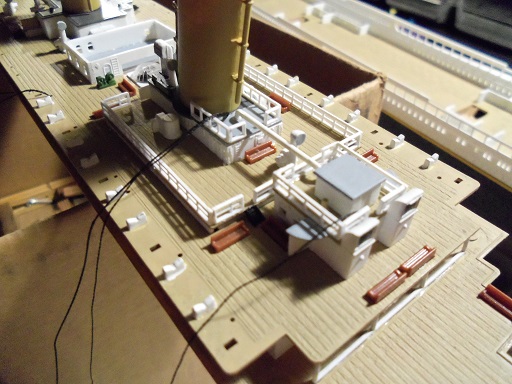
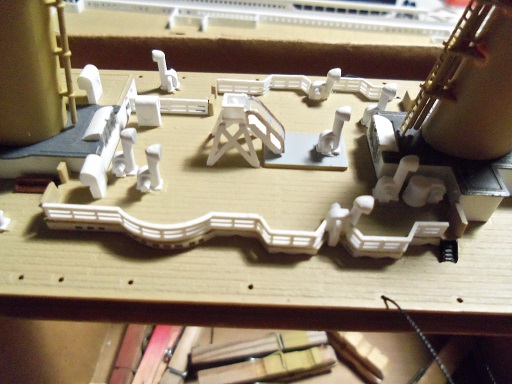
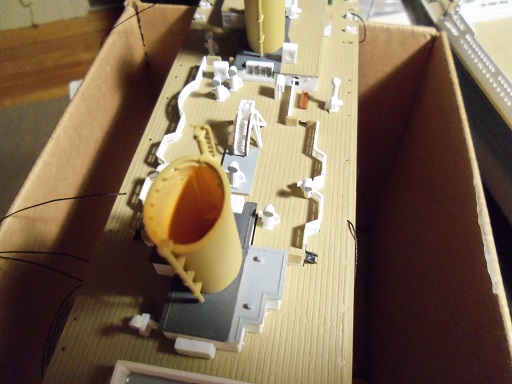
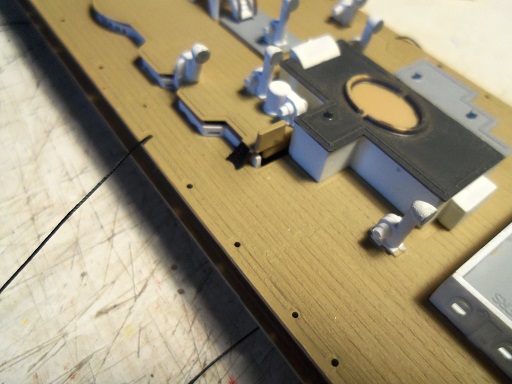
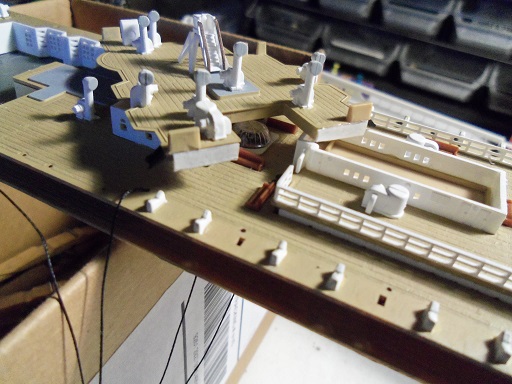
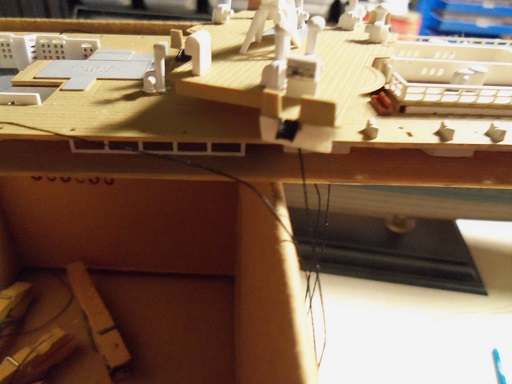
it's time to work on getting all the structures on the deck now. parts that have already been assembled...time to get 'em off the table and where they're supposed to be. I had placed one pair of cranes already........I placed a couple more pairs on the stern section. the last pair will go on the A deck, once that railing is finished. the first raised deck is still being held down with clamps. the structure that sandwiches it in was cemented in place at this time. the second raised deck and the structure behind it are somewhat joined together. these two areas were done together and fitted with the railings, vents, and the piping that connects them. the funnel was cemented in place soon afterwards. all four funnels are in place........the dilemma is over there is only one structure left to populate, and that one is connected to the third funnel, so they will need to be done together.... the first raised deck was next to get fitted with it's railing. any parts associated with it was also cemented in place. the railings for the aft end of A deck was cemented in place. these railings are assembled from small segments.....a bit too small to simply assemble and create the complete railing. I'll cement them on, one piece at a time. there! a lot got done today........hopefully , more tomorrow


- 573 replies
-
- 23
-
-
thanks for the good word and the likes....I really appreciate you folks cheering me on. part of my continuance tonight has been touching up all the glue marks and stuff. I am reminded just how annoying they are. thanks Ed......give my favorite reader a big hug for me, will ya she'll be happy to find that there is a second part very true Greg......I have a website bookmarked that sells the older kits.......before they sported rivets or body lines. it's like a trip down memory lane thanks Mark........the subject for this update is just that......a bunch of small parts. I'm not as steady as I used to be
-
sounds like your going to have some fun you may want to make a few extra.
-
thanks Lawrence and George......I'll get this build done one way or another thanks also to those who hit the like button
-
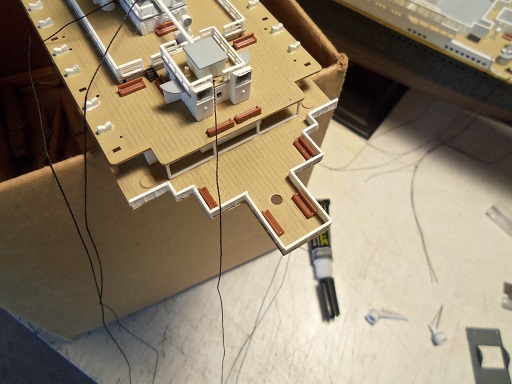
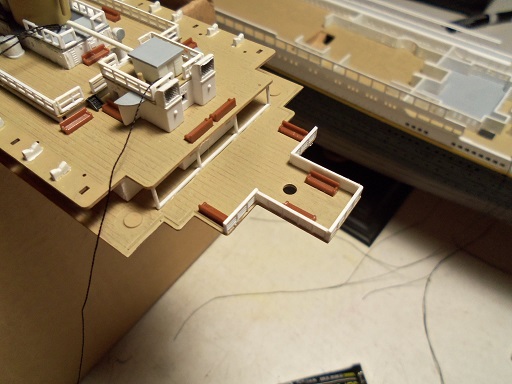
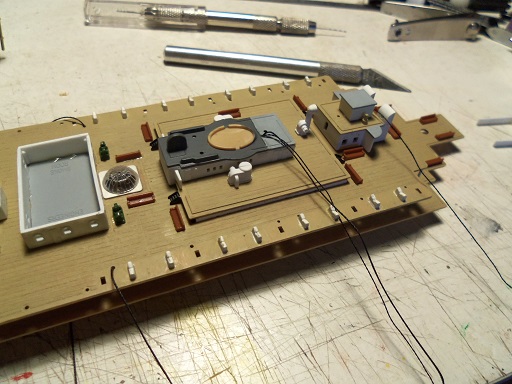
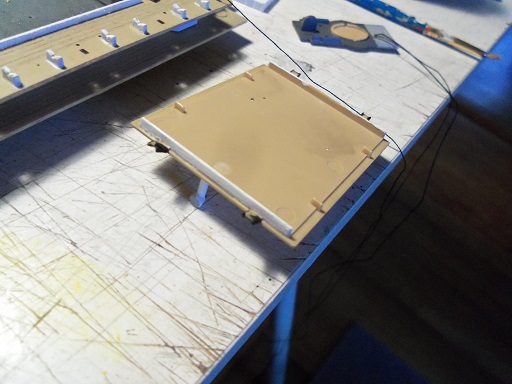
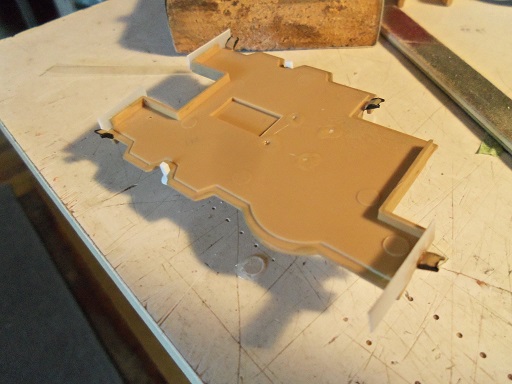
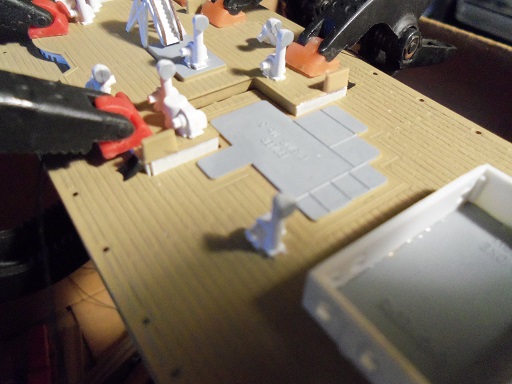
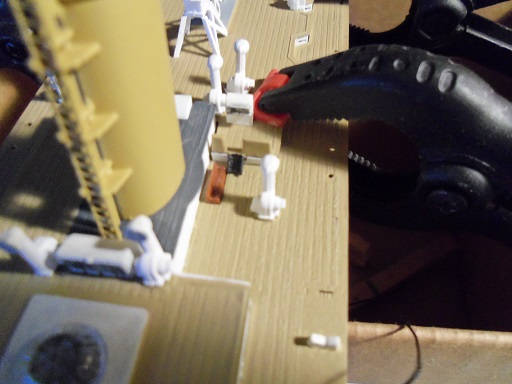
I had a 'first' today........I've never seen this happen before. this update is a bit fractured, because some of the pictures didn't come out. I'll tell ya all about it as I go along........ I am going to repair the short comings in the raised decks.........in looking at the aft deck, the gaps are very hard to see, so I just glued it down. the aft section roofs have been cable rigged......I dry fitted them to show you. first was to paint the fore and aft walls flat white here are a couple pictures to show how much of a gap there is.......of course, the first two are a poor example, since the deck is not seated all the way. one of the walls is somewhat pulled away from the boat deck...I will need to spread it out so it touches the deck and glue it. here's what happened......I decided to use clear cello to shim the fore and aft walls out. anyone who has worked with plastic cement, knows what it does to clear parts.......it can turn it white and marr the surface. I had pictures of this, but those were the ones that were blurry. after the glue had dried, I began to trim the newly grafted parts, so these walls would fit in the cavity. all of a sudden......one of them popped off! when I examined the part I had made {after finding it}, I found that the cement did not turn it white. nor did it adhere to the part, either! thinking that it was the type of plastic it's made of....the lack of cement-ability, I quickly though of another type of thin plastic to use instead. I still had some of the plastic {vacuum form parts} from the Guillow's Spitfire build, so I cut some thin strips and used it. while I was waiting for this to dry, I began with the railings for the second raised deck. when dry, the repairs were trimmed and painted flat white then the raised deck was cemented in place...it needed to be clamped down I had cemented the structure furthest aft, in place at this time...........more of the railing was also added. I'll try and get some more done this evening........stay tuned


- 573 replies
-
- 19
-
-
thanks for the kind words and the likes everyone.........it's been a few years now since I've touched a plastic kit. glad to see that at least some of my techniques are coming back. jee Gray........does this mean I still can't be envious of you? I'll go out on a limb here ......can you send me a copy of the parts diagrams......the ones that are in the back pages of the instructions. I am sooooo curious. love to see the instructions for the warrior as well......but time will tell you know Patrick.........I used to think that building wood kits would be harder that plastic. I was soooo wrong! there is a bit of finesse that is required for the plastic medium, that can be relaxed a bit with the wood medium. these are both great mediums in their-selves.......to master them both can really round out a well seasoned modeler. you folks flatter me.........I have my flaws. I enjoy myself too much to worry about the small stuff........I'll figure it out as I go along thank you all........got a birthday party to go to that I forgot about........I'd better get working on the next update!
-
getting caught up Jesse...........very nice progress! the hull planking looks very nice!
- 1,306 replies
-
- 2
-
-
- syren
- model shipways
- (and 1 more)
-
if you still have mating lines, seal the balsa and repeat with the filler. if you don't, any sanding you do now, will remove too much balsa.......sealing it will slow the process down. can you tell I don't like working with balsa......... the hull is looking really good....you got the contours down quite well. I'll be looking forward in seeing the hull painted as well.........should be very smooth
- 52 replies
-
- 1
-
-
- muscongus bay lobster smack
- Midwest Products
- (and 2 more)
-
catching up on your build KP..........the oars look great. sounds like a bad dilemma........but an easy fix. just sad that you need to do it you'll get it done, I'm sure........she's looking fabulous!
-
so.......the social butterfly has landed......and in a big way too. nothing like a bunch of repetitious parts to keep one in one place for a while looking very nice Sjors..........glad to have you back at the table
- 1,616 replies
-
- 2
-
-
- caldercraft
- agamemnon
- (and 1 more)
-
this has to be the diorama of dioramas.........it's absolutely gorgeous! the thought you've put into this Daniel is simply sheer genius! absolutely love it!