


popeye the sailor
-
Posts
16,007 -
Joined
-
Last visited
Content Type
Profiles
Forums
Gallery
Events
Everything posted by popeye the sailor
-
 I had to look back to see when you did the bottom paint.......really makes the hull look sweet! then there's the dilemma that a lot of folks do........they add a cool bit of detail below deck....and then plank over it. the ideology is "they know it's there".........never bought into that myself. not that I think it's a bad thing, by any stretch, but I tend to look at detail as "all things visible". how ever you do it Bob........it will look super! she's a sweet looking build
 -
thank you very much Piet! it was a bit of mayhem........but actually I'm glad it worked out this way {got all these parts off the table}. I spent part of the day yesterday trying to find diagrams of more conclusive pictures of the rigging. I found nothing .......I did find a picture of the ABS hull.......and there was a diagram tacked on the wall behind it, but I still couldn't make out anything. I even saw a picture of my boat..........courtesy of this great site we play in...made me smile like a Cheshire cat! I have a bunch of plastic double blocks and stuff.........I may get creative with 'em.........I have a cool set up in mind for the booms, if I do. not sure how close to the end I am.........I'll have to look.......to get an idea. not to worry though........ain't my last build.......not by a long shot! thanks for the good word and checking in!
- 956 replies
-
- 3
-

-
- andrea gail
- trawler
- (and 1 more)
-
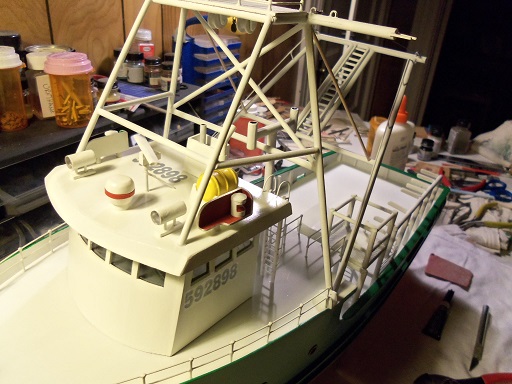
Patrick.......couldn't have said it any better the sailing vessel will always hold the title for best show piece, but I think any vessel can be done, if the interest is there. very well said my friend! thanks John.......I think that's what I said after I had done it. spent the mid day doing touch ups, and putting the mending plates on. they make the rig's fixing to the deck look much better. it really changes the way she looks thanks for the good word! thanks Nenad........I see your making milestones of your own I think your Cutty looks great......we can both smile tonight ! thanks Marty....glad your enjoying the log. I enjoy the personal side.......I go a bit further in my Word Press logs. if I did it here, I'd sound like a windbag just goes to show that there's more to a build, than just gluing wood together..........although I haven't bit my tongue yet, in trying to fidget a piece into place........thank goodness the #&*%@ filter is in place here thanks to all who hit the like button....really appreciate it!
- 956 replies
-
- 2
-
-
- andrea gail
- trawler
- (and 1 more)
-
Cutty Sark by NenadM
popeye the sailor replied to NenadM's topic in - Build logs for subjects built 1851 - 1900
very nice work Nenad.........the bow shot is really neat !- 4,152 replies
-
- 2
-
-
- cutty sark
- tehnodidakta
- (and 1 more)
-
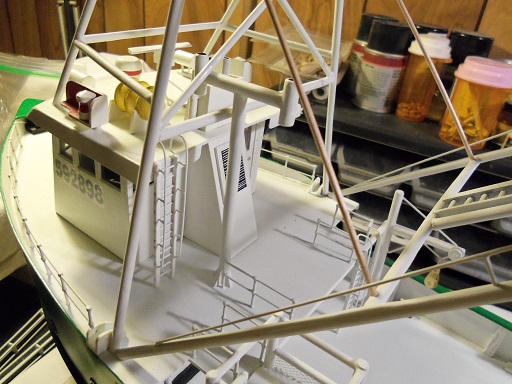
thanks George.......gee......and I pictured myself as being an 'imaginary romantic' {I love imagining things} thanks for the good word! I said the same thing when I had it lying on the table Augie.......the bars were the only thing holding it together! that's what drew me to this vessel.....the frame work. I did the mending plates at the base........I probably should have added others here and there. this has to be the most dowel that I've ever used! even some of my model stock car frames don't equal the amount I've used! thanks for the good word!
- 956 replies
-
- 4
-
-
- andrea gail
- trawler
- (and 1 more)
-
they look super Michael. when I saw them with the slots in the faces, I immediately thought that a screwdriver could be used instead of an suction cup very nice!
-
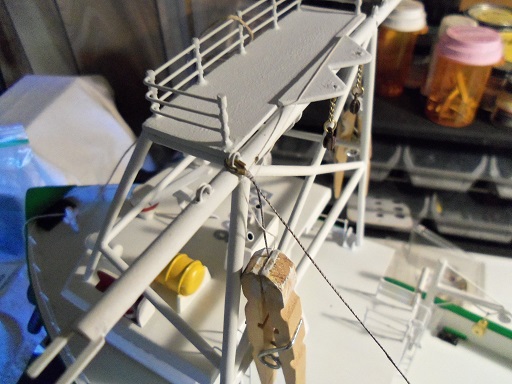
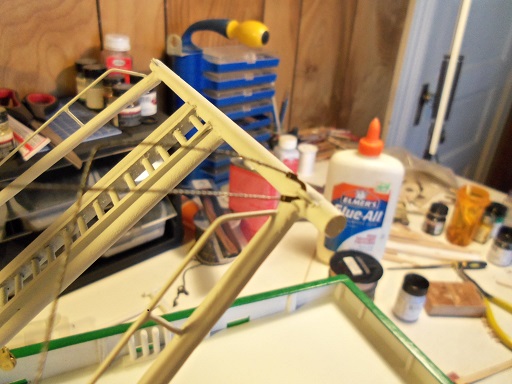
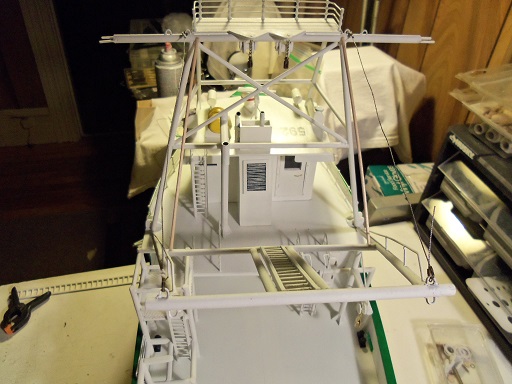
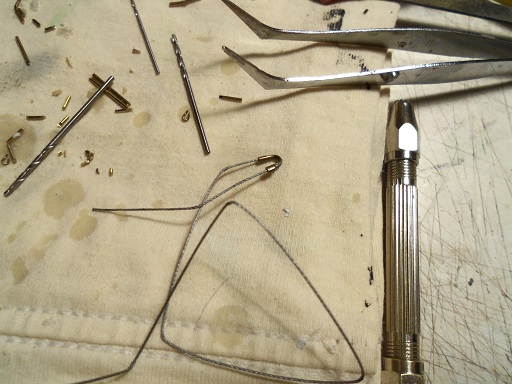
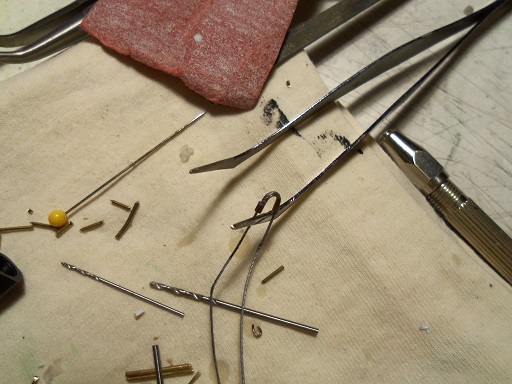
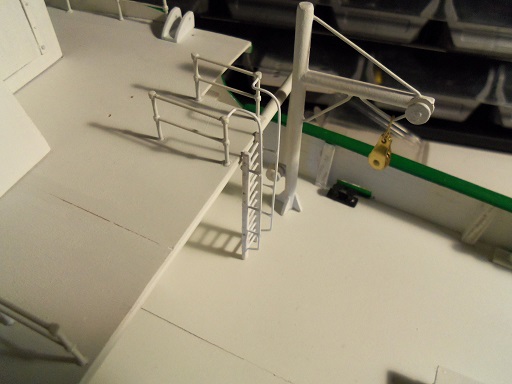
a strange turn of events.........the gangway ladder........yes! I did start on it....as I mentioned, I sized it, installed the locator tabs.......sanded it a bit more to define the rungs a bit more, drilled the holes for placement..... but the thought of assembling the aft section of the trawl rig, to the first section was stuck in my mind. taking a smaller dowel, and a number of dry fits { to be sure of the angle....proper or otherwise}, I was able to come up with the pair of support bars, I was going to need. I have a plan to assemble it, so it is still removable....it's just that it's going to be very 'tail heavy'. first thing I did was cement the main deck ladder in place........I didn't bother with the roof ladder just yet. it starts out with attaching the cables to the top of the gangway. once the aft section is cemented in place with the two support bars.....these will be attached. then it can be taken off the model, and patched together at the base, with mending plats on both sides {inner and outer}. I was going to try and do the mending plates on the model, but I was afraid that cement might get under everything and adhere it to the deck. the port side cable is attached. that is also the reason why there is a clamp on the deck.....it popped off and went flying........good thing it didn't break anything! when the starboard cable was attached......my idea went south! with it laying on the table, it was very unstable.......I was afraid it was going to break! so I ended up doing an about face on that plan.........before I cemented it in place, I did the roof ladder first. I'll touch up both ladders later. I'll do the mending plates later as well, now that the base is firmly seated. the 'T' vent need to have some flat black swabbed in the vent holes........after that it was cemented in place. so now..........it's touch up and lick my wounds....after this little escapade...... if I were to do a TV show, I think I'd call it "Plan gone Wild" ! the only real bad point about this, is that now if I need to drill any holes and stuff.....I'll have to do it on the boat. ahhhh, what the heck........at least I have it on there now


- 956 replies
-
- 18
-
-
- andrea gail
- trawler
- (and 1 more)
-
thanks Patrick, Augie, John, Mark, Wayne, and Nils! since these look as good as they do, my doing the gangway ladder too should really add to her looks piet.......note to self........do them entirely of brass next time in regards to how small they are, it might be quite a task........but man, would that be a test for me I think that they could be better done with plastic though.........Plastruct and evergreen has a lot of stuff for HO application.......and Andy, a while back posted a site where trim work can be purchased {I think I still have it in my book marks}. thanks Frank.......I like to think of myself as an underground poet.......every time I come to the surface, someone throws something at me it's all in fun, my friend thanks for the good word! thanks to all who hit the like button..........and to poor George.......who's probably thinking I forgot him on his last post. no I didn't, my friend!
- 956 replies
-
- 4
-
-
- andrea gail
- trawler
- (and 1 more)
-
I just use a pine board for cutting {when I think of it}........but I have a couple of the small mats around here somewhere. my main table has a Formica top, which is great when working with white glue........the part your working on pops off easily {just don't use CA}
-
you are correct in what your seeing........looks dumb....huh lots of folks thicken the inner hull walls and drill holes to install REAL eye bolts. in reading other posts, some use metal eye bolts........very few will actually use the plastic supplied ones. in the past, I have use the plastic one, and never had a problem....just keep in mind that you can't put a lot of stress on them. I have the United States.....and it's pretty much the same thing. the proper name slips my mind.......breech rope........recoil rope.......best I can come up with, without that second cup of coffee these kits are nice.........hope you enjoy!
-
build her the way you see her Kees.......never mind the nay-sayers
- 205 replies
-
- 4
-
-
- kw49 antje
- trawler
- (and 1 more)
-
hello Wayne! thanks for the good word.........I was hoping you were following along I hope the new job isn't putting a cramp on your progress thanks for the likes patrick and George
- 956 replies
-
- 2
-
-
- andrea gail
- trawler
- (and 1 more)
-
be sure to remind her that there are quite a few build of the Bounty that she can refer to for info and color selection. man.......I envy you.........but I'm lucky that the admiral and I work well in other ways I'll look forward to the start of Olive's build! nice work on the rigging.........very nice
-
had a chance to catch up John.........you've come a long way since I last saw her! she's very beautiful ....and very well done! love those pictures you took outside.......really shows off the oven quite well. splendid work, my friend.....never think that no one is interested........they'd be a fool not to!
- 2,250 replies
-
- 3
-
-
- model shipways
- Charles W Morgan
- (and 1 more)
-
is there a paint chart included in the plans? perhaps comparing the color to the hull stain may help.
-
now .........THAT picture Daniel....really defines the scale! sorry I didn't compete.......if it was about John Wayne though, I'd 'ave had plenty! super workmanship my friend!
-
I've been waiting for some progress.........sad to see that it's only a prod I miss your fine work, my friend
- 382 replies
-
- 1
-
-
- stadacona
- sylvan scale models
- (and 1 more)
-
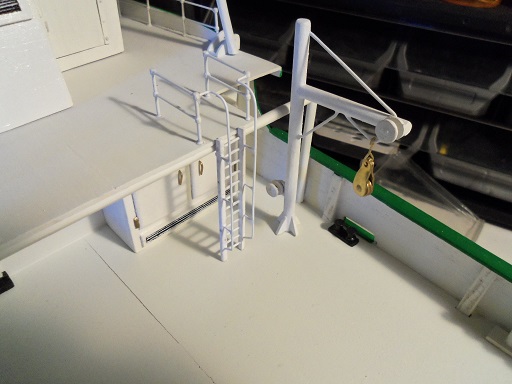
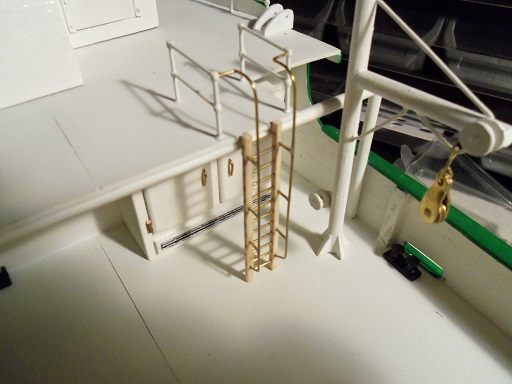
what to do with the rail mating........I just made it simple. the curve was made, and then bent it to flare out, meeting the top rails. if I had two more stanchions, I could have done the lower rail. I did a trial fit with the painted thread and one of those shackles......I want to try and get away without painting them, as it might have a negative effect on the rigging quality. perhaps after they are rigged.....I'll look at it then. the cable in the shackle....it can barely be seen, but it is noticeable. the main deck ladder was painted........took a couple of coats. I bought another can of primer....and this stuff is coming out like milk......very thin and watery. I have some Billing's flat white........I'm going to see if this will look the same. in place, they look good together. the addition of the grag rails adds quite a bit to their appearance. I was toying with the ladder that leads to the gangway........I'm thinking of doing the same treatment ot it. I already added the location tabs and drilled the holes for it's placement. I'm just about there, to put the trawl rig in place


- 956 replies
-
- 15
-
-
- andrea gail
- trawler
- (and 1 more)
-
I remember when my father seated valves........he used a compound and a suction disc on a stick. he put the compound on the valve seat, and the disc on the head of the valve, and rub the stick in his hands, making the valve spin back and fourth. made them fresh as a daisey I'm sure it can be found at any auto parts store. true what Mark says......once this is done though, they will become mated to their position. what your thinking sounds right, although I couldn't even guess at a spec at this scale. does this mean another cam is on the drawing board? once this engine is running, it will create it's own intake and exhaust pressures.........it'll start eating and breathing on it's own It's ALIVE!!!! heir Frankenstein....no......it's Fraunkensteen
-
I agree with Mark.......although your not holding the ladder. it's already in place Carl has it right as well......functionality is a huge factor in these subjects........practicality is the mother of design my Nordkap is 32 inches long @ 1:50 scale.....how long is the Antje? she looks great......the extension and masting really adds to the complexity and design! very very nice!
- 205 replies
-
- 3
-
-
- kw49 antje
- trawler
- (and 1 more)
-
nice work on the bulwarks and scuppers...cap rail looks very good too!
- 205 replies
-
- 1
-
-
- kw49 antje
- trawler
- (and 1 more)
-
nice work on the springs Michael! are the valves seated flush in the head? since the valves are on the same 'plane' as the pistons, the only thing to be sure of, is that there is enough clearance for their actuation. some seriously good metal work going on!
-
thanks Michael I was catching up on my Word Press logs this morning..........I was writing about the ladders, when another thought occurred to me. if I were to follow through........you and every one else would think me truely mad that settles it......I'll do it! thanks for the good word!
- 956 replies
-
- 4
-
-
- andrea gail
- trawler
- (and 1 more)