HOLIDAY DONATION DRIVE - SUPPORT MSW - DO YOUR PART TO KEEP THIS GREAT FORUM GOING! (83 donations so far out of 49,000 members - C'mon guys!)
×


popeye the sailor
-
Posts
16,007 -
Joined
-
Last visited
Content Type
Profiles
Forums
Gallery
Events
Everything posted by popeye the sailor
-
 whoa....baby! you are going to have fun with this! I think you've picked the ultimate subject Kees! just the added detail alone, makes me dizzy........and those plans are to die for. I'm in........I'm in!!!!
- 434 replies
-
- 4
-

-
- pelikaan
- beamtrawler
- (and 2 more)
-
WOW! sorry I lost track of your build Mobbsie....I had forgotten that it was in another part of the forum. it looks amazing my friend! very nicely done indeed!
- 255 replies
-
- 1
-
-
- granado
- bomb ketch
- (and 2 more)
-
interesting vessel Mobbsie. is that a solid hull, or is it ribbed {POB}? found this on E-Bay........could this be it? your making a good start on her......deck planking looks really nice
- 62 replies
-
- 2
-
-
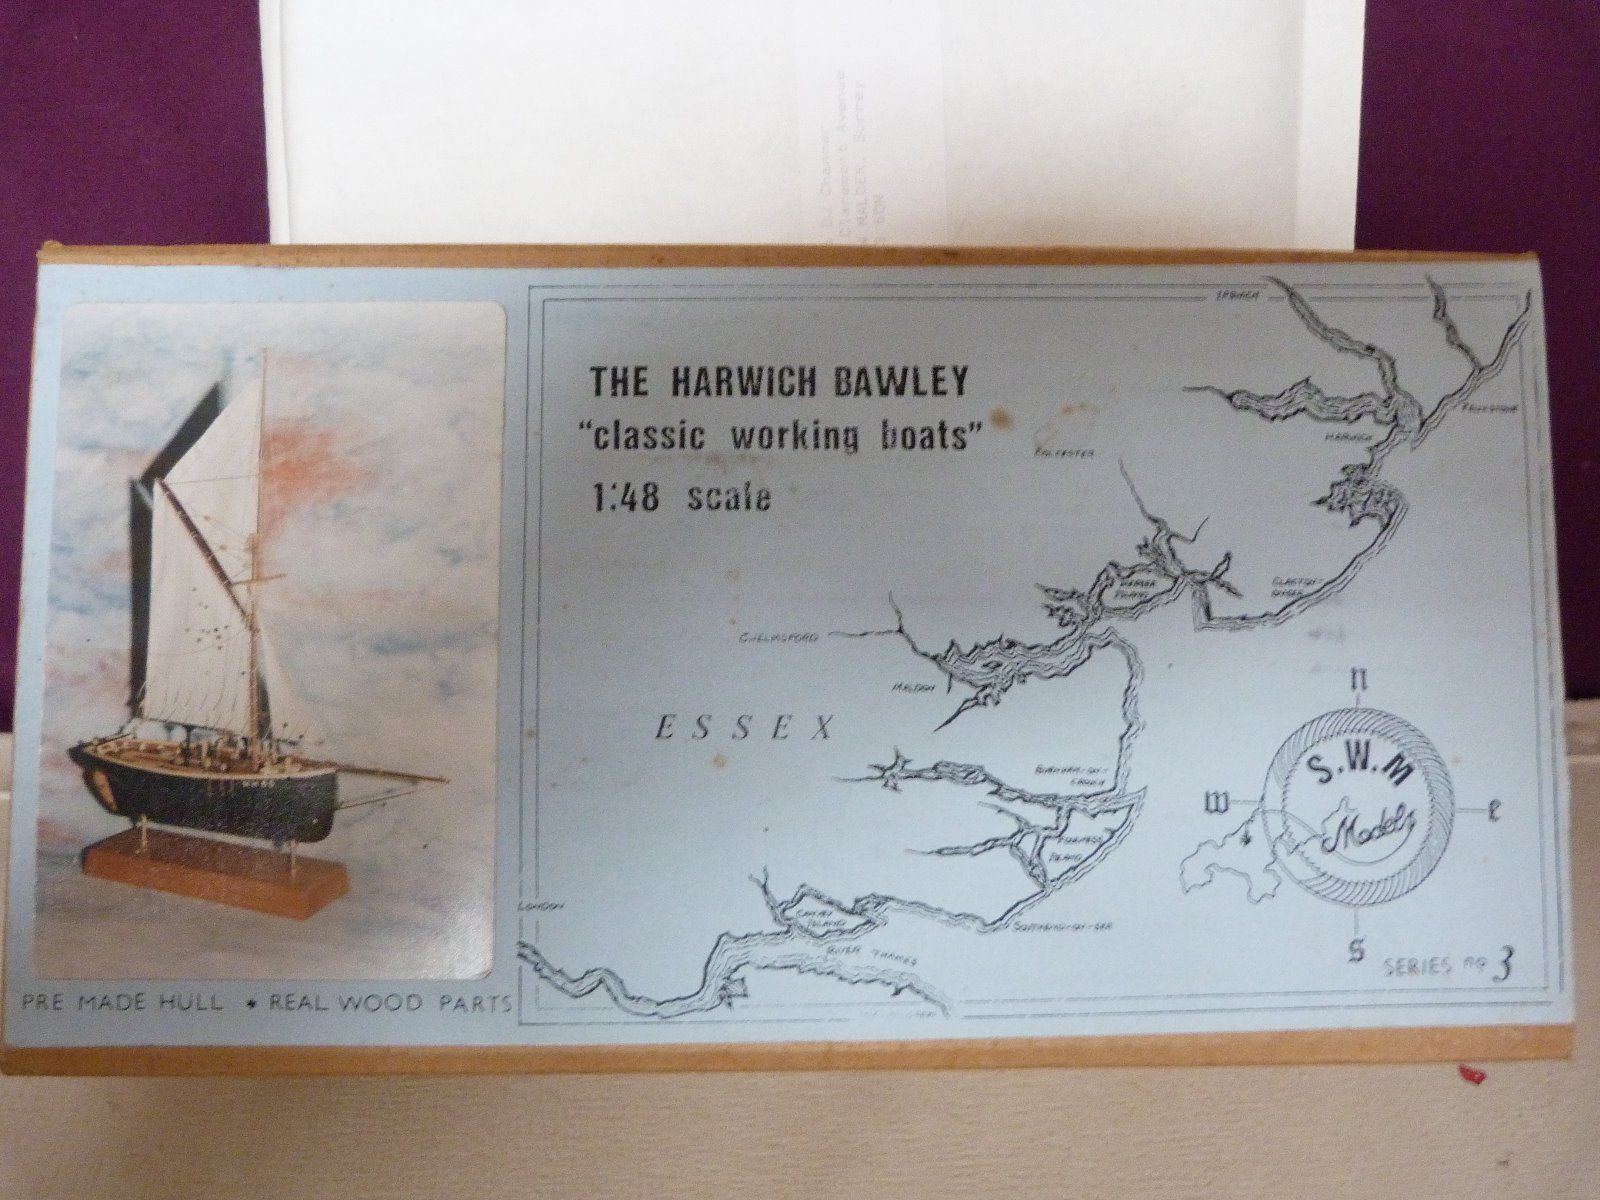
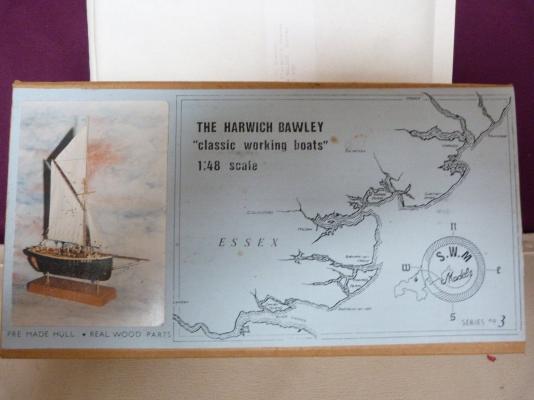
- harwich bawley
- fishing boat
- (and 2 more)
-
thank you Piet........I'm so glad you like it it's your contribution to the build. I enjoy reading suggestions that folks have.....if I can do them and it fits the concept......I do look into it. I think it's a wonderful thing, when your building a model such as this, and you can involve folks who are looking in. if you have pictures......by all means, post them please! I'd be honored.......man! I wish I could have been there! too bad that my commitments stood in the way, it would have been great to meet you and Dave....and of course, everyone else who attended from the site. seeing the newscast and hearing your voices, brought me closer to knowing you two so much more. I'm even happier now, that I was able to comply with your suggestion.......much better than that air filter canister look'in thing I started with gee Greg....I can't tell you.......it would be a spoiler it's tucked somewhere in the middle.......I did more on the caroler's boat after I made the decision to nix the third boat. it was slated to be the skater's boat.....I was going to have an ice rink in the middle of the deck. an observation was made, that one would have to be like a 'Peggy Flemming' to be able to skate on a pitching boat........that was all I needed to hear. I wasn't put out by the comment......it was logic. the other two boats had a good solid subject.........but the third boat's stern was hanging in the breeze, and I couldn't come up with a subject for her. so, the build turned into a dual build, and the third boat became what you see today. I think the modifications I had to make to the hull are interesting........cutting away a small part, and then adding the raised bow and fore deck....the rest is here in this log. still a bit more to go I appreciate you taking the time
- 956 replies
-
- 8
-
-
- andrea gail
- trawler
- (and 1 more)
-
she's looking great Mark......I think it's a great idea to leave open slots for the chain plates. it will give them a very good anchor point I fail to see a problem either, but I'm sure you'll be able to change it to your liking........super scratch build
-
that was my earlier thought.......drop 'em down to the deck. I agree........Adrieke will figure it out, with the thoughts we've batted around
-
now....your getting somewhere! nice!
-
I did do some checking into it. I did find models of this vessel, with the doors raised 1-2 mm above the deck........but with none of this molding. you still can get away with it though......cut out the molding leaving this difference, and you should be good
-
thank you very much Nenad...........to you as well John I hope I'm getting the mechanics right....with the pictures I've got, it's hard to see everything more to come
- 956 replies
-
- 1
-
-
- andrea gail
- trawler
- (and 1 more)
-
going very well good sir.........I'm on vacation! hee.....hee! rub her shoulders.........no cracking the whip........you don't gets no supper that way keep me informed! I'm in!
-
you may not have to cut the doors.......the green border is an edge molding. it can be trimmed away to install the doors.......the top of the door will be lower to show more head room in the cabin I be surprised if the actual pictures of the ship didn't show them this way. glad yo see your back at the table >big thumbs up!<
-
she look fabulous Augie.........so glad you added in that photo adding in the margins would be a great idea!
- 2,191 replies
-
- 2
-
-
- confederacy
- Model Shipways
- (and 1 more)
-
me thinks it is you that is too kind Jerry. I didn't know you were having health issues.....I wish you the best. I hope it isn't serious and your on the road to recovery. yea.......teaching can be tough.......but I think when your admiral passes in her first 'test' , you'll be amazed with how much she's learned. I try to keep tabs, but don't always see........please let me know when you begin your next build. the early birds get the good seats
-
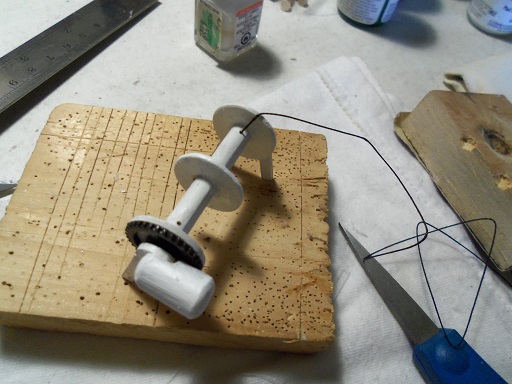
thanks Augie...you don't see the birds? yesterday, one of them tried to poke me a third nostril as for the zero gravity thing....usually ship model instructions have you running the anchor chain from one Hawse hole to the other. it's the excess chain running through the hull that is the problem maker. gravity seems to pull on the chain, sucking the chain back into the model.......my first Cutty build was notorious for this happening. when I did the second build, I thought about how to thwart it from happening again, and I came up with this solution. this can probably be done to other types of ships as well. http://seymore-thecuttysark-abuildlog.blogspot.com/2010/09/cutty-sark-windlass-modification.html thank to you also Bob and Carl for your kind word.......thanks as well to all those who hit the like button
- 956 replies
-
- 3
-
-
- andrea gail
- trawler
- (and 1 more)
-
took a bit of doing, but I got to see the newscast totally enjoyed it.........very good article! very proud of what you two accomplished
-
your gonna need a BIG case...........holy cow! she's a beauty Nils..........no bones about it!
-
thanks George....and crackers for the like mechanics in functionality....a great concept to show in a build. textures of wood and pattern is another. no matter what ship your modeling, just adding in basic detail, can really make a build come alive. there are many here, that have done just that. I could list them.........but I don't think there's enough ink in my key board
- 956 replies
-
- 3
-
-
- andrea gail
- trawler
- (and 1 more)
-
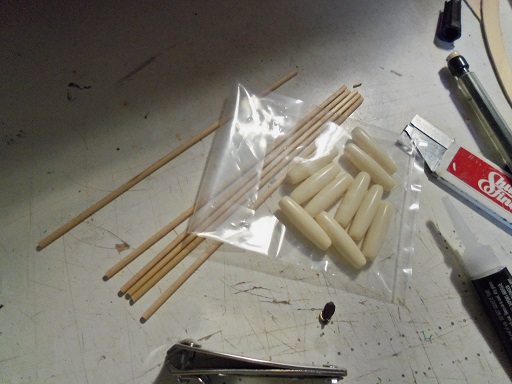
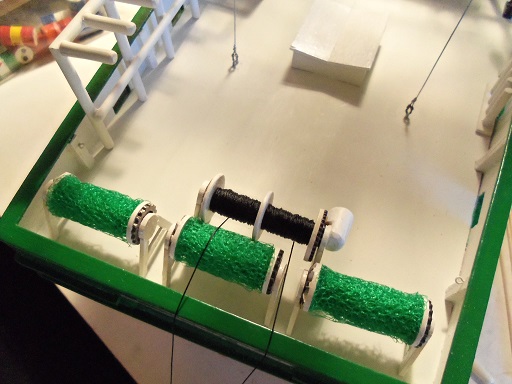
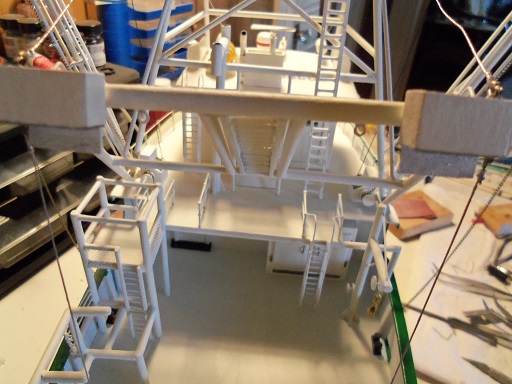
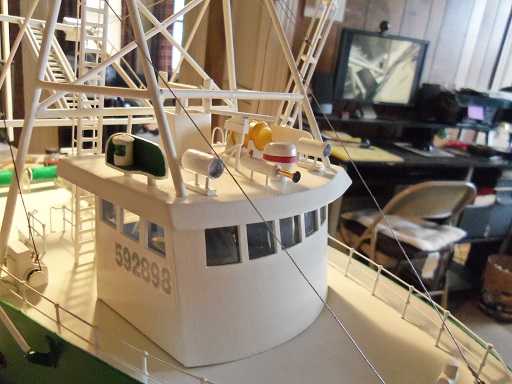
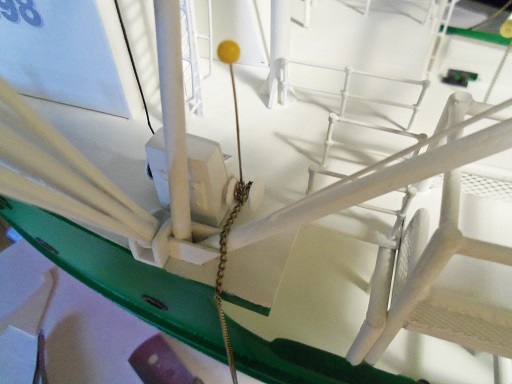
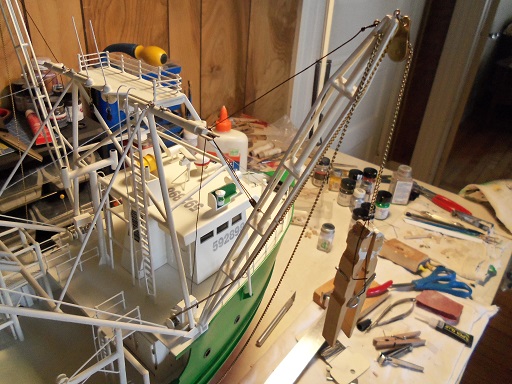
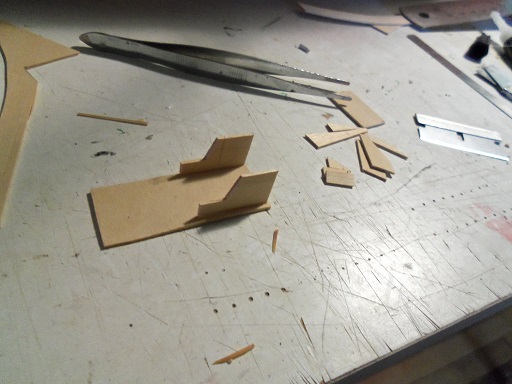
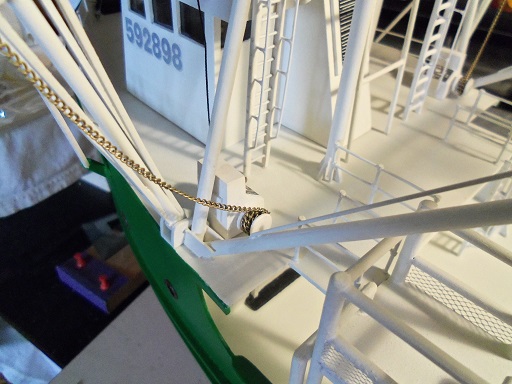
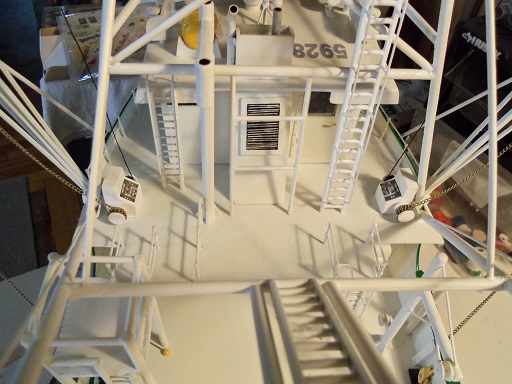
the last picture....will be the next area worked on. a hole was drilled on both sides of the fore deck reel, and thread was cemented in them. I did one side at a time. I'm taking a gamble on how the runout should look.......but I'm going to have it toward the bow side. I'm hoping it don't hit the upper frame of the trawl rig. the lengths of small dowel for the buoys were cut......there will be six of them. these are 1" beads........I'm beginning to think that they are too long. I may try to cut a small section out and make them shorter.....I'll have to see what they will look like. both sides of the fore deck reel have the thread on now looking at the picture above, you may notice the eye bolts on the stern bulwark posts. they are white, and may be hard to see. the same goes for the eye bolts on the top bar of the aft section. I removed those blocks under the gangway, and will relocate them here. the short pieces of chain that they were suspended from were too long anyway. here is the angle in which I settled on for the 'birds'. it's gonna need a wide berth........but I like it this way. the progress with the third control panel is at this stage, at the moment. almost ready for sanding....I've done some already. one of the buoy poles has a bead on it..........the first step in figuring how to assemble them. I believe them to be plastic, so making them shorter should be easier. if it doesn't work, I can get them in a shorter size........but if I can make 'em work........all the better!

- 956 replies
-
- 16
-
-
- andrea gail
- trawler
- (and 1 more)
-
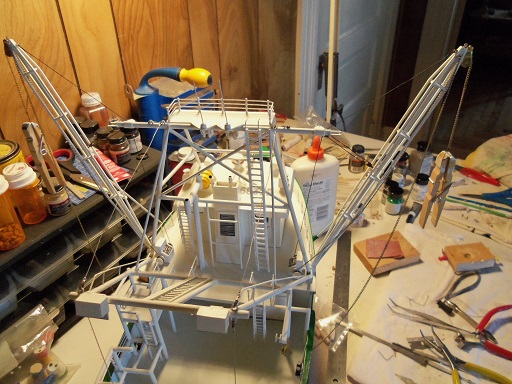
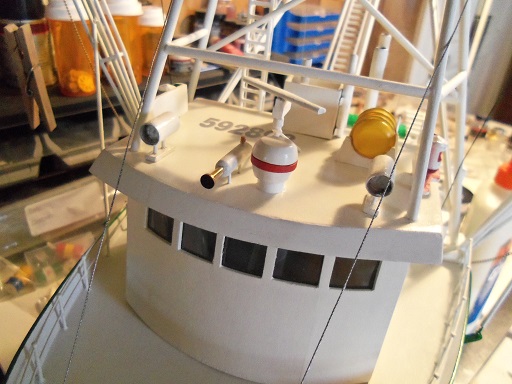
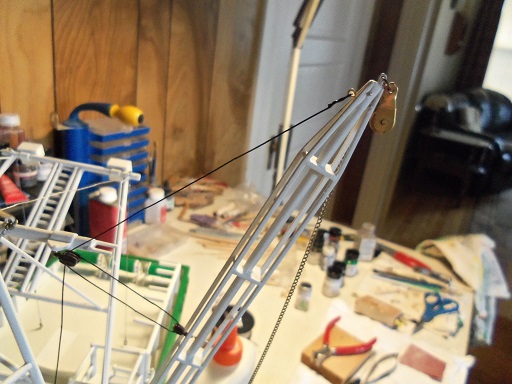
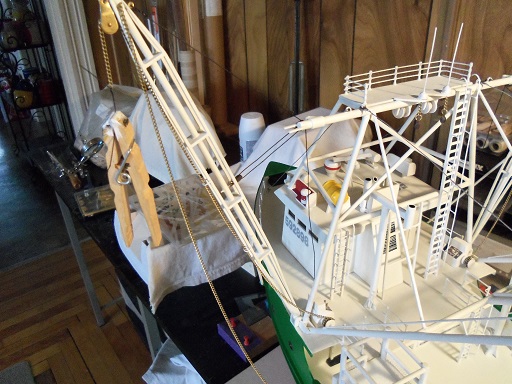
more progress was made yesterday. I began by doing a bit more with the air horn.....I didn't need to do much. I hope Piet can see his contribution to the build......and I hope he like it the next step I took, was to decide how I was going to show the 'birds'. I was on the fence about it, but I did like the idea of showing them partially deployed. the rigging was terminated with them slightly off the mark. the length of chain needed for the counter weights was measured and cut on the starboard side. the port side pulley was fitted with the chain and the end was cemented in place. it will have the same runout as the other side. basically, all I did was tie a piece of string to the chain and rig it up through the eye rings on the boom. it was then threaded through the pulley at the tip. the weights will need to be made now. the fore deck reel control panel still needed to be made.......it starts the same way as the others. why I didn't make all three at the same time........it's all part of the madness, my friends! the port side counter weight chain went pretty much the same way as the other.........the thread......up and through the pulley........with a clothes pin on the end, as a counter weight for the time being not that it really matters......but I can add some slack to the chain as it sits still. to move the model at any given time, will cause it to lose it, with the weight on. but this can be easily put back, when the model is finally on the shelf. the only reason I mention it, is the plans show it in this manner. I have found this problem with other kits.......the anchor with the chain drooping out of the Hawse holes, only to be sucked in after a time by the weight of the chain within the hull. I've had this problem with rope as well..........short of cementing the chain or rope as it enters the hull....the next best thing would be zero gravity. when I did my second build of the Revell Cutty Sark, I figured a way to defeat this, and gave function to the windlass. if this is of interest.....ask me and I'll give you the link to it.
- 956 replies
-
- 15
-
-
- andrea gail
- trawler
- (and 1 more)
-
thanks for the kind comments and the likes! I've done my best to keep with the Billing's plans, but I did change thing enough to keep away from the copyright monster. if one was to purchase this kit and build it though, I think you would be just as pleased with the outcome. George: every kit has at least a couple parts that are not used........some reveal that the kit may also build into another model that the company offers, some are simply extras. it's when you start to see big pieces laying around.......that's when you get scared! Greg: there is a beauty to these types of builds. I enjoy doing sailing ships as well, but it very hard to expand on them, as can be done with these types of vessels. the window is very narrow. with F/V builds.....quite a bit of detail can be added, even if your doing a replica build. as with any model, keeping within the subject is very important.........take it from me, I've fallen off the edge a few times {one time actually worked}. John: believe it or not, the plans do not show anything in the way of fish boxes. some of the models I've seen have what look like crates on board, rather than crab traps and such. this vessel's primary catch is swordfish, and most likely tuna as well. I have some detail ideas in mind.....haven't given much thought about boxes........I think I'll do a bit more digging Greg: what the Holiday Harbor build is about, is the replication of hulls from known kits. the hull that has become the Andrea Gail, is actually a French fishing vessel, known as the Boulogne Etaples. it another Billing's kit........it's supposed to be out of production at this point in time, but I have seen the kit still being offered on some websites. there were to be three vessels in that build, but only two turned out to have valid subjects. the A.G. was the first vessel I thought of when I built the frame and planked it..........and when I found that the hull dubbed "Larry" was the odd man out, I jumped at the opportunity.........I guess you could say 'with both feet' I really didn't need to add another build to my roster, but once I started on her, I found that I couldn't stop. usually, I'll stop at a certain point and turn to another build, just to keep the others active. I feel a bit relieved that MSW , has been kind enough to let a crazy guy like me, run rampant on their website, with all the open logs I've got in the works. I was trying to be good......my intent was to clear them up and finish them, before moving on to new ideas. this build is a good example with how that plan has been working for me Carl: thanks for posting the link........I would have done it I really appreciate it!.
- 956 replies
-
- 7
-
-
- andrea gail
- trawler
- (and 1 more)
-
the pin striping looks awesome Patrick! it really adds to the beauty of the hull. I'd love to see you do a larger scale of this vessel. you need not do the inner detail.......the outer detail will speak for itself! awesome job!
-
Cutty Sark by NenadM
popeye the sailor replied to NenadM's topic in - Build logs for subjects built 1851 - 1900
your idea came out in a very super way! it looks great Nenad!- 4,152 replies
-
- 3
-
-
- cutty sark
- tehnodidakta
- (and 1 more)
-
I'm sure your right Patrick.......the only scratch built hull I've done so far, was the Gundalow. very interesting how I stumbled onto it's design. have a browse through that log........you'll have a nice chuckle for yourself too funny Carl! I yam wot I yam!

- 956 replies
-
- 6
-
-
- andrea gail
- trawler
- (and 1 more)