HOLIDAY DONATION DRIVE - SUPPORT MSW - DO YOUR PART TO KEEP THIS GREAT FORUM GOING! (Only 51 donations so far out of 49,000 members - C'mon guys!)
×


popeye the sailor
-
Posts
16,007 -
Joined
-
Last visited
Content Type
Profiles
Forums
Gallery
Events
Everything posted by popeye the sailor
-
 thanks Nils........no, this is one of their more up to date kits....laser cut and all. I have been blessed by three people here, that have supplied me with pictures of her. I'm following these pictures and adding in as much as this scale will allow. I wish it was a larger scale, but I have been successful so far with what I've been able to do. {I like to think so} there are a few things I let slip by me though, and the absence of the carvings does take away from it a bit, but I do have plans for this build some time down the road. so I will finish it as best I can, and hope to create a second, larger build in the future. it's a honor to have an experienced modeler, like yourself looking in
 -
if the shroud routing is correct Sjors, it really shouldn't matter. it's just that folks are used to seeing the shrouds done from the lowest to the top. they haven't met you yet
- 1,873 replies
-
- 2
-

-
- occre
- san ildefonso
- (and 1 more)
-
thanks Keith.......nawwww, I think it was the winter blase.....that got me down. usually it doesn't hit me......but this winter, I felt like a putz. if this flies........who knows what will be on the other table, but the main table will not change. thanks Bob.......I'm making progress, but it is slow......I need to speed it up somehow. I know I don't have to, but I feel compelled to do so. we are in the midst of a good stretch of weather.......it's getting warmer. Gibbs and I have been going out into the field.......still snow at first.......but now the grass is showing fully, and the ground has dried. we are both happy I feel the sun on my face, and it is good. of all the things I value most in life I look upon my world and feel the warmth ....and know that it is good! .....you know that I should! {chorus from Sabbath's 'spiral architect'}
-
congrats Peter! such a beautiful build........you've done a superb job with her thanks for allowing me to tag along. I'll look forward in following your next build.
-
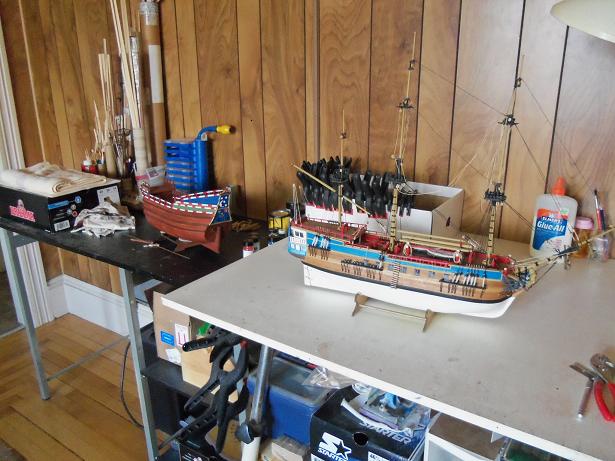
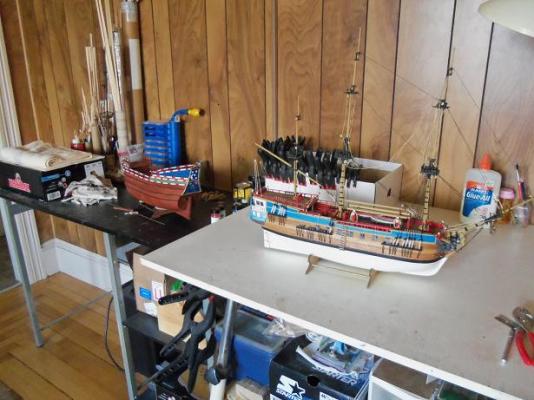
After Nenad informed me about the missing pictures in the Boulogne Etaples build, I went looking. found a few problems here as well. I had to go back about ten or so pages.......but I think I have it under control now I miss the time when I used to run both tables.......I found it very easy to toggle between builds and move along in a more flowing fashion. I have been looking for the avenue to make the switch 'er roo.......but I have failed. the Half Moon has become an interesting build. the revelations and changes I've made with her, have also caused me to lose track of time. looking at the last date on this build, it has forced me to make the switch. it feels early, still to me.....I feel as though I have not completed everything I wanted to do on the Half Moon. but the pull is that, as everyone knows, is that I am not finished. but to be finished, is to place the last piece, and step away from the table........and I am far from that. so, I am going to try the old method......with luck, I can appease both forces at the same time.
-
the reason why I mentioned this now, is according to the plans, these two sides will be decked and planked before they are joined together. you will not be able to see what happens in there after all this is done. it will depend how thick that center is and how large the dowels are. if those center parts are 1/8 thick......it will translate to 1/4. a good remedy for this is to only drill 1/4 inch into the decking. in this way, there will not be enough root to promote the side to side movement. the mast holes are denoted in the decking, and will give you the size of the drill used.....of course, so will the dowel. sorry if I seem an alarmist......but I tend to look ahead in a build, trying to see these little problems before they occur. be sure to add 1/4 inch to the overall length of the mast. as I mentioned, the measurements given only tell you the length of the masts from the deck up.
-
the rake of a mast is measured by how much the the mast is offset in relation to the deck. perpendicular to the deck is 0........it can be anywhere from 4-6 degrees, and as much as 10 degrees.....but I've never had to set 'em that far back {perhaps the AmericA had that much}. I looked at the box again before I left to go to another log.......you really don't have that much. cripes.......2 degrees at the most, and same if any for the mizzen.
-
looks like your missing the blocks, anchor{s}, and assorted hardware. well, at least you'll be able to assemble the hull and decking while you wait. these split hulls are OK......but I see no slotting for the masts. the holes are in the decking, so you can drill them yourself. be sure to give them the proper rake. my AmericA was the same design, but there were slots.......all I did was cement a piece of wood on both sides and drill down through, so the masts wouldn't go side to side when you put them in. you'll also need to add a mast root....the dimentions they show are from the deck up. you'll have fun with this build.......it's a nice kit
-
you can say that Dragzz......I've only built one other boat by another manufacturer. I've gotten to the point where I can follow the instructions pretty well........and the kit materials are of good quality. I've had no real issues with them. thanks for the good word.
-
I can certainly see where you wouldn't need the fittings kit........your past 'iron works' definitely shows your abilities well hopefully, we will see a log on her in the future.
-
simply awesome Peter!........I'm envisioning it without the paint brushes. a great looking boat indeed!
-
wow! I didn't realize...... I'll have to work on this right away!
-
Cutty Sark by NenadM
popeye the sailor replied to NenadM's topic in - Build logs for subjects built 1851 - 1900
congrats on the promo Nenad.......although it doesn't hold any water at home. when I got promoted to captain.....the admiral asked me something.......I puffed out my chest and told her I was the captain! I ended up doing KP- 4,152 replies
-
- 4
-
-
- cutty sark
- tehnodidakta
- (and 1 more)
-
seeing that paper is made from wood by products.......was that considered to be 'bulk mail'?
-
in the background of the last picture, it looks like you were building the Cux {the shrimp cooker gives it away}, another of Billing's fine boats. I built that one as well........enjoyed it very much. my big problem, was when I did the Nordkap, I was a confirmed newbie. I can tell ya.......nothing brings you up to speed faster, than a build that isn't laser cut It's just me.....I've always had a fascination with old kits.......I think it's the nostalgia more than anything else. it's nice to see kits {ships} like this, and the sweet upgrades you've done to her.
-
she's a beauty Nils........a very old Billing kit indeed! they don't even show the PDF instructions {I love to read them}. lots of cool brass......not surprising though, most of the early kits were sold with the fitting kits sold separately. my Nordkap was like that.....my friend Harold had a heck of a time trying to find them. I imagine that this kit wasn't laser cut either. looking forward in seeing more
-
Cutty Sark by NenadM
popeye the sailor replied to NenadM's topic in - Build logs for subjects built 1851 - 1900
rigging is not to bad.......tedious, but not too bad. to read is good.......but look at some of the builds here. most of the basic pulley assemblies can apply to the Cutty.......believe me, she has many. you have plenty of time for that though, before you'll get to that point. yea......you'll have enough height for the coops looking good........keep the progress flowing!- 4,152 replies
-
- 1
-
-
- cutty sark
- tehnodidakta
- (and 1 more)
-
nice looking gun so far........
-
see.....he's not a south paw! :D :D but does that rule out dyslexia ? the world may never know.
- 1,873 replies
-
- 2
-
-
- occre
- san ildefonso
- (and 1 more)
-
congrats as well on you anniversary! hope you have many more! beautiful boat Peter........the jib sails look great! I have heard of that method of cementing the knots.....I toggle between CA and white glue.......I may try that when it comes time to do ratlines. I too am curious as to your next build........I hope you have a prominent place to display her back when you picked back up on this build........I knew you would finish her glad I was right!!
-
home improvements and work on your ship as well........you ARE a busy guy!!! the crows feet look great Mobbsie....if by distortion, you mean that the crow's feet are pulling the stay upwards....then they are doing their job. I believe their prime use was to help support the stay when the sails are in use. there is also the added rigging tied to the stays to take into consideration. wonderful job so far on the rigging.........very....very nice!
- 1,279 replies
-
- 1
-
-
- agamemnon
- caldercraft
- (and 1 more)
-
Cutty Sark by NenadM
popeye the sailor replied to NenadM's topic in - Build logs for subjects built 1851 - 1900
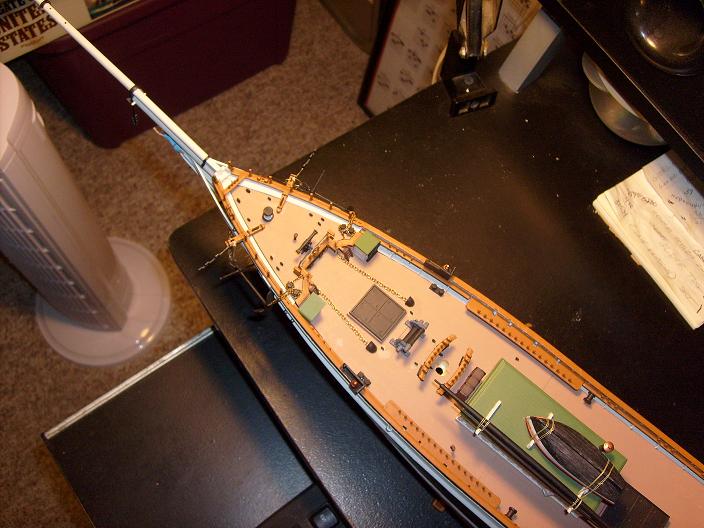
I think the detail will 'layer in' quite nicely Nenad. no reason to change it in my view. I really don't think the chicken coops will be that tall, that's basically the only thing you would have to look at. I believe there is a companion way there as well.......I hope you don't mind. this is my second build of the Cutty. don't fault me ...please the companion way is built off of the galley and nestled between the railings. I really like the Revell kits. the one thing that this kit lacked, was how the anchor chain was routed through the windlass, and under the deck. the kit tells you to use three pieces of chain to do this......but I did it using two. how I did that worked out quite well. I wrote a log about it.......if anyone would like to read it, let me know. I hope these pictures help you in some way. I have others {of course}. I can PM you some links to my build logs, if you'd like. your doing super Nenad.......your giving this a lot of thought, and that's what it's all about! I'd show you a picture of my rigging, but I don't want to scare you :D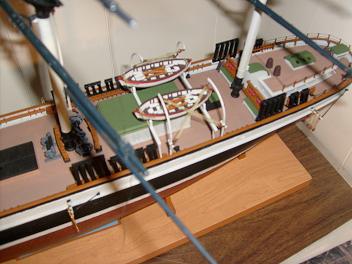
- 4,152 replies
-
- 6
-
-
- cutty sark
- tehnodidakta
- (and 1 more)
-
even brass encasing the wheels.........very nice Nils! the caps look great......one sweet looking cannon. now for the others........how many was that?
-
gotta love that gentle nudge Mobbsie I wanted to do some more on her during the work week.......but I'm usually too pooped to pop I got home Monday evening, and had to play 'catch up' on all my sites. I was so happy to see that Frank finished his Supply, saddened to hear about Vivian {I hope she pulls through alright}, and all the progress folks have made........before I knew it, it was after midnight. I've got a few more things to do.......then it's the bottom paint and clear coat, but I need a good day to do that. we'll see whatI can get done today. thanks for looking in Mobbsie.....I'll have an update soon.