HOLIDAY DONATION DRIVE - SUPPORT MSW - DO YOUR PART TO KEEP THIS GREAT FORUM GOING! (Only 51 donations so far out of 49,000 members - C'mon guys!)
×


popeye the sailor
-
Posts
16,007 -
Joined
-
Last visited
Content Type
Profiles
Forums
Gallery
Events
Everything posted by popeye the sailor
-
 you might need to do a pair Nigel........left and right. just a thought
 -
very nice progress Sherry.........is that 'cornflower blue' ? I still can't get over how it accents the gold........just looks so sweet! the ornamentation is simply outstanding!
-
thanks Bob........but don't give me ideas.......they are just sooooo dangerous for a mind like mine :D just for you though, I told the admiral that I posted the picture, and told her what you said. she liked the idea! ohhhhhhh, I'm going to burn for it.......I just know it! I'll keep it in mind........no......on second thought, I think I'll do it!!!! she told me that I can start no more builds until I'm caught up.....and it will just fry her eggs to know that she OK'd #9!!!!!! :D :D :D thanks for the good word! thank you very much Borge.......always good to see you here this kit is very nice.......it has it's flaws, but overall, it's very good. I myself, am surprised with what I've done with it......it's turned out to be an interesting project. there aren't too many parts left....but I still have much more to add, before the rigging. thanks for the good word. thanks Robbyn.......I'm just going by the pictures that I have of her. there are a few goofs, but they were things that I missed. it began with the cap rails......and I guess it snowballed from there. I just keep seeing things. thanks for the good word! as for the decal maker, it's called the 'Sure Thing Decal Maker - standard edition'...Testor's puts it out. the basic kit won't allow you to import your own designs, but if you go to www.decalgear.com you can get the standard edition, so you can import images. I just found out that there is an update for the software.......it will cost me an extra $15.00. with what I've done with it so far....it's more than paid for itself. the new update will be download supported only any will need to have the standard edition to run it {sounds to me like it's more of an expansion pack} Testors this is the basic kit........all the detail are there as well. if you get it and need more info.....give me a holler
-
thanks Frank!
-
nice job on the hull Sjors.......the second planking should go smoothly for you! nice to see the Half Moon........she's looking very nice as well is the log going to continue of late?
- 1,616 replies
-
- 1
-

-
- caldercraft
- agamemnon
- (and 1 more)
-
those look awesome Doris........perfectly created and skillfully done!
- 883 replies
-
- 1
-
-
- royal caroline
- ship of the line
- (and 1 more)
-
thanks J ! thanks Doris......I really appreciate your kind comment ....and thanks to everyone who hit the like button....it means a lot!
-
thanks Keith I've been wanting to move on to one of the other builds........but this one has become addictive! it's been a while since I ran two build together........I have two tables. it's the way I used to do it.......I may have to do just that! yes.......I do find it amazing........I guess having eight builds in the wings, is my case in point the admiral sent me a new picture today.........her sense of humor boggles my mind. thanks for the good word......from your fat forearmed friend I'll have the transom done tomorrow

-
thanks John......I really need to play around more with this, than I do. I'm going to get the updated program.....hopefully soon. the admiral gave me a good idea about this......she mentioned using typing paper first. I never gave this a thought.......better to blow a buck's worth of paper, than the twelve dollars for a package of decal paper! I can practice a little before I commit thanks for the good word......it really came out better than I thought it would thank you!
-
Cutty Sark by NenadM
popeye the sailor replied to NenadM's topic in - Build logs for subjects built 1851 - 1900
I guess it wasn't too big of a problem..........look at how fast you fixed it I think it looks great! with the two lockers, the windlass, the pump and the railings.......it's all going to blend right in! definitely a keeper!- 4,152 replies
-
- 1
-
-
- cutty sark
- tehnodidakta
- (and 1 more)
-
I like it Michael.......it look more functional there nicely done!
-
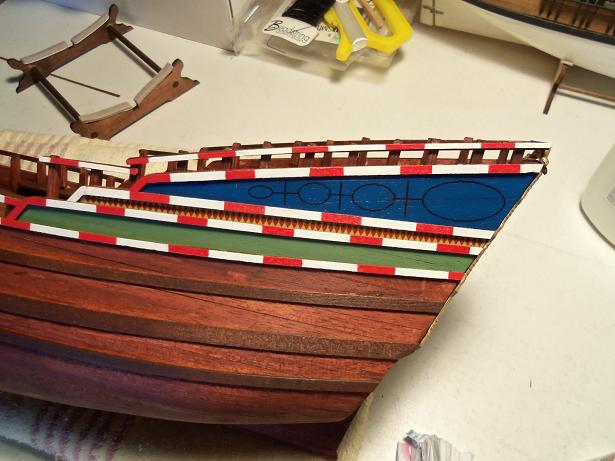
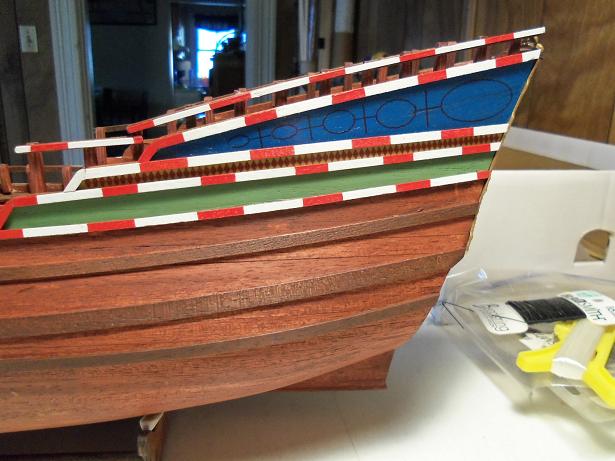
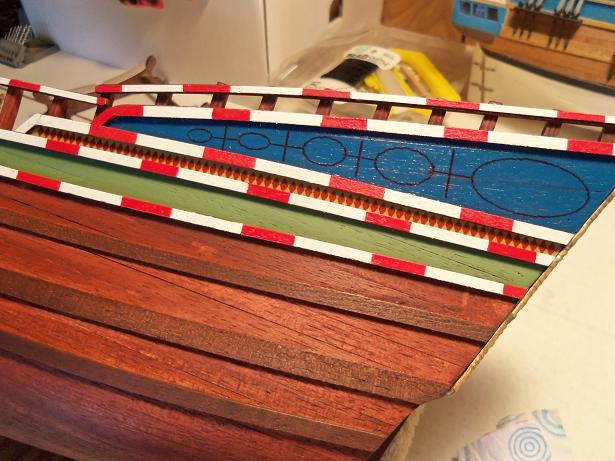
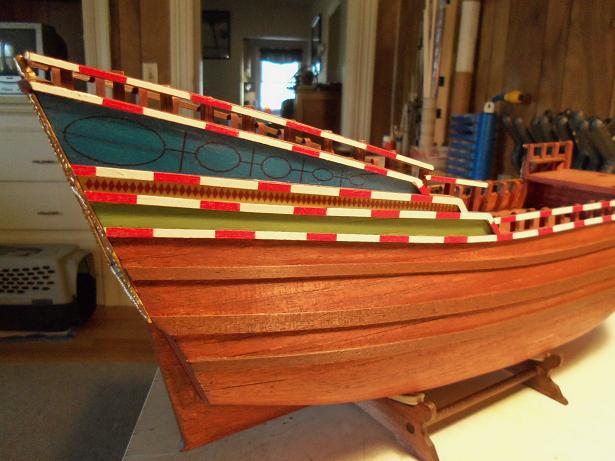
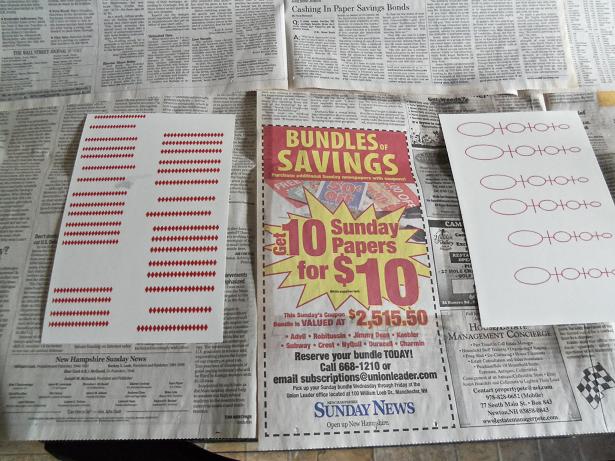
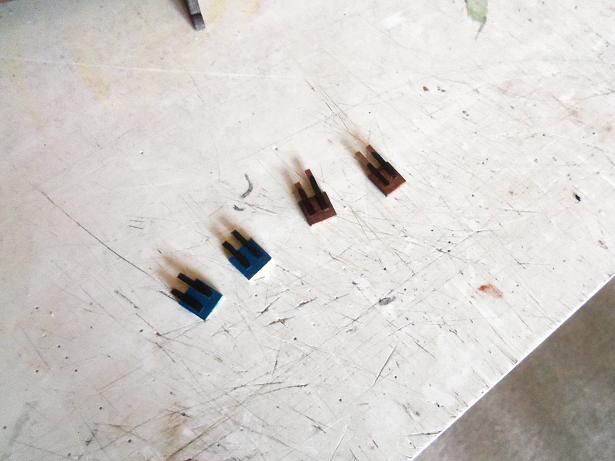
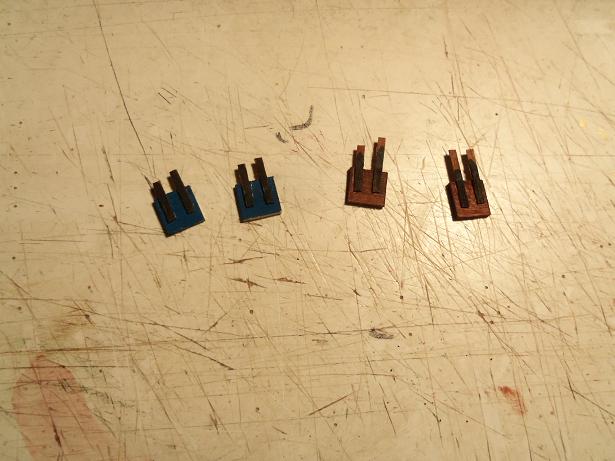
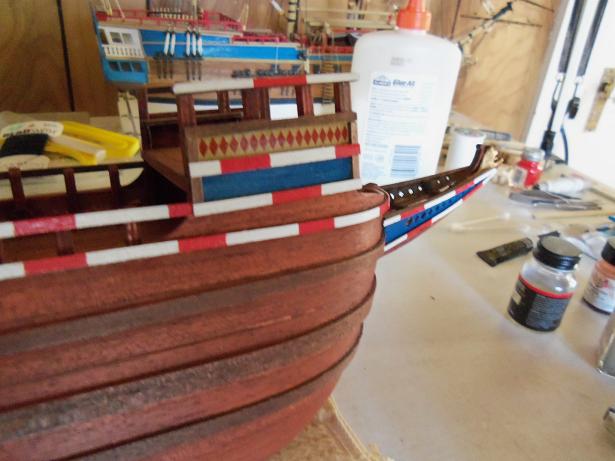
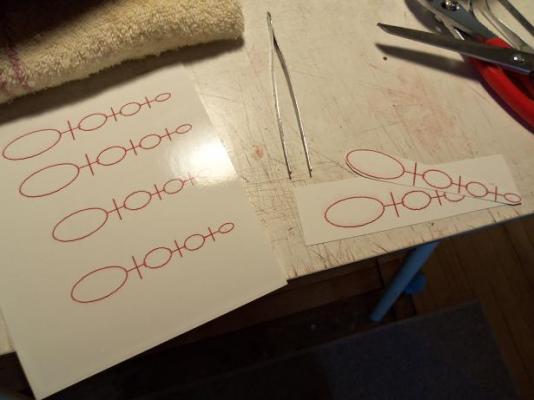
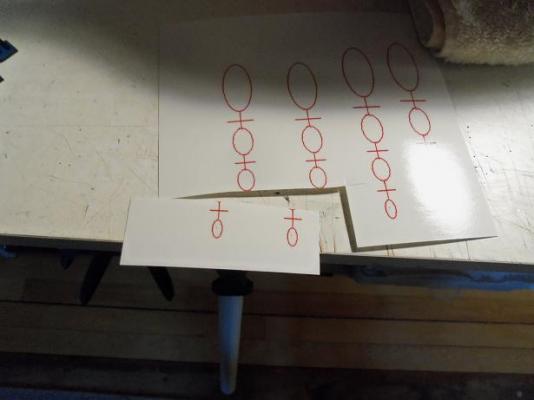
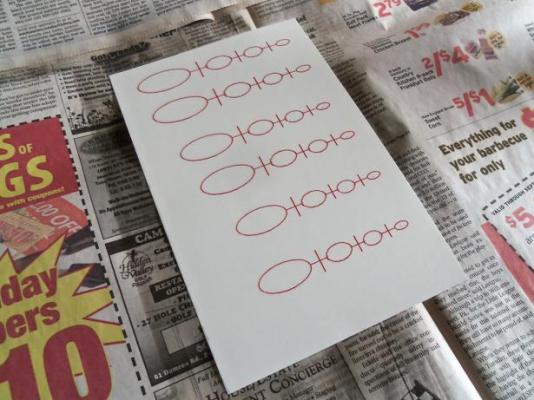
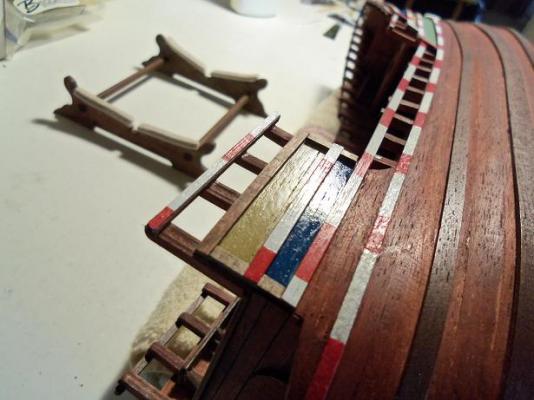
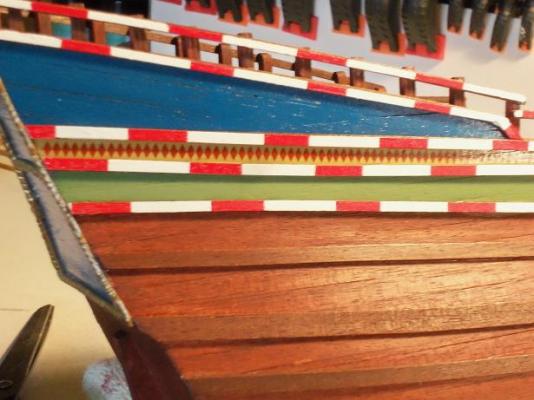
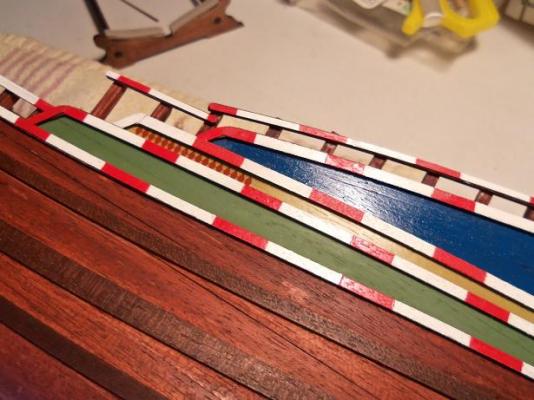
one word of caution with this decal program......be sure to let the sheets sit for a while before you apply the bonder. it's best to give the ink plenty of time to dry. there was a bit of an issue with the circle sheet, but not that bad, that I couldn't use them. they also need to lay as flat as possible, or there will be some color bleed. these are to go on the blue border.......I'm hoping that with new ink cartridges, the transparency issue will not be a factor. when cutting them out, you must get as close to the image as possible.....remember, the entire paper is embossed with film. this is clear decal paper........you will see no white, when the decal is applied. they do have a white decal paper.......it works to your advantage, when the image your using has white in it, or the decal is being applied to a white background. there are many variables, but it does have it's limitations. this is actually two layers......the foreground and the background. I did these to a white background......but the actual background color is blue. I could have changed the background to blue......but trying to match color would drive me nuts! it can be done.......but you'd have to know the spectral numbers that make up the color your looking for......too much for this simple mind to follow I was so surprised, when I applied the decal, and it showed up as good as it did! it could use one more circle, so I clipped one from one of the other images. ...and added it to the existing decal I did the other side the same way now I can get back to the transom in peace........no more little voice in my head about these pfffffffff decals! {you gotta teach me more word Sjors........I sound like a surfacing whale!} "Thar she Blows!!!!


-
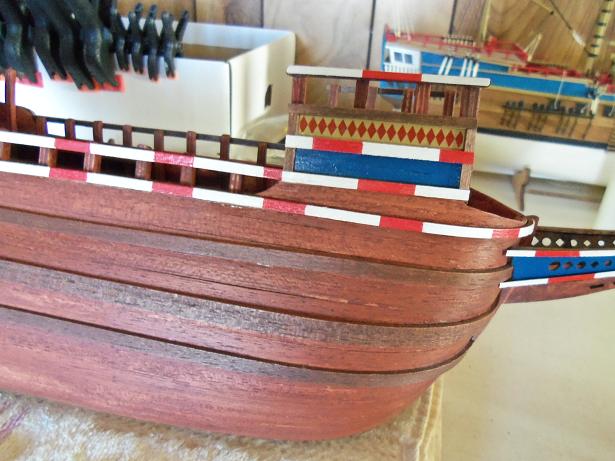
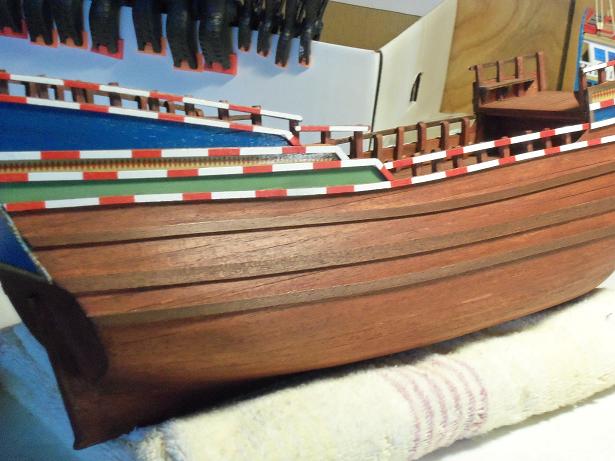
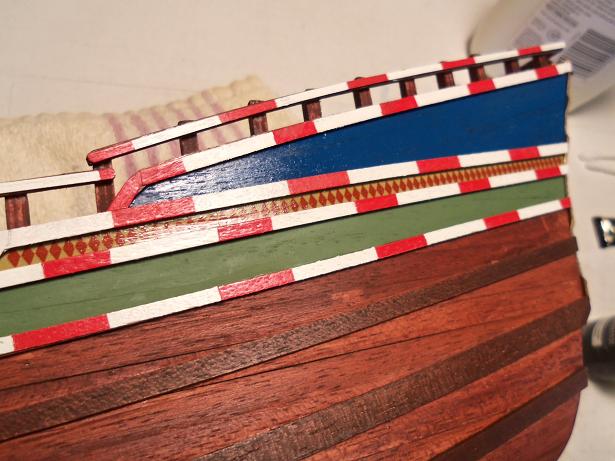
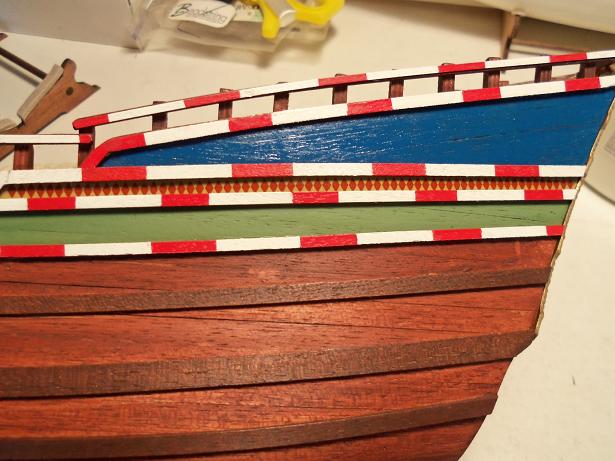
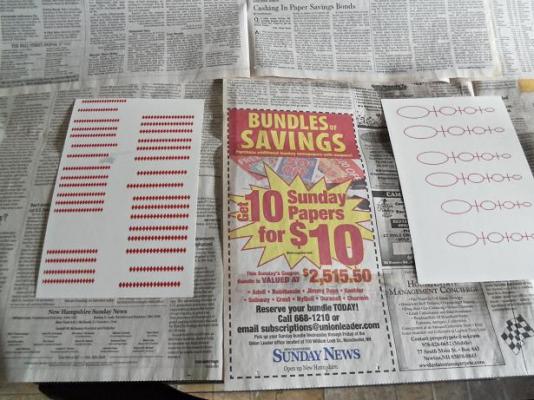
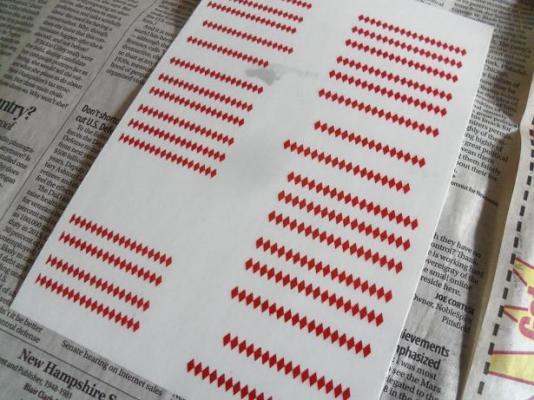
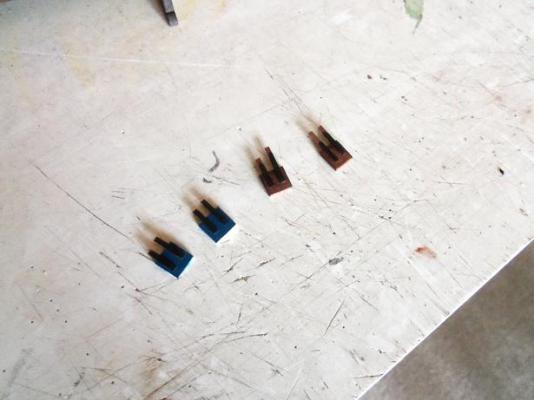
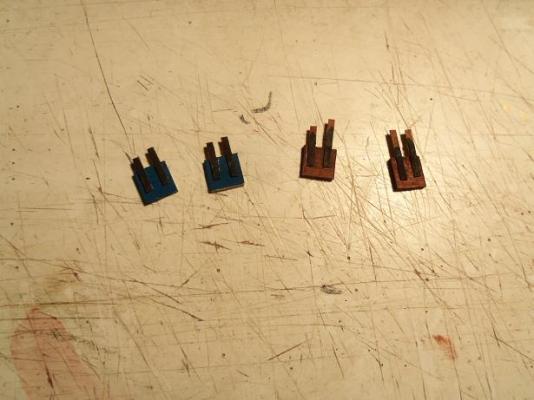
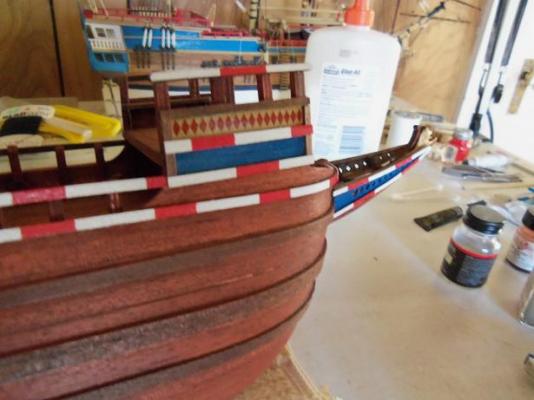
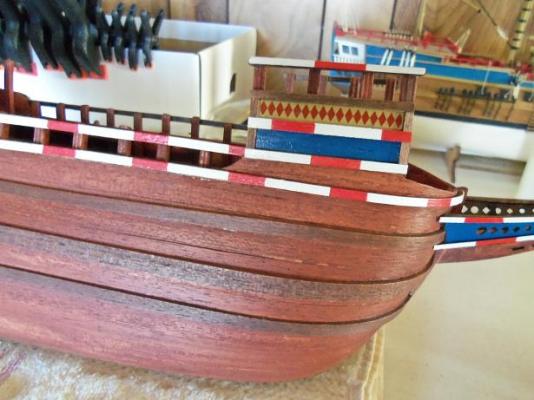
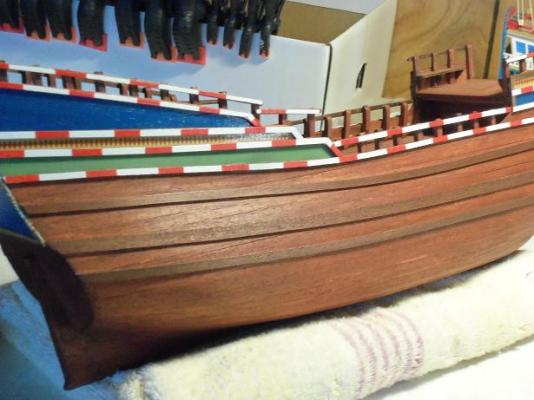
I'm glad your all enjoying this.......I'm having a good time with this as well. I'm a bit off the mark with the Gothenborg.......so it's really neat that I have another shot at this. I was going to carry on with the transom today, but I had other ideas. I couldn't get the circle thingies out of my head, so I installed the paint shop 10 program, and checked it out. I had a couple of strikes against me........ 1: it's already an image.....I couldn't alter it, much less figure out all the new functions in the time I was giving myself. 2: I couldn't change the boldness of the image {see reason #1} 3: I couldn't change the color either! {see reason #1} for that feeble reason........I went back to the decal maker. I had scanned off single rows of the diamonds and the circle image I created, and imported these back in. then they were copied and pasted.......and then sized down yet again. I was able to change the color of the circle image.....I did it in red, like it is supposed to be, according to the Half Moon picture. after uttering that famous Dutch word a couple of times {the admiral thought I was having an attack}, I ran them off. they got spray coated with the bonder to seal them up. notice the blotch on the diamonds sheet........never lay the sheet on wet bonder. as I was spraying the other sheet, the diamond sheet was creeping over to it, so I moved it......not a good move. now all the decals in that blotch will be adhered to the paper...rendered useless. not a big deal though.......I think there are enough diamonds there for me to do the whole job. while these were drying, I did a bit more work on the gun port lids. the sand color that the diamonds are to be located, is a flat paint. so, I painted the areas with a semi gloss lacquer. it sealed up the paint and gave it a good surface to work with. the fore deck outer bulwark has a larger surface, so I left some large enough to fit it. the stern area was next..... of course, making them this small, meant that this area had to be done in sections. I stated to do the same on the port side. then the fore deck outer bulwark was done.......that's it for the diamonds. since I used the kit supplied trail boards, I didn't do this to the bow.

-
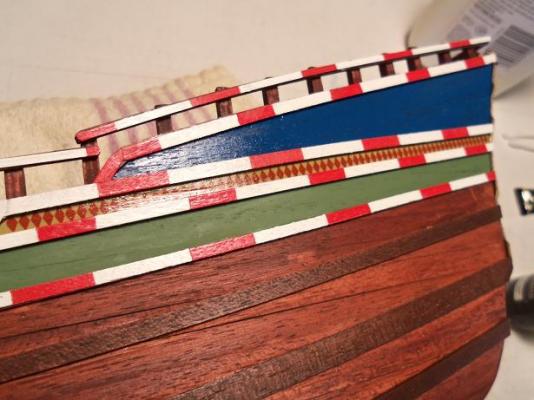
thanks Lawrence.........you'll like this next update then........the decals are on! came out better than I expected unexpected events made me put the Holiday Harbor boats in the closet for the time being.......got a lot of sanding to do, and I can't do it in the house {I almost got hung by the admiral}. weather is getting better, so I might be able to work in the garage. I can't work in the cellar anymore......it's off limits. thanks for the good word! thanks Gerty for the good word.......pleased to have yas visit me log....hopes yas follows along! thanks bob!..........yepper! I can imagine what the other sailors were saying............." well, there goes Hudson an' that crazy boat 'o his! them pirates will pick'em off fer sure!" :D I'm going by the pictures I have........hoping I can get real close to it thanks for the good word......I really appreciate it
-
what.......and not take advantage of teaching us other Dutch words...........other that pffffffffff!
- 1,616 replies
-
- 1
-
-
- caldercraft
- agamemnon
- (and 1 more)
-
she looking real sweet Augie.........really sets up the windows big time! BRAVO!!!! :)
- 2,191 replies
-
- 1
-
-
- confederacy
- Model Shipways
- (and 1 more)
-
perhaps a sliver of wood can be fitted in there..........yea, I've had this problem once of twice, even with kit supplied parts.
-
I hope it's nothing serious John........take care, and here's hoping all turns out well. I'll look forward to your return
- 2,250 replies
-
- 1
-
-
- model shipways
- Charles W Morgan
- (and 1 more)
-
they look really good Bob! very nice indeed
-
thanks Frank they're not on there yet.......I'll do them after I get the transom in order. I still need to play a little with the circles thanks for the good word hello Ed......good to see you......thank you for the nice comment!
-
very nice progress Bob! bow spirit looks nice........planking too I wonder if the thicker planking gives more support for the masts?
-
decals aren't too bad J, they react pretty much the same way on wood, as plastic. big case in point....they don't stick to surfaces painted with flats......for that, a clear coat must be applied. the upper part of the stern has the blue, which is a gloss, but the areas that the diamonds are to be applied, is done in flat paint. I will need to brush on some clear coat before I do them. then when the hull is clear coated, I'll spray the whole thing. in this case, the hull has been sanded, so most of the grain pits are gone......and painting fills the rest of them in. everyone seem mixed on the plastic and metal parts found in kits. I use them, but only up to a point. if that metal is soft, perhaps it can be shaved or filed down in areas to make it look less chunky. I guess this is another 'preference' between these two kits. Billing's seems to favor the plastic, over metal. in some kits I've had, they even supplied plastic blocks. I kept them and went with wooden blocks.....I will use them in a build that better suits them...........they have some detail to them, so they are not totally useless
-
thanks Patrick......still a bit more to go in the R&D dept....I'll have them on soon thanks for the good word Sjors and John thanks J! yes....they are made from that weird plastic. they looked good enough, so I'll use them. there has been some stuff that was too ridiculous to use {in other kits}......some I scratch and then chuck 'em........some I kept. thanks for the good word!