HOLIDAY DONATION DRIVE - SUPPORT MSW - DO YOUR PART TO KEEP THIS GREAT FORUM GOING! (Only 51 donations so far out of 49,000 members - C'mon guys!)
×


popeye the sailor
-
Posts
16,007 -
Joined
-
Last visited
Content Type
Profiles
Forums
Gallery
Events
Everything posted by popeye the sailor
-
 very nice progress Dee Dee........are you going to be adding in rigging as well?
 -
nice the way you did that was that in the kit plans?
-
thanks Patrick......while it would be something really cool.....I don't think I'd be doing something like that none too soon I just threw it together for some idea on numbers. I'm not a big fan of this preliminary stuff either.....I'd rather be building. I've never done anything like this {of this size} before....I want to make sure I have things in order. thanks for the good word
- 165 replies
-
- 1
-

-
- united states
- revell
- (and 1 more)
-
another toy......hopefully, you still have room for your builds :D more fine rigging....and more in store! she's looking good !
- 1,873 replies
-
- 1
-
-
- occre
- san ildefonso
- (and 1 more)
-
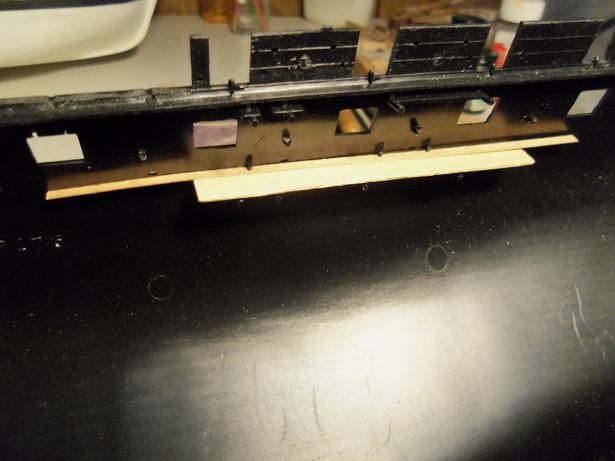
thanks for the good word Dave. it's part of the reason why I chose to do this conversion......the deck sections are warped. you can see it in the pictures. what would a plastic model be without warpage? I hear you John........I only have so much of the 3 mm planking, and I don't have the funds at the moment to get any more. the areas I plan on fudging will not be seen, and what I have in mind will look OK with what can. the main objective was the masting.......I see that I will need to make mast pots under the gun deck, probably about 1/4 inch deep. this might be a bit too much, but I'm just throwing a number out there. I do have a couple of thoughts that I'm toying with.....sort of a plan B. thanks for the good word
- 165 replies
-
- 1
-
-
- united states
- revell
- (and 1 more)
-
embossing sails
popeye the sailor replied to popeye the sailor's topic in Masting, rigging and sails
I haven't done much with transfers. I would imagine there is a program out there for it. transfers work backwards from decals, the film for it would be on the surface, and with decals, your printing on the film, but then another film needs to be overlaid as a sealant. I could go into the process of both mediums, but that would be moot.....the process I speak of negates both. whether you use a decal program as I did, or you do this through a paint shop program, the results would be the same. the one thing I can add is that with softer cloths, the use of a sealer may be required to stiffen up the cloth. a light coat would be the best. this might even be good to prevent hidden problems, like ghosting, and the ink bleeding through the other side of the cloth. -
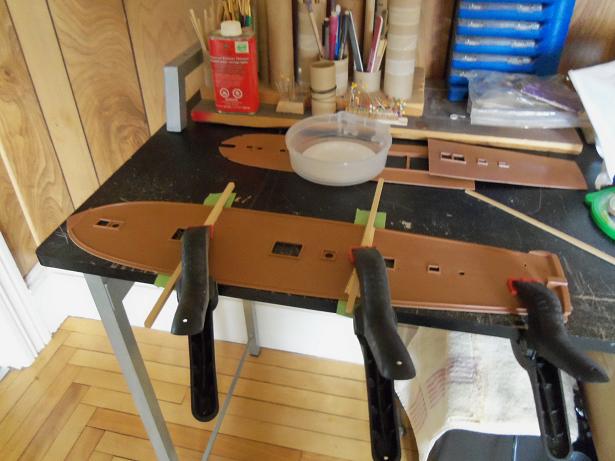
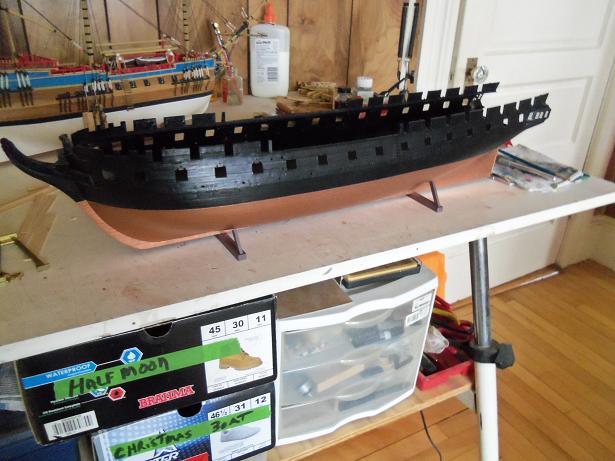
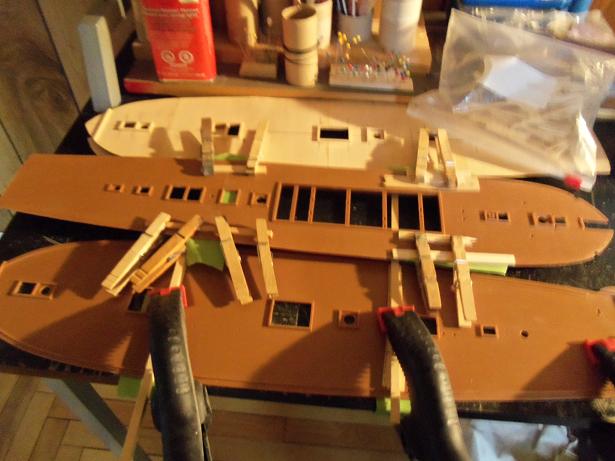
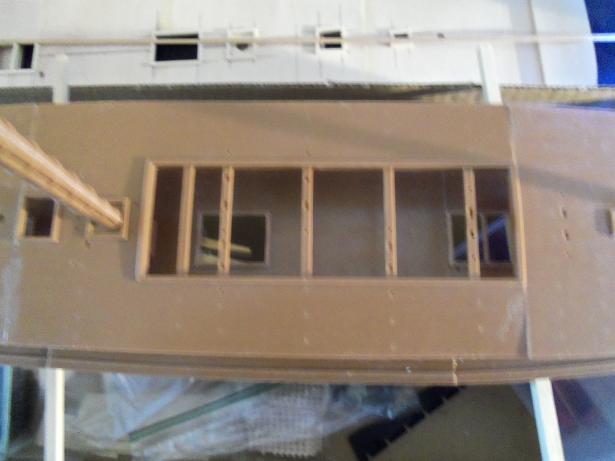
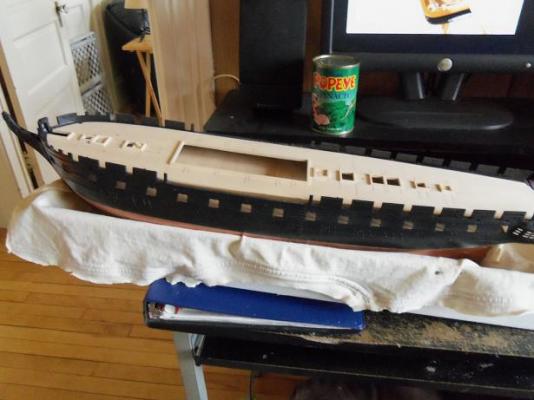
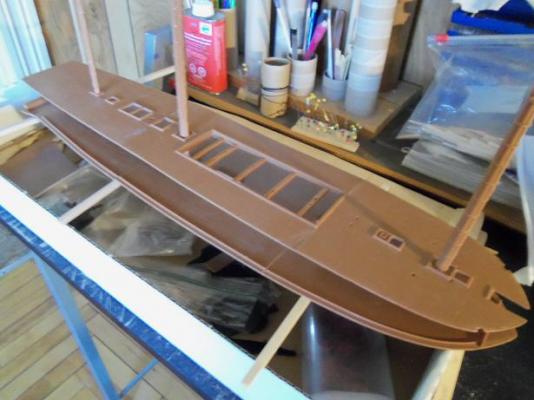
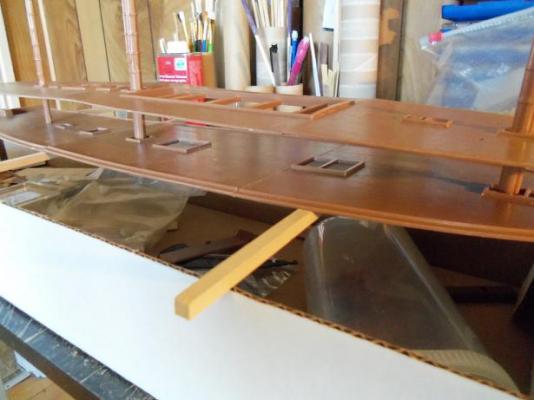
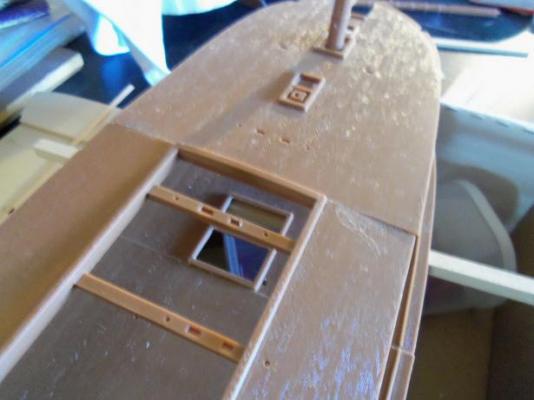
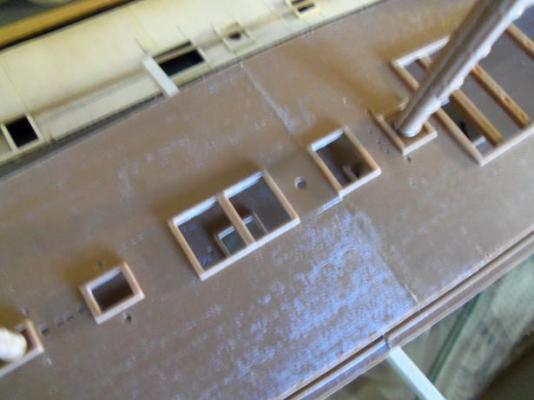
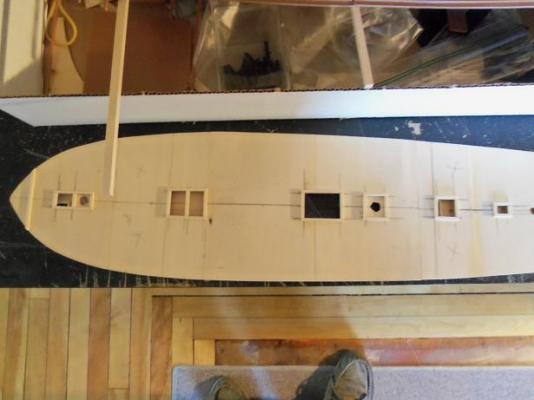
the box came out of the closet I can't stands n' more! the deck planking bug is really getting under my skin here......how much of the gun deck is....or is not visible? what is the plank length in the molded detail? an even bigger question occurred to me.....masting. that's down the road a ways.....but I did begin to scratch the surface on it. to get a good sense of the mast aspect, I started by cementing the sections together. the fore and aft stands were cemented to the hull the spar deck was cemented together I needed to make sure that the addition of the planking would fit in the tabs of the inner hull. after a bit of fidgeting, I managed to dry fit this together all this was to see what actually can be seen of the gun deck. I didn't think of this when I did it.......but this would make a very nice diorama. I'd need to correct the joints of the sections {they're a little off}.......well worth hanging onto these parts for perhaps something in the future. so, I marked of the areas that could be fudged over with wider planking. even through the gun ports, I don't think the difference will be seen. I won't use simulated calking on these areas, I will use a ruler to scribe in the lines later. the spar deck will be totally planked with 3 mm planking.


- 165 replies
-
- 4
-
-
- united states
- revell
- (and 1 more)
-
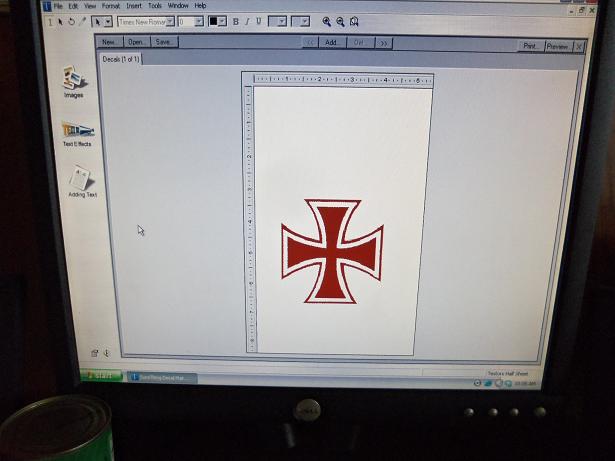
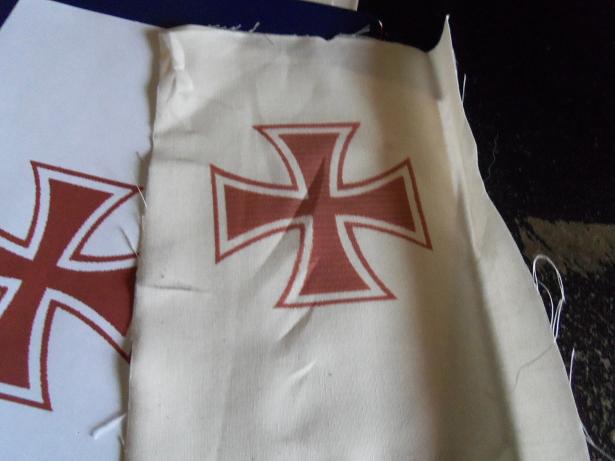
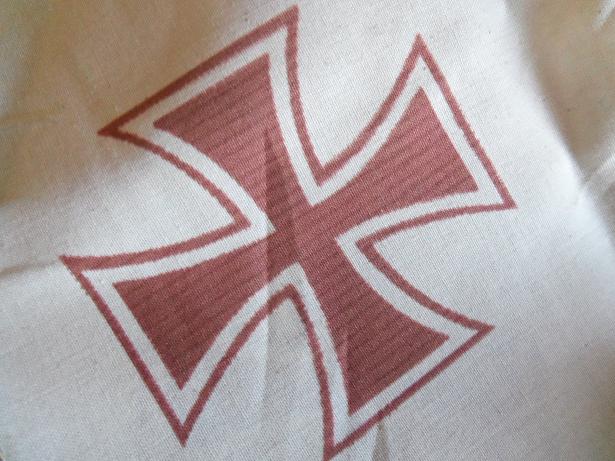
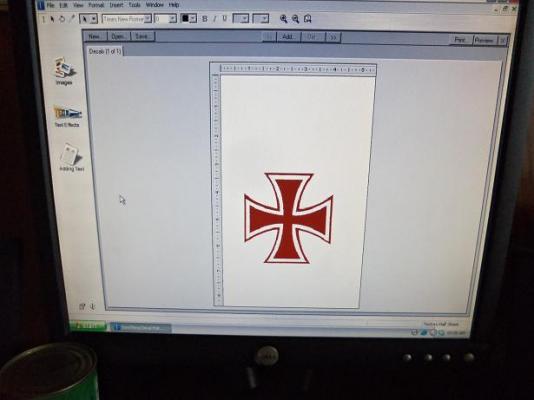
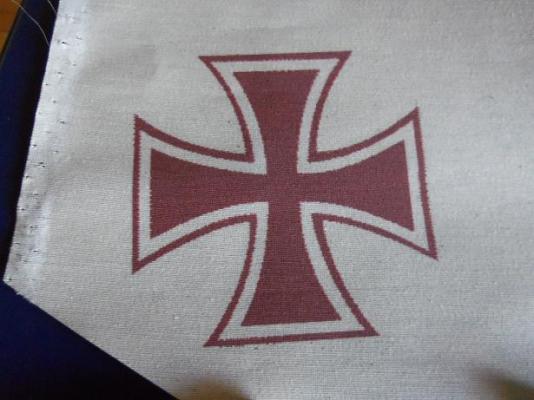
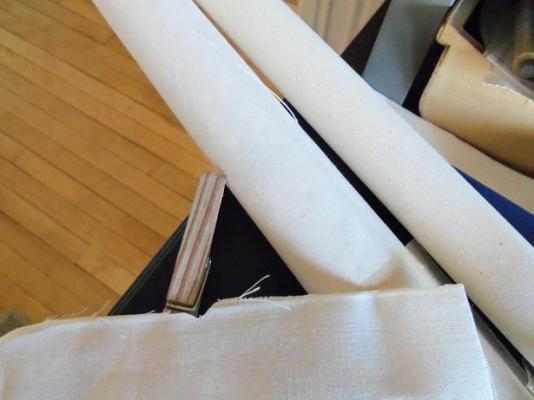
I have seen many topics about making flags and sails. on some early galleons and ships of this period, the main sail......and in some cases, other sails as well, are embossed with crosses and crests. I had suggested in the past, to try using your ink jet printer to make flags.....but wasn't too sure how this would apply to the sails. this week......as a spur of the moment, I embarked on such an experiment. I went on line and found lots of images of crests, shields, and stuff. you can also find quite a bit of scroll work there as well. these images can be brought into paint shop to alter and change to your specifications, but for now, I didn't go that far. I used the Testor's decal maker to do this little experiment. on some crosses, the bottom appendage is elongated. now, I used what many would say is an Iron cross, but if you look at it in the mindset of motorcycles and Harley Davidson.....I think you'll forgive me the admiral did some looking as well, and she came up with a couple....one of them I really like. so, in the decal maker program, I sized it and changed the color. since the decal sheet is half size, I re-positioned it so it would fall somewhere close to the center of the cloth.....yes....cloth. first, I ran a sheet of paper through. it looks good, but there are some abnormalities with it. I'm thinking that this is the first image....the printing track may have something to do with it. plus the fact that I've done nothing to clean it up. now, the cloth that I used is very soft and flimsy....it did bind up the printer a couple of times. I did manage to run it through. I'm hoping that these abnormalities are what I think they are. they did clean up to some degree. it may be the type of cloth I used, but printer lines are quite visible through the image. I have some sail cloth from other kits that I can try this on. they are of different textures and a bit stiffer as well. here is the same image on some of the material I got in the Gothenborg kit. .....as opposed to using soft cotton cloth there are different textures you can use.....here is the cotton cloth I used first {bottom}, the white cloth I got from the Regina kit...stiffer but smooth to the touch {roll on the left}, and the beige cloth I got from the Gothenborg kit {roll on the right}, stiffer than the Regina cloth, and feels like canvas. I won't be using it.......sadly, there isn't enough there to do all of the sails in the kit. I haven't gotten farther than this....at this point, the embossed image needs to be sealed onto the sail. I would think that if the image was allowed to dry, the sail perimeters could be drawn and cut out. but, before the sail goes through the rigors of the sewing machine, the sealing process should be done first. the process could be done in a couple of ways: 1) you could use decal bonder or some sort of fast drying sealer....anything that does not contain water. 2) this would be an experiment in itself.....mixing white glue and alcohol. this would have to be misted a very light coat at a time.....not that you need to give this a very thick coat, but it does need to get into the fabric to be effective. sealing the image should be done in light coats anyway.......saturating it would result in the ink bleeding and creeping. the sail should lay flat for this process, which is the only detriment I see.......not good if you desire billowing sails, but I think shaping may still work. bend to shape.....lay them on a crumpled towel or rippled surface, and give them another coat. preferably, with a flat clear coat of sorts.


-
if that mark won't sand out.....make a small crate or a couple of barrels usually cover up nicely. just use a prop
-
very beautiful Den......lots of glittery stuff! your style of rigging is really cool......heck I'd have to keep all that crap out of my way just wonderful!
-
the more research you do, the more changes and additions.......pretty soon, your not in Kansas anymore! with multiple builds of the Connie going on, it's neat to see the individual takes on her. looking forward in seeing the finished frame work
-
looks awesome Piet.....lots of cool detail to it!
-
looks great Steve.......now you need to get all your measurements, so you can frame in the mast plates.
-
wonderful job Vivian........I see the red arrow pointing to a mark of sorts.......something you need to do there? I like the looks of the hull.....very nice use of woods to show you how imaginative I yam........I saw the pictures with the paint brushes in the background.....and thought she would make a very nice trawler :D
-
nice work with the straps and dead eyes. they look great on the ship
-
I have those same pictures Wayne......I posted them in my log of the United States
-
she looks great Den........the main sail looks just as good at the fore sail. wonderful rigging.....you've done a very SWEET job!
- 555 replies
-
- 1
-
-
- sovereign of the seas
- mantua
- (and 1 more)
-
you've made some good progress......the cap rails look really good. came out really good at the bow. did they instruct you to cut the dowel like that? I'll have to try that one of these days
-
looking very nice Erik.....shaping up quite well. doesn't look like sanding will be that hard to do
-
I like the way you have the gun ports as well. having them even, is an aesthetic way of showing them. it does lend a more life-like look to the ship.....she's a beauty!
-
nice job on the crow's feet the Fonz is look'in real sweet!
- 1,873 replies
-
- 1
-
-
- occre
- san ildefonso
- (and 1 more)
-
I think the rope coils look great......I wouldn't change them I hung my anchors per the instructions. she looks great Kats......nice to see your back to the table!
-
very nice update......though it may not seem like much, there is a tremendous amount of work in air brushing! I think you've tackled the task and handled it quite well very nice indeed!
-
I am quite envious.....such a huge build! I wish I had taken the offer I got when it first came out {deal price}.....but it was still too expensive for my blood your doing a superb job so far Stewart!
-
Hi Frank this is where it all started....I had done plastic for many years. here I was, happy as a clam, and then this guy Harold throws a Nordkap in my lap! ....and look where that got me :D I should just be happy with the decks and be done with it, but I think it would be much more fun upgrading her. I know I've just been pick'in at her.....I should throw a few sessions at her thanks for the good word Frank. I like armor as well.......I'm a tank nut too!
- 165 replies
-
- 3
-
-
- united states
- revell
- (and 1 more)