HOLIDAY DONATION DRIVE - SUPPORT MSW - DO YOUR PART TO KEEP THIS GREAT FORUM GOING! (Only 51 donations so far out of 49,000 members - C'mon guys!)
×


popeye the sailor
-
Posts
16,007 -
Joined
-
Last visited
Content Type
Profiles
Forums
Gallery
Events
Everything posted by popeye the sailor
-
 thanks Sjors.......with the nice weather coming.....I figured I'd start doing a few thing I've been putting off. thanks for the good word! thanks Michael......seeing the work you do.....it gets me thinking I knew I wouldn't need much....the shim 'jig' is probably 1/32 thick. if I can make the shoes so they adjust to the angle, I'll be a happy camper. looking at the metal one....you can see that they can't move. that's what prompted me to try making them. I'll try fixing the metal ones.....one of these days, on another build perhaps thanks for the good word.
 -
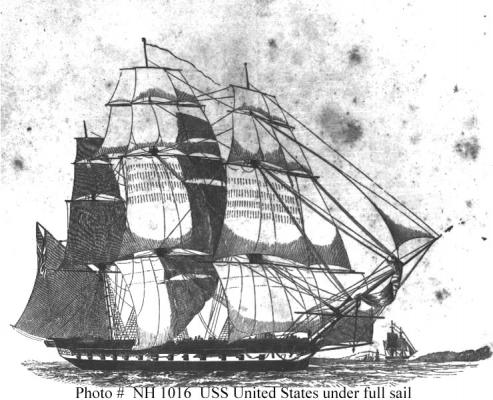
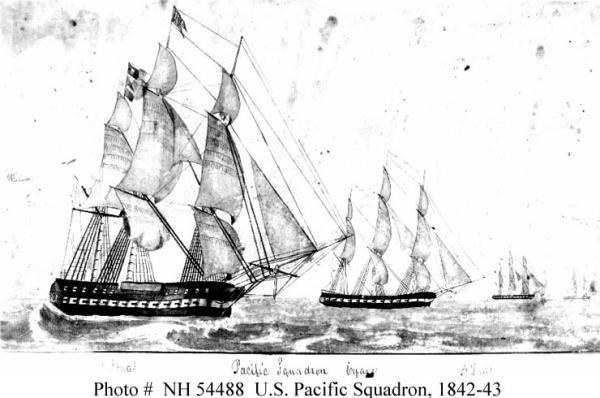
hello Steve.......I guess your ahead of me! :D I mentioned earlier that this kit is a spin off of the Connie kit. the differences between them is the transom fascia and the extra parts that you probably found in one of the other bags. I do plan on bringing out the decks and planking them.....the pull is too great. to be honest, I haven't looked that far ahead yet. I took a short pause here to check this out for you. these two pictures should help you.....but I don't usually trust drawings. there are some instances, where they can be a bit inaccurate. I built my first one using the supplied kit parts...I kinda liked the way it looked all rigged. I hope this helps you out to some degree. I should get moving on this bad girl.....I really like these Revell kits......aside from the crappy deck design, they were not bad kit. in their day, they were the best large scale kit that money could buy do you have a log started on her? love to see what you've done......thanks for looking in
- 165 replies
-
- 1
-

-
- united states
- revell
- (and 1 more)
-
yes you did :D my 'head' wasn't in it. bet your misgiving isn't as bad as mine look forward in seeing your progress happy Easter to you and yours as well. I'll be working
-
it's good to see your back.....take care and don't over do
-
it's so good to see her back! your groov'in.......groov'in!
-
I got that book from Harold, the fella that gave me the Nordkap. he also gave me a couple of other books as well as a stack of modeler magazines. if you follow the book, you'll do Ok.....keep going! looking really good
-
thanks Augie and Mark for the likes thanks John......I have a good model there.....it just lays there, and I copy it :D get the feet fabbed and assembled.....paint and hardware, and I think they'll look rather cool! this one's ready for deck work and stanchions. a little here, and a little there.......as long as it goes in the direction I want it to go :D
-
thanks Frank and Mark for the likes.......I wish there was more here. same goes to you John. when I can finally get the hull back out, there are a few thing I need to change....double check on the deck thickness, and perhaps plank them {I can't get them out of my head}. thanks for looking in......more soon to follow
- 165 replies
-
- 2
-
-
- united states
- revell
- (and 1 more)
-
absolutely!! the gun looks great Piet! you really nailed the overall looks of the real thing! hope your feeling better, and I wish you well on your next visit
-
Cutty Sark by NenadM
popeye the sailor replied to NenadM's topic in - Build logs for subjects built 1851 - 1900
ohhhhh.....Nenad........you better get that cleaned up before her Majesty get back! your gonna be in deep doo doo! -
Peg looks really super Nils.....the wavy cut away is neat to see. interested to hear how you came up with the metal figurehead.....it looks very nice.
-
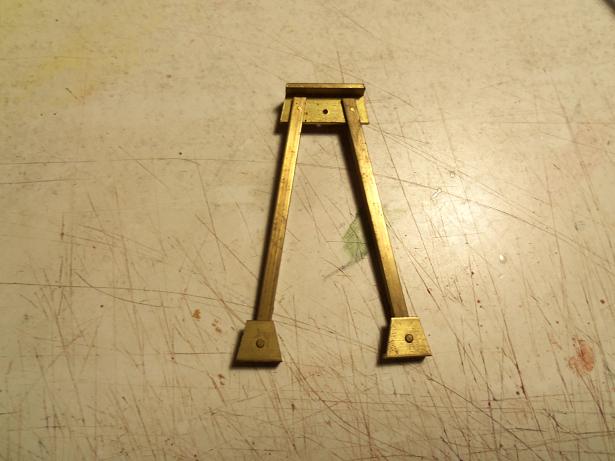
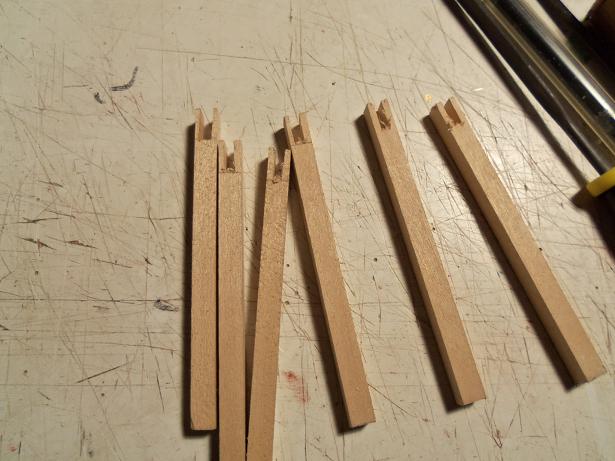
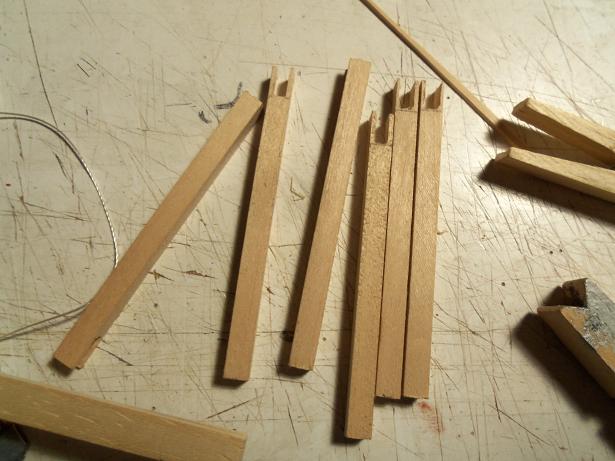
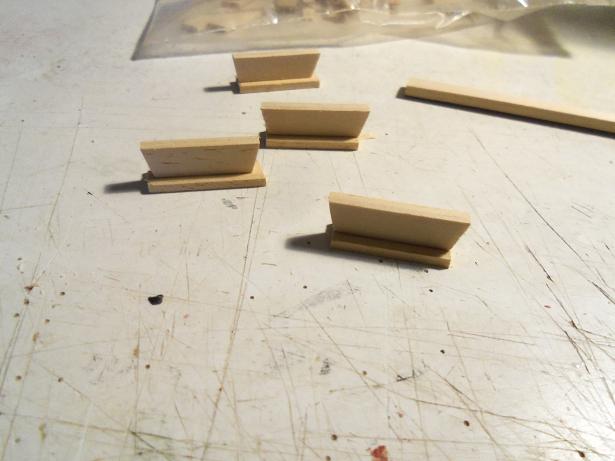
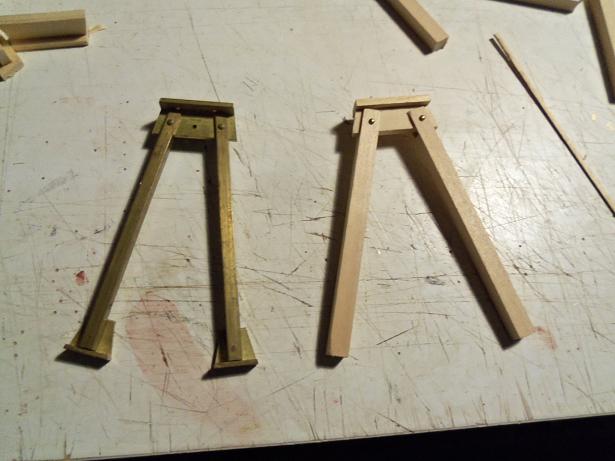
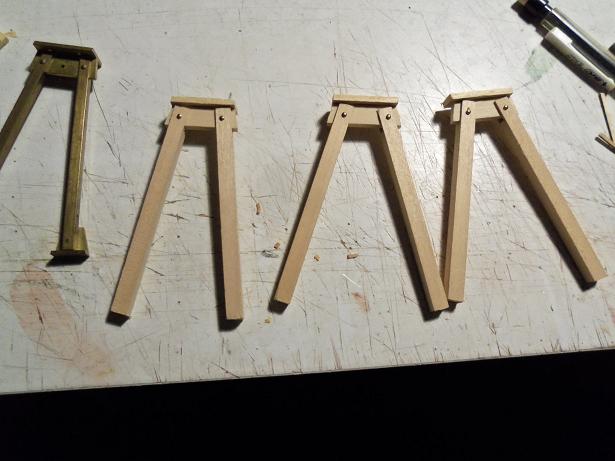
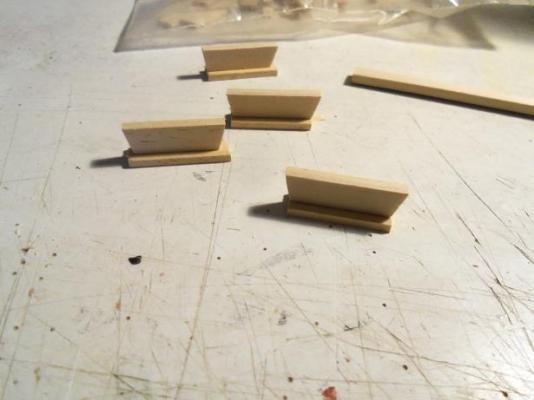
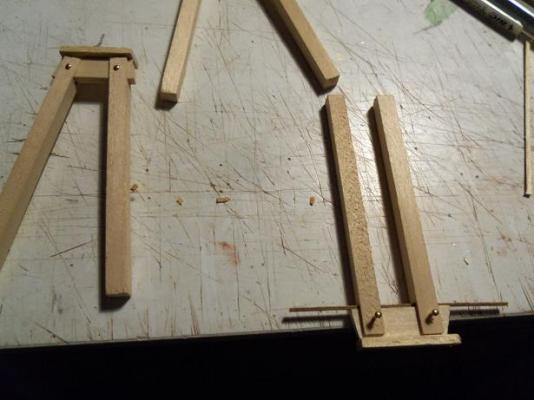
something I have been meaning to do on this build, is the gallows. I have a pair of metal ones from the Nordkap build. they are nice......I used the pair that I had gotten from the replacement parts for the build, but these were slightly different. I would have to alter the feet, because they don't move very well. they also look like they were attached incorrectly. I'm going to make some out of wood, similar to the metal ones. I started by notching some 3/16 square stock, the same length as the uprights. after some cleaning up, the notches look better I didn't have strip stock that was the correct thickness, so I added 1/32 to a length of 10 mm planking......it equates to 1/8th of an inch thick it was then cut to the length of the caps, and a short piece was cemented on the tops......later sanded and shaped the first one was assembled using 10 mm brads to assemble it, a thin shim was laid between the upright and the cap, creating an air gap, so the uprights could fan out. I remembered to do this for the first two.....the third on, however, I forgot. you can see how this affected the third one......I have since repaired it. all I need to do now, is create the feet for them. I might also make a fourth gallow rig, so the nets can be deployed on either side of the ship.


-
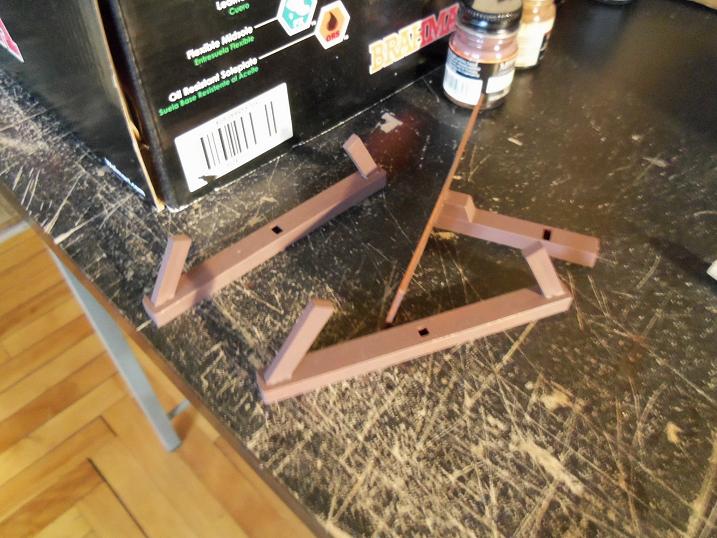
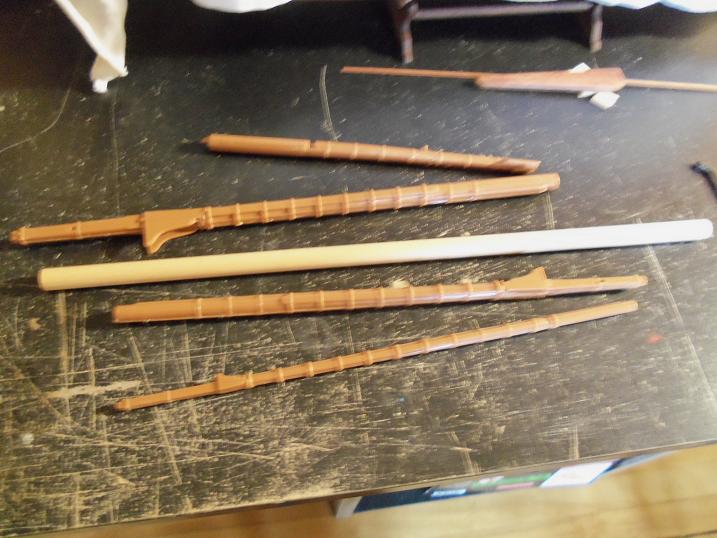
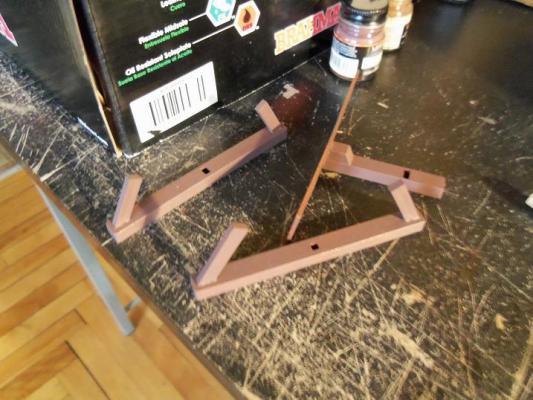
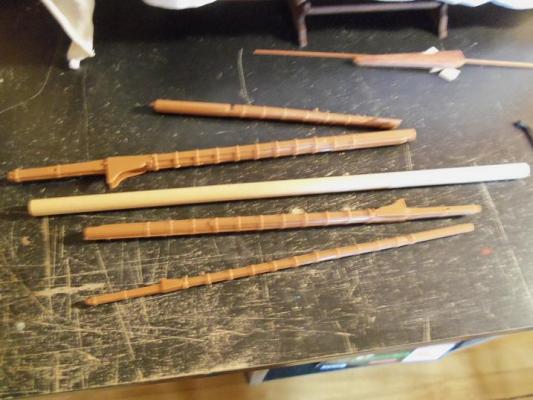
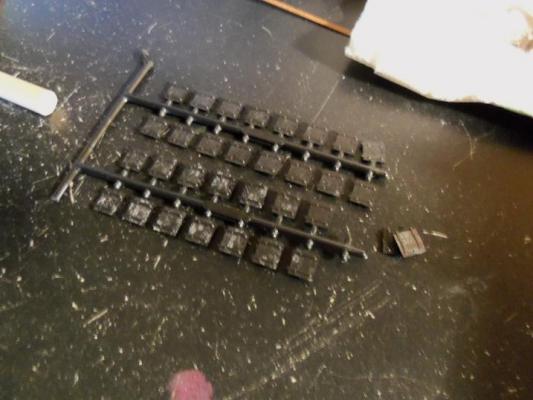
I wanted to begin planking the decks on this 'ole girl, but time is not on my side at the moment. there is some paint I also wanted to do....weather hasn't either. I did do a little painting on the stand pieces. I need to do a bit more. I also had a thought to assemble the first steps of the masts and bow spirit, to get an idea of the dowels I will need. this way too.....I can look at the detail and figure out a game plan. the gun port lids are a touchy subject....were they there or not. they are part of the kit, so I will use them. I'm also deciding whether or not to leave some of them in the closed position.....leaving a battery of them open and guns at the ready. this is as far as I got. perhaps I will remove the decks.....if I do, there will be an update for sure!
- 165 replies
-
- 5
-
-
- united states
- revell
- (and 1 more)
-
I wish I had something to report......I have pictures...but they are wrong. I had begun the shroud work on the main mast. I'm looking for a natural flow to the dead eyes, rather than the even symmetrical flow, done as an aesthetic feature. I kinda gave this a margin of + or - 1 mm........my botched attempt is a bit beyond that. so I'll be removing them and starting over.....hopefully I can correct this and get the main shrouds finished, so I can do the ratlines. there is also one fore stay, that I might need to replace......I'll see what it looks like when I do the second step shrouds. an update soon......
-
if you can see the Revell instructions, they simply have it going under the windlass. the first time I built this model, I did it that way.....but I didn't like it. when I got this kit, it was one of the first things I thought about. two hole at the chain gates.......I should have wrapped the chain inboard to outboard, they wouldn't be so close to the stairs. I used a wire to get the chain to go through the holes I drilled under the fore castle decking to the Hawse holes. it worked out really sweet. I hope your repair is going well.
-
I like that finish! time is going to dull it down and make it look quite natural. deck and bulwarks look great.....the waterways add so much more
-
the added accents look great Augie......really shaping up to be a very fine build!
- 2,191 replies
-
- 1
-
-
- confederacy
- Model Shipways
- (and 1 more)
-
I'm not too sure Frank.....never really gave it much thought. according to Billing's....they measure from the tip of the bow spirit to the stern. sometimes even this doesn't seem right
-
your almost there look forward to your restart!
-
yepper!!! it figures this is pretty much the same stern configuration as the Nordkap and the Cux 87, I did {my first two builds}. I wrapped the planking to the stern stem.......crappy job, but I did my best. this will do just as well......I'd be careful with the sanding though.
-
oh.....oh.....the dreaded 'looking back <--' from what I've seen of your work.......I think your fretting over nothing keep going this way -->
- 555 replies
-
- 2
-
-
- sovereign of the seas
- mantua
- (and 1 more)