popeye the sailor
-
Posts
16,007 -
Joined
-
Last visited
Content Type
Profiles
Forums
Gallery
Events
Everything posted by popeye the sailor
-
 could be a new Olympic sport.........baluster toss
 -
....just poured one.........man, would you look at the head on that! :D
- 745 replies
-
- 1
-

-
- francis pritt
- mission ship
- (and 1 more)
-
Cutty Sark by NenadM
popeye the sailor replied to NenadM's topic in - Build logs for subjects built 1851 - 1900
I feel your pain........I have two boys........one is still at home. but looky what you went and did............looks very nice! the sheen should calm down in a day or two........it needs to cure. with a new deck, it's going to look great! -
usual symptoms: blank stare and shivering in the timbers........!
-
thanks Piet! the hull is the only thing I am interested in........I'm not that great of design. I hope to do something like most of the other folks here......but I learn slowly..........little bites over a long period of time I do fudge the numbers a little.......just to keep the copy-write monster at bay......and keep it interesting for me. thanks for the good word. usually I can tussle with the computer pretty good.....but that left jab comes out of nowhere.......still haven't had to use my secret weapon yet........the two-armed window toss! :D I started building wooden builds in 2009.........in the beginning, I was never one to have a build going over a year. my second build of the Revell Cutty Sark was the first one to ever do that.........then the Nordkap. of course, both of these build got held up due to ordered parts and such.......but looking at my signature, things picked up for a while. to me, I think the time factor kicks in, in two ways: 1: it depends how much detail you want to put into your build. it is very easy to stretch the build time, with the infinite number of sub assemblies, framing, outfitting, and rigging. hand in hand with the detail, is the replica that is the subject of the build. reference work also adds time. 2. having a good idea of the direction of the build is also key. to think up things along the way can slow the build down........I was very lucky with the M&M build........all of the ideas came in one sitting! I have to admit........that build was a no-brainer.......I wish I could come up with another one like that! with a firm direction of how you want the finished build to look, there is little room for back tracking. adding some extra detail is great, but it can upset the apple cart with other detail that you might have already done. it may even change aspects that are already in the works, or are still on the drawing board in model building.......there is no such thing as a time frame or deadline Adam. the hobby wasn't designed for that.......I simply just lucked out with a few of them. to me.......I think your right on schedule I don't advocate competing in the speed build competition, but I do revel in it when a plan comes together! thanks for the good word!
-
I think I'd be doing the happy dance......with every one that's set......great start!!!
-
read your entire log Nils..........such a beautiful build! love the use of materials......the detail and rigging is fantastic!
- 113 replies
-
- 1
-
-
- heinrich kayser
- steamship
- (and 1 more)
-
belated condolences my friend.........glad to see your getting back to a reasonable sort of norm. take the time to recharge........the build isn't going anywhere. I'll look forward to your update when your ready
-
is that what your doing........making the frames and planking them? since your covering them with canvas.....sounds like a good simple approach.......looking very good
-
John & Bob...........CRAP!!!!! why didn't I think of that.......the 'Back' button! now I really feel like a dolt! I was never born for this era thanks for the good word gents! thanks Augie............pace?? well, let's see.........I built the Cux in 5 1/2 months.........the M&M boat in 4 1/2. kind of you to say, but I do believe I have mellowed a bit :D I know what you mean though..........thanks for the good word!
-
agreed........looking very nice Sherry can't think of a better word for your rail stanchions
-
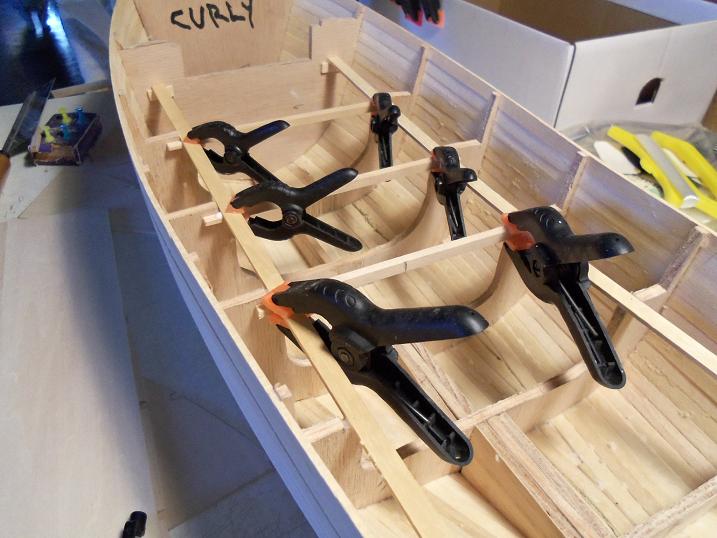
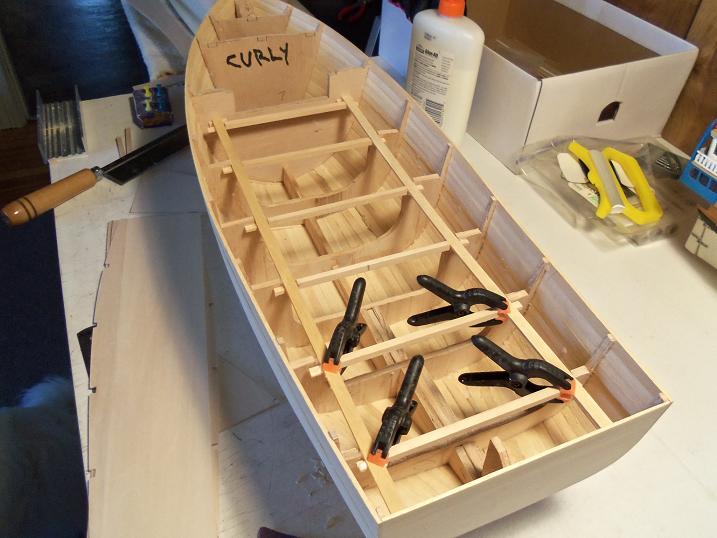
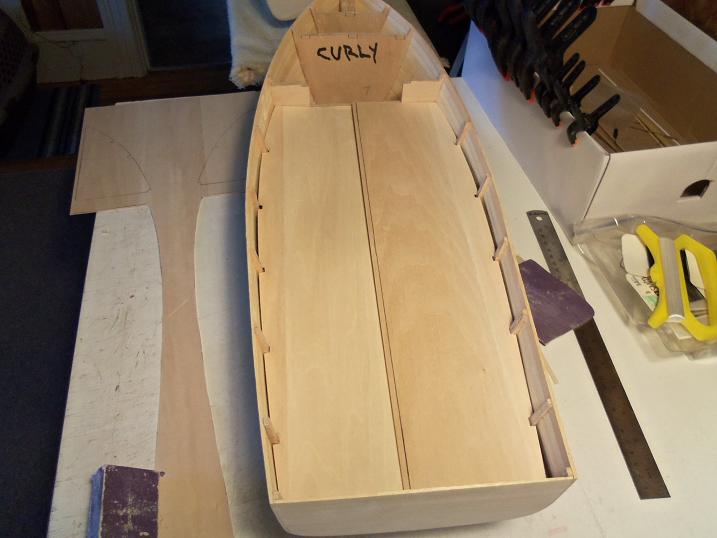
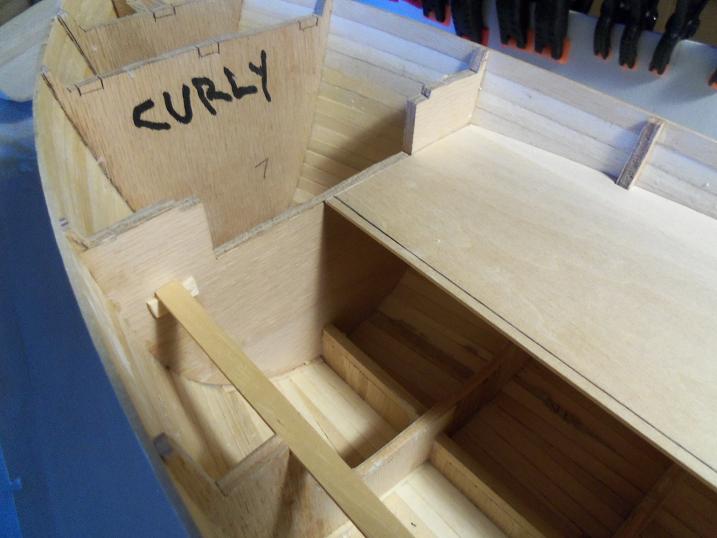
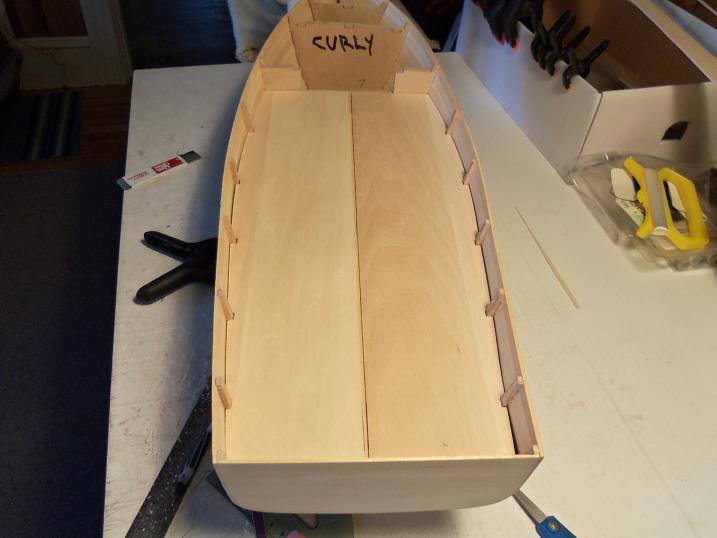
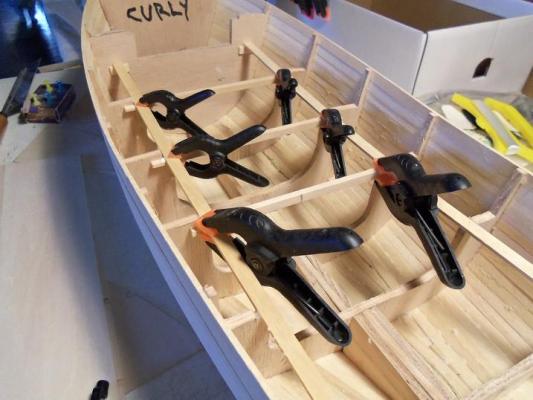
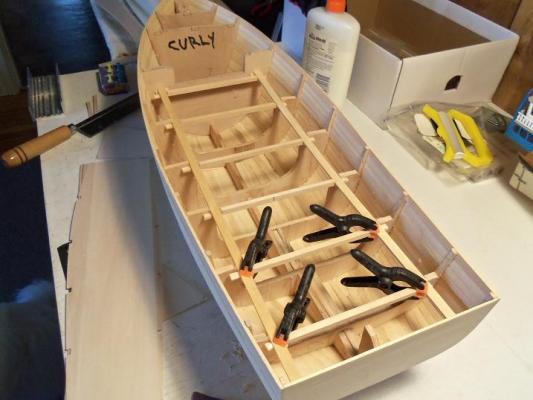
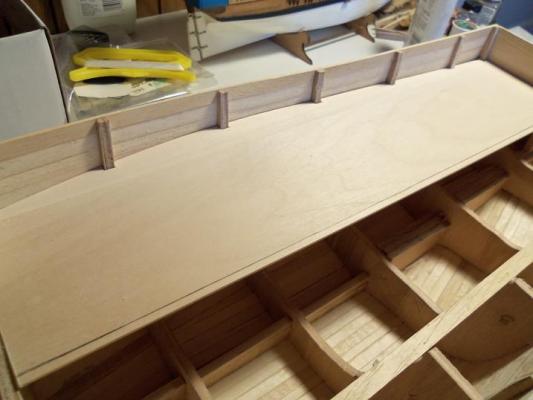
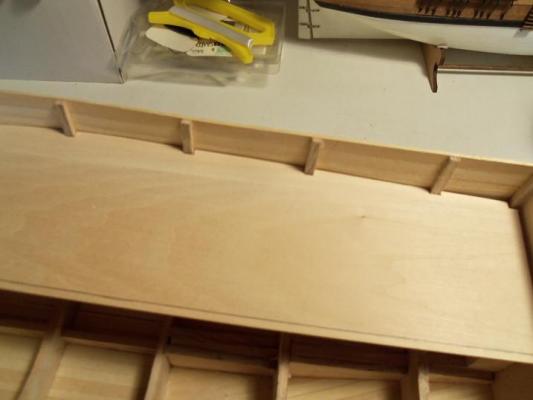
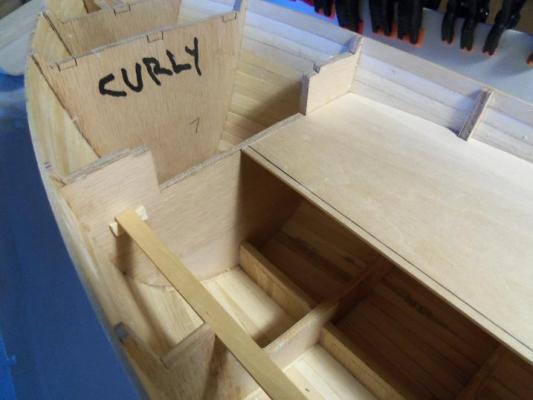
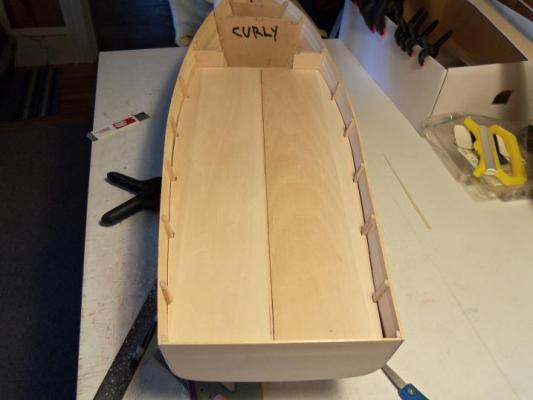
OK..........I'll start over with this last bit of my update...................................... with the panels nearly ready, it was time to get the deck beams in place. I could have gotten really creative with them, but they are what they are......just beams. using 1/4 x 1/4 square stock, the required lengths were cut and notched to even them up to the decking strips, going lengthwise from bow to stern. I was not going to get fussy with them. an additional beam was added to the bow section, near rib #6. I had a wild idea of cutting out the two areas of this rib {the two sides that border the opening to the pilot house}, leaving enough to constitute the bulwark posts, in an effort to make the main deck look longer. I may do that with one of the other hulls.....I just have to think up a more creative pilot house. notice the opening for the pilot house......it is uneven........I have a solution for it, you'll see. the horns on both sides of the ribs, needed to be sanded down to sit even with the deck beams..........sanding dust still can be seen. the port side was cemented in first......followed with the starboard side. there is a noticeable gap in the middle of the deck platform. that's OK though.......filler can always used here. Elmer and I are very good friends for that opening to the pilot house, I took one of the shavings from the deck beams and shimmed a board to go across........it is a bit raised and will serve well for the basis for a doorway stoop. ...and with the clamps and pins removed, filler added and sanded, the main deck platform is done at this point. I am quite pleased with how the deck platform mates the bulwarks....very minor filling is required......I could even get away with using white glue. I'll have to look into what to do with the bow section..........this hull seems to have it's direction already laid out for it. I can plank the other hulls and decide whether to plank or paint the deck{s}. I'll most likely plank.........seems to be how I roll


-
do you want to hear about stupid.........I was creating the latest post of all this madness........had it up here and was almost done. I wanted to look for something to add to it.......so instead of open another tab, I opened my book marks and clicked on where I wanted to go! DOUGGGGGGGGGGHHHHHHHHH! "me thinks me be better with smoke and blanket!" thanks Michael....a neat solution.......with a neat outcome {I'll have it up in a moment.....that is.......when my computer skills catches up with me again} your a lucky man Dave.......we're looking at a foot today more to come on Sunday, I hear. your neck of the woods have seen some bad weather of late........but yea........good day to stay in thanks for the good word!
-
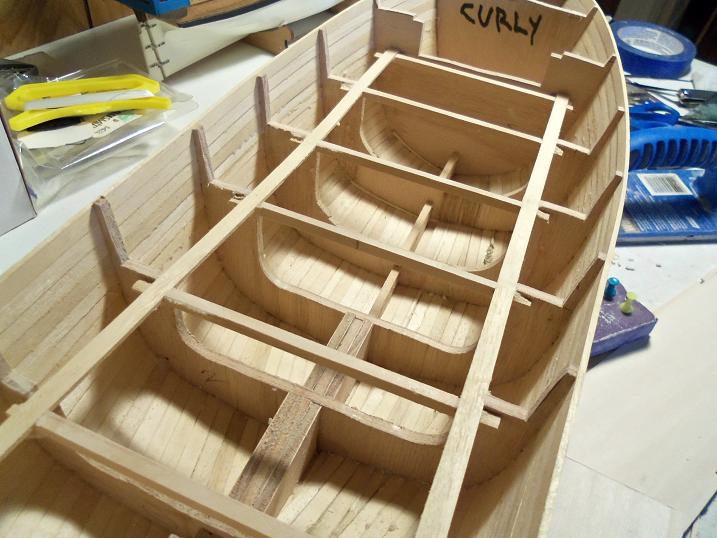
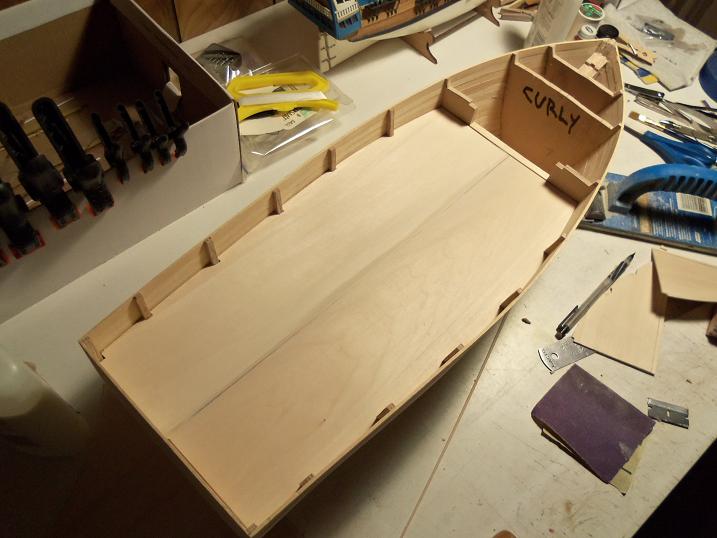
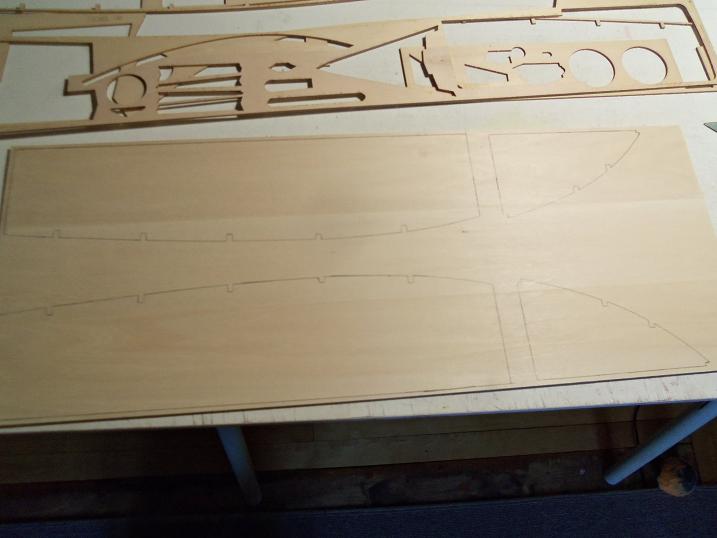
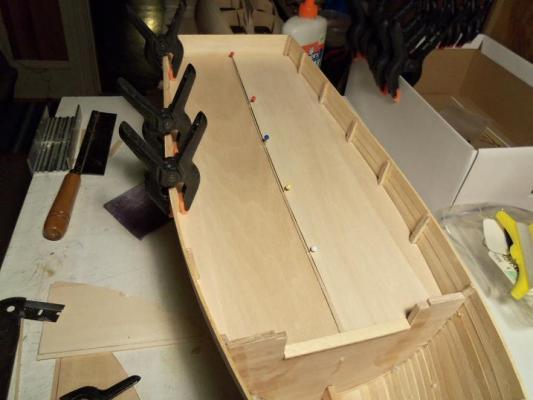
Fitting Time!!! the platform parts were cut from one of the sheets, and the process for the main deck commenced. there are two factors that are going to make this a bit tougher to do.......first is the curvature of the deck from bow to stern. the second is the lack of pressure I can apply to the halves for the pictures.......this will make it look worse than it is. but, it is there........there will be some shaping that will need to be done. I left the extra on the second half.....shaping is going to make the gap in the middle widen.......the extra will make up for it........the line you see is not the center line. these parts are shaped, bringing them as tight to the bulwark as possible. ........making sure that the line at the bow section is right up to the rib. I'm not concerned with the stern end.......if required, I can always cap it in. just about ready to cement them in place!


-
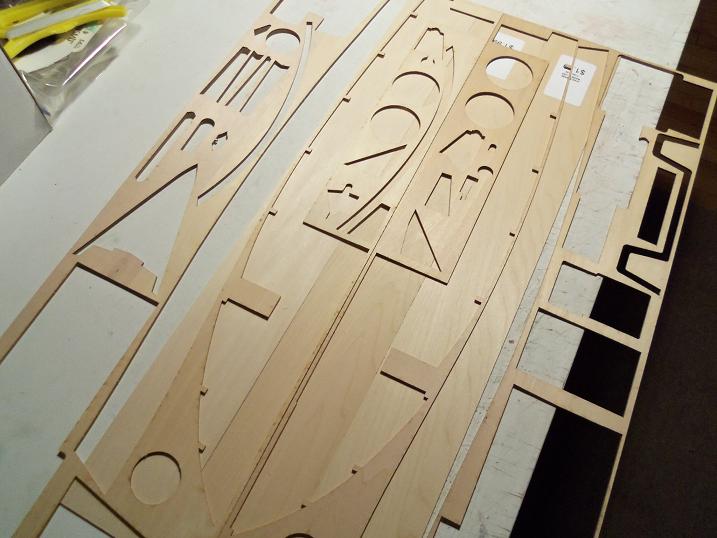
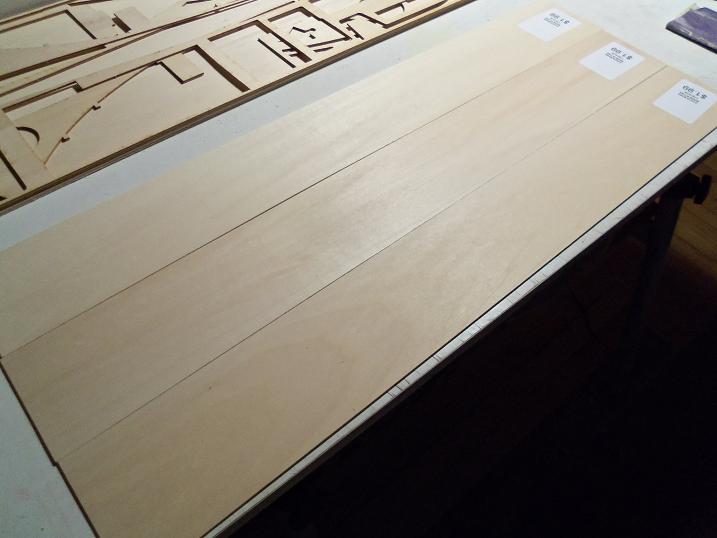
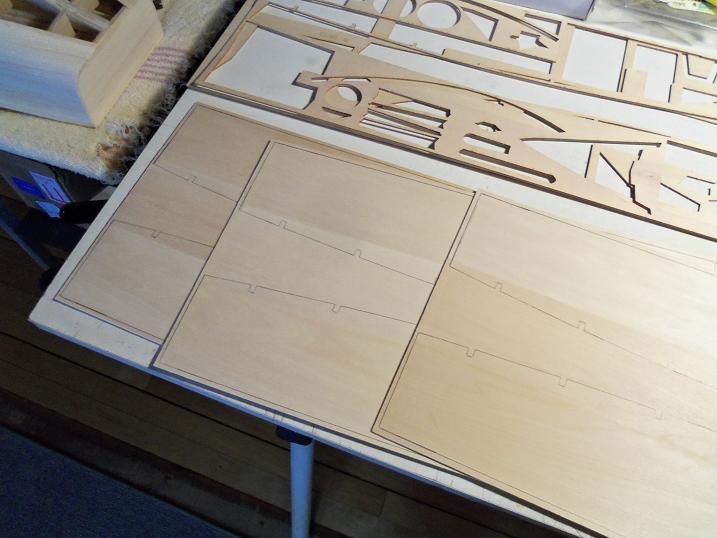
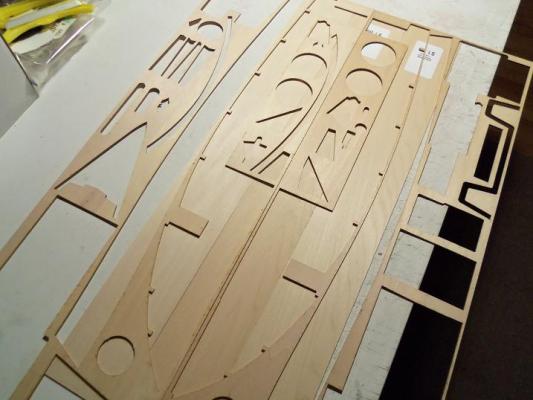
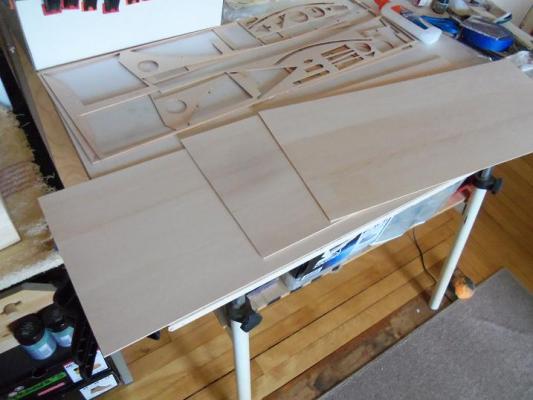
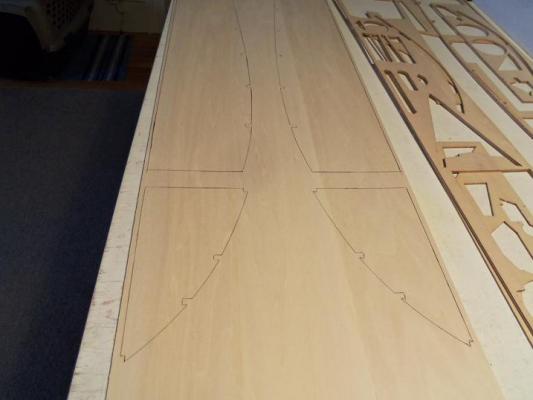
I have been lax........after the hull dubbed Curly was done and some filler {there will be more, I'm sure}, was applied, I did some sanding........and WHEWWWW! I like to have wore myself out! it looks pretty good though......more needs to be done.....but I will digress for a bit. I have Larry on the planking mat now, pretty close towards being done. a while ago, I showed you the parts panels for the deck platforms and how the arrangement of the parts created the opening in the center of the deck. the reason for it and the laments over missing parts, will not be an issue here. I found that I could use three of the 1/16 x 3 x 24 sheets for the platforms. too bad that I couldn't find these in whole sheets.........these were cemented together. soon, I had the three sheets I would need. the surfaces were sanded to smooth them out. then the task of tracing the parts took place. I'm not too keen on the bow parts, but I traced them out anyway. I'll get to them later. this wasn't too tough a pill to take........they are all done now


-
ohhhhhh, wait a moment.......got to pick up my jaw, it's on the floor! WOW! this really puts a positive look to the build.....she looks superb! you've done a great job!
-
Cutty Sark by NenadM
popeye the sailor replied to NenadM's topic in - Build logs for subjects built 1851 - 1900
the older pictures show just how much of a change you have made.........you've made some great progress. the rivets are a nice touch and paint will bring them out nicely. looking down the length of the deck......I don't see too much warpage. before you go any further, get the deck as flat as you can.........the sanding may knock off some of the rivet work your doing. then finish the rivet work and paint the bulwarks. plank the deck......you'll be showing those pearly whites in the biggest smile you'll ever have! you began this scratch build with a definite direction........as you saw the extra detail you could add in, you found that it altered the direction of the build.......and there was some consequences. but through it all, your build has evolved into a very interesting build, with detail that I have never seen in any Cutty build. you shouldn't change your log at all..........it is a testament of the process you took to get where you are now. scratch building comes with it's problems........it's all in how soon you see the problems......and solve them, that makes it an enjoyable medium. your doing a fantastic job!- 4,152 replies
-
- 6
-
-
- cutty sark
- tehnodidakta
- (and 1 more)
-
certainly, there is a lot less rigging, but it gives you a good idea of how it behaves in the configurations of pulley assemblies and such. to do a ship as your doing would be a feat in itself.........but it would sure look interesting you have a beautiful build there....your rigging is top notch
-
the only way I use the Billing's thread, is to treat it with diluted white glue and stretch it until it dries. for standing rigging, I have stained it with India Ink and then treated it in the same manner....this seems to work well. I downloaded the plans for the Will.......I am used to Billing's plans, as I have build a few of their kits. I must say......I am in awe of what you are up against........vague......doesn't even describe it. they must have a shortage of folks who can do a choreographic build log of the proto type. sorry to hear of your recent condition. know that there are folks here who care.....because of this site...we share a sense of closeness. just because we are 'across the pond' so to speak, my thoughts are with you...I hope you fair well. I hope you'll keep us up to date with how your doing.
- 170 replies
-
- 4
-
-
- thames barge
- billing boats
- (and 1 more)
-
shrouds look super Max! very well done did you stain the dead eyes, or did they come that color? sweet!
-
nope! I totally agree with showing the shortcomings...........the new lid looks great! well worth the effort I like the overview of the tower........you really have out done yourself ! great job! looking forward in seeing the upper hull paint.
-
Cutty Sark by NenadM
popeye the sailor replied to NenadM's topic in - Build logs for subjects built 1851 - 1900
plank the deck Nenad.........you'll forget about the little mistakes, when you see how nice it looks then -
coming from a plastic background.......I see no real difference between the two. a person working in either medium, has learned the skills to make do with the materials at hand. when I took my hiatus from modeling, I was just learning about plastruct and evergreen products. I would use everything in the kits.........the runners {sprues} made for excellent roll cages and frames for drag and race cars. your making good resolve with your plastic knowledge Andy.........the ship looks better and better.....every time I see it!
- 382 replies
-
- 4
-
-
- stadacona
- sylvan scale models
- (and 1 more)
-
it's all progress, my friend. lots of folks don't understand...perhaps if they picked up an x-actor, they might find that inner child, that's crying to get out! your best just the way you are......... I sit at home with a 30 pack........and I'm just as content you'll be back up to speed in no time.