


glbarlow
-
Posts
4,134 -
Joined
-
Last visited
Content Type
Profiles
Forums
Gallery
Events
Everything posted by glbarlow
-
 Thanks Joe, I appreciate your saying so. The new camera is a fun bit of technology. Should I stay inside and work on the model or go outside and shoot photos, hard to choose😊
- 840 replies
-
- 2
-

-
- winchelsea
- Syren Ship Model Company
- (and 1 more)
-
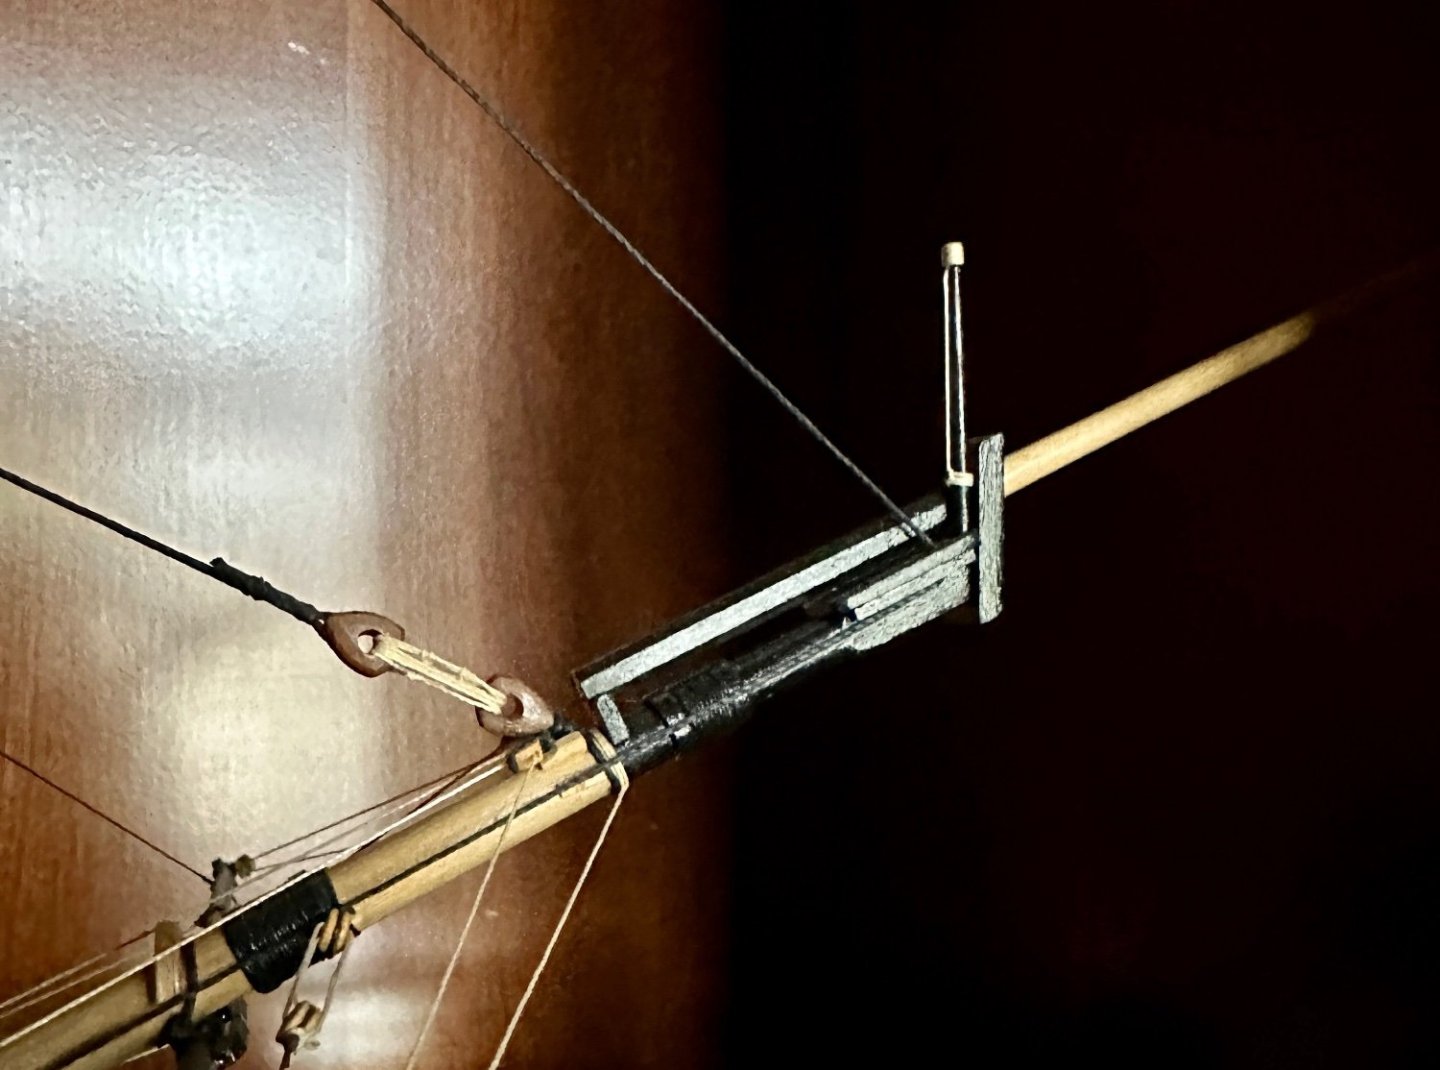
I probably should have also lashed it, but it didn’t show that on the plans. This is one of my first builds. I didn’t stray far from the plans back then.
-
It is true the masts and especially the rigging rely mostly if not completely on the plans, just to make it more fun and interesting. Either the pin or some PVA or both works, the rope lashing wouldn’t hold it by itself very well. Here’s mine if it helps, I believe I both pinned and glued it
-
Nice work, it looks great. Congratulations on the grandkids, they are truly our greatest reward.
- 144 replies
-
- 2
-
-
- winchelsea
- Syren Ship Model Company
- (and 1 more)
-
Masterful just under sells how good this is. Enjoyable just seeing the photos, the detailed knots and rigging show elements I didn’t know existed having done much inferior rigging that until now I thought was pretty good.
- 589 replies
-
- 4
-
-
- le gros ventre
- cargo
- (and 1 more)
-
Thanks Rusty. I appreciate your saying so.
- 840 replies
-
- 3
-
-
- winchelsea
- Syren Ship Model Company
- (and 1 more)
-
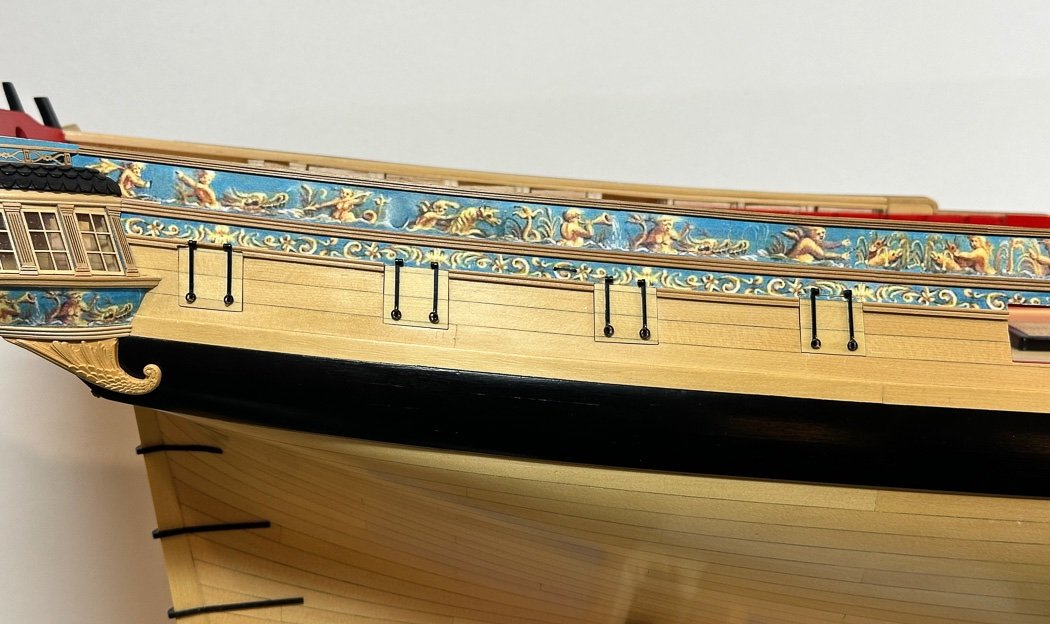
Thanks BE, kind of you to say so. Even though the forward three will be mounted open eventually I wanted them to all fit and match the run of the planks correctly. It took a try or two.
- 840 replies
-
- 3
-
-
- winchelsea
- Syren Ship Model Company
- (and 1 more)
-
Nice work on the wales. I’m personally left wondering though, what a Hoggs of Fife country shoe must look like😊
- 648 replies
-
- 3
-
-

-
- Indefatigable
- Vanguard Models
- (and 1 more)
-
Thank you, yours is one of those I follow for inspiration.
- 840 replies
-
- 3
-

-
-
- winchelsea
- Syren Ship Model Company
- (and 1 more)
-
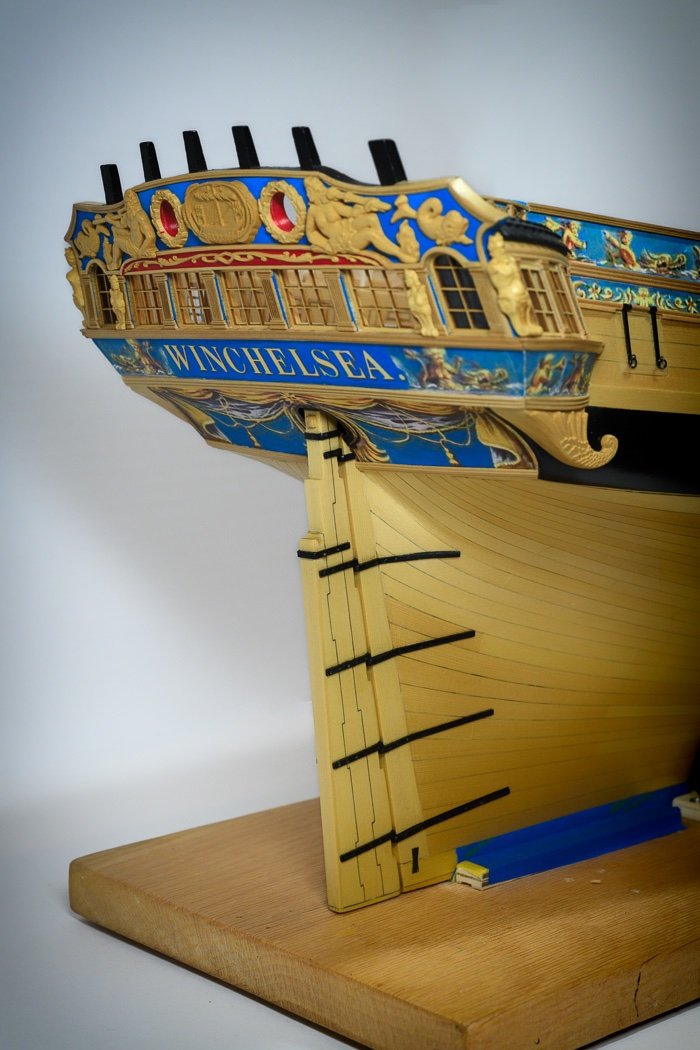
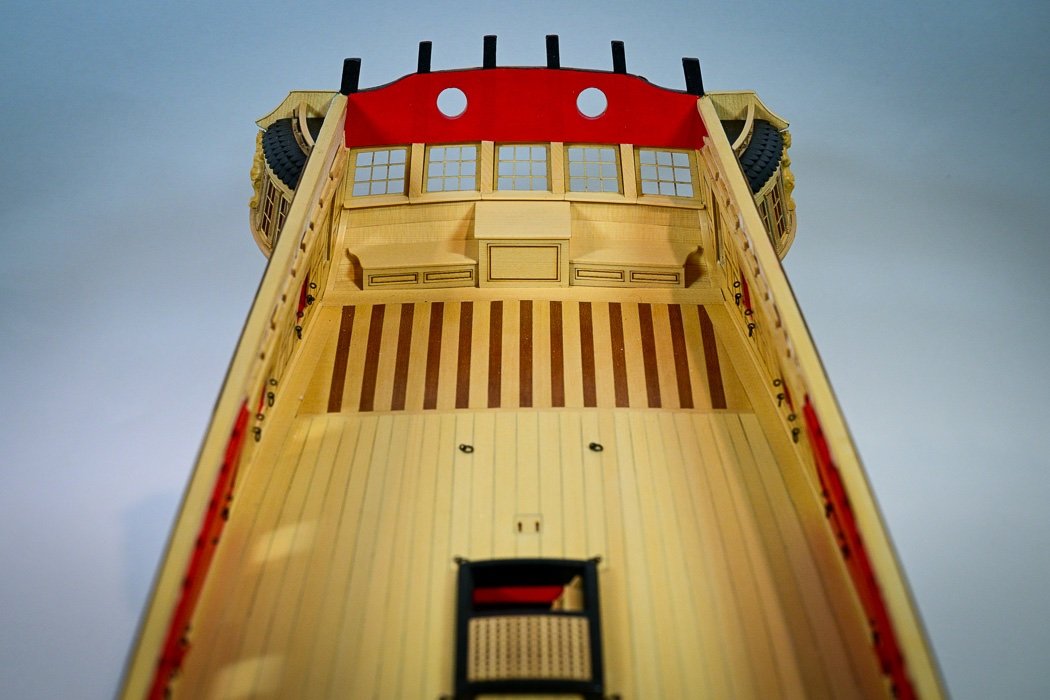
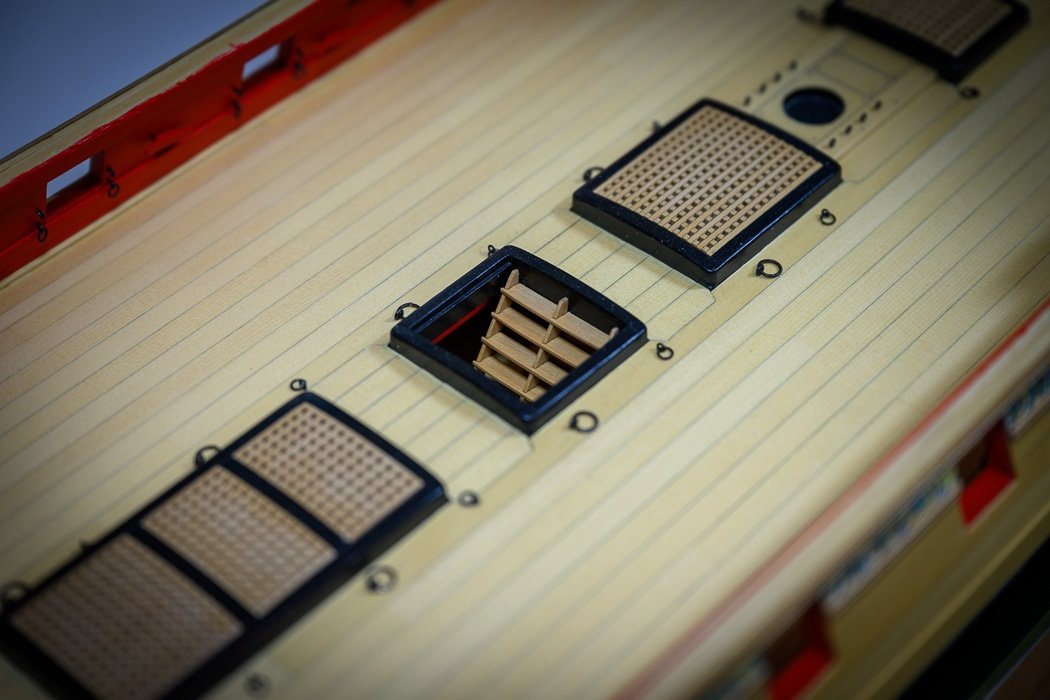
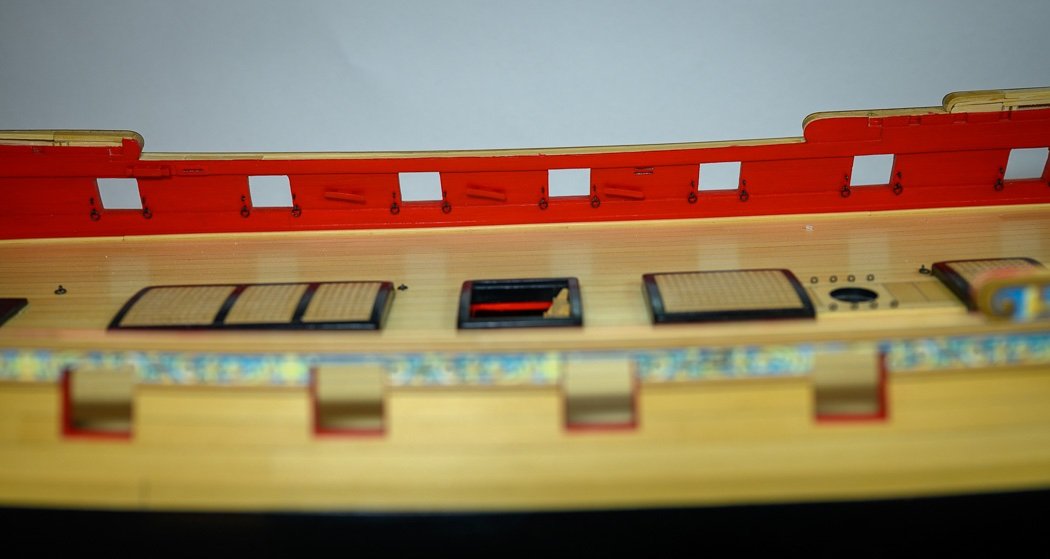
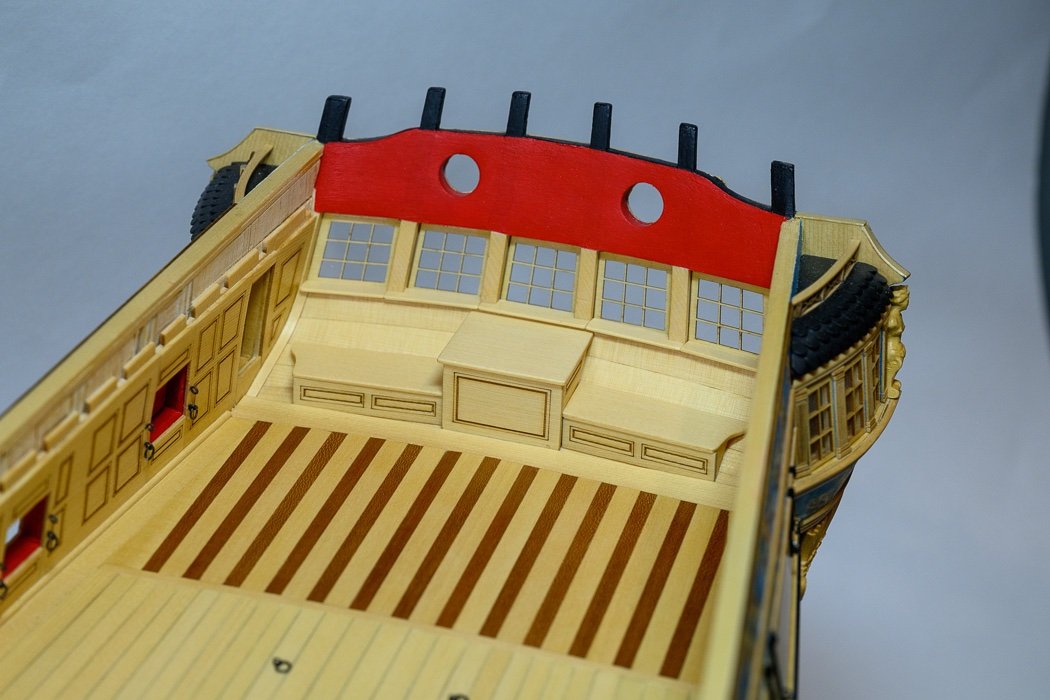
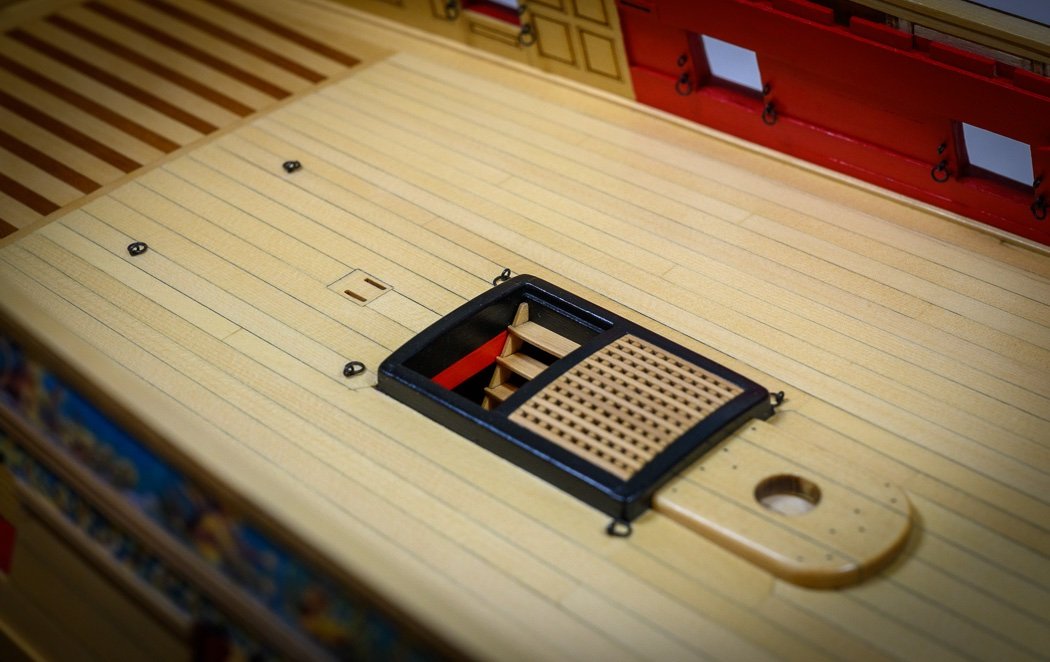
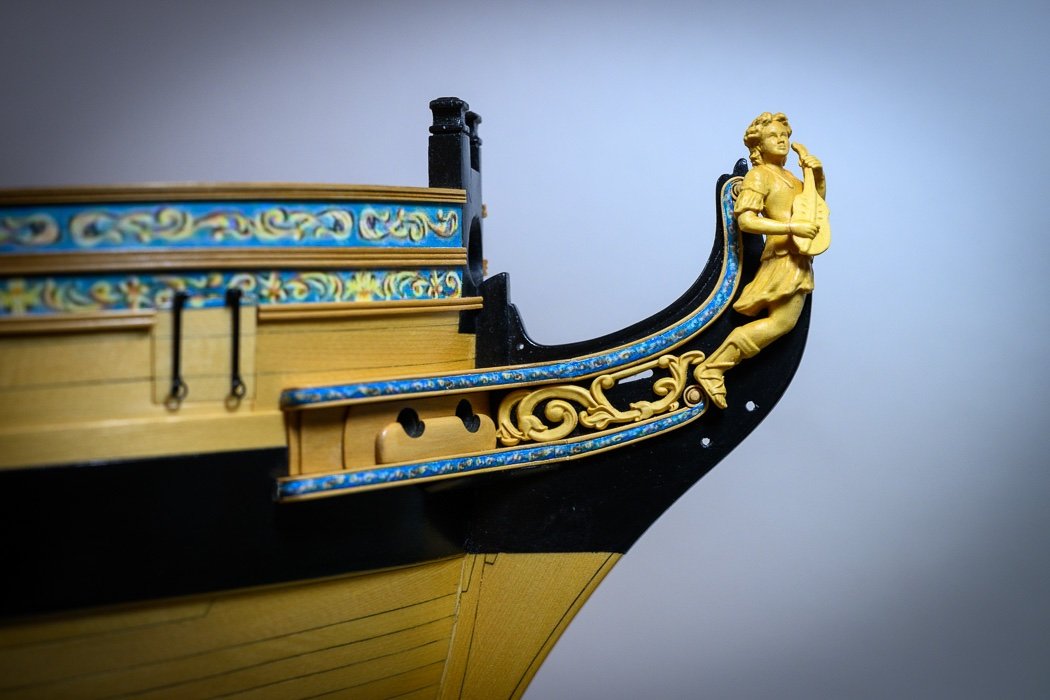
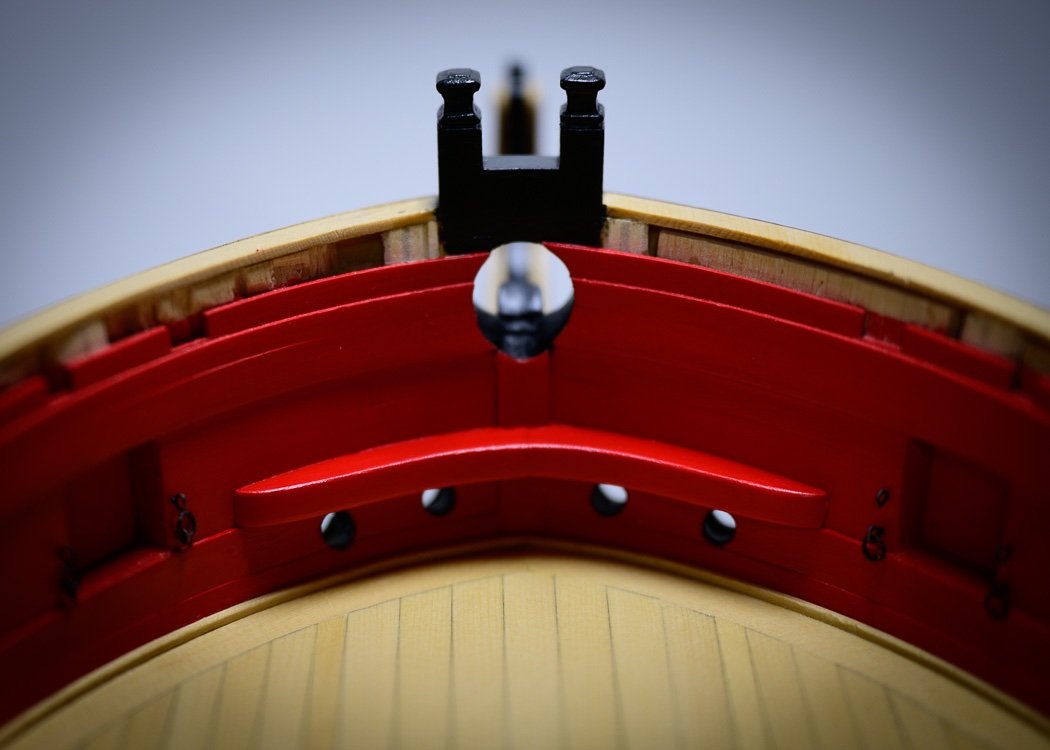
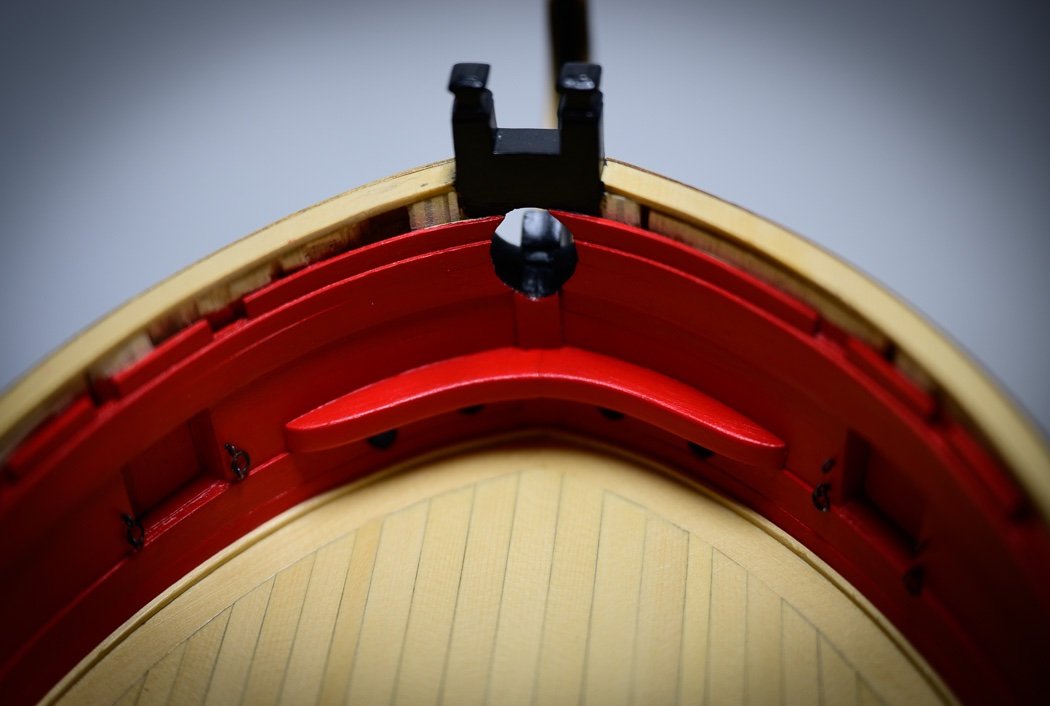
Chapter 5 is Complete After 3 months that included assorted other distractions I’ve completed chapter 5, only seven more to go. Nothing new to report but thought I’d add a few photos summarizing this long bold chapter of work. One of my distractions is a new camera, photography being my other hobby. I just got it so thought I’d give it a try instead of my usual iPhone work, still figuring it out. Nothing fancy with the lighting other than moving my work lights around and messing with shading and white balance for different affects - not work I'd put on my website, but fun. First up is the rudder. It is now safely tucked back into my finished work cabinet until I permanently attach it near the end of the build, otherwise I’m sure I’d find a way to knock it off. The captain’s cabin benches and rudder house followed. As I noted earlier, accurate or not I added my own personal touch to the cabin floor with cherry and boxwood. Then the ship’s ladder’s, which naturally are a bit hard to photograph. These are designed so nicely and laser cut in boxwood, a step up from my scratch built ladders on Cheerful. To avoid the port lids for a while longer in addition to shaping and adding cleats to the bulwarks I also made all and added all the eyebolts and rings for the 28 ports. You get pretty good at bending and cutting wire once you do it for a while. I’ve learned to enjoy making these, just crank the music up and zone out with the pliers and flush cutters. The ports took me a while, partially because while only ten are needed, I made … well, more than ten. There’s a lot that goes into making these little not-squares. In the end I’d like to say they were fun to make, as I said, I’d like to say… The cheeks and hair brackets are another of the many things I’ve had to opportunity to do more than once, I’m probably a broken record on this. Someday I’ll do something right the first time and totally surprise myself. They are a pretty cool feature of the ship and really stand out from anything else I’ve done. From these macro photos I can see a few things to go back to try improving. I did learn here that there is no end to the opportunity to over-optimize. The hawse holes - ok there is one thing I got right the first time, not much chance for a re-do on those so yay me. The bolsters are also something that nicely stands out. There is some sanding, ok a lot of sanding, involved to turn a flat square rectangle into a curved not flat bolster. And finally more sanding to shape the two pieces of the bow knee into one. Even though it eventually won’t be seen under the forecastle deck, it doesn’t take away my obsession to make it look as good as I can. Chapter 5 was everything I’d want and enjoy. A significant challenge and lots of variety from the rudder to the knee. Good Times! Now I have lots of cannon to make and mix that up with building the stove and capstan. The journey continues.
- 840 replies
-
- 28
-
-

-
- winchelsea
- Syren Ship Model Company
- (and 1 more)
-
Just amazing work. The consistency of the interior fairing, my having done it for Winchelsea, is crazy good and no small feat.
-
Well done, congratulations on. A very fine looking model!
- 102 replies
-
- 1
-
-
- Flirt
- Vanguard Models
- (and 1 more)
-
Nice to see you back at it again.
-
We’ll done , this will look great on display
-
Not sure the most respected ship in the US having having green bulwarks would support it be an Americanism what ever that is. All I know is my Winchelsea has red, and not an “accurate” red either, just one I like. I’m good with that.
-
No source, just an observation. The Constitution has green today.
-
Thank you, I hope it helps. Thanks Joe. I always like to share the good and the bad, mostly because the bad usually gets back to good. Sometimes you see logs with nothing but perfect results and wonder how they do things so well. I get there, but sometimes not on the first try. That's why I love the hobby and working with wood. Generally there is a solution to every problem, sometimes that involves "deconstruction" to get where I want to go. I don't know Bob's work, but I'm glad to be in his company. More importantly I'm glad I can be of help to your and your building. It was well said, thanks Dave.
- 840 replies
-
- 3
-
-
- winchelsea
- Syren Ship Model Company
- (and 1 more)
-
Bulwarks on American ships at the time were mostly painted green.
-
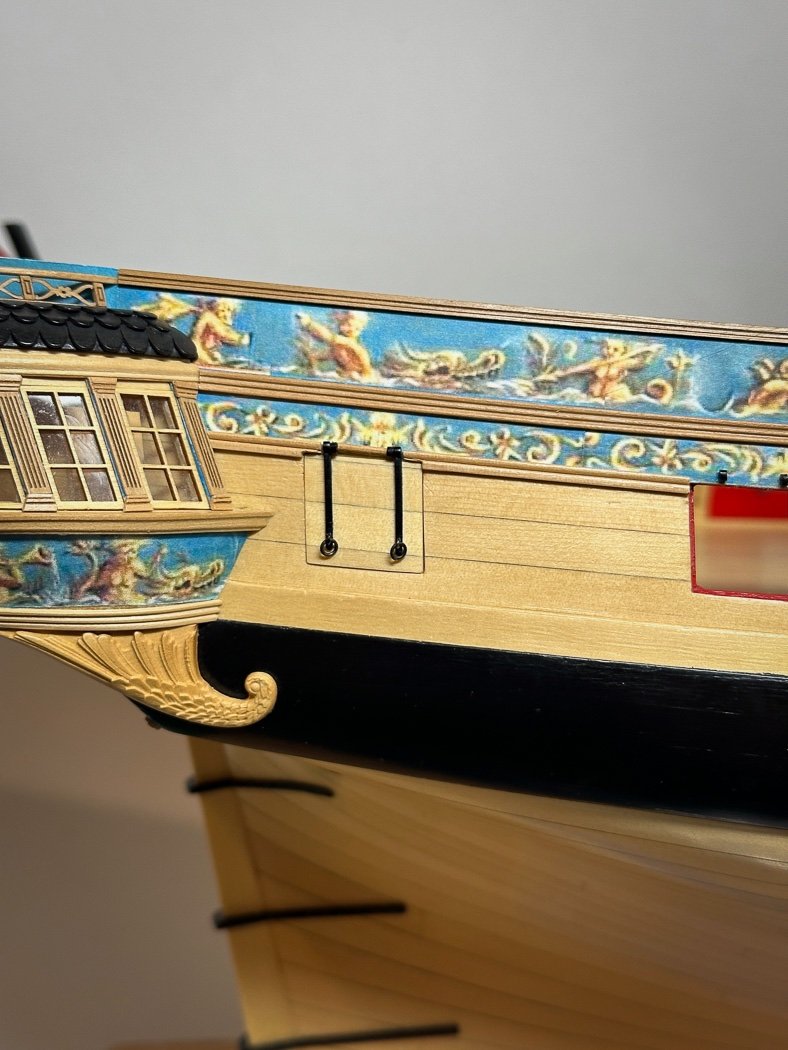
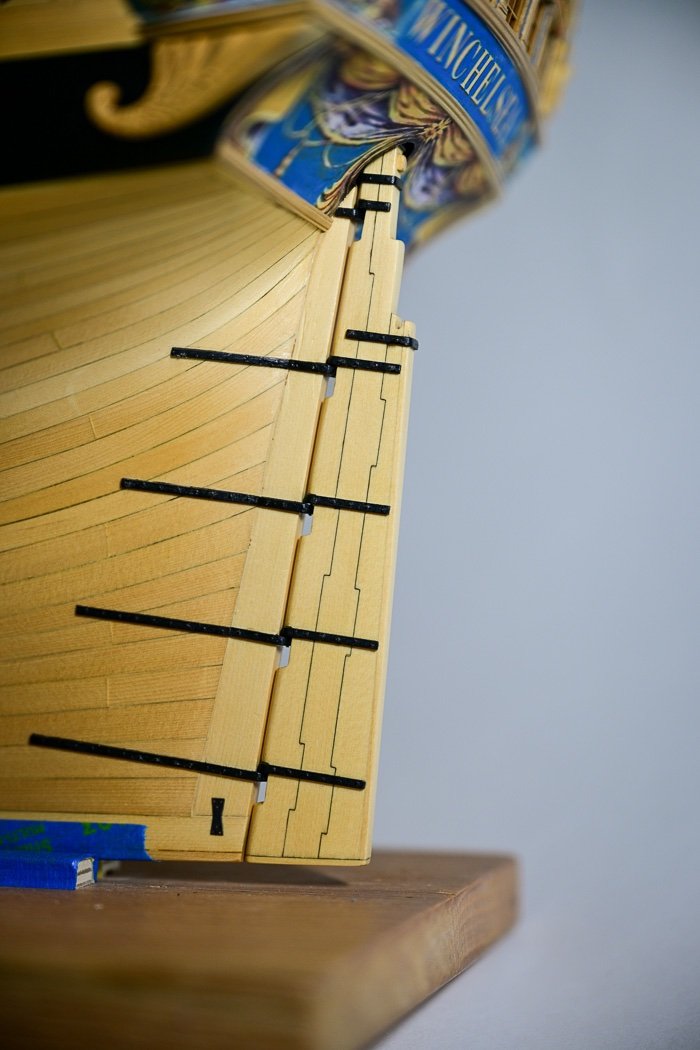
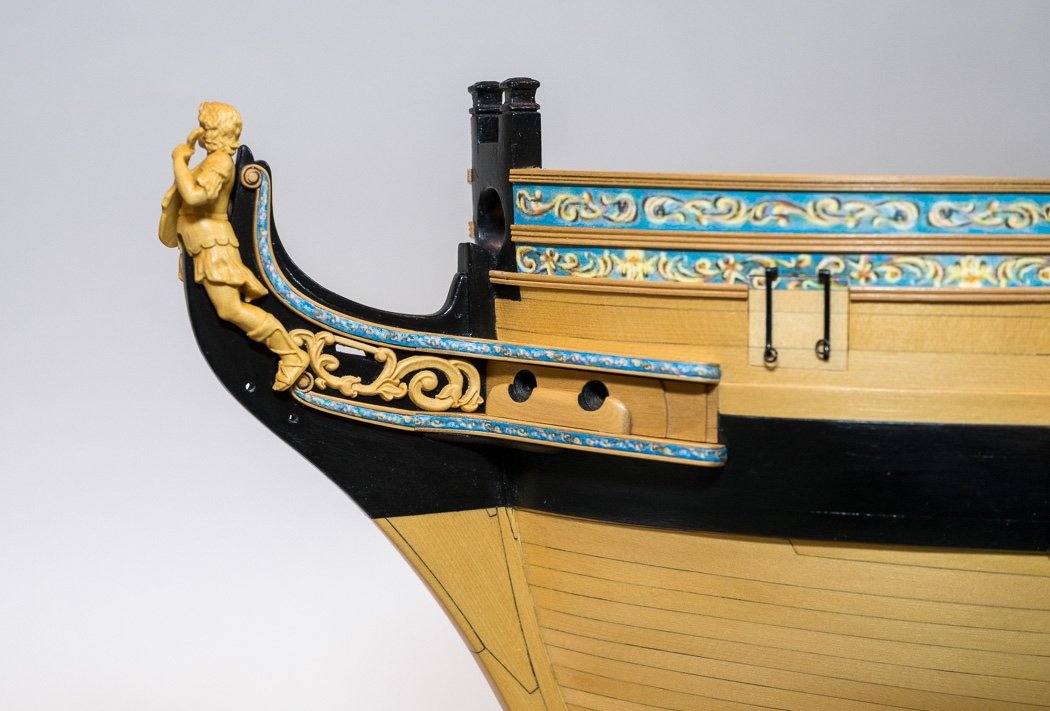
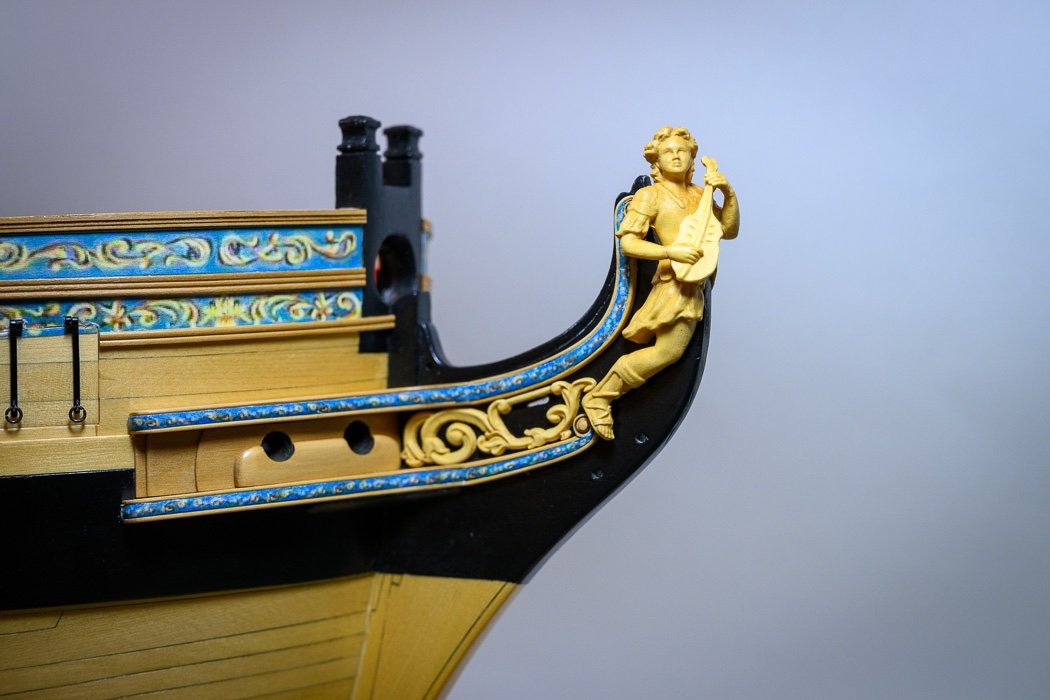
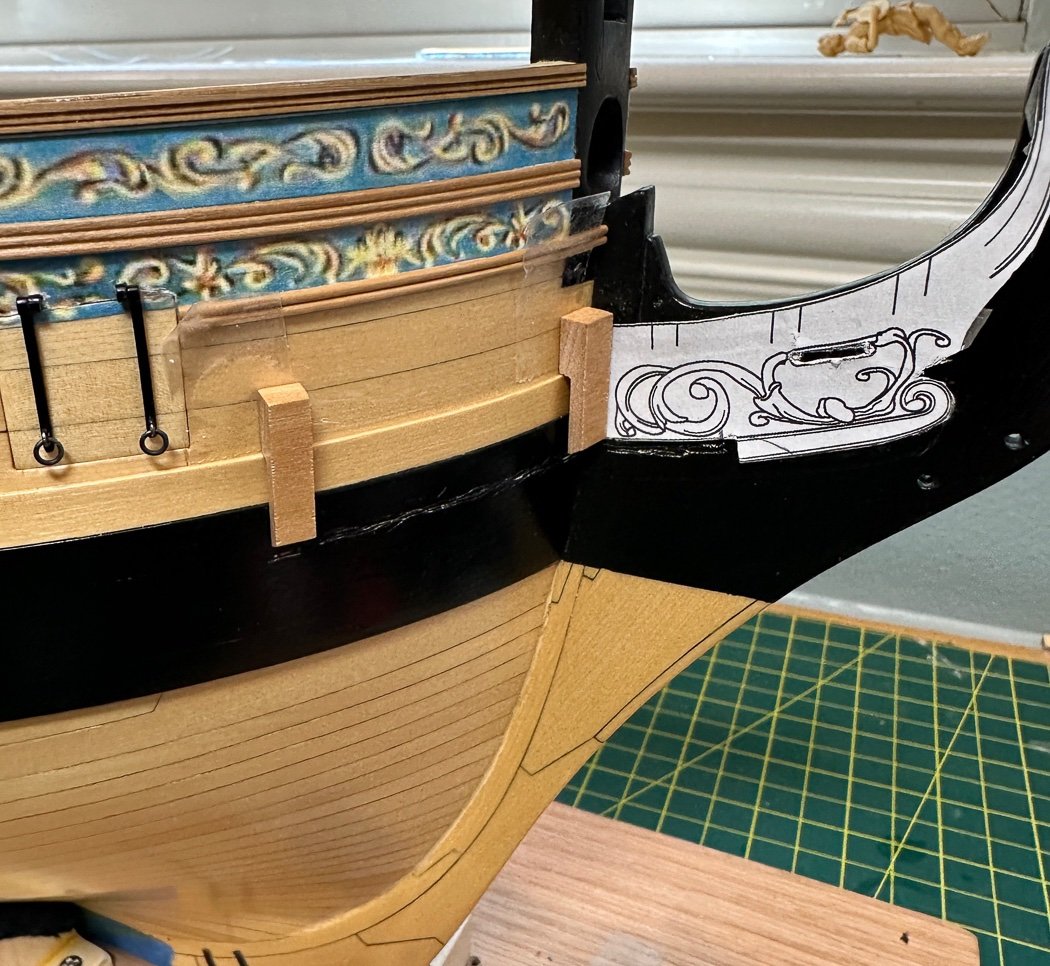
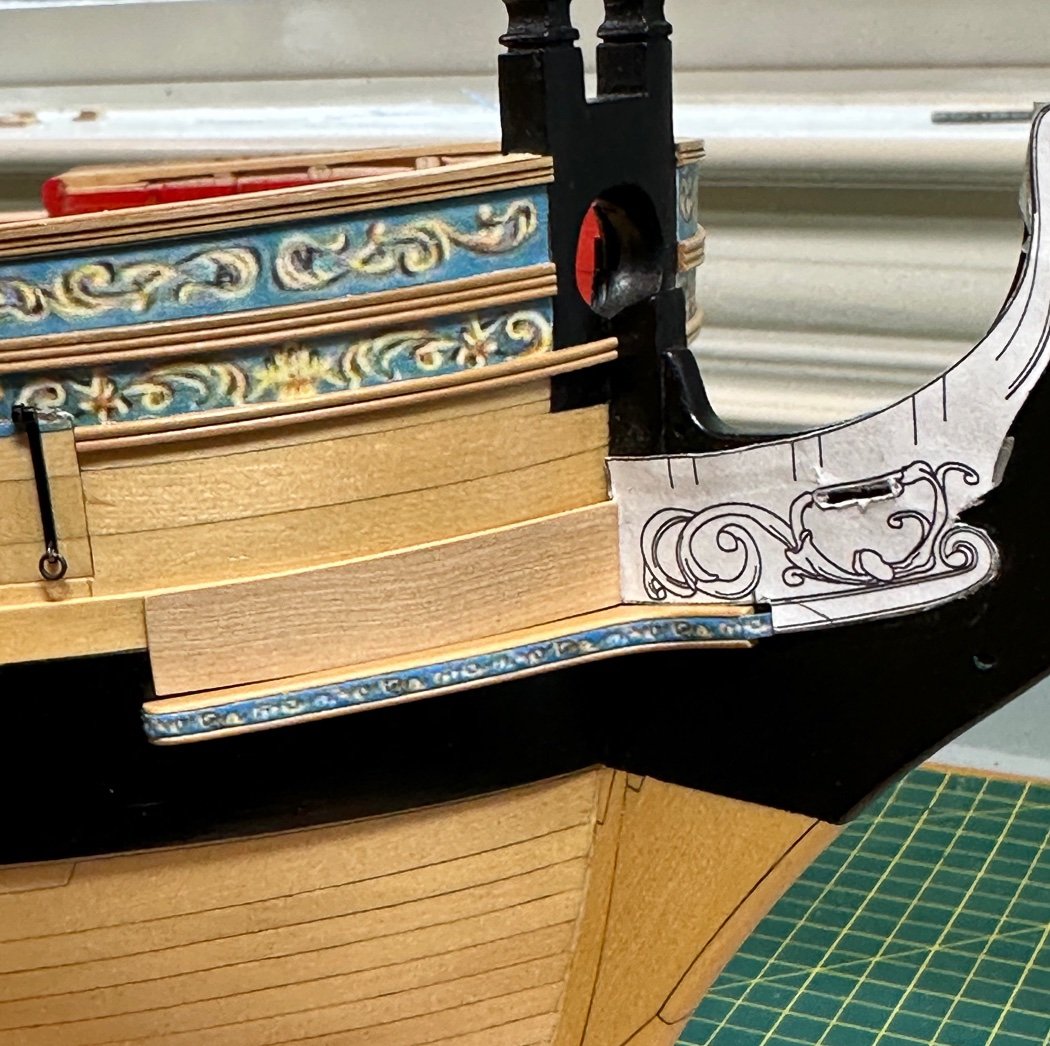
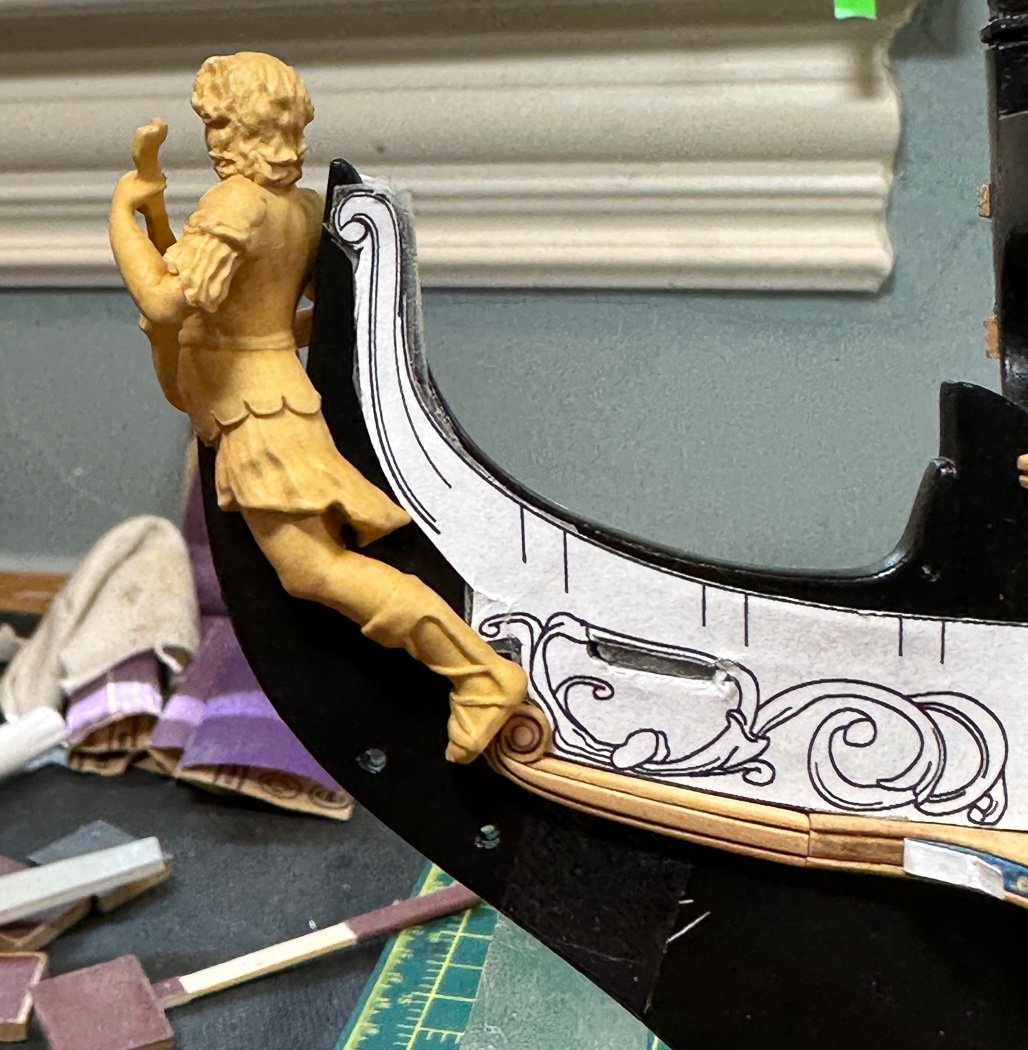
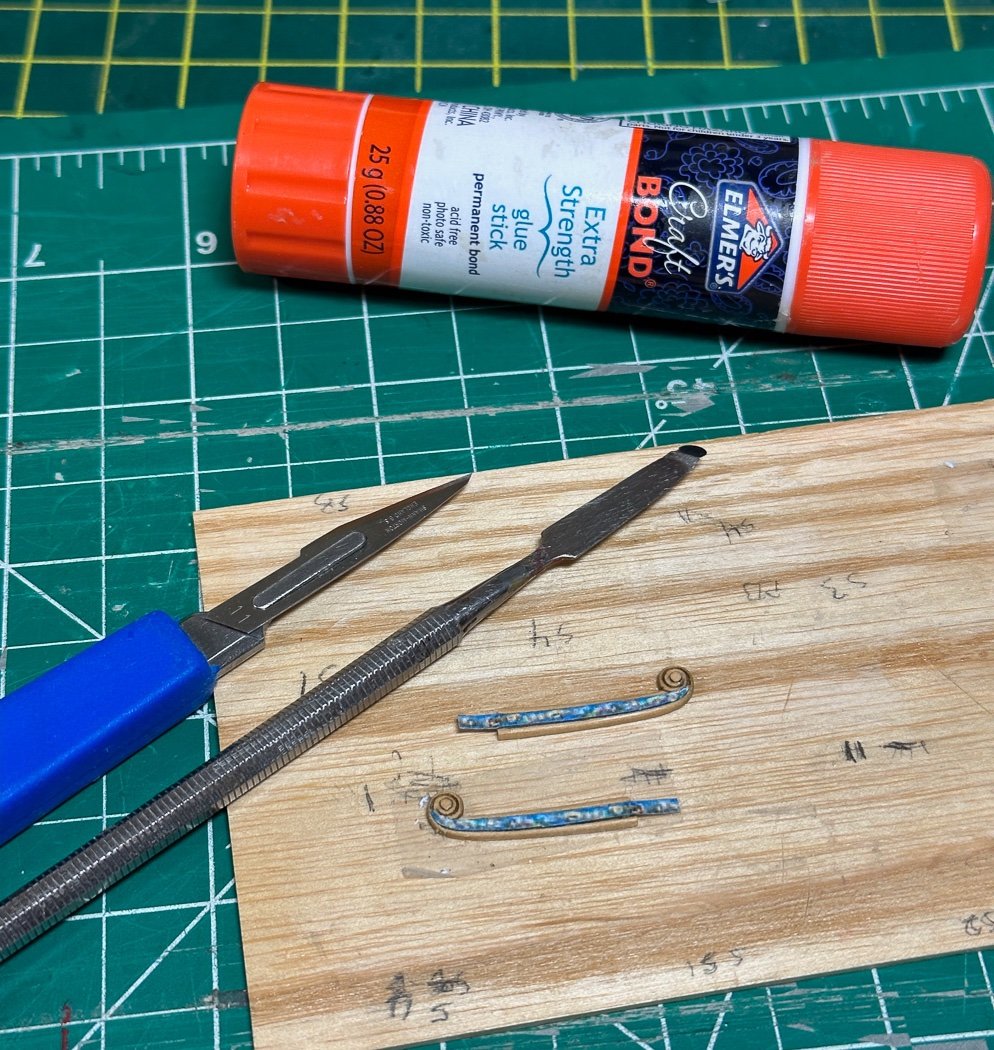
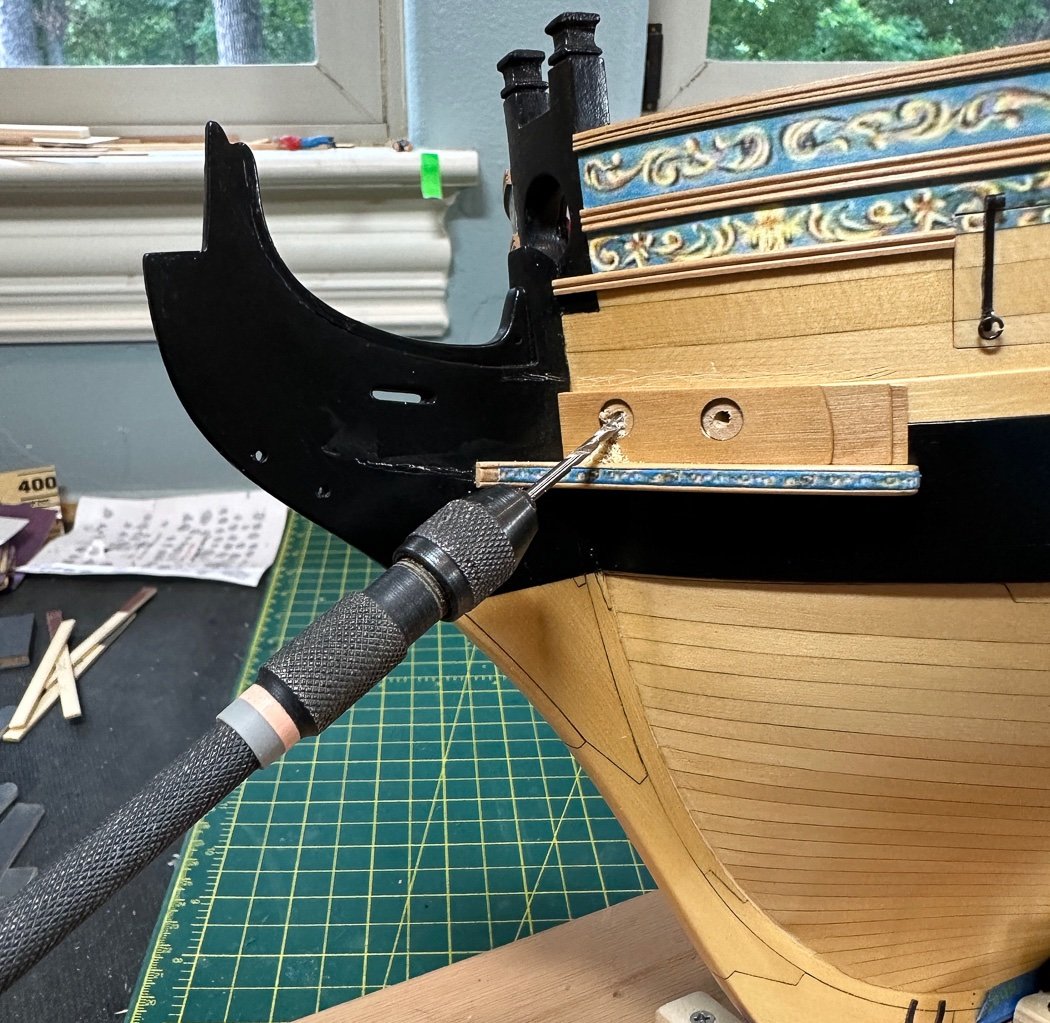
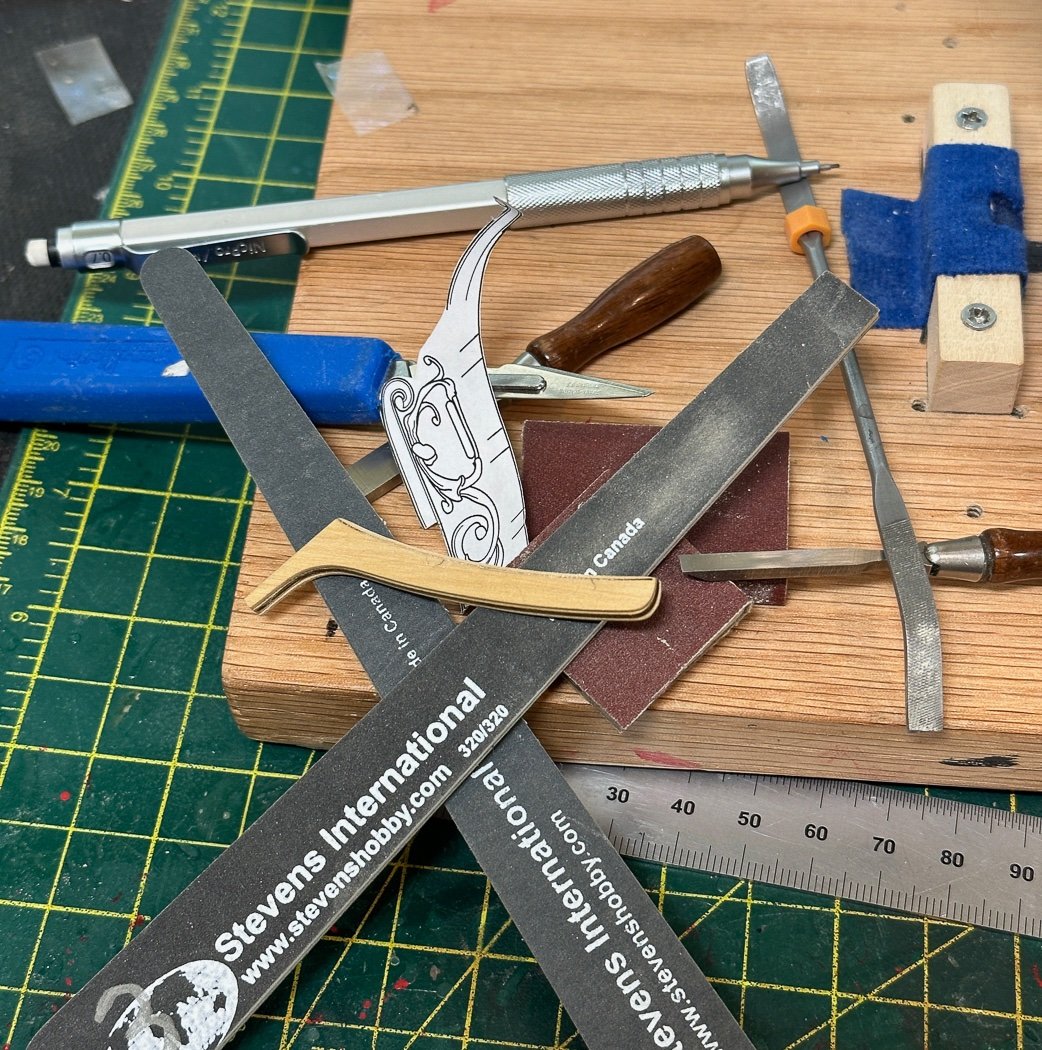
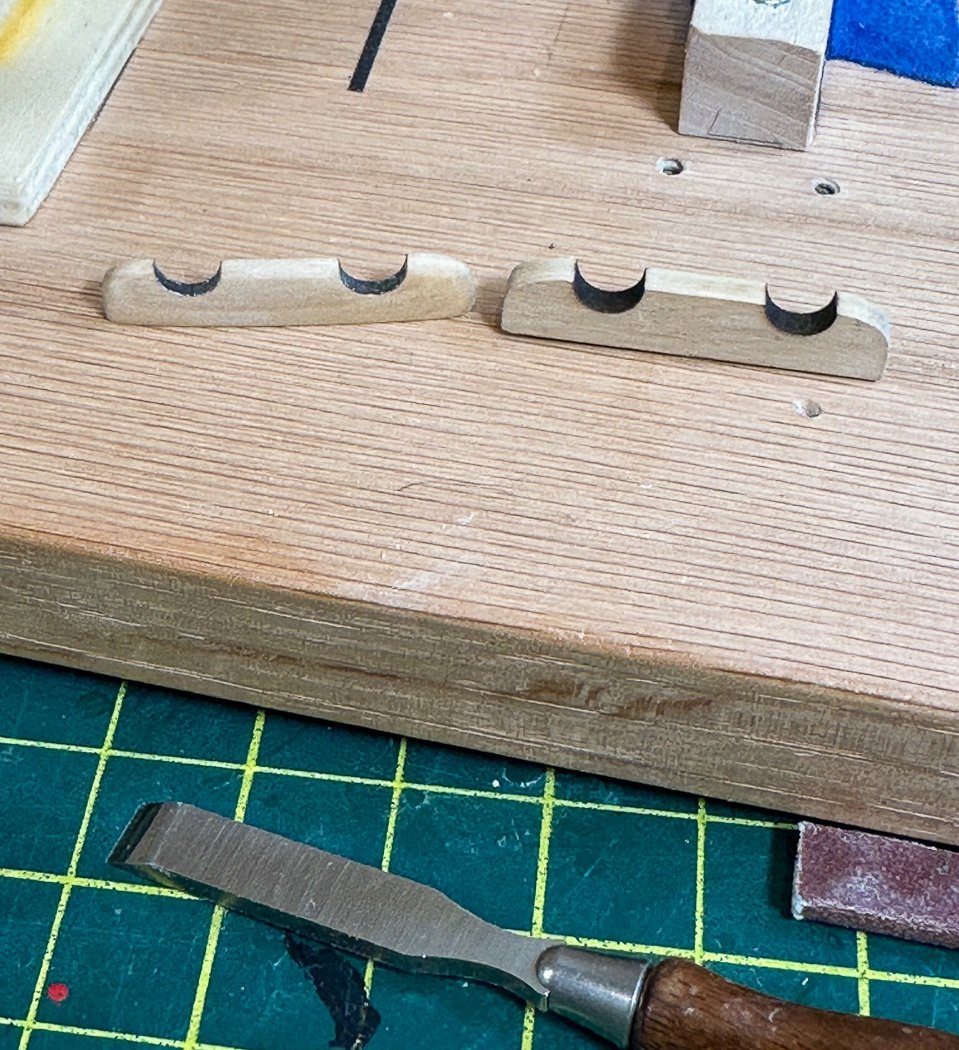
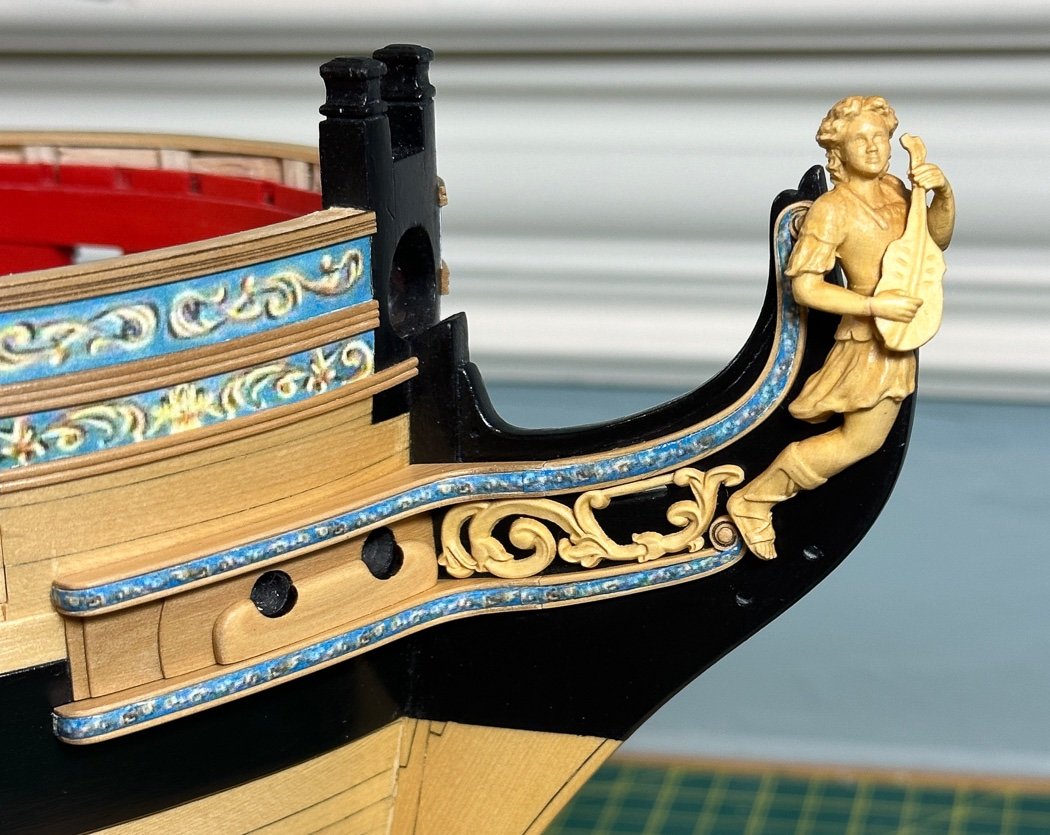
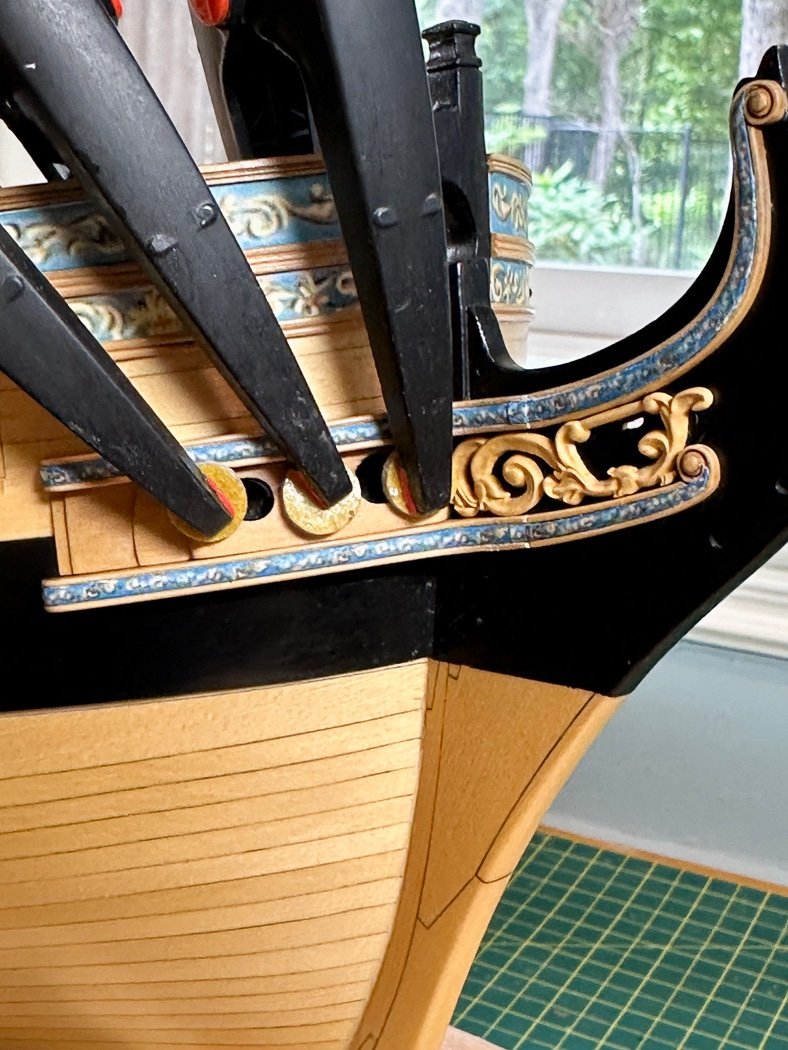
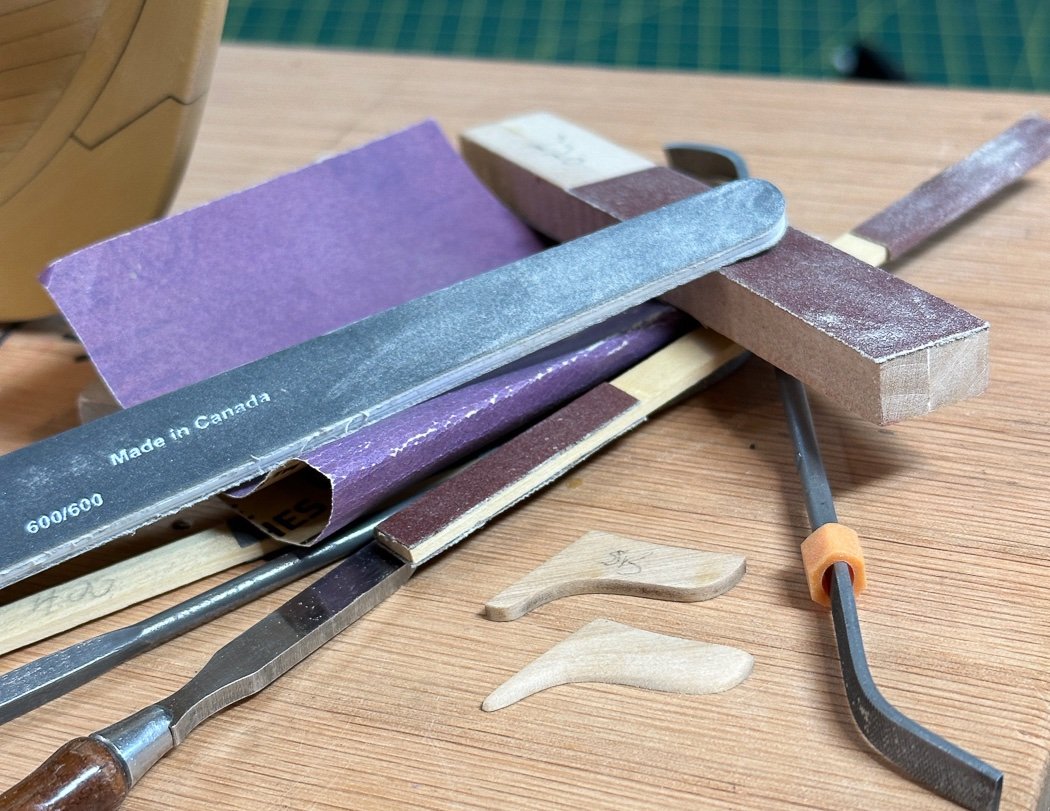
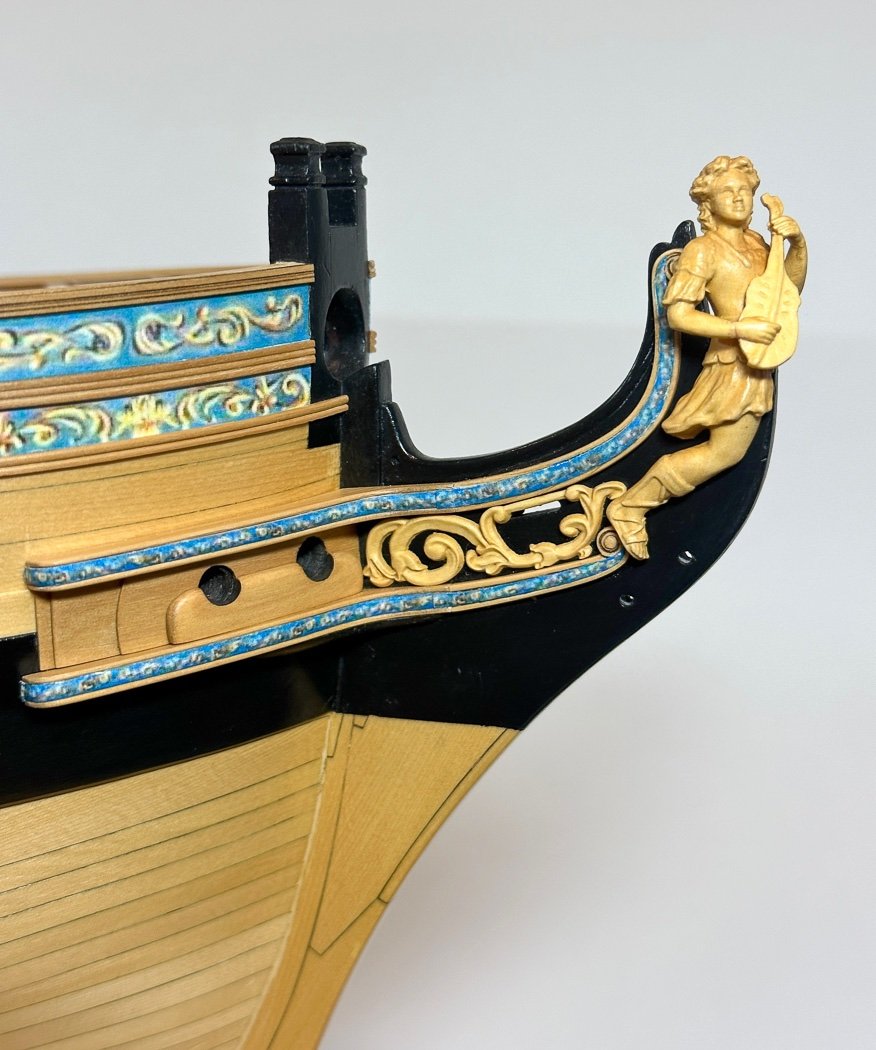
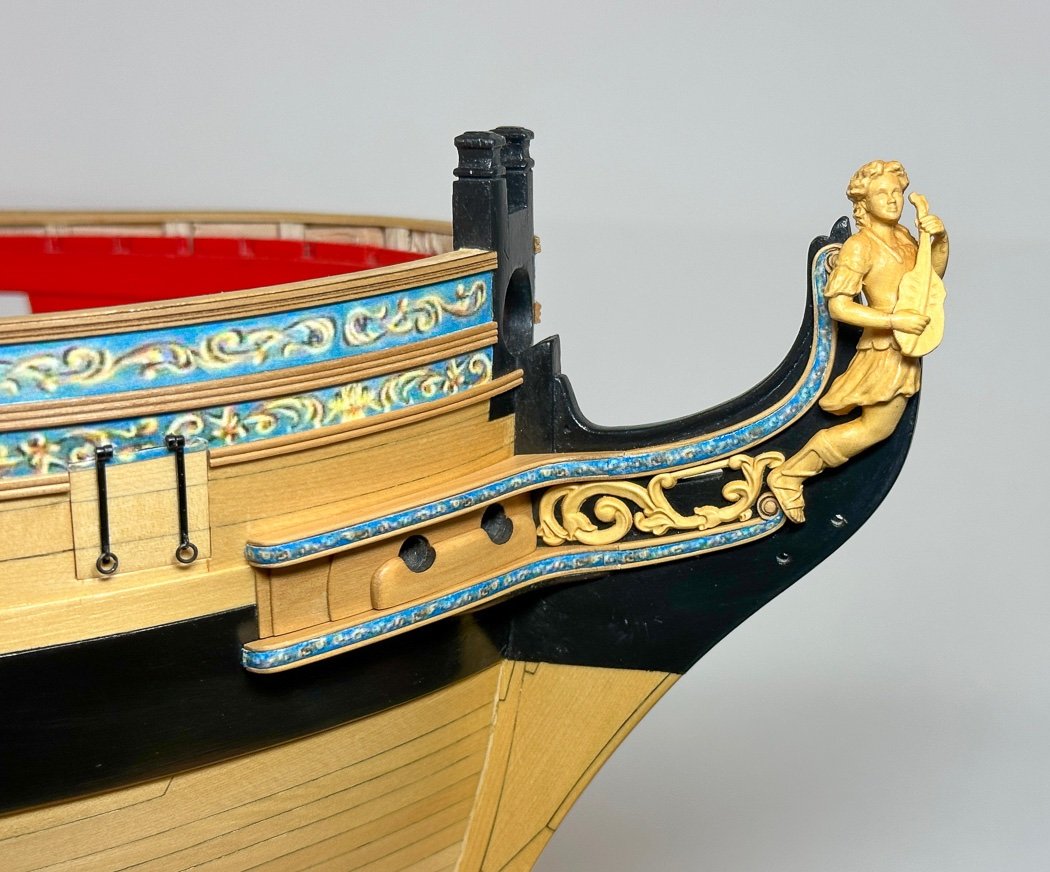
Cheeks, Hair brackets, Bolsters, & Wash Can’t. We decided to sell our lake house. Between that decision, the work we did to prep it for sale, it being sold and then the work to clear it for the buyers plus completely re-organizing our garage while we were at it, six weeks disappeared. Very little build time during all that, this section of Chapter 5 seem to take forever as a result. There are a few very appropriate appropriate quotes from Chuck’s monograph in this section, here is the first: “this is tricky work so take your time and try not to get frustrated.” Of course I counted. 46 distinct parts including the printed friezes make up this section all confined to the bow and stem. These are about 3-6 parts in an average kit, even if the kit includes them at all. A good time was had by all. It is worth it for the detailed realism of the result. I also admit to starting over more than once and taking advantage of Chuck’s generous offer for replacement parts. In some instance because I broke it, in others I just didn’t like what I had. I discovered, eventually, this is a section I could over-optimize time and again. At some point I needed to declare victory and move on. It started with the paper template. The first challenge is making sure the spacing between the cheeks is correct for the bolsters, the lower hair brackets align with the feet of the figure head, the upper hair bracket aligns with the top of the stem, in short a lot of planning before anything goes on the ship. My little spacers helped a little to make sure I was off to a good start. As I build I scratch into both the back of the thing to be added and the place where it goes to ensure good glue adhesion through the coats of WOP. Also testing the bolster layer to fit between helps (it needed sanding later), as does knowing the fit for the upper cheek is along the top of the black strake, this also defines the location of the bottom strake. Piece of cake so far right. That and double sided tape to check and recheck. Then a glue stick, a sharp knife, and a very thin putty blade to add the printed frieze after they were cut and sprayed with fixative. I owe this cutting to my wife. Multiple times she pulled out her scissors to do what I couldn’t, cut them with no white showing to then be glued to the cheeks and hair brackets. Some do this after the work is glued on, my choice was to apply the frieze before gluing the work to the ship. I can’t say it any better than the instructions in the monograph: “Now all of this always looks easier than it actually is. You will need to get in touch with our creative side here a bit. Each of these pieces will need some shaping and testing.....and repeat many many times the shaping and testing.” In case it’s that wasn’t clear…many, many times. My photos are a bit out of sync based on my applying, then removing a couple of the cheeks. Yes this can be done with a very deep breath and the managed application of acetone with everything surrounding taped off, and even the tape folded to funnel the excess Acetone away. Did I mention the deep breath part. I did this twice, the patient lived. Eventually though I had the three layers of the beneath the bolsters added and proceeded to drill in the hawse holes at the very upper angle required. first with a pilot hole with a small bit, then a larger bit, one more still larger bit, finished off with a soft edged round file. My choice for finishing the hawse holes, with the several layers of wood involved to the deck wound up pretty deep, was to use Admiralty Paints Ironwood Black - followed by O’Brien’s Grungy Gray weathering powder - carefully applied. The bolster started as a straight piece of 1/8th wood. It’s a process. First I filed, sanded, scraped the inside curve to fit the curve of the layered wood it sits on above the lower cheek, including the bottom for the angle of the cheek it sits on - no small task done very slowly. Shape and test…then do that again many many times, then match the outer side to that inner curve, more sanding and scraping, and finally fully rounding the top edges. Before gluing it in place I added the scroll work. Another bit of finesse filling and sanding. I had to sand micro-millimeters to get a fit between the cheeks and and clear the figurehead’s foot. I was fortunate not to have to remove any portion of it - just make four sides a little thinner. I added these little stick-on small furniture pads to some clamps so to not mar the finish of the bolsters, they worked great. Finally the wash cants. A lot of work to file the back edges to fit the bow and stem, then the front edge to a knife point. After painting them black they are barely visible installed, but I know they are there, so yay. And with that a time consuming process of sand, test, fit, slowly do it all again is complete. Here are a few photos. I feel bad because I had to take a sizable chunk out of the figurehead’s shoulder and back for a reasonable fit. I doubt he’ll ever be able to play the mandolin again. As always, thank you for stopping by. And if you are this time thank you for remembering I’m here - it’s been a while. Your likes and especially your comments are always appreciated. A few last steps to complete Chapter 5, so here I go with that.

- 840 replies
-
- 21
-
-
-
- winchelsea
- Syren Ship Model Company
- (and 1 more)
-
More than once I’ve ripped off lots of planks and started over, and sometimes started over again. Don’t give up on it.
-
Welcome to the group!
-
I was thinking, unlike the big crash when my logs were lost forever, at least this time I have my logs backed up at home.
-
I was so sad. 😁
