


glbarlow
-
Posts
4,018 -
Joined
-
Last visited
Content Type
Profiles
Forums
Gallery
Events
Posts posted by glbarlow
-
-
14 hours ago, garyshipwright said:
planking job is outstanding
Thank you. It’s such an important part of the model.
6 hours ago, westwood said:handled the planking nicely
Thanks. Just trying to do well with all that wonderful AYC.
- Dave_E and FrankWouts
-
 2
2
-
3 hours ago, LCdr Dave said:
it takes time isn’t just because I don’t know what I’m doing…
Thanks for the comment. I think it takes time because we know what we’re doing😊
- Dave_E and FrankWouts
-
2
-
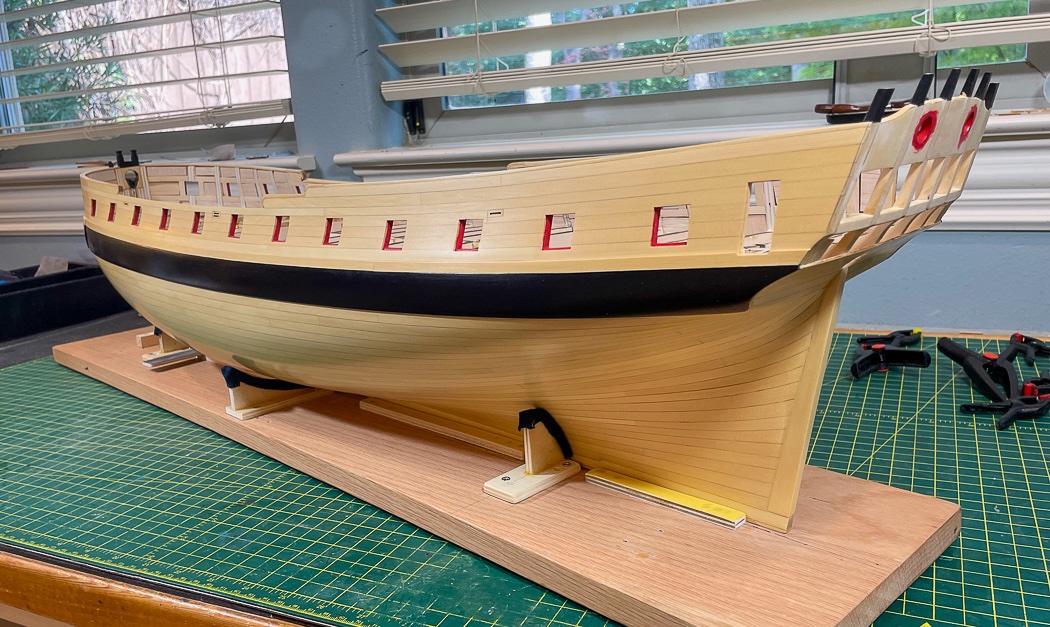
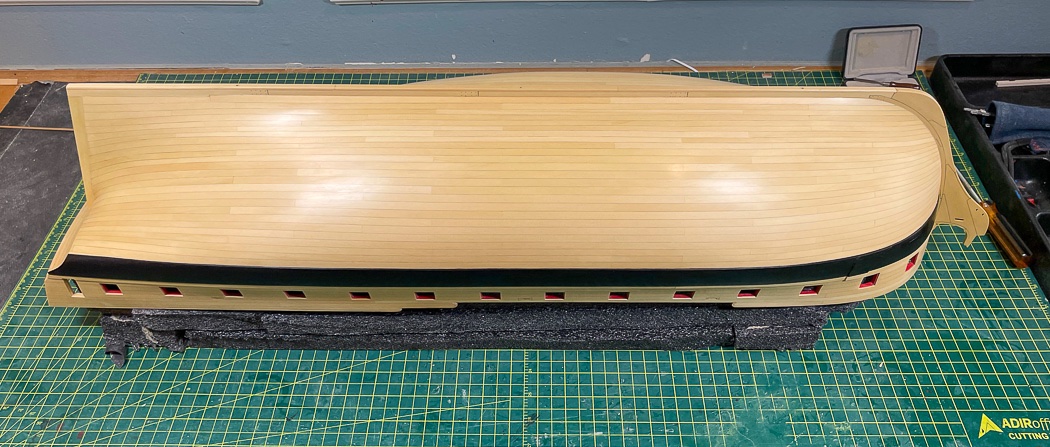
An Upright Hull at Last
Thought I’d share a few photos of my Winchelsea hull upright.
I thought about what would be easier to do now than later in the build, following the always good practice of reading ahead.
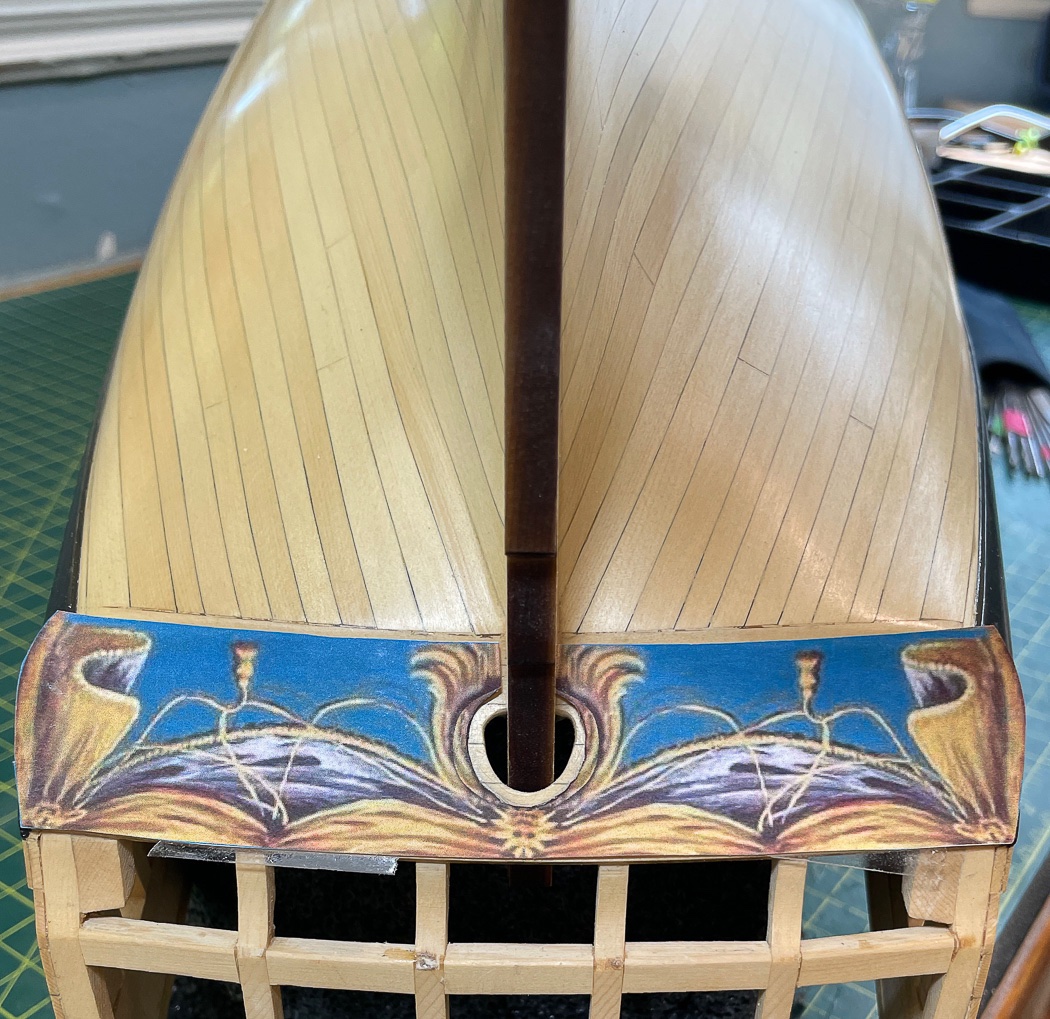
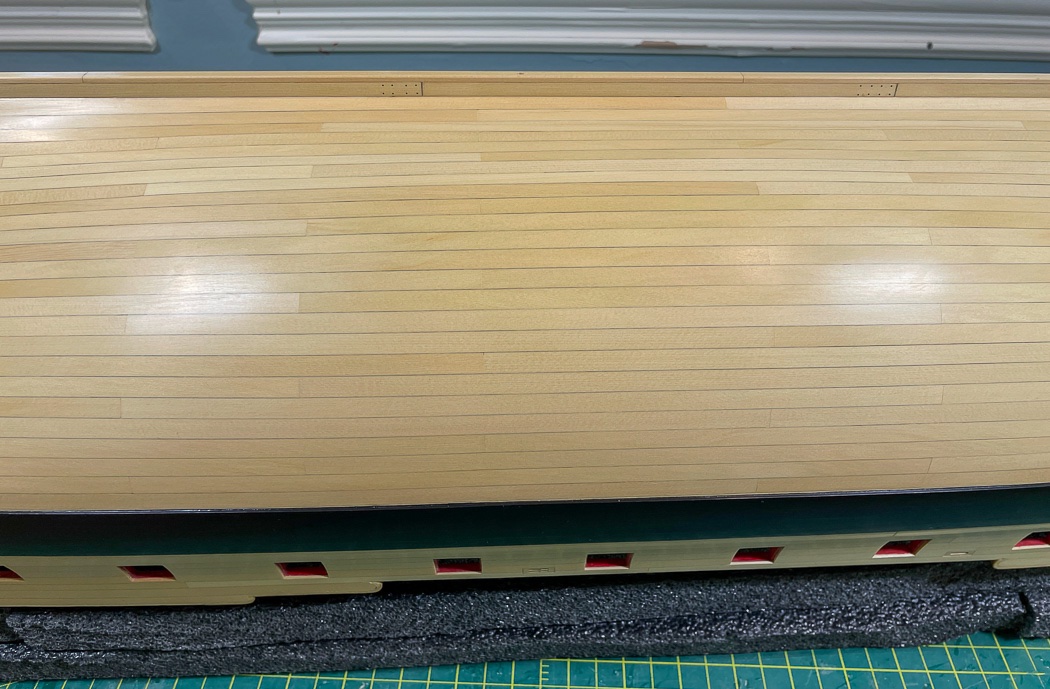
I drilled out the rudder port. To line it up I cut out a copy of the counter frieze and loosely taped it to the counter (I’ll get a better fit, only concerned about the rudder port) after cutting out the black area representing the port, drew a pencil line, drilled a hole, and worked my way out with a #11 blade and sanding sticks. I pulled out the rudder pieces from Chapter 5 and held the two parts together that pass through the port (the dark line shown in the photo is the rudder) to confirm the hole was big enough. I stopped well short of the black line, I’ll adjust later as needed. The still unassembled rudder went back in the bag.
I used the jig from Chapter 10 to determine the height of the stern frames and cut them down about 1/8th higher than the jig to allow for future adjustments. Why not paint them black, as they eventually must be, while I’m at it. I will admit I broke one during the hull planking, fortunately it was a clean break and easily glued back together. I waited until the planking was complete, it has bothered me looking at it all that time. Now it’s fixed.
Finally I painted the stem. It was always going to be black, I’d rather deal with occasional touch up and get it done now while it’s relatively easy to do.
With that the hull is prepped and ready for the next steps, the transom, upper counter, and quarter galleries - can’t wait. Once again, excuse the rushed iPhone photos with their work light glare.
As always thank you for stopping by with your likes and your comments. I really appreciate it.
-
Those channels look great, appreciate the build suggestions.
-
-
On 6/27/2022 at 1:39 PM, E Z Breeze said:
I'm glad that you did and that in 2022 you are building again.
Thank you. I just finished 4 months single planking HMS Winchelsea, a 1/48 frigate considerably larger than Vanguard. Though it took a long time it was and is much more enjoyable than those copper plates. Everyone should do it once 🤣Best of luck with yours, my anti-copper position shouldn’t deter anyone. It’s builders choice.
-
On 6/27/2022 at 1:39 PM, E Z Breeze said:
1/67 scale of yours
That must have been a typo, my model is 1/72
-
The AVS was my first model. I learned a lot from it and enjoy the result to this day.
- Ryland Craze, Canute, Mark m and 2 others
-
5
-
Thanks Rusty, I do think imay have taken every plan a project to the extreme in some cases🤣
- Dave_E, FrankWouts and Rustyj
-
3
-
It was a challenge for sure, but as Chuck says a slow process from the center out. Sorry you have to restart with the frames. I still vividly remember my Cheerful frame, nearly done, falling to the floor and shattering. That hurt, starting over is all I could do.
-
The best alignment tool is that pattern cut out of the plans with everything cut but the frames, then double-side tape to middle two and use that to space the frames. then the window sills which in addition to length have a beveled angle to sort out. It’s a fun challenge.
- Thistle17 and FrankWouts
-
2
-
6 minutes ago, Thistle17 said:
this is a 2D drawing of a slightly curved transom
As I'm sure you noted the transom is curved, the outer frames are closer to the hull than the two middle ones, and that you'll be able to account for that curve once its "in air" on the frame. The bottom outside of those doubled up outer frames get carved quite a bit to follow the curve of the wales. When you get to that point I found a cutout of the transom frieze a good tool to match up that curve with the wales and the frieze. The frieze design allows a little room to be small, but no room to be big on that shaping.
-
Your precision will pay dividends later. The hull is so big that small errors in geometry are magnified, very thorough approach to keeping that from happening. Surprisingly for me I found the fairing (and later planking) between bulkheads S and U a bigger challenge than what I would have guessed would have been U and W. Getting the correct angle/bevel is key.
- FrankWouts and Ryland Craze
-
2
-
Old school doing it by hand. I agree, very nice work
- Dave_E and hollowneck
-
2
-
3 minutes ago, DelF said:
scrap steel:
I checked, I don’t have any scrap steel. Your garage must be a haven for all things modeling 😳😊
As always you set the standard for rigging. Anyone needing any help with any model should consult your Speedy and Duchess builds for techniques, methods, and how to achieve them.
-
16 minutes ago, BobG said:
don't understand the "secret,"
Just being silly; using the blade in the photo to fake the joint closest to the bow. Really not a secret.
- FrankWouts, Dave_E and BobG
-
2
-
 1
1
-
2 hours ago, BobG said:
a work of art,
Thanks Bob, I have to admit I do like those top (or bottom up) views, the lines are very nice.
1 hour ago, DelF said:I've never seen a better planking job
Thank you Derek. It's not without its flaws, it did turn out pretty well though - lot of time invested in many many strips of ¼" wood strips.
18 minutes ago, Edwardkenway said:onwards to Chapter 3
Thank you. Chapter 3 will certainly be different, I'm looking forward to starting it after another coat or two of WOP. Plus I'm in the process of converting the build board. Looking forward to the next steps.
- FrankWouts, Edwardkenway and Dave_E
-
3
-
19 hours ago, Chuck said:
Beautiful...you will never go back to planking any other way.
Thank you Chuck, I appreciate your saying so. AYC is such beautiful wood.
I'm really not sure how I planked seven models in some other way, for sure whatever that way was I'm never going back to it. On the other hand it will be nice doing something besides planking finally - at least until I get to the deck...
- hollowneck, Ryland Craze, FrankWouts and 1 other
-
4
-
19 hours ago, Blue Ensign said:
Your planking
Thanks BE - I always enjoy the details of your models.
19 hours ago, KentM said:Absolutely superb
Thank you, it's a great model to work with
19 hours ago, Gregory said:" How I want things to look " collection...
I have one of those too - I'm just passing by the greats.
17 hours ago, Dave_E said:You are a planking
Thanks Dave, I appreciate the comment, not sure I am but appreciate it nonetheless.
17 hours ago, Trussben said:get to do some of the more fun stuff
Thanks - I'm definitely looking forward to anything that isn't planking.
16 hours ago, rafine said:still up to you to execute the task
Thank you Bob - I appreciate your saying so. It definitely is worth the effort in the end to see how it all comes out.
12 hours ago, Nunnehi (Don) said:beautiful work
Thank you Don, I appreciate the comment. Fun stuff this.
1 hour ago, scrubbyj427 said:perfect planking
Not sure it's that, but thanks for saying so.
- Dave_E, FrankWouts and Nunnehi (Don)
-
3
-
-
-
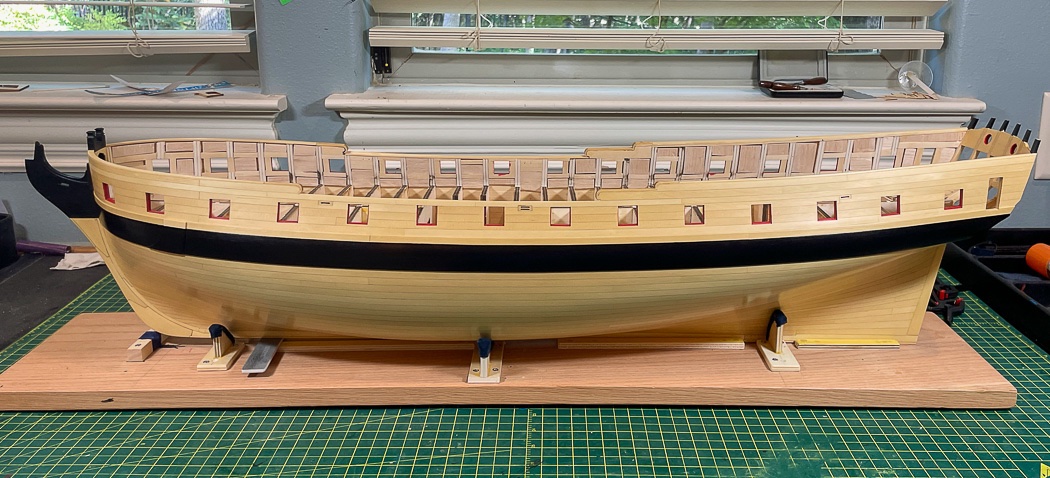
Hull Planking Complete!
It’s a big day, after more than four months of doing nothing but planking the enormous Winchelsea I’ve completed planking her hull, yay! A little story on how I got there:
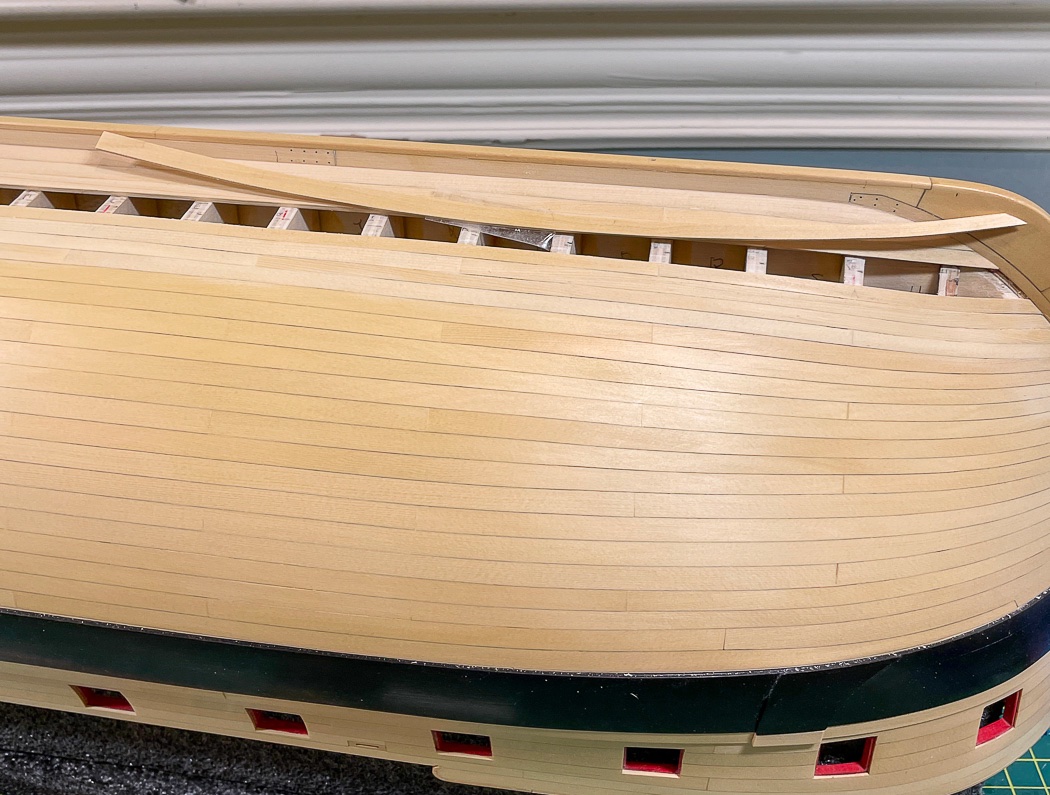
It begins with my once again championing Chuck’s planking technique. No way I’d gotten anywhere as good a result without heat bending planks. The one shown here is next up on the bow and, like its cousins, will fit perfectly without forcing flowing with the curves. It does take time and patience, there are planks that took me 10 minutes to shape (midships), others that took two hours, and more than a few that took almost an entire day. Many took multiple attempts to finally get one to fit right, more than a few were cracked in half and flung across the room - patience yes, but come-on man, fit already.
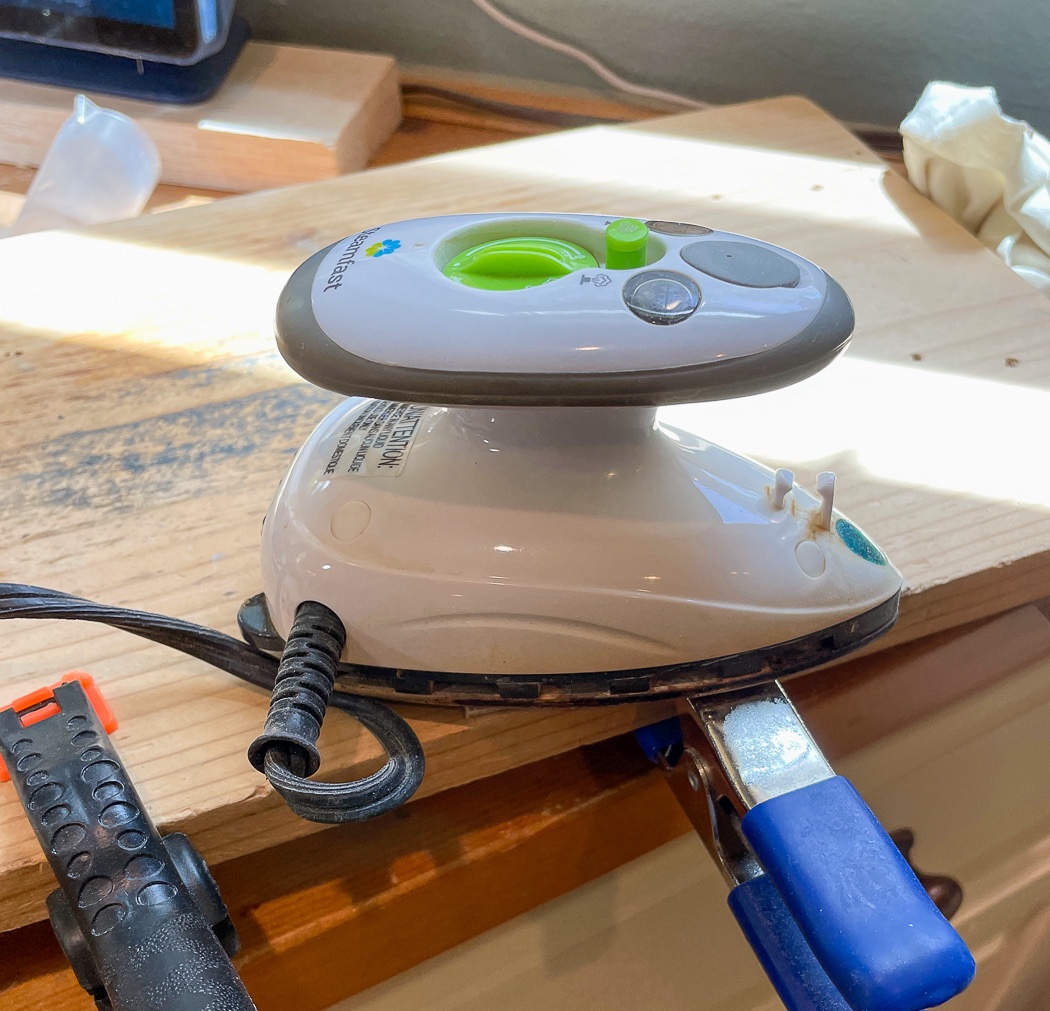
RIP. I’m sad to say, after hours and hours of use on Cheerful, Flirt, and 96% of Winchelsea my travel iron gave up and died. No matter, off to Target and $12.95 later it’s identical replacement is now in service of my shipyard. Maybe I shouldn’t leave it plugged in all day.
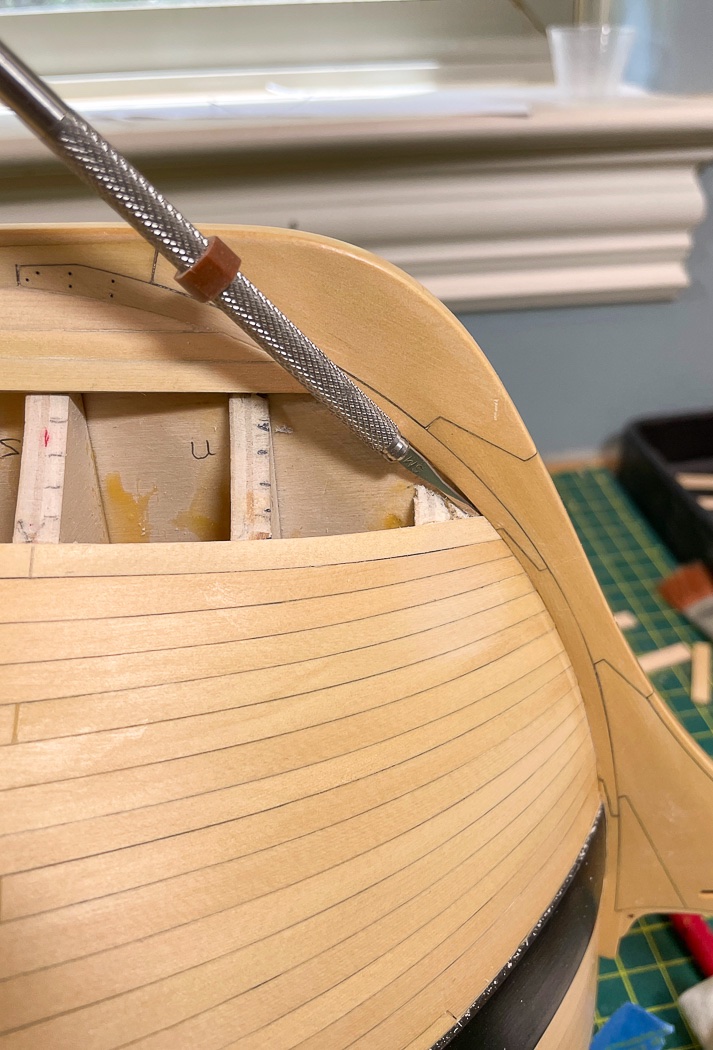
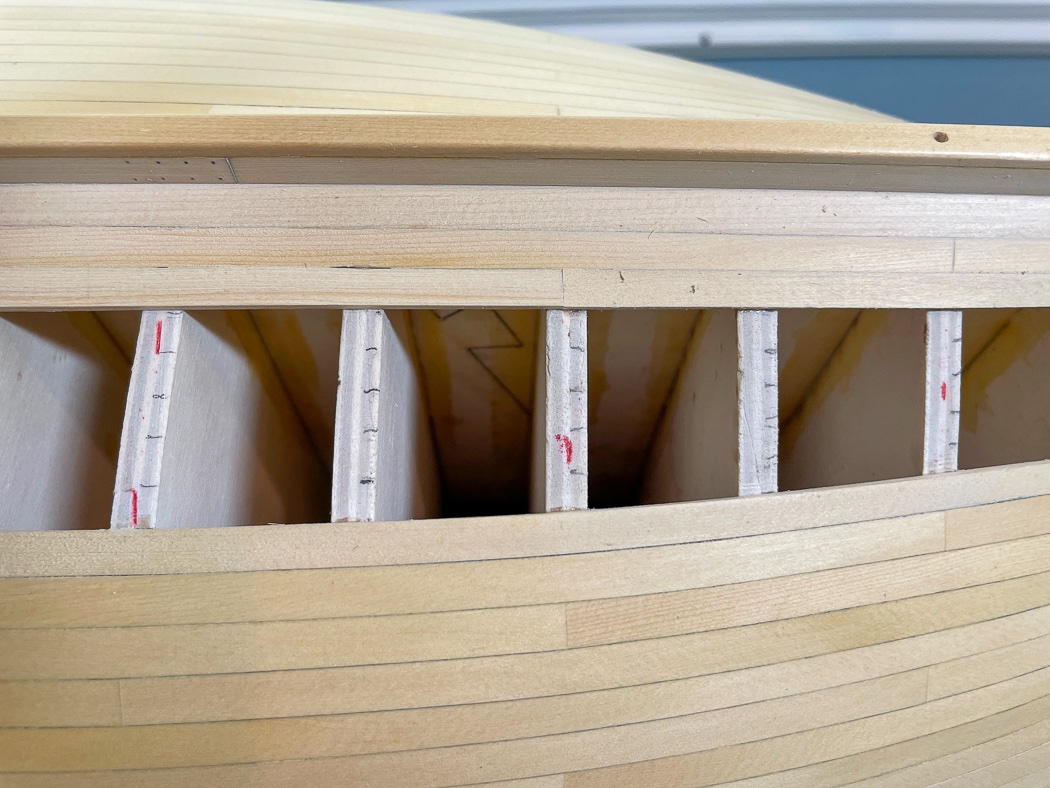
I spent over a week fairing the frames months ago, that doesn’t mean I did it completely right. With my limited abilities I sometimes needed the plank dry-fitted in place to see how it flowed. I am not reluctant to use a shim on occasion (never more than 1/64th needed fortunately) to make an adjustment where needed. In this case the rabbet slot wasn’t as deep as I’d like, a Swan Morton mini-chisel with two very sharp blade sizes (thanks @Blue Ensign) was perfect for making it a tad deeper.
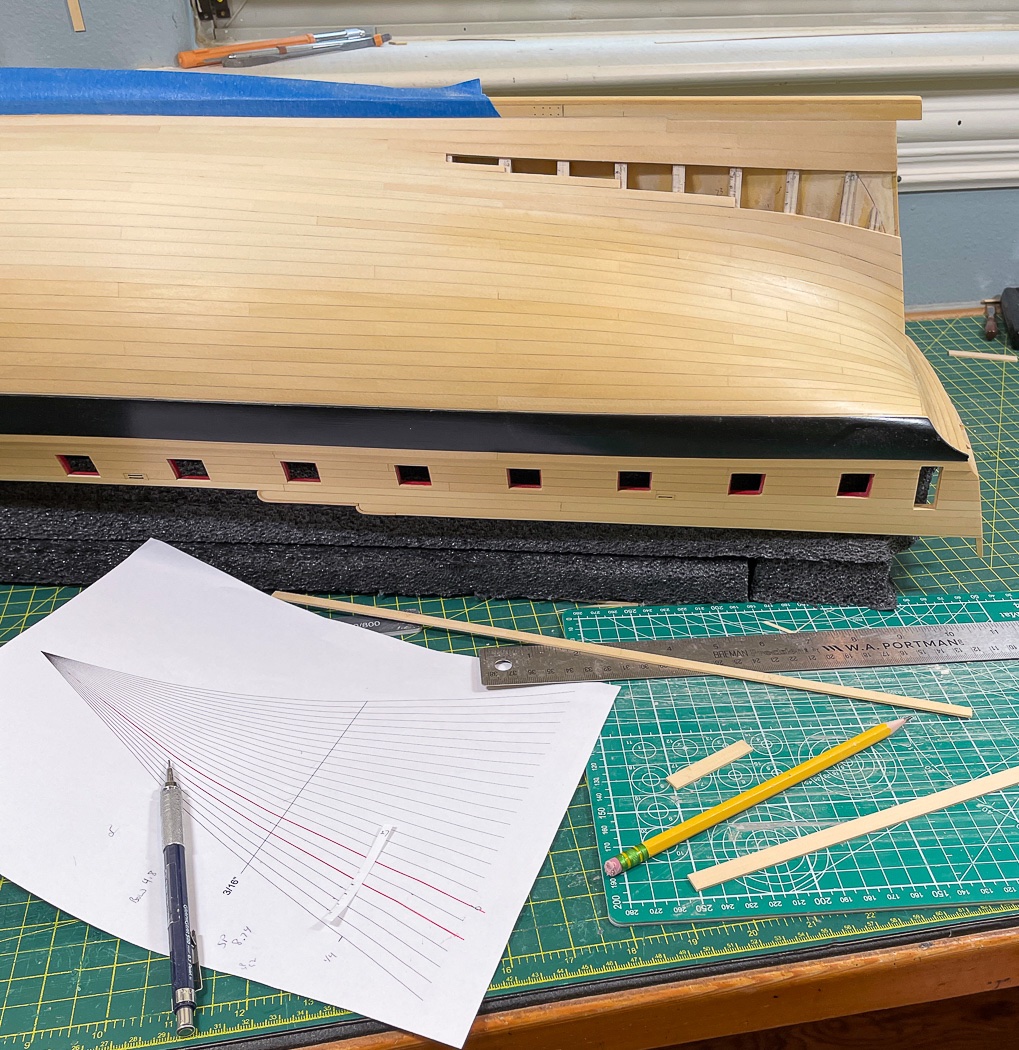
In the vein of not always doing it right, the tick strips Chuck provides were a gift, saving hours of work lining the hull. However, as faithful as I tried to be I wasn’t always near faithful enough. Occasionally I got out my planking fan (also provided by Chuck, but with the Cheerful monograph) to check and often re-mark. Were I really good at cutting and adding planks maybe I wouldn’t have needed it, but this extra step payed dividends.
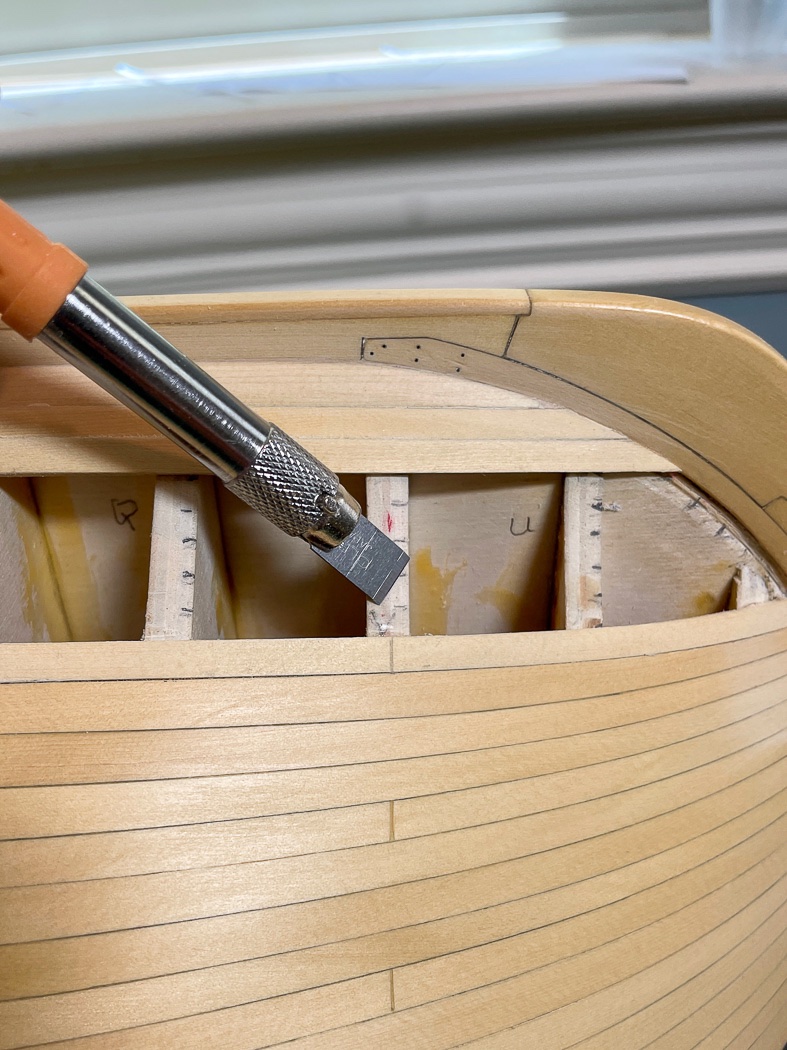
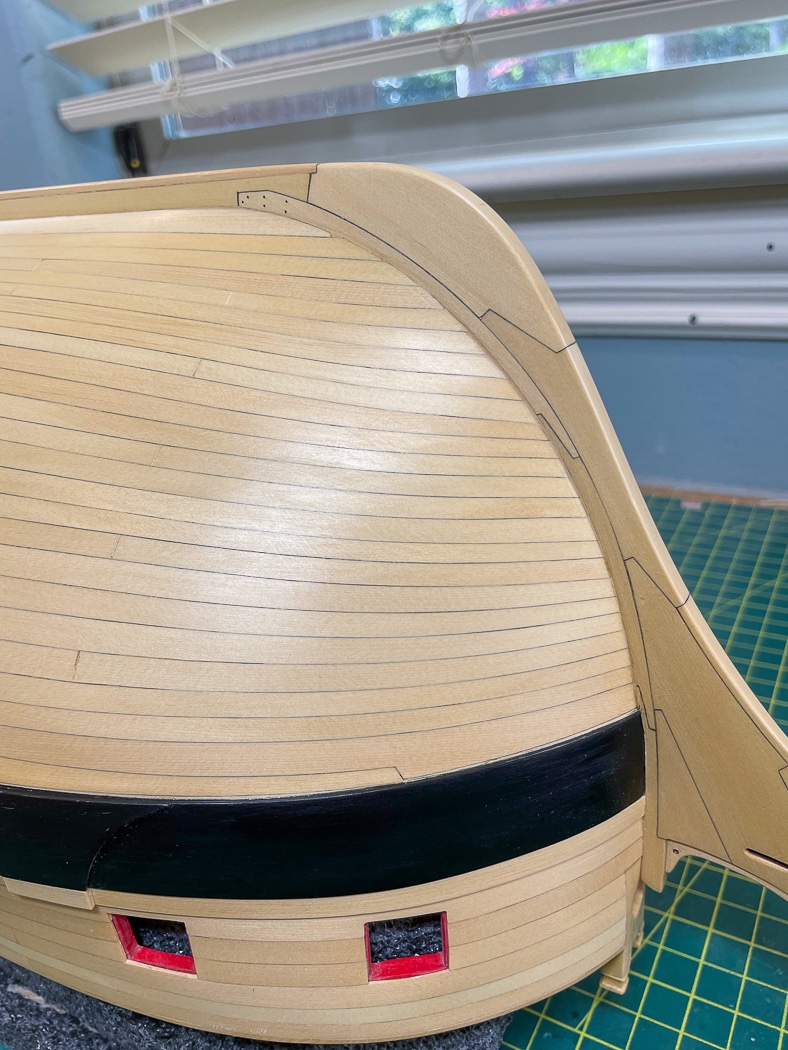
I followed a butt shift pattern that I extrapolated from the plans (which show only above the wales) then marked it out on the frames with my red pencil. Not being a total masochist I didn’t actually cut the planks at the first line of joints nearest the bow and last line nearest the stern, it was much easier and crisper to run those planks to the next joint, fitting the resulting longer plank. I then used this flat sharp blade to notch the joint into plank at the proper location before laying the next plank. So that secret’s out.
You can see in the upper right corner I’ve hand drilled one of three #4 machine screw size holes in the keel. I don’t know yet what the final display board will be or if these holes are even needed, but it’s much easier drill them now than with the model finished.
So finally I came to the last plank - I had to sit for a while to appreciate how far I and this wonderful, but very large, model had come since I started it last November. With my zen moment over - it then it took me several hours to get it to fit, as for the last time broken rejects were flung across the room, and all was peaceful at last.
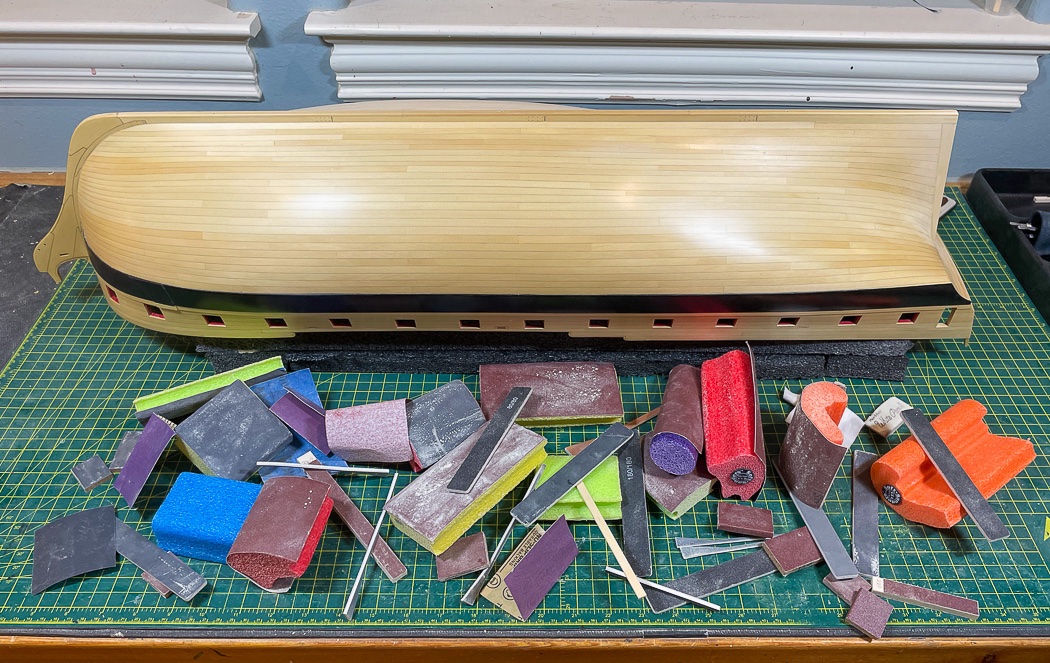
It may be hard to believe, or wonder why, but everyone of these sanding tools were used during the course of the planking. A bit extreme I’m sure but these Soft Sanders are perfect for the job. Last two times I ordered adhesive sandpaper the manufacturer included a number of half width sanders, so naturally I had to put sandpaper on them. I used 150, 180, 220, 320, 400, 600. and 800 grit at various times, again an excessive range I’m sure. I even used 1200 on the wales after they were painted to remove a few scratches without removing the paint. In addition to the soft sanders I frequently used my little wood blocks with the same adhesive sandpaper attached (every plank was beveled using those). The flexible sticks of 400, 600, and 800 grit shown in the photo are new additions from Amazon that were also helpful.
I realize that last paragraph was way more information than anyone cares about, but I feel an obligation to thank not only the plank bending process, but the tools that helped me get to this point.
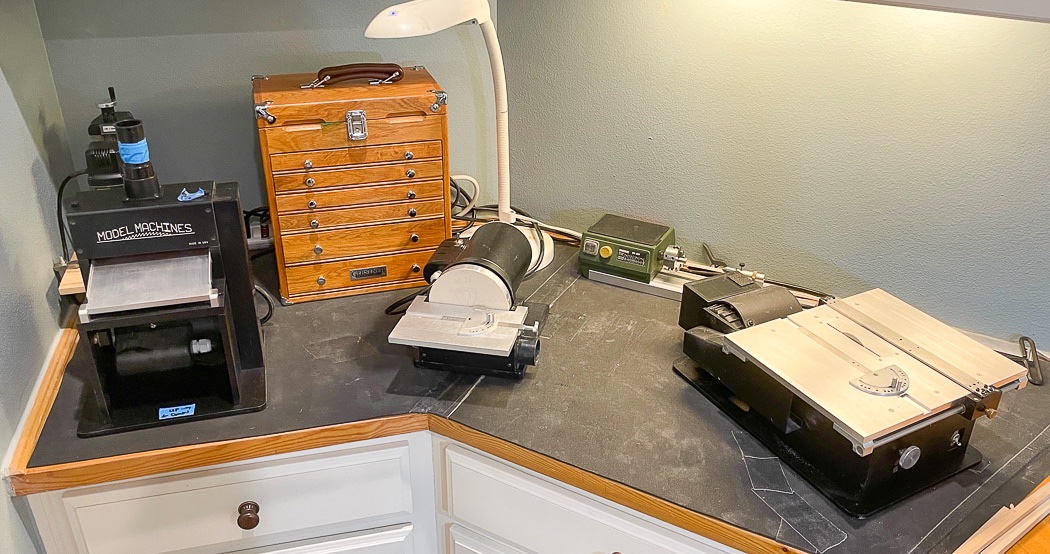
Speaking of people to thank I absolutely have to thank Jim Byrnes for his amazing machines. The angle of every plank at the bow and every plank joint was shaped or squared by the Byrnes Sander. Every plank used was first run through the Thickness Sander (shown with my vacuum attachment still on top. It flings a lot of dust, I’d rather than was into my shop vac and not the air. It also fits the saw and the sander. (Also note the tape on the bottom with Up and Down direction marked for those of us easily confused, though maybe it should say More and Less). Every plank was milled on the Byrnes Saw, the most essential, and likely the best tool in my shop. I shared the story in the tool forum of the saw starting to make an atypical noise. I called Jim, after troubleshooting with me he sent a replacement part and guided me on installing it. It then worked fine, but was the blade was rubbing the blade cover, so he cut a replacement with the slot moved over a milimeter or two and sent me that. There is no better example of superb workmanship coupled with incredible customer care than Byrnes Model Machines.
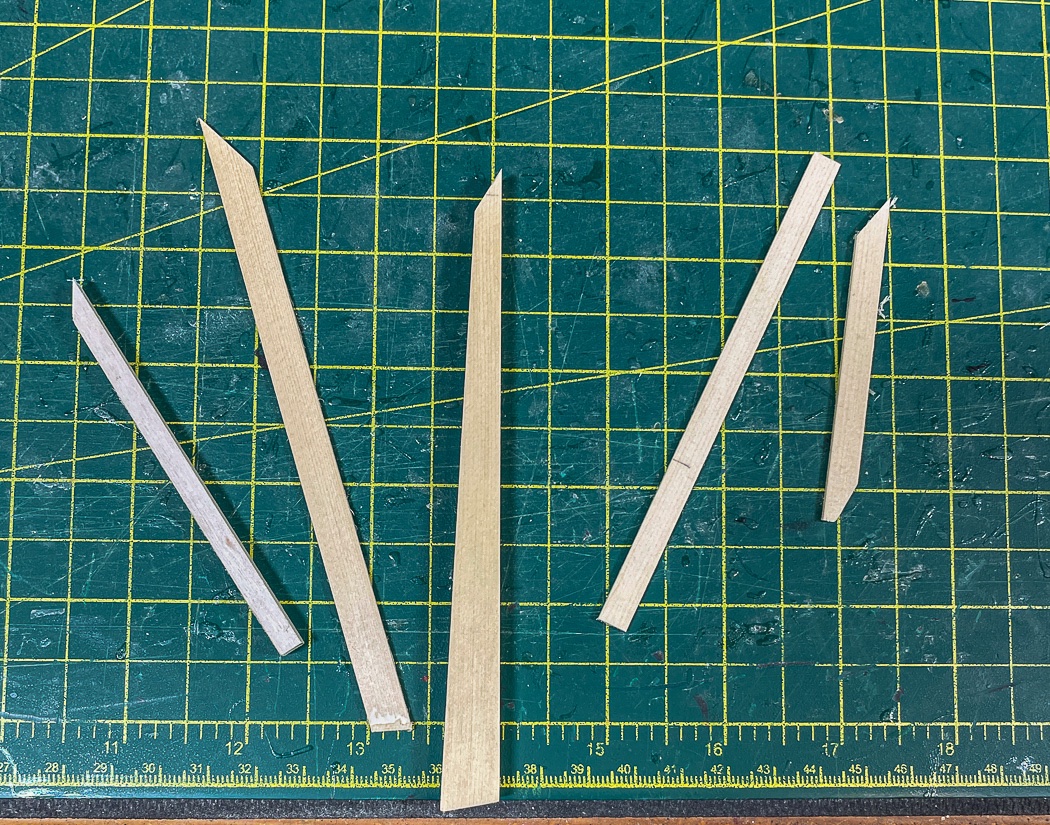
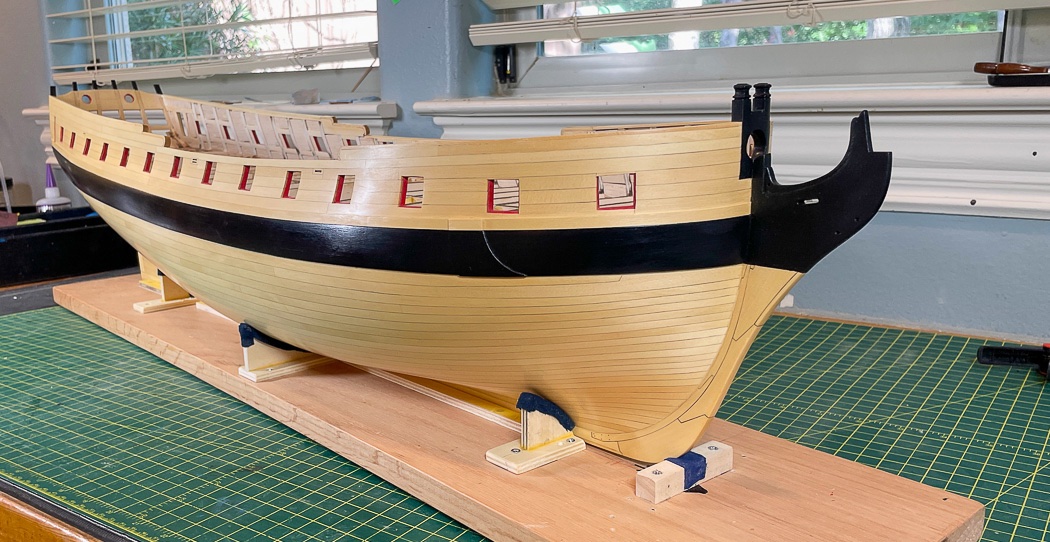
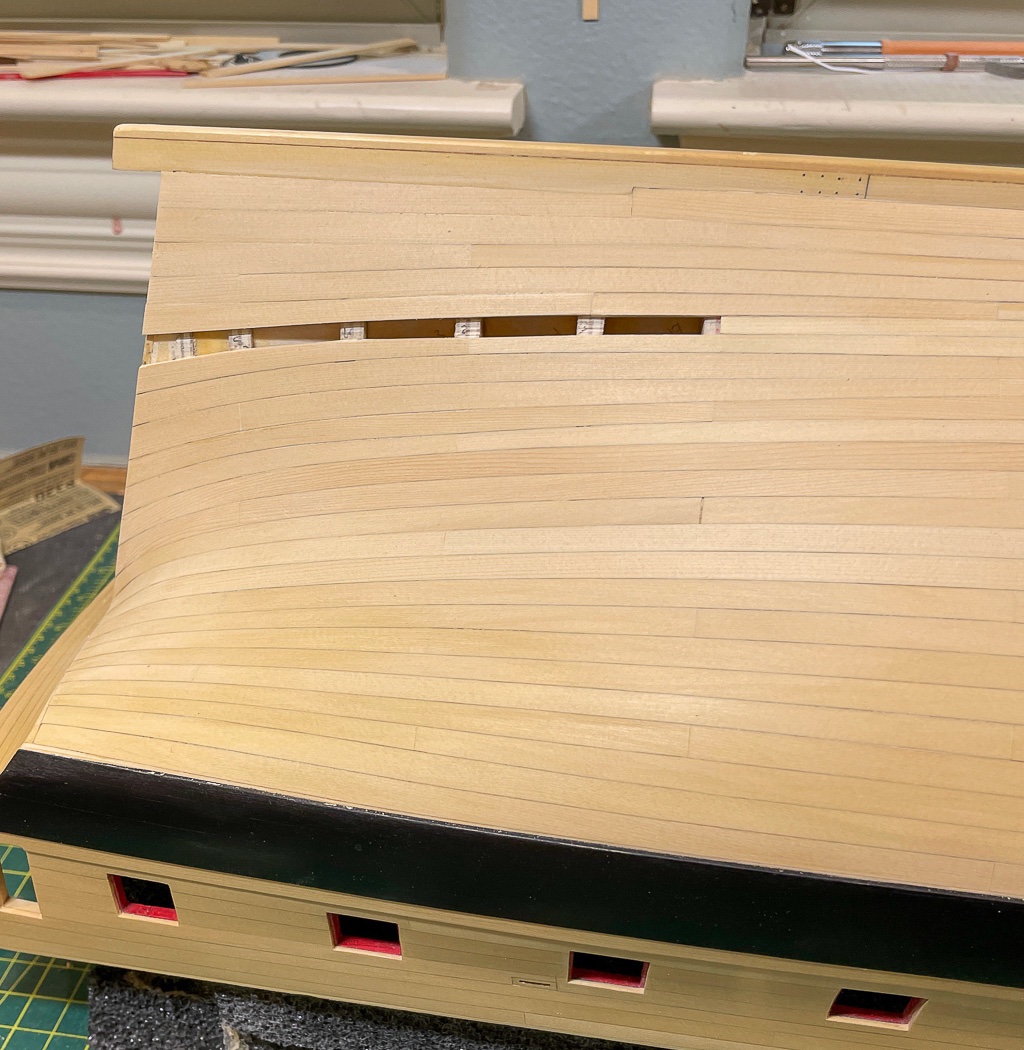
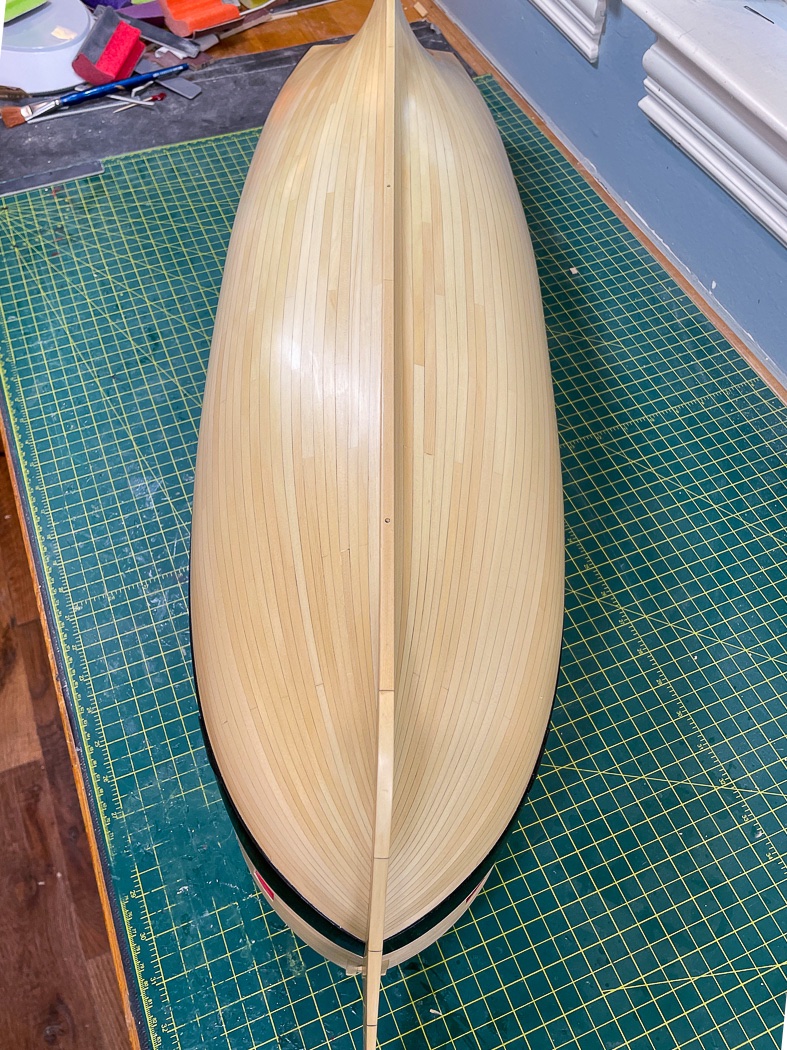
Next up was the stern post. More complicated than you’d think but for good reason, it took several hours to fit. The laser cut post is cut large on purpose, because every hull ends up slightly different. The challenge is to both cut it to the proper length and shape the curve to fit at the counter, and of course to have a flat, squared, and leveled surface there where I’d terminated all those planks. I used practice pieces to sort out both the length and the curve. I could shorten the post, but of course I couldn’t un-shorten it, so several scraps were used to get it close with final sanding from there.
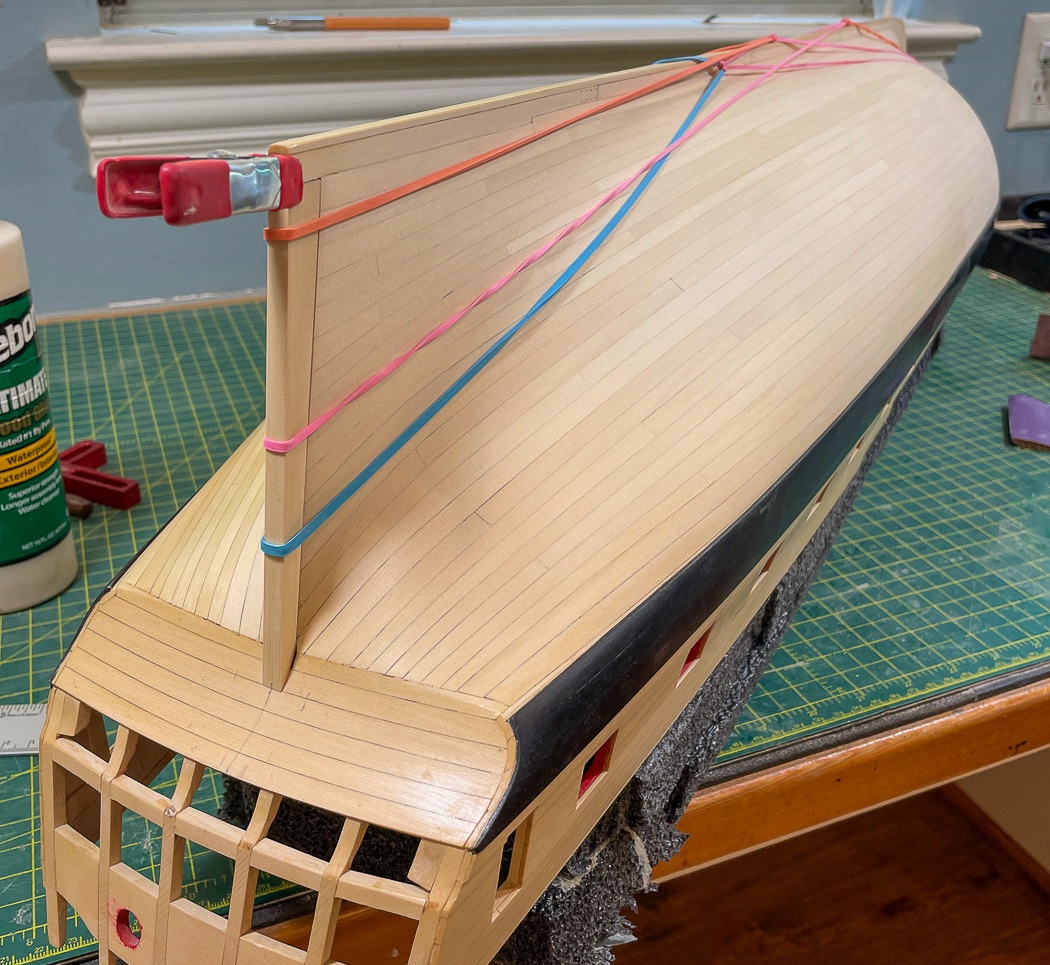
It was then marked, centered, clamped (including my handy large rubber bands doubled for the length required) and attached with Titebond III.
And it was done. While I didn't need wood filler in the planking itself I did use it along the seam of the stem, sternpost, and keel. I like the look. That look was made better by the use of the Winsor and Newton Pro Markers markers Chuck mentioned in his log. In my case Almond was the preferred color to add over the wood filler, I think it blended well.
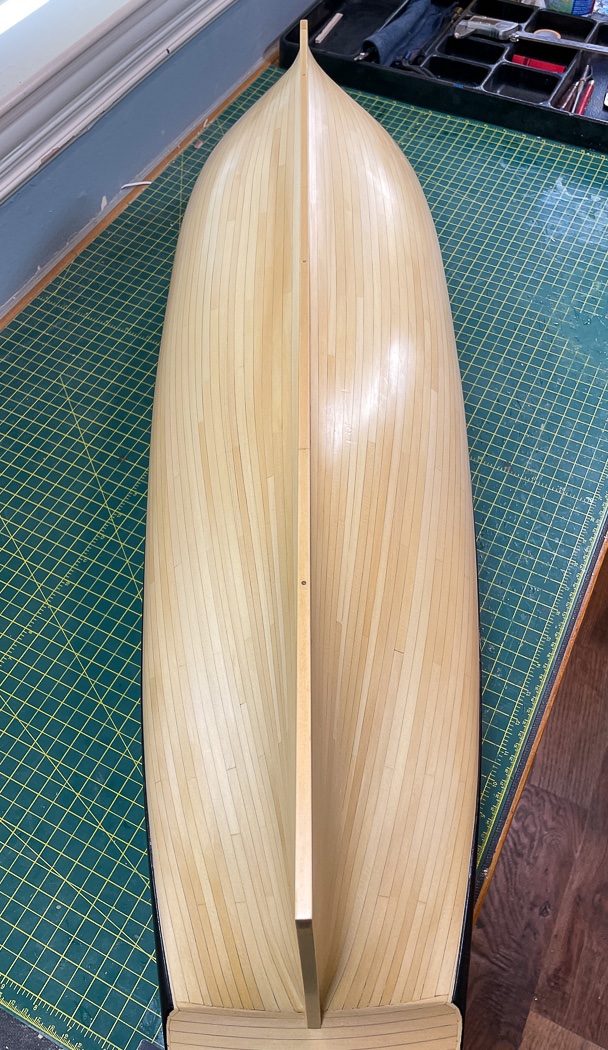
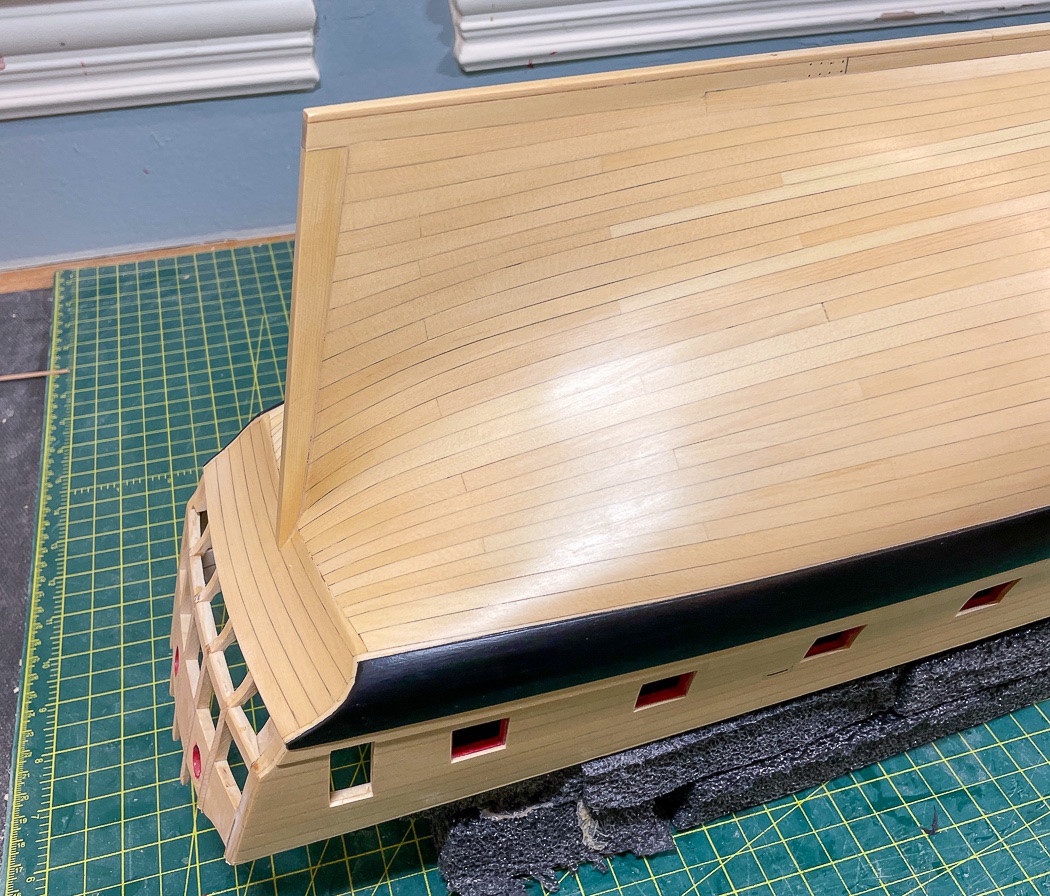
In these photos and the ones above the WOP is freshly applied, hence the sheen bounced by the work lights. It drys to a nice satin finish, that in turn will age and even out nicely with time.
So, Chapter 2 is complete. I have my finished hull, after another coat or two of WOP on the port side I’ll finally turn her over right side up and begin the next phase. I’d like to say I’ve enjoyed planking (well, I kinda have) and wish there were more to do (I definitely don’t). Chapter 3 is about as different as it can be from Chapter 2, I’m looking forward to it as the next challenge.
Thank you all for your support with your likes and comments - its nice to hear from you and is very appreciated.
- CiscoH, Blue Ensign, SiriusVoyager and 28 others
-
17
-
 1
1
-
 13
13
-
You’d be a braver man than me to attempt scratch building, it will be challenging enough using the laser cut parts. The stern looks great, we’ll done!
- Edwardkenway, FrankWouts and rafine
-
2
-
1
-
Like others it seems to me the easy solution is no solution at all. It should adhere just fine once it’s glued to where it’s supposed to go along with well distributed weights to hold it flat in place until the glue dries. I used a similar maple sheet as Flirt’s deck without issue.
- Swinging the lead, DelF, mtaylor and 3 others
-
6
HMS Winchelsea by cdrusn89 - FINISHED - 1/48th
in Member Build logs for the HMS Winchelsea
Posted
Precision here pays big dividends when you plank the counter and later and the transom piece. Test fitting Chapter 3 parts where you can really helps as does cut out copies of the friezes.
it’s all looking great, nice work.