


glbarlow
-
Posts
4,130 -
Joined
-
Last visited
Content Type
Profiles
Forums
Gallery
Events
Posts posted by glbarlow
-
-
-
-
23 minutes ago, Blue Ensign said:
allow the split line to be apparent.
Excellent work BE. I agree Cheerful was a game changer for me in many ways including the process converting wood to an iron anchor. That split in the stock was also a revelation for me. It looks really good done right, as you have done it here.
- Blue Ensign, Dave_E and mtaylor
-
 2
2
-
 1
1
-
-
The key to a good log is mixing pictures with descriptive text. I tend to scroll past long blocks of text and am not interested in a string of ‘here it is now’ photos. The length can vary from post to post depending on what stage or task you’re working on, no rules to follow there, really up to you. It’s the best place to share what you know and ask what you don’t know. I try to tell a story with mine and enjoy writing it almost as much as the building.
- hollowneck and mtaylor
-
2
-
There’s nothing wrong with those ratlines, the play in them makes them look natural and used. You are the modeling world’s master model rigger. No matter the model your logs serve as a valuable reference and tutorial for rigging.
- BenD, chris watton, VTHokiEE and 1 other
-
4
-
3 hours ago, DelF said:
I'm not sure the bar you're setting could get much higher.
18 minutes ago, Edwardkenway said:If the bar goes any higher, I'll be able to walk under it.
Thanks guys, very kind of you to say. There are a number of really excellent Winchelsea builders whose path I follow.
- Trussben, Ryland Craze, hollowneck and 3 others
-
6
-
I was a bit skeptical too, but I built a little confidence with the stern counters and once I sorted out a process it all went as advertised. The glue stick real works. You’ll do fine.
Still have the stern above the counter but I should be Into Chapter 4 just before my one year mark building this fun project.
Thanks for the comment!
- FrankWouts and Dave_E
-
2
-
-
1 hour ago, dvm27 said:
Beautiful work Glenn!
Thank you Greg, I appreciate your comment.
- Dave_E and FrankWouts
-
2
-
45 minutes ago, Vladimir_Wairoa said:
Very Nice
Thank you!
27 minutes ago, Dave_E said:real ship have all this ornate painting and carving
I believe that it did, kept the ship’s carpenter busy I’d imagine. 😏
- hollowneck, Dave_E and FrankWouts
-
3
-
-
-
-
Wow, I need a friend like that. It went from blue plastic to impeccably real. Where does one get 1/64th maps...
- mtaylor, chris watton, Canute and 1 other
-
4
-
-
Congratulations on your start. As noted the wonder of MSW is learning, leveraging, modifying, and adopting the ideas and work of others. The good ones did the same thing themselves. Along the way you become the next source for those that follow.
A recommendation: This is not a hobby driven by time. No need for schedules or time budgets. Take the amount of time it takes and enjoy the time you spend building.
-
The Victory and first time builder don’t go together in the same sentence in my opinion, plus 1/72 isn’t a fun scale. There are plenty of interesting tall naval ships that present a good challenge, like Vanguard’s HMS Flirt. These will teach the necessary skills and not be a source of frustration.
- clearway, mtaylor, Ryland Craze and 2 others
-
5
-
On 9/25/2022 at 9:34 AM, Blue Ensign said:
superlatives to describe the quality of your work
This same phrase applies to your work as well. Thank you Be, much appreciated.
- FrankWouts, Dave_E and hollowneck
-
3
-
18 hours ago, scrubbyj427 said:
found the batten trick and used it
Great minds think alike. I should have read your earlier log entries and would have gotten there quicker. You figured out before I’d even started my build 😊
9 hours ago, rafine said:I wish my own looked as good.
Yours looks quite good, I enjoy following your progress.
2 hours ago, jfhealey said:You must be very pleased with her
Ha. I’m quite pleased with both of them.
- scrubbyj427, FrankWouts, Dave_E and 1 other
-
4
-
You’re doing fine work, well done!
- Zarkon and FrankWouts
-
2
-
Shingles, Friezes, and Moldings
This title sounds like a 80’s rock band or a law firm specializing in medical malpractice. It isn’t, it is about my hull becoming all fancy.
It’s been a minute since my last post. My wife and I took an Alaskan cruise, it was a great adventure filled with good weather, good food and drink, and fun adventures - time well spent with my best friend of 46 years. Finally back to Winchelsea I turned my attention to the hull sides and its combination of quarter gallery, friezes, and multiple moulding strips.
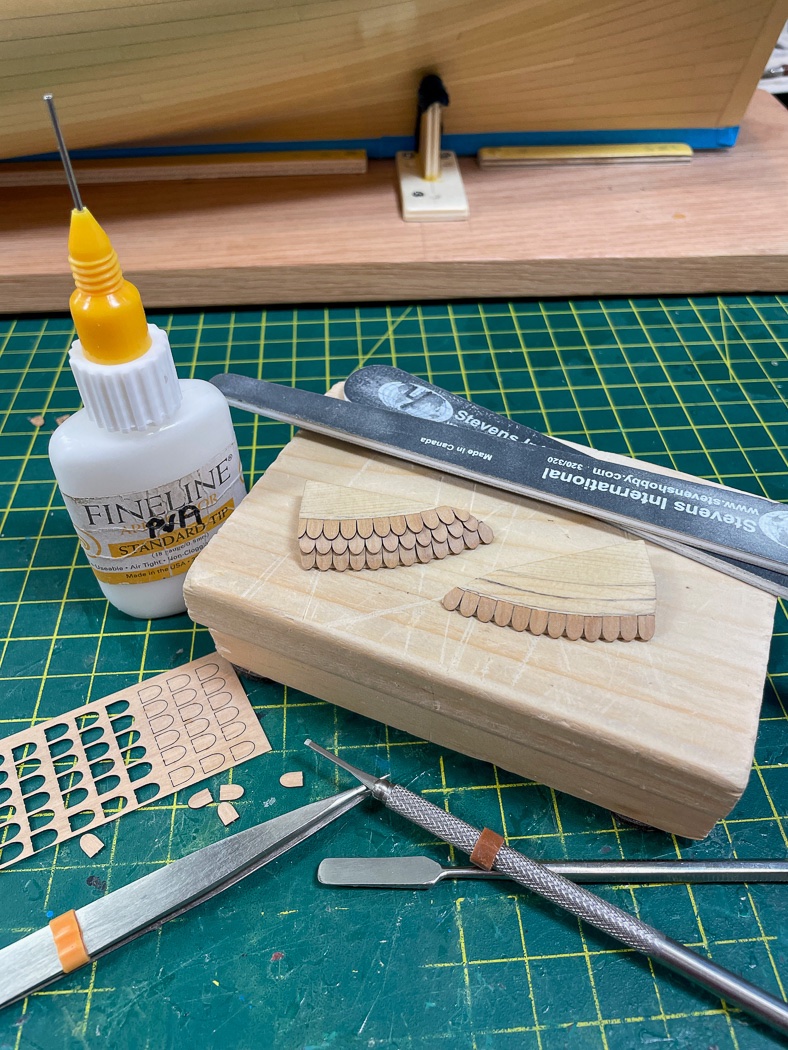
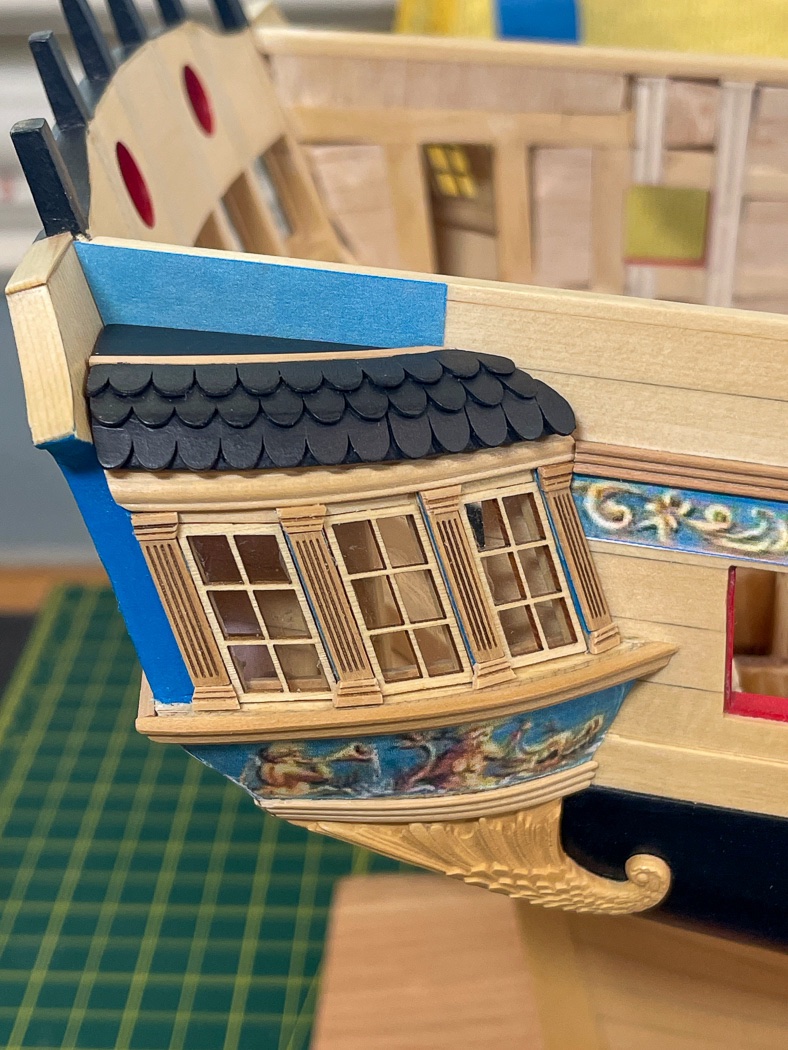
One little shingle, two little shingles, three little shingles… The quarter gallery roof is a fun little mini-project. I had earlier shaped and sanded down the roof block to match my galleries. It takes a little work to mirror the two as close as possible with two angles and the curve at play, the etched line on the top helps. Then the shingles; first I sanded them down to near 1/64th while still in the sheet, from there installed the first row using PVA (see I don’t always use CA). There are options in deciding the spacing, I preferred them in tight minimizing the gap. My roofer friends would approve I think.
Once dried I sanded them (as Chuck suggests) even more thin with 320 and 400 soft sanding sticks, particularly on the top, before laying the next row. They actually look pretty nice left bright.
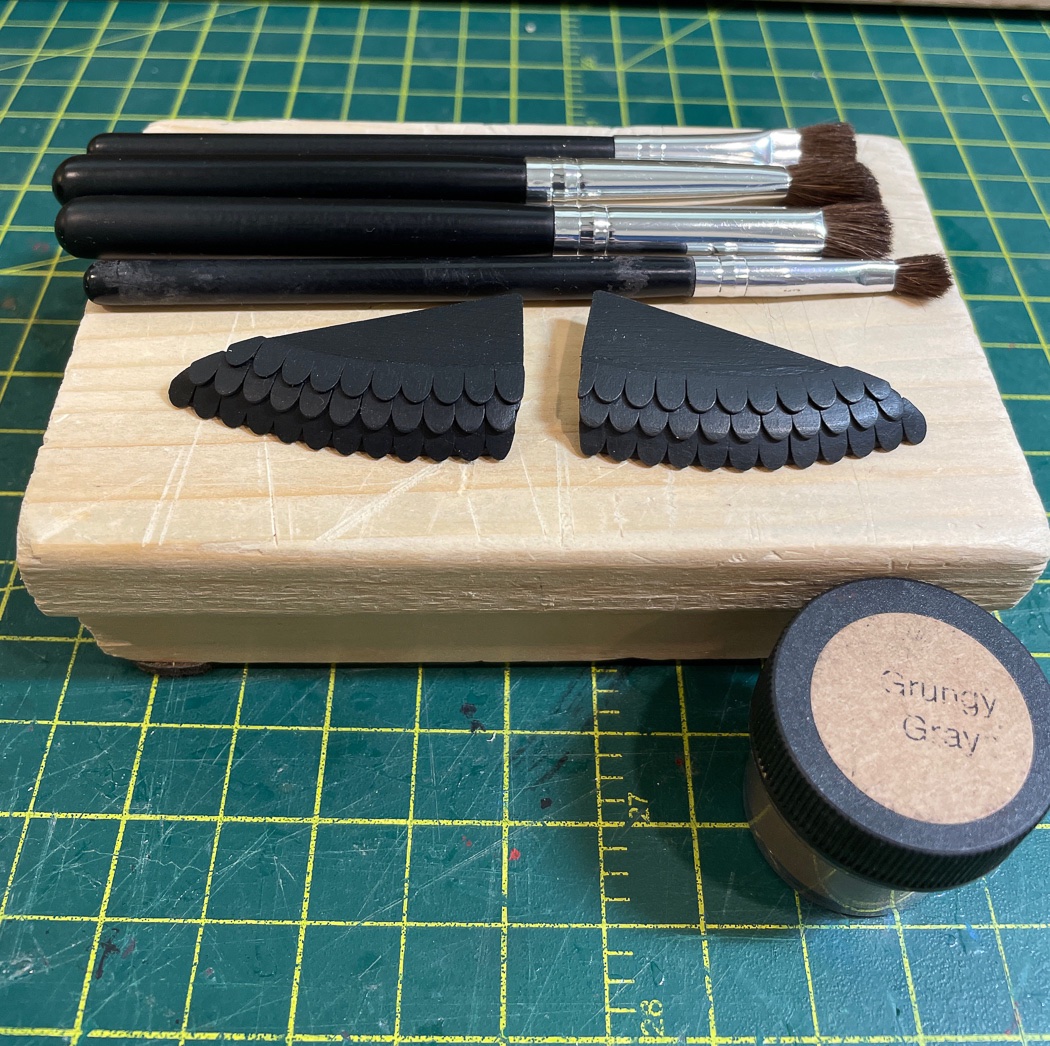
I elected to paint them with Admiralty Paints Ironwood Black, as I noted earlier though meant for iron works it’s a nice matte black, and the same paint used on the wales. Though it may be a bit hard to tell in the photograph, the right one is weathered, the left still in the matte black base. I weathered them using Doc O-Brien’s Grungy Gray weathering powder. I really like the 4 brush set (from Micromark) for application, I use them all, the smallest to apply, the round to remove excess, the (actually in back in the photo) the third to feather it and finally the larger brush to buff. I think it makes for a nice look, the shingles now appear to be gray slate (in my humble opinion). I’m going to experiment with some form of fixative, but multiple tests before I try it on the roof. Any suggestions that doesn't make them shiny appreciated.
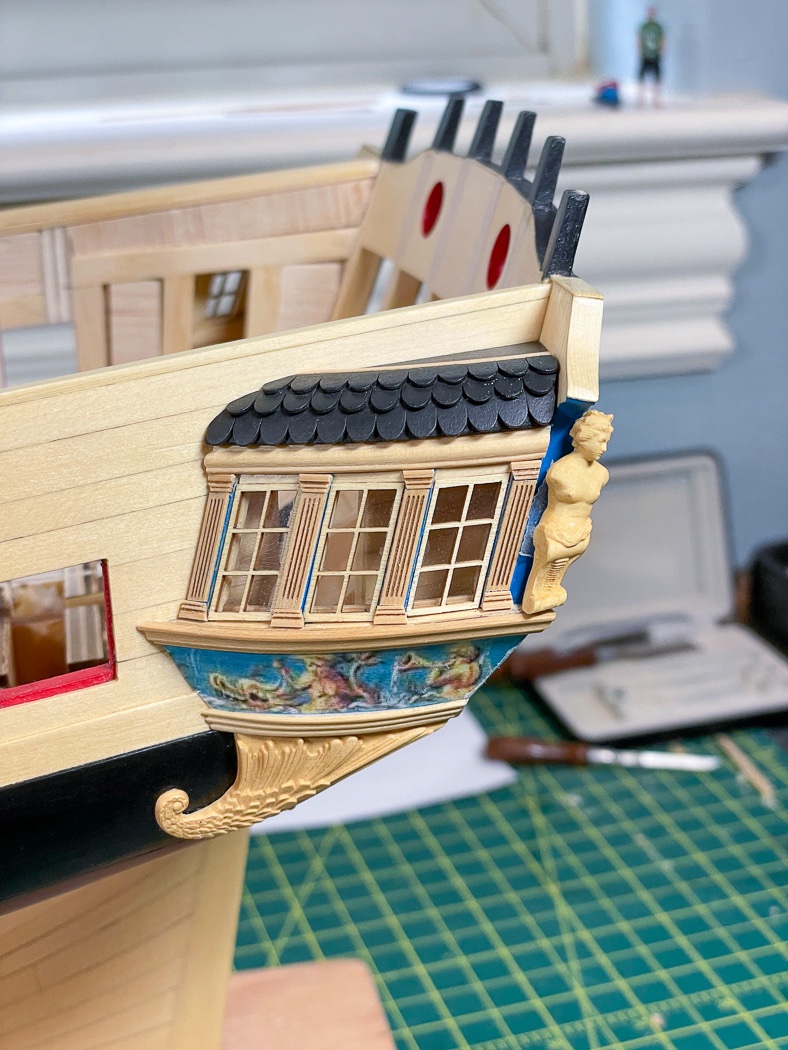
With that the gallery is complete, except the very detailed railing on top which I’ll save until later when I’m less likely to break it off. Neither the roof or the nice lady on the side are glued in place as yet.
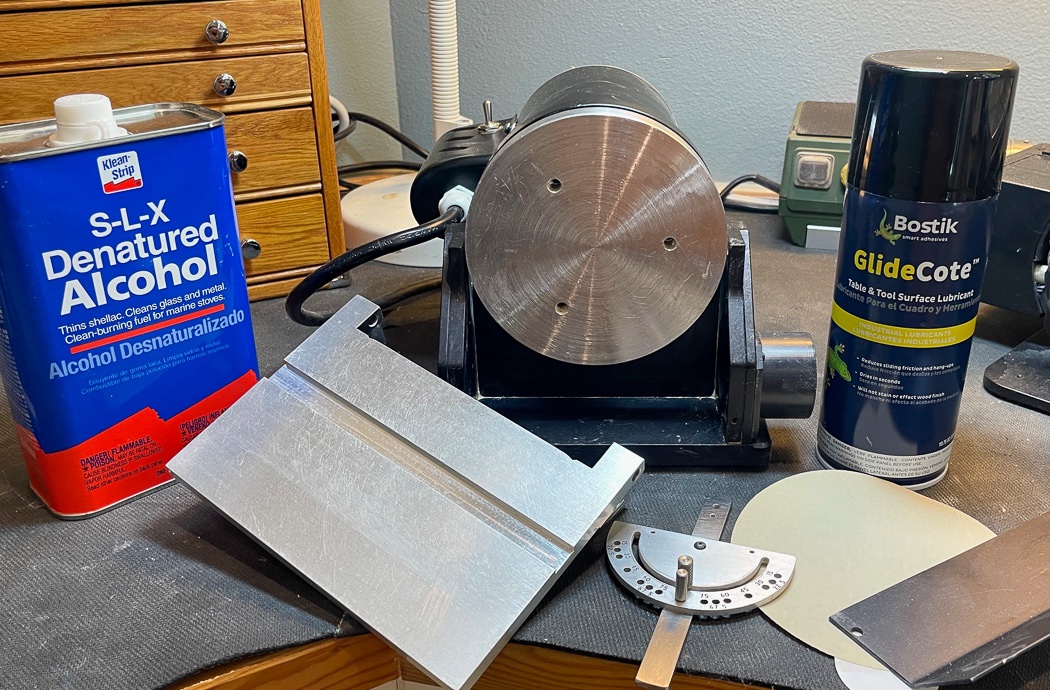
A pause for a maintenance break, replacing the 320 grit sandpaper and cleaning my ever faithful Byrnes Sander. I use Denatured Alcohol to clean the aluminum tables and mitre gauge, also to remove any residual adhesive from the front of the wheel. I was surprised how well GlideCote (which I learned from Jim Byrnes) works. Making the table more like a sheet of smooth ice, the wood glides easily and consequently is easier to manage. This plays a bigger role on the saw and thickness sander, it’s still handy here as well.
After installing the first more narrow middle moulding I decided I didn’t like the look. So, like I do, I removed it and made a new moulding.
The top moulding is laser etched. All the moulding is attached with CA except the volutes. They are also laser etched, I needed time to get them positioned so used PVA. I also broke two sanding them, @Chuck was kind enough to provide replacements, I then decided they looked really great not sanded…..
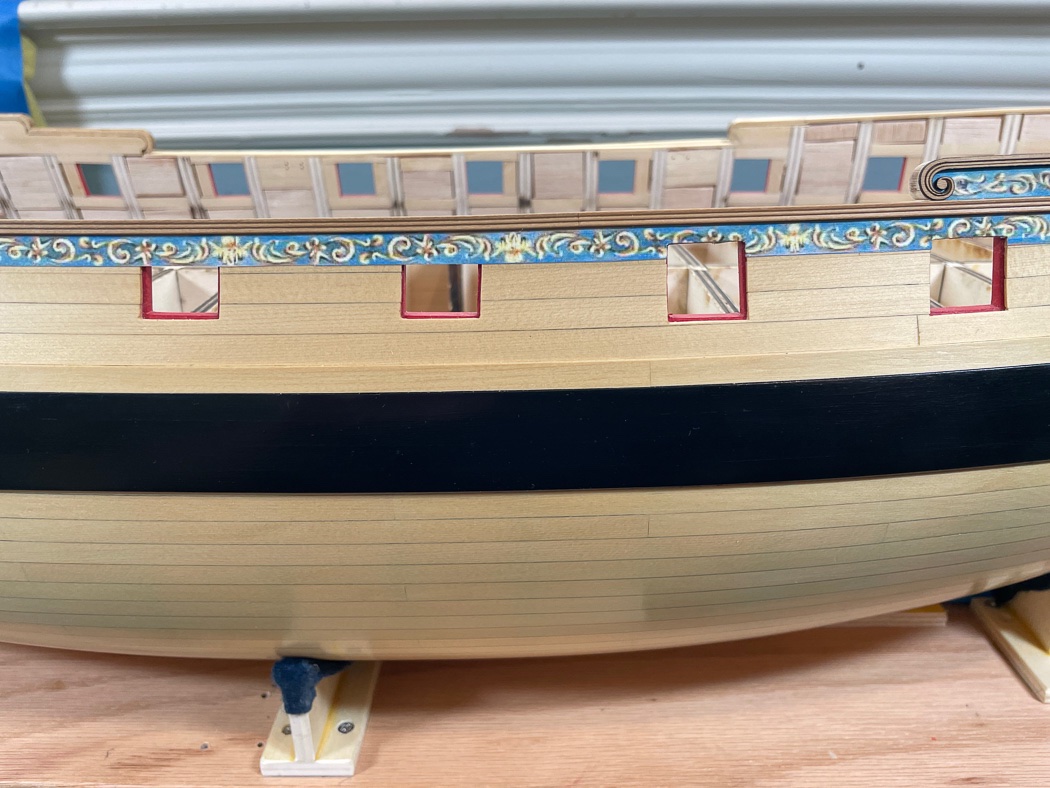
Then it was on to more life lessons of paper glued on wood. I mentioned in the last post my initial reservations on using printed paper and how wrong I was. It is easy to apply and looks great. I print them with highest quality on my Epson ink jet printer then spray them with Winsor & Newton Fixative. Once dry I outsource them to my much more talented wife to cut out. With the need to always align at least one edge directly up against (and not under) wood moulding, having a clean cut line is imperative, she’s far better at that than me.
The frieze was relatively easy to cut out from the ports with my Swann-Morton #11 scalpel - though I started with a fresh blade. The key is to first let the glue stick adhesive thoroughly dry so its rock hard.
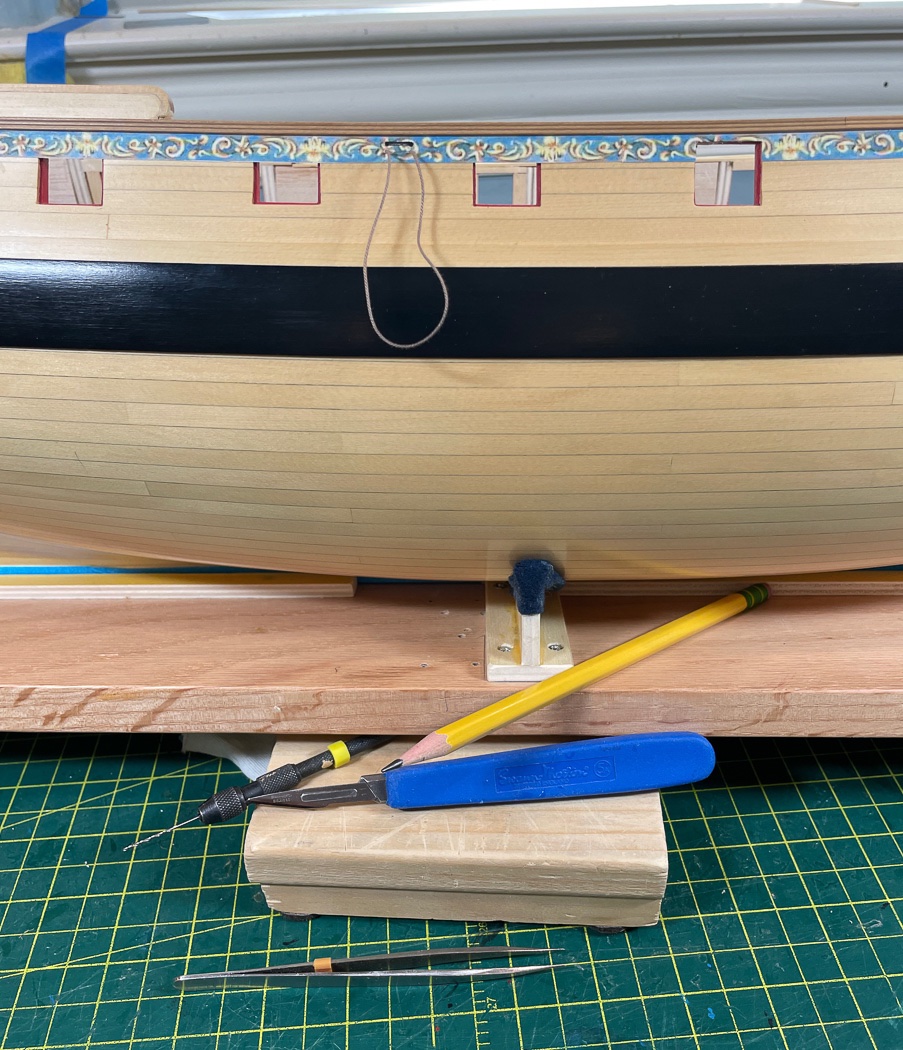
Having intentionally covered the fixed blocks I located them by drilling from inside, slowly, through the holes made back when they were installed. I threaded some nice Syren Rope through both holes from the outside and pulled it back and forth from the inside to restore the grove making it a block once again. A sharpened #2 pencil completes the look.
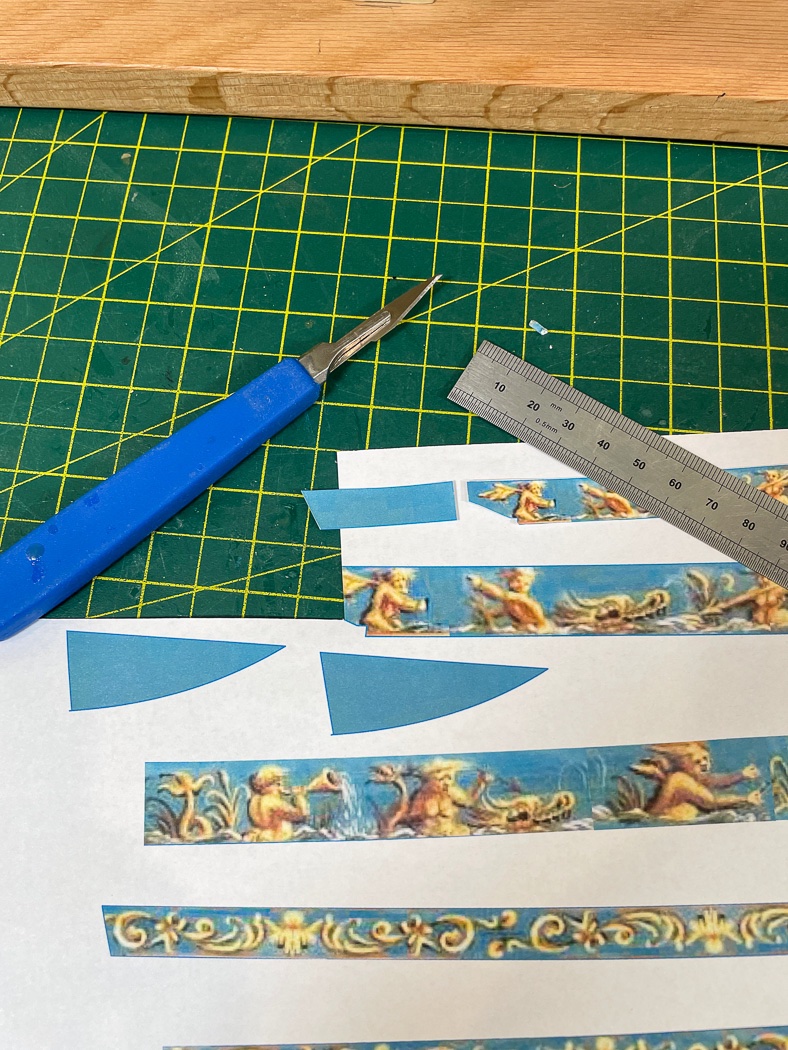
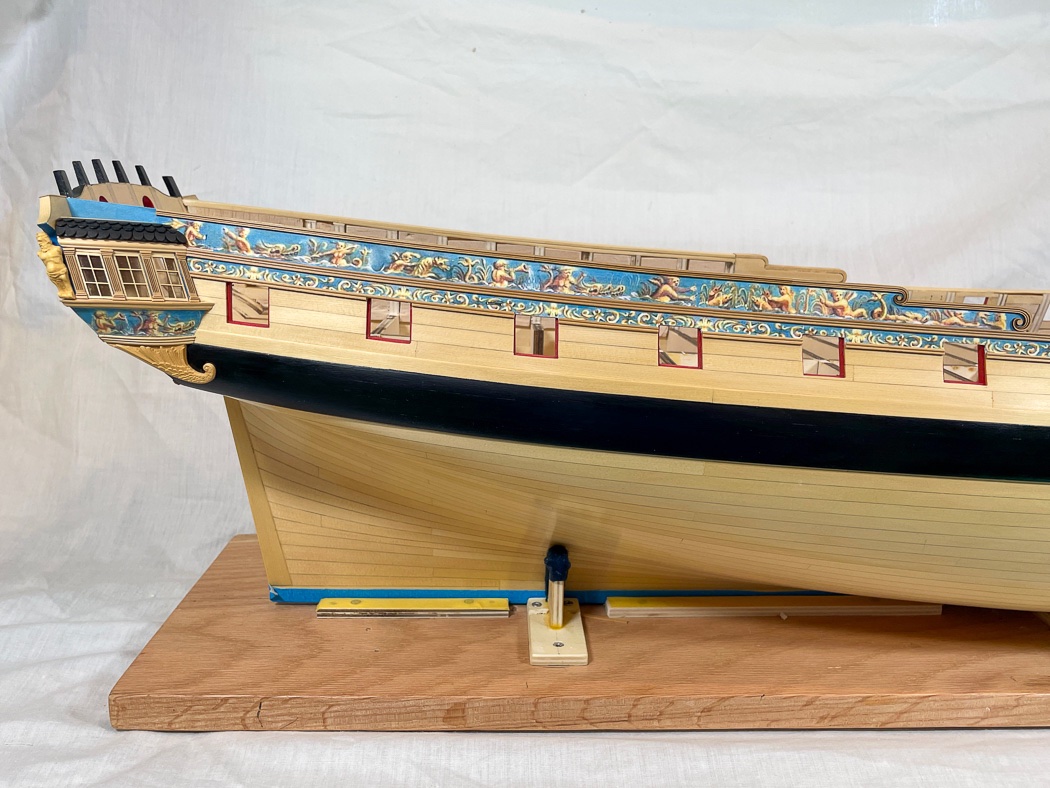
A dilemma. The upper stern hull frieze did not fully cover the area above the roof for my model.
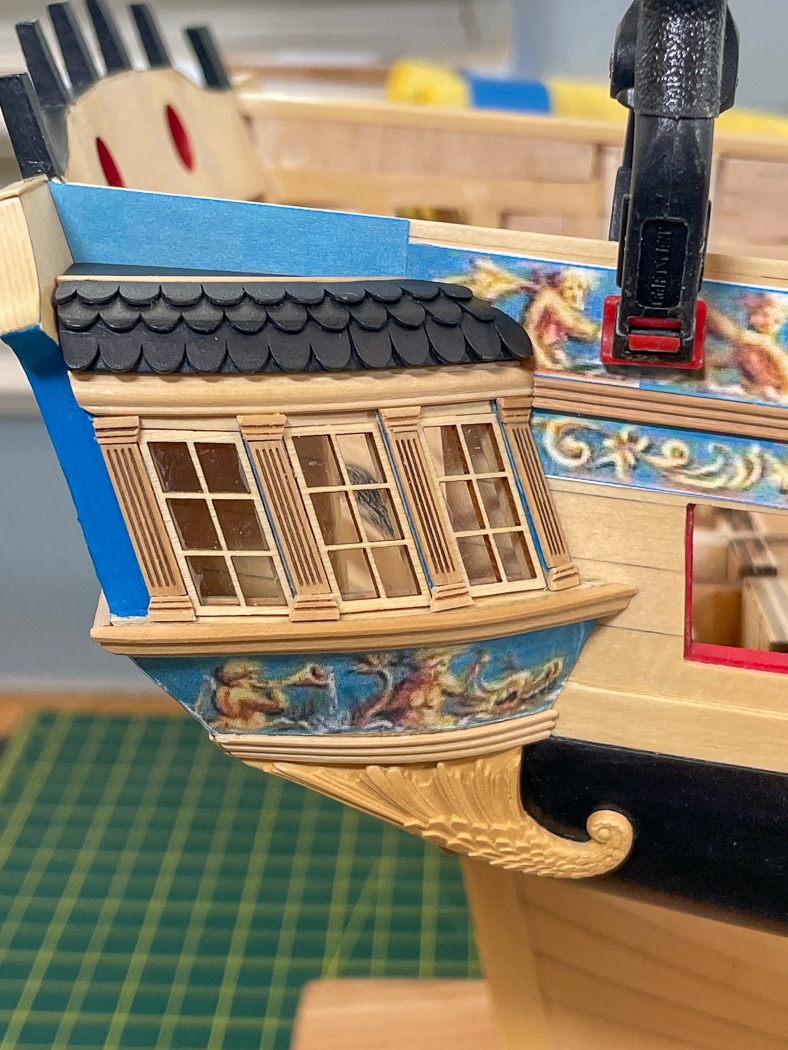
The solution was easy, once I thought of it, print out that same frieze at 150%, cut between the solid blue and the frieze, match the seams when glued on the model. It worked out great.
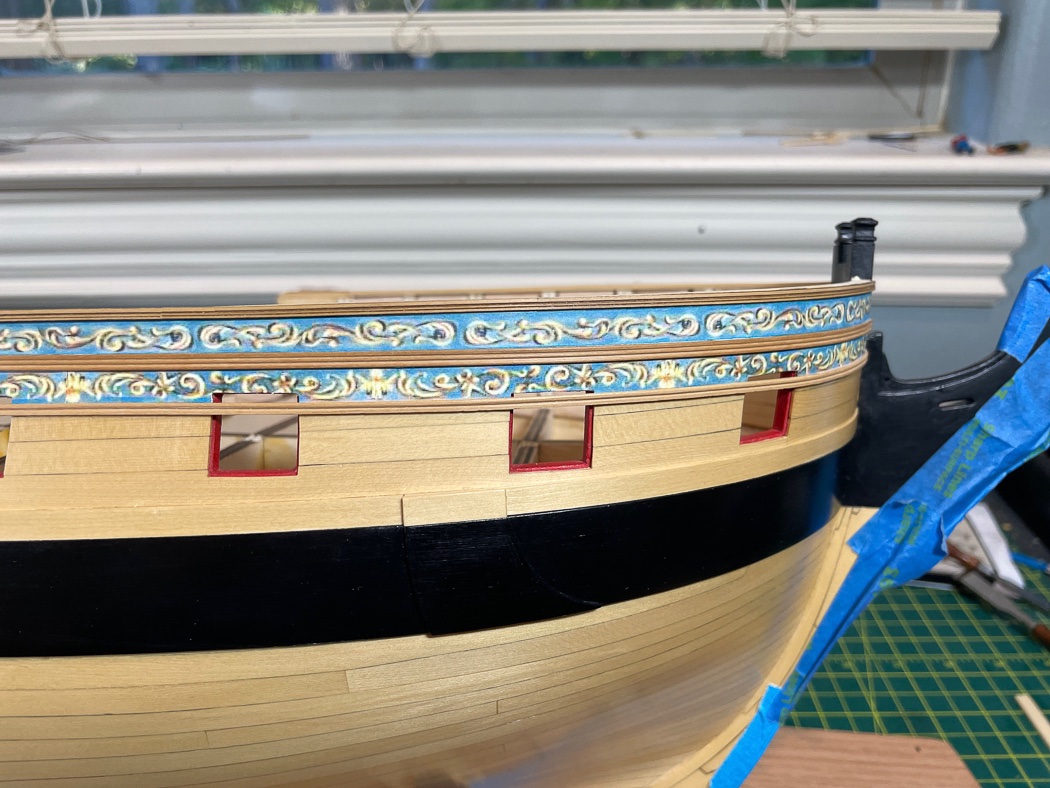
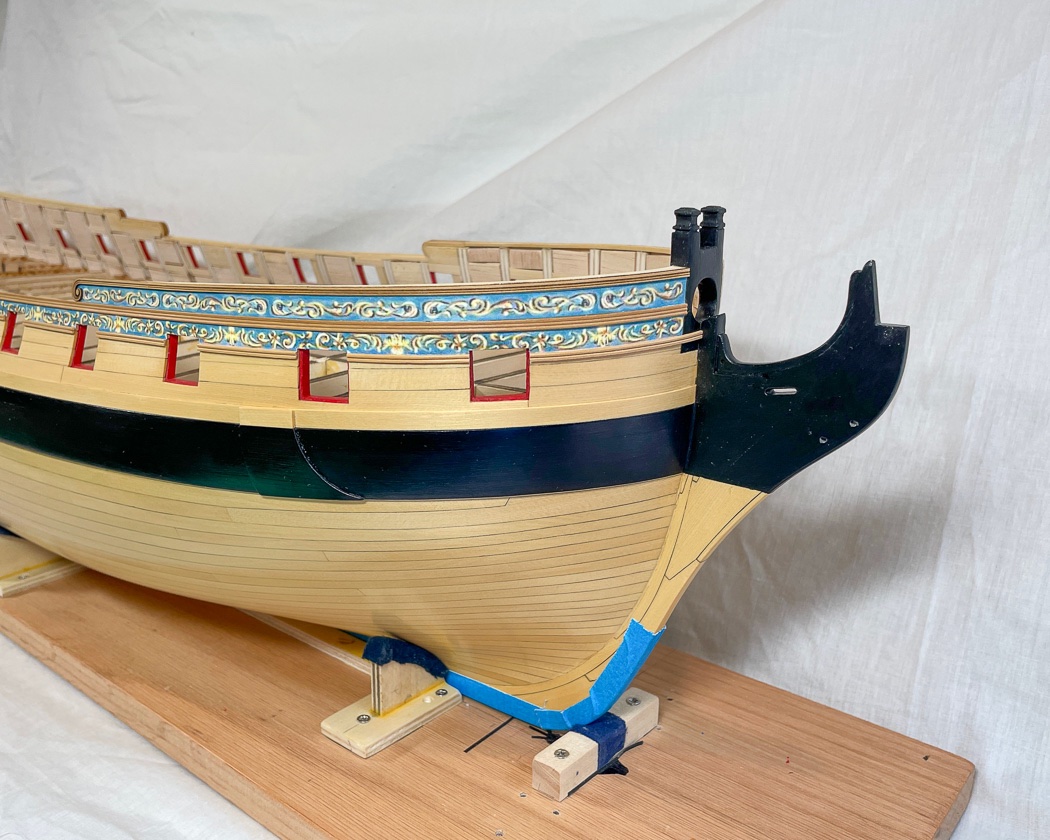
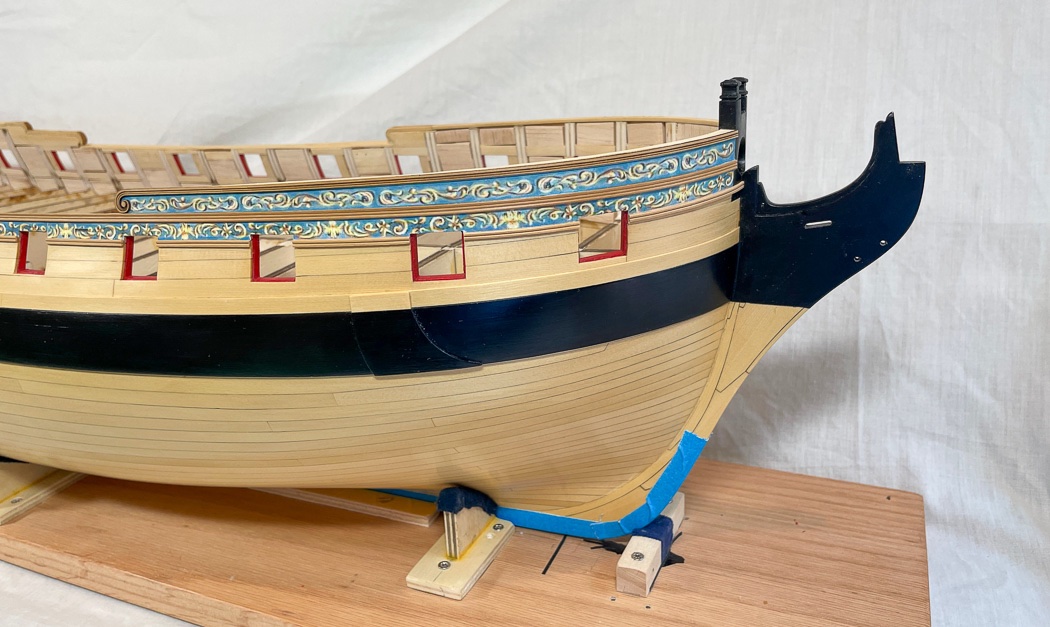
For me the proper line from the forecastle volute to the stem did not follow the planking as it does from the volute to the stern. I spent time with the plans and came up with a couple of jigs to get the correct spacing for the run of the moulding. (it is not coverging at the stem, just the aspect angle of the photography).
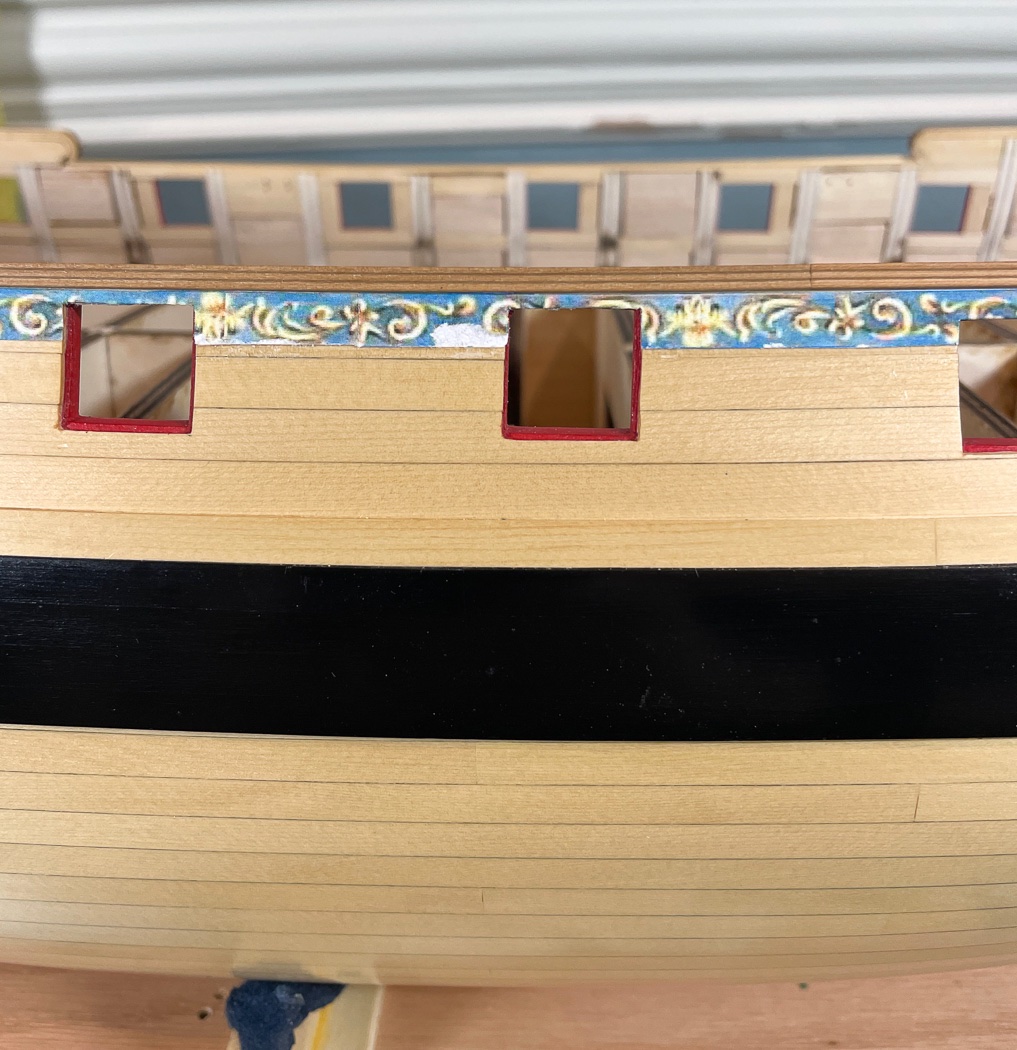
I’ve been clear in my posts that all of my work is perfect, I never do anything wrong, nor ever need to fix anything…NOT! Lesson learned in my new paper world. As shown in the previous moulding its been my practice to have a continuous run of moulding over ports. I’m confident of my skills to then free the ports with my Excel #11 blades. Paper, unlike wood, is very unforgiving, a small mistake results in the paper tearing. It initially was a tiny tear but I couldn’t just leave it. Once the moulding was removed, it didn’t matter, I was removing and replacing the frieze. As Rusty noted in a recent post I could have just showed the finished work and pretend it never happened, I prefer to share what went wrong as well as what goes right.
Though it took time there is no harm no foul. As Chuck points out on his model, it is difficult to find any seams once the pattern is matched and new frieze section glued in.
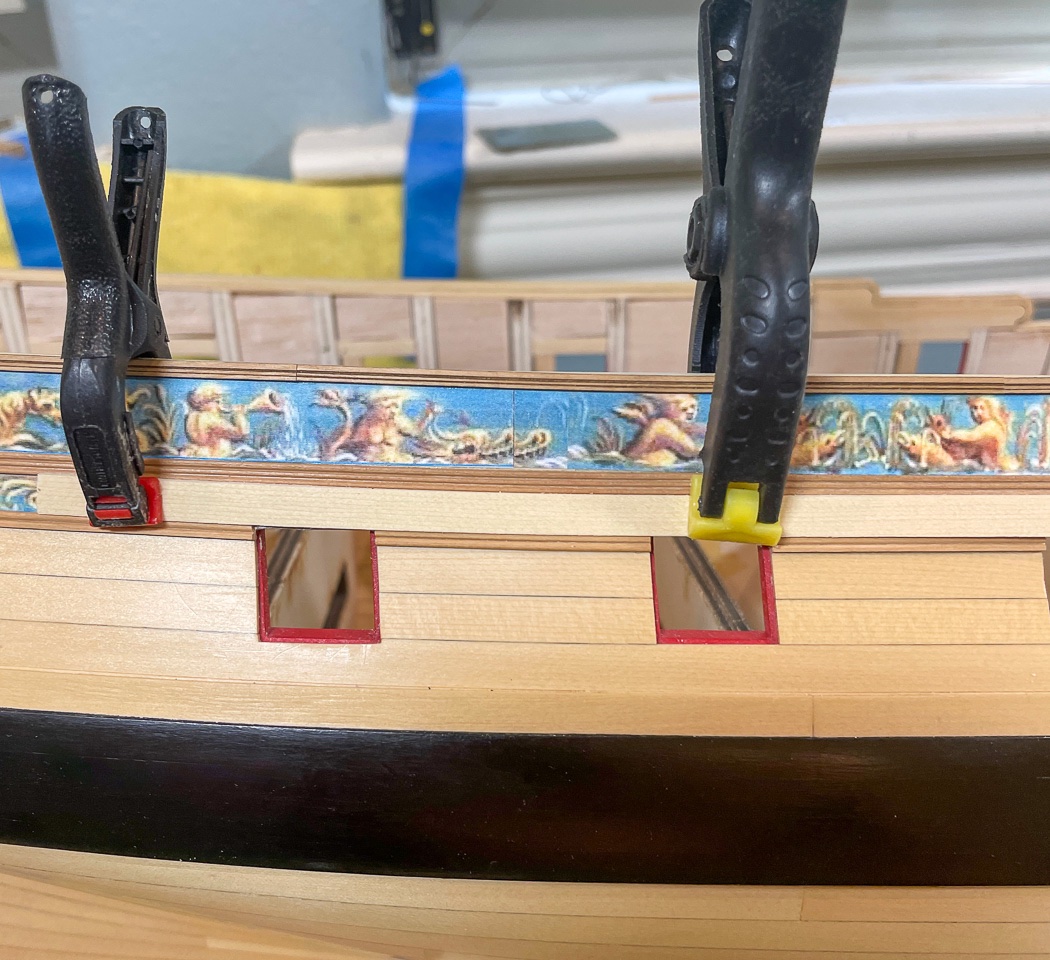
Having tossed my continuous run approach I switched to cutting the lower moulding section by section, matched up the width with the gentle use of my freshly maintained Byrnes Sander, then glued it in place. I cut a spacer clamped up tight to the upper moulding to keep an even line though all the sections.
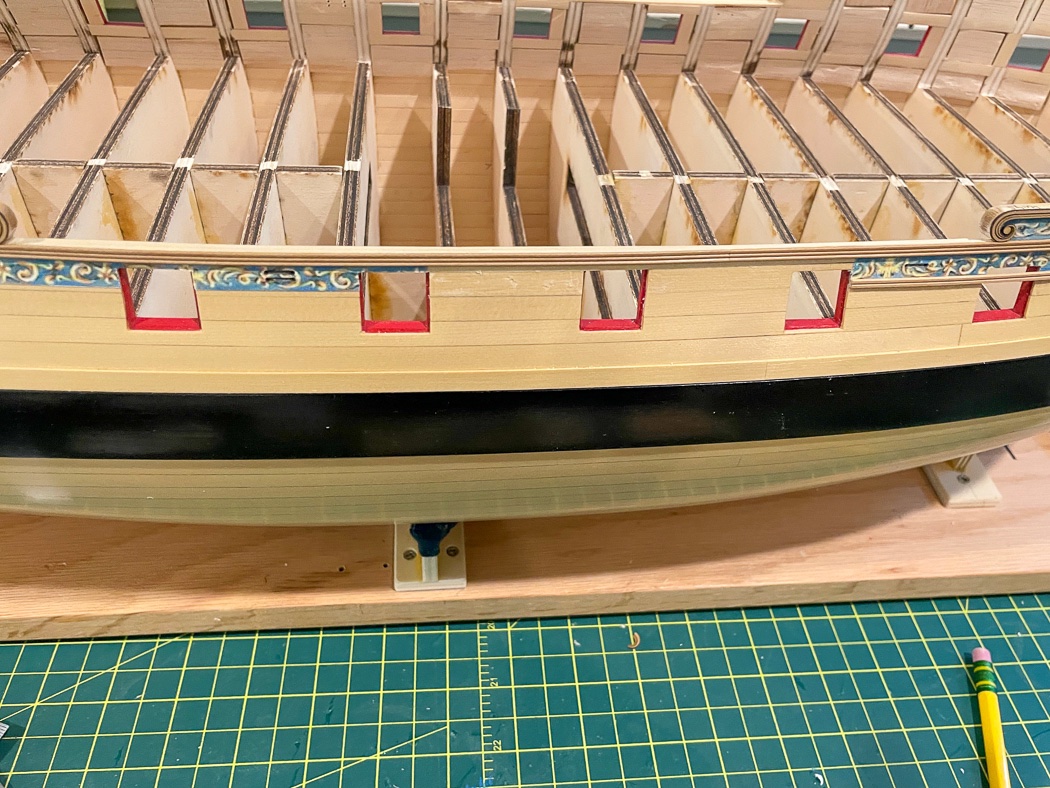
With that a few photos of the finished side. Though a semi-professional photographer I just use my iPhone for all my build photos. An as all seasoned photographers know a badly wrinkled piece of material is a proper backdrop. Not true, I just didn’t feel like ironing it. While the iPhone does nice work, it does tend to squeeze curves and warp aspect a bit. So things are actually straighter, or curvier, than they seem. Also I removed the tape, but not the residue, from the stem.
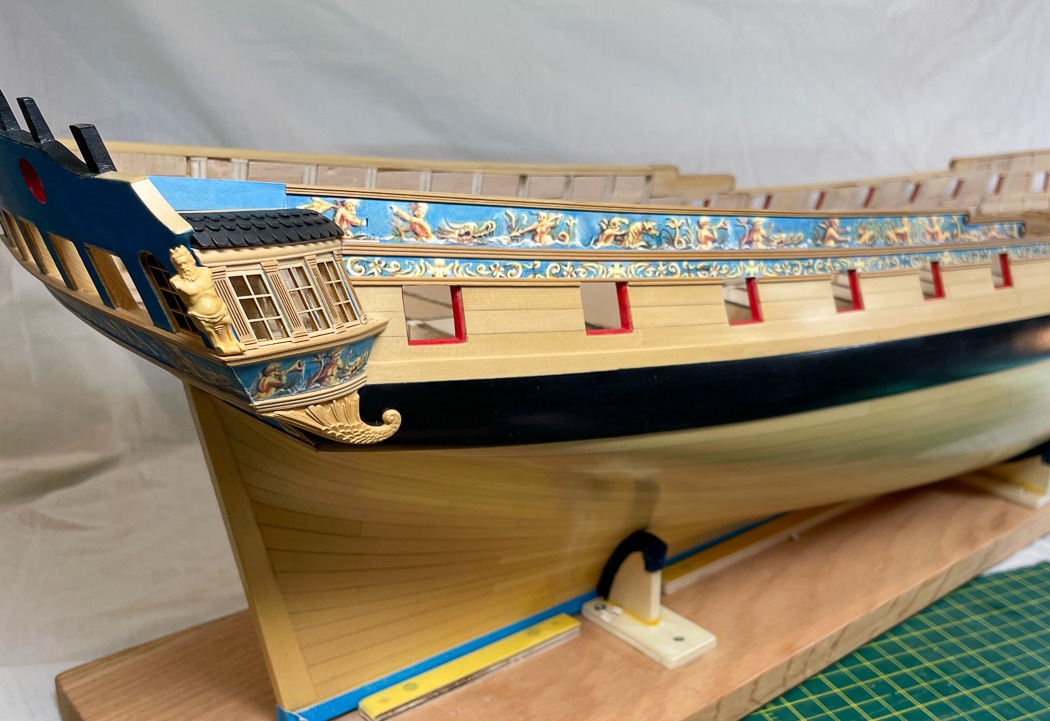
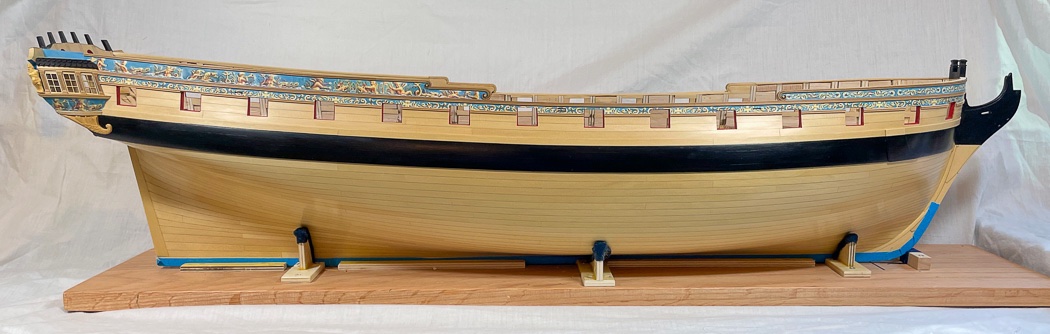
Now all I have to do is turn the ship around and do it all again on the port side. As always, thank you for your likes and especially your comments. I hope I’ve provided a bit of entertainment for your day.
-
-


HMS Winchelsea 1764 by glbarlow - FINISHED - 1:48
in Member Build logs for the HMS Winchelsea
Posted
Thank you, I hope it’s helpful.