


glbarlow
-
Posts
3,851 -
Joined
-
Last visited
Content Type
Profiles
Forums
Gallery
Events
Posts posted by glbarlow
-
-
On 12/7/2021 at 4:10 PM, chris watton said:
the outer hull will also be planked from the quarterdeck bulwarks down.
Personally I’m glad of this, better look in my opinion.
- Dave_E, mtaylor, Bill Morrison and 4 others
-
 7
7
-
I’d just mill my own planks or use the planks provided for the deck and wouldn’t want a laser etched deck for a model of this size and quality so having the laser etched deck as an option is a good approach.
- chris watton, Canute, thibaultron and 3 others
-
6
-
-
2 hours ago, chris watton said:
My philosophy - All or nothing!
I totally agree.
- KentM, Dave_E, hollowneck and 4 others
-
7
-
-
Excellent work , it’s looking really nice!
- FrankWouts, westwood and Oldsalt1950
-
3
-
10 hours ago, Edwardkenway said:
starting chapter 3
Thank you, I’m looking forward to moving beyond planking.
- Dave_E, FrankWouts and Edwardkenway
-
3
-
-
5 hours ago, DelF said:
delighted at your achievements.
Thank you. I am happy with how it’s going, but can’t help seeing every flaw, no matter how small. Into my third month planking I’m kinda ready to be done though.
5 hours ago, DelF said:taking a saw to bag me some of that cedar
So you check one of those hard shell golf club carriers empty and bring it back full, no one will notice a thing🤣
- Edwardkenway, FrankWouts, Dave_E and 3 others
-
4
-
 2
2
-
13 hours ago, Oldsalt1950 said:
Outstanding
Thank you for saying so.
13 hours ago, Seventynet said:That AYC sure is beautiful.
Thank you, it really is a great wood for modeling.
- Seventynet, FrankWouts and Dave_E
-
3
-
Thanks Chuck,
Yep, my Cheerful looks completely different, and better, than when I finished it.
- Rustyj and FrankWouts
-
2
-
There is no saw but the Byrnes saw - it is indispensable for me (plus the tall fence, mitre fence and especially the cross cut table as accessories). It also would take me much more time to plank with much less accurate results without the Byrnes Disc Sander. Like Derek, I really love the Proxxon Micro Mill for doing stuff I couldn't otherwise do. Rounding it out, I didn't know how much I'd like having the Byrnes Thickness Sander until I got one, I intentionally mill planks a tad thick and then even them all to a consisted thickness, really helps with planking. I enjoy having the relatively inexpensive Proxxon lathe, it's useful but for me so far limited to masts and spars, I'm sure there's more I could do with it someday. Like Derek, I can find a way to buy a new tool in any given moment.
-
Well done! I know it was a small size change, but it looks a lot better as it sits now. I'm still not sure how I'll feel drilling through that carving - but fortunately its a really long time for me before it's an issue. The real question "is the candle real?" 😄
- Gregory, Chuck, Ryland Craze and 2 others
-
5
-
AND Planking Continues …
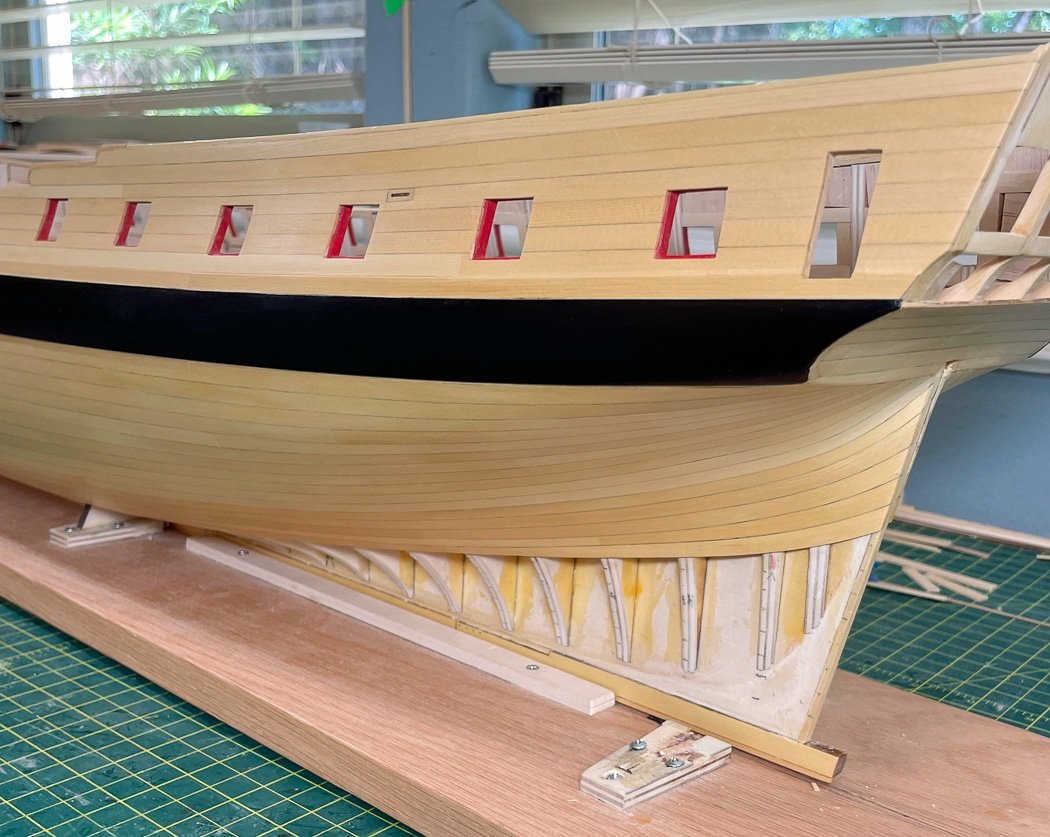
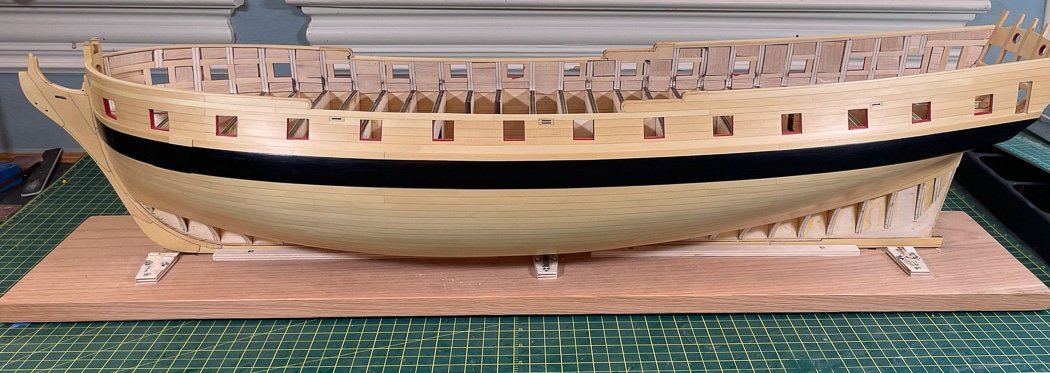
I started planking in early March, and I’m still and it and I’m still not done and I still have more planking to do and I’m having so much fun... I’ve now completed 16 strakes both starboard and port - with 8 more to go on each side.
It seems like these, plus my travel iron and craft hot air gun are the only tools I’ve touched in months, probably because they are. I do spend a lot of time with my Byrnes collection of saw, disc sander, and thickness sander so there’s that.
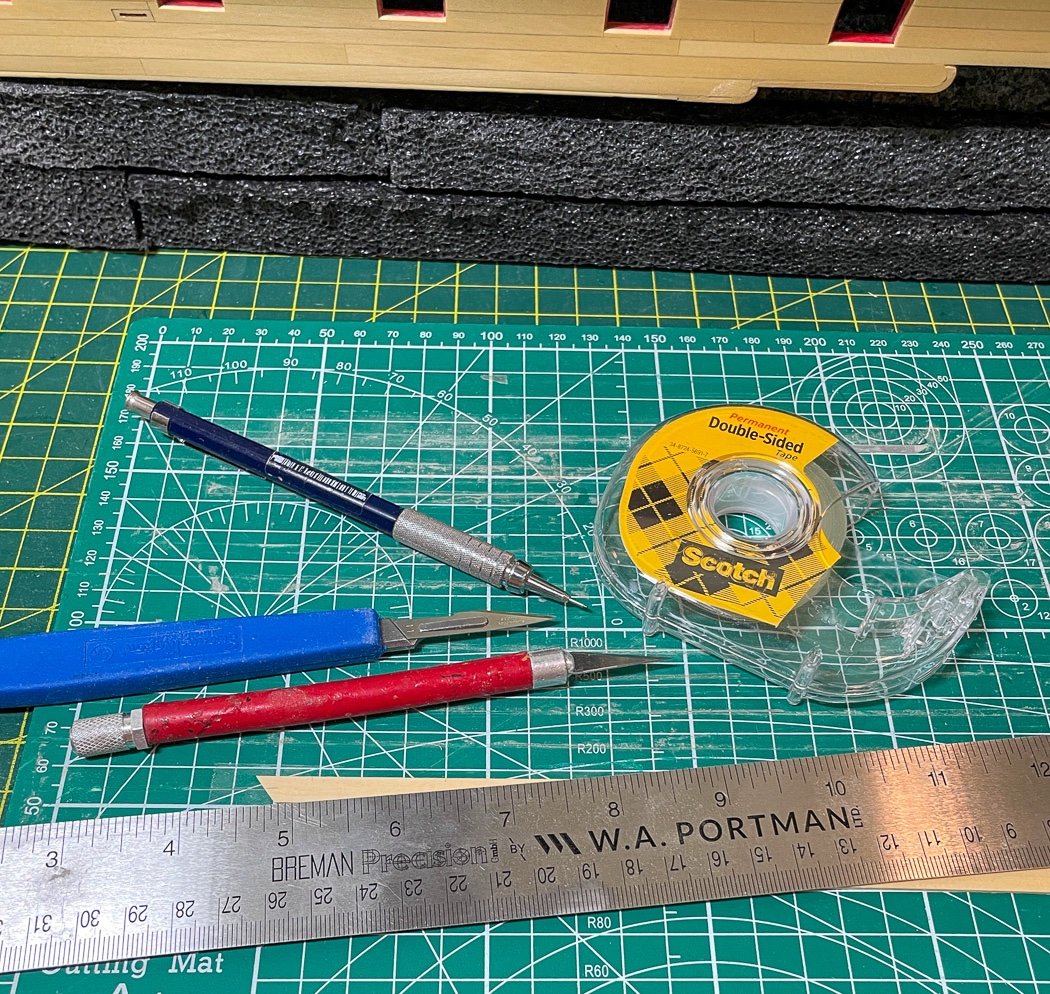
I’ve always been comfortable tapering planks with a metal ruler and a sharp object, with the longer planks required for Winchelsea I added a separate cutting mat along with double sided tape. I put a strip of the tape on the mat and stick the plank to the tape - it doesn’t move while I’m sliding the blade along the tick marks I’ve transferred from the ship.
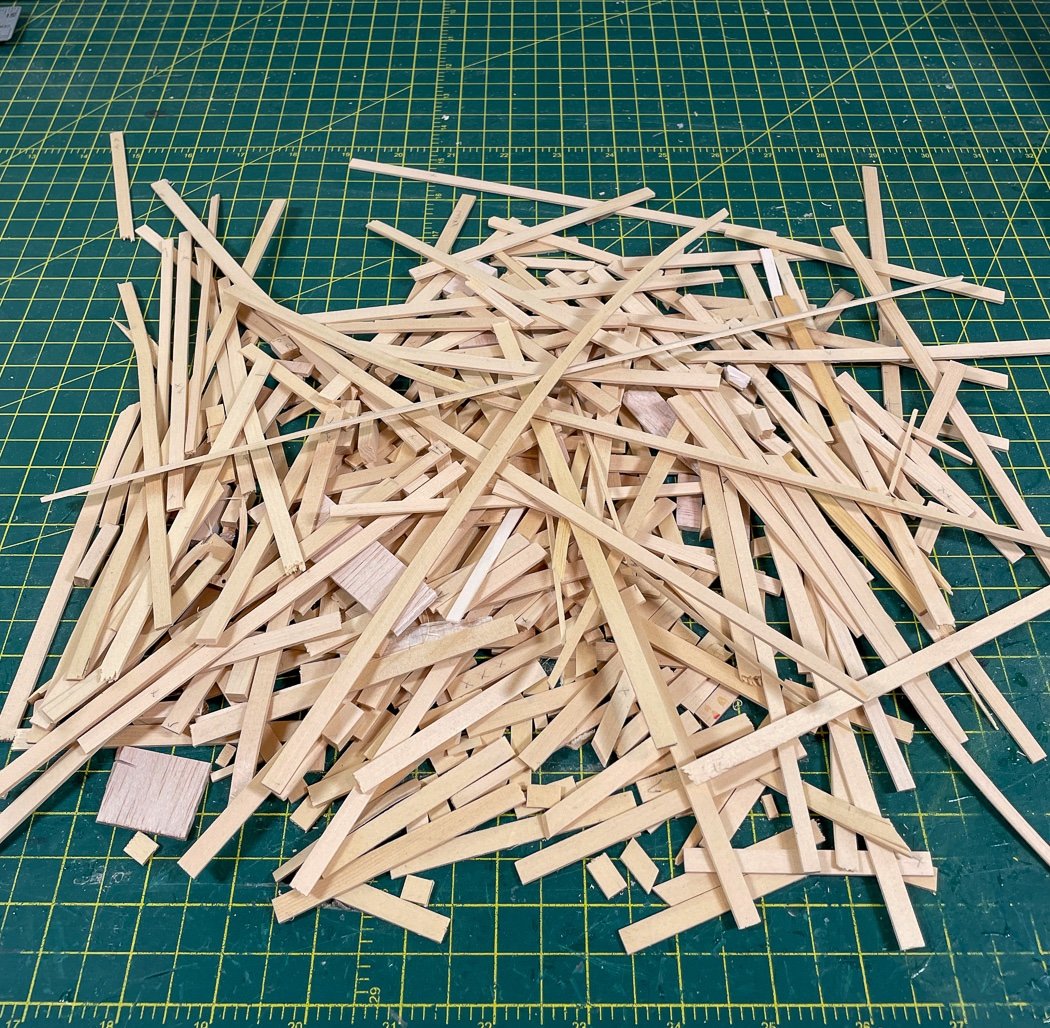
I have the problem of being somewhat of a perfectionist and not being very good at my job - the result is a lot of wasted wood from rejected planks and excess. I was feeling bad about this until my wife walked in the shop, looked at the pile and said “We’ll have some great summer projects for the grandkids using these.” I looked up and said “Of course, that was my plan all along.” We’re going to Alaska on a cruise this fall, I plan to find an Alaskan Yellow Cedar tree and apologize for how much of his brethren I’ve wasted.
The port side bow has turned out ok so far, it’s nice because it’s more or less measure, cut, fit. It’s still 'every plank’s a project' with the bending, fitting, edge softening, and gluing - each plank can take up to an hour or so to make. Then of course there are the repeats when that doesn’t work … grandkid projects I now call them.
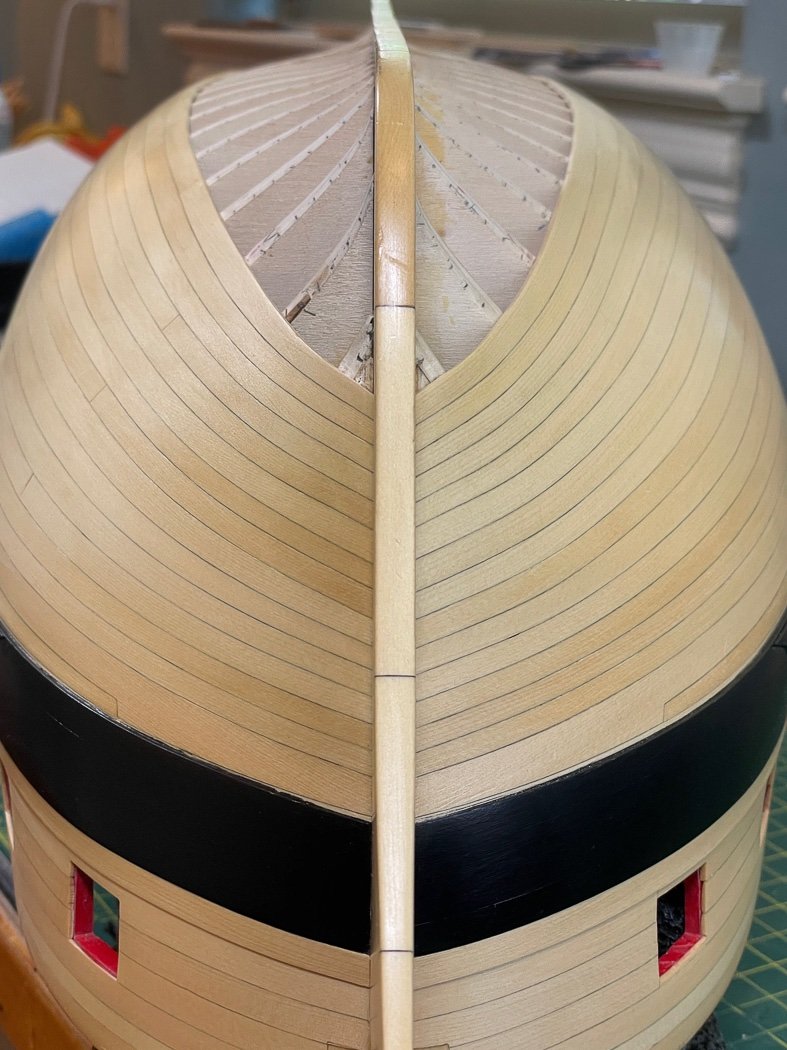
Remarkably both sides look more or less the same in this view I’ll likely never see or notice once the ship gets turned right side up, but still.

There was so much excitement at reaching this stage a guy with a mandolin came by to play a few tunes.
I’m not as concerned with the variances in the wood color, for one thing there are different number of coats of WOP, the port side has only one. The AYC soaks up the first coat like a towel. There will be more light sanding and more coats of WOP before I call it done. Plus, as I see my Cheerful on its shelf everyday I know somehow this nice wood just evens itself out over time. I probably should have milled all the planks at once, thrown them in a pile and used whatever came out first, rather than try matching as I’ve done, and not done well. In fairness it changes a lot with that first coat of WOP.
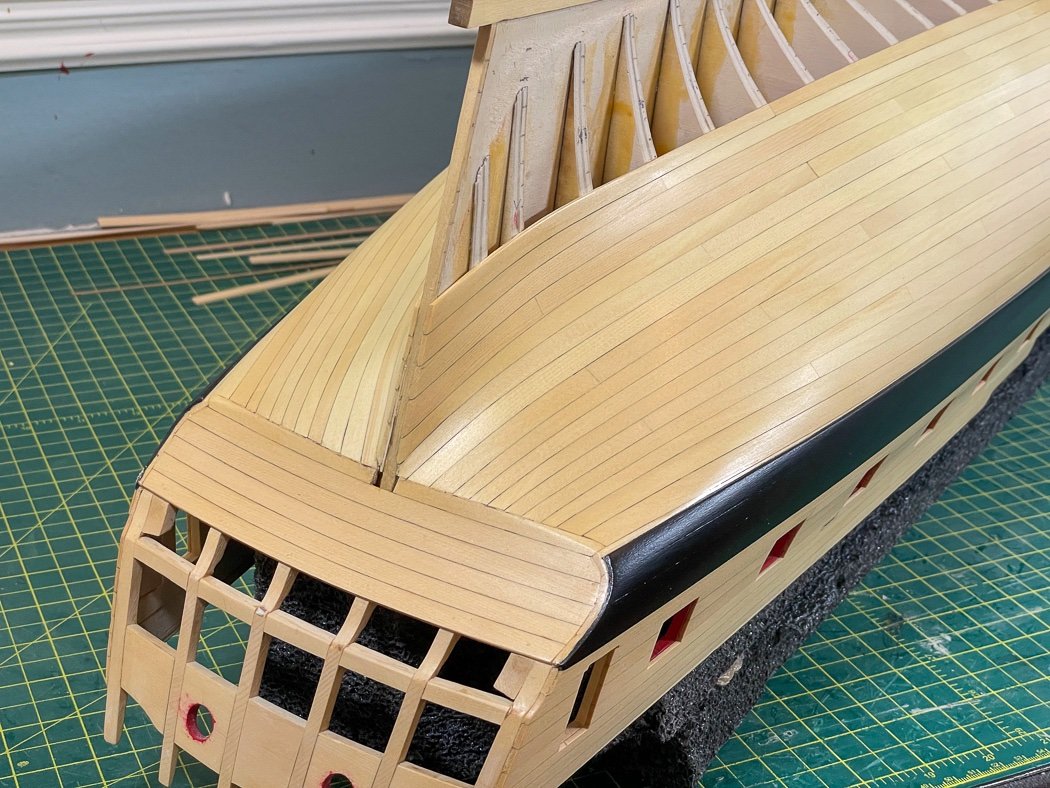
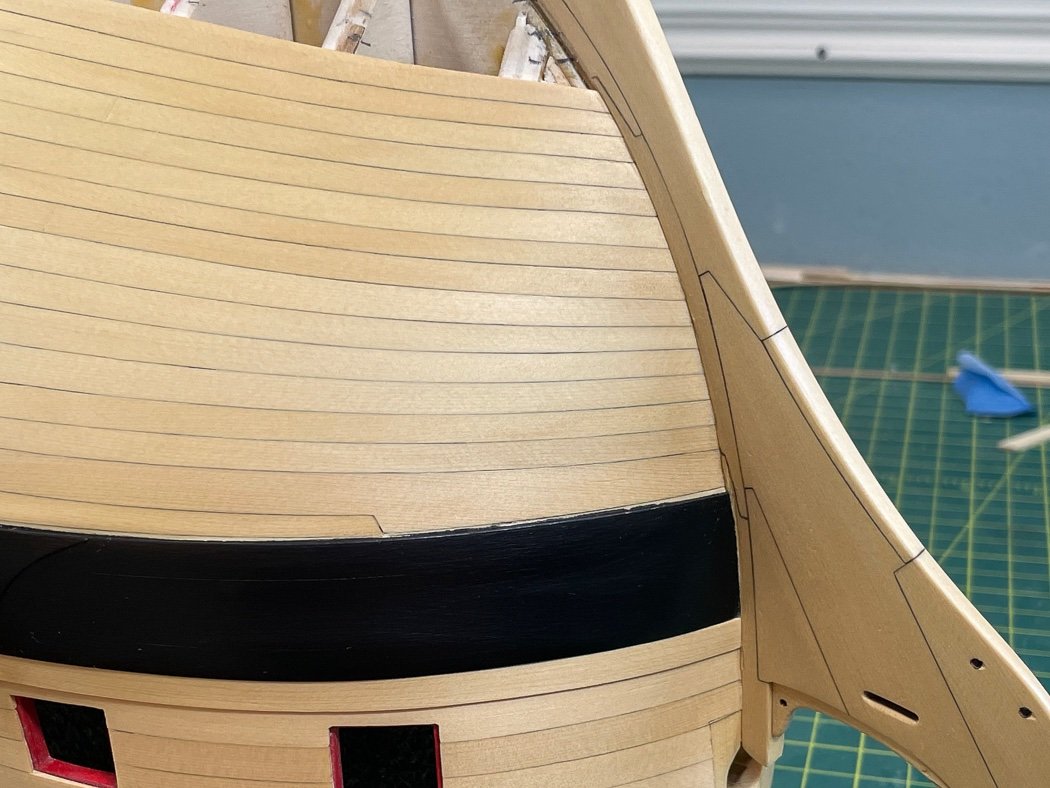
Then there’s the stern - Planks at the bow make take an hour or two, midship less, but these stern planks starting at the turn to the stern post wore me out. I really struggled with the stern on multiple levels. One plank might take me a day to get right. I’m fortunate these aren’t very heavy, so they didn’t do much damage when I flung the rejects against the wall.
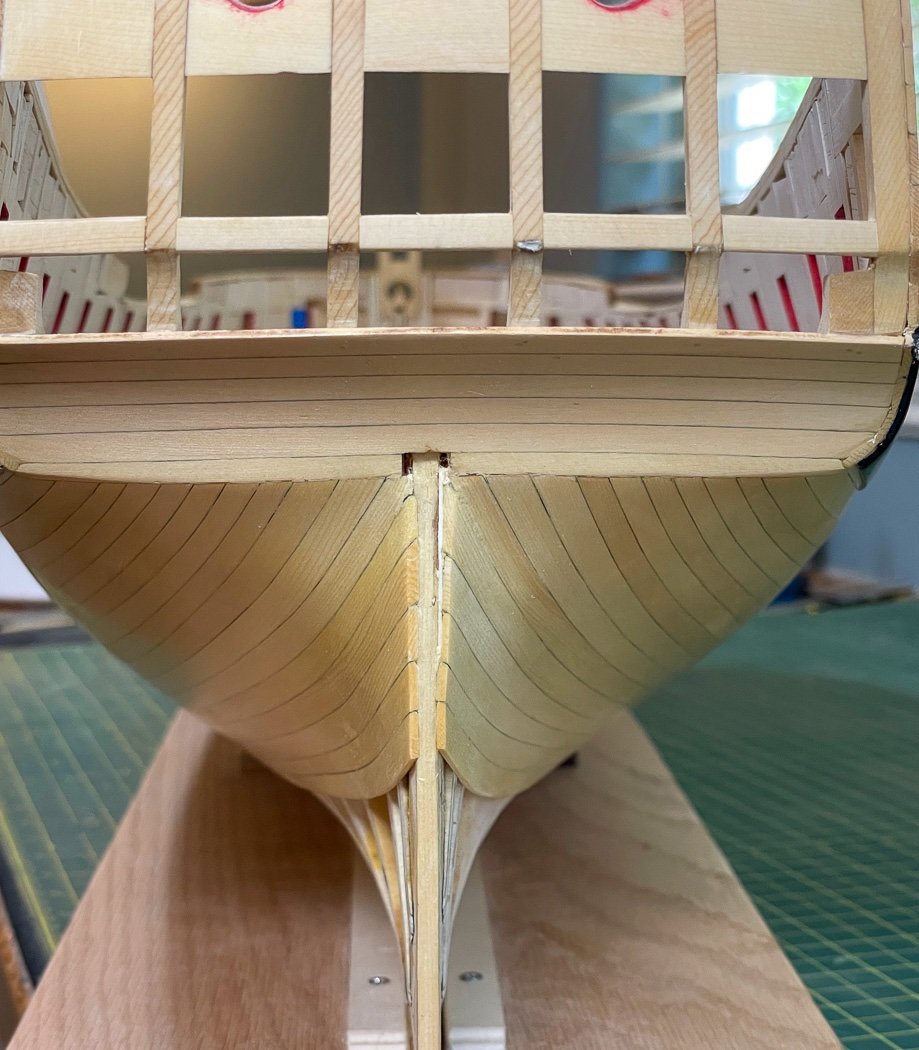
In another macro view I won’t often see it’s somewhat a miracle both sides are near equal. At least unlike the starboard side and the multiple rip and replace I didn’t have to repeat that for thr port side, so I must have learned something along the way. It is nice to know the counter will be covered by a frieze and a moulding strip eventually covers the seam.
I’m still not that happy with the stern, but I got there - it is in fact a stern. Even with wider planks and knowing I’m on the tick marks it looks like a lot of ground to cover at the stern post with just eight more strakes to go. I’ll make it work, that’s what wider planks are for.
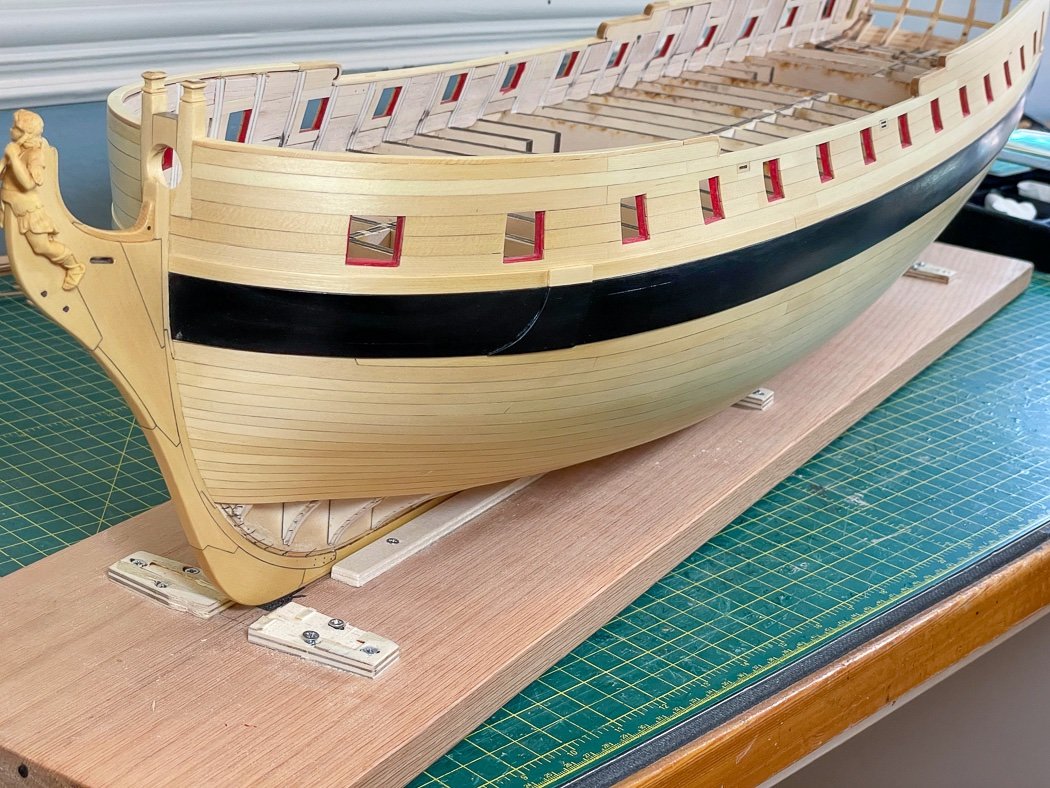
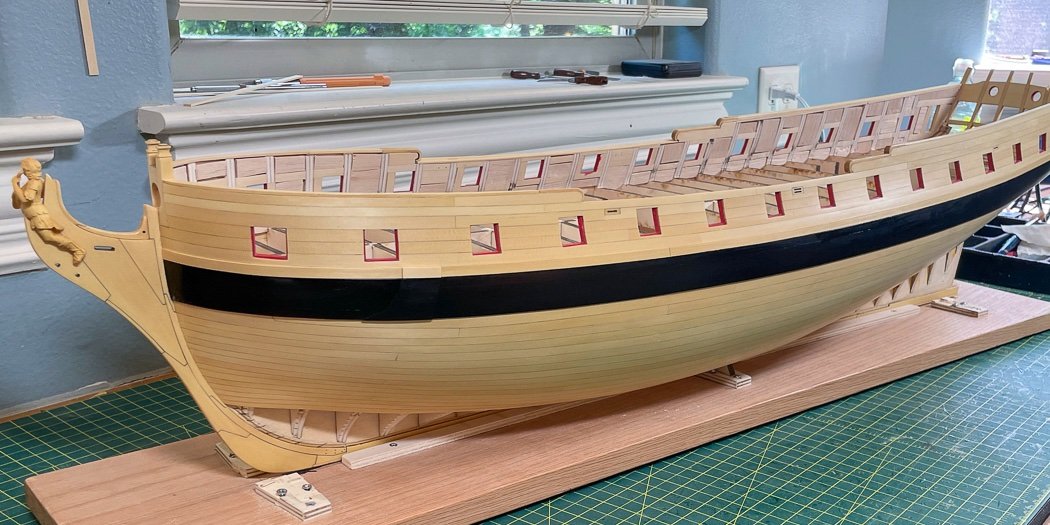
More and more it looks like an actual ship.
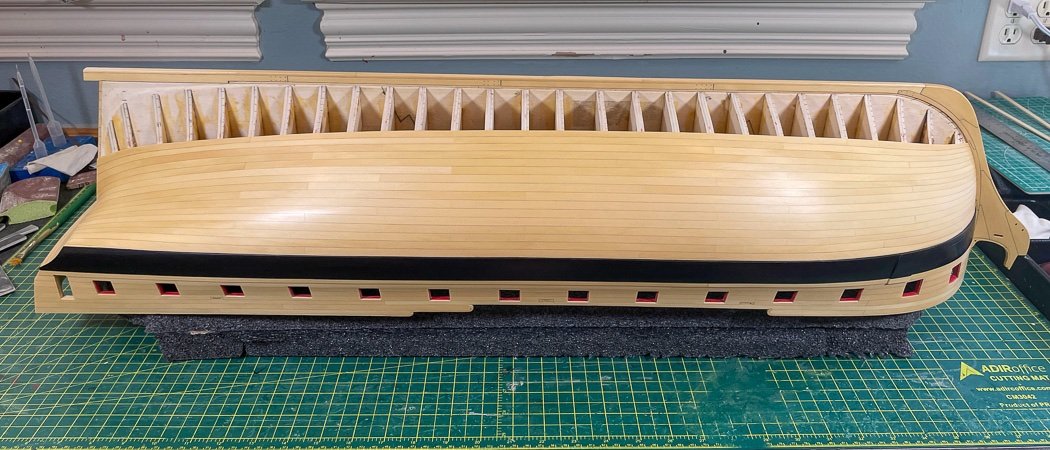
With that it’s time to reverse course and start down from the keel, so next up are garboard strakes. By my estimation (and no I’m not going to count them) with 32 strakes done below the wales and about 3.25 planks to a strake (depending on the butt pattern) I’ve added over a hundred planks and have about half that still to go…but who’s counting. Of course that’s not counting rejects, I mean grandkid summer project material. I’m just taking it slow, admiring build logs of those who have a deck, and working it a day at a time.
Thank you for the follows, likes and comments - it really helps keep me going - one plank at a time, then another plank, then another plank……
-
-
This is not a post about the Byrnes Saw, I'll just sum that up by saying there is no saw but the Byrnes saw. It's also not about the Byrnes Disc Sander or Thickness Sander which I also own and are equally outstanding.
This is instead about Jim and Donna Byrnes and the level of customer service they provide in support of their amazing products. It's nothing short of OUTSTANDING! I've had my saw for about 15 years and never had a problem until recently and likely one that I caused and not the quality of the design. Donna usually answers the phone because Jim is building things, I explained my problem to her, she said she'd have Jim call me back, which he did later that day. After some trial and error attempts per Jim's guidance he said "We'll send you a new arbor and an email on how to change it." Three days later I had the new arbor and installed it (after first admiring the piece, the milling is pure artistry) using his clear instruction. However another small problem resulted, by a few thousands of an inch the blade guard on the top of the table was rubbing the blade (after conferring further with Jim I had properly installed the arbor correctly). "Donna will send you a new blade cover." I'm sure he milled a special one that accounted for the few thousands because when I got it, again three days later, it was a perfect fit.
I've had other interactions with Jim and Donna over the years, always pleasant, always informative and helpful. This incident though was above and beyond - total, thorough, and complete support for a product I purchased over 15 years ago as though I'd bought it yesterday. No mail the unit in and we'll see what we can do, instead here's the part and how to install it. Who does that these days, what small business takes that level of pride and support in the products they produce over a decade after they sold it to you.
Just Amazing!
-
I agree about the too busy part, There are so many nice features there all ready I wouldn’t want to drown them out with hardware for the sake of hardware. Hammock cranes or crutches would add nothing in my opinion, maybe boarding stanchions.
While historical accuracy is relevant, I believe we are building an admiralty model, not a rendition of a sailing vessel (e.g. no rigging) so what would convince the board to build this vessel, eliminate adding anything would detract from the elegance of the design.
Just my two cents, I’ll go back to planking now.
-
-
I’m so so far from this point. It does look so cool.
-
-
-
-
I can’t begin to comprehend the builder skill and talent this model represents. As I struggle to plank the stern of Winchelsea then see such a masterpiece I just shake my head in wonder. I’m likely to buy the books just so I know there are masters like you two out there serving as inspiration.
-
Look at my Cheerful build rigging for the simple tools I use for rigging. You don’t have to remove the shrouds to master belaying with the right tools. See mine and other build logs (like Delf’s Speedy log),or Google, for how to belay and run lines. The coils are done with a separate piece of line after the rigging line is belayed and cut, not with the excess. You’ll either need to remake the pin rack or just stick with the fat ones you started with.
Rigging is a different aspect of modeling that takes patience and time to learn. The LN rigging is basic and a great way to learn it. I really enjoy and look forward to rigging my models. My first model was the AVS, I would have been lost without the Bob Hunt practicum, but that was long before MSW and the many excellent build logs to learn from.
You post a lot of questions around the forum which is fine, but maybe take a step back and make the time to look through build logs to see how things are done. Nothing you need to do to rig hasn’t been done many times before and explained in many build logs, do the research, don’t just rely on often confusing or contradictory comments to your log.
- Keith Black and Gregory
-
2


HMS Indefatigable 1794 (prototype) by James H - Vanguard Models - 1:64 - FINISHED
in - Kit build logs for subjects built from 1751 - 1800
Posted · Edited by glbarlow
New post captain is thrilled when told he will captain the frigate Sphinx, sees the frigate Indefatigable and then 😳😩