


glbarlow
-
Posts
4,135 -
Joined
-
Last visited
Content Type
Profiles
Forums
Gallery
Events
Everything posted by glbarlow
-
 Thank you for the kind words. Yes the copper plating drove a long hiatus, but as you noticed I’ve been back at it for a while now. However, I will never ever copper plate anything ever again😎
- 101 replies
-
- 1
-

-
- victory models
- amati
- (and 2 more)
-
I’m looking forward to that day, I think they will too. If I get to that day😁
- 840 replies
-
- 3
-
-
- winchelsea
- Syren Ship Model Company
- (and 1 more)
-
Thanks Rusty, but I’m pretty sure I’m second to a lot of our planking crowd 😊
- 840 replies
-
- 1
-
-
- winchelsea
- Syren Ship Model Company
- (and 1 more)
-
Yes, AYC. I turn it every month but no sunlight is hitting it. It’s just mellowed since I finished it. 😊 sort of I have as I’ve aged.
- 840 replies
-
- 3
-
-
- winchelsea
- Syren Ship Model Company
- (and 1 more)
-
Thanks JJ, your planking is great, nothing needing change, mine has its flaws. I’m fortunate to have completed Cheerful over a year ago now it sits in indirect sunlight and has taken on a warm and even gold glow. I’m hoping my Winchelsea will do the same. I do like the color tone on yours and appreciate the suggestion.

- 840 replies
-
- 8
-
-

-
- winchelsea
- Syren Ship Model Company
- (and 1 more)
-
It looks better with the second coat of WOP and will better still with the third coat, gotta love AYC. Thank you all for the comments and the likes!
- 840 replies
-
- 3
-
-
- winchelsea
- Syren Ship Model Company
- (and 1 more)
-
Thank you all for the kind comments. The bad lighting is referring to the bright spots, the color of the wood is true. I’m building ind AYC. I love boxwood too, but not this time around.
- 840 replies
-
- 3
-
-
- winchelsea
- Syren Ship Model Company
- (and 1 more)
-
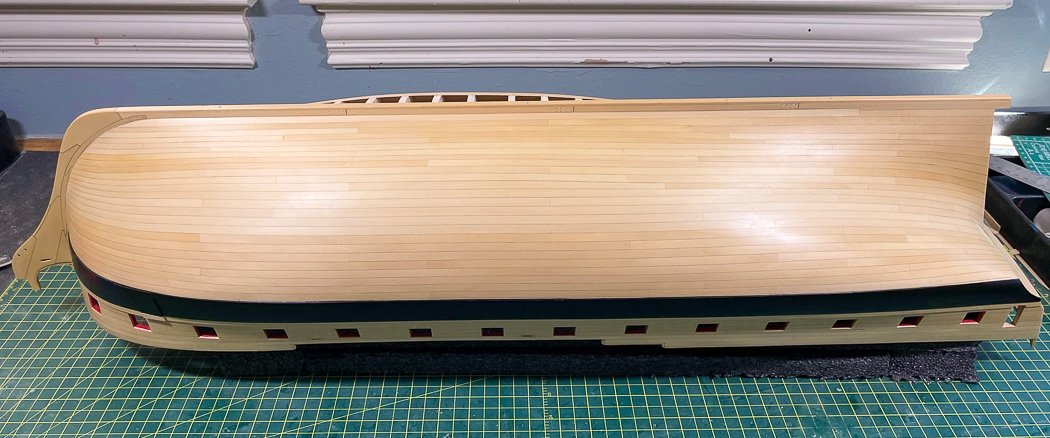
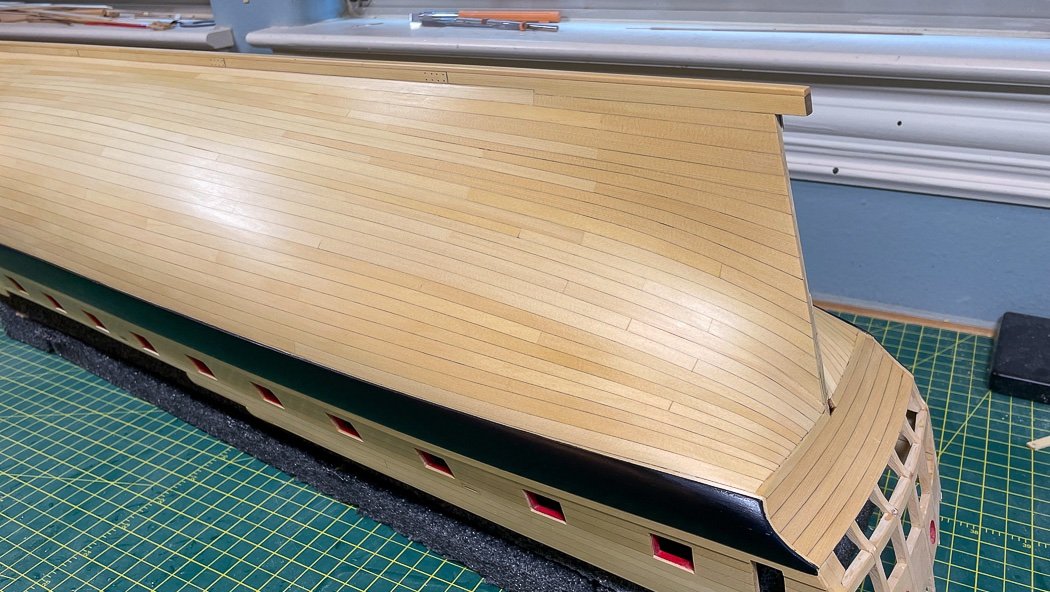
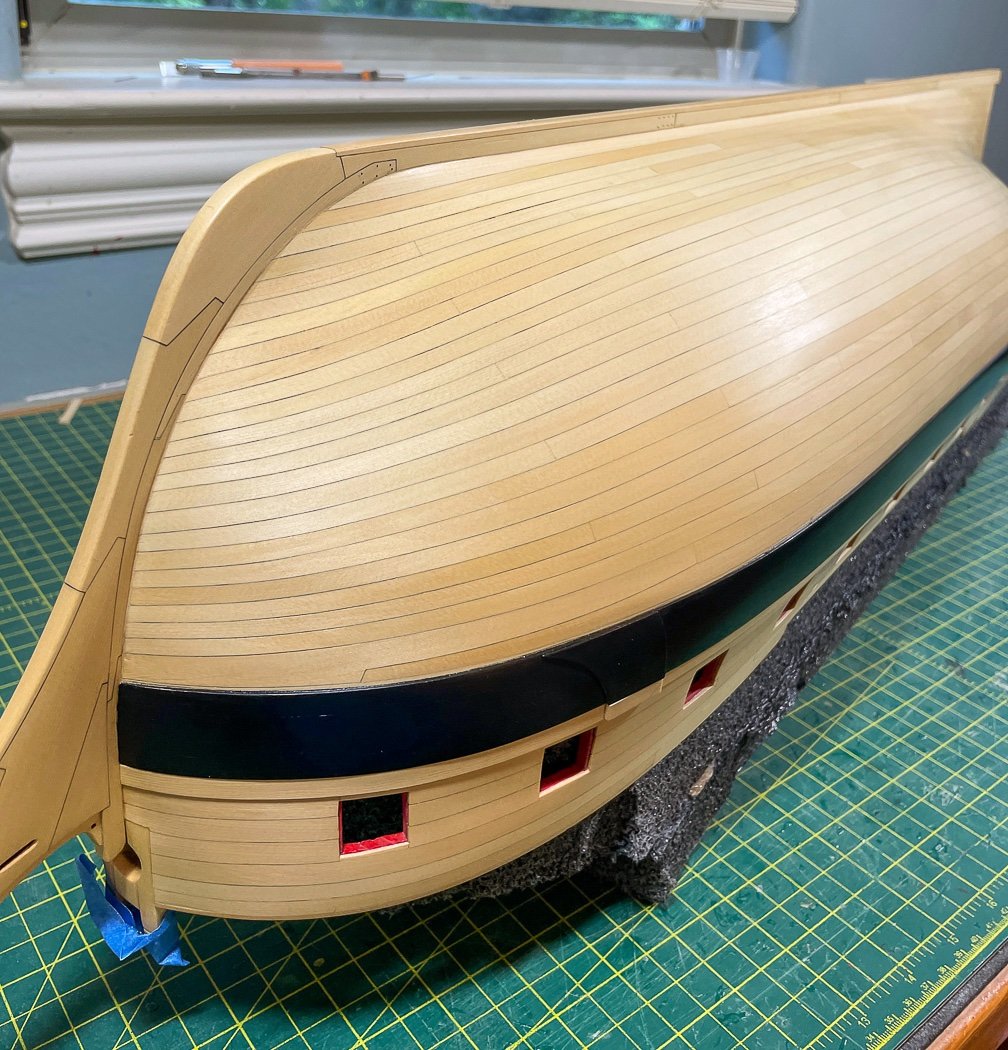
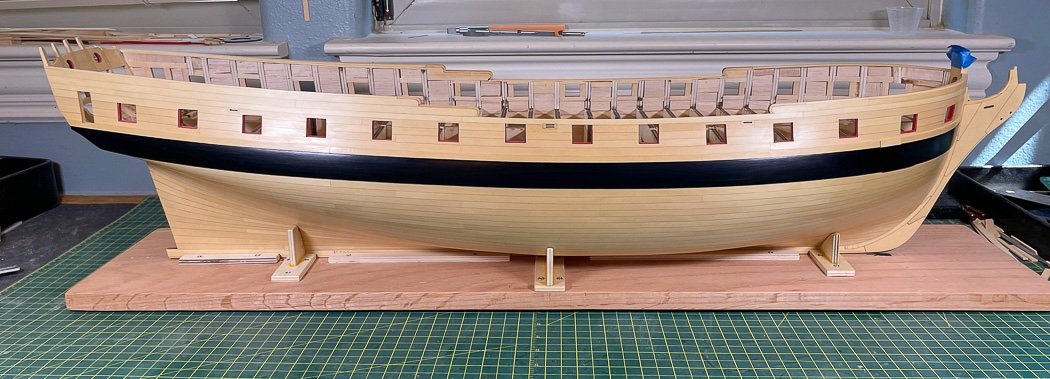
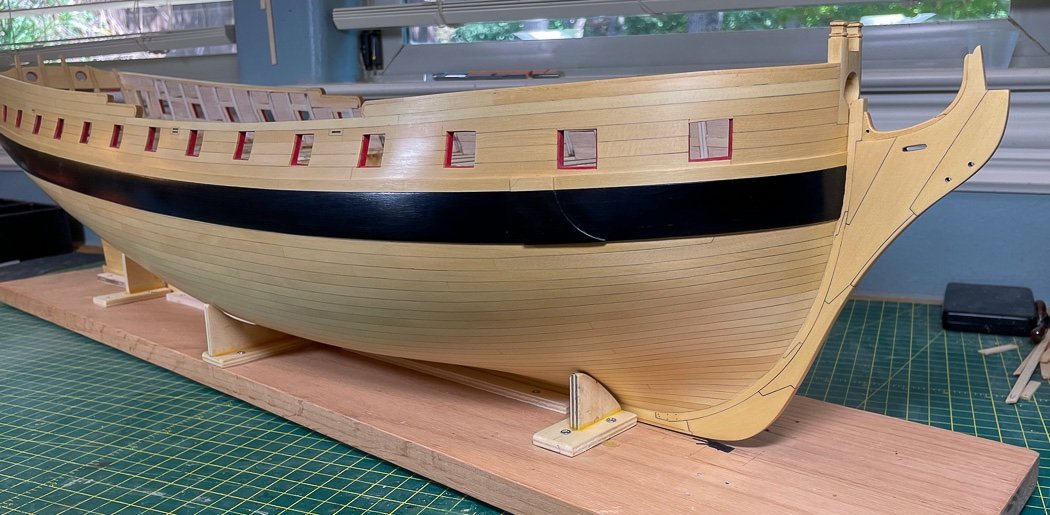
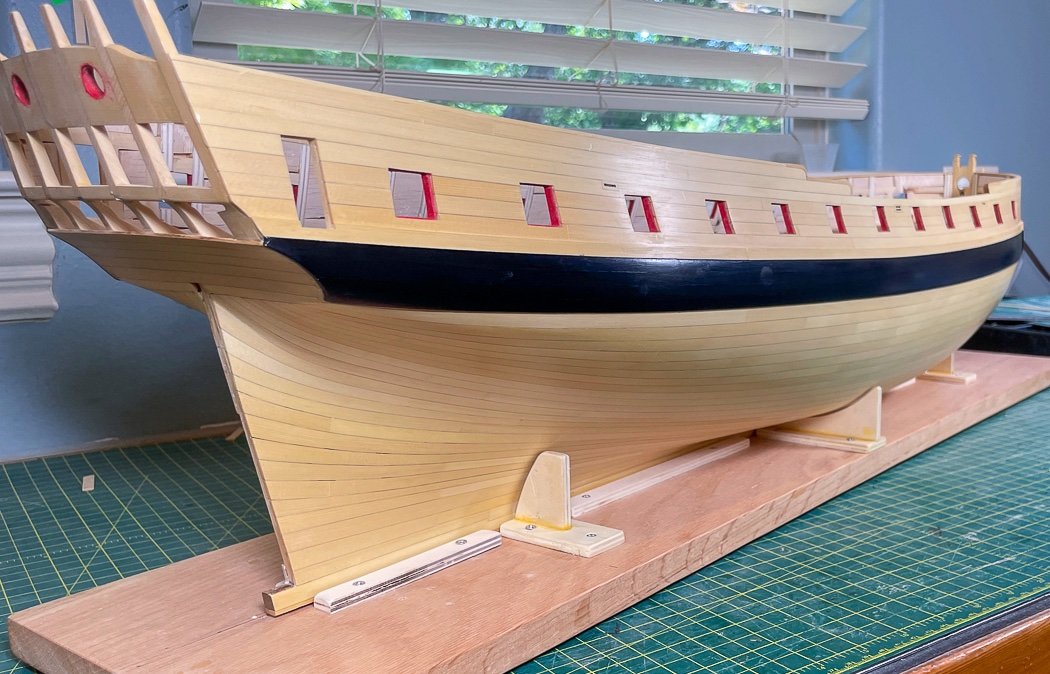
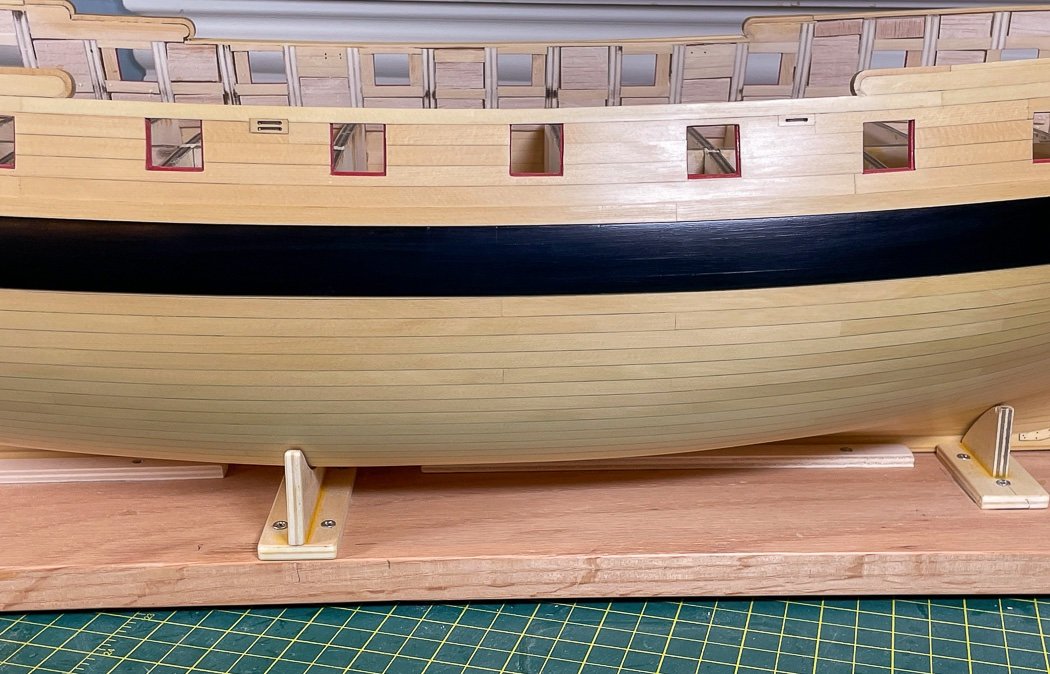
A Half A Milestone After a two week interlude of family vacations in Colorado and North Carolina I'm back to spending time with Winchelsea. I’ve now reached half of a major milestone by completing one side of the hull, only eight more strakes to go on the port side to finish my seemingly life long pursuit of planking. Other than apologizing for the poor lighting and rushed quality of photographs there isn’t too much to add to the text, I’ve about used up all my planking related commentary having been at for four months or so at this point. So here in her upside down glory subject to all that macro shots expose: I’m not at all concerned about the different shades. I completed Cheerful just over a year ago, I know the AYC mellows wonderfully with age and evens itself out. Plus there is only a single coat of WOP at the moment. I will sand with 800 grit and add at least two more coats before I call it done, that too will even out the color. Plus there is all that character and showcasing the butt shift pattern. Now flipping it over for the first time in a long time: Now back to my push to complete the hull and seeing her deck up going forward. As always thank you for the likes and your comments, they motivate me to continue.

- 840 replies
-
- 24
-
-
-
- winchelsea
- Syren Ship Model Company
- (and 1 more)
-
It’s looking really nice, well done! I’m looking forward to this phase of my build.
-
Glad to see you back at it. The columns are a great add and a nice touch!
-
The bow fillers were definitely helpful for me. I used Balsa, easy to shape and does the job. I went from deck level to keel. I’m sure you noted on the plans the gun-ports follow the sweep of the deck and consequently aren’t level with the waterline. It is essential to get them right, so much later will follow that line.
- 389 replies
-
- 4
-
-
- winchelsea
- Syren Ship Model Company
- (and 1 more)
-
I last used it to fair the inside of my Winchelsea, I show that in my log linked below
-
A small plane or chisels would be better for the rabbet, you’d stand a good chance of over doing it with a Dremel. I rarely find a use for mine. I have a slower speed Proxxon rotary tool thats easier to manage.
-
Bold move. I bought a sheet of acrylic, no way I’d go near the kitchen granite. Glad you survived contact. welcome to the build.
- 389 replies
-
- 2
-

-
- winchelsea
- Syren Ship Model Company
- (and 1 more)
-
Hi Allan, not to hijack BE's log, I'd be really interested in seeing some of your logs or gallery images of your models, I'm sure they'd be inspiration for us all to see the level of detail you bring to our shared hobby. Can you add links to your signature we could follow?
- 857 replies
-
- 2
-
-
- Sphinx
- Vanguard Models
- (and 1 more)
-
Glad to see you back and hope you are well and able to continue your Winchelsea, it is inspiration for us all.
-
There are details that matter and those that don't - the number of spokes in a ship's wheel simply don't.
- 857 replies
-
- 3
-
-
- Sphinx
- Vanguard Models
- (and 1 more)
-
What's a good kit for learning rigging?
glbarlow replied to Mark m's topic in Masting, rigging and sails
Detailed books can be overwhelming for many first time builders - while they are a valid resource the best way to learn rigging is to do it. The build logs noted above, in particular @DelF are an excellent resource, I try to explain as much as I can in my build logs, in particular the Cheerful log linked below in my signature. Cutters and sloops are a nice place to start, they have enough rigging to make it an effort but not too much to overwhelm. The most important thing to do is to get a model with excellent instruction and detailed plans. Many of the cheap kits have neither. Vanguard Models provides both in a manner that separates its kits from all others for beginners. The plans have all you need on what and where to rig, but you do have to know how to seize, belay, and tie, which the plans don't cover. The build logs help with that as does the specialty forum for rigging on this site. Although he's not in favor by many on this forum, I learned how to rig my first model, the AVS, using Bob Hunt's practicum - he covers every detail. -
Quite amazing how you engineer complexity such that us regulate people can build it simply.
- 1,784 replies
-
- 1
-
-
- winchelsea
- Syren Ship Model Company
- (and 1 more)
-
That’s pretty common for rigging. On quality models like Vanguard that’s really all you need, or for me it is anyway. I consult other build logs, sometimes even different models to sort it out, then try to explain as best I can how I did it. When that and looking at my copies of the many books often posted fail I go look at @DelFlogs😁
-
Wheel spoke count? Wow, I never knew 12 verses 10 was a thing, my lack of maritime knowledge continues to show.
- 857 replies
-
- 9
-
-
-
- Sphinx
- Vanguard Models
- (and 1 more)

