


druxey
-
Posts
12,459 -
Joined
-
Last visited
Content Type
Profiles
Forums
Gallery
Events
Everything posted by druxey
-
 Glad all is well! Nicely bevelled and fitted thwarts there.
- 70 replies
-
- 1
-

-
- Lowell Grand Banks Dory
- Finished
- (and 1 more)
-
Well, that saved you quite a bit of work!
-
Neatly done, although I might suggest that you scrape paint off where any glued joint is. Even if the glue holds, there is a possibility of the paint shearing if the riser were bumped.
- 70 replies
-
- 3
-
-
- Lowell Grand Banks Dory
- Finished
- (and 1 more)
-
I echo everyone else's concern and remarks, Michael.
-
Nice demo of this particular finish technique. As I only had a small area to do, I used artists' oil paint and thinners instead of stains. Otherwise I just used smaller brushes.
-
YOUNG AMERICA 1853 by Bitao - FINISHED - 1:72
druxey replied to Bitao's topic in - Build logs for subjects built 1851 - 1900
Congratulations on completing a superb model, bitao! I hope she will be protected in a suitable case.- 257 replies
-
- 3
-
-

-
- young america
- Finished
- (and 1 more)
-
Just discovered this lovely build and excellent figures. (This is a problem on MSW - too many fantastic models being built to be able to keep up with them all!) Very impressive work. Congratulations on a fine model, Silverman.
-
Just catching up on this lovely model. Well done, bolin!
- 179 replies
-
- 3
-
-
- longship
- Helga Holm
- (and 1 more)
-
Doing the gratings over the skylights at that scale is a real challenge!
-
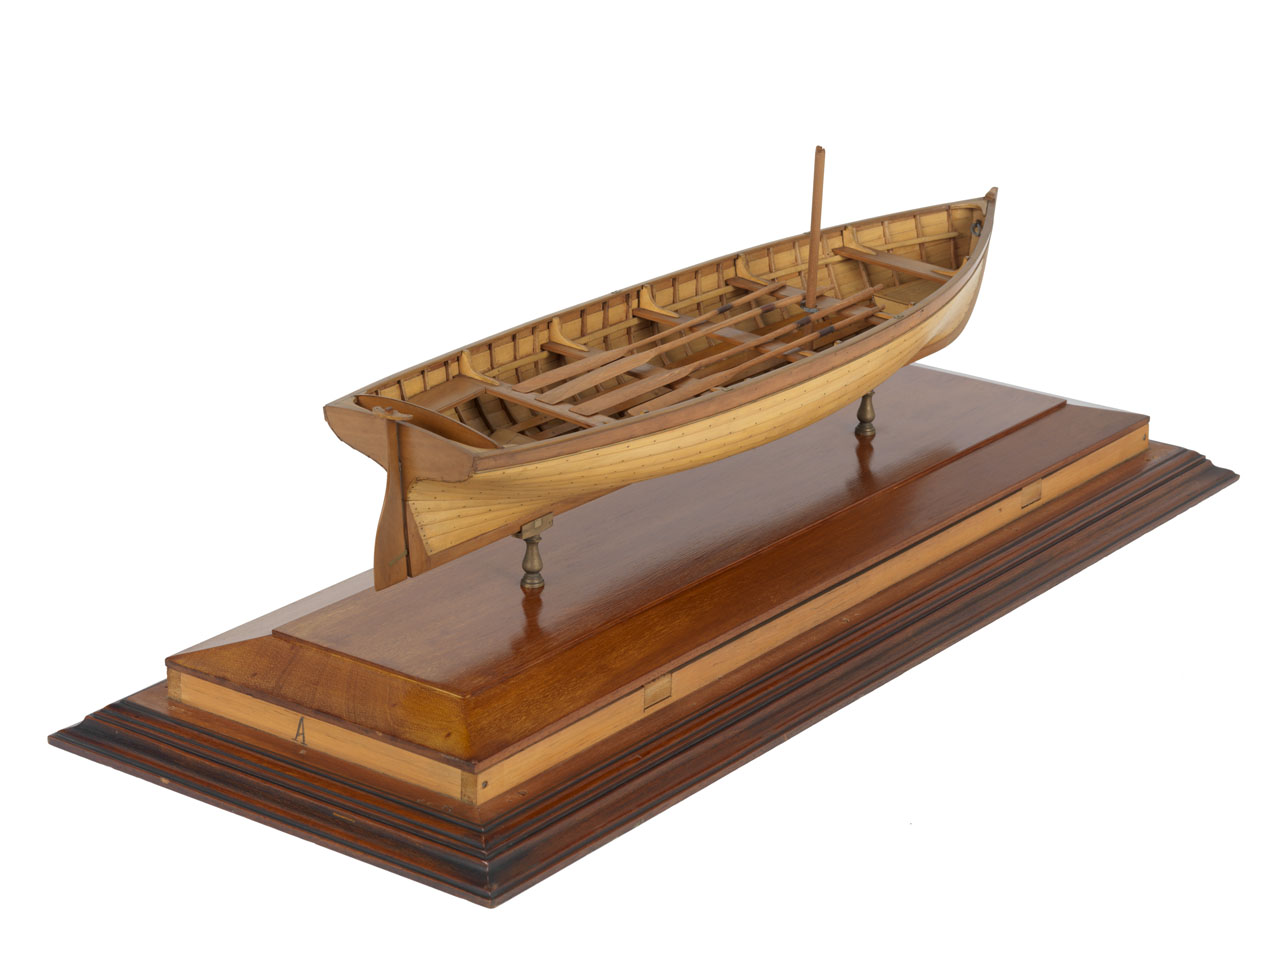
Thanks to all who checked in and commented. Bob: The yoke is based on ones seen on contemporary models (see example below, SLR 1820). None have long arms, so presumably the leverage was sufficient. None show the lines and/or how they were run, but it would be reasonable to assume some kind of leading blocks. There is no indication of any on the cutter in the Venetian museum, so we are left hanging. This model will not show sails or rigging, just oars deployed. The case should be completed on Thursday, so no more can be done until then.
- 433 replies
-
- 11
-
-
- open boat
- small boat
- (and 1 more)
-
Which reminded me of when I was a small child who read early. At my grandmother's was a shared toilet off the landing. The 'works' were a Victorian era extravaganza with a highly decorated bowl. I was mildly terrified to read the name of that particular piece of china. It read, "The Shark". But we digress!
-
The bibbs do no angle anywhere as much as you show, Alan. As they are now, they will stick out either side of your trestle trees. I made that mistake on my first lower mast as well!
-
So, the moldings I cut and ebonized yesterday have been assembled on the base and the acrylic pedestals installed. The model has been mounted on these using spots of epoxy. I now have to wait for the case to be made before I can mount the base on the much larger sub-base and attach the oars. Almost there!

- 433 replies
-
- 35
-
-
-

-
- open boat
- small boat
- (and 1 more)
-
Swan-Class Sloop by Stuglo - FINISHED - 1:48
druxey replied to stuglo's topic in - Build logs for subjects built 1751 - 1800
Good save there, Stuglo! -
Looks very promising, Michael.
-
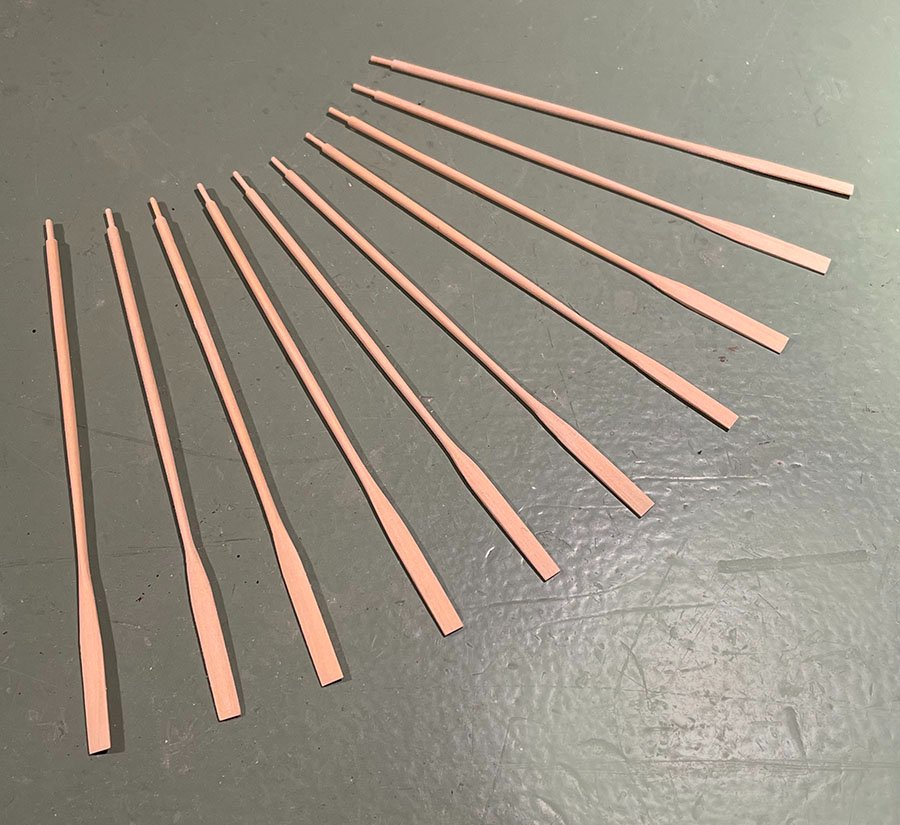
Pat: I simply cut rectangular section blanks for the oars, milled the shaft portions to 3" square, then cut, scraped and sanded the rest by hand and eye, also using a dial gauge for the finished dimensions. Spent part of the day (when not doing remedial work on the house exterior) milling moldings for the base and sub-base and ebonizing them. More soon. Thanks again for all the likes and visits, everyone!
- 433 replies
-
- 10
-
-
- open boat
- small boat
- (and 1 more)
-
There are so many creative solutions to any problem. That's one of them!
- 160 replies
-
- 3
-
-
- Model Shipways
- norwegian sailing pram
- (and 1 more)
-
Now what would be really interesting is for you to build this kit, then build a modern kit version and see how the two compare!
- 26 replies
-
- 1
-
-
- Maine
- Laughing Whale
- (and 2 more)
-
What plug? Nice progress, Toni! My only comment is that I interpret the shaded are at the tip of the knee as being shaved away to a blunt point as seen from above. If you can do that, the carving will look even nicer. Oh, and don't forget the shallow notch for the gammoning. See the Weazle draught.
-
Eberhard: I was lucky this time. I made 12 blanks and did not have to re-do any of the ten. HH: Thank you. If you know the tricks of the trade, faux wood grain of all kinds is not that difficult. A wonderful book on the subject is: Professional Painted Finishes, by the Marx brothers (not those ones!) Allen and Robert and Ina Brosseau Marx, Watson Guptill, 1991.
- 433 replies
-
- 9
-
-
-
- open boat
- small boat
- (and 1 more)
-
All ten oars are now carved and ready for bindings and leathering. Work continues on the base and pedestals. The latter will be from ⅛" diameter acrylic rod, so as to be minimalist.
- 433 replies
-
- 21
-
-
- open boat
- small boat
- (and 1 more)
-
Yes, softening means a very light rounding off of a sharp edge.
- 160 replies
-
- 4
-
-
- Model Shipways
- norwegian sailing pram
- (and 1 more)
-
That galley roof is beautiful. I'm sorry that it will hardly be seen.
- 589 replies
-
- 3
-
-
- le gros ventre
- cargo
- (and 1 more)
-
HMS Euryalus 1803 by rlb - 1:48 scale
druxey replied to rlb's topic in - Build logs for subjects built 1801 - 1850
Looking very nice, Ron.- 122 replies
-
- 3
-
-
- Euryalus
- Plank-on-frame
- (and 4 more)
