HOLIDAY DONATION DRIVE - SUPPORT MSW - DO YOUR PART TO KEEP THIS GREAT FORUM GOING!
×


druxey
-
Posts
13,275 -
Joined
-
Last visited
Content Type
Profiles
Forums
Gallery
Events
Everything posted by druxey
-
 In reality, any sharp edges and corners were chamfered for safety. For a 'first build' this detail is optional. Good for you to include it!
 -
Tricky work, applying inside bulwark planking when all the outer detail is already installed!
-
That is a very nicely laid out planking job, Well done!
- 64 replies
-
- 1
-

-
- amati
- victory models
- (and 1 more)
-
Yup; we're interested, Steven! You always find such interesting and different subjects.
-
Untangling and rerigging or start from scratch?
druxey replied to Rgpracer's topic in Masting, rigging and sails
There were many 'experimental' drawings made; the standard steering wheel didn't need a detailed explanation with the drawing. The example above was obviously a proposal that didn't eventually make the cut. -
Well that was one method of cutting a helm port that I've not seen before! I have far less valor. I pre-file the shape of the hole before I assemble the parts. Only final shaping is done after assembly. That way, if I mess up, only one piece will be spoiled, not all of them!
-
Figureheads of English East Indiamen 1750
druxey replied to bruce d's topic in Nautical/Naval History
Although I cannot locate these drawings in his book, the style of illustration is very similar to those of L.G. Carr Laughton. (Old Ship's Figureheads & Sterns, 1925.) -
Remember - the full-size builders didn't have elaborate building stations with jigs! Just plumb lines, squares and measuring tools. It helps to remember to check vertical in all three planes as you erect each frame: 1) vertical as seen from the side 2) at right angles across the keel 3) center of cross-spall centered above the keel No-one will notice, once you model is complete and mounted vertically, that your keel is very slightly canted to one side!
-
HH: you might consider 'progressive' vari-focal lens spectacles. Since I got mine, I've rarely needed an Optivisor - something that i wore extensively over the previous 10 years.
- 2,696 replies
-
- 6
-
-
- heller
- soleil royal
- (and 9 more)
-
Your work looks excellent to my eye. Mark. Very sweet.
-
It appears that the manufacturer did not know this and simply intended it for a relatively unsophisticated kit.
-
A radius is required so that, when at anchor, the cables are not chafed when the ship turns and they cross the bow. I've discovered that, in shipbuilding, there was always a reason for why something was done a certain way.
-
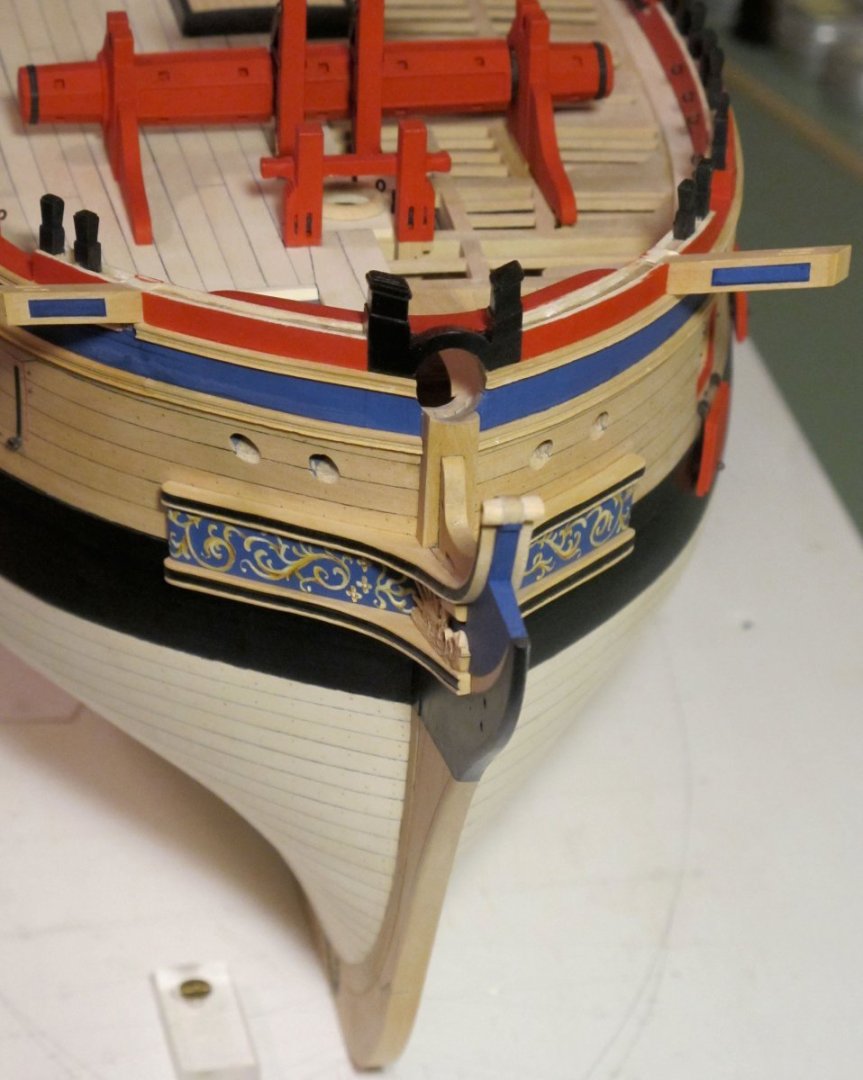
Allan makes a good point. There are many models that do not show this double taper (from aft to forward as well as from below upward) of the knee of the head. The knee is not simply slab-sided. It makes the fore end of a model look heavy and clumsy. An example of this taper is shown here:
- 20 replies
-
- 13
-
-
Congratulations on achieving this milestone, Alan!
-
With a small table saw such as a Byrnes, with a proper set-up you are unlikely to have a kick-back. However, as a precaution, I always stand to the left of the path of any potential flying object.
-
Your leather looks very good. Nicely McGyvered!
- 51 replies
-
- 2
-
-
- Model Shipways
- norwegian sailing pram
- (and 1 more)
-
Yup, it's an 'advanced' all right! If a piece buckles as you describe, you can often selectively re-wet the buckled bit and 'massage' it into the shape you want. But it looks like you are coping well with that tricky countered stern.
- 146 replies
-
- 4
-
-
- Harriet Lane
- Model Shipways
- (and 1 more)
-
It appears that the lowest strakes do not narrow sufficiently as they come into the bow and stem. Once you have lined out the planking runs, you must follow them accurately, or cumulative 'creep' will occur and you'll end up with the same problem again. Also, your garboard could end a little further aft as well to help things out.
-
Harold Hahn method
druxey replied to Essayons's topic in Building, Framing, Planking and plating a ships hull and deck
In fairness to Hahn, he used this for small-scale models, not large 1:48 scale ones. The wastage was significantly less. -
Harold Hahn method
druxey replied to Essayons's topic in Building, Framing, Planking and plating a ships hull and deck
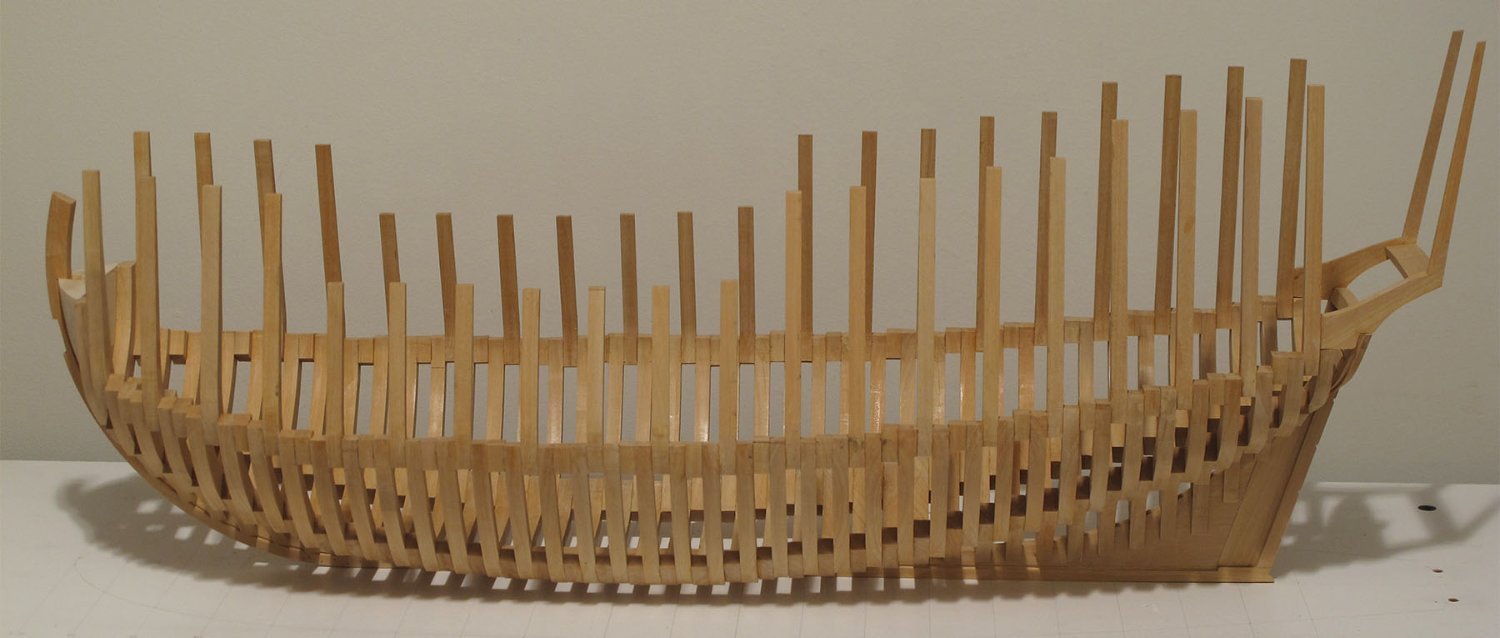
Here is an example of the open 'Navy Board' style of framing. Note that the model was built right side up, with no wasted extended toptimbers.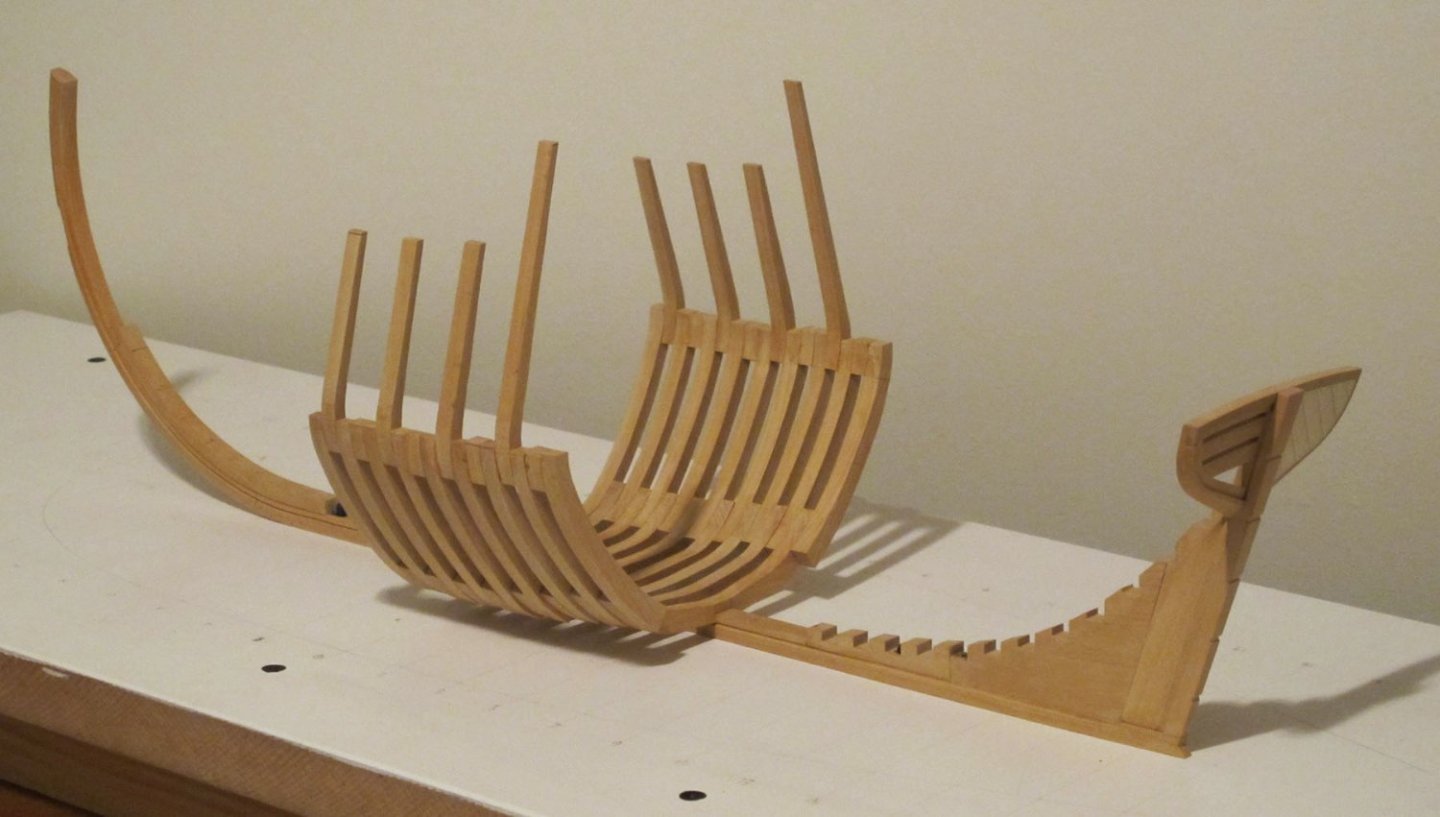

-
Well done! Your final result looks great.
- 12 replies
-
- 1
-
-
- Lowell Grand Banks Dory
- Model Shipways
- (and 1 more)