druxey
-
Posts
13,369 -
Joined
-
Last visited
Content Type
Profiles
Forums
Gallery
Events
Everything posted by druxey
-
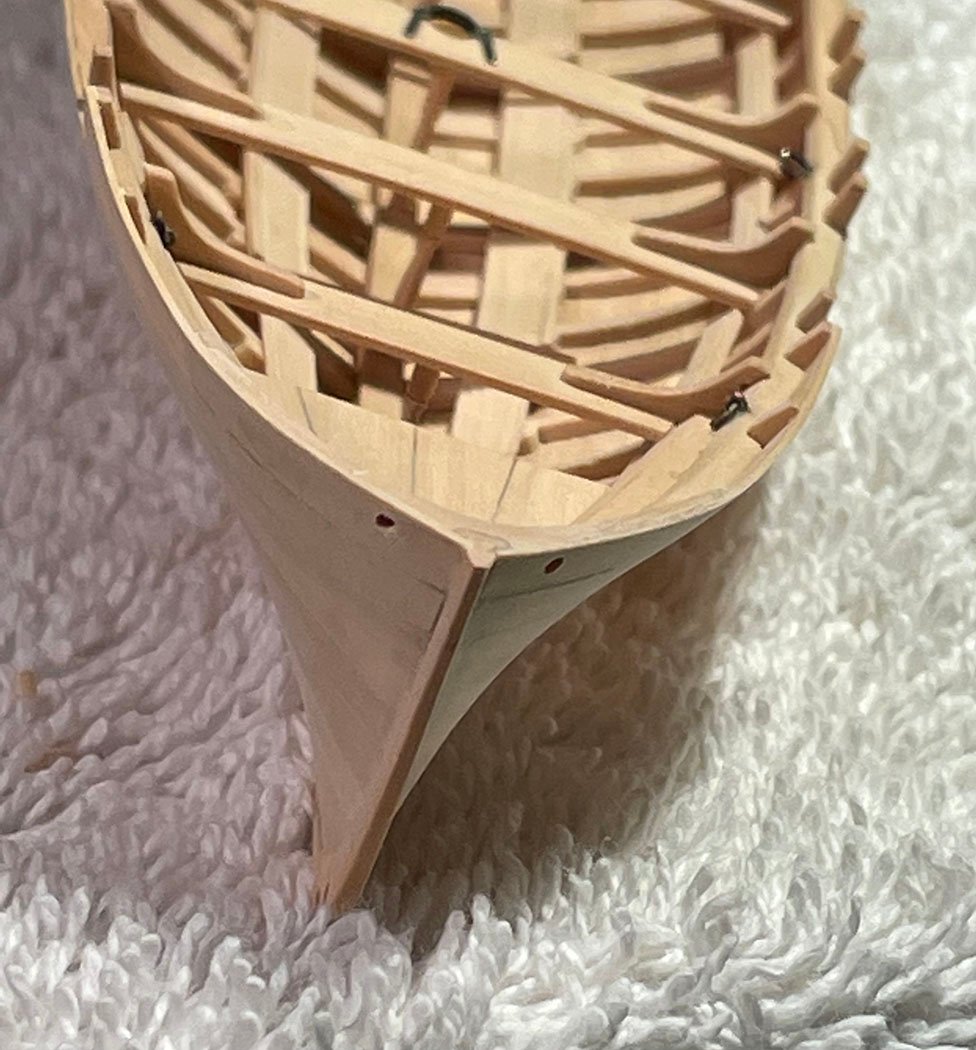
 Continuing, I made and fitted the bow sections of the wash strake. These were spiled as I had the hull planking, cut and glued in.. The next apart of construction was a nail-biter. The upper bow breast hook and extensions had to be carefully shaped to fit properly, glued in, and then drilled for the hawse holes. I only had one shot at getting the holes in the correct places on either side of the bow. There was virtually no margin for error. Too high, and the drill would break out, too low and the hole would pierce the rub rail that has yet to be installed. Fortunately, all went well. The holes were drilled under size, then slight corrections made with a round escapement file. At this point, the stem was bevelled on each side and the inside bow neatened up.
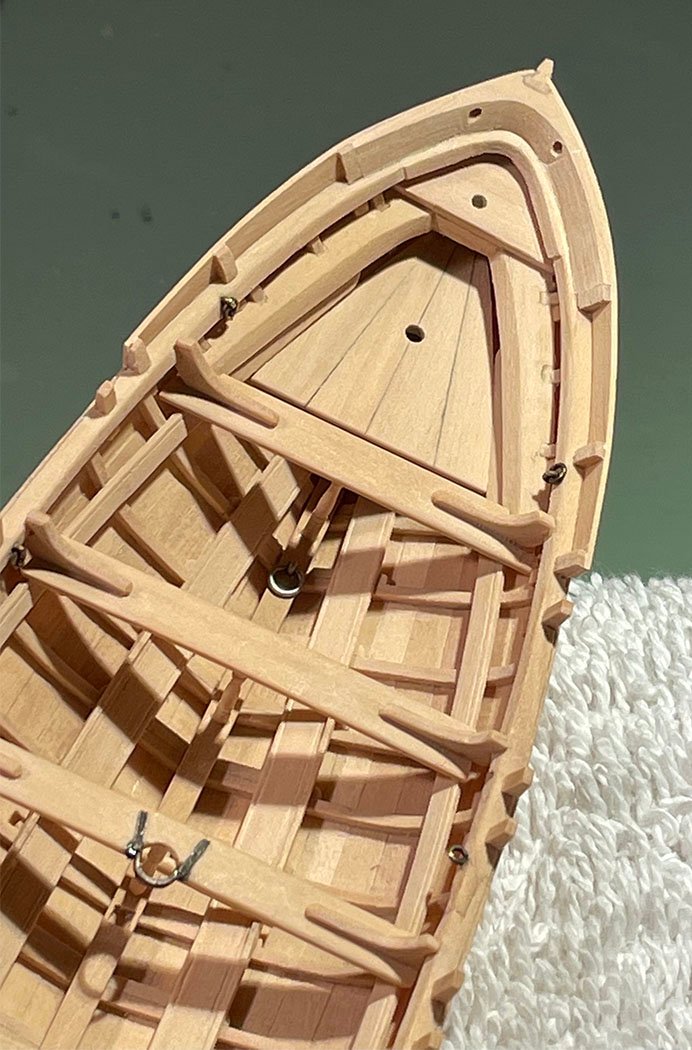
- 433 replies
-
- 25
-

-
- open boat
- small boat
- (and 1 more)
-
Now things start to get interesting!
-
No, the reinforcing piece is on the prototype original, Shipman. It is Plan A, o, ye of little faith!
- 433 replies
-
- 6
-
-
- open boat
- small boat
- (and 1 more)
-
Thank you, Giampiero! I forgot to mention that the transom is now trimmed to its final shape and a reinforcing piece attached to the fore side. Next is the wash strake.
- 433 replies
-
- 5
-
-
- open boat
- small boat
- (and 1 more)
-
More finishing details at the stern; a step and a hoop for an ensign staff. The photo I have of this area shows more metalwork, but it looks as if this was added later by the museum for the anti-hogging arrangement.
- 433 replies
-
- 20
-
-
- open boat
- small boat
- (and 1 more)
-
They look more like piranhas!
-
Exactly, Michael! My party trick is to cut an exact 45 degree angle without a protractor using the reflected image on the back of the chisel.
- 433 replies
-
- 8
-

-
-
- open boat
- small boat
- (and 1 more)
-
Thank you for looking in and for your kind words. More progress soon!
- 433 replies
-
- 4
-
-
- open boat
- small boat
- (and 1 more)
-
Looks pretty neatly done to this point. There will aways be minor tweaks when building a model.
- 70 replies
-
- 2
-
-
- Lowell Grand Banks Dory
- Finished
- (and 1 more)
-
Use threads instead of battens with a spot of PVA on the frames. To adjust them, wet your finger and roll the thread up or down the frames as required,
-
Actually, the rounding above deck is easy. Leave the corners square until after the deck is laid. A sharp chisel and a 45 degree cut just to the deck and a horizontal one at deck level. Then a few strokes of a sanding stick and you are done!
-
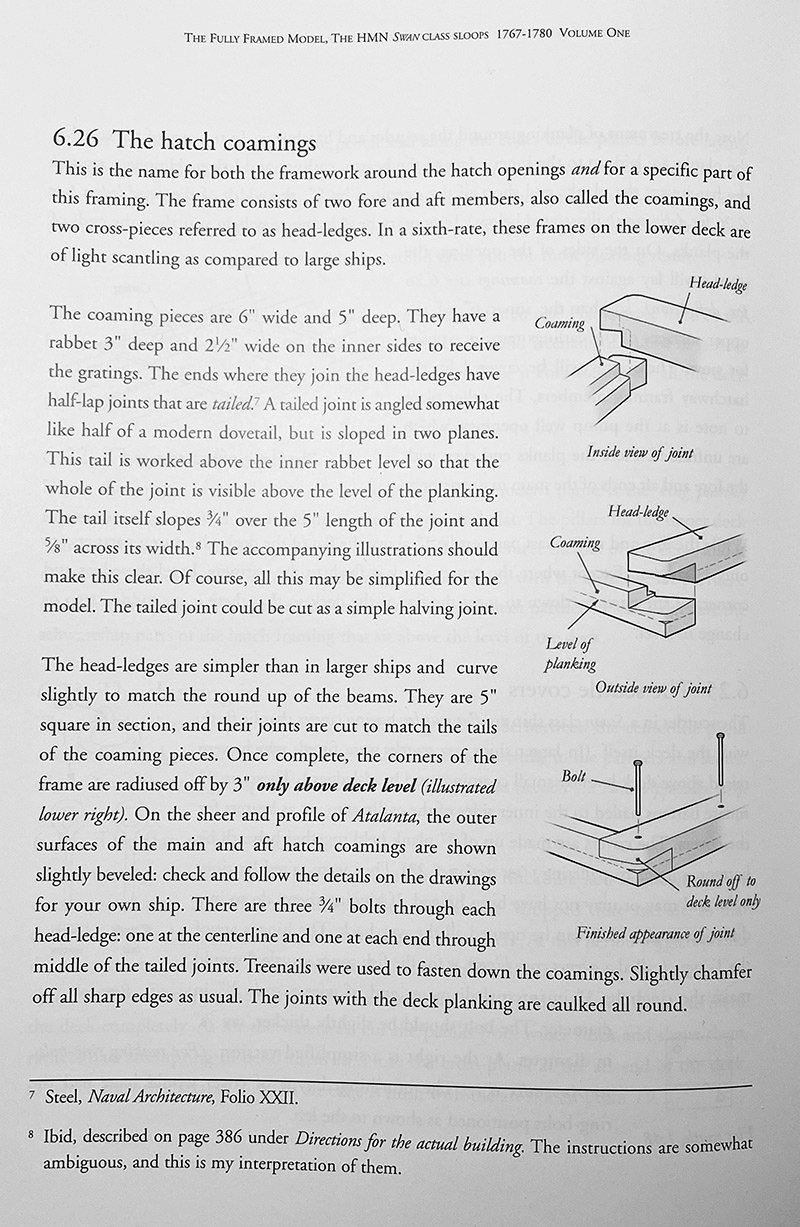
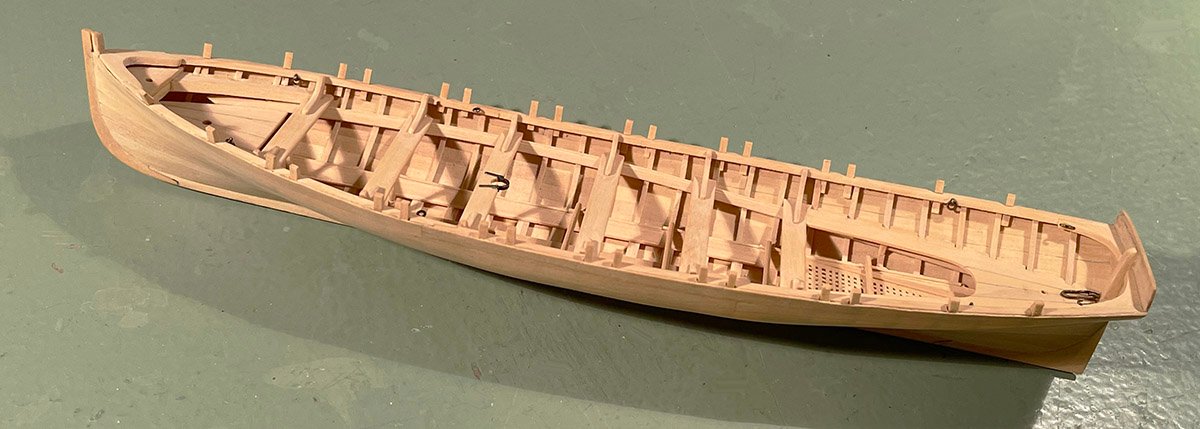
The many stub toptimbers have been cut and dry fitted. Their shapes vary along the length of the boat. I cut them using my favorite tool; a ¼" chisel. Using a larger blade makes seeing the cutting angles easier. Next will be refining the fit and gluing the toptimbers in.
- 433 replies
-
- 25
-
-
- open boat
- small boat
- (and 1 more)
-
You must be barking mad! Welcome to the club, Alan.
-
Yes, Shipman, often thwarts were set into scores in the risers. This particular boat did not. I think Eberhard addressed your other points very well. Horst's model is a beauty. Thank you, Eberhard!
- 433 replies
-
- 6
-
-
- open boat
- small boat
- (and 1 more)
-
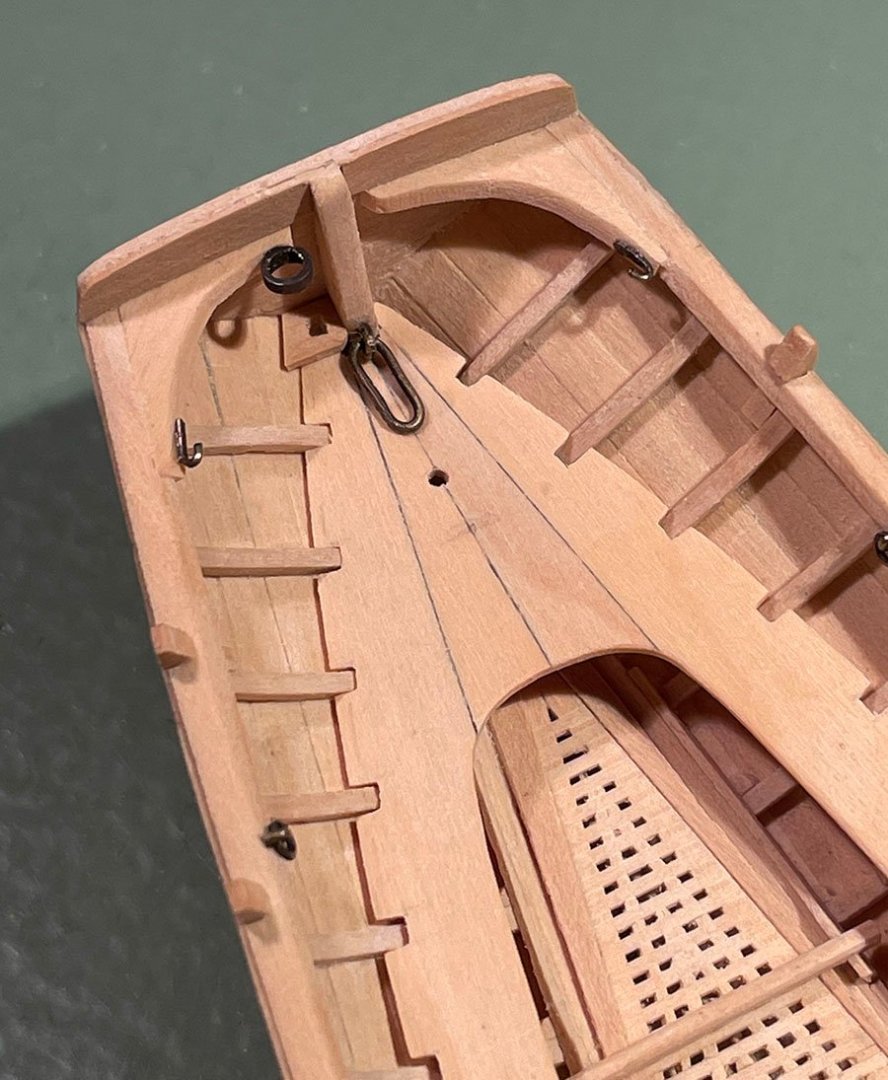
Not a close yet, Shipman! There's a lot more to do yet. Thank you for your kind remarks. The brackets are standards, the name for inverted knees. It appears that the thwarts in this boat are fixed. The standards create a strong connection between the sides of the boat, preventing 'spread', both in the model and the real thing. Your comment on footrests or stretchers is interesting. They are not often shown in draughts of boats, but I'm sure they were normally there. If you think about the action of rowing; if you can brace your feet you can effect a much more powerful stroke and conserve energy.
- 433 replies
-
- 8
-
-
- open boat
- small boat
- (and 1 more)
-
If you absolutely want to pounce at scale, use watch gears.
-
As far as I know, the boat was not armed. A strong connection is, however, required to hold the two sides of the bow together.
- 433 replies
-
- 4
-
-
- open boat
- small boat
- (and 1 more)
-
Pre Tapering Formers?
druxey replied to PRS's topic in Building, Framing, Planking and plating a ships hull and deck
If you mean fairing (shaping) the edges , this will only work if the layers or frames are almost in contact with each other. In the case of a model with bulkheads, where they are spaced far apart, you can only fair them after the framework is assembled.- 1 reply
-
- 1
-
-
The trouble with research is that you find out stuff!
-
Yes, those plates are poorly nailed with large dimples - nay, large dents!
-
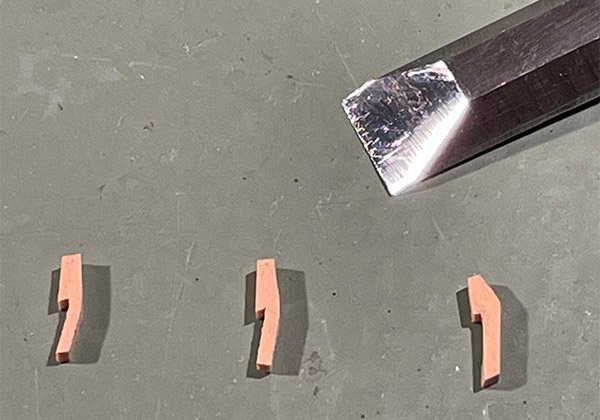
Well, I thought I was progressing well with the stub toptimbers. I'd completed the port side when I realized that I'd beveled them the wrong way: instead of the outer surfaces being almost vertical, they flared outward. A session of water (isopropanol would have been too aggressive and loosened planking) followed by 'tooth-pulling' - and teeth grinding! - ensued. I've now begun a second batch of correct toptimbers. They have an almost comma-shaped profile and are tedious to make and fit.

- 433 replies
-
- 19
-
-

-
- open boat
- small boat
- (and 1 more)
-
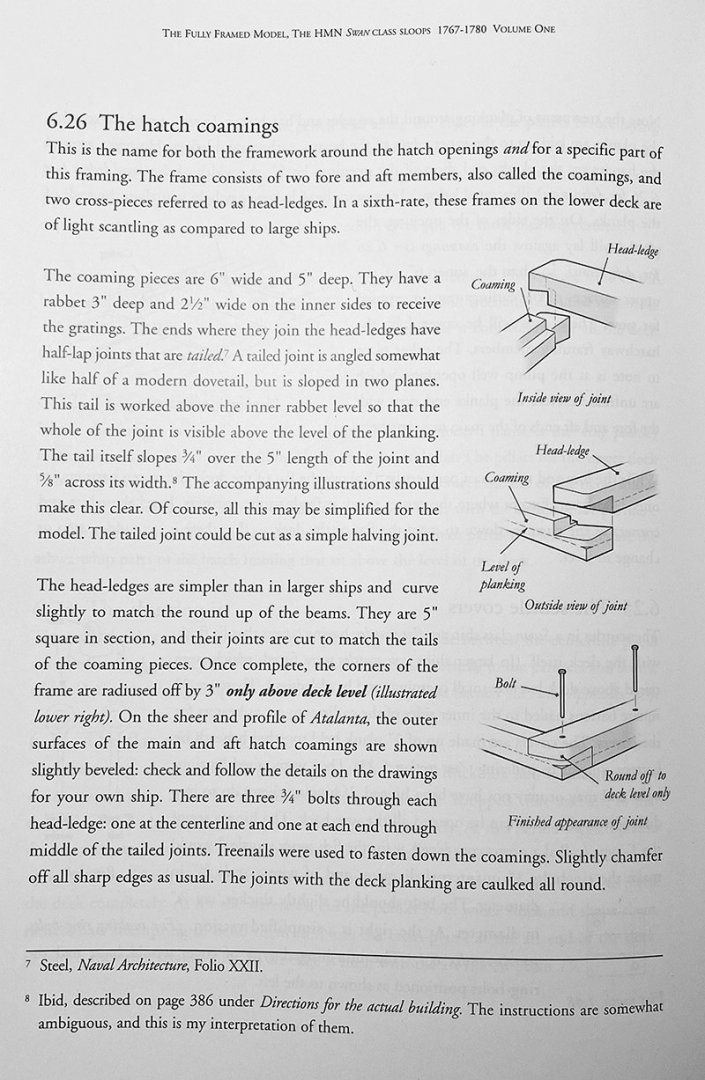
The half laps were also dovetailed ones!
-
This question made me smile. For my first 'coppered' model when i was about 16, I used 5 thou copper. As the model scale was 1:96, the coppering looked like cedar shingles! As mentioned by others, just because the actual ship used copper doesn't mean you have to use copper on a model. Very thin paper attached using a glue without water content and painted will look much better. Unless very large scale, forget the nailing pattern. Experiment on scrap before committing to the actual model. To answer the original question, one way to cut thin copper is with a straight edge and sharp blade. Use a hard surface such as a piece of plate glass to cut on. Score the metal and work the piece back and forth along the score using parallel pliers until it comes free.
-
As if model sails aren't enough of a challenge without decorating them!
- 740 replies
-
- 4
-
-
- Tudor
- restoration
- (and 4 more)