HOLIDAY DONATION DRIVE - SUPPORT MSW - DO YOUR PART TO KEEP THIS GREAT FORUM GOING! (Only 13 donations so far - C'mon guys!)
×


druxey
-
Posts
13,290 -
Joined
-
Last visited
Content Type
Profiles
Forums
Gallery
Events
Everything posted by druxey
-

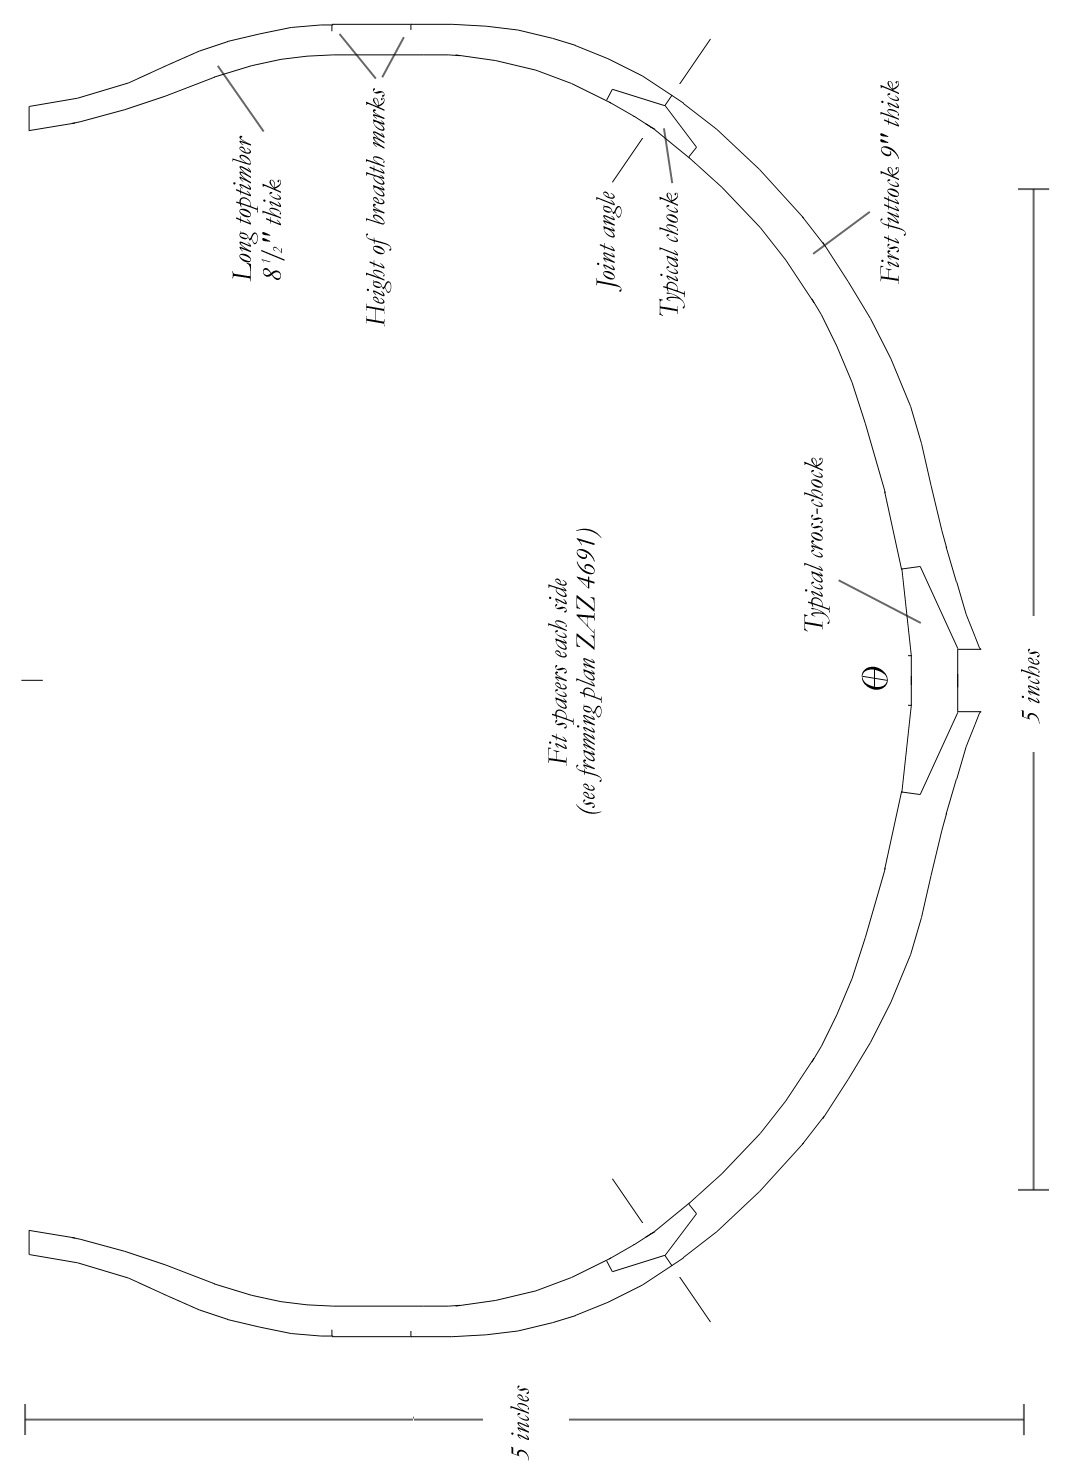
Framing Math
druxey replied to vwmiller's topic in Building, Framing, Planking and plating a ships hull and deck
Manual lofting is a tedious process. However, once you get into the rhythm of it, it can go fairly quickly. I've been doing it this way for years. These days I loft manually, scan and clean up the drawings on computer. Sample attached.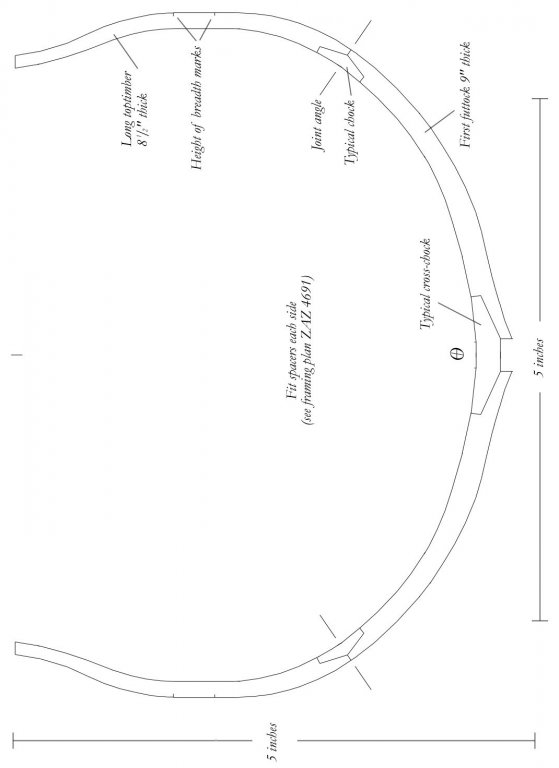
-
Framing Math
druxey replied to vwmiller's topic in Building, Framing, Planking and plating a ships hull and deck
Theoretically the curves are composed of arcs of circles. However, in practice this is not the case the further ones moves forward and aft of the dead flat frame.... -
The gangway was normally flush to the planksheer at this time period. Nice progress, Toni!
-
Hmm.... Seems like a stretch to me. Sure it is an early anchor but, as they were hard to produce and expensive, might have been in use well into the following century before being lost. Unless there is a log stating that an anchor of that size was lost in that location by one of Columbus' ships, I remain sceptical!
-
It has as much detail as anyone might wish for. No comparison with the AOTS series for accuracy and complexity.
-
Not so much restore as rebuild! That is a very neat job so far, Paul.
- 53 replies
-
- 6
-

-
- clipper
- restoration
- (and 1 more)
-
Lovely work as ever, Johann. The cutting of the edge strips for the gratings is impressive.
-
Congrats on your growing family! Your lack of progress is excused, I think. I wish you many happy years in your new home.
-
Quite the month, Kevin! My condolences. Try not to take your electronics to sea again, eh? Hopefully you'll be up and running again soon. I use a Mac Time Capsule as external back-up. As two computers can use it, it came in very useful when my wife's iMac hard drive quit. It was easy for her to download all her files on her new iMac Pro.
-
Looking lovely, Frank. Great job with those raking stern timbers. All those clamps made me think of a row of exotic budgerigars perched on a wire!
-
Lovely progress - but why stop now? Seriously, the model is a gem as is.
- 281 replies
-
- 5
-
-
- falls of clyde
- tanker
- (and 2 more)
-
Those railings and metalwork are first class, Adrian!
- 184 replies
-
- 2
-
-
- ruby & arthur reed
- lifeboat
- (and 1 more)
-
Just catching up on your progress, Rob. Lovely work indeed! The sea in your diorama looks impressive as well.
-
More tools - Luthier, jeweler, fly-tying
druxey replied to vossiewulf's topic in Modeling tools and Workshop Equipment
I believe that in North America these are called Lightning strips. -
Congratulations on completing the framing, Ben. The idea of omitting fillers in a regular pattern is a good one.
-
If you look at contemporary paintings, ensigns and flags are translucent. The material had a very loose weave, as surviving examples show. You've imitated the effect very well in my opinion, Chuck. Excellent! And the rigging looks great as well.
- 1,051 replies
-
- 8
-
-
- cheerful
- Syren Ship Model Company
- (and 1 more)
-
Oooh, nice! Also love the adjustable spanner (wrench) that you made lo those many years ago. Do I assume that the compass will work when completed? Otherwise you might just use brass for the balls (adolescent snigger).
-
If that is a snatch block, the open side should face forward. It's hard to see whether yours do. Coming along nicely!
- 525 replies
-
- 1
-
-
- anchor hoy
- hoy
- (and 1 more)
-
Make sure that the set comes with the tables for setting any proportion you wish. (The photo above shows the paper chart.)
-
Looks pretty good to me. Would the aft end of 'Deadwood 5' have a lip rather than taper to a point?