Supplies of the Ship Modeler's Handbook are running out. Get your copy NOW before they are gone! Click on photo to order.
×


druxey
-
Posts
13,134 -
Joined
-
Last visited
Content Type
Profiles
Forums
Gallery
Events
Everything posted by druxey
-
 Lovely miniature metalwork, Ed. The third hands and rotating ceramic plate are a nice sophistication over earlier fixed base soldering stations.
- 3,618 replies
-
- 6
-

-
- young america
- clipper
- (and 1 more)
-
Thanks, Siggi. The barge is displayed much better than it used to be years ago. Fortunately the Greenwich Hospital barge has nowhere nearly as much carved work!
- 641 replies
-
- 4
-
-
- greenwich hospital
- barge
- (and 1 more)
-
That model is the exception proving the rule, Paul!
-
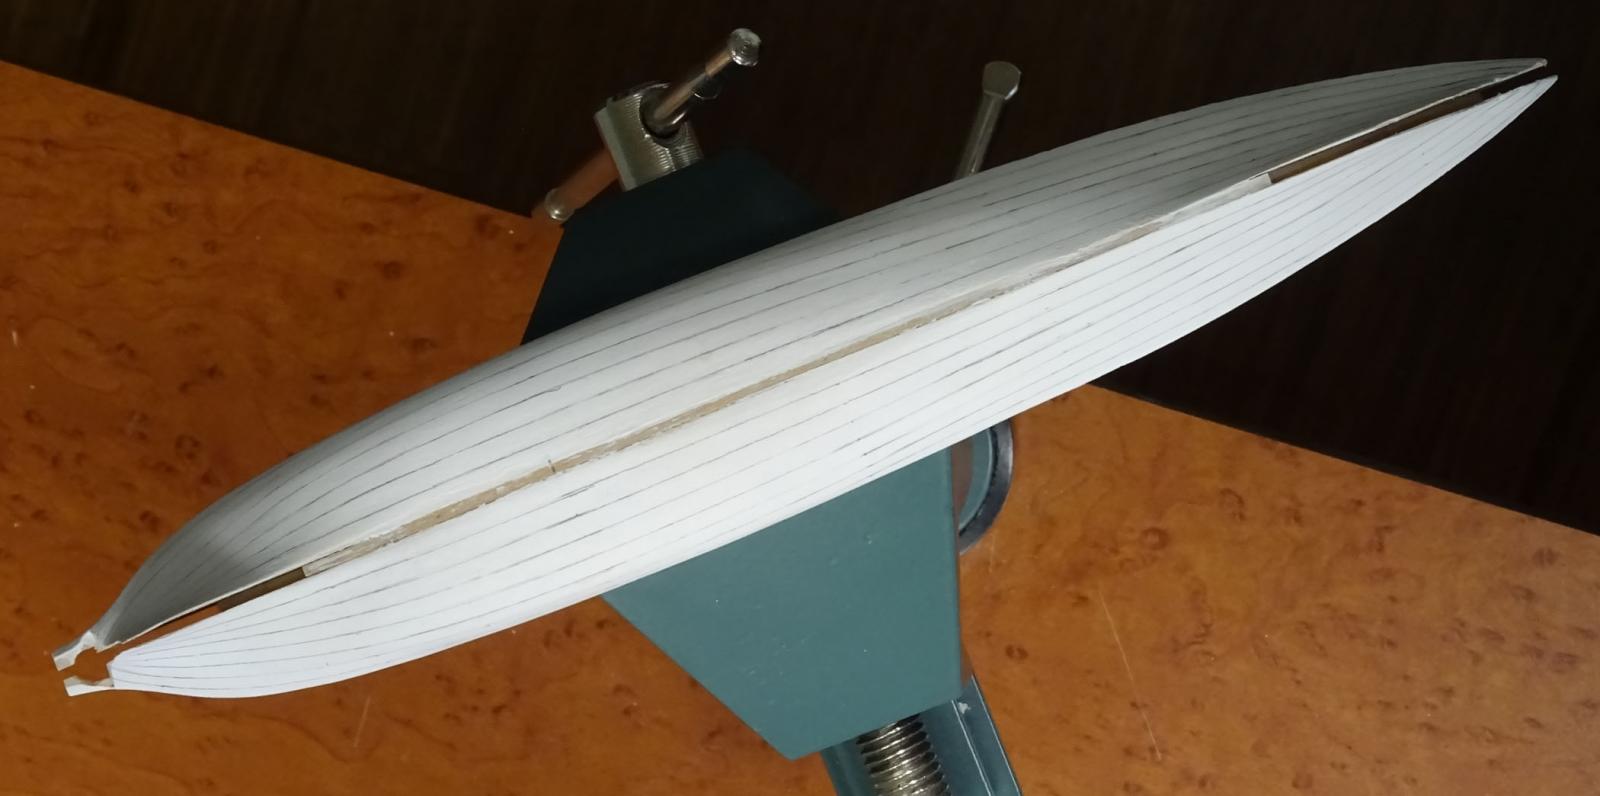
Thanks, Siggi. I do have some photos of that barge, but if you have some you'd like to share.... Update: I had to rework the forward hull, as I'd omitted to remember that the sheer strake narrows almost to a point at the bow. Both sides of the plug are now lined out to my satisfaction and have been checked by viewing from all angles. It always surprises me that lines that look sweet from one angle look awful when viewed from another! Several re-works were required before arriving at what you see in the photos. I may spot more minor adjustments to make before committing myself to the plan.

- 641 replies
-
- 28
-
-
- greenwich hospital
- barge
- (and 1 more)
-
Hah! Maury, have you not noticed how carefully the photos are framed and cropped?
- 641 replies
-
- 8
-
-

-
- greenwich hospital
- barge
- (and 1 more)
-
Congratulations on completing Dragon, Siggi! She looks terrific and those delicate hammock cranes are very neatly done.
-
Nice relief carving there, Jerry. You have the knack!
-
Gesso dries fairly quickly, fills grain and sands well, Nigel. It also takes pencil easily. Certainly it does not prevent adhesion without some form of varnish or wax over the plug, but that's later in the process.
- 641 replies
-
- 8
-
-
- greenwich hospital
- barge
- (and 1 more)
-
Seeking information on determining load waterline
druxey replied to trippwj's topic in Nautical/Naval History
Don't forget the 'anonymous' of c.1600 whose manuscript of Propositions Newton copied out! -
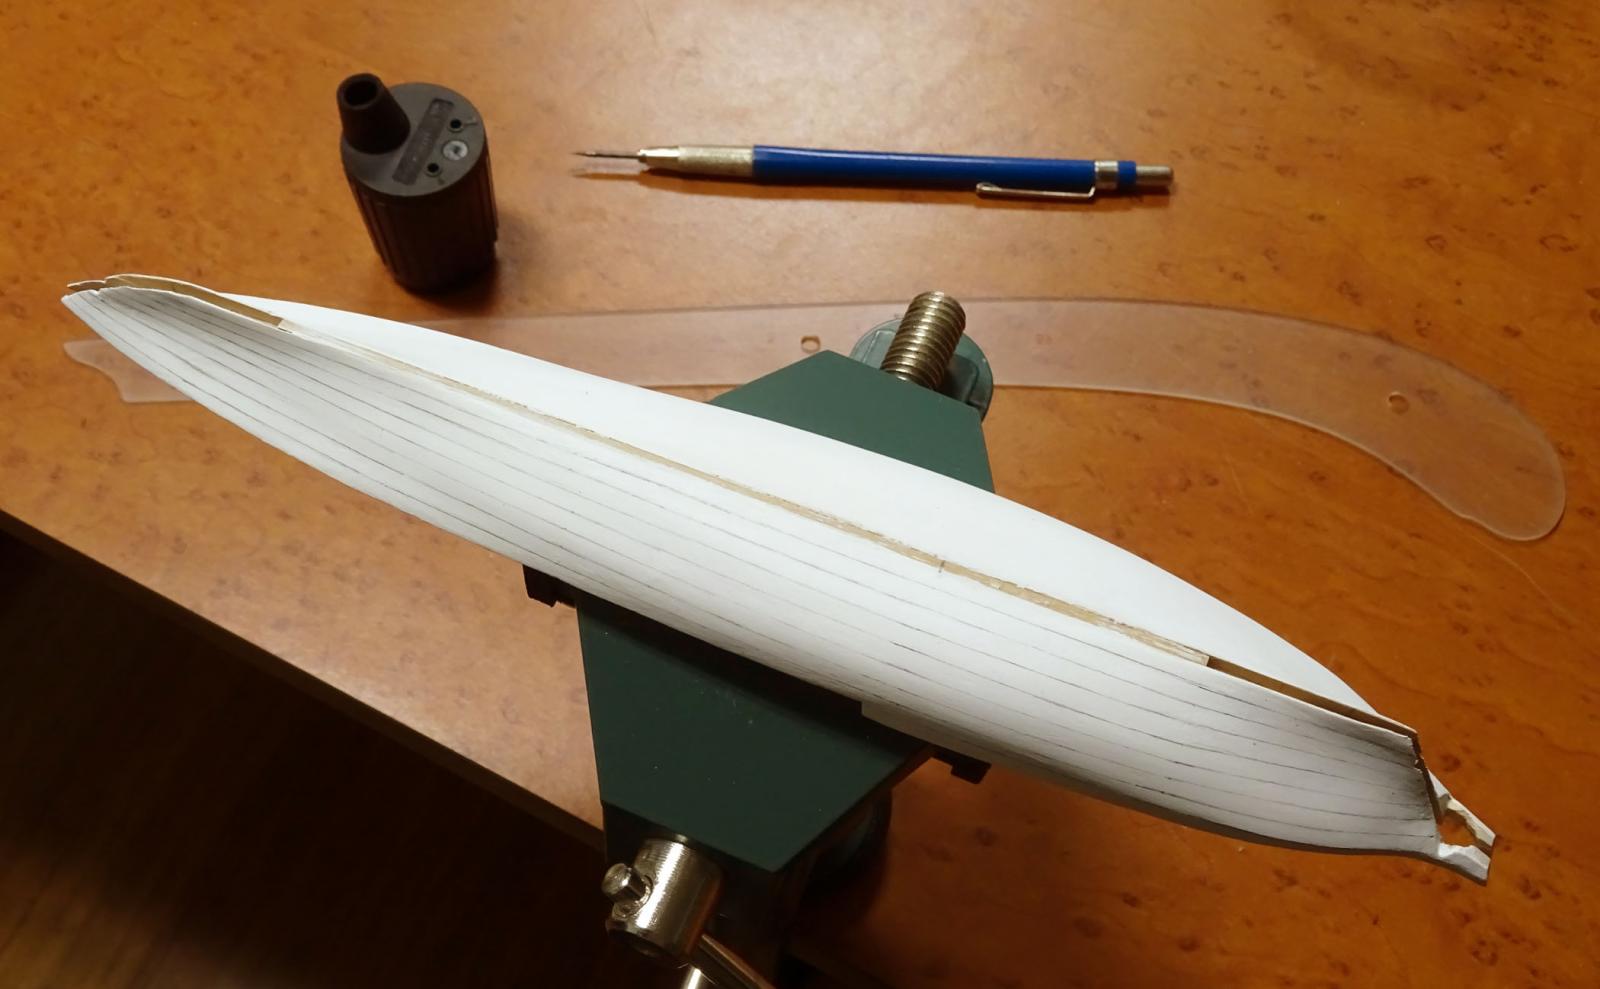
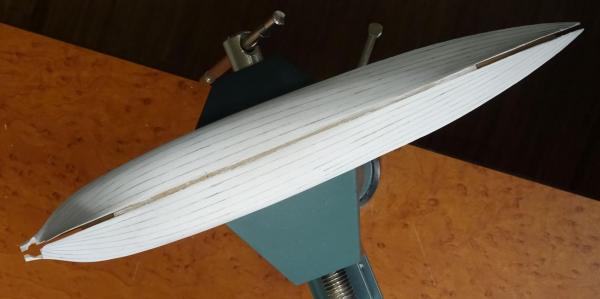
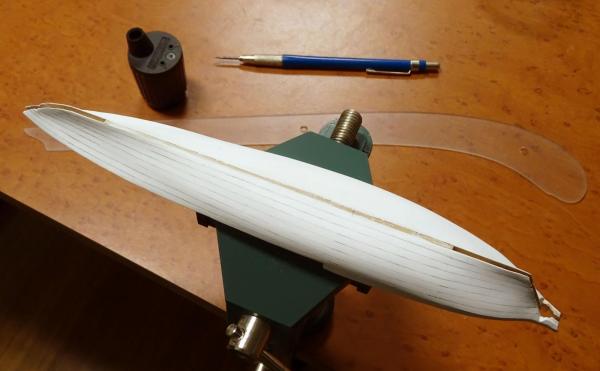
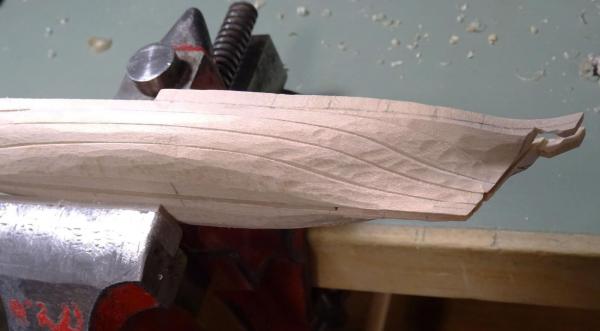
Now things start to get interesting. The plug was repeatedly gessoed and rubbed down to a smooth surface. The next step is to line out the planking. There are two stages to this process. The first is mechanical: dividing the surface into equal parts at various points along the hull. In this case the draught showed eight strakes. The distance around half the hull at the dead flat was exactly 4' 0", so each stroke is 6" wide at that point. Once the hull has been divided into 8 bands or strakes, these need to be finessed so that, no matter from which direction you look at it, the planking runs smoothly to the eye. The bow-most third of the hull gave the most difficulty, as there is a pronounced hollow to the form. In some cases the variation of the thickness of the pencil line (very thin) was enough to make the difference. In others the line had to be moved by as much as 1/32". I may still play with the layout a little more before I'm completely satisfied. The layout at present makes no allowance for overlaps of the clinker planks - that will come later, as will the shift of plank butts.

- 641 replies
-
- 30
-
-
- greenwich hospital
- barge
- (and 1 more)
-
Yup, cumulative error can really mess things up. Good on you for having the courage to re-start, Jerry!
-
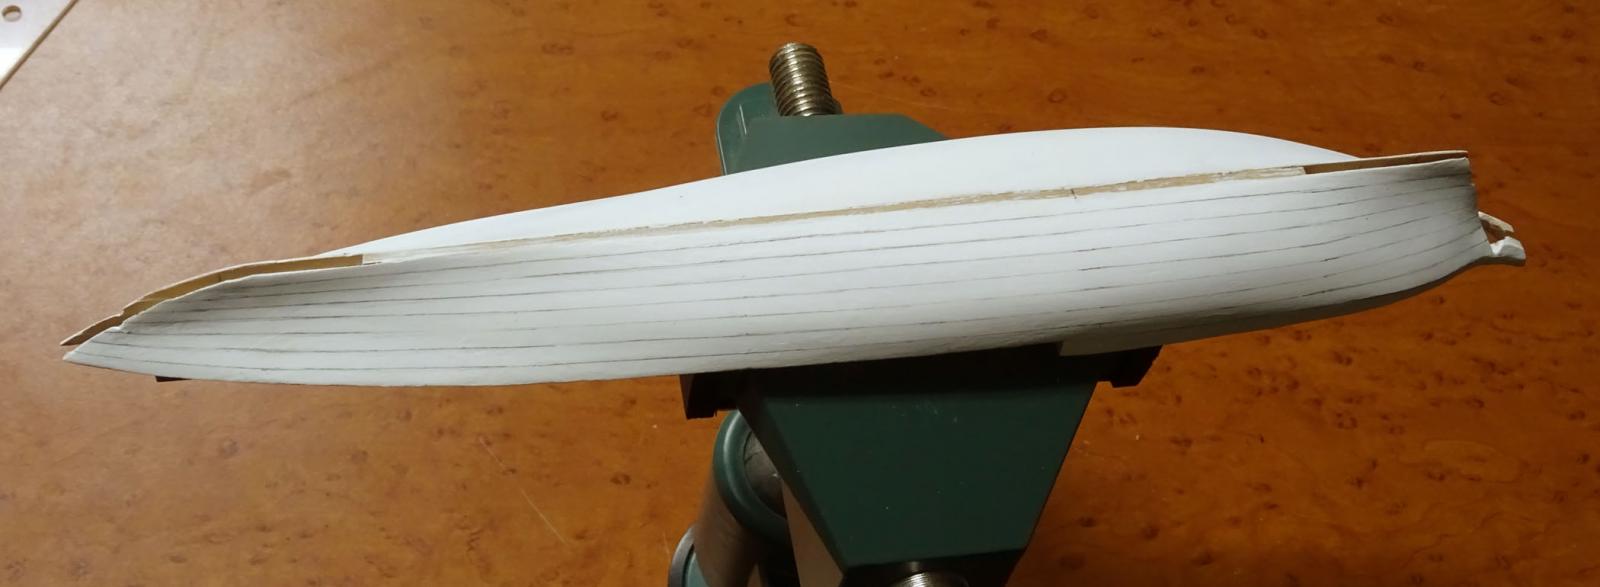
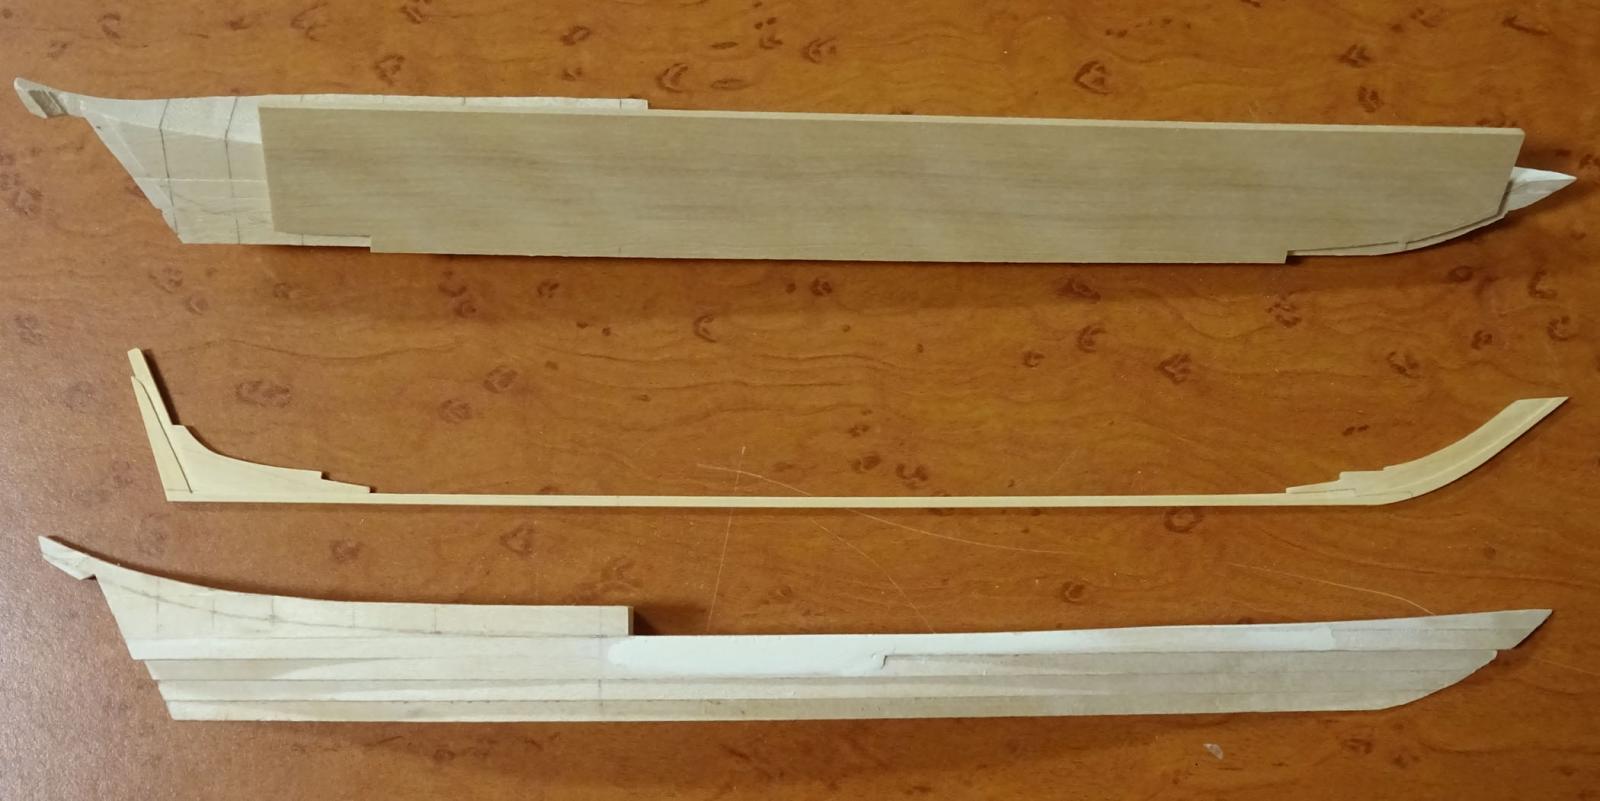
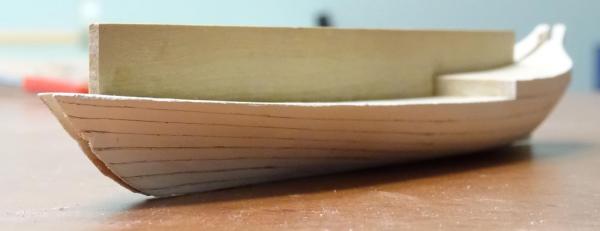
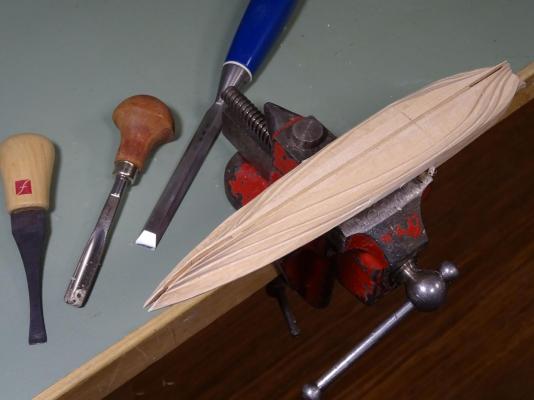
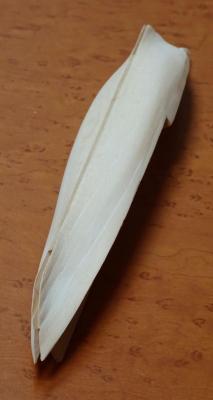
I was able to put in some more time on carving and refining the plug. The initial shaping was done with chisel and gouges, then smoothed with various grades of sandpaper. The sleek and streamlined form, dimensioned to the inside of the planking is almost complete. The form at the stern up to the transom was the trickiest part of the shaping. At both bow and stern, the plug is paper thin. Later this will be cut away to prevent the planks from adhering. Next, when time allows, will be further sanding and smoothing of the plug's surface with gesso.


- 641 replies
-
- 36
-
-
- greenwich hospital
- barge
- (and 1 more)
-
Lovely work. The photo on the beach was very convincing until Queequeg arrived!
-
Sweet! What a lovely hull form, beautifully executed.
-
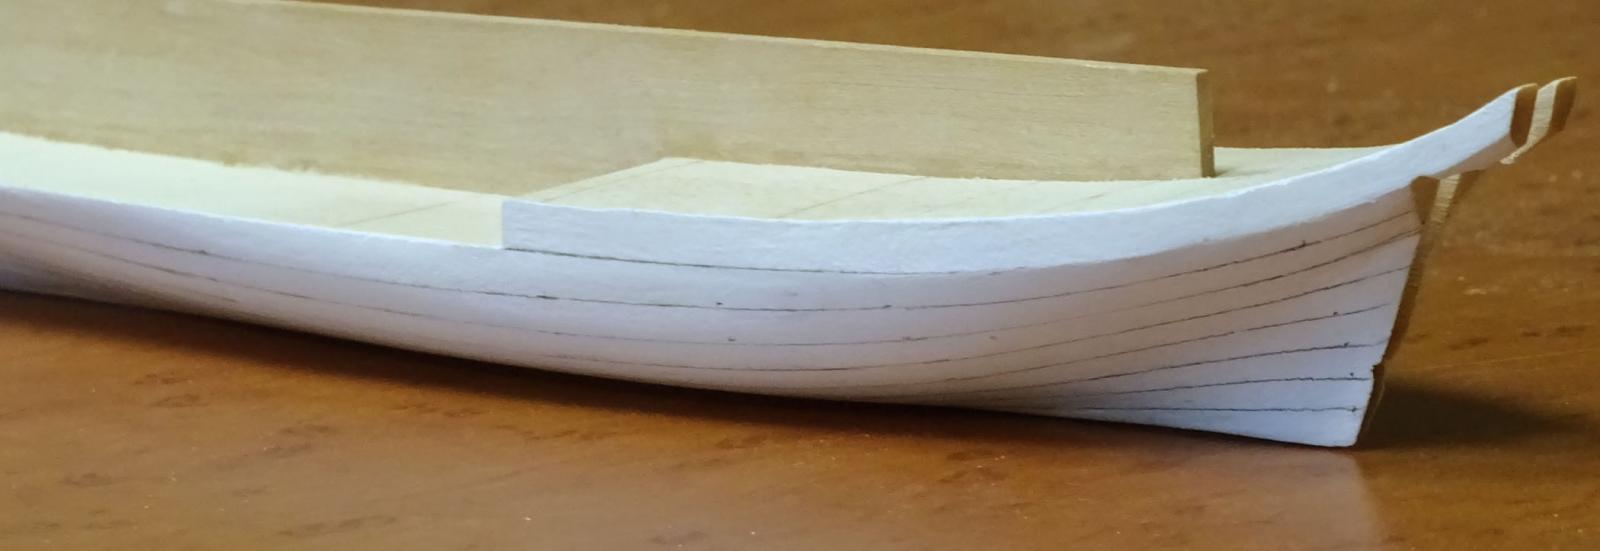
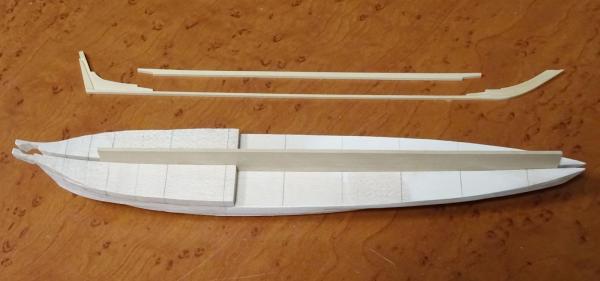
Some progress has been made between commissioned work. The plug central spacer was the next consideration. This is 1/16" thick and is cut away to support the central spine fore and aft. Observant eyes will note that the aft end of the plug has been modified to accommodate the small triangular transom and the wider upper end of the stern post. The plug spine protrudes above the sheer so that it can be conveniently clamped in a vice. Next will be shaping the plug to the inside of plank.

- 641 replies
-
- 29
-
-
- greenwich hospital
- barge
- (and 1 more)
-
Frégate d'18 par Sané , la Cornélie
druxey replied to JohnE's topic in CAD and 3D Modelling/Drafting Plans with Software
Hah! Good stuff, John. -
Heal soon!
-
Bandsaws are fine for straight and some curved cuts but, as Blue Ensign points out, cannot cut tight curved or intricate and thin pieces. Also, it's much easier and cheaper to replace a scroll saw blade!
-
The model making business is a continuous learning curve, Mark. She's looking much better. I don't know whether it's the photos, but check the spacing and angles of the counter timbers. They don't look quite equally spaced: particularly on the port side. If they are not, it will come back to bite you later when making the lights.
-
Yes, Ed, I think it's 'rebranding'. I suspect the title The National Maritime Museum will be dropped after an interim period. Thanks for all the recent comments and 'likes'.
- 641 replies
-
- 2
-
-
- greenwich hospital
- barge
- (and 1 more)
-
The Radetzky March? No-one ever seems to know whether to clap on the beat or off, in my experience! (Generally, people hedge their bets and clap in between.) The extensions of the cranes would probably bend to conform with the hull inside. They would not pierce the hull.
-
It's always worth re-doing - you'll be happy once the struggle is over and won. Sometimes it takes several runs to get things right. Go for it!
-
Hammock crane I believe. The fitting at the end of one arm would have held a batten that acted as a rail that possibly supported netting.