

.jpg.f26acc9a74319261612561bfa7da1303.jpg)
vaddoc
-
Posts
1,599 -
Joined
-
Last visited
Content Type
Profiles
Forums
Gallery
Events
Posts posted by vaddoc
-
-
Dear Friends
Another quick update to share some photos!
On 4/3/2024 at 11:32 AM, Mark Pearse said:Perhaps matt finish below the waterline?
Mark, it is Valejo matt acrylic paint, it is just that the photo was taken immediately after the coat went on so still wet.
@64Pacific Thanks Scott, welcome!
@KeithAug Keith, I do not think Humbrol enamels will be arround for long so if you use enamels, stock up. I bought some of the enamel varnish.
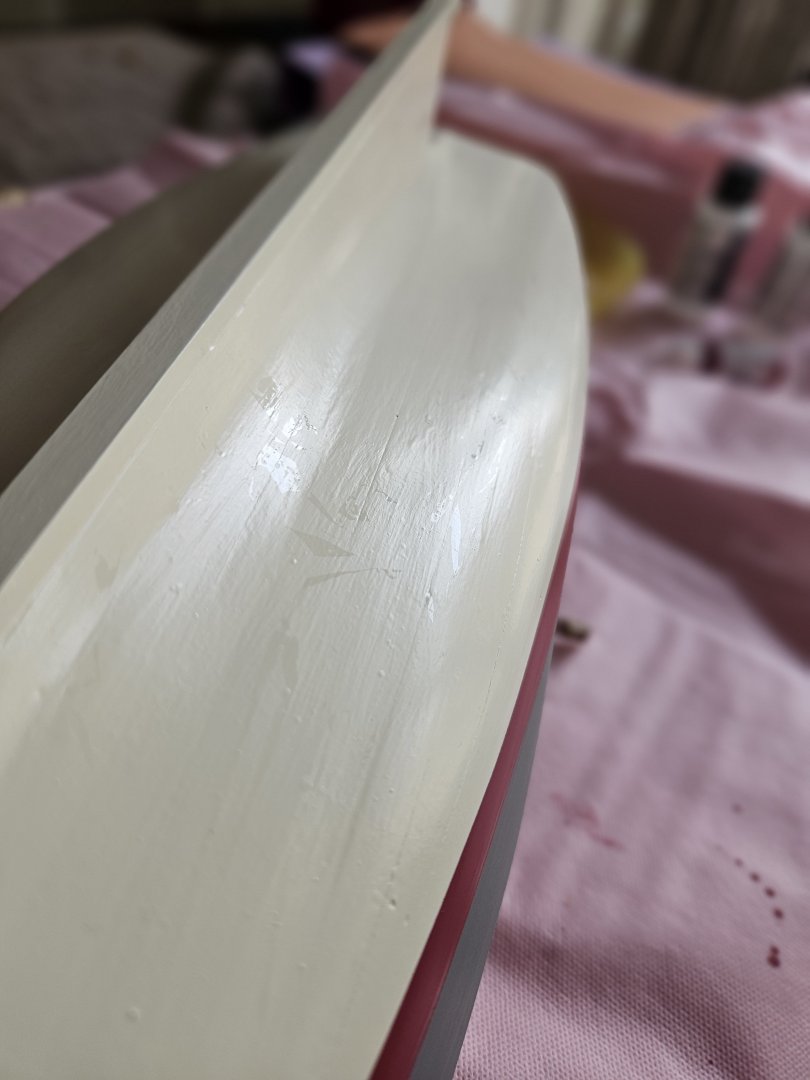
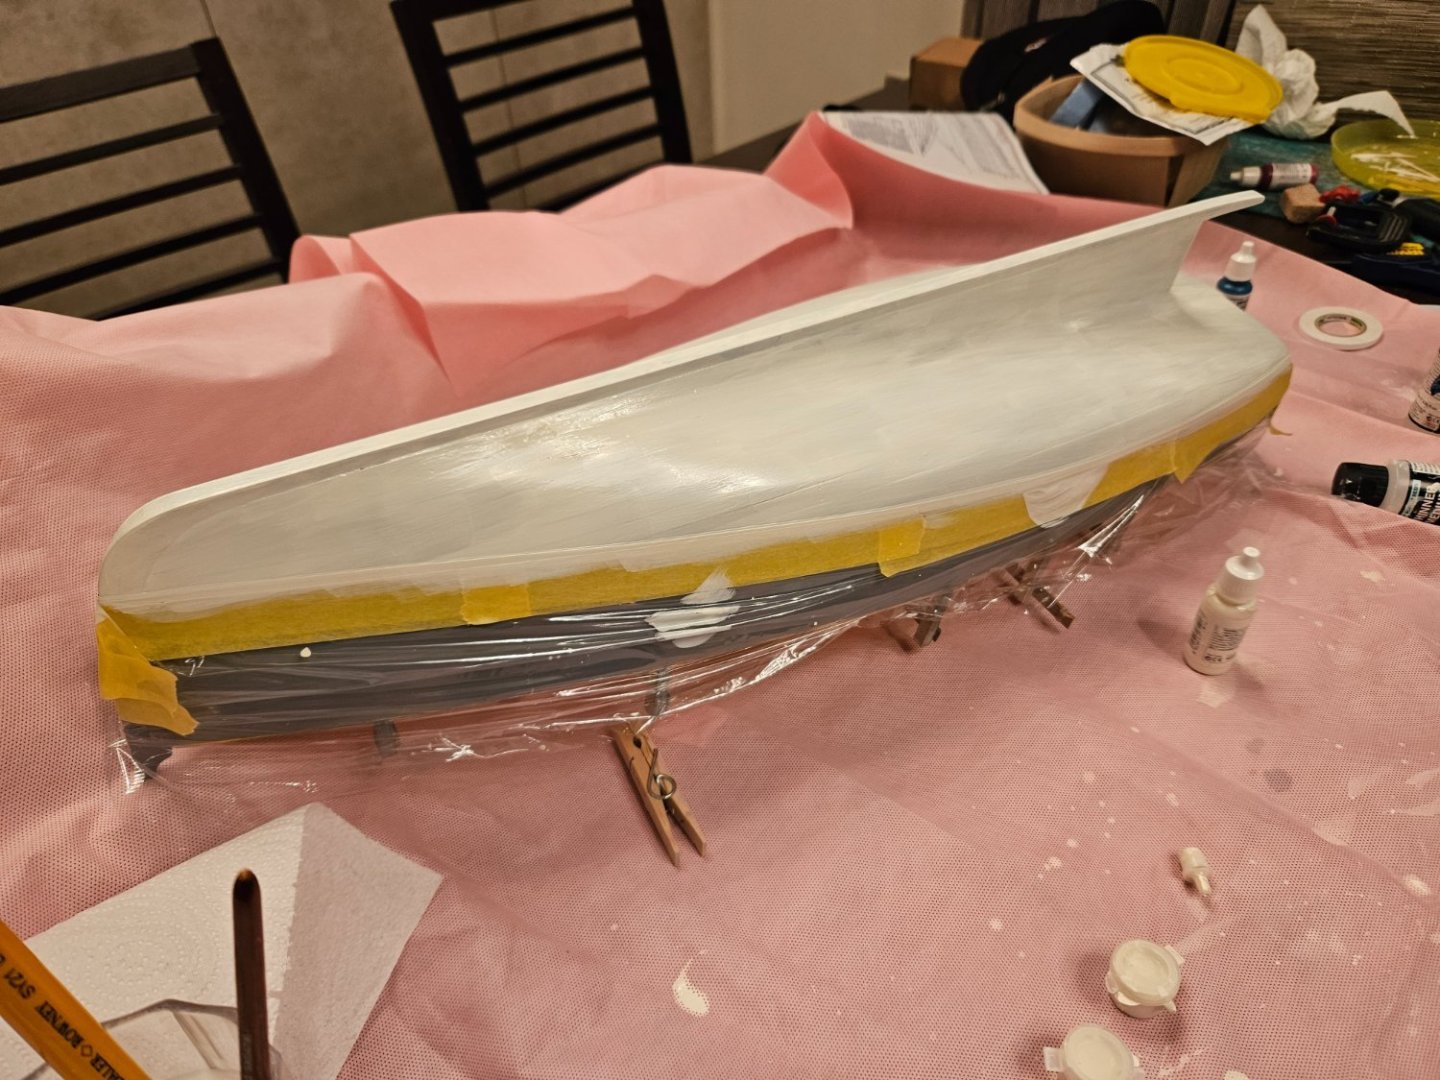
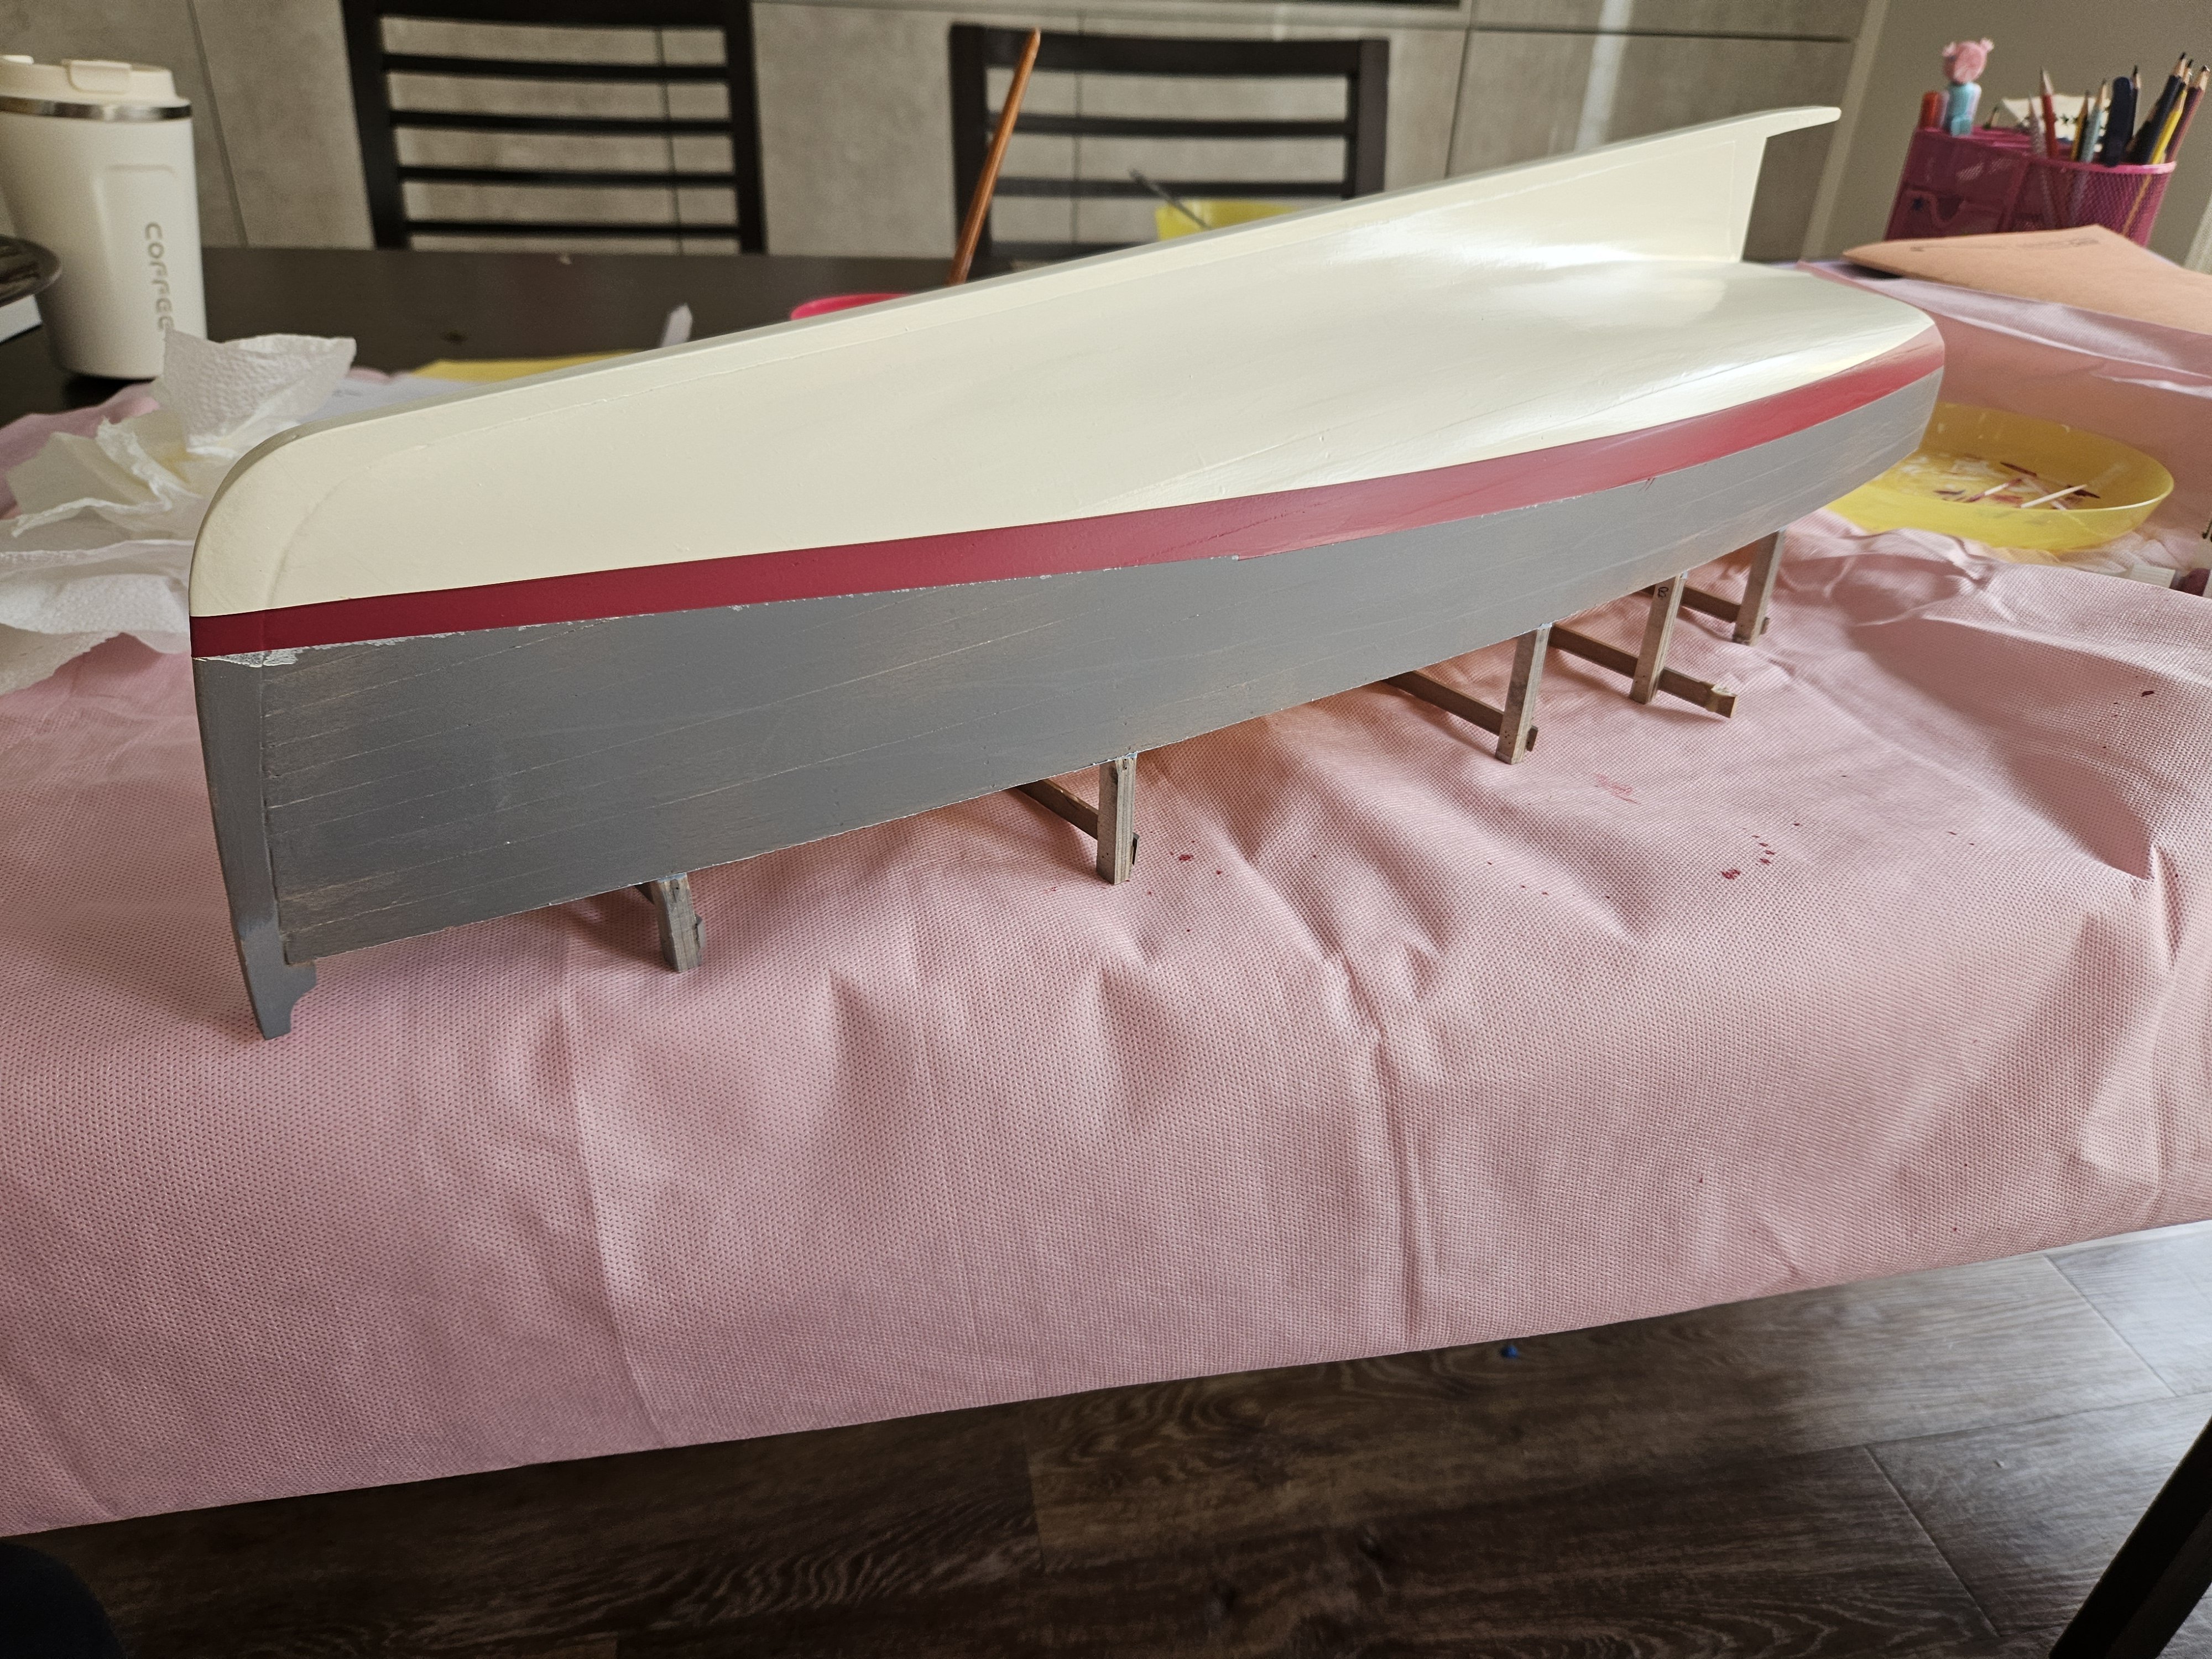
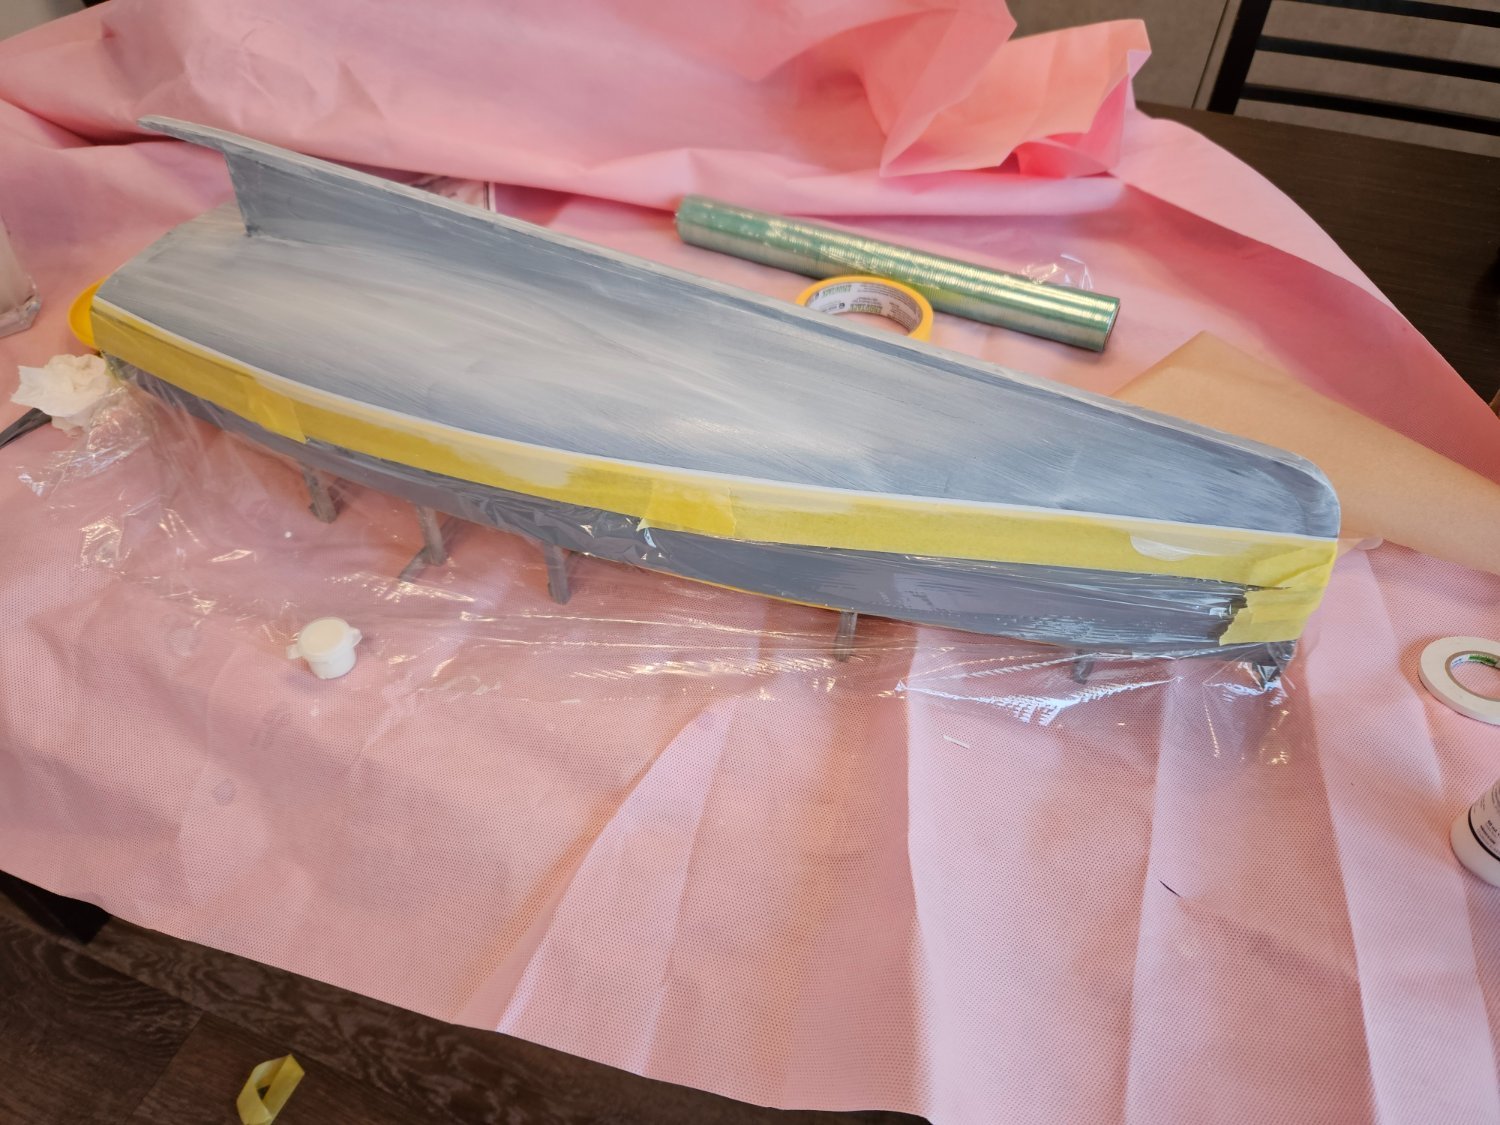
So I carried on with painting. The white paint has exceptionally poor coverage. I must have put on 15 coats, not with the greatest of care I must admit. But it came out alright - modern paints are so forgiving. I am not sure what the shiny areas are but it does not matter, these should disappear after varnishing.
I then masked again and added the red waterline. The red color has much better coverage

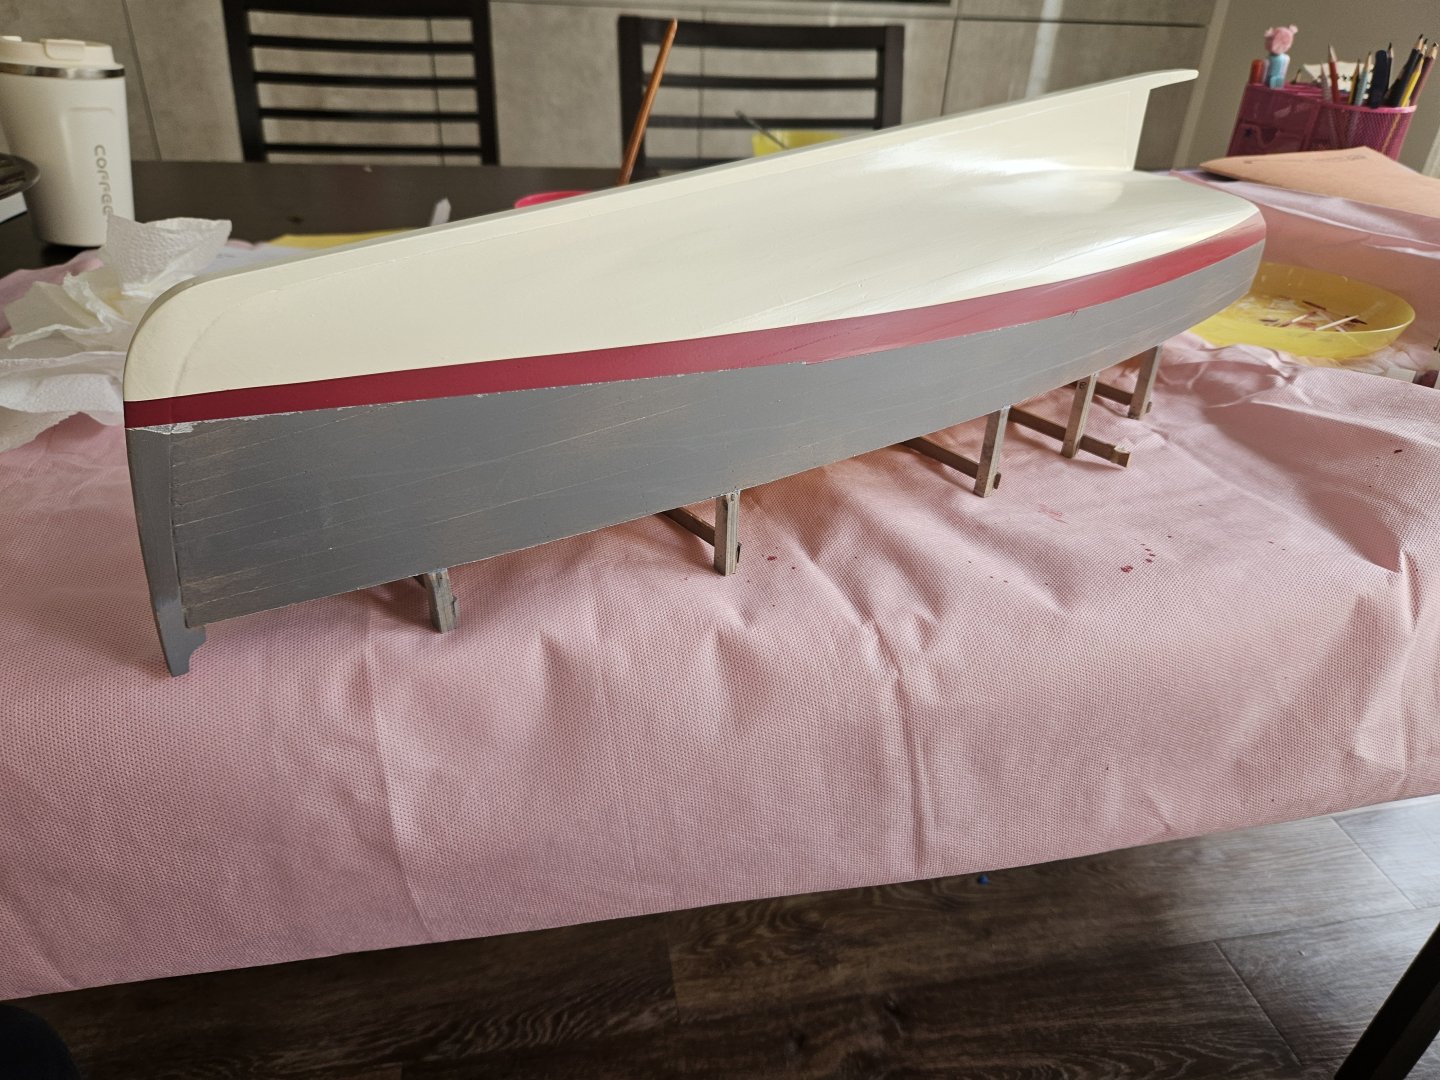
I could have sanded the paint but I decided not to bother. Also, I should have first painted the red zone, mask and then paint over. I did not really pay much attention but in the end it came out fine, I just had to mask and remask again and again.
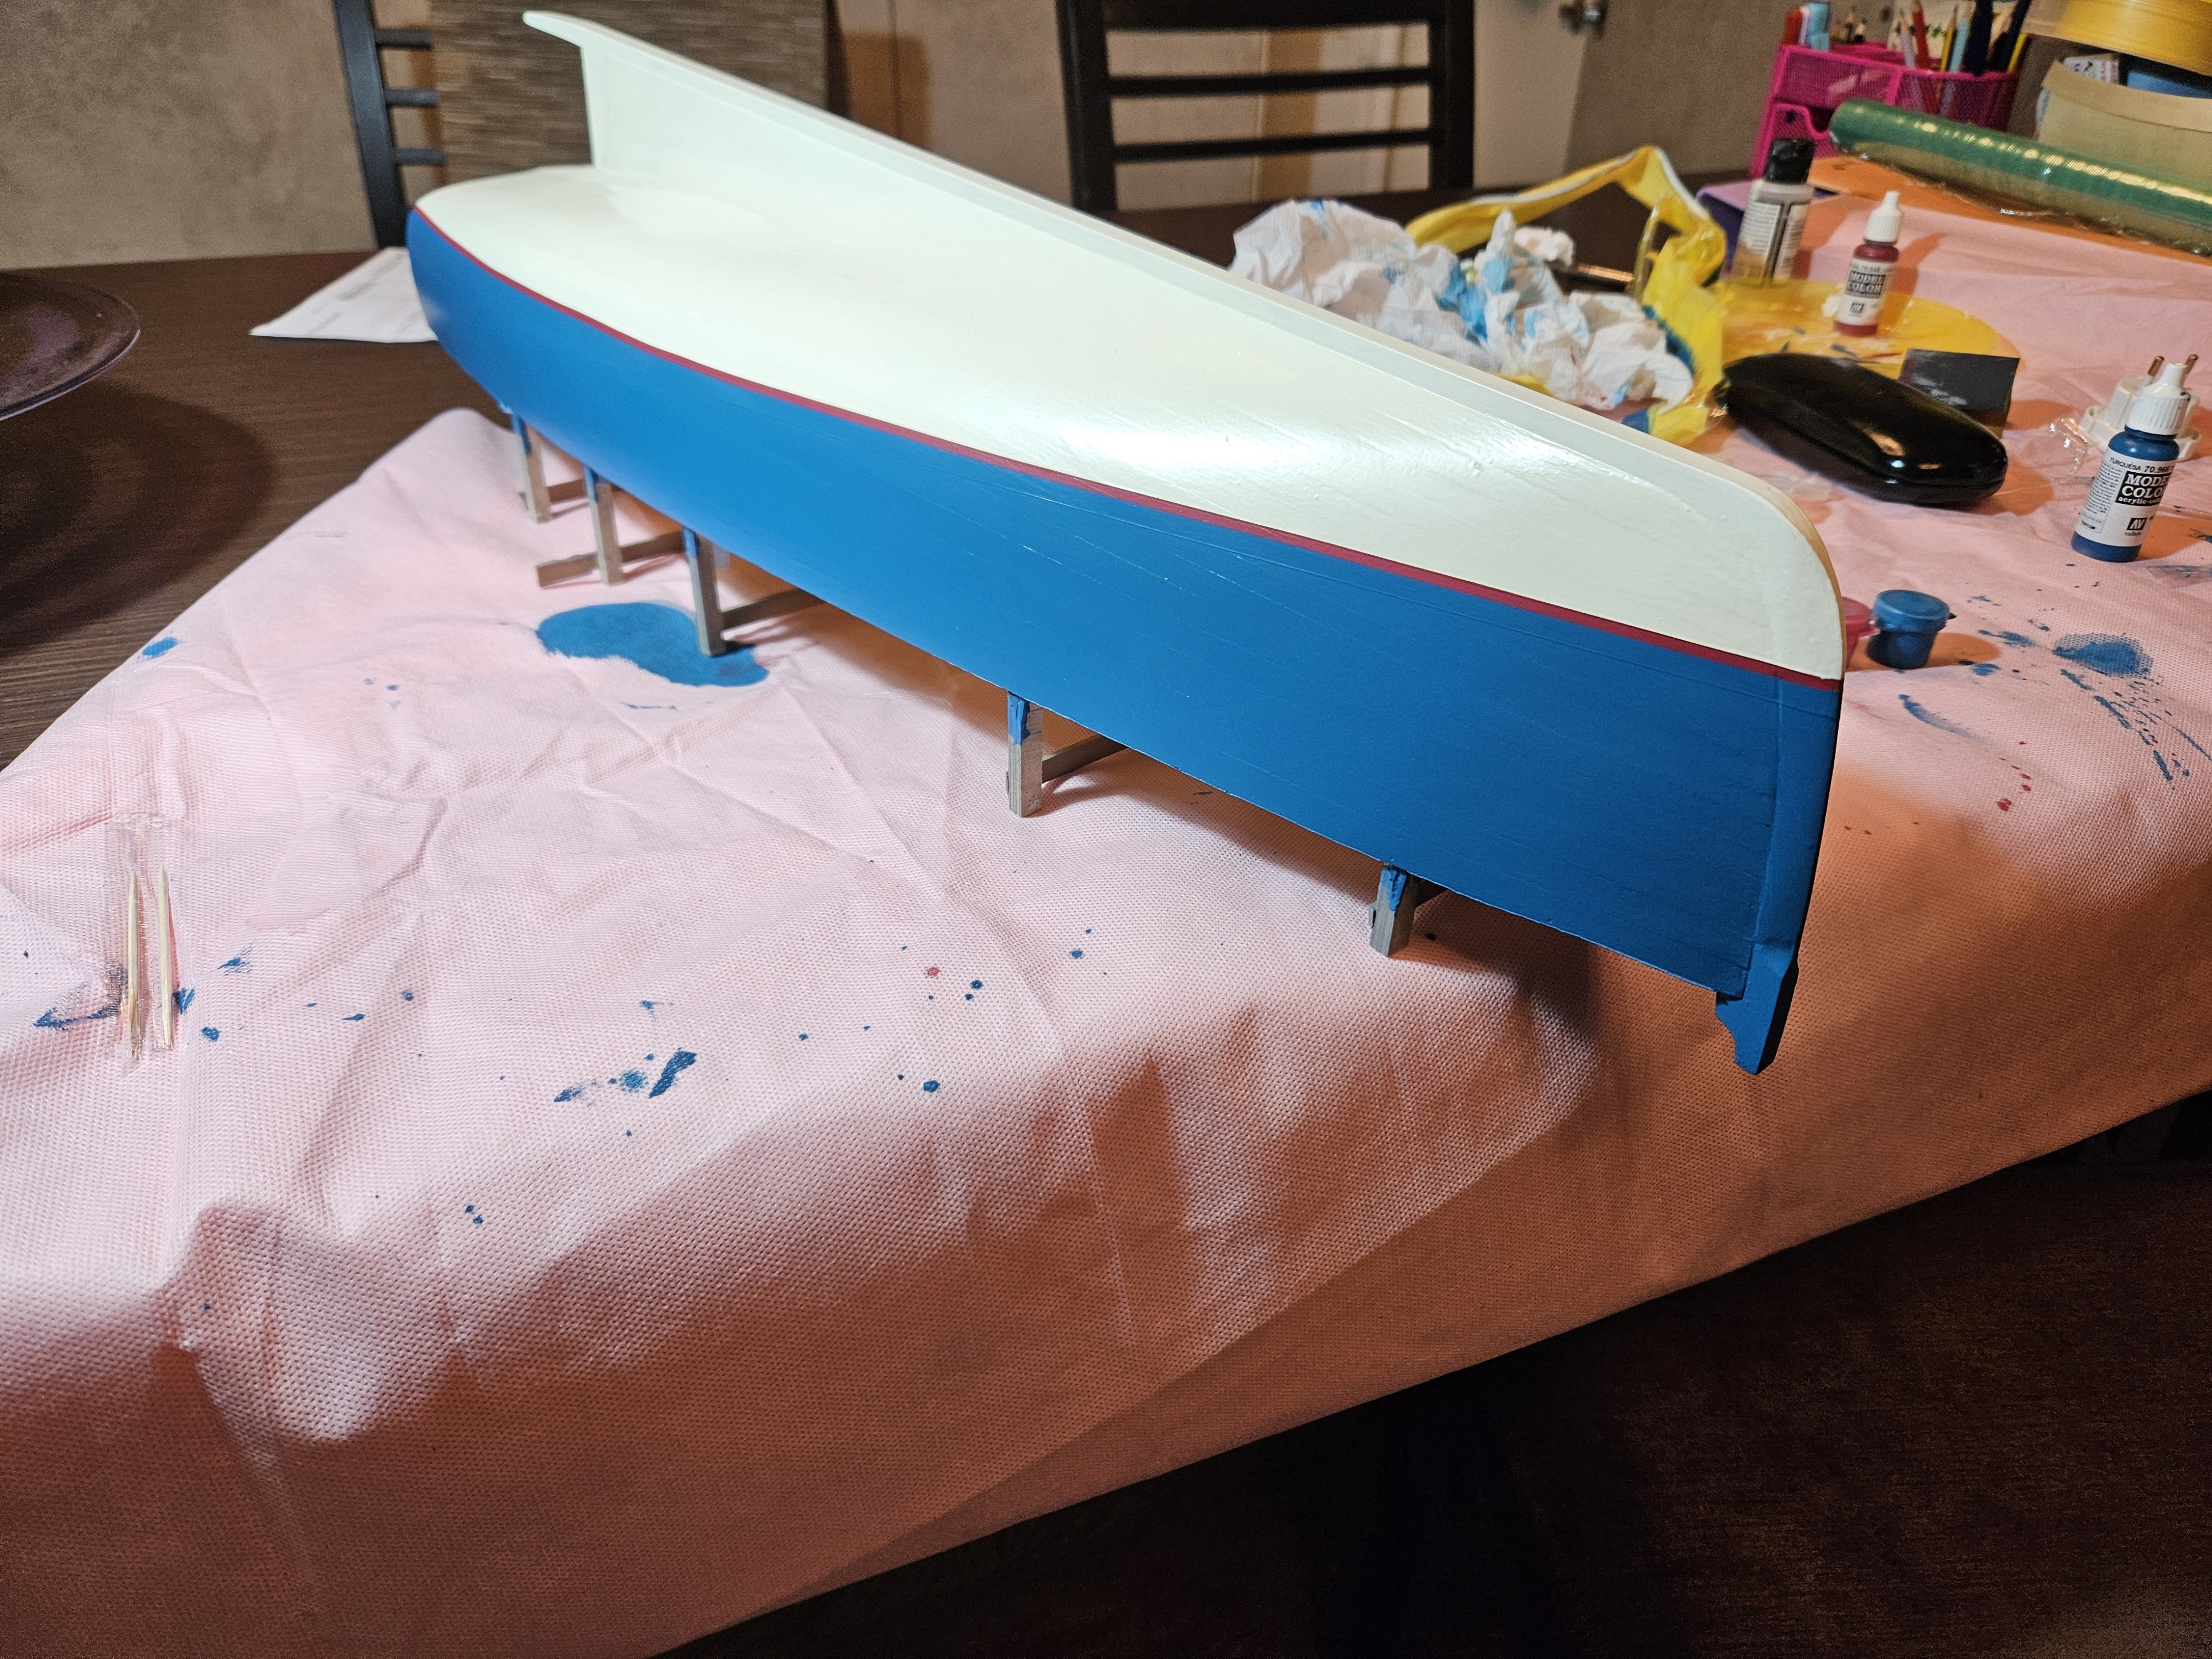
Then, I added the turquoise - very nice color, excellent coverage. I was more careful this time and came out much better.
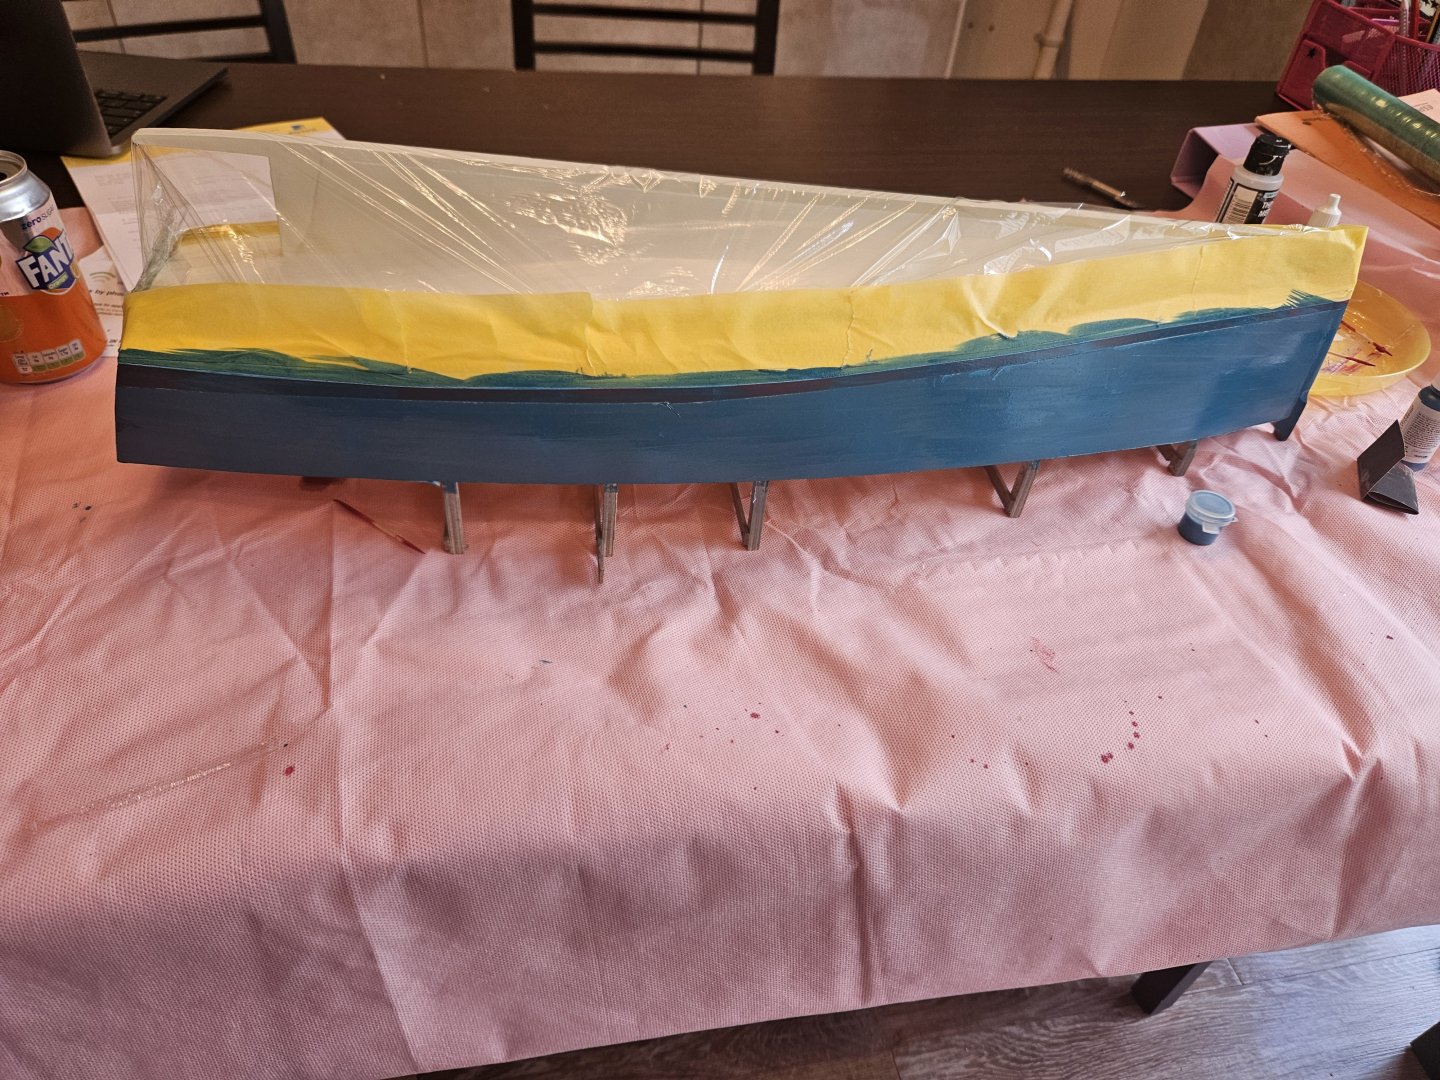


There is a masking line that shows, I masked without thinking. I could have sanded it off but did not bother, it actually looks ok.
I will now give it a couple more days for the paint to cure and then I will protect the paint with enamel Humbrol varnish. I am dissapointed with the water based ones - Poor adhesion and not as hard.
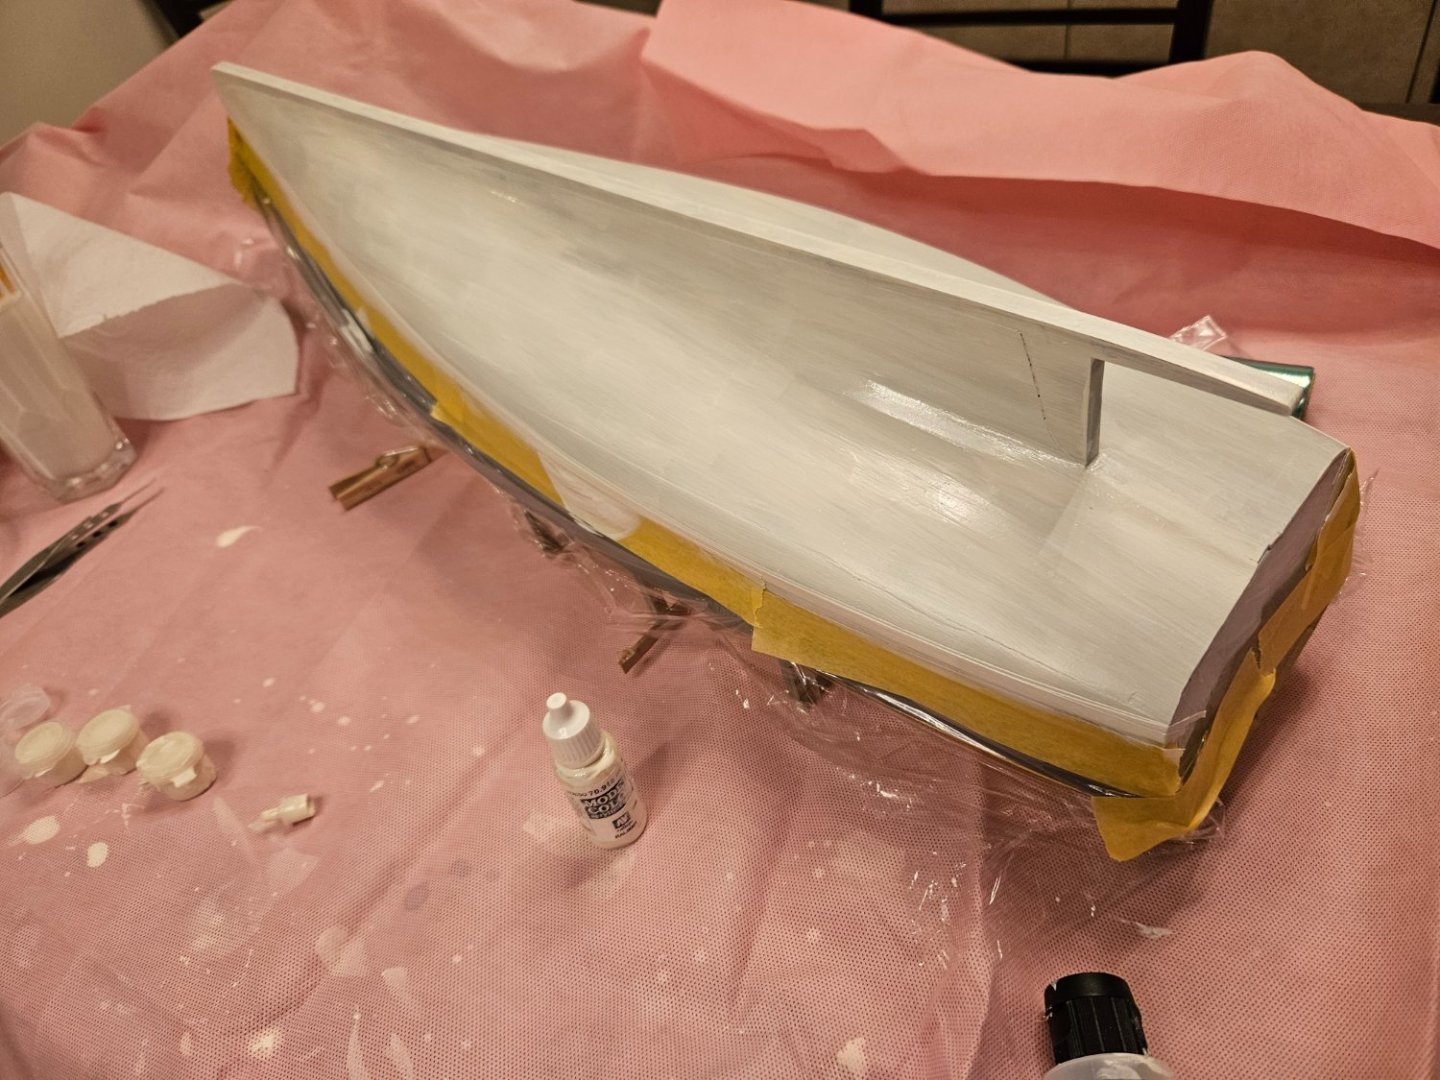
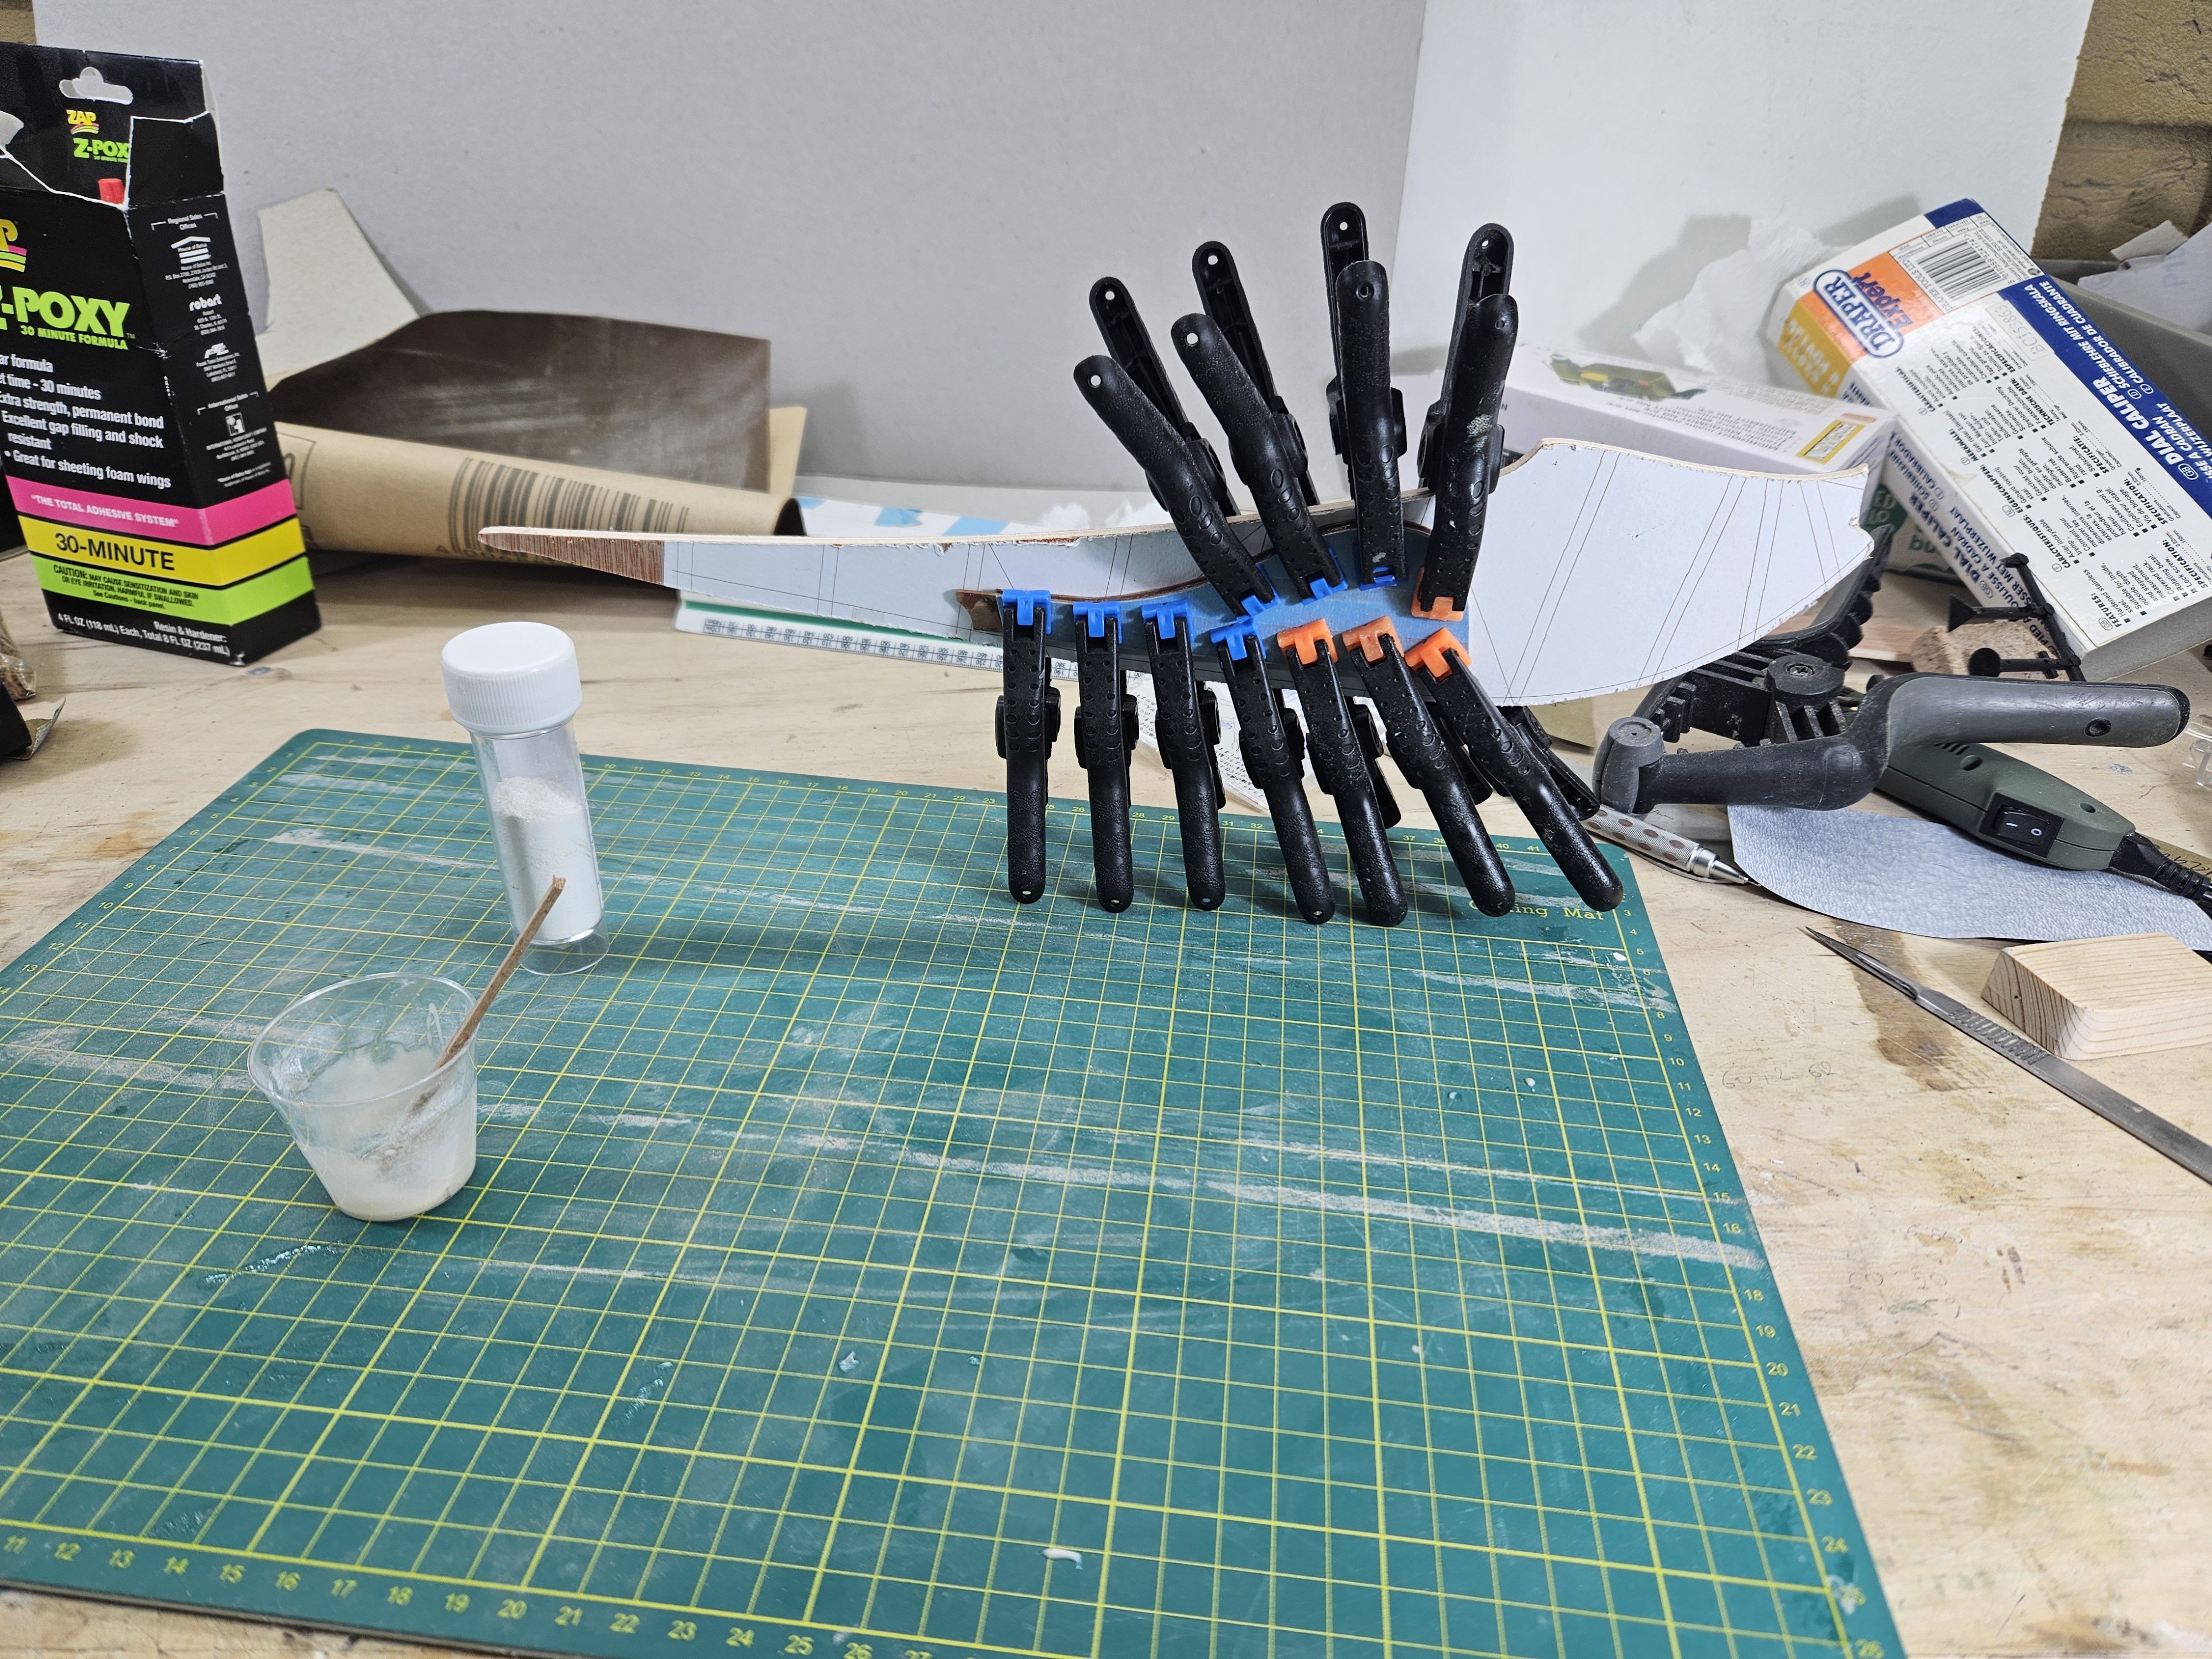
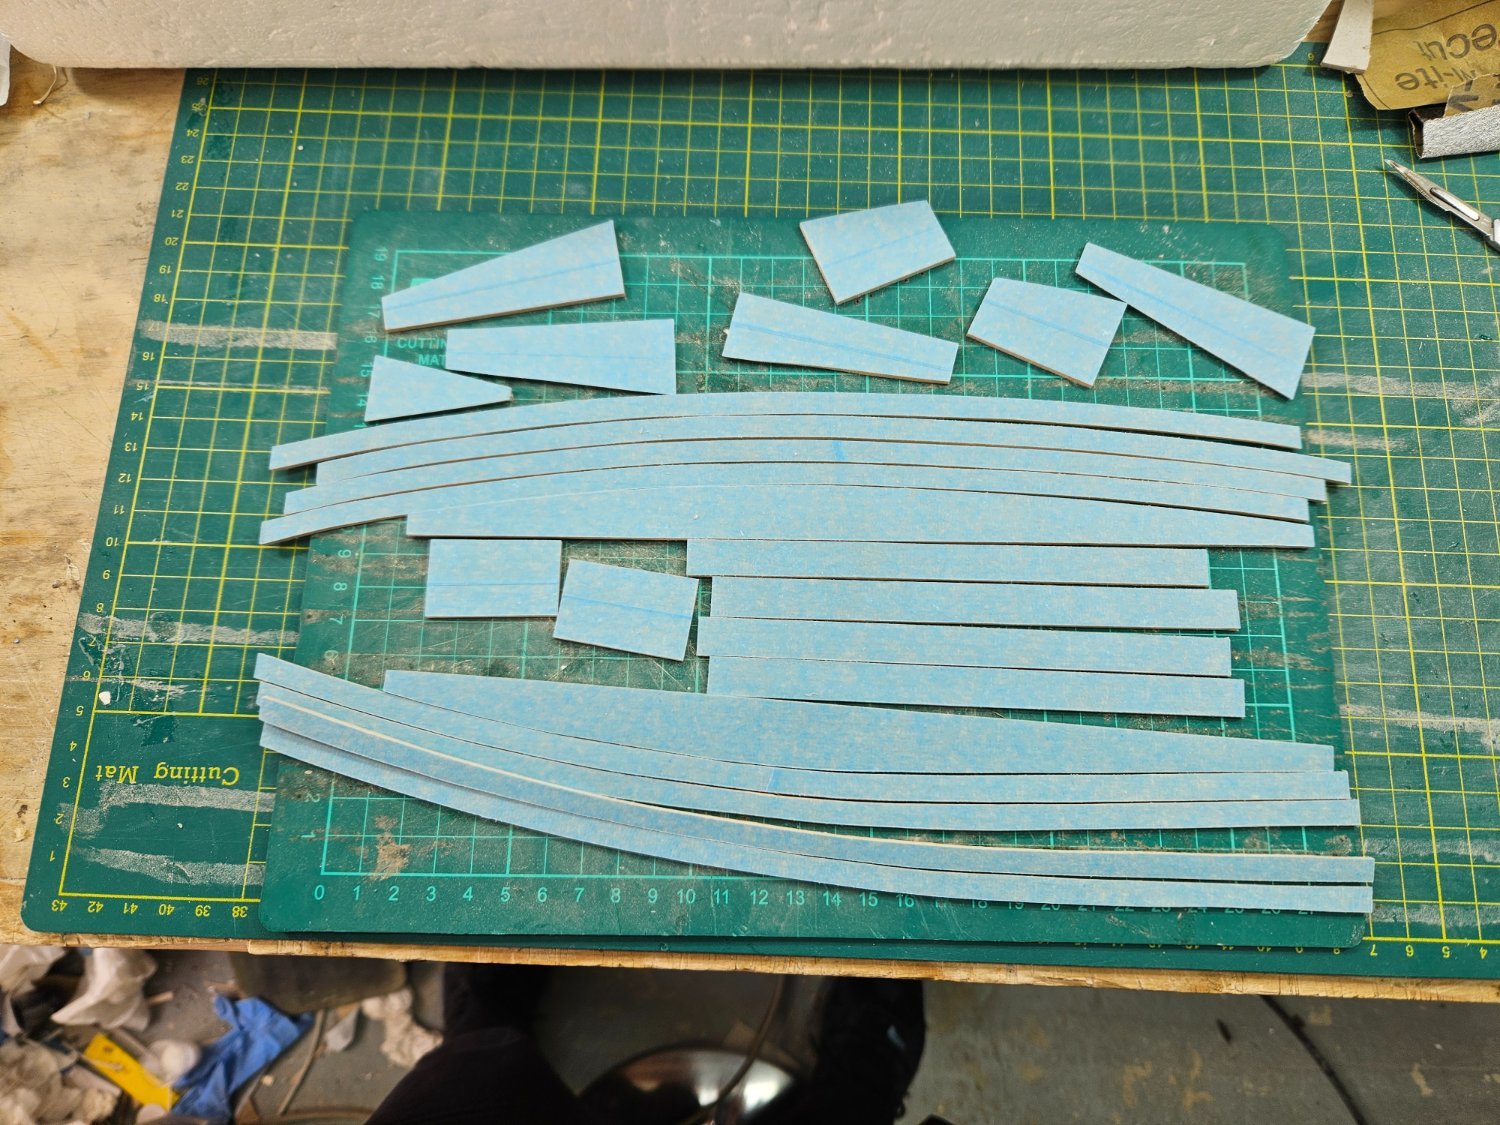
So next I started work on the rudder. In the plans it is only 1.5 inch thick - that is 4 mm in the model. So I made a card template and cut three pieces to laminate
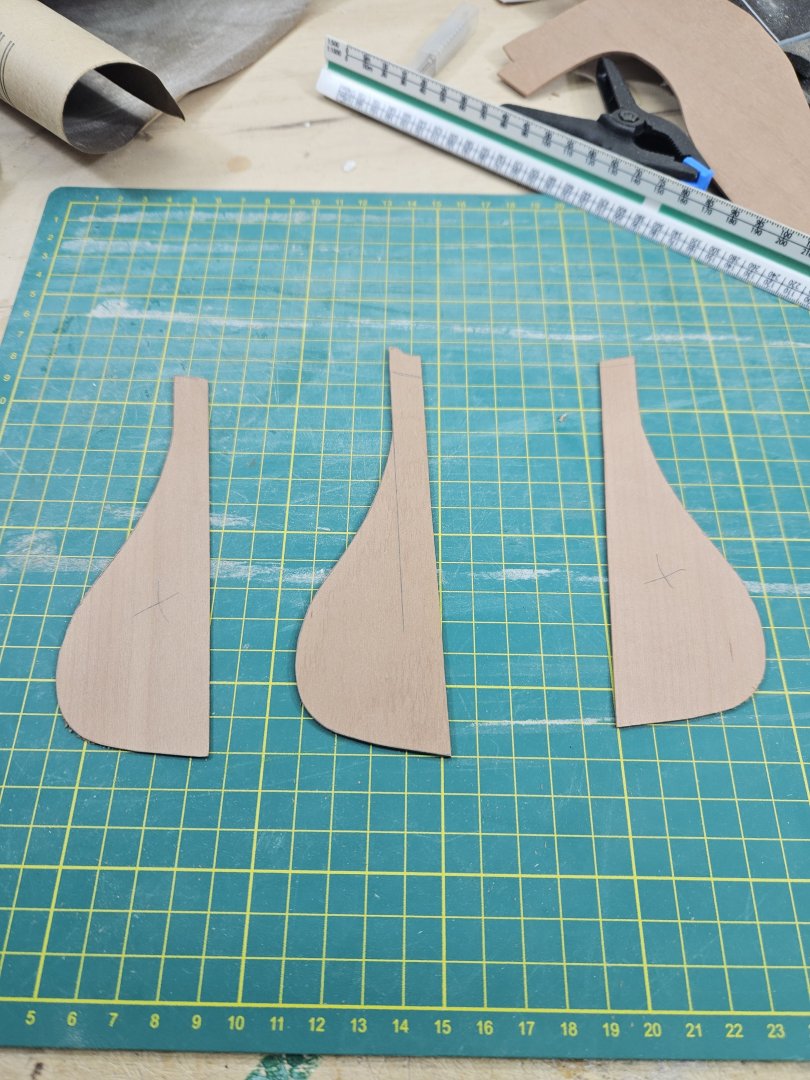
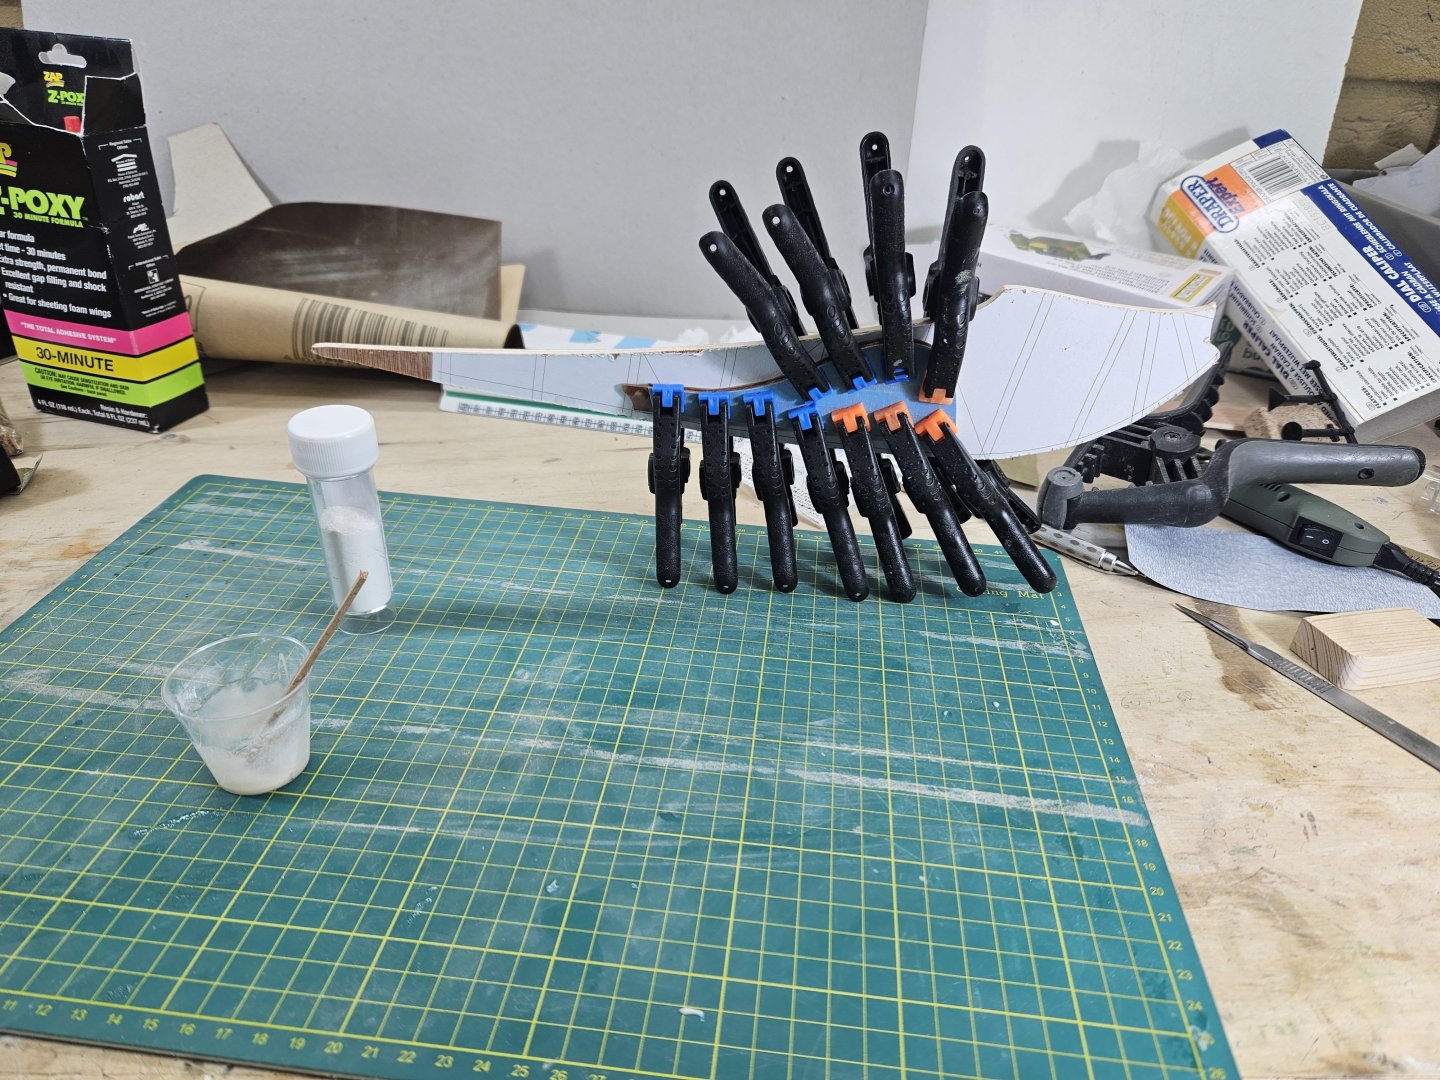
Waiting for epoxy to cure - then the rudder will be painted in same colors.
Take care all
Vaddoc
- GrandpaPhil, Bedford, FriedClams and 3 others
-
 6
6
-
-
7 hours ago, wefalck said:
In my experience, acrylics are better applied by airbrush. Somehow, the self-levelling is not as good as for organic solvent-based paints. They also dry too fast to be able to equalise them well. Or may be, I am not that good a painter ...
You are very right Wefalck, enamels have a much better self leveling potential as they take a long time to dry. But this is counterbalanced by the hair and dust particles they attract. Still, modern acrylics with a bit of retarder can have fantastic self leveling when applied by brush but they need speed, extra care and the margin for error is small. Their coverage is appalling - I am already at coat number 9 and still needs more.
Because of the above, I was determined to use enamels on this boat. I rushed to buy some of the Humbrol enamels before they are pulled out of the market - apparently one of the ingredients is now banned in Europe. I decided on the colors. And then I used acrylics!
I must admit I am not giving this boat my full attention due to work and life commitments so I expect a bit sloppier results - We ll see how it turns out!
- Rick310 and FriedClams
-
2
-
Dear all
Paint has been splashed onto wood, so time for another update.
Also, as this boat is approaching completion (in my time, this means less than a year), I ve been thinking about the next one. I have some thoughts involving multiple masts, we ll see...
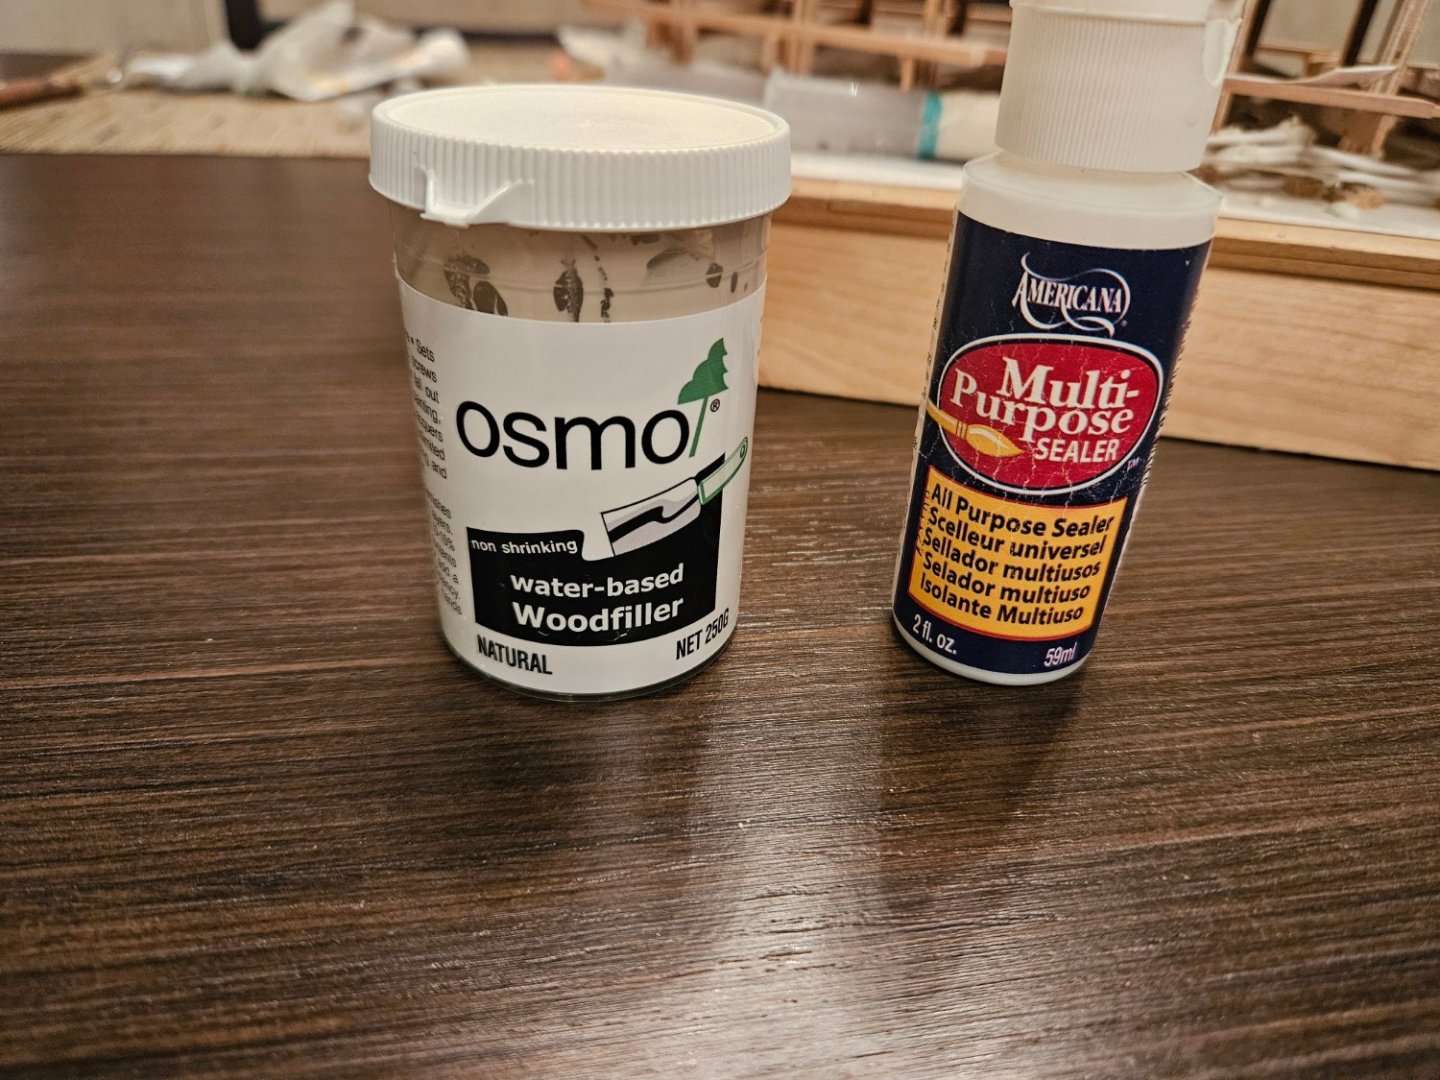
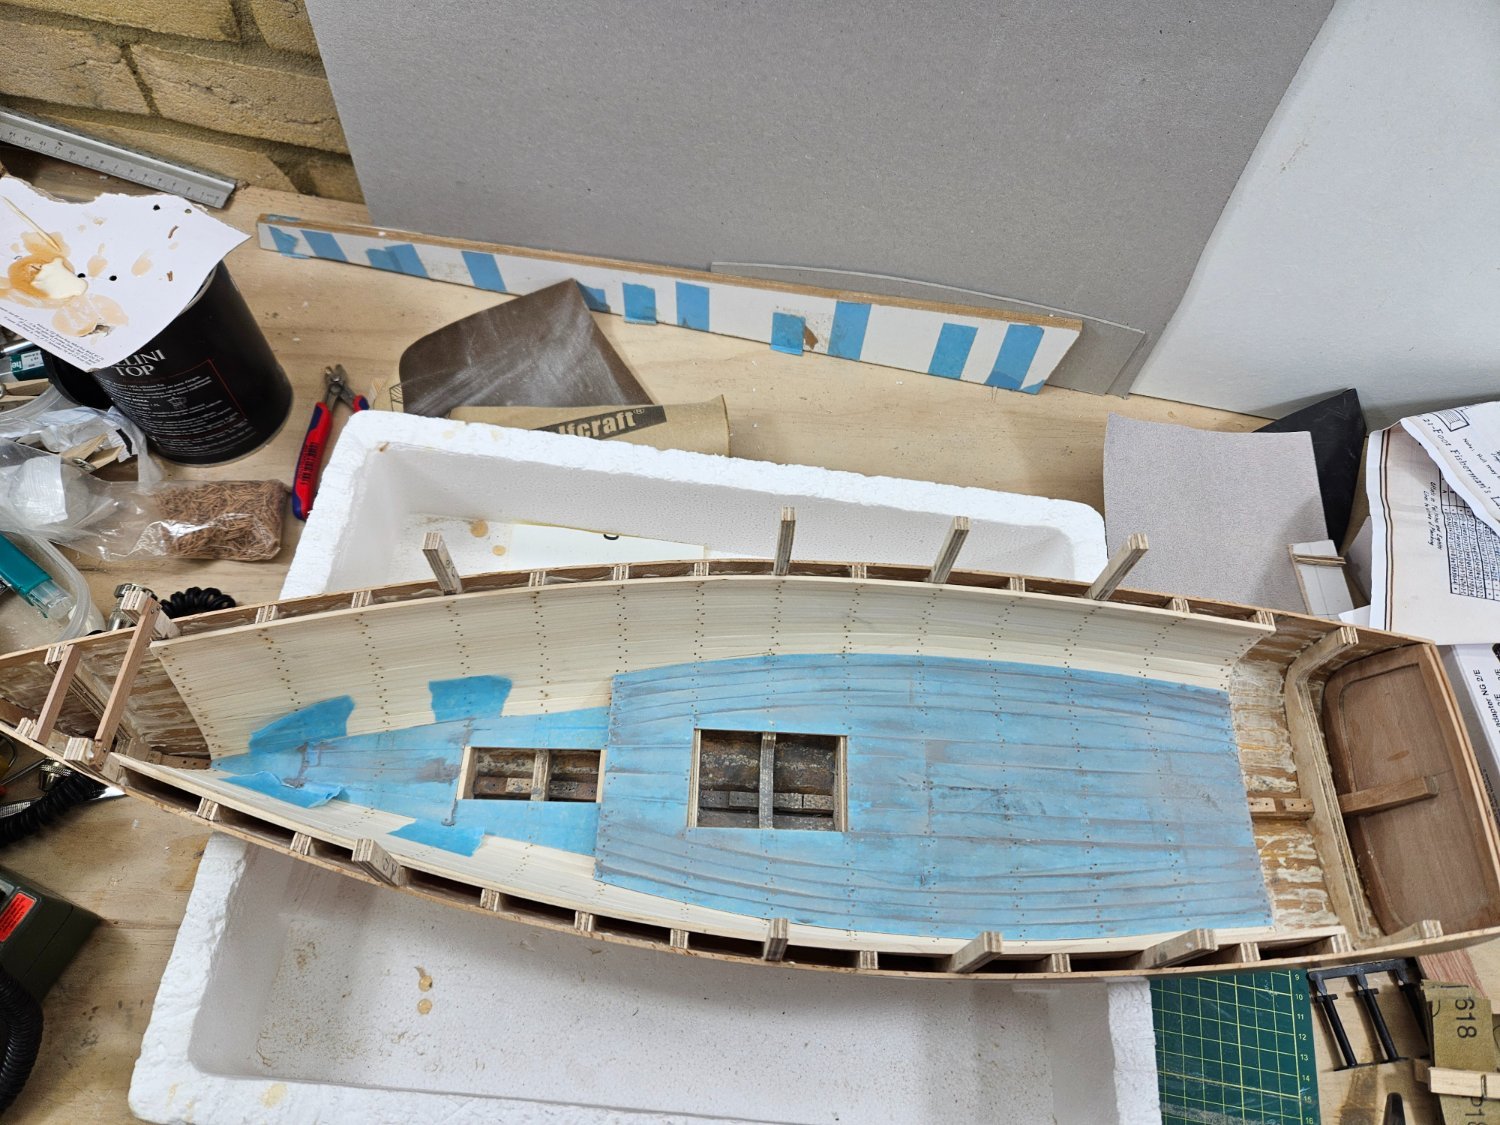
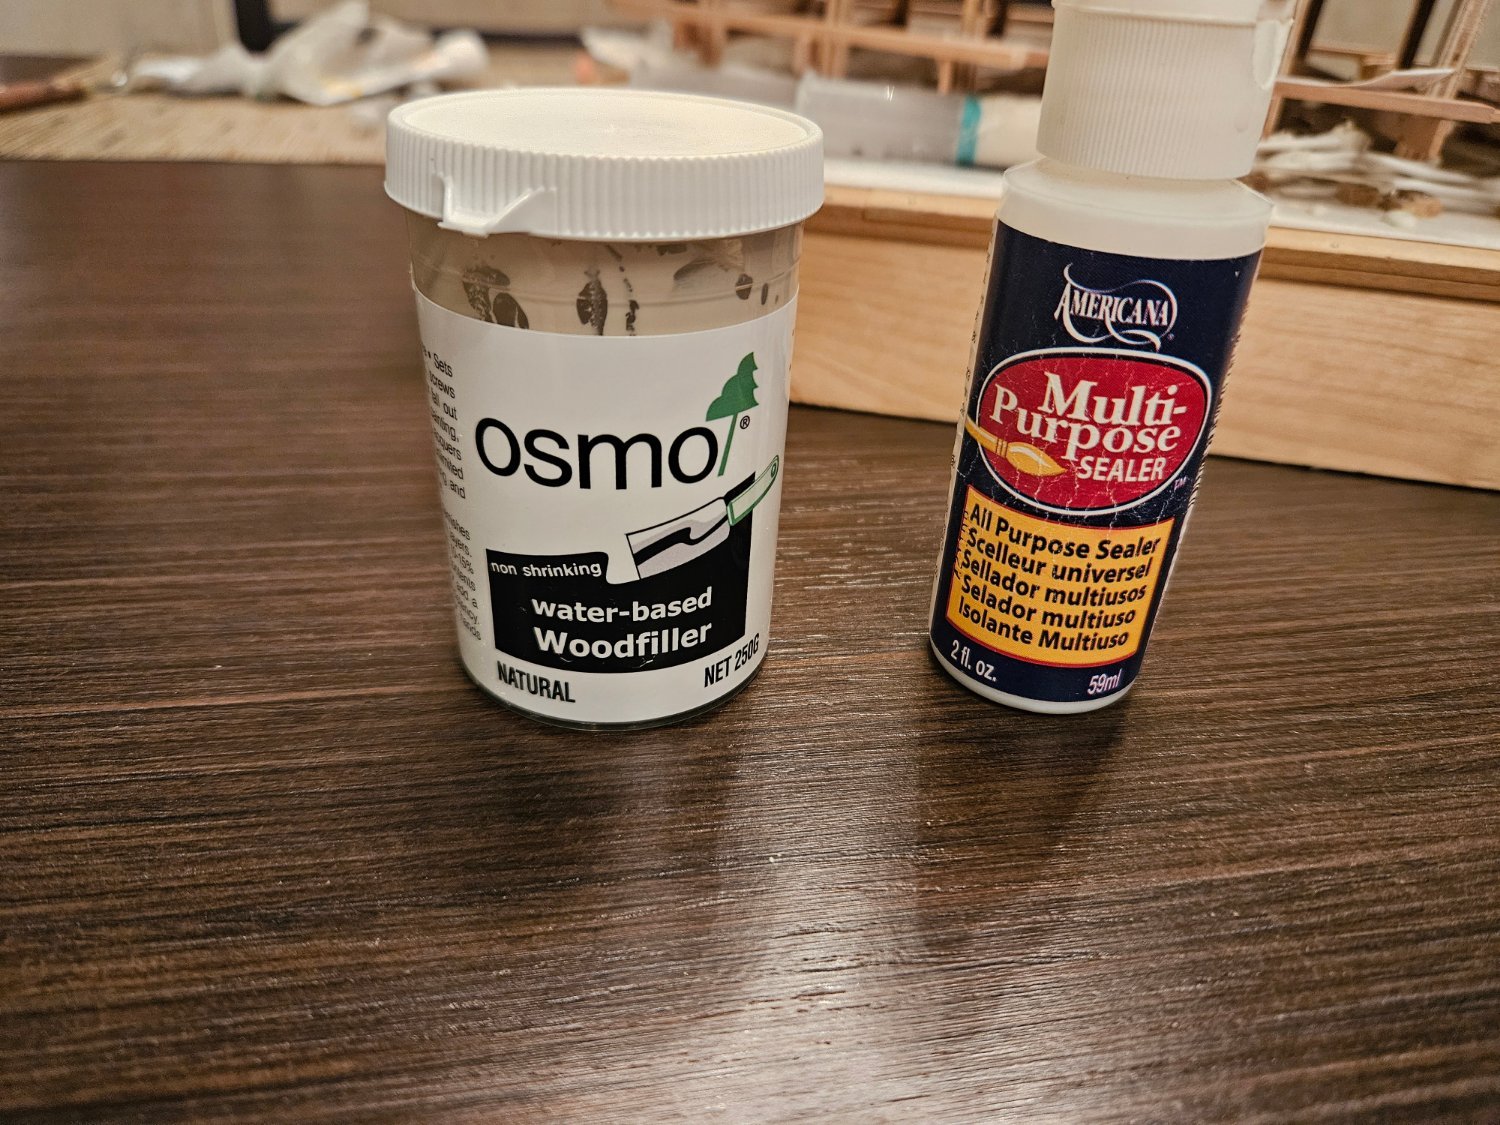
In any case, I decided to do some caulking on the deck. I do not think it needs it and almost certainly it is historically inaccurate but this boat from the beginning was about having fun and cutting (some) corners for speed. I ll use Osmo filler mixed with black acrylic paint. This needs Tung oil to shine black but maple does not take well to Tung oil, needs to be sealed first or will come out very blotchy.
So floors came out again and were sealed with my favorite Americana Decoart water based sealer (I dislike Shellac)

Of course the hull needed some more attention again.


The floors were covered with masking tape.
Then put back in place, all screws replaced with wood nails, sanded smooth

Then the mixture was slapped on!
Wait until dry
Then sanded off

Tape off, Tung oil on - done!

It is not perfect by any stretch but it is done!
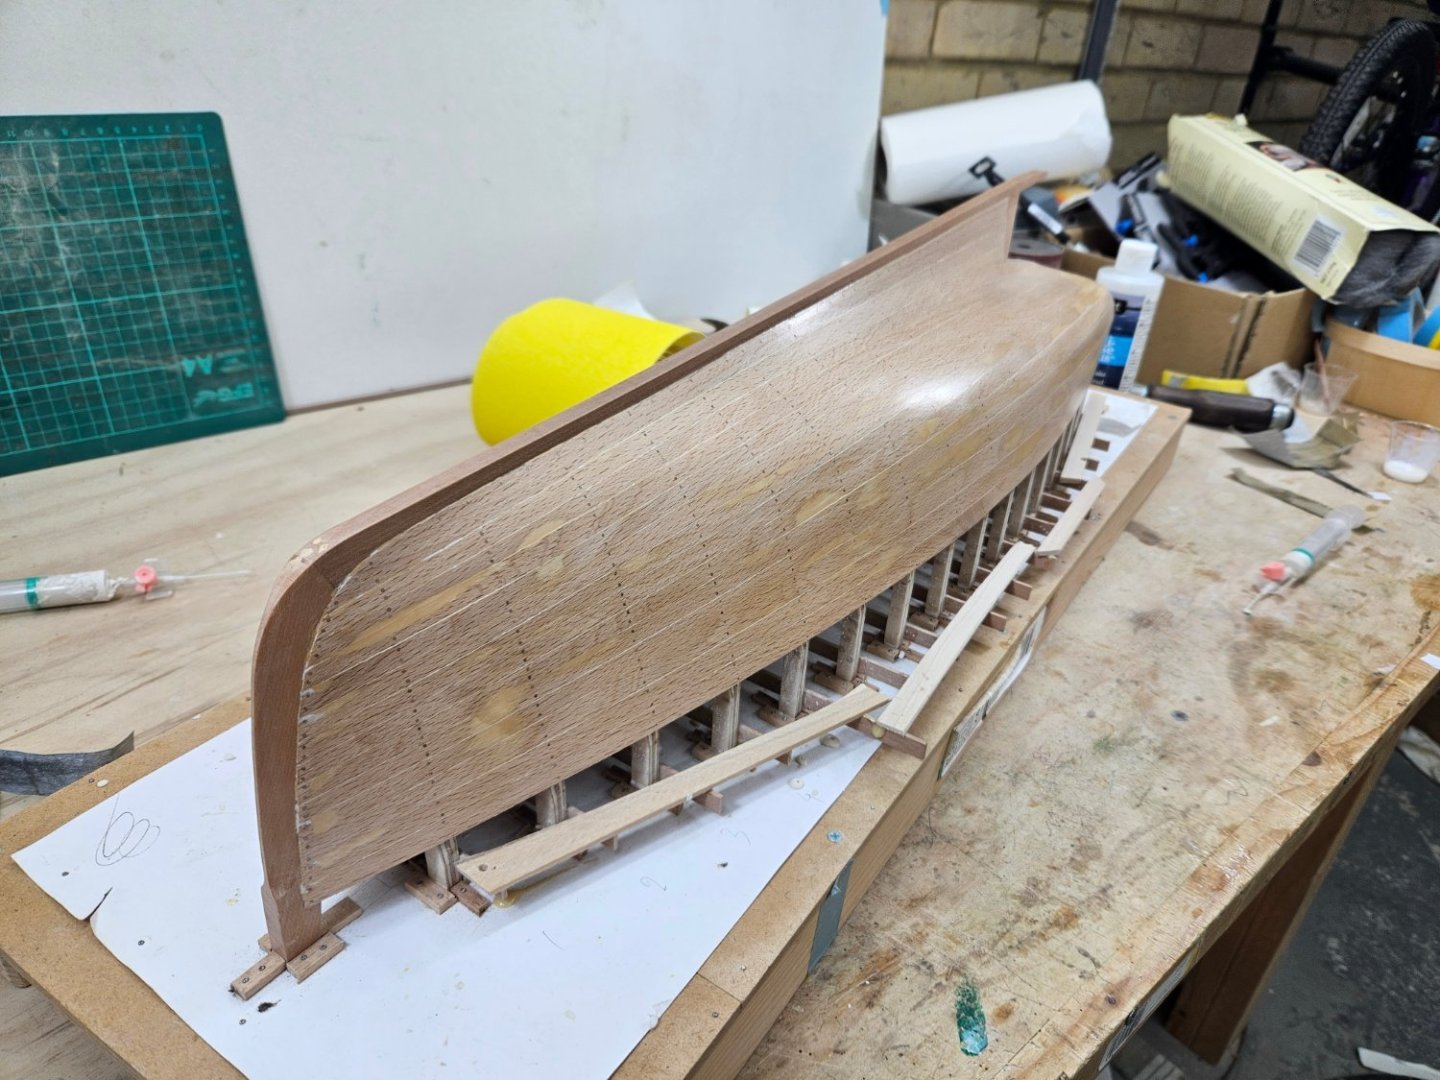
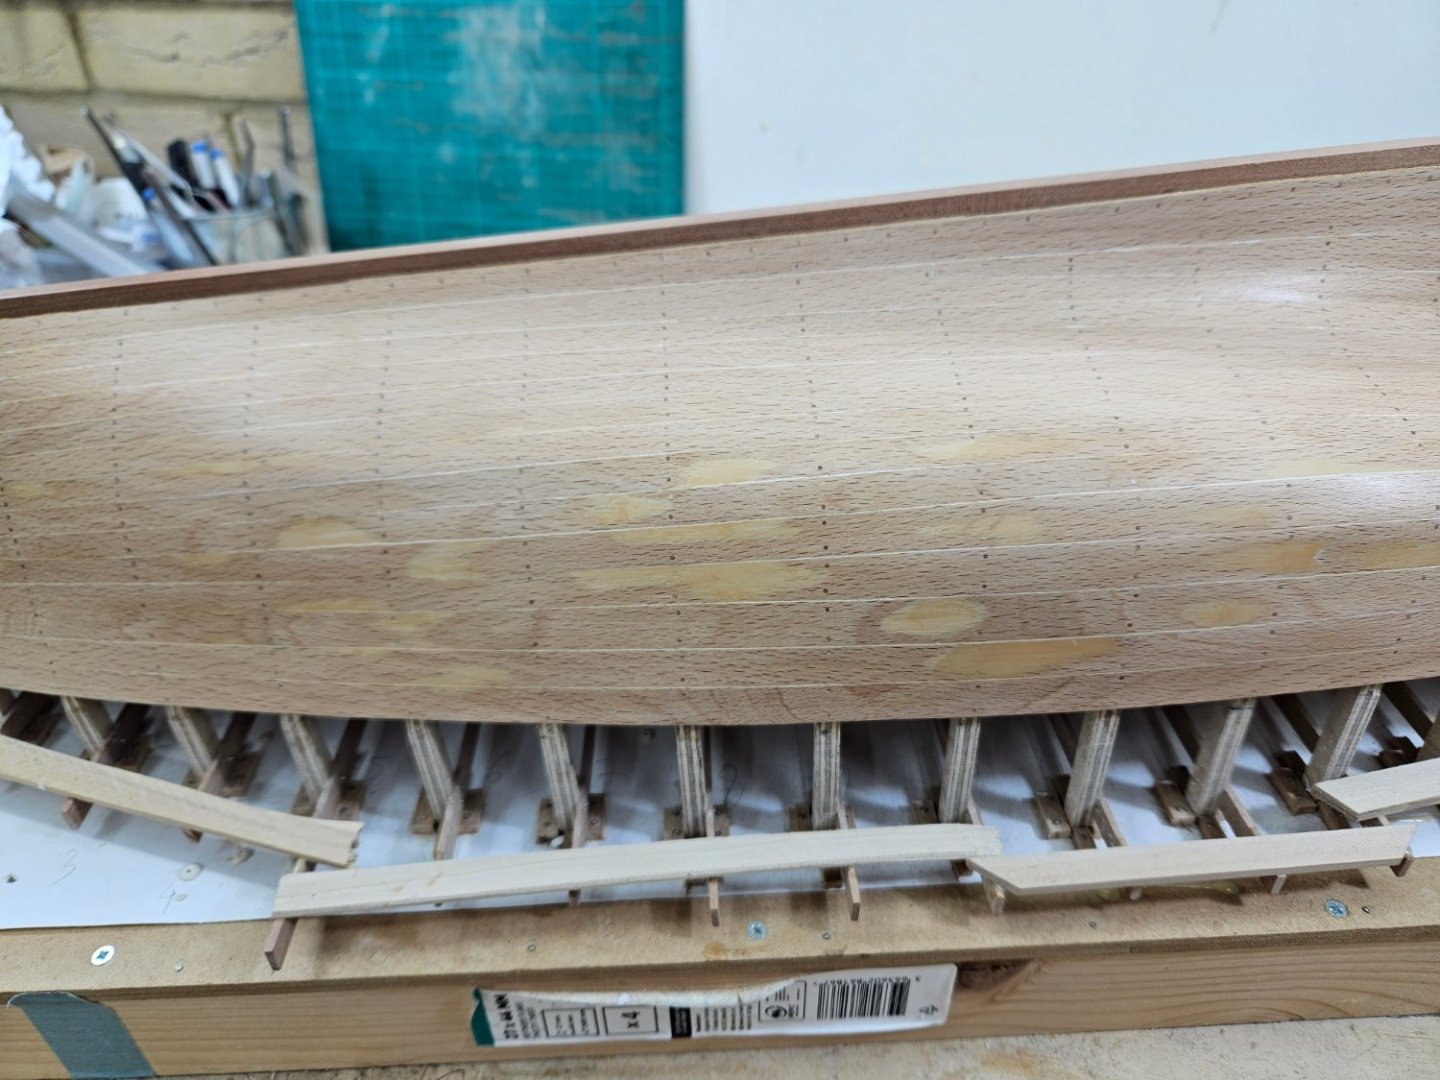
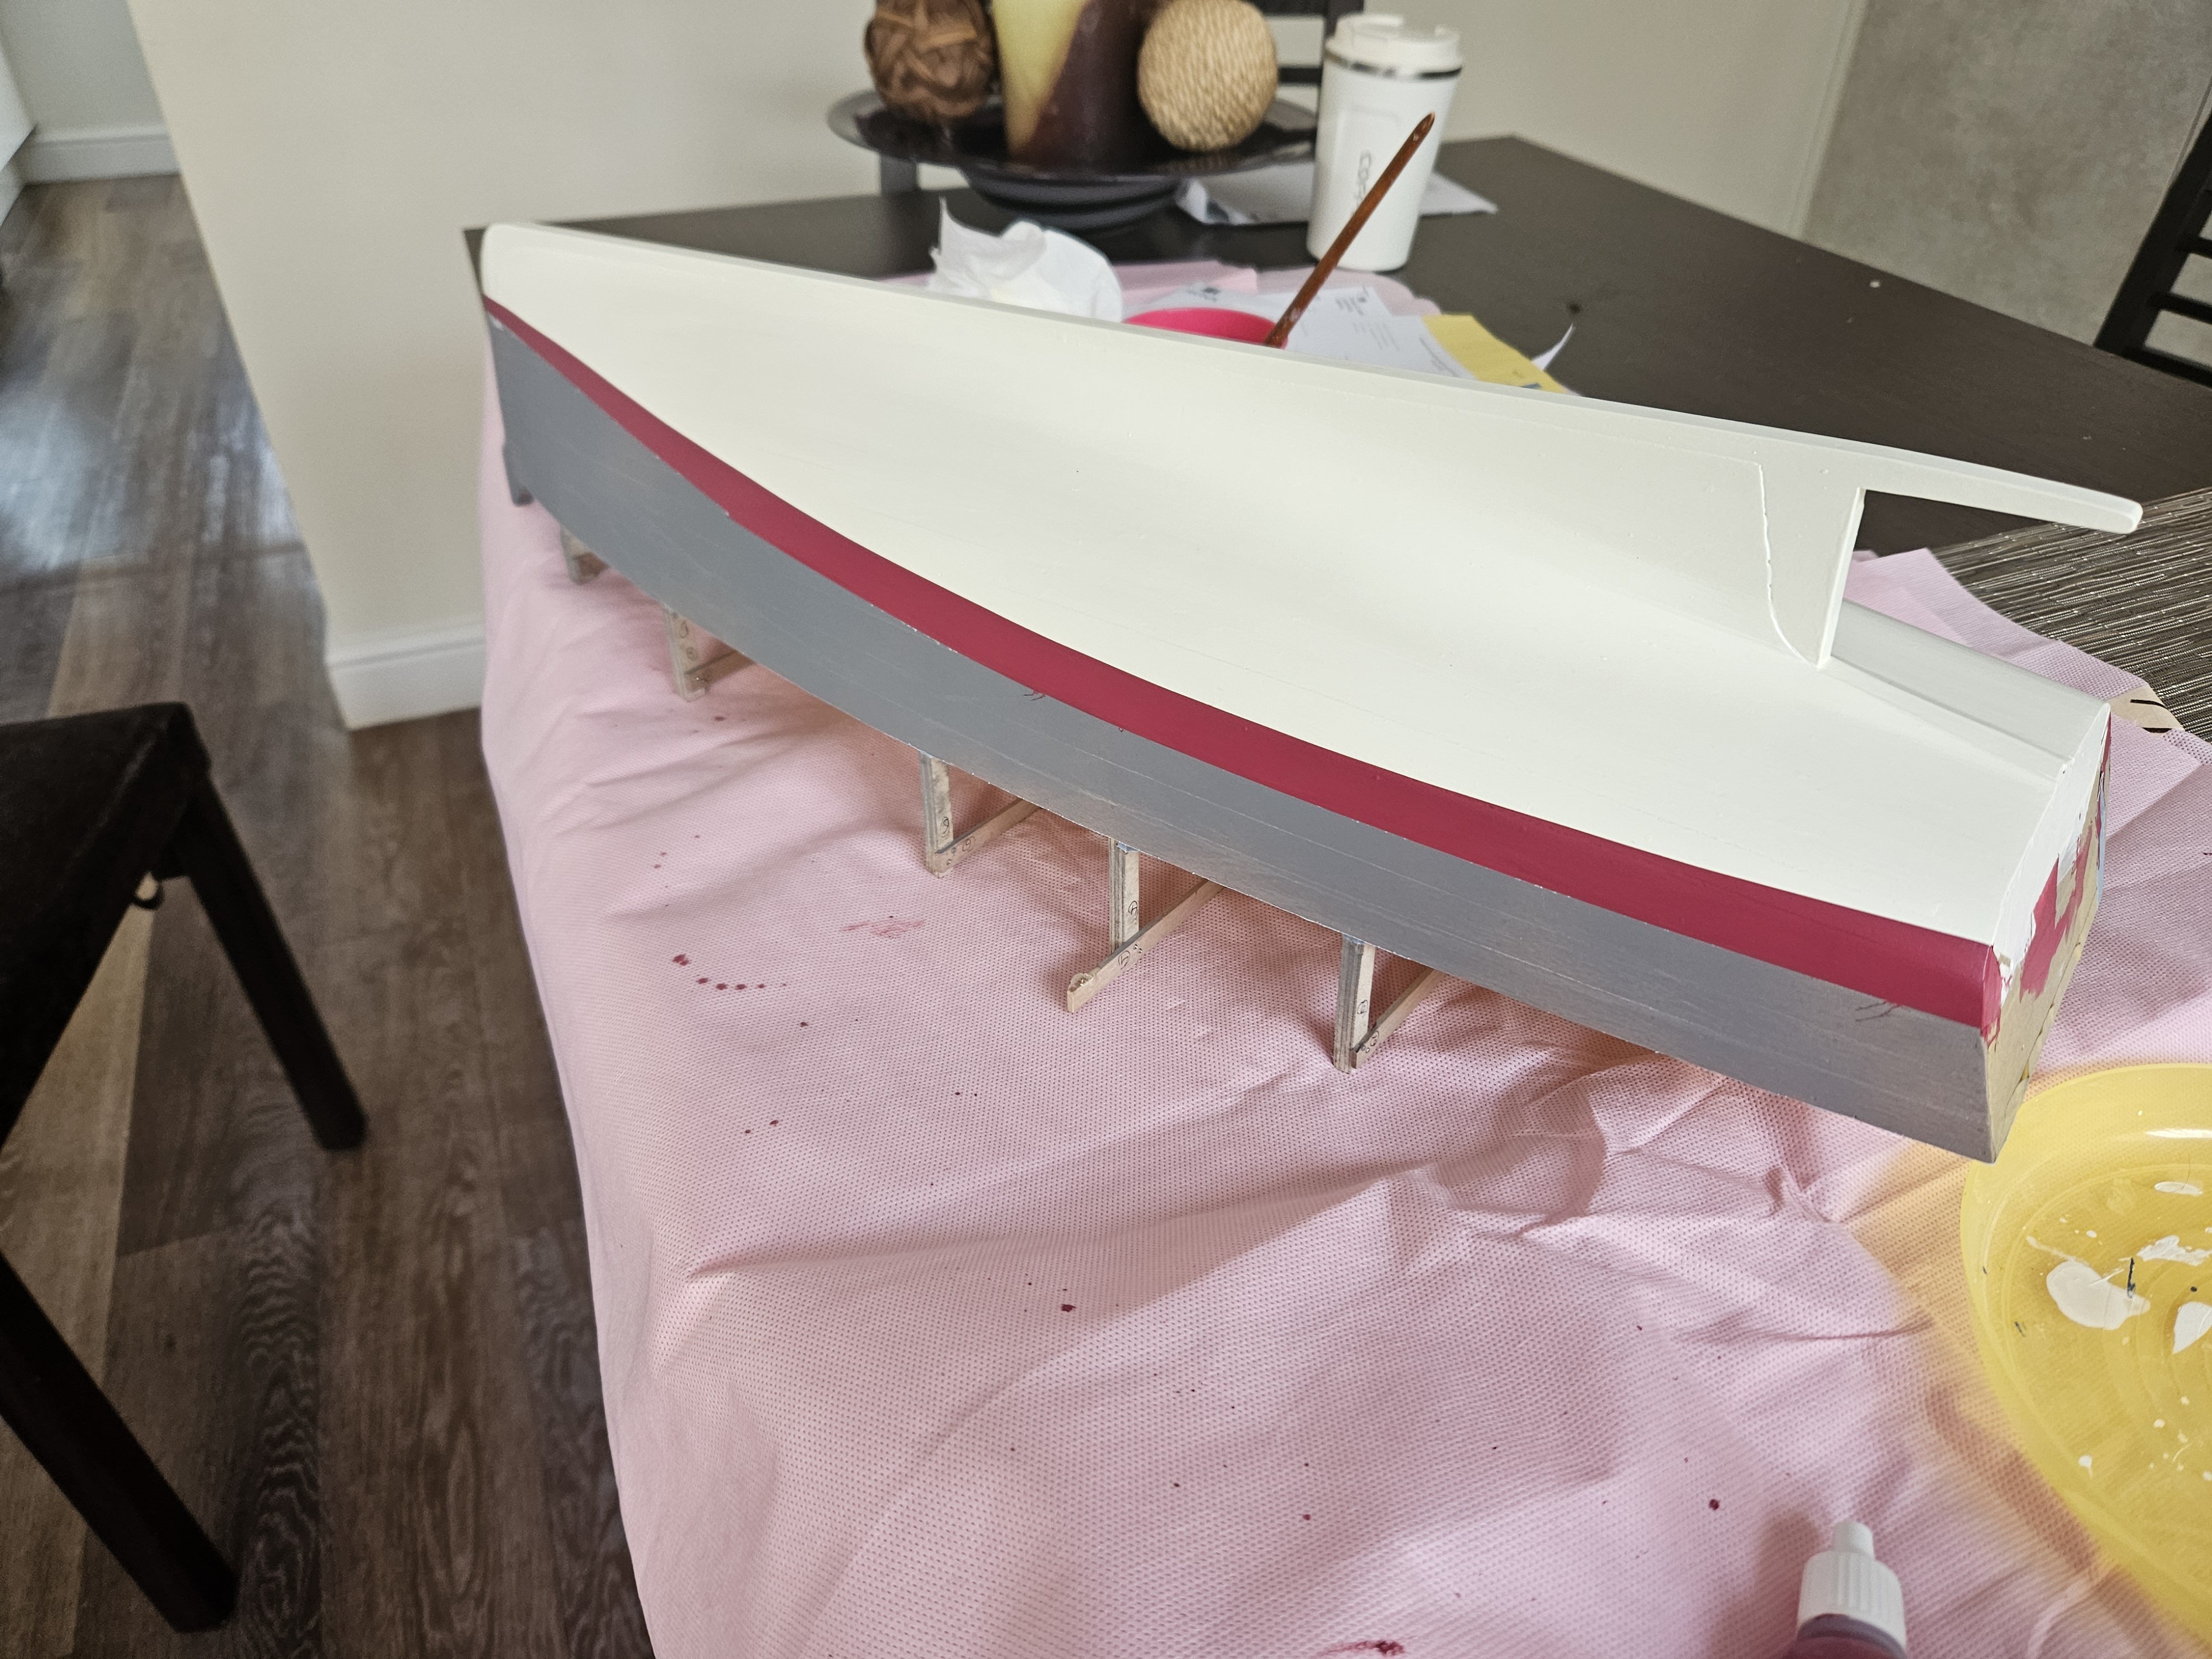
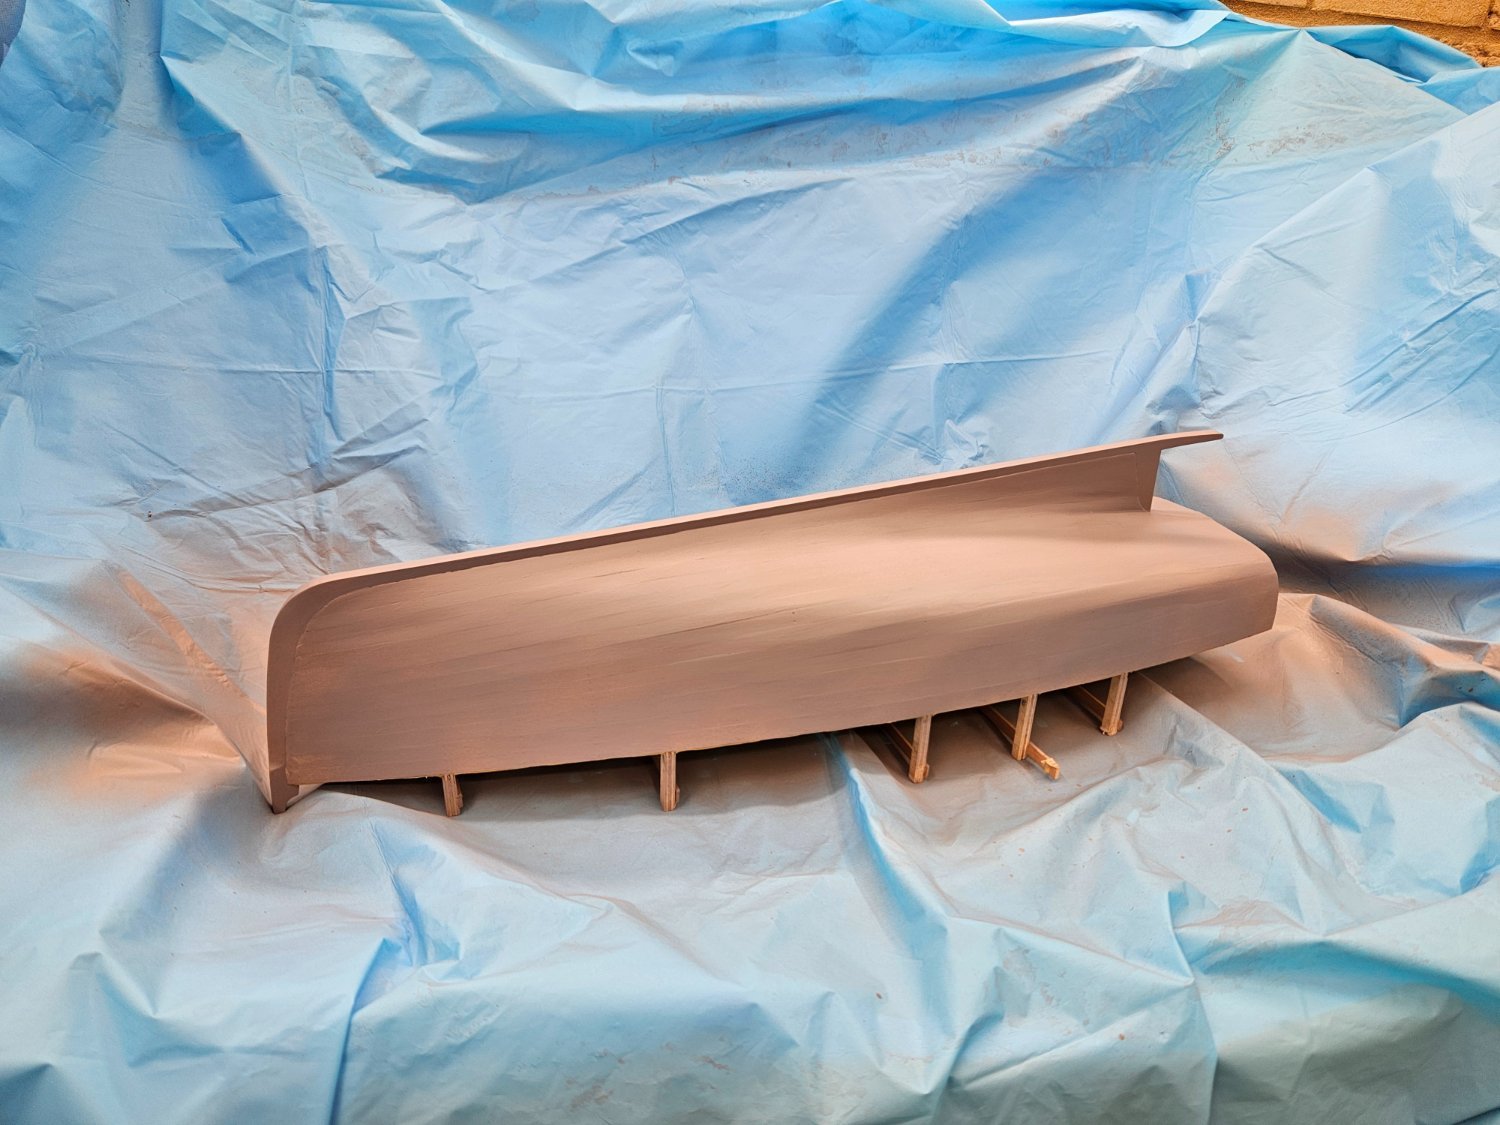
And now it is time to paint the hull! Lots of masking done (which immediately failed)
Then I sprayed some Humbrol grey primer. The photo really did not get the color well!
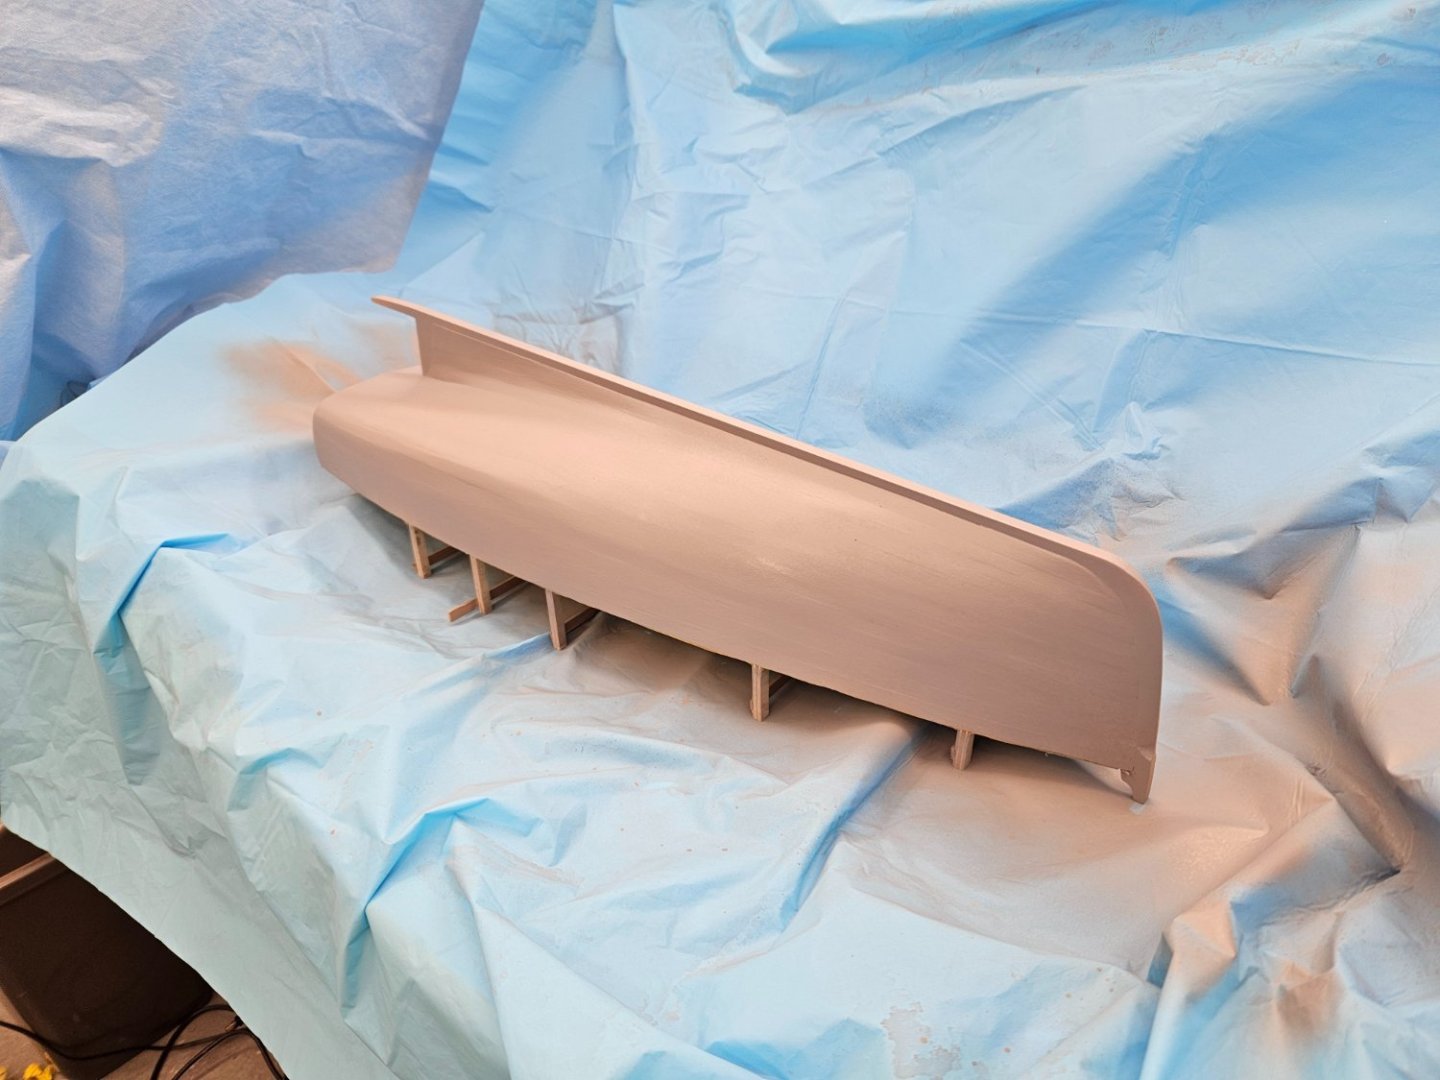

Then the waterline was marked and the hull masked further
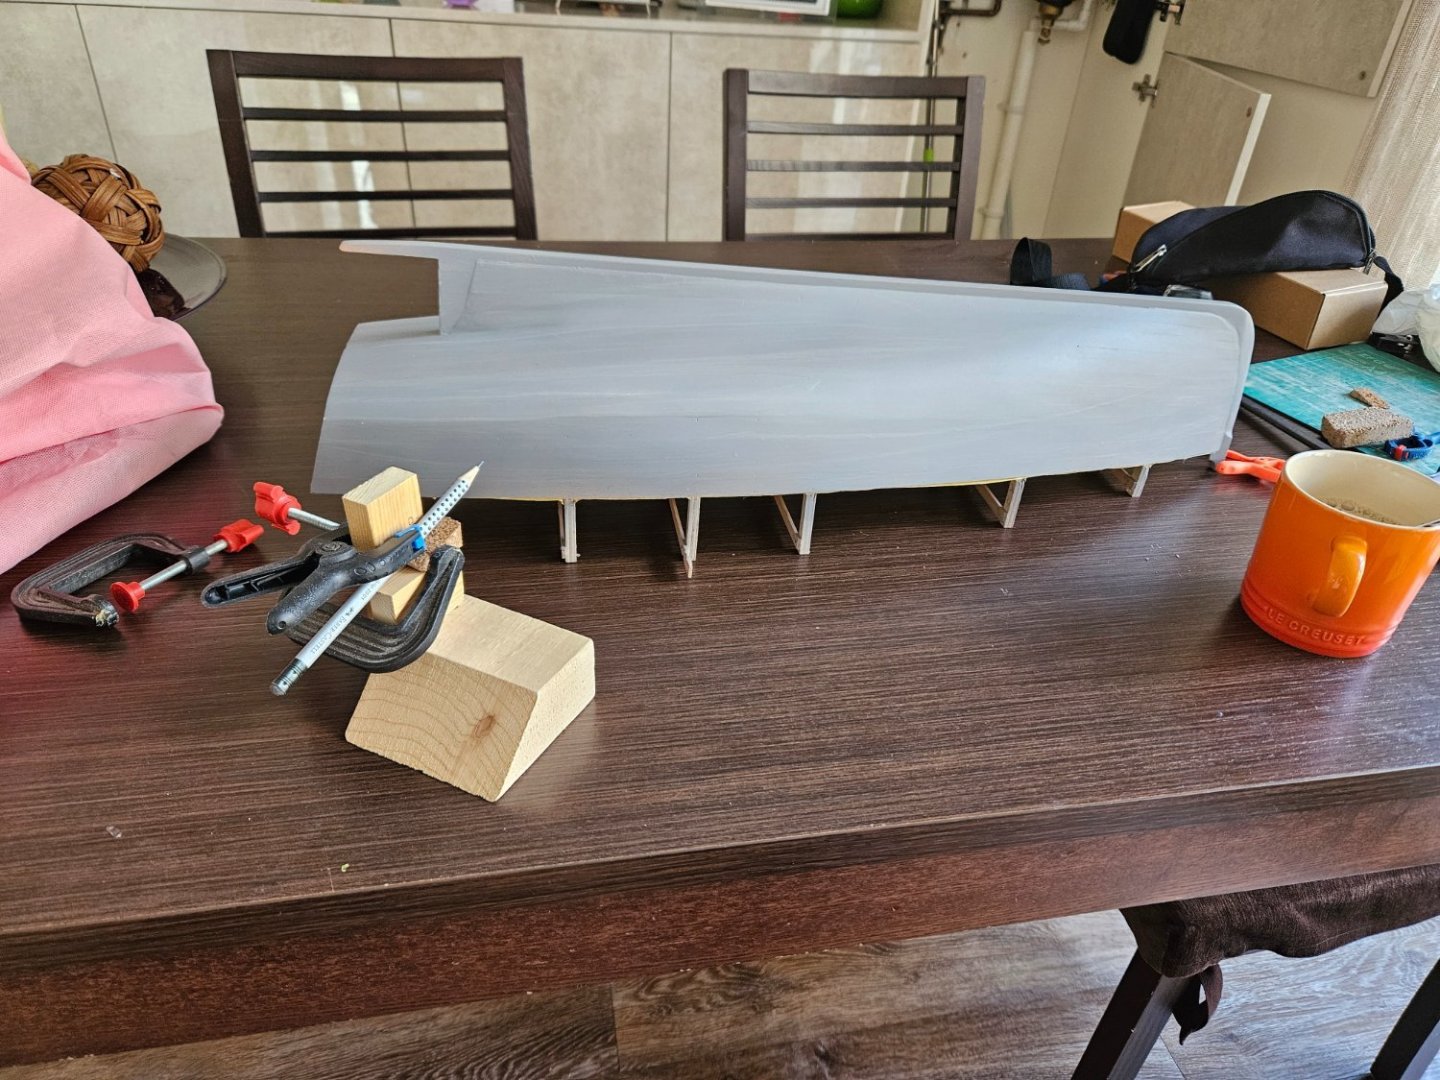
I used grey primer because I intended to use Humbrol enamels. At the last moment I decided to use acrylics, completely different colors. This is why enamels are dead.
So first coat of Valejo Ivory is brushed on. It looks dreadful:

And yes as expected, the hull is moving again!


And after 5 more coats, still looks terrible!
It will get better. Maybe I should have used enamels!
I am almost certain the waterline will mess up the whole paint job. I will try and tuck the masking tape down well but I am sure the red paint will find a way underneath. We ll see
Till next time, take care all
Vaddoc
-
Lots and lots of info on MSW, some dedicated threads as well, a wealth of info.
Test on scrap wood, not the model!
I would however suggest to buy good brushes straight away - System 3 if still around are great
Modern paints are so good that with a bit of practice and attention you ll have excellent results
Vaddoc
-
-
In my experience, there is a world of difference between cheap and higher end CA glue.
An issue to consider with any glue is the degree of contact between the mating surfaces. PVA needs excellent contact and pressure, not always possible with planks. CA just a bit of contact as it is incredibly strong. Thickened epoxy will bridge any gap but is very messy. Expanding glues like the amber Gorilla one are even messier. I would not trust contact cement for this task. Hide glue I have no experience with.
If I was gluing planks to frames I d probably go for CA. Have debonder at hand though to detach your finger from your eyelid!
- Canute, robert952 and Scottish Guy
-
3
-
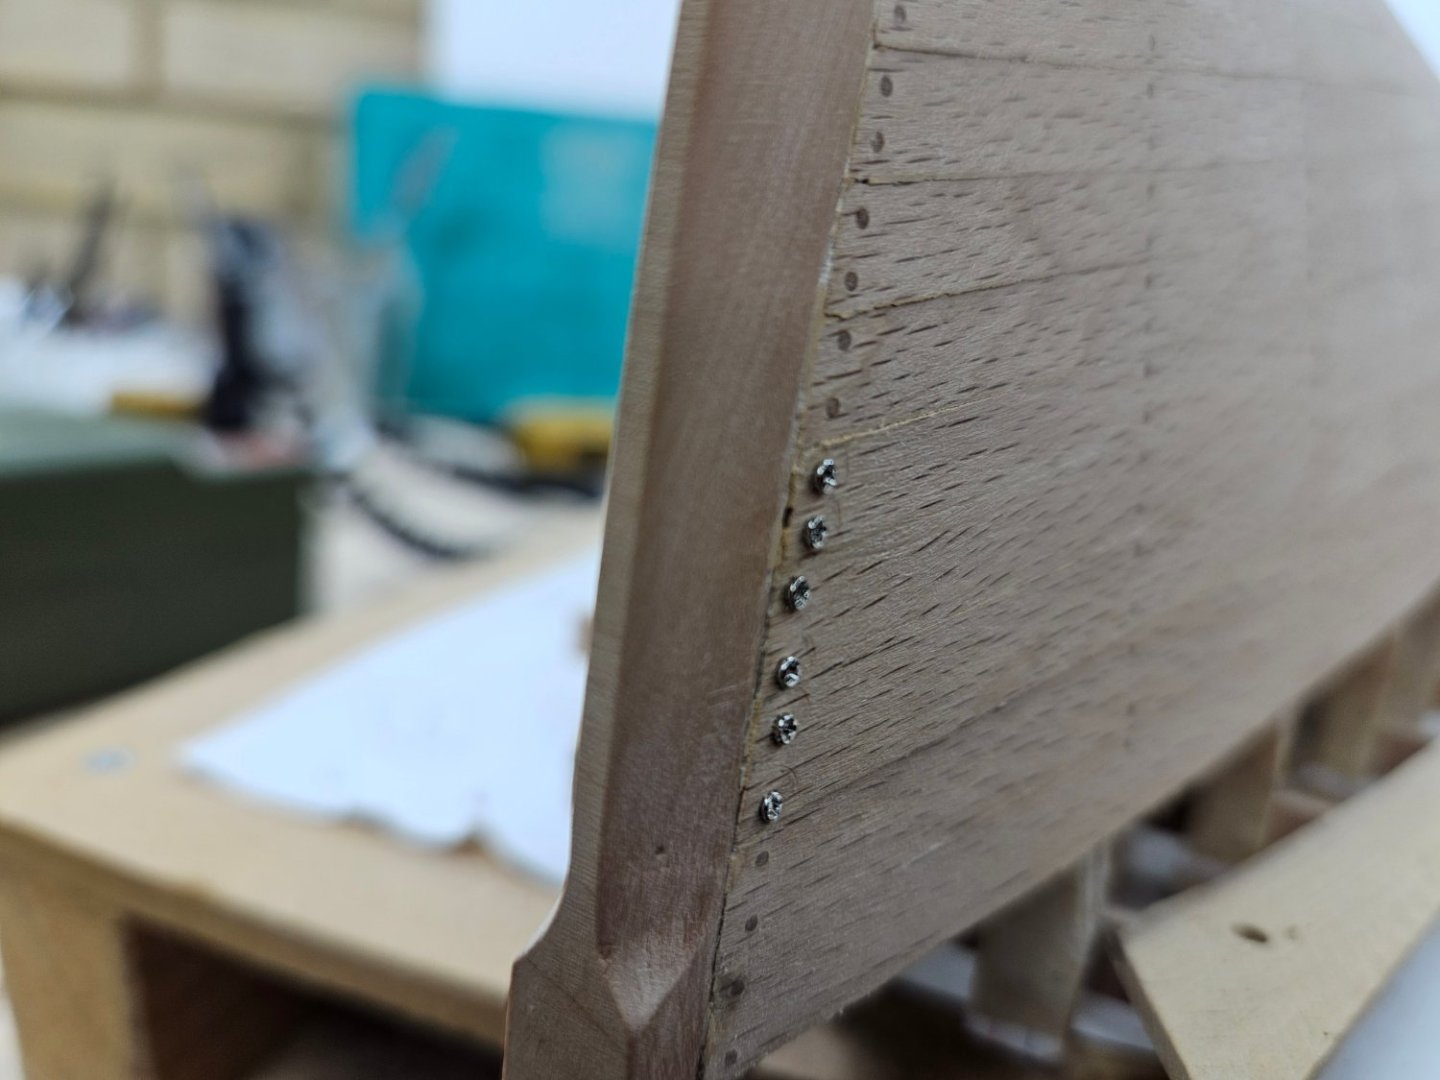
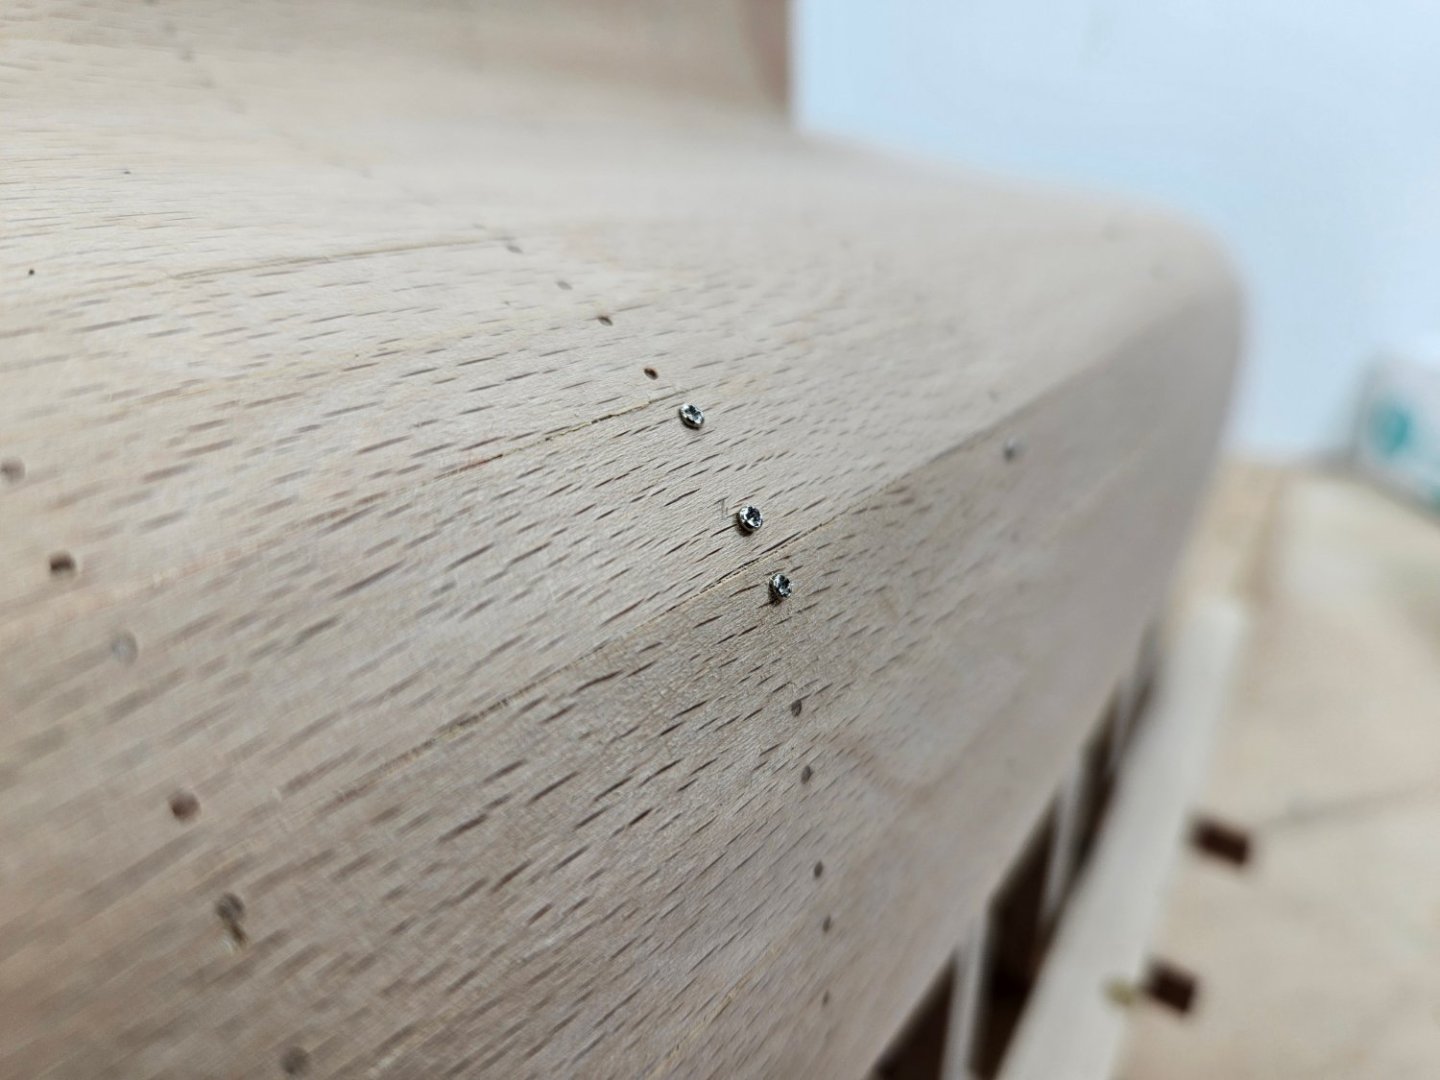
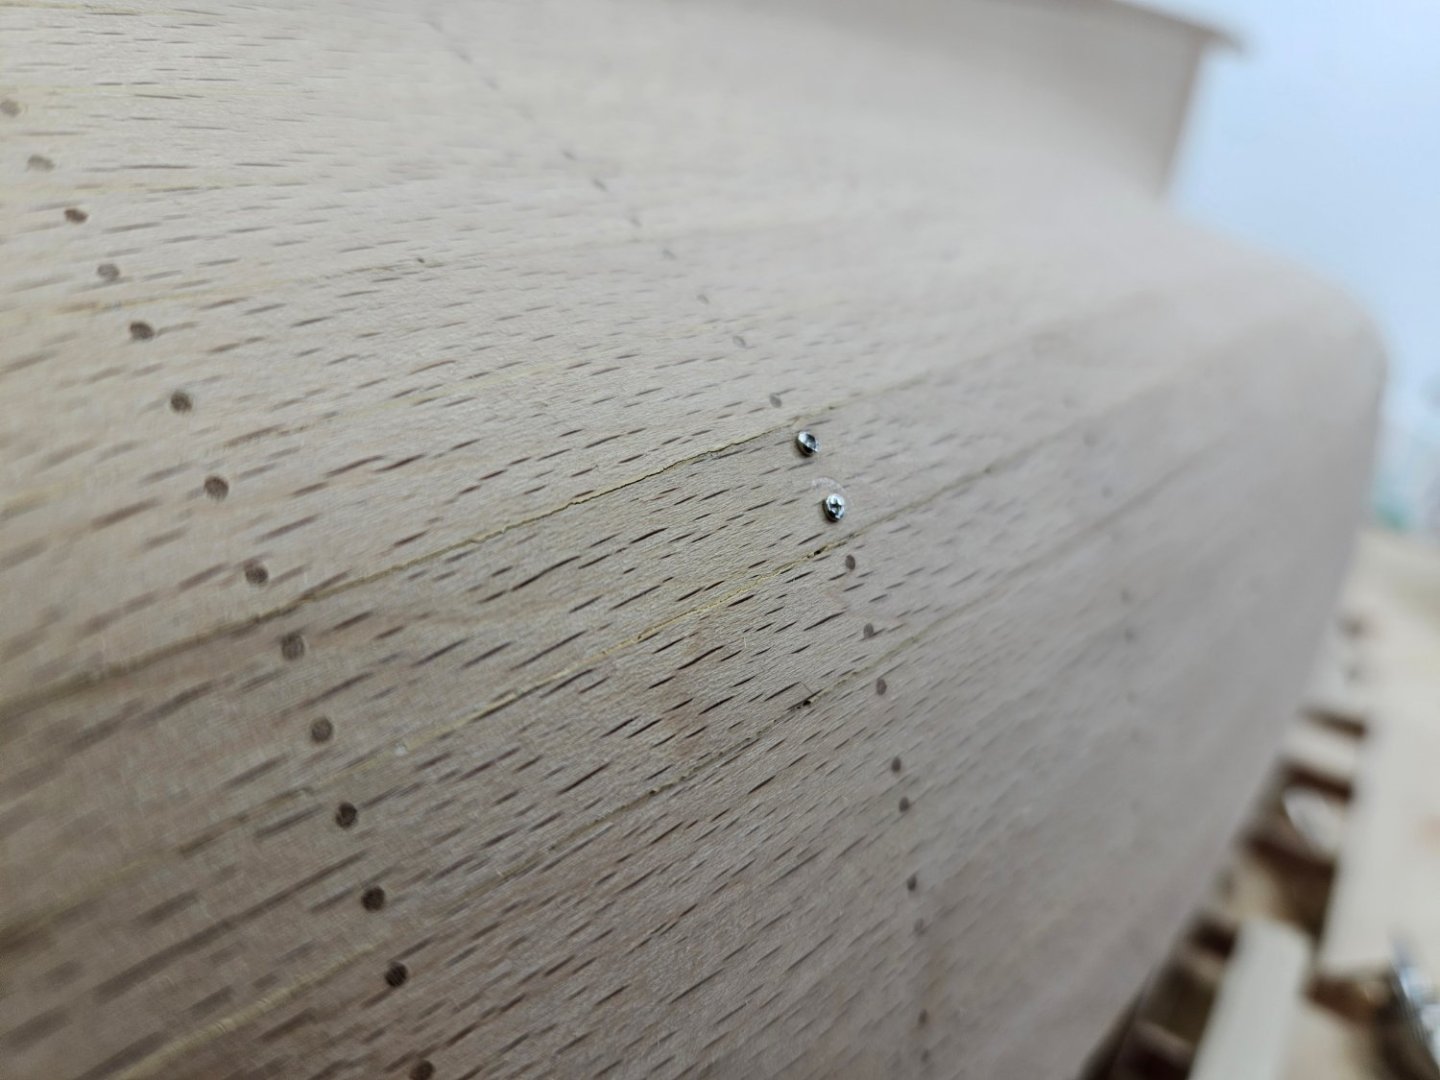
I use 1 mm screws which I then replace with wooden nails. In the past I ve used brass wire dipped in CA glue. All planks in all of my models are fastened this way - no plank is glued.
Once I thought of threading brass wire and using it without glue but the amount of work needed would be far too huge.
- Scottish Guy, robert952, mtaylor and 1 other
-
4
-
Dear all
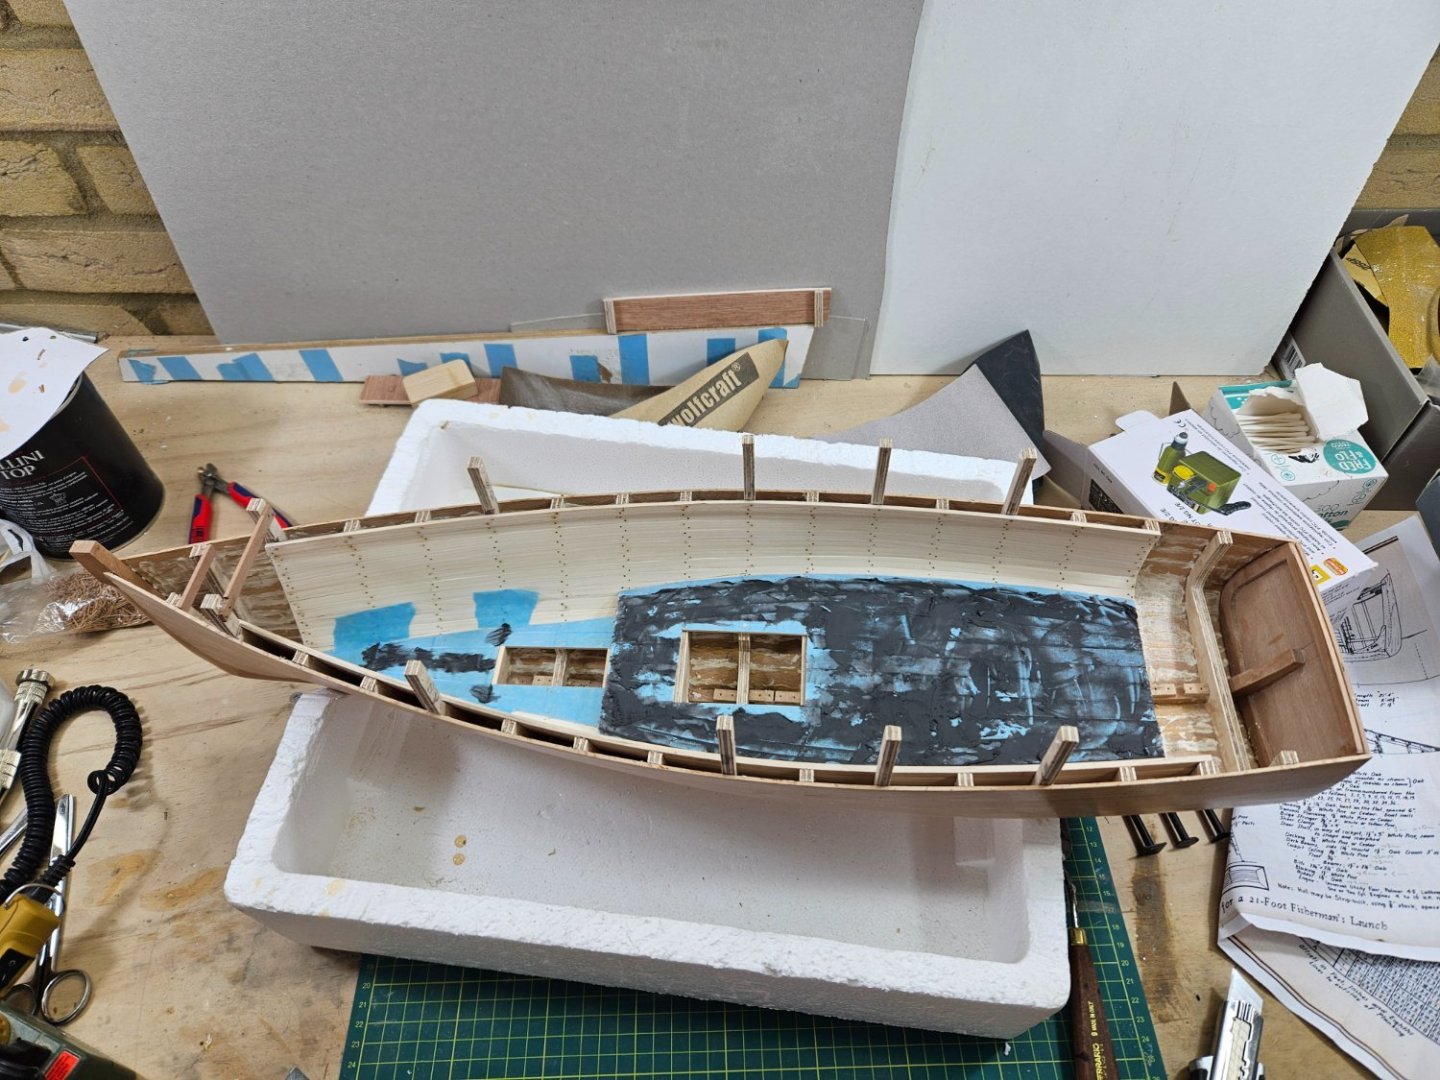
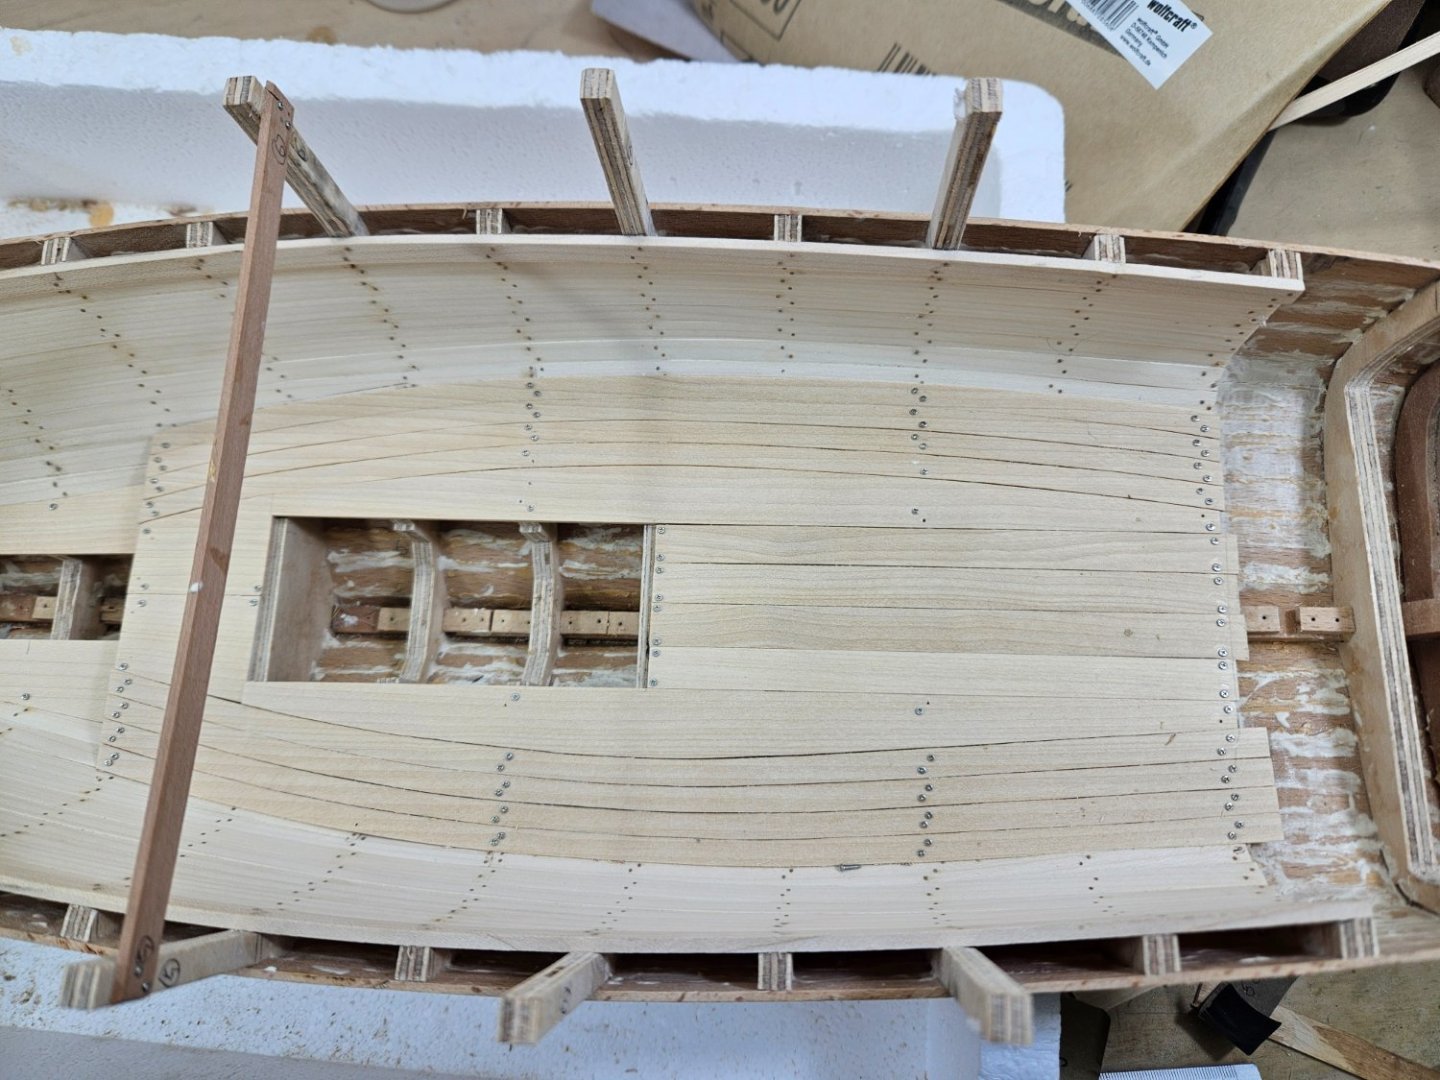
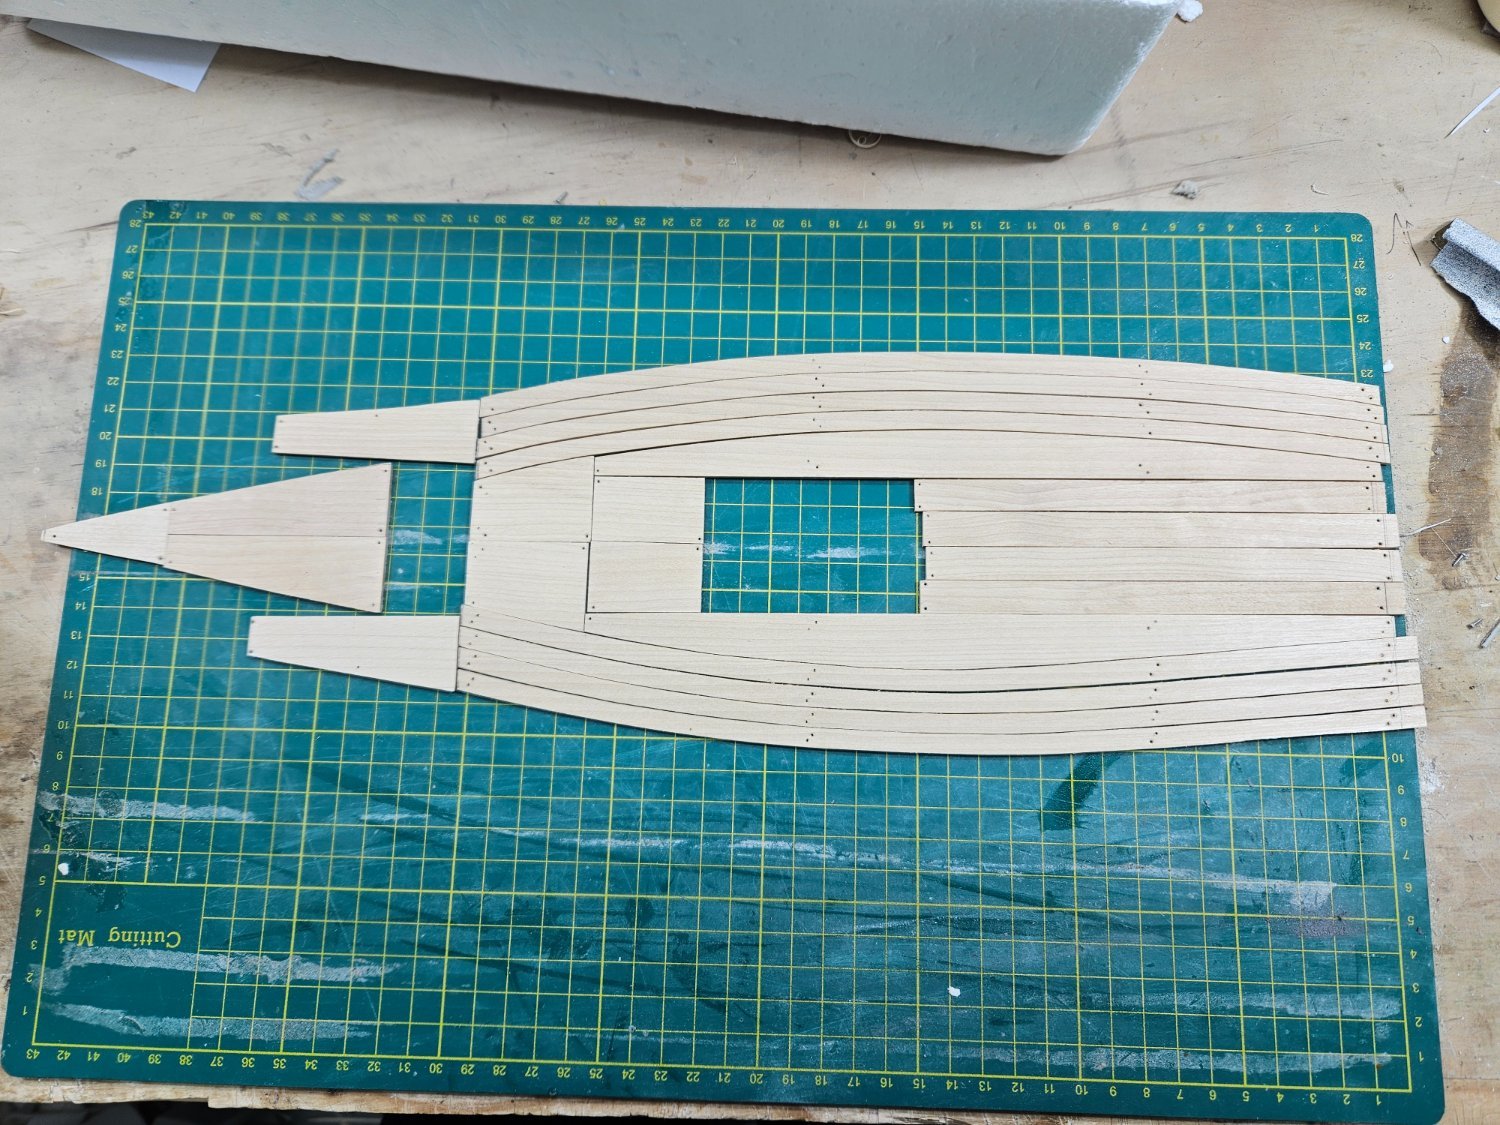
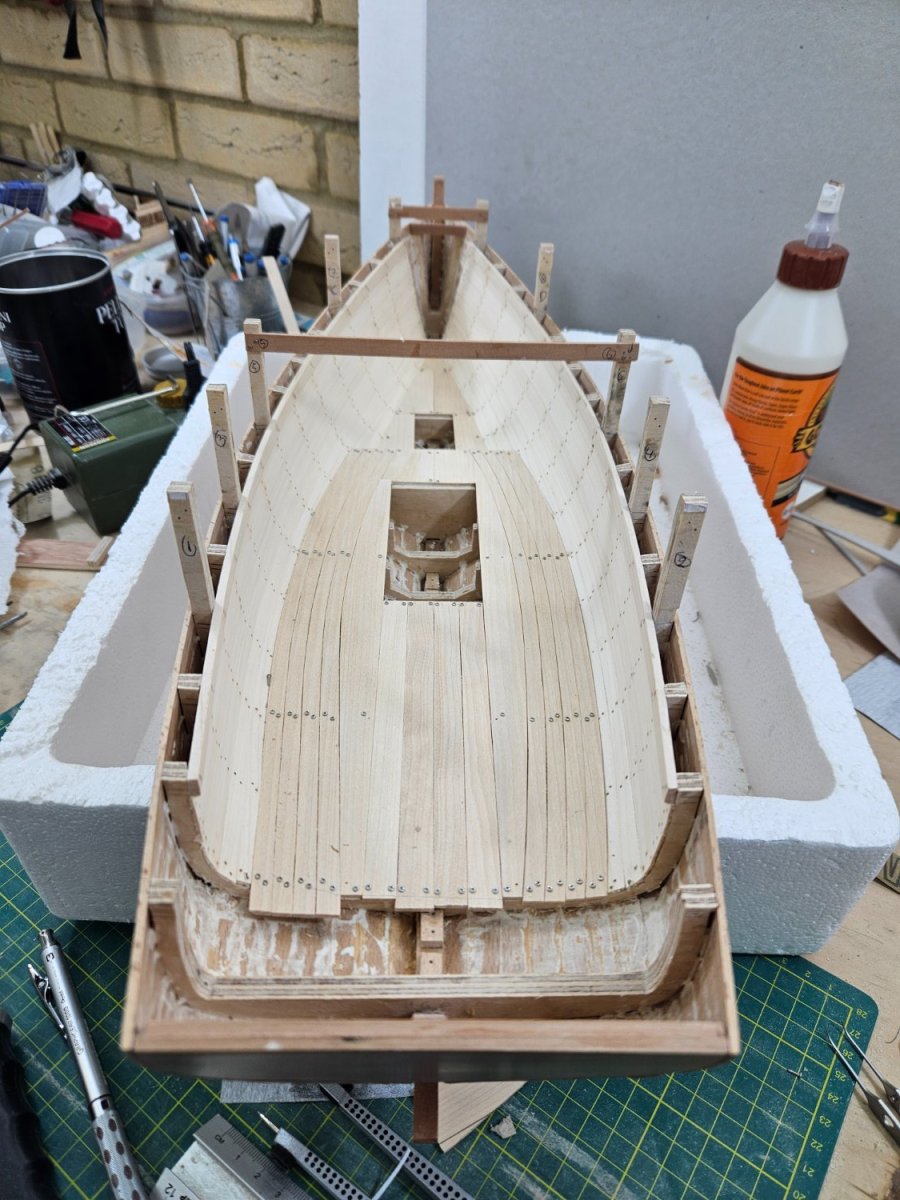
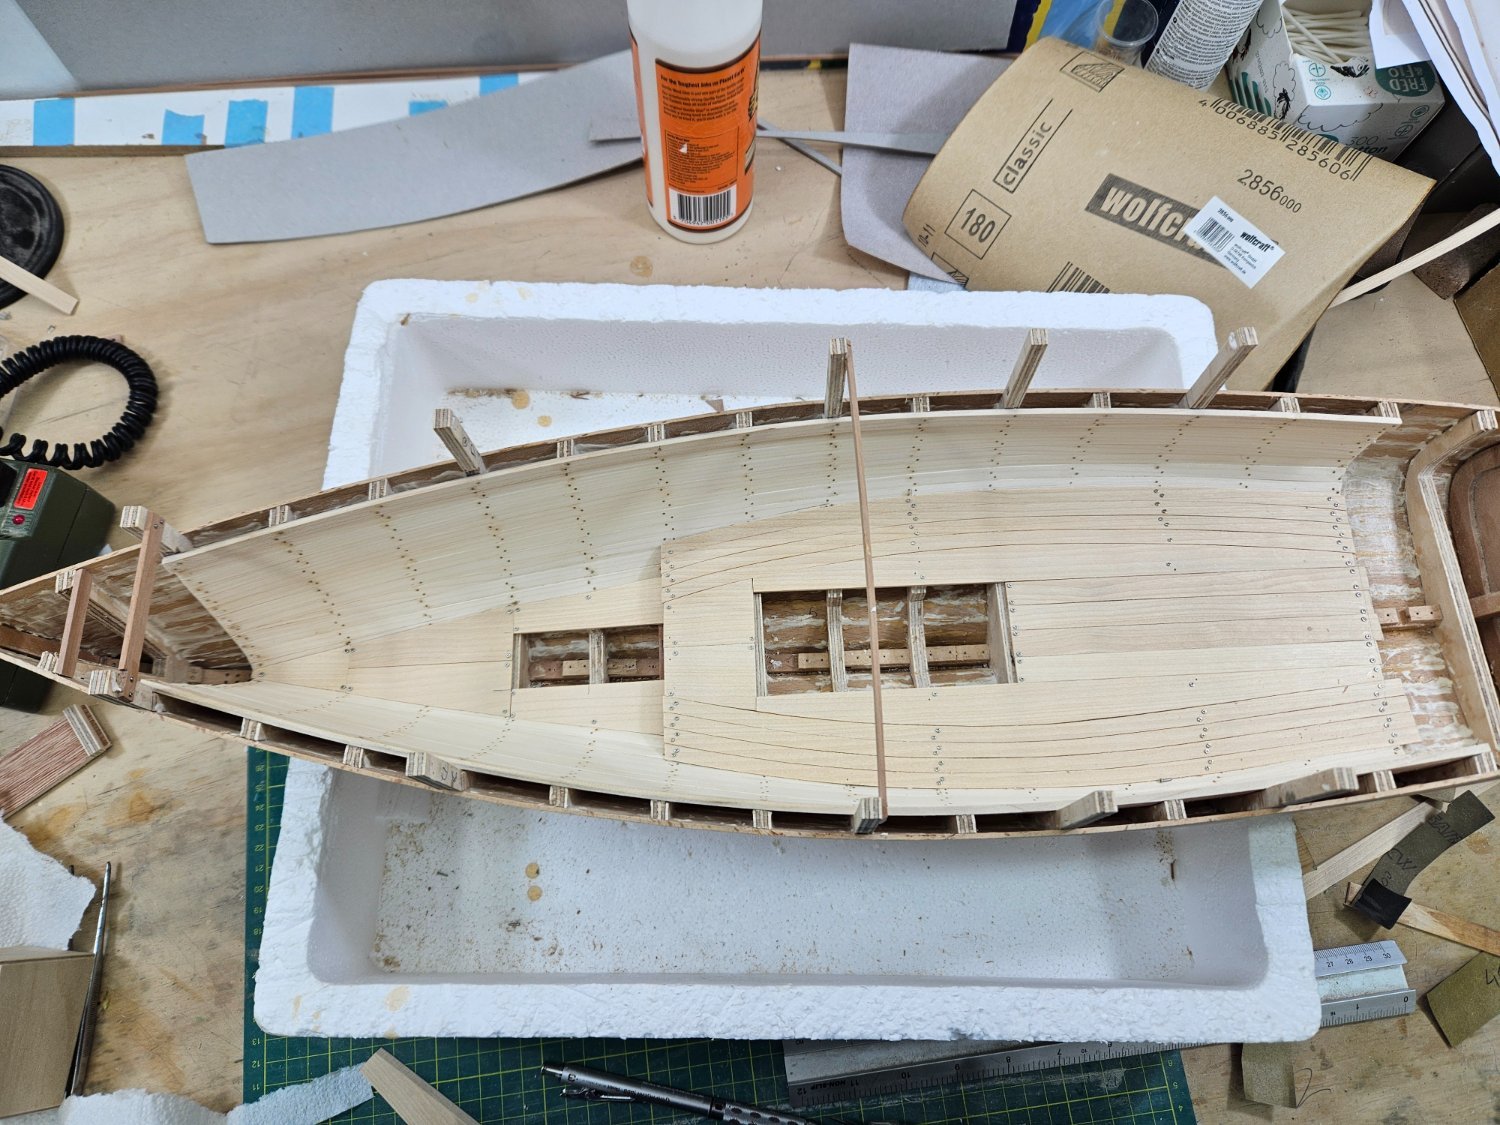
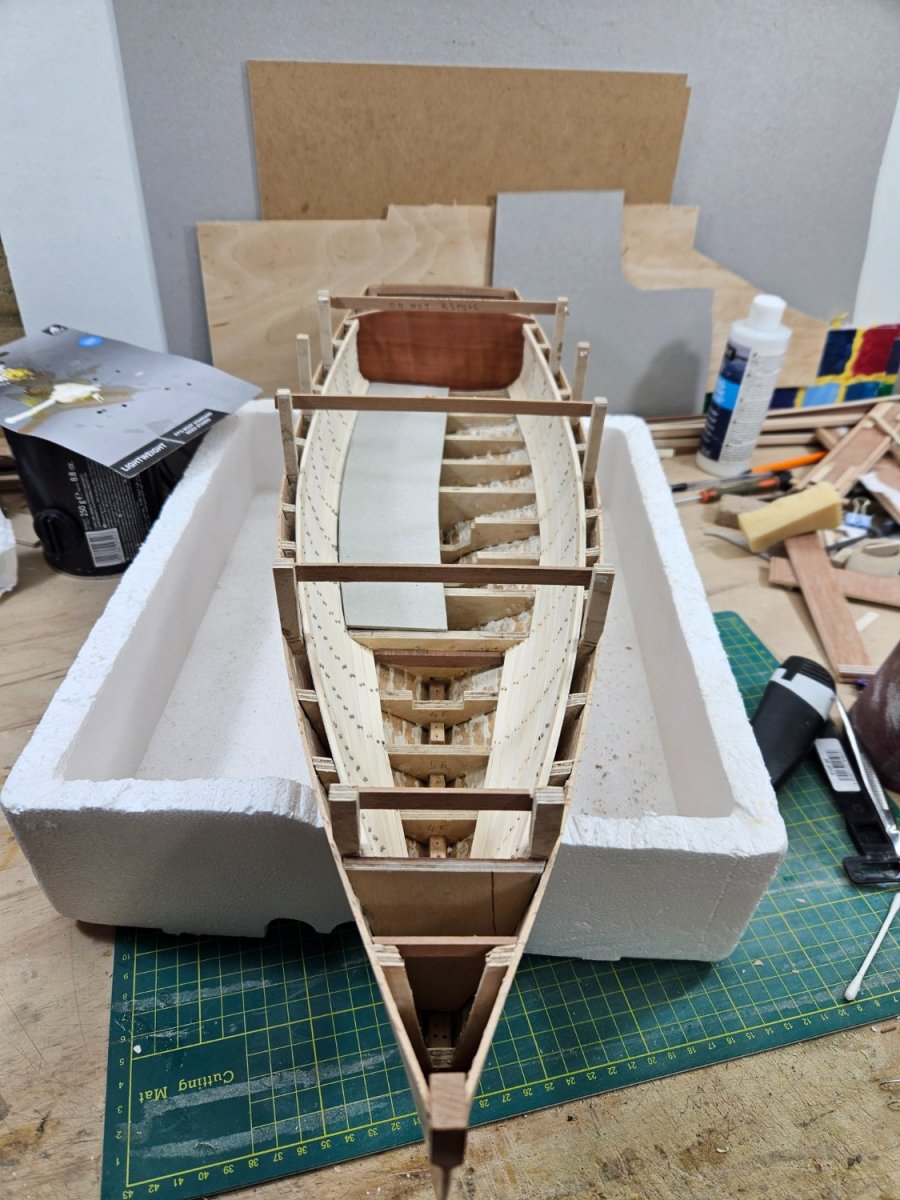
A bit of progress but a also a bit of a milestone: The deck is done! Still needs lots of work, treenails, sanding, caulking etc but the arrangement seems ok - I hope in the end it will look more tidy. The wood is maple but has a different color than the maple used for the inner planking. One of the planks aft stands out as, not sure where I cut it from but it needs to be replaced.


Take care all
Vaddoc
-
Thank you John and Nils
@Mark Pearse Mark, the wood is already sealed inside and out! It has reduced the movement but not completely. Maple that I ve used in the past, does not move at all. Isn't boat building fun!
Vaddoc
- Mark Pearse, Mirabell61 and mtaylor
-
3
-
Dear all
Many thanks for your comments and likes.
@Dr PR You are right re: epoxy Phil, but I ve used beech wood - couldn't have made a worse choice!
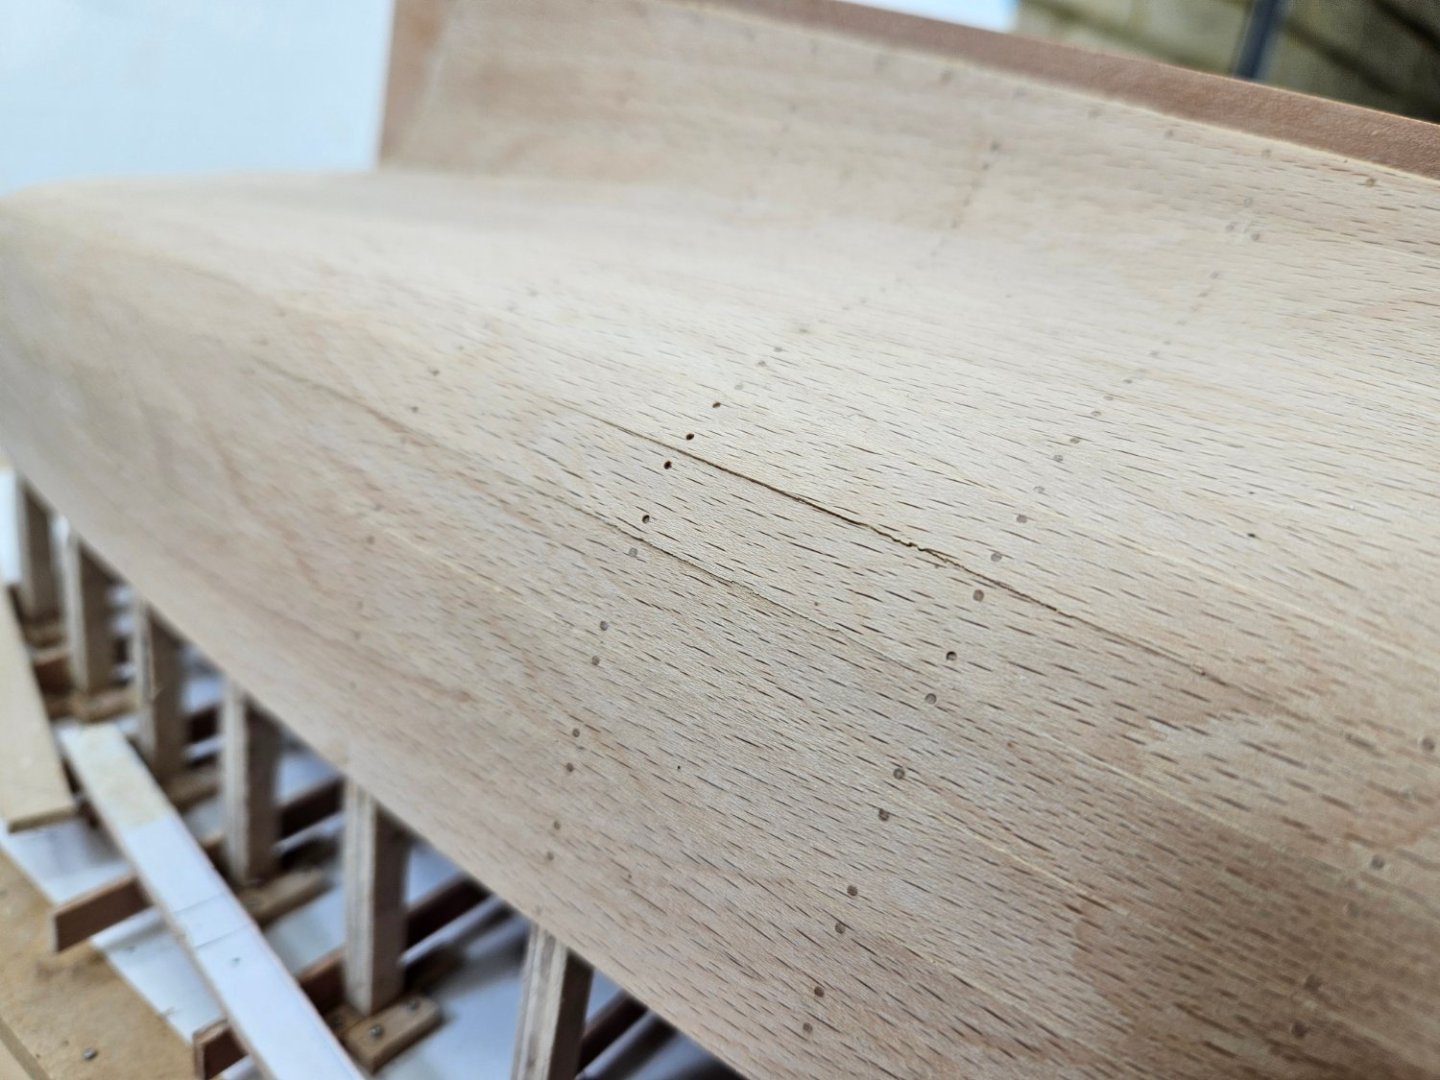
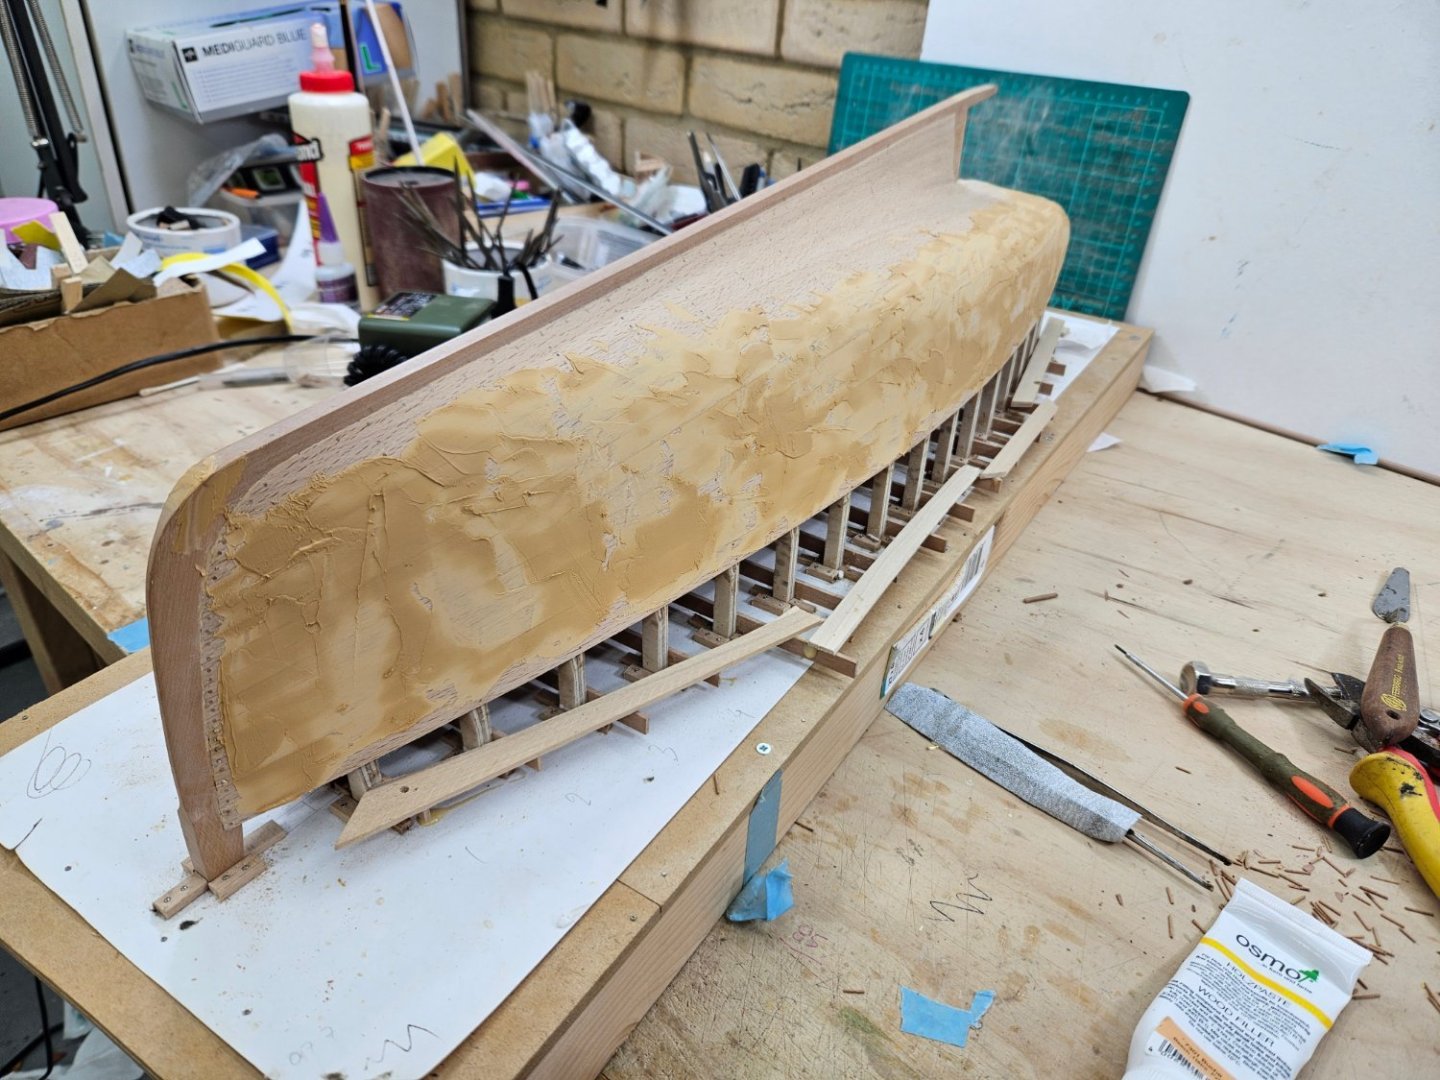
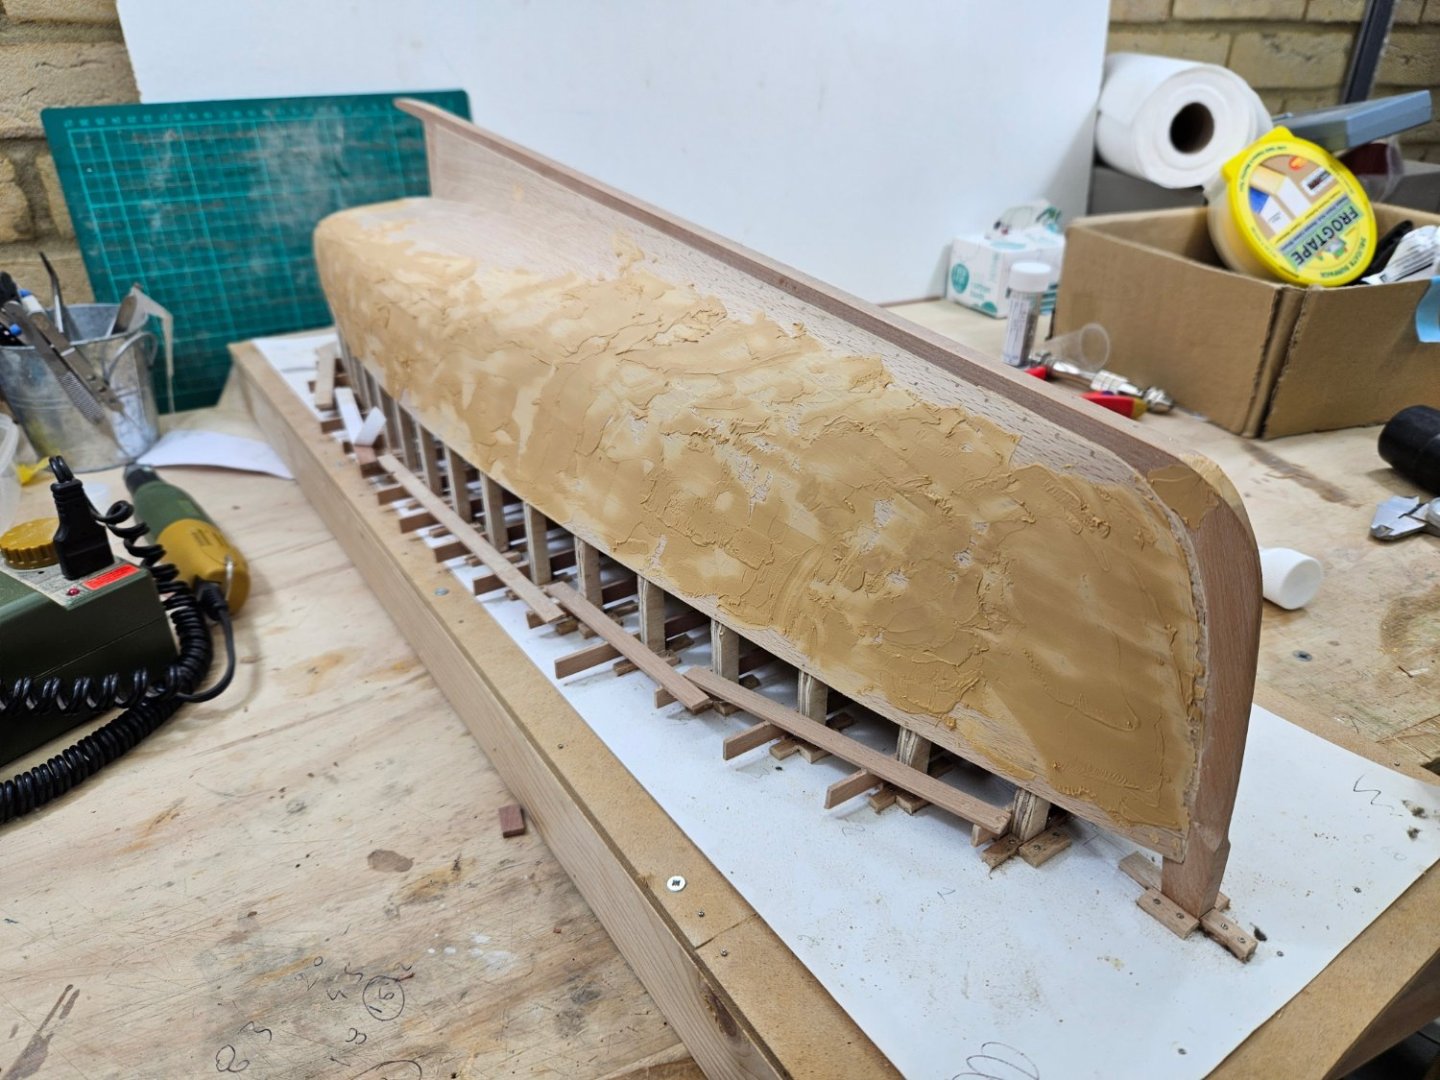
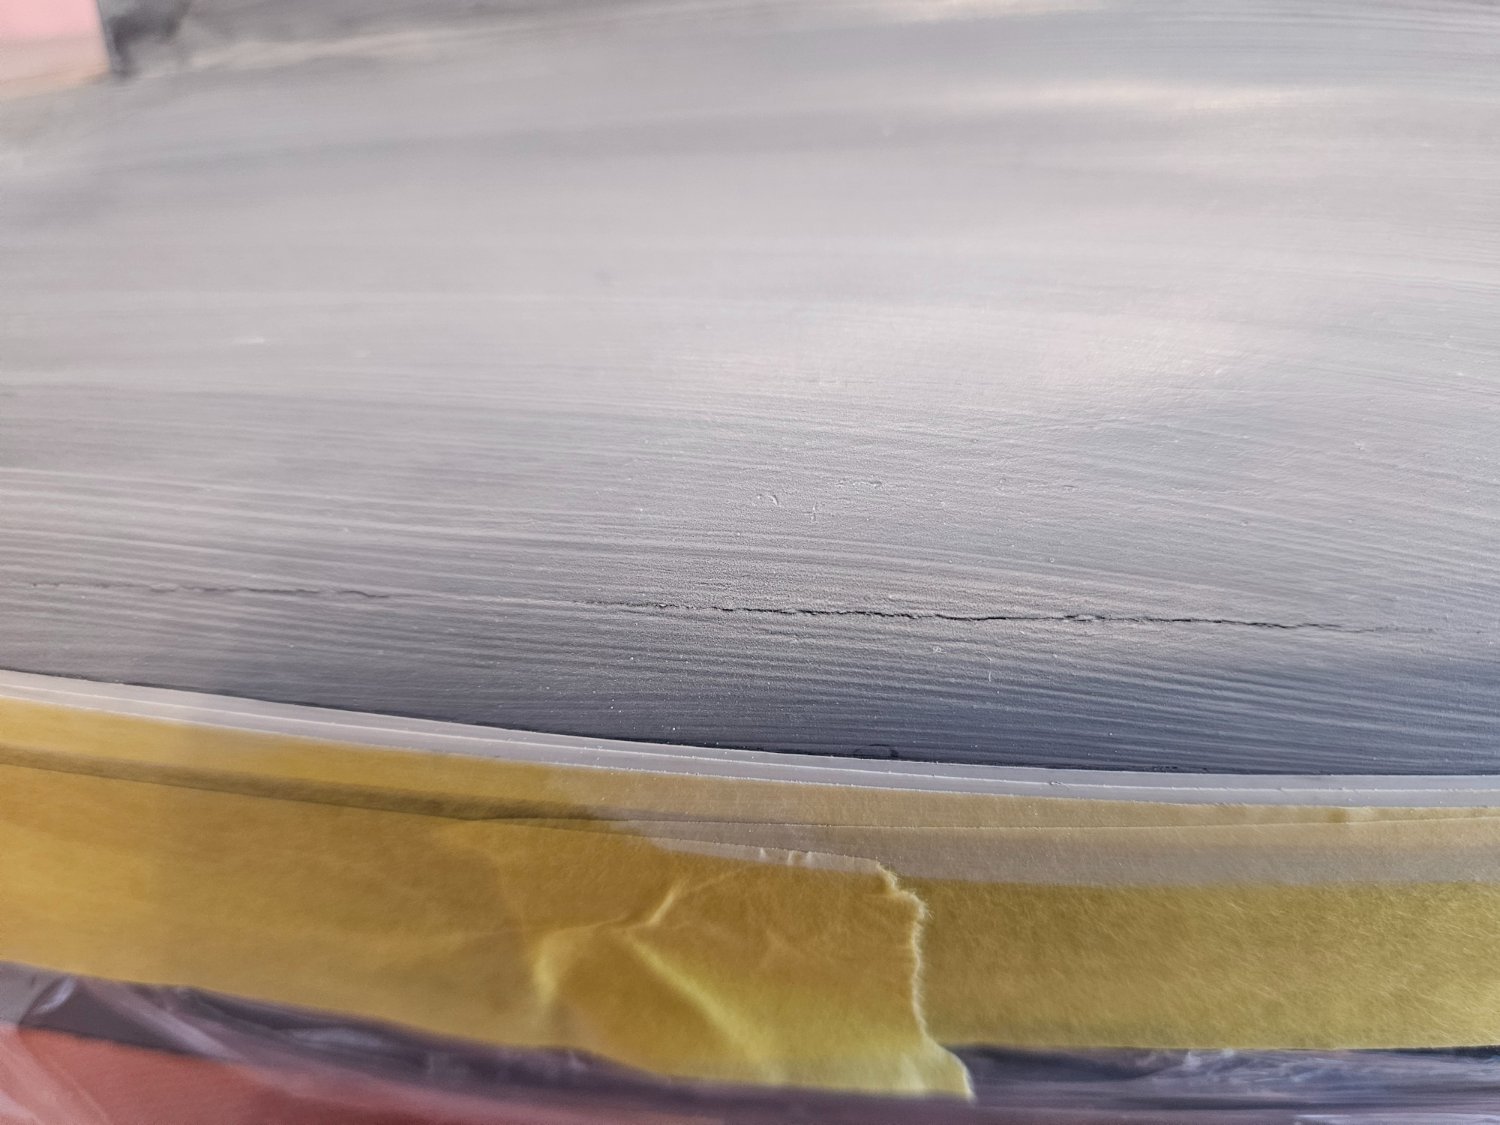
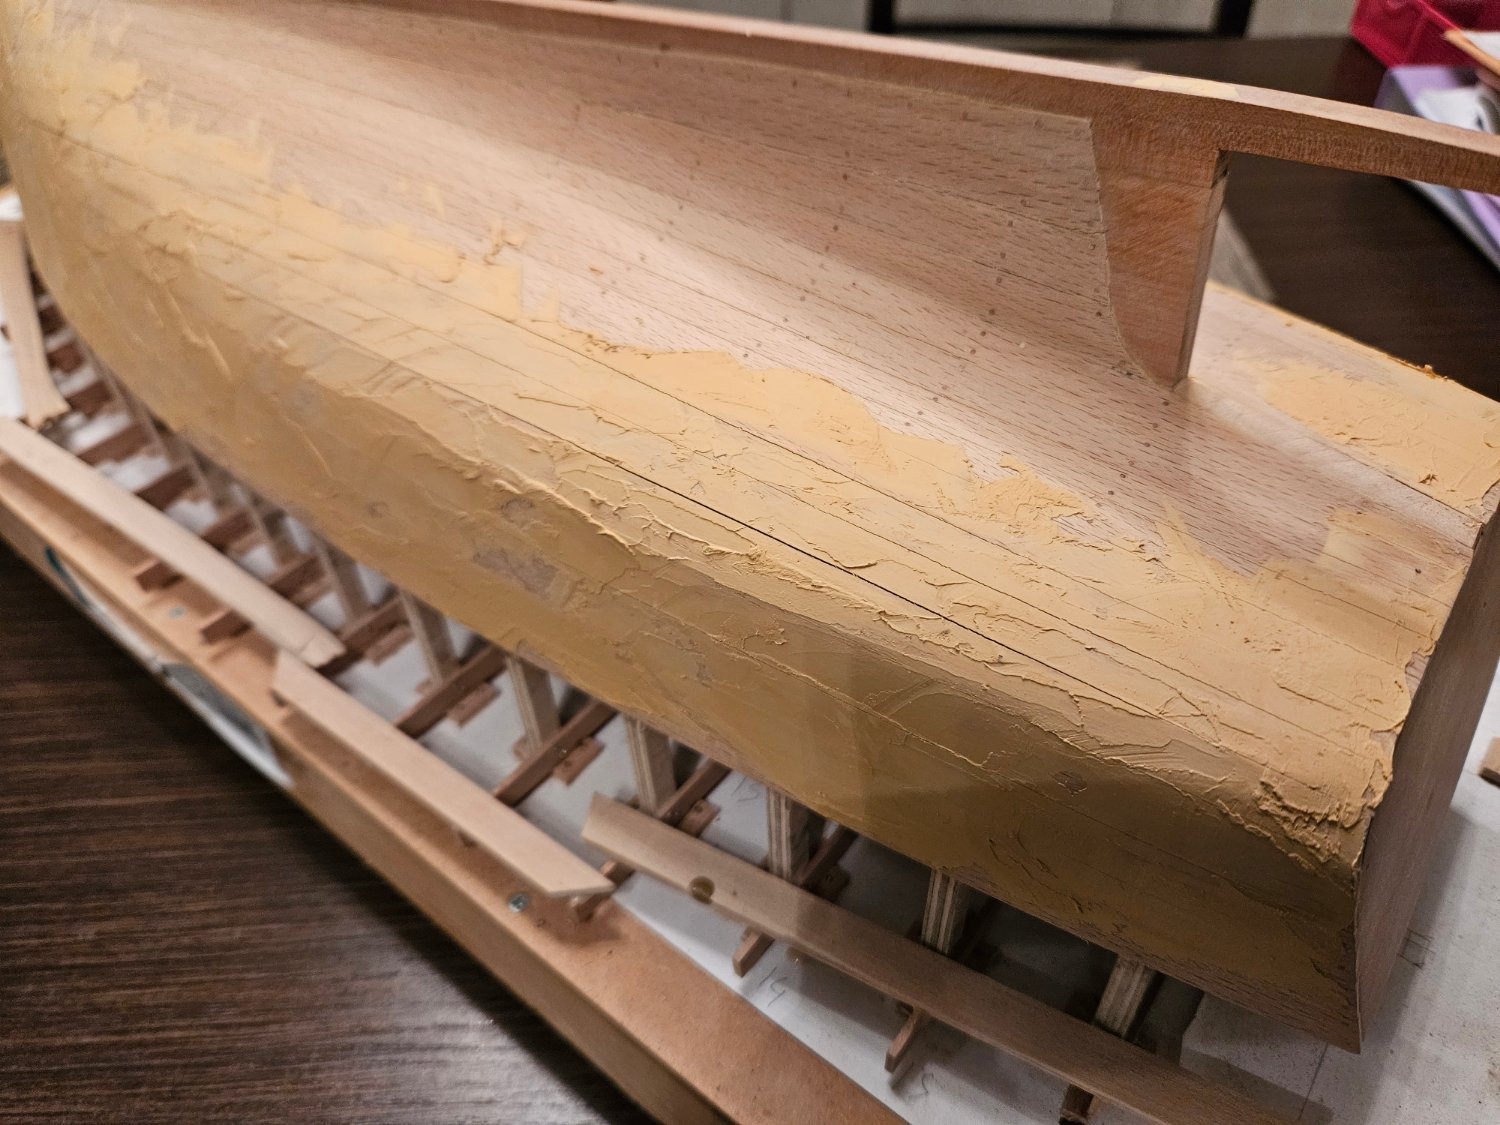
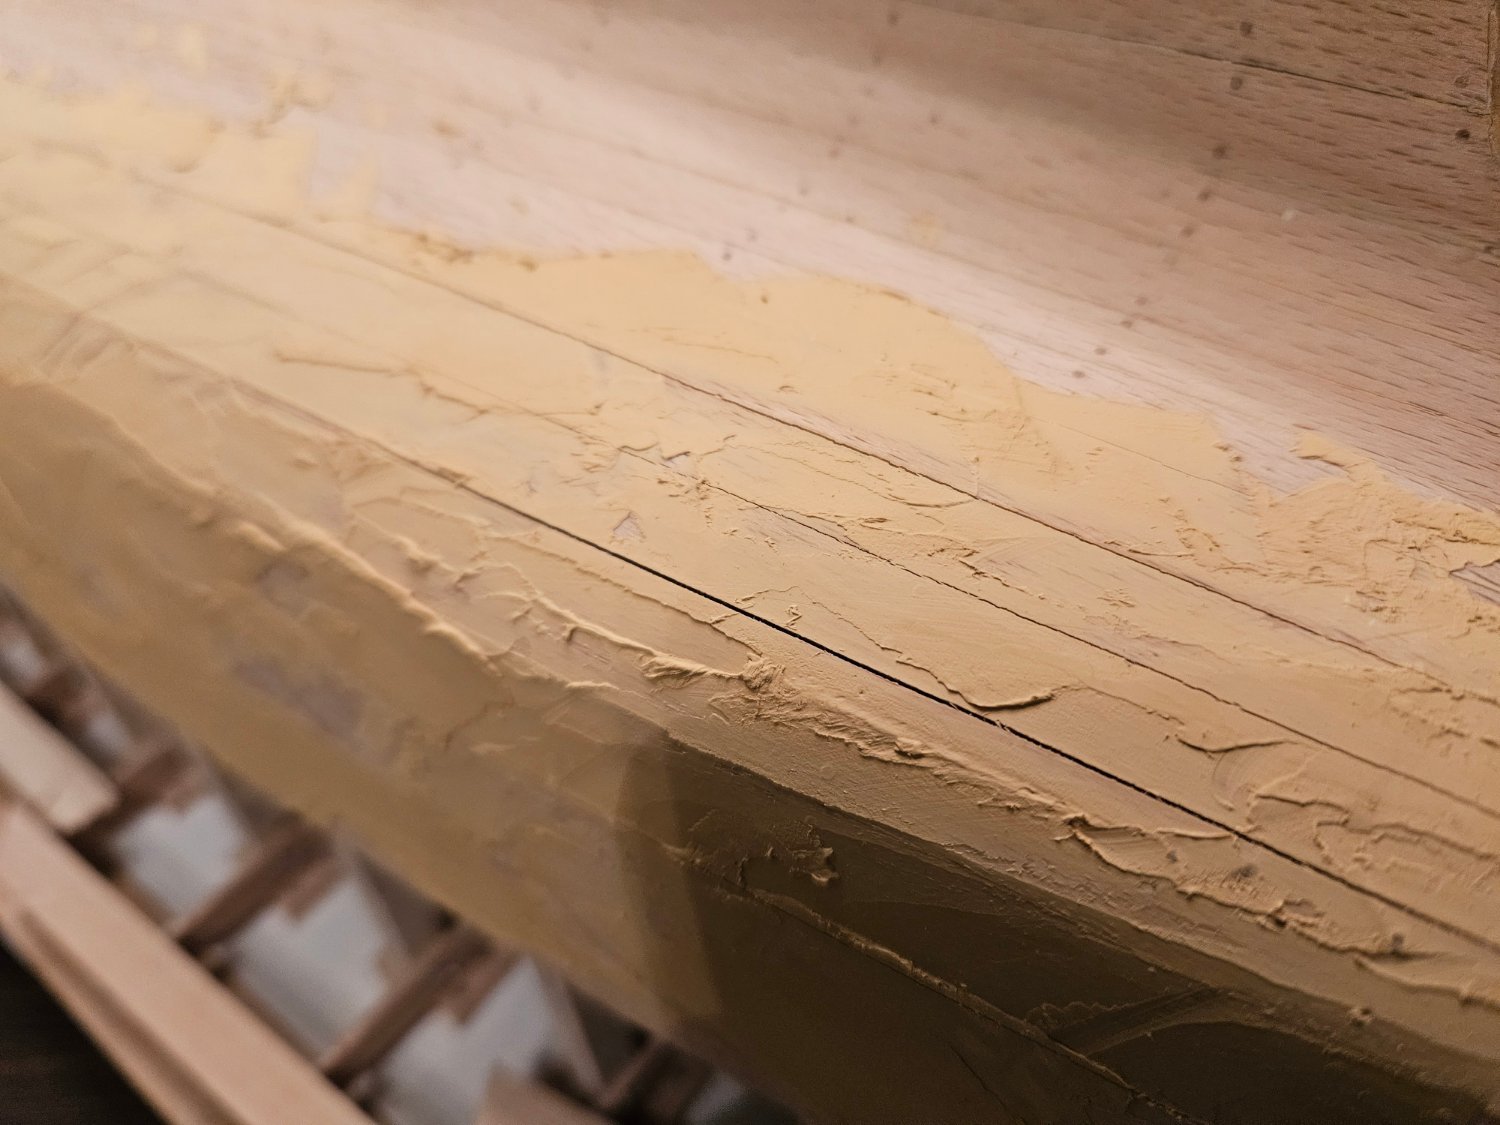
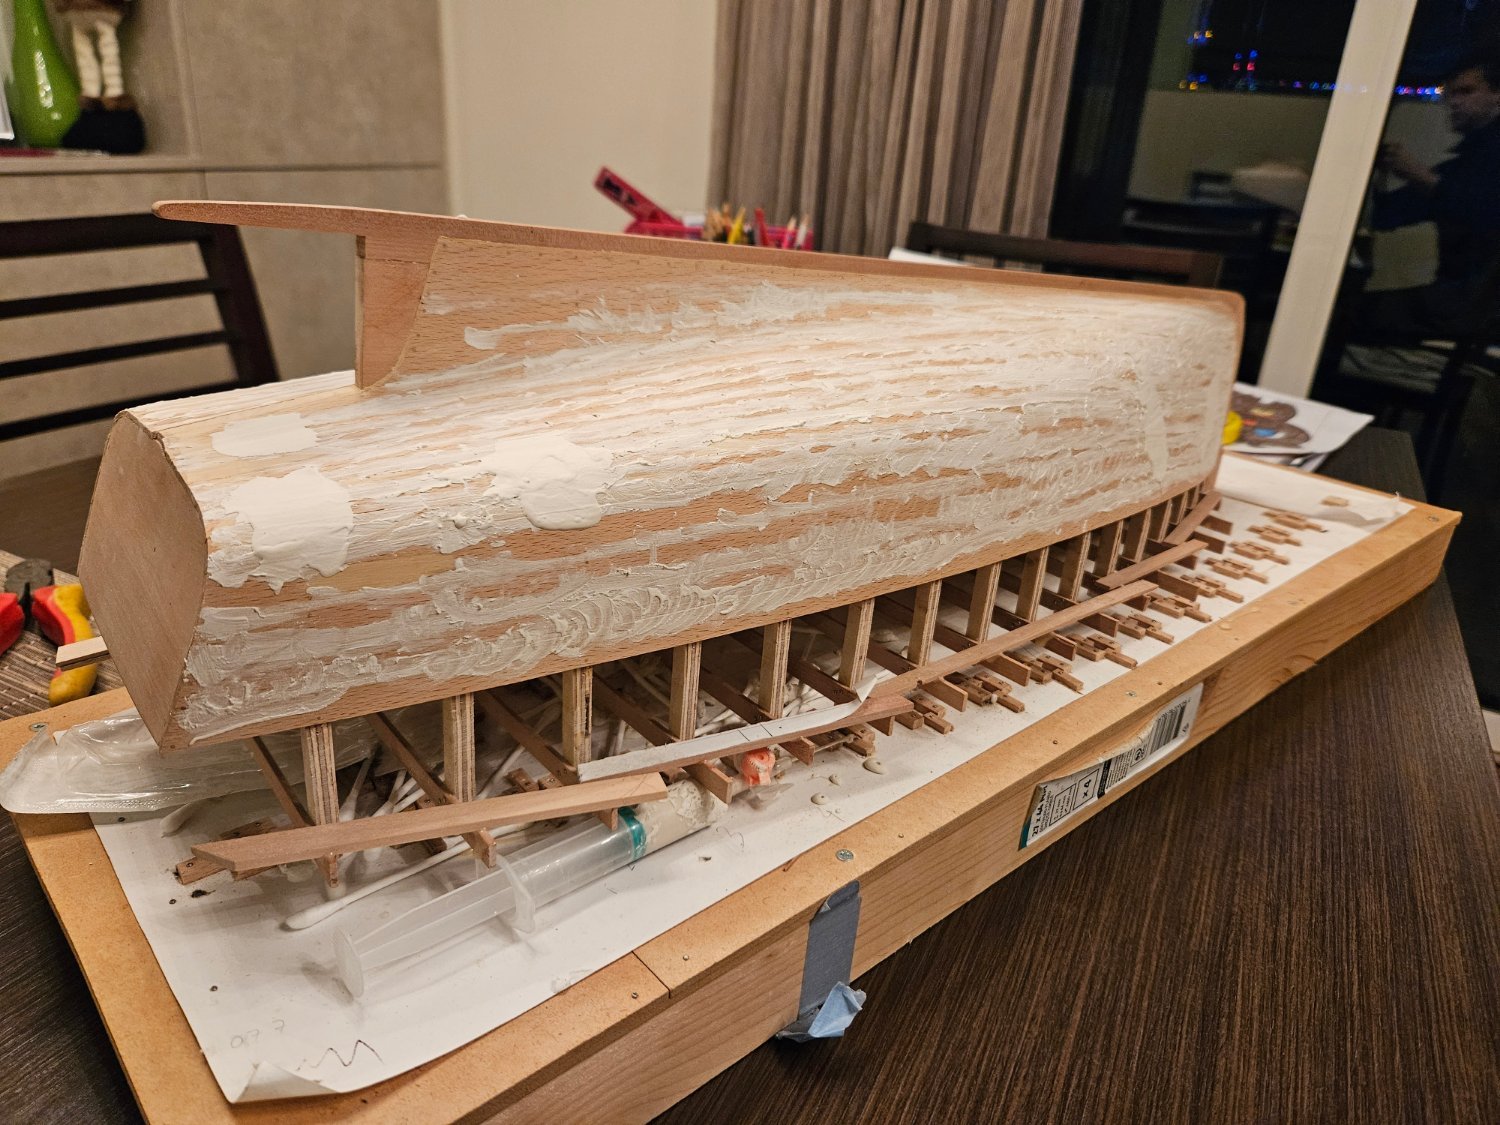
I ve lost count how many times I have had to go back to the hull. It keeps on changing shape, new cracks appearing, planks shifting, it follows the change of seasons and when it reaches equilibrium with the ambient moisture the planks go walkabout. I am waiting for the weather to get warmer so I can paint and varnish it and then leave it to cycle through its moods. For now, I ve just used some more filler - Ill sand it smooth tomorrow.
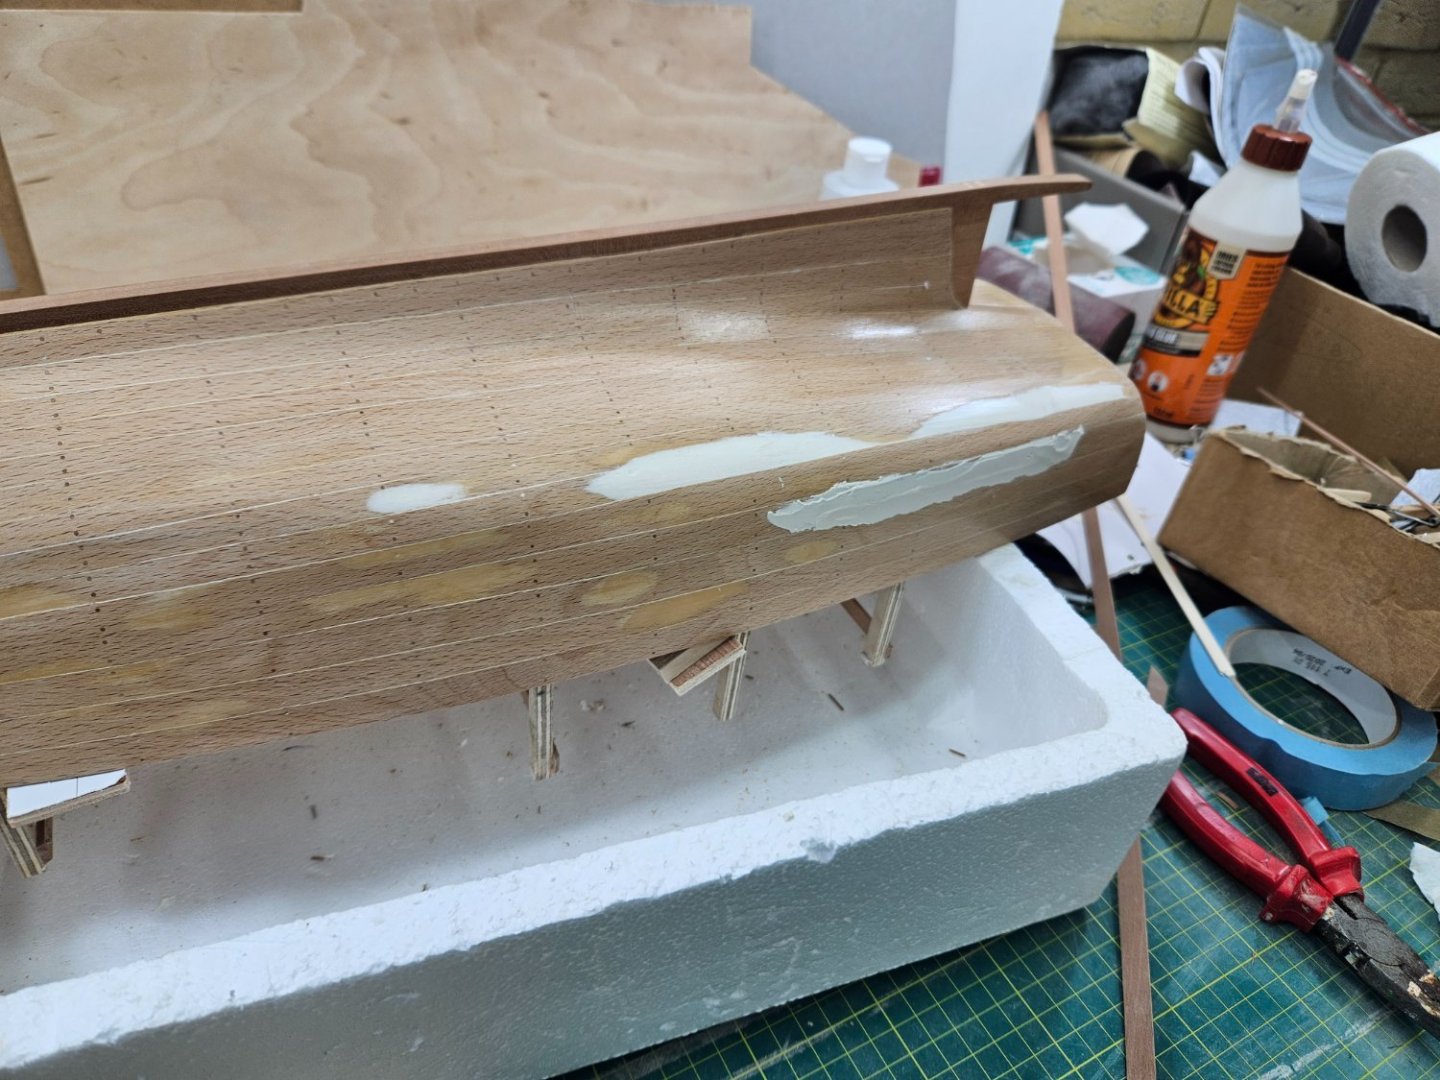

I am using Osmo filler which is wonderfull stuff, run out of beech colour so using colourless but I ll prime the hull so it does not matter.
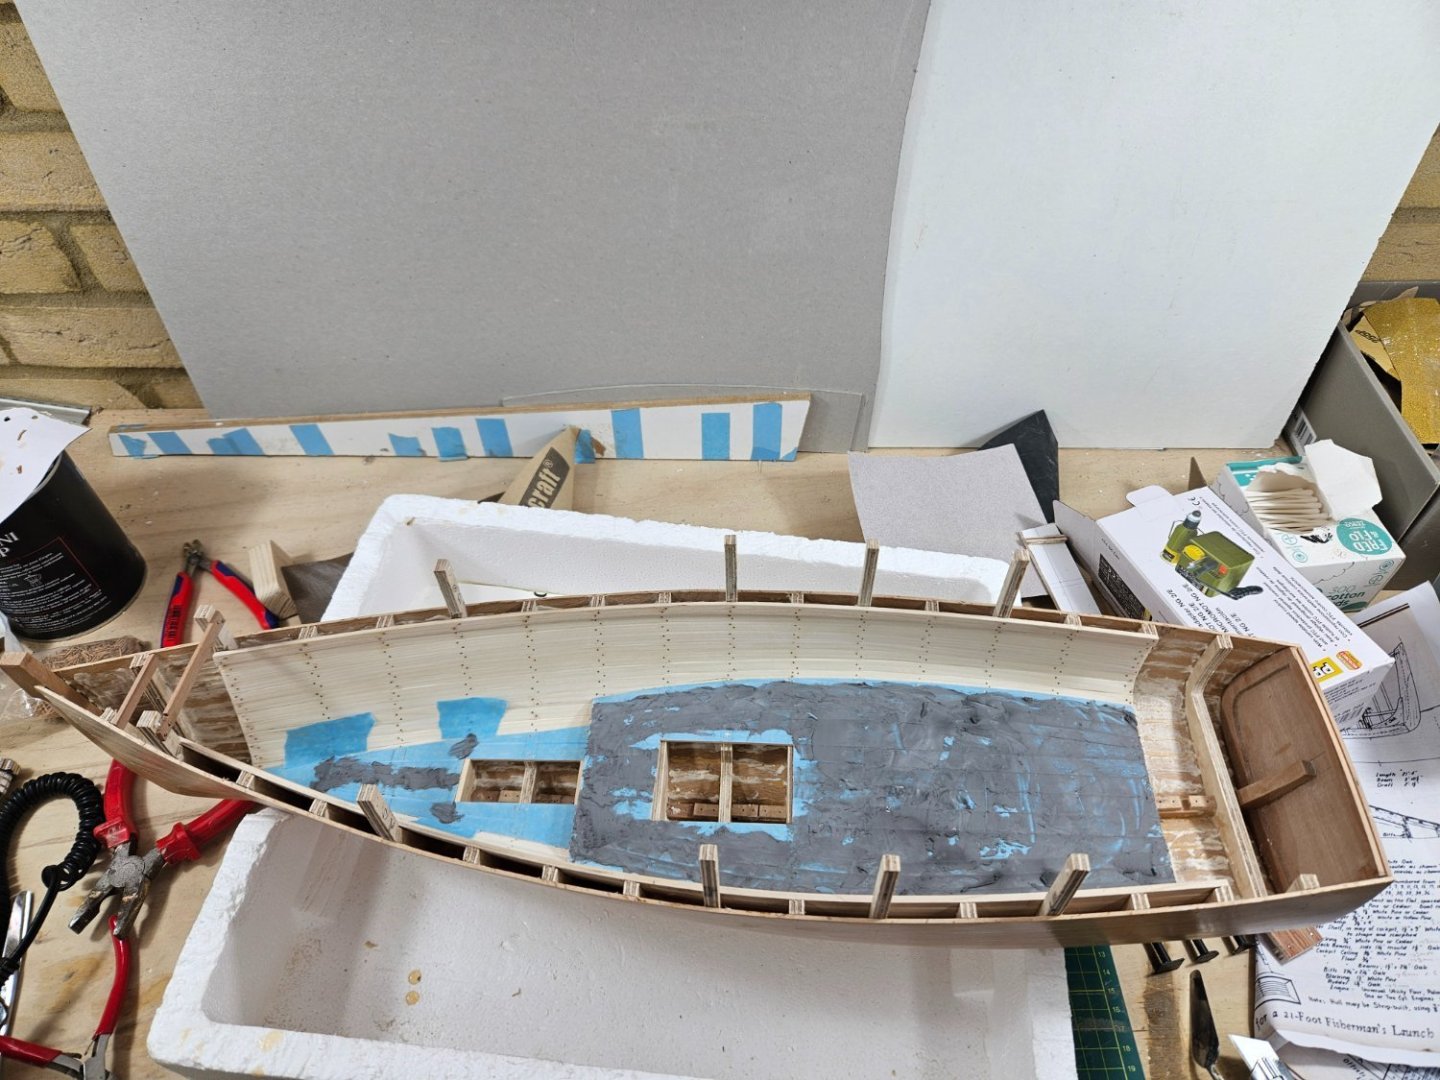
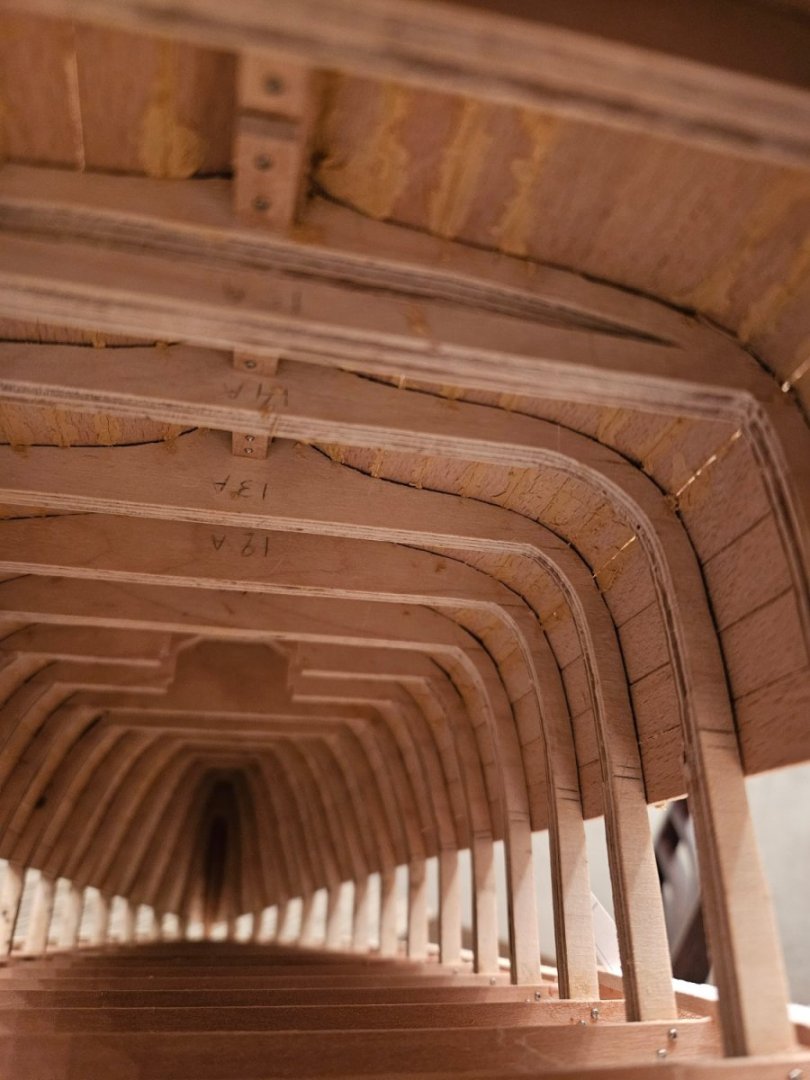
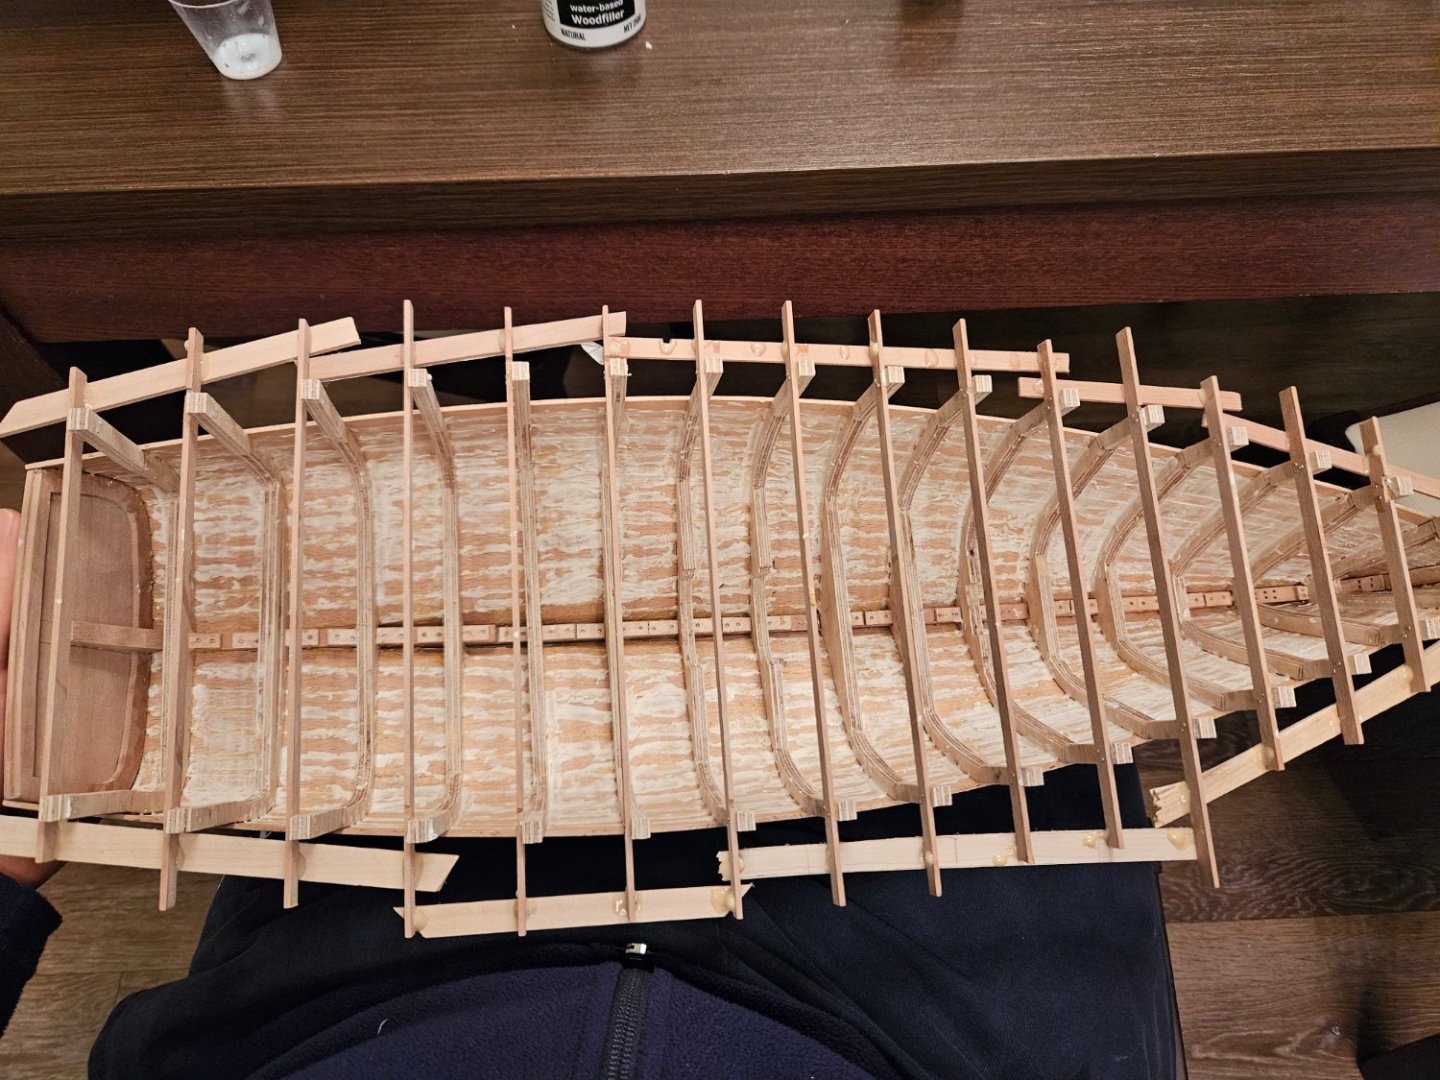
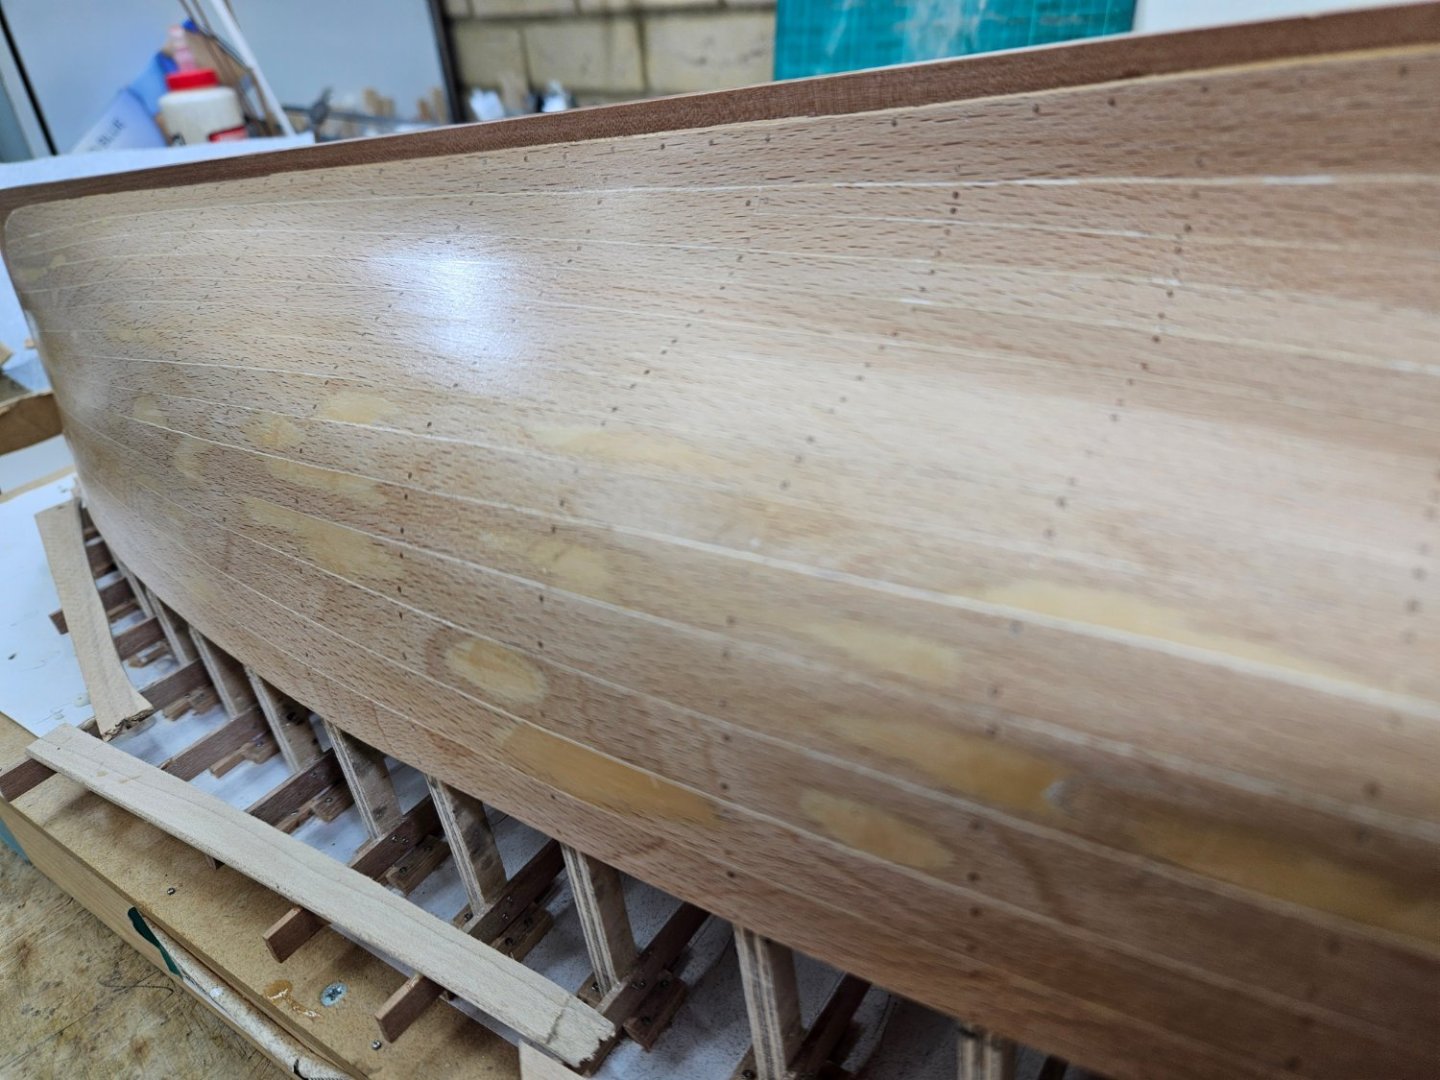
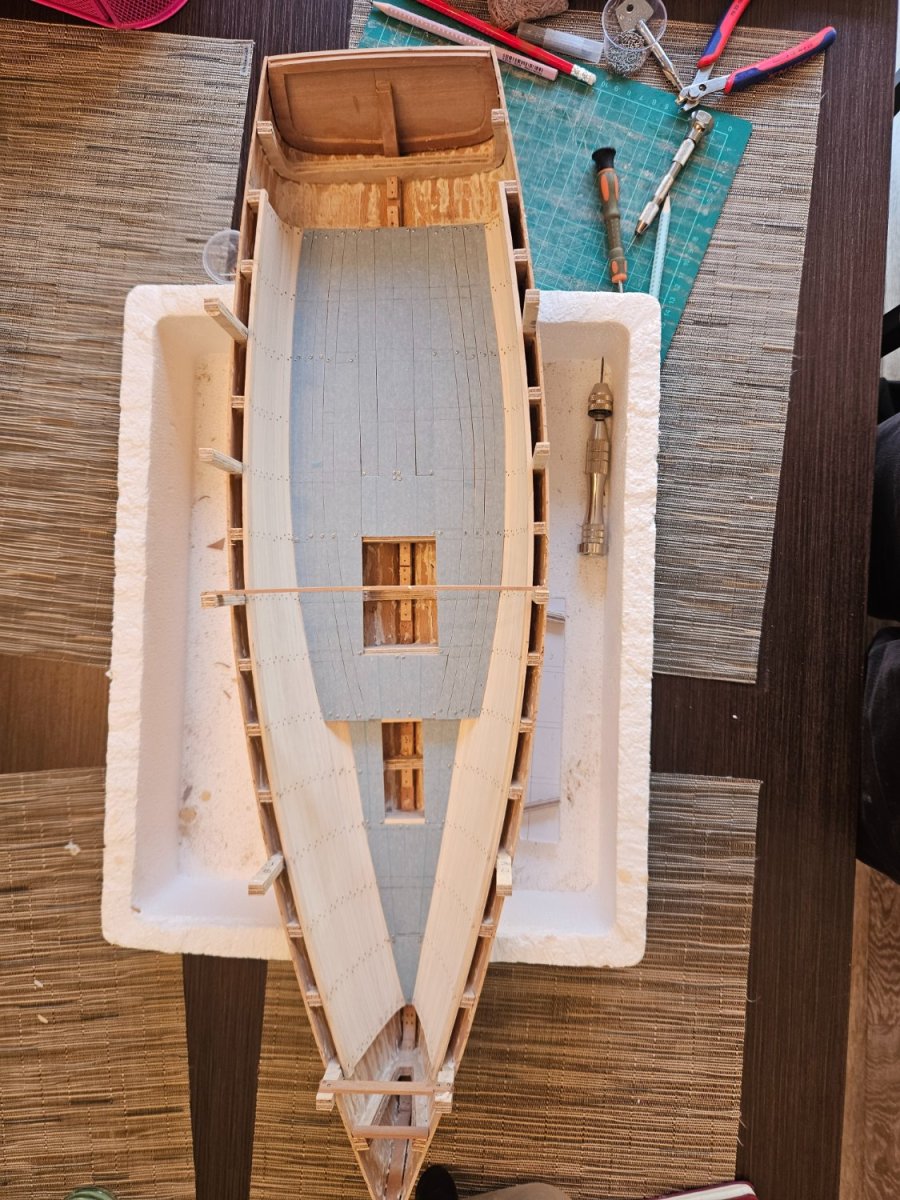
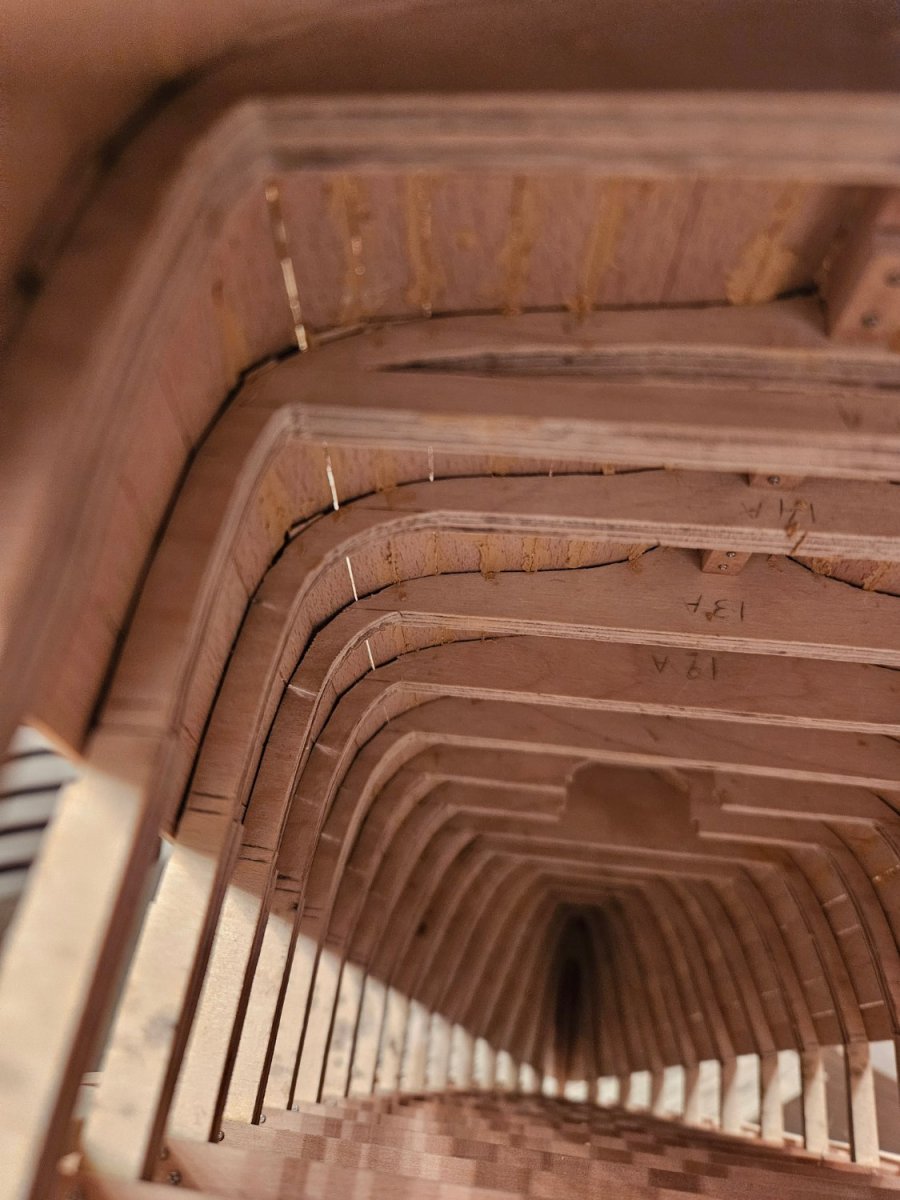
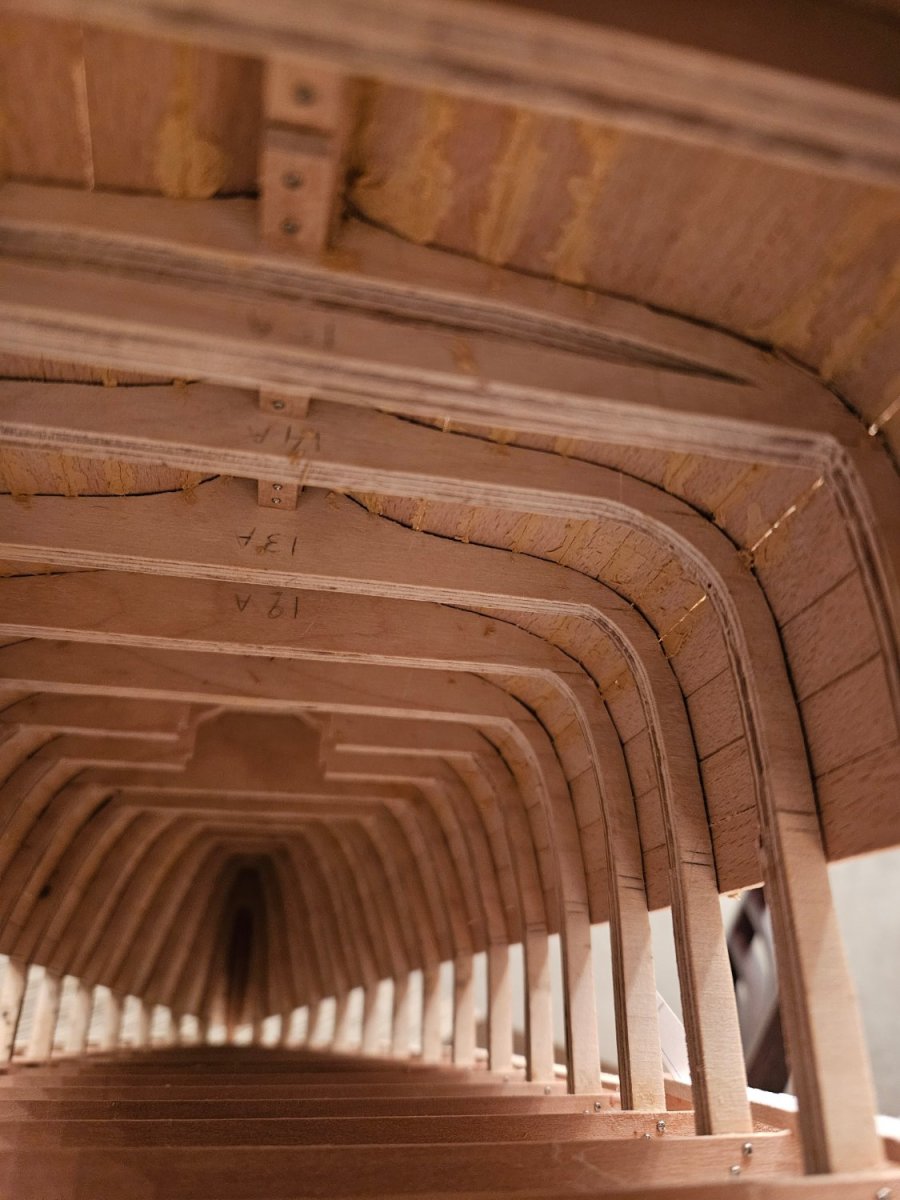
I finished the inner planking and sand it smooth - ish. I ve been scratching my head for some time now, not sure how the floorboards should be arranged. There is a substantial curve at the sides where the floor meets the side planking. Not sure how this would have been made


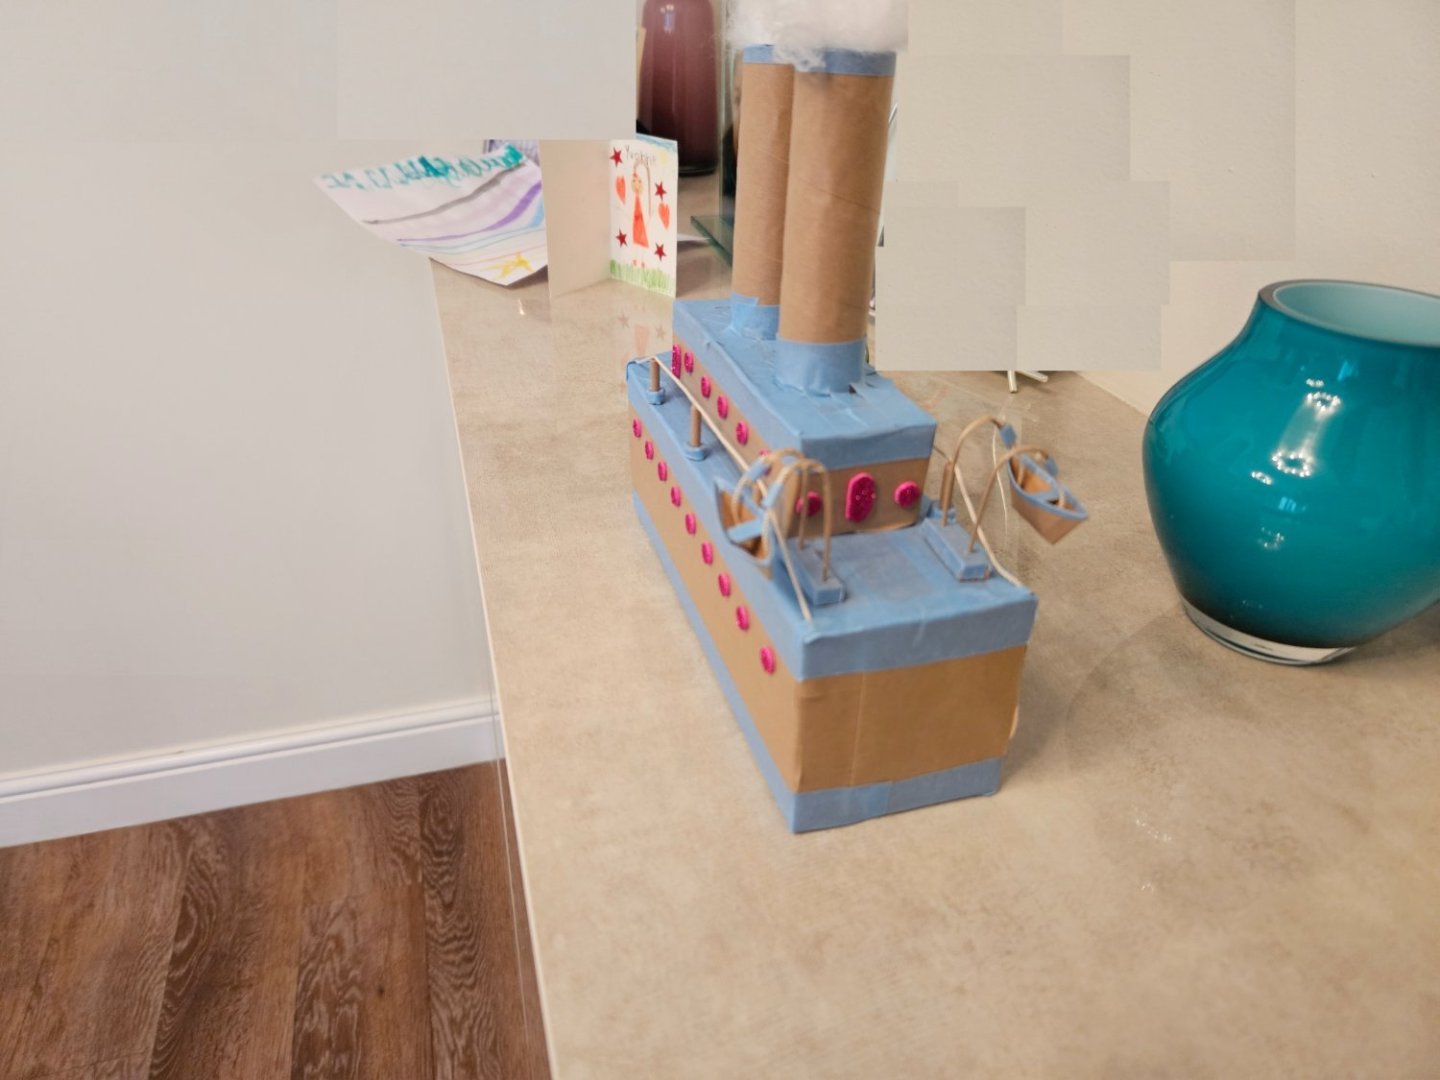
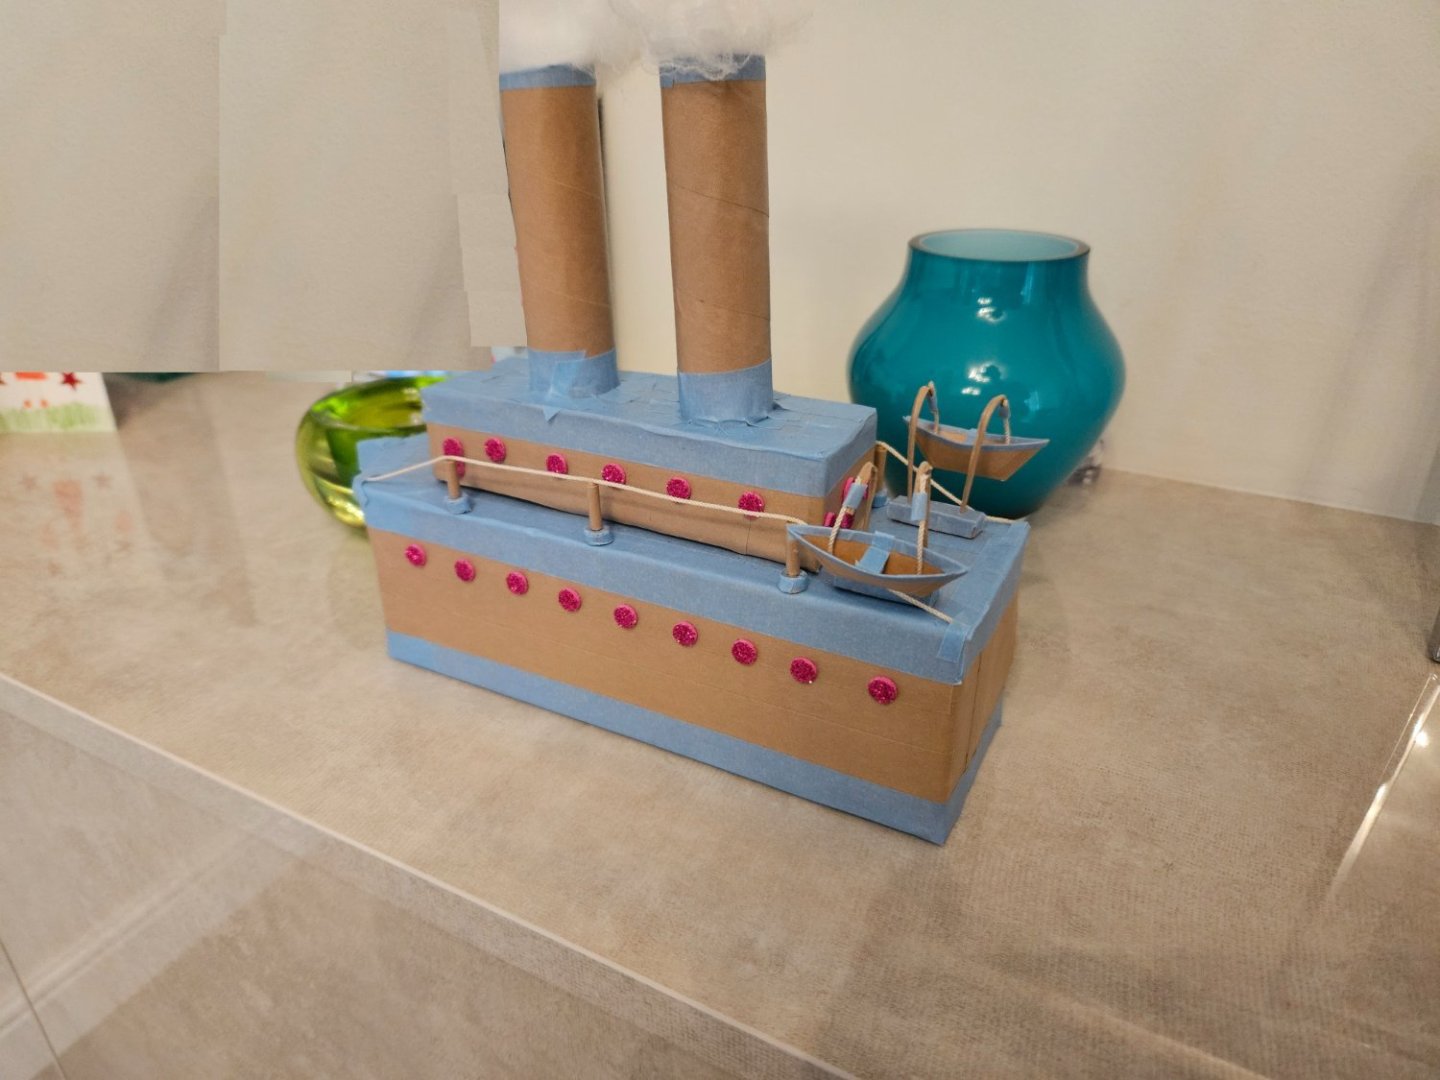
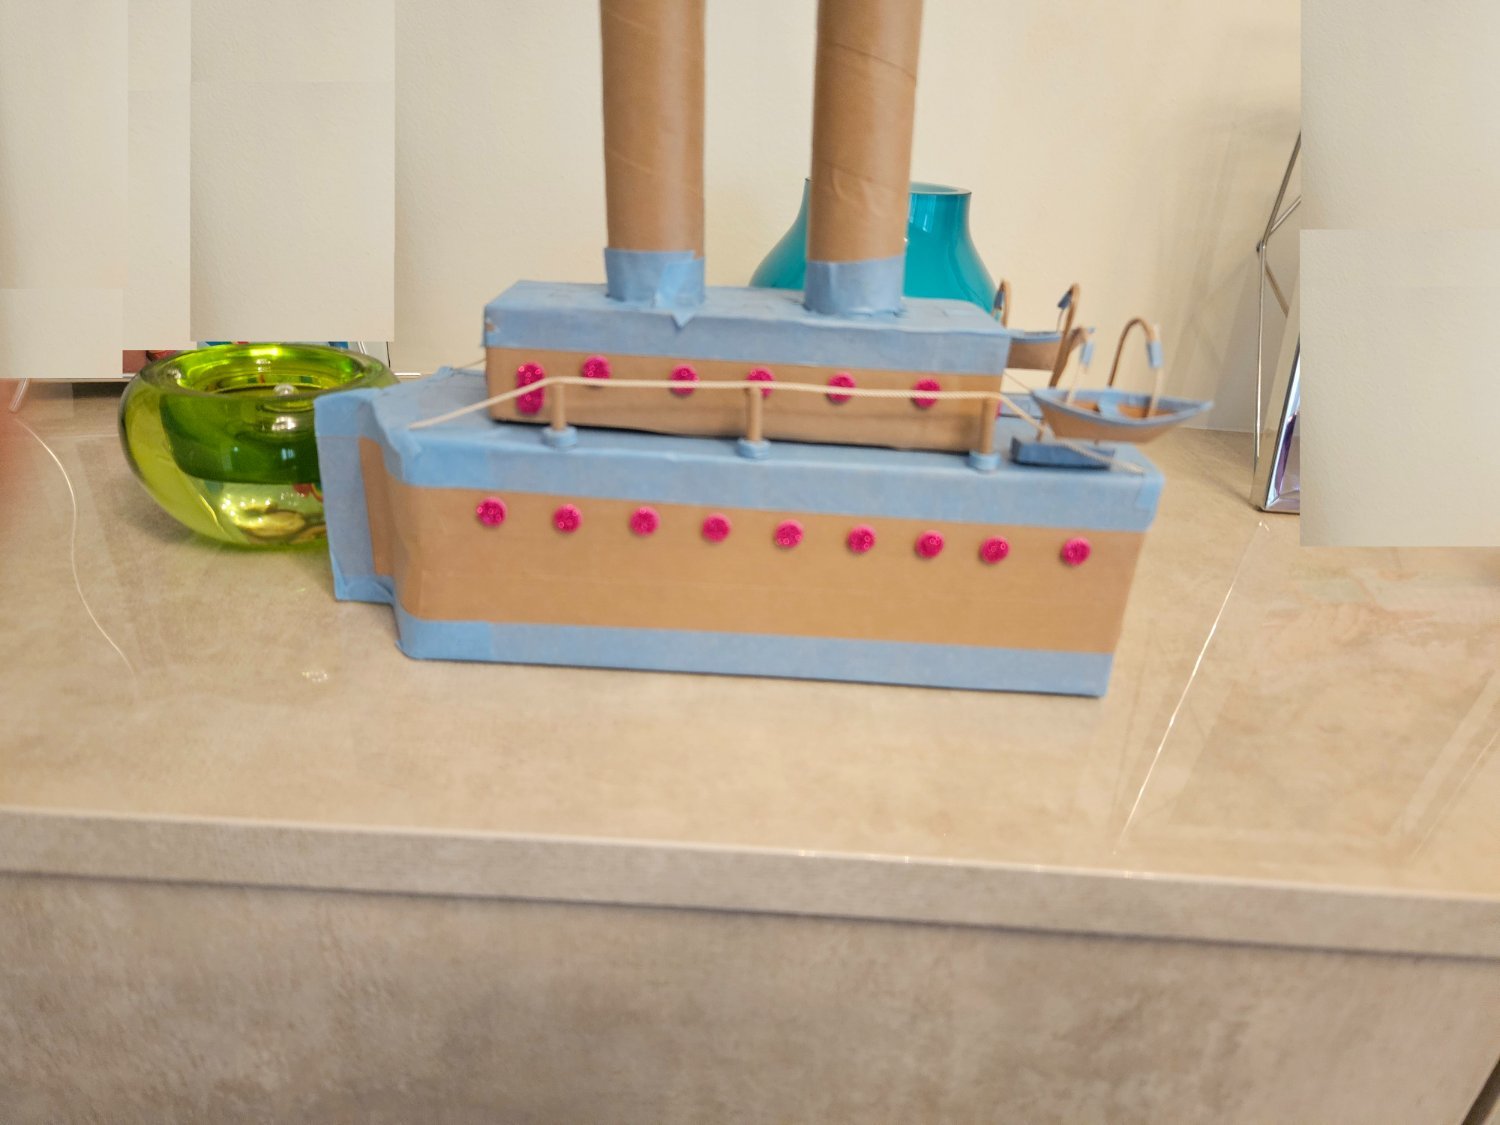
In the meantime, I made another model with my 7 year old daughter - a school project. The photos are terrible but you may just make out the cotton at the top of the chimneys. We really enjoyed the juice previously contained in the hull.

Till next time
Vaddoc
-
Ok, so I ve used this sander a bit and these are my thoughts.
Really quiet, this is a massive advantage. Also the 150 mm usable disc is very useful. The guide is solid and totally usable.
Now, the negatives. There is a run out of about 1 mm at the very edge, this however is not a huge issue as the disc rotates fast and also nearer the centre this run out reduces a lot - overall, it would be nice to be dead flat but it is not an issue for me.
However, it comes with 80 grit paper which I changed to 120. Oh dear!
This took me 3 days and was a Herculean task. The disc it comes with is some kind of very high industrial quality disc, with a thick plastic backing. Unfortunately all of the glue was left stuck to the disc which is not smooth but rough. I destroyed my finger tips rolling off the glue. Heat did nothing. Isopropyl alcohol and methylated spirits also were ineffective. Acetone however did the job well. I used cheap toothbrushes and finally all the glue came off. I assume and hope the glue of the replacement paper discs will be less vicious.
I put the new paper on which did not stick well and comes off if left unused. I may not have allowed enough time for the chemicals to evaporate or not degreased the disc well. As I am still traumatised I just press it it back and ignore it for now.
Overall, a good buy and a good tool, I do not regret getting it and I ve been using it a lot.
Regards
Vaddoc
- Canute and Roger Pellett
-
2
-
-
@håkan, @Jim Lad, @Mirabell61, many thanks!
To all that hit the like button, many thanks as well!
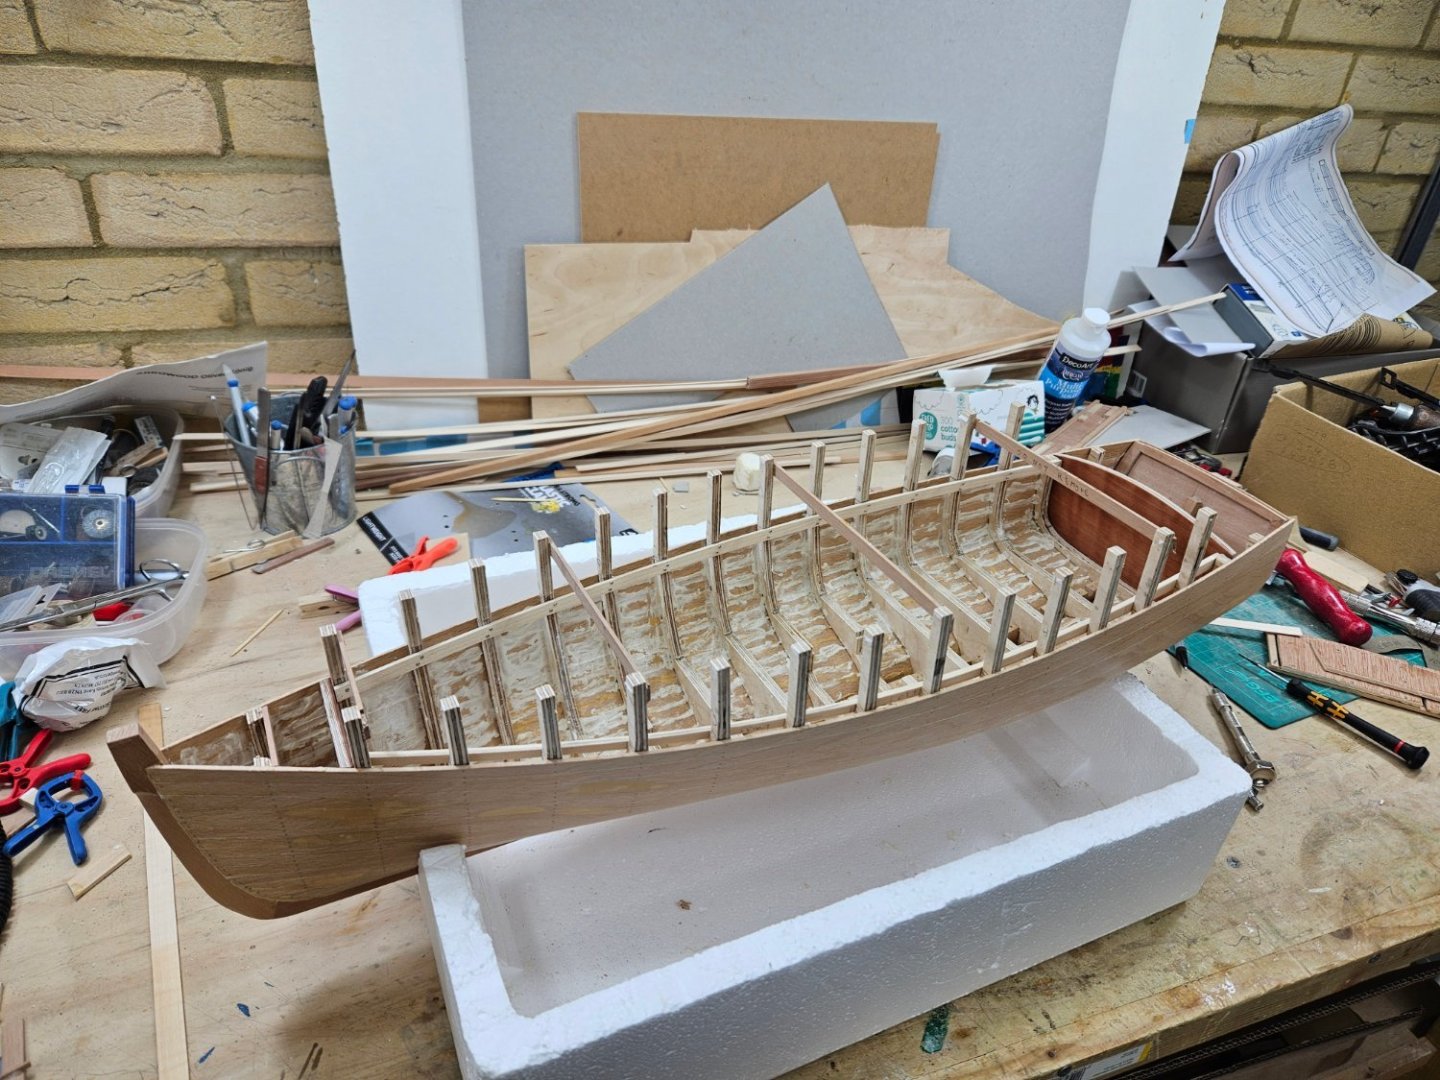
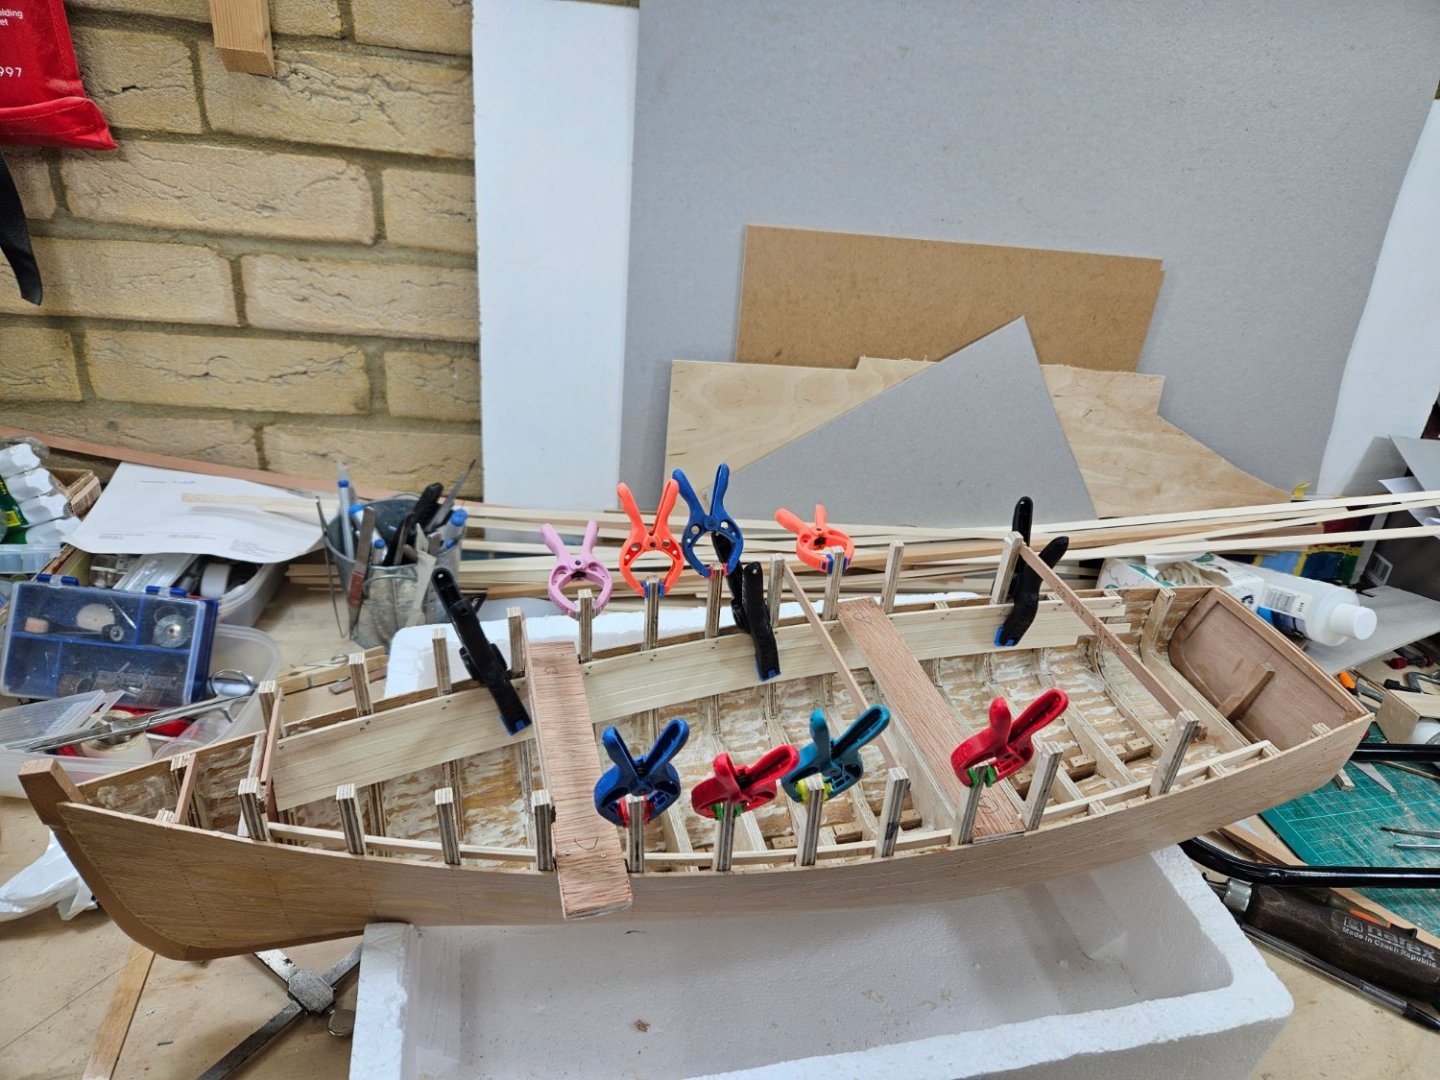
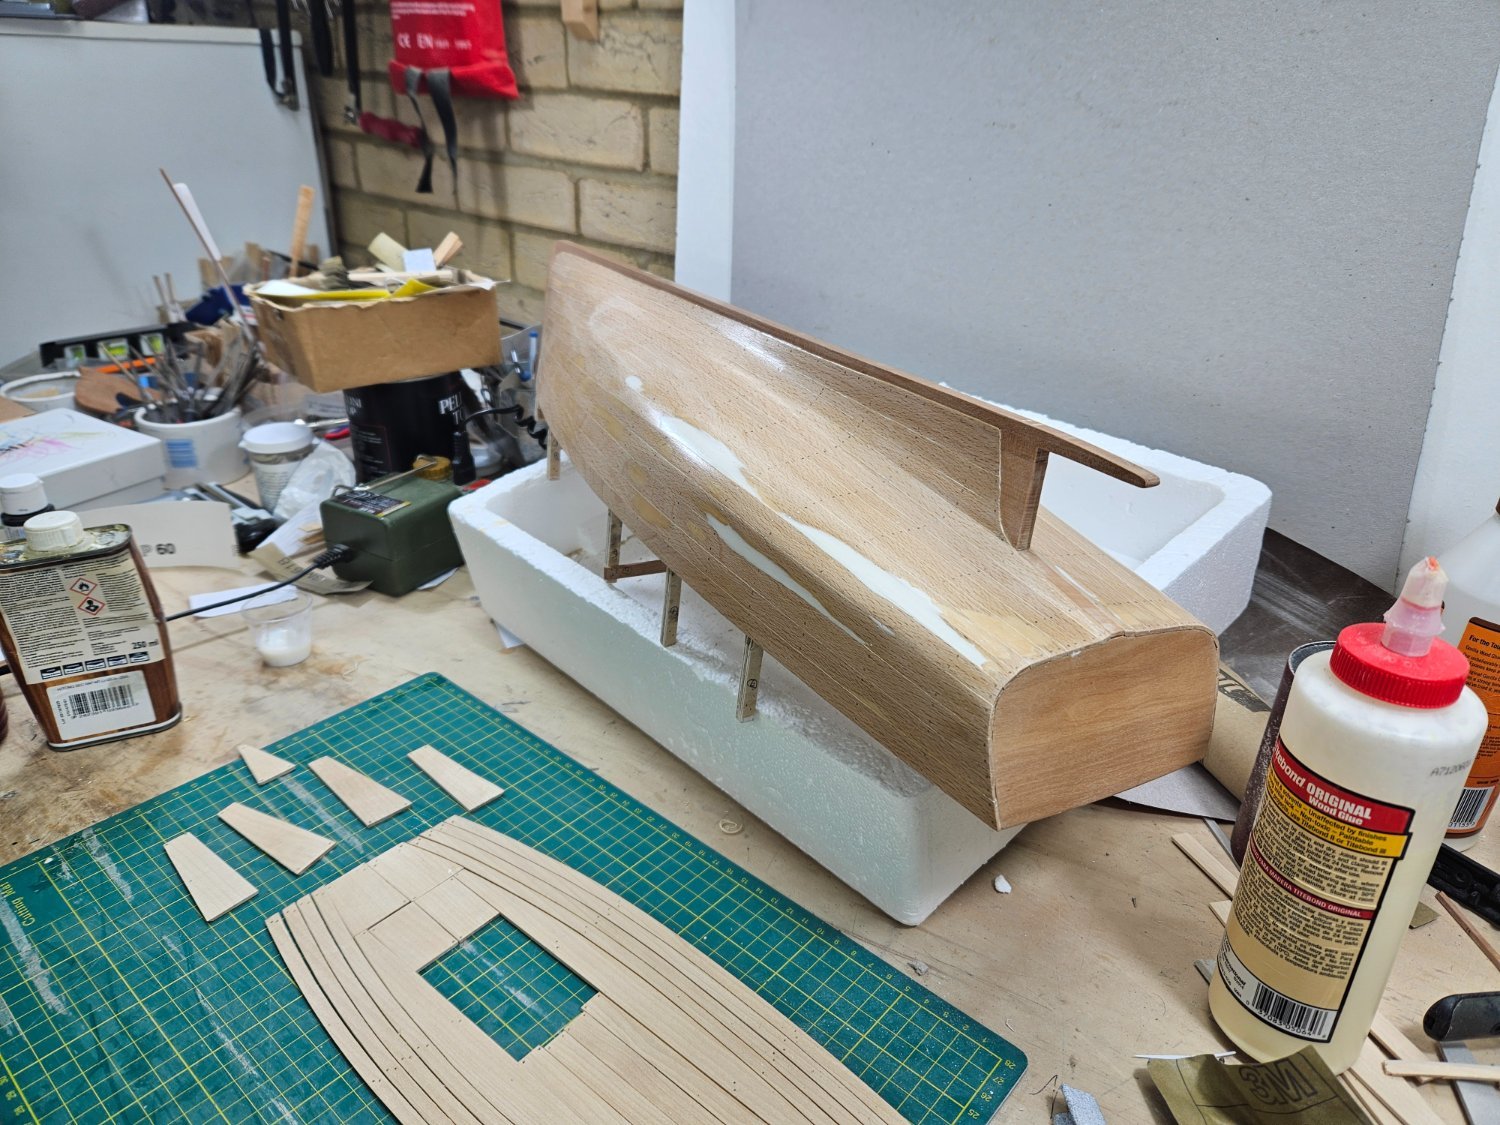
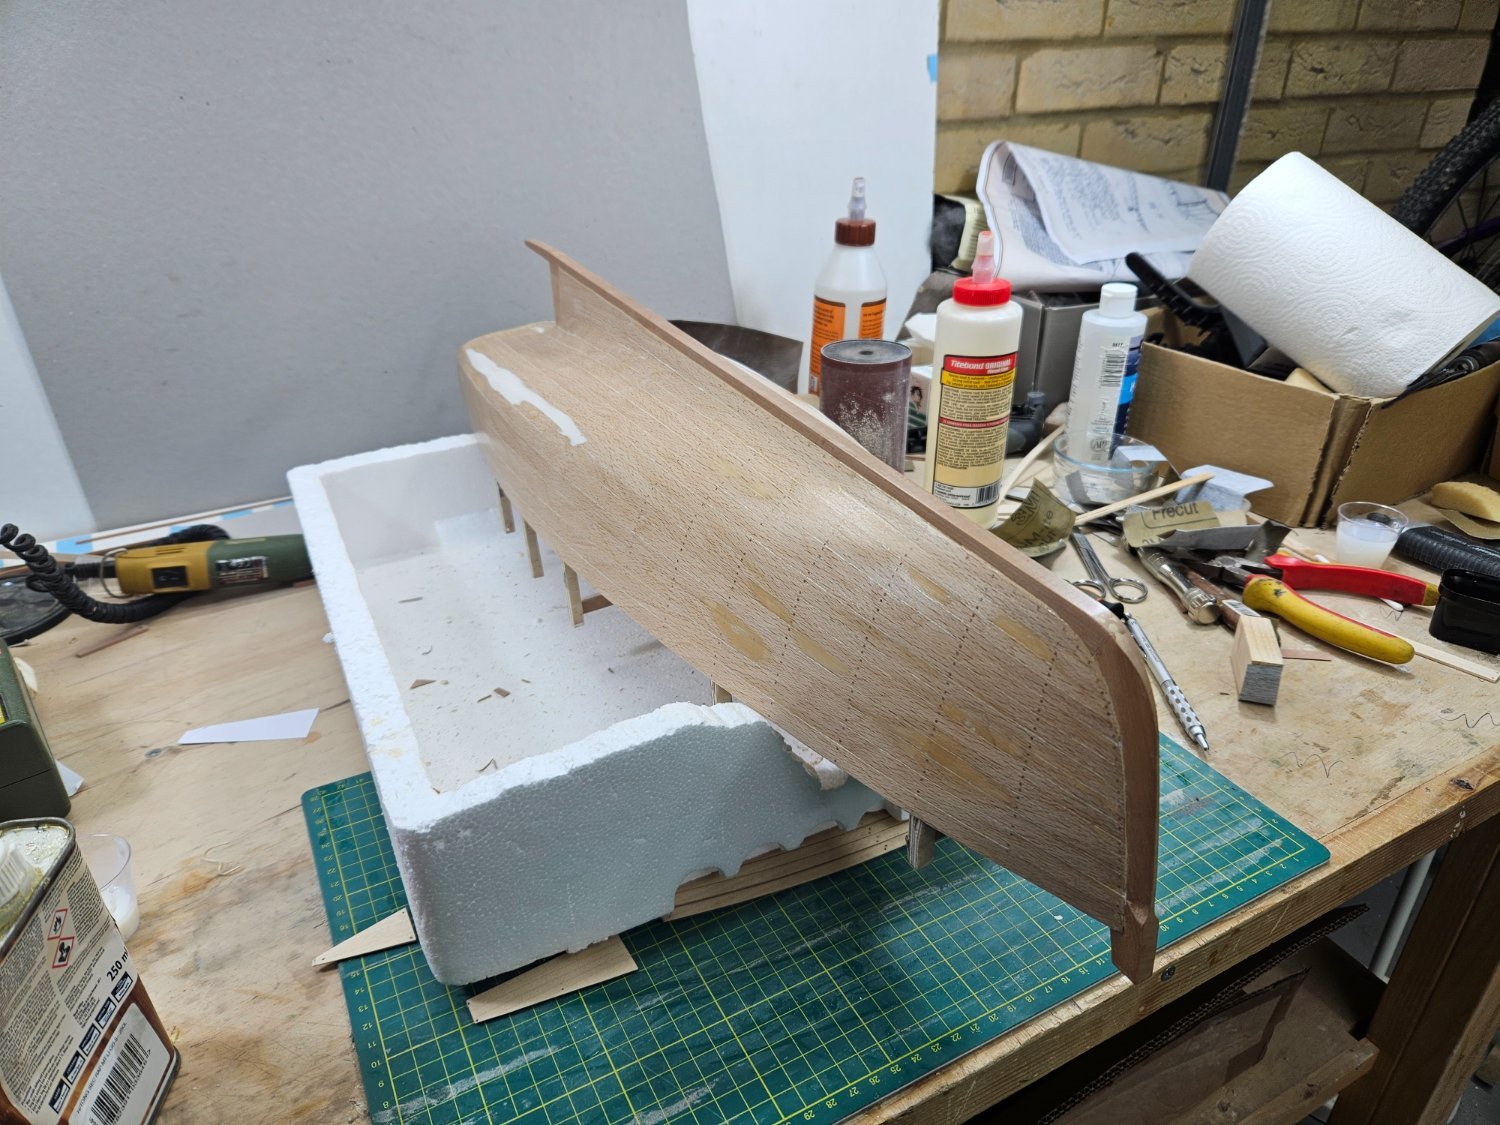
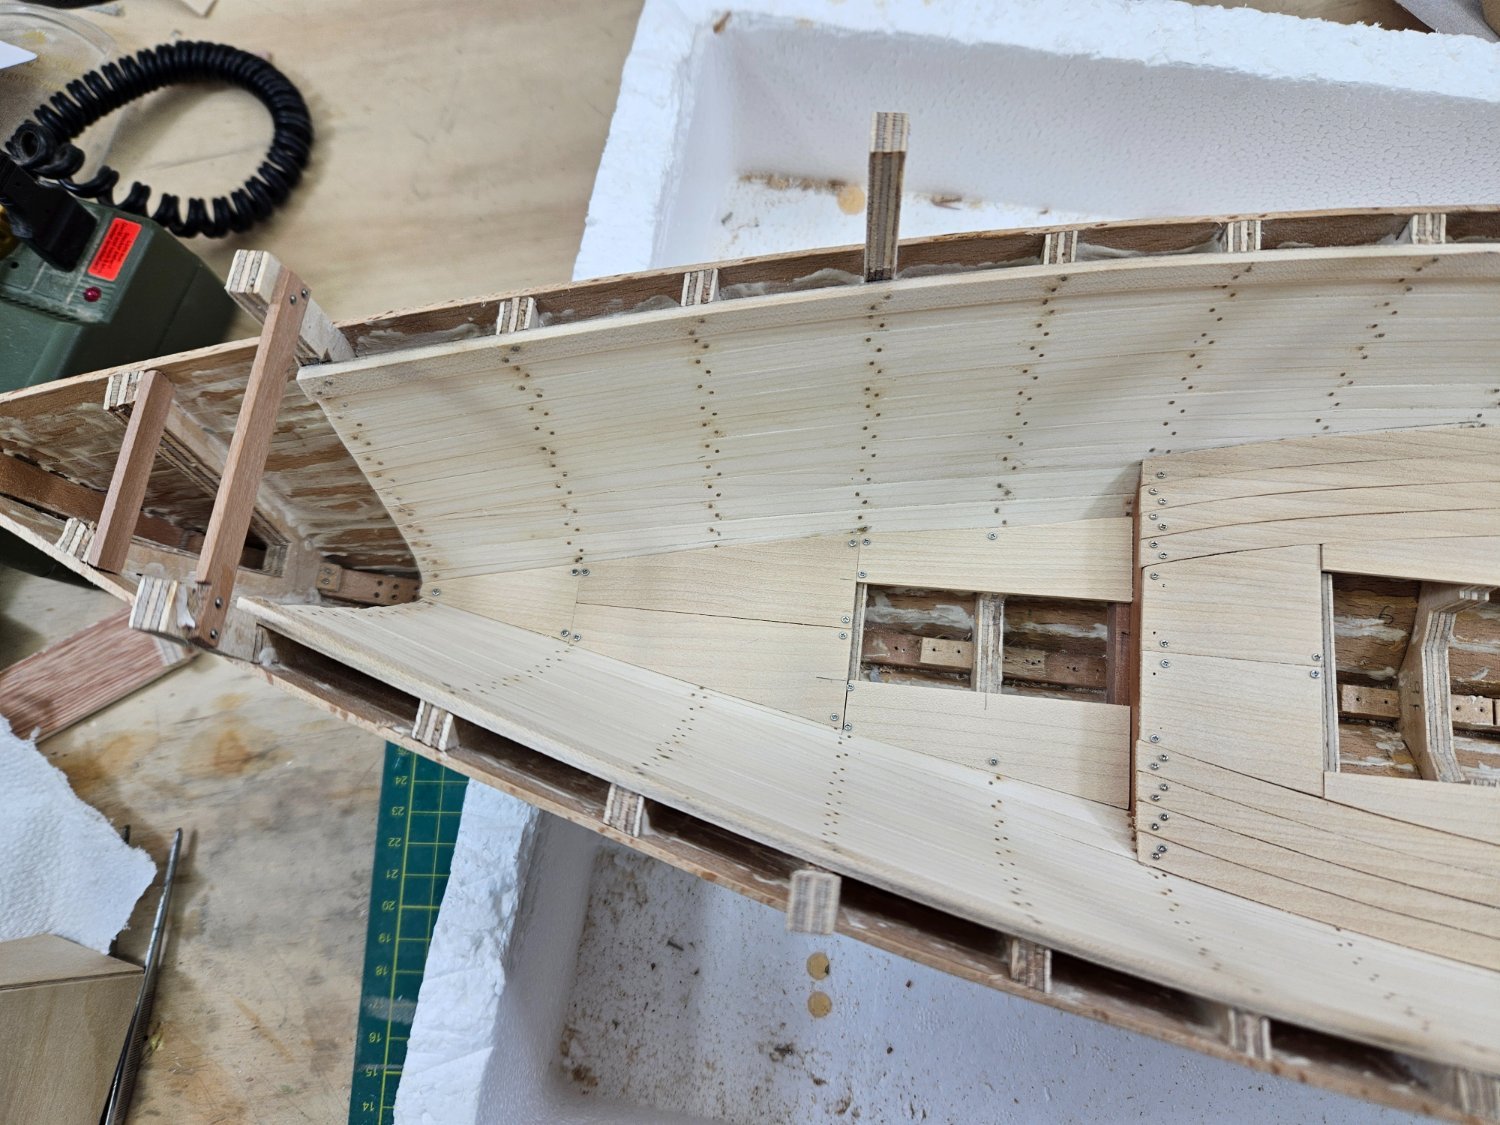
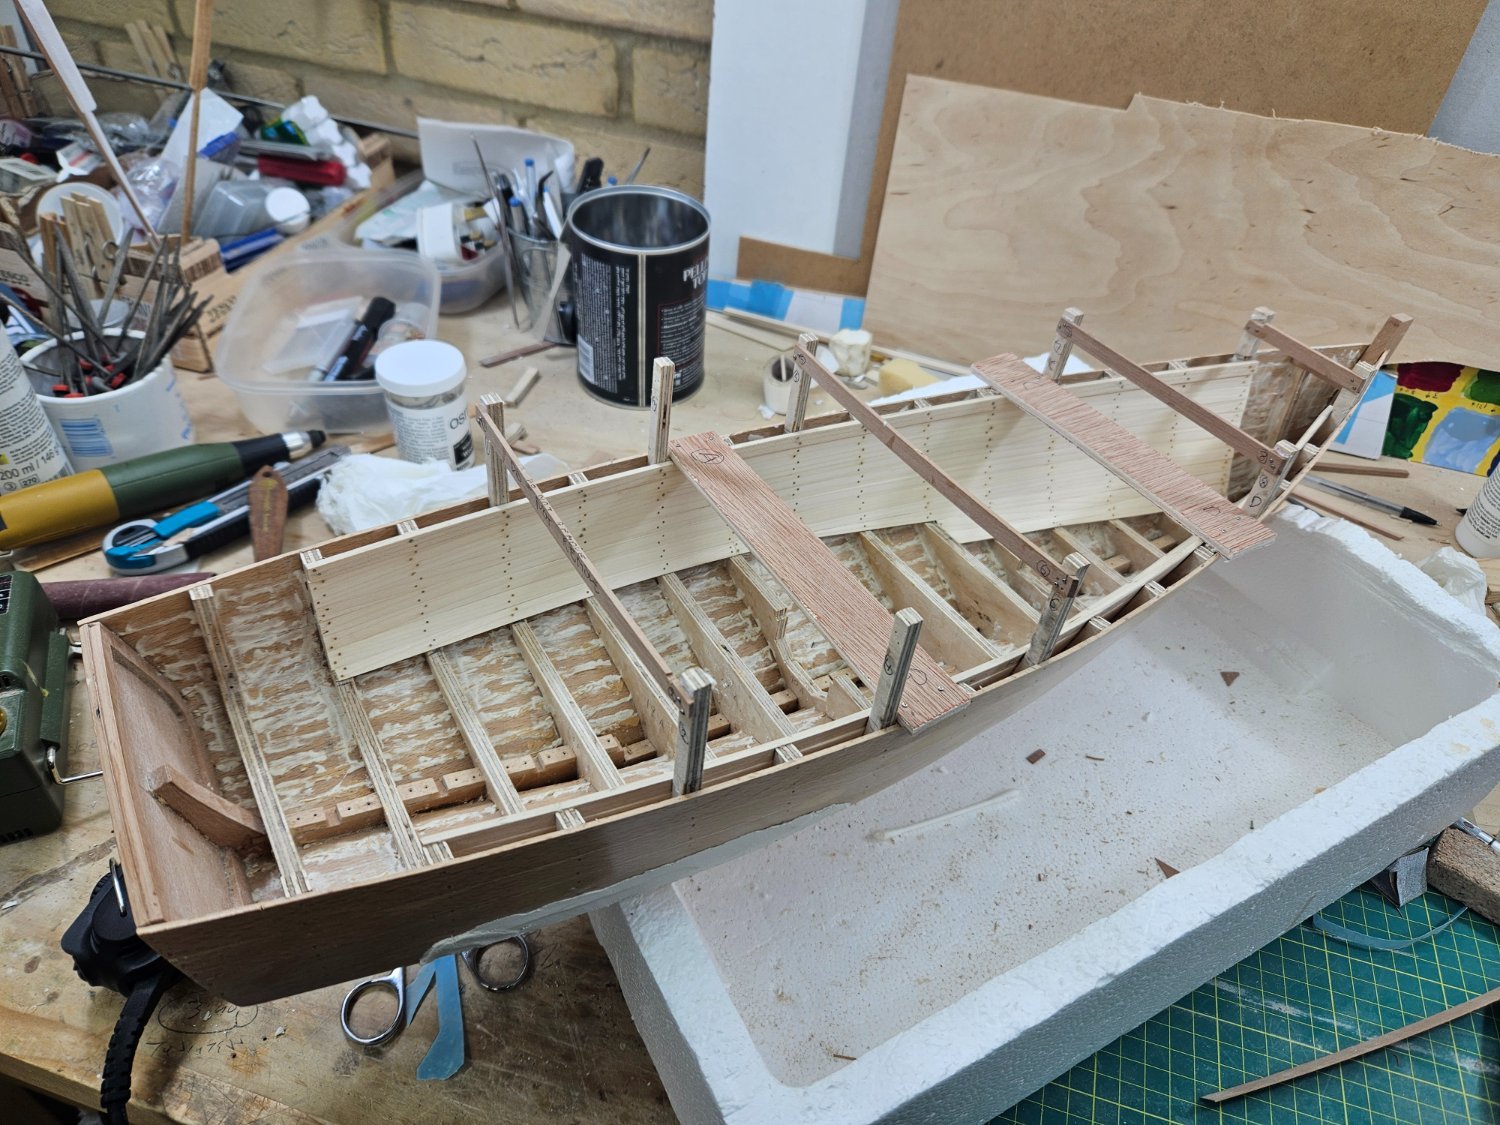
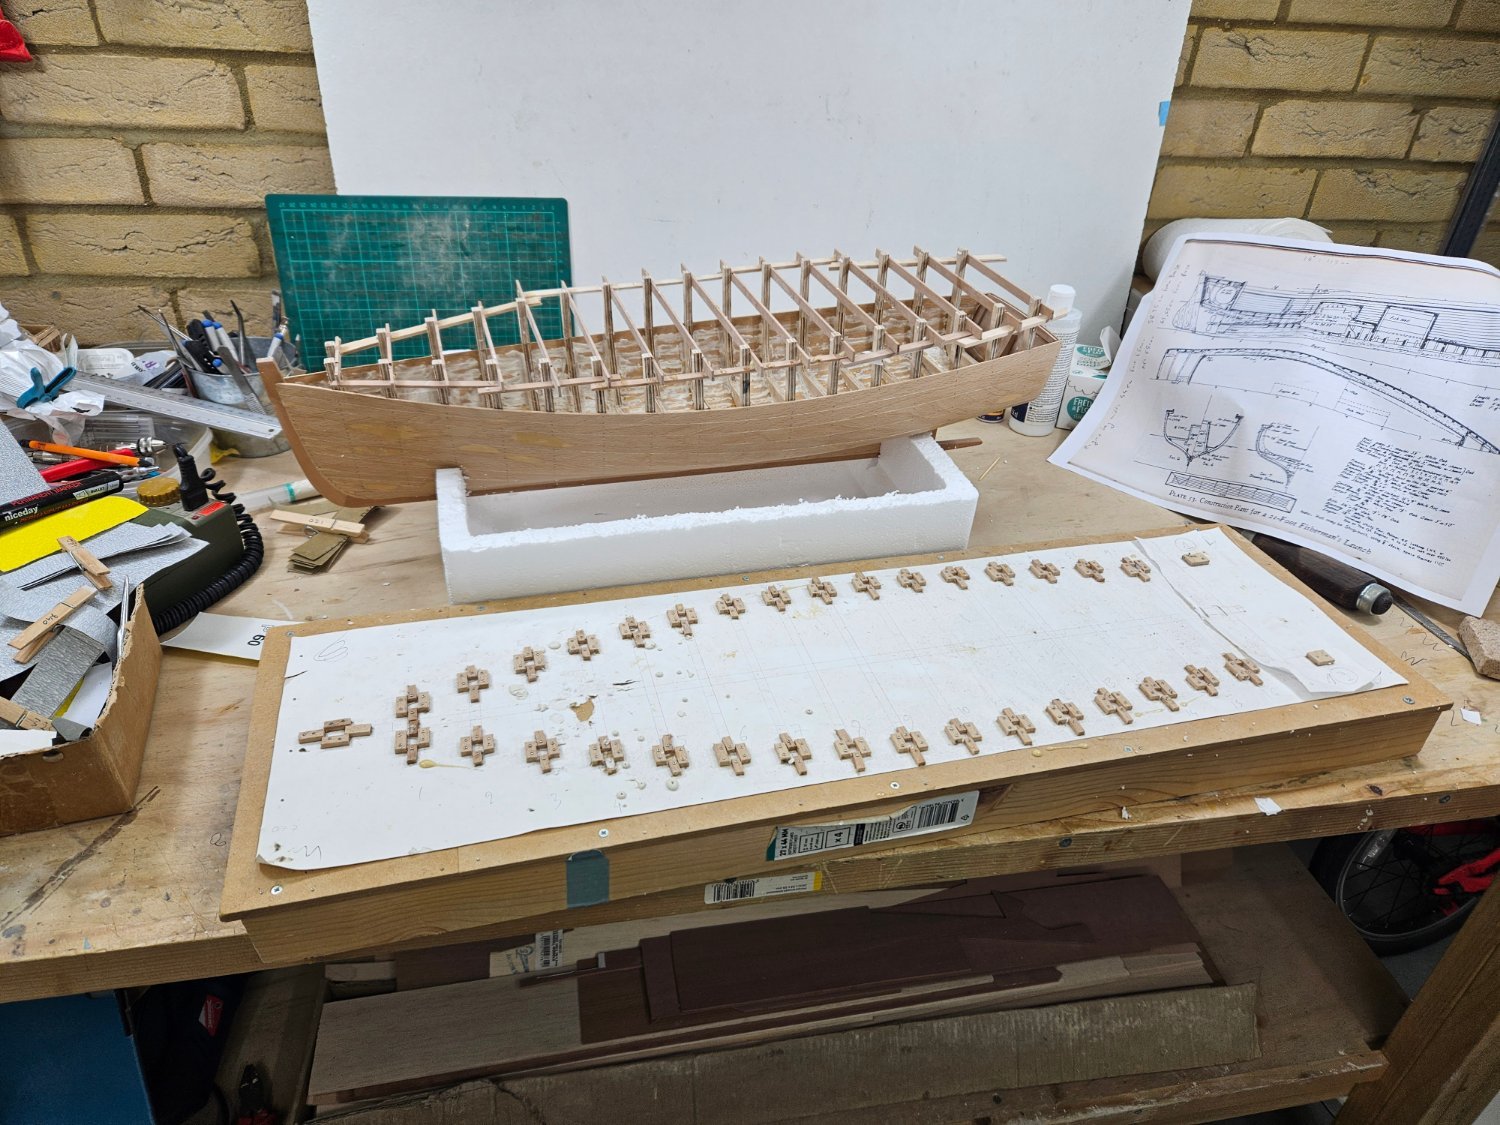
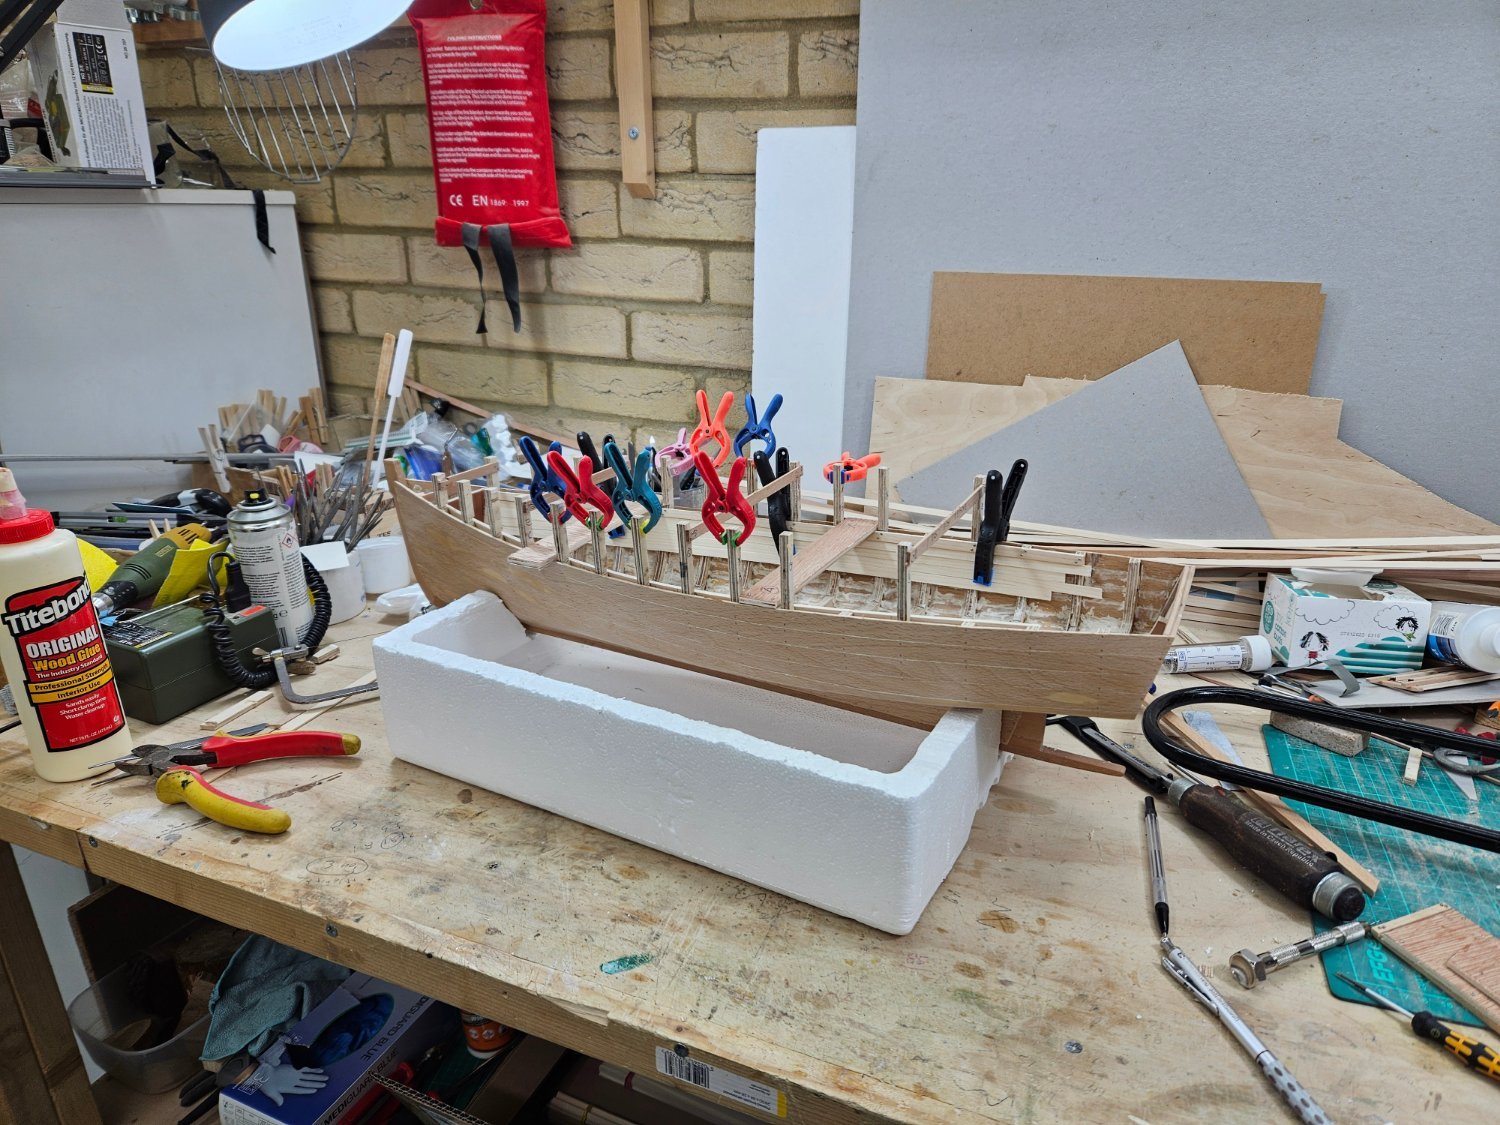
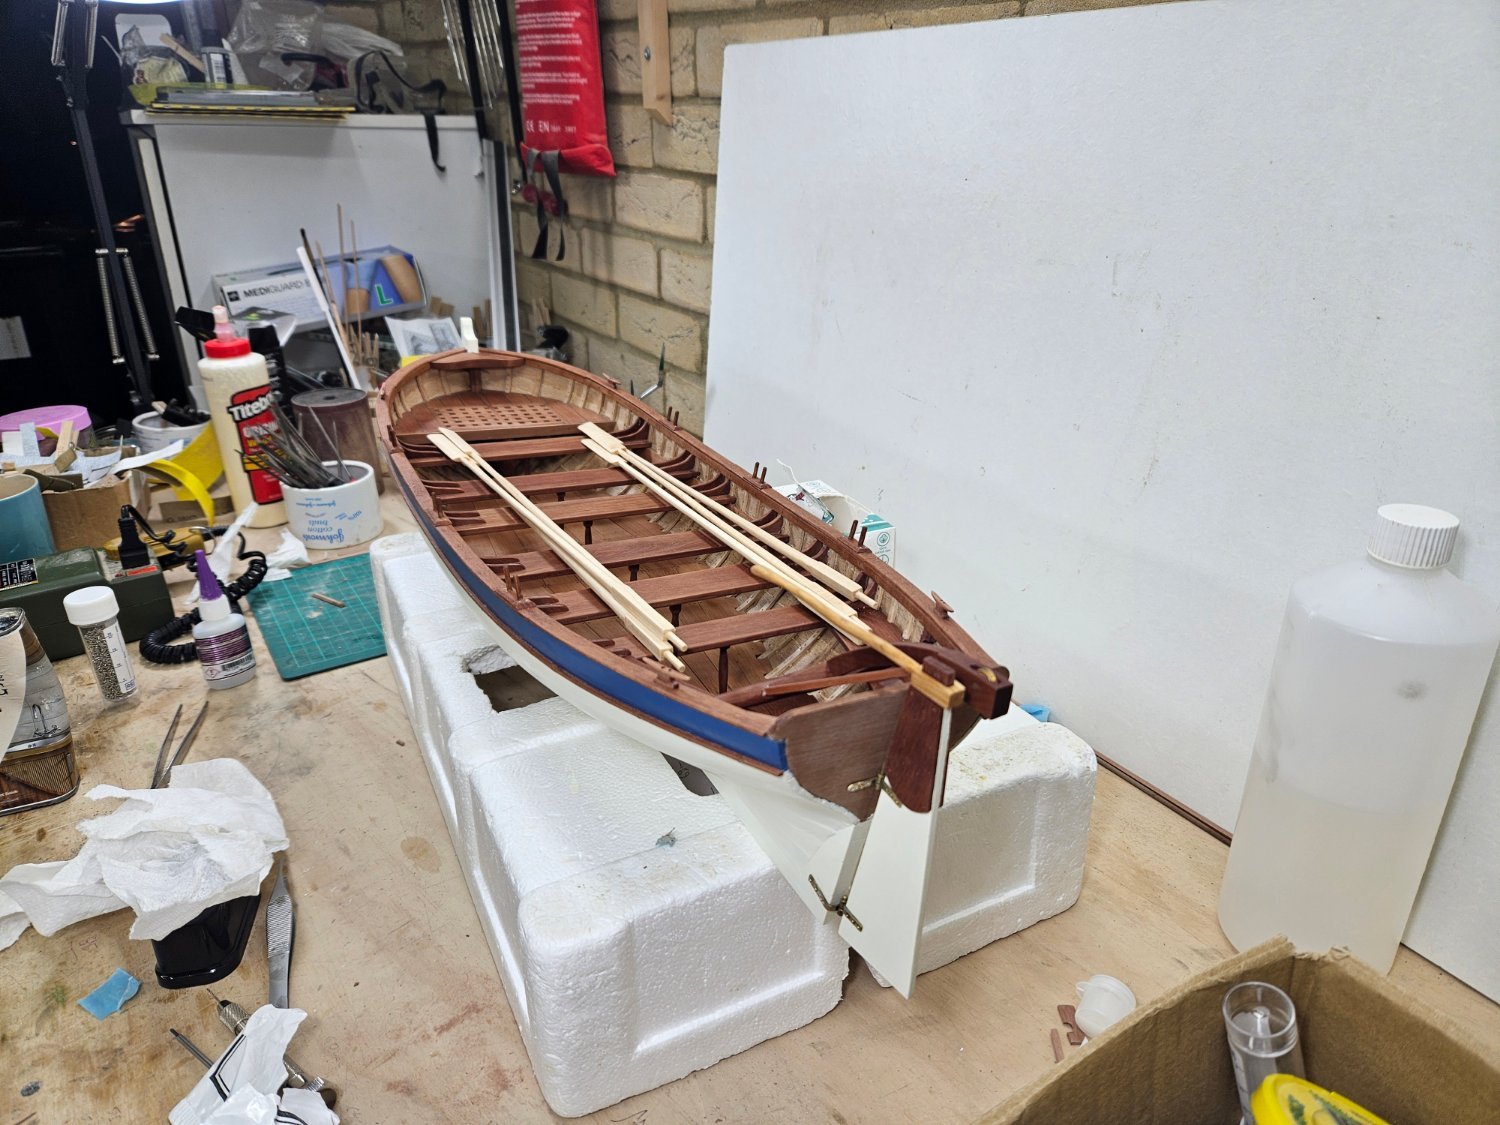
A bit more work done, I feel I understand the boat better now.
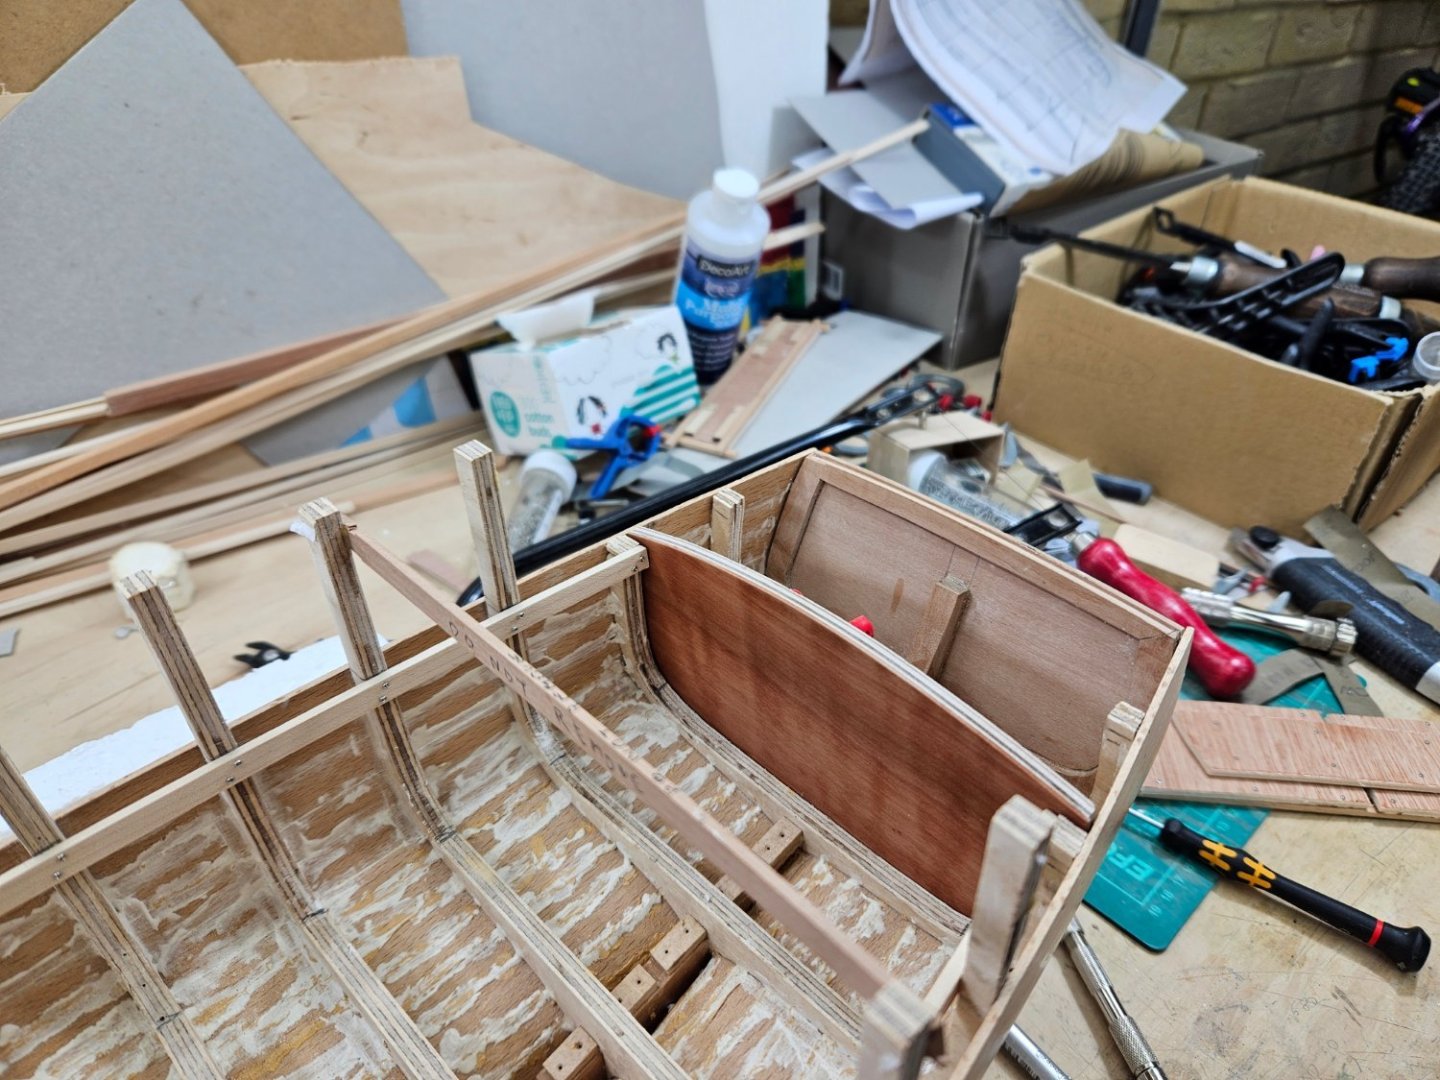
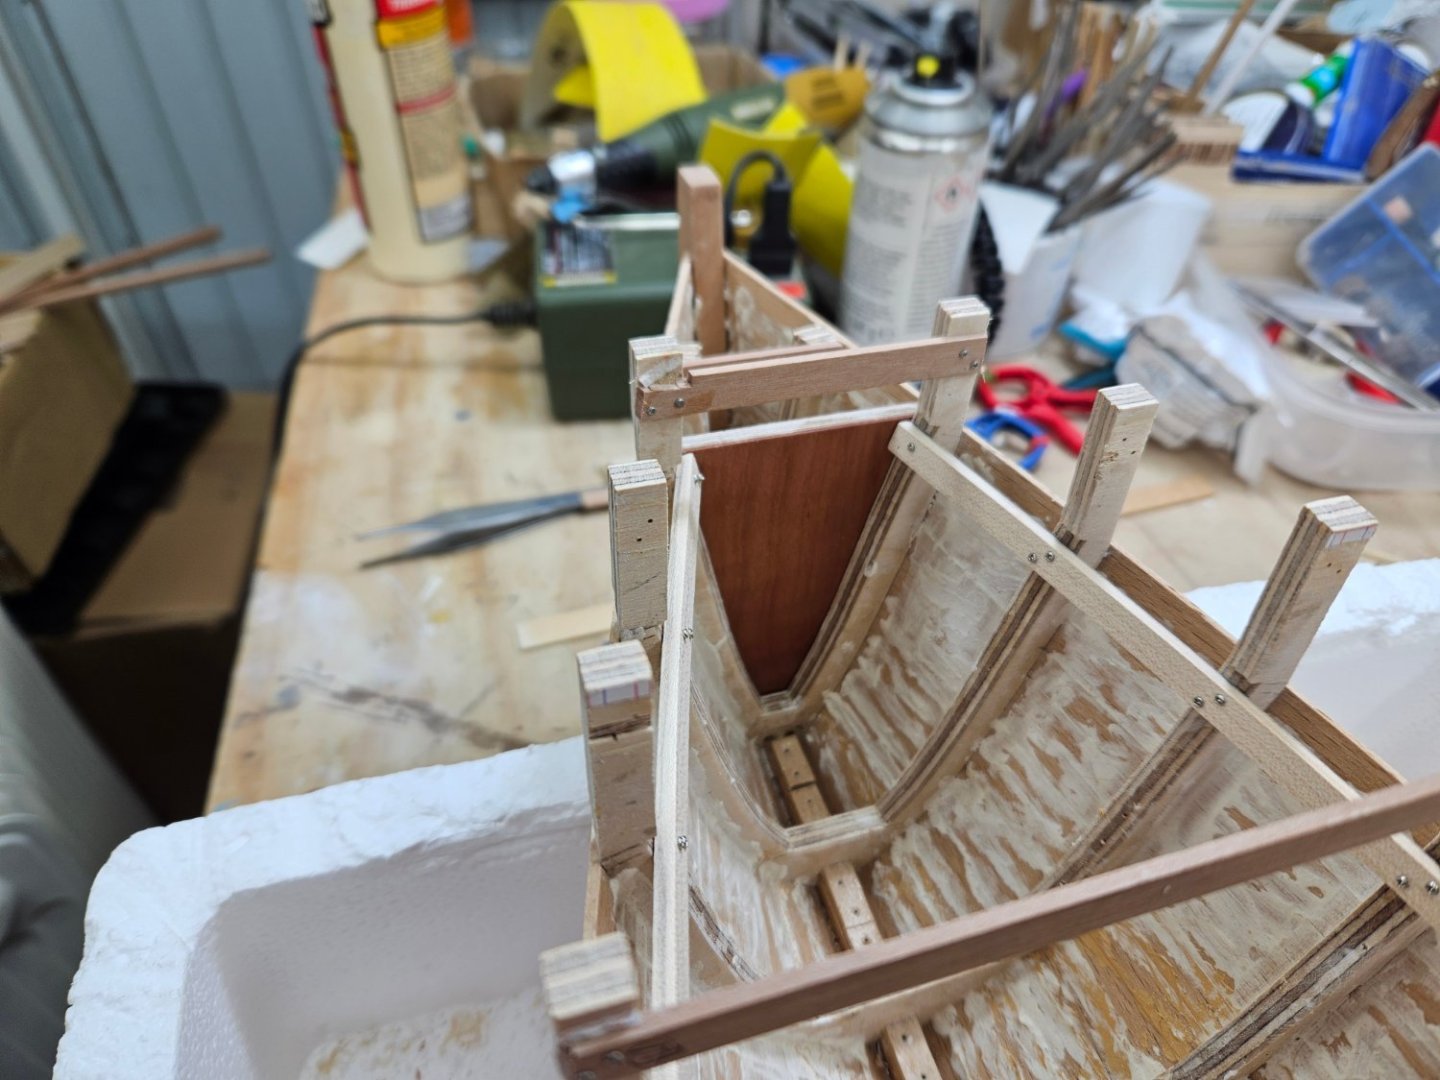
I made the frame for the fish well, needs its veneer to be added on.
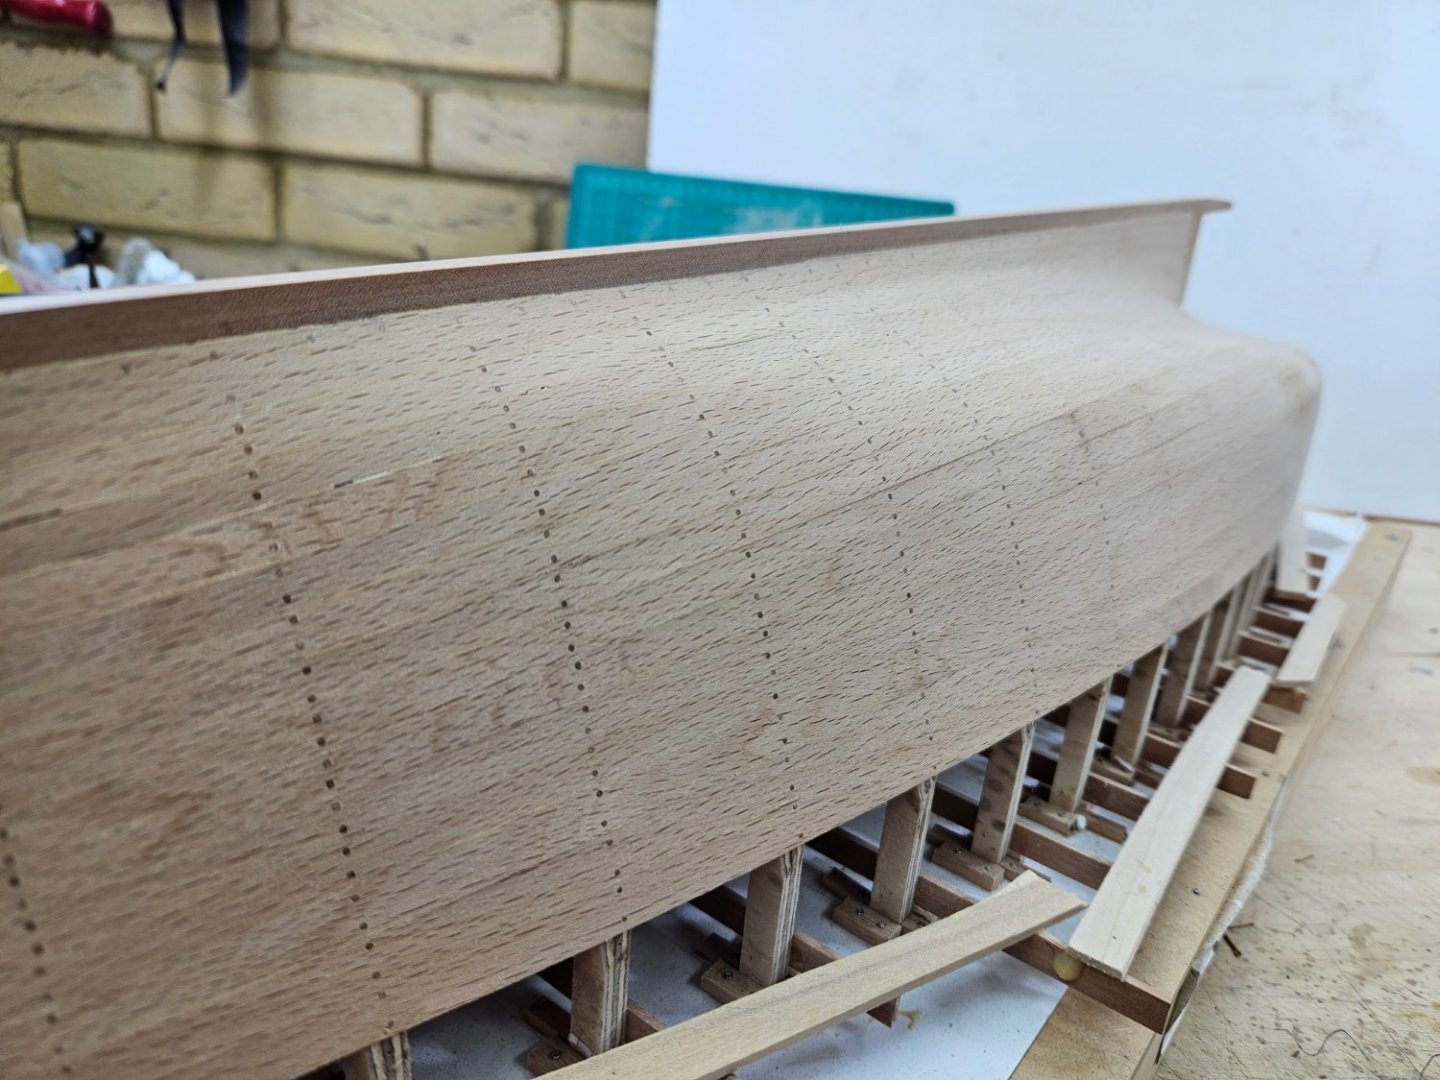
I also added most of the inner planking on the starboard side. It went really well, I only had to spill the aft part of the lower plank. There is a bit more planking left to do towards the bow. Screwing and drilling at such angles is pretty difficult, mainly at the bow.


I also cut a piece of wood for the breasthook/small deck, it will be sanded curved later on after the sheer shelf is added.
The inner planking is maple, so will be much easier to sand than beech. At 1 mm thick it allowed generous edge bending but I do need to be careful when sanding.
Vaddoc
- KeithAug, allanyed, Mark Pearse and 8 others
-
11
-
Ok, time for a wee update!
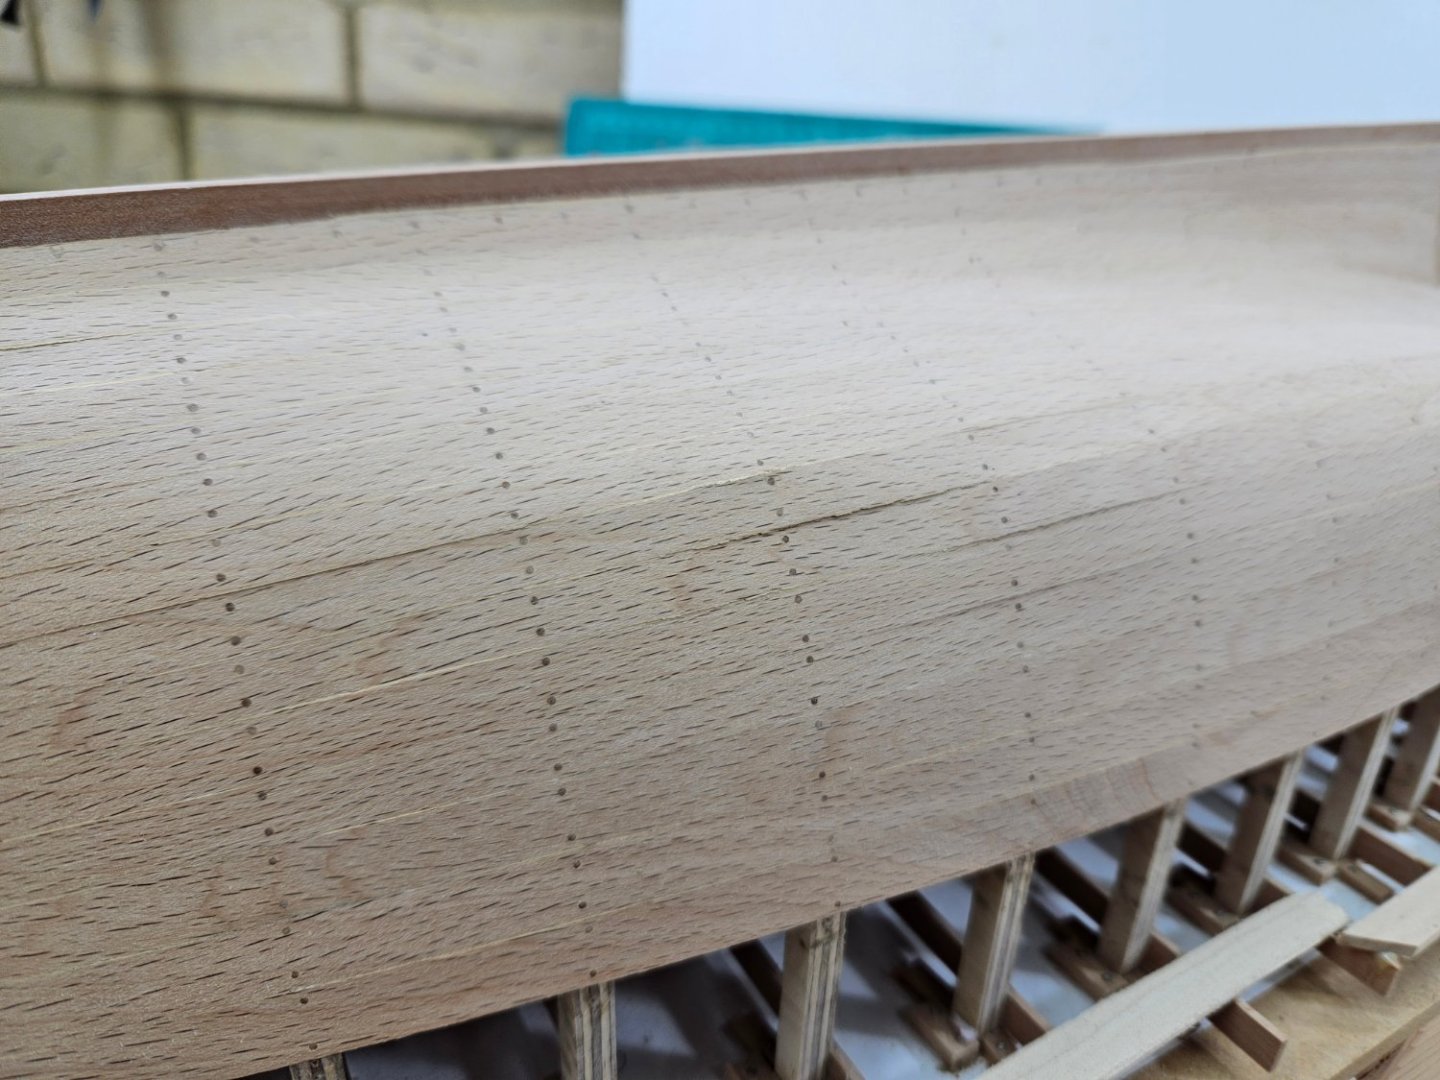
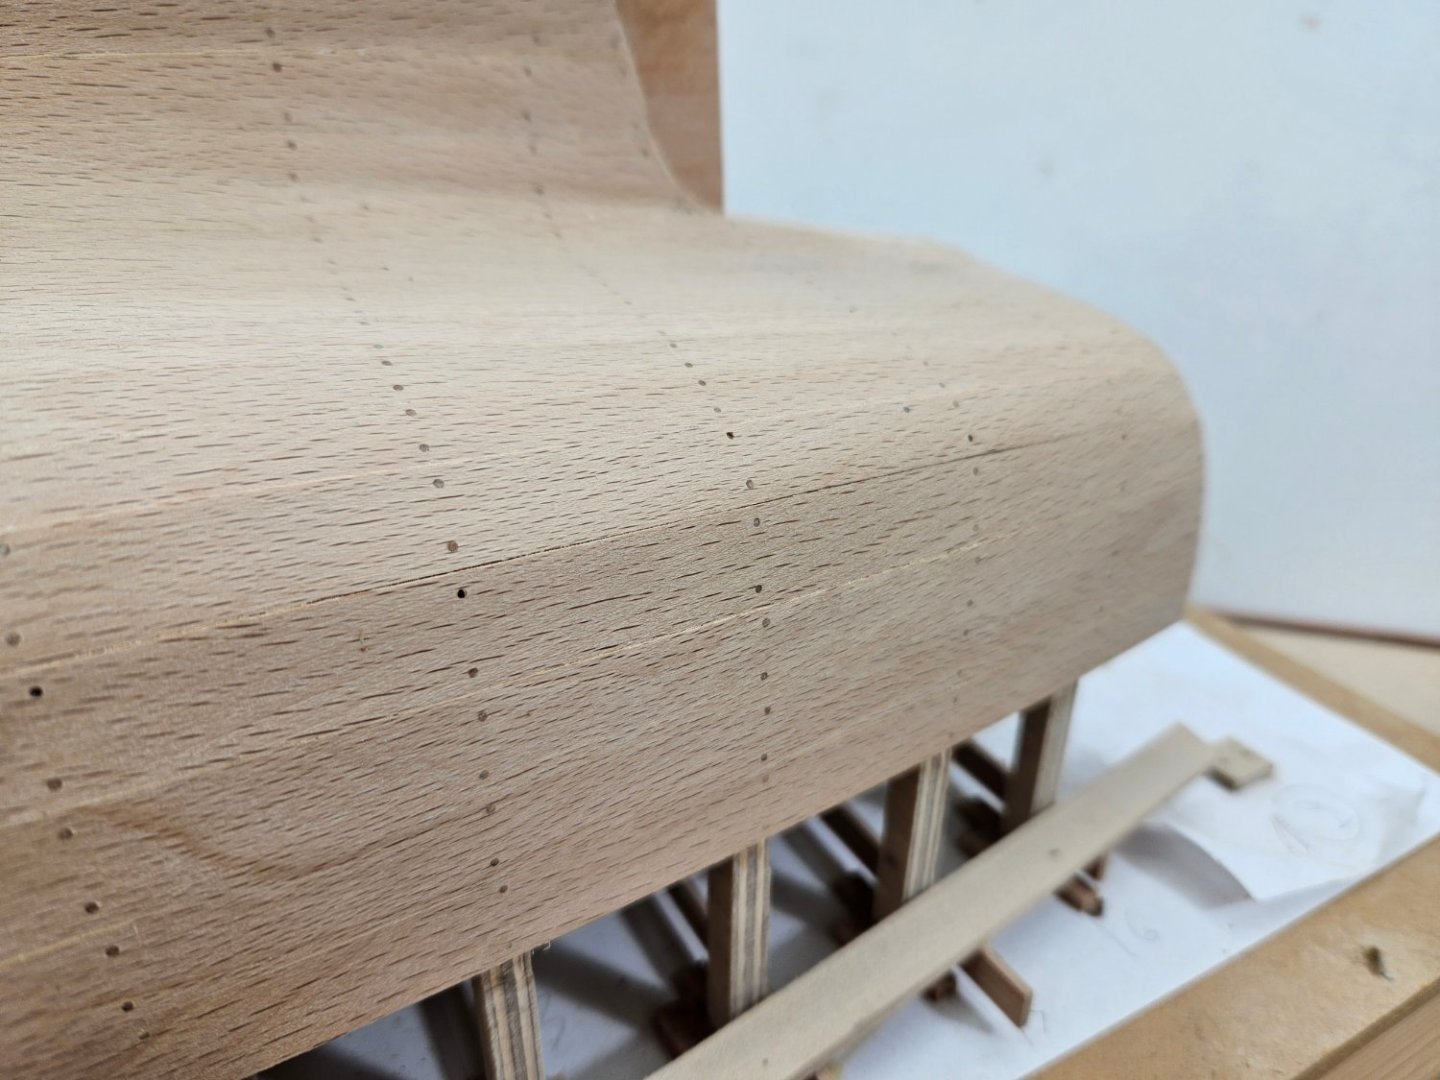
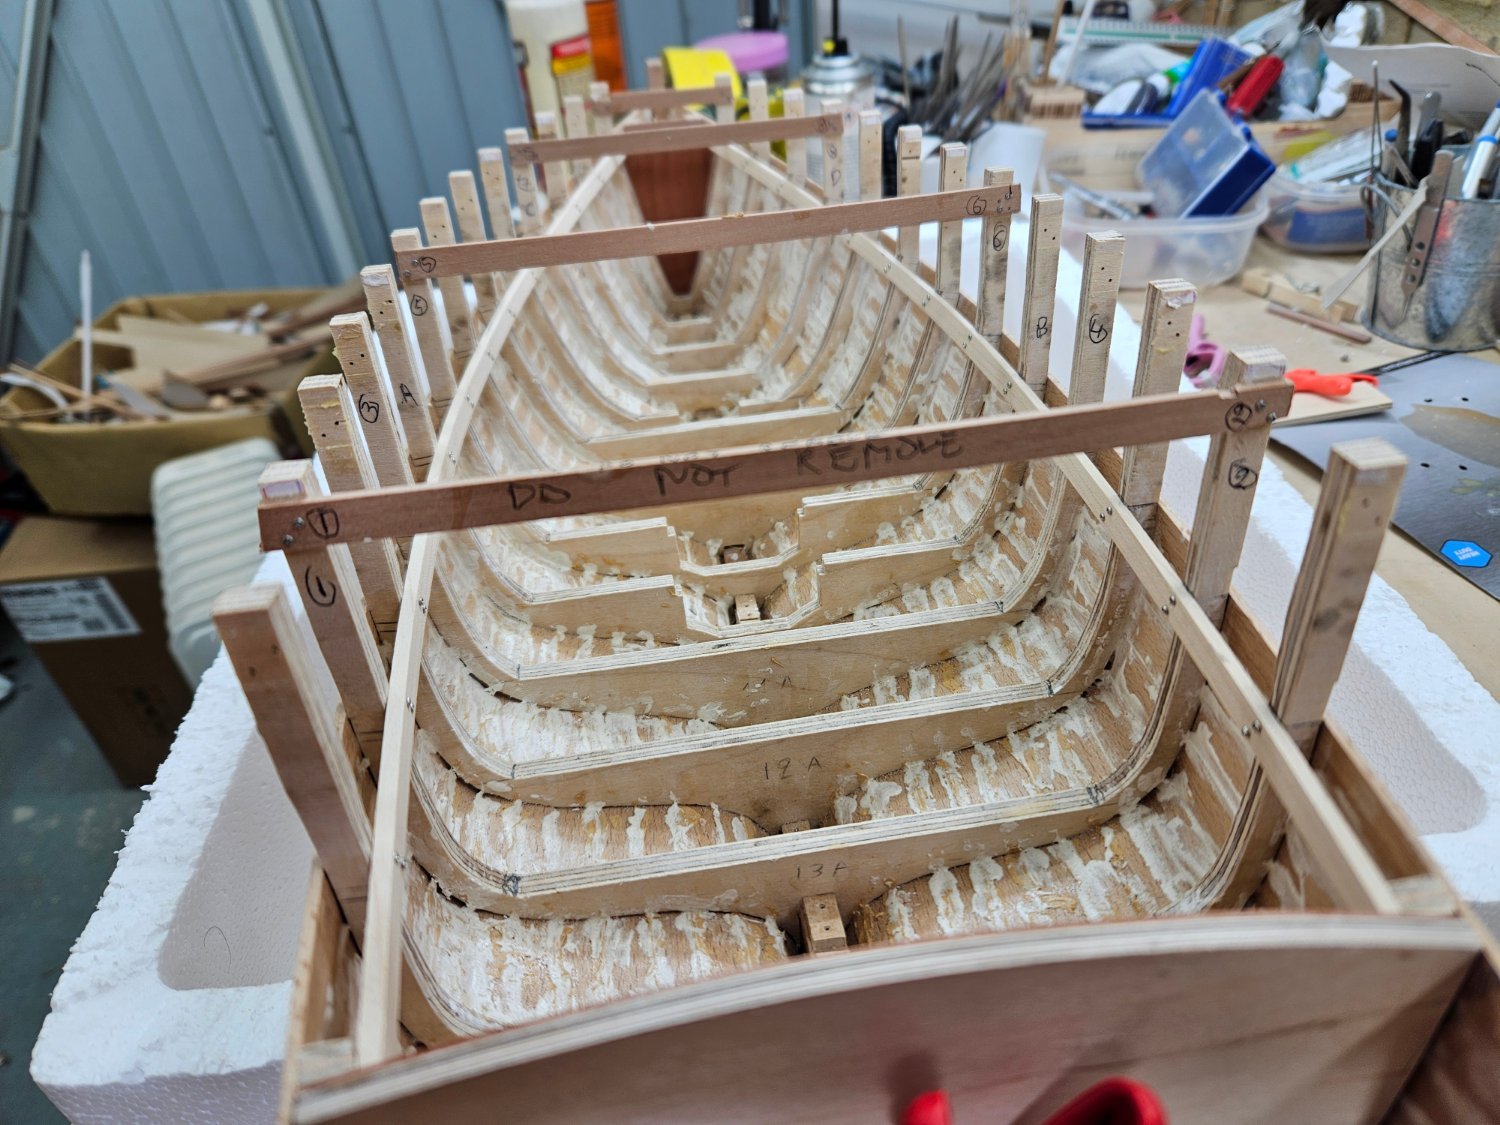
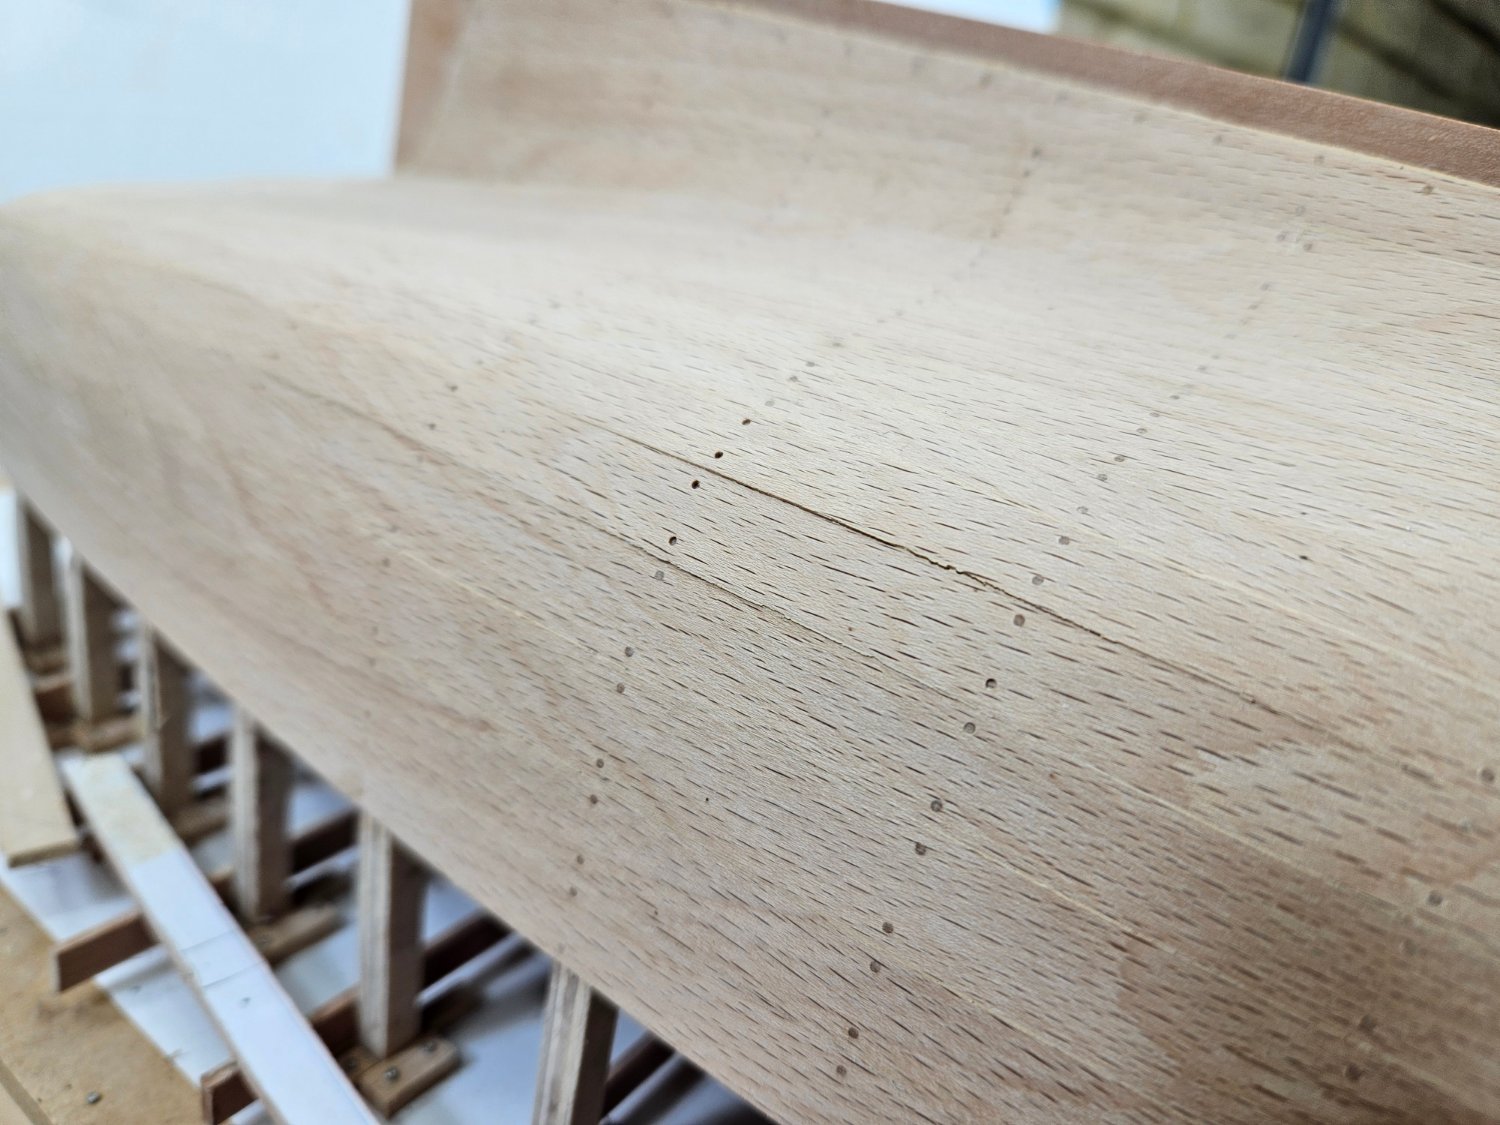
I have not gone into hibernation and have done a bit of work, just did not have the time to take photos and post the progress. A lot of head scratching though, it's been a long time since I did the 3D plans and I had forgotten how everything come together. I also had forgotten that I ve used beech for the hull and generally cut a few corners in this boat. Now these are biting back! I simply cannot understand why I used for the frames the cheapest, nastiest plywood ever made!
So, first I had to deal with the hull and the dancing/shrinking beech wood. I filled the cracks but brought the boat inside as it was freezing cold in the garage. Yep, the wood contracted again and the sims opened once again!


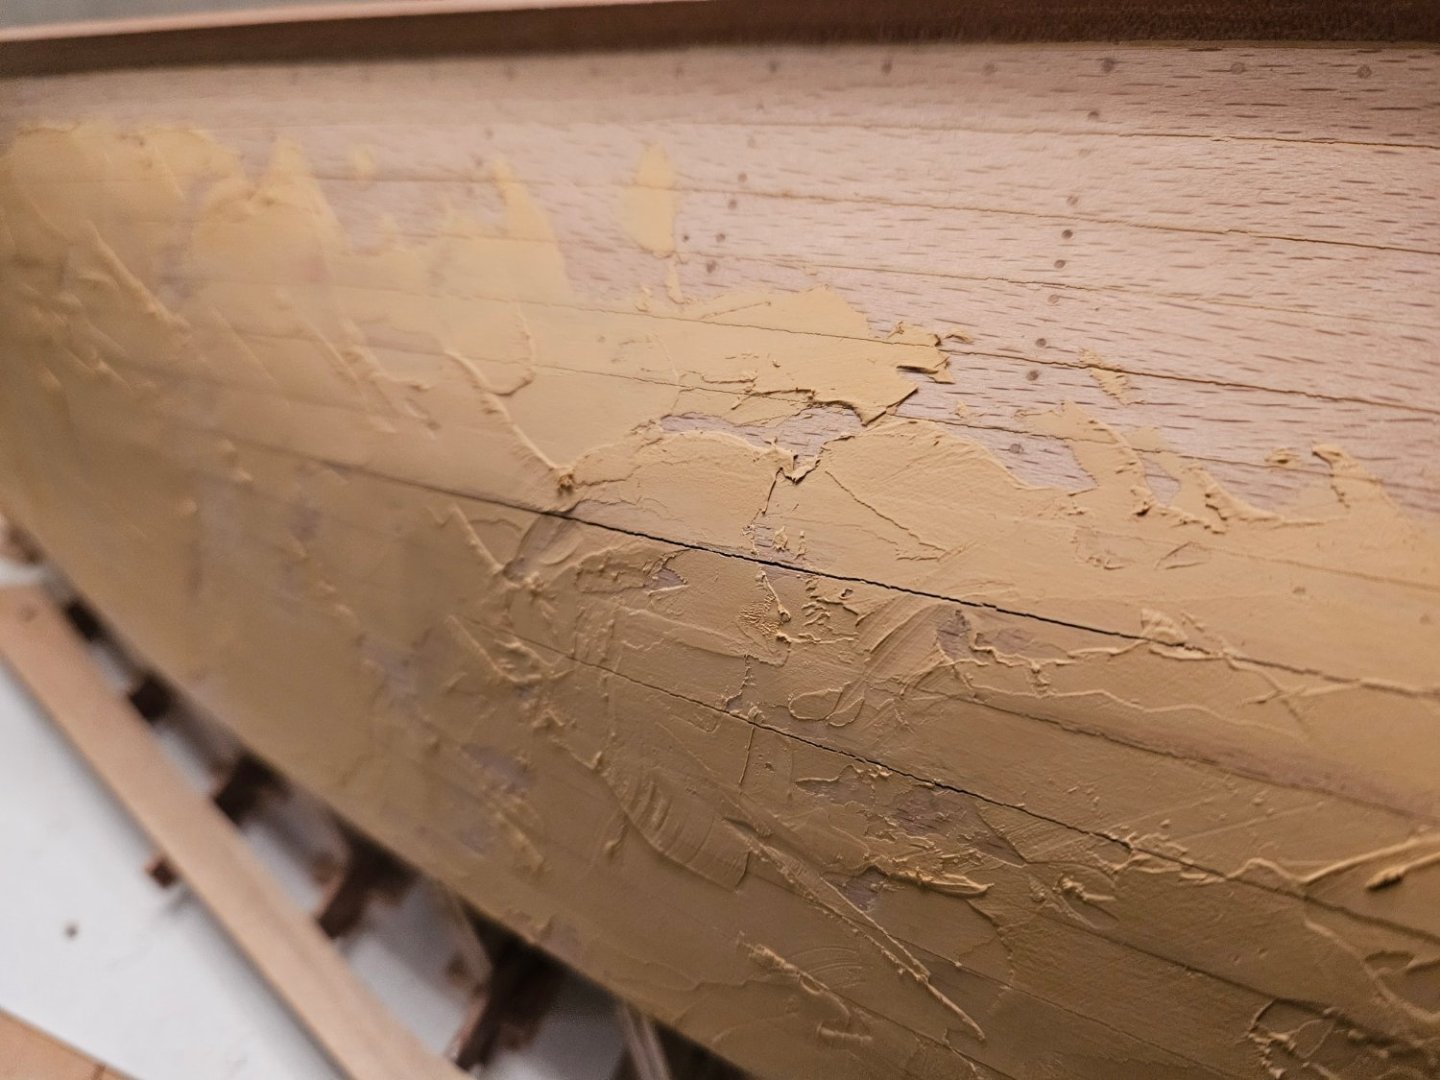
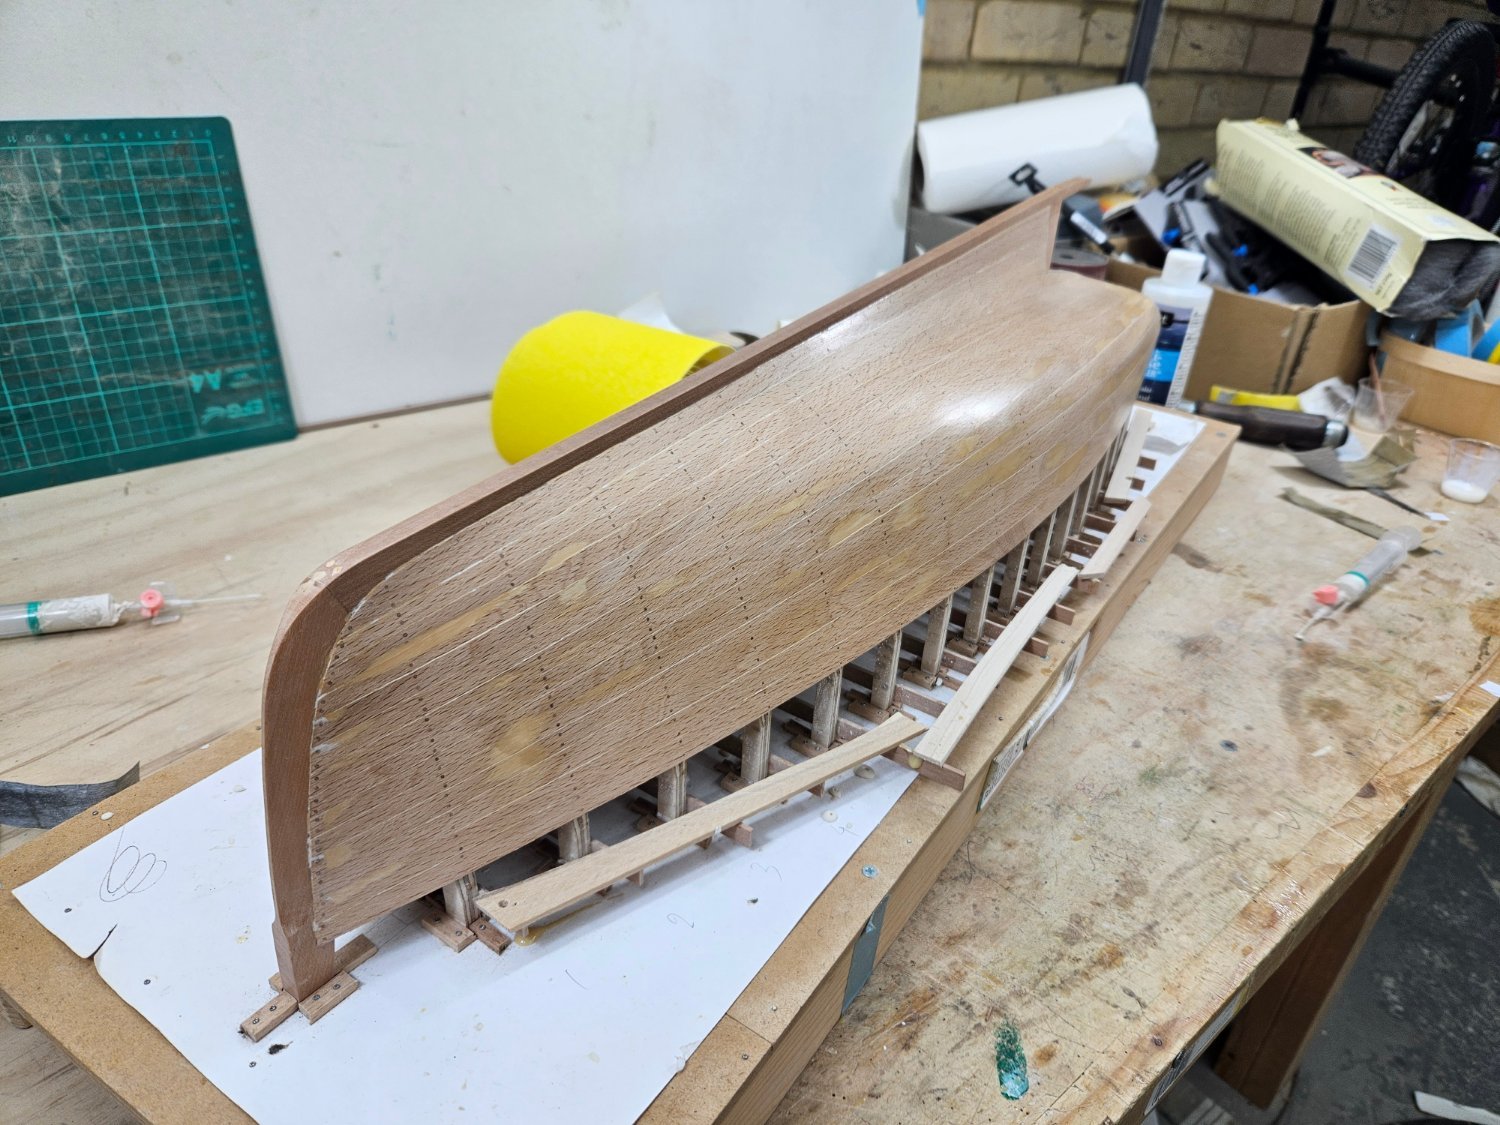
I filled again, sanded, filled, sanded... I have now settled with Osmo water based filler and Decoart water based sealer - excellent products.

So, after lots of filling, sanding, scraping etc, the hull looks decent, is sanded to 400 grit and is sealed inside and out. This took time, effort, a few lungfuls of dust and lots of cursing.


Ok, time to free the boat from its cradle!

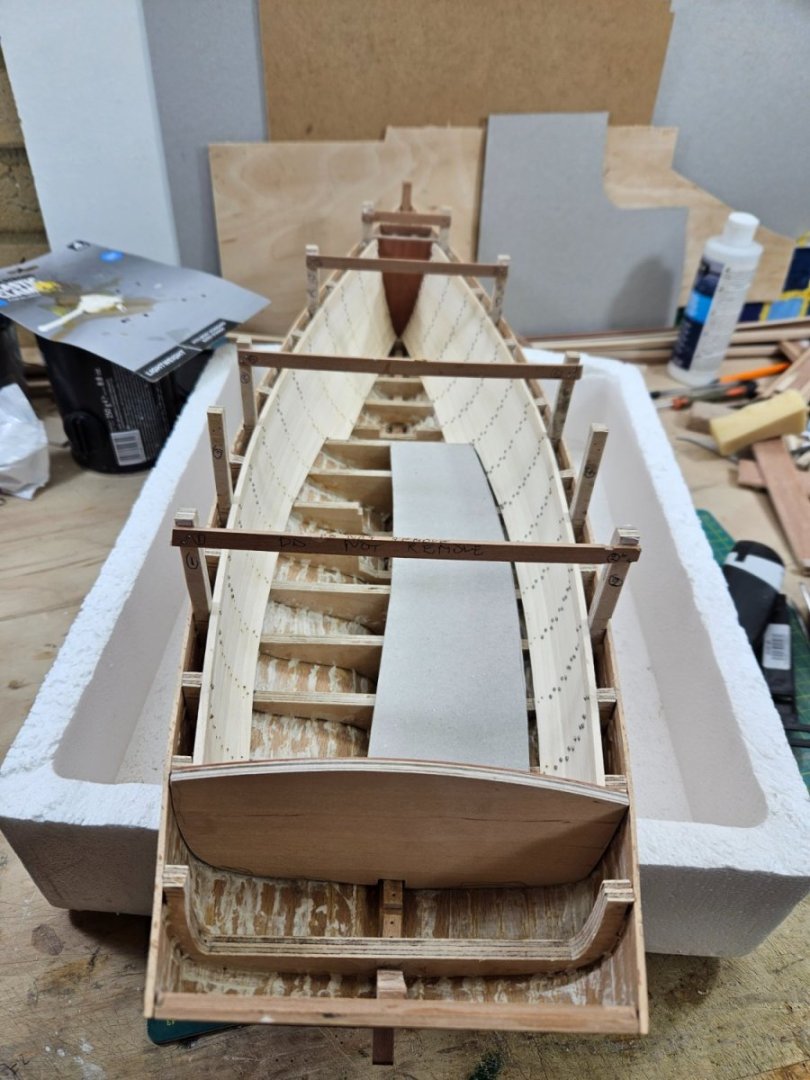
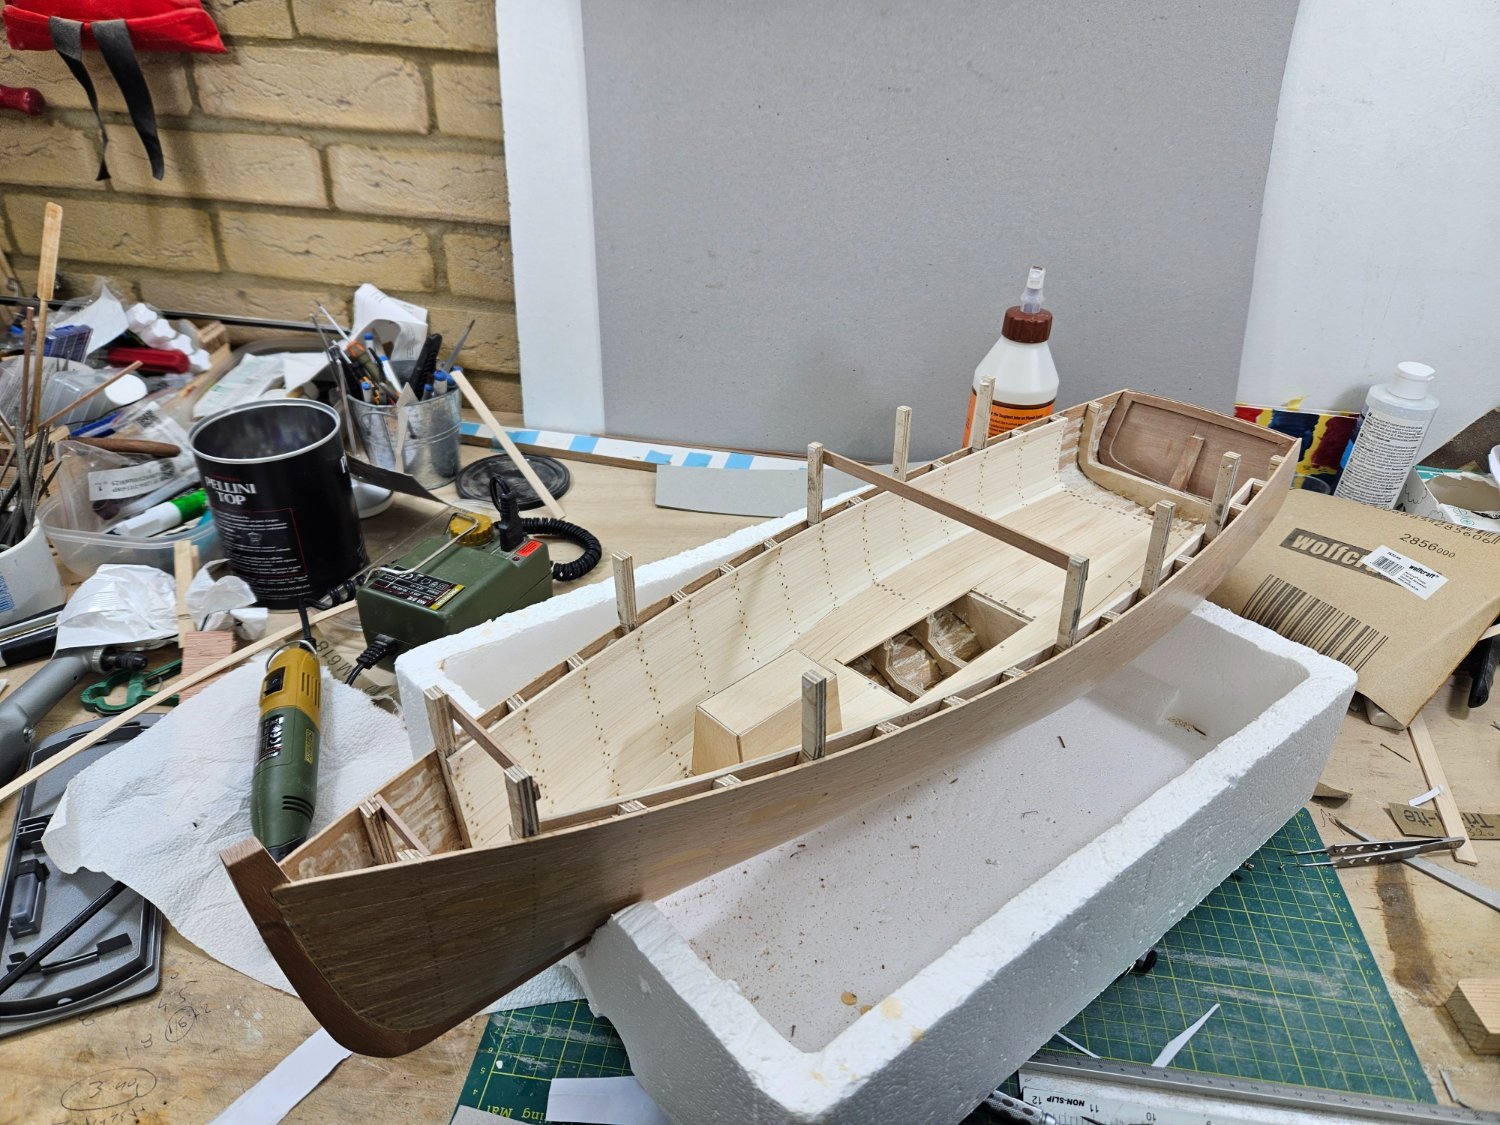
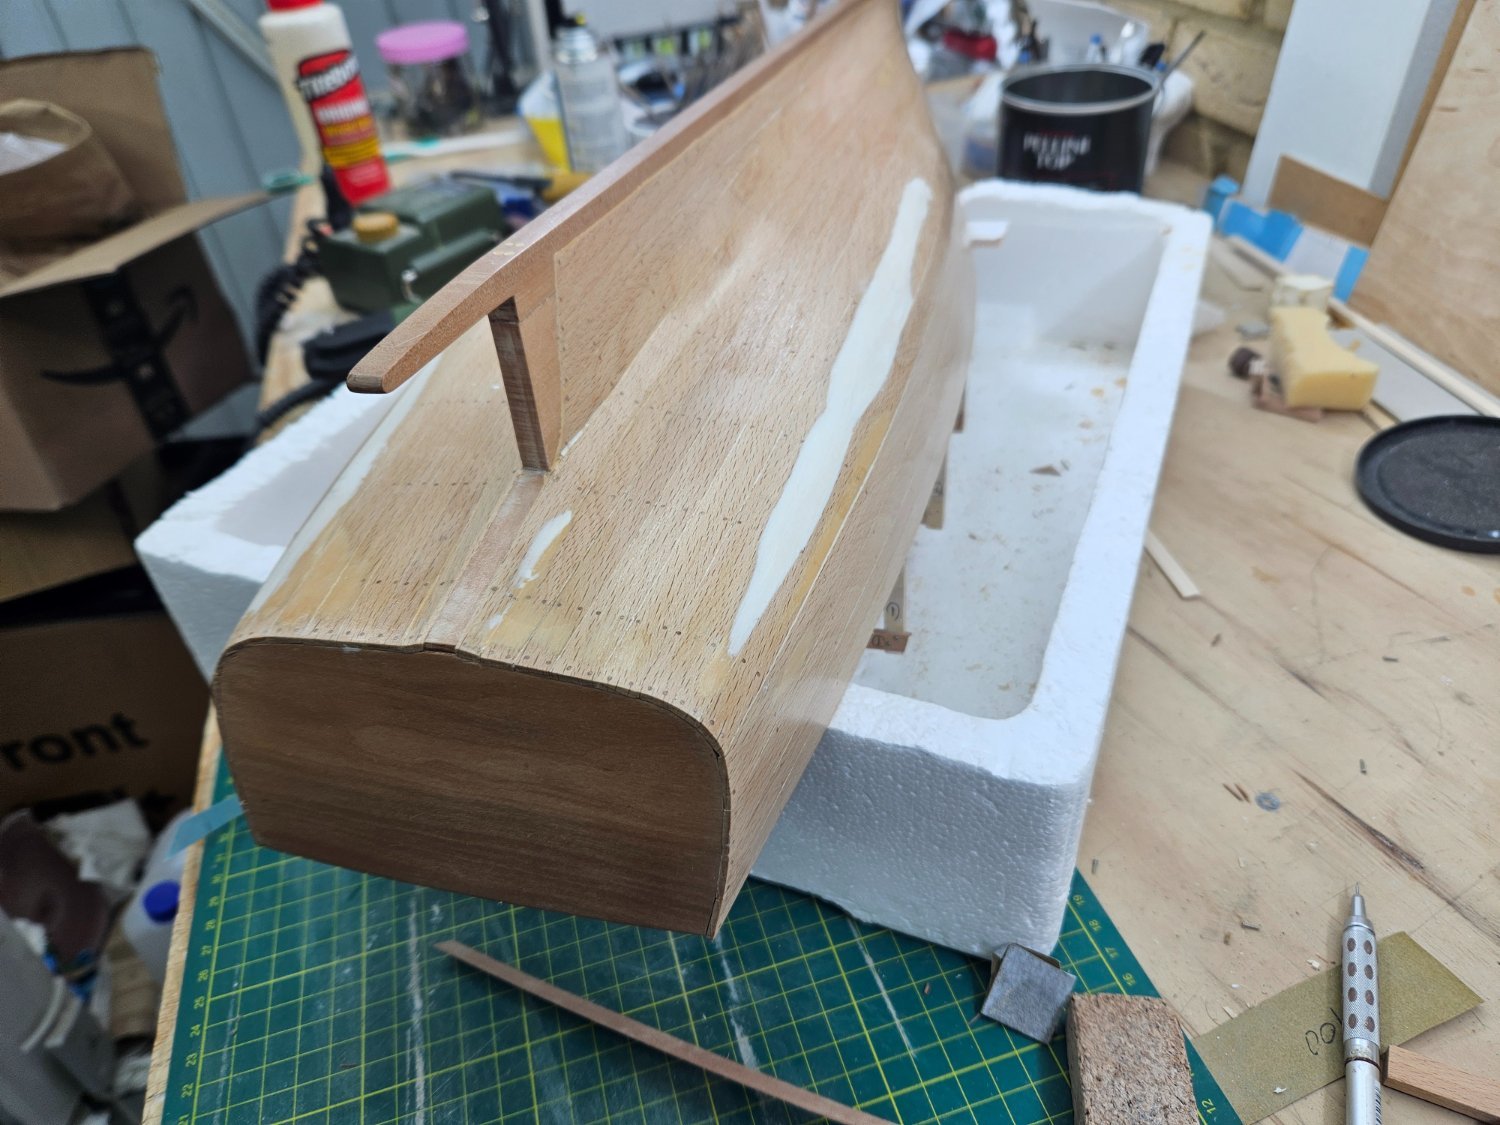
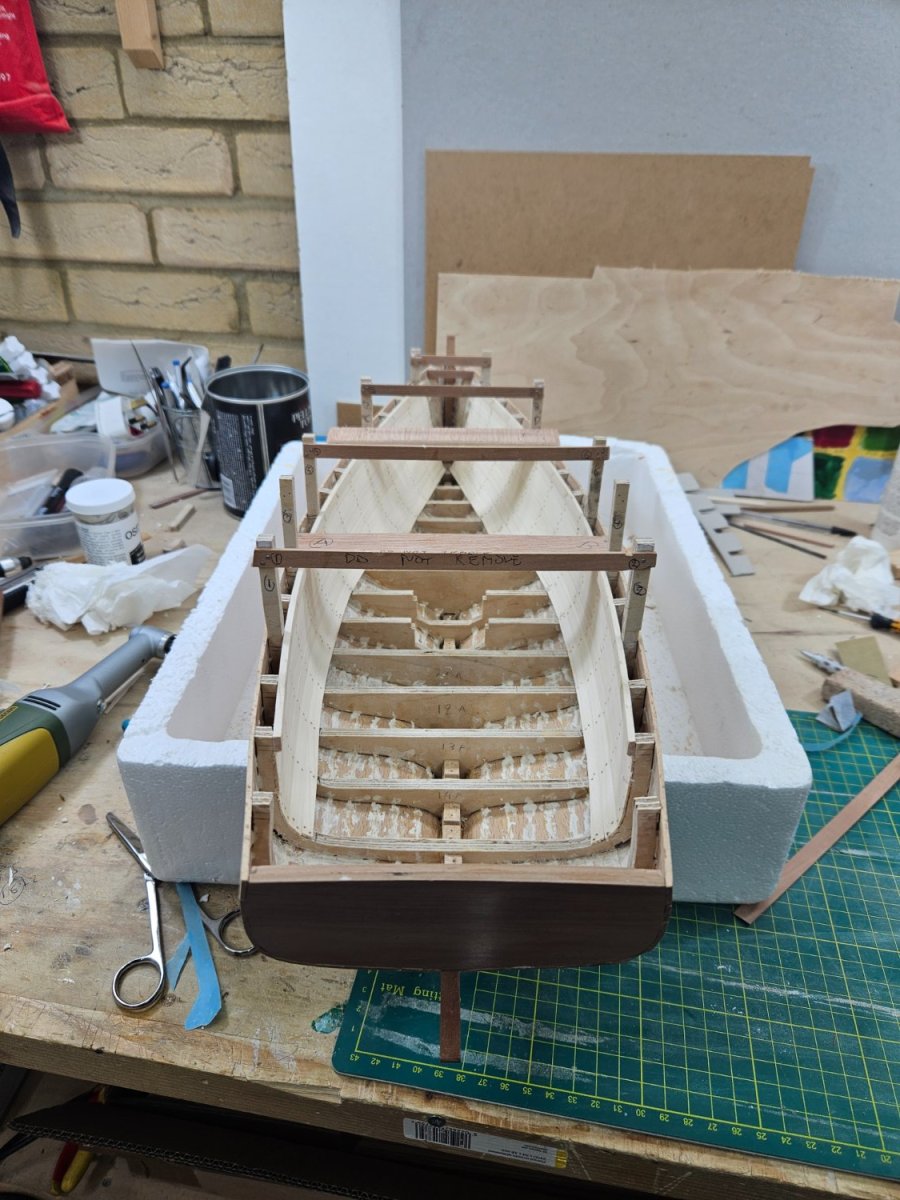
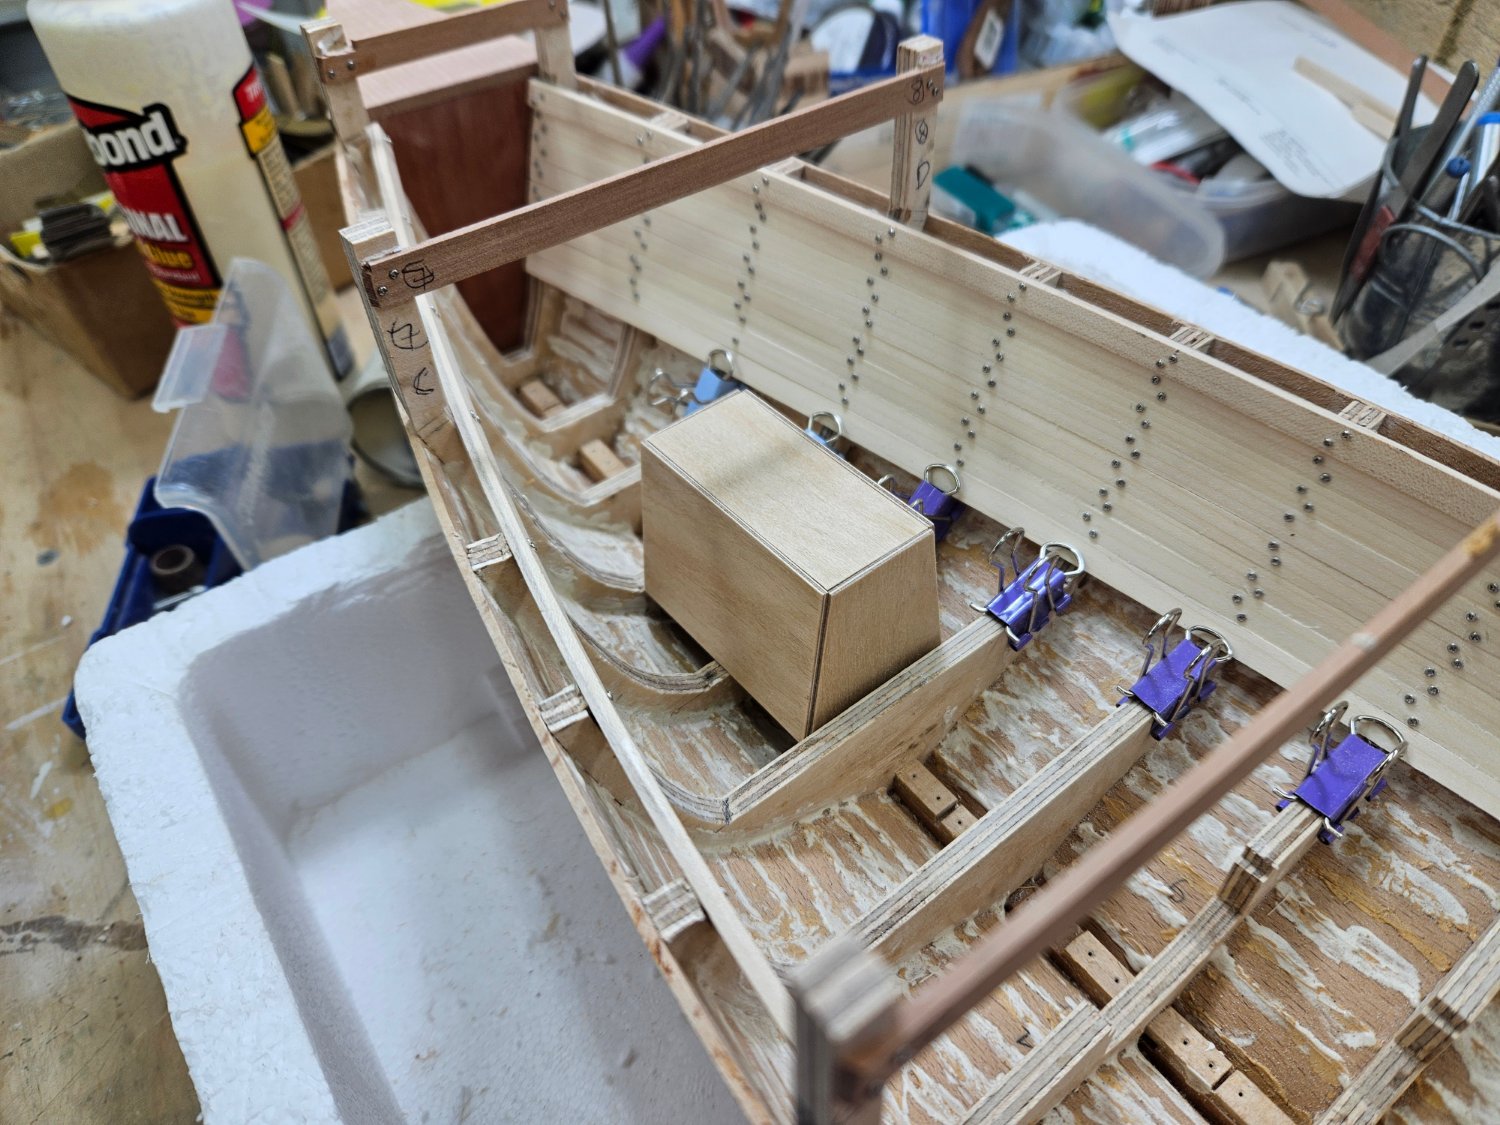
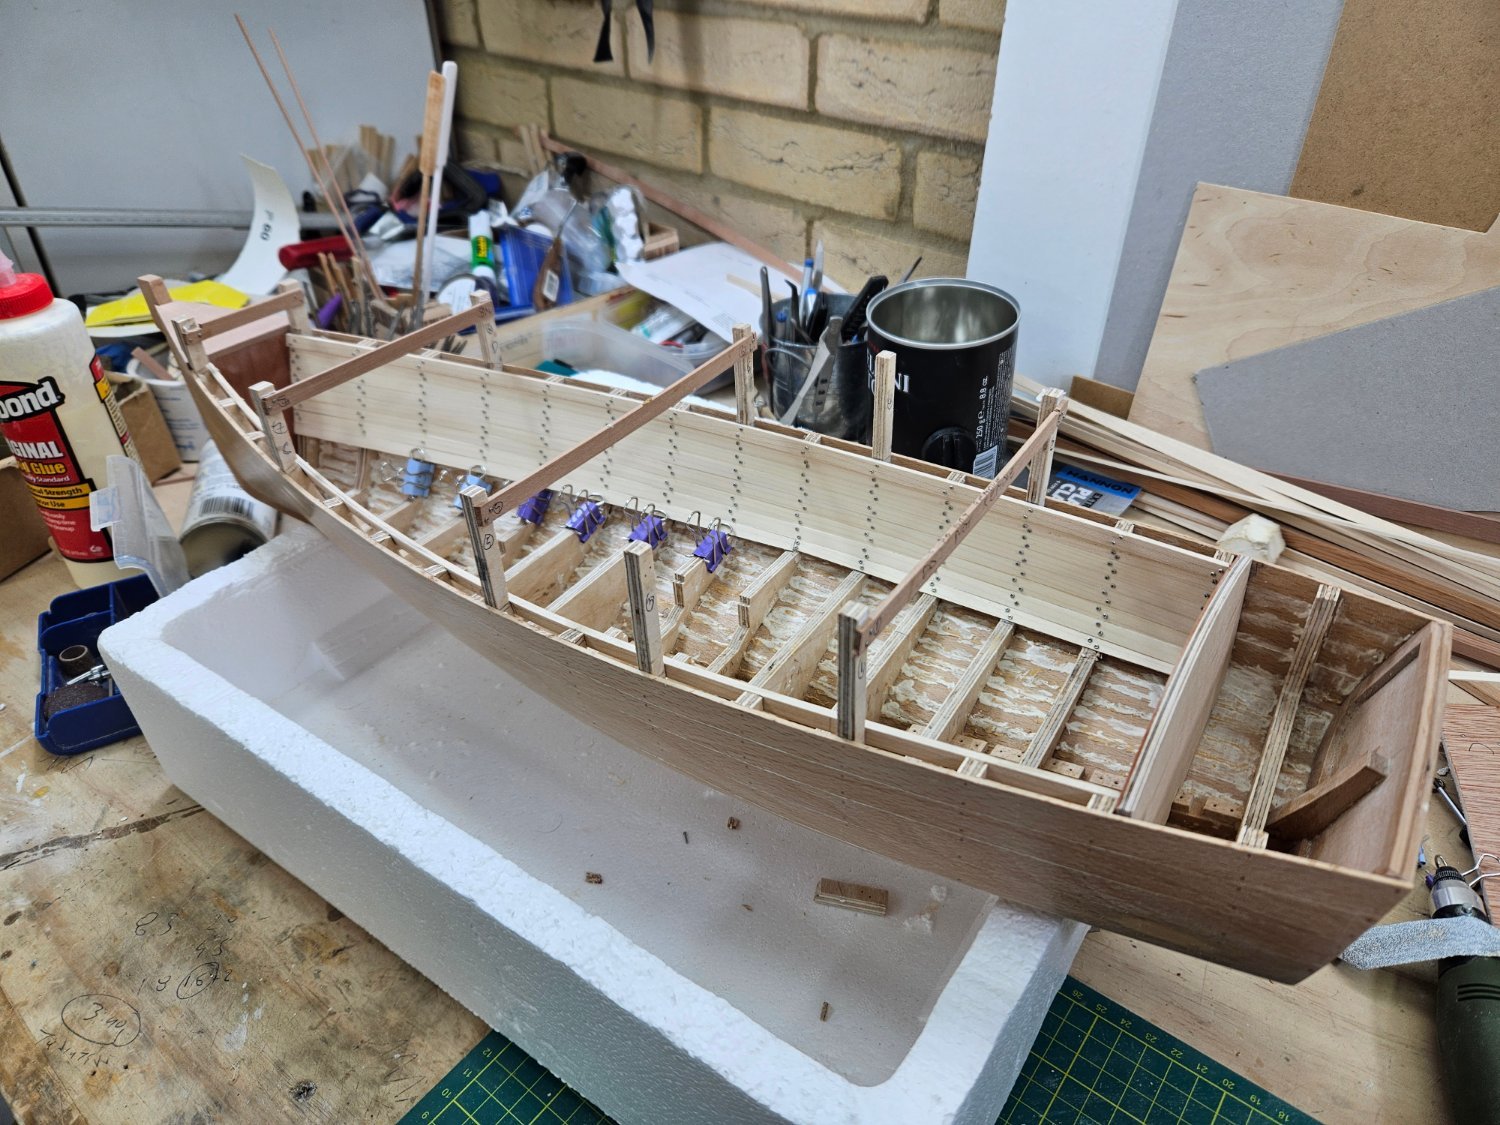
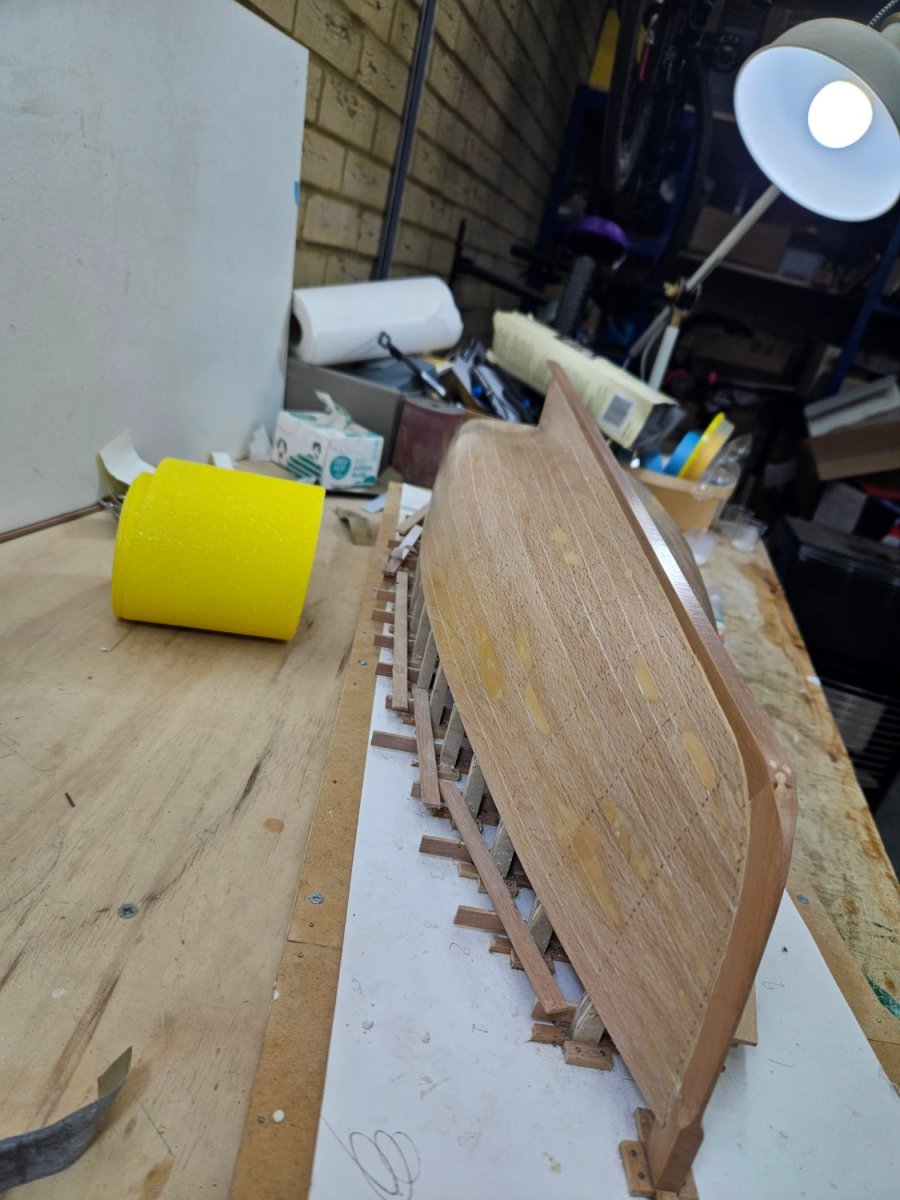
Now, the boat needs inside planking, bulkheads a bit of deck fore and aft, floor boards, the engine box, the fish well, a rudder, and this elusive vertical rudder. So here it goes:
I could not remember how all were supposed to come together and it took me a long time to figure the boat out again. I am still not sure how the floor boards and inner planking should be arranged. In any case, I installed the sheer clamps and the two bulkheads fore and aft. I had to deviate a bit from the plans due to my corner cutting. I also cut several of the frame extensions and made two braces to make sure the hull does not loose its shape.


I also bought a new water stone 1000/6000 and honed again all my chisels - they are now truly razor sharp. I also did all the kitchen knives including the serrated bread knives - all now very sharp!
Much to do and at some point I must paint the hull. I have no doubt the beech will find a new moisture equilibrium and the sims will open up again so it needs to be done asap but it is -2C in England currently so painting will have to wait. I 've decided to use enamels and top it up with enamel varnish - all brush painted. Have not used enamels in many years!
Till next time, my very best wishes for the New Year!
Vaddoc
- KeithAug, Bedford, Wintergreen and 8 others
-
11
-
If I need really flat strong plywood, I make it my self.
If I need 6 mm, I take two sheets 2.5 mm each on a flat surface. Thicken epoxy with gypsum, spread onto one sheet, cover with the other and put something very heavy on top. 12 h later I get very flat, very rigid 6 mm ply.
- Canute, mtaylor, GrandpaPhil and 1 other
-
4
-
-
17 hours ago, allanyed said:
This is less than 2" full scale at 1:48 so sounds spot on. Do you know if there are smaller screws? For smaller scales such as 1:64 that will leave a hole way over scale.
Are the screws you are using wood screws or?? Can you post a pic, this sounds like a solution for many builders?
Sorry for all the questions😕Thanks Vaddoc!
Allan
Allan, if you google "1mm Philips self tapping screws" you ll get lots of results. I buy mine from Aliexpress, different lengths with 5 and 6 mm more useful. Last time I bought 20k!
Best is to use 0.8 mm drill. The stainless steel are better than mild steel as the head resists deforming which can make removal impossible. I have had difficulty recently finding good quality proper hard stainless steel ones (if they are non magnetic they are the good ones)
Smaller screws are extremely expensive available in very few specialist shops. However, you can thread brass wire and use it to screw things together but it is very labour intensive,
vaddoc
-
-
-
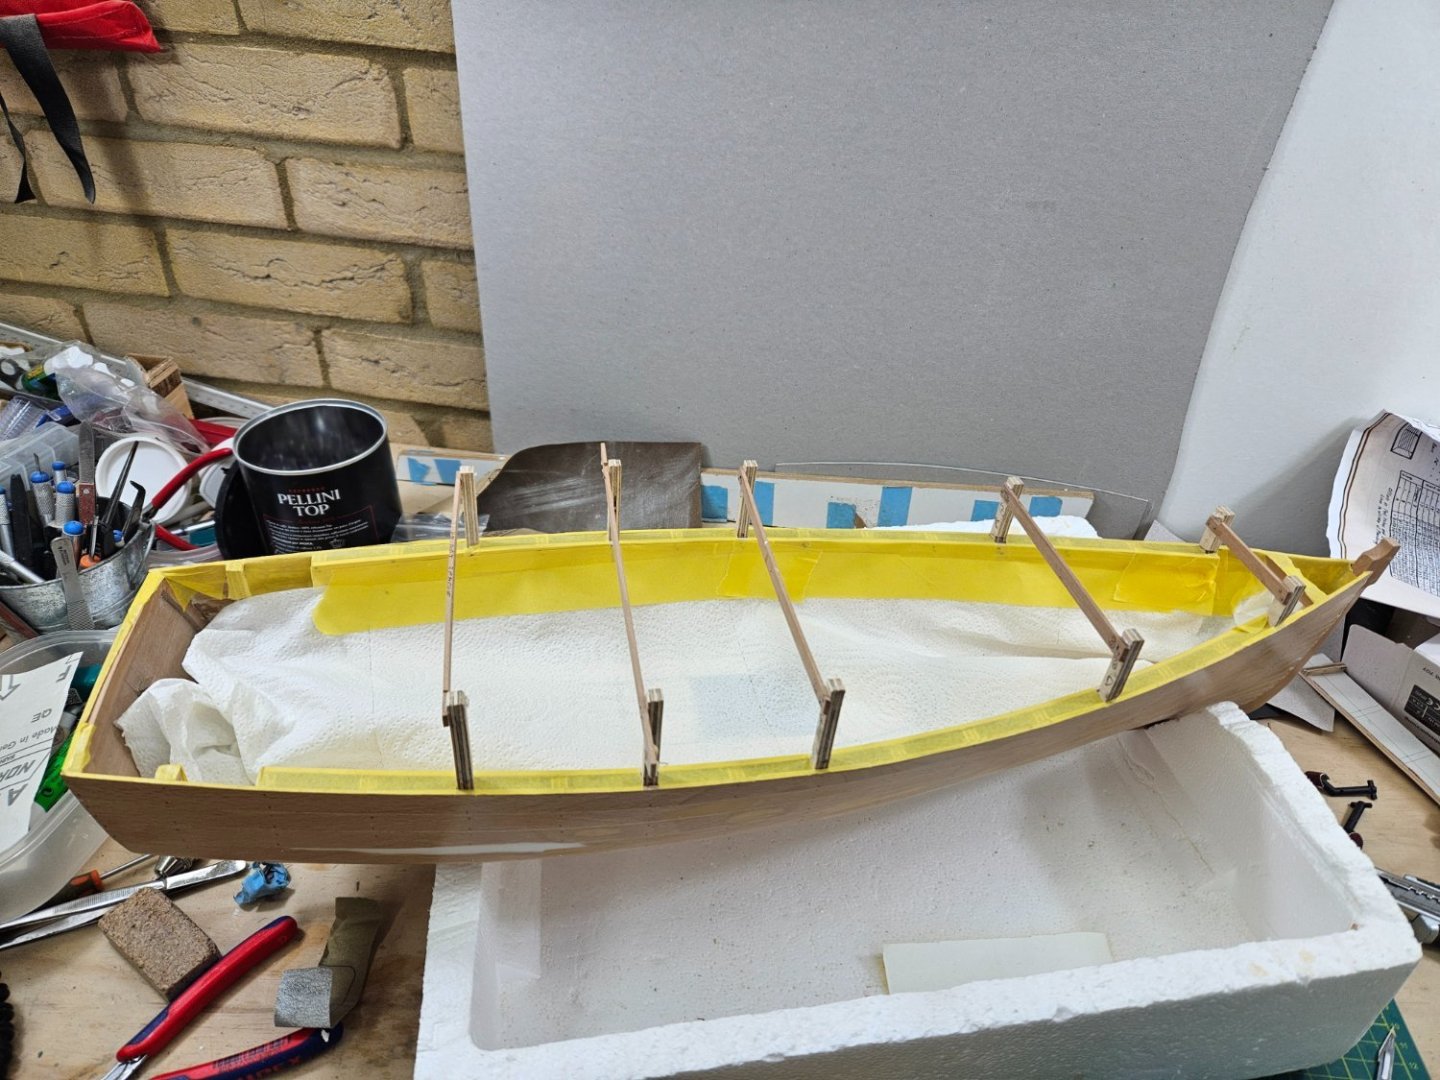
Well, as we all know time is relative so I guess two and a half years since my last post is not a long time! Ladies and gentlemen, the Launch is back in drydock.
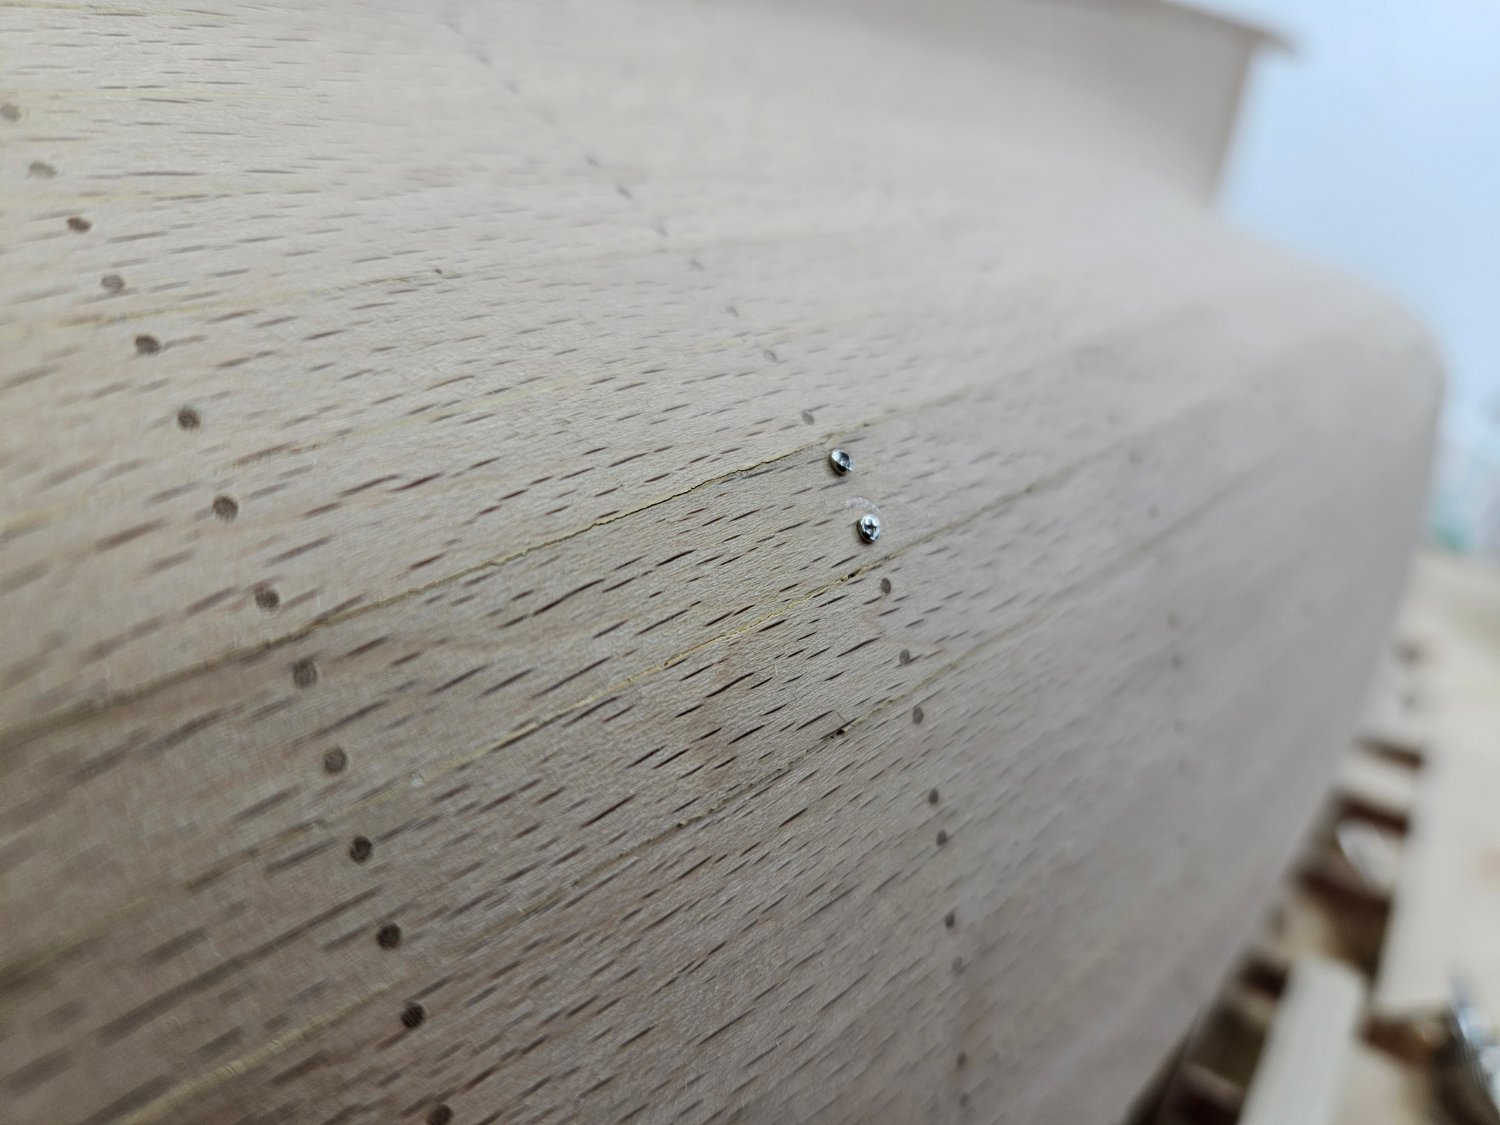
During this time I ve been working on the Yawl. Now, both boats have hulls made of beech wood so the Launch suffered the same fate. The planks constantly change dimensions in response to changes in moisture and shrunk a lot reaching equilibrium after initial steaming. Beech has huge movement in service.
However, the Launch faired better, I think because the planks are not as acutely bent as in the Yawl so did not need so much steaming and boiling. The filler between the planks is almost intact and the planks have moved in only a few areas. In the bow some nails seem to have failed.

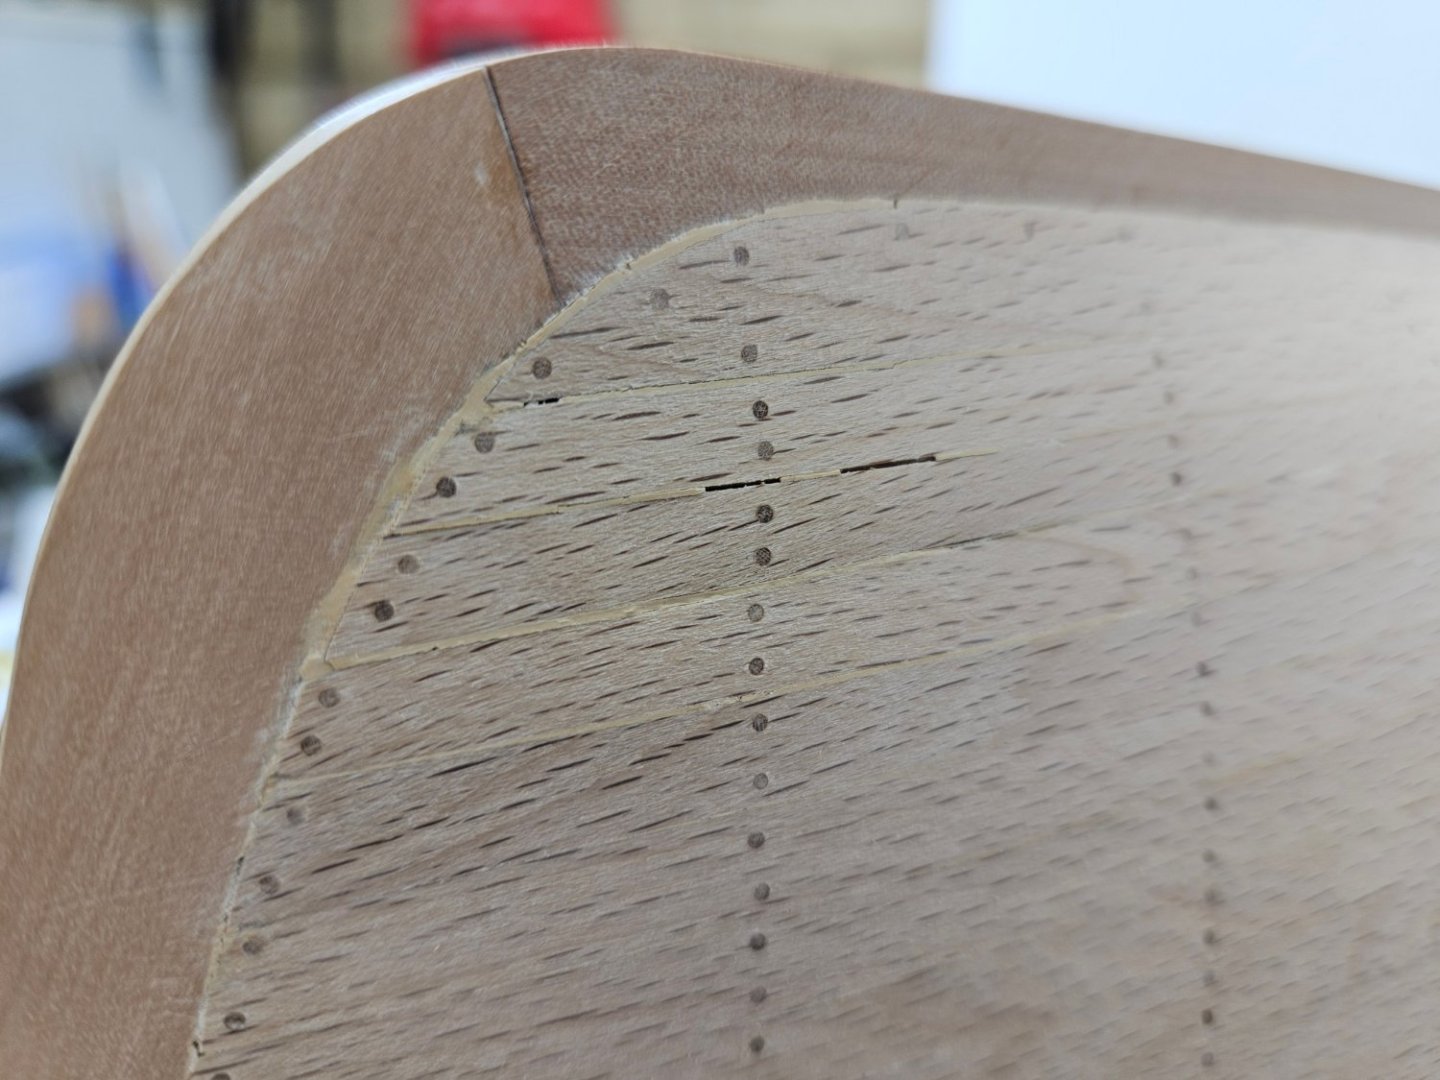
These need to be fixed and the hull needs to be sealed inside and out to prevent movement as much as possible. However, I plan to paint the hull so I will use filler more extensively to smooth it out a bit, since paint will highlight every single imperfection.
So I drilled some nails out, push the planks in place and things improved.
Then, I applied filler very generously. I nowadays use Osmo, it dries very quickly, does not shrink, is hard but still sands very nicely. This is where we are now.
We rarely know what our future holds but mine certainly has a lot of sanding.
Till next time
Vaddoc
- KeithAug, Mark Pearse, mtaylor and 10 others
-
13
-
Ok, I used it a bit today.
Really quiet, this is a massive advantage. Also the larger sanding area is very useful. However there are a couple of possible issues.
The table is secured in the horizontal by two screw on friction plates on either side, these seem to give in while working. I may be wrong though. Time will tell.
Also it does not spin true, there is a slight wobble. I am not sure whether it is the disc or the way the sand paper has been glued on. I guess I should not complain as this is not really intended to be a precision tool, like the Byrnes tools. On the other hand, I have a feeling it will not be a problem as I tried to sand to a line and it went fine. I ll do a bit more sanding.
I need to change the paper though as it came with what looks like 80 grit, I need to swap to 120 grit.
- Roger Pellett, Canute and mtaylor
-
3
-
Dear all
Before anything else, my condolences. I ve never had the pleasure of even seeing a machine made by Mr Byrnes but I can recognise their quality and his contribution to this and other hobbies and professions.
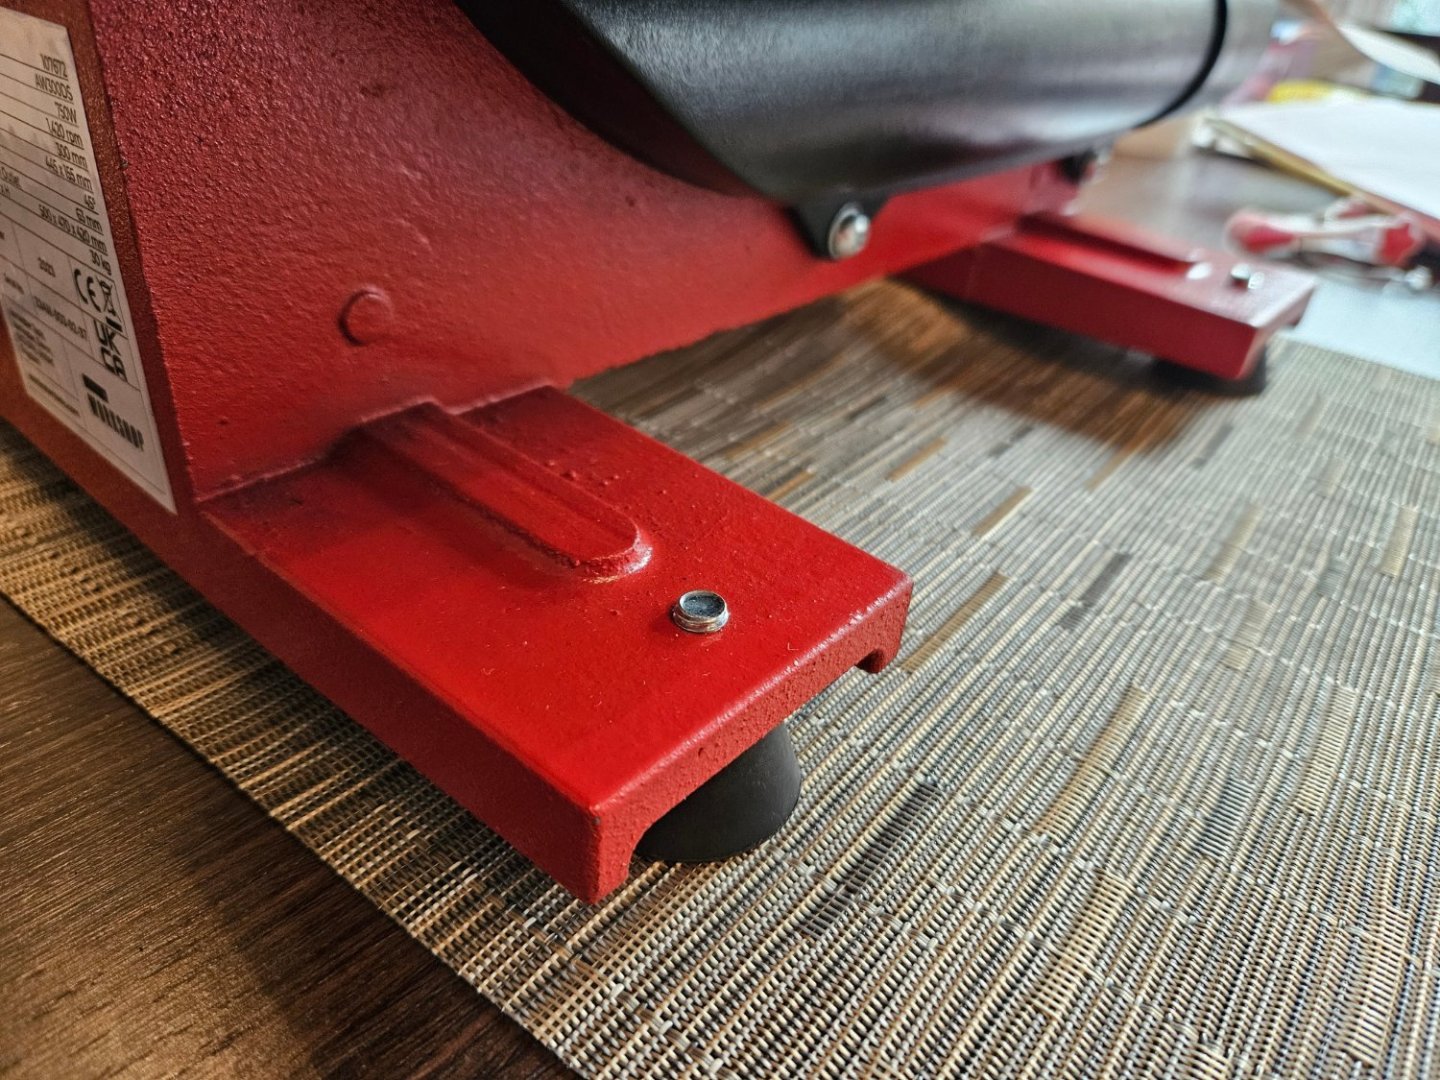
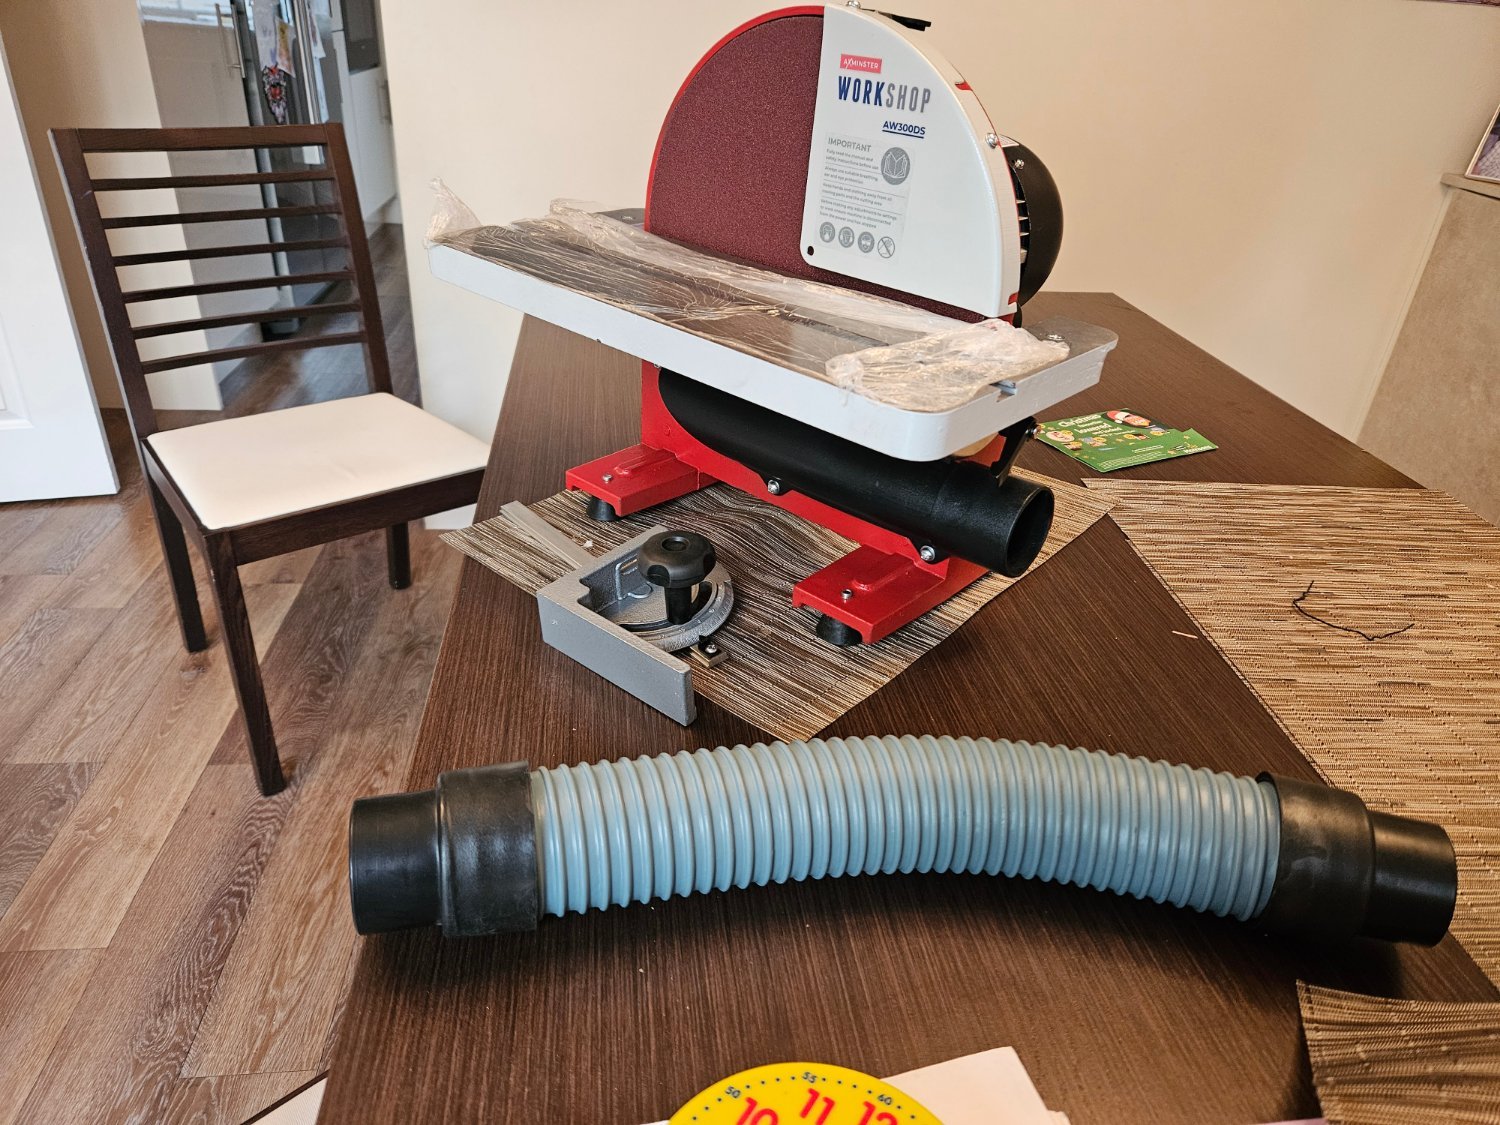
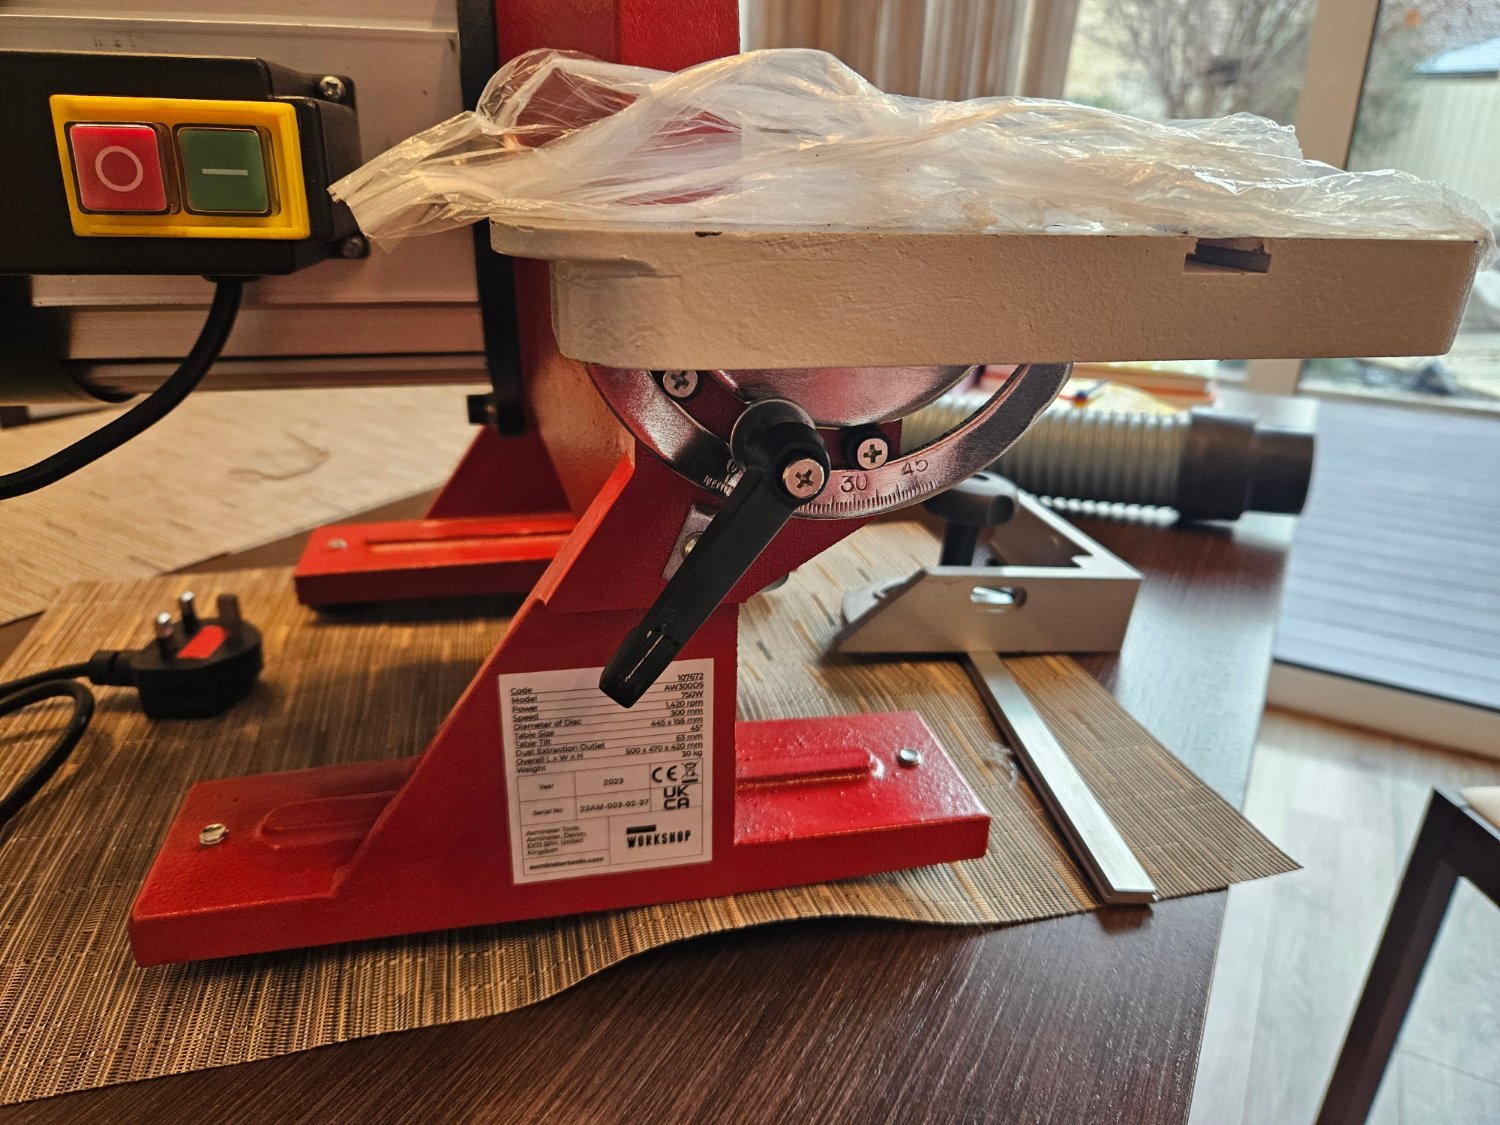
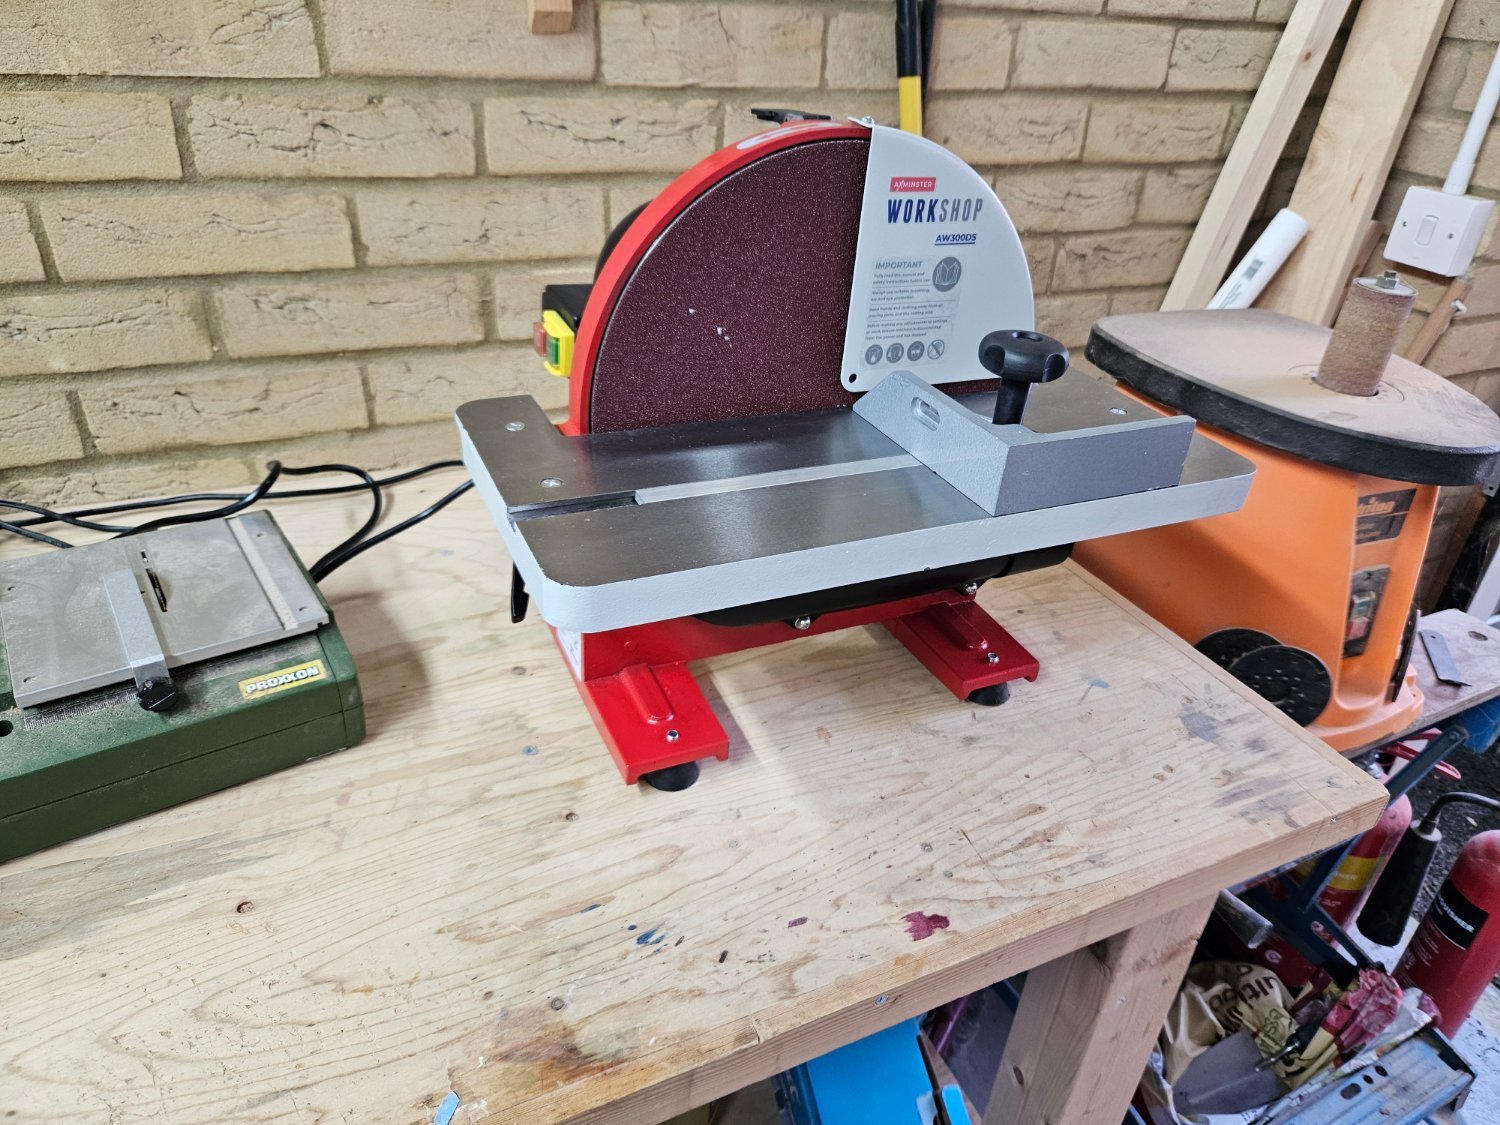
I d like to share my recent addition to the shipyard, an Axminster 300 mm disc sander.
Now, a bit of background. The disc sander is the tool I use the most. I find far more accurate to cut the pieces close to the template line and then sand accurately to the line. I create bevels and even sand brass pieces. Closer to the outer part of the disc, it spins faster and takes off material fast. Closer to the center where it spins slower, allows more precision work. I really could not do without one.
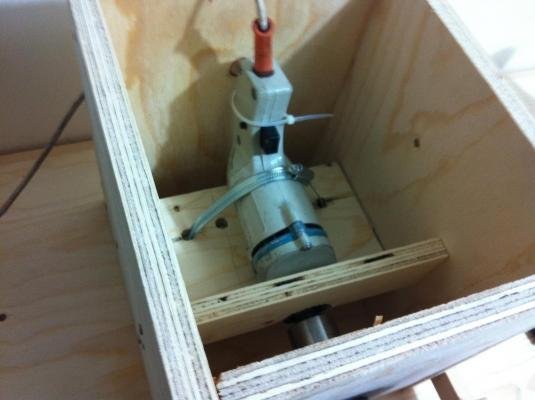
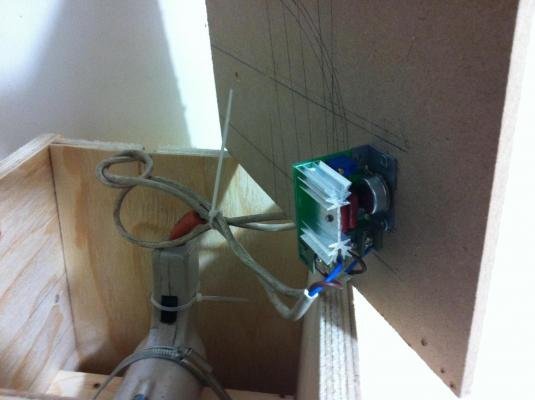
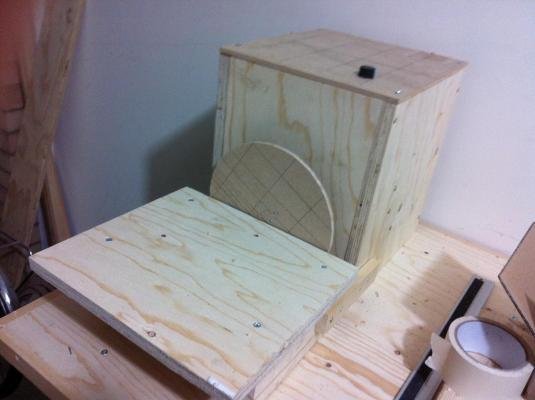
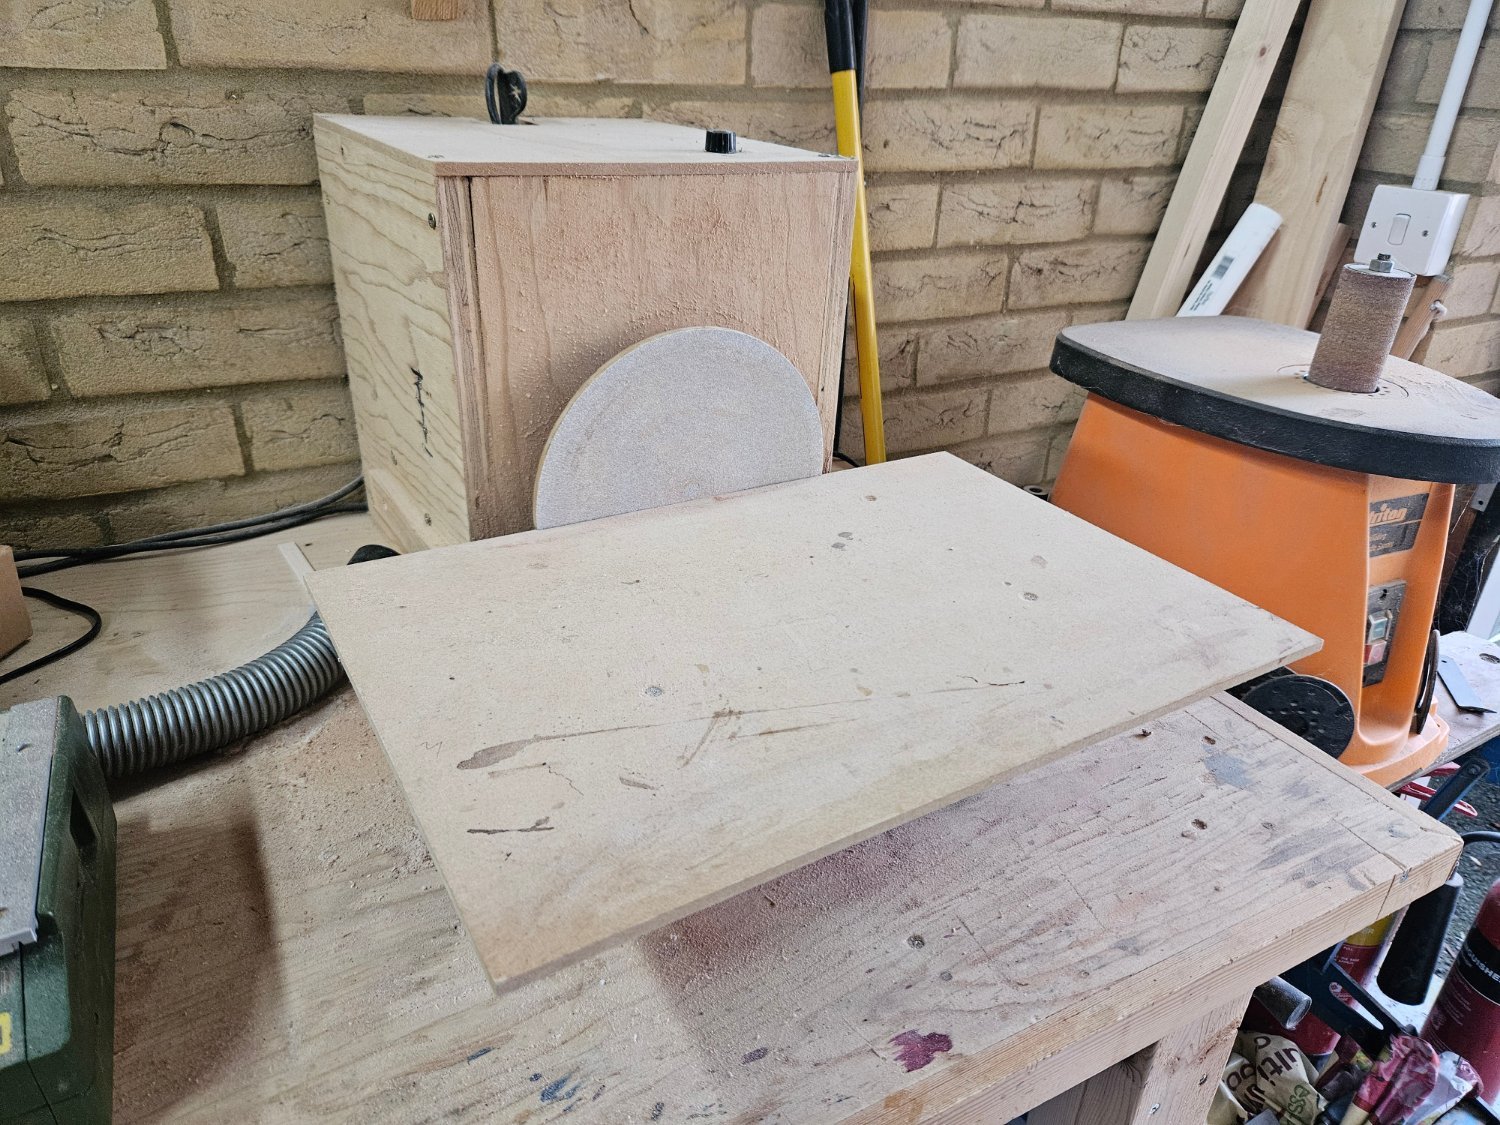
For years now I had a 200 mm disc sander I made myself with pieces of plywood and MDF, an old drill and a small voltage regulator. It worked very well and served faithfully (and noisily) for years with minimal maintenance. Overall cost was about £10...
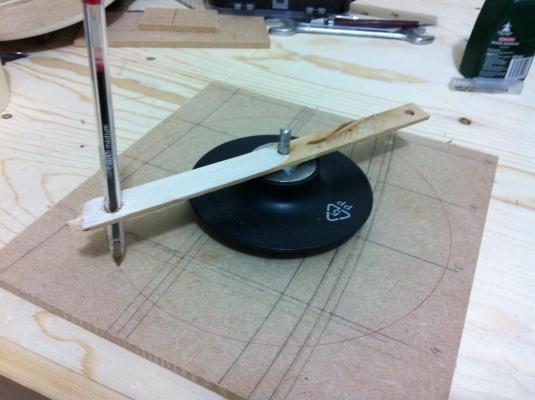
However, I recently managed to destroy the flatness of the disc changing the sand paper so I took the plunge and decided to upgrade. 200 mm is the absolute minimum I think and 300 is much better for the 1:10 scale I like, considering that less than half of this sanding surface is available. There are many disc sanders on the market but I went with Axminster, mainly thinking I may have better customer support. A bit of discount on offer helped as well to pull the trigger.
First impressions: Well built, very heavy! Came in well boxed.


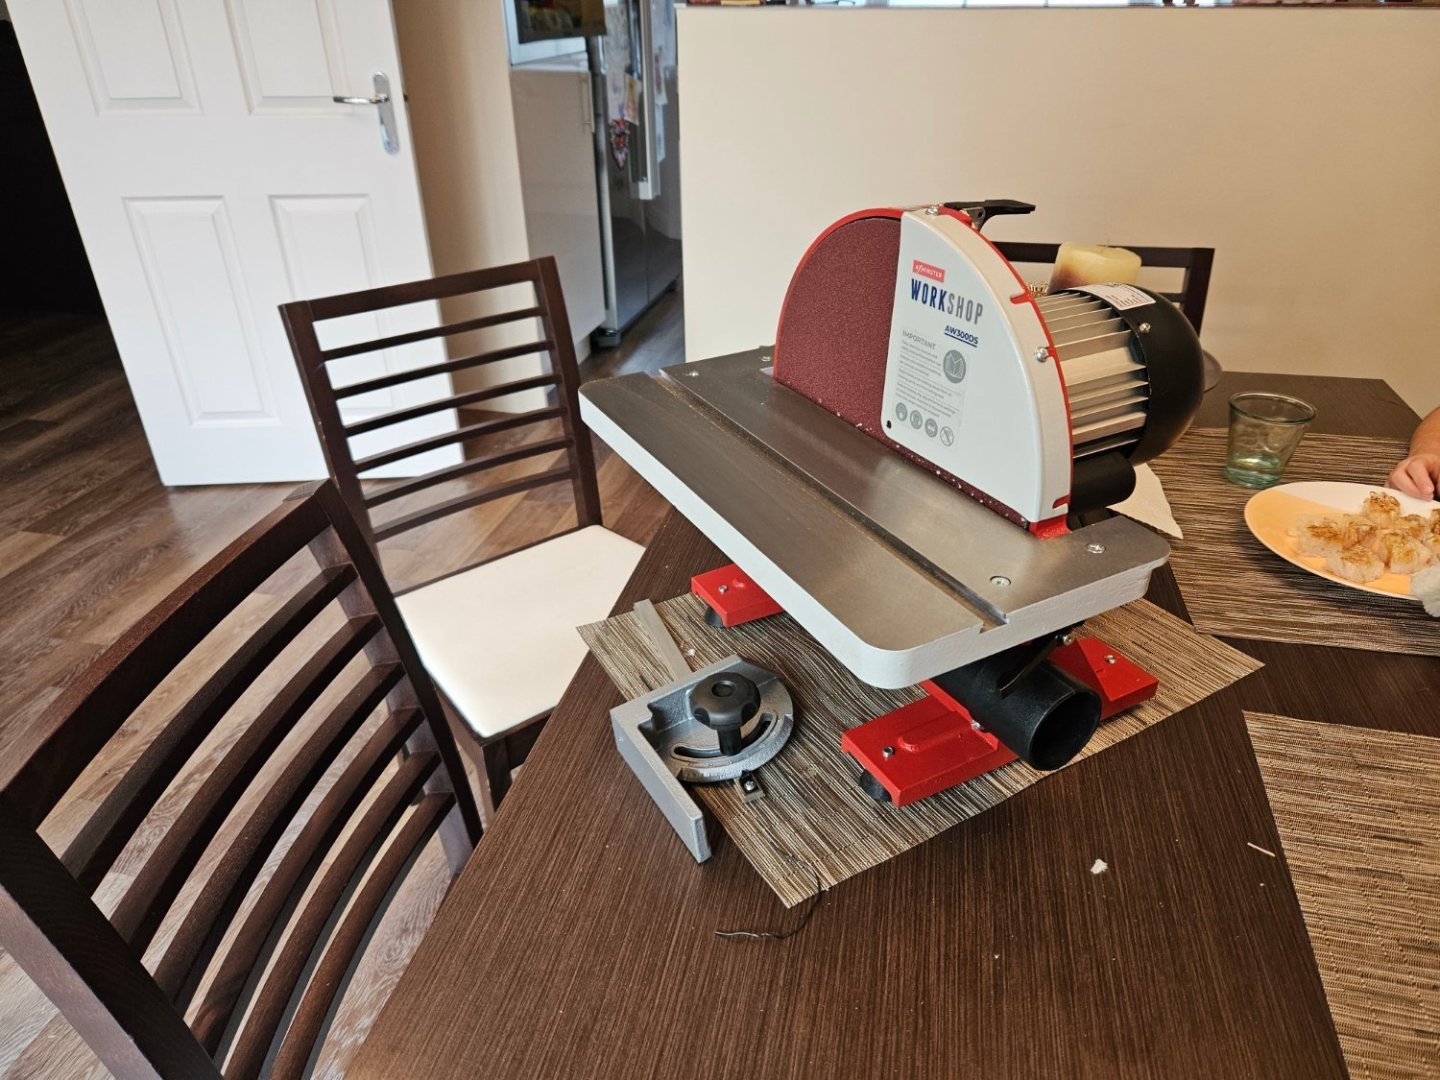
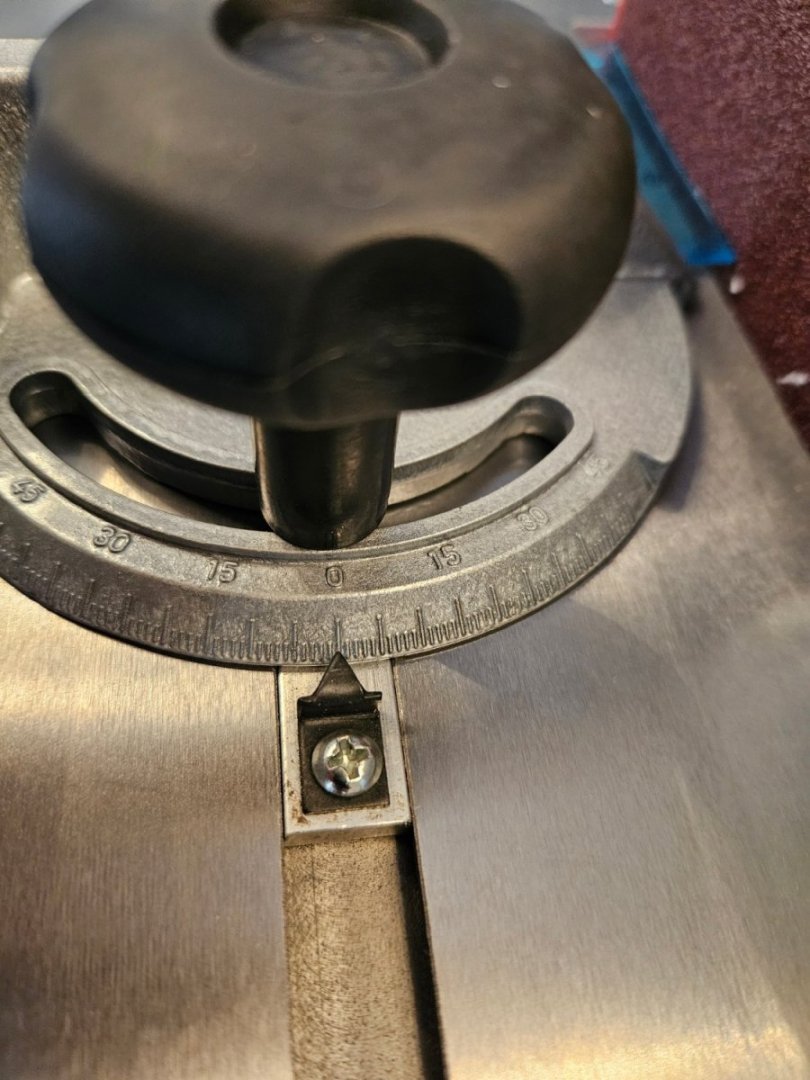
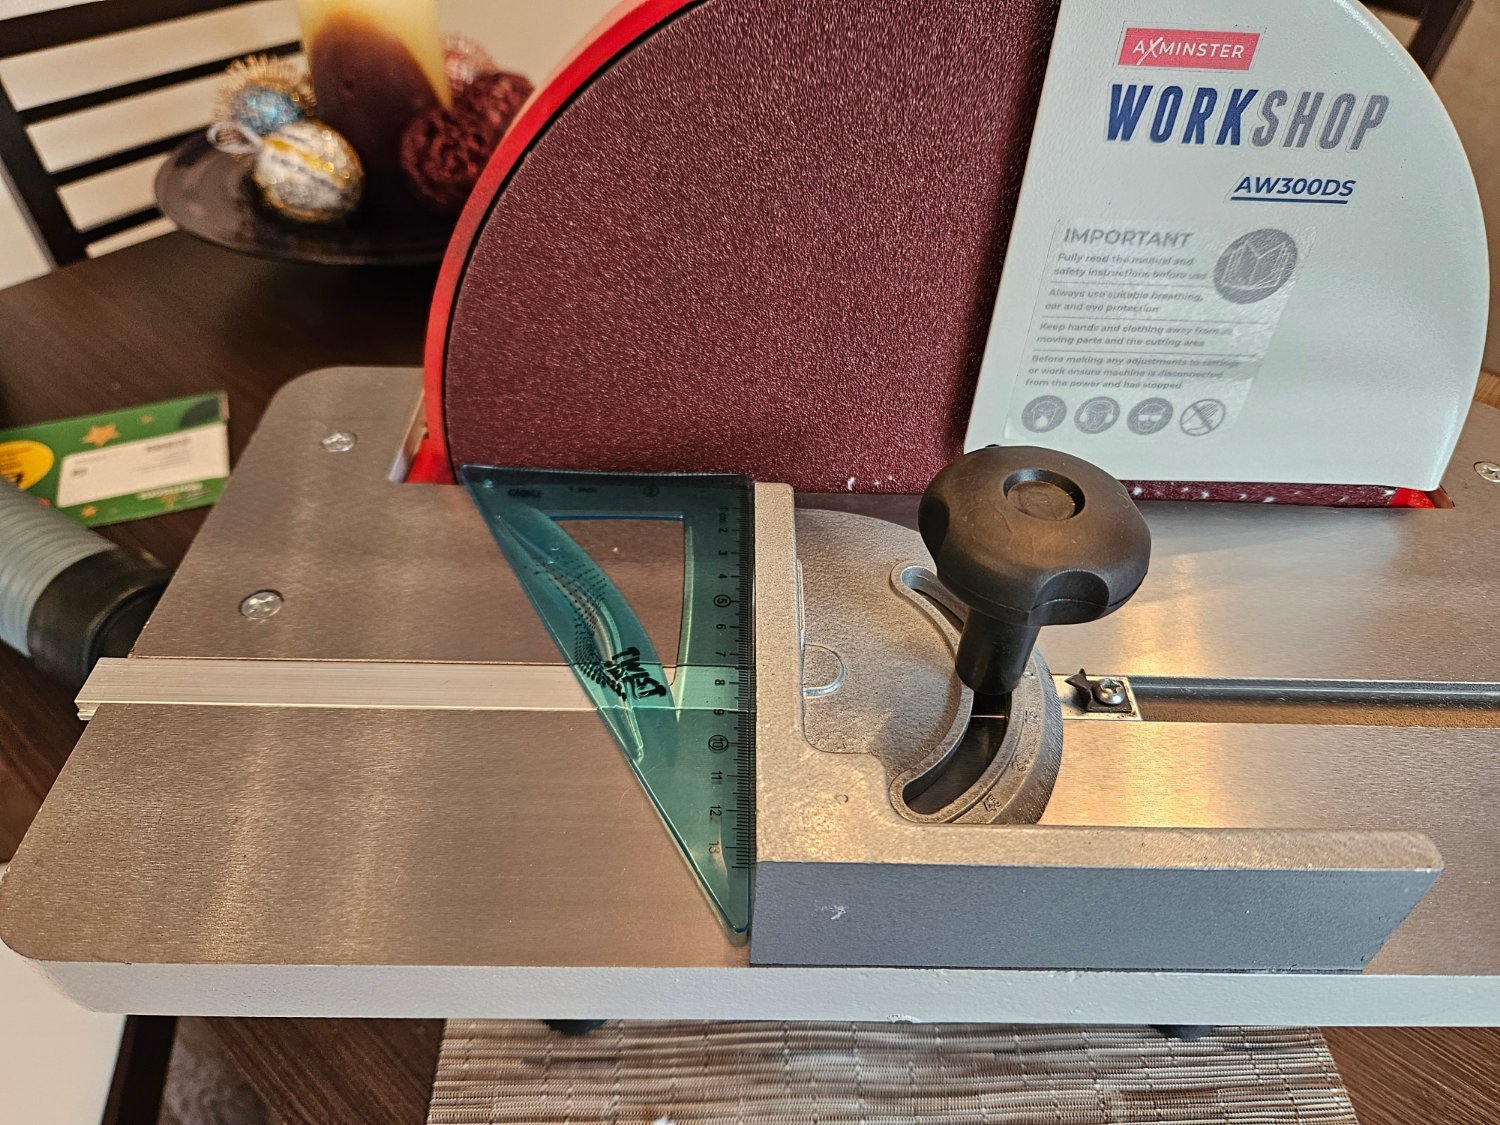
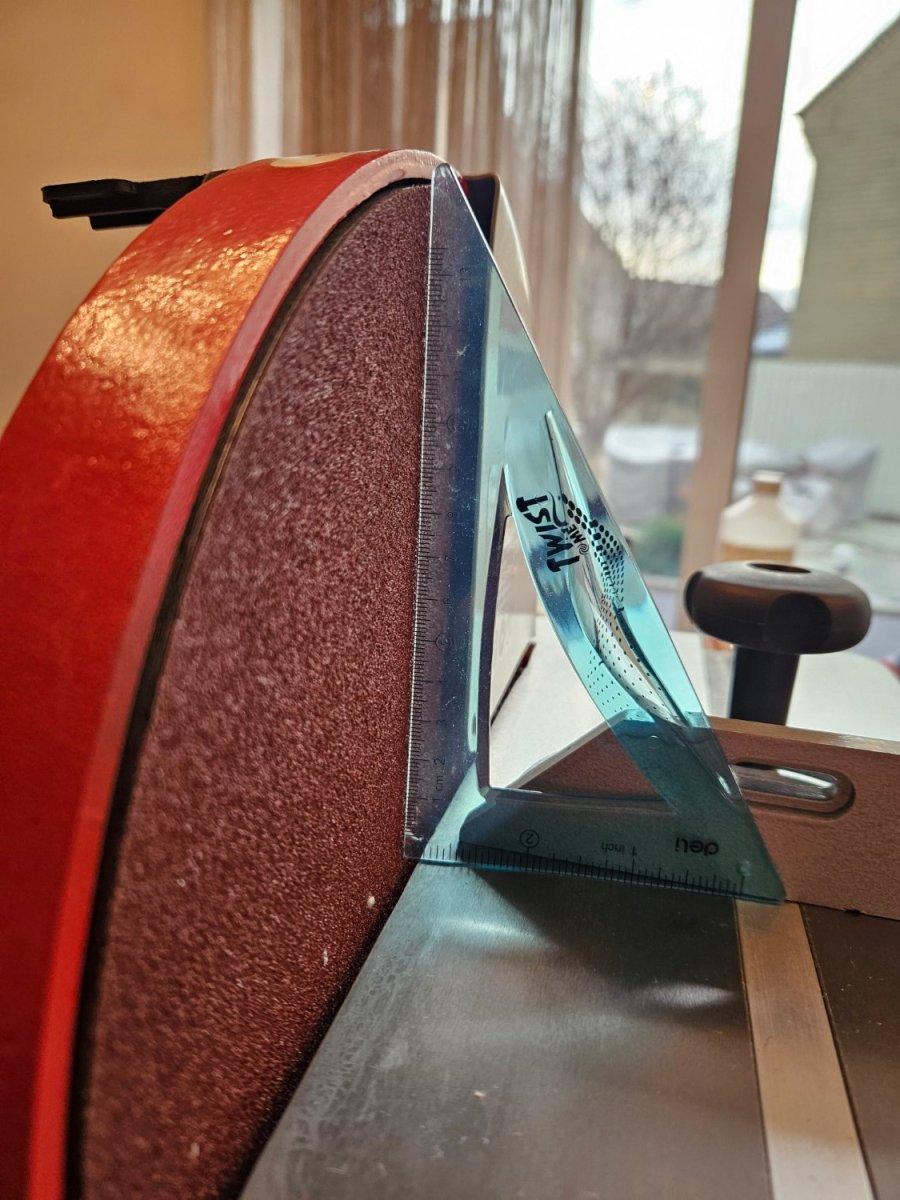
The legs are adjustable. The table is large enough, the gap to the disc is between 4 and 5 mm. It looks easy enough to add a bit of MDF to customise things a bit. There is a guide supplied which works well, the tolerances are tight enough and it does not wobble - it seems entirely usable. The angle of the table is adjustable and it was easy to set it to 90 degrees - or close enough.


The sander is very quiet. The speed seems ideal. It actually blows air out of the extraction port on operation so even without a vacuum the dust can be directed. The disc runs true. Overall very happy.
So out with the old and in with the new!


I think the sanding discs are proprietary or something similar but I did not really looked into it much, I am not too bothered.
I ll update after I ve used it a bit.
Vaddoc
-
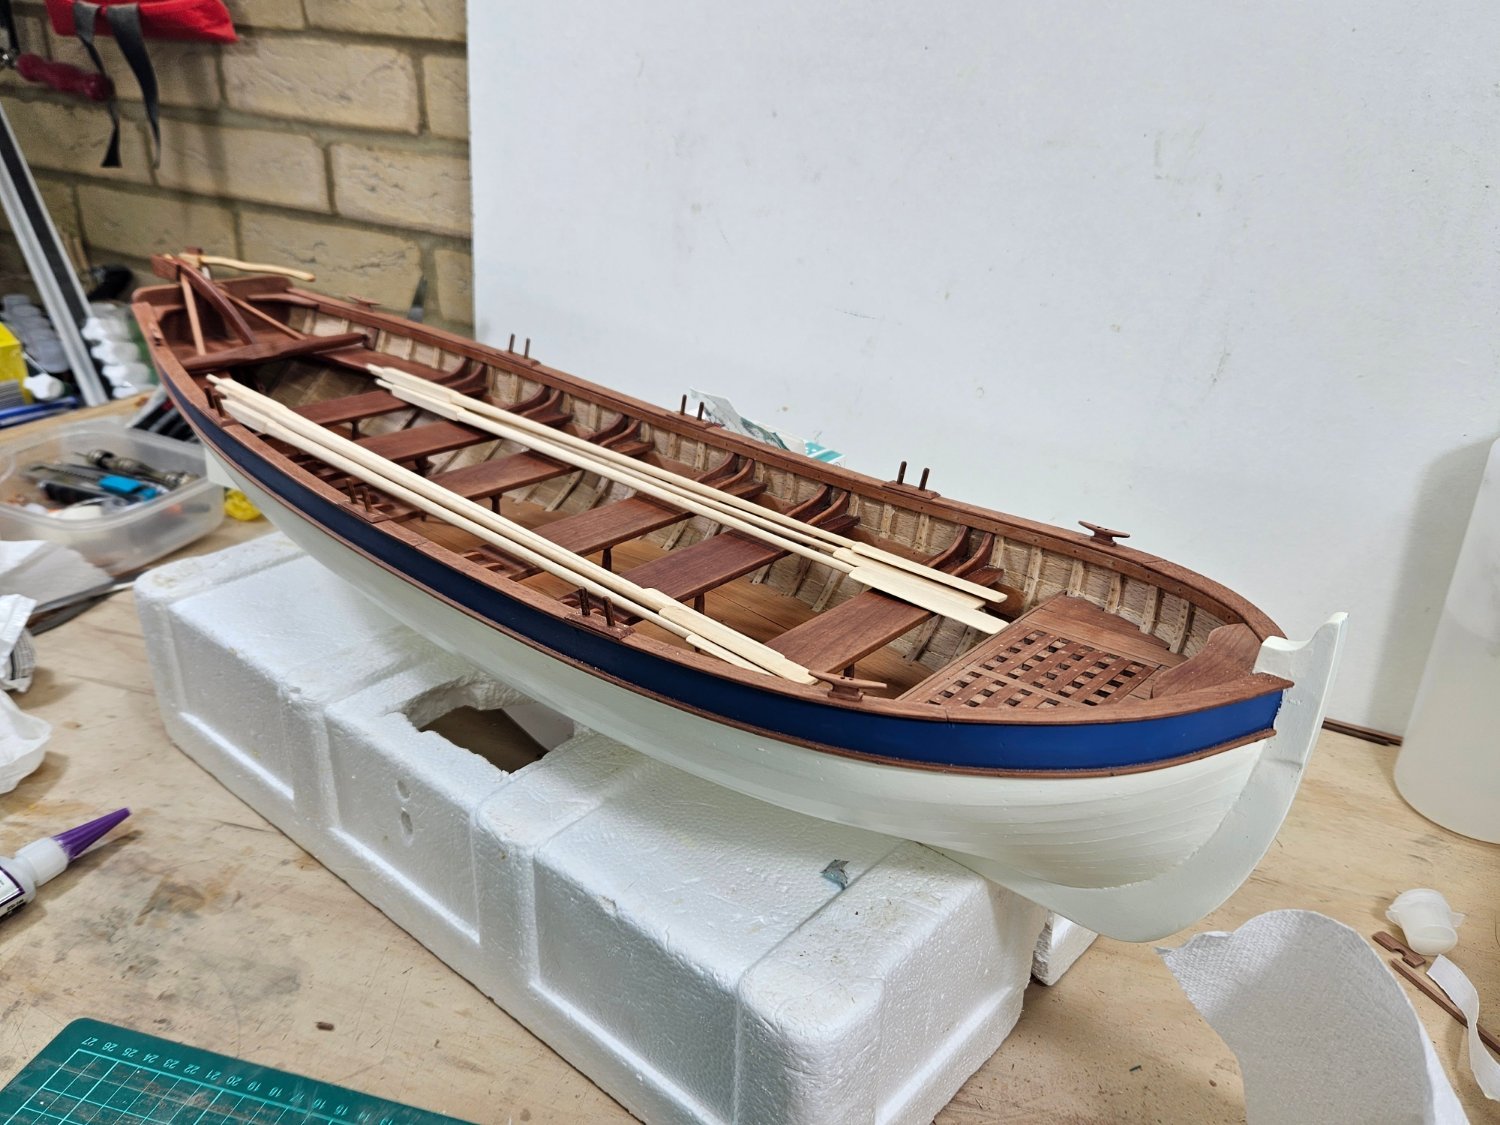
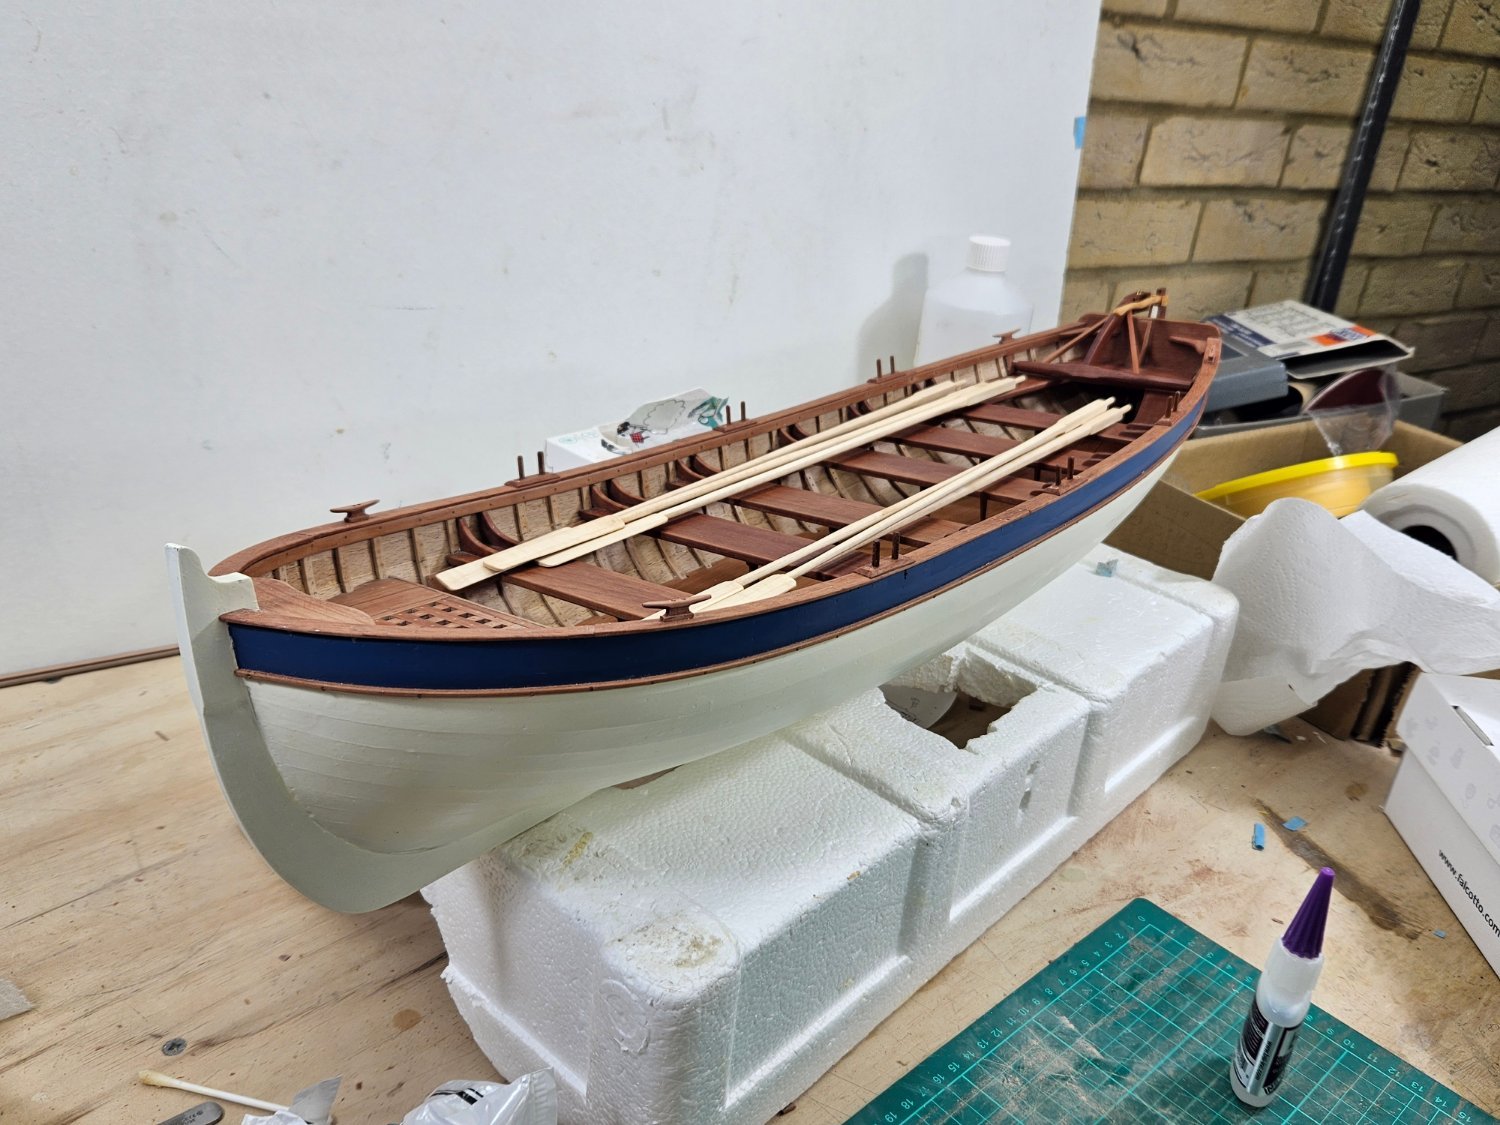
Dear all
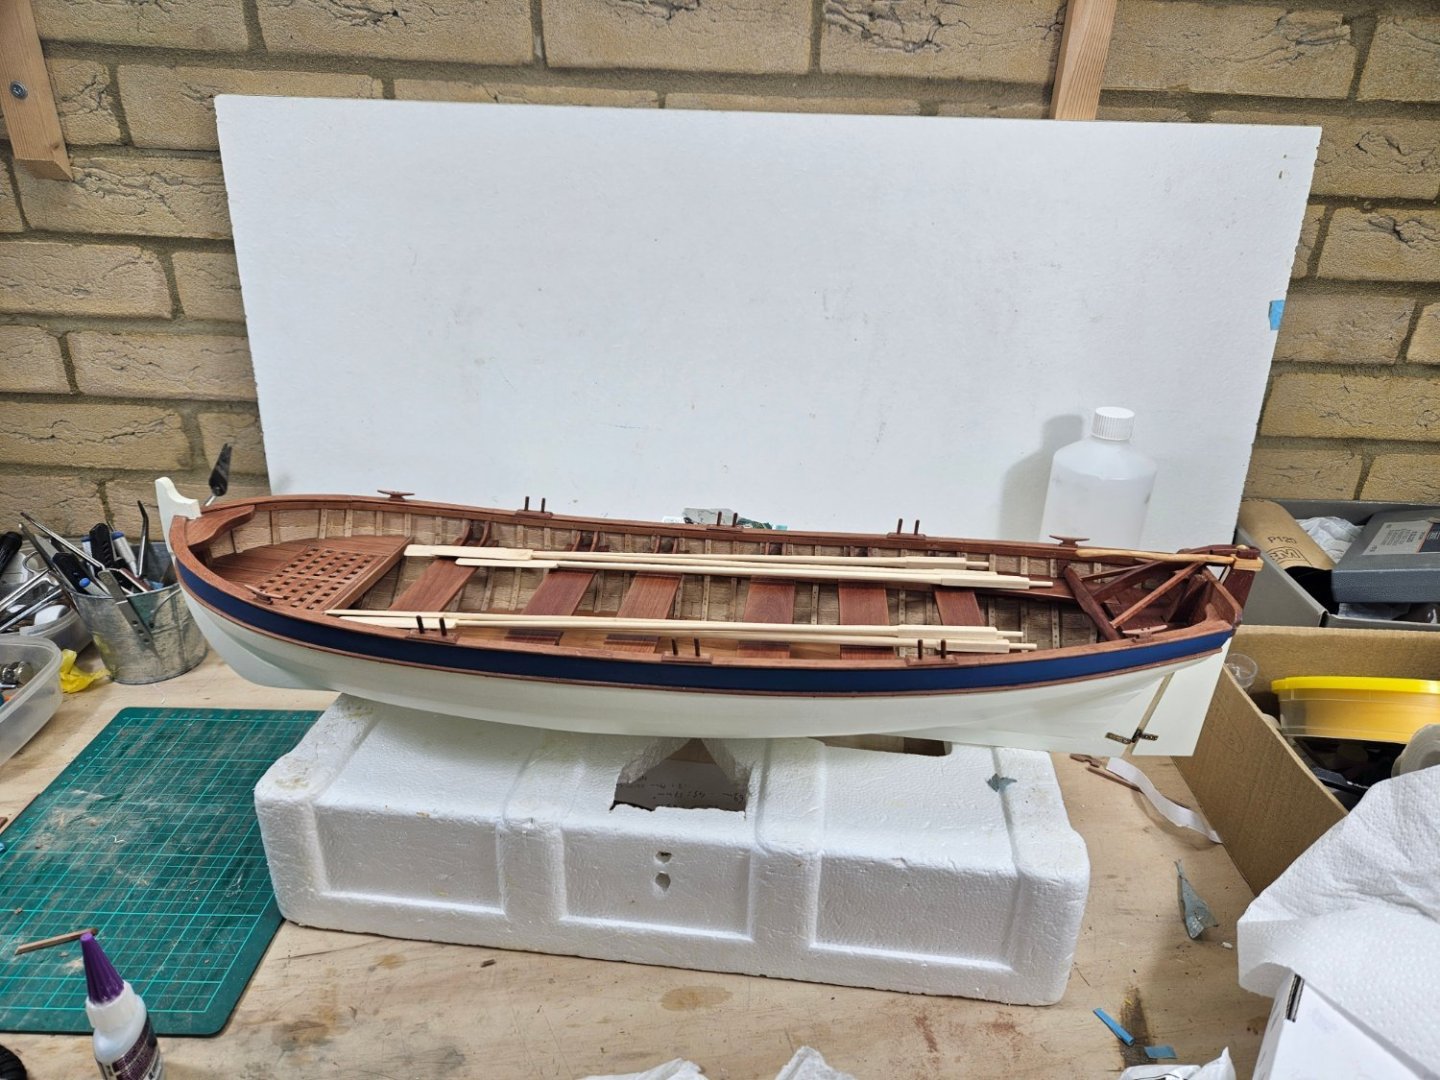
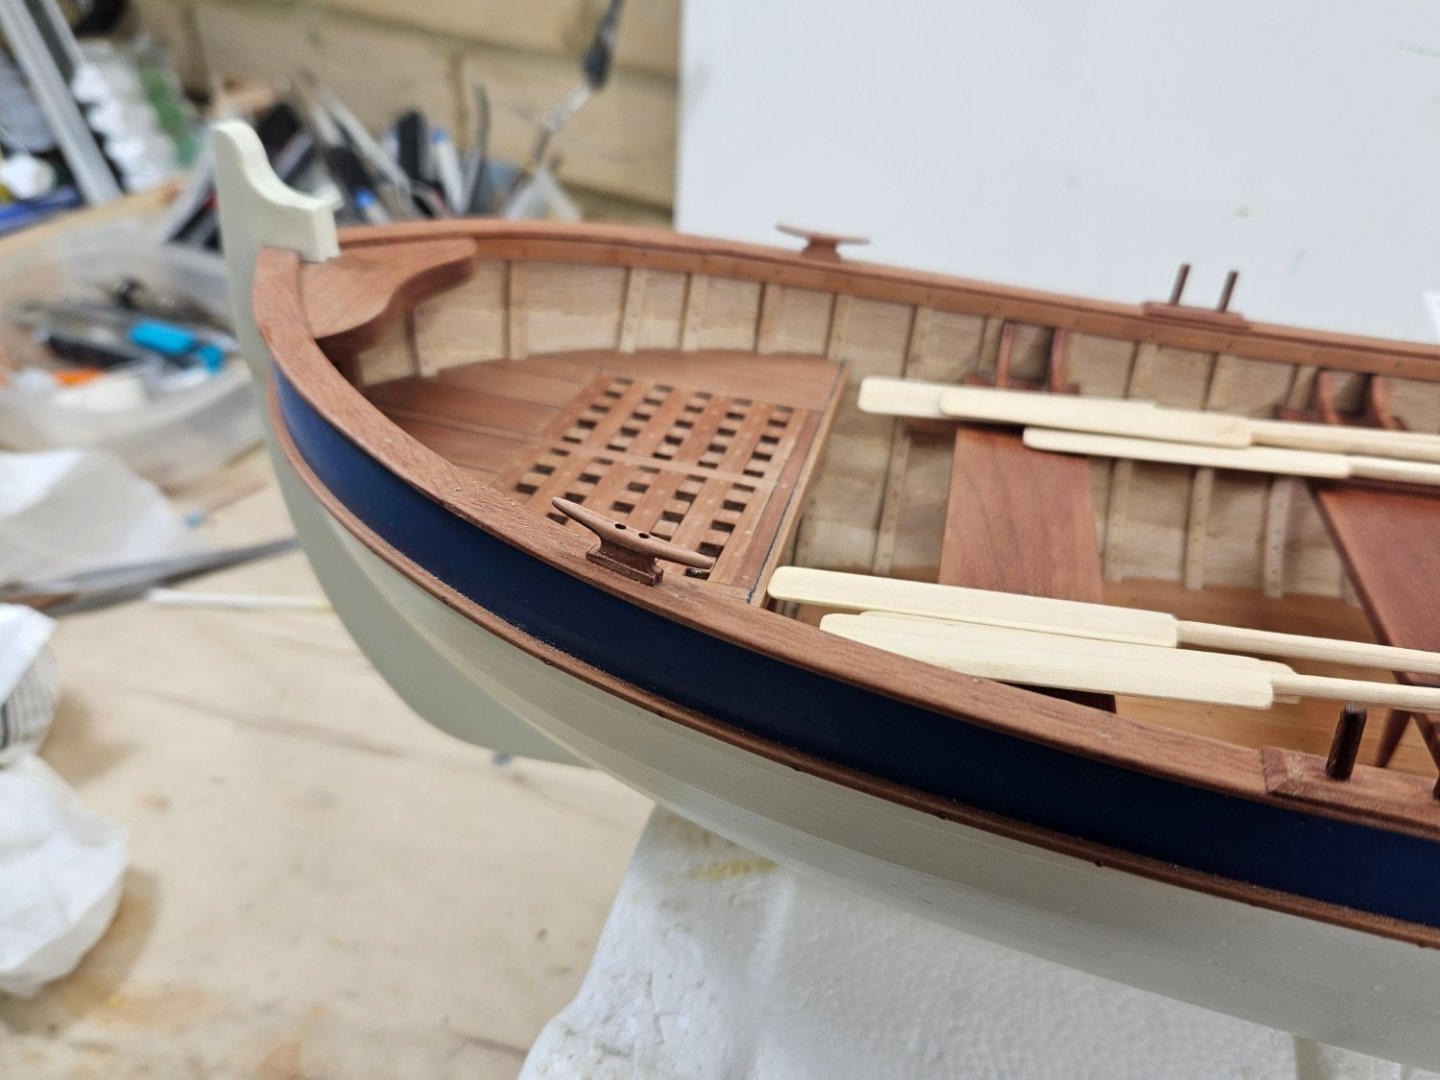
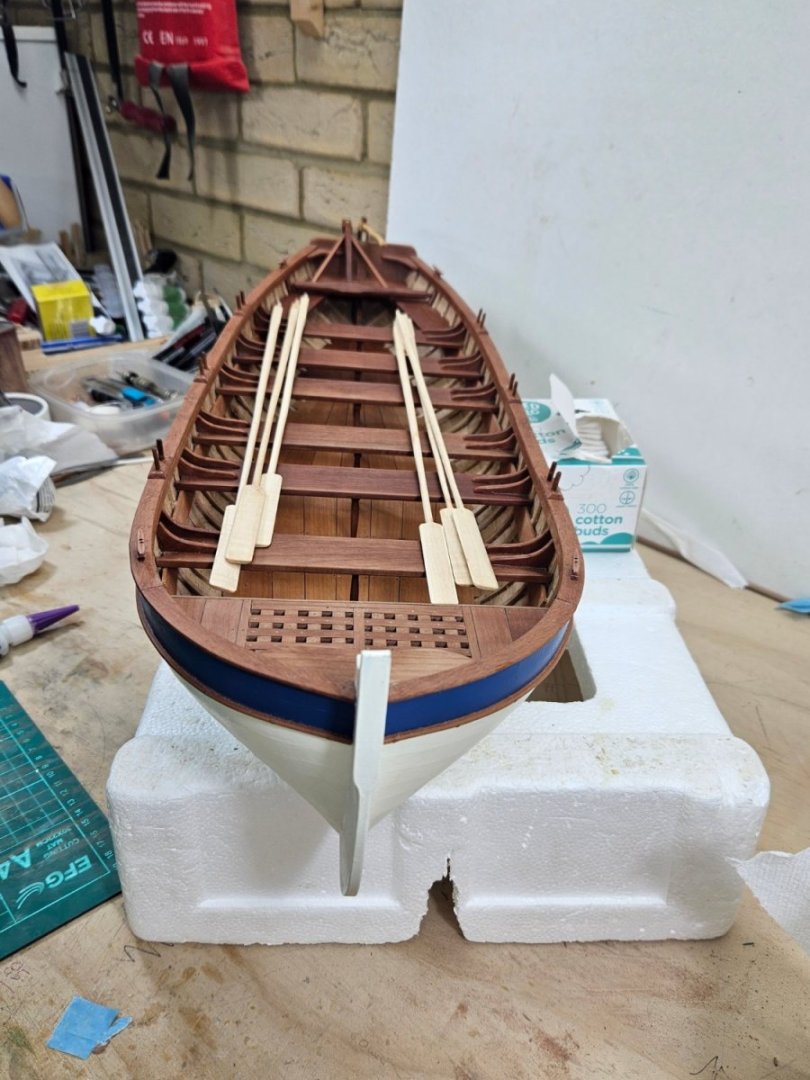
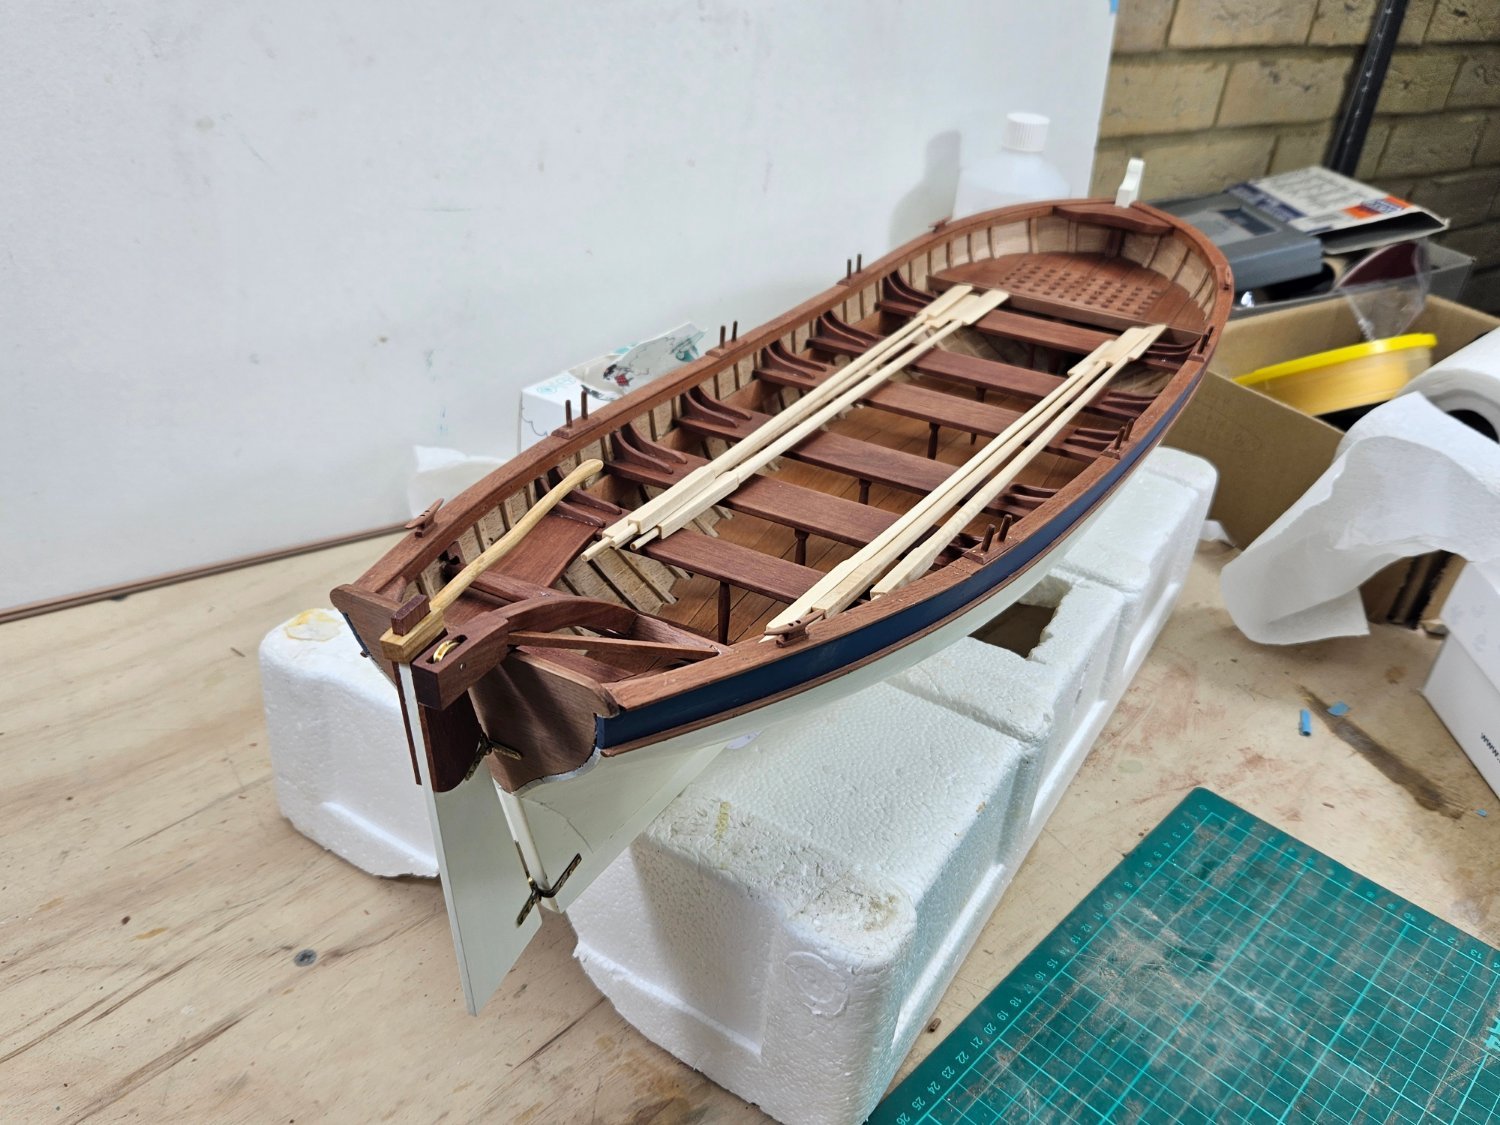
The boat is finished!
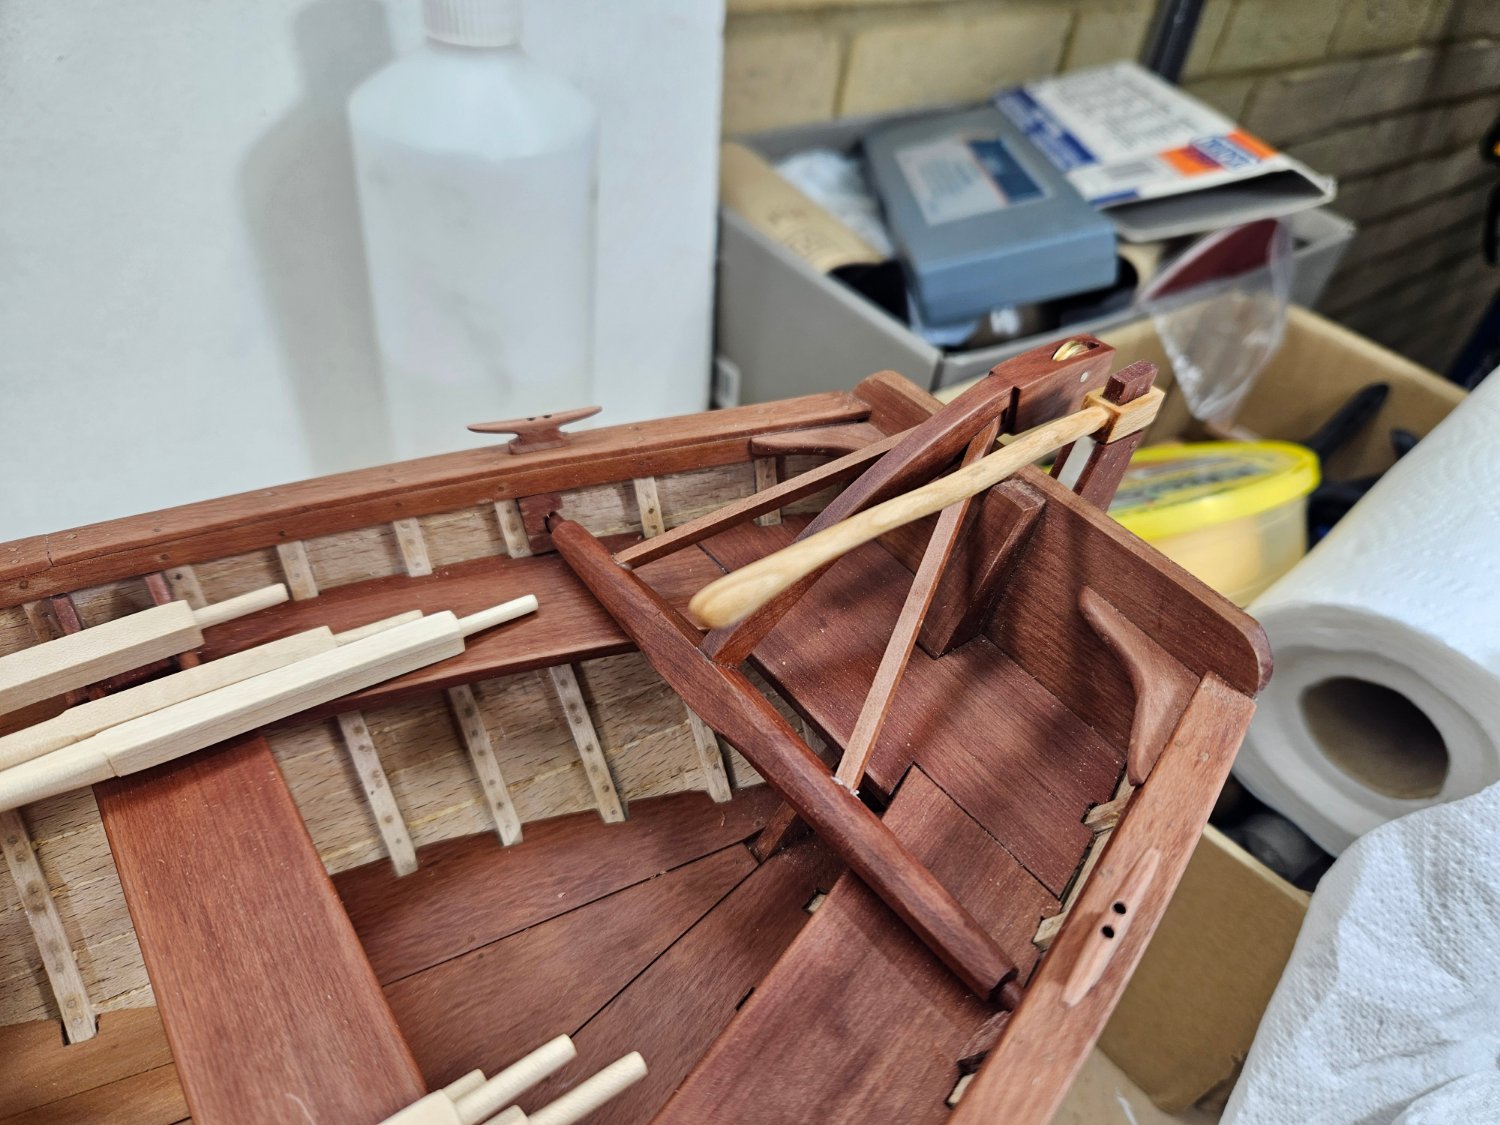
After a lot of head scratching I ended up with a solution for the davit sockets that looks reasonable. The davit it self was also quite challenging to make but I think it came out fine.
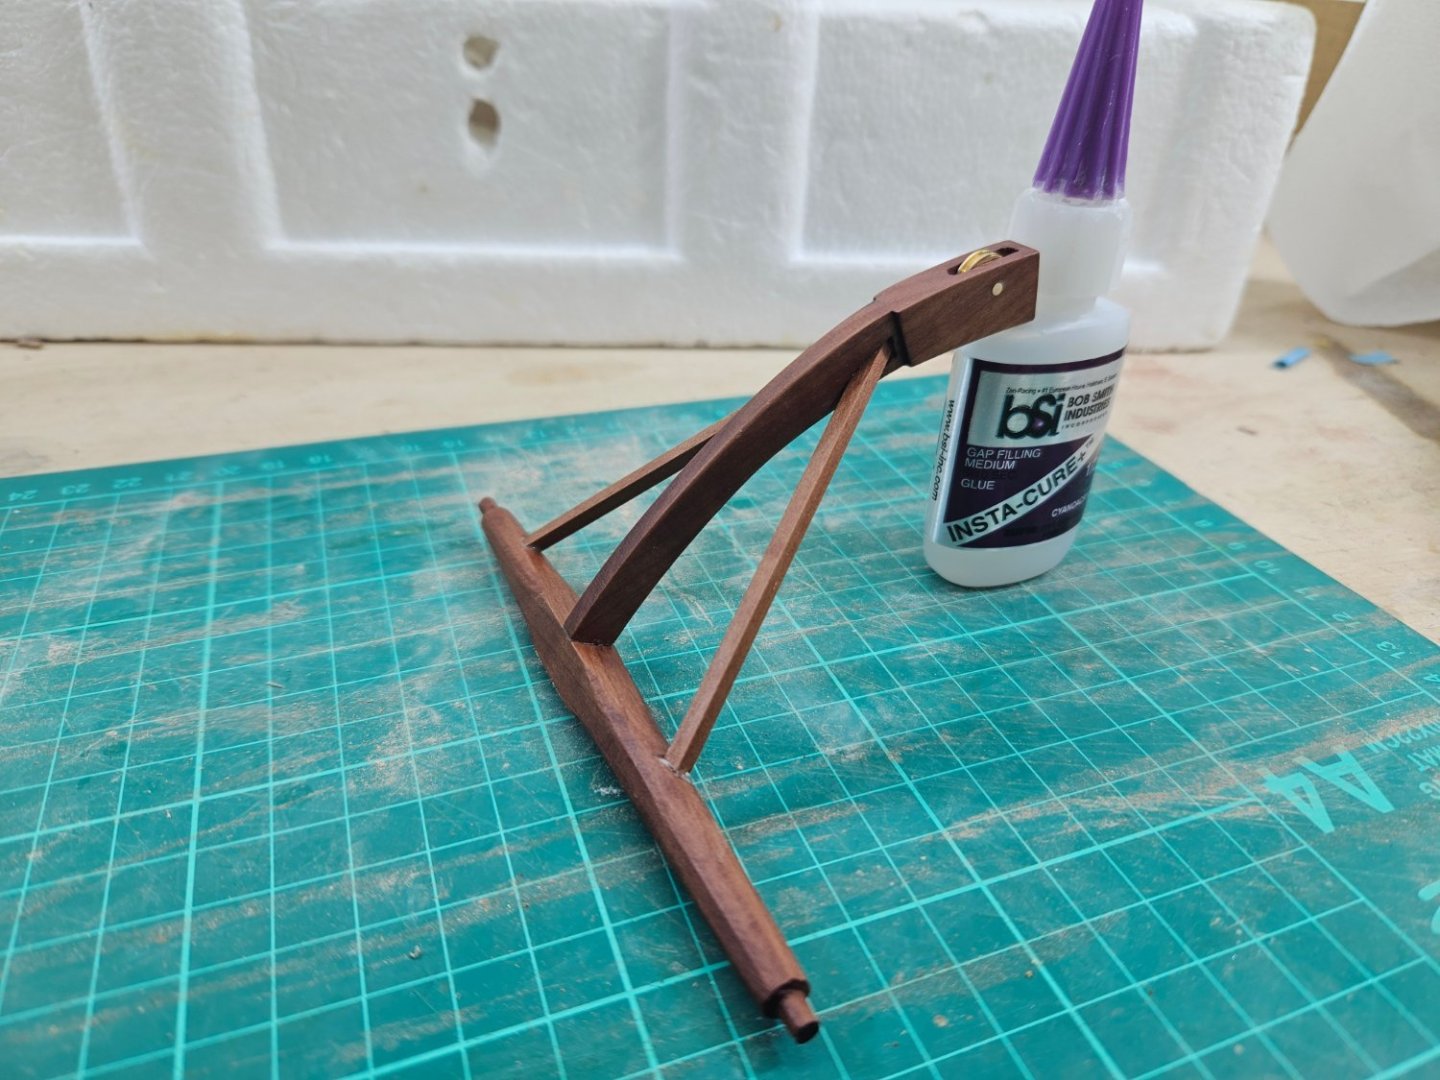
Last thing to do was to install the thole pins and the cleats.
I still need to take some proper photos, make some type of cradle and order a display case. I think it is also appropriate to order the print from the National Maritime Museum or place some compact version of these plans within the case - we ll see.
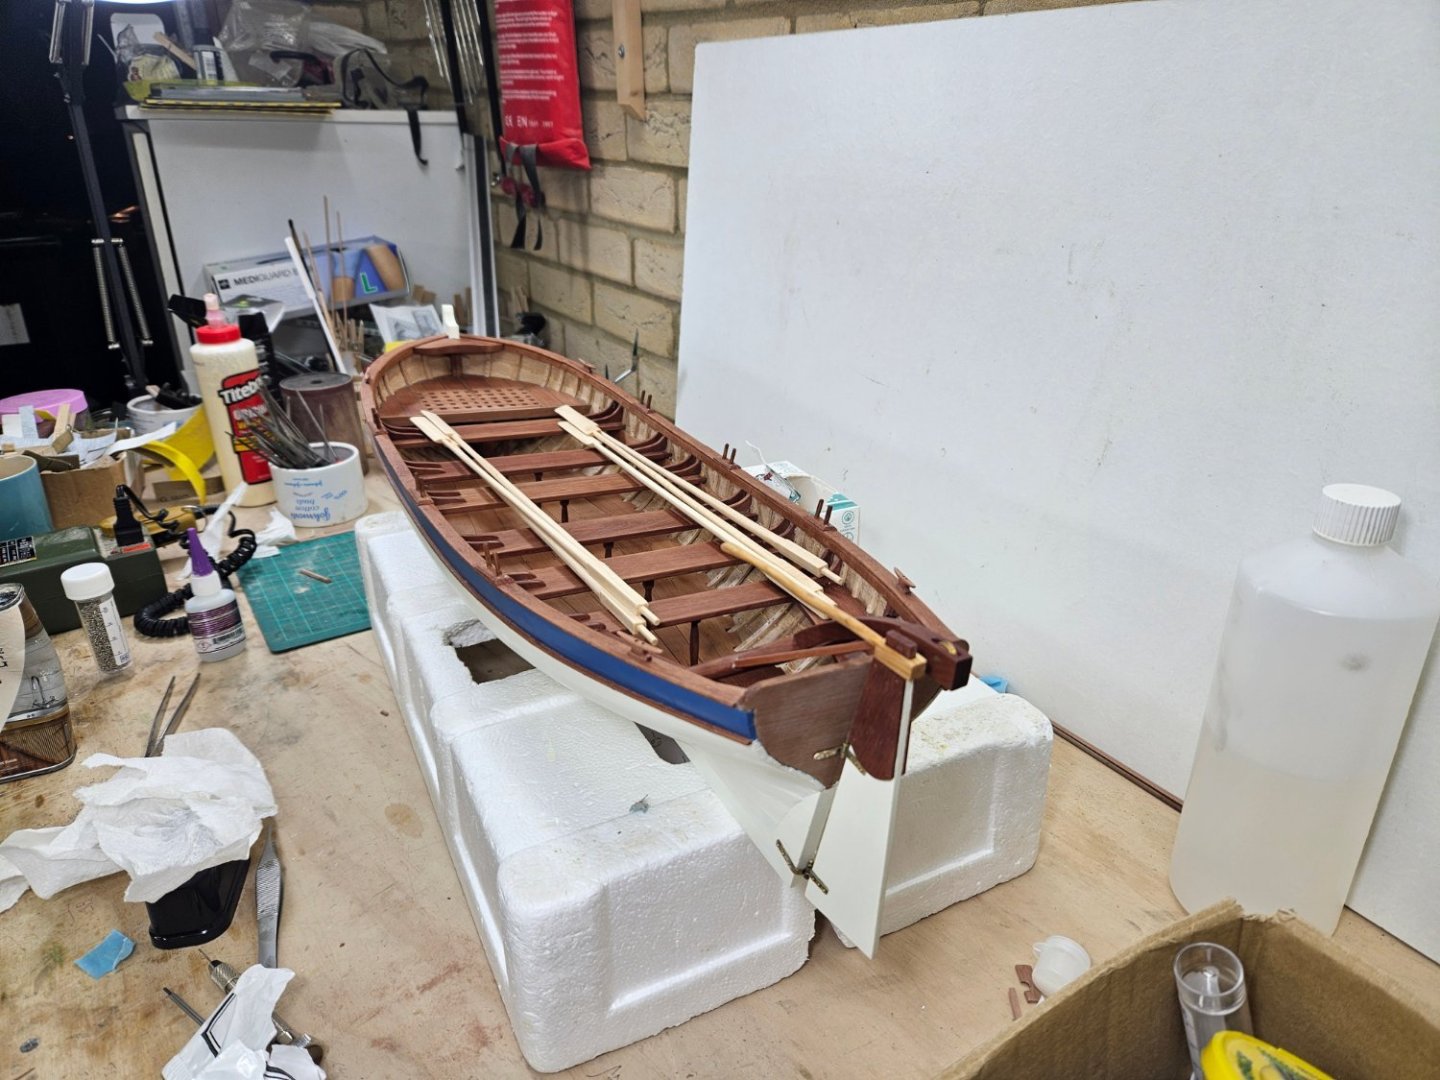


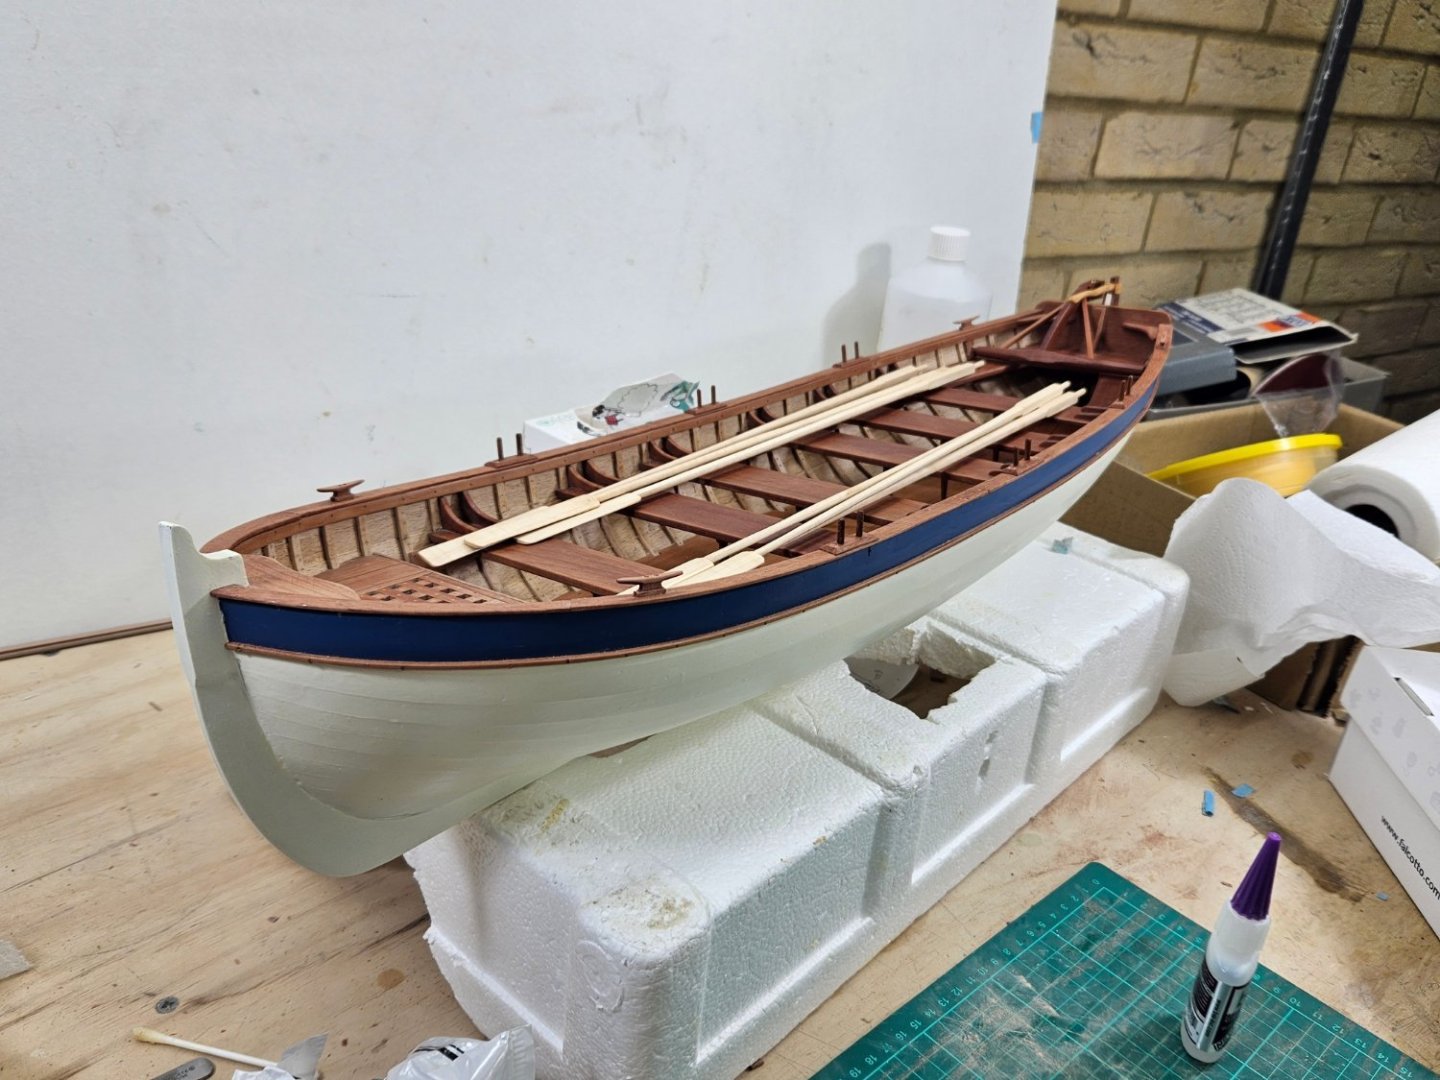
This has been a very enjoyable build and I certainly learned a lot. In future I will post pictures in the gallery.
In the mean time however, there is another hull that has been gathering dust waiting patiently to come back into the shipyard. I do hope you will join for the Chapelle's fishing launch.
I regret I have not been able to keep up with many logs I had been following - This is a period that life demands too much from me!
My deepest thanks for your company and support in this journey
Vaddoc


21' Fisherman's Launch by vaddoc - FINISHED - Scale 1:10 - Plans from Howard Chapelle's "Boatbuilding"
in - Build logs for subjects built 1901 - Present Day
Posted
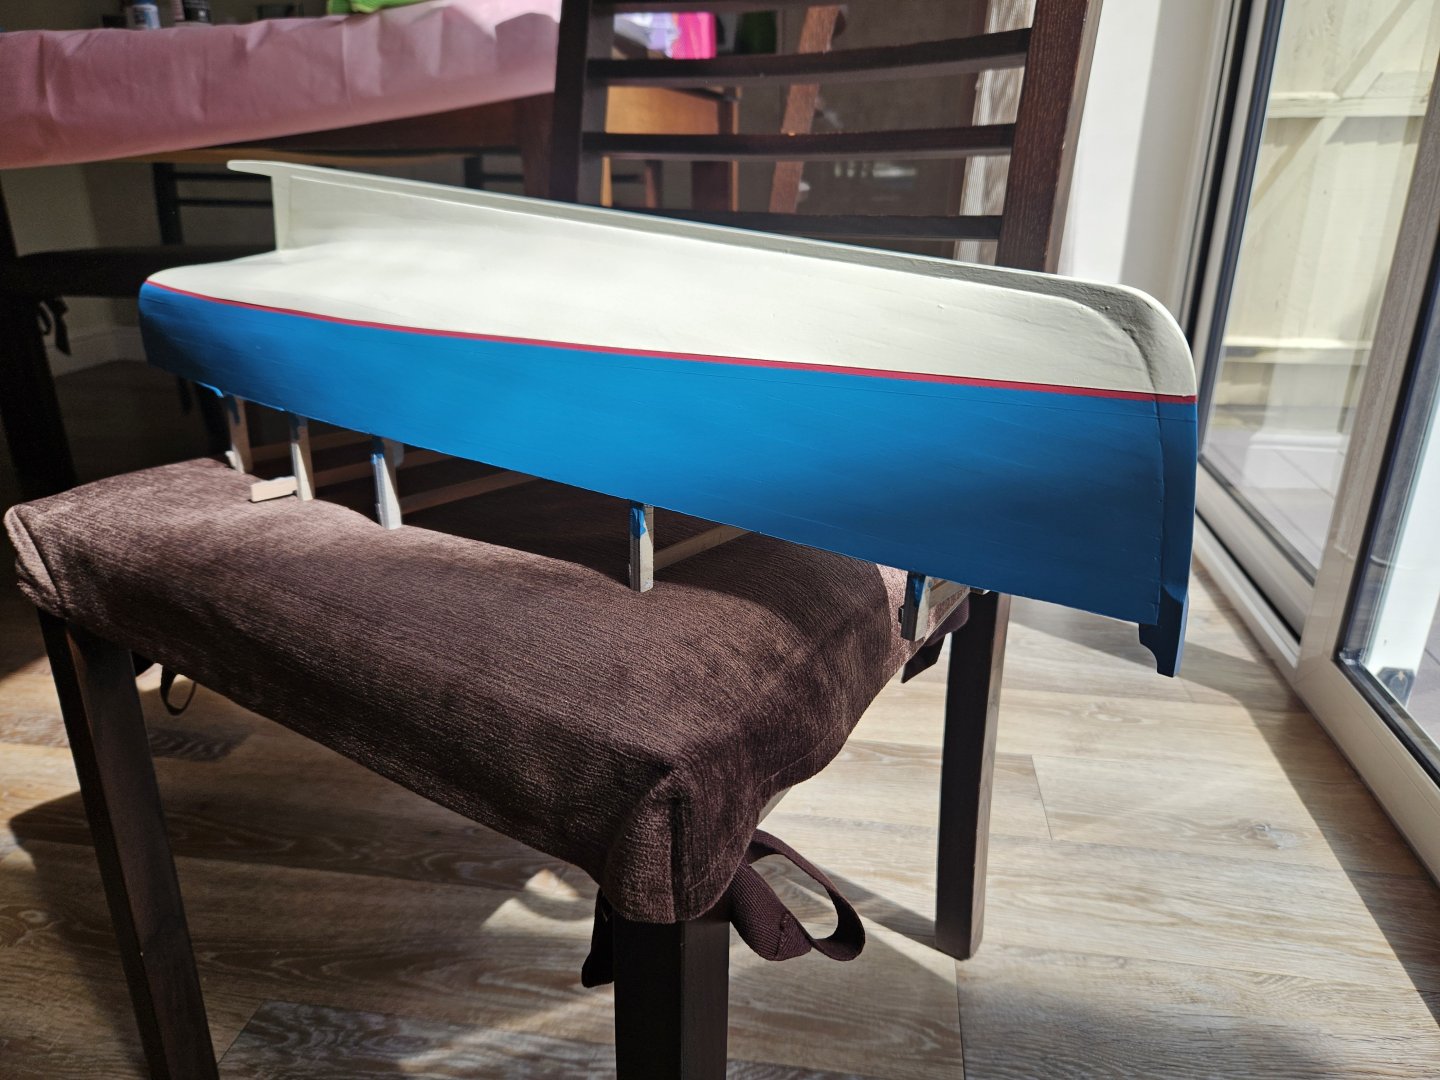
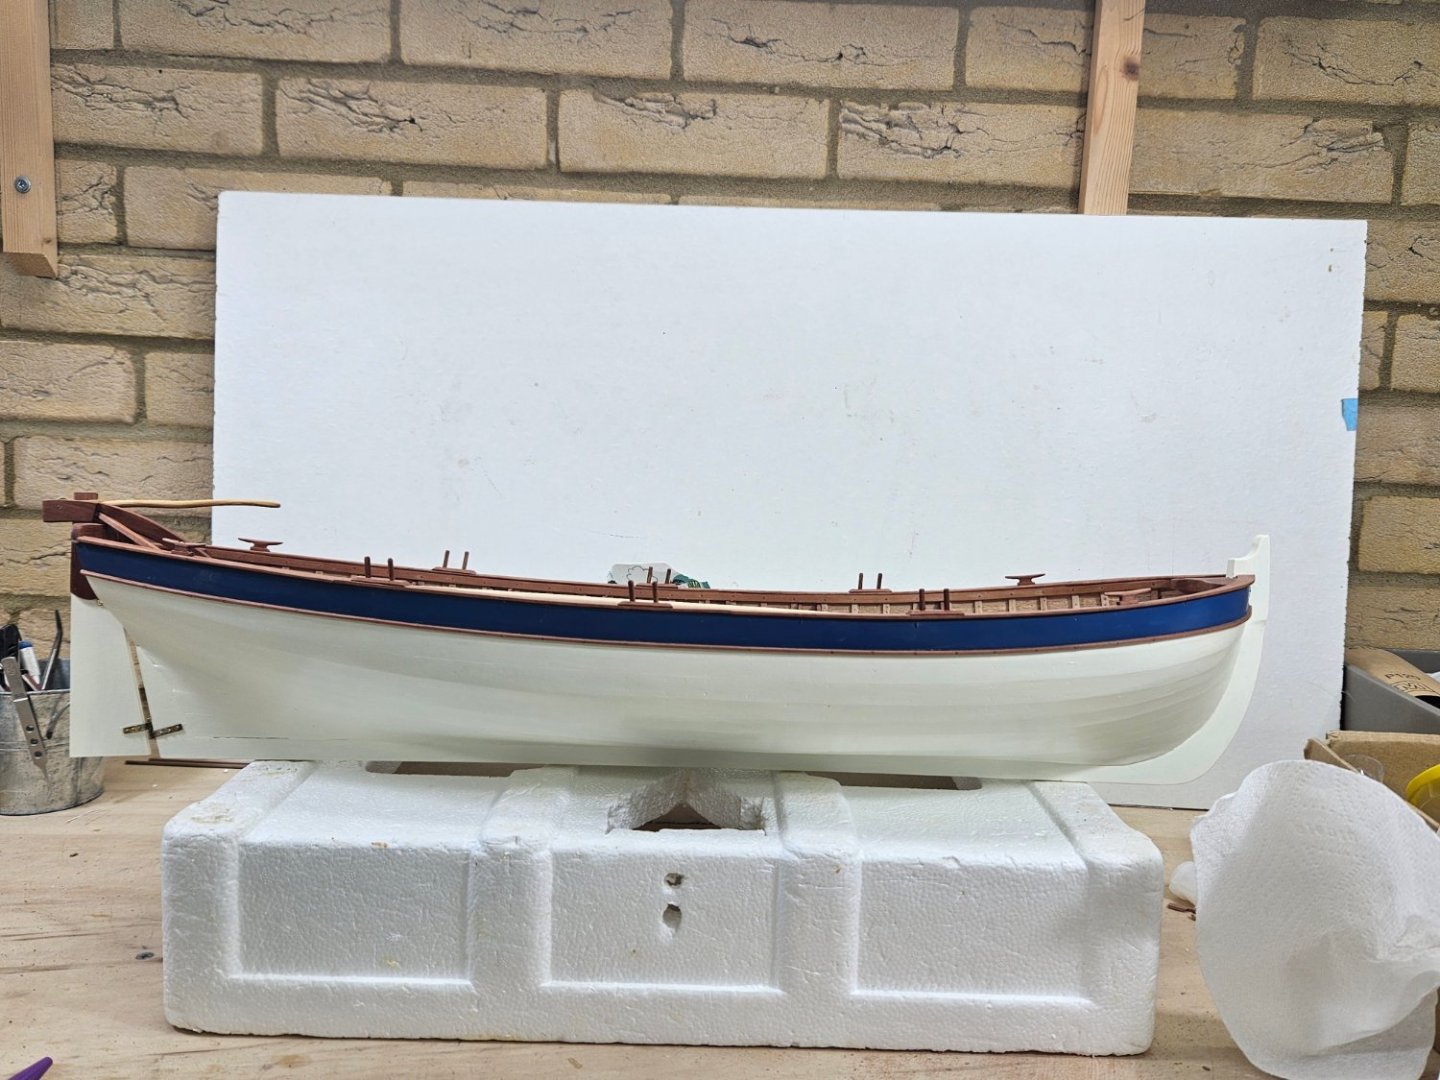
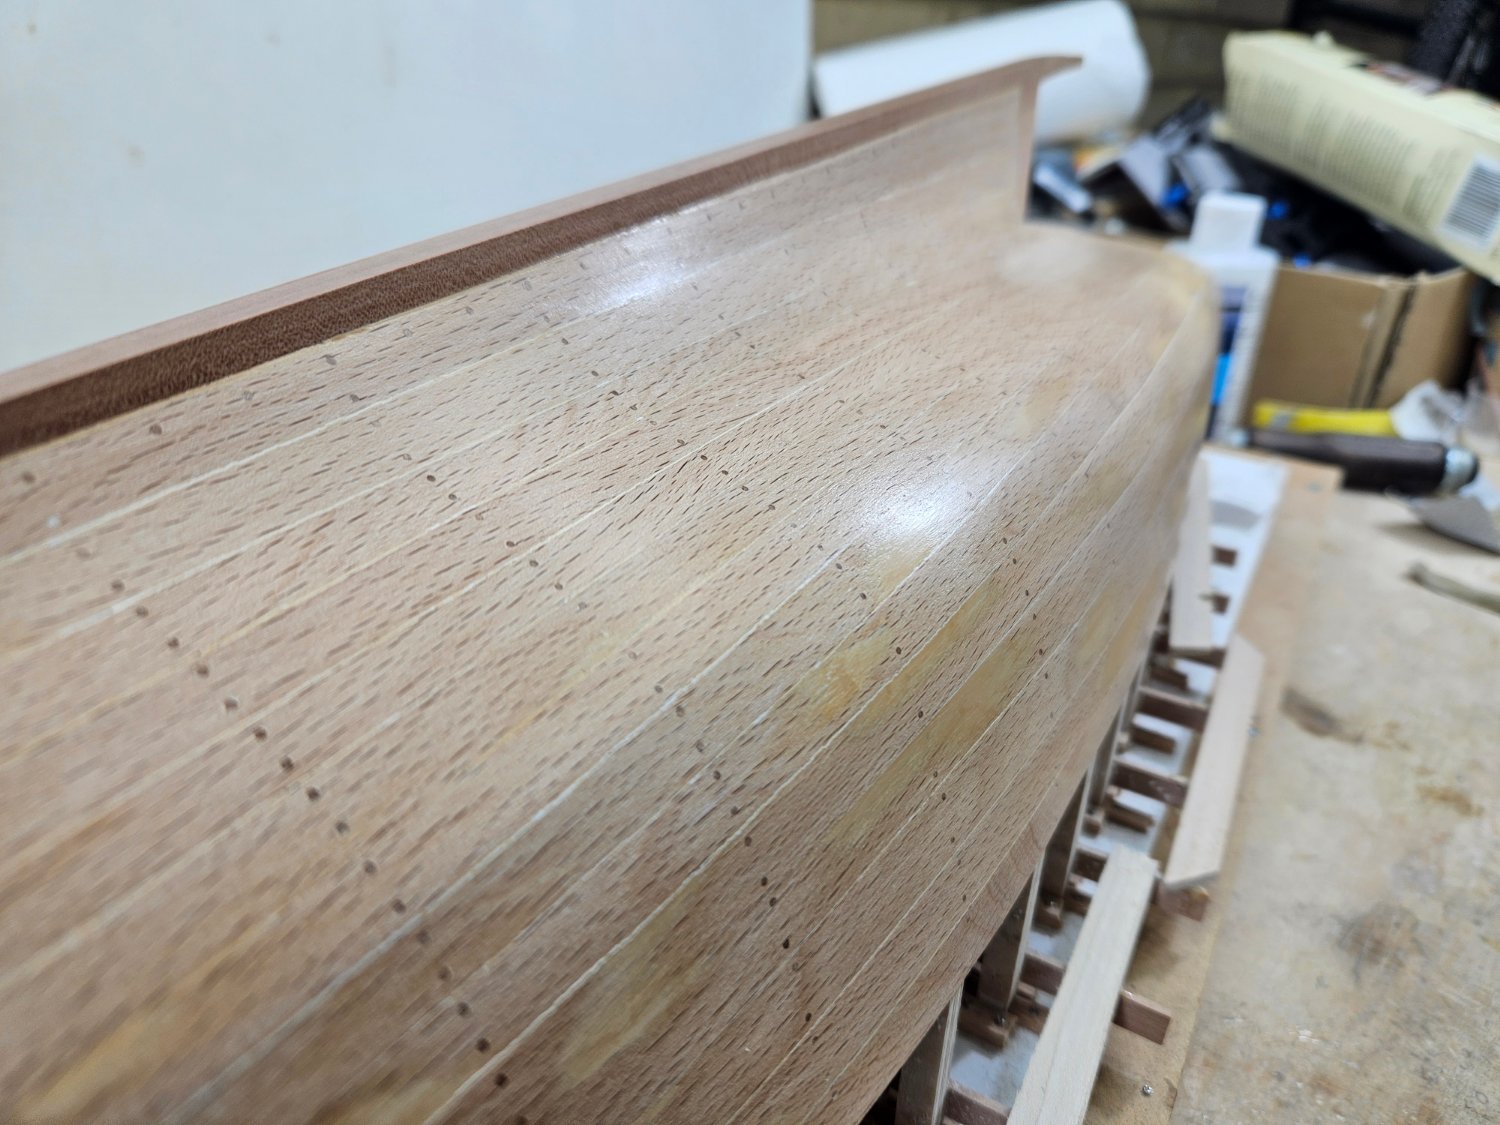
So the paint has settled further and it actually looks pretty good! Especially the red and Turquoise are really nice. Some photos bellow in natural light. The hull of course is rough despite so many cycles of filling and sanding. Never use Beech!
But look what the postman dropped, all the way from the colonies across the pond!")
Till next time
Vaddoc