

.jpg.f26acc9a74319261612561bfa7da1303.jpg)
vaddoc
-
Posts
1,527 -
Joined
-
Last visited
Content Type
Profiles
Forums
Gallery
Events
Posts posted by vaddoc
-
-
Try 3M 618 sand paper. Amazing stuff, I only use this for many years now. It is silicon carbide (not aluminum oxide), has some anticlog technology that works very well and it is very robust. It is not cheap and needs a bit of googling. Typical 3M high quality.
120 removes wood in a controlled way, 180, 240, 320 and 400 leave the wood so smooth that it reflects light.
I cut sheets of all grades into thin strips and use them with a solid flat backing, or sometimes a flexible one - as needed
-
Getting a straight line with a V chisel is to my experience very difficult. It will end up wavy-especially in large scales. Repeated cuts with a very sharp chisel, up to 6 mm for straight, 3 mm for curves, then deepening the grove without touching the edge of the rabet, works much better for me.
-
Dear all
It has been 2 months since my last post, I have not had the time to work on the boat or even to catch up with your logs. I will try to though, in the meantime I do hope that you are doing well!
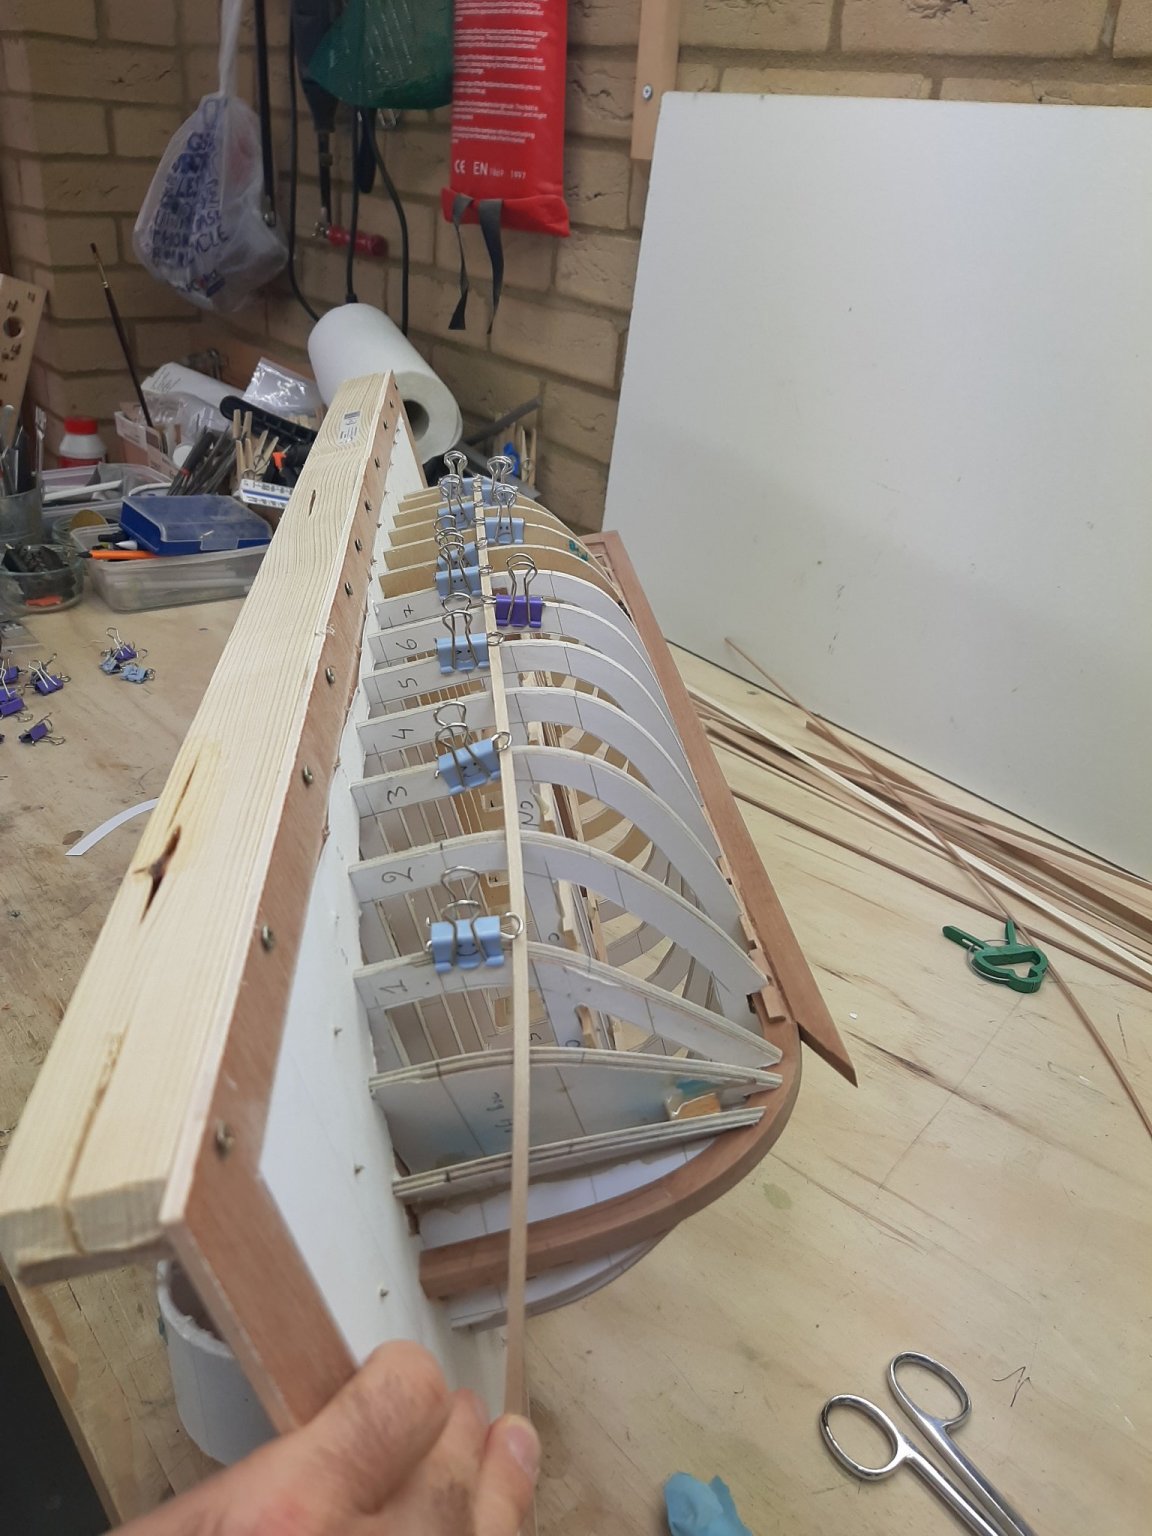
Today though I did visit the shipyard and did some work-and had a nasty surprise.
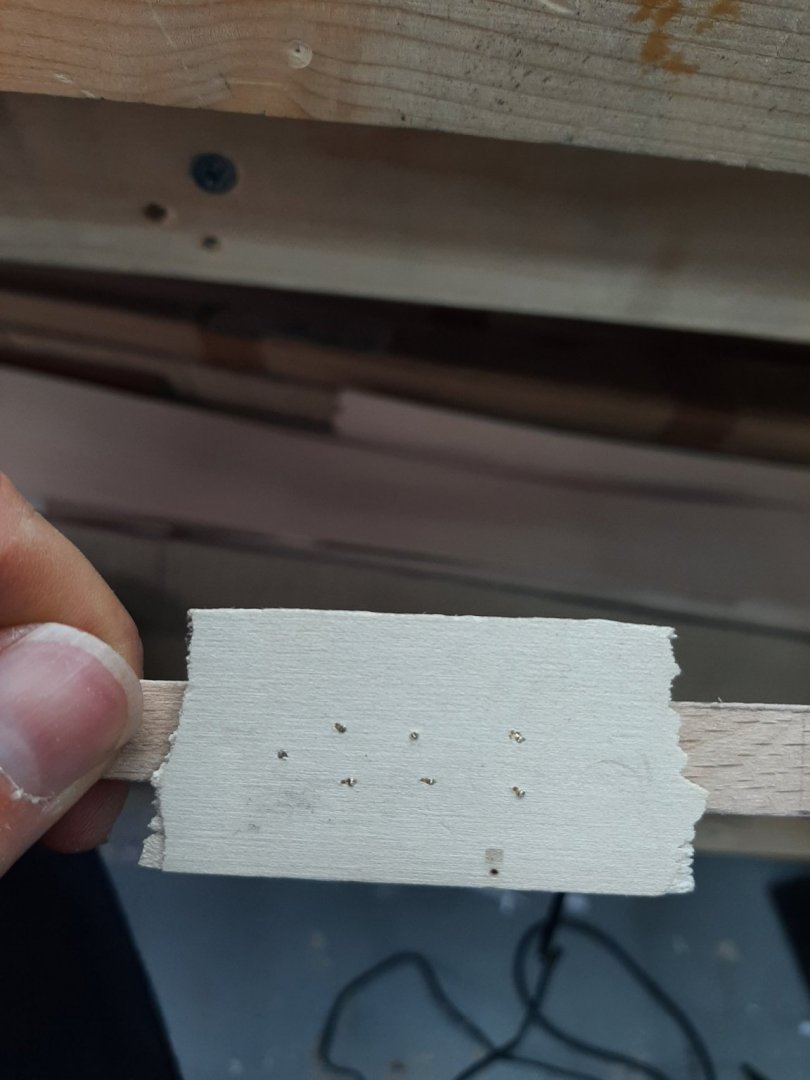
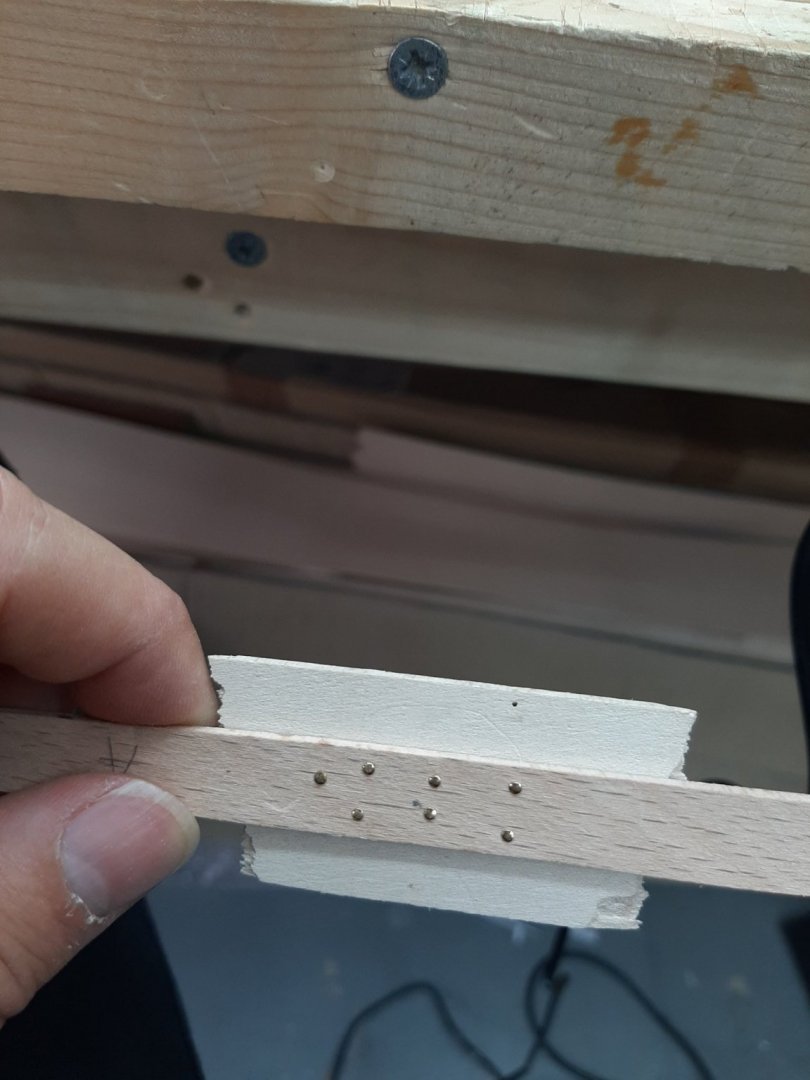
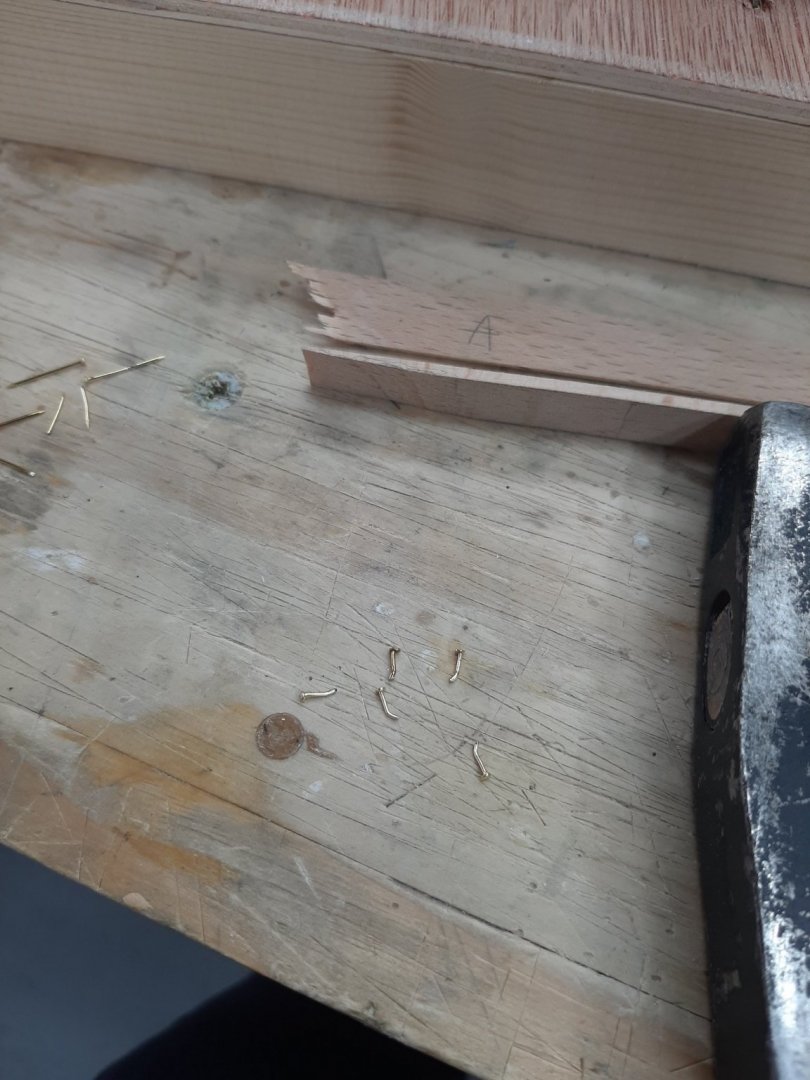
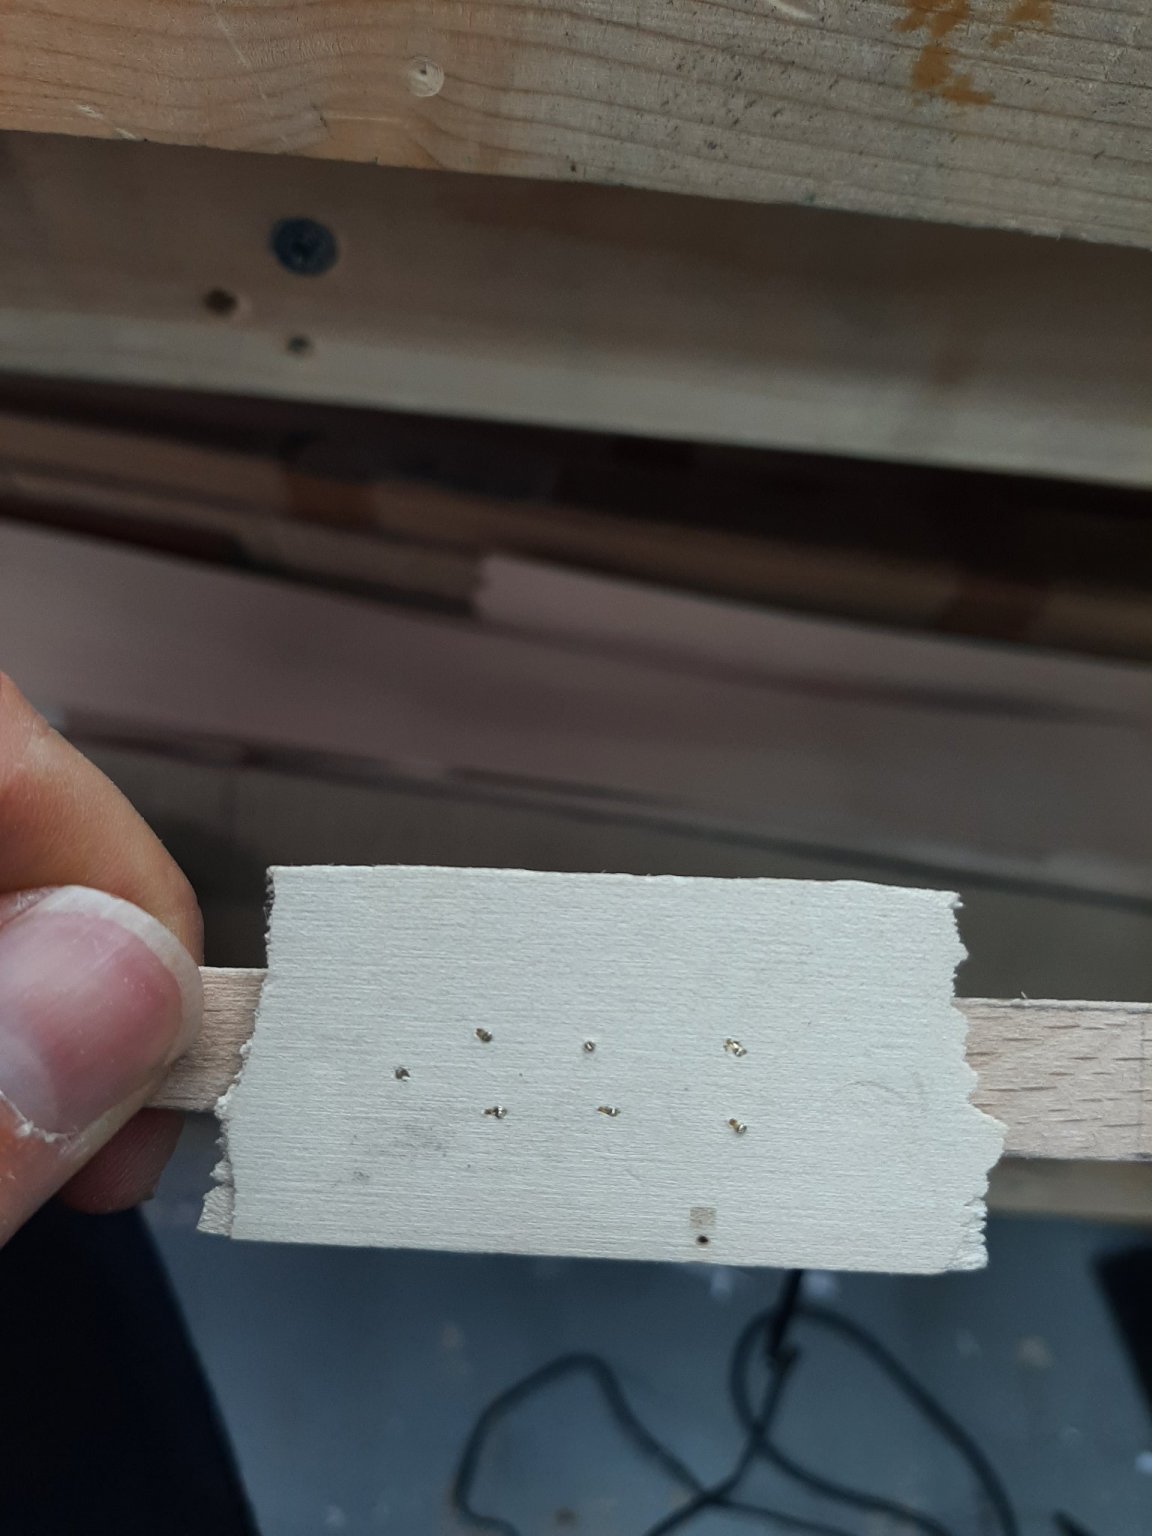
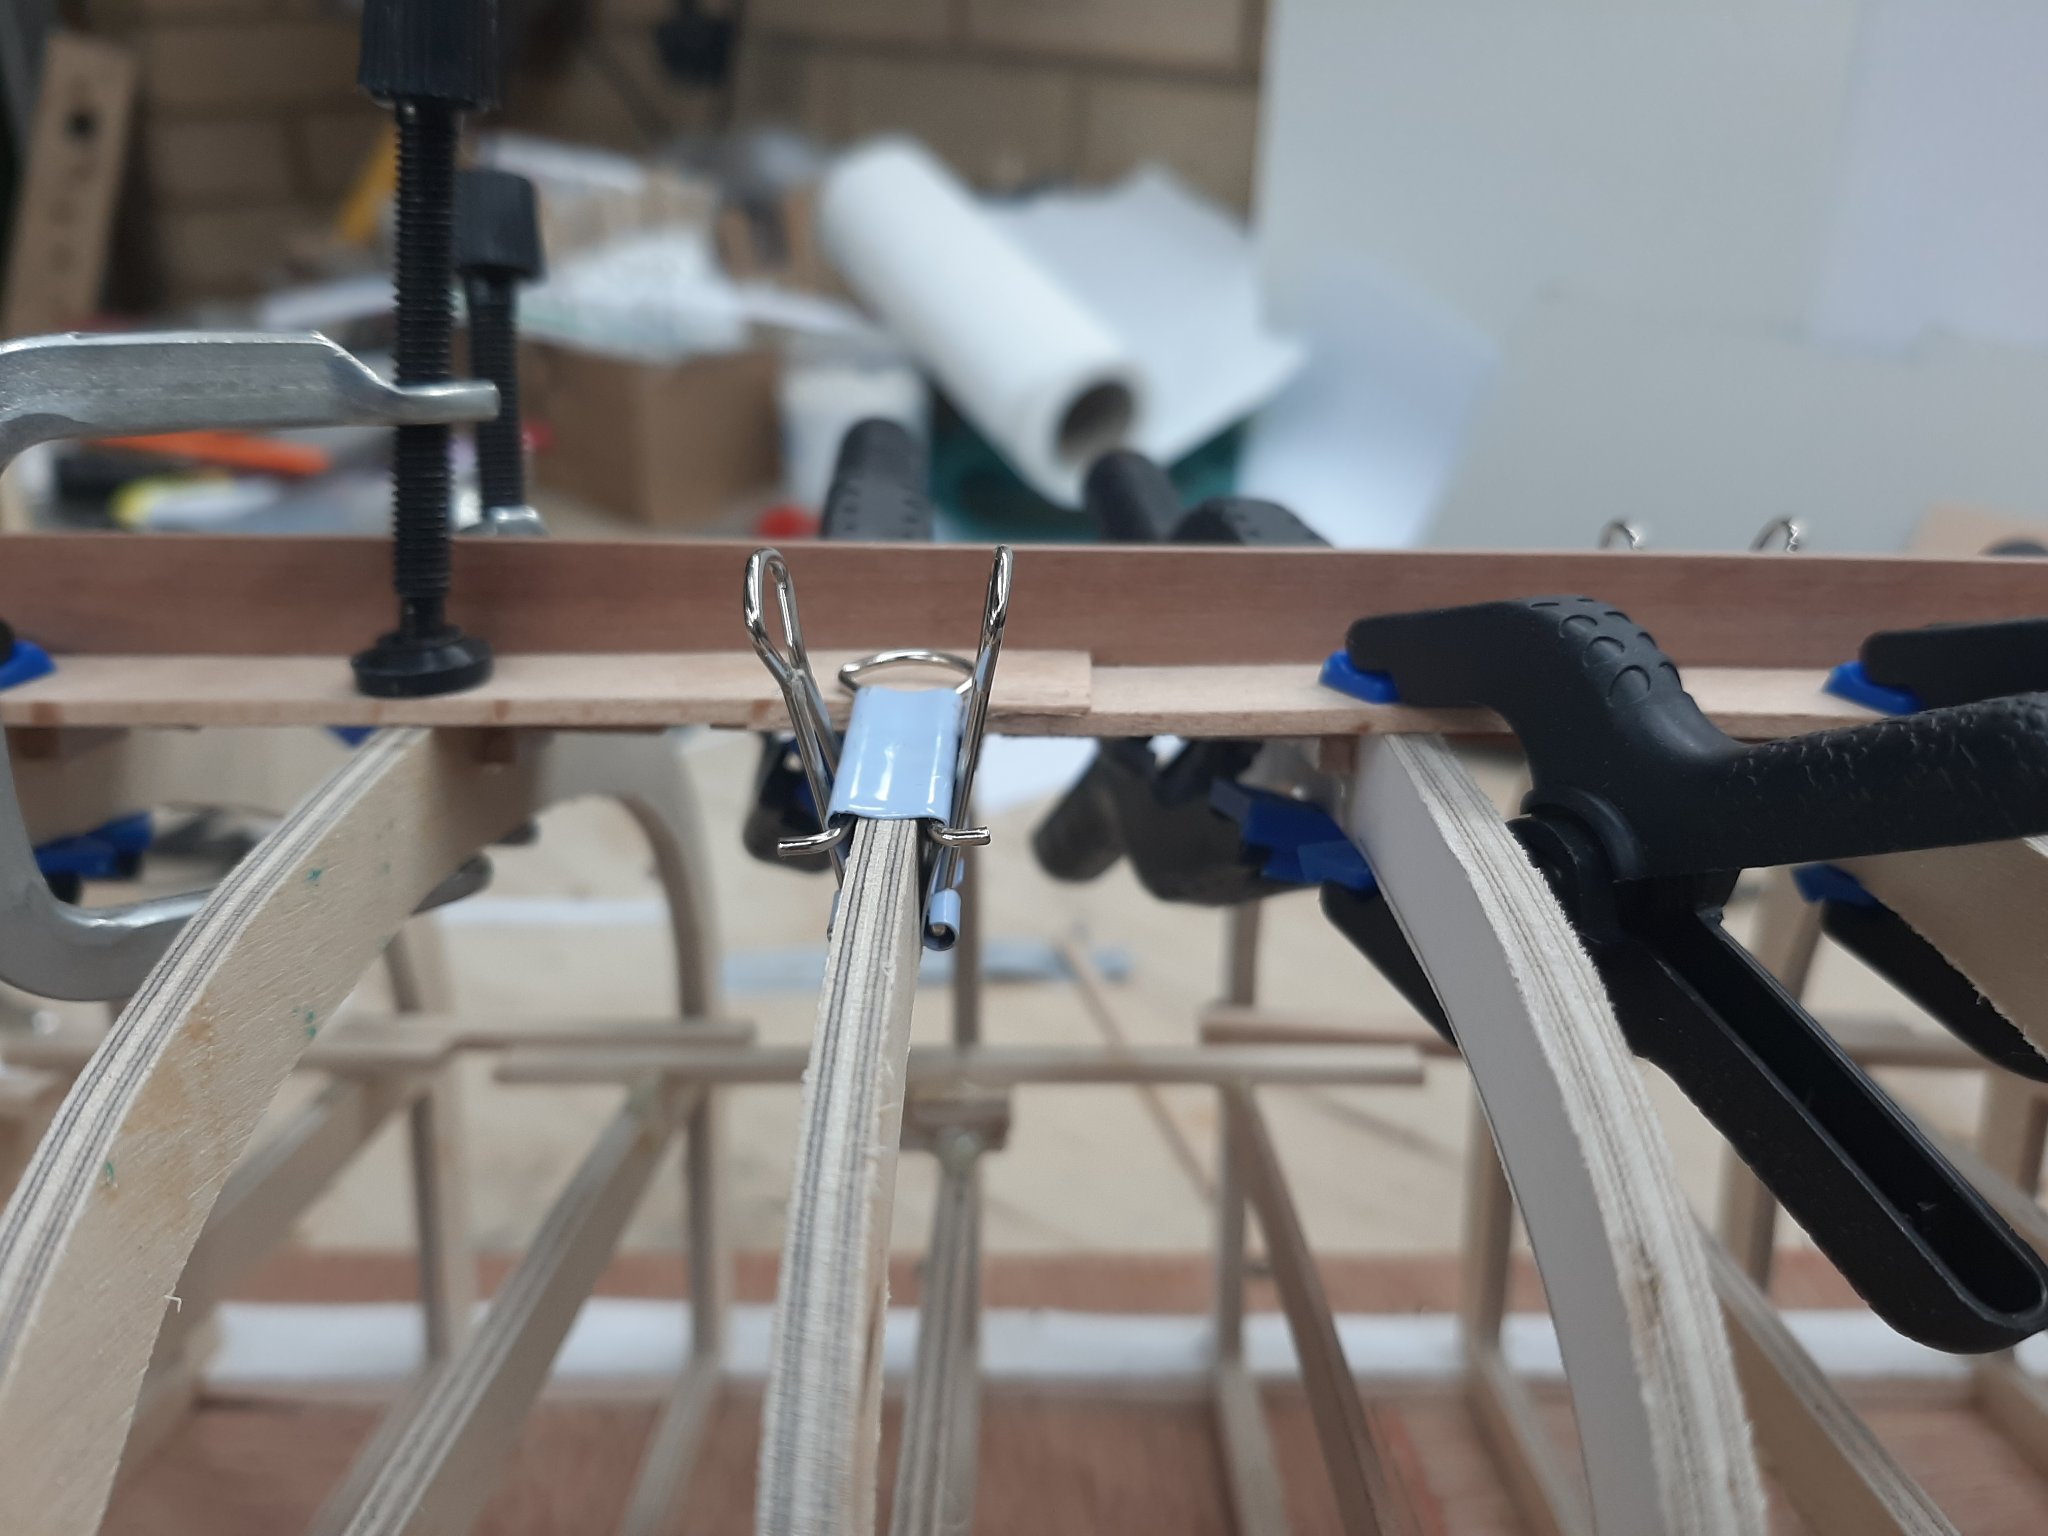
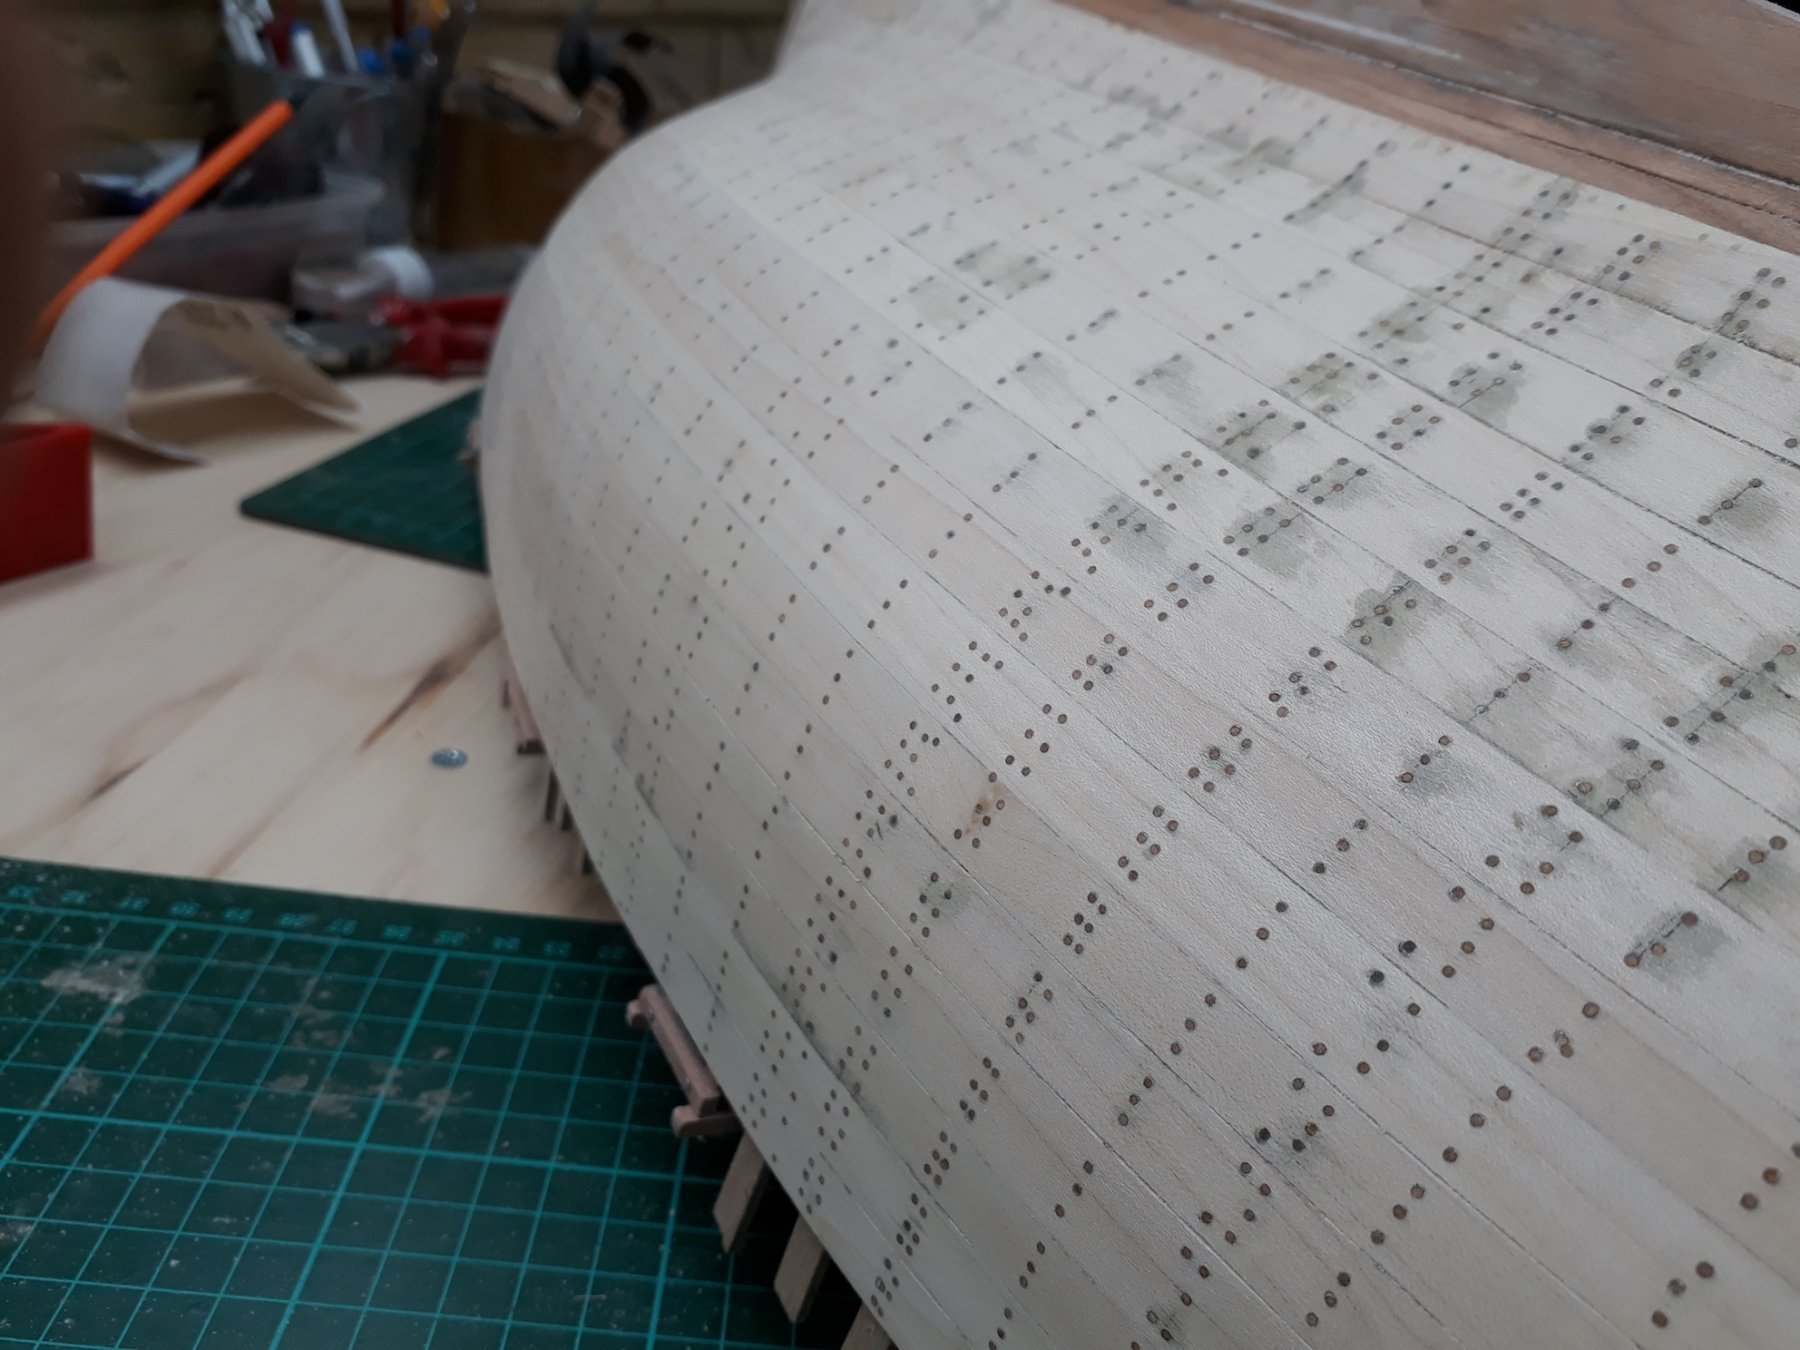
I am still not certain how I will secure the planks, whether I ll use threaded brass wire, treenails or bras pins. I experimented with 0.55 mm brass pins, nailed against a steel surface. The tips bend exactly as they should and hold the planks very securely. I think however the pin heads are out of scale.

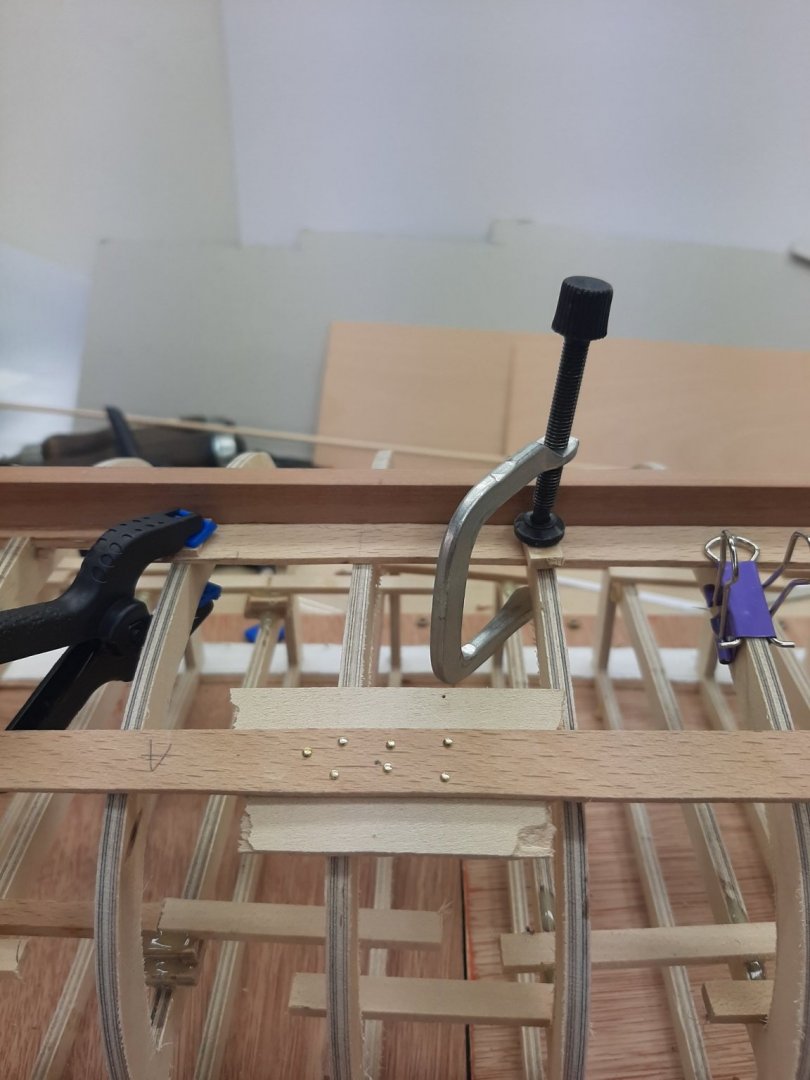
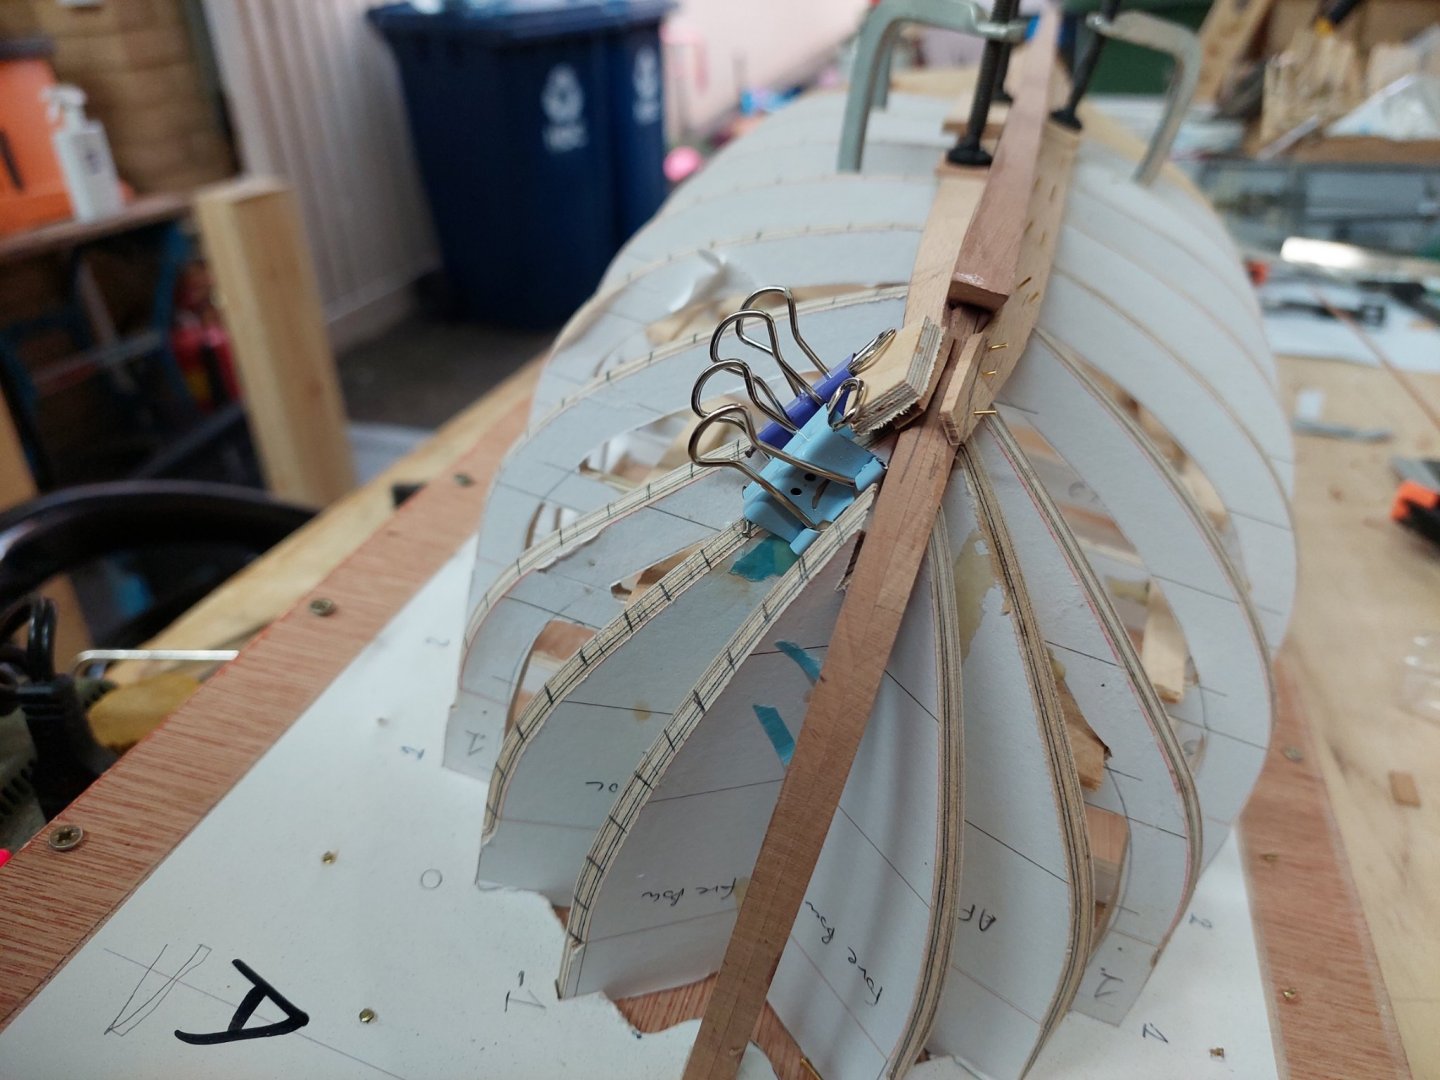
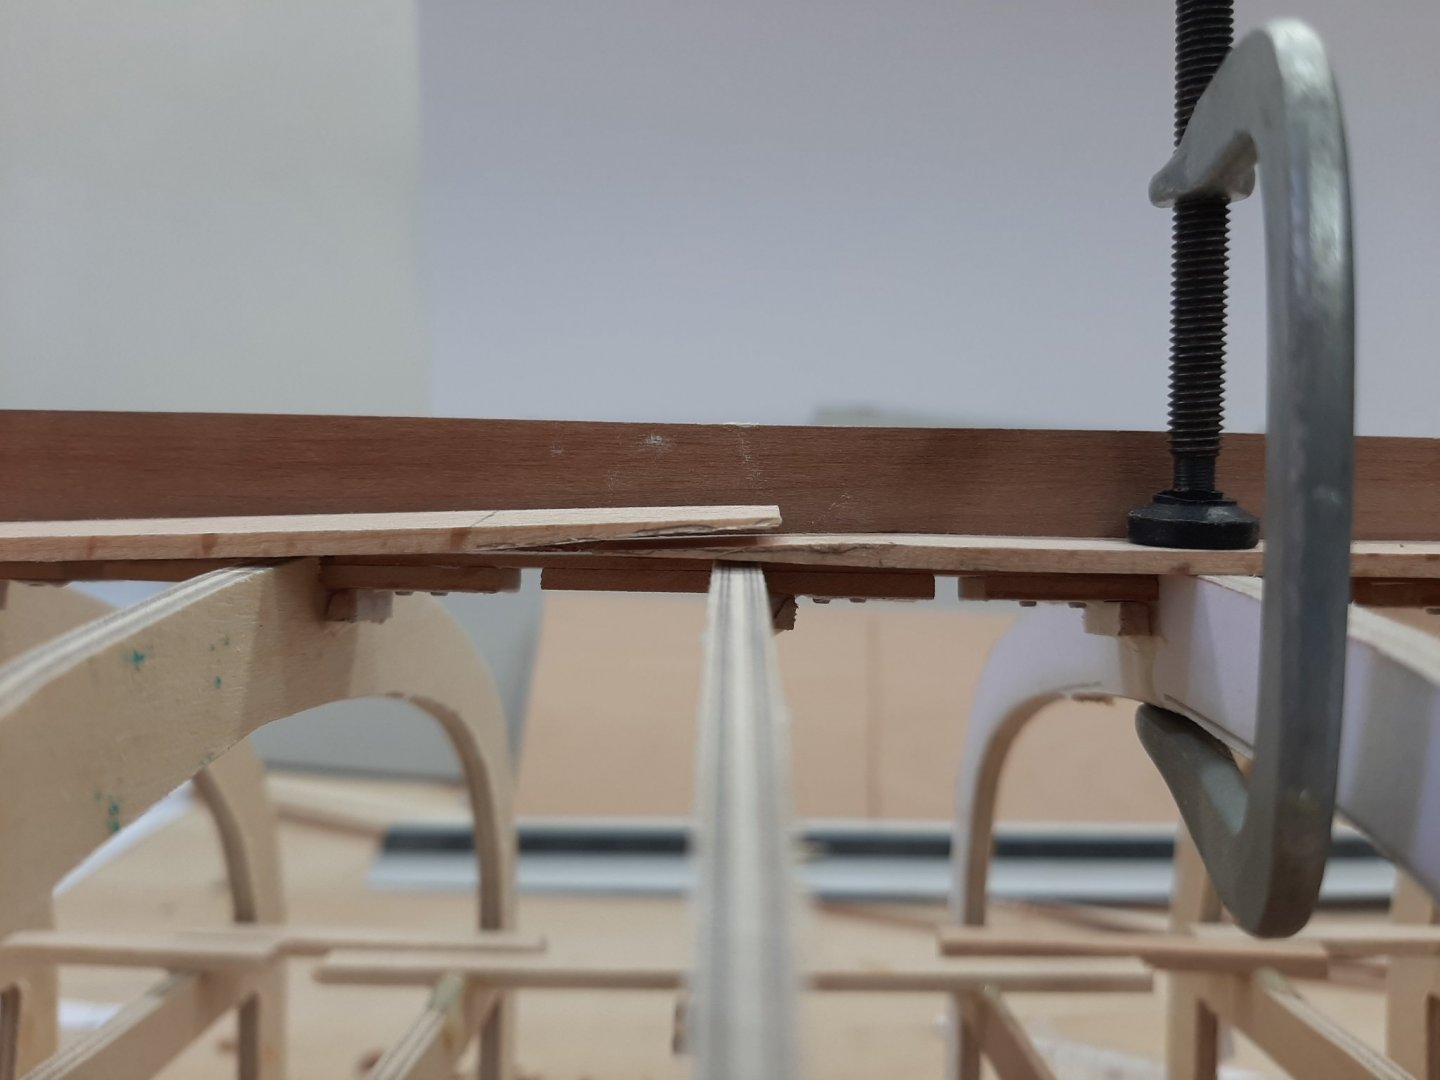
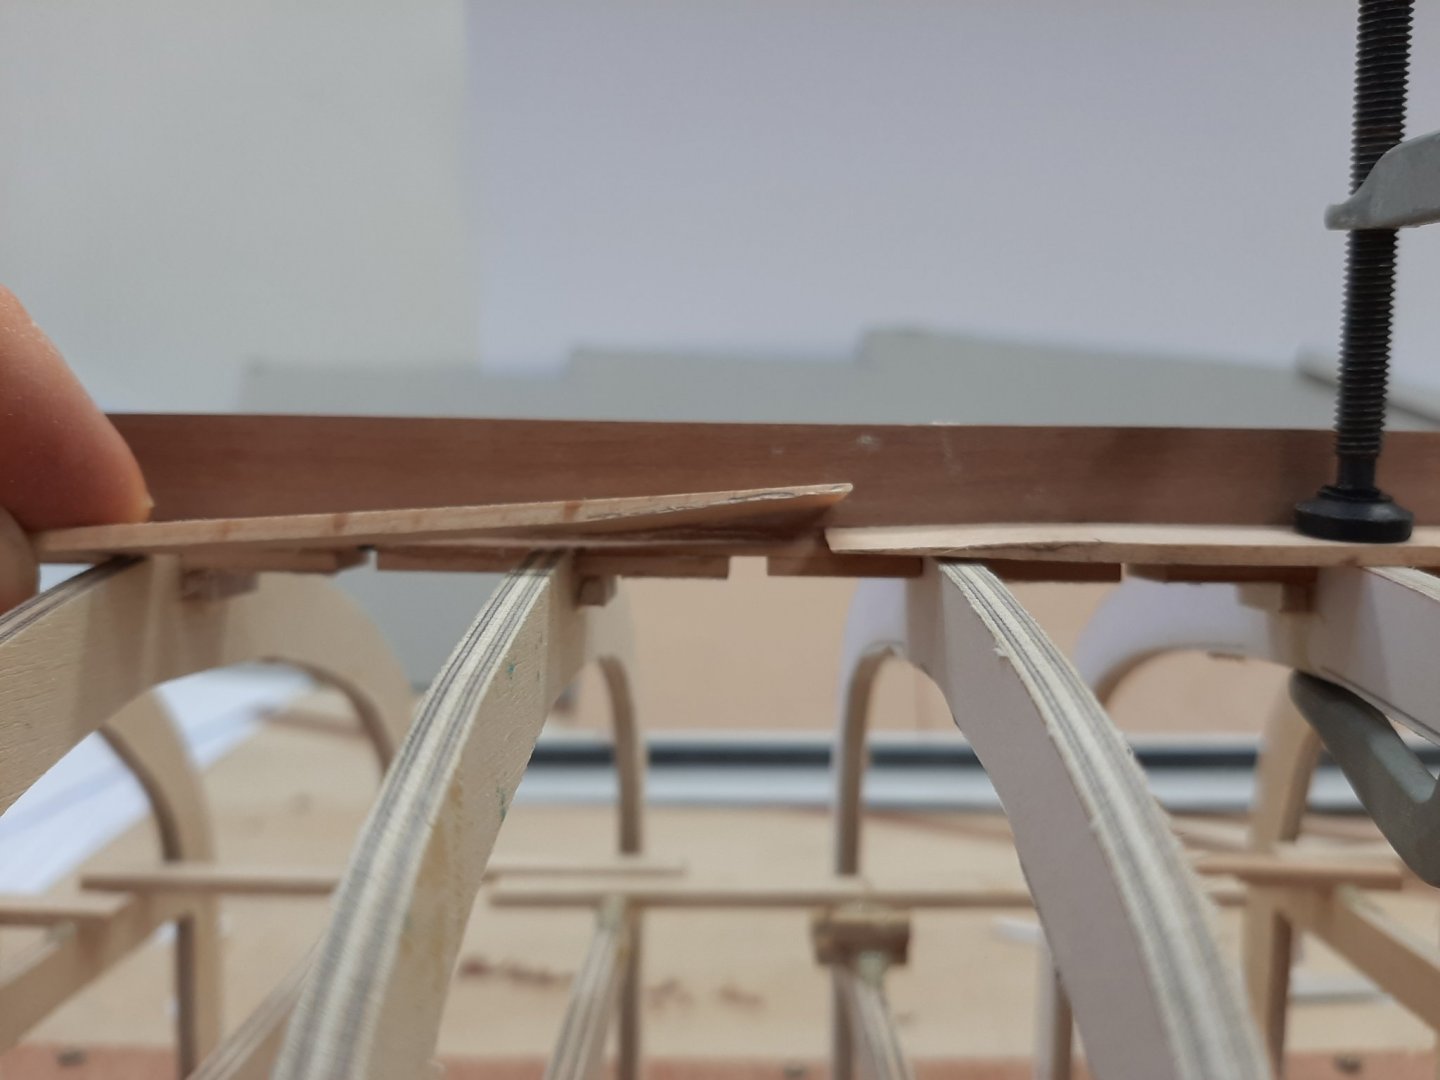
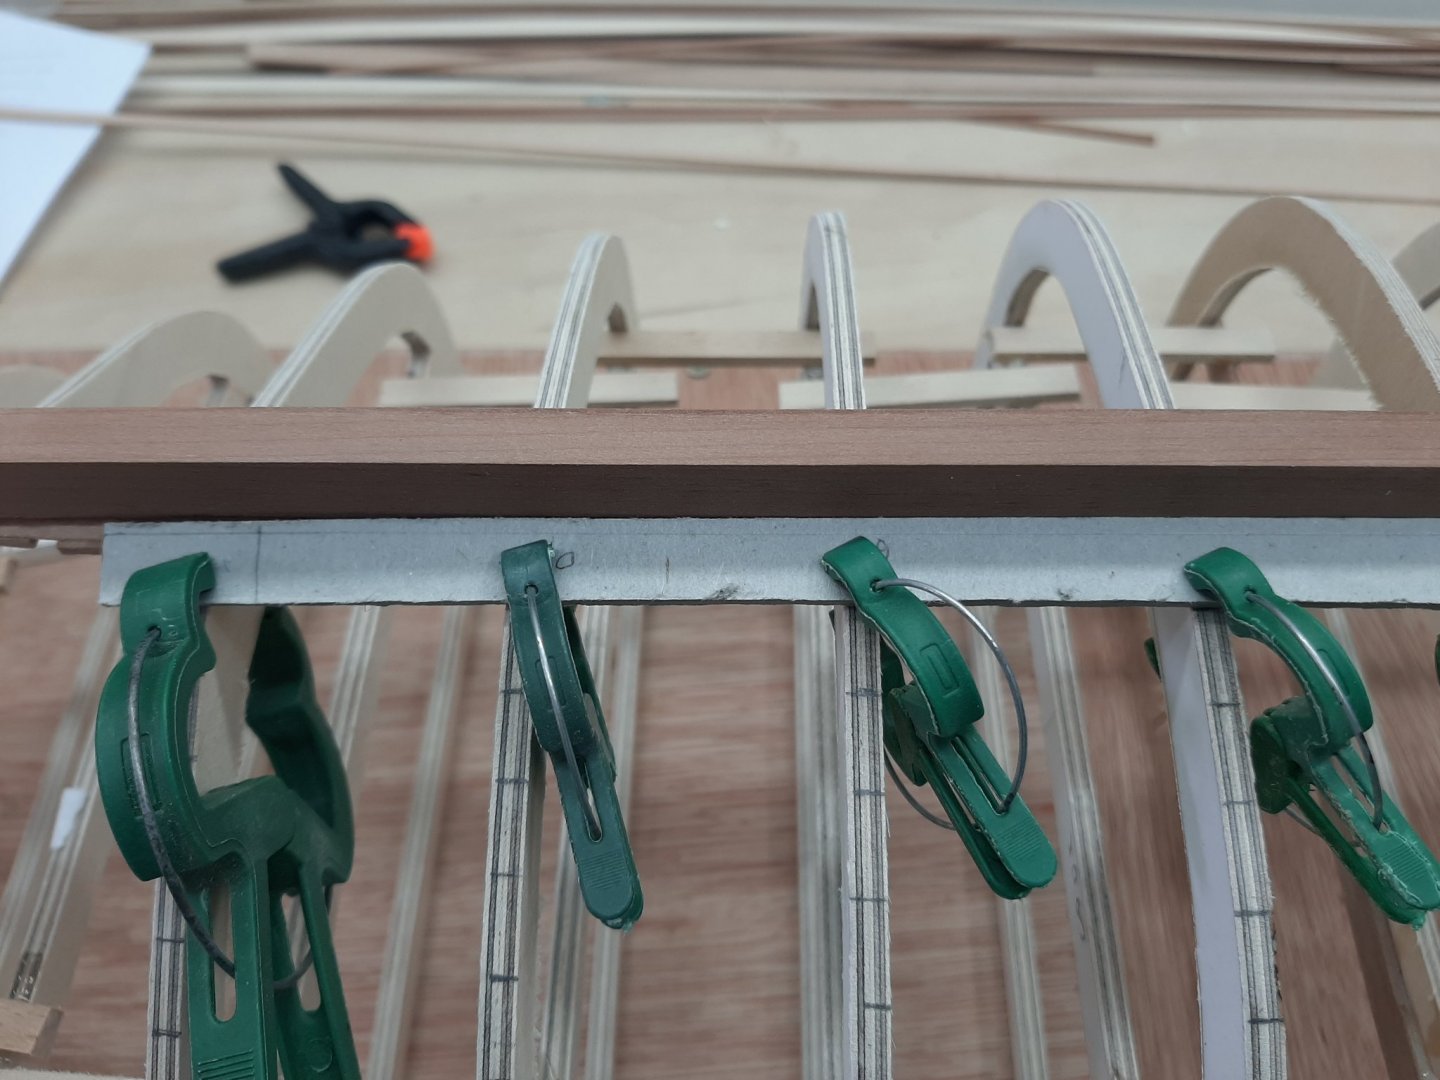
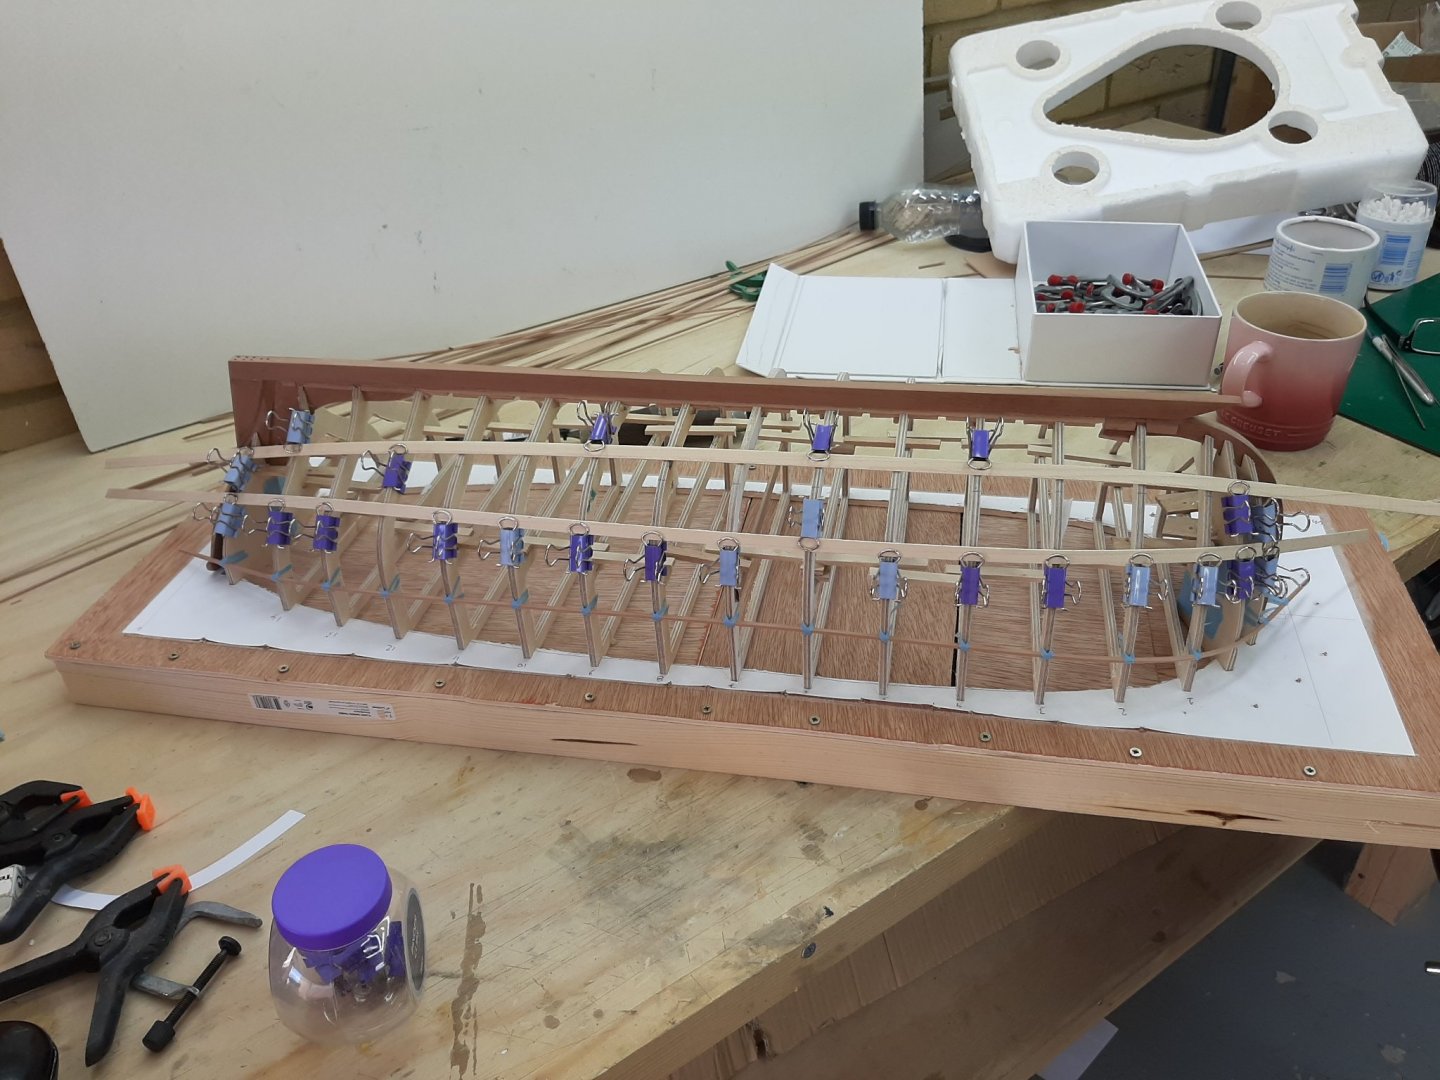
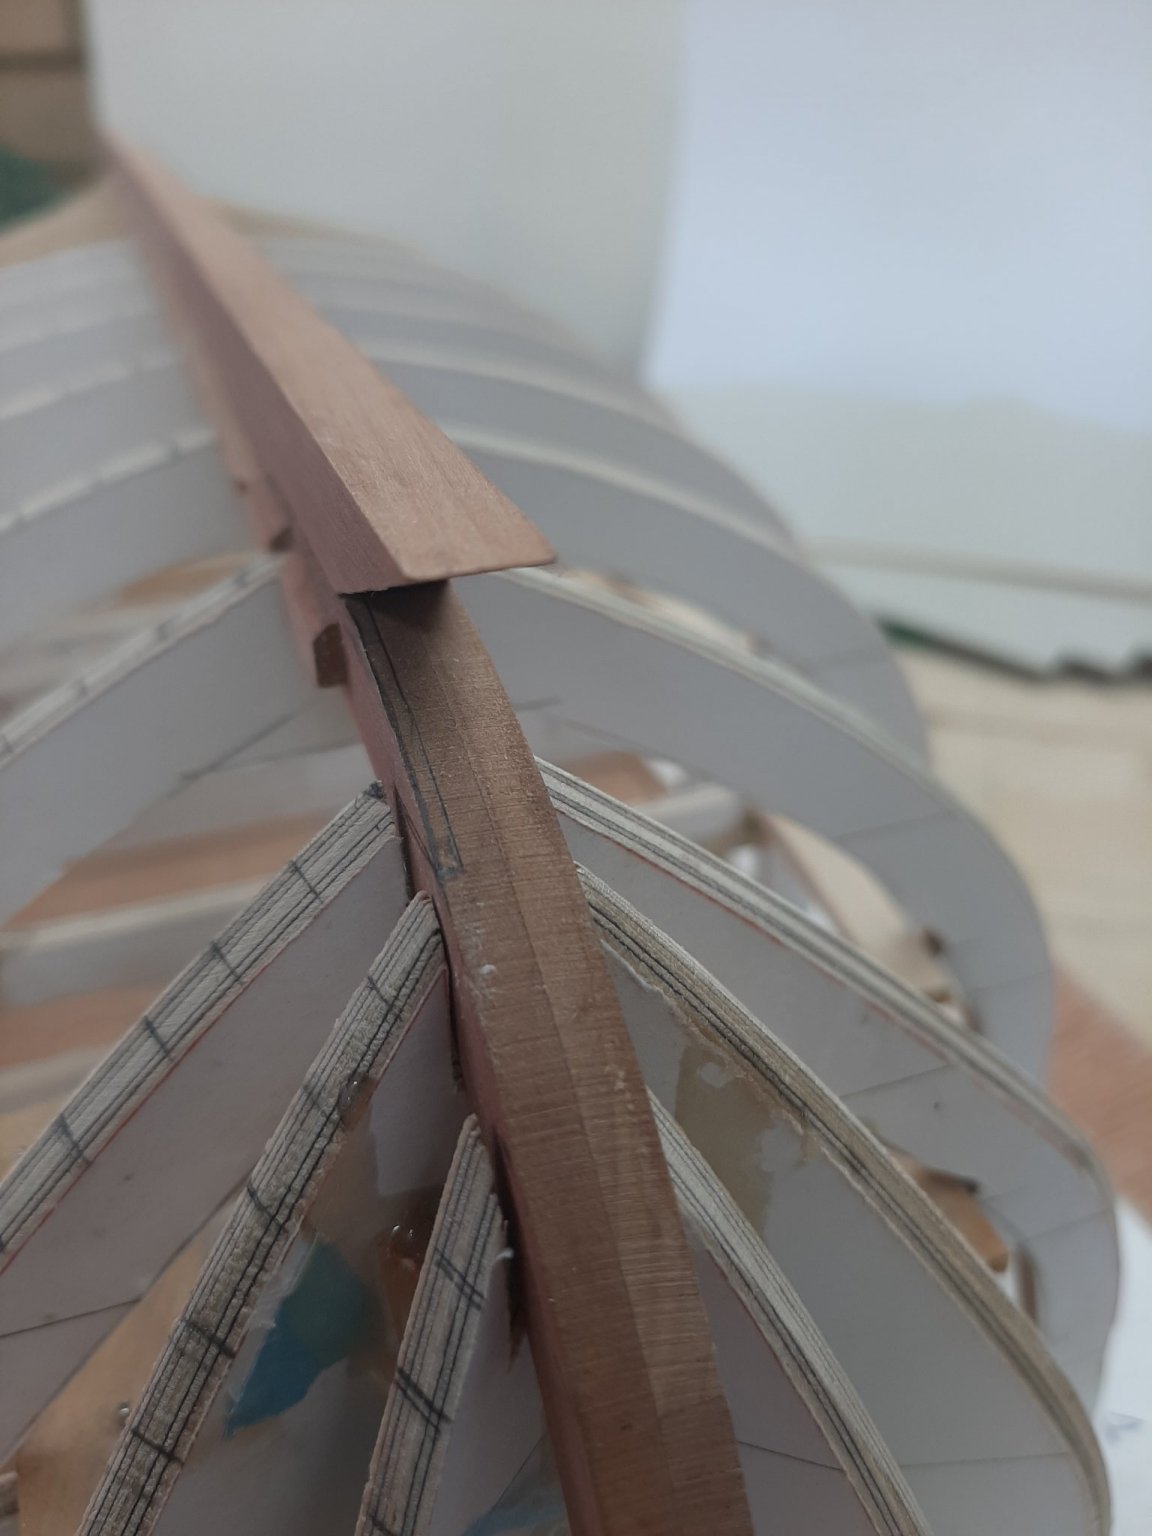
I finished the starboard garboard, the planks are secured with brass pins 0.6 mm through 0,5 mm pilot holes. The scarf is glued for now but some form of reinforcement nailing or screwing will go on. As I am not sure what I will use to fasten the planks to the ribs, I just cut the pins leaving a length so I can pull them out later as these are the temporary frames.
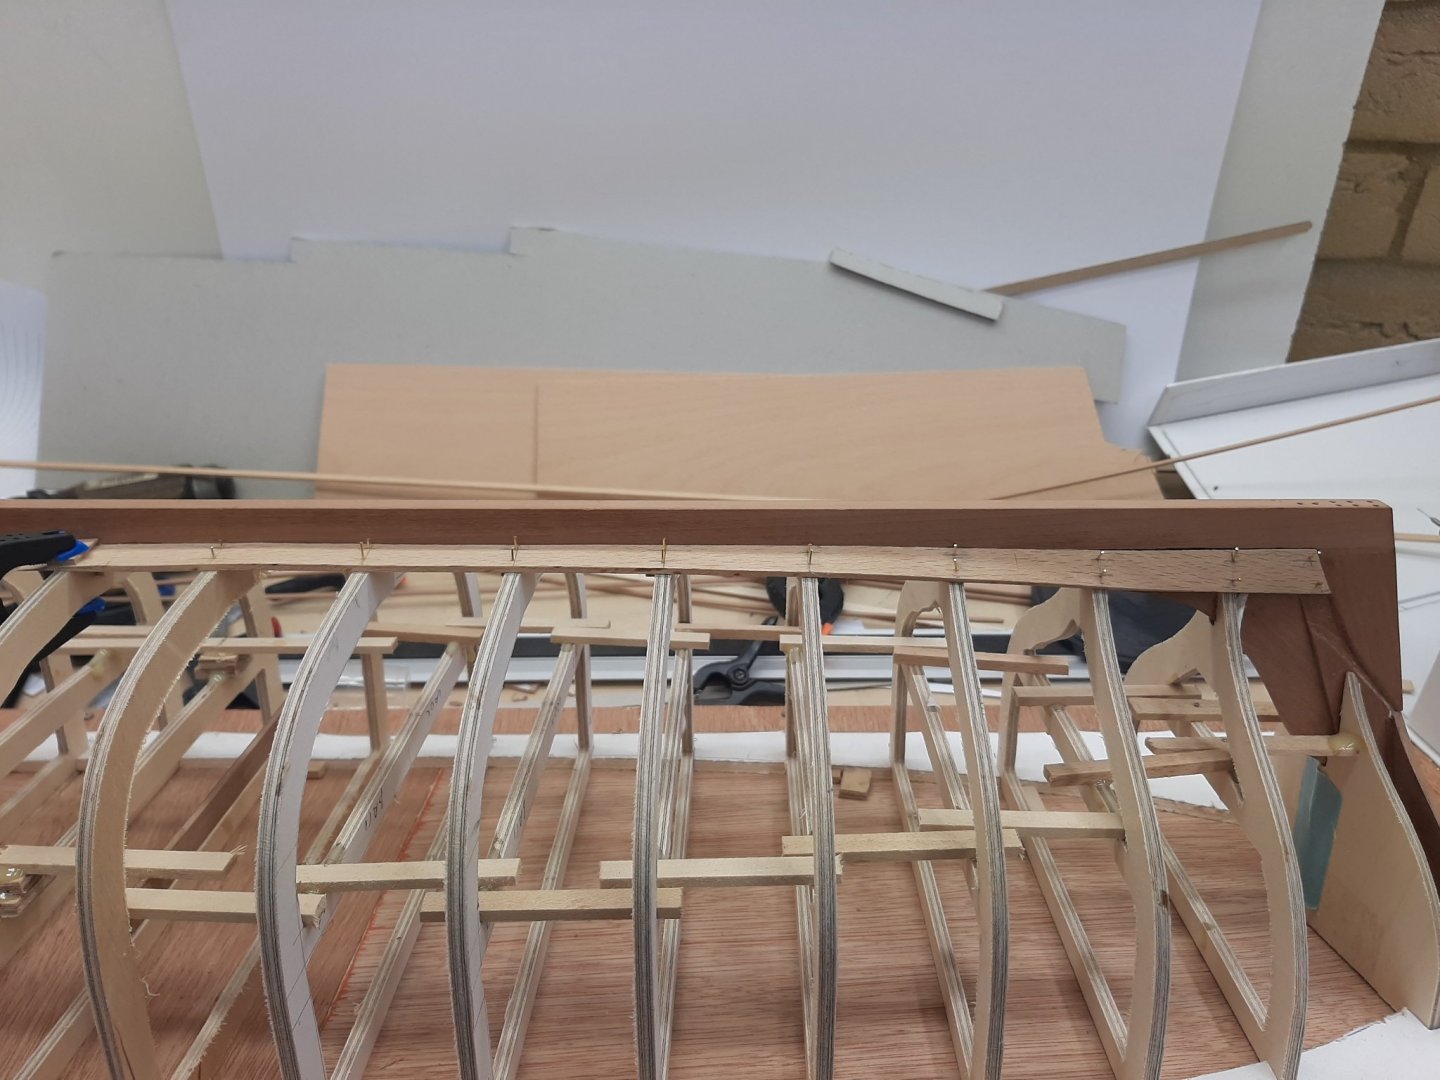


Then I started work on the port side. Disaster...
A few days ago, I needed a small piece of wood so I just broke a segment from a scrap piece I found on the bench. yep, that was the plank!
I used the broken pieces to recreate the plank and thankfully, with a bit of sanding it came out fine. Then, I secured it in place

The ends at the bow will need to be trimmed, I think I ve put the nails very close to the trimming line-we ll see.

Till next time
vaddoc
-
Get well soon Michael, all the best. Very good to hear all went well
Vaddoc
- michael mott, mtaylor and Keith Black
-
 3
3
-
Very nice Bill! Seems you had fun and learnt a lot. Good luck with your next project.
- mtaylor, wstalcup and Ryland Craze
-
3
-
System 3 brushes. Fantastic results with acrylic and enamel.
- Canute, mtaylor and Old Collingwood
-
3
-
Elmers colour changing filler is very good, my preferred filler. I tried osmo filler as well-very good, more liquid, dries much faster and comes in various colours.
- Canute, mtaylor, thibaultron and 2 others
-
5
-
On 7/18/2021 at 11:28 PM, Mark Pearse said:
Are you planning to set up any battens or thread to sight the planking lines
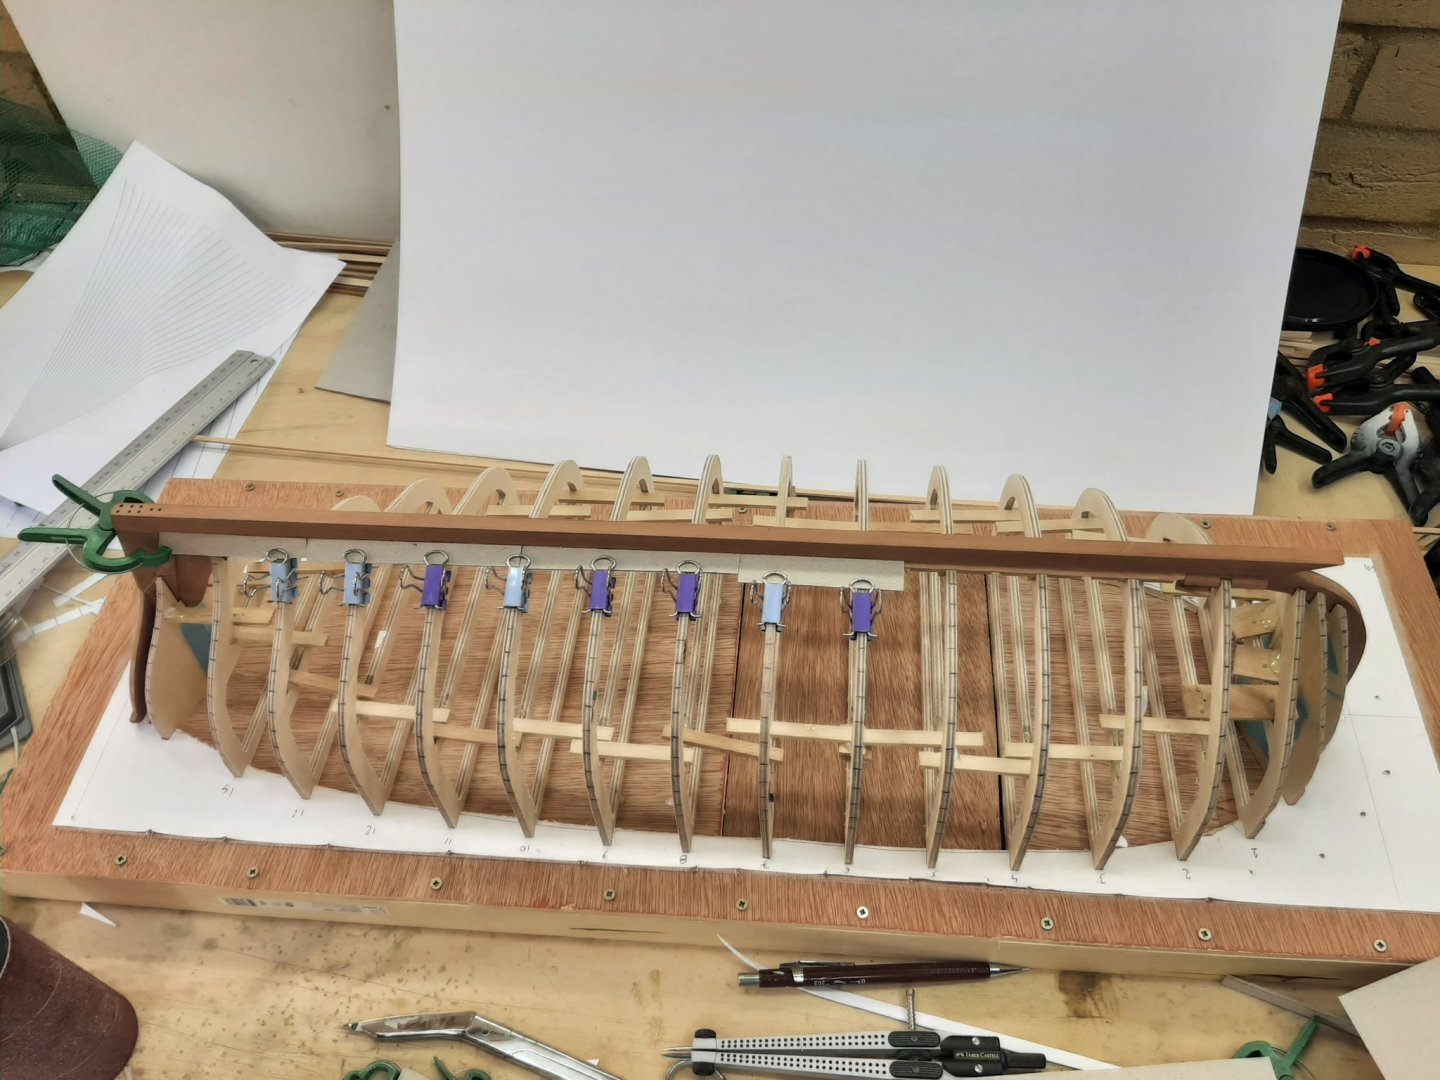
All done Mark! But the lines are on the other side of the boat. The final fairing will be done while cutting the actual planks
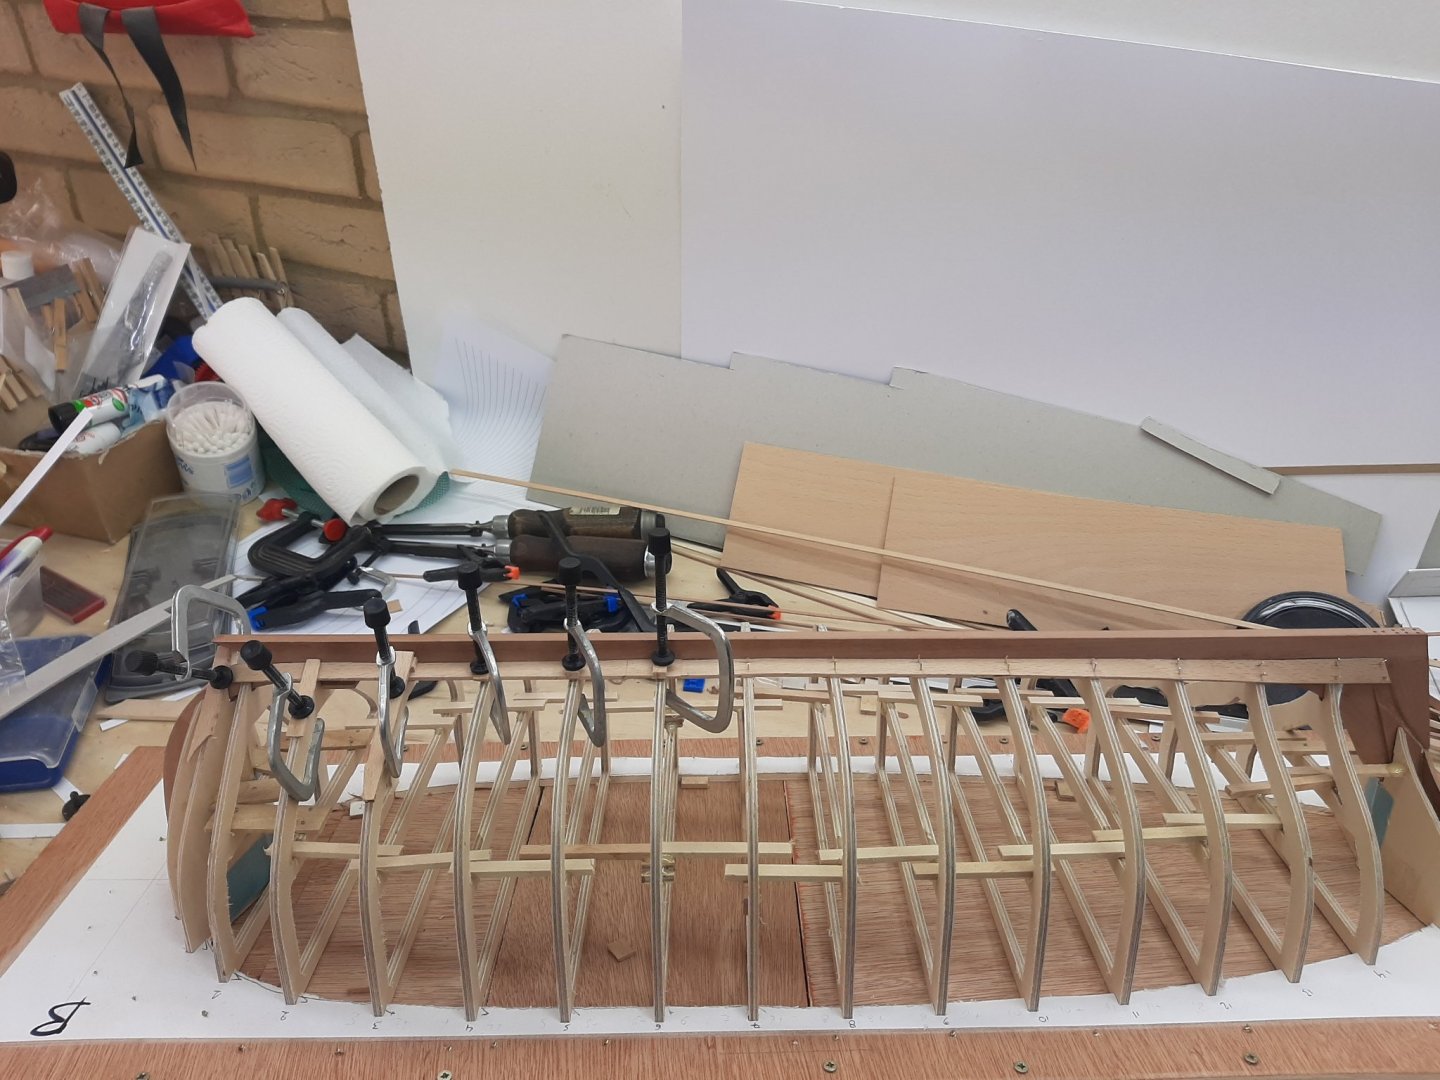
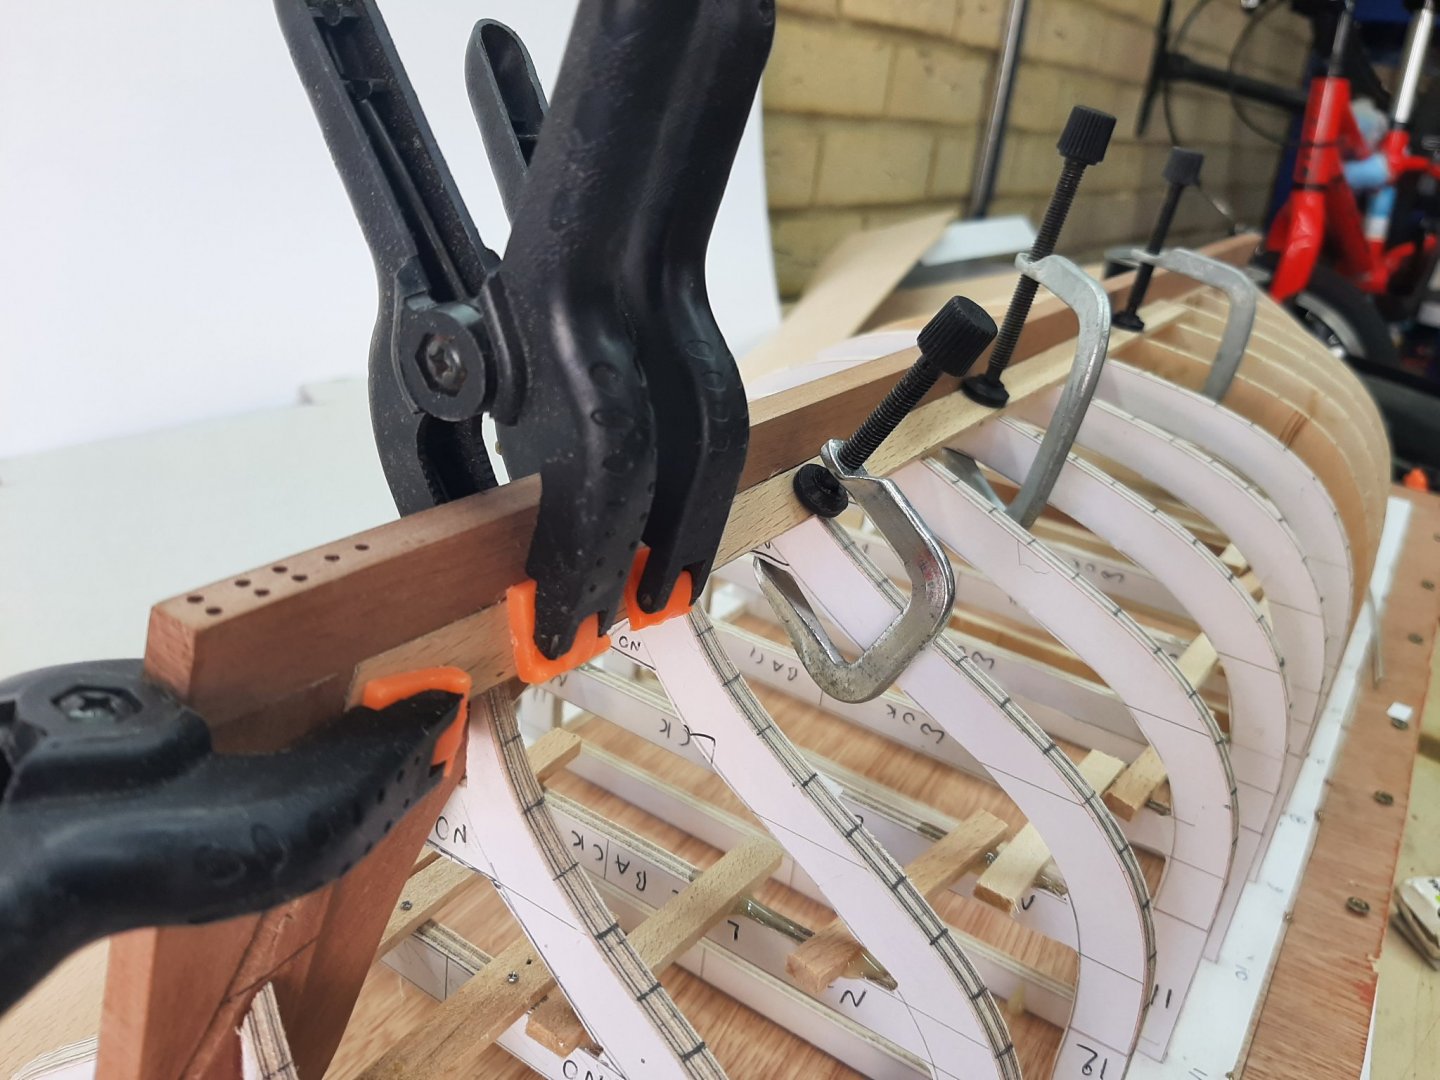
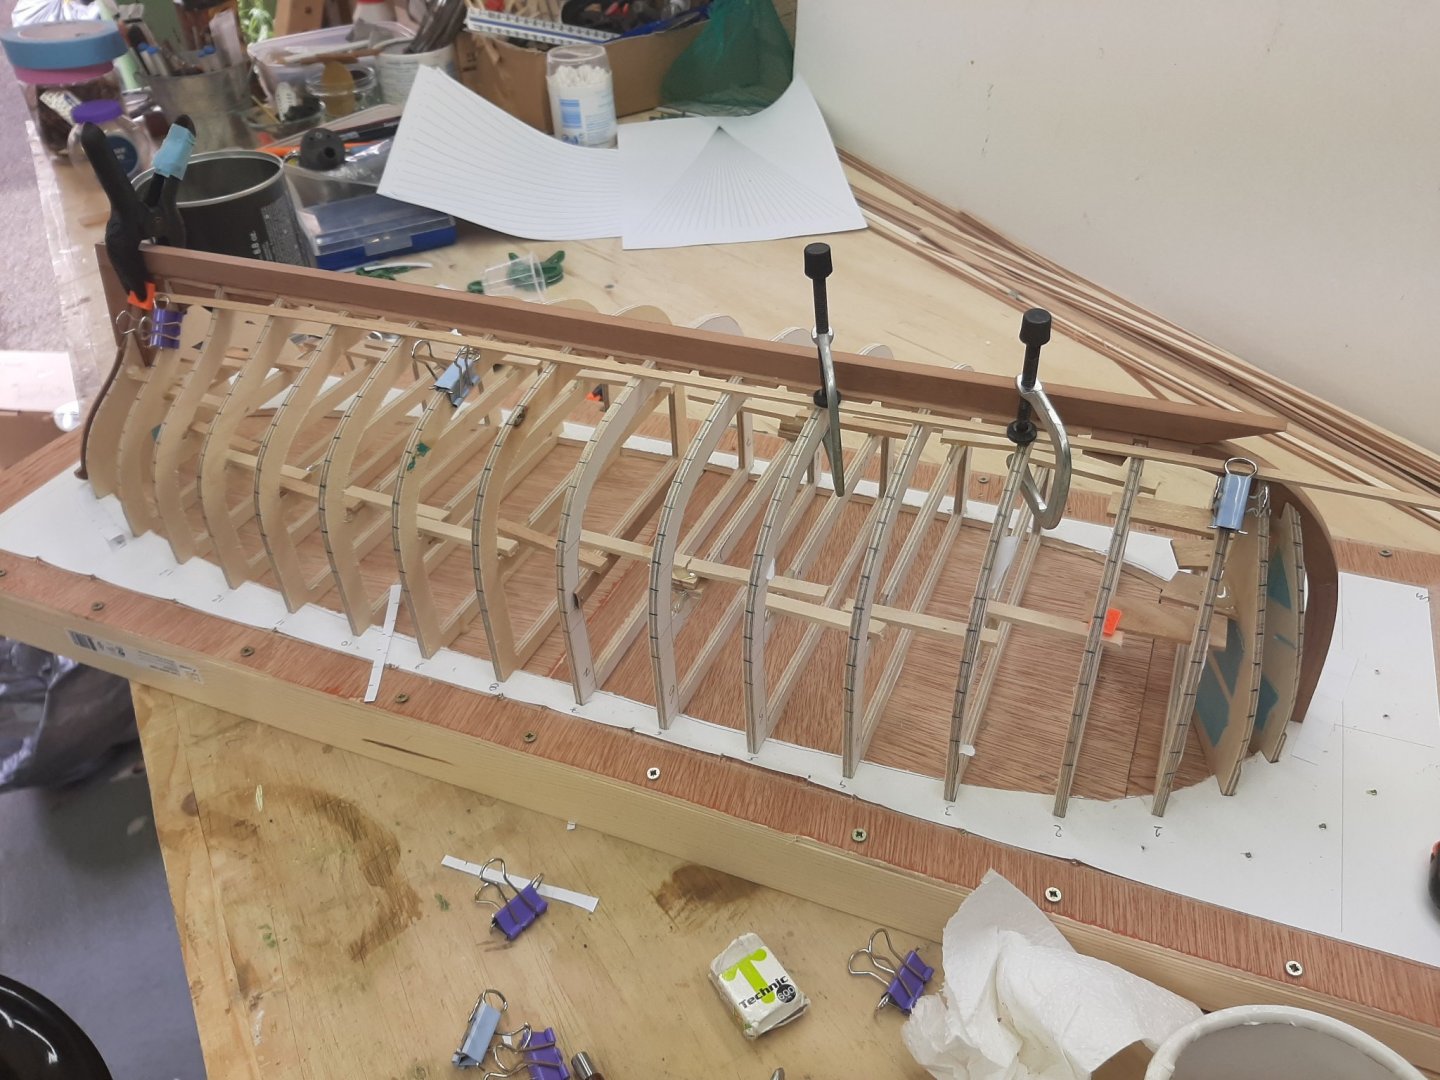
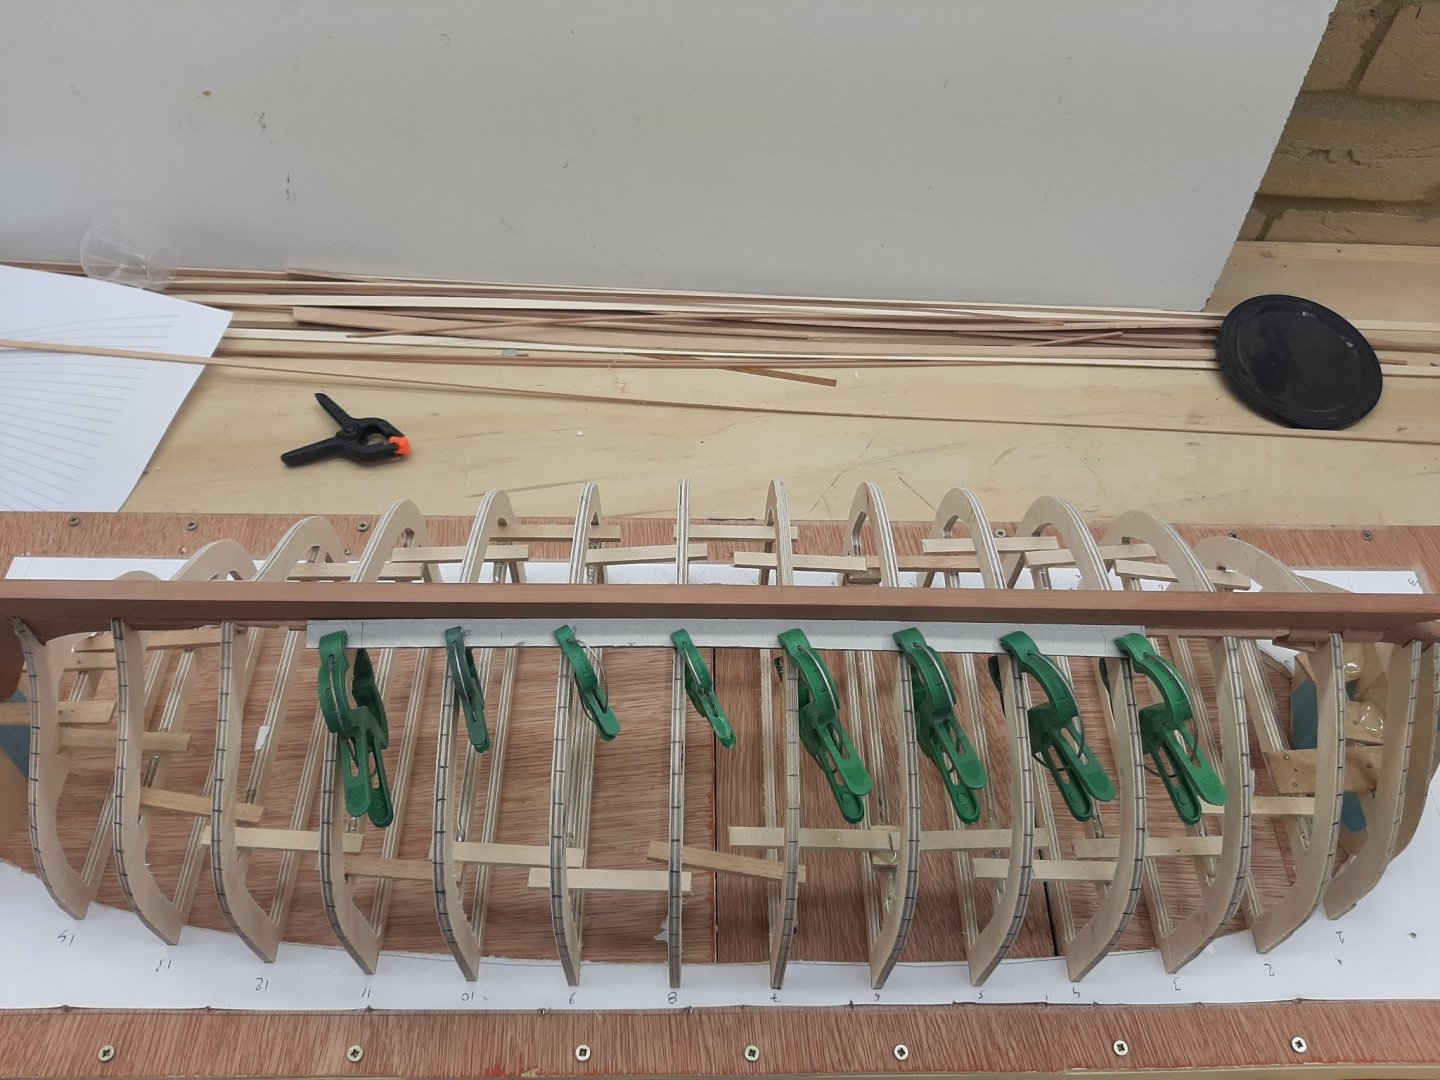
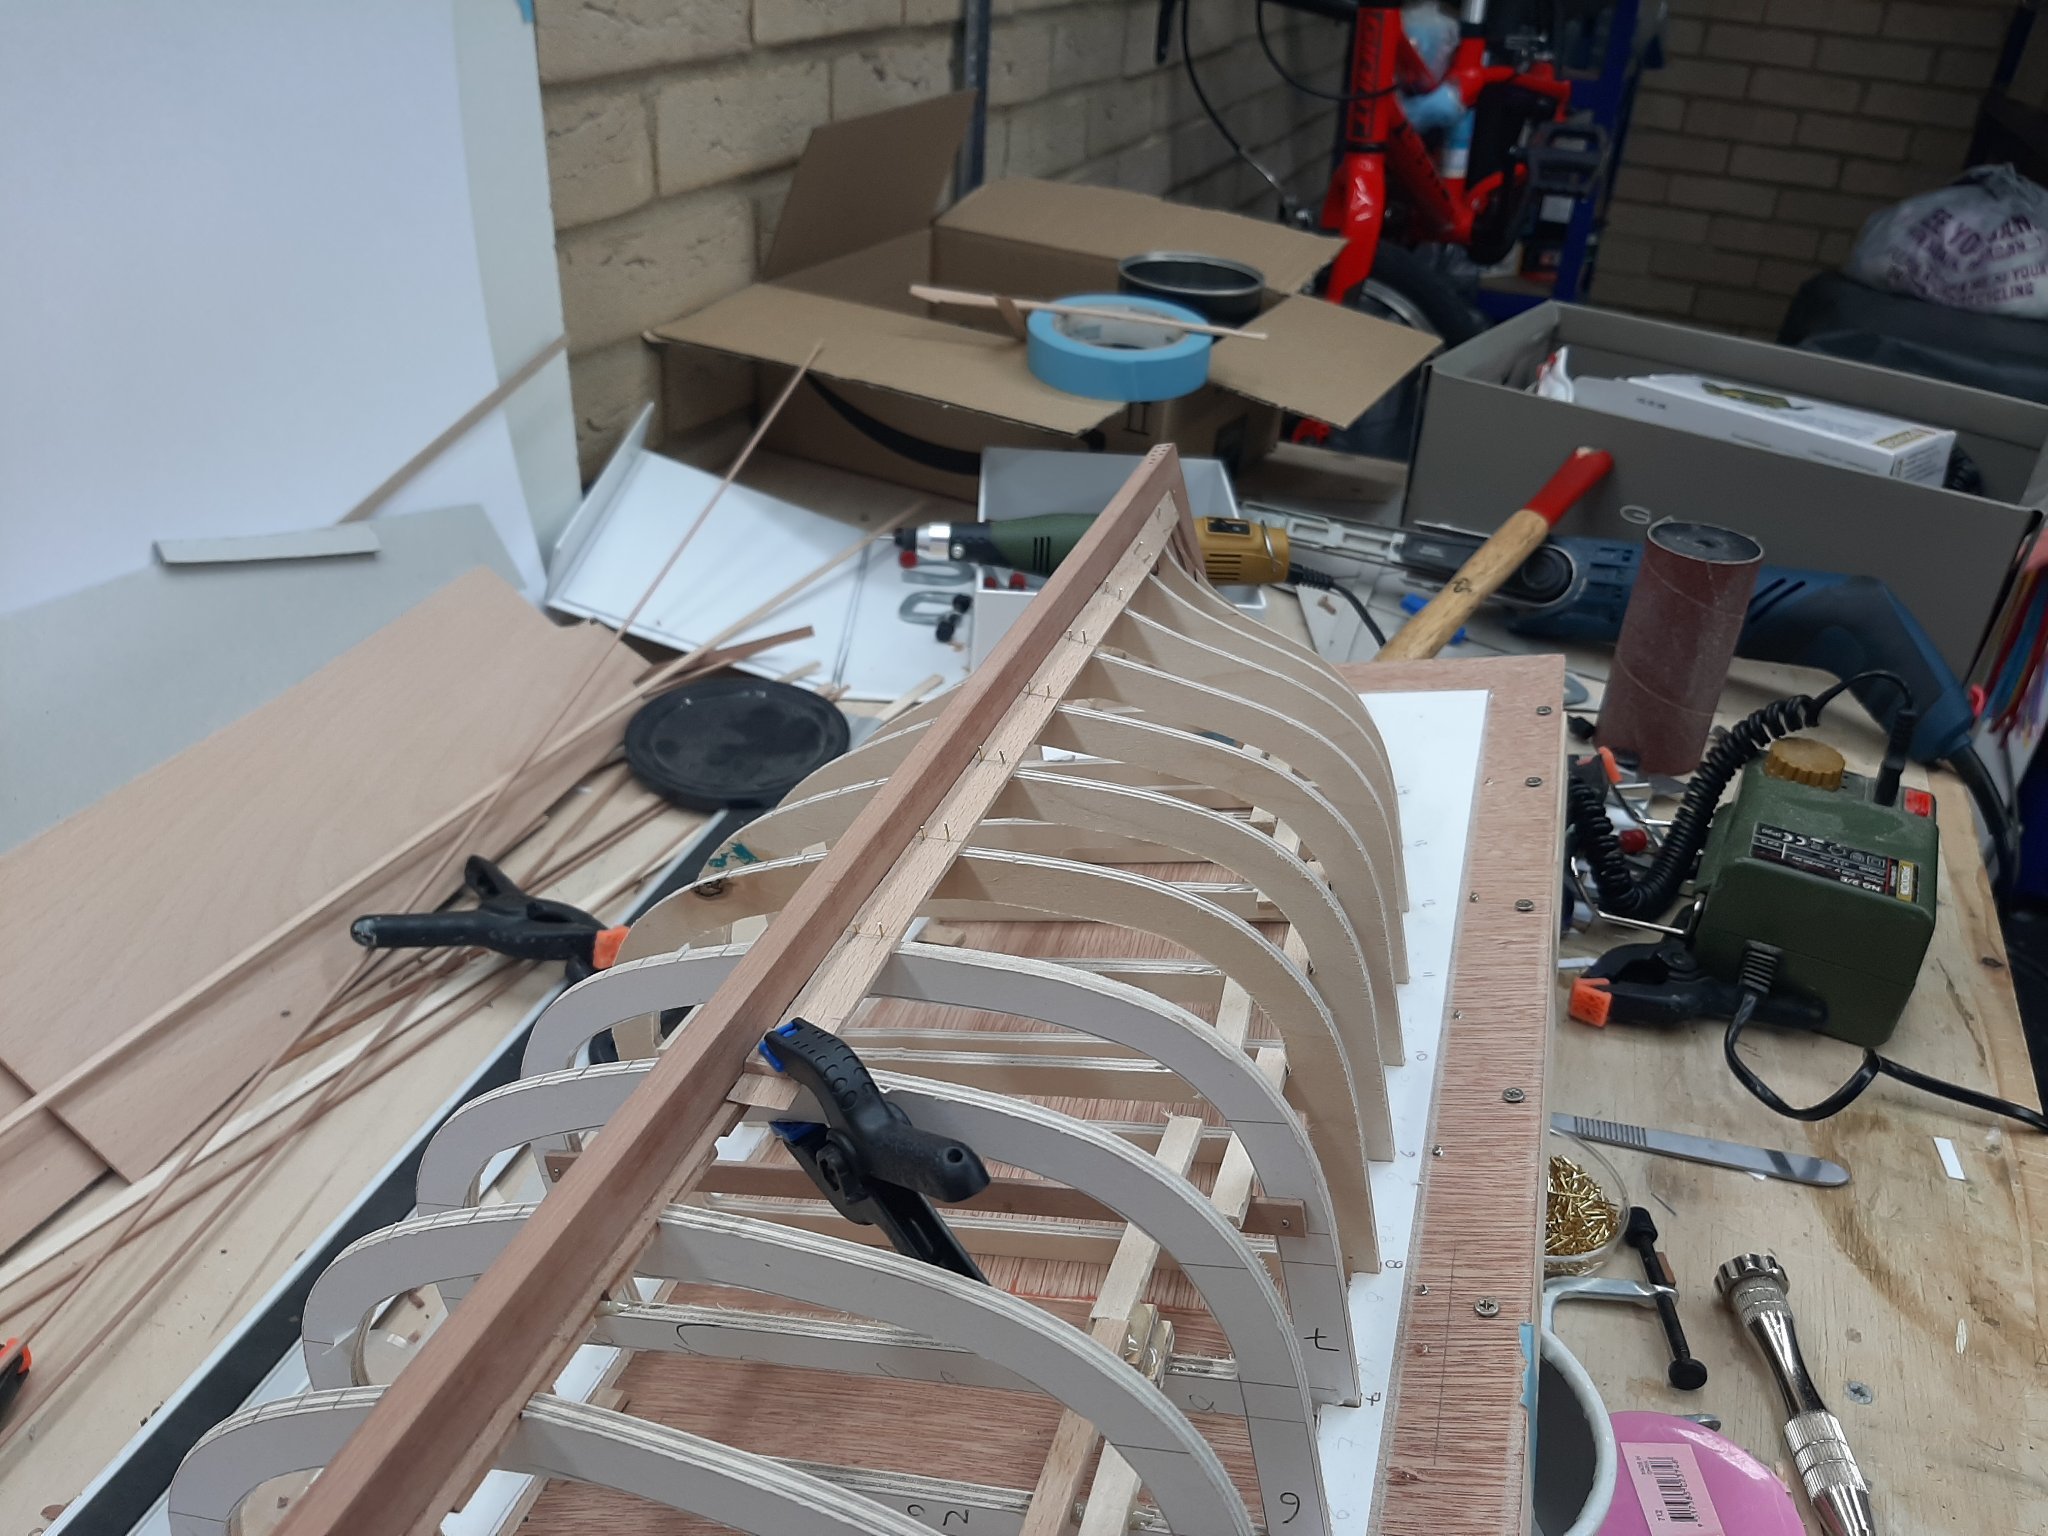
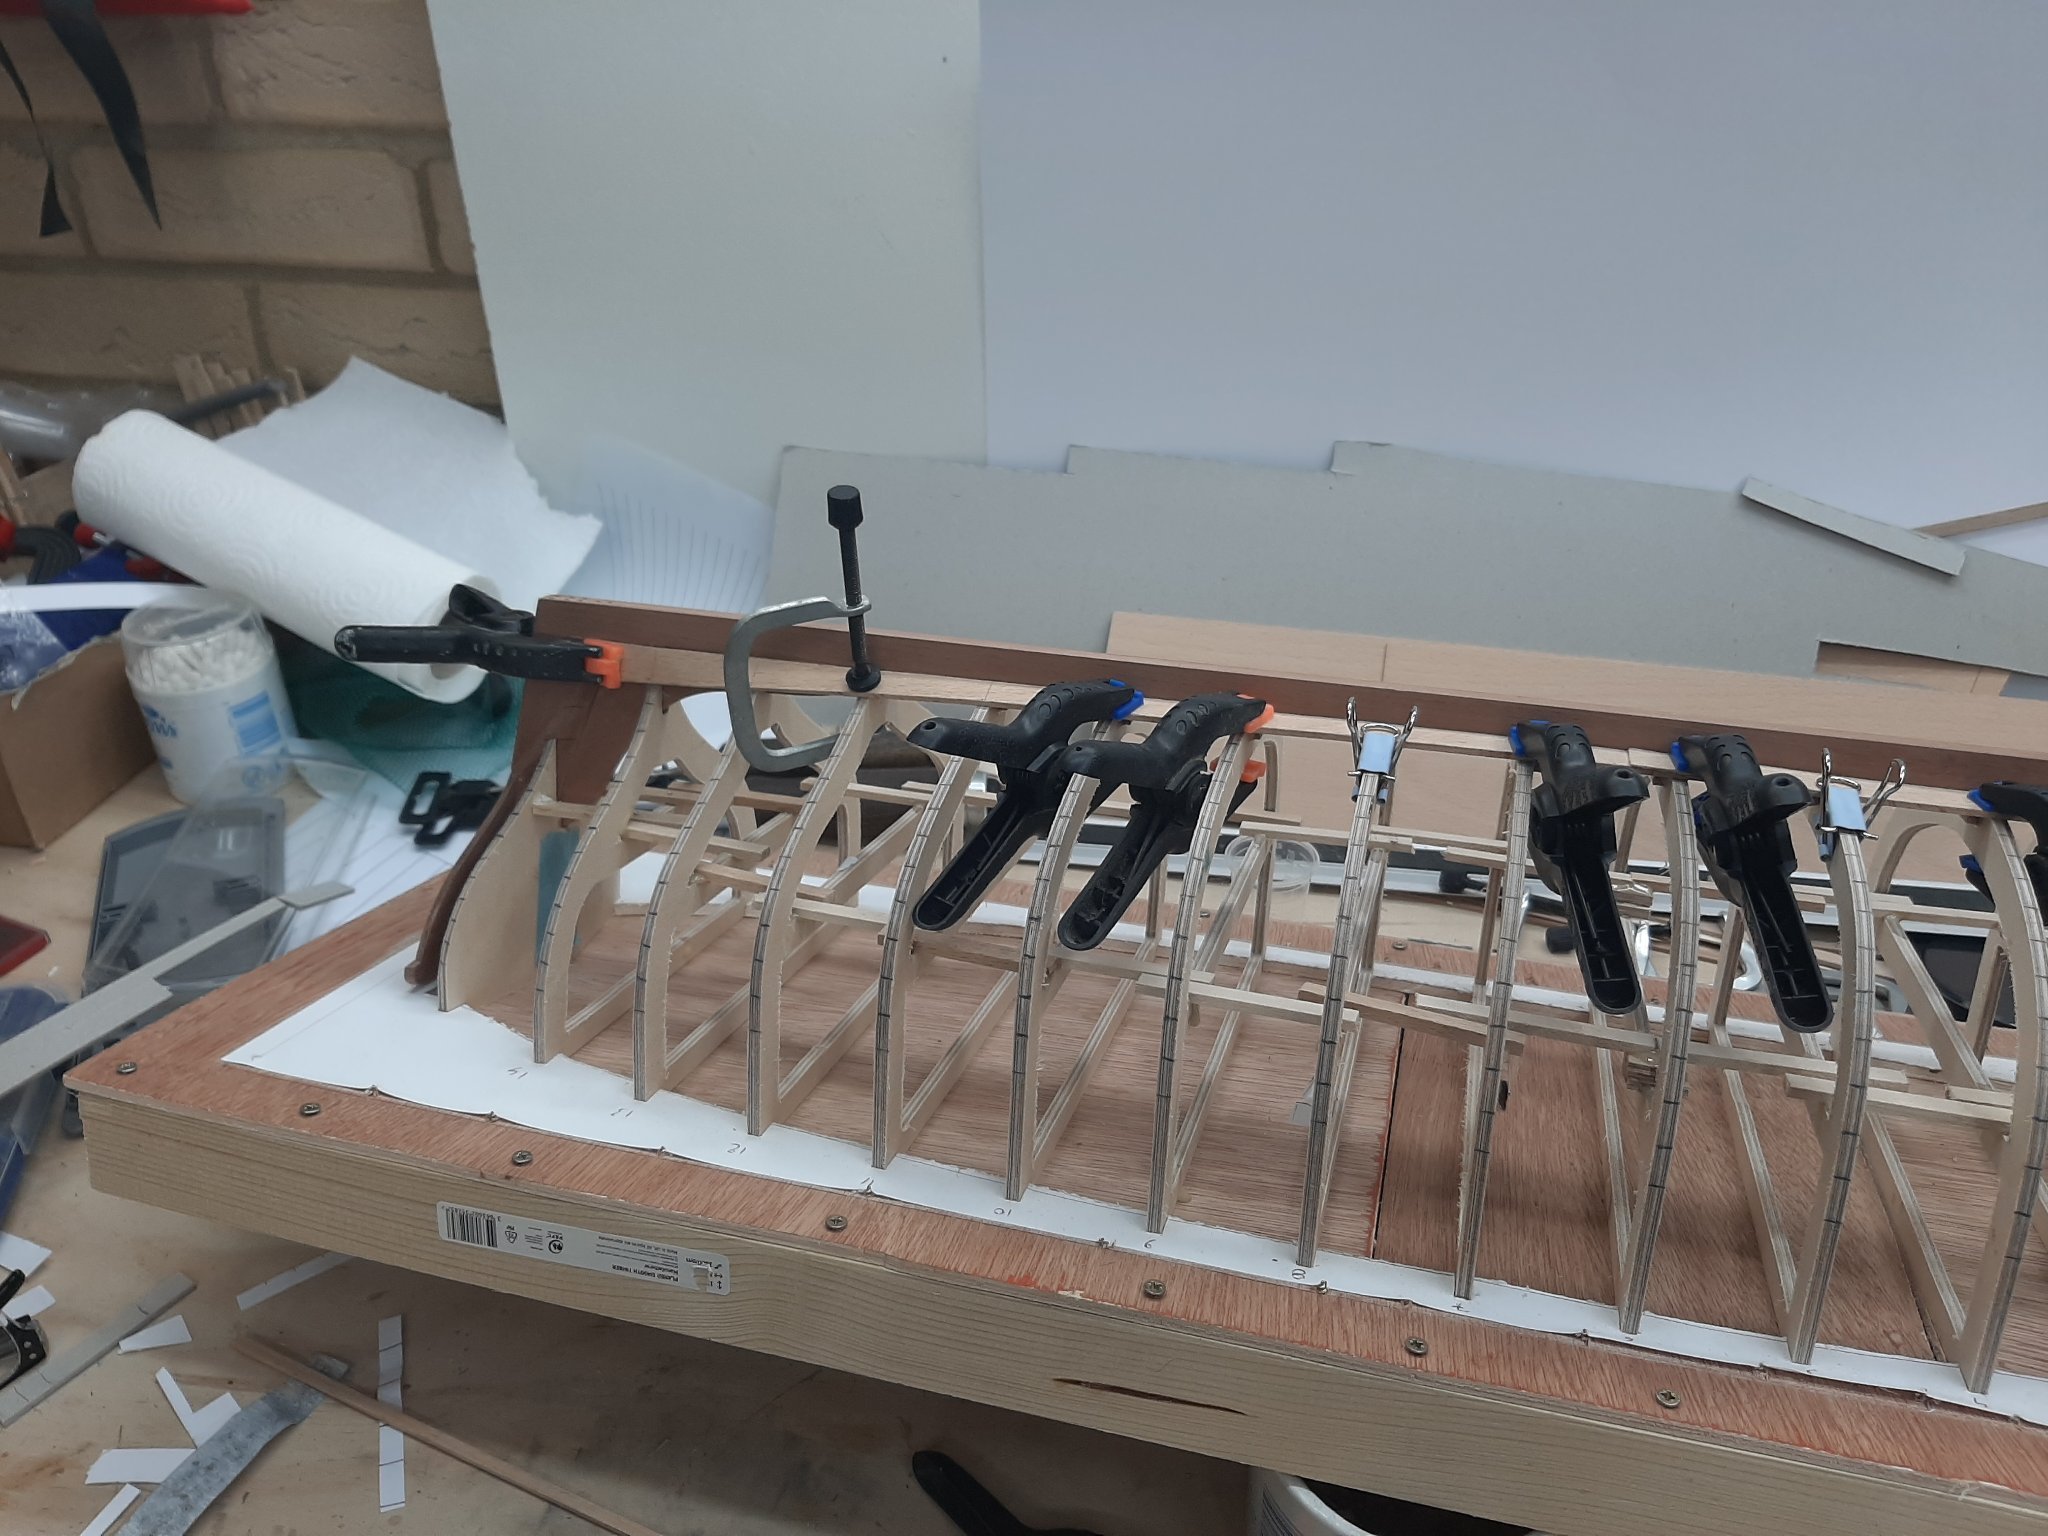
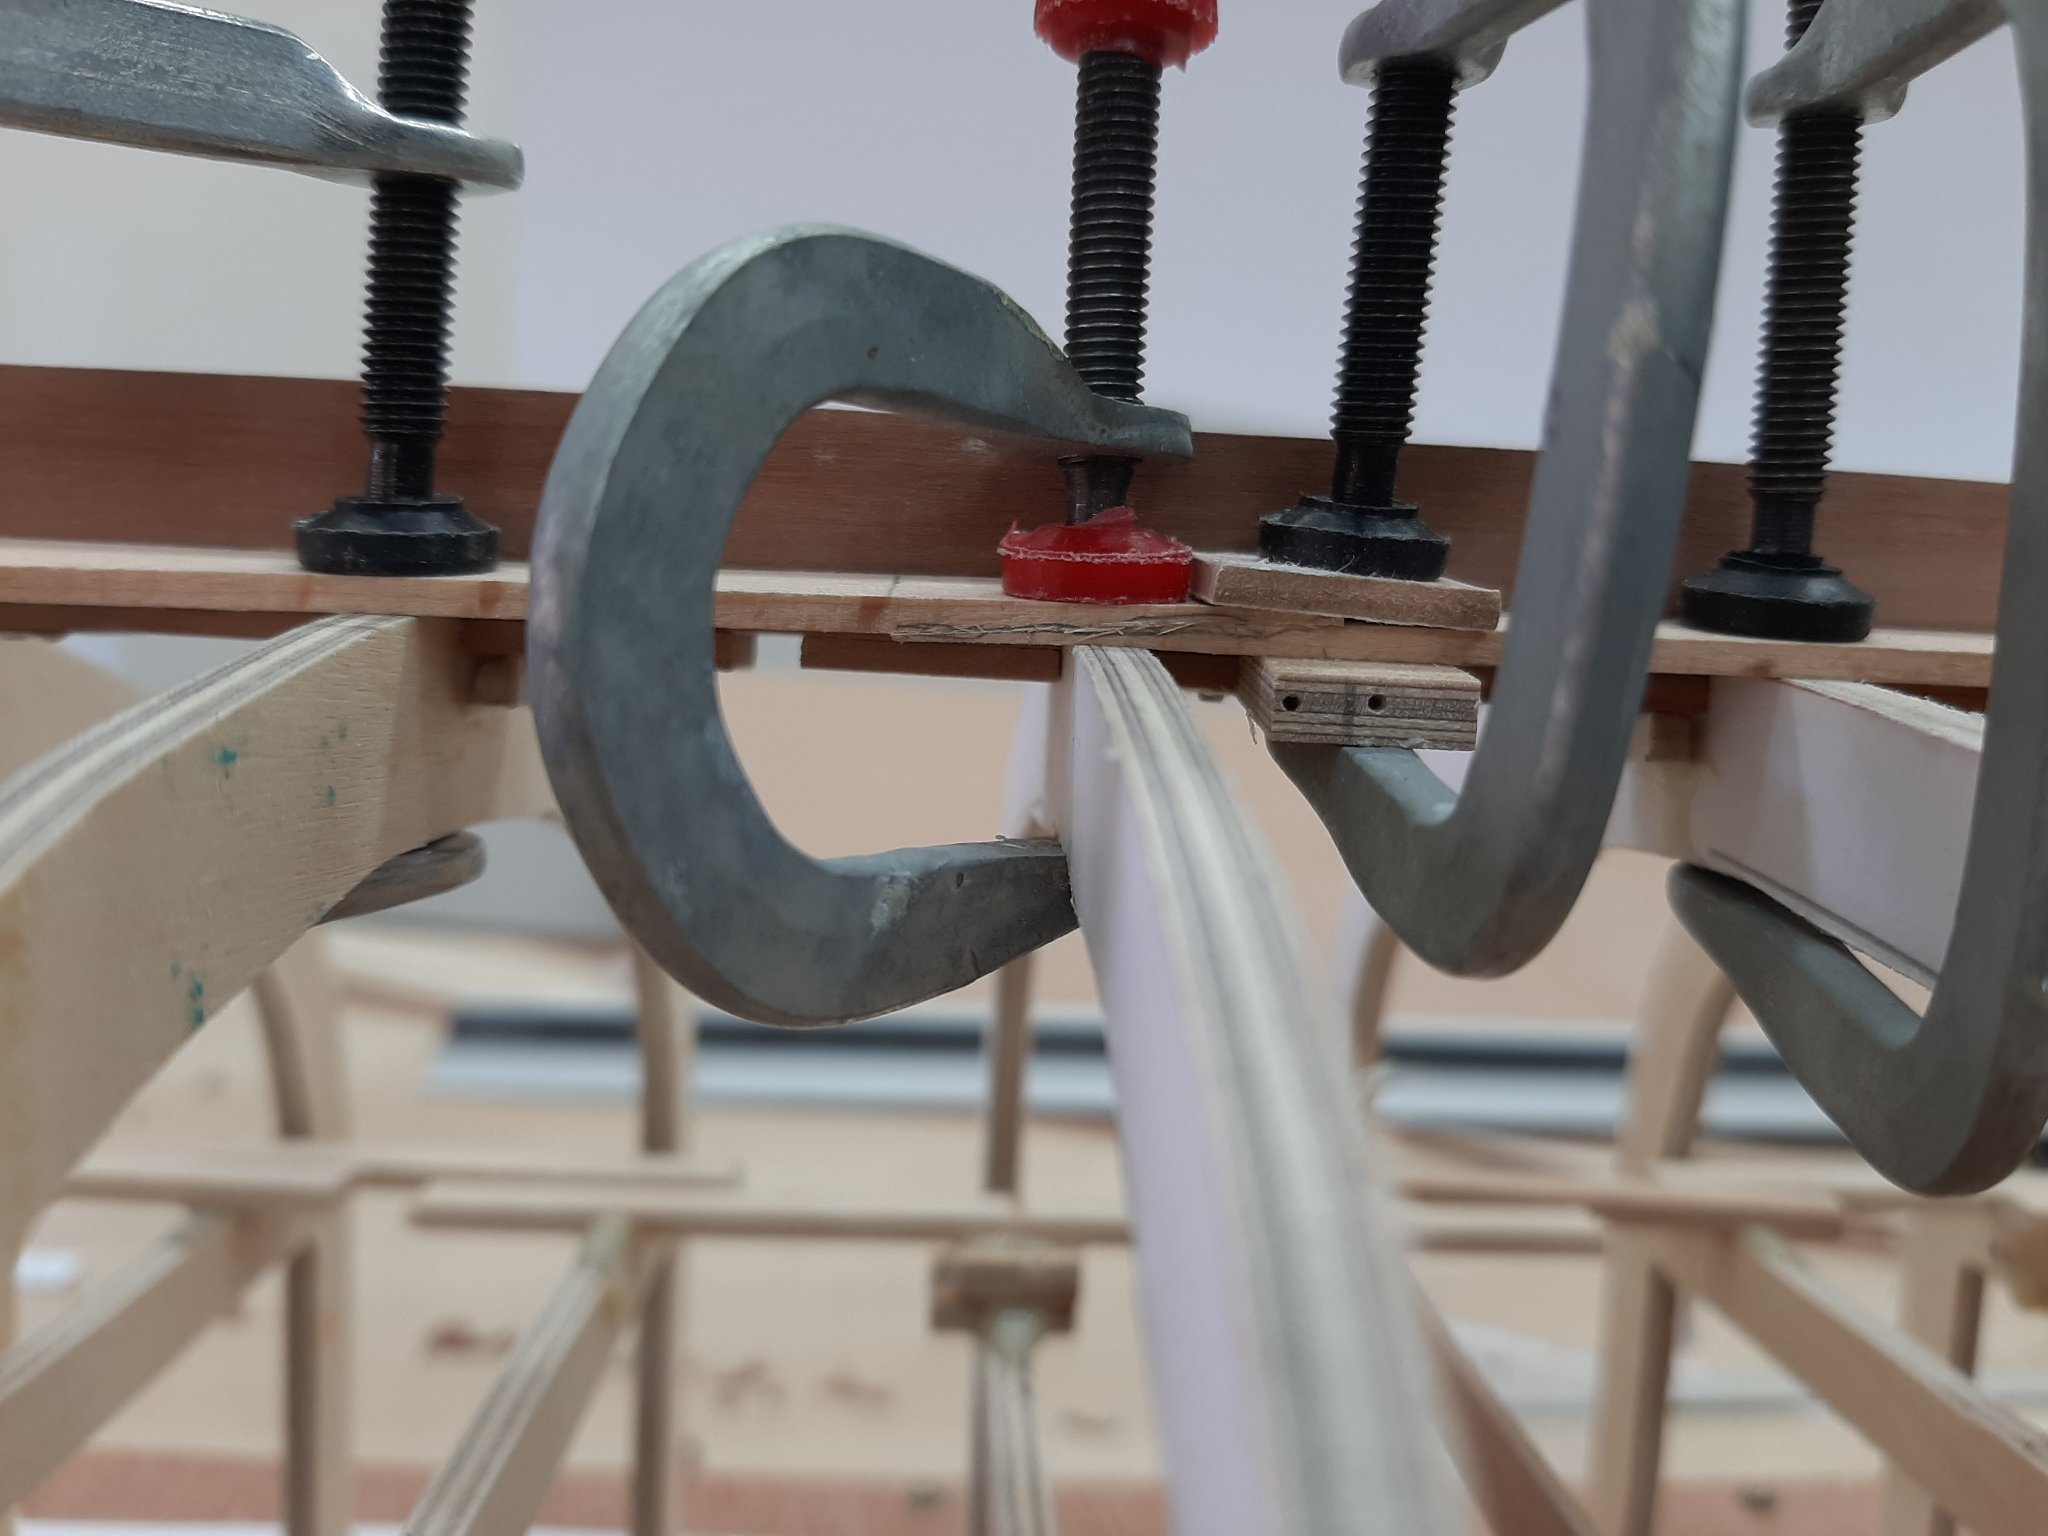
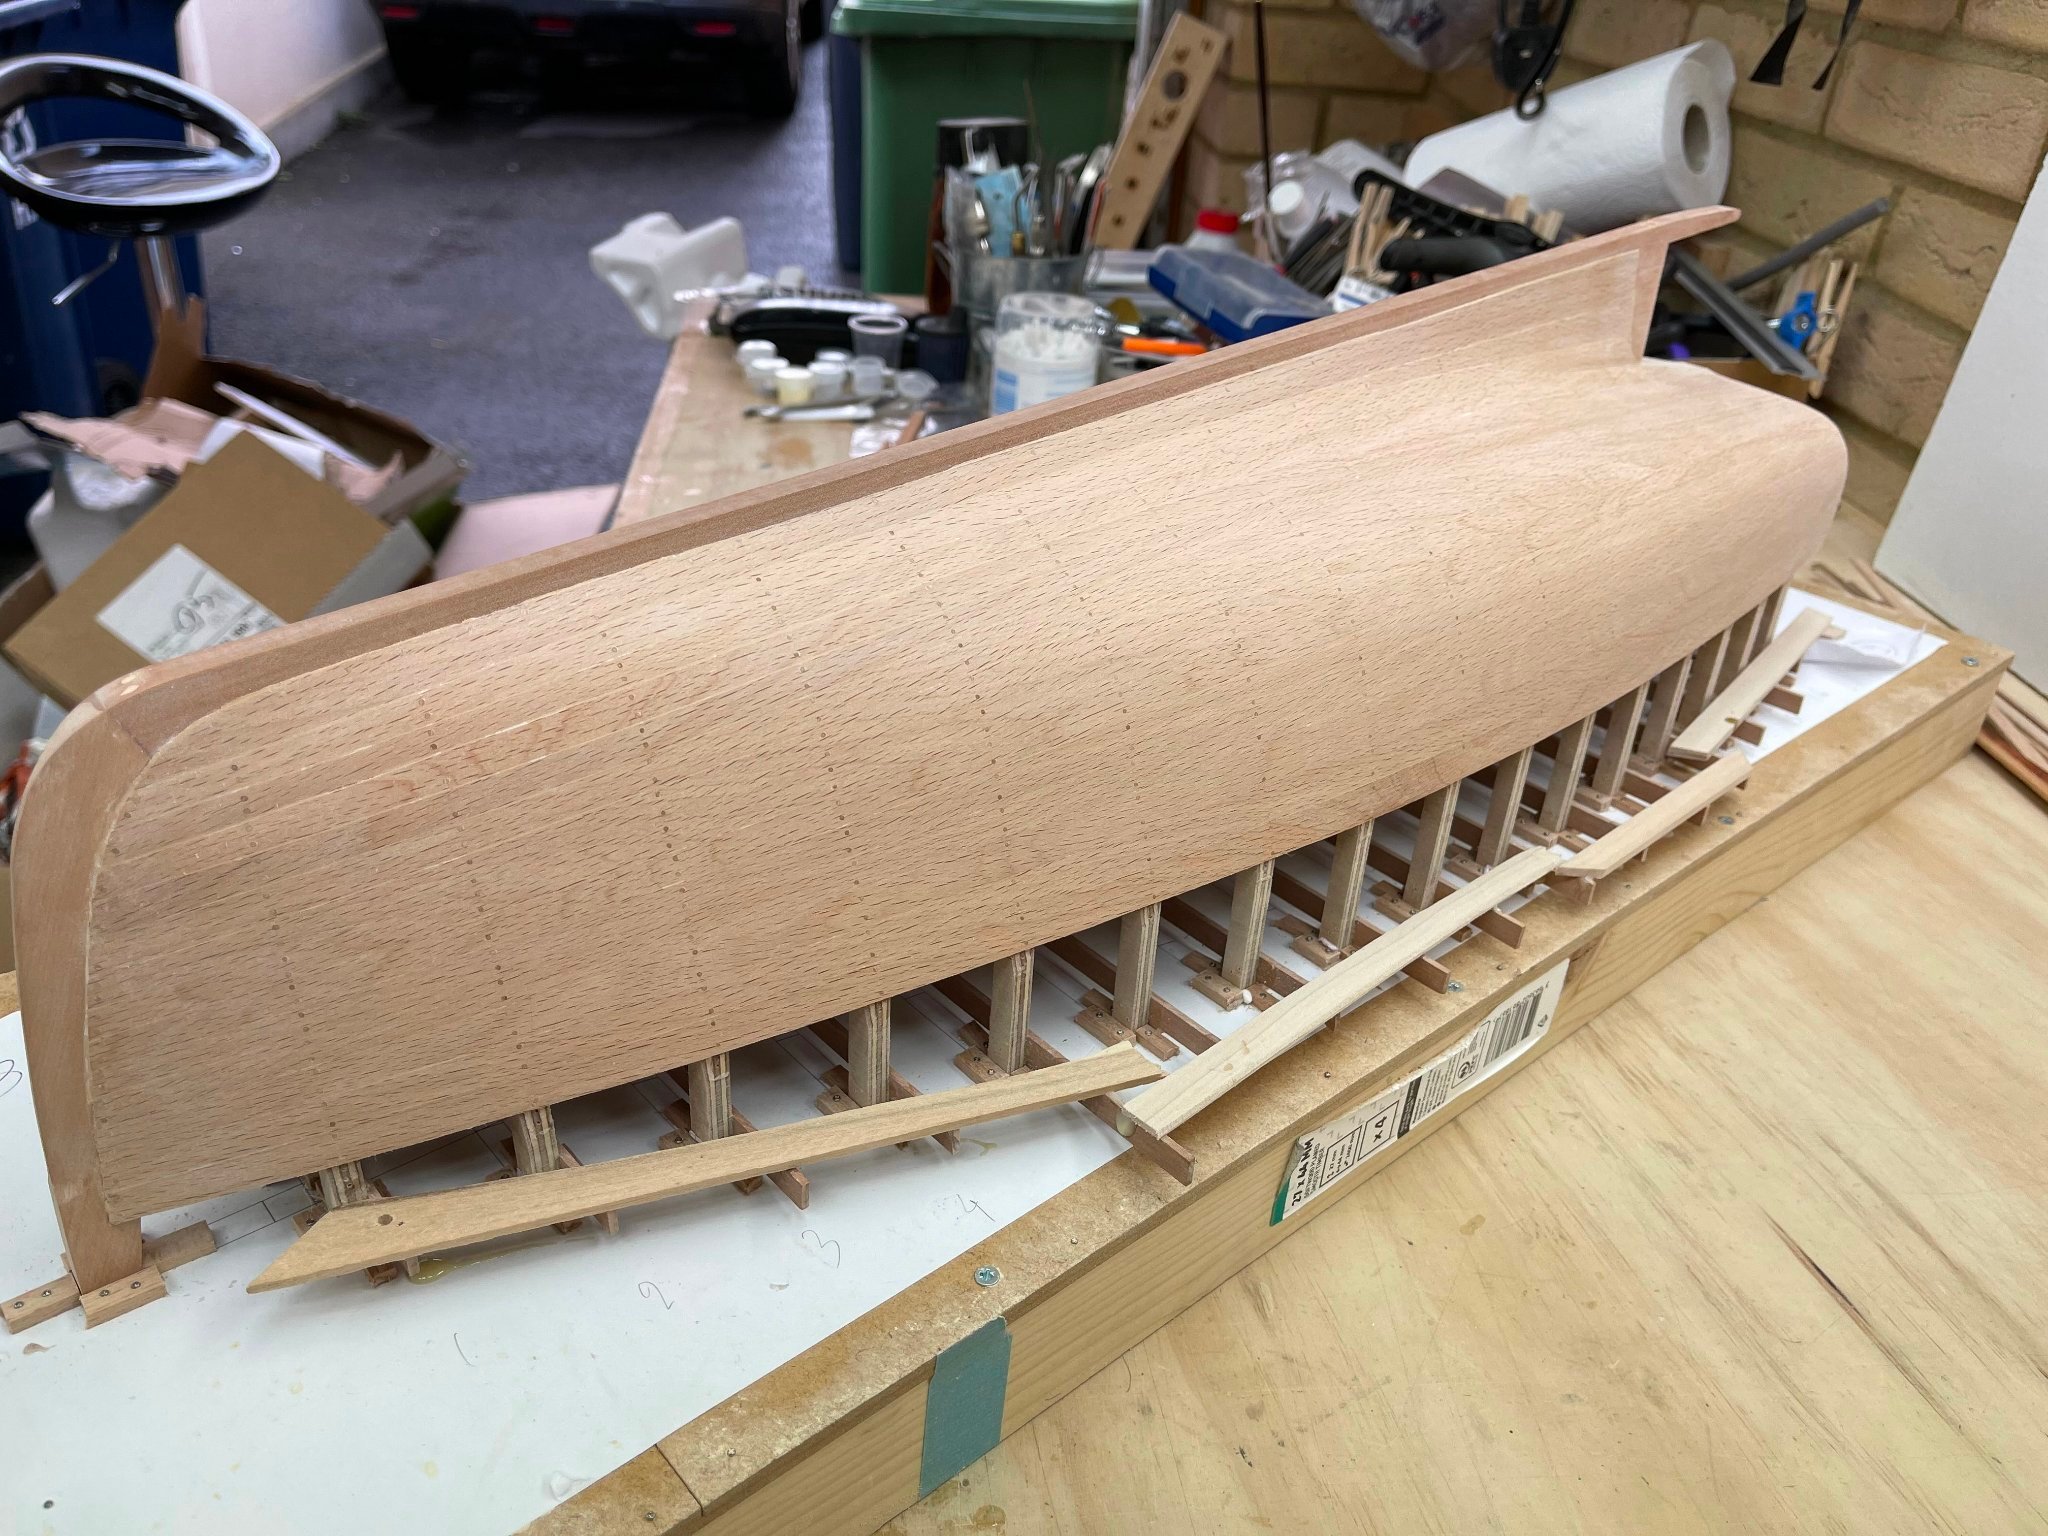
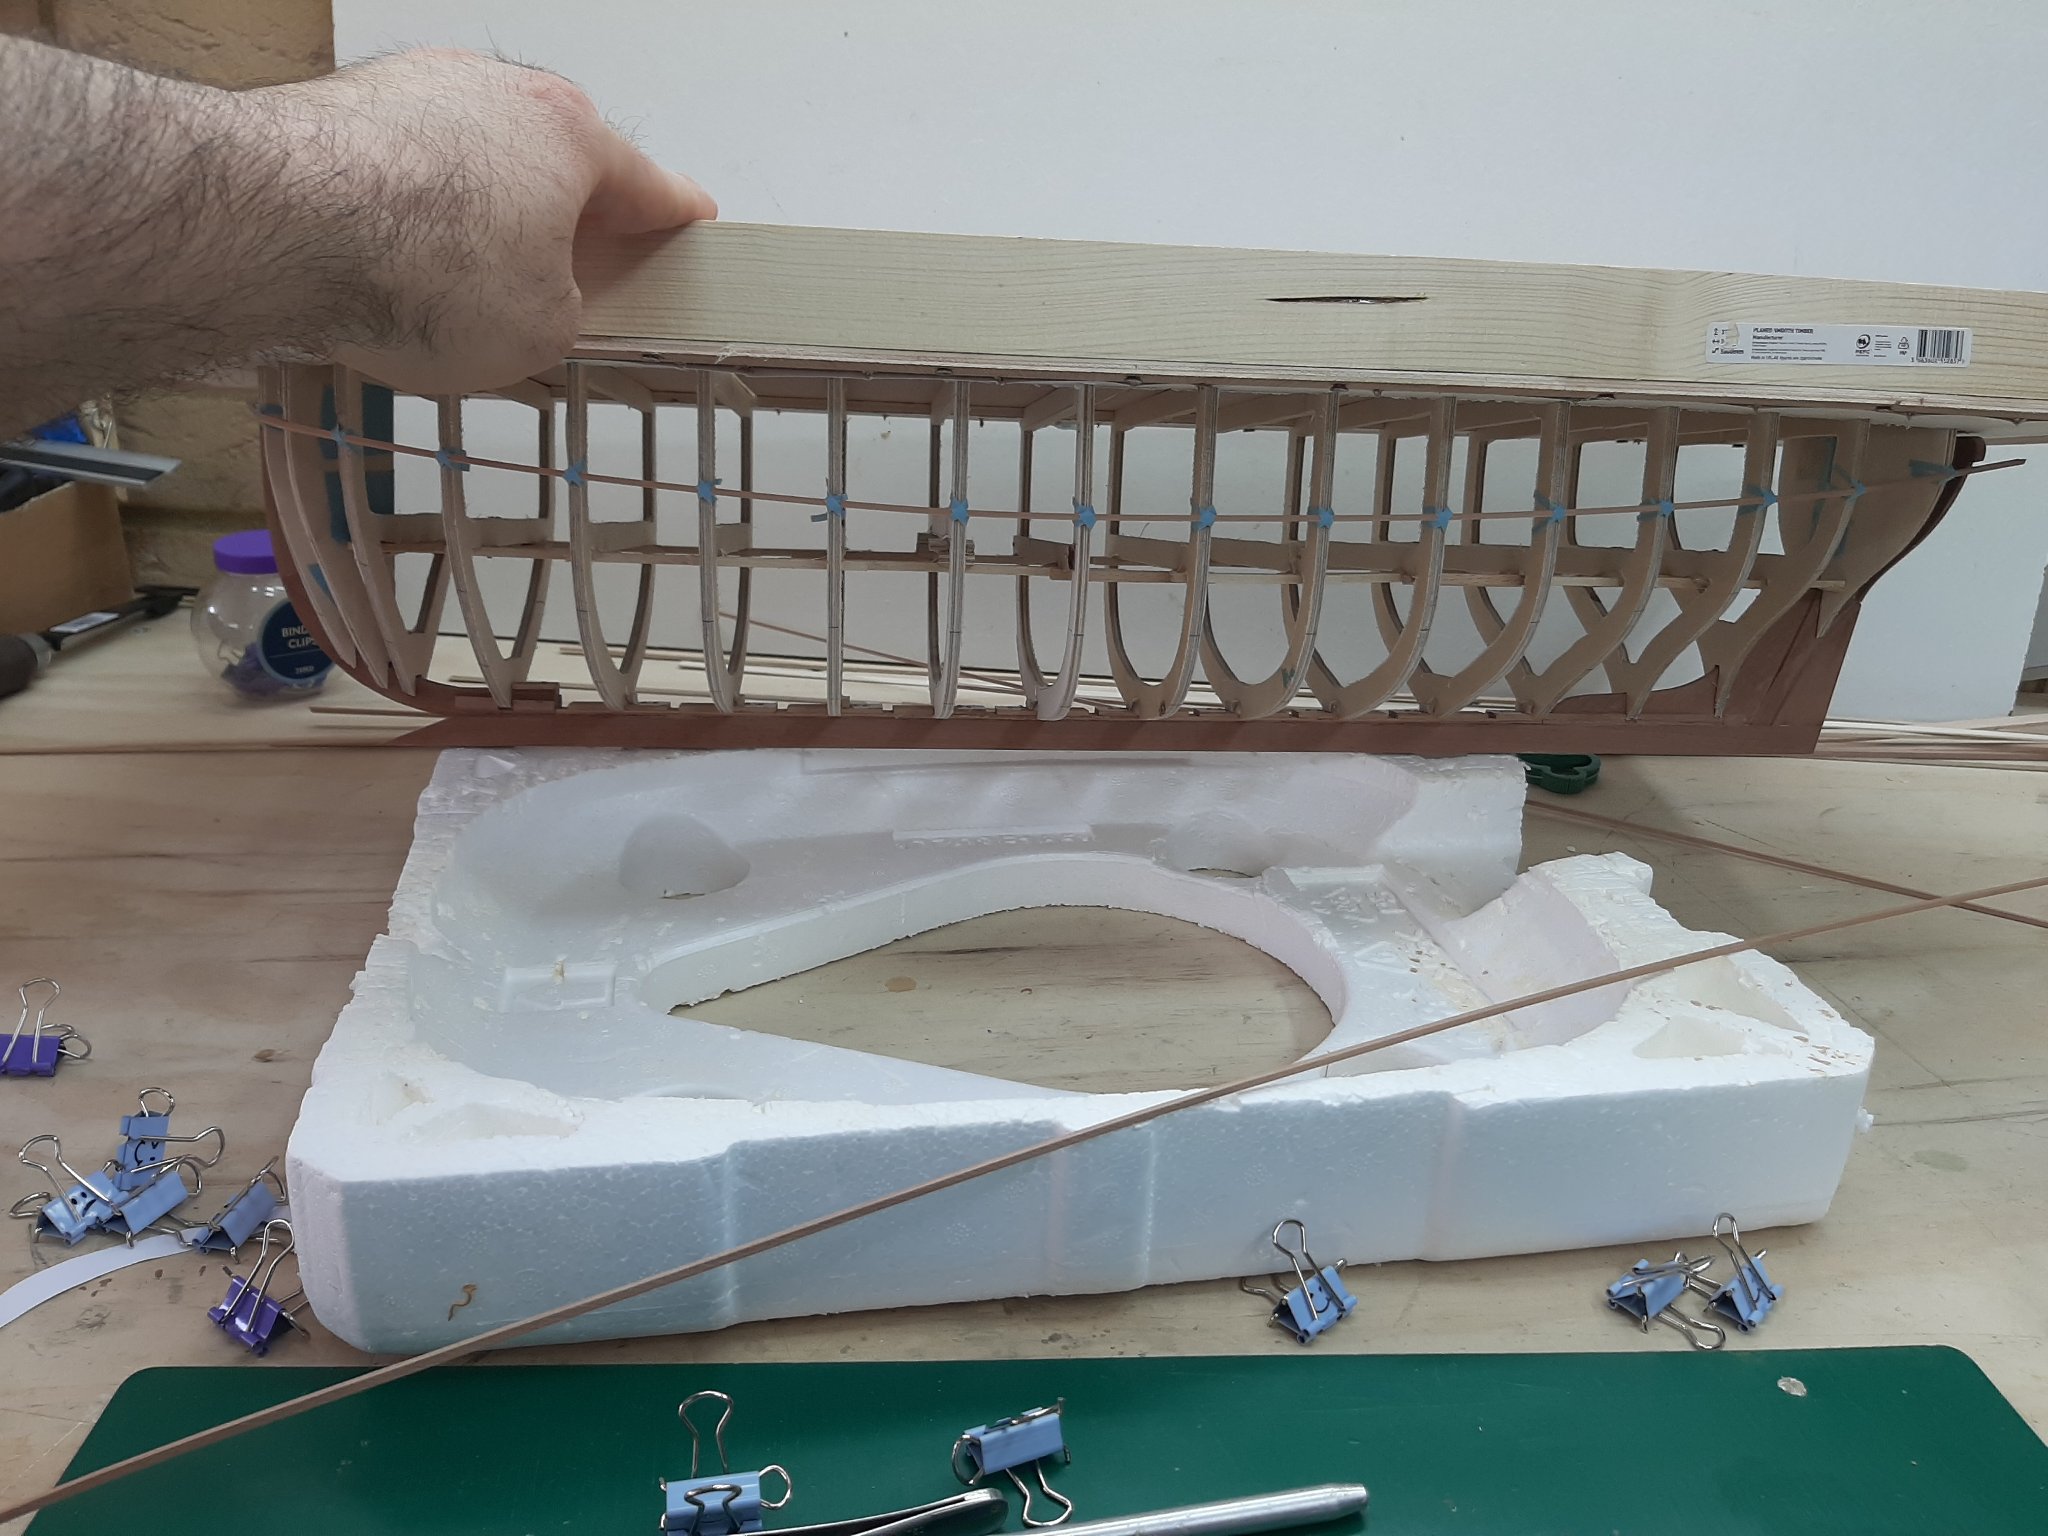
Today I nipped over to the shipyard, just for a few minutes. I put the planks to the steamer and then straight on the boat. Beech responds great to steaming, the planks immediately twisted to shape.

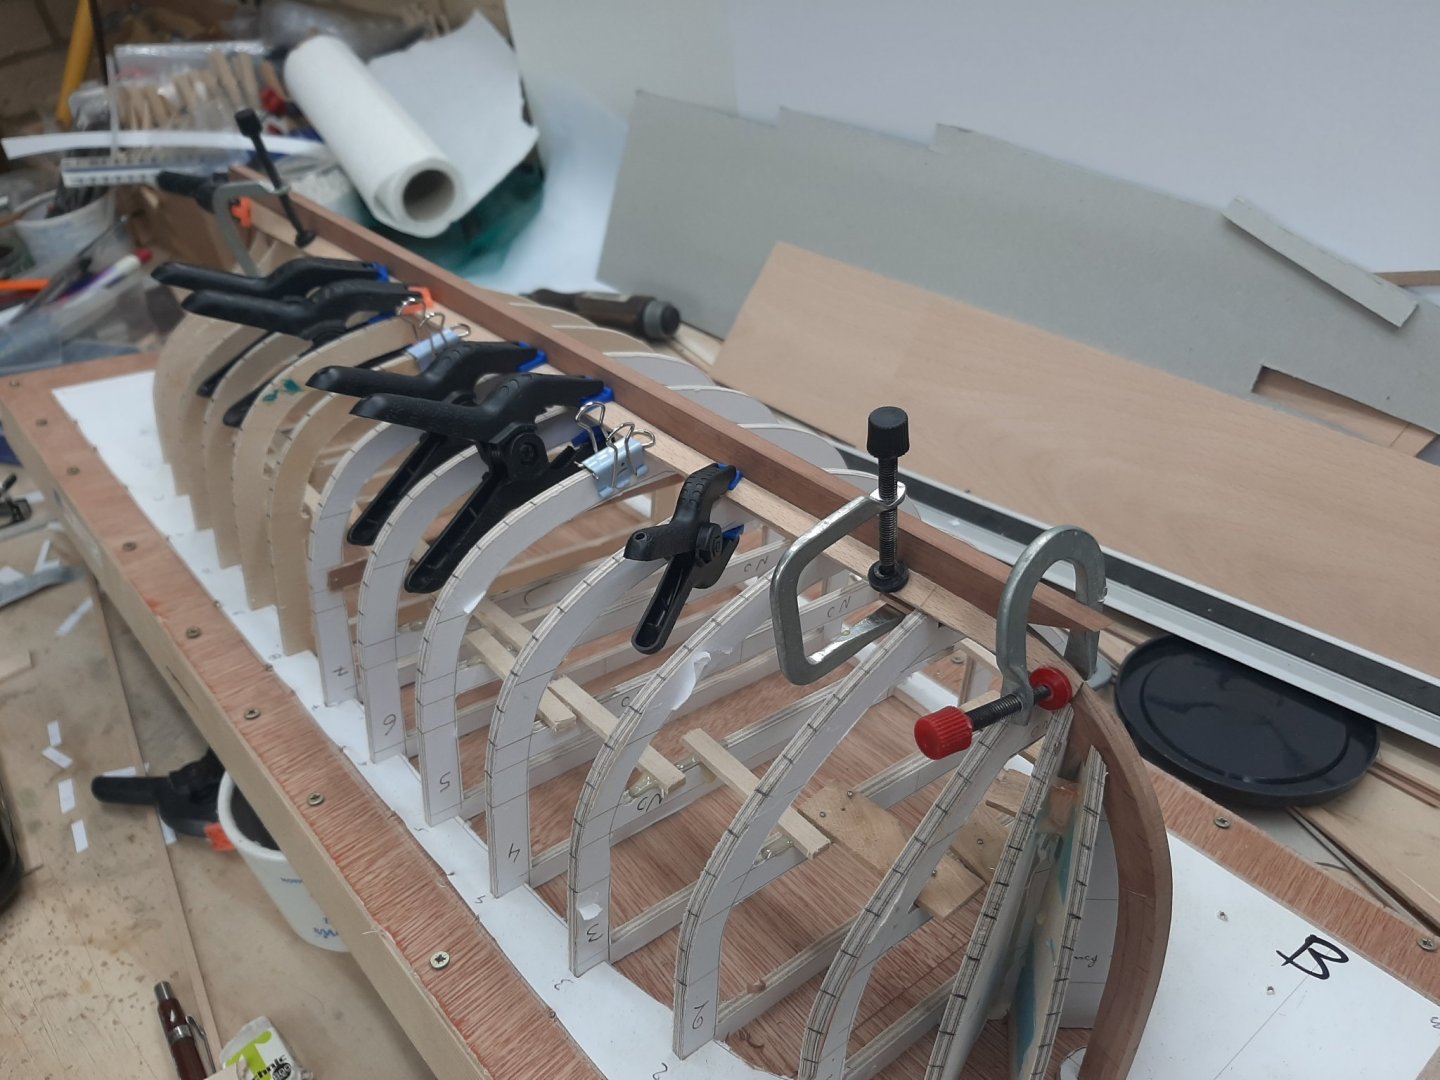
Actually, the garboards look reasonable

The problem with planking without a complete stem is that it is difficult to get the planks to end up at the same level on both sides. The excess wood at the plank edges will be trimmed away when the false stem is installed.
The scarf joint needs a bit of tinkering. Or maybe I just need to push the half a bit forward.

Best wishes to all
Vaddoc
- Mark Pearse, GrandpaPhil, mtaylor and 2 others
-
5
-
Many thanks to all for your comments and likes!
Bedford, that was great. Unfortunately I do not own a quality plane that can reliably do the job. However, your suggestions were very helpful and I think I did find a solution.
Also, I decided that the planking will be carvel. I will in the future make a large scale lapstrake boat but I will choose an easier boat. It will be lots of fun but needs to wait.
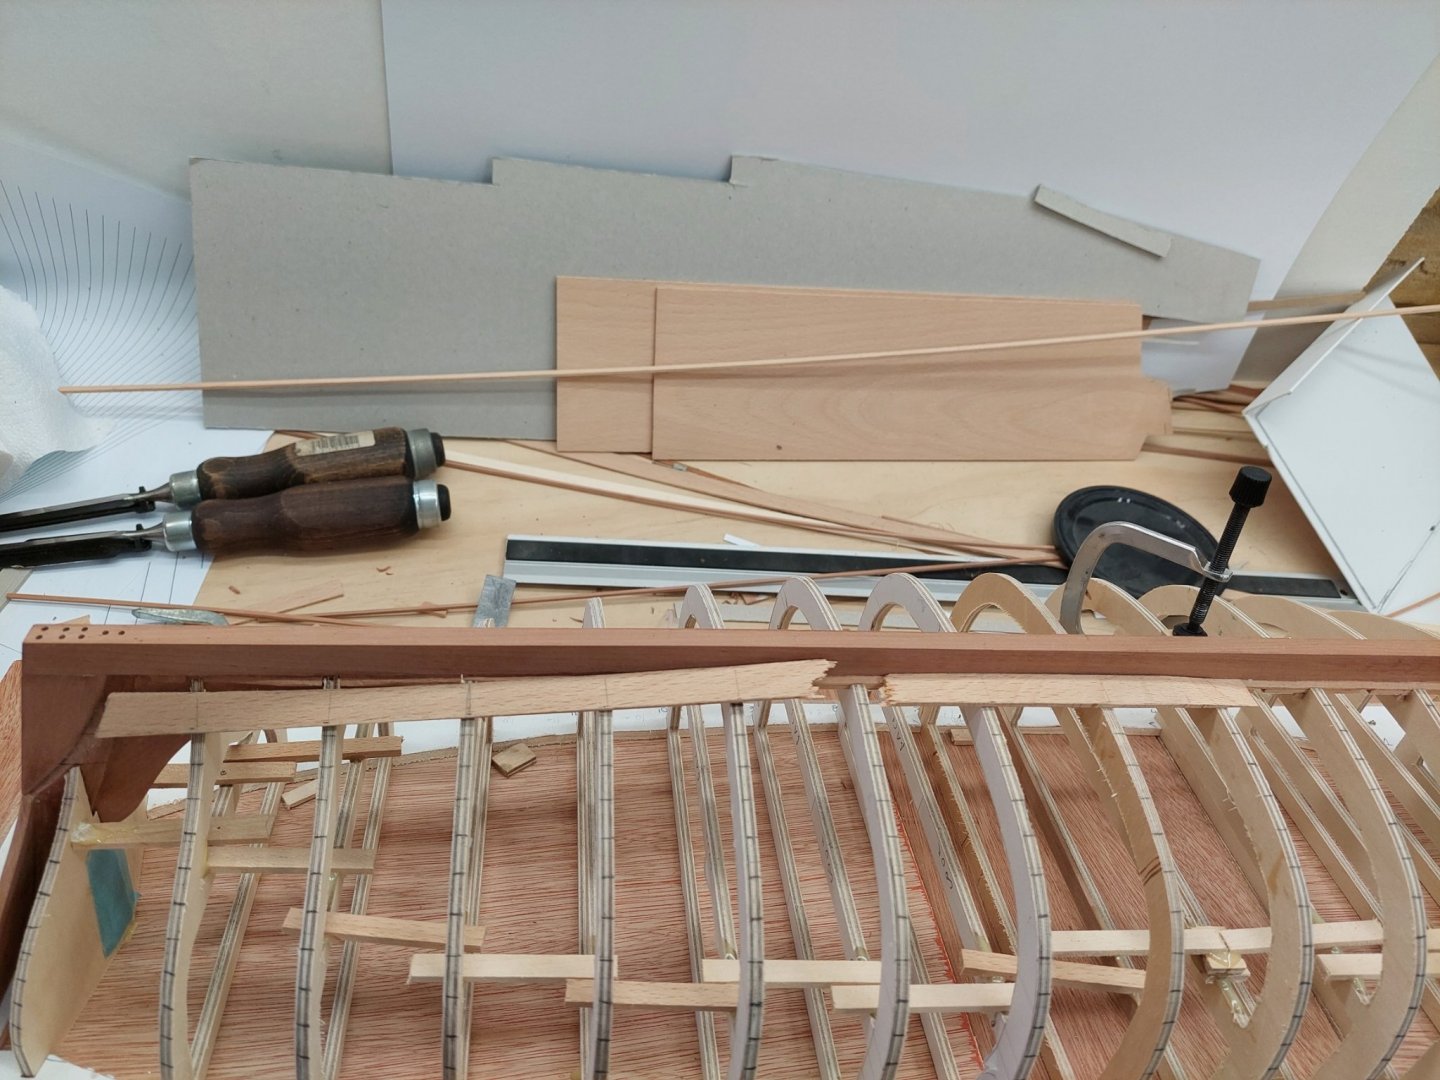
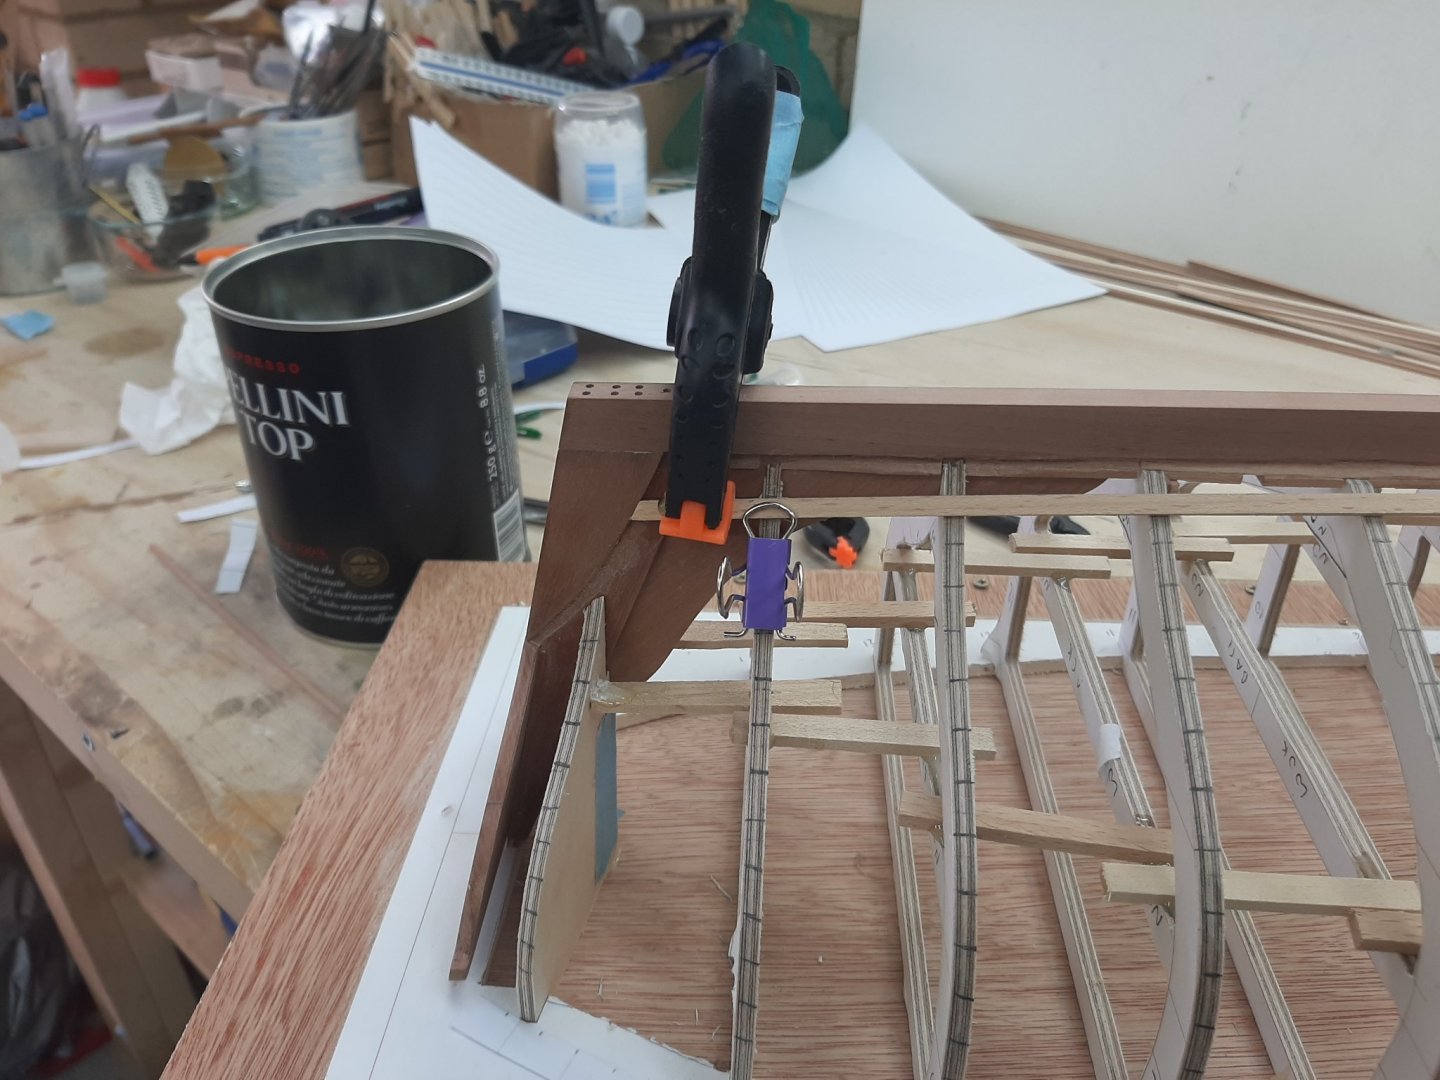
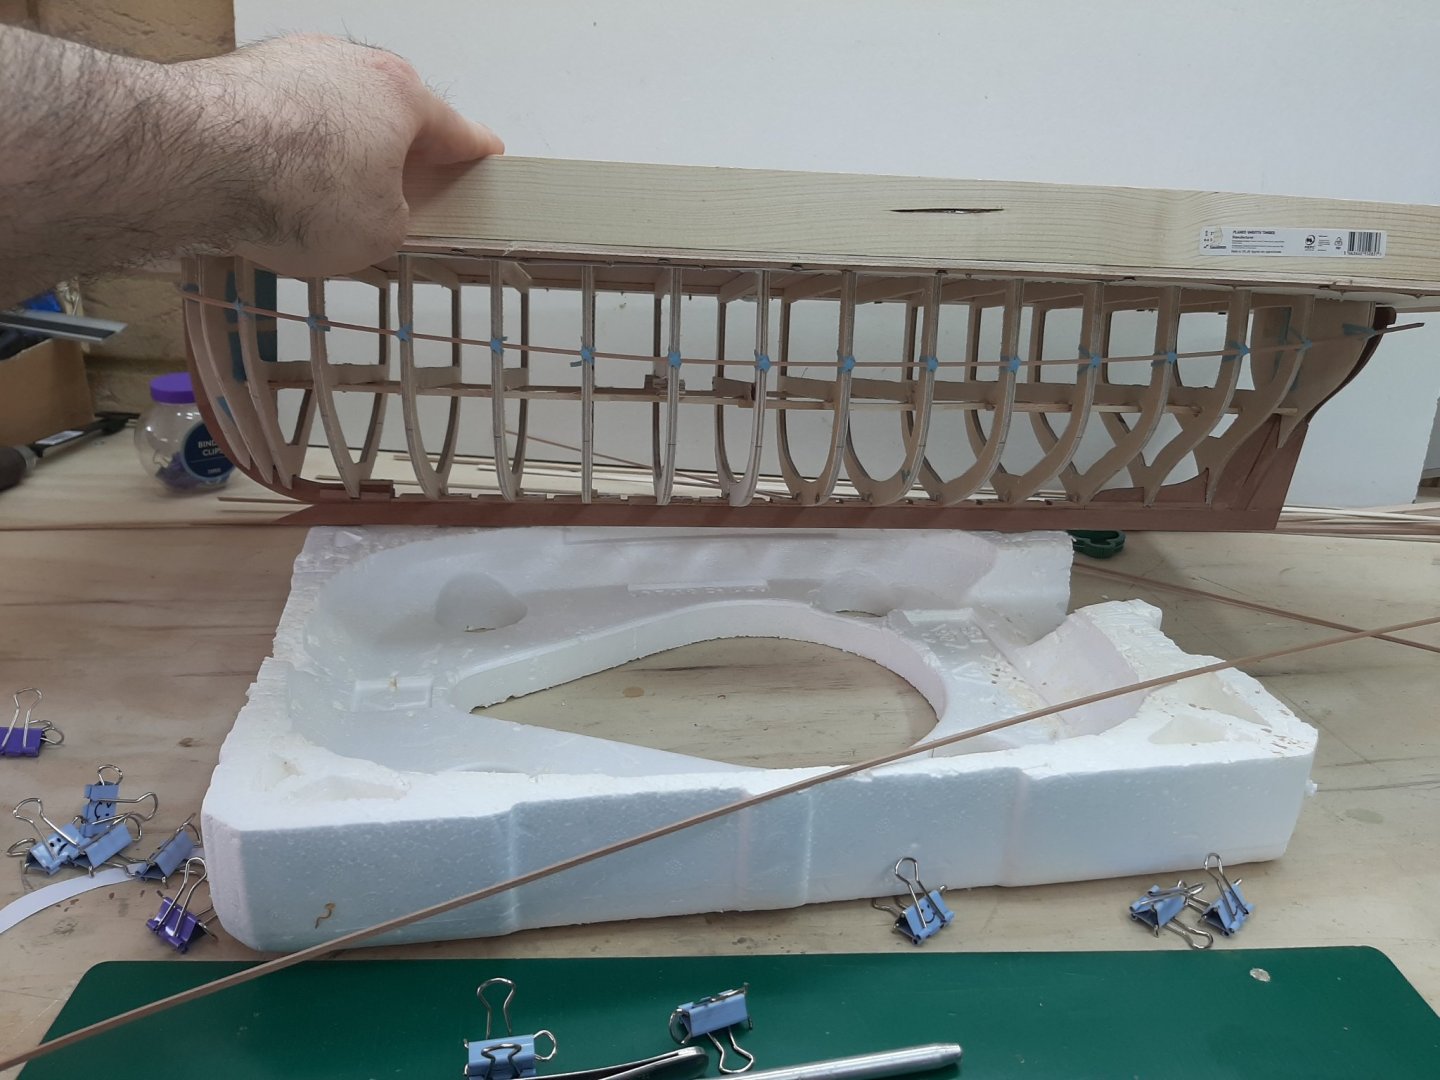
I first made the port garboard in two halves. It took very many tries, I kept getting it wrong but finally I got it right. The planks are sanded to shape so the edges are much smoother compared to the Launch, which were cut with a knife.


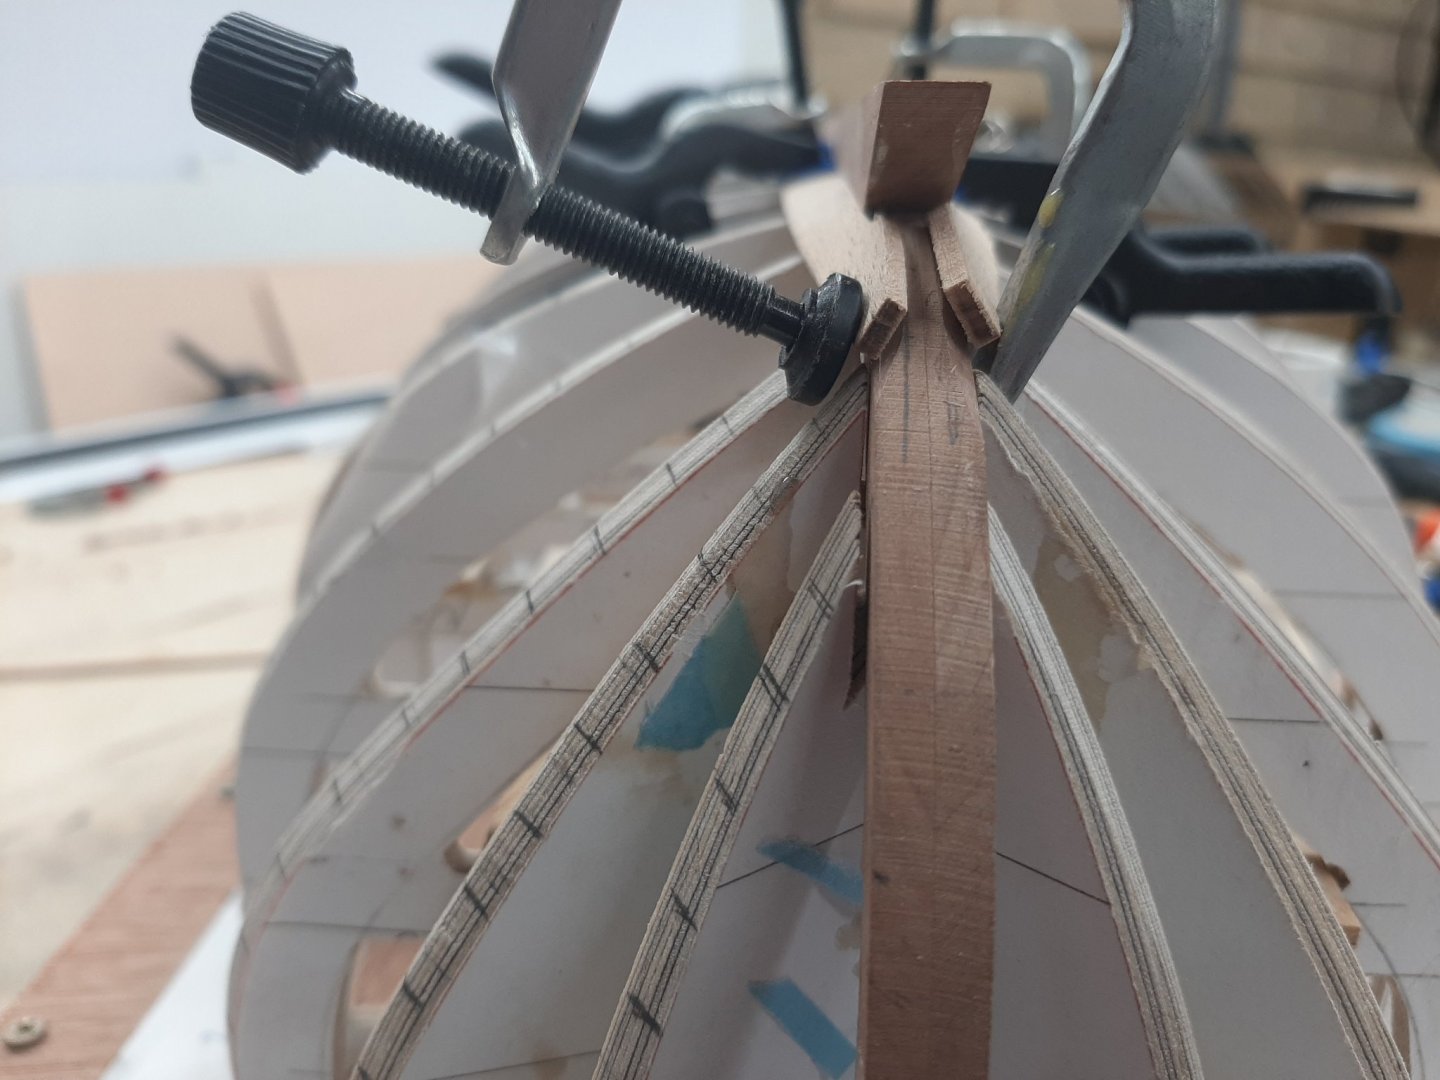
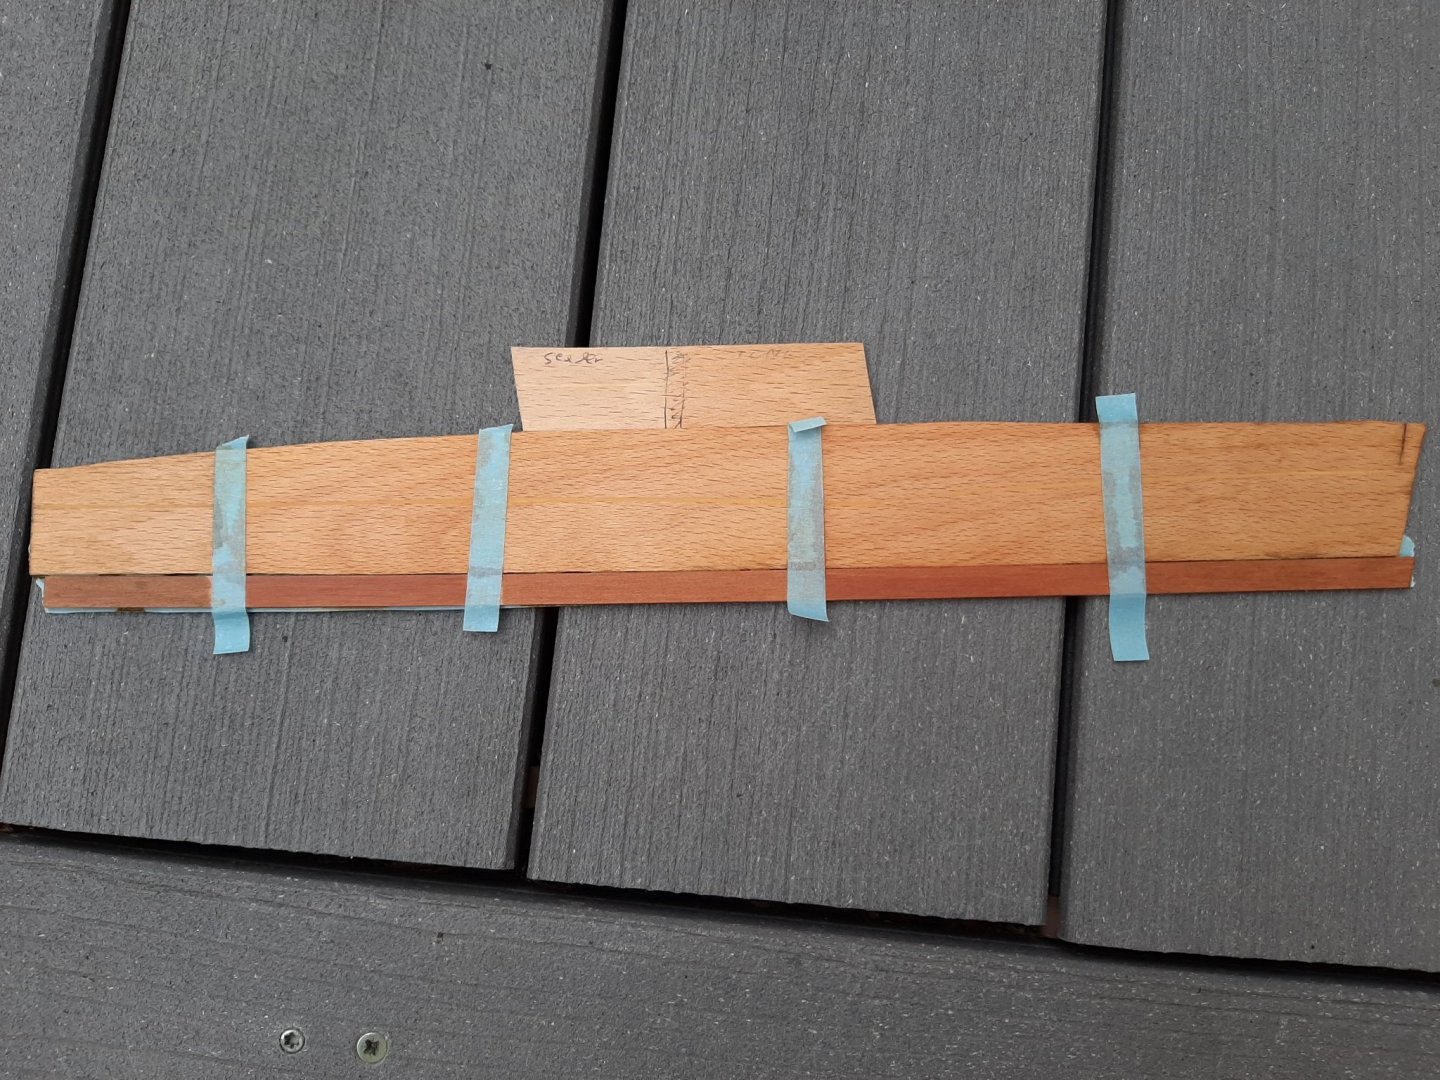
This is the overlap for the scarf joint

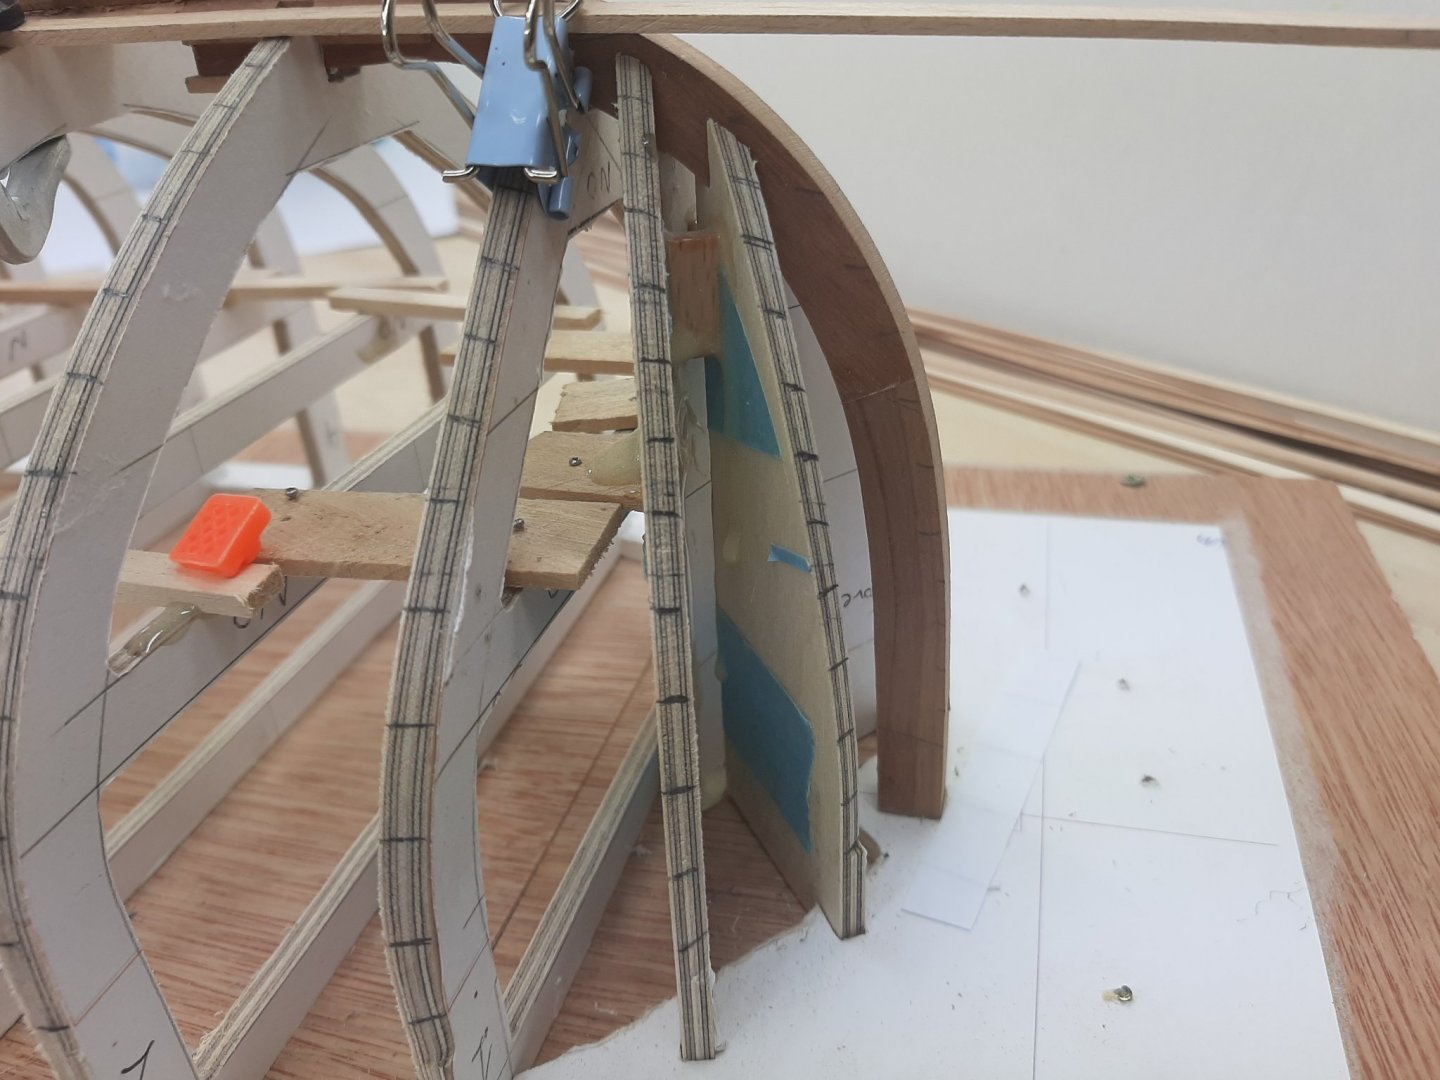
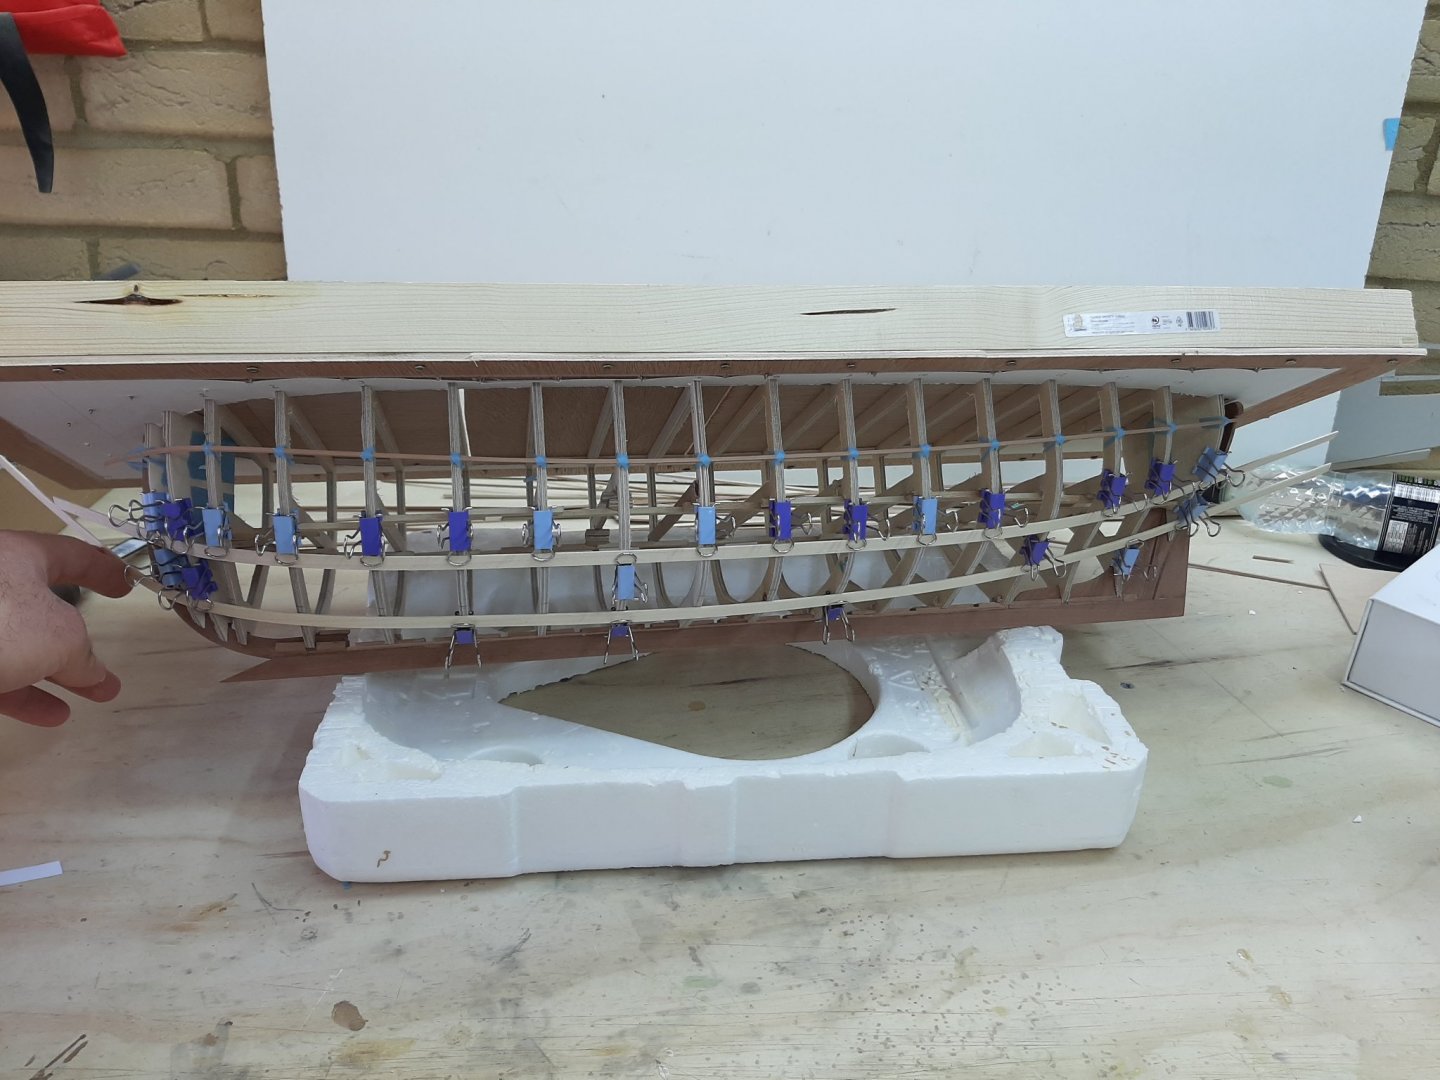
The twist in the garboard is significant, almost 90 degrees. Planks will easily take a bend but will resist a lot to be twisted. Note the gap between plank and keel-it disappears with the plank in place.
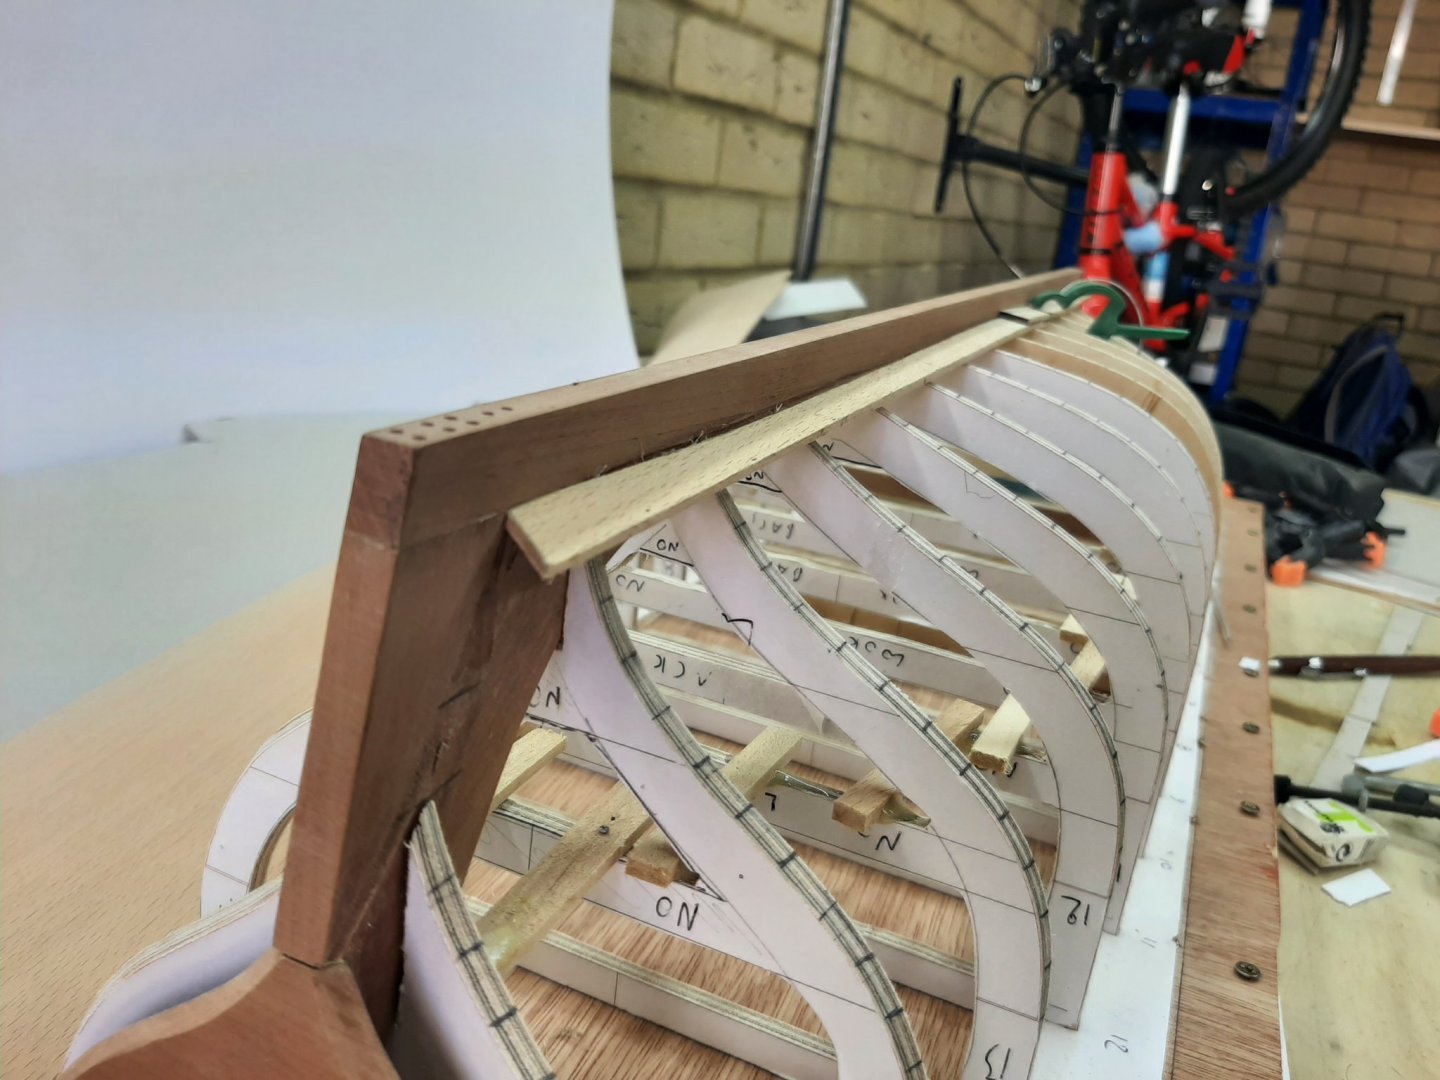

Another area that needed attention was the stem. The edges have to be trimmed to accept the plank ends. After planking, the excess plank material will be trimmed off so that the false stem will sit flush. Or so is the plan...

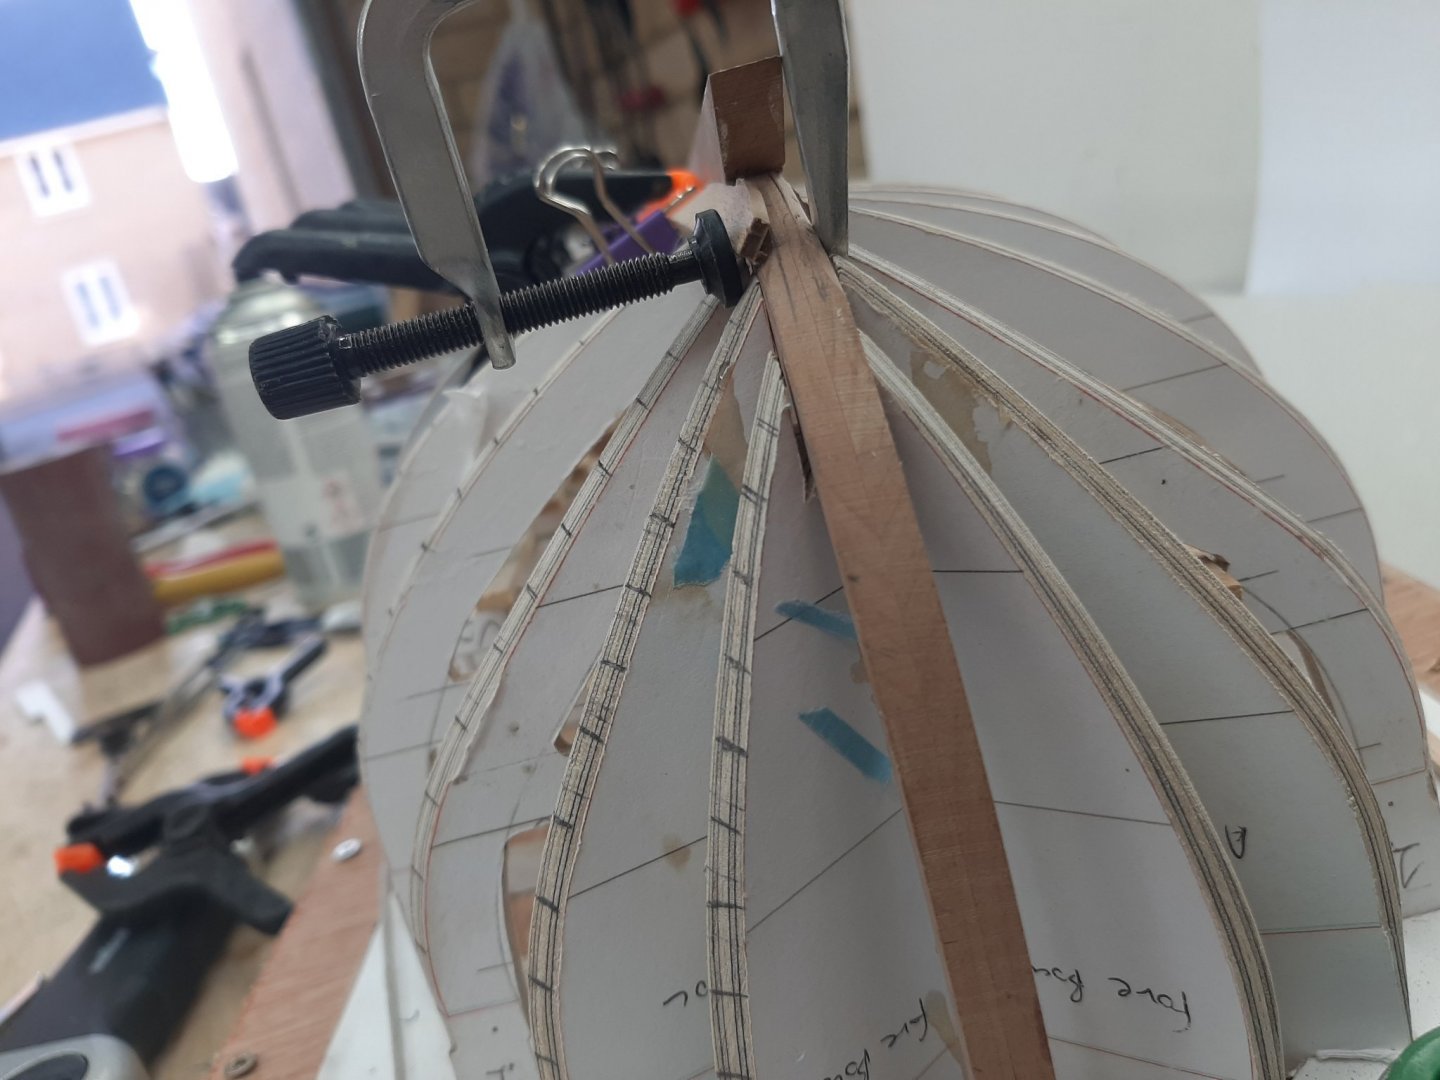
Next, I tackled the scarfing. After a bid of thinking and testing, taking on board Bedford's suggestions, I find a solution. Since the planks are 2 mm thick, I went for a 25 mm scarf joint. Basically, I just used the belt sander bellow to create the bevels. This worked fine with no dramas. The edges will stand a bit proud but nothing a bit of sanding will not fix. I ll probably try and thin the edges a bit more.


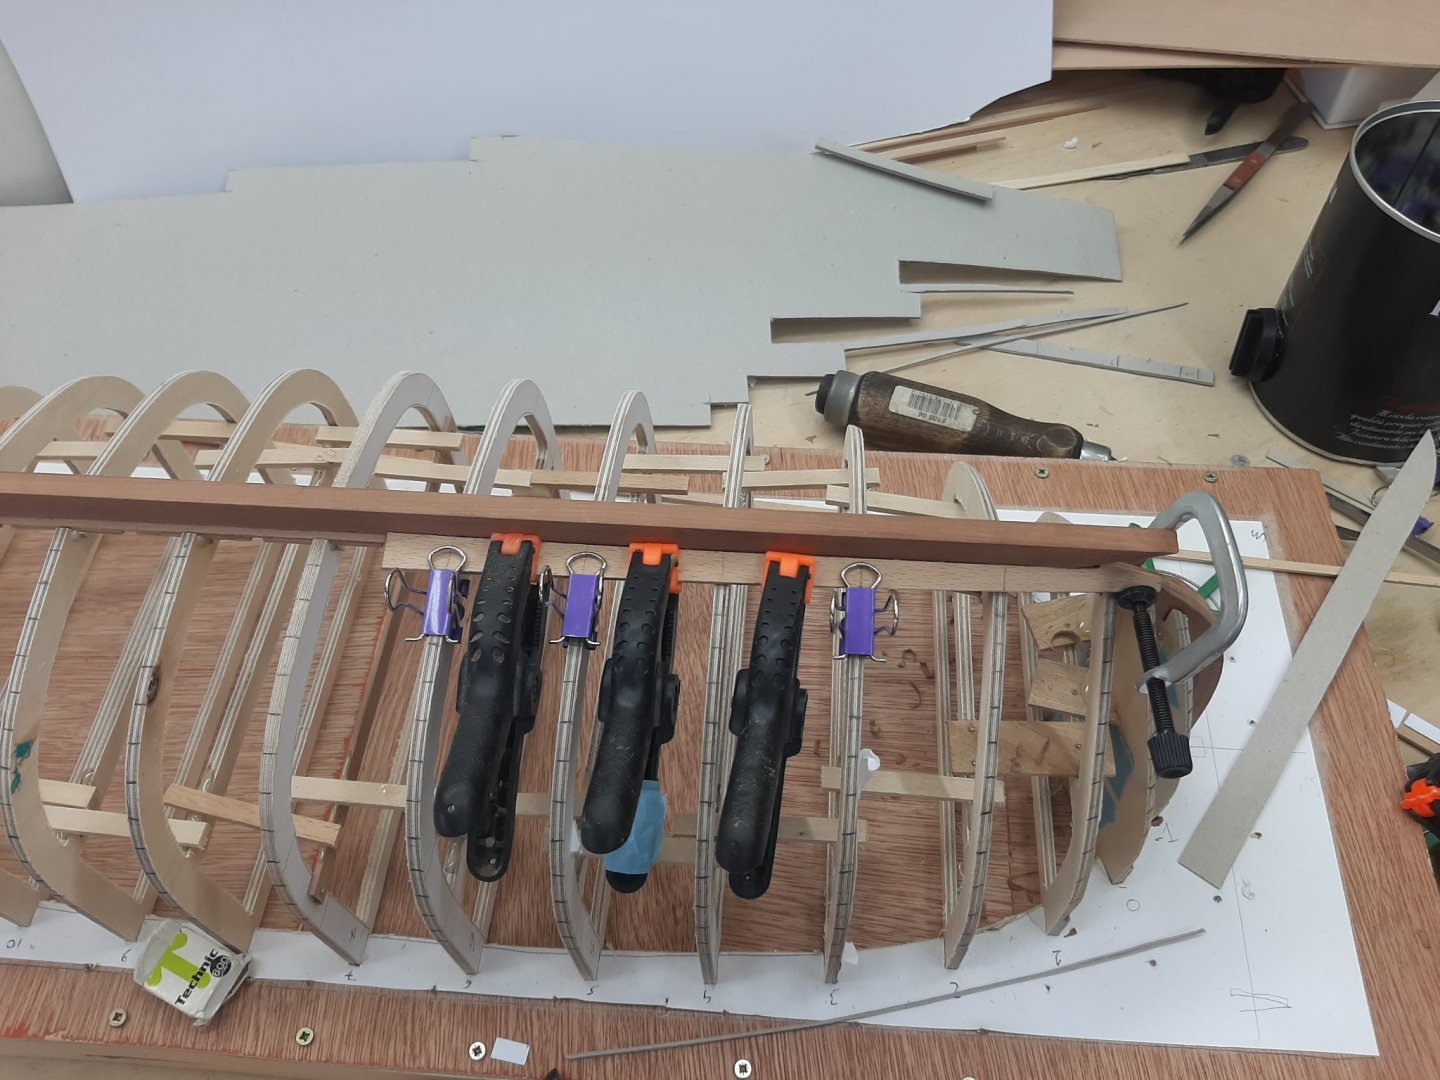
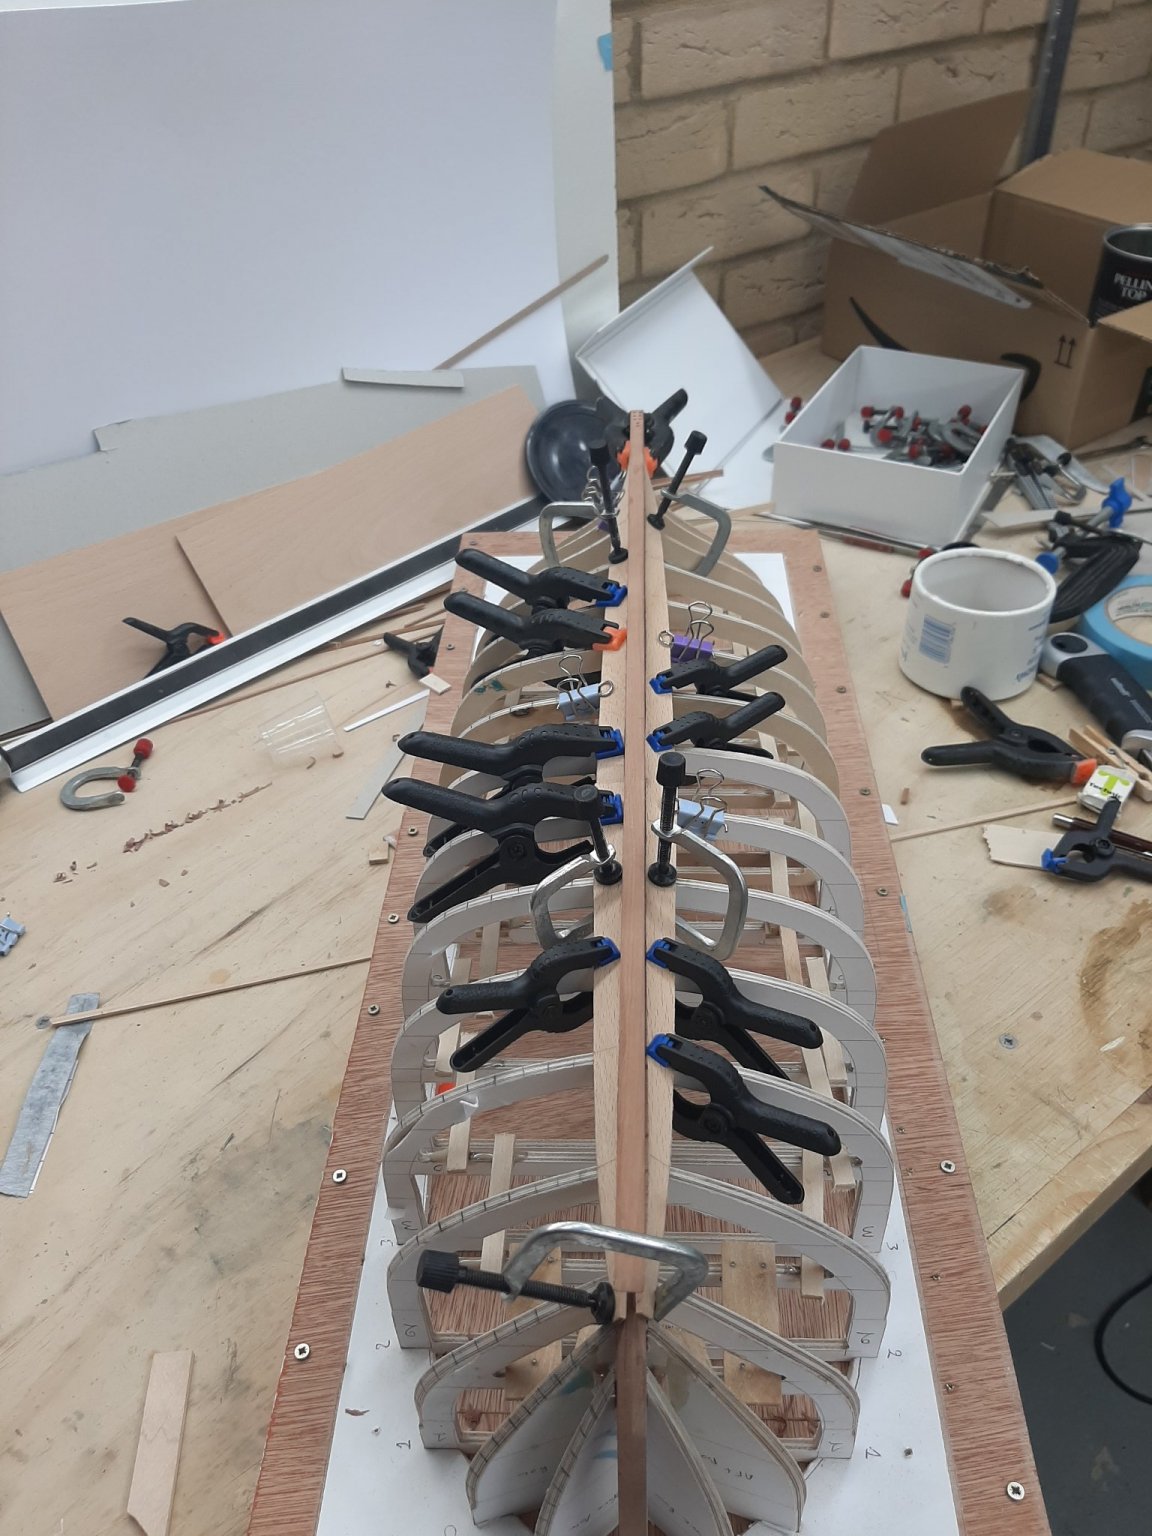
Now, much more care has gone into this boat, compared to the Launch. The CAD drawings are much more accurate, the frames were cut with much greater care and generally, it was put together better. With this in mind, I decided to make a set of identical garboard halves for the starboard side. Test fitting: They fit!
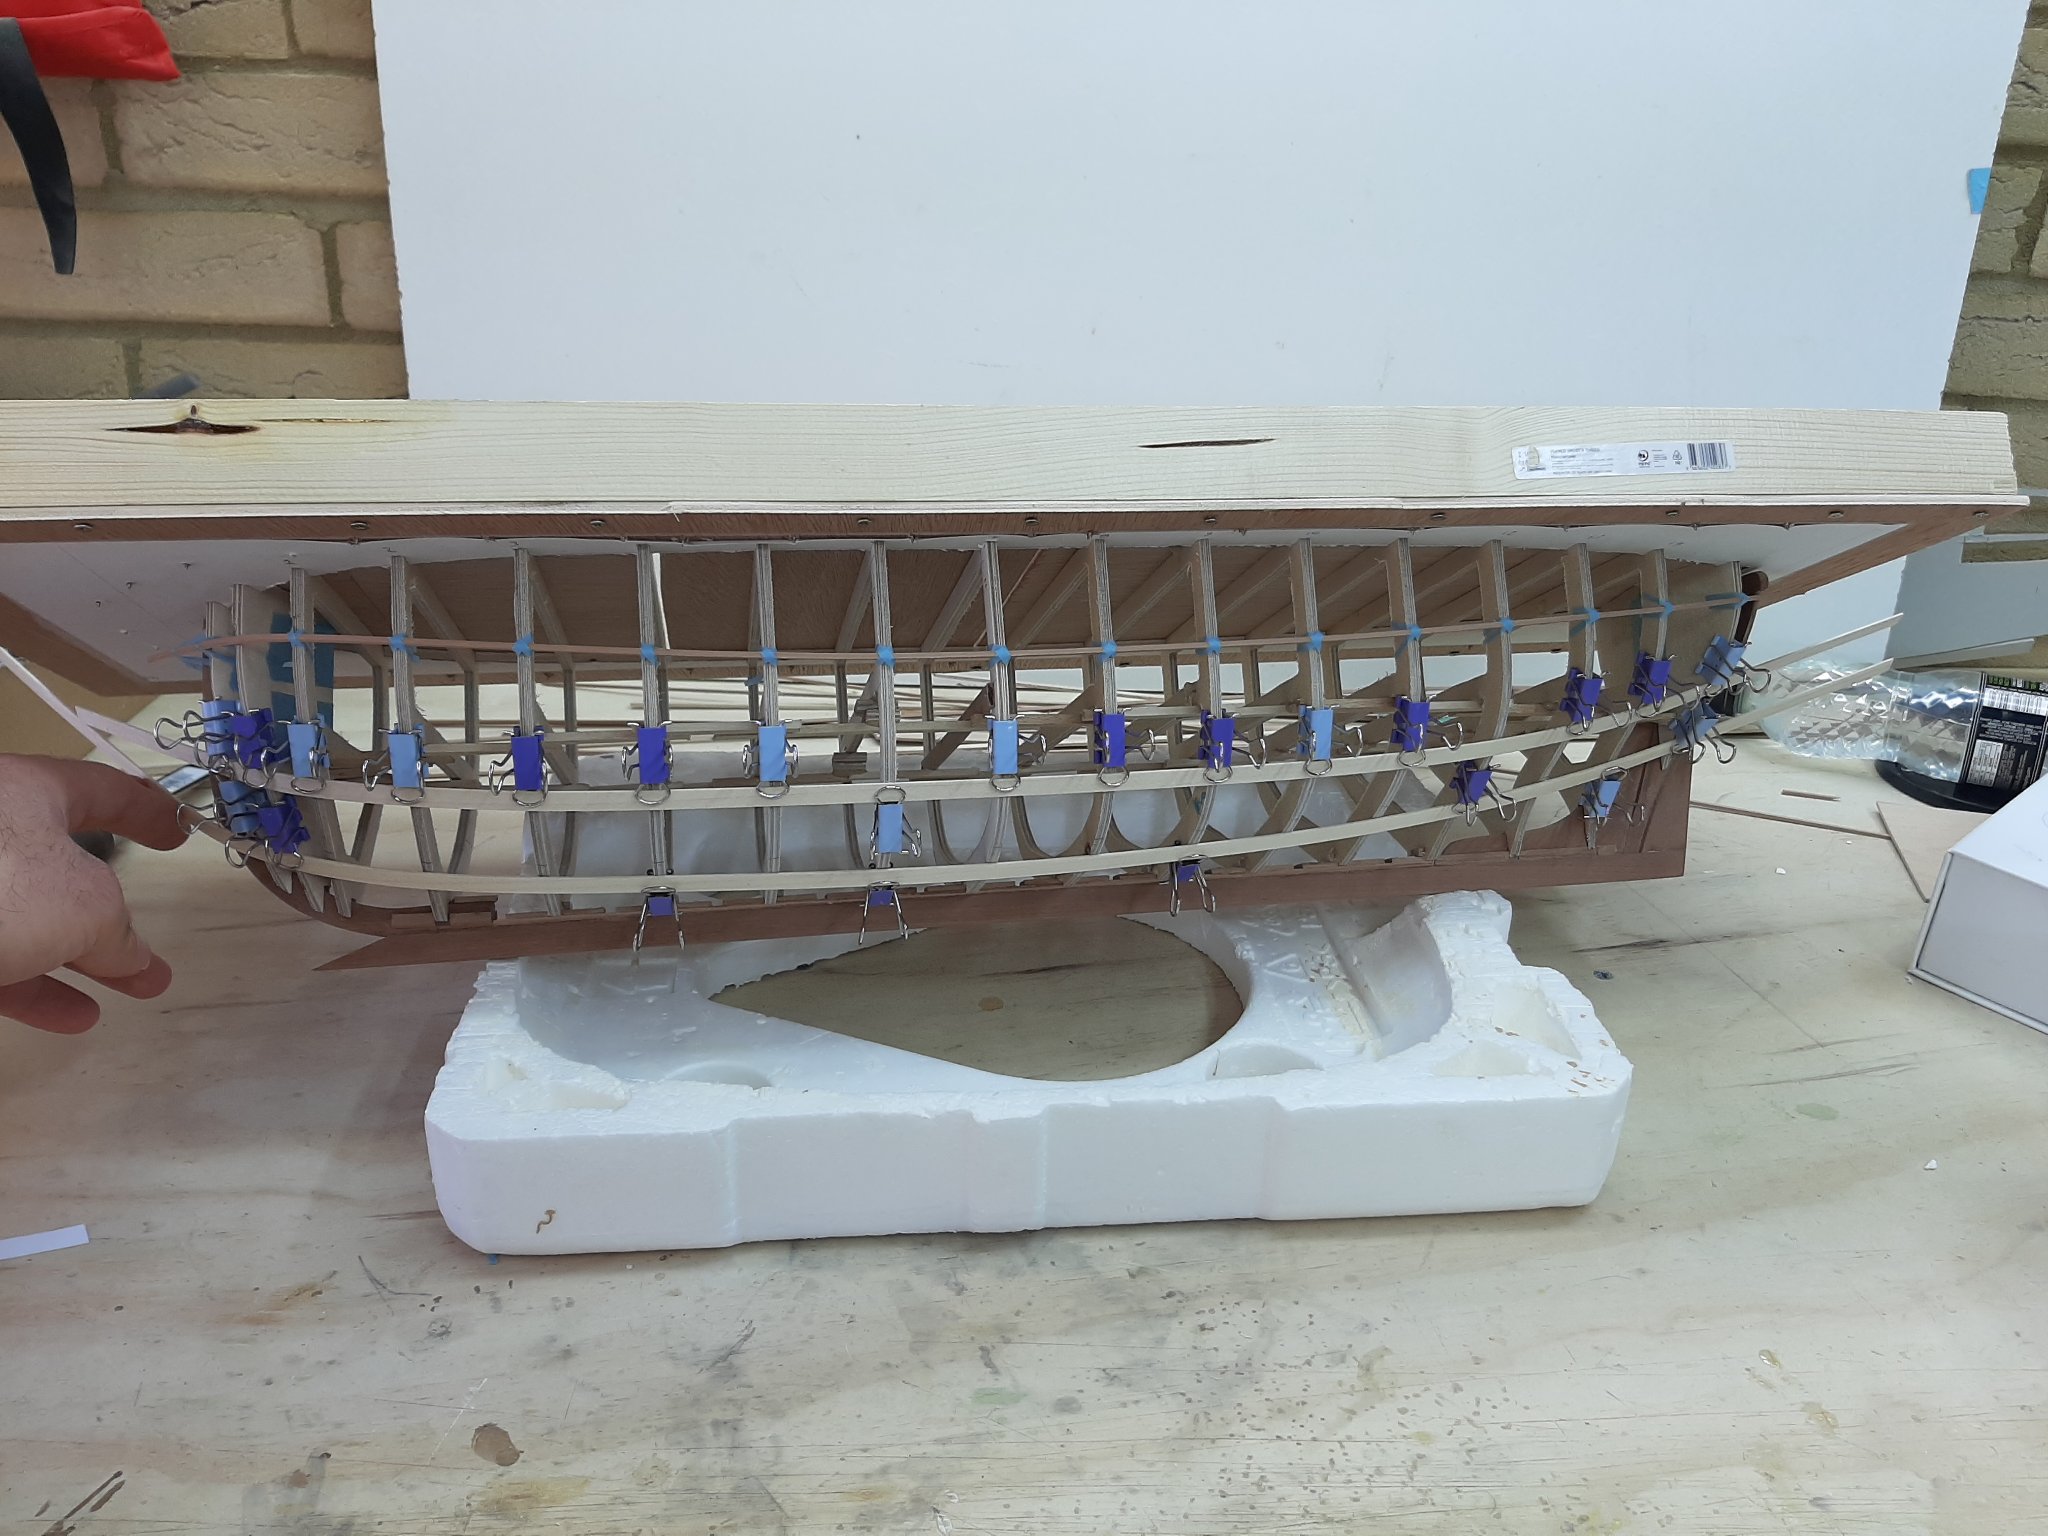
So now I have both garboards. They need to be steamed and secured into place, this will also make the whole structure much more rigid.
Another issue that needs to be dealt with is how to secure the planks to the frames. I was thinking of using threaded brass wire but now I am not so sure. This was the plan for the lapstrake. With carvel planking, sanding of the hull will be needed and the brass will complicate things. Maybe tree nails will be a better choice.
Regards
Vaddoc
-
-
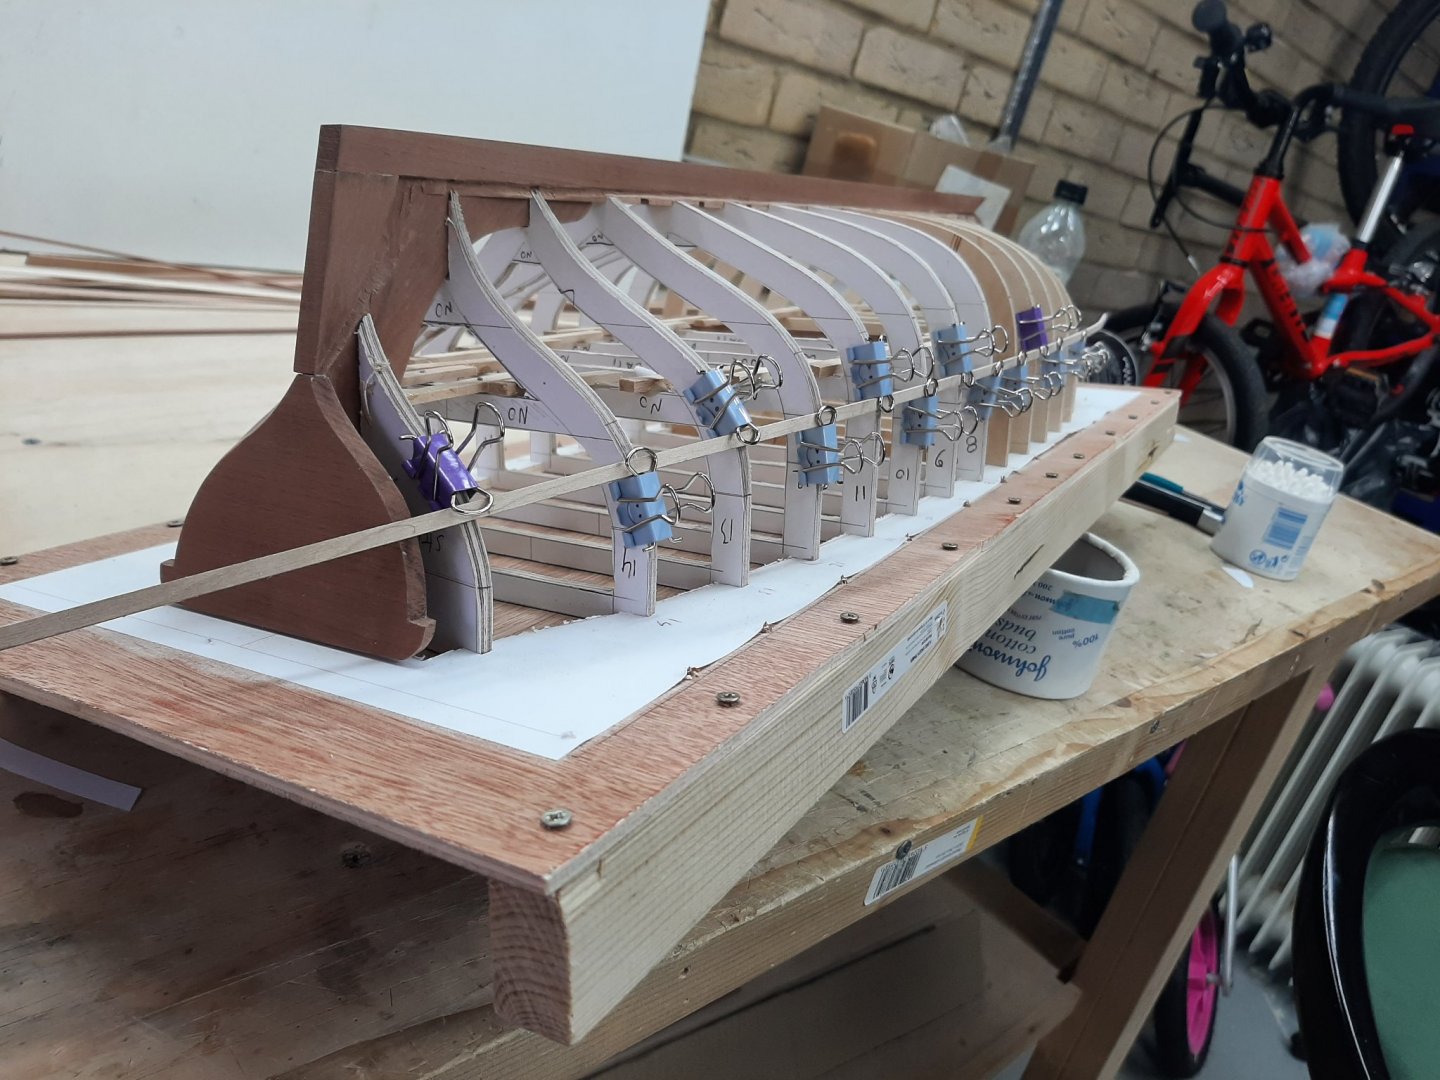
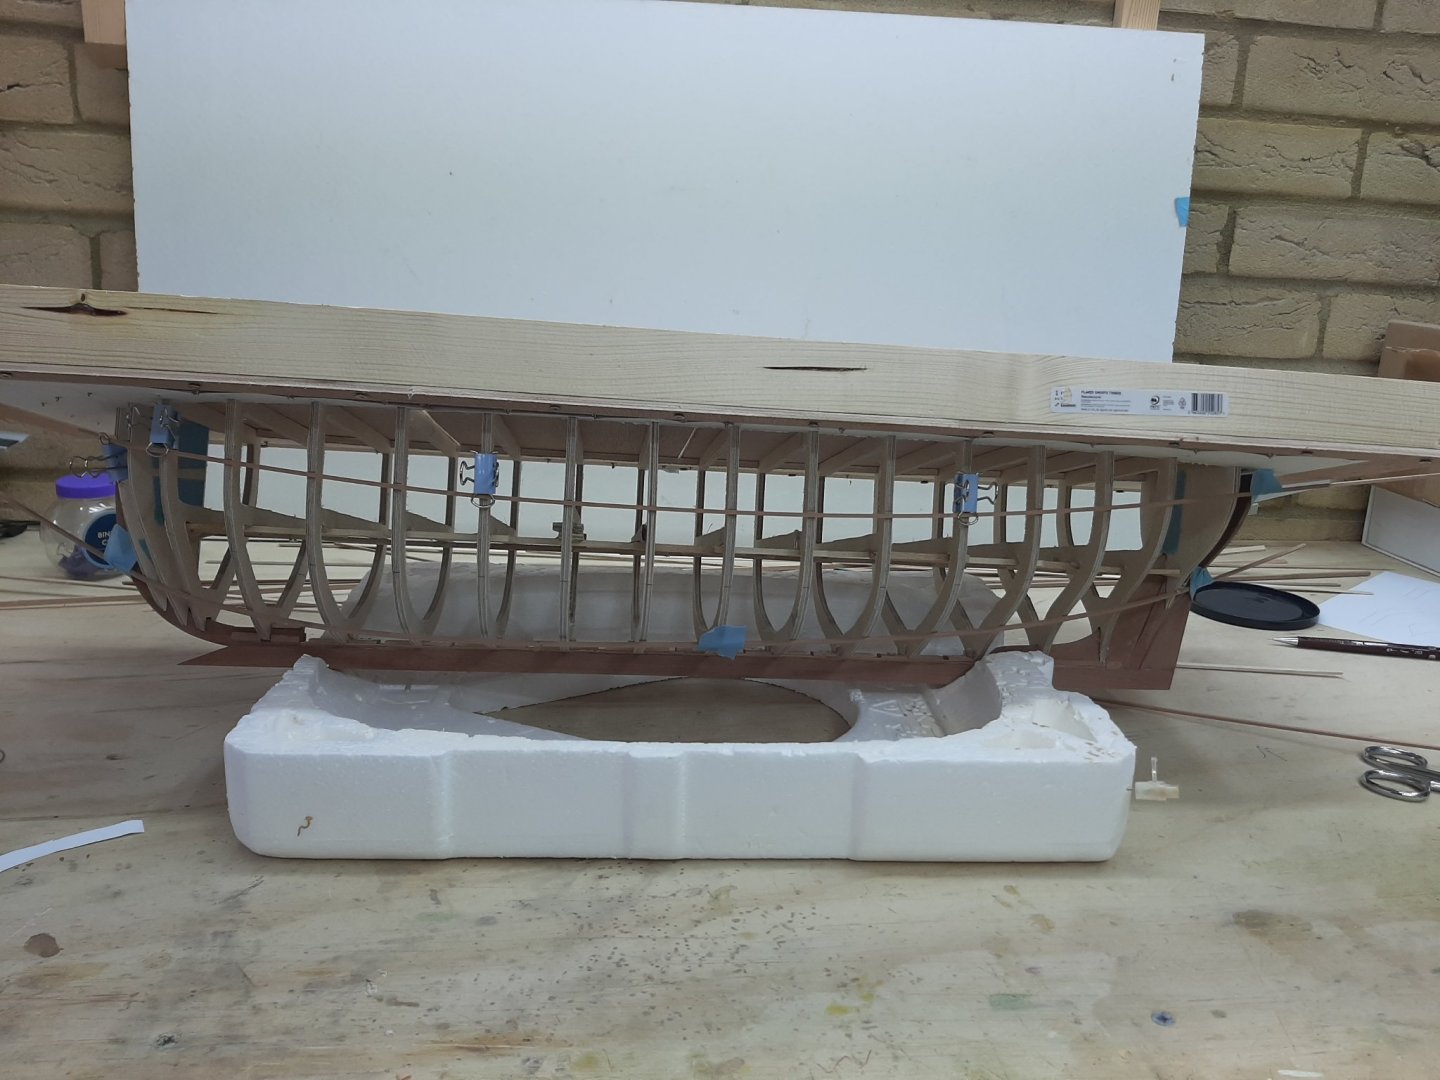
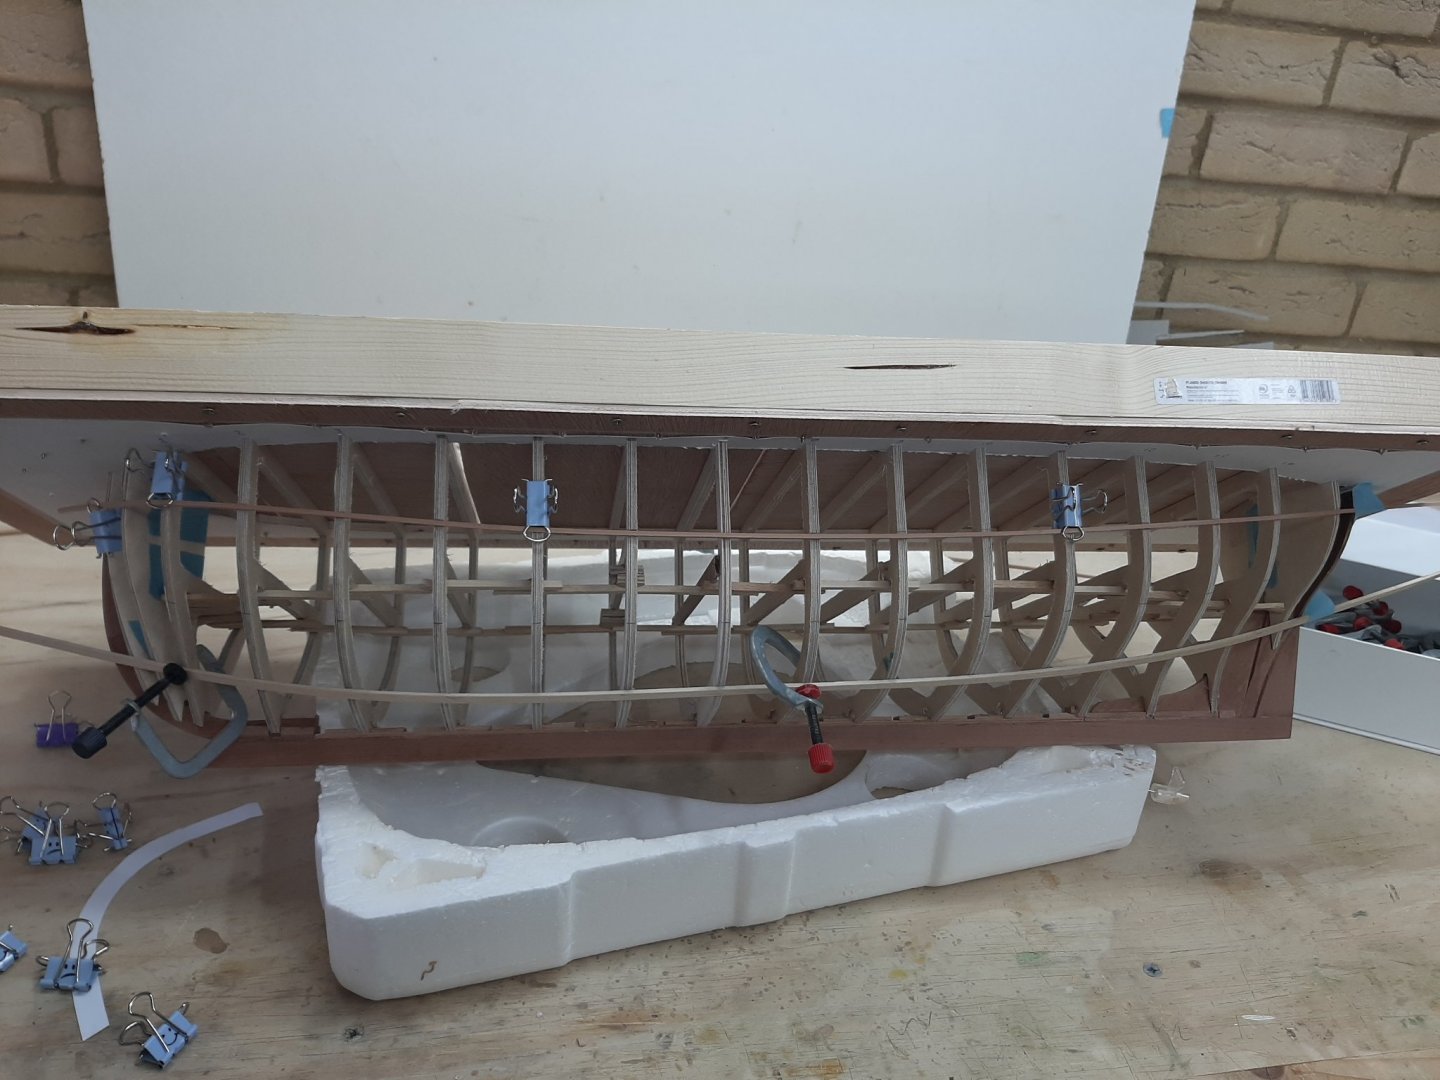
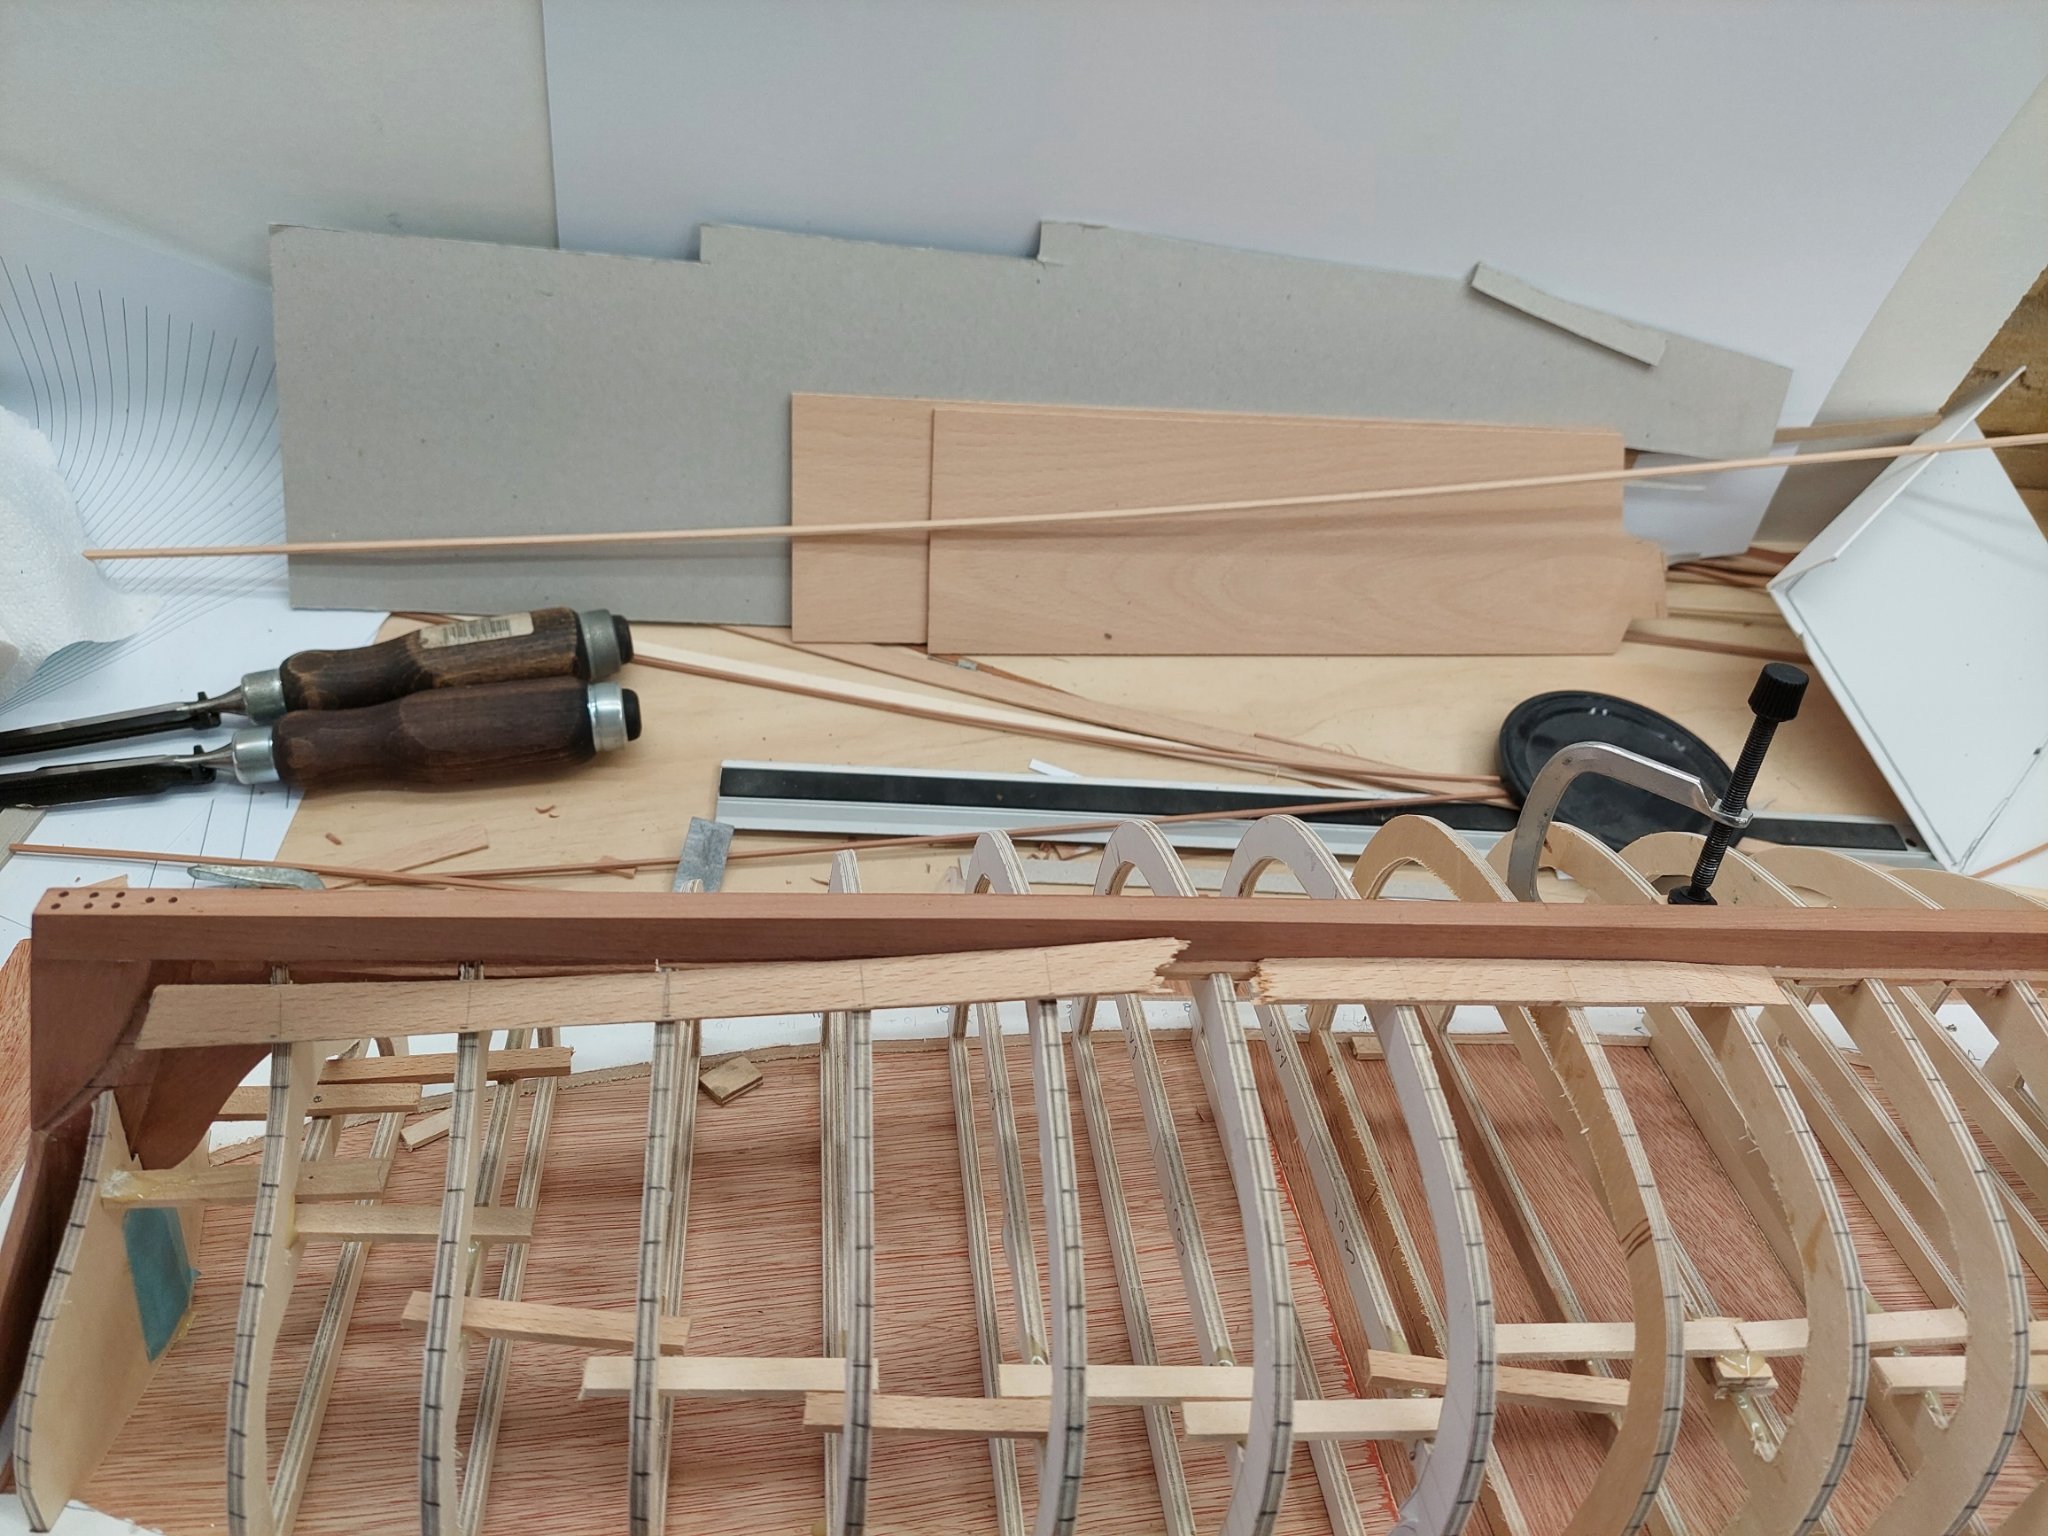
Dear friends
Due to increasing life commitments it's been almost a month since my last post. Unfortunately, I also did not have any time and more importantly peace of mind to visit the various very interesting logs I 've been following - I will try and catch up. However, I found some scraps of time to visit the shipyard and made a bit of progress.
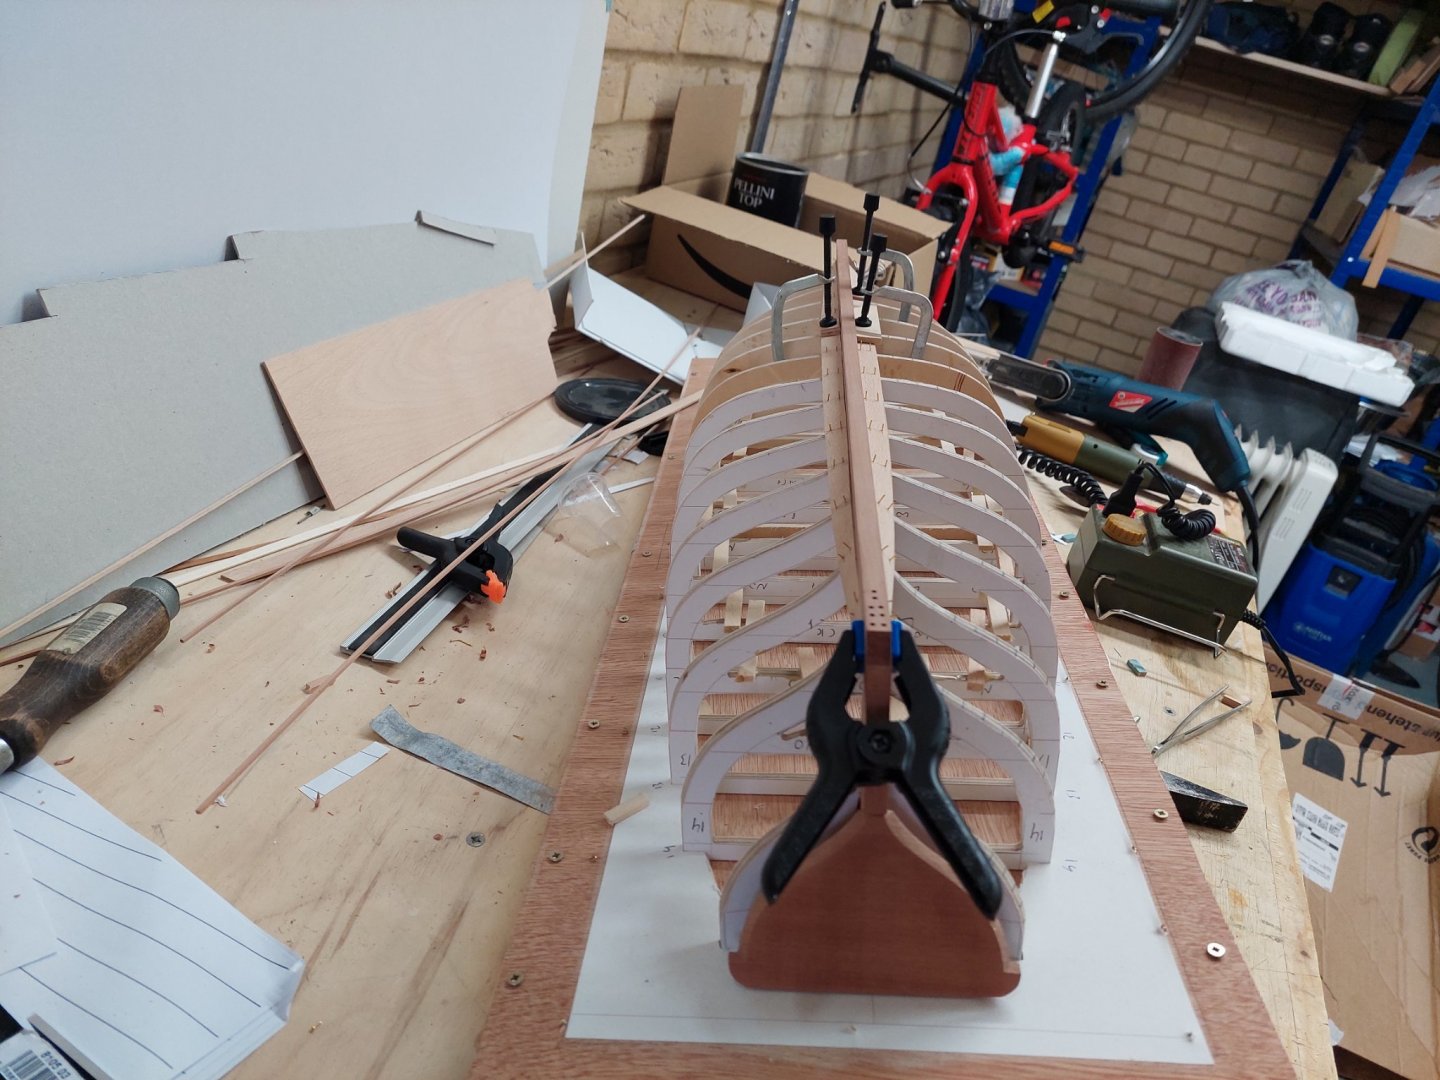
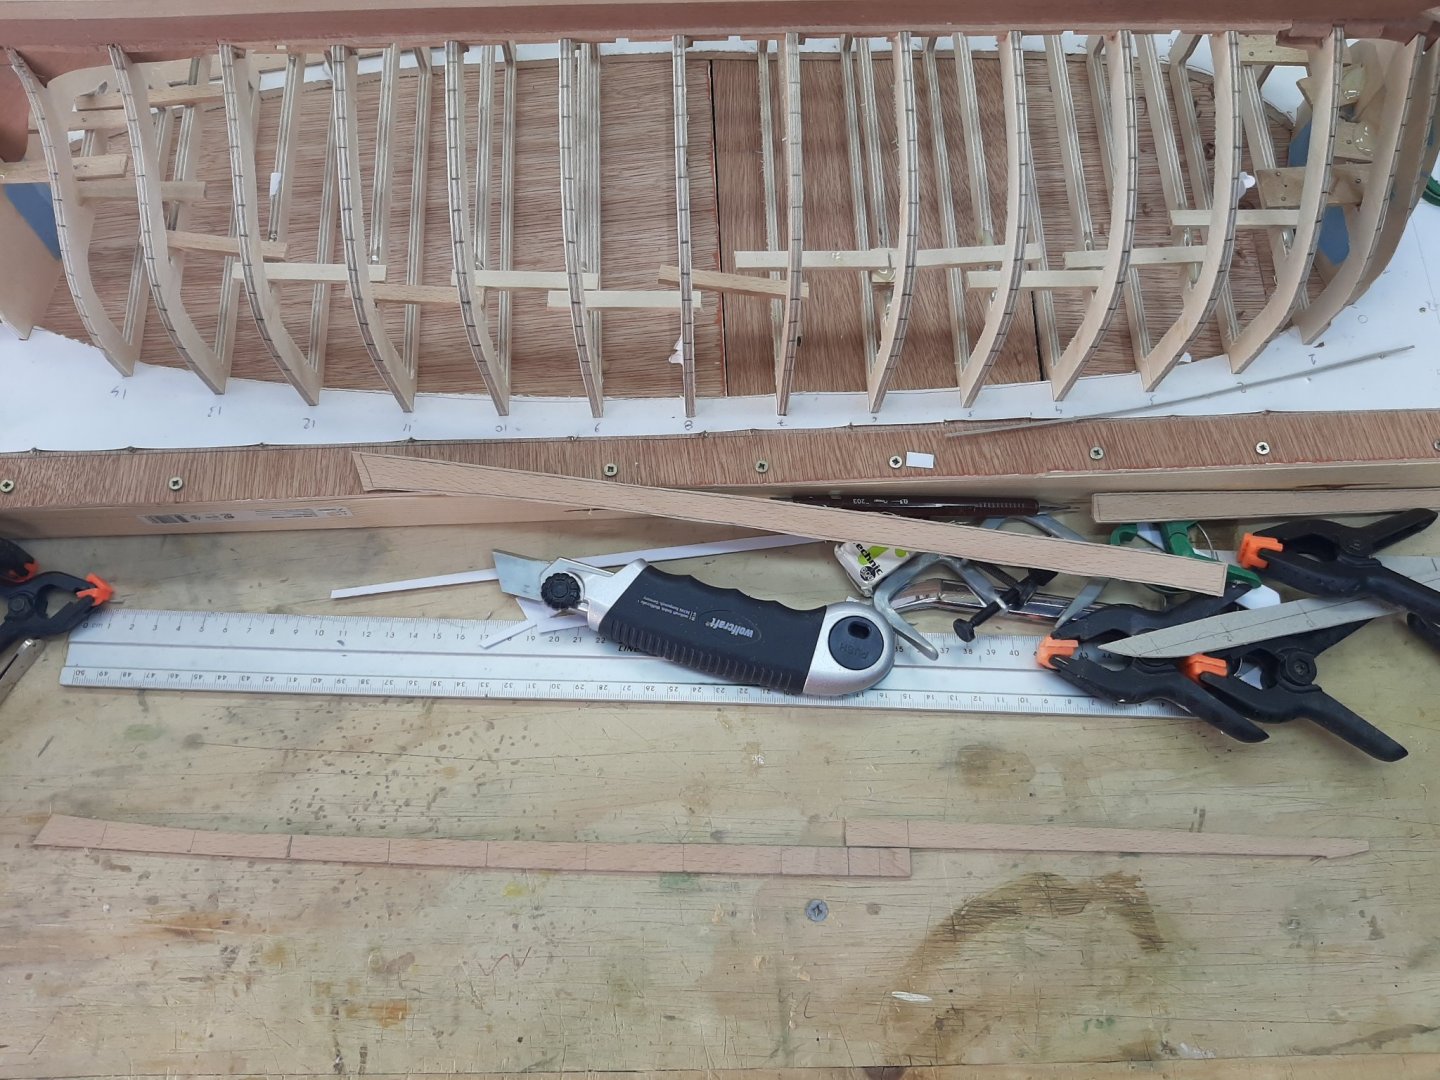
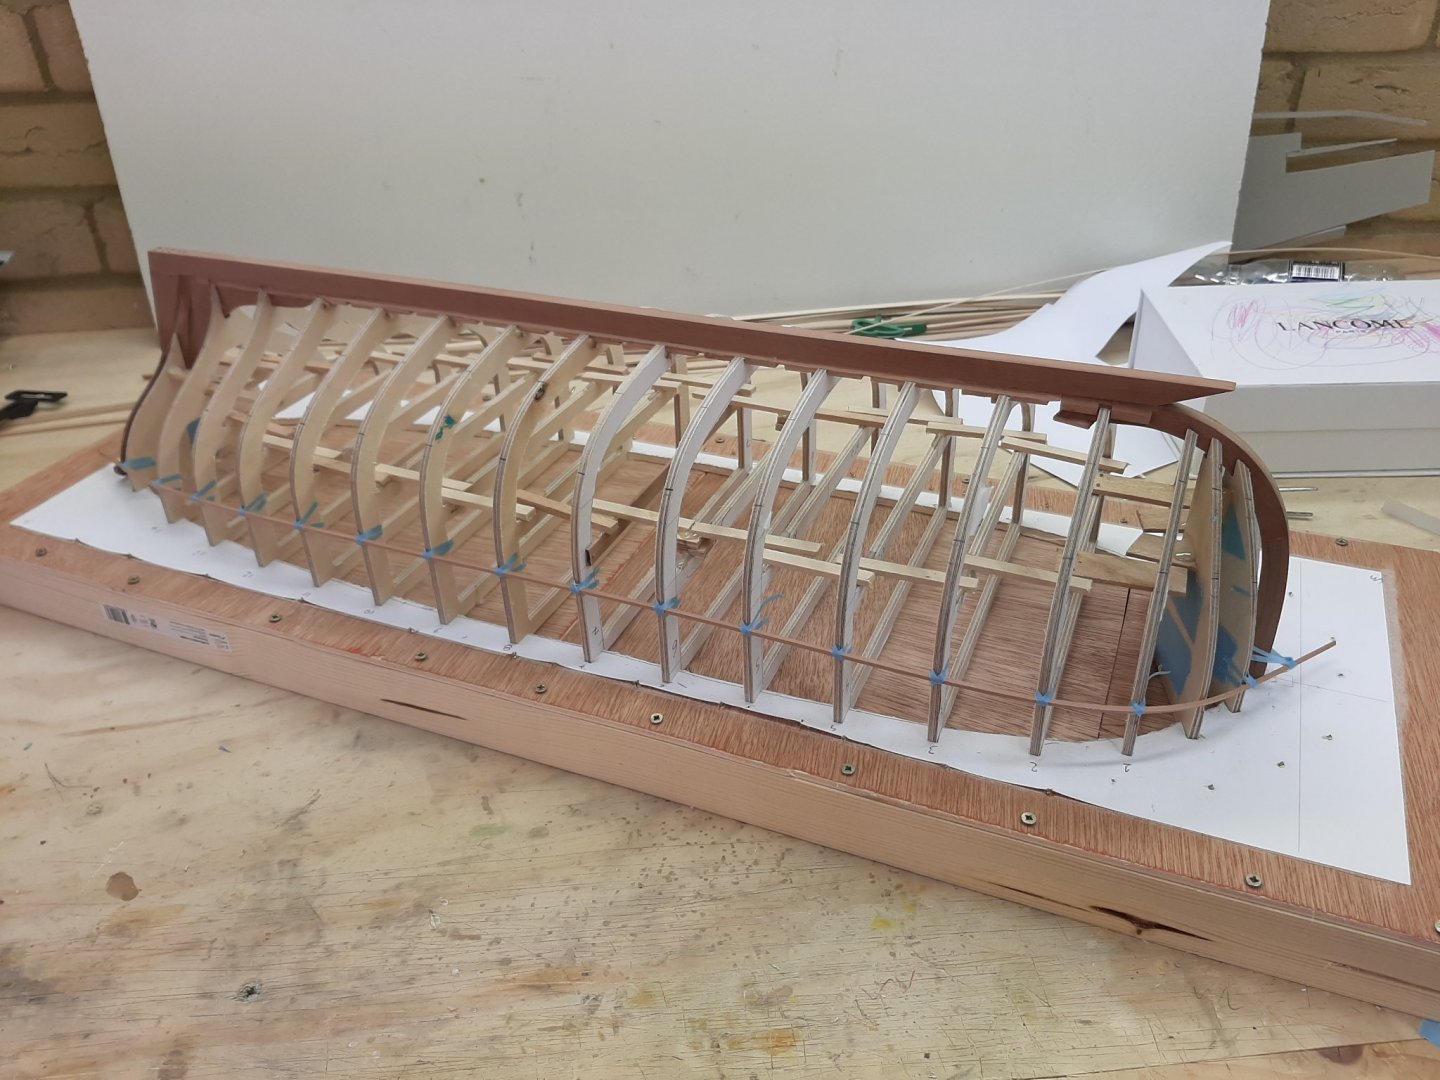
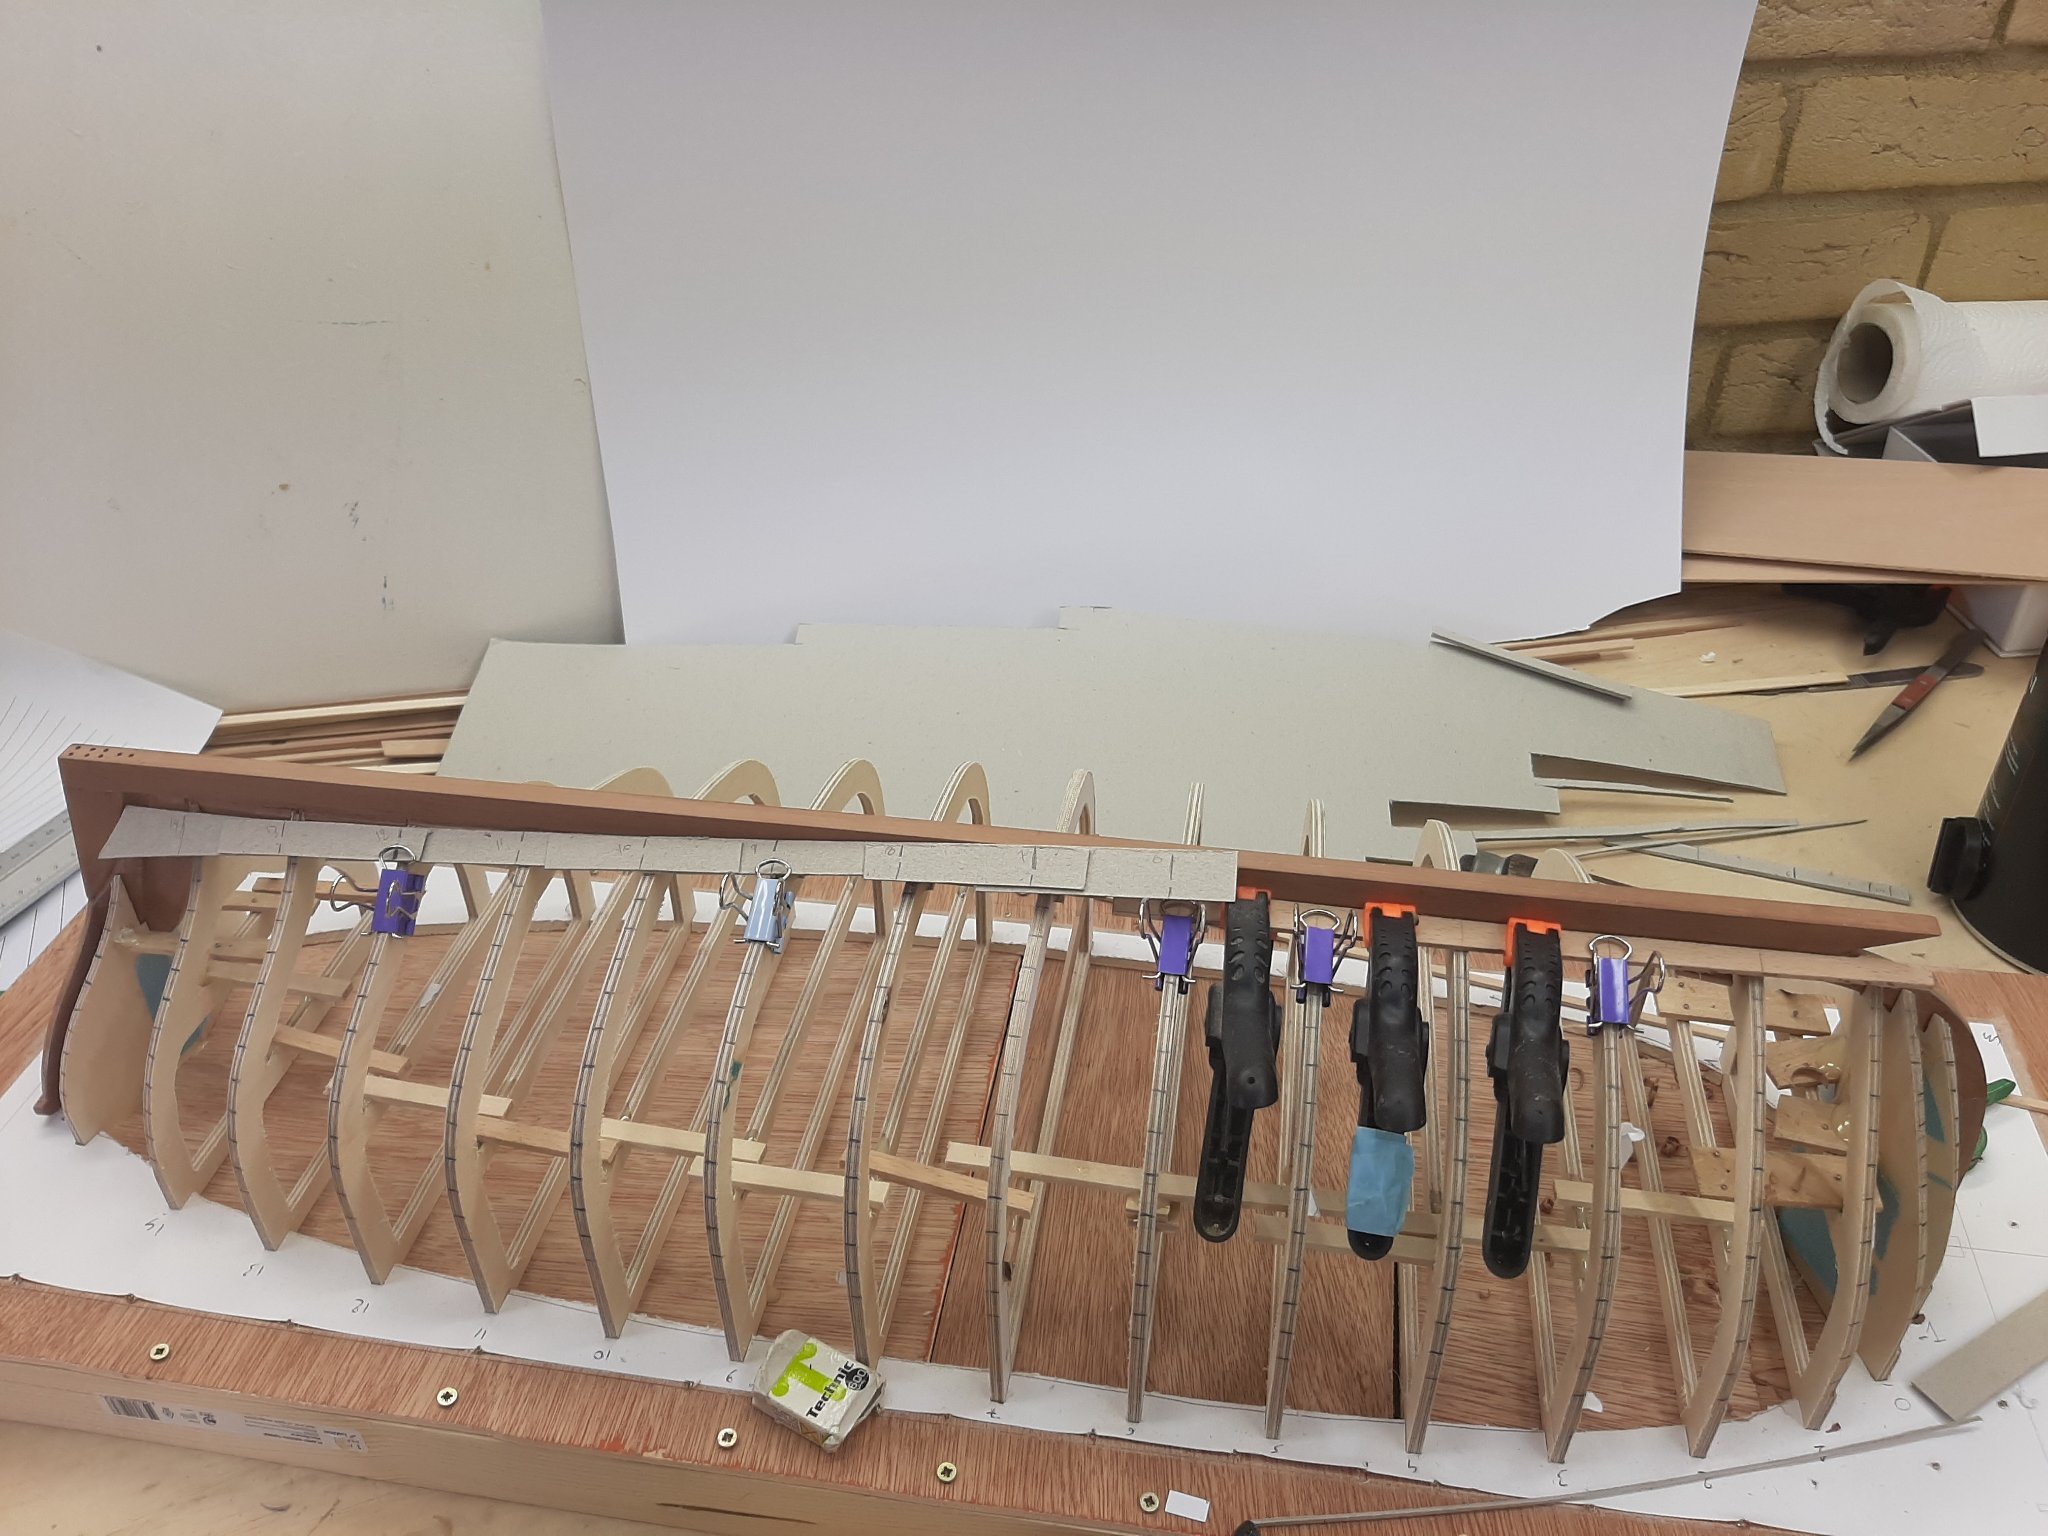
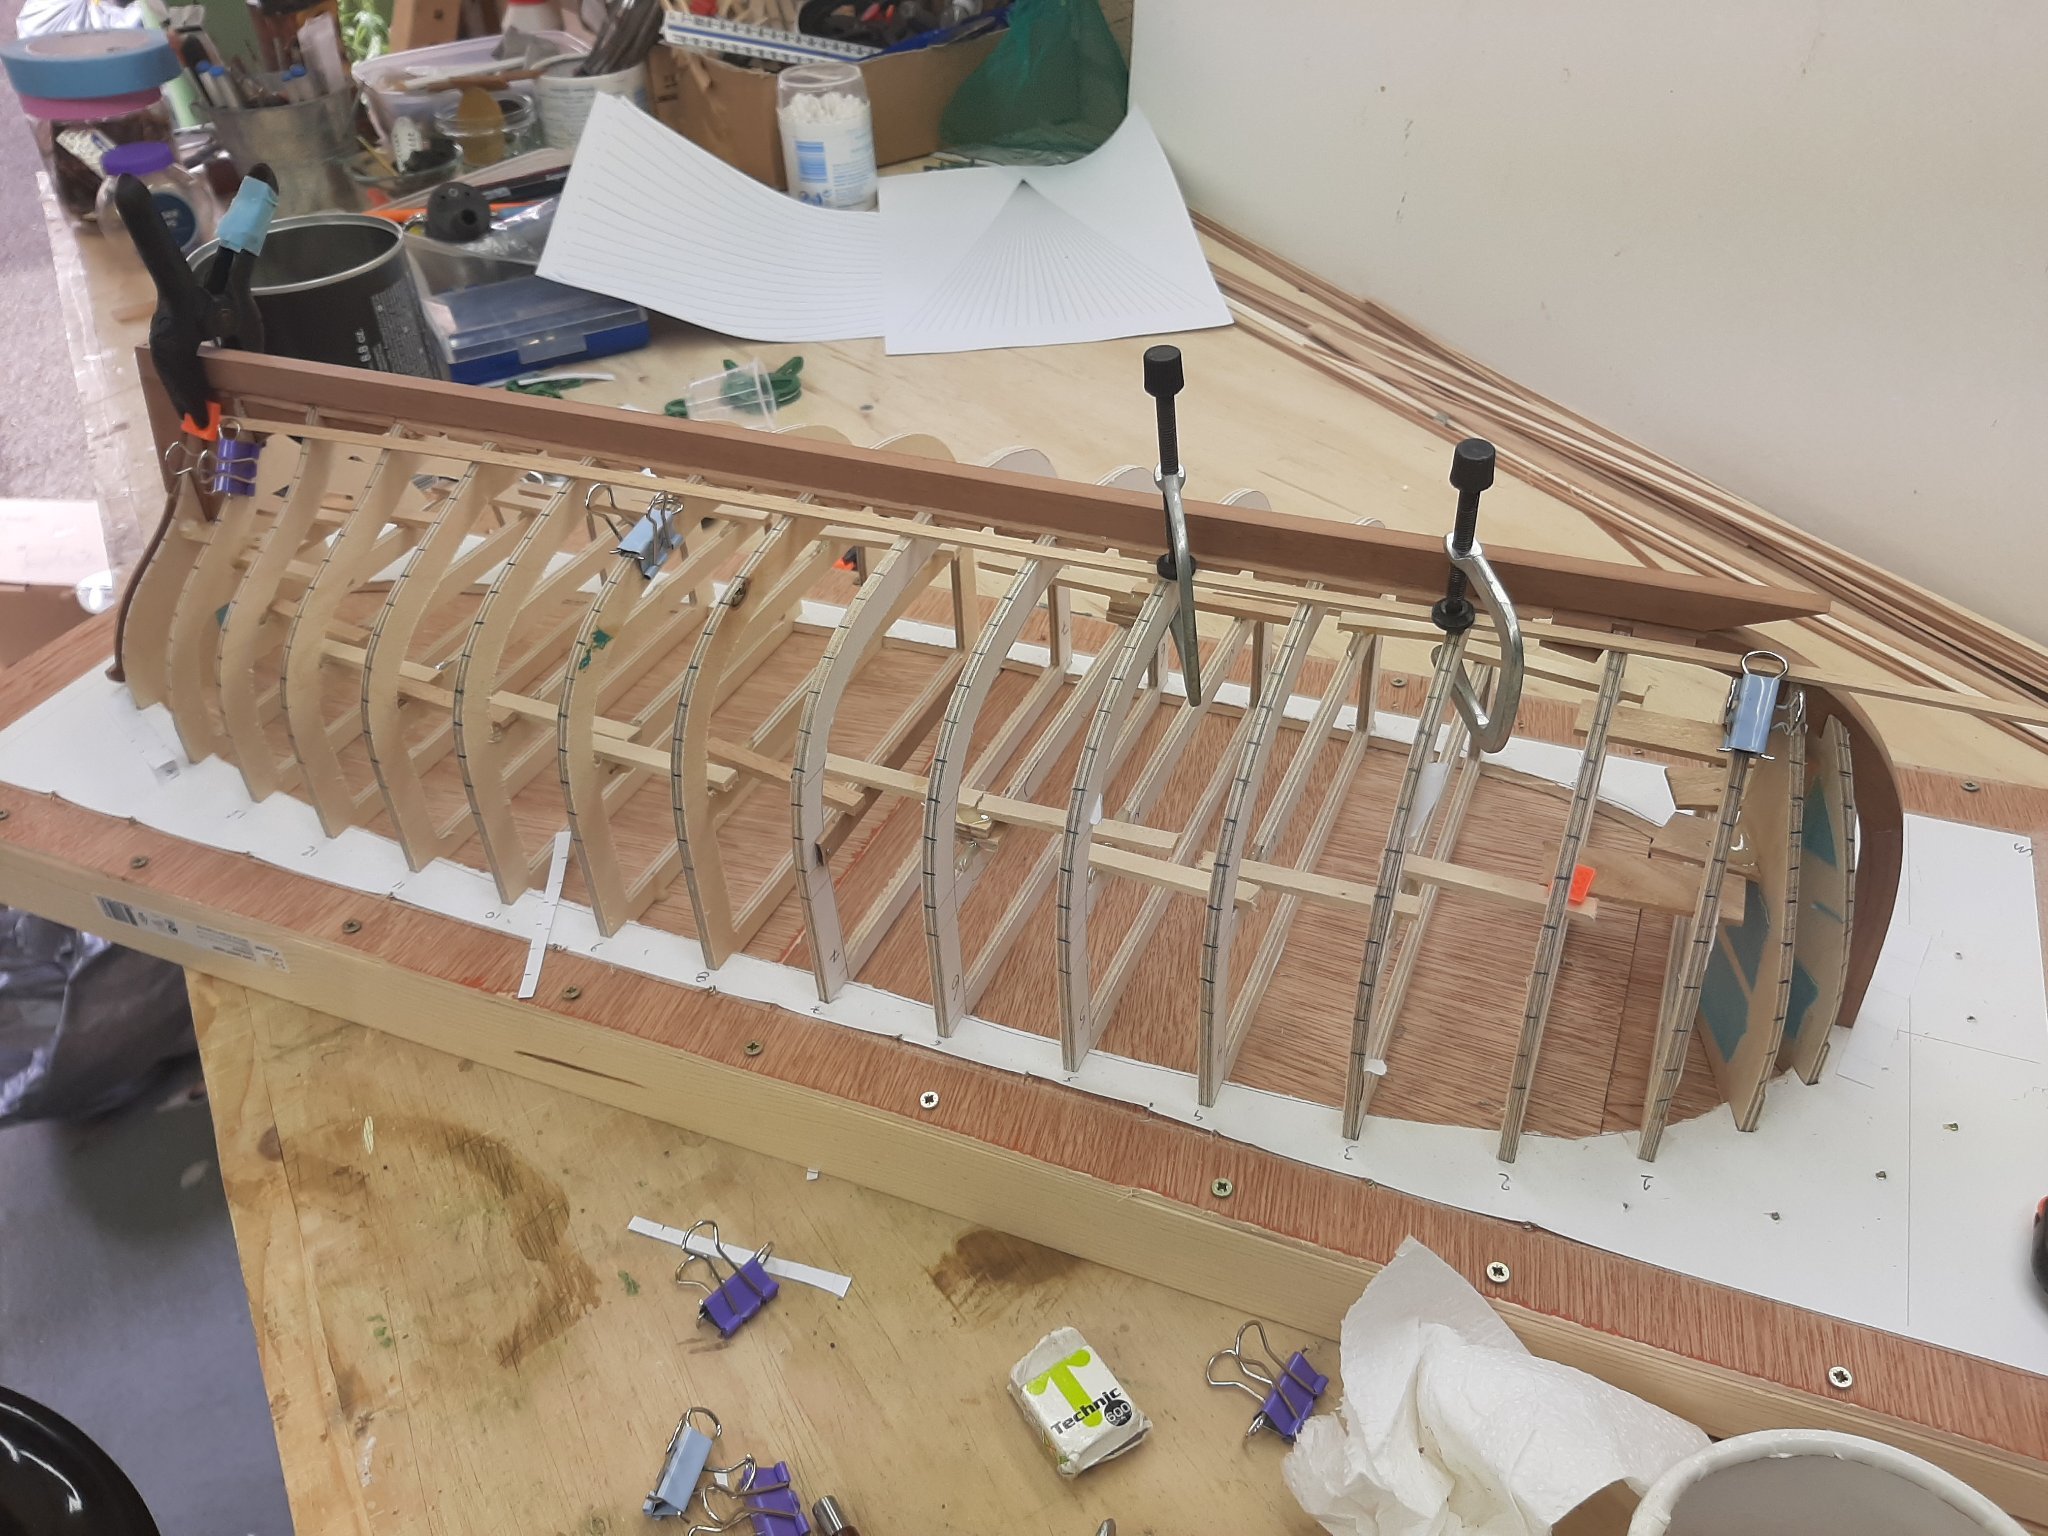
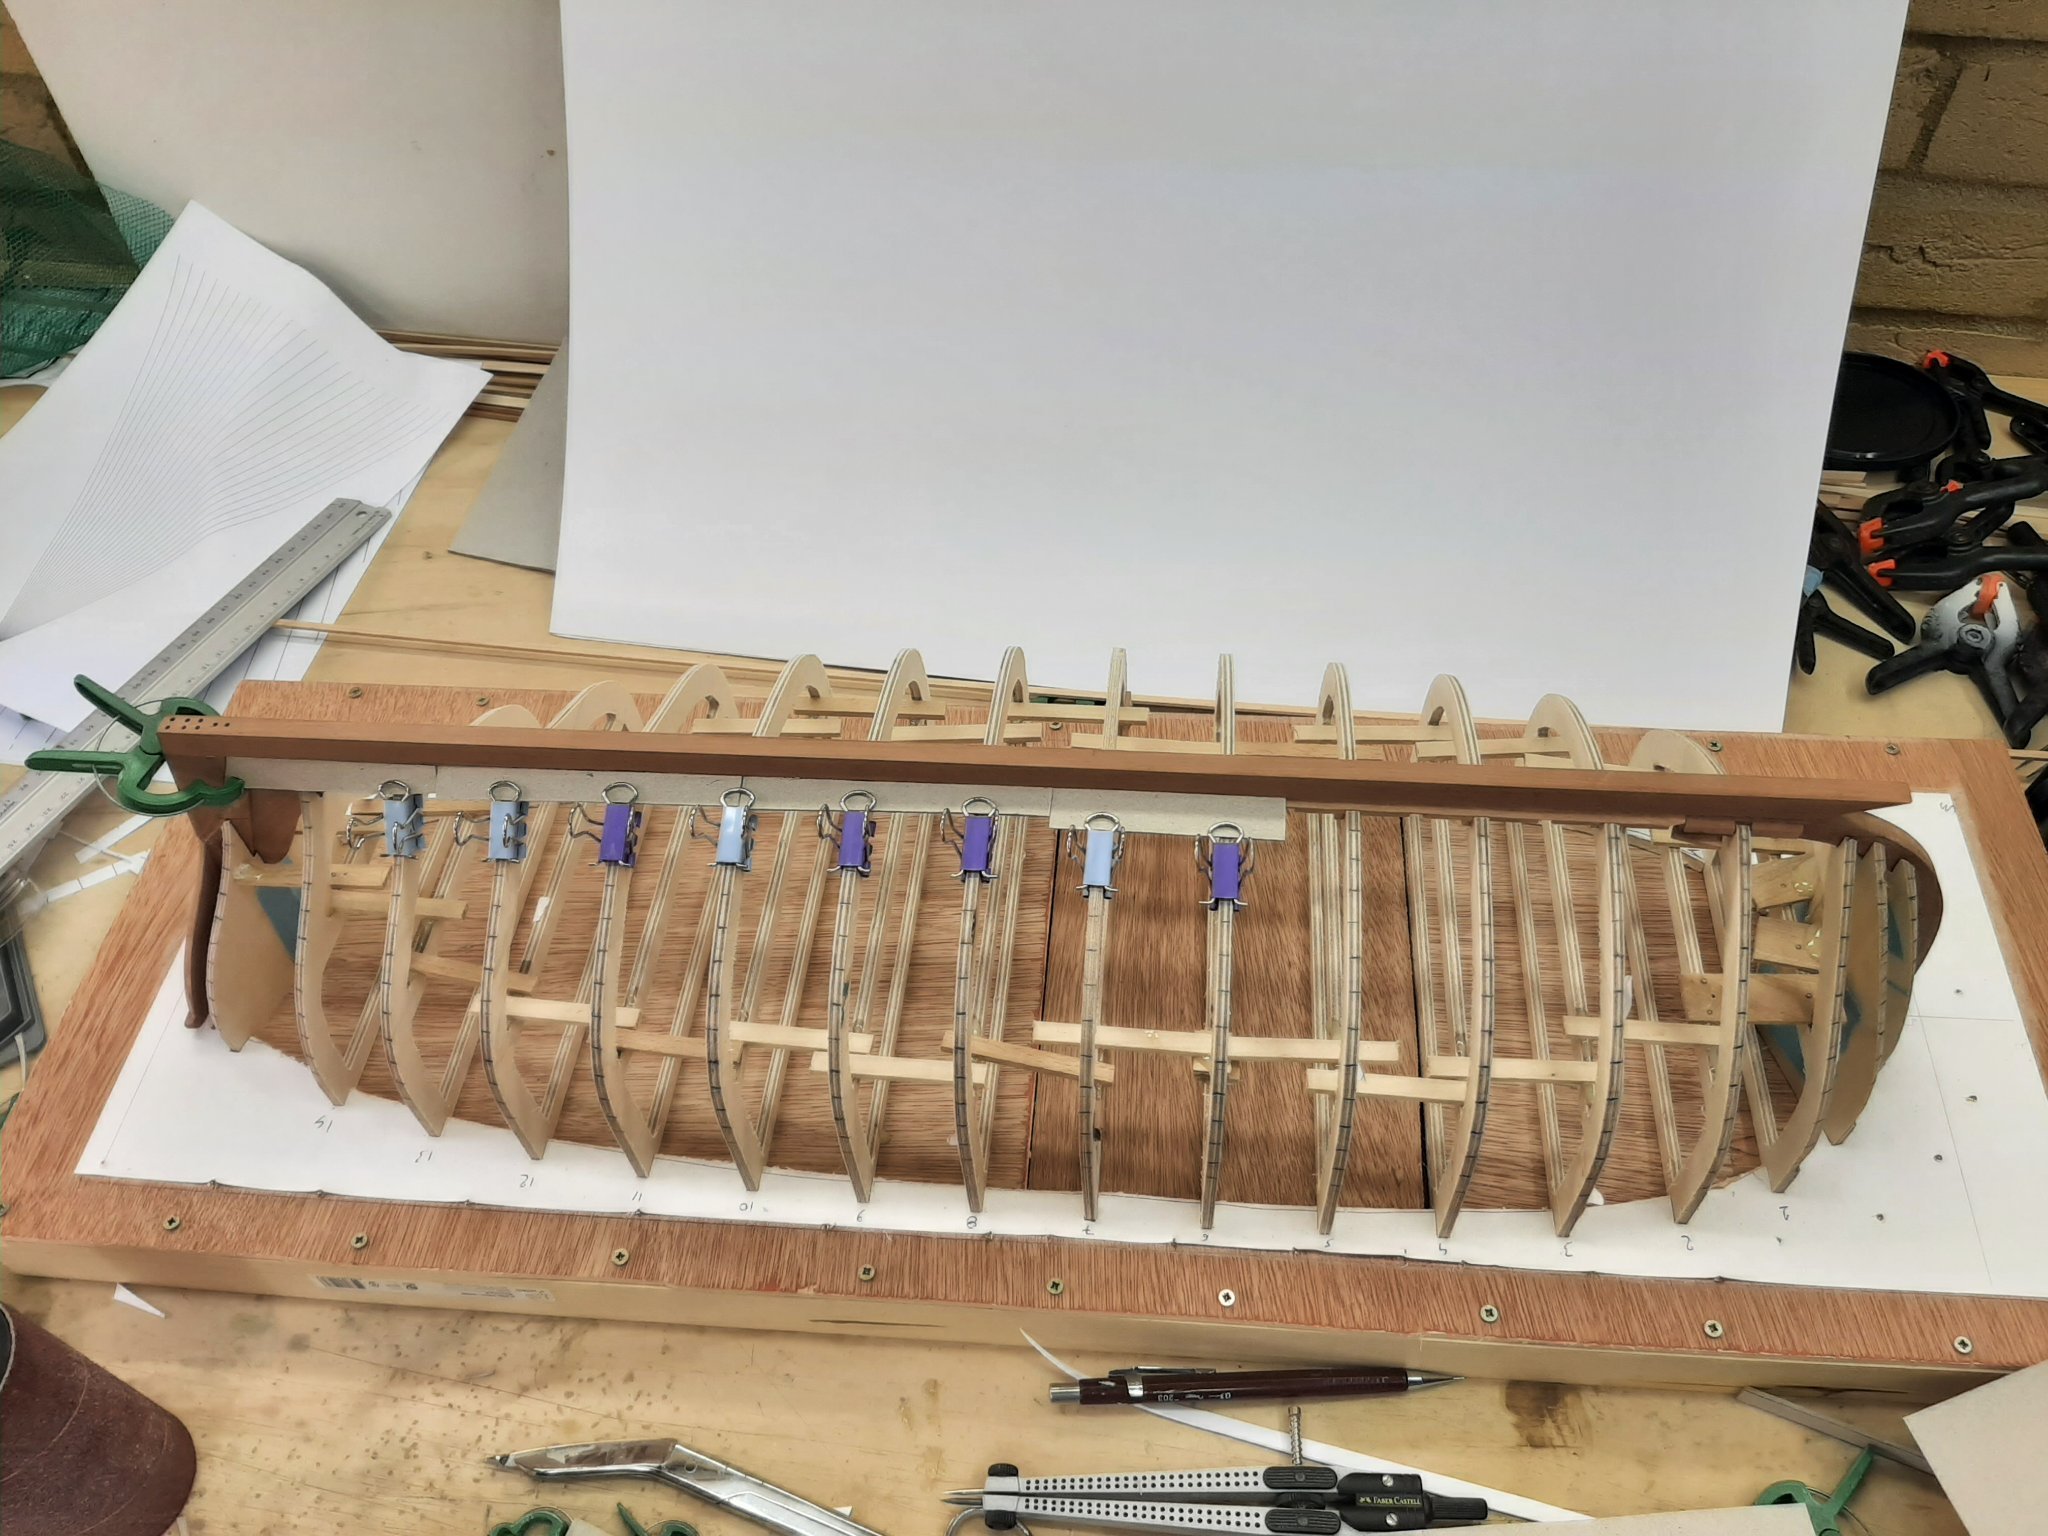
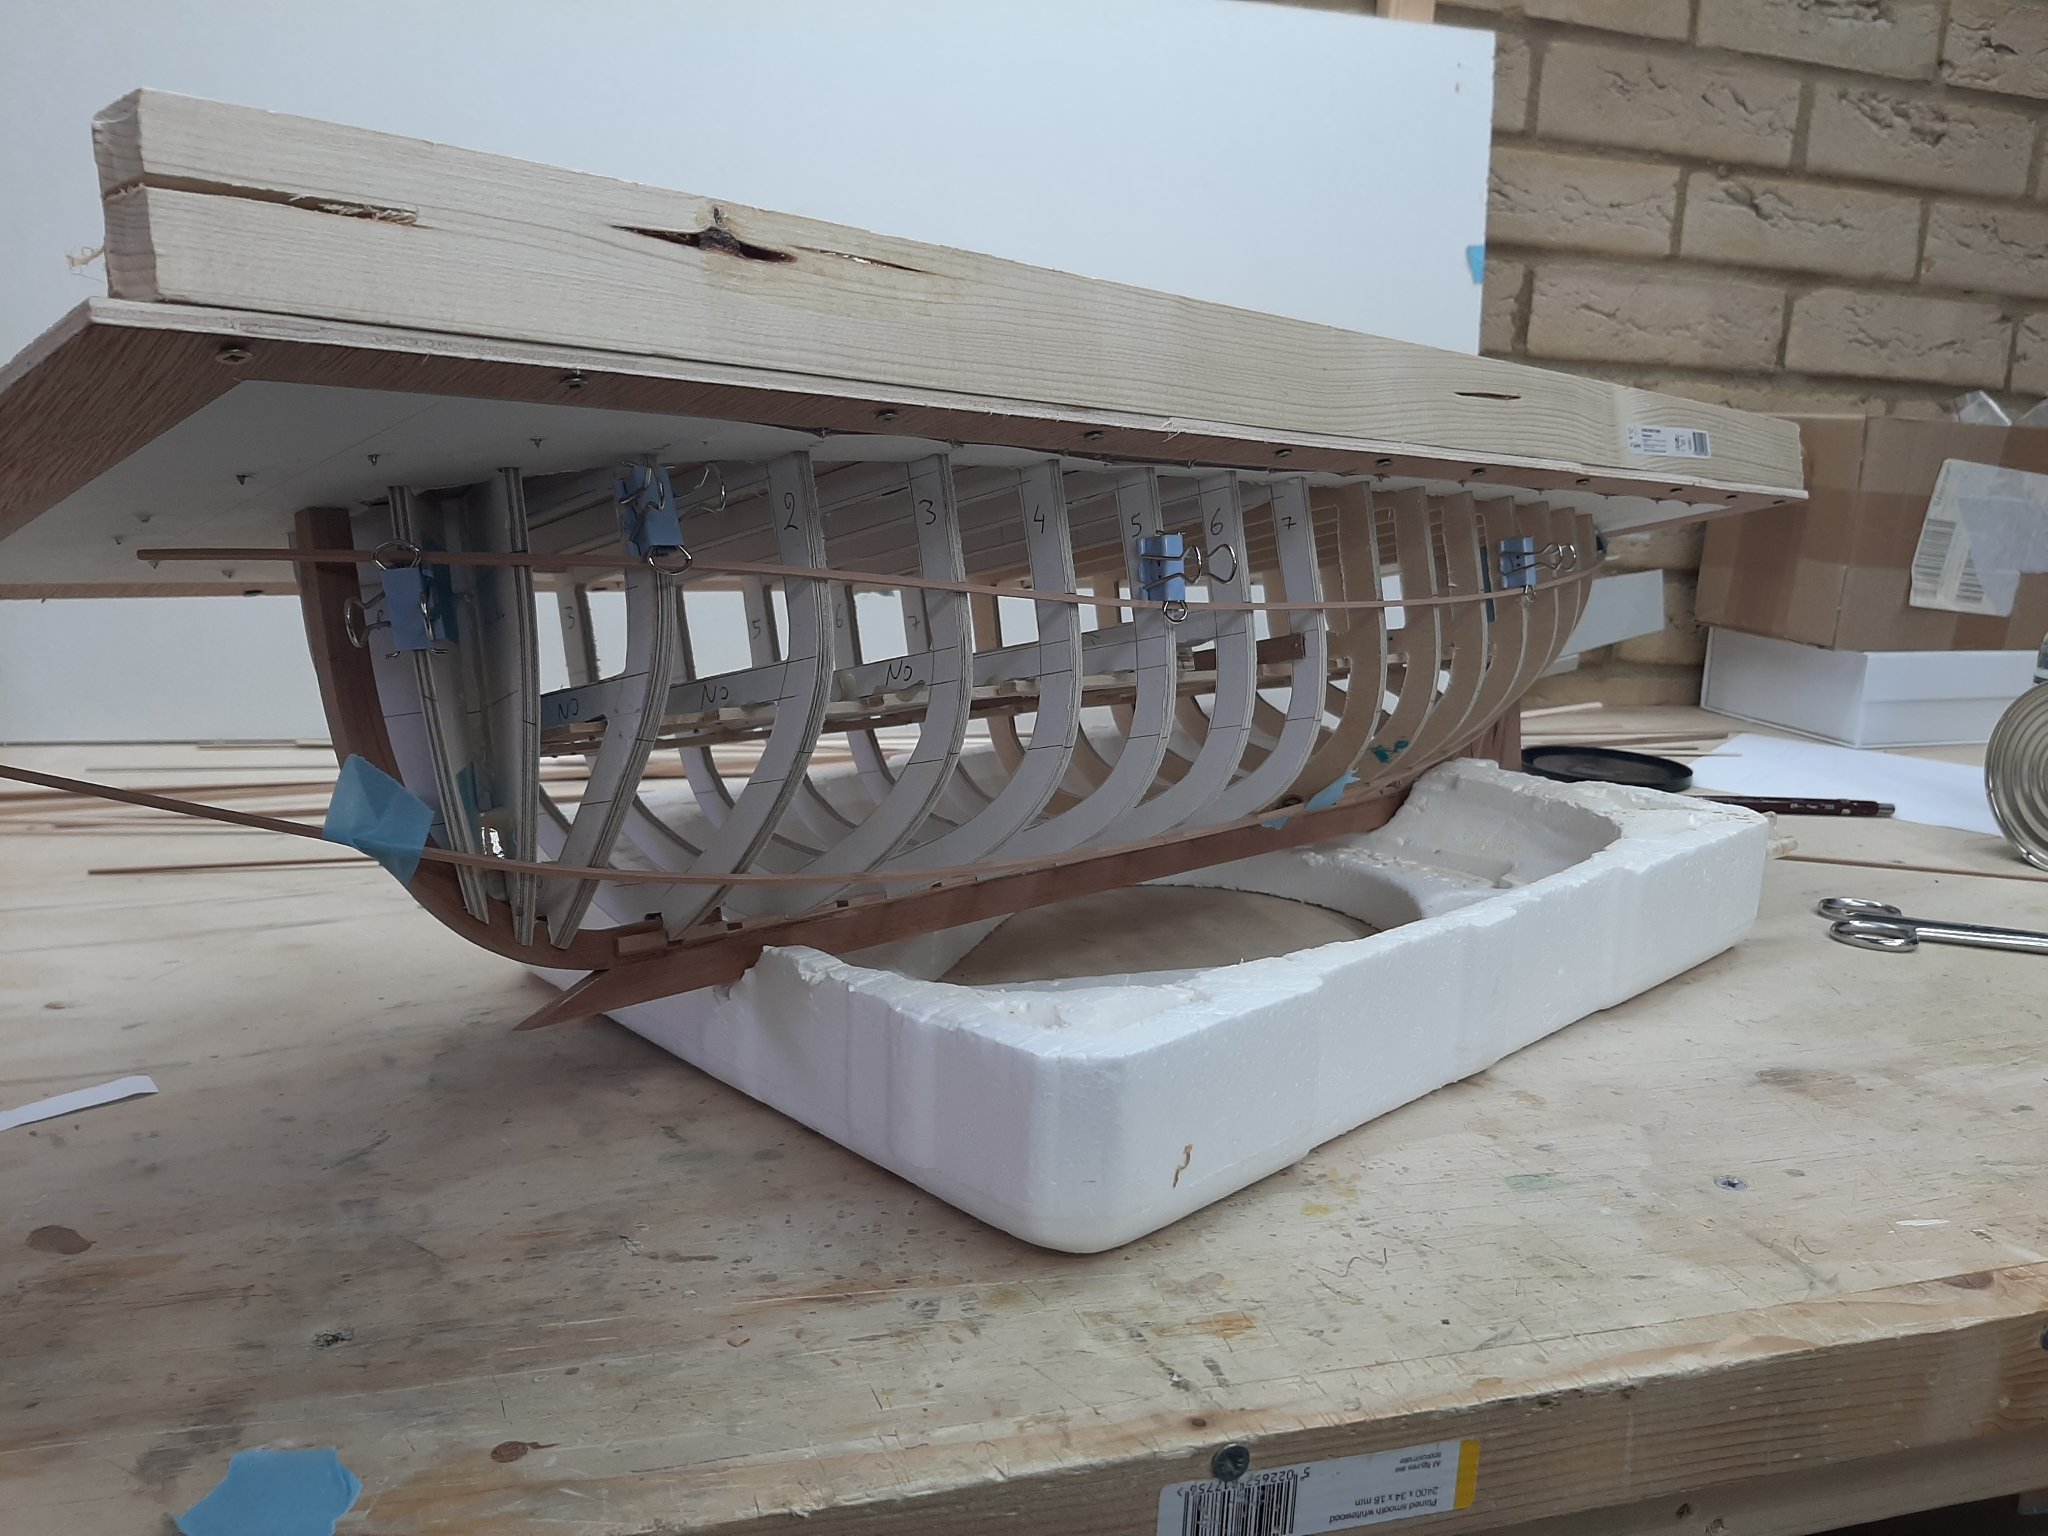
In the last post, I had divided the hull to three zones. Excluding the very curved bow, this hull seems to be much easier to plan that the Launch. I simply used the planking fan diagram to divide the zones into plank widths at every station. I used a baten to figure out the plan ends at the bow and stern. I have decided to scarf the planks so I do not care how much spilling will be needed and how curved they 'll end up to be. The final fairing of the planks will be done during the actual planking but I hope my lines are not far off.
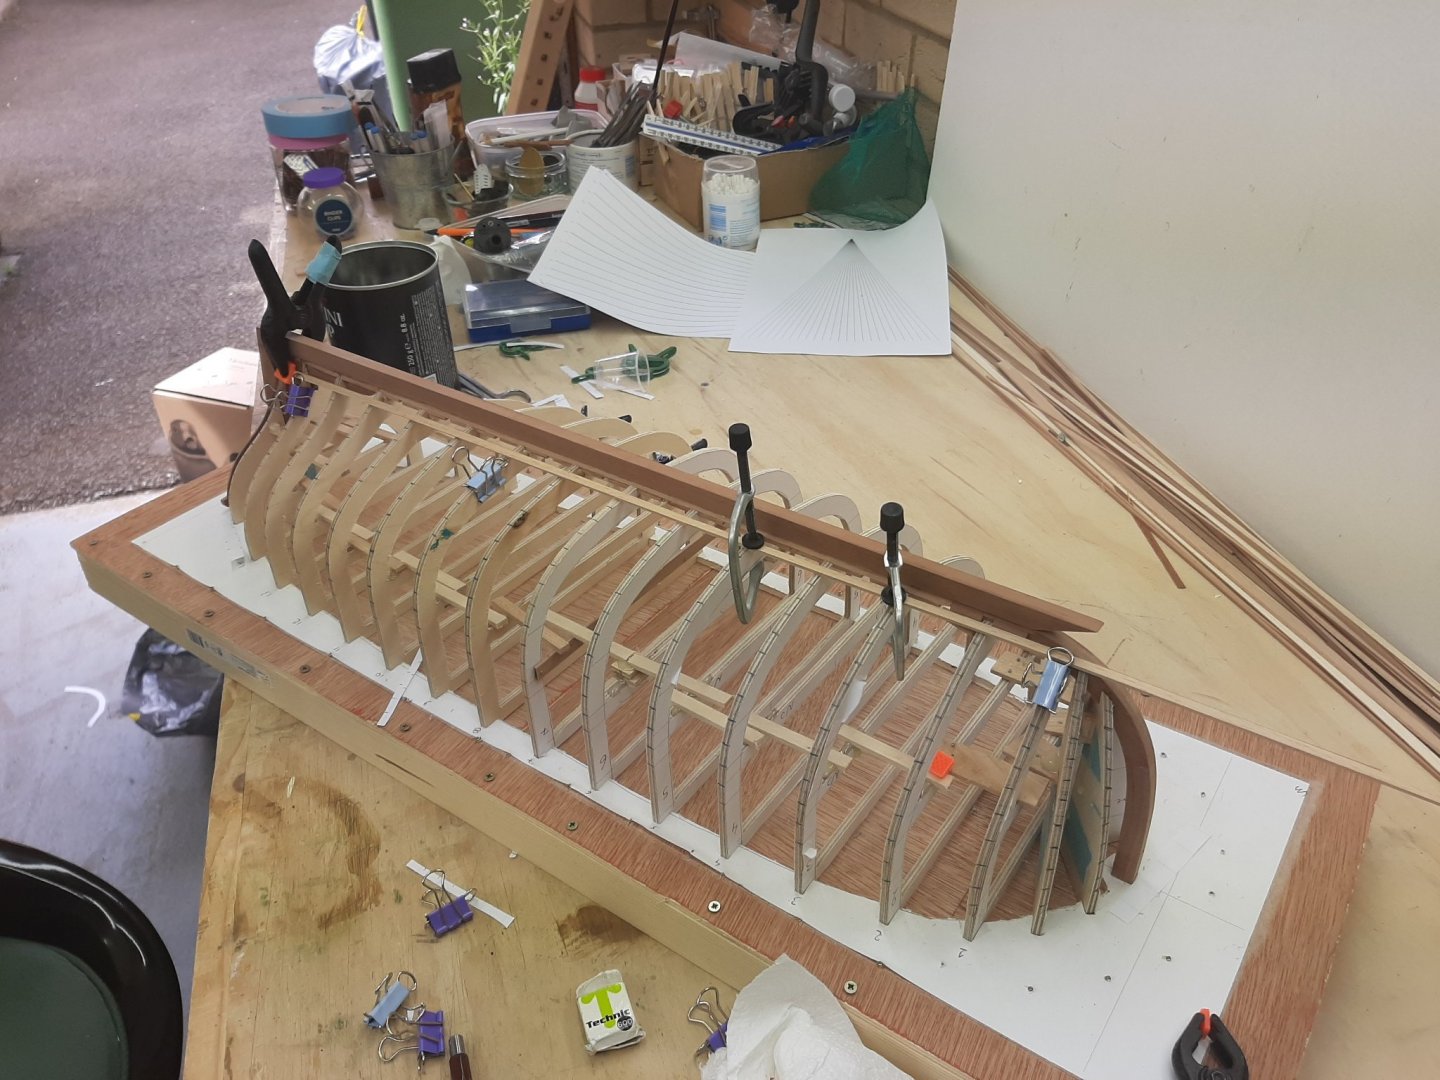


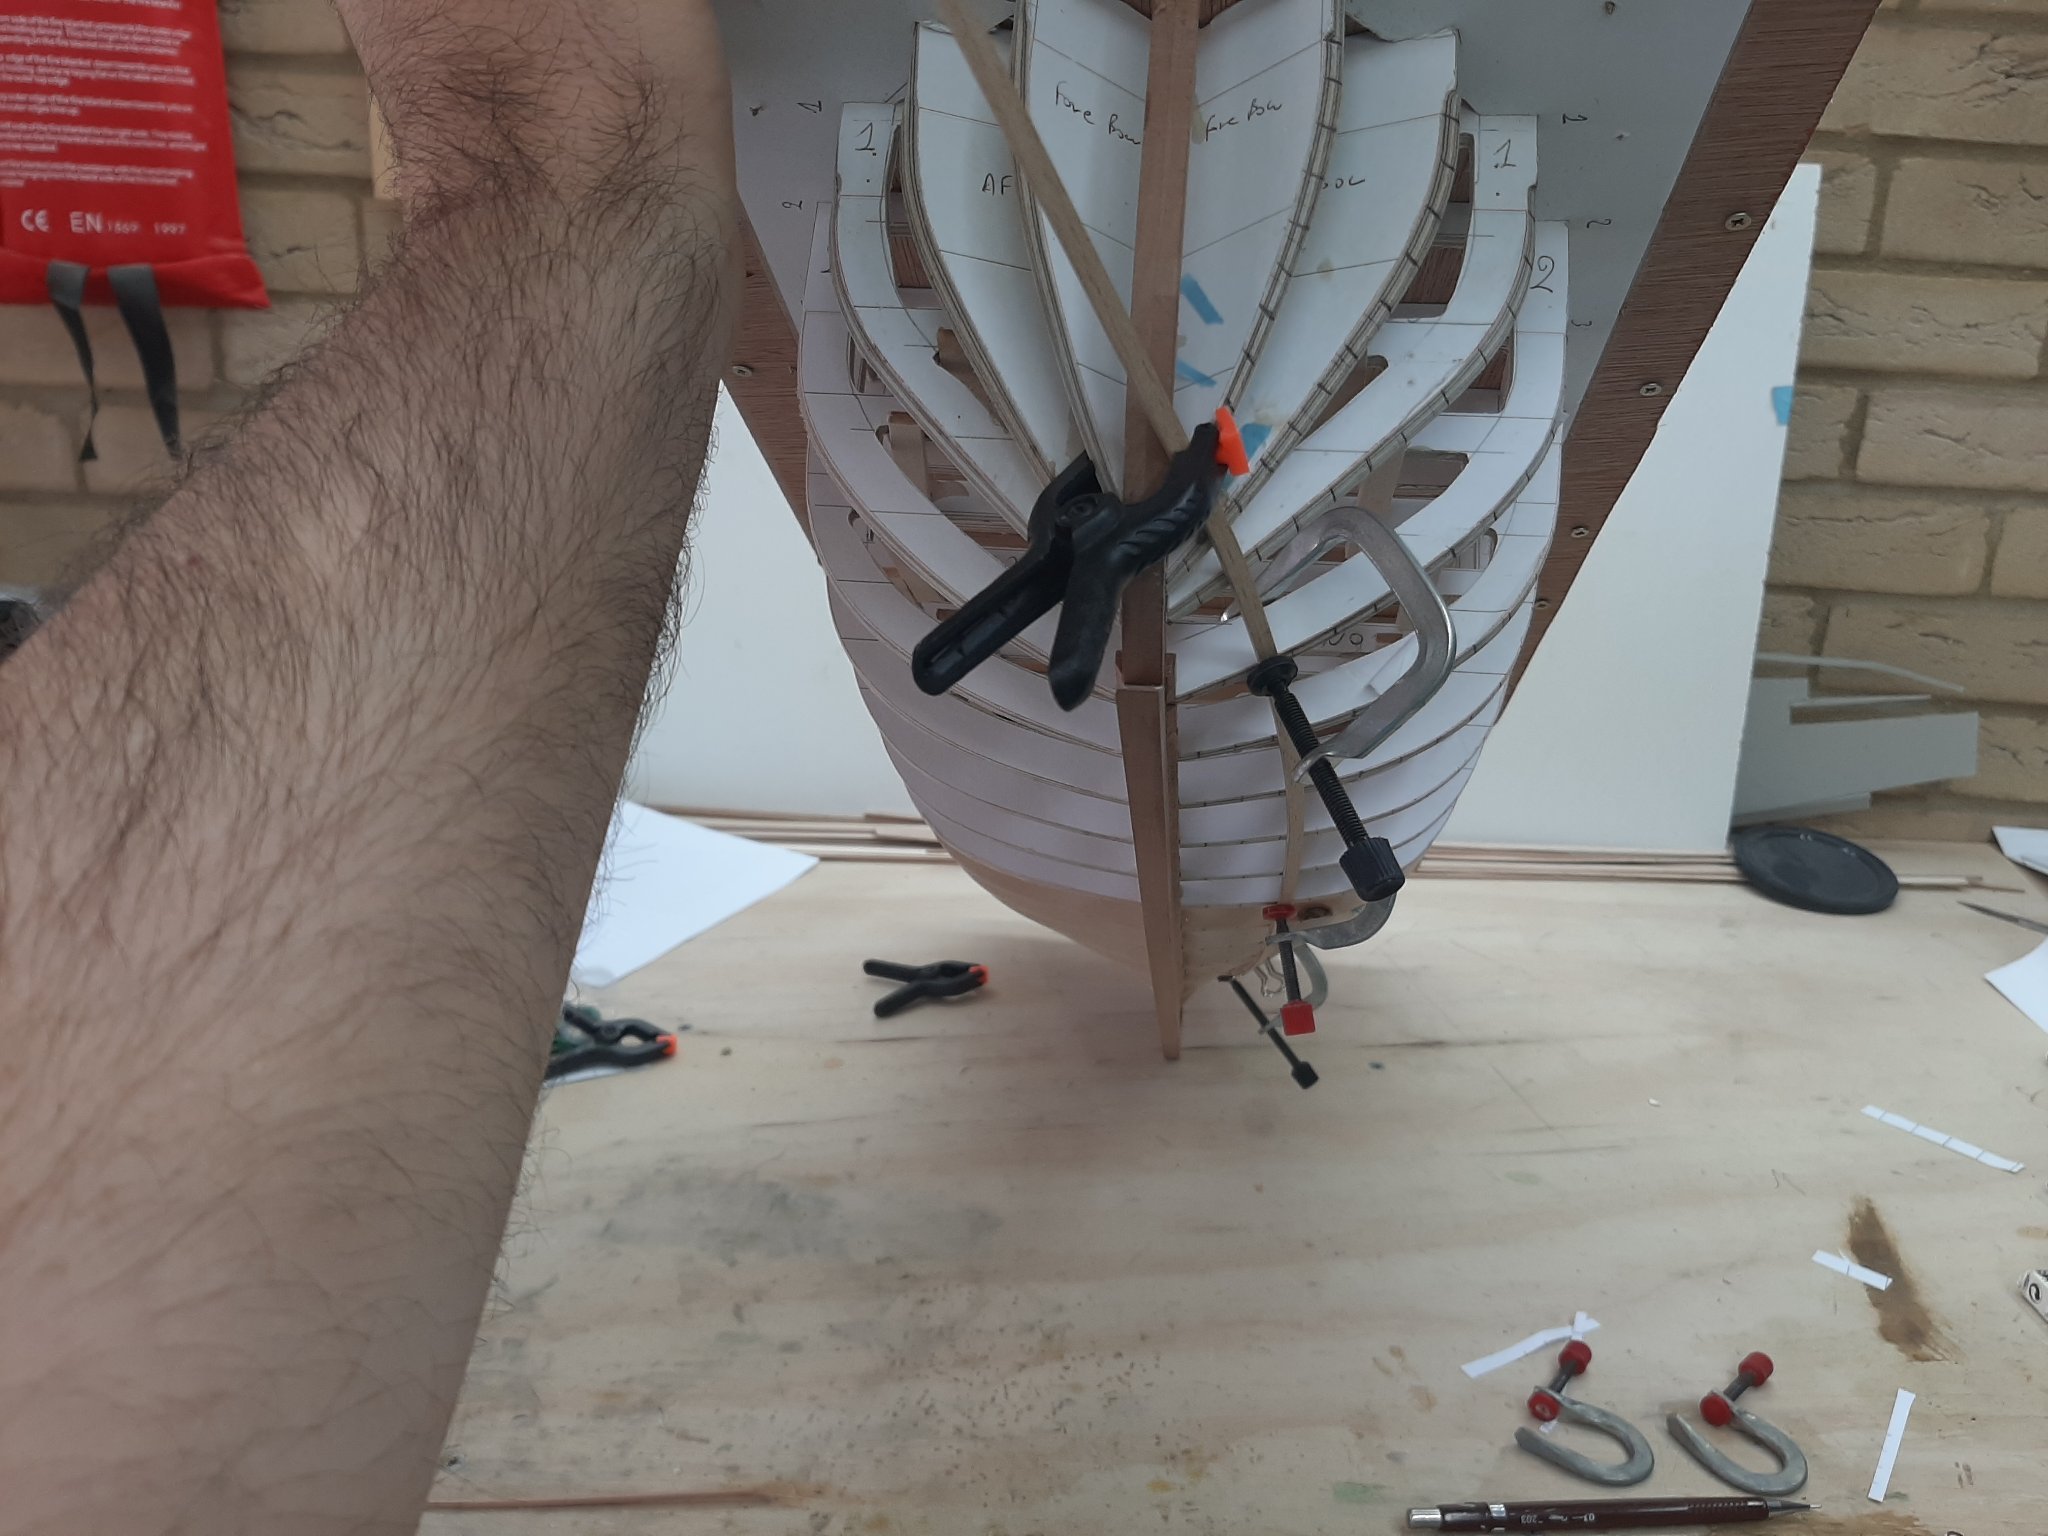
It is very difficult to capture the run of the planks right side up, due to the size of the boat but they look ok

But now it is clear that this boat will be very difficult to do lapstrake. I am concerned that this curved bow will cost me my sanity. I wonder whether it would be better to do a carvel planking and leave the lapstrake for a future boat with a more friendly bow. Decisions-decisions...
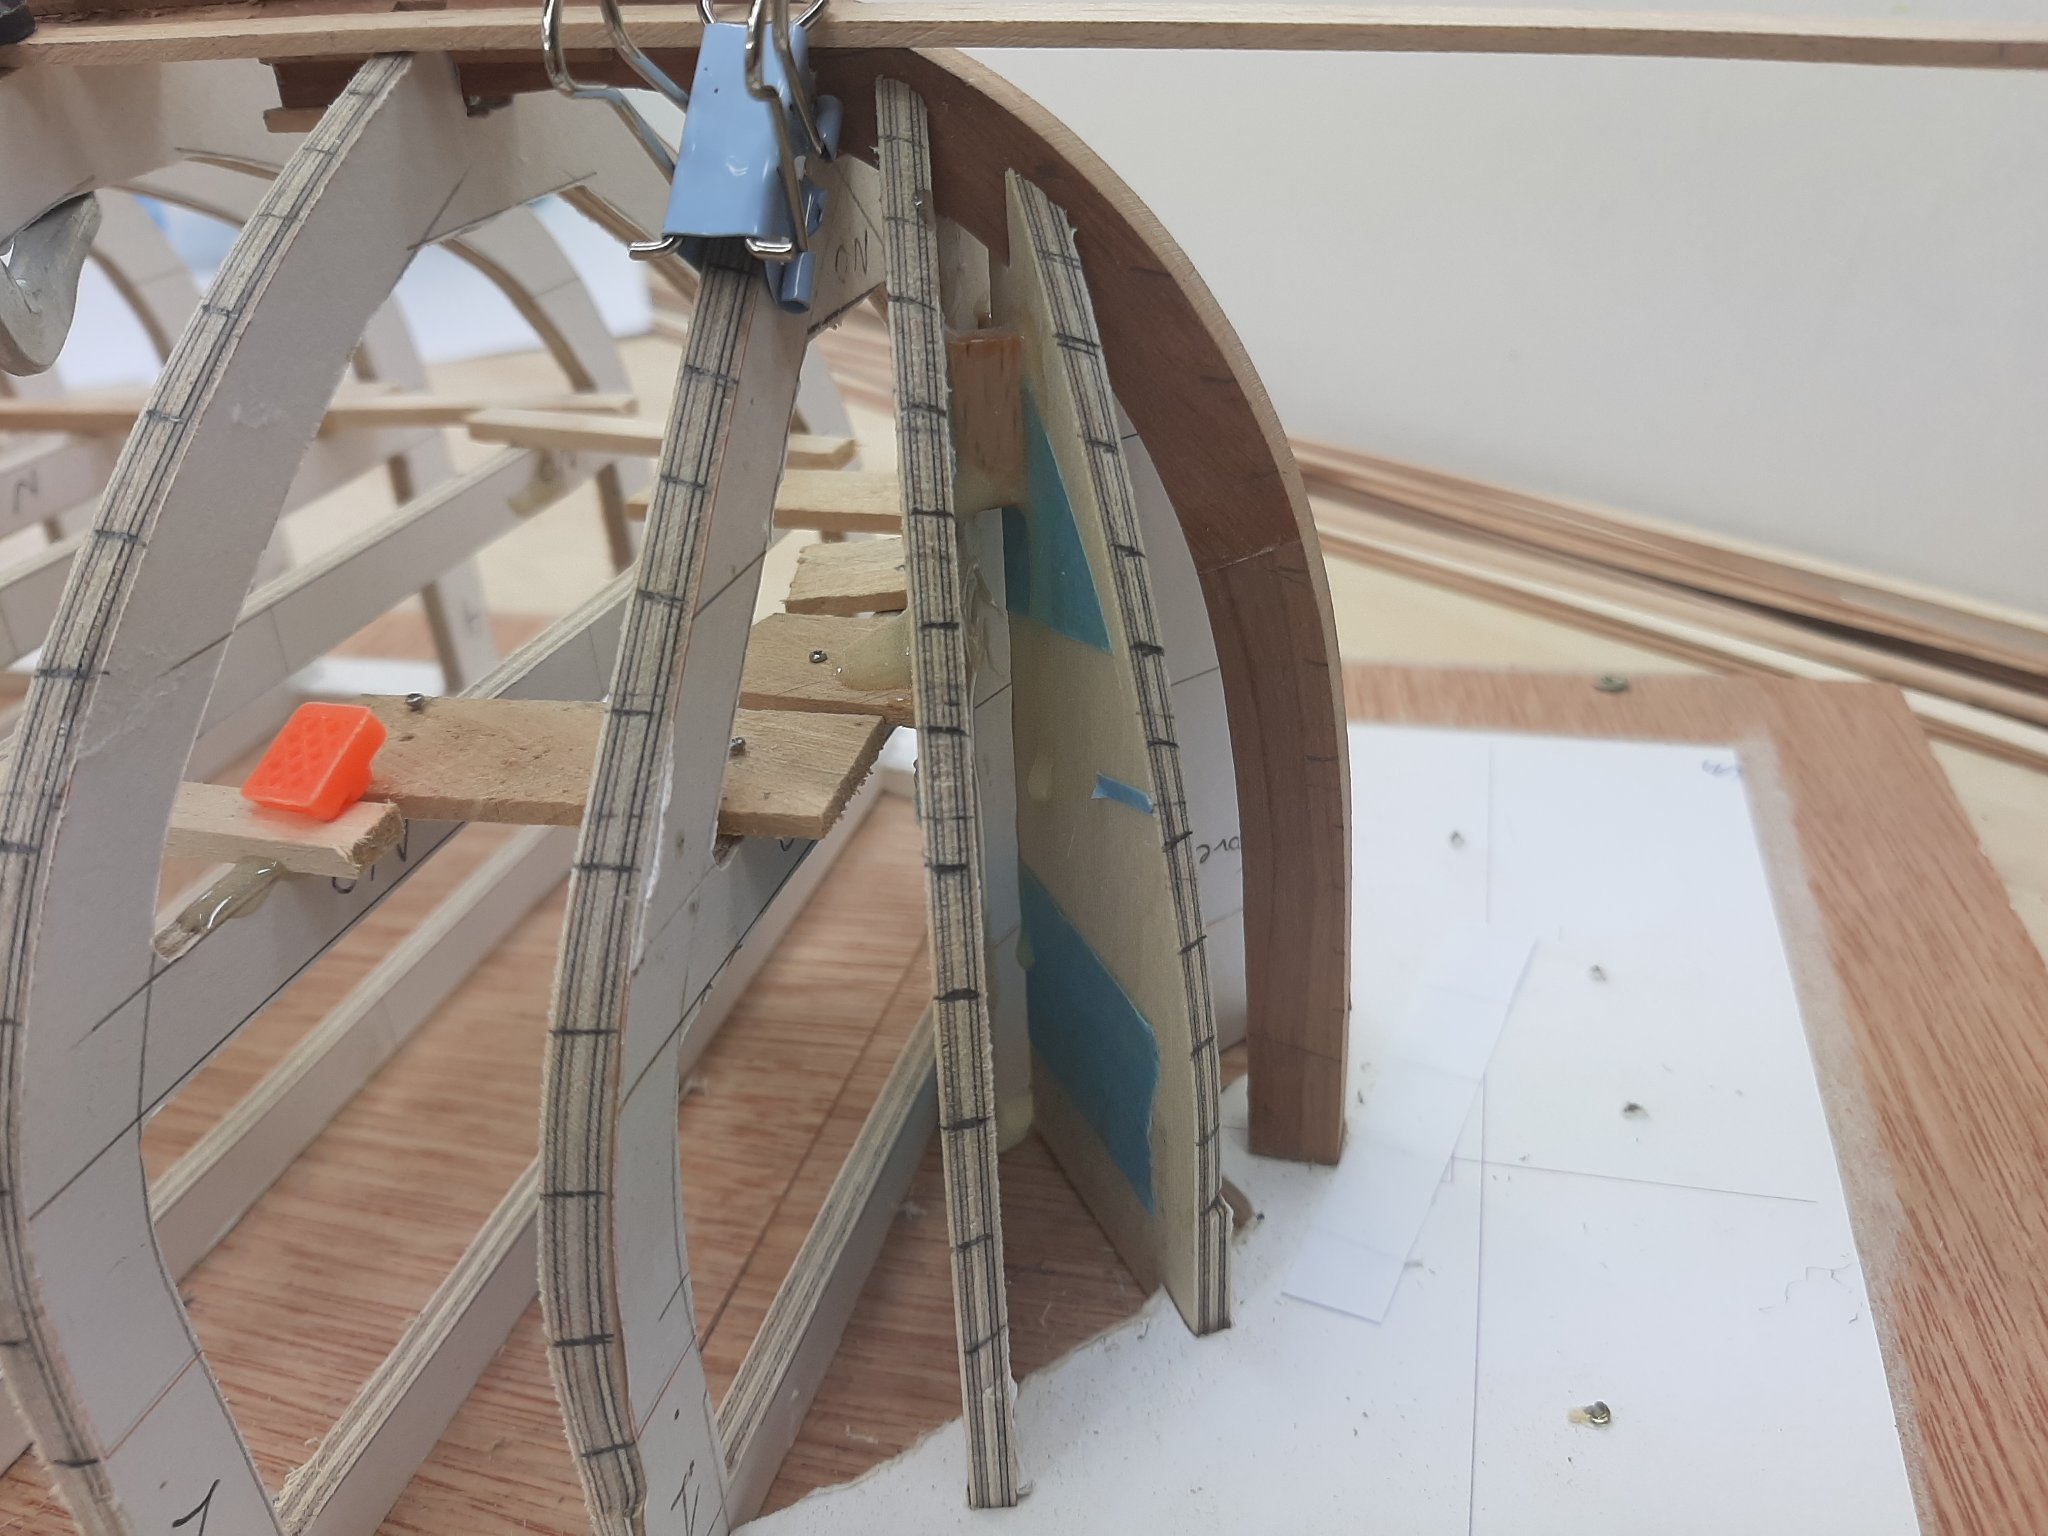
For now, I started making the first template, for the garboard plank. Initially I thought to do it in 3 pieces but then realised it makes no sense to have so many scarfs - one is plenty, giving a length of 3 to 3.5 m per plank. The last photo shows the pieces for the aft segment of the garboard-they still need to be connected.
I have the feeling that the garboard should be a bit wider but I am not going back, it will be fine. Also, I need to figure out a way to scarf the planks. It needs to be reproducible and reasonably easy.
Also, for this boat I will sand the planks to shape, and will put more effort to have minimal gaps.
Regards
Vaddoc
- AnobiumPunctatum, druxey, G.L. and 3 others
-
6
-
Personally, I try to avoid fruit woods for planking. They are a bit too hard to work with and a bit reluctant to bend, especially along the axis of the plank. I find maple and beech much nicer. Beech is much harder than maple and has a huge distinctive grain, both hold an edge very well. Walnut is terrible.
Maple hull, later painted. The stains were caused by aliphatic glue that I did not bother cleaning...

Beech hull, fate yet unknown.

- thibaultron, Mike Dowling and mtaylor
-
3
-
Congratulations Mark! The stainless steel really worked very well.
-
Dear all
Many thanks for your likes, comments and encouragement!
I have not worked on either boat for the last 3 weeks, since my last post on the Yawl log. I now work pretty much 7 days a week and life has gone into hyperdrive-it is what it is and we must do what we need to do! The little spare time I have I ve decided to invest in working out to get back into shape.
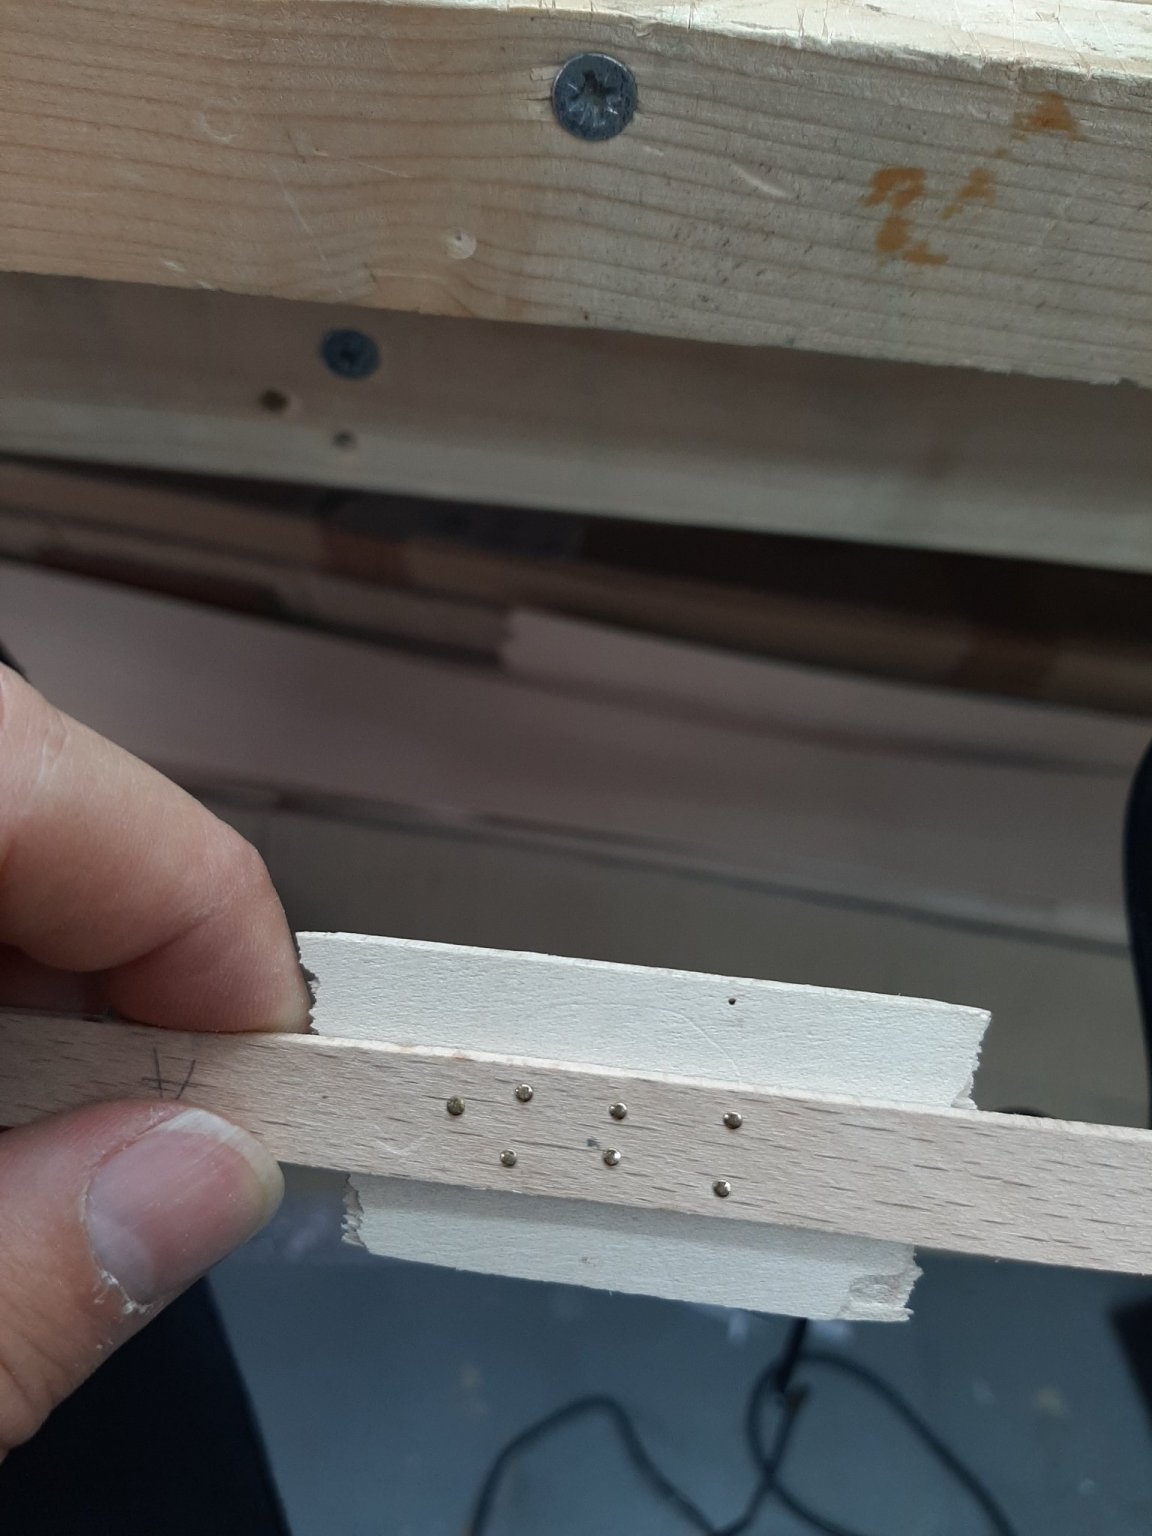
Today though I popped to the garage to do a bit of testing with stains. I made a grove in a piece of beech, filled it with filler and sanded to 120 grit.
I ordered a number of stains, different colours and compositions-some "wax stains", "some oil stains" and some "something else".
The next photo shows 5, supposingly completely different colour stains. They came out almost identical! The one on the right is walnut, the middle one is pine. There is however a bit of difference in the blotchiness, I think the middle one is a bit better. The pear wood is very dark because it was not sanded, it looks much lighter and uniform in sanded pieces.
The small piece has clear sealer on the left, Tung oil on the right
I expected much bigger differences in colour and better coverage of the filler. Maybe when the piece dries, the colours might change.
As it is though, I quite like the middle one. But I have a few more stains to try.
A word about stains: I now know why they are called "stains". The mess they created was unbelievable-pretty much everything got stained!
Vaddoc
- bruce d, GrandpaPhil and FriedClams
-
3
-
-
Thanks Hakan, that was indeed the question
1 hour ago, Wintergreen said:It would be really hard to get a watertight fit in stem and stern at the same time with one full length strake.
Now I ve never thought about it but I think you are right, unless the plank is perfectly cut, with time it will warp back and no rivet will hold it. Much more difficult to perfectly cut a very long plank than a short one.
-
Many thanks for your likes and comments!
10 hours ago, Dowmer said:Chuck Passaro’s tutorials
Dowmer, I ll be using 2 mm thick planks, probably 8 to 12 mm wide. Unfortunately, the only edge bending it will tolerate is a little nudge to fit into place! However, I have many lovely maple strips which I d love to use, I ll give it a try and see whether Chuck's method will work.
10 hours ago, druxey said:wet your finger and roll the thread up or down the frames as required,
Thanks for the tip Druxey. In the past I had used very thick black fishing line. The problem is that due to the shape of the bow, the perspective is easily lost and I cannot eyeball a fair shape. This is why I need a very wide baten, to make sure there is no edge bending and the lines are fair. But even with this, bending the baten around the curve at the bow, pulls the baten up midships. A very stubborn hull.
6 hours ago, Bedford said:I've included a pic of some of the strakes for my boat
Bedford, you answered a few queries I had but now I have another for you.
Planking the launch, I had noticed that at the bow some planks had a funny S shape. Initially I tried to simplify it but then I realised that this would be wrong and I had to trust my markings. The bow of the launch is very sharp, so probably this is why this S shape was less pronounced-it is much more visible in your boat and I expect even more on the yawl.
Now, the planks in your photo are half planks-or plank thirds. I assume many adjacent planks would need scarfing. Here is the question: Does it matter if the scarfing is done at the same point mid ships or would builders spread the joints at different frames?
Wonderful plywood by the way!
Regards
Vaddoc
- mtaylor, tkay11 and FriedClams
-
3
-
-
-
Do a search, many discussions and lots of good info on painting.
With modern paints and thinners and good brushes, you can get fantastic results hand painting.
But I assume that consistency is much easier with spraying.
- mtaylor, thibaultron, Canute and 2 others
-
5
-
Dear all
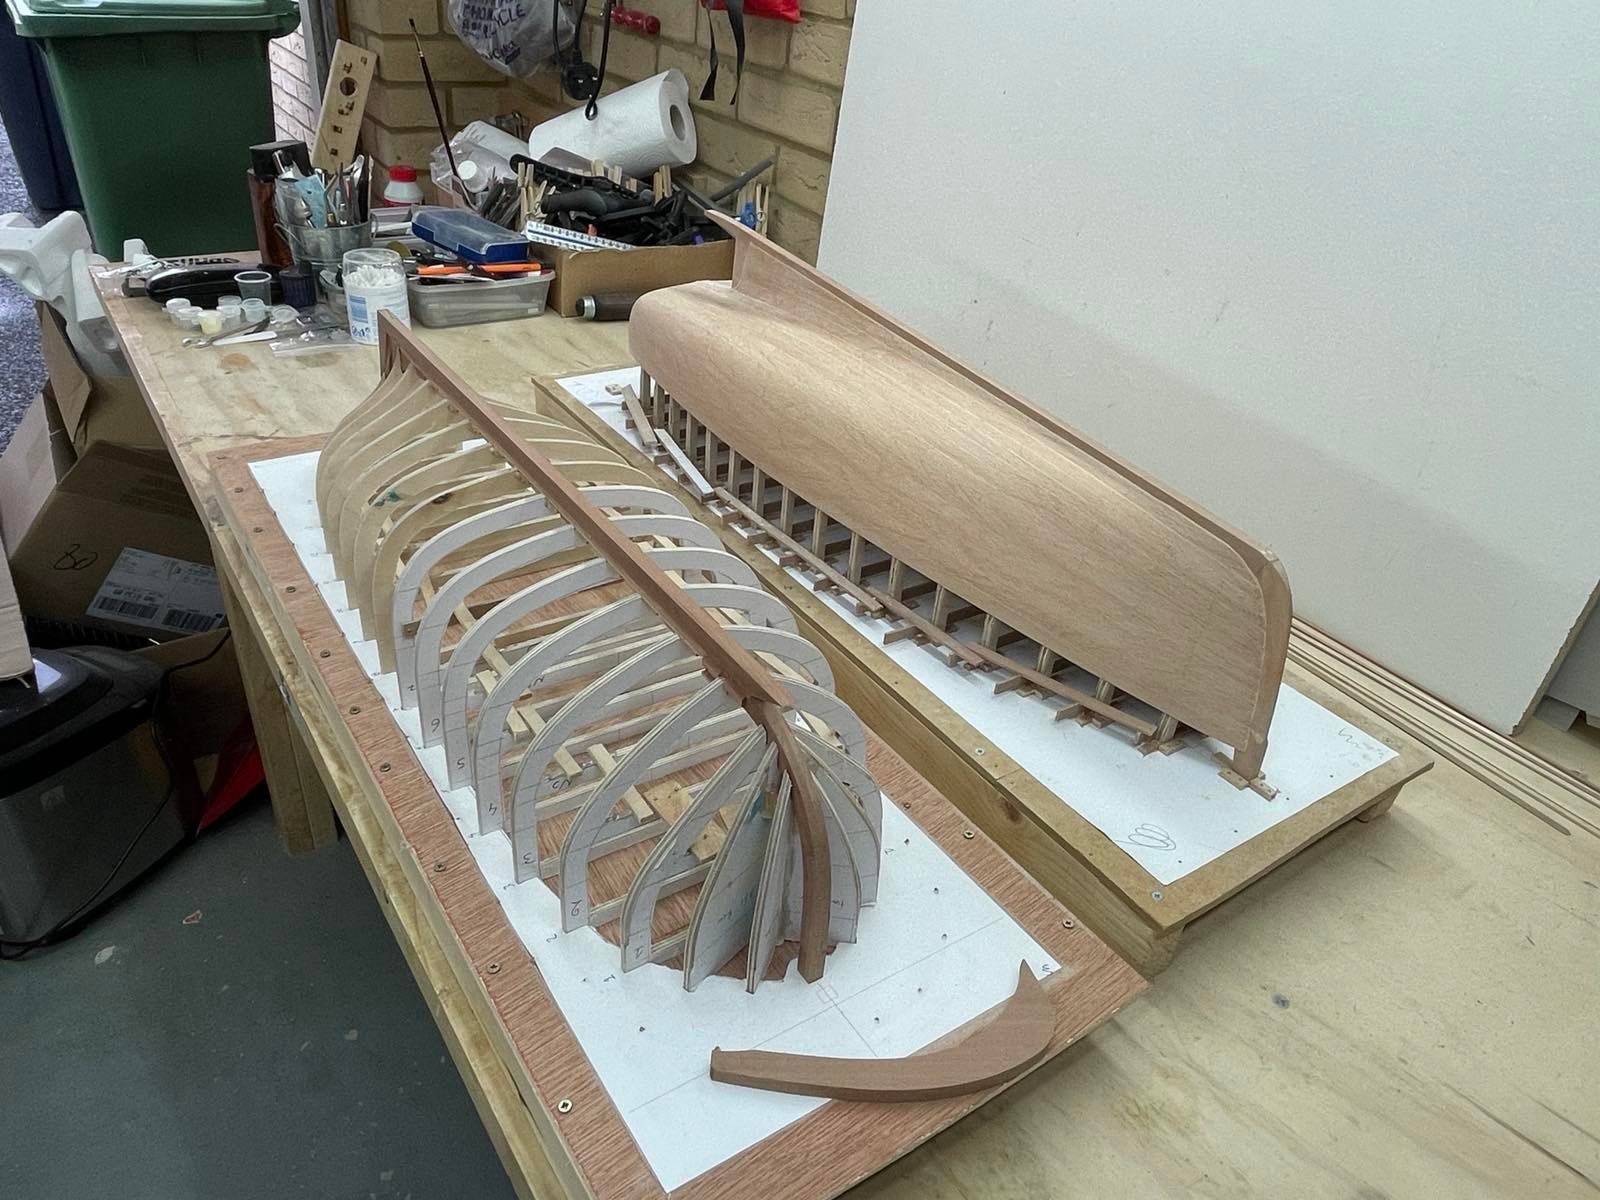
With the hull of the fishing launch completed (but still not finished), I decided to start working on the Yawl.
The initial intention was to build two hulls back to back, one carvel and the other lapstrake, as a learning exercise as well as building two boats I like. The two hulls are very different and my initial impression is that planking the Yawl will be much more difficult.

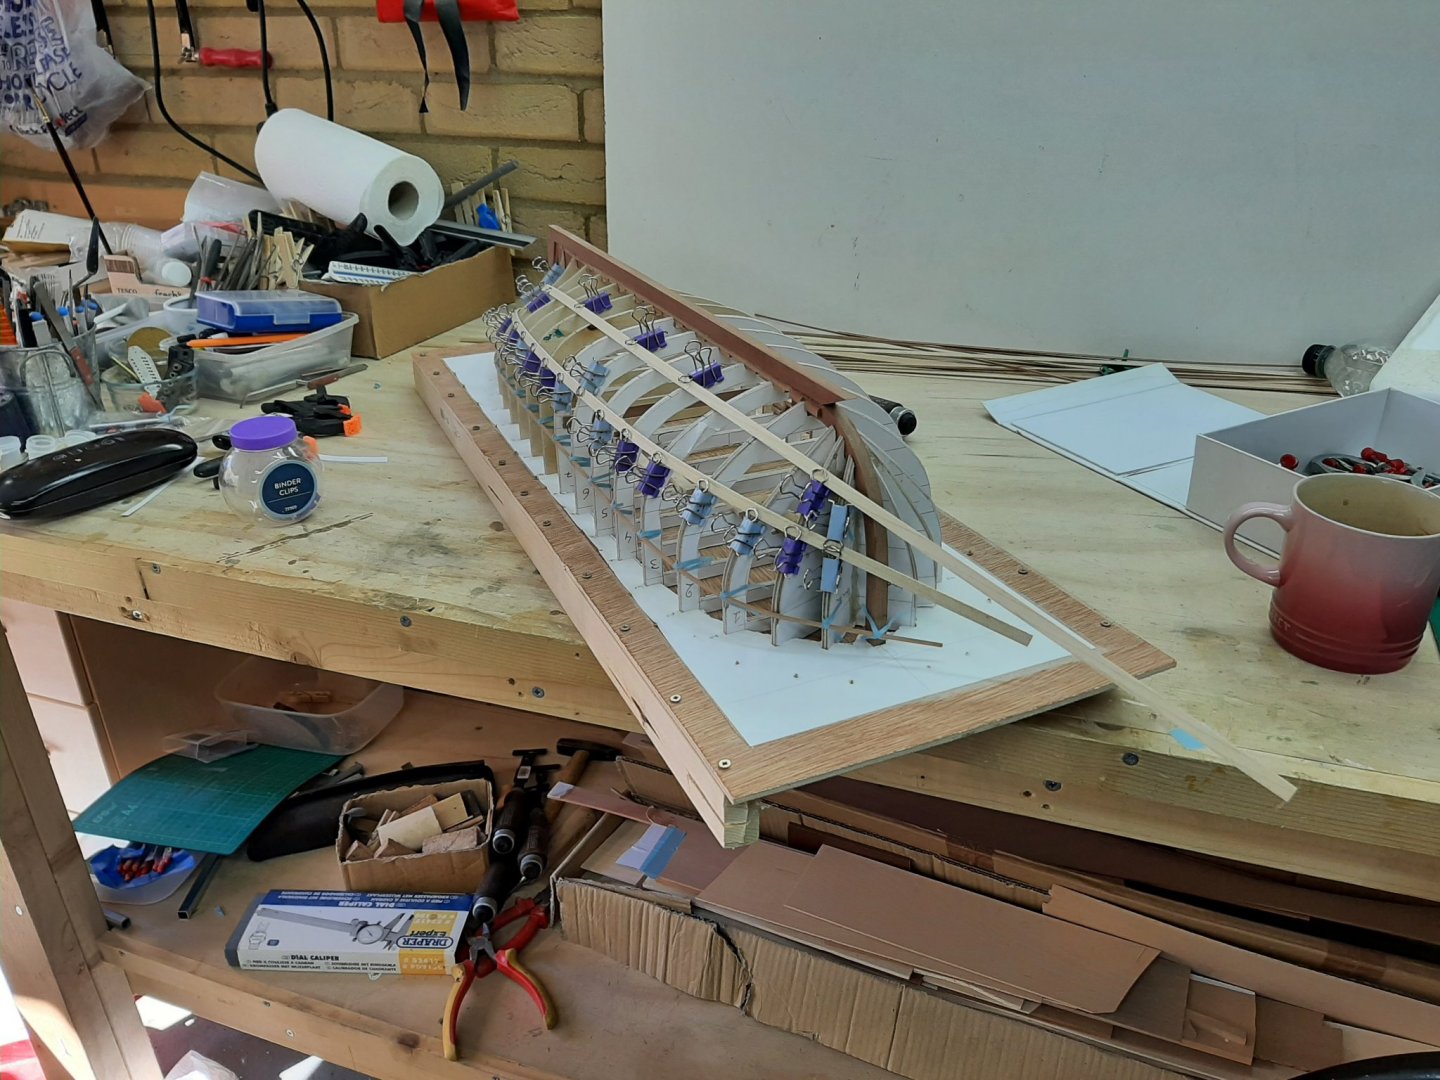
The first challenge came when I tried to deploy a baten. My usual 2 x 4 mm strip cannot negotiate the curve at the bow, it will break. How do you plank a boat without batens? I tried a slightly wider one-no go.


I used a 2 x 2 mm pear strip that looked bendy and starting playing with the hull. My initial intention was to divide the hull into three areas. To do this, 2 lines are needed. One going through the point where the transom and sternpost join, and another one halfway from that point to the sheer.
In lapstrake, the planks should have equal widths but to the eye, only the planks at the sides being vertical will show their true width. The planks bellow the turn of the bilge being at an angle will appear more narrow. So, in reality, only the planks in each zone need to have the same width.
I tried to eyeball the run of the strip, to make sure it is fair but that was impossible. A square sectioned baten will happily bend in all directions. Again, the very curved bow made it very difficult to arrange a fair run. I tried many times but afterwards, eyeballing the hull, it was obviously wrong.
I did manage though to define the sheer using my CAD markings-I hope these are accurate.
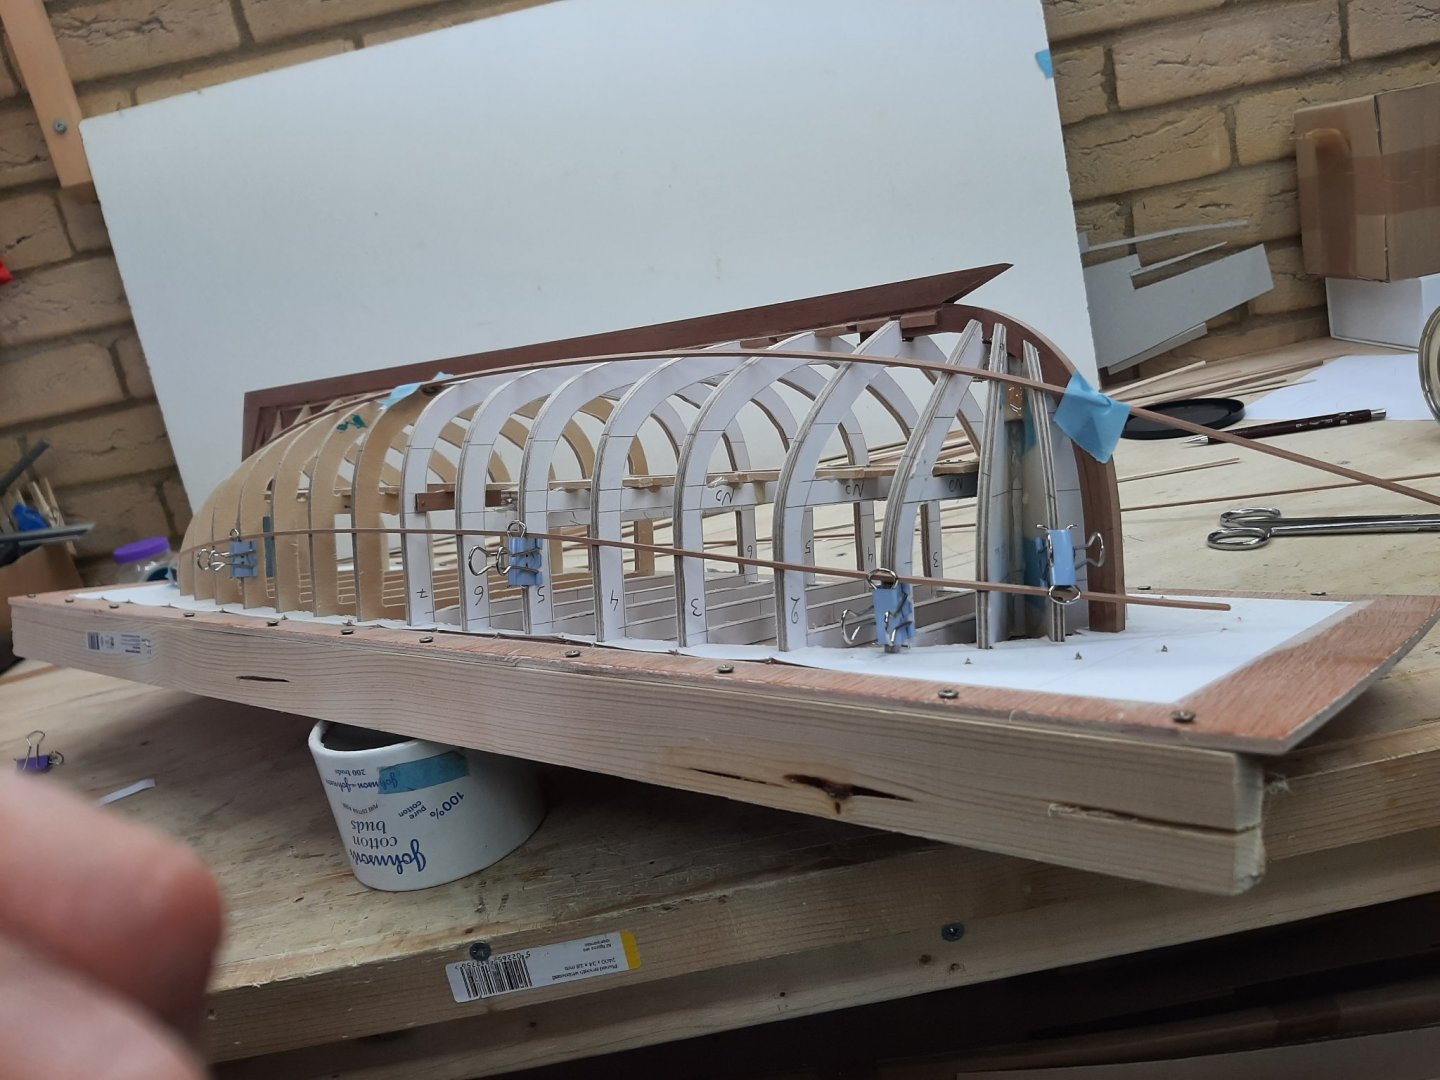

However, all of the above attempts were wrong. The run of the 2 dividing lines is far from fair-it is all over the place. It is impossible to do this without a baten.
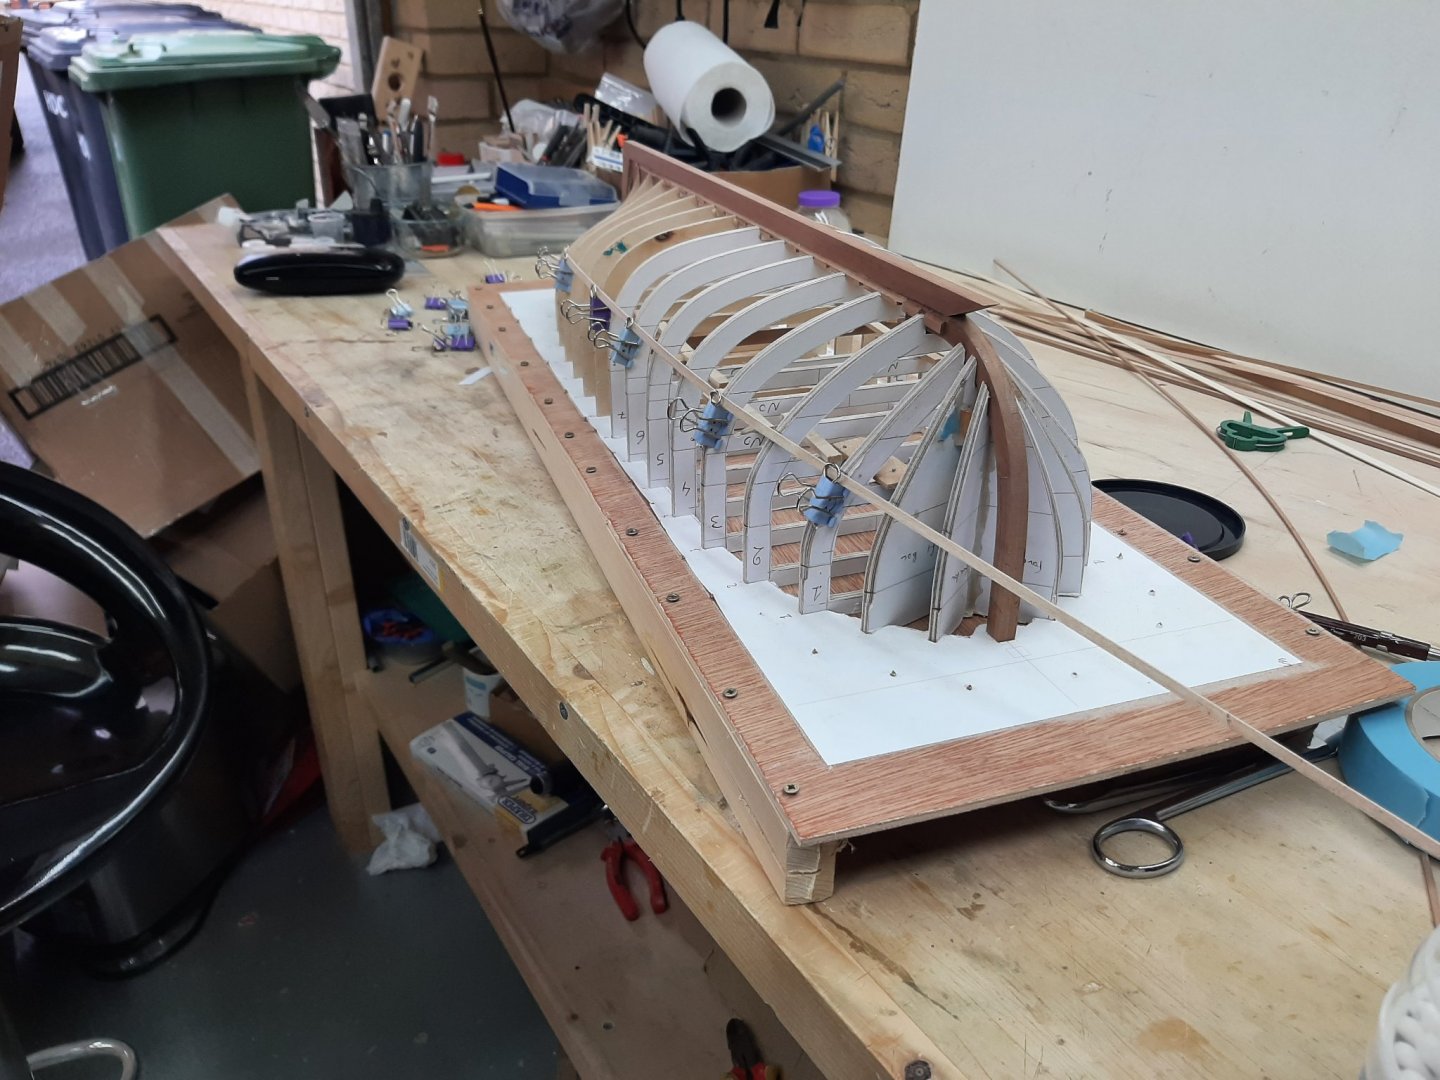
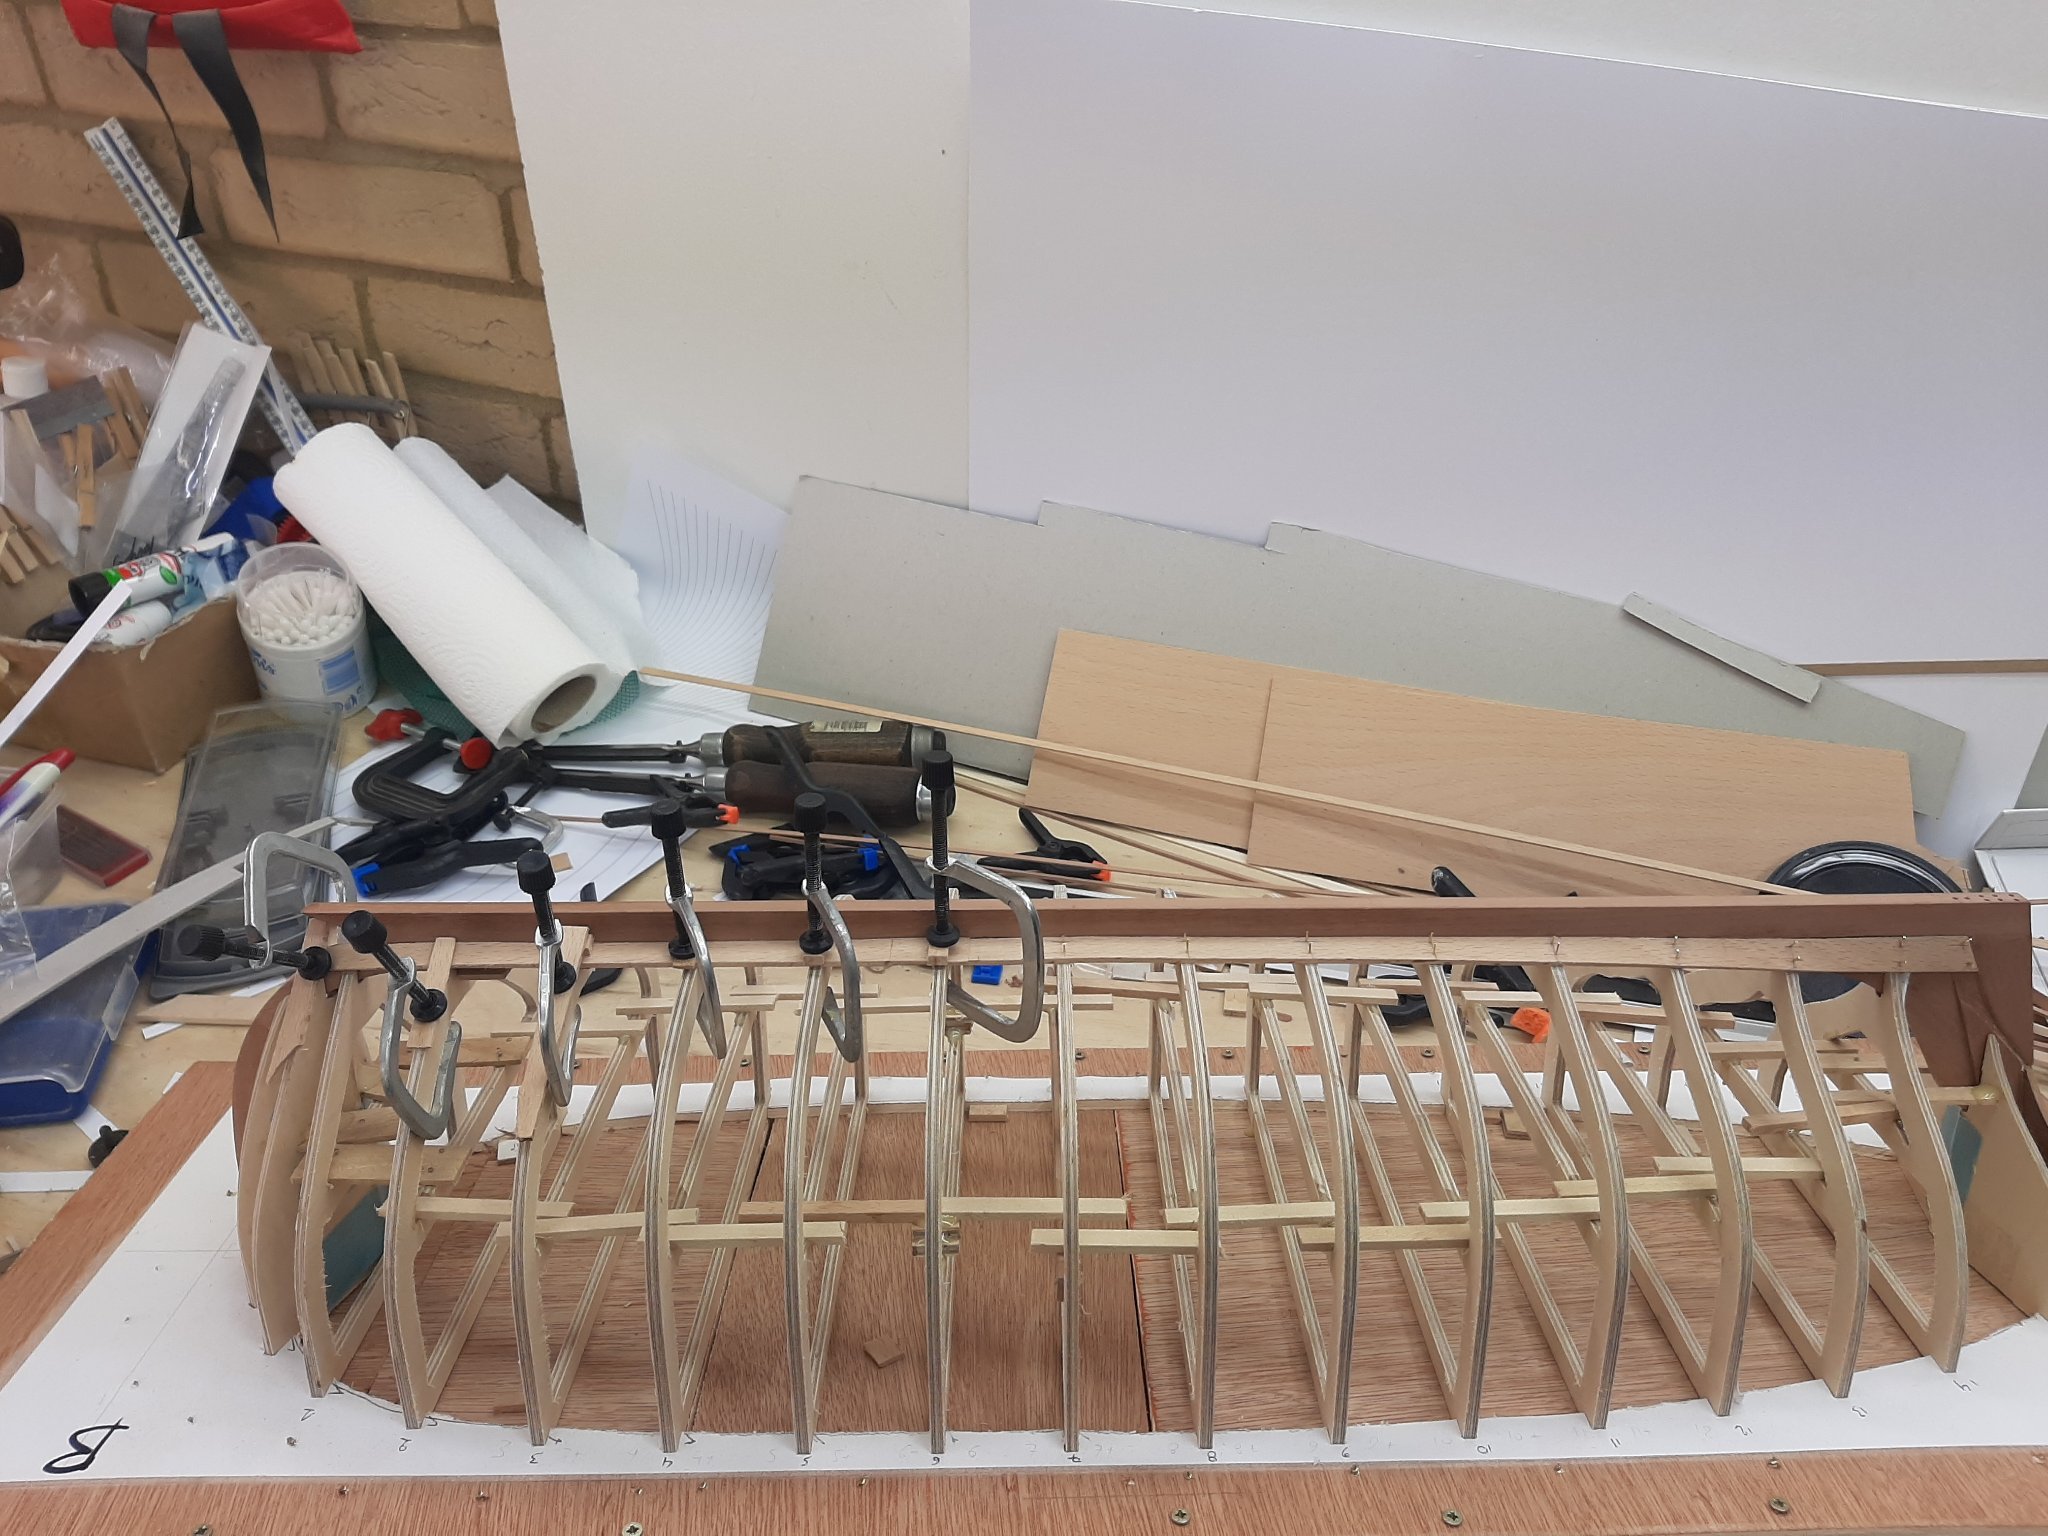
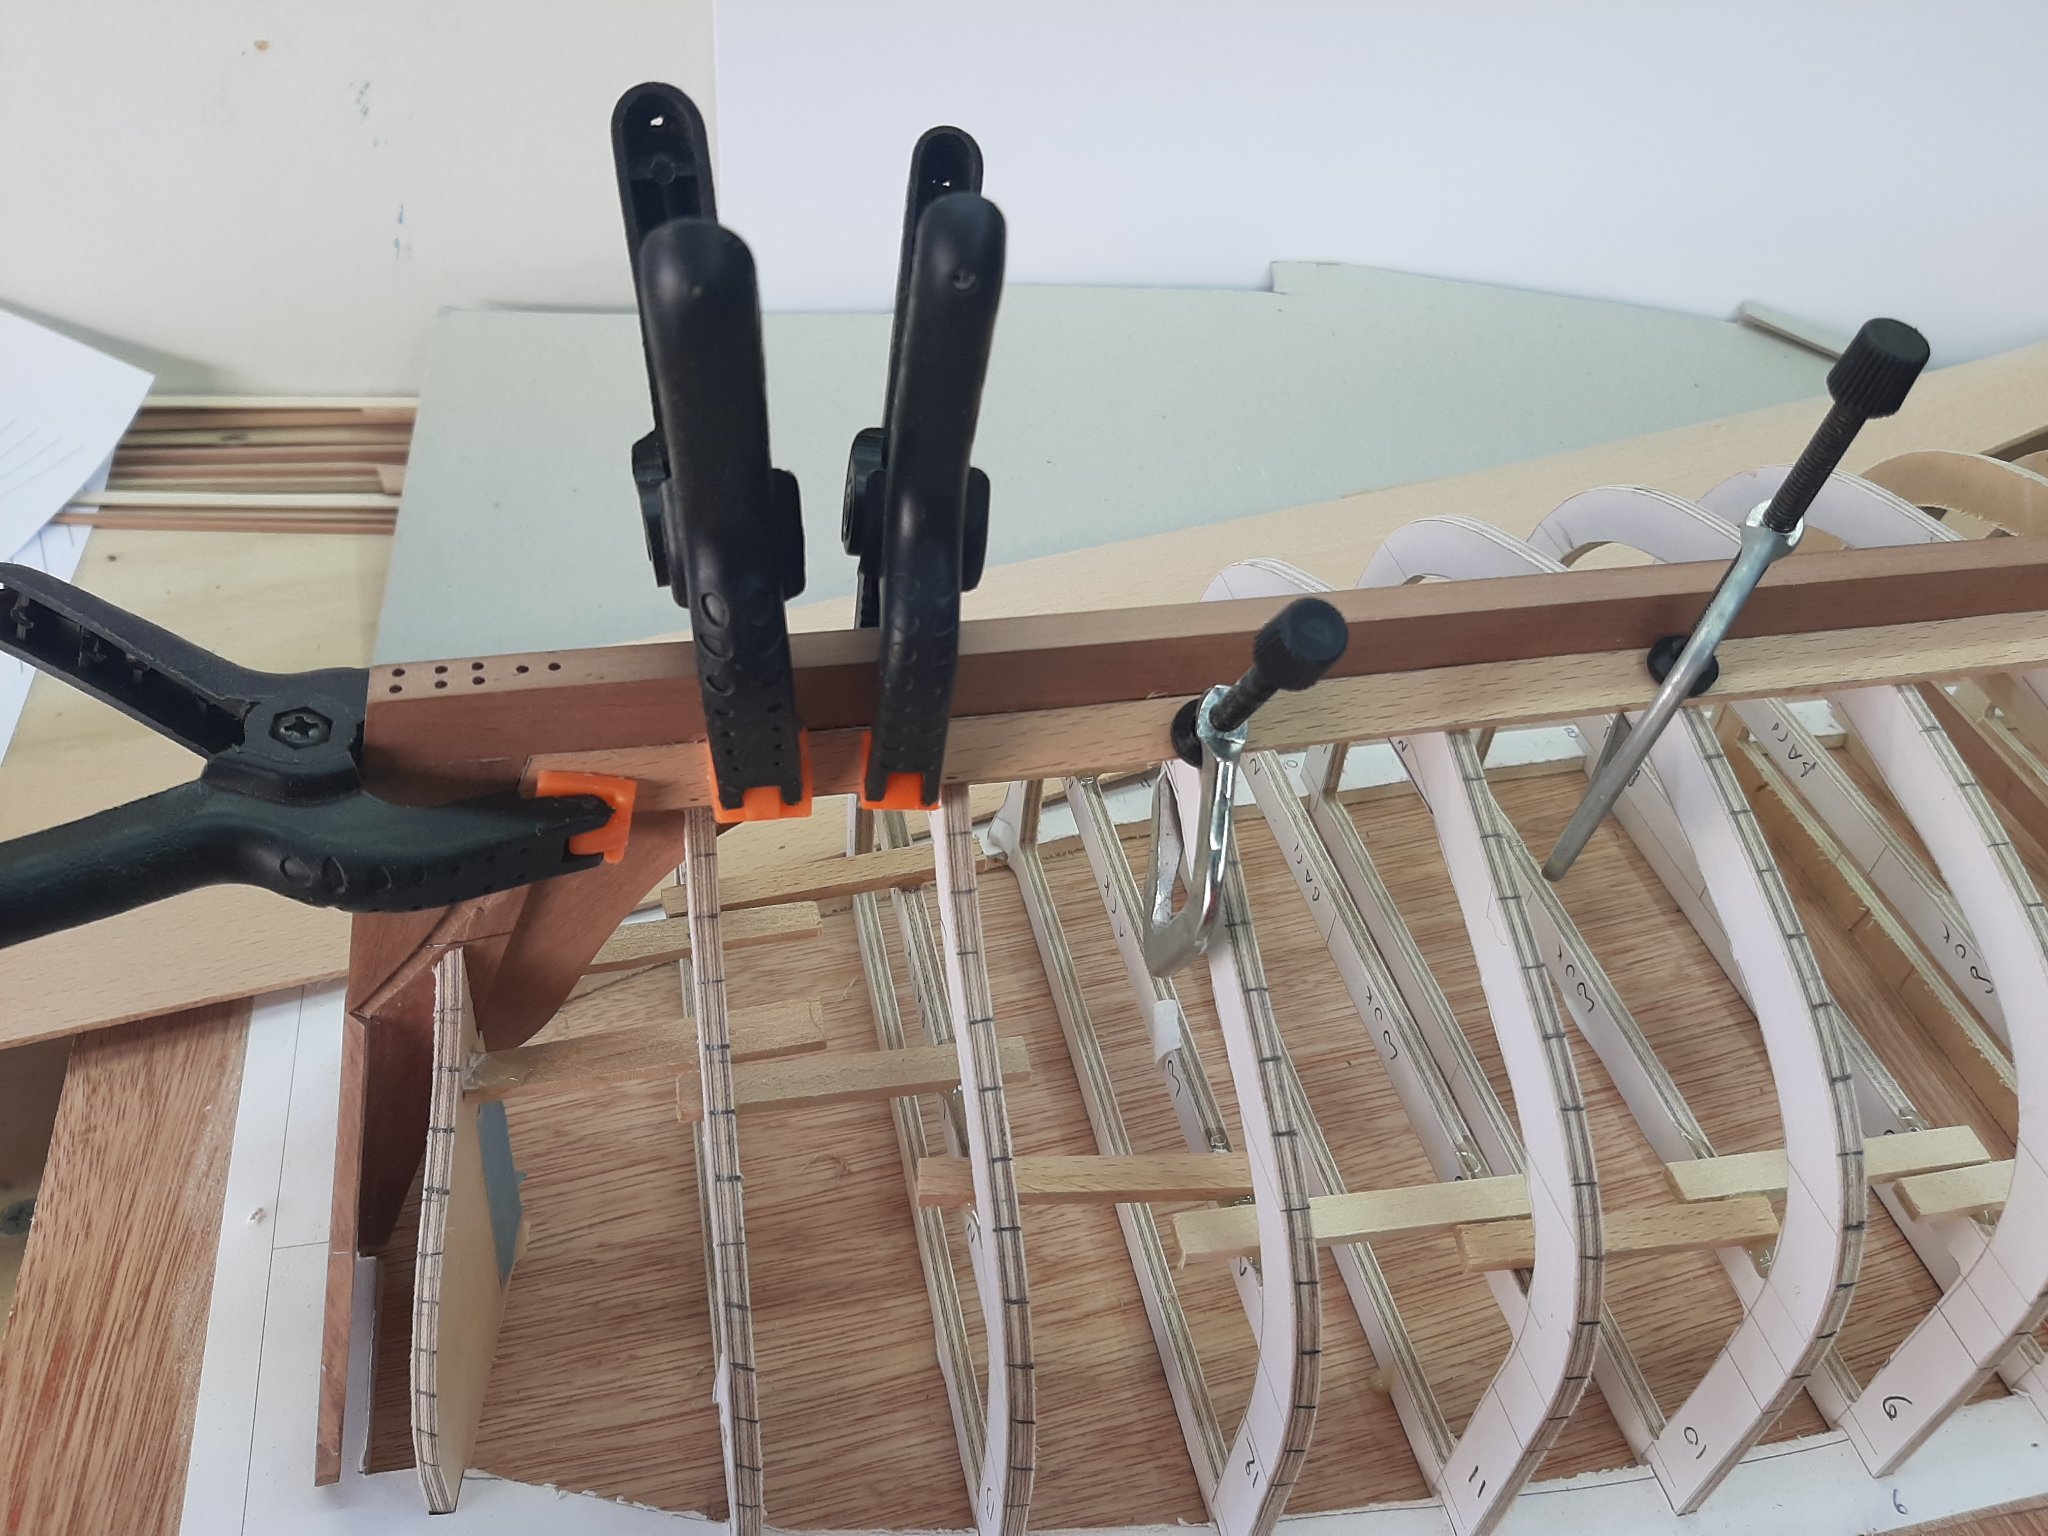
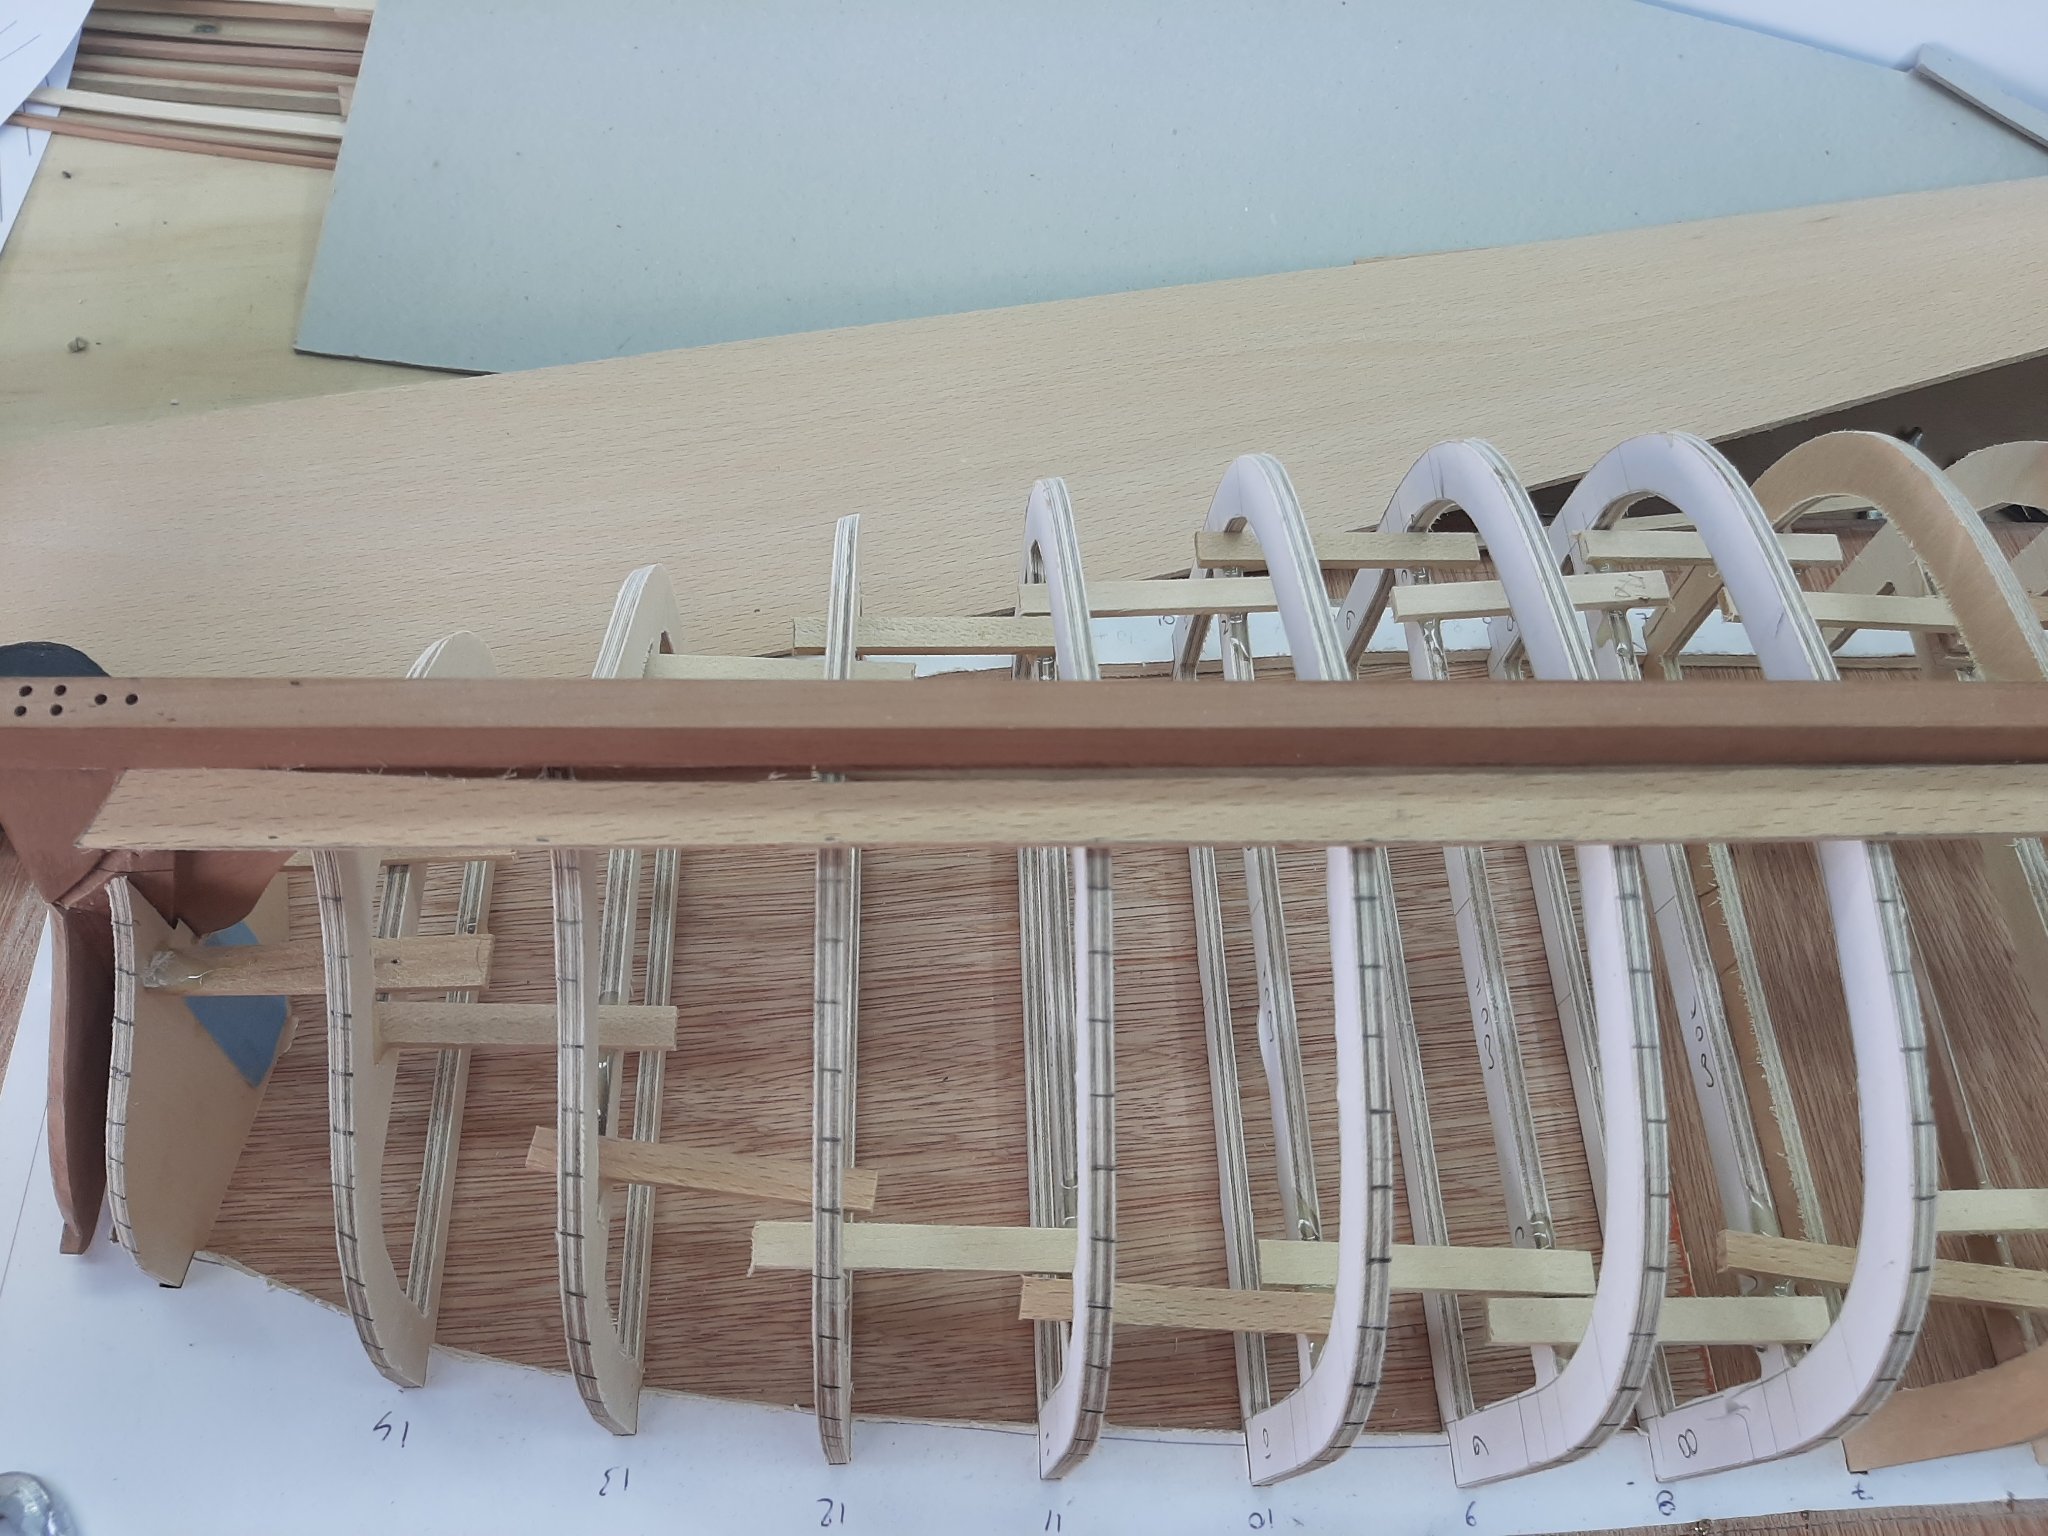
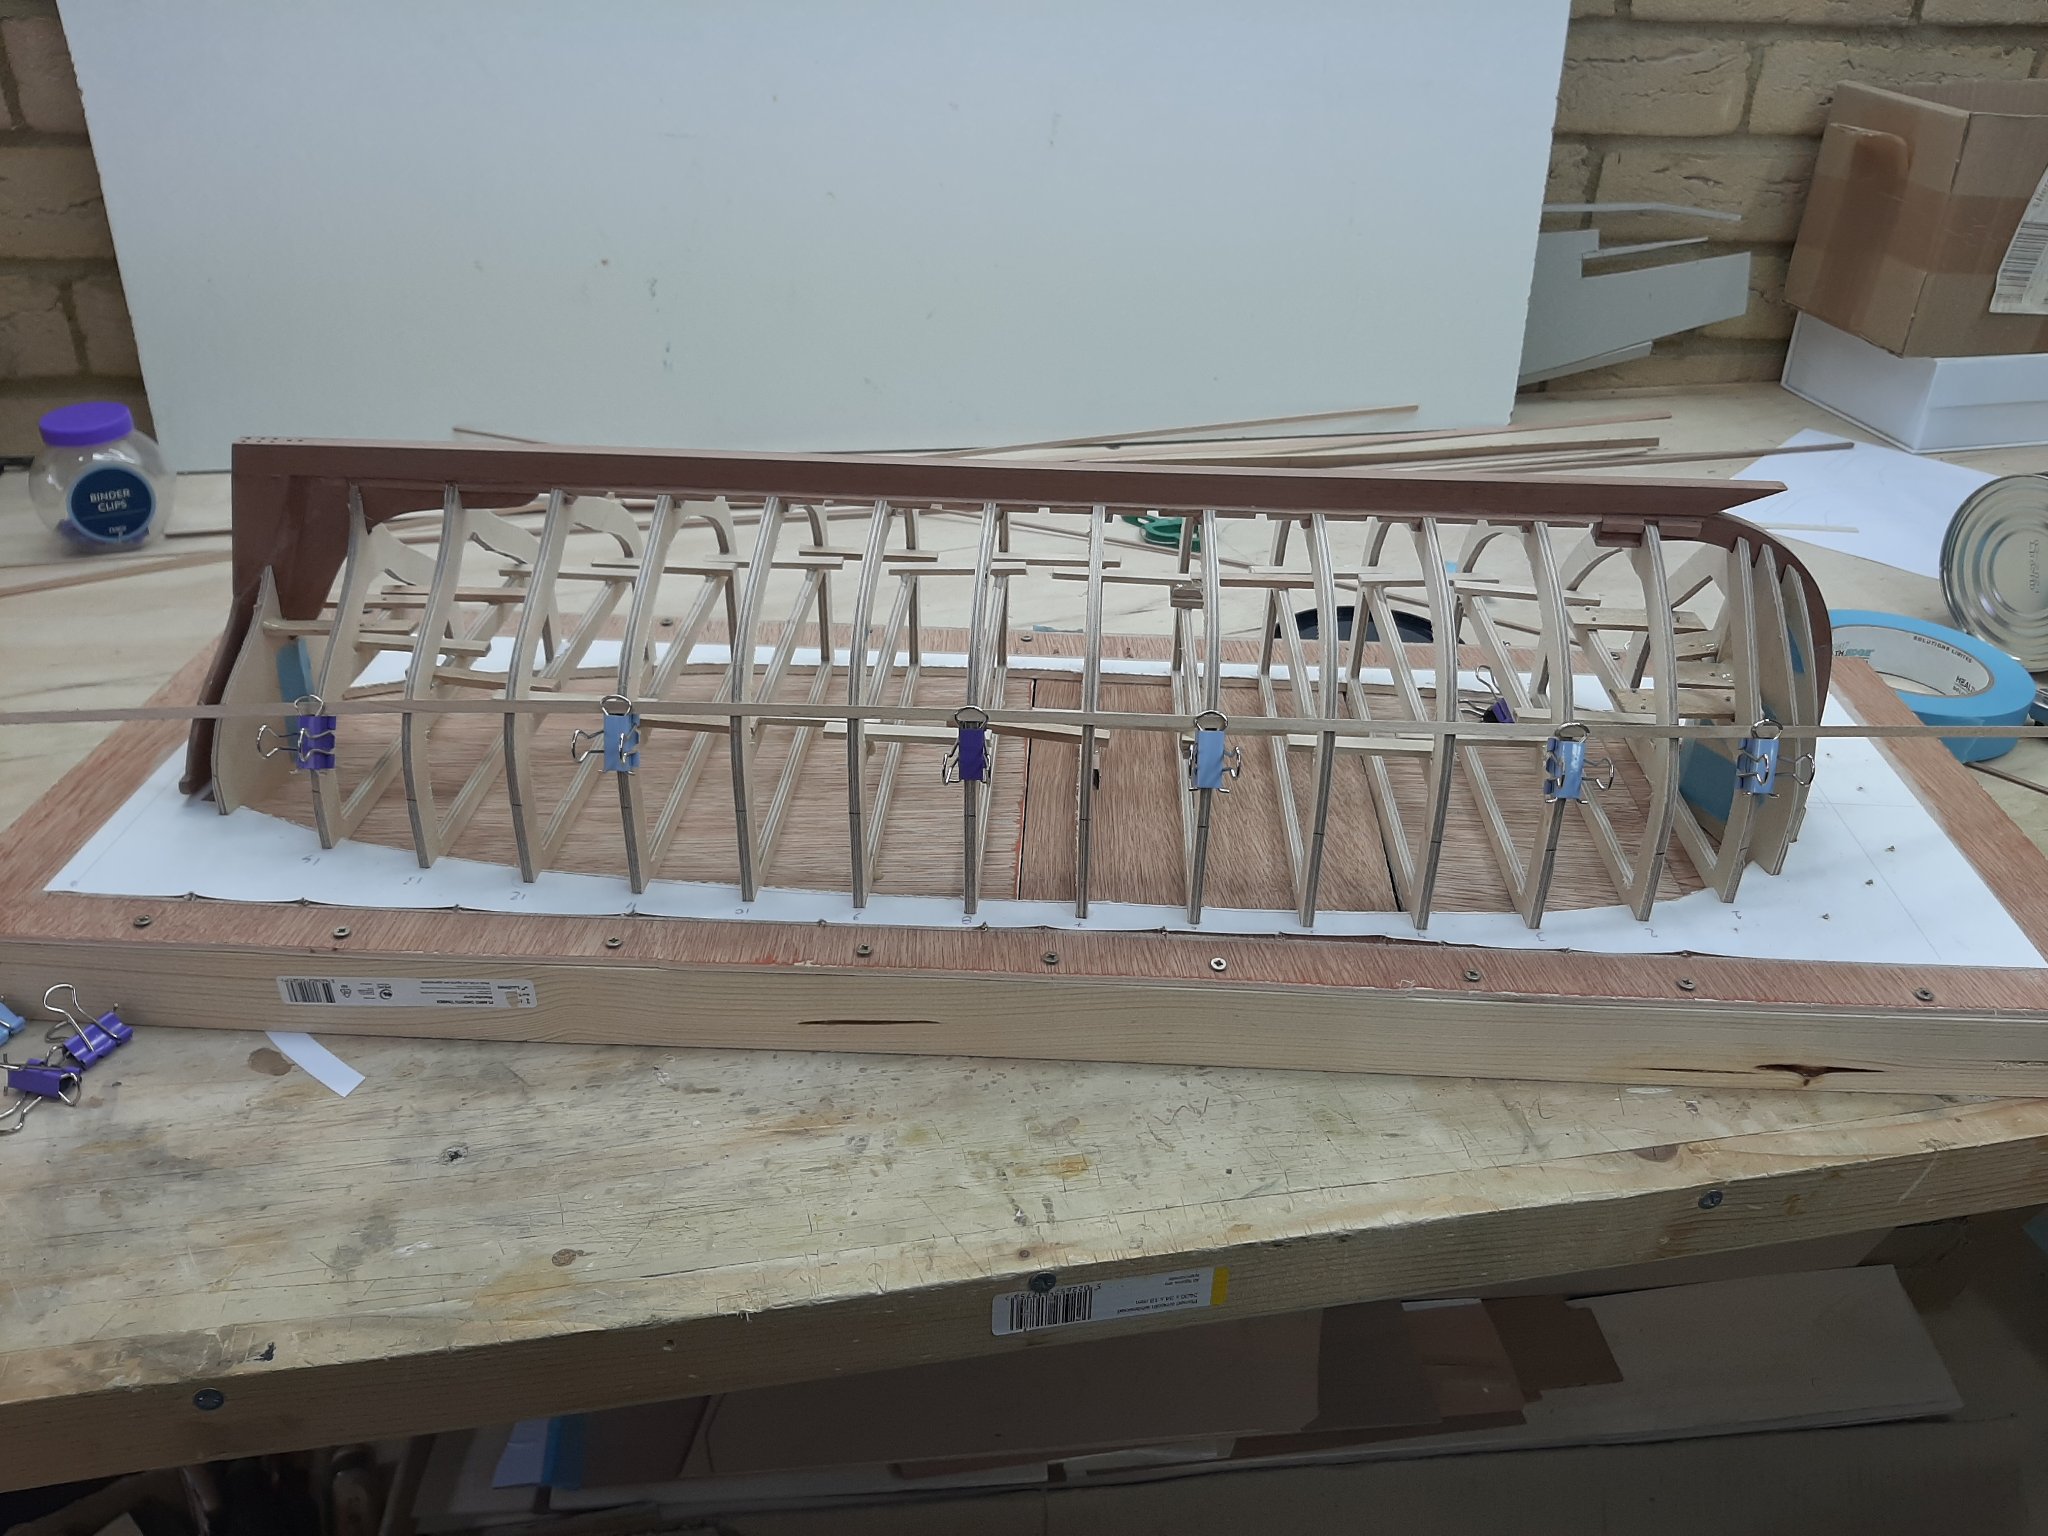
So I use two maple strips, 1x8 mm (or something like that) as batens, They are very straight, very bendy and do not permanently deform and of course they will not tolerate any edge bending.
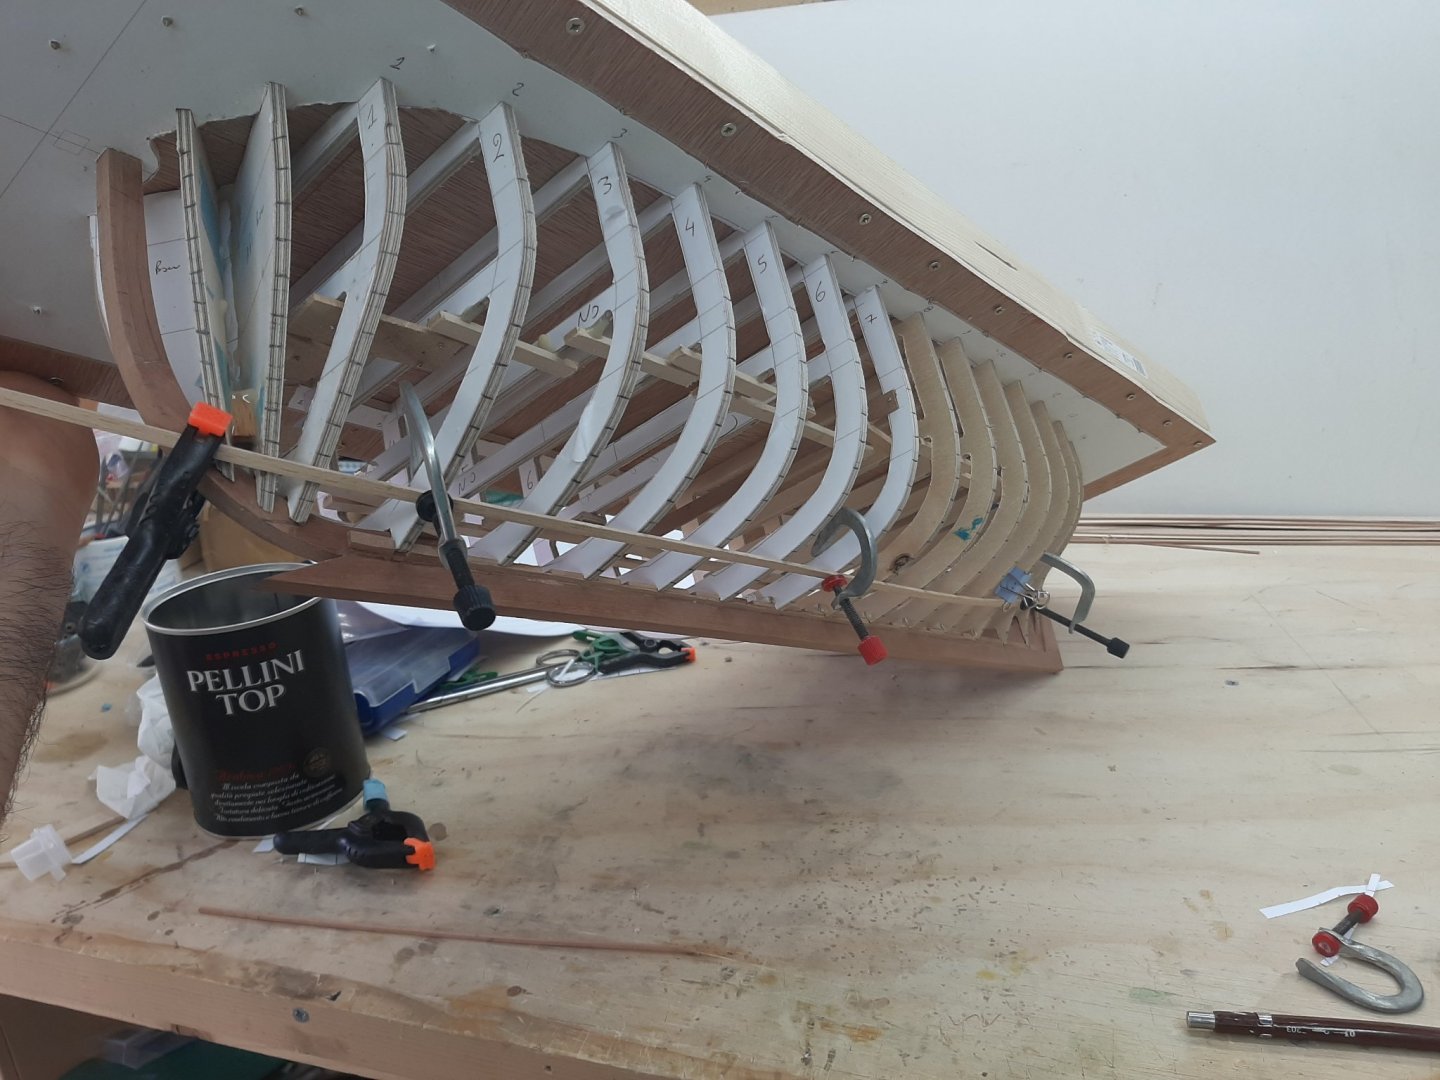
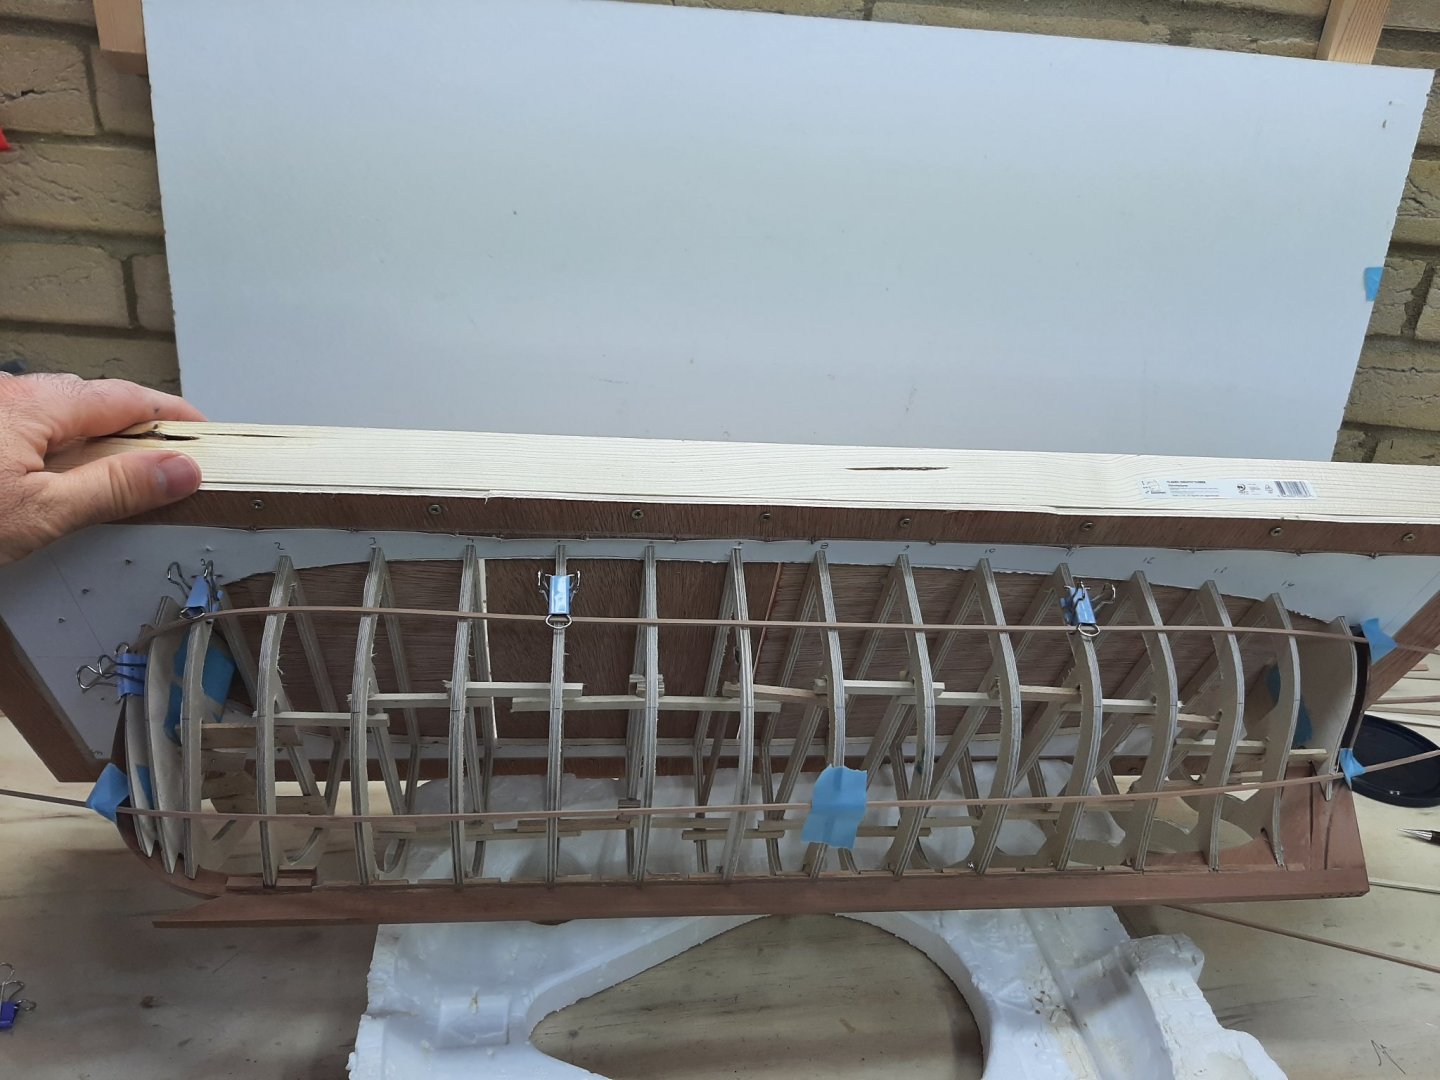
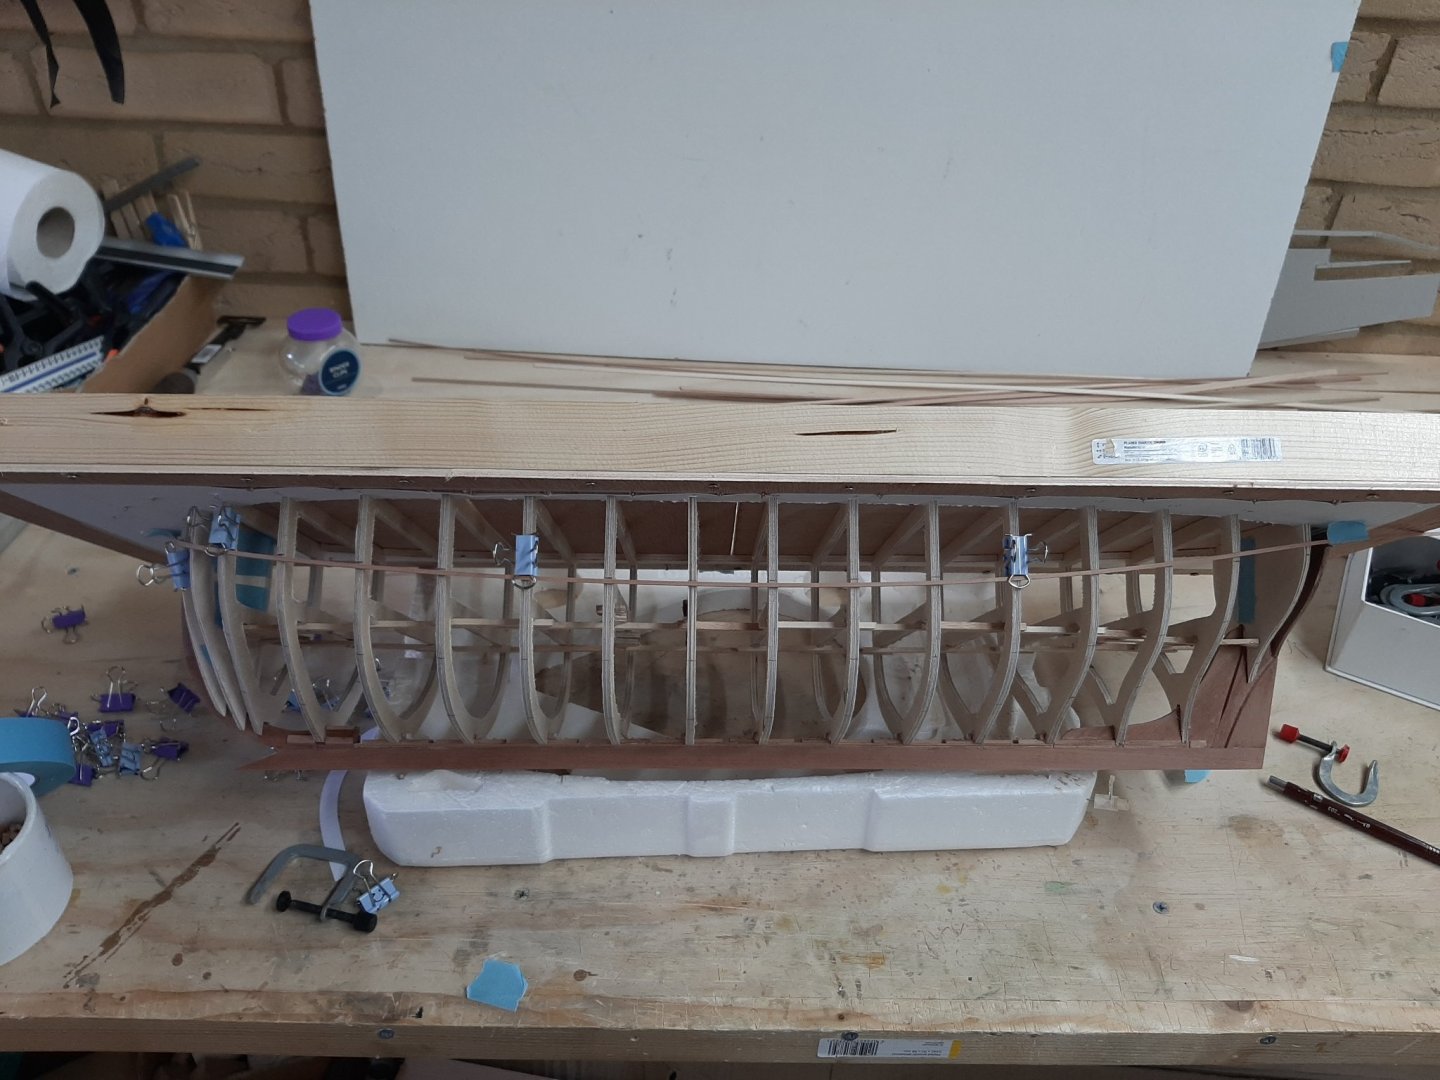
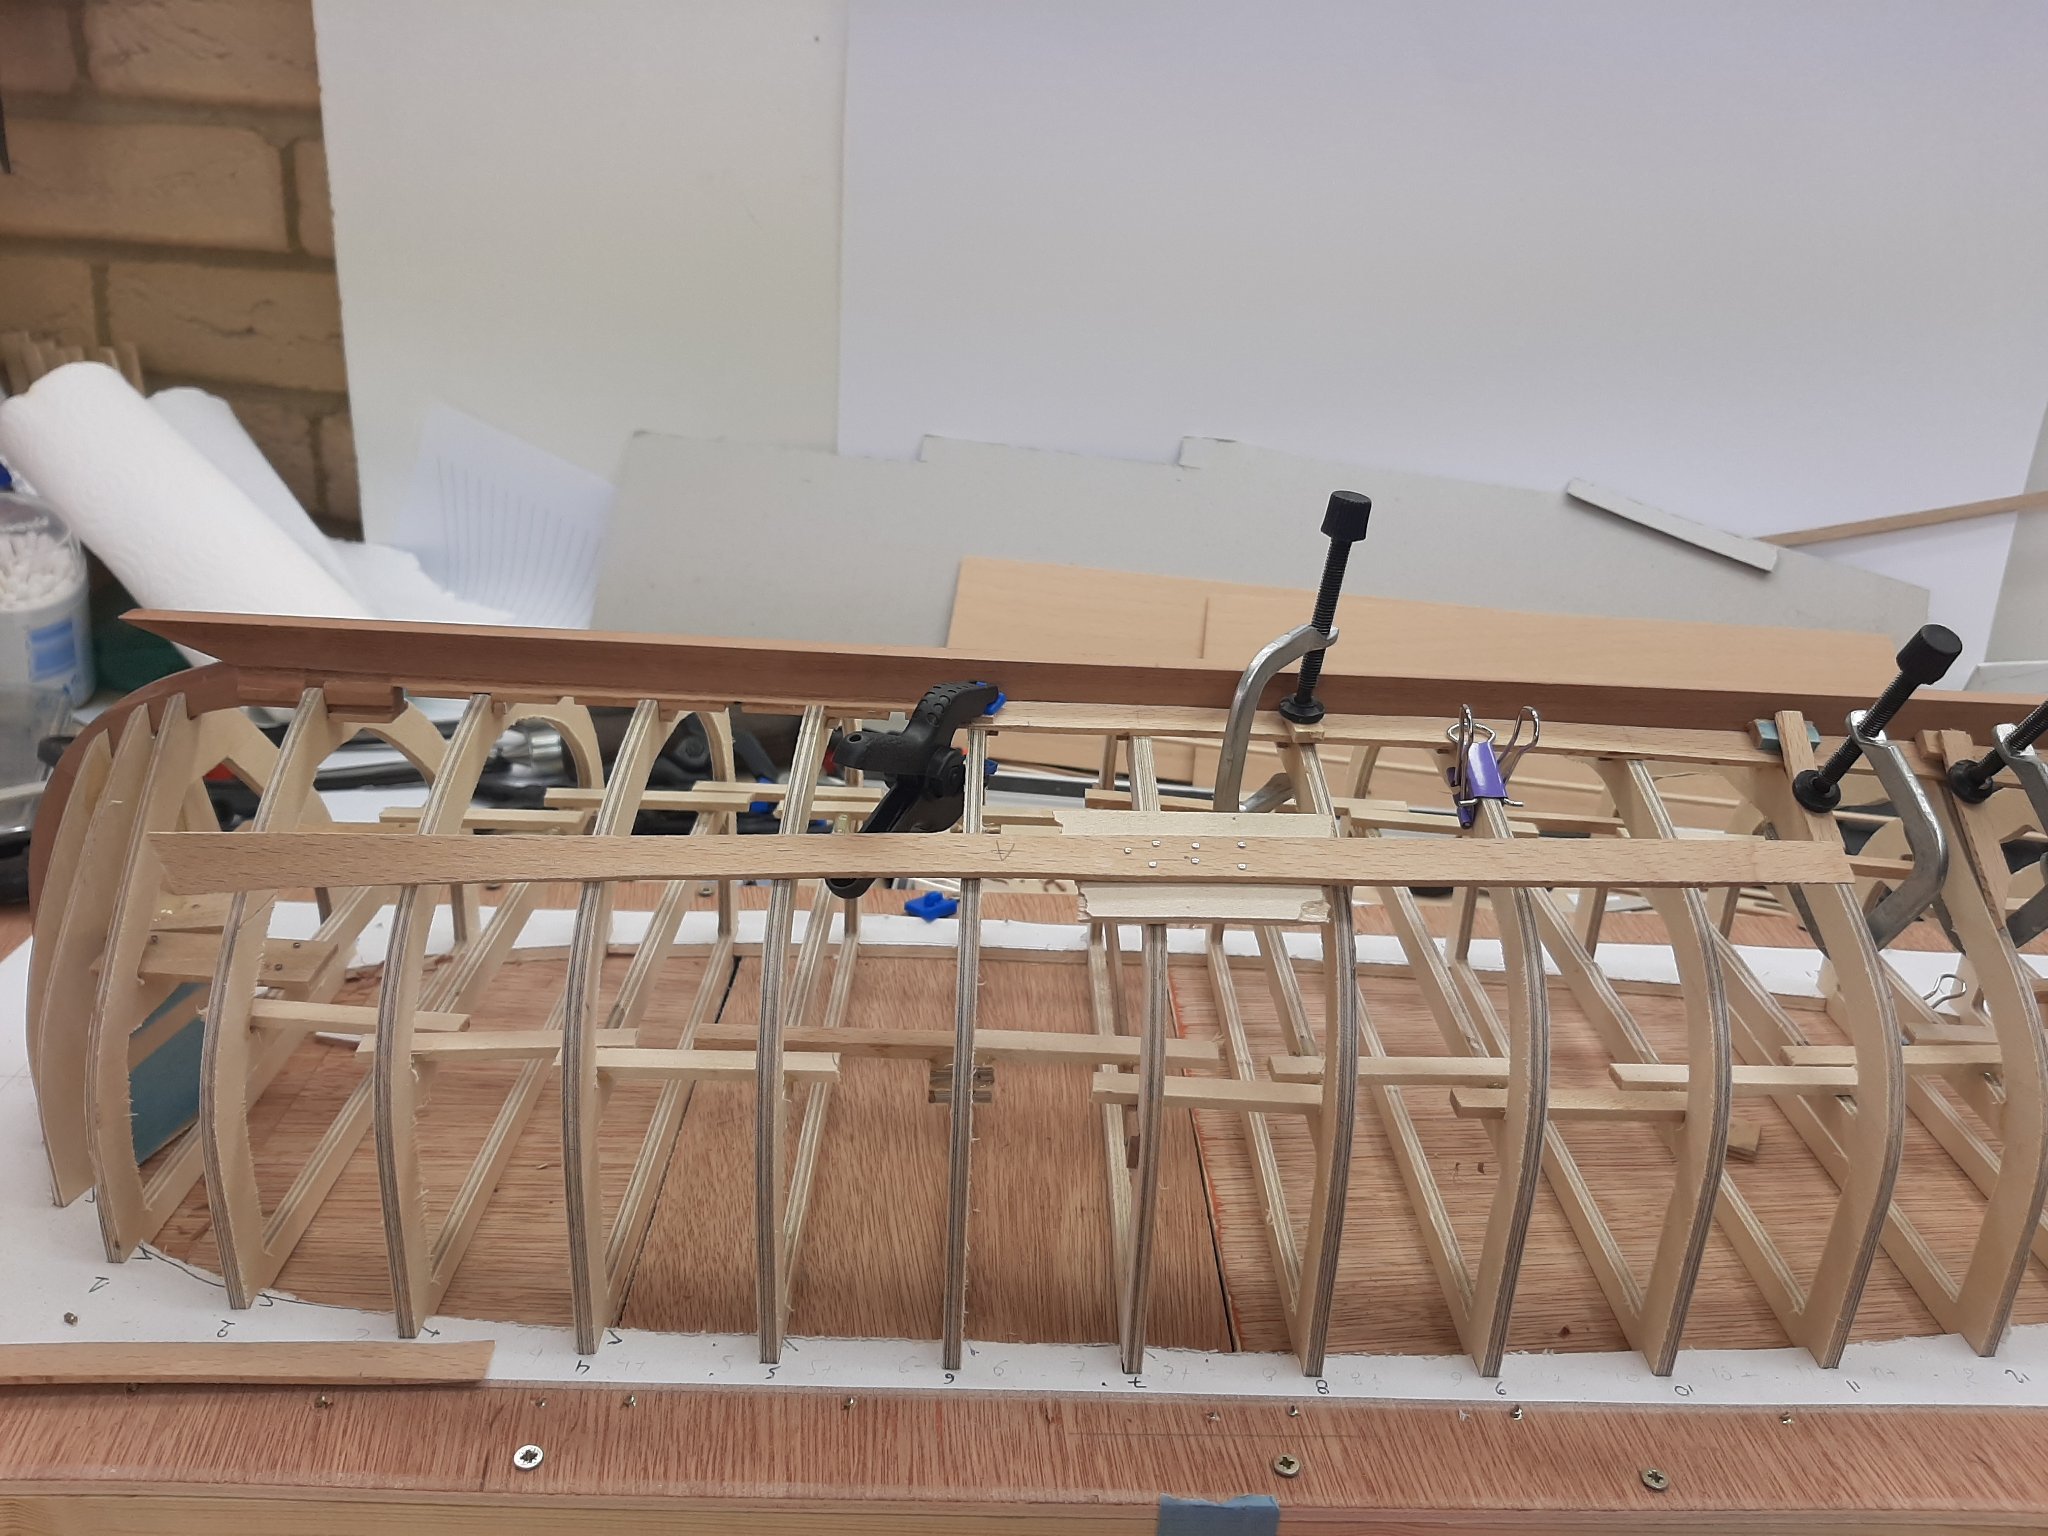
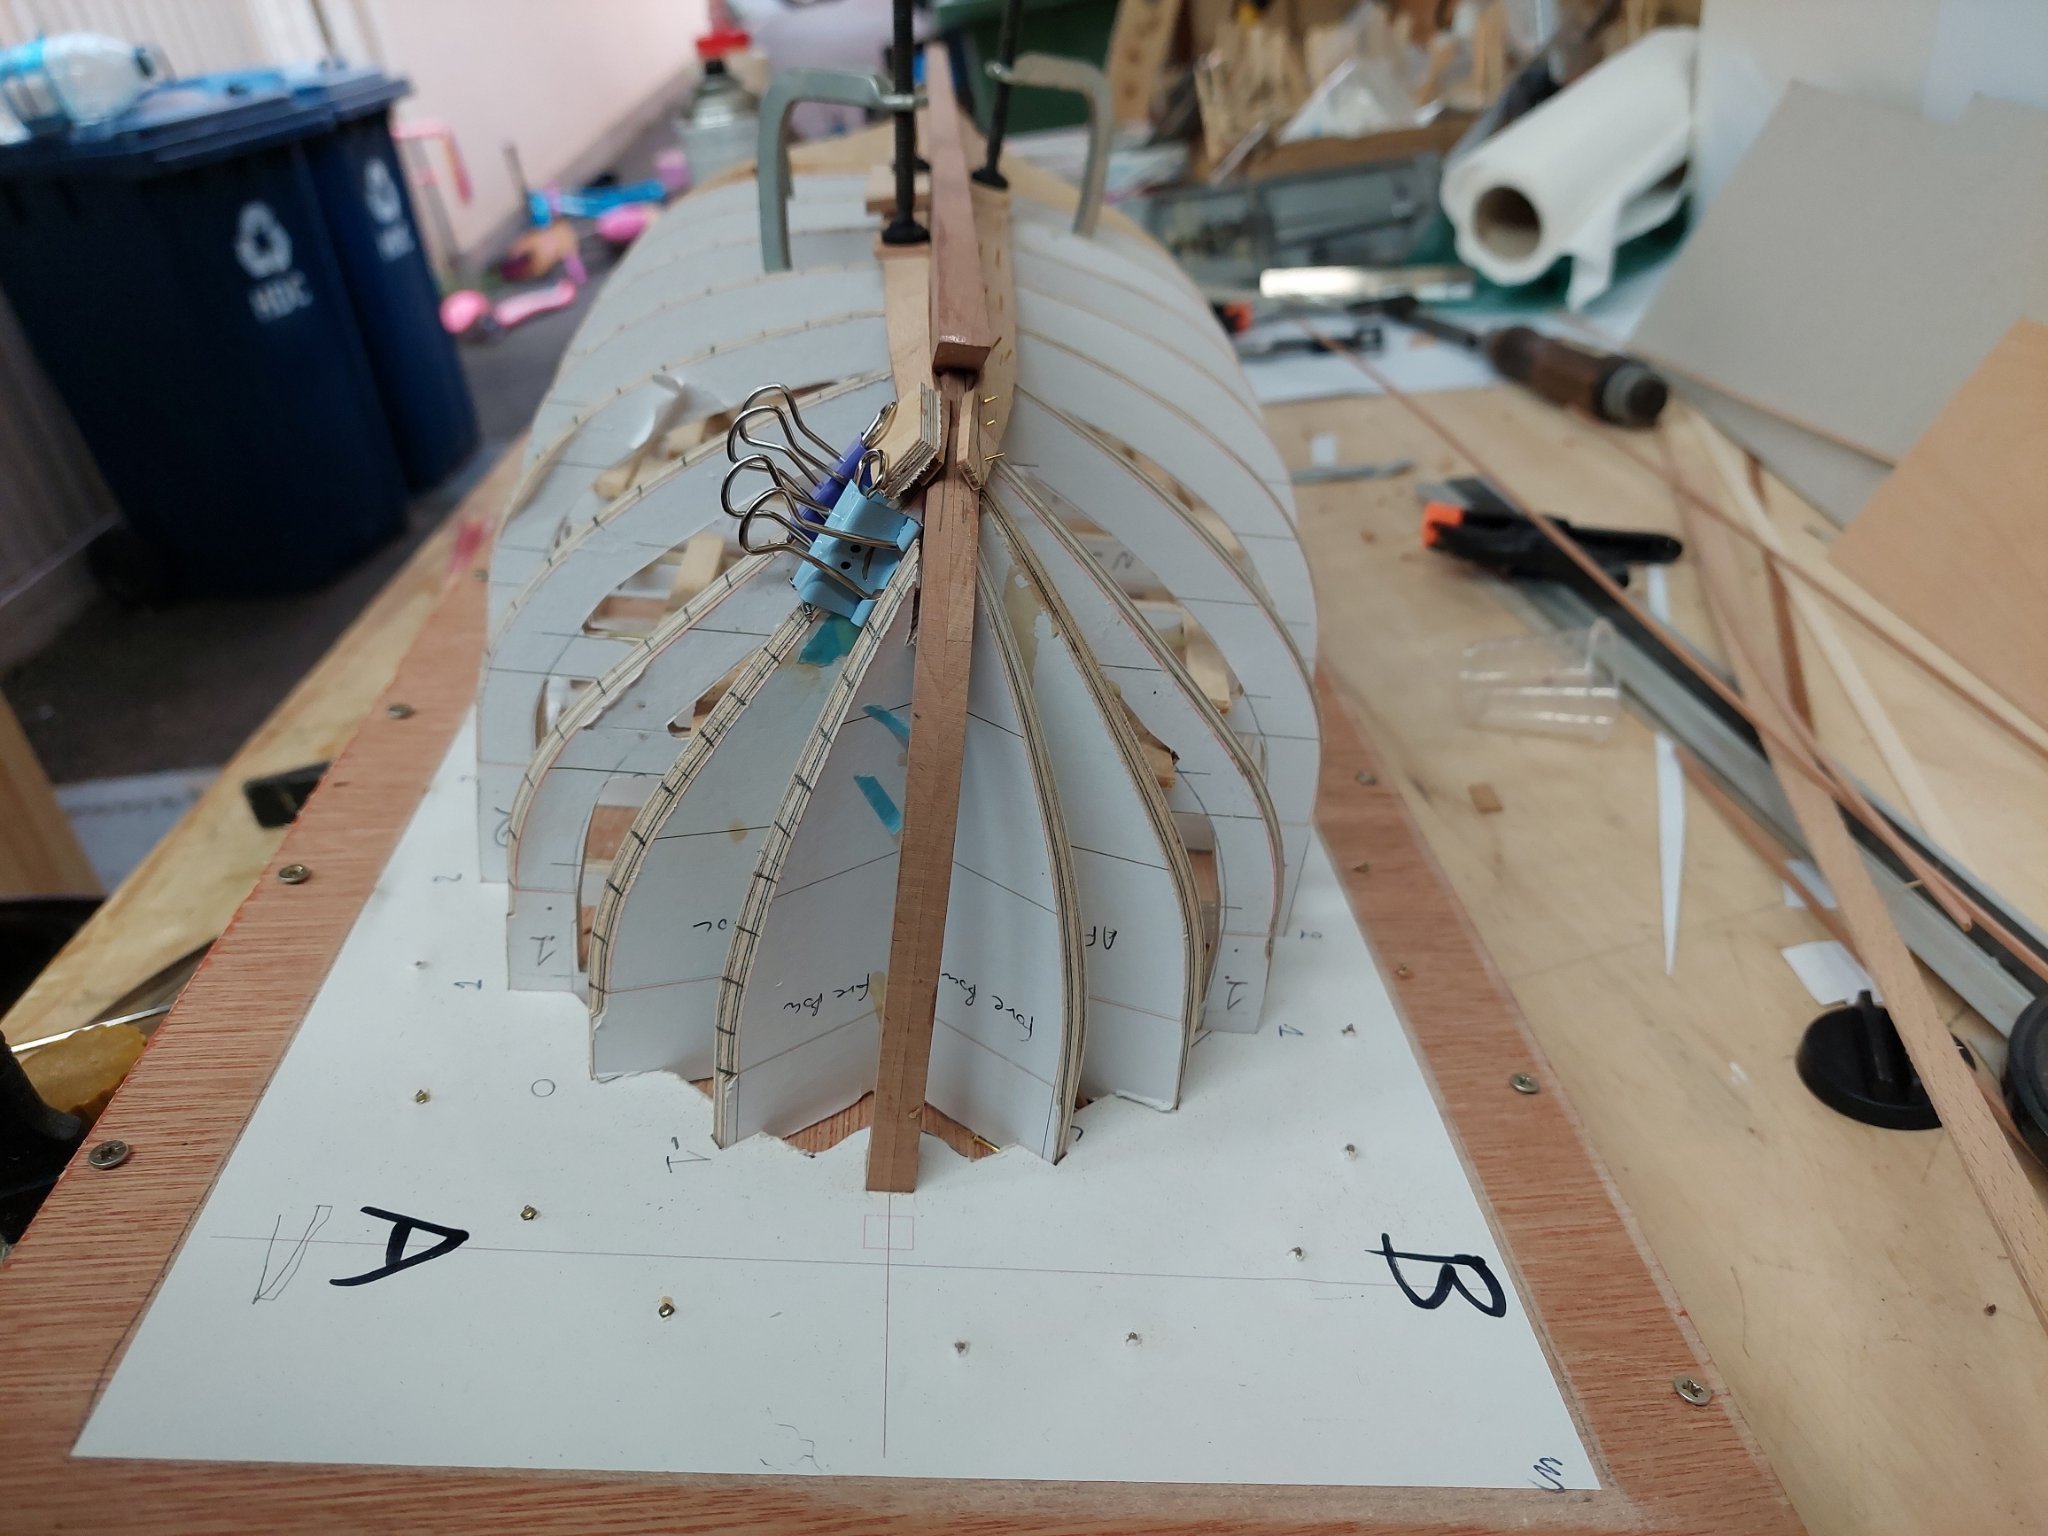
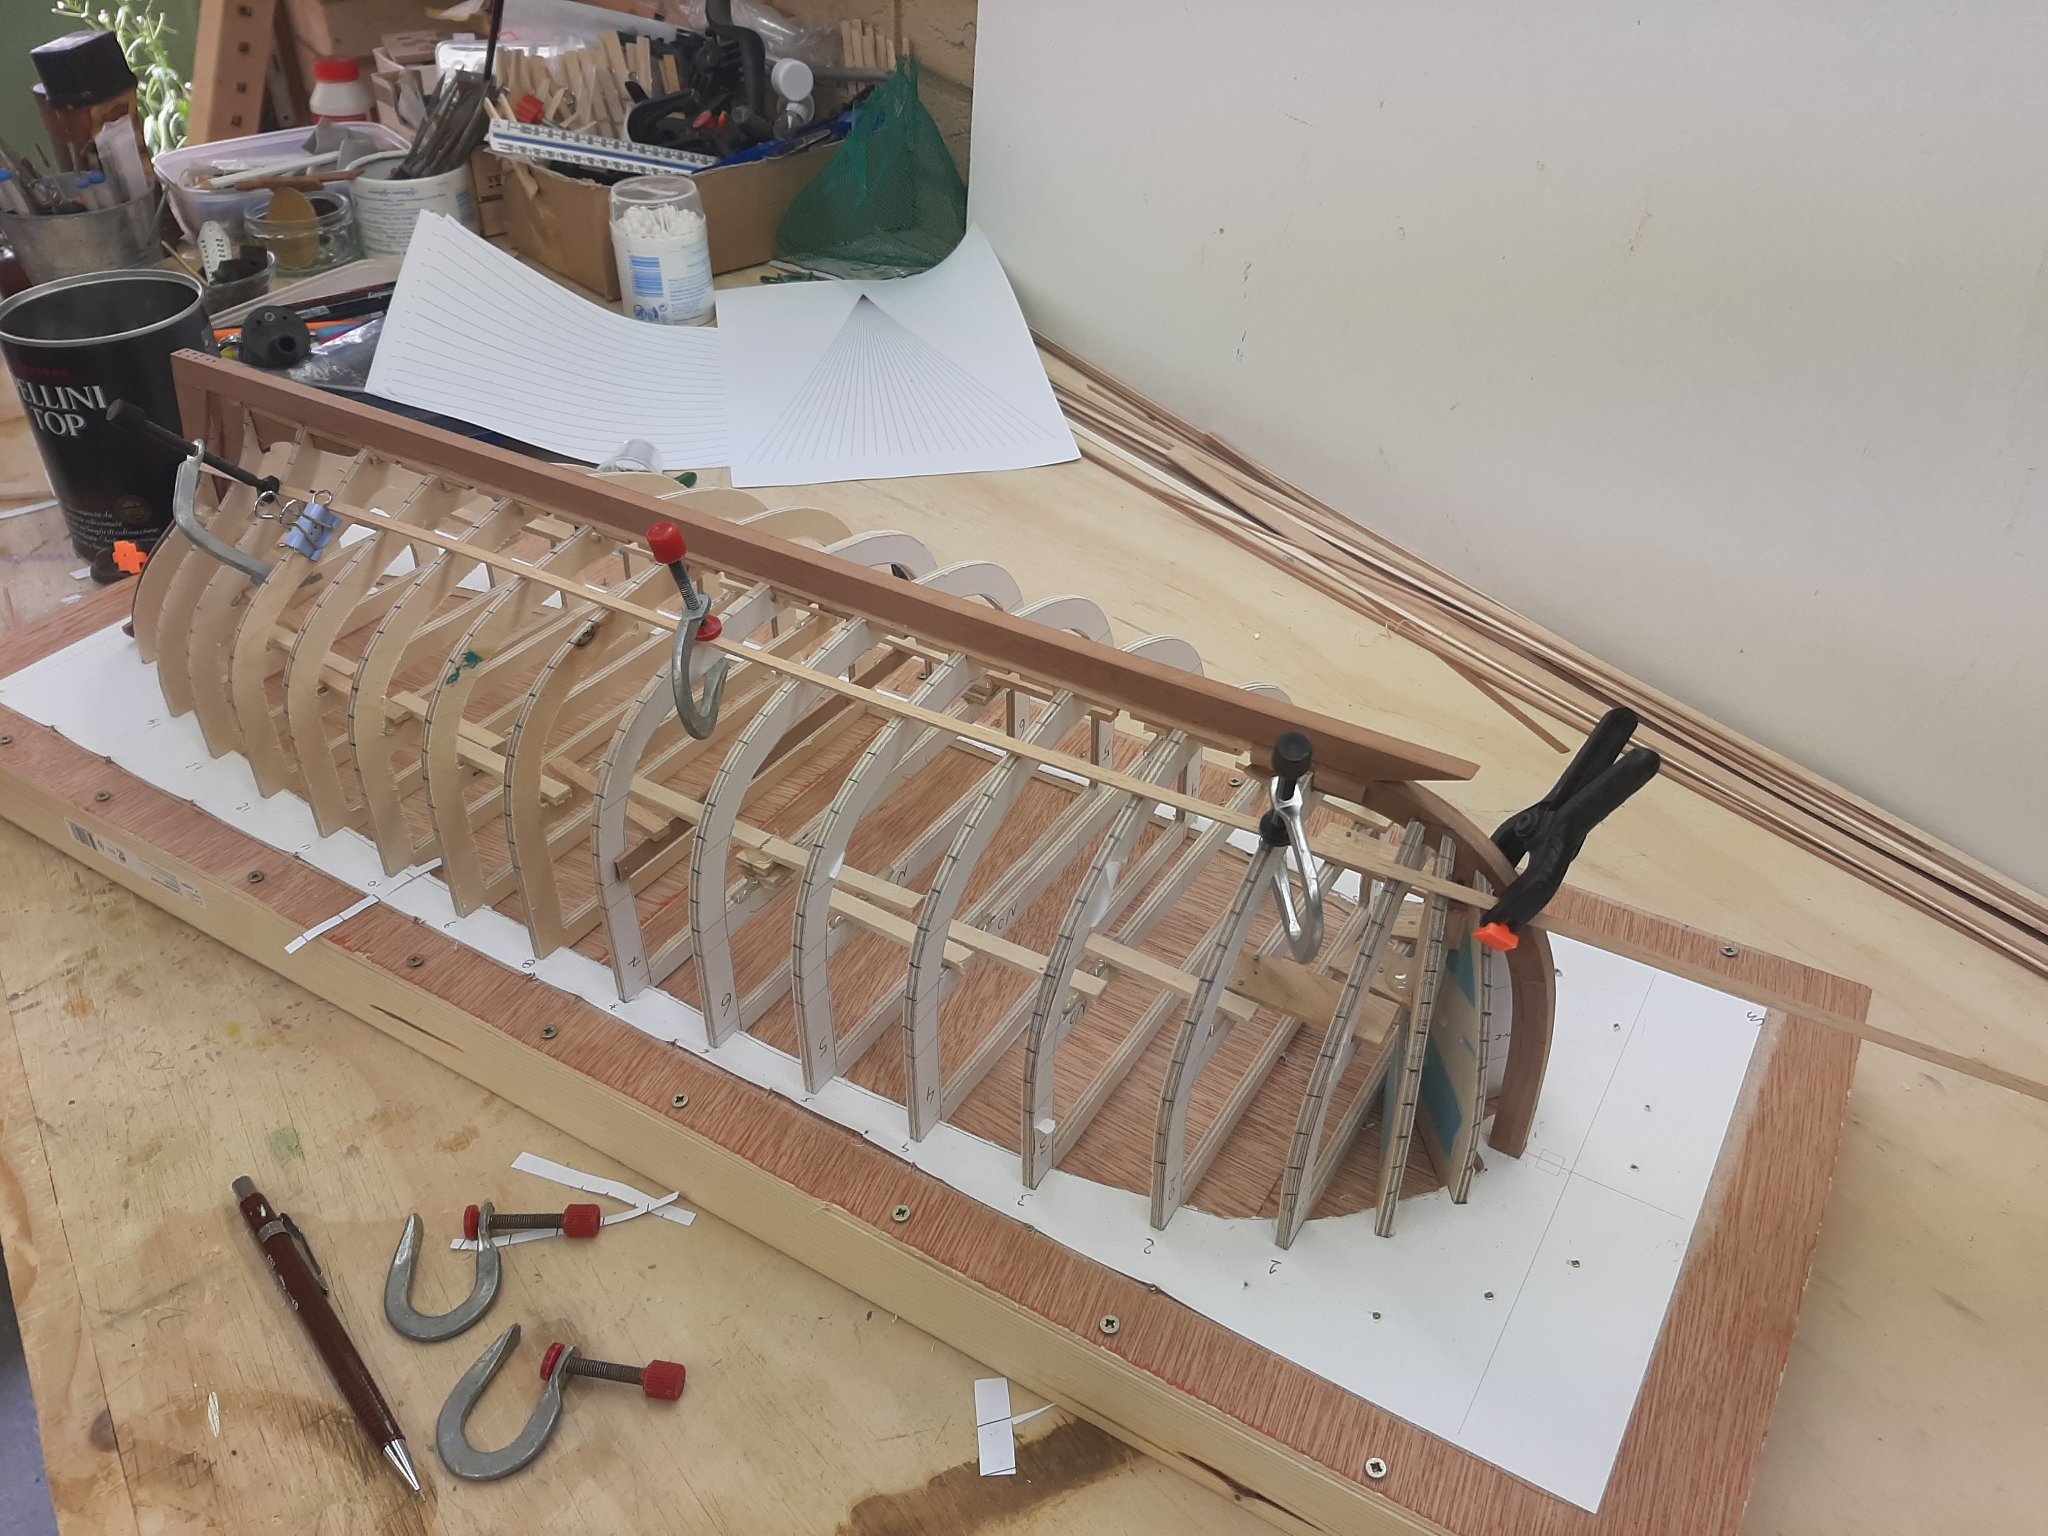
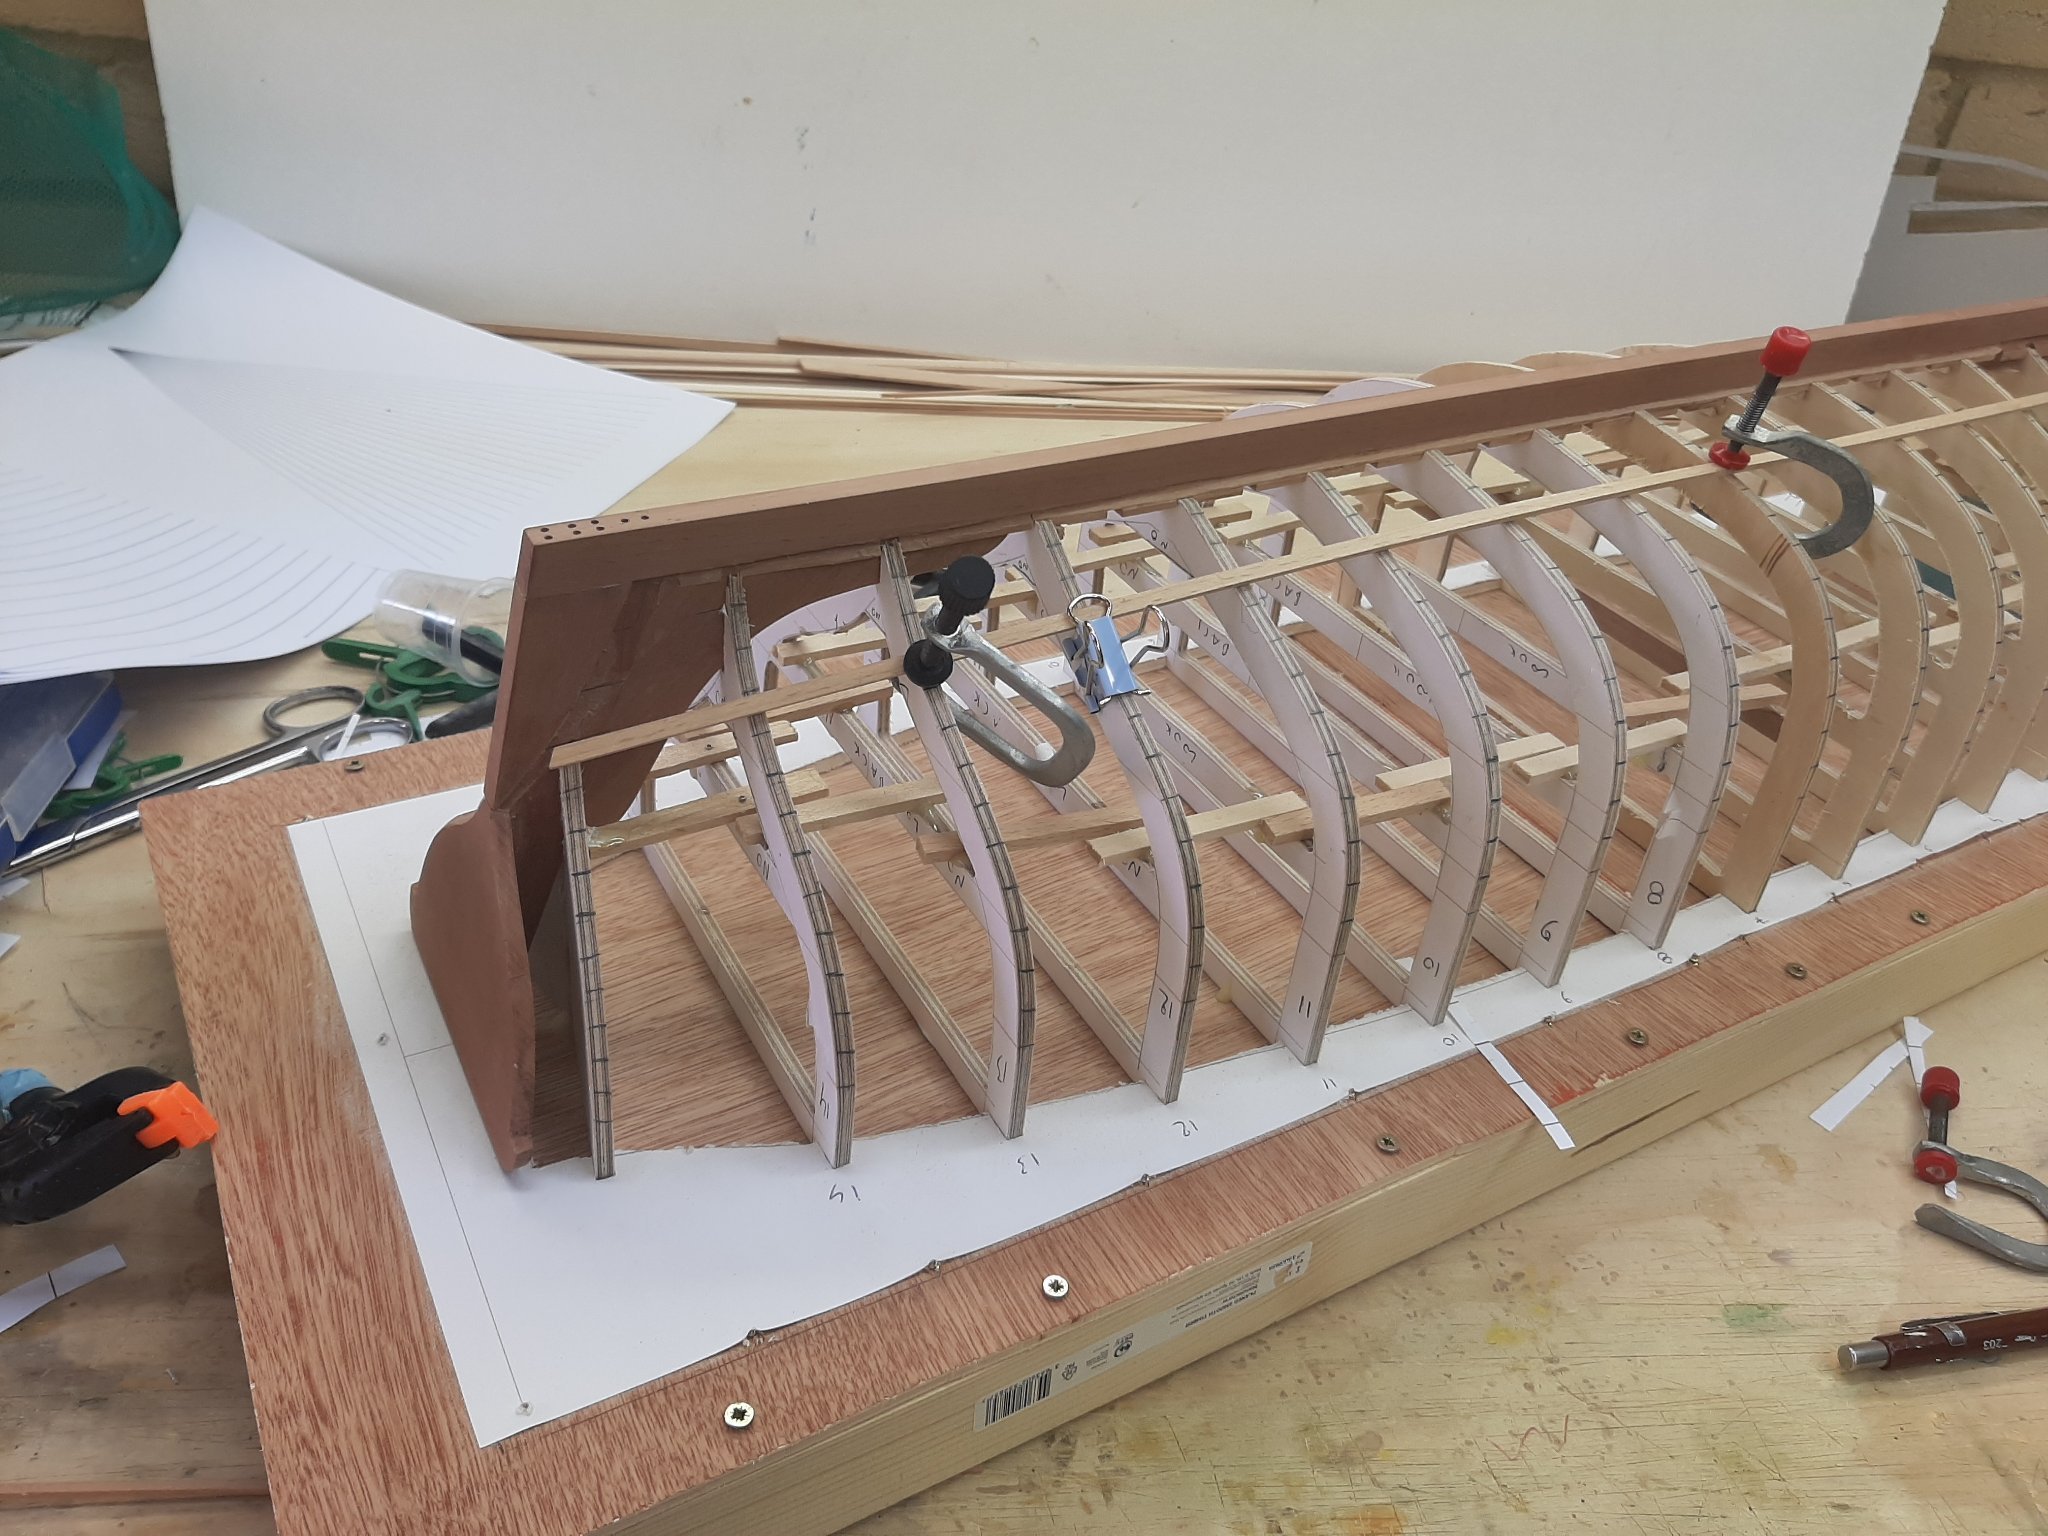
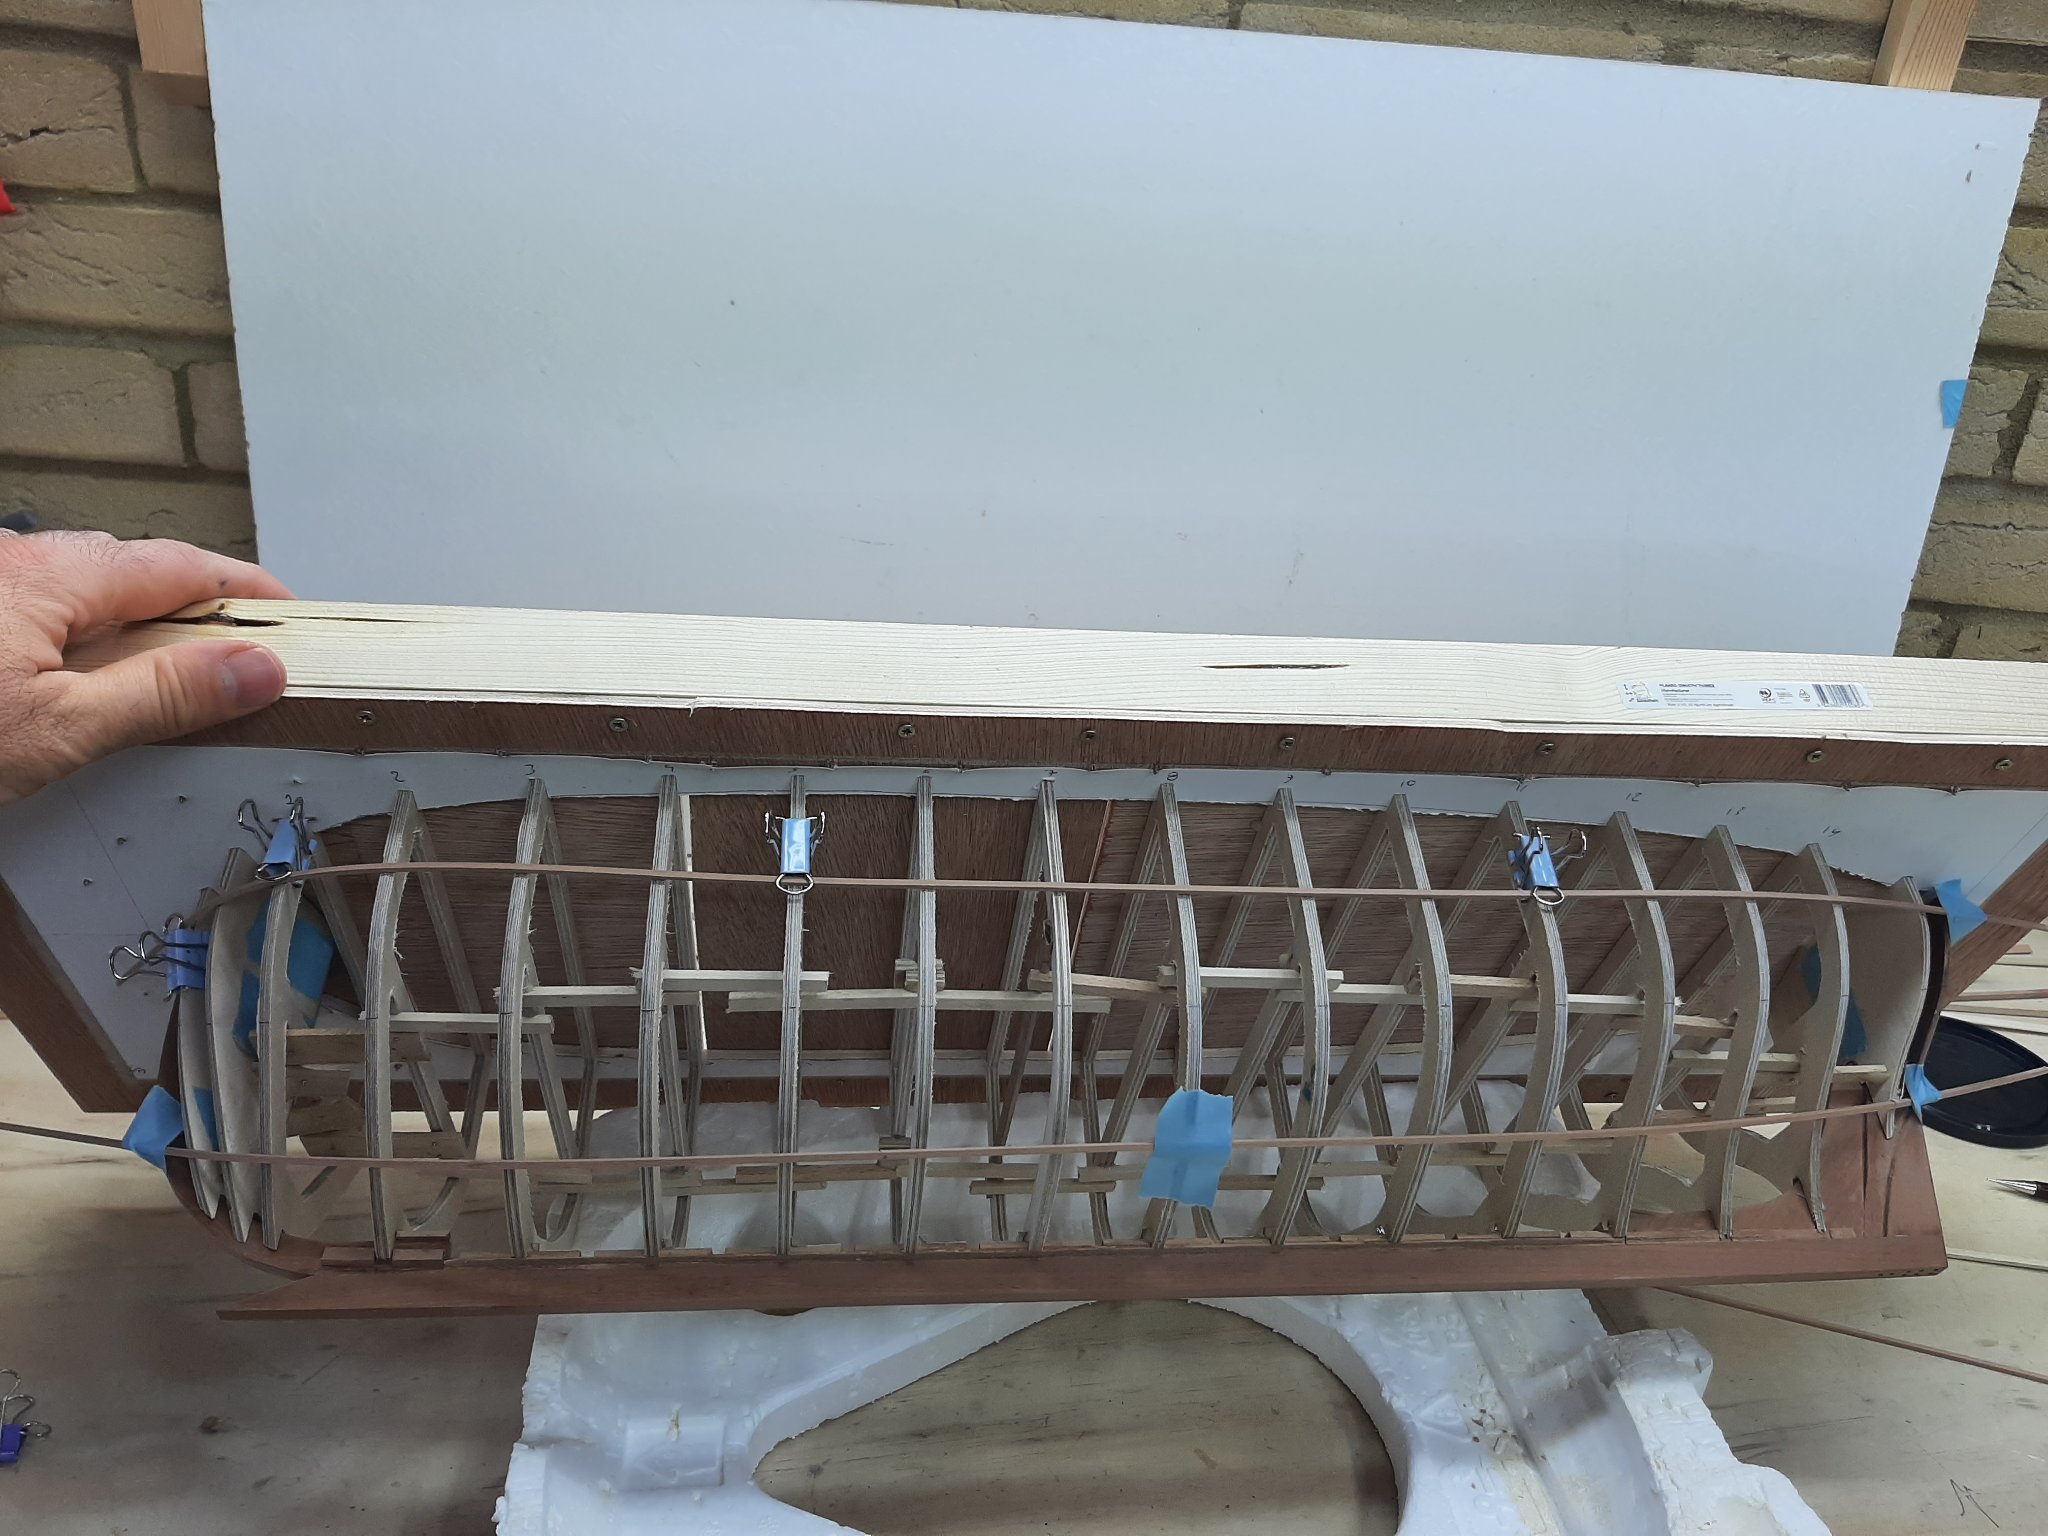
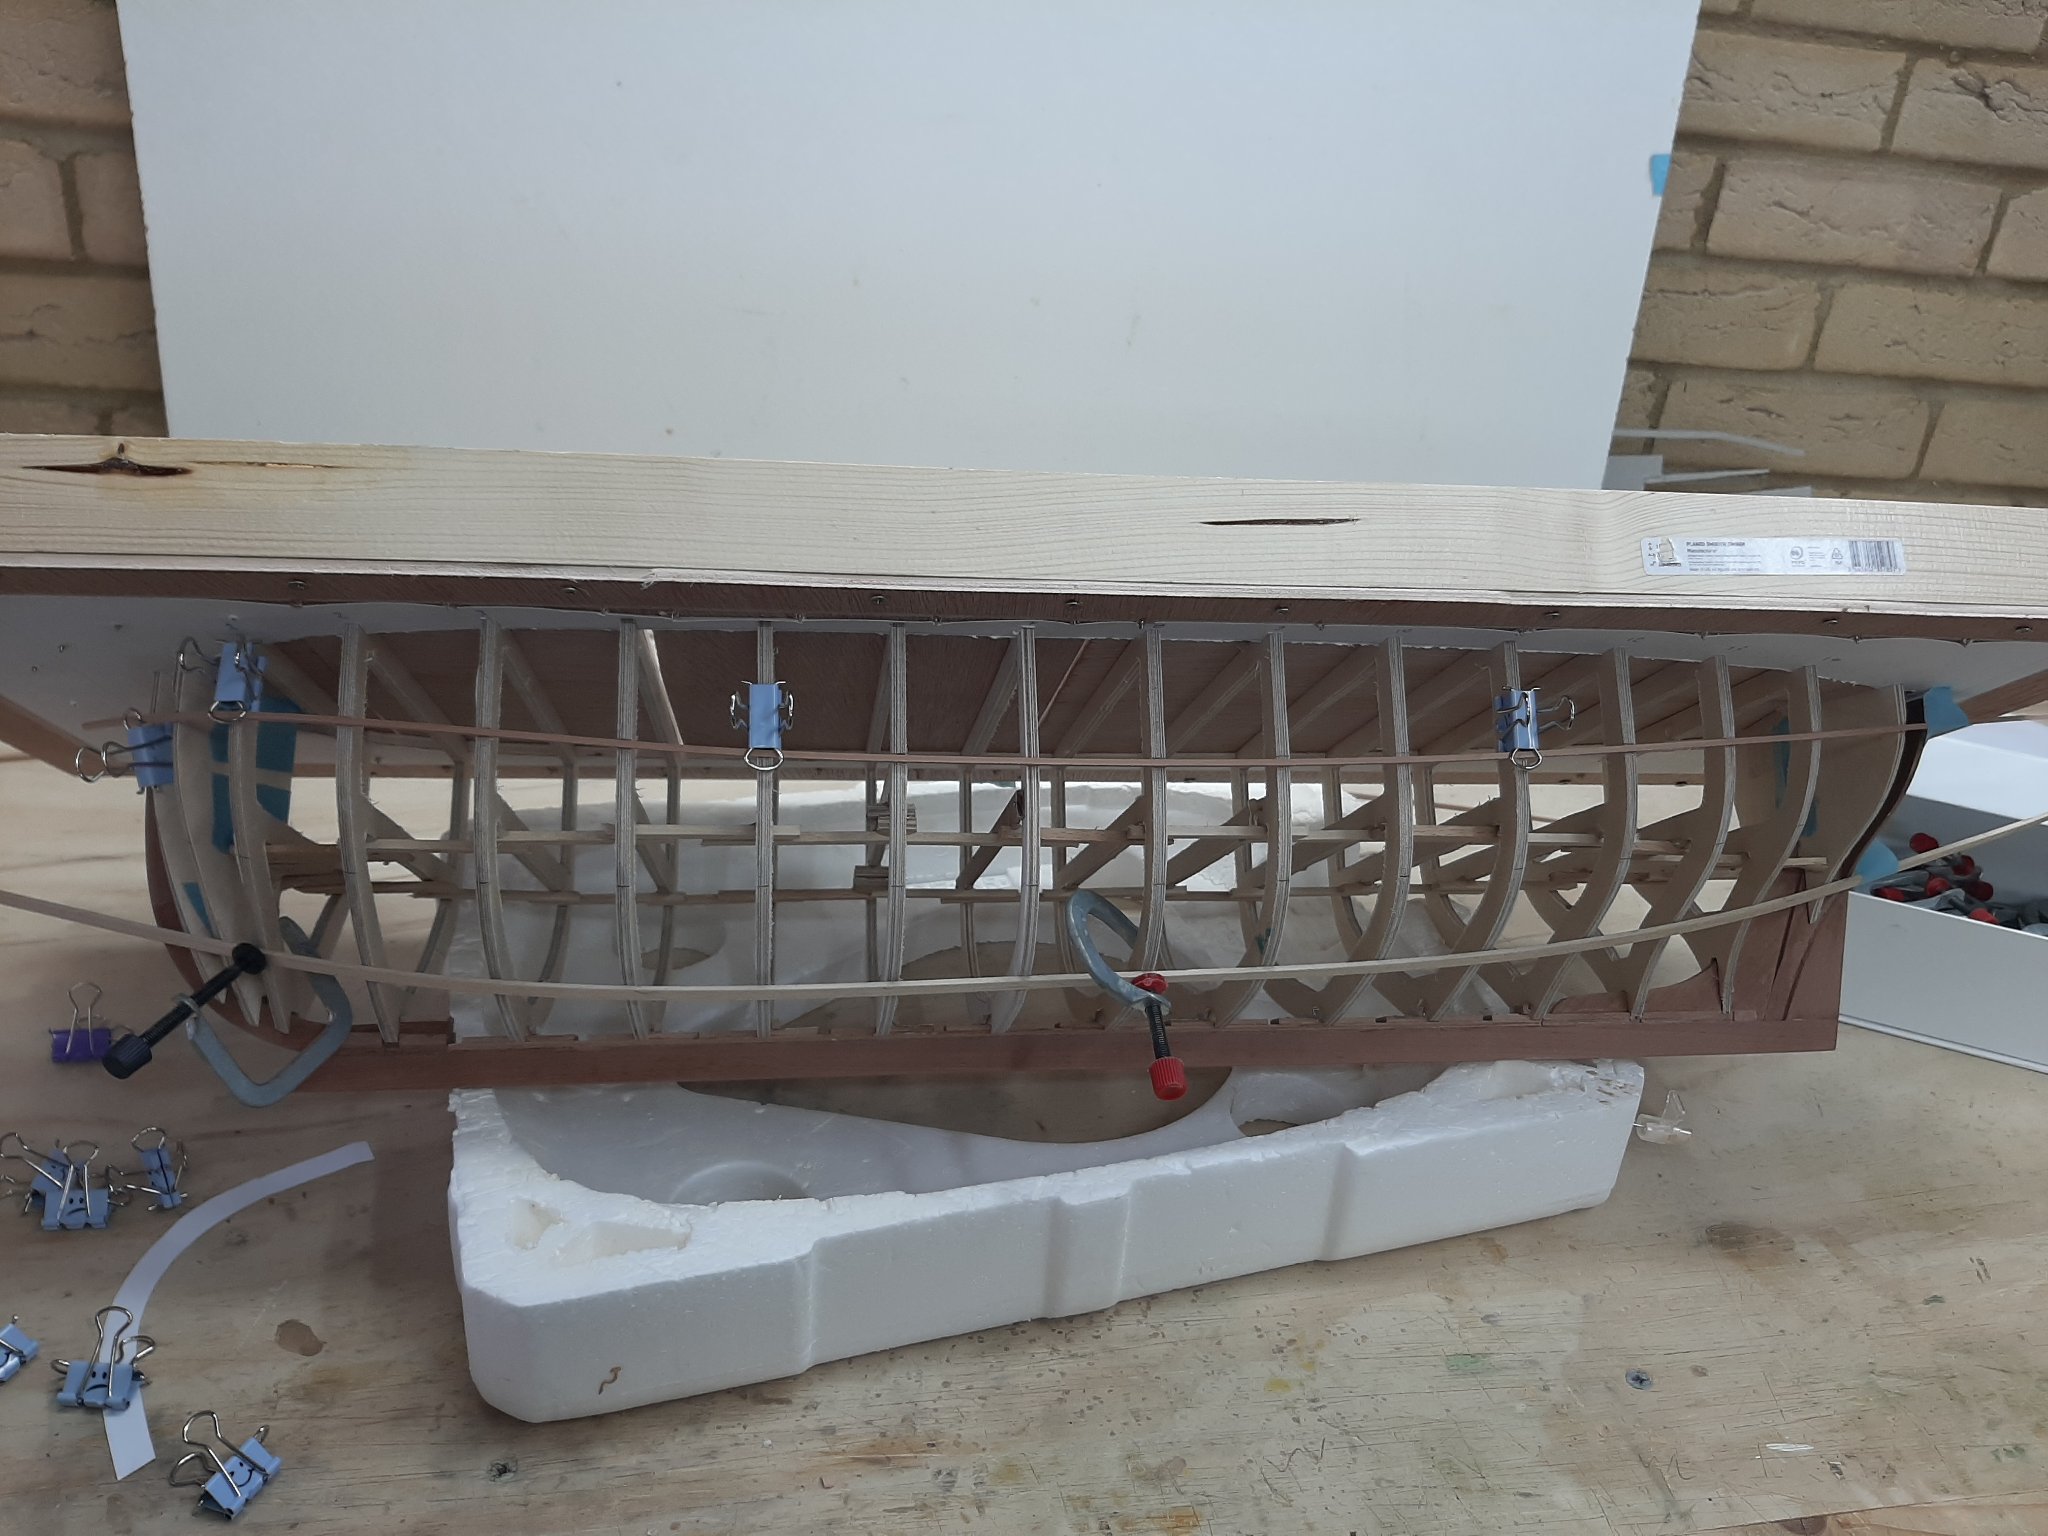
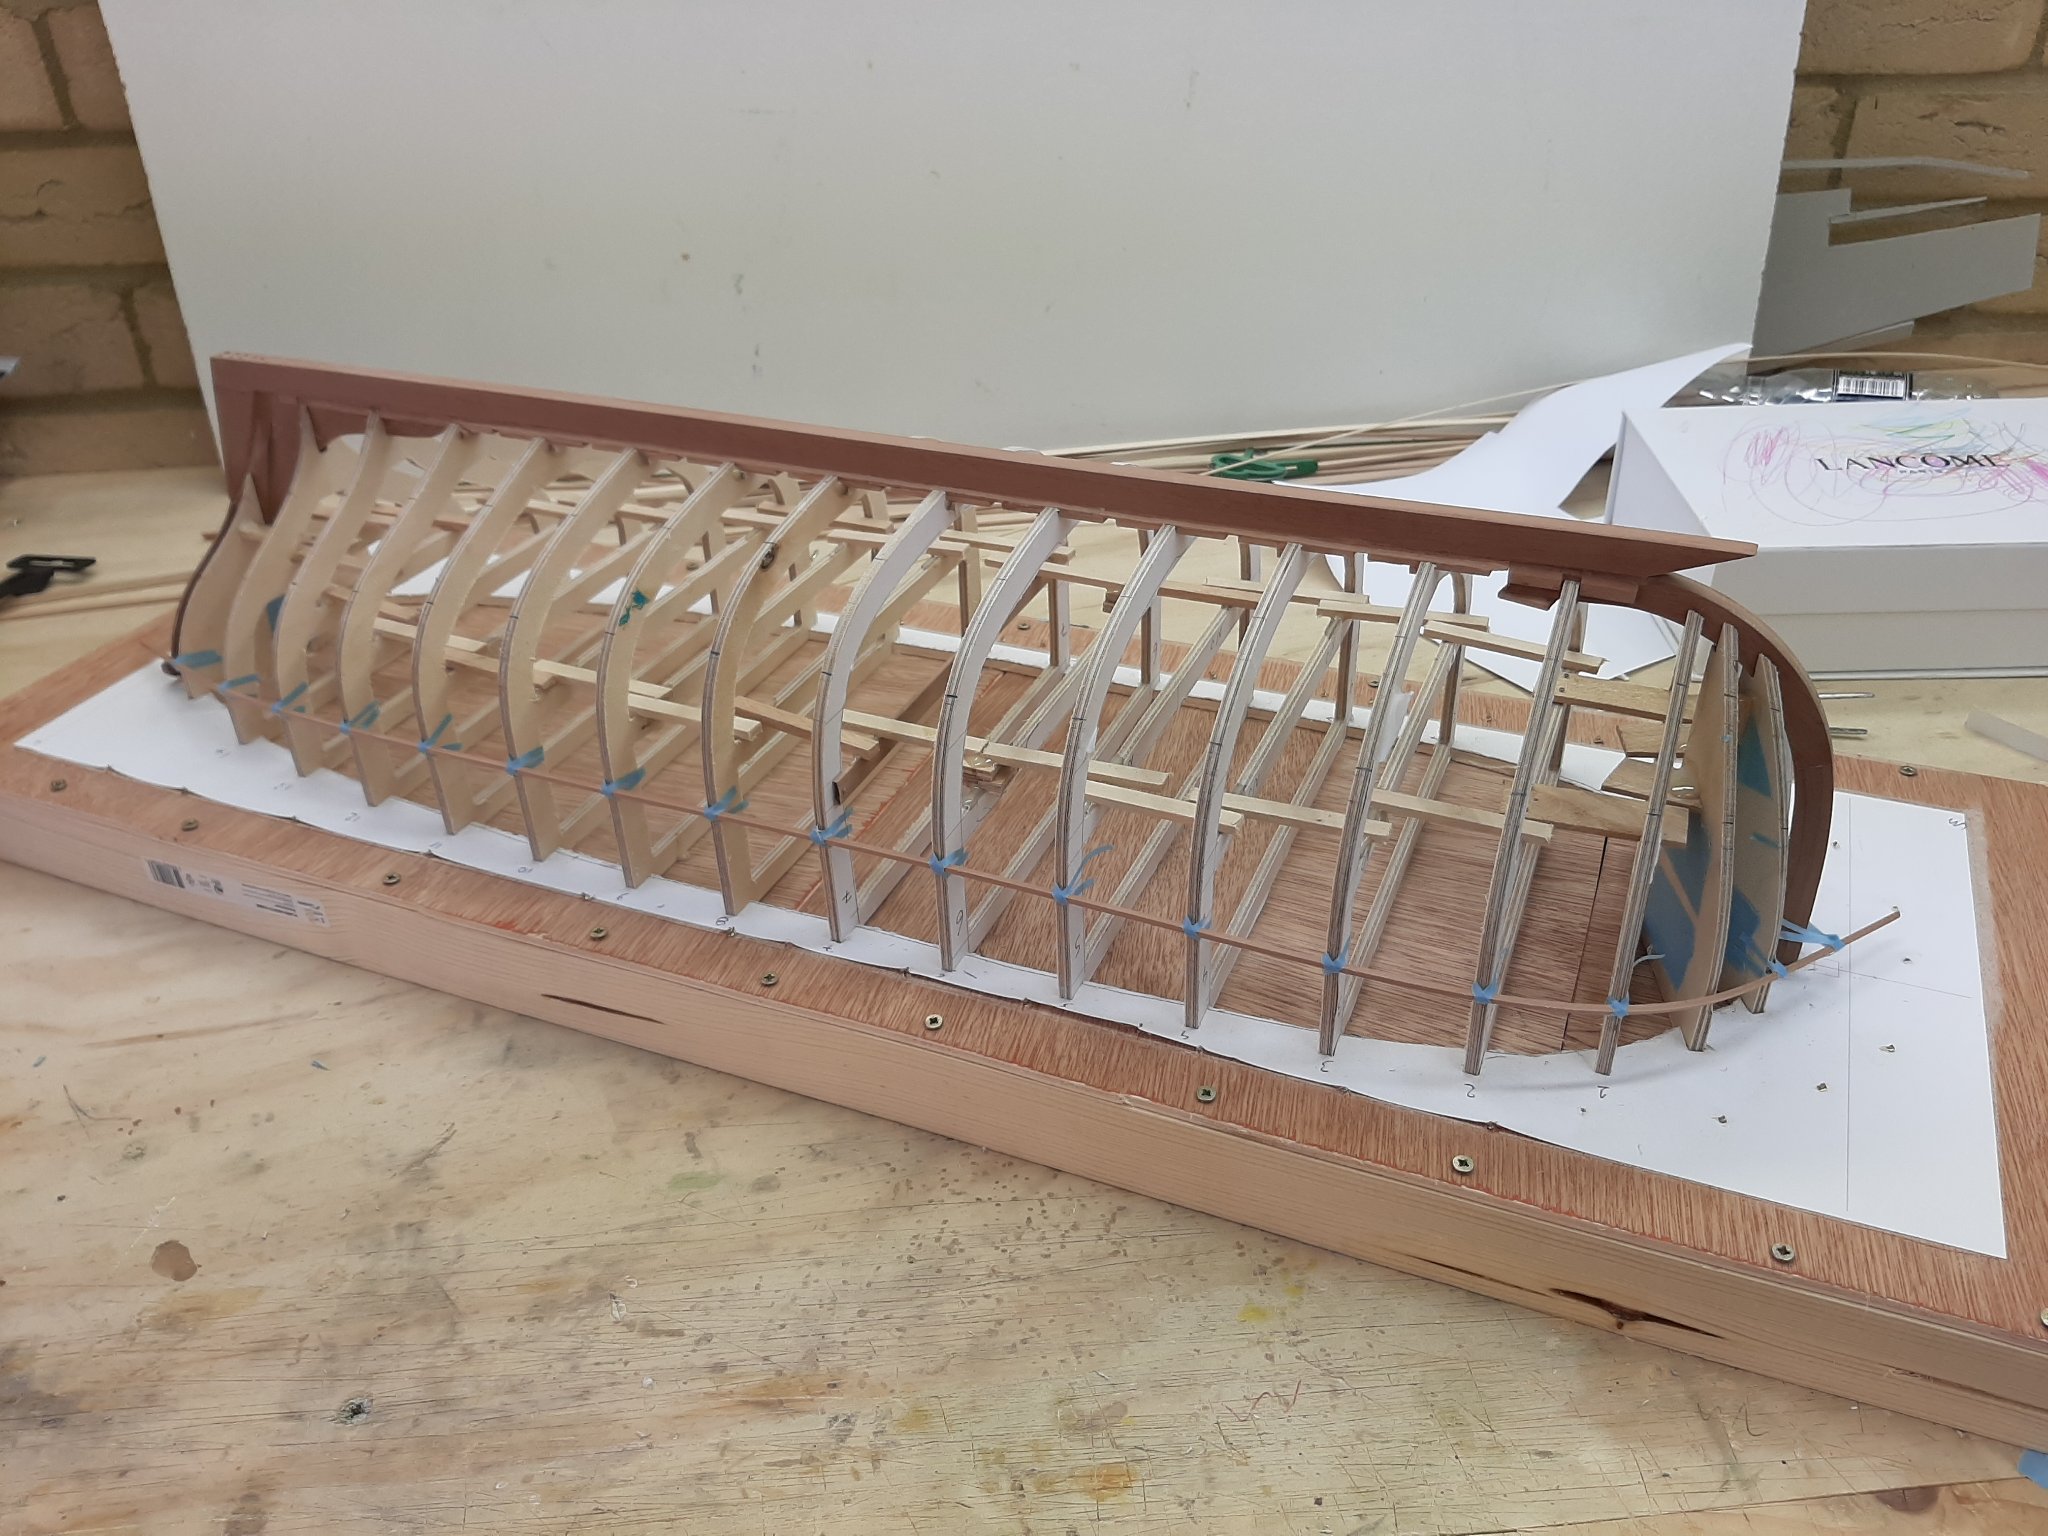
After many failed attempts, I think I got my 3 zones kind of close. Now, the following photos show how difficult this hull is and how the bow messes up the perspective.
In the first photo, the lower baten seems wrong and the one near the sheer appears fair. In the second photo, it is the other way around. In the third photo, both look ok.
I marked the lines and removed the batens
This would be a very difficult boat to plank as carvel. Lapstrake, even more.
I have no idea what kind of spilling will be needed. Judging by the lift of the batens though, I expect the planks will have significant curves. Considering how long they will be, I think all of the planks, except perhaps the garboard, will need scarfing.
I had decided on this boat to hold all planks with threaded brass wire. This would mean drilling 0.5 mm holes, using brass pins to hold the planks to the temporary frames, then re-drill to 0.6 mm when the steam bend frames are installed and screwing everything together.
Have I bitten more than I can chew? Quite possibly!
-
We ve been waiting a long time for this Michael. But the wood is indeed patient and so are we. I am sure you ll overcome the difficulties and we will all enjoy the rest of this journey.
- Keith Black, FriedClams, Jack12477 and 1 other
-
4
-
The reason I am asking Hakan is that printing the plans has been a headache for me. Printing A4 and gluing together produced major inaccuracies at 800+ mm. Printing in a shop was not an option to print the 3D shapes I wanted at the views I needed-would the shop have the needed software to open the files? Converting to pdf, the compression is such that curves become series of small right angle lines-not an option, at least for 3D plans.
I bought an A3 paper roll and I cut long pieces to A4 width and print with custom settings on my A4 printer. Even so, long straights lines end up ever so slightly curved. My next printer will def be an A3 one.
I m really looking forward to this build!
-
Oops! I completely missed your new log Hakan! An excellent choice of boat and of scale. I ll be following for sure.
Your drafting looks good. One advantage 3D has is that after the initial fairing of waterlines etc you can create and work with surfaces, then project vertical lines to get the shape of the frames with all bevels in a flash. But you have done very well on 2D.
How will you print your drafts? Some will be close to 1000 mm long!


Beginner marking tools
in Modeling tools and Workshop Equipment
Posted
+1 for all the above. Especially compass and calliper are in constant use.
However, I do love my 1 m long steel ruler!